

Tellur TLL331071 User Manual

Smart Indoor Camera
User Manual
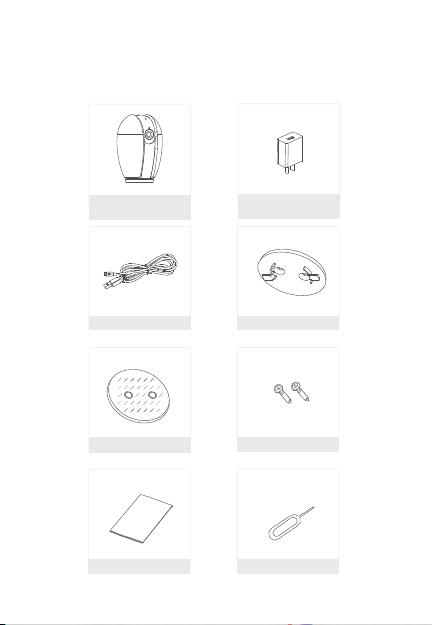
What's in the box
Consult the checklist below for all components.
Smart
Indoor Camera
USB cable
Adhesive tape
User manual
Power adapter
Bracket
Screws
Pin
1
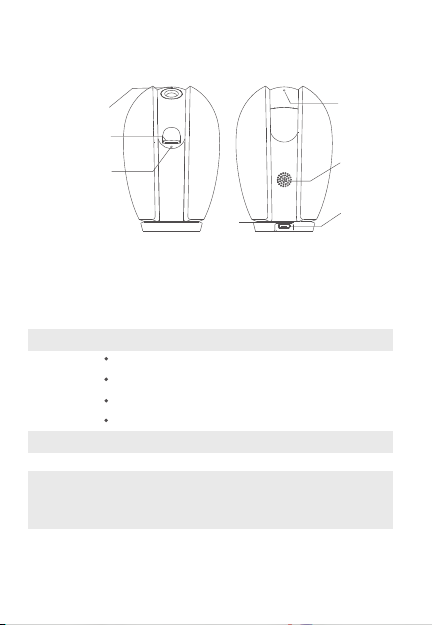
Status light
SD card slot
Reset
Description
Power
Status light
Microphone
SD card slot
Reset
Microphone
SD
RESET
Speaker
Power
DC5V±10%
Red light solid on: the camera network is abnormal
Blinking red light: awaiting WiFi connecting
Blue light solid on: camera running correctly
Blinking blue light: currently connecting
Captures sounds for your video
Supports local SD Card storage (Max.128G)
Press and hold for 5 seconds with pin to reset the
device(if you have modified settings, they will return
to factory defaults)
2
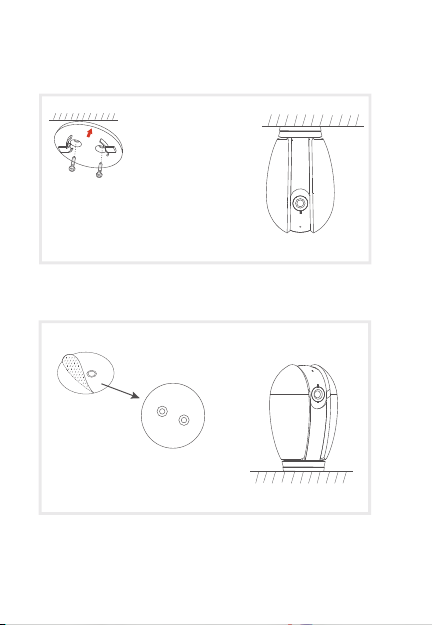
Install
1. Use the included mounting bracket to fix the camera
to a clean surface.
2. Or, stick the camera to an inclined surface with the
adhesive tape we provided.
Peel off the sticker
apply to the circle
3
 Loading...