

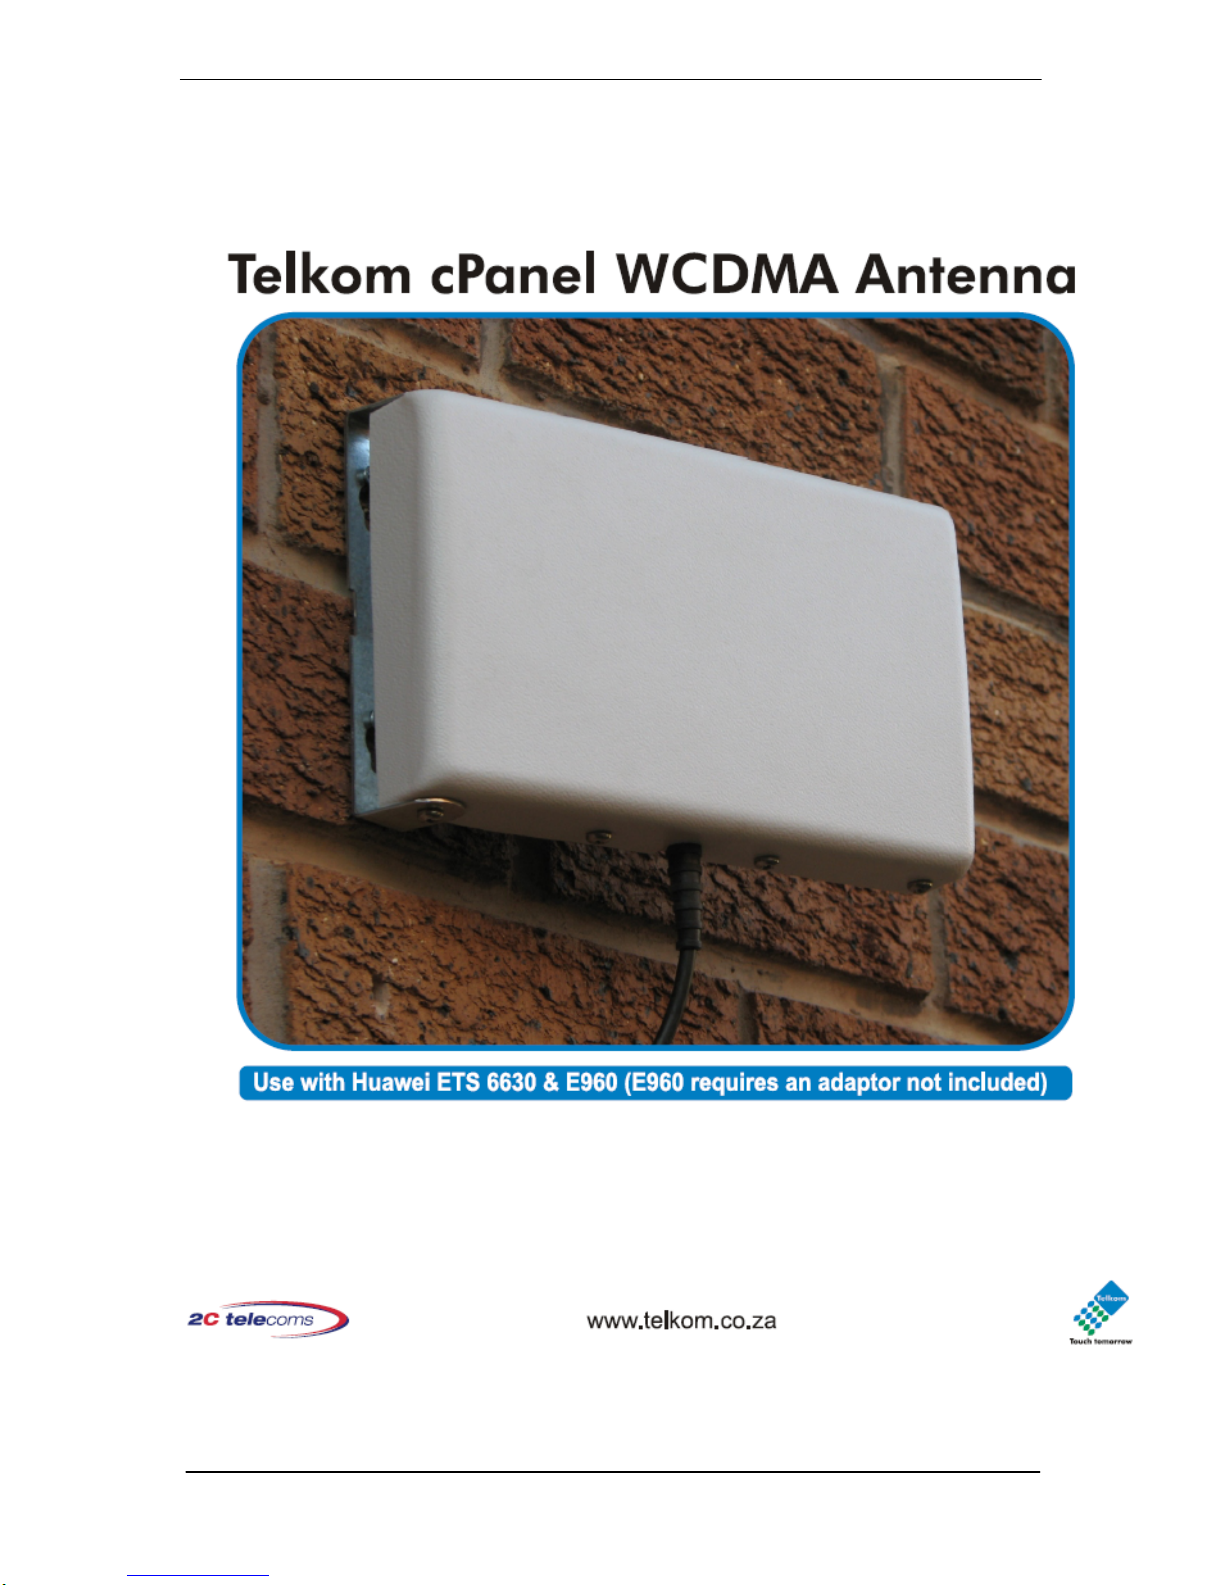
Telkom antenna, cPanel WCDMA Antenna Installation Manual
i
User / Installation Guide
Rev1.0a

ii
TABLE OF CONTENTS
1.
Introduction ....................................................................................................................................1
2. Installation procedure – Mounting the Antenna .............................................................................1
2.1. Wall mounting ............................................................................................................................1
2.2. Pole Mounting ............................................................................................................................2
3. Connection to the Modem / Terminal ............................................................................................3
3.1. Connection to the ETS6630 Terminal ........................................................................................3
3.2. Connection to the E960 Modem ................................................................................................3
4. Antenna Alignment ........................................................................................................................4
5. Technical Specifications ................................................................................................................5
1
1. INTRODUCTION
The Telkom WCDMA antenna was designed for receiving maximum possible signal level from
the Network tower for the Huawei ETS6630 and Huawei E960.
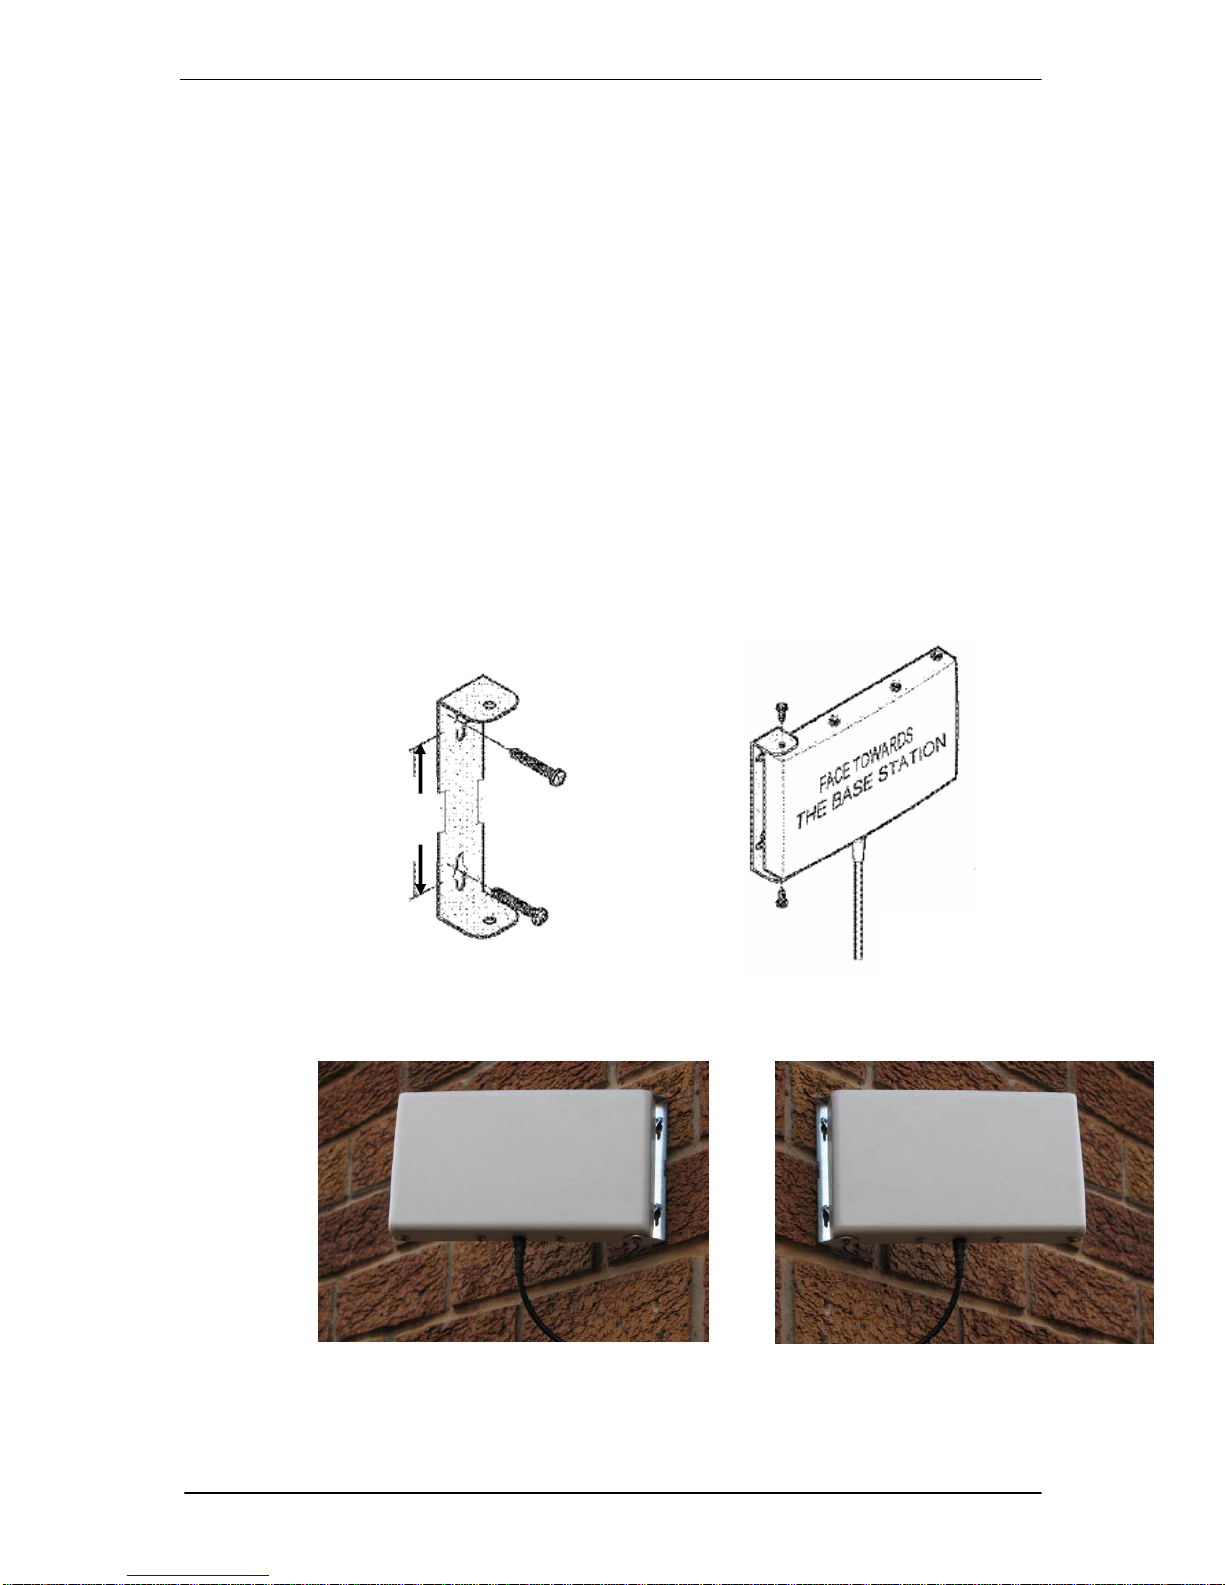
2. INSTALLATION PROCEDURE – MOUNTING THE ANTENNA
1) The antenna can be mounted indoors or outdoors
2) The antenna can be mounted on a wall or a pole
3) For best reception, the face of the Telkom cPanel antenna must be directed towards the
direction of the antenna tower
2.1. Wall mounting
1) To mount the phone against a wall use the screw kit provided (2 screws and 2
wall plugs).
2) Drill two holes 89mm apart (vertically).
3) Insert wall plugs into each hole.
4) Mount the bracket by threading a screw into each wall plug. Ensure that the wall
mount screws are well tightened and that the bracket is securely mounted onto
the wall.
5) The bracket can be positioned on either side of the antenna. Remove a pair (top
and bottom) of screws from the antenna for fitting the bracket.
6) Fit the antenna into the bracket, and use the screws (that were removed in the
previous step) to mount the antenna onto the bracket.
7) Do not tighten these screws before antenna alignment was done.
89mm
 Loading...