

Page 1
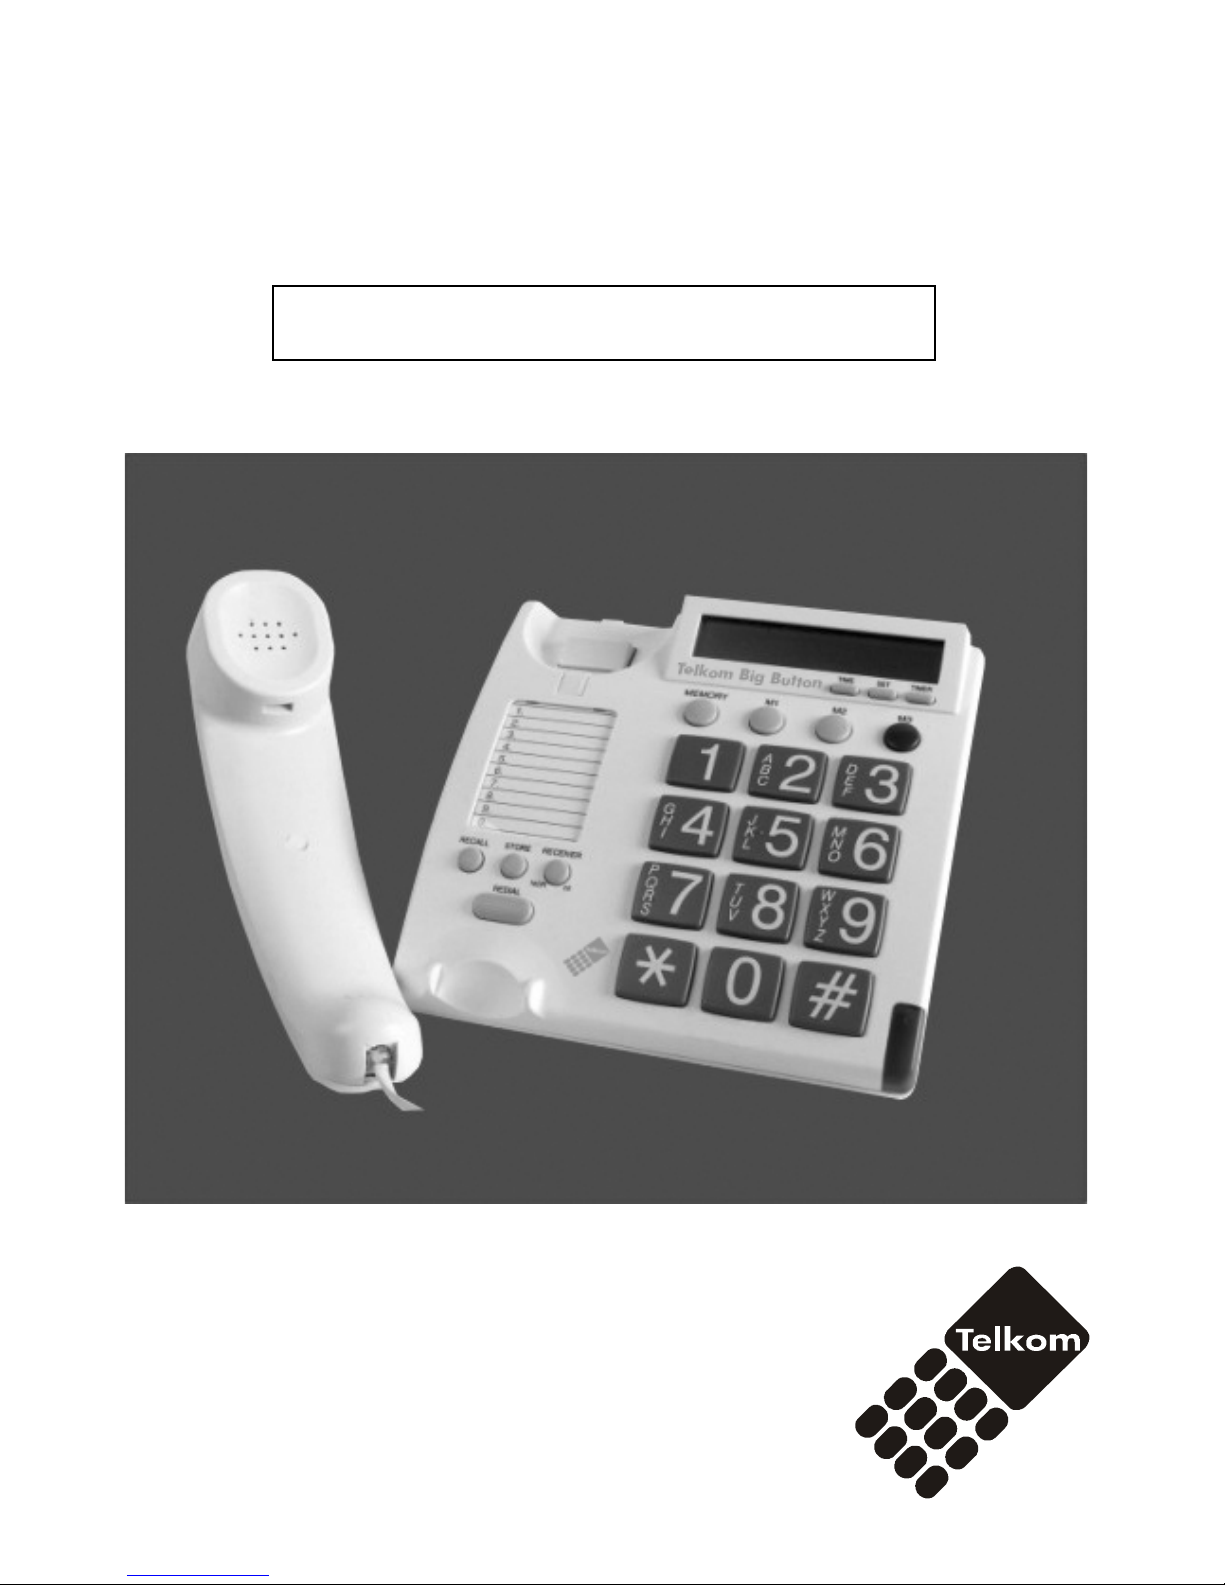
INSTRUCTION MANUAL
Telkom Big Button
Page 2
1. INSTALLATION
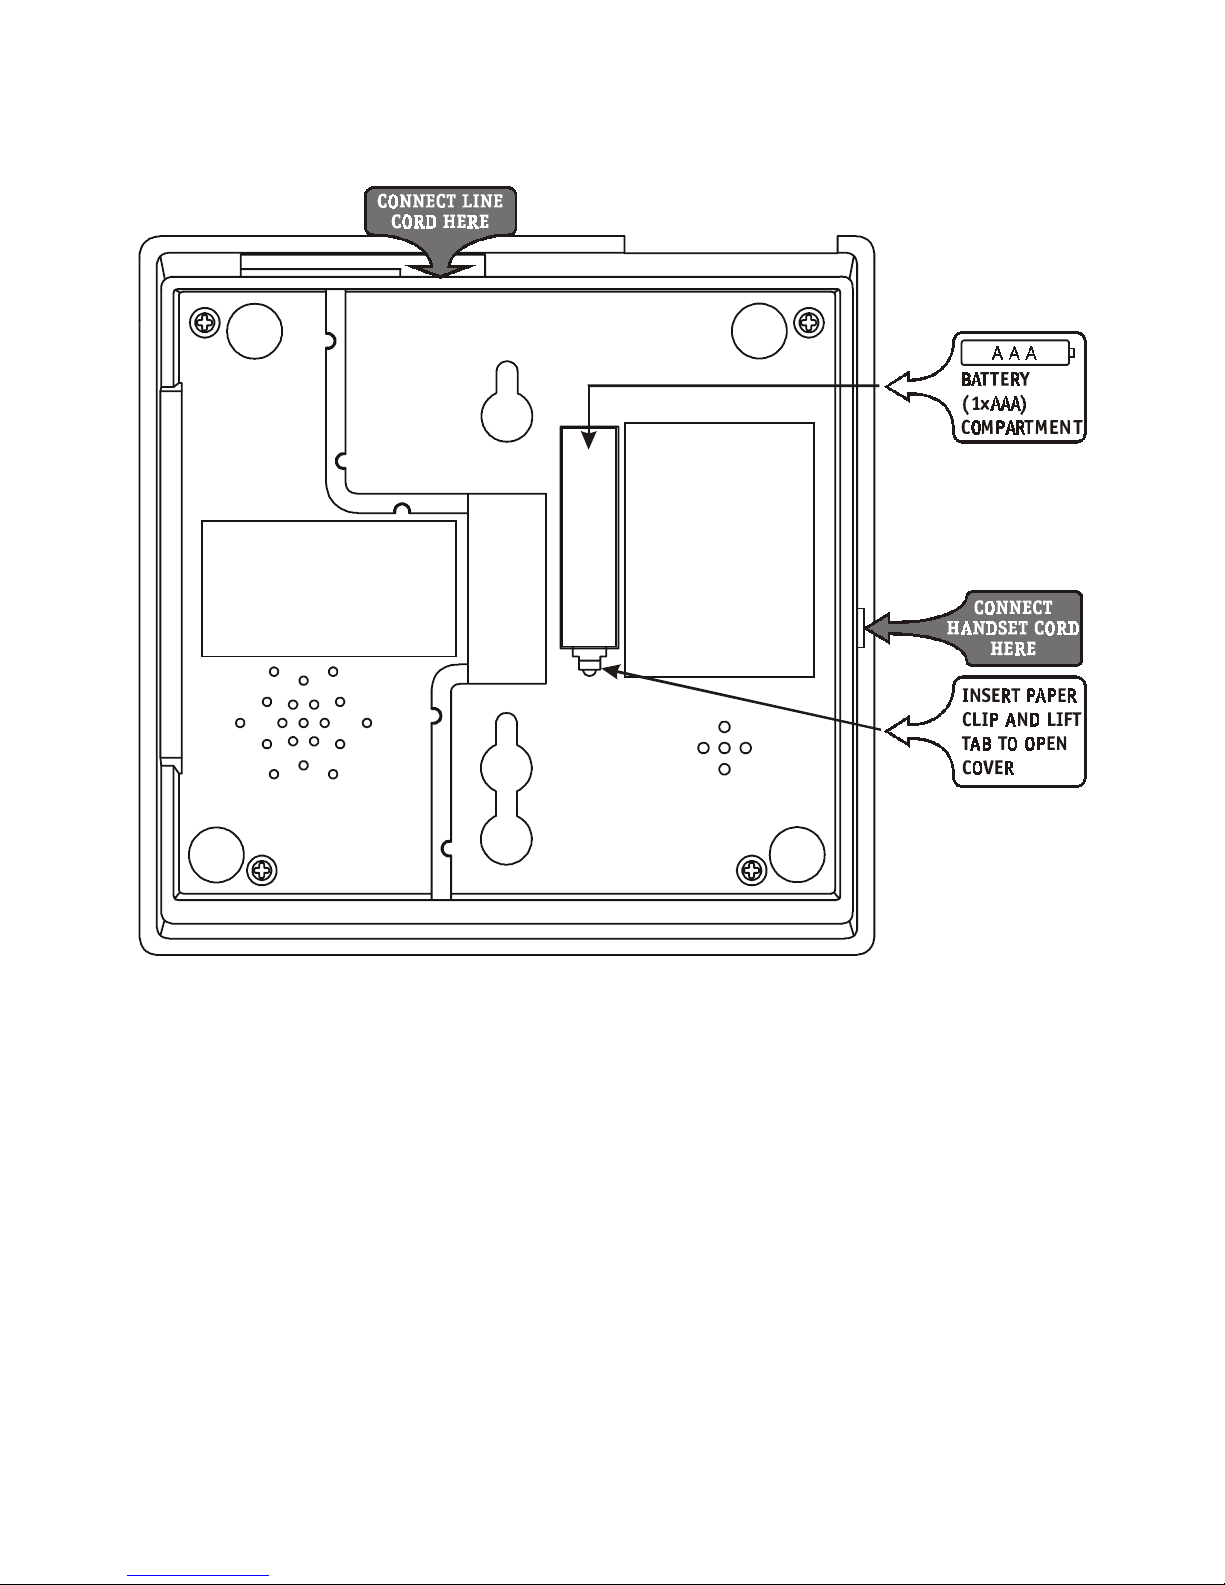
1.1 Installing the battery
Disconnect the telephone line before installing or replacing the battery.
1. Open the battery door by pulling back the latch on the battery cover.
2. Insert one (1) AAA alkaline battery (not included).
3. Snap the battery door back into place.
The telephone offers a unique memory retention feature. This will prevent the
loss of memory for a short while when replacing the battery.
1.2. Choosing a location
You can place the telephone on a desktop, table or mount it against the wall.
Select a location that is conveniently located near a telephone wall socket.
Page 1
Page 3

1.2.1. Desktop connection
To use your telephone on a desk, table, or shelf, plug the telephone line cord
into a telephone wall socket and into the socket underneath the LCD panel. The
handset cord must be plugged into the handset and the socket on the left hand
side of the telephone.
1.2.2. Wall mounting
Using a drill and screws (not supplied), you can easily mount your telephone
directly on the wall.
1. At the desired mounting location drill two holes 83 mm apart, one above
the other (vertically).
2. Turn the screws into each hole until the screw’s head extends about 5 mm
from the surface.
3. Line up the keyhole slots on the bottom of the telephone with the screws
on the wall, and then slide the telephone down onto the screws until it is
secure.
4. Plug the telephone line cord into a telephone wall socket. The cable can be
routed into the recess underneath the telephone
5. The handset cord must be plugged into the handset and the socket on the
left hand side of the telephone.
6. Remove the handset holder by pushing the holder towards the back of the
base, rotate the holder 180 degrees and replace it. The holder tab supports
the handset when the telephone is wall mounted.
Please use the enclosed template for easy wall mount installation.
1.3 Cleaning and care
• Avoid rough handling, areas with excessive moisture, heavy dust or extreme
temperature.
• The unit should be cleaned regularly, use a mild detergent and slightly
damp cloth, never use strong solvent or abrasive cleansers.
• Do not expose the telephone to direct sunlight or use it in extreme humidity.
Page 2
Page 4
2. PREPARATION
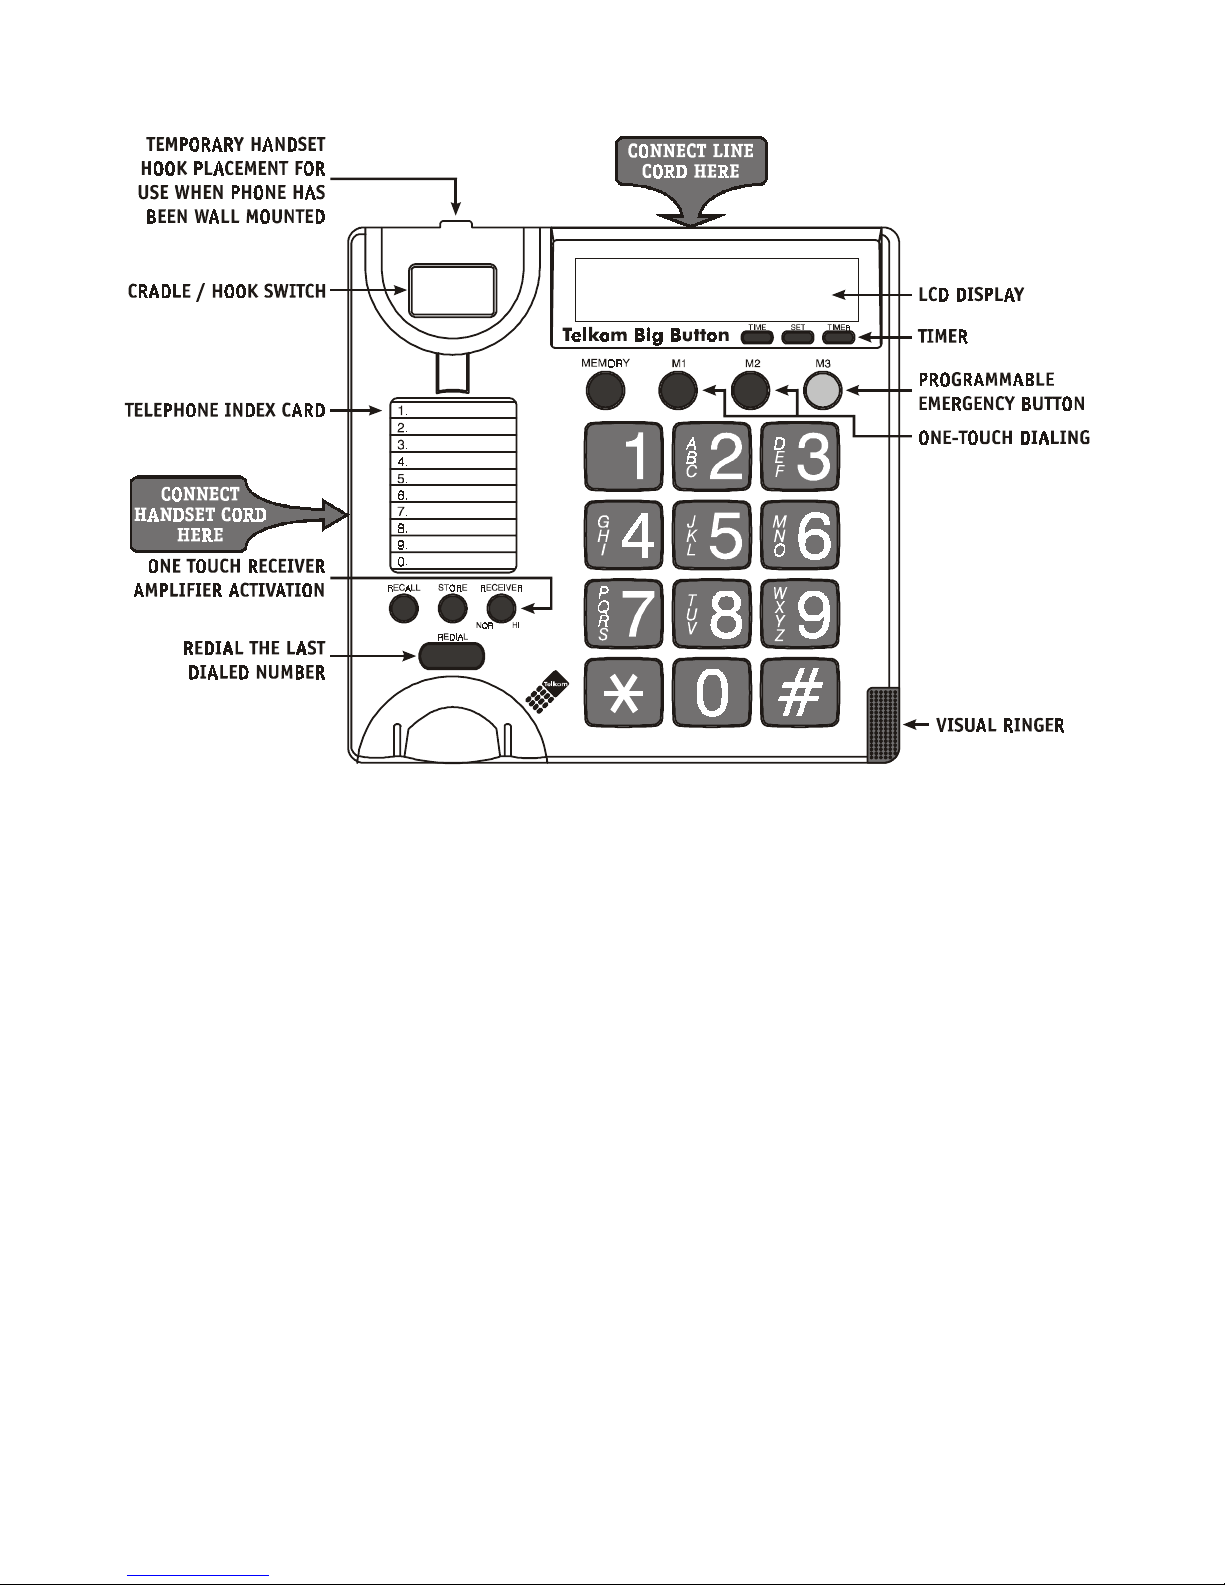
2.1. Ringer Volume
The ringer volume can be adjusted to a high or low sound level by sliding the
Ringer Volume control to the required setting. The following ringer settings are
available Off / Low / High.
2.2. Clock
Unless you are dialing out or using the timer feature, the LCD shows the current
time in 24H00 format. The LCD will show the current time again within about 6
seconds after the handset is replaced.
2.2.1. Setting the time
1. Set the hour
Press SET button once, the current hour setting will appear on the LCD and
will flash indicating the program mode. Press and hold TIME button. Release
the TIME button when the LCD shows the correct hour.
Page 3
Page 5

2. Set the minute
Press Set button once, the current minute setting will appear and the LCD
will flash. The second setting will automatically reset to 00. Press and hold
TIME button. Release the TIME button when the LCD shows the correct
minute. Press the SET button again to complete the set-up procedure.
3. OPERATION
3.1. Making a call
1. Lift the handset. The LCD will clear.
2. When you hear a dial tone, dial the number. The LCD will show the number
that you dialed. If you dial a number more than 16 digits long, it will
display the last 16 digits only.
3. Once you have completed the call, replace the handset.
3.2. Answering a call
1. When you receive a call, the telephone will ring and the ringer LED will
flash. Lift the handset.
2. Once you have completed the call, replace the handset.
3.3. The Redial Function
To quickly dial the last dialed number, press the REDIAL button.
1. Lift the handset
2. Press the REDIAL button.
If you press the REDIAL button during dialing, this button does not function as
REDIAL but as a PAUSE. The PAUSE function inserts a pause during dialing or
storing a number in memory. This is a convenient feature for electronic banking
or dialing from certain PABX systems where a short delay is required between
digits to pick-up an external line.
3.4. The Pause function
By pressing the REDIAL button after any digit is pressed you can insert a pause
in a string of digits e.g. for memory dialing.
Page 4
Page 6

3.5. Recall
Many special network services, such as WaitingCall, require a switch hook signal.
The RECALL button provides the electronic equivalent of a switch hook operation.
For example, if you subscribe to WaitingCall*, you can use this feature to put
your current call on hold and answer another call on the same line by pressing
the RECALL button. Press the RECALL button and then press 2 to answer the
second call.
* Please note that a subscription is required to use these services. Call Telkom
on 0800 600 015, to subscribe to this service.
3.6. Receiver Volume Control
The RECEIVER button allows you to adjust your handset volume from normal to
high volume for a more comfortable listening level. During the telephone
conversation, press this button once to set the receiver volume louder, press the
button once again to reset to normal. After you replace the handset, the receiver
volume will be reset to normal automatically.
3.7. Timer
You can activate the timer at any time by pressing the TIMER button, 0-00
appears on the LCD and starts the timer. Press the TIMER button again to stop
the timer. The maximum timer duration is 60 minutes where after the timer will
start again from 0-00.
3.7.1. Answering a Call
After lifting the handset, the LCD will display 0-00, and the timer will start. To
reset to 0-00, press TIMER button once.
3.7.2. Place a Call
After you have dialed out, the LCD displays the dialed telephone number. After
dialling the telephone number, the timer will start.
Page 5
Page 7

3.8. Memory Dialing
Your telephone has two types of memories, direct and indirect, that allow you to
store and easily dial up to 13 numbers.
• You can store up to 3 numbers in direct memory and dial them by pressing
the specific direct memory button located below the LCD.
• You can store up to 10 numbers in indirect memories and dial them by
pressing memory followed by the indirect memory location (0,1 …9).
A memory index card is located on the base so you can record the indirect
memories.
3.8.1. Storing a Number
1. Lift the handset.
2. Press the STORE button.
3. Dial the number (up to sixteen digits) that you wish to store in the memory;
the LCD will display the number.
4. Press the STORE button again.
5. To store a number in direct memory, press the direct memory button (M1,
M2, M3). To store a number in indirect memory, enter the desired memory
location number (0,1 …9) on the keypad.
6. Replace the handset.
3.8.2. Dialing a Stored Number
1. Lift the handset.
2. To dial a number stored in direct memory, press the direct memory button
(M1, M2, M3).
3. To dial a number stored in indirect memory, press the MEMORY button, then
press the memory location number (0,1 …9).
4. The telephone automatically dials the number stored in that location.
5. Replace the handset.
3.8.3. Memory Index Card
1. Insert a paper clip into the memory index card cover and pry it out.
2. Write on the card the person’s name or number that you stored in the
memory.
3. Replace the cover.
Page 6
Page 8

LIB887Y2
4. SERVICE ENQUIRIES
For any service or product information queries relating to this telephone, please
call our FreeCall number 0800 PHONES (0800 74 66 37) or visit our website on
www.telkomphones.co.za
 Loading...