

Telkom ADSL 5100, 5100 Quick Start Manual

Telkom ADSL 5100 Router
Quick Start Guide
Telkom ADSL 5100
For more detailed instructions on configuring and using the
Telkom ADSL 5100, please refer to the on-line manual.
Package Contents
1 X Telkom ADSL 5100 Router (modem)
1 X RJ-11 ADSL/telephone Cable
1 X Ethernet (CAT-5 LAN) Cable (Straight)
1 X Integrated Surge protector and Power adapter unit (12VDC, 1A)
1 X Console Cable (For technical support use only! Do not use unless requested by Telkom)
2 X ADSL Micro filters
1 X CD-ROM containing the utility, PC qualification test and the on-line manual
1 X This Quick Start Guide
Warning
9 Do not use the Telkom ADSL 5100 in high humidity or high
temperature rooms and/or surroundings. I.e. Kitchens.
9 Do not use the same power source for the Telkom ADSL 5100 as
other equipment.
9 Do not open or try to repair the Telkom ADSL 5100 yourself. If the
Telkom ADSL 5100 gets too hot, turn off the power immediately
and contact technical support on 0860 2C HELP (0860 22 43 57)
Attention
9 Place the Telkom ADSL 5100 on a stable surface.
9 Only use the power adapter that comes with the package. Using
a different voltage rating power adaptor may damage the router.
1
Quick Start Guide
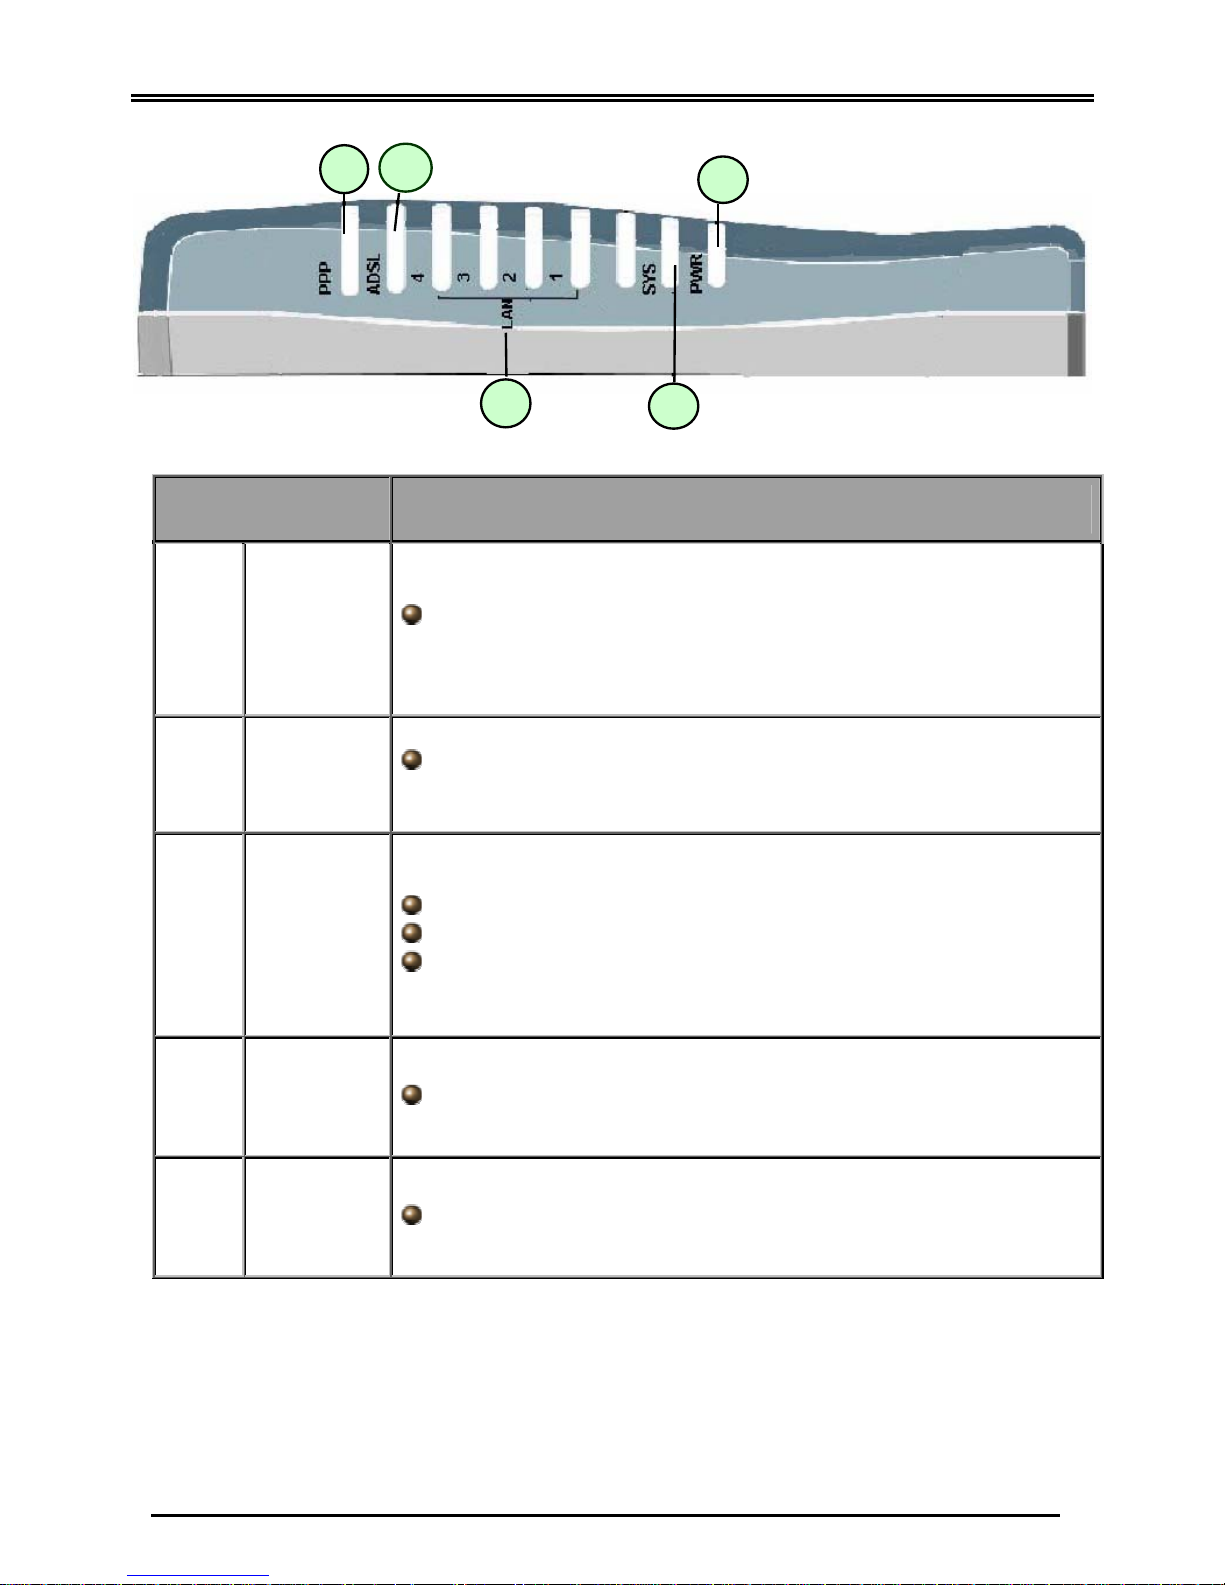
The Front LEDs
2
Figure 1
LED Meaning
1 PPP :
Lit steady when there is a PPPoE connection using the internal
PPPoE of the router.
2 ADSL:
Lit steadily when successfully connected to an ADSL DSLAM
(“linesync”).
3
LAN Port
1-4:
Lit when connected to an Ethernet device.
Green for 100Mbps; Orange for 10Mbps.
Blinking when data is Transmitted / Received.
4 SYS : Lit when the router is ready.
5 PWR : Lit when power is ON.
1
2
3
5
Telkom ADSL 5100
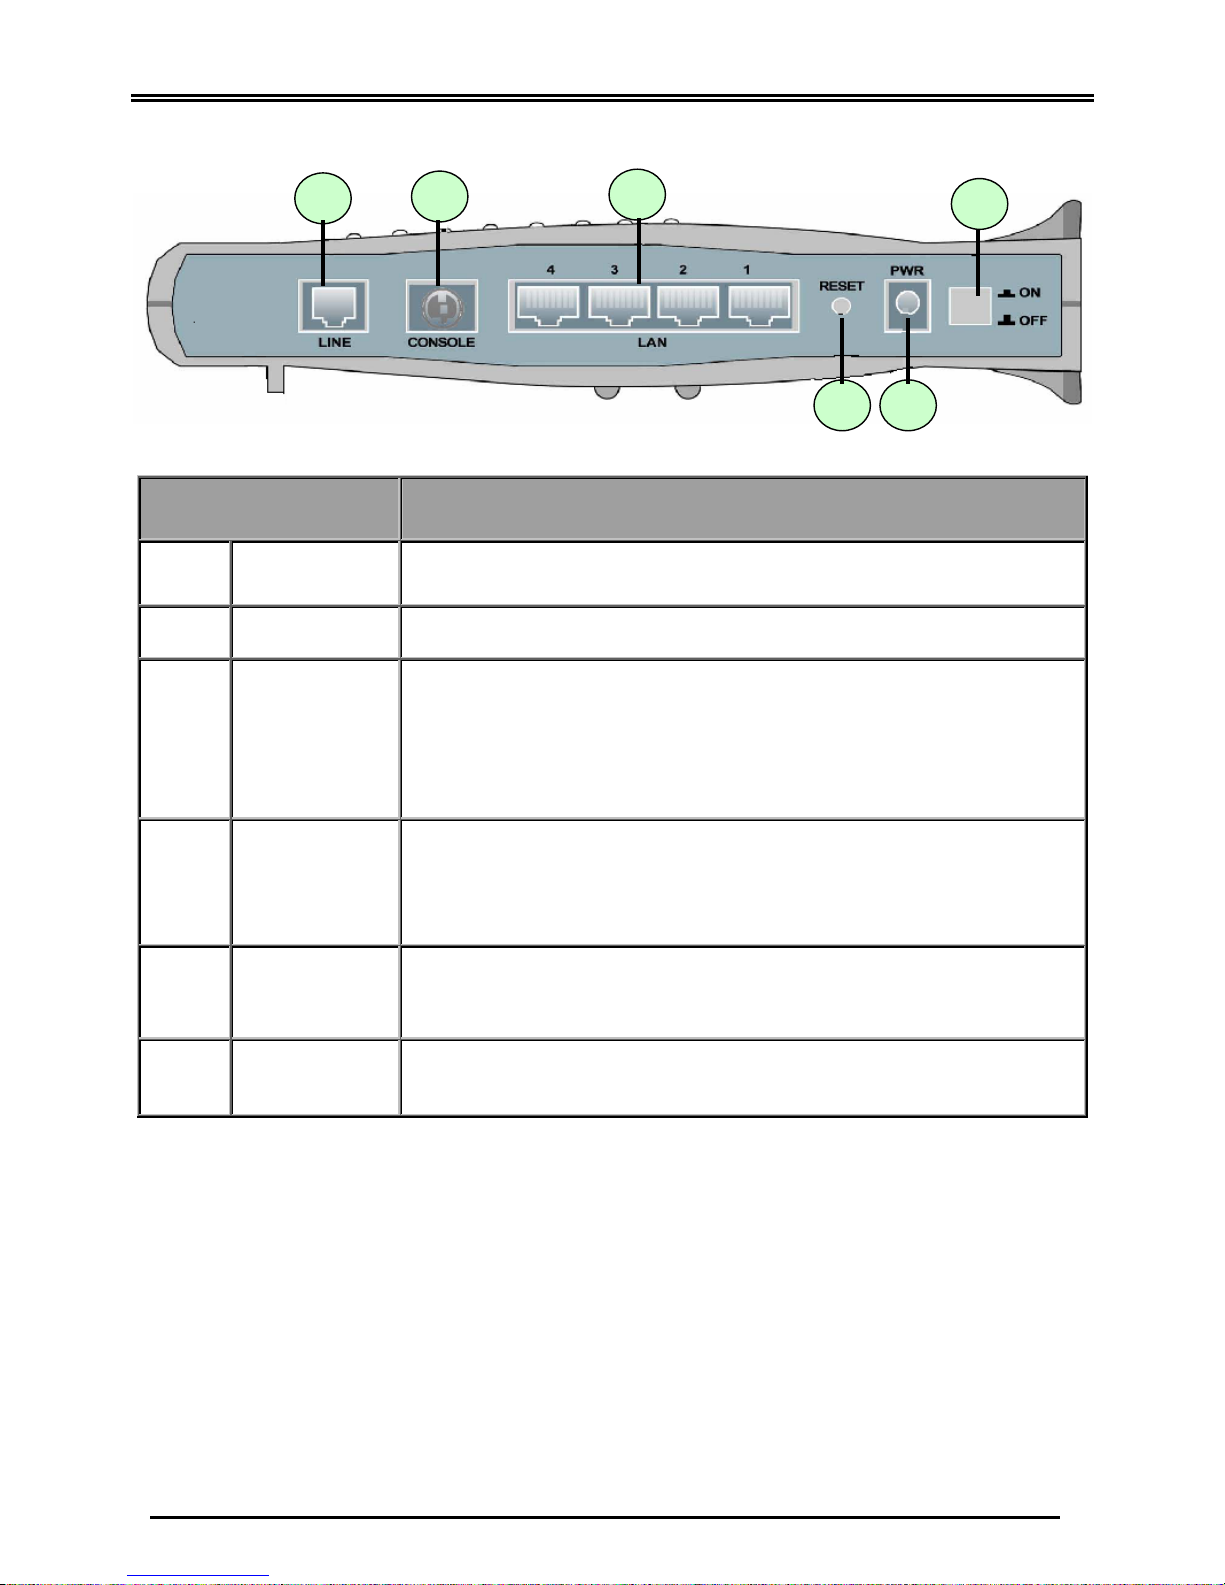
The Rear Ports
1
2 3
4
5
6
Figure 2
Port Meaning
1
Power Switch
Power ON/OFF switch
2
PWR
Connect the supplied power adapter to this jack.
3 RESET
The moment the device is powered on, press it to reset the device
or restore to factory default settings.
0-3 seconds: reset the device
6 seconds above: restore to factory default settings (this is used
when you can not login to the router, e.g. forgot the password)
4
LAN
1X — 4X
(RJ-45
connector)
Connect a UTP Ethernet cable (Cat-5 or Cat-5e) to one of the four
LAN ports when connecting to a PC or an office/home network of
10Mbps or 100Mbps. You may use a straight or a crossover cable.
5
CONSOLE
Console port is used for technical support purpose only.
(Do not use unless requested to do so by Telkom)
6
LINE
Connect the protected (“out”) RJ-11 plug of the integrated surge
and power unit into this jack.
3

Quick Start Guide
Connecting Your Telkom ADSL 5100 Router
(Hardware Installation)
Follow the installation instructions below, using the overview sketch on the next page
(figure 3) and the corresponding letter indicators.
1. Power up the device
a) Plug the power adapter into the electrical wall-socket (A).
b) Plug the power pin-connector (male) into the router’s power socket (B).
c) Switch on the device.
d) Wait for approximately 20 seconds, then confirm that the “PWR” and “SYS”
LED’s (front panel lights) are steadily lit.
2. Connect the ADSL line
a) Plug the “IN” telephone cable of the integrated power & surge unit into the
Telkom wall-socket (C).
b) Plug the “OUT” telephone cable of the integrated power & surge unit into the
router’s “LINE” port (D).
c) Your router will now attempt to synchronize with the Telkom ADSL line. The
“ADSL” LED will come on, start to blink and after approximately 40 seconds be
steadily lit. If the “ADSL” LED does not come on, please refer to the
troubleshooting section at the end of this guide.
d) The Telkom ADSL 5100 router is, by default, distributed with a guest ISP
username and password. This guest account allows you access to the
www.telkom.co.za website only. Although this account only allows limited
access, it serves as a tool to confirm that your hardware installation and your
own PC’s network configuration has been completed successfully. This guest
account will cause your router’s “PPP” LED to be steadily lit now. We will again
refer to this guest account at a later stage of the installation process.
3. Connect the LAN (network) cable
a) Plug one end of the enclosed Ethernet (CAT-5 LAN) cable into one of the
router’s LAN ports, you may choose any of the 4 ports (E).
b) Plug the other end of the Ethernet (CAT-5 LAN) cable into your computer’s
network port or network hub/switch (F).
c) Confirm that the corresponding LAN LED is lit.
d) You can connect up to 4 network devices directly to the Telkom ADSL 5100 as
shown in the overview sketch.
4. Connect the ADSL micro filters
a) If you also intend to use traditional telephones (for voice calls) on the ADSL line,
you need to connect the included ADSL micro filters. (These units filter out any
data noise on your voice lines.)
b) Plug the micro filter into the Telkom wall-socket from where you intend to utilize
your traditional telephone (G).
c) Plug the telephone into the micro filter (H).
d) Important Note: Make sure that you do
not connect any micro filters between
the Telkom wall socket used for the router and the router itself. Refer to the
overview sketch, from indicator (C) to indicator (D).
4
 Loading...