

Page 1

Gm882
USER’S GUIDE
INTRODUCTION
Thank you and congratulations for having bought a Telit mobile phone.
The Gm882 is a GSM dual b and, that works fully automati cally on the
double frequency band (GSM 900-1800 MHz, on condition that the
network operator offers this service) and guarantees an excellent quality
of conversation an d a wider range of the coverage of the radio s ignal;
you can use it in all countrie s of the E uropea n Union and in an y countr y
that has implemented GSM networks.
The GPRS techn ol og y gu ar an te es mu ch f as ter con n ection both for WAP
connections and for the Internet connections made when linking your
mobile to a computer.
EC Conformity
This phone is in conformity with the standards of the European Union
EN 60950
EN 301 489 – 07
and with the provisions of the following European regulations:
99/5/CE
89/336/CEE
73/23/CEE
In order to guarantee conti nuous im provem ent, th e specific ation s, design and
other details described in this guide can be changed without prior notice.
© 2002 Telit Mobile Terminals S.p.a. All rights reserved.
1
Page 2

USEFUL NUMBERS & CODES
Would you like to have more information on Telit products, or on your Gm882?
Have you got any suggestions for improvement?
Visit our site www.telit.net
There are some safety numbers and codes for the use of your phone that you
should remember.
Write important data on this page, cut it out and keep it in a safe place!
I
MEI _________________________________________________________
Safety code ___________________________________________________
Selflock code__________ __ ___ __________________ ___ ___ __ ___ __ ____
Telephone nr. _________________________________________________
SIM number ___________________________________________________
PIN _____________________ PIN 2________________________________
PUK ___________________ PUK 2________________________________
Answer machine code __ __ ___ ___ __ ___ __ ___ ________________ __ ___ _
Telephone nr. _________________________________________________
SIM number ___________________________________________________
PIN ____________ _________ PIN 2_______________ ________________ _
, or send us an e-mail to info@telit.net.
PUK ___________________ PUK 2________________________________
Answer machine code __ __ ___ ___ __ ___ __ ___ ________________ __ ___ _
2
Page 3

SAR CERTIFICATION
Like all radio transmitters, the Gm882 emits electromagnetic waves.
For user’s safety, the European Union Council has i ssued law s regardin g the
SAR (Specific Absorption Rate), a limit below which users’ health is not
jeopardised in any way.
Studies and anal yses whi ch g uar an tee th e absolute safety of u s er s, what eve r
their age or conditions of health, have provided the maximum value of 2 W/kg.
Users must bear in mind that the po wer ra di at ed by the phon e i s not cons tan t;
the GSM standard indeed states that for the telephone must use the minimum
power necessary for being connected to the nearest repeater.
The maximum level of the SAR reach ed in the most unfavourable con ditions
and during the emission of the maximum power available with Gm882 is 0.735
W/kg.
INSERTING THE SIM CARD
• To use your phone you must use a valid “plug-in”-shaped SIM card (small).
This card is given by the network operator or by the service provider.
• Switch off the phone and remove the battery cover on the rear side.
• Pull out the battery taking care not to pull the small cable that connects it to
the phone.
• Free the sim-card holder by moving the metal clip to the right of the phone
and remove it.
• Insert the SIM card into the card holder so that the connections are turned
towards the inner part of the phone; replace the sim-card holder and block it
with the metal clip.
• Insert the battery into position and replace the removed cover.
3
Page 4

BATTERY RECHARGE
Rechargeable Ni-MH b atteries (Nickel Metalhydrate, o r Nickel-Metalhydride)
power this phone.
Note: only use original batteries and battery-chargers.
Ni-MH batteries are subject to the “memo-effect”, that is the progressive loss of
power efficiency if they are not recharged correctly. In order to obtain the best
results, remember to recharge the battery only after it is completely flat.
I
MPORTANT
Connect the battery-charger only when the battery is installed.
Even though the connectors are different, pay attention not to confuse
the connector for the battery-charger on the right-hand side of the phone
with the one for the hand-free on the upper part.
Recharging the battery
• Switch off the phone by keeping the key
• Insert the lead of the battery-charger into the connector on the right-hand side
of the phone, then connect th e batt ery -charger to the socket ( first check th e
tension indicated on the label of the battery-charger).
Note: In order to greatly improve the performance and the life of the
battery, it should be di schar ged an d rechar ged twice bef ore yo u use th e
phone for the first time.
Note: when recharging the battery, the room temperature, which is not the
one shown on the display, must be between 0° and +45°C.
pressed for a while.
4
Page 5

THE Gm882: PRESENTATION AND BASIC FUNCTIONS
To switch on
correctly connected the battery, press the key
Press the same key for one second,
After the phone has been switched on, (and the PIN code, if required, has been
inserted and confirmed with the key
If the area is covered by the service , the phon e is conn ecte d to th e ne tw or k of
the operator that issued the SIM card, or (abroad) to the network of an operator
with roaming agreements that allows use of the available call services.
If the service is not availa ble in th e area wh ere you u se the phone, the phon e
will be unable to receive or send anything.
SUGGESTION
To use most of the menus and set up the different functions you need only 2
keys and the middle joystick:
Joystick press it in stand-by to enter the traditional menu, or shift it in any
the Gm882, after you have inserted a valid SIM card and
to switch off
), the Gm882 is in stand-by mode.
to confirm the selected entry
to exit the menu you are looking at without changing anything.
direction to enable the quick menu. To browse the menus, see
page 12 and page 13.
for a second.
the phone.
5
Page 6

FUNCTION OF THE KEYS
Key function:
to switch the phone ON/ OFF
ON/OFF during conversation.
In stand-by, by moving the joy s tick in an y dire cti on , you e nte r the quick m enu ;
to use it see “The quick menu” on page 12
-
Soft keys:
on the display.
to make a call after the number has been dialled;
confirm a choice, to quickly view the call register
in stand-by mode, by pressing the joystick like a key you
enter the traditional menu; by moving it left or right you go
back to the upper menu le vel or you enter the selecte d
one; by moving it up and down you select the various
menu entries of one level.
to end or reject a cal l
without changing the sett ings. If you keep it pressed it
exits completely from the menu , independently fro m the
current level.
to delete a character, data, a call, an EMS, to erase an
entry in the phone book or missed calls viewed on the
display; to exit from a menu and go back to the upper
menu level or (if pressed for a while ) to go back to the
stand-by mode
to insert the telephone numbers or availab le characters
on each key
to digit the char acter
(W) when sending touch tones DTMF after at least one
number has been dialled in stand-by mode.
to digit the character #, to recall – preceded by a number
– the corresponding entry of the phone book; in stand-by,
when pressed for a while, to lock/unlock the keypad
to perform the functions indicated by the icons
, turn the “Mute” function
, to reject a choice, to exit a menu
; to insert pause (P) and waitin g
*
to
Note: in Internet sessions with WAP and using T9 some keys have
special functions.
6
Page 7
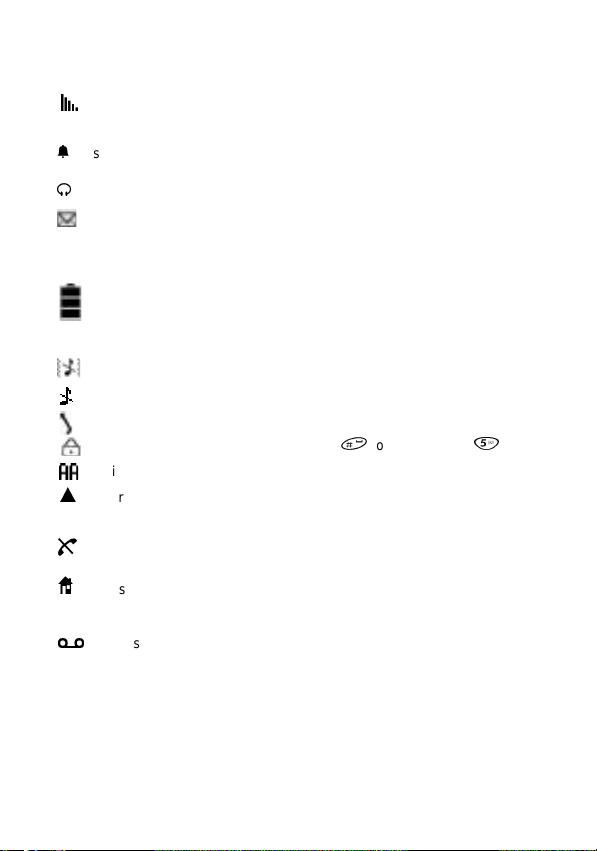
SYMBOLS SHOWN ON THE DISPLAY
the signal strength of the cellular network (maximum 5 bars); if the name
of the GSM network is no t displayed, but the b ars are shown, you can
only make emergency calls
shows that a memo for an ap pointment, or the ala rm clock have been
enabled
a headset or a viva voce device (optional) are connected
shows that there are EMS messages that have not been read; if it flashes,
it means that there is no more space in the SIM card for new SMS
messages. Erase some of the existing E MS messages to receive new
ones
shows the battery charge level: from 3 fixed bars (full) to flashing bars
(flat). During recha rge the bars i n the batter y symbol prog ressively li ght
up; when the battery has been totally recharged, the light is fixed.
12.22 18/04 shows the time and date. To set them, see page 25
the vibrating alert function is ON, the ringing tones are OFF
the ringing tones are OFF
indicates that call divert is ON
the keypad is locked. To unlock it press
indicates that automatic answering is ON (see page 39)
the roaming mode is ON (the phone is con nected to a different G SM
3
network from the op erator that issued th e SIM card and cal ls are mad e
on this network with possible changes to the price)
shows that you are registered on a GSM network without roaming which
H
means that you can only make emergency calls
if this is ON, it shows the home zon e sta tus (t he n etwo rk op era tor or th e
7
service provider can give you more detailed information on this) or your
own network after you have searched for a new network from the menu.
)
there is a message in your mailbox (this f unction depends on th e SIM
card)
for a while, then
7
Page 8

During a call some icons may appear on the display:
indicates call is in progress
indicates you have put a call on hold
indicates there is a new incoming call while a conversation is in progress.
In this case, by pressing
answer the new incoming call,
or, by pressing
reject the new incoming call.
If you have answered the new incoming call, by pressing
person you are talking to on ho l d an d ret urn to the conve rsa ti on with the other
person.
Moreover, if you press the Joyst ic k, you ha ve access to a menu, which allows
you to:
• End call number 1
• End call number 2
• Swap calls, putting one on hold and returning to the other
• Use the number keypad to transmit the DTMF tones
• Connect both calls together (Multiparty)
• A ccess t he main m enu, fo r example , to go to th e phon e book or to read a n
SMS message
If you enable the Multiparty function, the same menu will then allow you, using
the function “Split”, to separate the calls and go on with the two (or more) calls
separately.
you can put the call in progress on hold and
you can go on with the convers ation in pro gress an d
you can put the
DTMF – what it is, its use
The DTMF system (Dual Tone Multi-Frequency) allows yo u to send tones in
standard frequency u sed for remote co ntrol devices that ar e able to decode
these tones. This system is used , for example, to control voice mailboxes,
answering machines, telephone cards, etc.
8
Page 9

BASIC FUNCTIONS OF THE PHONE
Making a call
When the phone is in st and-by mo de, key in the num ber of the re ceiver
including the area code, and press the key
Use the key
delete the whole number and go back to the stand-by mode.
To key in an internationa l prefix, press the key
(eg. +39 02 xxxxxxx to call Milan from abroad).
If the phone of the receiver is engaged, your phone can automatically recall the
same number at longer intervals of time the more attempts it makes.
To stop the sequence of automatic recalling at any time, press the key
to delete the last figure or – keeping it pressed for a second – to
Receiving a call
When someone is calling you, the display and the keypad light up; on th e
display you see the text “Call” and the caller’s number (if available); if you have
previously inserted this number in your phone book, the cal ler’s name will
automatically be displayed.
If the vibra-call function is ON, the Gm 882 i nform s you, vibra ting , that ther e is
an incoming call (see page 38).
When someone call s you, 2 icon s are vi ewed on th e lower line of the display
that show the functions of the keys (soft key) situated below.
Press:
to answer
to reject a call
and the engaged tone when you reject the call).
If you press this key you can also
To end the conversation
a call
(the caller hea rs the ringi ng to ne whi le you r pho ne ring s
press the key
During a conversation . . .
You can
set the volume of the loud sp eak er
joystick left and right
You can
disable and re- en ab le t he mic ro ph one
second
You can digit a number on the keypad and call it without interrupting the first
conversation.
.
for a while and digit +
divert the call
to your voice mailbox.
.
or of the headset by moving the
by pressing the key
.
for a
9
Page 10

Emergency calls
Any time – even without a SIM card, but on condition t hat the phone is i n an
area served by the GSM network – you can make a (free) emergency call.
Key in the number 112 in stand-by mode and press
Without the SIM card, press
ATTENTION
Before making any emergency calls, we advise you to read the network
operator’s instructions on this service.
: DO NOT USE THIS SERVICE TO EXCESS
and confirm with the key
.
.
Keypad locked/unlocked
A locked keypad prevents the keys fr om bein g accid en tal ly pr esse d whe n yo u
are not using your phone. To lock the keypad when the display is in stan d-by
press the key
message “KeypadLocked”.
To unlock the keypad press
When the keypad is locked, only emergency ca lls can be ma de.
for a while. The display will show the s ymbol and the
for one second followed by
.
10
Page 11

MENU
The GM882 has two menus through which you can access the various
functions and controls which characterise its functioning.
The traditional menu, which includes all the functions and controls, and a quick
menu, which with few “clicks”, allows you to use the functions you will probably
use most often.
Tradi tional menu
In stand-by mode press the joystick vertically.
Depending on the t ype of SIM card used, yo u may or may n ot have the
menu which depends on the network operator issuing the card.
Toolkit
If your SIM does not offer the “SIM Toolkit”, this display will be shown:
Phonebook
which, as you can see f rom the number on the lef t, is menu number 1. By
pressing the joystick, you confirm this choice and enter the phone book.
By moving the joystick up or down, however, you can scroll the various entries
of the menu.
To confirm an e n t ry a n d en t er t he me nu s e le ct e d, y ou c a n pr es s it or m o ve it to
the right.
To go back to the upper level menu, move it to the left, or press
The structure of the menu is similar to a tree.
The first level of the menu has eight (nin e, with the men u of the SIM Toolki t)
branches, and the first is the phone book.
For each ramification of the me nu-tre e there is a corr espond ing numb er: afte r
you press the joystick, you can access the desire d function by keying in the
sequence of numbers that correspond to the route you want to follow.
For example, to set the light of the display, enter the me nu by pressing the
joystick and then press the keys 4-1-2.
or
SIM
.
11
Page 12
The quick menu
In stand-by mode, move the joystick in any direction, without pressing it.
The left side of the display will show some icons – each of these allows you to
access the basic functions of your Gm882 directly and quickly.
The quick menu can be tailored for your
personal use: when yo u have enabled it, and
the icons are viewed , move the joystick to the
right to have access to the list of fu nctions that
you can add to the menu.
Scroll the list by moving the joystick up and
down; press it to add the selected function to the
quick menu.
To erase a function from the quick men u, pr ess
when the relative icon has been selected on the other side.
The functions that you can en ter quickly, by adding them to the quick menu,
are:
• Access to the phone book
• Direct access to the text editor for editing a new message SMS
• Access t o the audio profil es, which al low you to set all t he sou nd ale rts tha t
the Gm882 can emit – from the SMS tone to the ringin g tones for inco ming
calls, to the flat battery warning tone.
• Setting display and keypad brightness
• Quick switching off of all tones (shown by the icon X)
• Quick call to the voice mailbox
• Viewing unread SMS messages
• Calculator
• Call list
• Melody maker function which allows you to compose melodies
• Sendin g a new e-m ail
• Reading e-mails
• WAP browser
• Menu for accessing games
Read SMS
12
Page 13

g
g
g
g
Writing letters and numbe rs in the traditional way
When writi ng EMS /SMS me ssages and e-mail s you can u se the T9 tech nolo gy,
whereas in other case s, numb ers an d lett ers (fo r exam ple in th e phon e book )
have to be keyed in in the “
To obtain the desired character, press the correspondin
times consecutively until the character you are searchin
the display; continue like this with the followin
If the followin
cursor shifts to the next position and select the desired character.
Move the joystick left and right to shift the cursor to the right or to the left in the
text, and move it up and down to shift the cursor to the beginning or the end of
the text.
Use the key
To insert upper case characte rs press
word will be upper case followed by lower case letters) or twice (all the following
characters will be upper case).
Press the same key one more time to go back to lower case letters.
To insert punctuation and special characters press
character is on the sa me key, wait a second until th e
to erase wrongly digitised characters.
traditional”
way.
key several
for is viewed on
key.
once (the initial letter of the next
several times .
13
Page 14

PHONE BOOK
The phone book is one of the basic features of the phone.
With the
phone also provides extra memory for the phone book.
You can copy names and numbers from the SIM card onto the phone and vice
versa, allowing you to use the phone book whichever SIM card is inserted in the
phone.
If a number is stored in the phone book, you can use it not only to make a call,
but also to insert it as the addressee of a text message without having to key it
in again manually; moreover
1 to 9 in the phone book, by simply pr essing for a second, in stan d-by
mode, the key that correspo nd s to th e des ire d en tr y.
The
Gm882
characters for the n ame (e.g. name and surn ame); home, work and mob ile
phone numbers; two e-mail addresses.
Storing a new number in the SIM phon e book
• Key in, in stand-by mode, the phone number you want to store and then press
the joystick – or enter the phone book menu by pressing the joystick when you
are viewing it, select “New” and then insert the number.
• You can no w access the text editor that all ows you to key in the name tha t
corresponds to the inserted number.
• Write the name in the traditional way (see “Writing letters and numbers in the
traditional way” on page 13) and confirm it by pressing the key
• Now choose from the available caller groups (family, friends, colleagues etc.)
the one you want to assign the name to and the type of number (home, work,
mobile).
• The ph one now shows you the progressive n umber of the first available
position of the phone book for storing this number.
Selecting a name in the phone book
• In stand-by mode, press the joystick to enter the menu and access the phone
book.
• Browse thr oug h the na me s by moving the joystick until you find the one yo u
want, or:
• Press the key labelled with the first character of the name you are looking for
– or press it several times, as in the traditional way if the character you need
is not the first letter on the key.
• The first name with that letter as its initial will be shown on the display. If you
are searching for ano the r n am e wi t h th e sam e initial, insert other ch ara cter s
of the name until the one you need is selected.
Now, press
desired.
To call the selected number, press
, besides the memory space available on the SIM card , the
Gm882
you can call up those stored in the entries from
allows you to insert various data for each name; two sequences of
to view the page of the pho ne book containing the name
.
14
Page 15

g
When you use the internal phone book, you can store further inform ation for
each name.
For example, you can store the hom e number, wor k number, mo bile numbe r
and e-mail address of one friend. They will be stor ed in separate files. By
moving the joystick left or r i ght yo u c an go fr om one to another and to call the
number you need, simply press
Adding a phone number to the internal phone book
Enter the phone book and press the joystick to access the menu
• Select and confirm entry 1 –
• One by one sele ct and confir m the entr ies
and description),
Mobile phone
data.
• Obviousl y you are not oblig ed to insert al l the data; the unu sed files will no t
be shown when viewing the phone book.
• After all data have been inserted, select the entry
data and create a new entry in the phone book.
Office
(mobile phon e nu mb er) ,
Phone book menu
If you keep the joy sti ck p re ssed whil e yo u a re viewi n g any na me in the phone
book you can access the phone book menu, which allows you to:
1
a new name
Key in
2 Modify the current entry
3 If you are using the SIM card phone book: the entry
the displayed name to insert a new number (for example the mobile number
and home number of the same person)
If you are using th e i nter na l ph on e b ook, the entry
contents of the phone book
4
the current entry
Clear
5 If you are using the SIM card phone book, you can filter the names assigned
to a chosen
group”.If you are using the internal phone book, you can enable and disable
the FN (fixed number) function which allows you to limit the outgoing calls to
a series of numbers protected by the PIN2 code
6 If you are using the SIM card phone book, you can check and reset the
Speed dials
pressing the corresponding key for a while in stand-by mode.If you are using
the internal phone book, you can enable and disable the barring of outgoing
calls to certain numbers (
7 In the SIM phonebo ok, here you ’ll find t he FN
the internal phon ebo ook, you can access th e
the numbers (that chan ge according to the operator that issued the SIM
card) you use to access spe cial services, such as, for exam ple, the voice
mailbox or the information service
User
, that is, the 9 teleph one numbers that you ca n call by simp ly
.
New
(work phone number),
. To view the whole ph one book a gain, sele ct “No
roup
Barred numbers
Name, Surname, Title
E-mail 1
(home phone number),
Home
and
E-mail 2
Store and exit
Copy
Delete All
)
(Fixed number
Service numbers
, and store the
allows you to use
will erase the
(category
to store the
) function; in
, which are
15
Page 16

8 SIM phoneb oo k: Barred numbers. Internal phonebook: Options menu
9 SIM phoneb oo k: Service numbers
10 S IM pho neb oo k: Options menu
If you are using the internal phon e book, the Op tions menu is displayed a s
follows:
1 Memory in use: this allows yo u to cho ose be twee n th e i n ter nal pho ne book
and the SIM card phone book.
2 M emory status: this provides infor mation on how many numbers ca n be
stored and on the amount of space av ailable.
3Copy: you can copy part of the S IM card phone bo ok to the internal phone
book and vice versa. Insert the progressive number of the first and last posi-
tion of the phone book you want to copy, and all the entries in between includ-
ing these will be copied. To cop y one entry, inse rt th e n umber o f it s p osition
in the phone book twice.
4Organise: in the internal phone boo k you can in ser t two se que nce s of ch ar -
acters for each number – for example name and surname – and this function
allows you to decide which name to base the phone book list on.
If, however, you are using the SIM card phone book, the m enu “Options” is as
follows:
1 Phone bo ok format: you choose how you want to view the entries (name and
number – list of names only) and confirm with ?
2 Current memory: see above.
3 Memory status: see above.
4Copy: this function allows you to co py parts of the SIM card p hone book to
the internal phone book, as described above.
16
Page 17

CALL REGISTER
Basic information (the number of the person you are talking to, if available, the
time the conversation s tarted, the cal l type) of the last c alls ar e store d in you r
phone.
Among the incoming calls there are also the unanswered calls.
Information refers to calls received while the phone is switched on and
connected to the network; some operators can give you information via SMS
on calls sent to your number while your phone was switched off or unattainable.
To access the call list
Select and confirm the entry
Unanswered
of
All
The entry
You can use the joystick to select a call, and call that number by pressing
If you press the joystick, all available information on the selected call will be
viewed; by pressing it again you can store the select ed number in the phone
book (you will be asked to assign it a name).
If that number is al re ady sto red i n yo ur pho ne bo ok, the phone will inform yo u
of this with a message, to avoid the same number being stored more than once.
To delete a call from the list
selected the call as described abo ve; you will be asked to confi rm
you can answer in the affirmative by pressing the key
pressing
The text “Nr. X missed calls”
indicates that you received x calls that you did not answer.
If you press, in stand-by mode, the key
calls (outgoing, incoming, or unanswered).
To redial the last number in the li st quickly press the key
calls, only the
calls stored in the memory.
Delete al
.
, scroll the menu and confirm the entry
” allows you to delete all the stored calls.
and then choose if you want to view the
List
Received
calls, the
, you must keep the key
that you sometimes see on your display
, a list is viewed showing the last 10
calls or the complete list
Sent
pressed after you have
, or in the negative by
Calls
.
Delete
twice.
and
.
17
Page 18

g
EMS/SMS MESSAGES
With the
receive traditional SMS text messages
that are enriched with t wo functions –
and
EMS
text easier and quicke r and allow you to
insert pictures, animat ions and sounds in
your messages.
SMS parameters
Before you send your messages, you must set up some
parameters
SIM card.
Service Center
This is the phone number provided by the network operator (if you do not have
it, you can ask your op erator for it) for sending messages to be sent to th e
addressee.
Do not confuse this nu mber with the phone num ber of the addres see of the
message.
Do not confuse this number with the phone number of the
addressee of the messa
Profile name
SMS parameters (“profile”). Create the profiles containing the parameters
settings you often need, and then active the one you need by choosing it in the
menu 2-1-4-4-7 (SMS-Pa ra meters-Advanced-SMS P rofile ).
(menu 2-1-4-3)
Validity
This network service allows you to set the length of time your S MS messages
are stored at the service center while attempts are made to deliver them.
Select and confirm the length of time you want by using the joystick.
Advanced
From this menu you can access the following functions:
Delivery report
Enable this function to have the delivery of your message confirmed. You will
receive an SMS with the head ing and the number of the addressee’s mobile
phone, the date and the time the message you sent was received.
Destination
This function allows you to store the phone n umber of th e addressee o f new
messages and is very useful if you want to send EMS/SMS messages often to
the same addressee.
If you set a phone number, this will be set automatically as addressee when you
write a new message, as if you had written it manually; by pressing
change the number and send the message to someone else.
you can send and
Gm882
– which make the editing of the
; most of them are provided by the network operator that issued the
(menu 2-1-4-1)
e
.
(menu 2-1-4-2) allows you to assign a name to the whole set of
(menu 2-1-4-4)
(menu 2-1-4-4-1)
(menu 2-1-4-4-2)
is a trademark of
T9
Tegic communications
T9
inc. and is a technology
patented in Europe,
the United Kingdom
and other countries.
operation
you can
18
Page 19

Type (menu 2-1-4-4-3)
This network service allows you to convert EMS messages into different
formats, such as for e xample: ISDN and PSTN ser vices, Pager, E -mail, Fax,
etc.
Change the pre-set value “0_Text” only after h aving contacted yo ur network
operator to make sure these formats can be sent.
Extended alphabet (menu 2-1-4-4-4)
This function is usefu l for sending special c haracters (eg. foreign al phabets)
which occupy more space in the memory. The total length of one SMS
message is limited to 70 characters.
ATTENTION: with mobile phone s that cannot read extende d characters,
the addressee may have problems reading these messages.
Class (menu 2-1-4-4-5)
There are several classes o f S MS mes sage s th at you can cho ose fr om in this
menu.
Store in SIM the message will be stored in the addressee’s SIM card
Store in mobile the message will be stored in the addressee’s mobile
Show immediately the message is no t stored by the addr essee; it is show n
Reply path (menu 2-1-4-4-6)
If you enable this fu ncti o n, the a dd res sees o f yo ur m essa ges can answer yo u
by using your SMS Service Center. This is necessary for some spe cial SMS
services, such as, for example, the automatic replacement of messages stored
with incoming ones.
Ask your operator for more detailed information.
SMS Profile (menu 2-1-4-4-7)
This function allows y ou to displa y the lis t of all th e SMS p rofiles you created ,
and choose the one you prefer to use it in the next message. SMS profiles are
useful because once y ou’ve created them, you don’t ne ed to change every
single parameter; just save severa l different profiles, each one containin g the
parameters you might need, then choose and use the one you want.
SMS Info (menu 2-1-4-4-8)
This function gives you information on EMS messages stored in your SIM card.
In detail: number of messages stored, total capacity of the SIM card, number of
the SMS Service Center.
on the display and is deleted after viewing
19
Page 20

g
Concatenated messages
The phone Gm882 supports concatenated messages. This means that you can
edit a text with more than the traditional 16 0 characte rs. Before you send the
message, it will be automatically split into two or more messages (up to 5) that
will be sent to the same addressee.
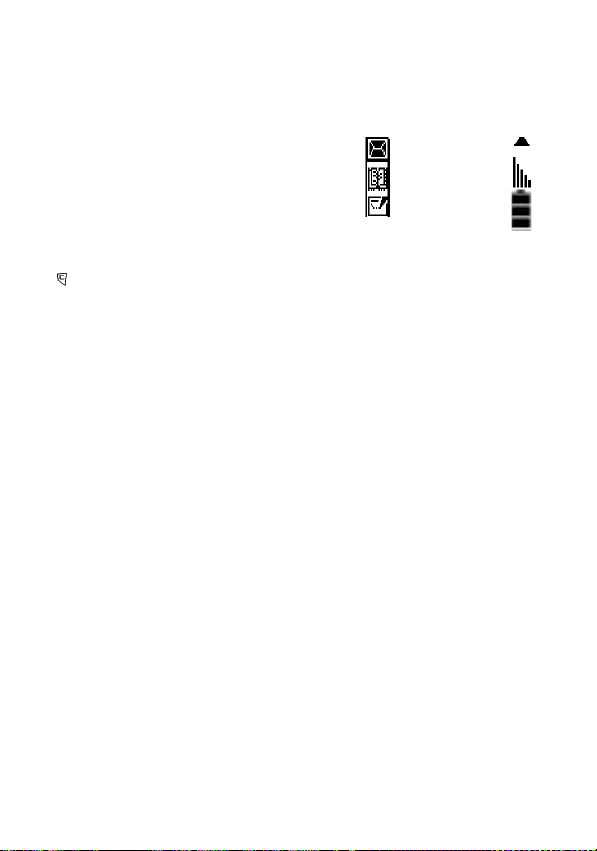
In the text editor on the left of the character counter, which is in the bottom righthand corner, a number is displayed indicating how many messages are needed
to send the text you are editing.
Sending an EMS/SMS message
Scroll to me nu 2 – MESSAGES and confirm twice with the key
–
Write new
Writin
You can edit the text in two different ways:
The operating mod e is shown b y an icon on the l ower p art of the di splay:
or
The icon
number written on it.
To scroll from one mode to the other, press the joystick.
Writing a message in the traditional way
In the traditional way, you use each key to digitis e different ch aracters (t hose
written on each key); see “Writing letters and numbers in the traditional way” on
page 13.
Writing a text with T9
With the T9 technology, you can write texts more quickly and in different
languages (the number of available languages changes according to the
software the phone is equipped with).
You can also use the T9 mode to write multilingual messages by changing the
built-in dictionary th at you access through the special menu (see “T9/EMS
menu” on page 32) each time.
T9 technology
In the memory of your phone there is a database with a large number of words.
To write a word, pr ess each key that corres pon ds to the letter of t he wor d just
once.
For example, to write the word “horse” press (on ce each ) the keys 4-6 -7-7-3.
The software analyses the sequence of the pressed keys and considers which
word in the dictio nary co uld be the o ne yo u are loo king for and write s it down
automatically while you press the keys.
The characters viewed while you write a word can change each time you press
a key; therefore read the result only after you have pressed all the keys and you
will notice that most of the time the phone has written exactly the word you were
looking for.
.
the text of the message
(traditional way).
indicates the numeric mode, that is, each key corresponds to the
to enter
SMS
20
Page 21

If the word written by the phone is not the one required, press
change it with all t he available ma tches, that is, w ith all the othe r words you
could have written, using the same keys.
For example, with the keys 3-4-4-4-8 you can write “digit”, “fight” or “eight”.
If the word you were lo oking f or is not among th e matc hes, you can add
the words you often use and that T9 does not “know” to the dictionary.
Adding new words in the T9 database
Scroll to traditiona l text input mode by pr essing the joyst ick until t he followin g
is viewed on the lower part of the display. Write the word you want to
icon
add to the dictionary as describ ed in the chap ter “Writ ing lett ers and n umber s
in the traditional way” ( page 13); w hen you have digitise d the l ast lette r, scroll
to T9 (icon
The word is now part of the T9 diction ary and from now on you can write it
automatically, like any other word that is in the dictionary.
) by pressing the joystick again.
EMS: what are they? How to use them
EMS (Enhanced Messages Services) are one of the most recent in novations
as far as SMS text messages are concerned: besides the traditional text
message, from now on, you can send sounds, melodies, pictures and
animations.
When the addressee re ads the message (his mobile pho ne must of course
support EMS standard capacity) the melodies you have inserted are
automatically repla yed and the animations a nd pi ctu res you ha ve in ser t ed ar e
viewed on the display with the text you wrote.
T9/EMS menu
By pressing the joystick for a while as you key in the message, you can access
the T9/EMS menu.
Here you can:
• Insert one of the available Ems objects (Insert) choosing it in the list :
predefined/user-defined pictures, predefined/user-defined animations,
sounds
• Change the size of the characters (font) used in the text Ch ange font
• Change the T9 dictionary to write a text in another language – Language
• Read the guide to see how text input works with T9 – Help
Press the key
to go up to an upper menu level.
and
When you insert an objec t in your message, an ic on is displayed in the text
editor which indicates th at there is an object, and this ob ject uses part o f the
characters that are usually available to edit the text message – you can see that
the character counter in the top right hand corner indicates that less space is
available.
to confirm each of your choices, the joystick to scroll the list
to
21
Page 22

There are two types of EMS objects...
...that is, the predefined objects and the user-defined ob jec ts.
The former are sent from one phone to another as a code that has been defined
by the EMS standard and only take up a very small amount of space within the
message itself and t hese objects are reproduc ed by the addressee’s phon e
according to the interpretation that the manufacturer gives them.
The user-defined objects are not coded by the EMS standard and are therefore
sent complete. Result: they take up more space within the message, but on the
other hand, there is an accurate reproductio n of the original versi on on the
addressee’s phone.
Sending a message
After you have edited a message, confirm it with
Then insert the addressee’s phone number, confirm it again with
choose, from the menu viewed, if you want to:
• Check the preview of the message, as th e addressee will view it, to s ee if
the text and the images are exactly as you want them (this feature is
available if you inserted an Ems object in your message)
• Send the message
• Store the message.If you store the message, you can retrieve it and send it
again, to various addressees.
• Send & Store the message
• Go back to the text editor to Edit the message
• Check and modify the SMS Parameters (see “SMS parameters” on
page 18)
.
Reading a message
When your Gm882 receives a message it emits a short tone or vibration (you
can set this in the relative menu – ) an d the symbol ! will be viewed on the
display.
To read the new messag e, mov e the joystick to enable t he quick menu an d
press it when the first icon at the top of the display is selected (! Read SMS).
This way the list of unread messages is viewed.
Select the one you want to read by moving the
While you are reading the text of an SMS, by pressing th e key
access to the Options menu which allows you to:
1 Get number: you can extract one of the numbers from the message (i.e the
phone number of the sende r, or a number that’s written in the message) to
call them (pressing
joystick).
2 Reply to the mes sage you ar e reading
3 Delete the message.
4 Forward the message to another person.
joystick and press it to read the text.
) or save them in the phonebook (pressing the
you have
and
22
Page 23

Also in the text messages, the numbers stored in the phone book are
automatically replaced by the corresponding name so you can read the name
of the person that sent you the message and call them without having to search
for their number.
Re-reading messages stored in the SIM card...
Access menu 2-1-2 (Messages – SMS- Rece ived/Written). The list wit h the
message headings will be displayed, which you can scroll with the joystick and
read by pressing the joystick.
Deleting a stored mess ag e...
Confirm the entry of menu 2-1-3 (Messages – SMS – Delete message).
The list of the stored messages will be displayed; choose the message you
want to delete and press
When the limit of the SIM card for stored messages (i.e. sent and received
messages) has been rea ched the icon ! flashes and the phone will not be
able to receive other messages. Delete some of the existing messages to leave
space for the new messages.
Reading an EMS message
To read a message with EMS objects you ha ve to do the same operation a s
when reading tradition al messag es: open it, as de scrib ed in chapte r “Reading
a message” on page 22. Pictures and animations are viewed together with the
text, in the way the sen der set them. If there is a sound or m elody in the
message it is indicated by a note on the staff shown in the text.
While viewing the text of a m essage, you can se lect the objects that are in it
with the joystick. An object is selected when a discontinuous line marks its
outline.
When you select a sound or melody object, the phone reproduces the audio.
Storing EMS objects
User-defined objects (see “There are tw o ty pe s of E MS o bj e ct s. . .” on page 22)
can be stored in the memory of your phone and can be used again for
messages you want to write afterwards .
To store an object, select it as described above, then press the joystick to enter
the Options menu.
The second entry of the menu is “Save...[object]”
By selecting this entry, the object is stored and it will be available for further
messages.
.
23
Page 24

GAMES
The menu
Game rules
There are 5 games available:
Menu 6-1-1
The betting is $50, and your starting capital is $1000. If, with the first five cards,
you have no winnin g combinations, you ca n change them. The win of each
hand, shown in the top right-hand corner, is automatically added to your capital
(viewed at the top on the left). At the bottom on the left you can check how many
cards are left in the pack. When you finish the pack of cards, it will be shuffled
again. The game is over when you have finished your capital.
Select the cards you want to change by mo ving the joystick left and right and
then turn them over by pressing
pressing the joystick, then press it again to start a new hand.
Menu 6-2-1
You have to recompose a picture divided into 32 pieces that are shuffled each
time. One piece is missing and you can use this empty space to shift one of the
pieces next to it. Rotate the arrow that indicates in which direction to move the
piece by pressing the joystick and move it to the left. By moving the joys tick to
the right you can view the complete picture and go back to the game.
Menu 6-3-1
The aim of this game is to eat the pegs, as in the traditional game of draughts,
until only one is left.
Start each move by p ressing the joystick an d move it le ft and righ t to choos e
the peg you want to move; press the joystick to confirm, then choo se wher e to
move it (and the p eg you wan t to eat). Ma ke your move, eat a peg a nd start
again.
Use the joystick to choose the peg you want to move and its new position, press
it to confirm each choice; use
Menu 6-4-1
Use the joys tic k to guid e the sna ke to the a ppl es sh own on the d is play . As t ime
passes, the snake becomes faster and e ach apple makes it gr ow. You can
leave the display by going out through the side doors and come in again on the
other side but do not eat your tail and mind the walls!
Menu 6-5-1
Use the joystick to control the cannon and destroy the aliens that want to invade
the Earth. Move to aim at and avoid their bullets and press the joystick to shoot.
With menu 6-5-3 you can view the score reached. If you hit the mother
spaceship which occasionally flies over the battlefield, you get a bonus point.
(menu 6) gives access to 5 games.
Games
Cards
. Change your cards and p lace your bet by
Puzzle
Pegs
to cancel the last command.
Apples&Snake
Shoot ‘em all
24
Page 25

APPLICATIONS
The Gm882 provides a series of software applications that are often useful.
Date and time
Setup
month/day); enable and disable the
Daylight Summer Time
Calendar
change the year, the progressive number of the week and the day of the
selected date. Then select the type of engagement you want to store (meeting
with friends, a birthday, a phone call, an anniversary) and decide what time you
want the phone to aler t you.
Memo pad
traditional writing mode or with T9. The entry
of all the notes you have sto red. Sele ct one a nd by p res sing
the whole text. The menu entry Delete allows you to erase only one or all of the
stored notes.
To do
them all with
pressing
Delete
Here too the editor can use T9 to insert the text more quickly.
Calculator:
select the operators and the functions that you need with the joystick and press
it to confirm each choice.
Insert the figures by pressing the keys from
Press
To insert the decimal point, press
keypad and press it to confirm.
Currency converter: the upper part of the display shows the currency and the
amount that has to be con verted , the lo wer part sh ows the resul t. Th e centr al
part shows the exchange rate.
To select other currencies - and to set a different exchange rate, pr ess the
joystick and insert the name of the currencies and the exchange rate.
Press the joystick to confirm and to go back to the converter.
To convert a currency value, insert it and press
By moving the joystick up and down, you can choose to convert the first
currency that is indicated to the second or vice versa.
Unit converter: the upper part of the display shows the measure uni t to be
converted and the lower part shows the resulting one.
Insert the amount to convert and press
Press the joystick to change the measure unit; choose the s ize you want to
convert and the relative measure units from the list shown.
: setting the clock (
), change the
: the weekly agenda is vie wed on the display. Use the joystick to
: with the entry
.
to view the result and
Date format
: a space for writing (
Add
; you can select one of the tasks and mark it with a cross by
List
.when it has been done. To erase an entry from the list, select
it works in the same way as all the normal commercial calculators;
Time Setup
(month/day/year – da y/month/year – year/
and the
World Timezone
Add)
you insert memora ndums for the near future; v iew
to erase the last figure inserted.
), setting the c urr en t date (
Internet time
and storing short texts, using the
or select it with the joystick of the virtual
to view the result of the conversion.
, and set its parameters:
.
allows you to vi ew the list
Read
to
.
you can read
Date
25
Page 26

By moving the joystick up and do wn you can choos e to convert the meas ure
unit indicated at the top to the other or vice versa.
Melody Maker
With the function Melody Maker of the Gm882, composing your own melodies
to use as ringing tones has never been easier.
You do not need to know how to compose, or to know the music staff.
The lower part of the display shows a piano keyboard (two octaves). The upper
part of the display shows t he notes as you choose them, which you do by
moving the hand left an d rig ht over the keyb oard an d press ing the j oystick o n
the note yo u want.
To the left of the piano keyboar d is the comm an d tha t all ows you to hea r w ha t
you have composed and the one for inserting a pause.
To modify the duration o f the note or of the pause that you want to i nsert,
choose between 4 possibl e va lues ( 1/2 , 1/4 , 1/8, 1/16 ) shown vertically on the
left hand side of the display. Shift the sel ector, by moving the joystick up or
down.
To delete the last note you have written, press the key
The display shows the last 12 notes; the maximum duration of the melody is 80
notes (including pauses).
SyncML (menu 5-7)
With your Gm882 you can use WA P to connec t up to a serve r where you can
store your personal phone book and the data inserted in your agenda. This way
you have much more space in your memory for storing data, and the possibility
for updating (“Synchronise”) the data of the server in the phone and vice versa.
The function Synchronize (menu 5-7-1) sets up a WAP connection wi th the
specific server and update s the d ata base acco rdi n g to the m ode s set in m en u
5-7-2, Server setting.
1 WAP profile: choose the pre-set profile you want to use for the
synchronisation.
2 Server user ID: set the user’s name to access the server
3 Server password: insert the password to access server services.
4 Server URL: insert URL (address) of the server you want to connect to.
5 Phone book Server name: if you can store more than one p hone book in
the server, using diffe rent nam es for ea ch one, inse rt the na me of the one
you want to update.
6 Calendar Server name: th is has the same funct ion as the prev ious menu
entry.
7 Database to be synchronized: choose to update Phone book or Agenda
.
26
Page 27

GPRS
The GPRS (General Packet Radio Service) is an evolution of the GSM system
which keeps the same voice transm ission m ode bu t sig nificantly im pr ove s th e
performance of the data transmission using a “packet” system.
The Gm882 uses the
system and you
COM Port
Data cable
Data transmission spe ed
The maximum speed of transmission is approximately 40Kbit per second.
This speed is much faster than with the normal GSM network.
Connection speed
GPRS allows imme diate c onne ction s and in form ation c an be sent an d rece ived
whenever necessary.
Efficiency
Packet converting allows the Gm882 GPRS telephone to use the radio
frequencies only during the transmission and reception of data.
The operators can therefore maximise the efficiency of their networks by
allocating their resources a ccording to effective nee d, and devote the circu it
switching infrastructure solely to the call traffic and reduce the traffic of the SMS
center by using the interconnection between the latter and the GPRS system.
Pricing
With the GPRS system you pay fo r the ser vice based o n the qua ntity of data
transmitted and not on the duration of the GPRS connection.
The Gm882 GPRS telephone allows you to view the quantity of data
transmitted and receive d du ri n g the GP RS connections and therefo re to kno w
the cost of the connections themselves in other contexts that you can set from
the menu.
To make a GPRS connection you need to set some parameters
8-2 “
”. Your service provider will give you these data.
Settings
GPRS
can connect it to your
computer using the
appropriate data cable
(optional or included,
according to the product
type) and this allows a fast
transmission of data and
connection to the Inte rnet
when no connection to the
landline is available.
in menu 4-
27
Page 28

WAP
Internet connection with the WAP browser of your Gm882...
• You need a SIM card that is enabled for data calls and you must subscribe to
the service of the network operator or the service provider.
• Search for a place where the signal reception is at its best and stay there; this
will definitely improve the quality of your connection.
• Press the jo ysti ck to acc ess the main menu a nd scr oll t hro ug h t he en tri e s o f
the menu by pressing the joystick up or down to entry
• Confirm access to this menu by pressing the joystick and select entry
If you enabled the funct ion
during an Internet session, the signal of incoming calls will be shown on your
display as usual;
you can
or
If the Call waiting is not enabled, the Internet session will not be interrupted.
The first time yo u activ ate a WAP ses sion
security functions; confirm by pressing the key
In Internet some keys have special functions:
to be connected to the Web.
Browser
Call waiting
accept the cal l
the call by pressing
reject
To scroll the content of the WAP pages, move the joystick.
In the text editor this deletes the ch ar acte r on the le ft o f the curs or o r,
if pressed for a while, the whole text;
With Soft Key function (option on the top left-hand of the display)
With Soft Key function (option on the top right-hand of the display);
and end the Internet connection by pressing the key
.
(page 35) and someone calls you
, you might be asked to enable the
.
8 – WAP Browser
.
1 - WAP
28
Page 29

g
g
Internet Configuration (menu 8-4)
Before you make the first W AP con nection, you m ust set some p arame ters i n
the phone – most of them, if they are missing, are given by the service provider.
The phone could already be set up for the Internet access; in this case the data
needed for the Internet acc ess are already set in the menus: pr ess several
times the key
The phone can support up to a maximum of three
manufacture settings.
The WAP confi
1 WAP Browser >WAP Connection
2 Last Page >go to the previous WAP page
3 Favourite \>Insert a favourite
4 Settings Profile 1
5Homepage >Homepage address
6Linger time > Insert
7Connections > Select
8Save and exit > Profile Name
Keyin
Select the parameter you wan t to set by moving th e joystick up or down and
press it to confirm the entry that you need.
Key in the data and confirm with
Go to the next data by moving the joystick up or down.
Move the joystick to the left to go back to the upper menu level (without
confirming the change s ma de ). M ove the j oyst ick up or down to scroll t hro ug h
the options, and press key
Once you have keyed in all the dat a, se lect
pressing
to exit the menu and go back to the display in stand-by.
uration menu has the following structure
Profile 2
Profile 3 1 Connection Name > Insert name
in data for the configuration...
to enable the current profile and make it effective.
2 IP Address > ____.____.____.___ _
3 IP Port > Nr. IP Port
.
to clear some data.
“Profiles”
7 – Save and exit
according to the
:
and confirm by
29
Page 30

Set-up paramete rs for WAP connection...
1 Connection Name: This is the name tha t ha s be en assig ned to each of the
three available profiles a nd is displayed in the upper menu level, when th e
phone asks you to select the profile whose parameters have to be viewed/
changed. If no profile has been set, the three entries are viewed as <empty>.
2 IP Address: key in the IP Address (of the Proxy) using the joystick to mov e
the cursor through the numbers of the parameter; when a field is complete, the
cursor moves automatically to the next field.
3 IP Port: key in the required data (usually 9201 or 9203)
4 Homepage: key in the URL address of the first page (if it is different from the
Proxy WAP it might not be accepted). It usually begins with
5 Linger-Time: connection time in seconds: once this time passes and no data
exchange has been performed, the call will be interrupted.
6 Connections: this function allows you to choose the type of connection (e.g.
GPRS or GSM).
7 Save and Exit: Save the data of the connection and use them as pre-defined
for the next connection.
Note: If some data are incorrect or were not keyed in, the entry “Save and Exit”
shows which data are missing and asks you to key them in.
After all data have been keyed i n correctly, go back to the menu “8 WAP
Browser ” and enter the submenu 1 WAP Browser to start the connection.
Browser menu
During an Internet WAP session, keep the joystick pressed to access the
Browser menu (the stru cture o f the menu is s hown below ) that offers a series
of functions which are very useful for surfing in the Internet.
From now on, you can scroll the funct ions of the menu b y mov ing the joys tick
up or down, and select the fun ctions th at you n eed by pressi ng the key
indicated on the soft keys.
To go back to the previous menu level press
Note: The WAP Browser uses the phone’s languages for the functions, the Soft
Keys and for error messag es, except du ring the Intern et session s when othe r
languages might be used.
The structure and the meanings of the entries of the Browser menu are
explained in the following pages:
1 Prev.
2 Home
3 Exit
4 Mark site
5 Favourite
6 Incoming mail
7 Store image
8 Reload
9 Settings
.
“http://wap...”
.
as
30
Page 31

1 Homepage
2 Proxy
3 Circuit Prompt
4 Circuit waiting
5 Page scroll mode
1 Skip
2 Smooth
6 Page scroll speed
1 Fast
2 Medium
3 Slow
7 Timeout key pressing
1 Fast
2 Medium
3 Slow
8 Protection
1 Connection prompt
2 Protection prompt
3 Current certificate
4 CA certificates
5 Coding
9 Advanced
1 Show URL
2 Re-start Browser
3 Off-line Services
? Information on...
1 – Prev.
This goes back to the previous page.
2 – Home
This goes back to the first page.
3 – Exit
This ends the WAP session and goes back to the stand-by mode of the phone.
4 - Mark site
Use this function to add the current site to the list of your favourite sites.
5 - Favourite (favourite WAP sites)
This shows the list of the favourite Internet WAP sites.
4 Outgoing mail
1 Openwave
2 Security
1 Check code
2 New code
1 Schlumberger
2 RSA
31
Page 32

6 - Incoming mail
The incoming mailbox is shown and new messages are signalled.
7 - Reload
This reloads the current WAP page.
8 – Settings
8-1 Homepage
If this function has be en enabled by the Pro xy, i t sho w s th e co mp lete ad dre s s
of the homepage and gives you the possibility of changing it (settings of this
function contained in the P ro xy take prio ri ty ov er th ose contained in the user’s
profile).
8-2 Proxy
This allows you to select the WAP Proxy server from those listed.
8-3 Circuit prompt
This allows you to enable or disable the mess age that is displayed ea ch time
the system does not have a data circuit at its disposal and needs a data call to
re-establish the connection.
The text of the displayed message is:
8-4 Circuit waiting
This allows you to set the m aximum waiting time befo re being disconnected
from a data circuit. The va lue set by the u ser will be sto red in the pho ne, but
some providers set a minimum limit that takes priority over the value set by the
user. The maximum value is of 9999 seconds.
8-5 Page scroll mode
This allows you to set the consulting mode of the lines by scrolling or by one
line at a time.
8-6 Scroll speed
This allows you to set three speeds for line scrolling.
8-7 Timeout key pressing
Usually each key can be used, by pressing it several consecutive times, to key
in different characters. The timeout is the period of time that has to pass for the
last viewed character to become definitive and for the cursor to move to the
next position.
With this function it is po ssi ble to var y the speed at which the cursor mo ves t o
the next position. Y o u can select Fast, Medium or Slow (that corr espo nd to 1 -
1.5-2 seconds)
8-8 Protection
From here you access the following 5 submenus:
8-8-1 Connec tio n pr om p t
This allows you to enable or disable the alert “Protected connection
established”
8-8-2 Protection prompt
This allows you to enable or disable the message “You are accessing a non-
protected area. Ok? ” shown before you exit a protected area.
“The circuit is not operating. Send a data call?”
32
Page 33

8-8-3 Current cer ti fic a te
The phone makes use of d igital certi ficates (ca lled “CA”) t hat are issue d by a
reliable third party, to authenticate some web sites. By accessing this function,
the phone shows in formation that is available for the certificate used for the
current session.
8-8-4 CA Certificates
This function displays the list of the CA certificates that are stored in the phone;
it is possible to view the main data and to enable or disable them.
8-8-5 Coding
This shows the control cod e o f the br owser cod i ng ( 8-8-5-1 – Check co de) or
forces the calculation of a new code (8-8-5-2 - New code).
8-9 Advanced
By confirming access with
8-9-1 Show URL
This shows URL of the current site.
8-9-2 Re-start browser
This clears the cache memory in the browser and starts a new session with the
proxy.
8-9-3 Off-line services
This displays a list of ap plica tions that are a lready avai lable i n the pho ne an d
that can be used without needing to access the GSM network.
8-9-4 Outgoing mail
This shows outgoing items.
? Information on...
The browser gives main info rmation (version , copyright) on Op enwave (WAP
management software) a nd on the availab le security systems (S chlumberger
and RSA).
Note: The Gm882 supports the funct ion Download fun . From some sites it is
possible to download and store, in your phone, screensa vers of compatible
format and melodies (standard iMelody) which can then be used as ringing
tones.
you can access the following 4 submenus:
33
Page 34

ALL FUNCTIONS IN BRIEF
Phonebook (menu 1)
To use the phone book an d other relative fun ctions, see “PHONE BOOK” on
page 14.
Messaqqges (menu 2)
To use the functions for sending and reading EMS/SMS messages (menu 2-1-
) see “EMS/SMS MESSAGES” on page 18.
SMS
Voice mail (menu 2-2):
(menu 2-2-1) and insert or modify the number you want to call (menu 2-2-2)
Push messages (menu 2-3)
which, besides the text, also contai n WAP addresses or commands for the
software which your telephone’s WAP browser can read. You can subscribe to
services which offer the latest news; the SMS text can contain the news
headline, and, by pressi ng a key , you can se t up the WA P connect ion a nd be
connected directly to the page of the site whi ch contains the whole article.
You can also use WAP push to send the settings you need to be connected to
your WAP browser so that it is no longer necessary to insert them manually.
Reading a WAP push message
symbol @ is shown on the display; enter the menu 2-3 and choose the
message you want to read, confirming it with
Email (menu 2-4)
mail in the same way as on a PC.
: insert, in the following order, confirming each time by pressing the
Write
joystick; addressee’s e-mail, object of the mail, and finally the text. To insert the
text, use the same editor as the one used for SMS messages, including the use
of the T9 technology (see “Writing a text with T9” on page 20).
: the phone connects up to your mail ser ver based on the data (server
Read
address, password etc.) and allows you to read incoming e-mails.
Configure
phone to the mail server for sending and receiving e-mails. The parameters are:
User name
Password
Pop3 Server
SMTP Server
Email Address
Connections
: from this menu yo u can set the data need ed for connecting the
this function allows you to call your voice mailbox
the providers can se nd special SMS mes sages
: when the Gm882 receives a WAP push, the
.
with the Gm882 you can send a nd receive you r electronic
34
Page 35

Zone Messages (menu 2-5): the broadcast messages are free messages
which are sent by some network operators and viewed on the phone display in
stand-by mode. The most common shows the name of the area you are in.
The submenus available are:
Reception: you can choose if you want to view th e messages that your
phone receives from the network operator (enabling of the service and
message content varies from operator to operator).
Type filter : by confirming this menu entry, the list of filters will be shown
which allow you to view the m essages only on certain topics. By pr essing
you access the functions for selecting the filters.
key
Remove filter: this erases the selected filter.
Add filter: choose, from the list of those available, a topic for filtering the
incoming broadcast messages and store it in the selected position.
Remove all: clear the filter list.
Set as default: enables the selected filter
Language Filter: from a list of available languages you can select, by
pressing the joystick, the language in which you wou ld like to receive you r
messages. Only the messages in the language selecte d will be viewed o n
the display. To receive messages in any language, do not select any.
Read: the list of the available messages will be shown. Select the one
Calls (menu 3)
You can view the last calls, rec eived calls and unanswere d calls on the first
entry of the menu – List (see “CALL REGISTER” on page 17)
The function Cost (menu 3-2) allows to check the costs of the calls.
Last call shows the cost of the last call.
All calls shows the cost of all calls.
Credit shows the remaining credit (this function depends on the ne twork
operator and from the type total time of the SIM card).
Cost control allows to decide, by scrolling the two sub-menus, the currency
you want to use and the value of each unit cost. To set the currency you must
have your PIN2 code.
Reset Costs: to clear the costs stored by this function it you need to insert
the PIN2 code.
Call duration (menu 3-3), by confirming the first two entries of the menu,
shows the length of the Last call and the Total length o f all calls made
respectively. The function Delete allows you to erase the two data.
Call waiting (menu 3-4): this function, which is provided by the network
provider, informs you of an incoming call while you are already making another
call. The three entries of the menu allow you to enable or disable the service,
and to ask the network to check the curr ent status
Barring (menu 3-5) : this f unction filters the outgoin g calls and the incoming
calls, more specifically you can bar: all the Incoming calls, the Incoming calls
35
Page 36

from abroad, the calls Originated by your mobile; all the international
outgoing calls or all the international outgoing calls except for the calls towards
your home country. The entry Clear all allows you to cle ar all filters, and so
make and receive any type of call. Change code allow s you to change the
security code you have to insert before working on Barring functions.
Divert (men u 3-6) allows you to divert incoming calls to another phone number.
You can select to divert All calls, only Missed calls, the calls with No reply,
calls received while your phone was Not reachable, calls receive d while you
are busy, or all calls except those in the last 3 categories.
Send number (menu 3-7) allows you to deci de if you want your number to be
viewed on the display of the phone you are calling. The first entry of the menu
– Predefined – uses the default setting of the network. With the second entry
your number will be shown each time you call, whereas with the third entry it
will not be shown.
N.B. independently of the setting of this function, SMS messages will ALWAYS
show the sender’s numbe r.
Calls control (menu 3-8) allows you to enable a sound signal every 60
seconds during a conversation in order to check its length.
Settings (menu 4)
The functions you can access throu gh this menu entry allow you to set and
regulate the various mod es of pho ne fu nctio ni ng , fro m th e ring ing t one s to th e
screen brightness, from the SM S tone volume to th e manageme nt of security
codes.
From the menu entry Display (menu 4-1) you can access the p arameters
related to the screen and display.
You can set, in order, the Contrast (4-1-1) of the display, the Brightness
(4-1-2) and the Bright time (4-1-3) of the backlight.
The Gm882 is equipped with a Screen saver (4-1-4), that you can choose
from those available, which shows an image on the display if no keys have
been touched for a certain len gth of time (to set this, ent er menu 4-1-4- 3
Waiting time)
Use the function Select (menu 4-1-4-1) to choose the Screen saver from
those available (move the joystick up and down to view them, press it to
select the one you want, then go back to the menu by pressing
Select the entry Enable (4-1-4-2) to enable or disable the Screen saver
function.
The entry Delay allows you to decide how long the ph one has to wait
before acticvating the screen saver.
).
36
Page 37

Wallpaper (4-1-5): use this function to Select (4-1-5-1) the image you
want to have on the displ ay in stand-by mod e instead of the logo o f the
network operator (whose name will however appear at the top). With
Enable (4-1-5-2) you choose which to have on your display betwee n the
image or the operator’s logo.
The menu Fonts (menu 4- 2) allows you to choose between 3 different types of
character (font) for the text on the display: Young, Thin and Classic.
Move the joystick up and down to select the one you like and press it to confirm.
Security (menu 4- 3) i s th e m en u wh er e yo u find the functions on th e se cur ity
codes and the automatic keypad lock.
PIN: this enables the PIN request when you switch on the phone (menu 43-1-1), you can change the current PIN code (menu 4-3-1-2) and the PIN2
code (menu 4-3-1-3).
Phone lock (menu 4-3-2): in order to use the phone you need to know a 5
figure code to insert once you have switched the phone on (when you buy
the phone the code is 00000) which you c an modify with the functio n
Change code (menu 4-3-2-3). With No lock (menu 4-3-2-1) the code is
not requested. To enable the request, select Lock (menu 4-3-2-2).
Autolock keyboard: by enabling this function, the keypad is automatically
locked after it has not been touched for 30 seco nds. You can set up th e
keypad lock in the same way as t he manual lock (see “Keypad locked/
unlocked” on page 10)
Networks (menu 4-4)
From this menu you can connect your phone to the GSM network.
With Search Network the telephone searches for networks that are
available in your ar ea and gi ves you the lis t of th e networ ks th at have be en
found. Select the network you want with the joystick and press it to confirm.
The networks indicated with a crossed o ut telephone r eceiver cannot b e
used.
Home net shows the name of the operator that issued the SIM card
inserted in the phone.
Network list allows you to create a list of GSM networks which the phone
will try to connect to, should your own be unavailable. Select the entry
<Empty> and press the joystick; the list of known networks will be viewed.
To select o ne an d go ba ck to the pr iori ty lis t, pr ess t he joy stic k on th e name
of the network you want.
Selection: this funct ion enables the Automatic or Manual search mode
of the GSM network.
37
Page 38

Audio profile s (menu 4-5)
The Gm882 has 6 audio profiles which you can use to set the various
parameters on rin ging tones, vibrating al ert and alert tones. At a ny time, you
can enable the audio profile most suitable for the situation you are in, enabling
and setting all the different parameters in a single touch.
These parameters are alr eady de fined w hen you buy the ph one; you can us e
or change them as you like.
For example, you can set the profile Outdoor so that the ton es ring at the
highest volume accompanied by the vibrating alert and that each time a key is
pressed there is a “beep” whose volume can be regulated. If you then go to a
Meeting, you simpl y ena ble thi s set p reviousl y pro file t o switc h off th e ringin g
tones, and incoming calls are signalled by a short vibration and the keypad no
longer beeps when touched.
N.B. the menu Audio profiles is in the quick menu.
By pressing the joystick when on e of the audio profil es is selected, you hav e
access to the menu which allows you to set the various parameters:
Ringer (profile X – menu 1)
From this menu entry you can set the following parameters:
Ring volume: this is the volume of the ringing tone when there is an
incoming call. Move the joystick left and rig ht to set th e volume, then press
to confirm.
Ring type: this is the melody that will be played. Select it with the joys tick
and press
Ringer mode: you can choose between different alerting modes:
Manner mode: when this option is enabled, the volume of the ringing tones
is very low to begin with and gradually gets louder.
Alarm (profile X - menu 2)
You can set the audio feat ures of the alar m clock in the same way and wi th a
similar menu as for the ringing tones with a choice of melody, volume, vibrating
alert etc.
Keyclick vol. (profile X - menu 3): the Gm882 can beep every time you press
a key; you can set the vo lume of this beep for ea ch audio profile. Mov e the
joystick left or right to set the volume desired and press
back to the menu.
to confirm.
1 Only ringer
2 Ri ng ing afte r vibro
3 Ringer and vibro: this enables both each time there is a call
4 V ibro: the phone won’t play any sound , but its vibrations will let you
know that someone is calling you.
5 Ringer off: both vibro and sound are de-activated.
to confirm and go
38
Page 39

Warning tones (profile X – menu 4): these are tones the Gm882 emits when
you receive an SMS message, a Class ero SMS message,when the Battery
is Low, and when you switch the Power on or off. In each case there is a menu
entry which allows you to set the volume, the tone and the type of alert (ring
only, vibrate only, ring and vibrate etc.).Network allows you to enable or
disable a tone signal that indicates when the phone is connected to a network;
No network available enables and disables a tone signal w hen the phone i s
unable to connect to any network.
Restore F.P. (profil e X - me nu 5) is a function th at automatically re -sets the
profiles to the default settings of the manufacturer.
To change the active profile, enter the quick menu, selec t the audio p rofile
icon and press the joystick to confirm. Mov e the joystick up or down to sele ct
the profile you want and then press it again to confirm. Select and confirm menu
entry 6 - Activate.
Answer mode (menu 4-6) : this menu allows you to select the way you want to
answer incoming calls.
Answer with a key allows you to answer by pressing
Answer with any key allows you to answer by pressing any key except
or
.
Automatic Answer enables the a utomat ic answer after a few ring s (thi s is
useful, for example, if you are connected to a hand-free device).
Language (menu 4-7) allows you to choose the language for all messages and
the menu entries on your dis play. B y choosin g the e ntry Auto matic the phon e
recognises and uses the language of the cou ntry where the SIM card wa s
issued. If this language is not available in the phone, English will be used.
Connection and GPRS Mode (menu 4-8/9) are functions that allo w you to
check and modify the parameters of GPRS connections (see “GPRS” on
page 27).
DTMF (menu 4-10) allows you to enabl e or disa ble the tran smis sion of DTMF
tones (see “DTMF – what it is, its use” on page 8).
Restore factory [settings] restores the phone parameters pre-set by the
manufacturer.
Applications (men u 5)
For information on the use of the applications see “APPLICATIONS” on
page 25.
Games (menu 6)
For the instructions on the available games, see “GAMES” on page 24.
.
,
39
 Loading...