

Page 1

Mod. 0809 2017-01 Rev.8
NE310H2 & NL865H2
Quick Start Guide
80630NT11837A Rev. 1 – 2020-09-03
Page 2

80630NT11837A Rev. 1 Page 2 of 40 2020-09-03
SPECIFICATIONS ARE SUBJECT TO CHANGE WITHOUT NOTICE
NOTICE
While reasonable efforts have been made to assure the accuracy of this document, Telit
assumes no liability resulting from any inaccuracies or omissions in this document, or from
use of the information obtained herein. The information in this document has been carefully
checked and is believed to be reliable. However, no responsibility is assumed for
inaccuracies or omissions. Telit reserves the right to make changes to any products
described herein and reserves the right to revise this document and to make changes from
time to time in content hereof with no obligation to notify any person of revisions or changes.
Telit does not assume any liability arising out of the application or use of any product,
software, or circuit described herein; neither does it convey license under its patent rights
or the rights of others.
It is possible that this publication may contain references to, or information about Telit
products (machines and programs), programming, or services that are not announced in
your country. Such references or information must not be construed to mean that Telit
intends to announce such Telit products, programming, or services in your country.
COPYRIGHTS
This instruction manual and the Telit products described in this instruction manual may be,
include or describe copyrighted Telit material, such as computer programs stored in
semiconductor memories or other media. Laws in the Italy and other countries preserve for
Telit and its licensors certain exclusive rights for copyrighted material, including the
exclusive right to copy, reproduce in any form, distribute and make derivative works of the
copyrighted material. Accordingly, any copyrighted material of Telit and its licensors
contained herein or in the Telit products described in this instruction manual may not be
copied, reproduced, distributed, merged or modified in any manner without the express
written permission of Telit. Furthermore, the purchase of Telit products shall not be deemed
to grant either directly or by implication, estoppel, or otherwise, any license under the
copyrights, patents or patent applications of Telit, as arises by operation of law in the sale
of a product.
COMPUTER SOFTWARE COPYRIGHTS
The Telit and 3rd Party supplied Software (SW) products described in this instruction
manual may include copyrighted Telit and other 3rd Party supplied computer programs
stored in semiconductor memories or other media. Laws in the Italy and other countries
preserve for Telit and other 3rd Party supplied SW certain exclusive rights for copyrighted
computer programs, including the exclusive right to copy or reproduce in any form the
copyrighted computer program. Accordingly, any copyrighted Telit or other 3rd Party
supplied SW computer programs contained in the Telit products described in this instruction
manual may not be copied (reverse engineered) or reproduced in any manner without the
express written permission of Telit or the 3rd Party SW supplier. Furthermore, the purchase
of Telit products shall not be deemed to grant either directly or by implication, estoppel, or
otherwise, any license under the copyrights, patents or patent applications of Telit or other
3rd Party supplied SW, except for the normal non-exclusive, royalty free license to use that
arises by operation of law in the sale of a product.
Page 3

80630NT11837A Rev. 1 Page 3 of 40 2020-09-03
USAGE AND DISCLOSURE RESTRICTIONS
I. License Agreements
The software described in this document is the property of Telit and its licensors. It is
furnished by express license agreement only and may be used only in accordance with the
terms of such an agreement.
II. Copyrighted Materials
Software and documentation are copyrighted materials. Making unauthorized copies is
prohibited by law. No part of the software or documentation may be reproduced,
transmitted, transcribed, stored in a retrieval system, or translated into any language or
computer language, in any form or by any means, without prior written permission of Telit
III. High Risk Materials
Components, units, or third-party products used in the product described herein are NOT
fault-tolerant and are NOT designed, manufactured, or intended for use as on-line control
equipment in the following hazardous environments requiring fail-safe controls: the
operation of Nuclear Facilities, Aircraft Navigation or Aircraft Communication Systems, Air
Traffic Control, Life Support, or Weapons Systems (High Risk Activities"). Telit and its
supplier(s) specifically disclaim any expressed or implied warranty of fitness for such High
Risk Activities.
IV. Trademarks
TELIT and the Stylized T Logo are registered in Trademark Office. All other product or
service names are the property of their respective owners.
V. Third Party Rights
The software may include Third Party Right software. In this case you agree to comply with
all terms and conditions imposed on you in respect of such separate software. In addition
to Third Party Terms, the disclaimer of warranty and limitation of liability provisions in this
License shall apply to the Third Party Right software.
TELIT HEREBY DISCLAIMS ANY AND ALL WARRANTIES EXPRESS OR IMPLIED
FROM ANY THIRD PARTIES REGARDING ANY SEPARATE FILES, ANY THIRD PARTY
MATERIALS INCLUDED IN THE SOFTWARE, ANY THIRD PARTY MATERIALS FROM
WHICH THE SOFTWARE IS DERIVED (COLLECTIVELY “OTHER CODE”), AND THE
USE OF ANY OR ALL THE OTHER CODE IN CONNECTION WITH THE SOFTWARE,
INCLUDING (WITHOUT LIMITATION) ANY WARRANTIES OF SATISFACTORY
QUALITY OR FITNESS FOR A PARTICULAR PURPOSE.
NO THIRD PARTY LICENSORS OF OTHER CODE SHALL HAVE ANY LIABILITY FOR
ANY DIRECT, INDIRECT, INCIDENTAL, SPECIAL, EXEMPLARY, OR CONSEQUENTIAL
DAMAGES (INCLUDING WITHOUT LIMITATION LOST PROFITS), HOWEVER CAUSED
AND WHETHER MADE UNDER CONTRACT, TORT OR OTHER LEGAL THEORY,
ARISING IN ANY WAY OUT OF THE USE OR DISTRIBUTION OF THE OTHER CODE
OR THE EXERCISE OF ANY RIGHTS GRANTED UNDER EITHER OR BOTH THIS
LICENSE AND THE LEGAL TERMS APPLICABLE TO ANY SEPARATE FILES, EVEN IF
ADVISED OF THE POSSIBILITY OF SUCH DAMAGES.
Page 4

80630NT11837A Rev. 1 Page 4 of 40 2020-09-03
APPLICABILITY TABLE
PRODUCTS
NE310H2-W1
NL865H2-W1
Page 5

80630NT11837A Rev. 1 Page 5 of 40 2020-09-03
CONTENTS
NOTICE 2
COPYRIGHTS ................................................................................................ 2
COMPUTER SOFTWARE COPYRIGHTS ...................................................... 2
USAGE AND DISCLOSURE RESTRICTIONS ............................................... 3
I. License Agreements ..................................................................... 3
II. Copyrighted Materials ................................................................... 3
III. High Risk Materials ....................................................................... 3
IV. Trademarks .................................................................................. 3
V. Third Party Rights ......................................................................... 3
APPLICABILITY TABLE ................................................................................ 4
CONTENTS .................................................................................................... 5
1. INTRODUCTION .......................................................................... 7
2. GENERAL DESCRIPTION ......................................................... 10
Module Main Features ................................................................ 10
Communication Port ................................................................ ... 10
3. APPLICATION MAIN FLOW ...................................................... 11
4. NETWORK REGISTRATION ..................................................... 12
PDN Connection Setup ............................................................... 12
4.1.1. Auto Dial ..................................................................................... 12
Fast Registration ......................................................................... 13
Signal strength and quality .......................................................... 14
Module registration network status query .................................... 14
Operator Information ................................................................... 15
PPP dial ...................................................................................... 15
5. DNS SCRIPT .............................................................................. 16
6. TCP/UDP SCRIPT ...................................................................... 17
6.1.1. Example for UDP ........................................................................ 17
6.1.2. Example for TCP ........................................................................ 18
7. FTP/FTPS SCRIPT ..................................................................... 19
8. NIDD SCRIPT ............................................................................. 20
Page 6

80630NT11837A Rev. 1 Page 6 of 40 2020-09-03
9. PSM AND EDRX ........................................................................ 21
PSM overview ............................................................................. 21
PSM script .................................................................................. 22
eDRX overview ........................................................................... 25
eDRX script ................................................................................ 25
PSM/eDRX Graphs ..................................................................... 27
10. MQTT ......................................................................................... 28
11. FTP FOTA .................................................................................. 29
12. LWM2M ...................................................................................... 31
13. TLS ............................................................................................. 34
14. HTTP .......................................................................................... 36
15. GLOSSARY AND ACRONYMS ................................................. 38
16. DOCUMENT HISTORY .............................................................. 39
Page 7

80630NT11837A Rev. 1 Page 7 of 40 2020-09-03
1. INTRODUCTION
1.1. Scope
Scope of this document is to give an overview and basic instructions of how to start using
the NE310H2 and NL865H2 module.
1.2. Audience
This document is intended for customers who want to use and test the NE310H2 and
NL865H2 products.
1.3. Contact Information, Support
For general contact, technical support services, technical questions and report
documentation errors contact Telit Technical Support at:
• TS-EMEA@telit.com
• TS-AMERICAS@telit.com
• TS-APAC@telit.com
Alternatively, use:
http://www.telit.com/support
For detailed information about where you can buy the Telit modules or for recommendations
on accessories and components visit:
http://www.telit.com
Our aim is to make this guide as helpful as possible. Keep us informed of your comments
and suggestions for improvements.
Telit appreciates feedback from the users of our information.
Page 8
80630NT11837A Rev. 1 Page 8 of 40 2020-09-03
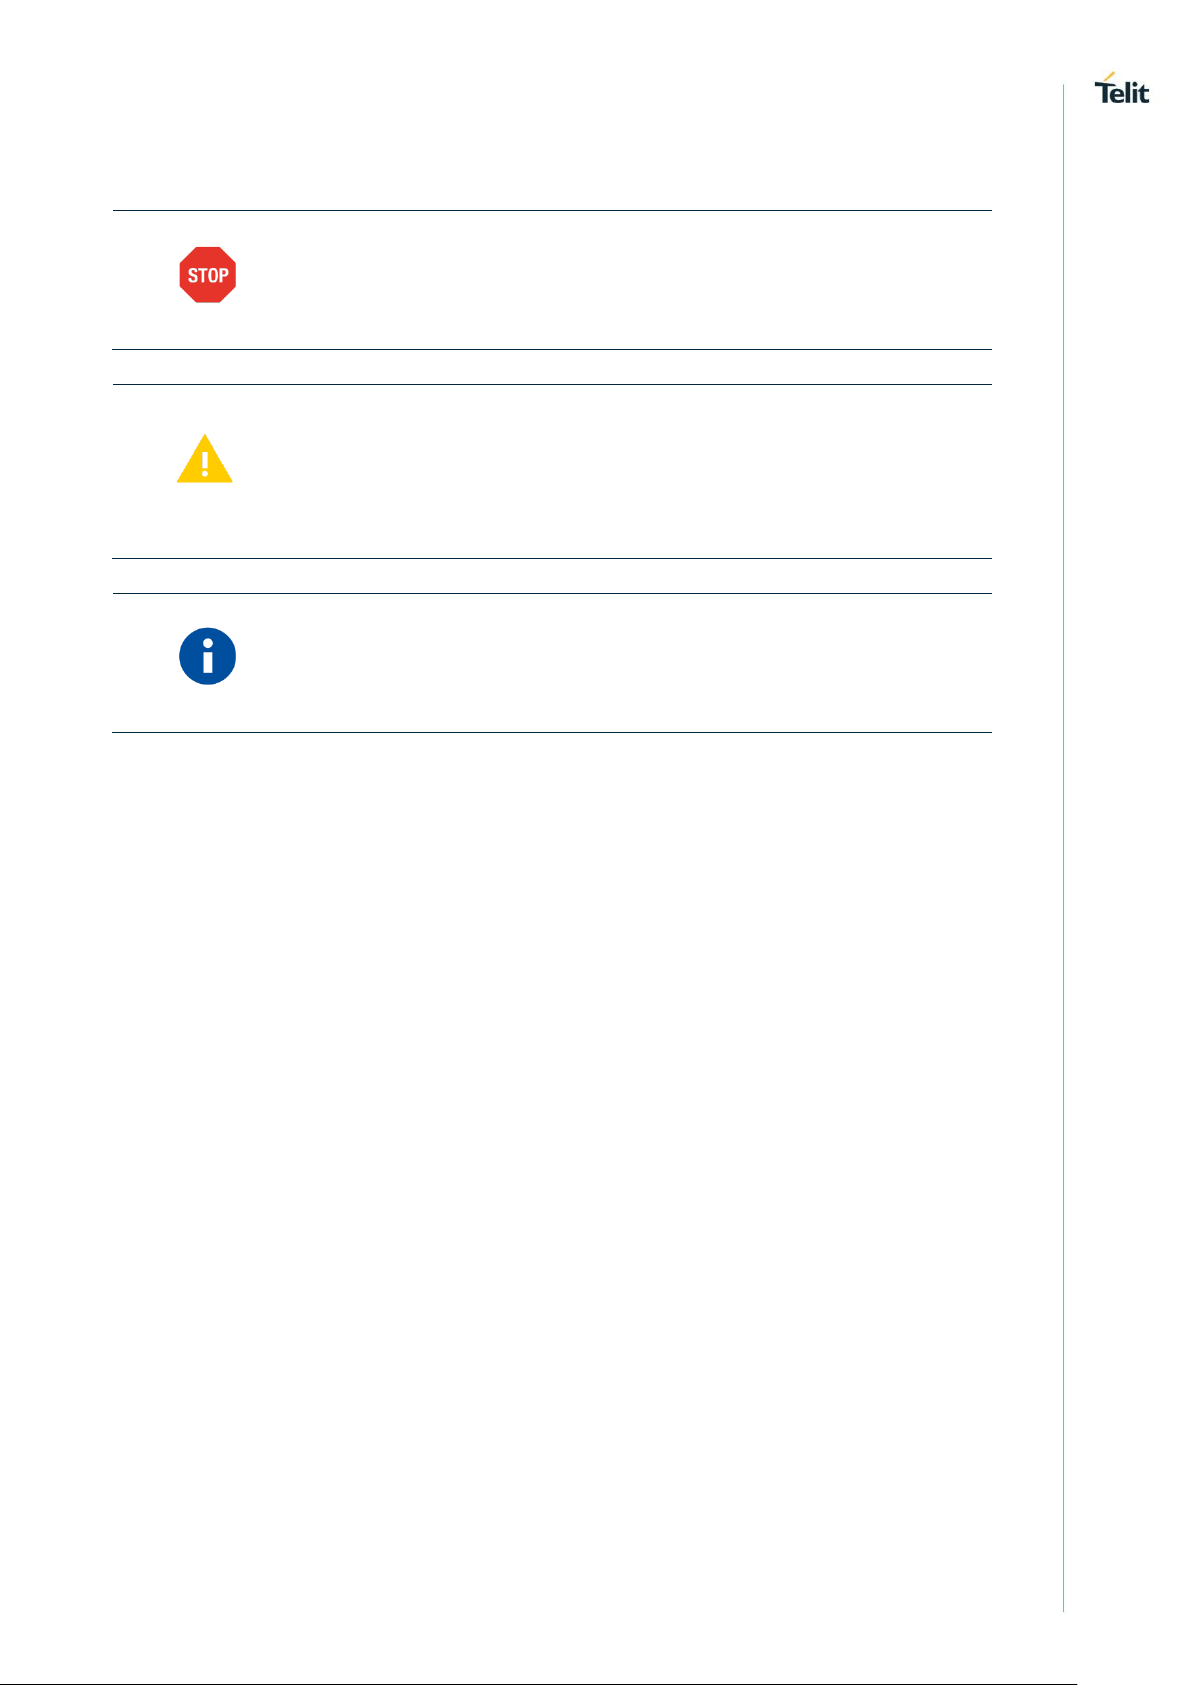
1.4. Text Conventions
Danger – This information MUST be followed or catastrophic equipment
failure or bodily injury may occur.
Caution or Warning – Alerts the user to important points about integrating the
module, if these points are not followed, the module and end user equipment
may fail or malfunction.
Tip or Information – Provides advice and suggestions that may be useful
when integrating the module.
All dates are in ISO 8601 format, i.e. YYYY-MM-DD.
Page 9

80630NT11837A Rev. 1 Page 9 of 40 2020-09-03
1.5. Related Documents
• NE310H2-W1 HW Design Guide, 1VV0301608
• NL865H2-W1 HW Design Guide, 1VV0301616
• NE310H2 Interfaces User Guide, 1VV0301617
• NL865H2 Interfaces User Guide, 1VV0301629
• NE310H2 and NL865H2 AT Commands User Guide, 1VV0301611
• xL865 Global Form Factor Application Note, 80000NT11207A
• xE310 Global Form Factor Application Note, 80617NT11846A
Page 10

80630NT11837A Rev. 1 Page 10 of 40 2020-09-03
2. GENERAL DESCRIPTION
Module Main Features
The NE310H2-W1 and NL865H2-W1 are the NBIoT evolution of the Telit Series of LTE
modules based on the xE310 and xL865 form factor.
Specified in the approved Release 14 of the 3GPP standard, Cat NB2 devices are
specifically tailored for IoT applications, offering optimized power consumption and
enhanced coverage.
• NBIoT Category NB2 3GPP release 14 compliant
• Half Duplex FDD (see HW Design guide for details on supported bands)
• Single Rx, single antenna
• 3GPP Rel. 12 Power Saving Mode (PSM)
• 3GPP Rel. 13 Extended Discontinuous Reception (eDRX)
• Control via AT commands according to 3GPP TS27.005, 27.007 and customized
AT commands
• SMS
• IPv4/IPv6 stack with TCP and UDP protocol
• Over-the-Air firmware update
• UDP, TCP, TLS, HTTP, HTTPS, FTP, COAP, MQTT, NIDD, LWM2M
TIP:
the IP address/port set in this document is just for test, when in product
application, please instead with the proper value.
Communication Port
• NE310H2-W1 supports:
o 3 UARTs (Main and secondary with flow control and Auxiliary with RX TX only)
o USB for debug only.
• NL865H2-W1 supports:
o 2 UARTs (Main with flow control and Auxiliary with RX TX only)
o USB for debug only.
Product
UART Interface
Use
NE310H2-W1
UART0
Software Download
AT Communication
UART1
AT Communication
AUX UART
Print Log
NL865H2-W1
UART0
Software Download
AT Communication
AUX UART
AT Communication
Page 11

80630NT11837A Rev. 1 Page 11 of 40 2020-09-03
3. APPLICATION MAIN FLOW
Boot/WakeUp
Configure
Register?
Data service
success?
Enter PSM
Y
Y
RESET
N
N
AT#IOTBNDFULLPWR=1
TIP:
Configure step includes APN config / Band lock / Frequency lock / PSM config
and so on.
NOTE:
As per default setting and as shown in the above diagram, the module after
the Power ON will enter in Power Saving state if no activities are requested.
In order to change this setting is possible to use the AT#TSLK=1 command
after the startup.
Page 12

80630NT11837A Rev. 1 Page 12 of 40 2020-09-03
4. NETWORK REGISTRATION
PDN Connection Setup
AT*MCGDEFCONT command, set the connection settings for PDN connection.
In NB-IOT, when the module attach to the NB-IOT network, after it power on, it performs a
PDN connection setup. Thus, the PDN connection settings must be set and stored in the
NVRAM preior to the attcach procudeure so it will be used by the module during the
attach procedure.
The set parameters of this command will take effect after restart the module.
AT*MCGDEFCONT=<PDP_type>[,<APN>[,<username>[,<password>]]]
The standard +CGDCONT command, should be used to define PDP context.
4.1.1. Auto Dial
Once the module power on, it will establishPDN connection automatically. And will report
+IP:xxx.xxx.xxx.xxx when PS connection established. As shown below:
*MATREADY: 1
+CFUN: 1
+CPIN: READY
+IP: 100.82.105.9
Page 13

80630NT11837A Rev. 1 Page 13 of 40 2020-09-03
Fast Registration
In order to shorten the register process with the network the below commands may be
used to narrow down the number of bands and frequancies to scan.
AT*MFRCLLCK - Lock UE to specific frequency and optionally Cell ID
This command is used to lock UE to specific frequency and optionally Cell ID.
It will take effect once setting, and will be invalid after restart the module
AT*MFRCLLCK=1,10,3,301 // Lock to EARFCN 10, offset 0, PCI 301
OK
AT*MFRCLLCK=0 //Remove lock
OK
AT*MBSC - Lock BAND
This command is used to lock a specific band, and it will take effect after restart the module
AT*MBSC=3,3,5,8 //lock three bands, that is band3,5,8
*MBSC: 0
OK
AT*MBANDSL - Set Modem NB-IOT Search Prefer Band List
This command is to define the search prefer list
AT*MBANDSL=1,1,2,3,5 // Enable and se the prefer list
OK
Page 14

80630NT11837A Rev. 1 Page 14 of 40 2020-09-03
Signal strength and quality
If the mobile device is already registered on the network. The following AT commands can
be used to query the received signal strength and quality, thus giving an indication of the
reliability of the wireless link.
AT+CESQ
Assuming that the module is not connected to the antenna or the network cannot be
covered at all, there are:
AT+CESQ
+ CESQ: 99,99,255,255,255,255 // In this case, the module cannot be connected to the network
OK
Now, the antenna is connected to the module and the network coverage reaches the
current position. Execute the above AT command again:
AT+CESQ
+ CESQ: 17,99,255,255,26,87 // 17 is the received signal strength indicator
OK
Module registration network status query
Execute the following AT command to verify whether the module has been registered on
the EPS network using E-UTRAN method:
AT+CEREG?
AT+CEREG? // Verify that the module is registered
+ CEREG: 0,1 // registered
OK
Now, suppose there is no signal (the module is not connected to the antenna) and
execute this command again:
AT+CEREG?
+ CEREG: 0,3 // In this case, the module cannot be connected to the network
OK
AT+CEREG=2 // Enable EPS network registration and position information to report actively, the results are as
follows:
+ CEREG: <stat> [, [<tac>], [<ci>], [<AcT>]]
Page 15

80630NT11837A Rev. 1 Page 15 of 40 2020-09-03
Operator Information
Use the following AT command to return to the current mode, currently selected operator
and current access technology:
AT+COPS?
E.g:
AT+COPS?
+ COPS: 0,0, "46011", 9
OK
Now, if there is no signal (the module is not connected to the antenna) and it is assumed
that the detailed extended error return result has been enabled. Execute the above
command again:
AT+COPS?
+ COPS: 0 // In this case, the module did not select an operator
OK
PPP dial
Configure Ubuntu Dialup Connection:
1) Send command AT#TSLK=1 before PPP dail.
2) Issue command “sudo gedit /etc/ppp/options”
3) Change crtscts to nocrtscts, comment modem, lcp-echo-interval, lcp-echo-failure
#lcp-echo-interval
#lcp-echo-failure
Page 16

80630NT11837A Rev. 1 Page 16 of 40 2020-09-03
5. DNS SCRIPT
If the base station does not allocate DNS, then you need to configure the DNS server
through the AT command EDNSSET. If the module is not configured with a DNS server,
all services related to domain name resolution cannot be performed. EDNSSET can be
configured with two IPV4 DNS servers and two IPV6 DNS servers.After EDNSSET
configures DNS, it needs to re-register the network to take effect.The following
demonstrates an example of setting up an ipv4 DNS server, then re-registering the
network, and using the EDNS command to resolve the domain name.
Note:
You can use command AT+CGCONTRDP=1 to query whether the network
allocates DNS.
AT+EDNSSET=0,0,"114.114.114.114"
OK
AT+CFUN=0
OK
AT+CFUN=1
OK
+CPIN: READY
+IP: 100.113.57.57
AT+EDNS="www.google.com
OK
+EDNS:31.13.83.1
Page 17

80630NT11837A Rev. 1 Page 17 of 40 2020-09-03
6. TCP/UDP SCRIPT
An example of UDP communication over NB-IoT is reported below; in this scenario, The
ESOC command is used to create a socket, you can use parameters to control whether it
is UDP or TCP,ESOCON is used to establish a connection (UDP does not need to
connect, here is only used to mark the address information of the communication peer,
mainly for the consistency of AT commands),ESOSEND sends data, the data format is a
hexadecimal string.+ESOMNI is used to report the received data(Hexadecimal string
format).If you want to send data in the original format, you need to use ESODATAMODE
to enter the data mode, you can use "+++" to exit the data mode to the command line
mode, you must close the data channel after using ESODATAMODE. ESOCL closes the
socket.
Note:
The interval between the three +++ should be less than 1s, and the
interval between the first +and other inputs or the last + and other
inputs should be greater than 1s.
6.1.1. Example for UDP
AT+ESOC=1,2,1 // Create UDP socket
+ESOC=0
OK
AT+ESOCON=0,12345,"192.168.1.1" // Open a session to a server
OK
AT+ESOSEND=0,8,4142434445464748,1 // Send 8 bytes to the server
OK
+ESONMI=0,8,4141424243434545 // Get 8 bytes from the server
AT+ESOCL=0 // Terminate the session with the server
OK
Page 18

80630NT11837A Rev. 1 Page 18 of 40 2020-09-03
6.1.2. Example for TCP
AT+CGPADDR=0 // Read IP address
AT+ESOC=1,1,1 // Create TCP socket
+ESOC=0
OK
AT+ESOCON=0,12345,"192.168.1.1" // Open a session to a server
OK
AT+ESOSEND=0,8,4142434445464748,1 // Send 8 bytes to the server
OK
+ESONMI=0,8,4141424243434545 // Get 8 bytes from the server
AT+ESOCL=0 // Terminate the session with the server
OK
Page 19

80630NT11837A Rev. 1 Page 19 of 40 2020-09-03
7. FTP/FTPS SCRIPT
An example of FTP/FTPS communication over NB-IoT is reported below; in this scenario,
FTPOPEN is used to connect to the server. NB-IOT may be slow to connect to the FTPS
server and it may take a few seconds.FTPPUTCON is used to establish a data channel
connection with the server to provide services for uploading files.The FTPPUTDATA
parameter indicates whether it is the last packet to upload data.
AT+FTPOPEN="192.168.1.1",21,"test","test",1,0,61000
OK
+FTPOPEN: OPEN SUCCESS
AT+FTPSIZE=/,testwu1.txt
+FTPSIZE: 34
OK
AT+FTPPUTCON=/,testwu1.txt
OK
+FTPPUTCON: SUCCESS
AT+FTPPUTDATA=0
CONNECT
NO CARRIER
AT+FTPPUTDATA=1
CONNECT
NO CARRIER
+FTPPUTDATA: END SUCCESS
AT+FTPGET=/,testwu1.txt,0,512
OK
+FTPGET:512,Hello!testTEST123567890!@#$%^&*()Hello!testTEST123567890!@#$%^&*()Hello!testTEST1
23567890!@#$%^&*()Hello!testTEST123567890!@#$%^&*()Hello!testTEST123567890!@#$%^&*()Hello!test
TEST123567890!@#$%^&*()Hello!testTEST123567890!@#$%^&*()Hello!testTEST123567890!@#$%^&*()He
llo!testTEST123567890!@#$%^&*()Hello!testTEST123567890!@#$%^&*()Hello!testTEST123567890!@#$%^
&*()Hello!testTEST123567890!@#$%^&*()Hello!testTEST123567890!@#$%^&*()Hello!testTEST123567890!
@#$%^&*()Hello!testTEST123567890!@#$%^&*()123
Hello!testTE
80630NT11837A Rev. 1 Page 20 of 40 2020-09-03
Page 20

+FTPGET:488,ST123567890!@#$%^&*()Hello!testTEST123567890!@#$%^&*()Hello!testTEST123567890!@
#$%^&*()Hello!testTEST123567890!@#$%^&*()Hello!testTEST123567890!@#$%^&*()Hello!testTEST123567
890!@#$%^&*()Hello!testTEST123567890!@#$%^&*()Hello!testTEST123567890!@#$%^&*()Hello!testTEST
123567890!@#$%^&*()Hello!testTEST123567890!@#$%^&*()Hello!testTEST123567890!@#$%^&*()Hello!tes
tTEST123567890!@#$%^&*()Hello!testTEST123567890!@#$%^&*()Hello!testTEST123567890!@#$%^&*()H
ello!testTEST123567890!@#$%^&*()123
+FTPGET: END
AT+FTPCLOSE
OK
8. NIDD SCRIPT
AT+NIDD=0,PDN,user,password // Create NIDD account
+NIDD=0,Account_ID
OK
AT+NIDD=1,Accunt_ID // Create NIDD Sockett
+NIDD=1,NIDD_ID
OK
AT+NIDD=2,NIDD_ID // Set NIDD socket
OK
AT+NIDD=3,NIDD_ID,”3132333435 // Send data to the server
OK
+NIDD=4,NIDD_ID,”3637383941” // Reciev data from the server
Page 21

80630NT11837A Rev. 1 Page 21 of 40 2020-09-03
9. PSM AND EDRX
PSM overview
Power Saving mode is a feature designed, in 3GPP Rel 12, for the IoT devices, in order to
save battery consumption and therefore potentially achieve 10 years of battery life.
In the period of the time before the PSM, devices was turned off in order to conserve the
battery power. Consequently, every power on of the device, an attach procedure to the
network was performed. The acomulative energy consumption during a life time of a
device can be significant and this can be avoided by using the PSM.
The PSM cycle actually stops the paging in front of the network and defines the interval
between periodic Tracking Area Update (TAU) message. During the PSM time the device
can’t receive any MT message (Data/SMS) from the network side.
This will decrease the battery consumption due to the decreasing of the device <->
network messaging.
During the PSM time, the IoT device will enter a low power mode, and will save battery
consumption by not sending network messages.
Two types of Timers can be requested by the device to the network:
1. T3324 Active Time
This timer defines the time the IoT device stays in active/idle mode, following a
TAU procedure OR data transmition. During this time, the device still performs
paging with the network. Once the timer is expired the device will switch to PSM
mode.
2. T3412 TAU time
This time defines the interval between two periodic Tracking Area Updates.
Actually this timer can be set even if the PSM is disable.
NOTE:
User can request the two timers value, but the network decides the final vlaue.
Page 22

80630NT11837A Rev. 1 Page 22 of 40 2020-09-03
PSM script
Module supports 3GPP command AT+CPSMS and custom Telit command AT#CPSMS that
simplifies and improve PSM management.
AT+CPSMS=[<mode>[,<Requested_Periodic-RAU>[,<Requested_GPRS-READYtimer>[,<Requested_Periodic-TAU>[,<Requested_Active-Time>]]]]]
The set command controls the setting of the UEs power saving mode (PSM) parameters. The command controls
whether the UE wants to apply PSM or not, as well as the requested extended periodic RAU value and the
requested GPRS READY timer value in GERAN, the requested extended periodic TAU value in E-UTRAN and
the requested Active Time value. Find the relevant parameters below.
<mode>
0 Disable PSM
1 Enable PSM
2 Disable PSM and all the previous parameters set shall be removed to restore them to default
values. (The parameter is not supported for the moment)
<Requested_Periodic-RAU>string type; 8-bit single byte. Request setting RAU cycle (T3412) unde
GERAN/UTRAN network.
<Requested_GPRS-READY-timer>: string type; 8-bit single byte. Request setting GPRS READY cycle
(T3324) under GERAN/UTRAN network.
<Requested_Periodic-TAU>: string type; 8-bit single byte. Request setting RAU cycle (T3412) under LTE
network.
<Requested_Active-Time>: string format, 8 bytes. Request the Active Time value T3324 of the module. The
default value is 20 seconds, that is, the module goes into dormant state 20s after reporting TAU to network by
default.
AT+CPSMS?
Read command presents the current CPSMS configuration returned by the network, in the format:
+CPSMS: <mode>,[<Requested_Periodic-RAU>],[<Requested_GPRS-READYtimer>],[<Requested_Periodic-TAU>],[<Requested_Active-Time>]
Page 23

80630NT11837A Rev. 1 Page 23 of 40 2020-09-03
Here below a simple script shows the AT+CPSMS functionalities.
AT+CPSMS? // PSM feature is OFF
+CPSMS: 0
OK
AT+CPSMS=1,,, "00011000","00001010" // Enable PSM feature: T3412=4Hs, T3324=20s
OK
A TAU (Tracking Area Update) is triggered, timer negotiation with the network starts; the procedure is fast,
unsolicited are disabled we suggest to wait about 2s before proceeding with the next step
AT+CPSMS=1,,, "00011000","00001010" // It goes into dormant state 20s after reporting TAU to network
every 4 hours in LTE network.
OK
Timers T3412 and T3324 start when module move from CONNECTED state to IDLE state (RRC Connection
Release).
TIMERS START POINT (RRC Connection release)
20s
Active Time T3324 EXPIRE
The module enters automatically in PSM sleep (module turns off)
E.g. let's assume that at a certain point in time the user wants to use the module to send data; it is possible
even if the module is in PSM; the user can wake module up with WAKE pin (see turn on procedure defined in
HW user guide)
+CPIN: READY
The module is just turned on and it does not interact with the network, the T3412 timer is still running from
TIMERS START POINT
AT+ESOC=1,2,1
+ESOC=0
OK
AT+ESOCON=0,7000,"219.144.130.27"
OK
Page 24

80630NT11837A Rev. 1 Page 24 of 40 2020-09-03
AT+ESOSEND=0,10,30313233343536373839
OK
AT+ESOCL=0
OK
New TIMERS START POINT: the module was in CONNECTED state, after RRC Connection Release from
the network it moves to IDLE state, this reset the two timers
TIMERS START POINT (RRC Connection release)
20s
Active Time T3324 EXPIRE
The module enters automatically in PSM sleep (module turns off)
4Hs (T3412-T3324)
Tracking Area Update period T3412 EXPIRE
The module exits automatically from PSM sleep (module turns on); Tracking Area Update is triggered
+CPIN: READY
Page 25

80630NT11837A Rev. 1 Page 25 of 40 2020-09-03
eDRX overview
eDRX is the extended of the DRX feature, designed in 3GPP Rel 13, for IoT devices in
order to reduce power consumption and increase battery life.
eDRX allows to increase the time, in which the IoT device is not listening to the network.
The device can configure the eDRX cycle (TeDRX) and every cycle can be configured
with the Paging Transmition Window time (Tptw).
When TeDRX expires, it is restarted and Tptw is started. When Tptw expires, the device
stops monitoring paging occasions.
NOTE:
This eDRX feature can be used with or without the PSM feature.
With eDRX the device can be reachable but still keep low power consumption.
The user can request the two timers value, but in the end, the network makes
the decision.
eDRX script
Module supports 3GPP commands AT+CEDRXS, AT+CEDRXRDP and custom Telit
command AT#CEDRXS that simplifies and improve eDRX management.
AT+CEDRXS=[<mode>,[,<AcT-type>[,<Requested_eDRX_value>]]]
Set command controls the setting of the UEs eDRX parameters. The command controls whether the UE wants
to apply eDRX or not, as well as the requested eDRX value for each specified type of access technology. Find
the relevant parameters below.
<mode>integer data to enable/disable eDRX. This parameter can be applied to all the specified types of access
technology,
0 Disable EDRX
1 Enable eDRX
2 Enable eDRX and enable active submission in the following formats:
+CEDRXP:<AcT-type>[,<Requested_eDRX_value>[,<NW-provided_eDRX_value>[,<Paging_time_window>]]]
3 Disable eDRX and all the previous parameters set shall be removed to restore them to default values.
<AcT-type>: integer data, access technology type
0 Access technology without using eDRX. The parameter is only used to actively report result codes.
5 E-UTRAN (NB-S1 mode)
Page 26

80630NT11837A Rev. 1 Page 26 of 40 2020-09-03
<Requested_eDRX_value > : half a byte in a 4 bit format. The eDRX value refers to bit-4 to 1 of octet 3 of the
Extended DRX parameters information element (see subclause 10.5.5.32 of 3GPP TS 24.008). For the coding
and the value range, see Extended DRX parameters information element in 3GPP TS 24.008, Table
10.5.5.32/3GPP TS 24.008. Default value is "0000".
AT+CEDRXS?
Read command returns the current settings for each defined value of <AcTtype> in the format:
+CEDRXS: <AcT-type>,<Requested_eDRX_value>
Here below a simple script shows the AT+CEDRXS functionalities. The test is performed using a network
simulator but the same can be applied on live network.
AT+CEDRXS=1,5,"1101"
OK
AT+CEDRXS?
+CEDRXS: 5,"1101"
OK
Page 27

80630NT11837A Rev. 1 Page 27 of 40 2020-09-03
PSM/eDRX Graphs
Page 28

80630NT11837A Rev. 1 Page 28 of 40 2020-09-03
10. MQTT
MQTT stands for Message Queue Telemetry Transport, It is a publish/subscribe,
extremely simple and lightweight messaging protocol, designed for constrained devices
and low-bandwidth, high-latency or unreliable networks. And port 1883 is reserved for
MQTT, port 8883 is also reserved for using MQTT over SSL.
AT+EMQNEW="192.168.1.1","1883",50000,100 ------- create an MQTT instance
+EMQNEW: 0 ------- mqtt instance id
OK
AT+EMQCON=0,4,"myclientid",1000,1,0,"test","123456" ------- connect the server
OK
AT+EMQSUB=0,"topic",1 ------- send SUBSCRIBE packet to server
OK
AT+EMQPUB=0,"topic",1,0,0,4,"31323334" ------- send PUBLISH packet to server
OK
+EMQPUB:0,"topic",1,0,0,4,"31323334" ------- reoprt packet received from server
AT+EMQUNSUB=0,"topic" ------- send UNSUBSCRIBE packet to server
OK
AT+EMQDISCON=0 ------- send DISCONNECT packet to server
OK
Page 29

80630NT11837A Rev. 1 Page 29 of 40 2020-09-03
11. FTP FOTA
An example of FTP FOTA communication over NB-IoT is reported below; in this scenario,
FTPOPEN is used to connect to the server. FTPGETOTA is used to download the FTP
FOTA package. FTPCLOSE is used to close the link of FTP FOTA. OTAUP is used to
reset the module to upgrade the firmware.
AT+CGMR
M0J.00010-B001
OK
AT+FTPOPEN=ftp.test.com,21,username,password,1,0
OK
+FTPOPEN: OPEN SUCCESS
AT+FTPGETOTA=/tlttest,updateB.zip
OK
+FOTADL: 100%
FOTA DOWNLOADED
AT+FTPCLOSE
OK
AT+OTAUP
OK
FOTA UPDATING
F1: 0000 0000
V0: 0000 0000 [0001]
00: 0006 000C
01: 0000 0000
U0: 0000 0001 [0000]
T0: 0000 00B4
80630NT11837A Rev. 1 Page 30 of 40 2020-09-03
Page 30

Leaving the BROM
*MATREADY: 1
+CFUN: 1
FOTA SUCCESS
+CPIN: READY
+IP: 100.82.105.9
AT+CGMR
M0J.00010-B002
OK
Page 31

80630NT11837A Rev. 1 Page 31 of 40 2020-09-03
12. LWM2M
First of all, The user need to connect to LwM2M server. The module supports there ways
to connect to LwM2M server.
The first way is to use bootstarp mode based on DTLS. The bootstrap mode requires the
help of a LwM2M Bootstrap-Server to achieve the ultimate goal to connect a LwM2M
Server. In the bootstarp mode, the module require credentials information for securely
communicate with LwM2M Servers .
The following is the usage of AT cmd.
AT+ELMREG=1,"54.209.23.144","5683","BS868613030014677",300
+ELMREG=0
OK
+ELMEVT:connect success
+ELMEVT:bootstraping
+ELMEVT:lifetime changed,value:21600
+ELMEVT:bootstrap success
+ELMEVT:connect success
+ELMEVT:registering
+ELMEVT:register success
The second way is to use registeration mode based on DTLS. In this mode, the module
require credentials information for securely communicate with LwM2M Servers .
The following is the usage of AT cmd.
AT+ELMREG=0,"192.168.1.1","5684","PSK8686130300111111",300,"868613030011111","3132344446"
+ELMREG=0
OK
+ELMEVT:connect success
+ELMEVT:registering
+ELMEVT:register success
Page 32

80630NT11837A Rev. 1 Page 32 of 40 2020-09-03
The third way is to use registeration mode without DTLS. This mode is insecure.
The following is the usage of AT cmd.
AT+ELMREG=0,"192.168.1.1","5683","T868613030014444",300
+ELMREG=0
OK
+ELMEVT:connect success
+ELMEVT:registering
+ELMEVT:register success
After connecting to LwM2M server successfully, The user can add or delete Object using
“AT+ELMADDOBJ” or “AT+ELMDELOBJ”.
The following is the usage of AT cmd.
AT+ELMADDOBJ=0,3200,0
OK
+ELMEVT:update success
AT+ELMDELOBJ=0,3200
OK
+ELMEVT:update success
The user also can update lifetime using “AT+ELMUPDATE”.
The following is the usage of AT cmd.
AT+ELMUPDATE=0,200
OK
+ELMEVT:set success
After connecting to LwM2M server successfully, the LwM2M server will send device
management request to module including Read, Write or Excute. and the module will report
request information using “+ELMREAD” , “+ELMWRITE” or “+ELMEXECUTE”.after receiving
the report information , the user need to use “AT+ELMREADRSP”,“AT+ELMWRITERSP” or
“AT+ELMEXECUTERSP” to send reponse infomation to LwM2M server.
The following is the usage of AT cmd.
+ELMREAD:0,3200,0,1,5501
AT+ELMREADRSP=0,3200,0,1,5501,I,2,33
80630NT11837A Rev. 1 Page 33 of 40 2020-09-03
Page 33

OK
+ELMWRITE: 0, 5, 2, 1,1,S, 5, “ABCDE”
AT+ELMWRITERSP=0,0
OK
+ELMEXECUTE:0,3303,0,5605
AT+ELMEXECUTERSP=0,0
OK
If LwM2M server is interested in some objects, the server will send observe request to module
and the module will report observe request information using “+ELMOBSERVE”.Then the user
should send response information using “AT+ELMOBSERVERSP”.
After the Observation is successfully, the user can report information about object to LwM2M
server using “AT+ELMSEND”.
The following is the usage of AT cmd.
+ELMOBSERVEREQ:0,3200,0,1,5501
AT+ELMOBSERVERSP=0,0,3200,0,1,5501,I,1,0
OK
AT+ELMSEND=0,1,3200,0,5501,I,2,33
OK
+ELMEVT:send success
+ELMEVT:send confirm success
The user can use “AT+ELMDEREG” to disconnect from LwM2M server.If the module has
registered with LwM2M server successfuly. The module will report “+ELMEVT:deregister
success” and “+ELMEVT:clean complete”. if the module has not finished registeration with
LwM2M server.The module only reports “+ELMEVT:clean complete”.
The following is the usage of AT cmd.
AT+ELMDEREG=0
OK
+ELMEVT:deregister success
+ELMEVT:clean complete
Page 34

80630NT11837A Rev. 1 Page 34 of 40 2020-09-03
13. TLS
TLS can be used on top of a transport-layer security protocol like TCP. There are three
main components to TLS: Encryption, Authentication, and Integrity.
1. Encryption: hides the data being transferred from third parties.
2. Authentication: ensures that the parties exchanging information are who they claim to
be.
3. Integrity: verifies that the data has not been forged or tampered with.
AT+TLSCFG="host_name",localhost ---config hostname
OK
AT+TLSCFG="auth_mode",2 --- config auth_mode
OK
AT+TLSCFG="handshake_timeout",60000 - ---config handshake_timeout
OK
AT+TLSCFG="view_mode",1 --- config view mode
OK
AT+TLSCFG="CA_CERT",1326 --- config CA certification
CONNECT
receive 350 data
receive 350 data
receive 350 data
receive 276 data
NO CARRIER
AT+TLSCFG="CLI_CERT",1330 --- config client certification
CONNECT
receive 350 data
receive 350 data
receive 350 data
receive 280 data
NO CARRIER
AT+TLSCFG="CLI_KEY",1700 --- config client key
CONNECT
80630NT11837A Rev. 1 Page 35 of 40 2020-09-03
Page 35

receive 350 data
receive 350 data
receive 350 data
receive 350 data
receive 300 data
NO CARRIER
AT+TLSOPEN=192.168.1.1,8557 --- connect tls server
+TLSSTAT:1
OK
AT+TLSSEND=74656c69745f73656e645f636d645f74657374
+TLSSEND: 19 --- send Hexadecimal string
OK
+TLSRECV: 28,telit_send_cmd_test --- receive data from server
AT+TLSSENDRAW=31,60 --- send raw data
CONNECT --- enter data mode
receive 31 data --- data mode reveive 31 data
NO CARRIER --- exit data mode
+TLSSEND:31 --- send raw data
OK
+TLSRECV: 31,telit_sendraw_cmd_test --- receive data from server
AT+TLSSTAT --- get tls state
+TLSSTAT:1
OK
AT+TLSCLOSE --- close tls
+TLSSTAT:0
OK
Page 36

80630NT11837A Rev. 1 Page 36 of 40 2020-09-03
14. HTTP
The Hypertext Transfer Protocol (HTTP) is an application-level protocol for distributed,
collaborative, hypermedia information systems. It is a generic, stateless protocol which
can be used for many tasks beyond its use for hypertext, such as name servers and
distributed object management systems, through extension of its request methods, error
codes and headers.
AT+EHTTPCREATE=0,41,41,""http://192.168.1.1:61613/",,,0,,0,,0," // create a HTTP client
+EHTTPCREAT:0 // 0: client id
OK
AT+EHTTPCON=0 // connect the server
OK
AT+EHTTPSEND=0,27,27,"0,0,9,"/Test.txt",0,,0,,0,," // get the file with path /Test.txt
OK
+EHTTPNMIH:0,404,157,Server: nginx/1.12.2 // report the header part of response
Date: Thu, 20 Dec 2018 09:14:27 GMT
Content-Type: application/json;charset=UTF-8
Transfer-Encoding: chunked
Connection: keep-alive
+EHTTPNMIC:0,0,129,258,7b2274696d657374616d70223a22323031382d31322d32305430393a31343a323
72e3338302b30303030222c22737461747573223a3430342c226572726f72223a224e6f7420466f756e64222c
226d657373616765223a224e6f206d65737361676520617661696c61626c65222c2270617468223a222f54657
3742e747874227d
// reprot the content part of response
AT+EHTTPSEND=0,113,113,"0,1,9,"/postjson",0,,16,"application/json",66,7b2274657374223a313233343536
2c226d657373616765223a313333323432347d," //Send HTTP-post request
OK
+EHTTPNMIH:0,200,157,Server: nginx/1.12.2
Date: Thu, 20 Dec 2018 09:14:41 GMT
Content-Type: application/json;charset=UTF-8
Transfer-Encoding: chunked
Connection: keep-alive
+EHTTPNMIC:0,0,33,66,7b2274657374223a3132333435362c226d657373616765223a313333323432347d
AT+EHTTPSEND=0,77,77,"0,2,4,"/put",0,,33,"application/x-www-formurlencoded",18,746573743d74657374," //Send HTTP-put request
OK
80630NT11837A Rev. 1 Page 37 of 40 2020-09-03
Page 37

+EHTTPNMIH:0,200,143,Server: nginx/1.12.2
Date: Thu, 20 Dec 2018 09:14:57 GMT
Content-Type: text/plain;charset=UTF-8
Content-Length: 14
Connection: keep-alive
AT+EHTTPDISCON=0 //Disconnect HTTP
OK
AT+EHTTPDESTROY=0 //Destroy the http client instance
OK
Page 38

80630NT11837A Rev. 1 Page 38 of 40 2020-09-03
15. GLOSSARY AND ACRONYMS
Description
TTSC
Telit Technical Support Centre
USB
Universal Serial Bus
HS
High Speed
DTE
Data Terminal Equipment
UMTS
Universal Mobile Telecommunication System
WCDMA
Wideband Code Division Multiple Access
HSDPA
High Speed Downlink Packet Access
HSUPA
High Speed Uplink Packet Access
UART
Universal Asynchronous Receiver Transmitter
HSIC
High Speed Inter Chip
SIM
Subscriber Identification Module
SPI
Serial Peripheral Interface
ADC
Analog – Digital Converter
DAC
Digital – Analog Converter
I/O
Input Output
GPIO
General Purpose Input Output
CMOS
Complementary Metal – Oxide Semiconductor
MOSI
Master Output – Slave Input
MISO
Master Input – Slave Output
CLK
Clock
MRDY
Master Ready
SRDY
Slave Ready
CS
Chip Select
RTC
Real Time Clock
PCB
Printed Circuit Board
ESR
Equivalent Series Resistance
VSWR
Voltage Standing Wave Radio
VNA
Vector Network Analyzer
Page 39

80630NT11837A Rev. 1 Page 39 of 40 2020-09-03
16. DOCUMENT HISTORY
Revision
Date
Changes
0
2020-08-12
First issue
1
2020-09-03
Updated examples
Page 40

Mod. 0809 2017-01 Rev.8
 Loading...