

Telindus 1031 User And Reference Manual

Telindus 1031 Router
Telindus 1031 Router
User and reference manual
Version: 1.1 181341
Telindus Technical Publications – Geldenaaksebaan 335 - B-3001 Leuven - Belgium – Tel. +32 16 382011

Telindus 1031 Router Copyright, safety and statements
ii
User and reference manual
Document properties
Subject Telindus 1031 Router
Manual type User and reference manual
Version 1.1
Code 181341
Modification date 21 October 2002 ©Telindus
Copyright notice
The information and descriptions contained in this publication are the property of Telindus. Such information and descriptions must not be copied or reproduced by any means, or disseminated or distributed
without the express prior written permission of Telindus.
This publication could include technical inaccuracies or typographical errors, for which Telindus never
can or shall be held liable. Changes are made periodically to the information herein; these changes will
be incorporated in new editions of this publication. Telindus may make improvements and/or changes in
the product(s) described in this publication at any time, without prior notice.
Safety requirements
Carefully read the safety instructions at the beginning of 2 - Installing and connecting the Telindus 1031
Router on page 13.
The connectors of the Telindus 1031 Router should only be connected to the following circuit types:
Connector name Connector label Connector type Circuit type
LAN connector LAN RJ45 SELV
G703 interface connector
auxiliary connector AUX (DTE) subD-9 SELV
control connector CTRL (DCE) subD-9 SELV
• SELV (Safety Extra Low Voltage): local connection (e.g. PC to Telindus 1031 Router) or leased line
inside the building.
• TNV-1 (Telecom Network Voltage): leased line outside the building.
• TNV-2: PSTN from PABX inside the building.
• TNV-3: PSTN from operator PABX outside the building.
G703 RJ45 SELV

Telindus 1031 Router Copyright, safety and statements
User and reference manual
Statements
http://www.telindusproducts.com → Products → Choose a product → Download certificates
Hereby, Telindus declares that this Telindus 1031 Router complies with the essential requirements and
other relevant provisions of Directive 1999/5/EC.
Hierbij verklaart Telindus dat deze Telindus 1031 Router overeenstemt met de essentiële vereisten en
andere relevante bepalingen van Richtlijn 1999/5/EC.
Par la présente, Telindus déclare que ce Telindus 1031 Router est en conformité avec les exigences
essentielles et autres articles applicables de la Directive 1999/5/EC.
iii
Hiermit, Telindus erklärt daß dieser Telindus 1031 Router in Fügsamkeit ist mit den wesentlichen
Anforderungen und anderen relevanten Bereitstellungen von Direktive 1999/5/EC.
Mediante la presente, Telindus declara que el Telindus 1031 Router cumple con los requisitos esenciales y las demás prescripciones relevantes de la Directiva 1999/5/CE.
A Telindus declara que o Telindus 1031 Router cumpre os principais requisitos e outras disposições da
Directiva 1999/5/EC.
Col presente, Telindus dichiara che questo Telindus 1031 Router è in acquiescenza coi requisiti essenziali e stipulazioni attinenti ed altre di Direttivo 1999/5/EC.
Με το παρον, η
Telindus
δηλωνει οτι αυτο το
µε τιζ βασικεζ απαιτησειζ και µε τιζ υπολοιπεζ σχετικεζ διαταξειζ τηζ οδηγιαζ
5/EC
.
Telindus 1031 Router
ειναι συµµορφουµενο
1999/

Telindus 1031 Router Preface
iv
User and reference manual
Organisation of this manual
This manual contains the following main parts:
Part This part …
User manual shows you how to install and connect the Telindus 1031 Router. It also gives a
basic configuration of the Telindus 1031 Router.
Reference manual gives more detailed information on the Telindus 1031 Router. It contains a com-
plete description of all the configuration, status, performance and alarm parameters for look-up purposes.
Annex gives additional information.
Refer to the Table of contents on page vii for a detailed overview of this manual.
Application software version
This manual describes the features, containment tree and attributes of the Telindus 1031 Router application software version T2802/00200.
Audience
This manual is intended for computer-literate people, who have a working knowledge of computing and
networking principles.
Your feedback
Your satisfaction about this purchase is an extremely important priority to all of us at Telindus. Accordingly, all electronic, functional and cosmetic aspects of this new unit have been carefully and thoroughly
tested and inspected. If any fault is found with this unit or should you have any other quality-related comment concerning this delivery, please submit the Quality Comment Form on our web page at
http://www.telindusproducts.com/quality
.

Telindus 1031 Router Preface
User and reference manual
Typographical conventions
The following typographical conventions are used in this manual:
The format ... indicates ...
Normal normal text.
v
Italic
• new or emphasised words
• application windows, buttons and fields. E.g. In the
Computer
text you have to enter at the DOS or CLI prompt, computer output and code
examples.
Computer Bold
E.g.
NOK,1,1,Invalid command
text you have to enter at the DOS or CLI prompt when it is part of a mix of com-
.
puter input and output.
E.g.
/o1003:"Edit Configuration"
>get sysName
sysName = "Orchid 1003 LAN"
/o1003:"Edit Configuration"
>
Narrow
containment tree objects and attributes of a device when they are mentioned in
the normal text. I.e. when they are not a part of computer input or output.
E.g. Use the
sysName
attribute in order to ...
Blue references to other parts in the manual.
E.g. Refer to xx - Title for more information.
Blue underline
• a hyperlink to a web site. E.g. http://www.telindus.com
• a reference to another manual. E.g. Refer to the TMA manual for …
File n
field enter ...
ame
Telindus 1031 Router Preface
vi
User and reference manual
Graphical conventions
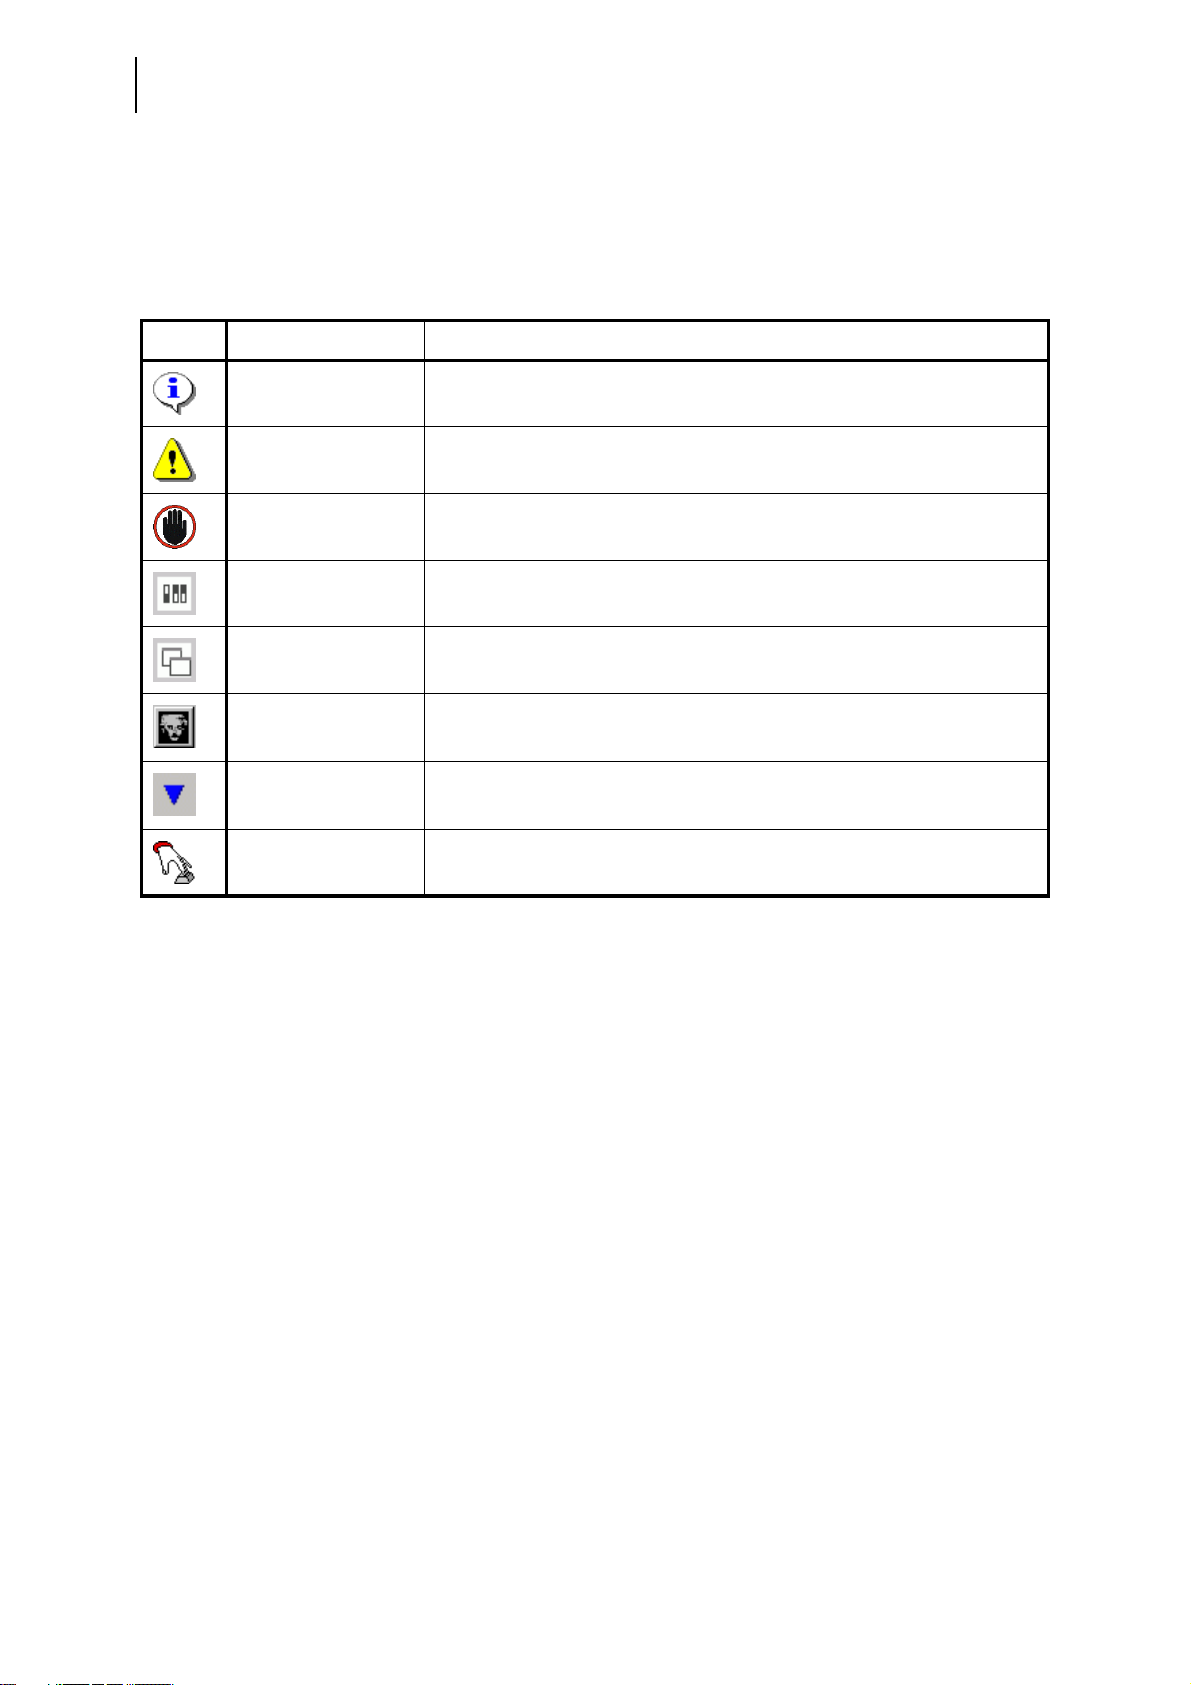
The following icons are used in this manual:
Icon Name This icon indicates …
Remark remarks or useful tips.
Caution text to be read carefully in order to avoid damage to the device.
Warning text to be read carefully in order to avoid injury.
DIP switch a DIP switch or strap table.
Basic attribute a basic attribute in the containment tree of the Telindus 1031 Router.
Advanced attribute an advanced attribute in the containment tree of the Telindus 1031
Router.
Structured attribute a structured attribute within another attribute in the containment tree
of the Telindus 1031 Router.
Action an action in the containment tree of the Telindus 1031 Router.

Telindus 1031 Router Table of contents
User and reference manual
Table of contents
User manual............................................................................................ 1
1 Introducing the Telindus 1031 Router ...............................................................3
1.1 What is the Telindus 1031 Router? ............................................................................ 4
1.2 Telindus 1031 Router applications............................................................................. 5
1.3 Telindus 1030 Router family overview ....................................................................... 6
1.4 Management tools.................................................................................................... 10
1.5 Management tools connection possibilities .............................................................. 12
2 Installing and connecting the Telindus 1031 Router......................................13
2.1 Safety instructions .................................................................................................... 14
2.2 Unpacking ................................................................................................................ 15
2.3 Selecting a site ......................................................................................................... 16
2.4 Installation and connection precautions ................................................................... 17
2.5 Connecting the Telindus 1031 Router...................................................................... 18
2.6 The front panel LED indicators................................................................................. 24
vii
3 DIP switches of the Telindus 1031 Router.......................................................29
3.1 The Telindus 1031 Router motherboard .................................................................. 30
3.2 DIP switches of the Telindus 1031 Router ............................................................... 31
3.3 Opening and closing the housing............................................................................. 32
4 Managing the Telindus 1031 Router ................................................................33
4.1 Managing the Telindus 1031 Router with TMA ........................................................ 34
4.2 Introducing the management terminology................................................................ 40
4.3 The objects in the Telindus 1031 Router containment tree...................................... 44
4.4 Adding an object to the containment tree................................................................. 45
4.5 Telindus 1031 Router attribute overview.................................................................. 50
5 Basic configuration ...........................................................................................51
5.1 Reading DIP switch tables and TMA attribute strings .............................................. 52
5.2 Configuring IP addresses......................................................................................... 55
5.3 Configuring the G703 interface ................................................................................ 61
5.4 Configuring passwords............................................................................................. 62
5.5 Configuring the major features of the Telindus 1031 Router.................................... 65
5.6 Executing configuration actions................................................................................ 66

Telindus 1031 Router Table of contents
viii
User and reference manual
6 Configuring the WAN encapsulation protocols..............................................71
6.1 Selecting a WAN encapsulation protocol ................................................................. 72
6.2 Configuring PPP encapsulation................................................................................ 73
6.3 Configuring Frame Relay encapsulation .................................................................. 77
6.4 Configuring ATM encapsulation ............................................................................... 86
6.5 Configuring HDLC encapsulation ............................................................................. 95
7 Configuring the router.......................................................................................97
7.1 Introducing routing.................................................................................................... 98
7.2 Configuring static routes......................................................................................... 100
7.3 Configuring the Routing Information Protocol ........................................................ 107
7.4 Configuring address translation.............................................................................. 116
7.5 Configuring L2TP tunnelling................................................................................... 127
7.6 Configuring traffic and priority policy on the router ................................................. 130
7.7 Configuring an extended access list....................................................................... 138
8 Configuring the bridge ....................................................................................139
8.1 Introducing bridging................................................................................................ 140
8.2 The self-learning and Transparent Spanning Tree bridge...................................... 141
8.3 The Spanning Tree root bridge .............................................................................. 142
8.4 The Spanning Tree topology.................................................................................. 143
8.5 The Spanning Tree bridge port states.................................................................... 144
8.6 The Spanning Tree Bridge Protocol Data Unit....................................................... 145
8.7 The Spanning Tree behaviour................................................................................ 146
8.8 The Spanning Tree priority and cost ...................................................................... 147
8.9 Configuring bridging ............................................................................................... 149
8.10 Configuring traffic and priority policy on the bridge ................................................ 154
9 Configuration examples..................................................................................159
9.1 LAN extension over a PDH/SDH network .............................................................. 160
9.2 LAN extension over a Frame Relay network.......................................................... 161
9.3 LAN extension over an ATM network..................................................................... 162
9.4 Connecting a LAN to the Internet using NAT and PAT .......................................... 163
9.5 Using PAT over PPP with a minimum of official IP addresses............................... 164
9.6 Combining bridging and routing in a network......................................................... 165
9.7 Connecting two networks through a tunnel ............................................................ 166
9.8 Connecting VLAN enabled switches over a WAN.................................................. 168

Telindus 1031 Router Table of contents
User and reference manual
Reference manual .............................................................................. 169
10 Configuration attributes ..................................................................................171
10.1 Configuration attribute overview............................................................................. 172
10.2 General configuration attributes ............................................................................. 174
10.3 LAN interface configuration attributes .................................................................... 178
10.4 WAN interface configuration attributes................................................................... 181
10.5 Router configuration attributes ............................................................................... 200
10.6 Bridge configuration attributes................................................................................ 231
10.7 SNMP configuration attributes................................................................................ 238
10.8 Management configuration attributes..................................................................... 240
10.9 Proxy configuration attributes ................................................................................. 244
11 Status attributes ..............................................................................................245
11.1 Status attribute overview ........................................................................................ 246
11.2 General status attributes ........................................................................................ 248
11.3 LAN interface status attributes ............................................................................... 251
11.4 WAN interface status attributes .............................................................................. 257
11.5 Router status attributes .......................................................................................... 273
11.6 Bridge status attributes........................................................................................... 287
11.7 Management status attributes ................................................................................ 293
11.8 File system status attributes................................................................................... 294
11.9 Operating system status attributes ......................................................................... 296
11.10 Proxy status attributes ............................................................................................ 297
ix
12 Performance attributes ...................................................................................299
12.1 Performance attributes overview ............................................................................ 300
12.2 LAN interface performance attributes..................................................................... 302
12.3 WAN interface performance attributes ................................................................... 305
12.4 Router performance attributes................................................................................ 312
12.5 Bridge performance attributes ................................................................................ 318
12.6 Management performance attributes ..................................................................... 321
12.7 Operating system performance attributes .............................................................. 323
12.8 Proxy performance attributes ................................................................................. 325
13 Alarm attributes ...............................................................................................327
13.1 Alarm attributes overview ....................................................................................... 328
13.2 Introducing the alarm attributes.............................................................................. 329
13.3 General alarms....................................................................................................... 332
13.4 LAN interface alarms .............................................................................................. 334
13.5 G703 interface alarms ............................................................................................ 335
13.6 G703 channel alarms ............................................................................................. 336
13.7 Router alarms ......................................................................................................... 337

Telindus 1031 Router Table of contents
x
User and reference manual
14 TMA sub-system picture .................................................................................339
15 Auto installing the Telindus 1031 Router ......................................................341
15.1 What is BootP and DHCP? .................................................................................... 342
15.2 Getting the LAN IP address.................................................................................... 343
15.3 Getting the configuration with TFTP....................................................................... 344
15.4 Creating configuration files..................................................................................... 347
15.5 Creating a binary configuration file......................................................................... 348
15.6 Creating an ASCII configuration file ....................................................................... 349
16 Downloading software ....................................................................................353
16.1 What is boot, loader and application software?...................................................... 354
16.2 Downloading application software using TMA........................................................ 355
16.3 Downloading application software using TFTP ...................................................... 356
16.4 Downloading application or loader software using TML......................................... 357
16.5 Downloading application or loader software in loader mode.................................. 358
16.6 Downloading files to the file system ....................................................................... 359
17 Technical specifications .................................................................................361
17.1 G703 interface specifications ................................................................................. 362
17.2 LAN interface specifications ................................................................................... 363
17.3 Control connector specifications ............................................................................ 364
17.4 Auxiliary connector specifications .......................................................................... 365
17.5 ATM encapsulation specifications .......................................................................... 366
17.6 Frame Relay encapsulation specifications ............................................................. 366
17.7 PPP encapsulation specifications .......................................................................... 366
17.8 IP routing specifications ......................................................................................... 367
17.9 Bridging specifications............................................................................................ 367
17.10 Routing and bridging performance specifications .................................................. 367
17.11Power requirements ............................................................................................... 368
17.12 Dimensions............................................................................................................. 368
17.13 Safety compliance .................................................................................................. 368
17.14Over-voltage and over-current protection compliance ........................................... 368
17.15 EMC compliance .................................................................................................... 368
17.16 Environmental compliance ..................................................................................... 369
Annex .................................................................................................. 371
Annex A:common TCP and UDP numbers ..........................................................373
Annex B:product information ...............................................................................375
Index ................................................................................................... 377

Telindus 1031 Router
User manual
1
User manual

Telindus 1031 Router
2
User manual

Telindus 1031 Router Chapter 1
User manual Introducing the Telindus 1031 Router
1 Introducing the Telindus 1031 Router
This chapter gives an introduction to the Telindus 1031 Router. The following gives an overview of this
chapter:
• 1.1 - What is the Telindus 1031 Router? on page 4
• 1.2 - Telindus 1031 Router applications on page 5
• 1.3 - Telindus 1030 Router family overview on page 6
• 1.4 - Management tools on page 10
• 1.5 - Management tools connection possibilities on page 12
3

Telindus 1031 Router Chapter 1
4
User manual Introducing the Telindus 1031 Router
1.1 What is the Telindus 1031 Router?
The Telindus 1030 Router series is a set of IP access routers designed for high-speed WAN access.
They offer high performance IP routing and bridging.
The versions with 2Mbps E1 interfaces are extremely well suited to transport LAN traffic over a PDH or
SDH backbone network. These G703 interfaces (1 or 2, depending on the model) can be used as channelised E1 interfaces, offering multiple logical interfaces on one physical port. The versions with serial
interface (X.21, V.35, V.36, RS530 or RS530A) allow speeds up to 10Mbps.
The Telindus 1030 Router series can directly encapsulate the LAN traffic for transmission over ATM and
frame relay WAN networks. ATM encapsulation includes RFC2684 (formerly RFC1483), PPP over ATM,
and PPP over Ethernet and RBE (Routed Bridge Encapsulation). For point to point set-ups and connections over PDH or SDH networks, PPP can also be used as the WAN protocol. Additionally, the Telindus
1030 Router series is equipped with an AUX V.24 WAN interface for low-speed asynchronous PPP connections and a control V.24 management interface.
The Telindus 1030 Router series supports differentiated services based on VPNs (Virtual Private Networks). Therefore it integrates features like L2TP (Layer 2 Tunnelling Protocol), IPSEC, 802.1Q (VLAN
tagging) and COS (Class Of Service) based on Diffserv priority tagging and queuing. A specific model
supporting DES and 3DES encryption is also available.
The Telindus 1030 Router series is designed for integration into demanding network environments and
can be controlled by a complete set of network maintenance and management tools. It supports autoinstall features over the WAN network. This makes it ideally suited for plug-and-play installation at customer premises while the configuration is prepared at a central site.
What is more, the Telindus 1030 Router series themselves are designed to act as a management concentrator (also called management proxy).
Refer to 1.3 - Telindus 1030 Router family overview on page 6 for a detailed description of the differences between the models of the Telindus 1030 Router series.
Telindus 1031 Router Chapter 1
User manual Introducing the Telindus 1031 Router
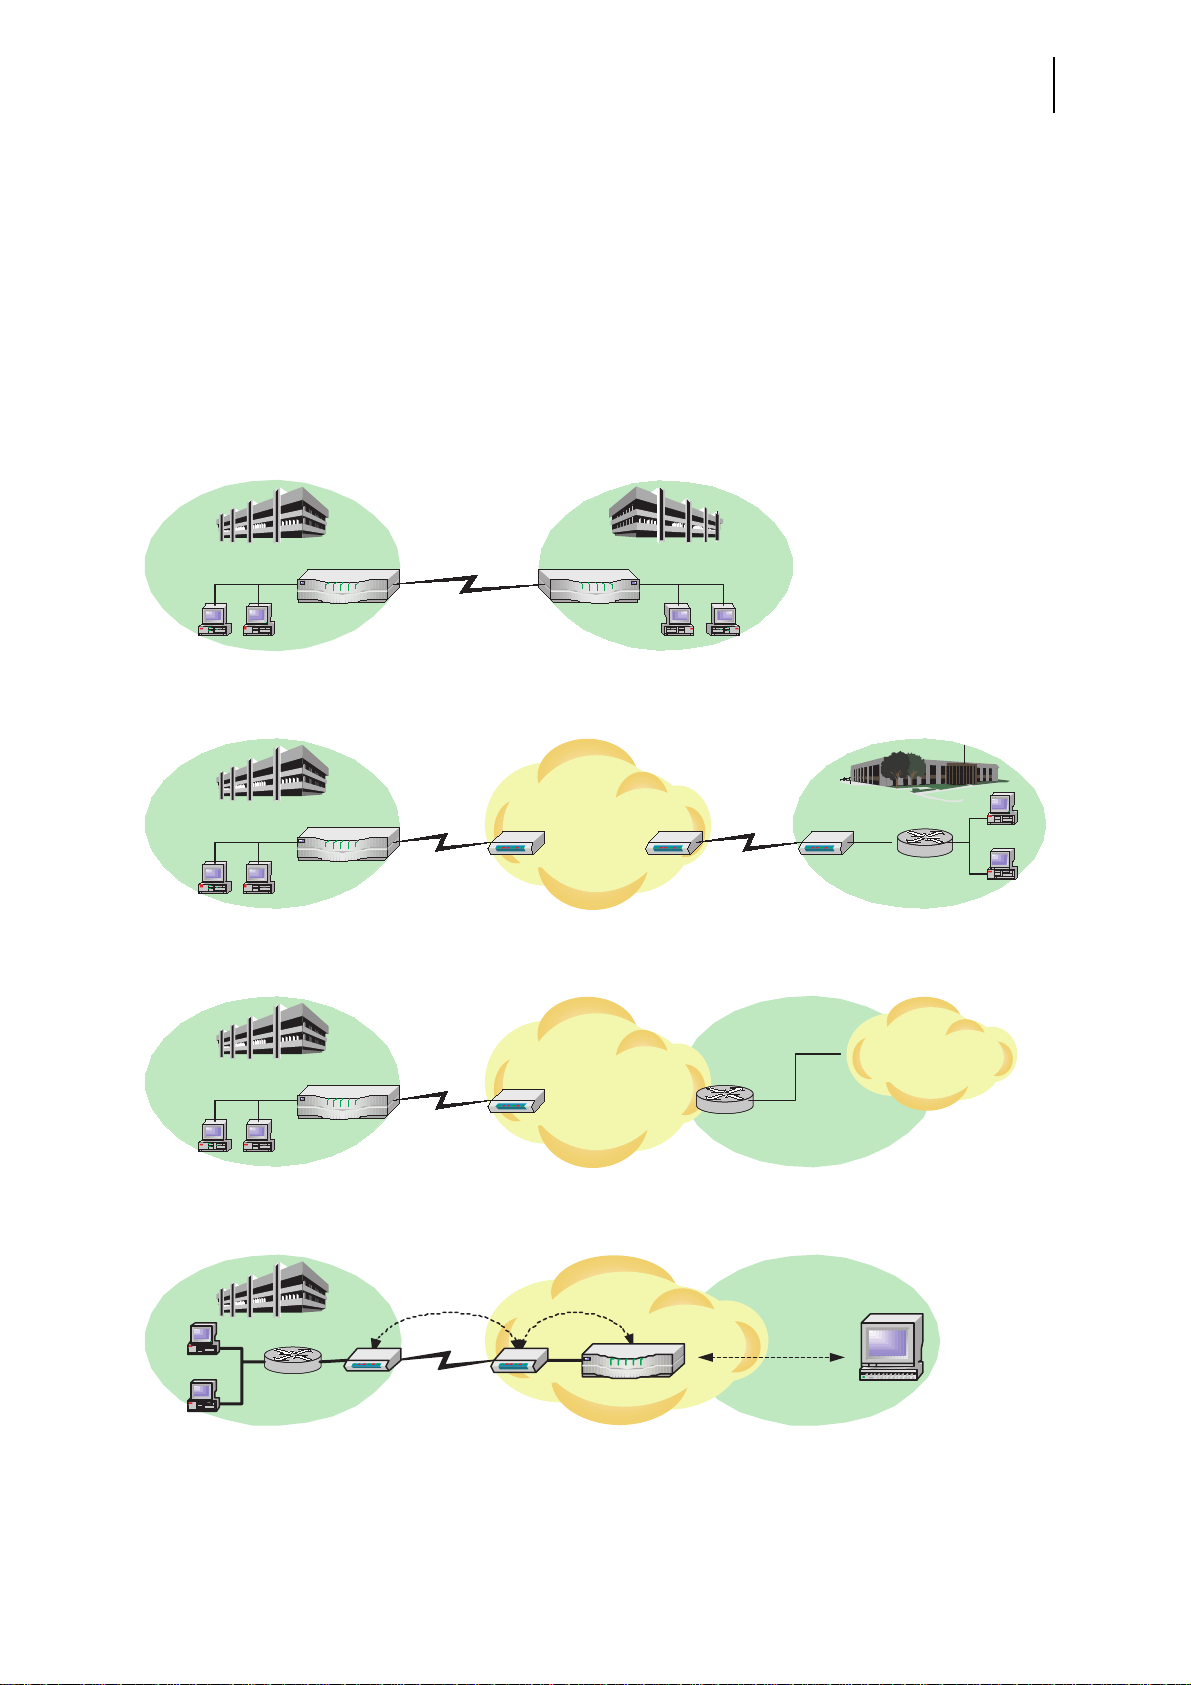
1.2 Telindus 1031 Router applications
Some examples of Telindus 1031 Router applications are:
• LAN to LAN connection over a line
• LAN extension over a network
• LAN to Internet connection
• LAN to network connection while managing the local access devices
Point-to-point LAN interconnection
LAN LAN
5
Router
(+ modem)
LAN extension over a network
LAN
Router
(+ modem)
LAN to Internet connection
site
LAN
Router
(+ modem)
FR / PDH / SDH ...
FR / PDH / SDH ...
modem
Router
(+ modem)
network
network
3rd-party
router
LAN
modemmodem modem
3rd-party
router
Internetyour
ISP
LAN to network with local management
management
LAN
router
Crocus
modem
Crocus
modem
data
1031, 1032,
1033 Router
network
management data
management station
(TCP/IP management,
HP OpenView, other...)

Telindus 1031 Router Chapter 1
6
User manual Introducing the Telindus 1031 Router
1.3 Telindus 1030 Router family overview
The Telindus 1030 Router family is a range of routers each with their own specific features. This section
gives an overview of all the members of the Telindus 1030 Router family. First this section shows you
how to distinguish the different members from one another. Then it lists the features that apply on the
complete Telindus 1030 Router family. Finally, this section highlights the specific features of each member of the Telindus 1030 Router family.
The following gives an overview of this section:
• 1.3.1 - How to distinguish the different members of the Telindus 1030 Router family? on page 7
• 1.3.2 - Common Telindus 1030 Router family features on page 7
• 1.3.3 - Telindus 1031 Router features on page 8
• 1.3.4 - Telindus 1032 Router features on page 8
• 1.3.5 - Telindus 1033 Router features on page 9

Telindus 1031 Router Chapter 1
User manual Introducing the Telindus 1031 Router
1.3.1 How to distinguish the different members of the Telindus 1030 Router
family?
Every router of the Telindus 1030 Router family has the same front panel. The only way to distinguish
them from one another is by looking at the back panel. These are displayed in the following sections.
1.3.2 Common Telindus 1030 Router family features
The major features that apply on all the members of the Telindus 1030 Router family are:
• high performance routing and bridging,
• encapsulation of LAN traffic for transmission over a WAN network,
• support of differentiated services based on VPNs,
• controllable by a wide set of management tools,
• a control connector (CTRL) to connect various management tools to the 1030 Router locally (e.g.
TMA, CLI, EasyConnect, etc.) or to connect Telindus devices that have to be managed by the 1030
Router (i.e. the 1030 Router as management concentrator),
• an auxiliary connector (AUX) to connect Telindus devices that have to be managed by the 1030
Router (i.e. the 1030 Router as management concentrator).
7
Telindus 1031 Router Chapter 1
8
User manual Introducing the Telindus 1031 Router
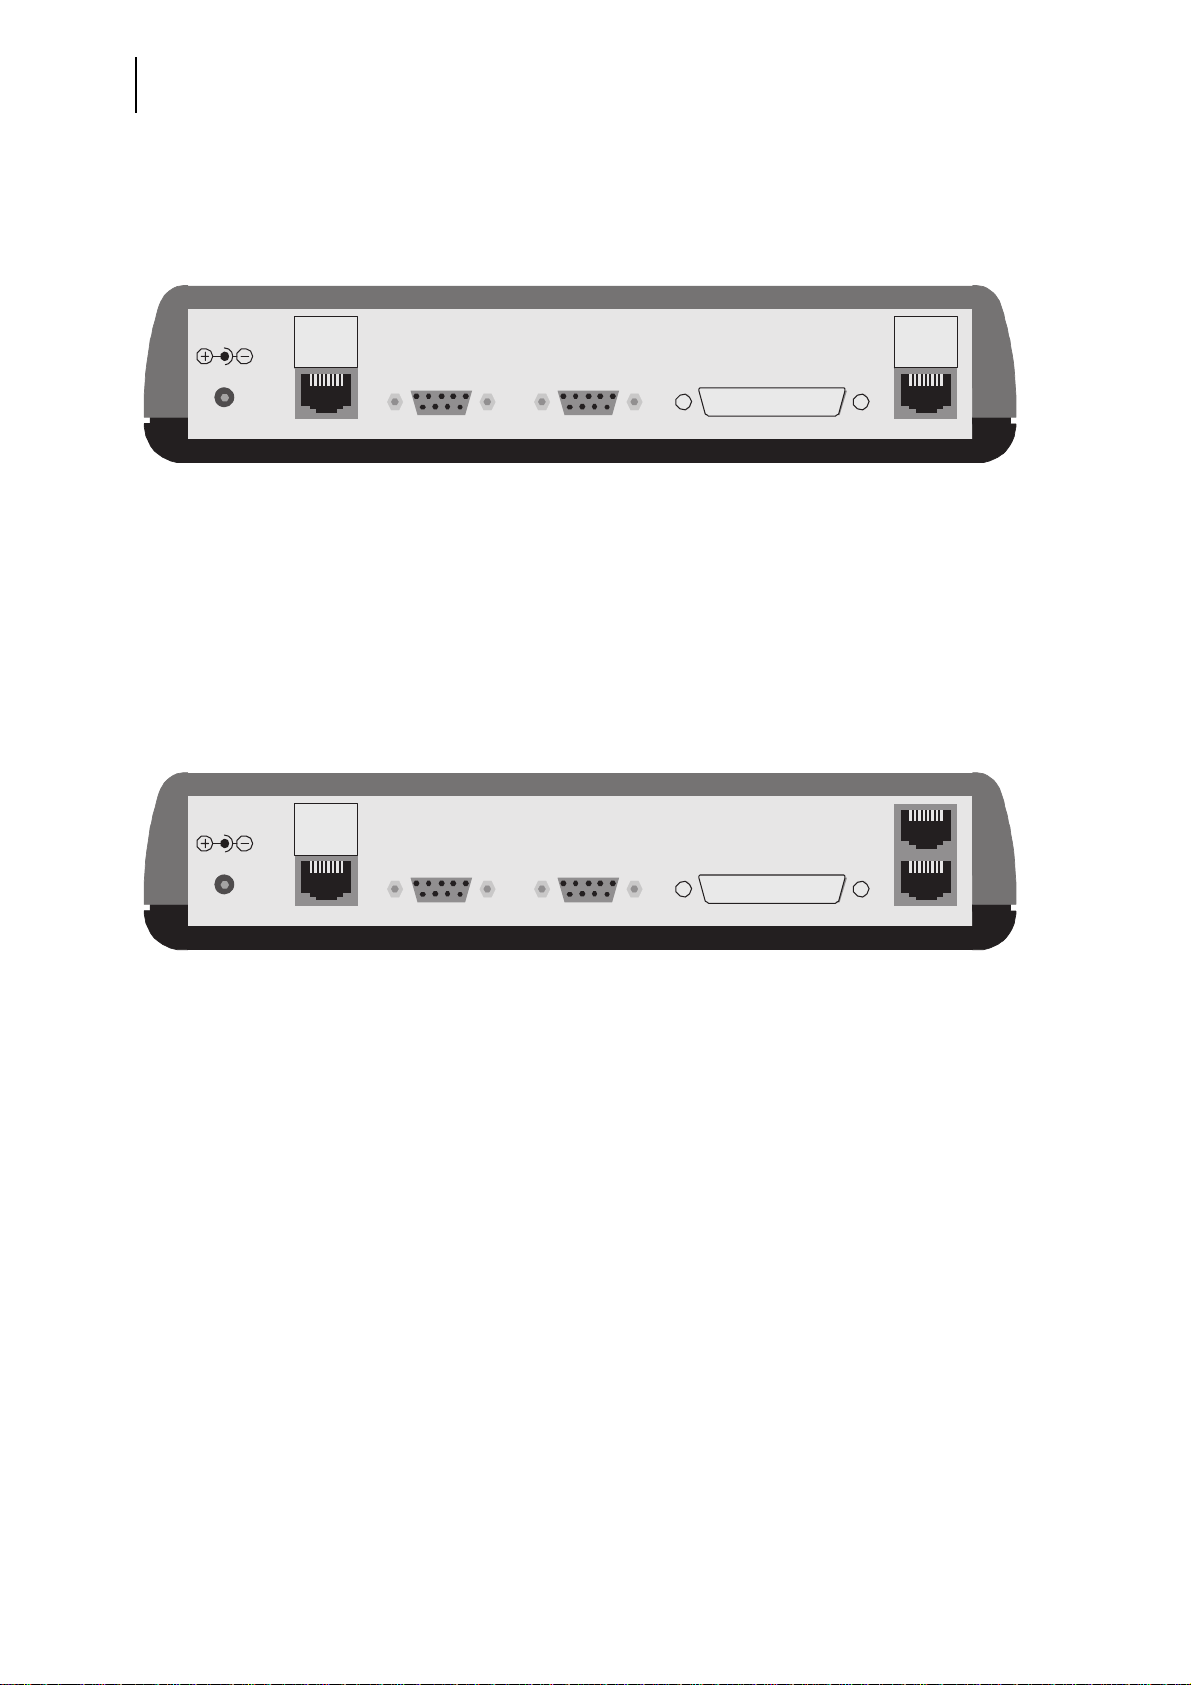
1.3.3 Telindus 1031 Router features
The following displays the back panel of the Telindus 1031 Router:
MAX 9VDC
HS
bus
LAN
CTRL (DCE) AUX (DTE) RS530 (DTE)
2
G703
1
The specific features of the Telindus 1031 Router are:
• one G703 interface. This interface can be used as channelised E1 interface, offering multiple logical
interfaces on one physical port.
• management concentrator capabilities. These are limited because only the CTRL and AUX connectors can be used to connect to other Telindus devices.
1.3.4 Telindus 1032 Router features
The following displays the back panel of the Telindus 1032 Router:
MAX 9VDC
HS
bus
LAN
CTRL (DCE) AUX (DTE) RS530 (DTE)
2
G703
1
The specific features of the Telindus 1032 Router are:
• two G703 interfaces. These interfaces can be used as channelised E1 interfaces, offering multiple
logical interfaces on one physical port.
• management concentrator capabilities. These are limited because only the CTRL and AUX connectors can be used to connect to other Telindus devices.

Telindus 1031 Router Chapter 1
User manual Introducing the Telindus 1031 Router
1.3.5 Telindus 1033 Router features
The following displays the back panel of the Telindus 1033 Router:
9
MAX 9VDC
HS
bus
LAN
CTRL (DCE) AUX (DTE) RS530 (DTE)
2
G703
1
The specific features of the Telindus 1033 Router are:
• one RS530 interface. This serial interface allows speeds up to 10 Mbps. The interface can also be
used as RS530A, V.35, V.36 or X.21 interface by setting the correct straps and using the correct conversion cables.
• management concentrator capabilities. These are limited because only the CTRL and AUX connectors can be used to connect to other Telindus devices.

Telindus 1031 Router Chapter 1
10
User manual Introducing the Telindus 1031 Router
1.4 Management tools
The Telindus 1031 Router is manageable in many different ways. This section gives a quick overview of
the various management tools.
Management
tool
TMA TMA (Telindus Management Application) is a free Windows software package that
TMA for HP
OpenView
TMA CLI TMA CLI (TMA Command Line Interface) enables you to use its commands in
ATWIN ATWIN is a menu-driven user interface. You can read and change all attributes as
Description and reference
enables you to manage the Telindus products completely. I.e. to access their configuration attributes and look at status, performance and alarm information.
Refer to 4 - Managing the Telindus 1031 Router on page 33 and the TMA
for more information.
TMA for HP OpenView is the management application that runs on the widely
spread network management platform HP OpenView. It offers the combination of
the easy to use graphical interface of the stand-alone version of TMA, together
with the advantages and features of HP OpenView.
Refer to the TMA for HP OpenView
scripts in order to automate management actions. This is particularly useful in
large networks. TMA CLI is a complementary product to TMA and TMA for HP
OpenView.
Refer to the TMA CLI
with TMA, but in a more basic, textual representation using a VT100 terminal.
manual for more information.
manual for more information.
manual
Refer to the Maintenance Tools
CLI CLI is also a Command Line Interface, although not so extensive as TMA CLI.
Experienced users who are familiar with the syntax can access the Telindus
devices more quickly than with TMA or ATWIN.
Refer to the Maintenance Tools
Web Interface The Web Interface is an ATWIN alike menu-driven user interface. You can read
and change all attributes as with TMA, but in a more basic representation using a
web browser.
Refer to the Maintenance Tools
EasyConnect
terminal
Connecting the Telindus EasyConnect hand-held terminal through the control connector to the Telindus 1031 Router, allows you to manage the Telindus 1031
Router in a basic way using the LCD display and keyboard. This is called keyboard
management.
Refer to the EasyConnect
manual for more information.
manual for more information.
manual for more information.
manual for more information.

Telindus 1031 Router Chapter 1
User manual Introducing the Telindus 1031 Router
11
Management
Description and reference
tool
SNMP You can manage the Telindus 1031 Router through SNMP using any SNMP
browser. The Telindus 1031 Router supports MIB2 and a private MIB, including
traps.
The private MIB comes with your copy of TMA. After installation of the TMA data
files, the private MIB file is available in directory C:\Program Files\TMA\snmp
the name
<filename>.mib
2
.
Refer to 10.7 - SNMP configuration attributes on page 238 and the documentation
of your SNMP browser for more information.
1. The first part of the directory path may be different if you did not choose the default path during
the installation of the TMA data files.
2. The filename is product dependent. To determine which MIB file corresponds with which prod-
uct, refer to the models.nms file (located in C:\Program Files\TMA\model
1
).
1
with

Telindus 1031 Router Chapter 1
12
User manual Introducing the Telindus 1031 Router
1.5 Management tools connection possibilities
The following table gives an overview of all the management tools and how you can connect them with
the Telindus 1031 Router:
Management
tool
EasyConnect X
CLI X
ATWIN X
PC - Telindus 1031 Router connection
Serial
2
4
4
IP
3
5
X
5
X
PC - management concentrator connection
Serial
1
2
IP
3
X
4
X
4
X
5
X
5
X
TMA XXXX
TMA CLI XXXX
TMA for HPOV
6
SNMP
Web Interface
7
X X
X X
X X
1. Examples of management concentrators are the Orchid 1003 LAN and the Telindus 1030
Router series. Refer to their corresponding manuals for more information on how to set these
devices up as management proxy.
2. A serial connection is a connection between the COM port of your PC and the control connec-
tor of the Telindus 1031 Router using a male-female DB9 cable.
3. An IP connection is a connection between your PC and the Telindus 1031 Router over an IP
network.
4. Using a VT100 terminal (emulation program).
5. Using Telnet.
6. Using an SNMP browser.
7. Using a web browser.

Telindus 1031 Router Chapter 2
User manual Installing and connecting the Telindus 1031 Router
2 Installing and connecting the Telindus 1031 Router
First this chapter gives some important safety instructions. Then it explains how to install and connect
the Telindus 1031 Router.
You are advised to read this chapter from the beginning to the end, without skipping any part. By doing
so, your Telindus 1031 Router will be completely installed and ready for configuration when you reach
the end of this chapter.
The following gives an overview of this chapter:
• 2.1 - Safety instructions on page 14
• 2.2 - Unpacking on page 15
• 2.3 - Selecting a site on page 16
• 2.4 - Installation and connection precautions on page 17
• 2.5 - Connecting the Telindus 1031 Router on page 18
• 2.6 - The front panel LED indicators on page 24
13

Telindus 1031 Router Chapter 2
14
User manual Installing and connecting the Telindus 1031 Router
2.1 Safety instructions
IMPORTANT SAFETY INSTRUCTIONS
Disconnect the power supply before installing, adjusting or servicing the unit.
ACHTUNG! WICHTIGE SICHERHEITSINSTRUKTIONEN
Vor sämtlichen Arbeiten am Gerät (Installation, Einstellungen, Reparaturen etc.) sollten Sie den
Netzstecker aus der Steckdose ziehen.
SAFETY WARNING
To avoid damage to the unit, please observe all procedures described in this chapter.
SICHERHEITSBESTIMMUNGEN
Um eine Beschädigung des Gerätes zu verhindern, beachten Sie bitte unbedingt die Sicherheitsbestimmungen, die in diesem Abschnitt beschrieben werden.
Ensure that the unit and its connected equipment all use the same AC power and ground, to reduce
noise interference and possible safety hazards caused by differences in ground or earth potentials.

Telindus 1031 Router Chapter 2
User manual Installing and connecting the Telindus 1031 Router
2.2 Unpacking
Checking the shipping carton
Rough handling during shipping causes most early failures. Before installation, check the shipping carton for signs of damage:
• If the carton box is damaged, please place a claim with the carrier company immediately.
• If the carton box is undamaged, do not dispose of it in case you need to store the unit or ship it in the
future.
Package contents
The box should contain the following items:
• Telindus 1031 Router
• TMA CD-ROM (including this User and Reference manual in PDF format)
Optionally (depending which sales item you ordered):
15
• external power supply with power cord (2 meter)

Telindus 1031 Router Chapter 2
16
User manual Installing and connecting the Telindus 1031 Router
2.3 Selecting a site
WARNING
Always place the unit on its feet without blocking the air vents.
Do not stack multiple units directly onto each other, as stacking can cause heat build-up that could damage the equipment.
ACHTUNG
Stellen Sie das Gerät niemals seitlich, sondern nur auf den Füßen auf und achten Sie darauf, daß die
Lüftungsschlitze an der Seitenverkleidung frei bleiben.
Stapeln Sie nicht mehrere Geräte direkt übereinander, dies kann zu einem Hitzestau führen.
Install the unit in an area free of extreme temperatures, humidity, shock and vibration. Position it so that
you can easily see and access the front panel and its control indicators. Leave enough clearance at the
back for cables and wires. Position the unit within the correct distances for the different accesses and
within 2m of a power outlet.

Telindus 1031 Router Chapter 2
User manual Installing and connecting the Telindus 1031 Router
2.4 Installation and connection precautions
ESD WARNING
The circuit boards are sensitive to electrostatic discharges (ESD) and should be handled with care. It is
advisable to ensure an optimal electrical contact between yourself, the working area and a safety ground
before touching any circuit board. Take special care not to touch any component or connector on the
circuit board.
EMC WARNING
EMC compliant installation
The Telindus access products are fully EMC compliant. To ensure compliance with EMC directive 89/
336/EEC, shielded cables or ferrite beads have to be used.
17
NOTE
This unit may be powered by an IT power system.
ANMERKUNG
Das Gerät kann gespeist wurden durch ein IT power System.

Telindus 1031 Router Chapter 2
18
User manual Installing and connecting the Telindus 1031 Router
2.5 Connecting the Telindus 1031 Router
This section explains how to connect the Telindus 1031 Router. The following gives an overview of this
section:
• 2.5.1 - Rear view of the Telindus 1031 Router on page 19
• 2.5.2 - Connecting the different parts of the Telindus 1031 Router on page 20
• 2.5.3 - Connecting the Telindus 1031 Router - an example on page 22

Telindus 1031 Router Chapter 2
User manual Installing and connecting the Telindus 1031 Router
2.5.1 Rear view of the Telindus 1031 Router
The following is a rear view of the Telindus 1031 Router:
19
HS
bus
LAN
MAX 9VDC
CTRL (DCE) AUX (DTE) RS530 (DTE)
1 2 3 4 5
2
G703
1

Telindus 1031 Router Chapter 2
20
User manual Installing and connecting the Telindus 1031 Router
2.5.2 Connecting the different parts of the Telindus 1031 Router
The following table gives an overview of the parts located at the back of the Telindus 1031 Router and
reveals their function:
Part Label Function
1 9 VDC This is the power input. Insert the plug of the external power supply in this
socket.
2 LAN This RJ45 Twisted Pair Interface (TPI) is the connection towards the IP LAN.
Connect one side of an RJ45 to RJ45 cable (not included) to the LAN connector
of the Telindus 1031 Router and the other side to a network outlet. If you want
to connect the Telindus 1031 Router to …
• a regular Ethernet network outlet, then use a crossed RJ45 cable.
• an Ethernet hub, then use a straight RJ45 cable.
3CTRL
(DCE)
4AUX
(DTE)
Refer to 17.2 - LAN interface specifications on page 363 for the specifications
of this connector.
This female 9-pins subD connector is the control connector.
You can connect this connector to a COM port of your PC with a straight malefemale DB9 cable
1
. This enables you to manage the Telindus 1031 Router
locally, using TMA, CLI, ATWIN etc.
You can also connect this connector to the control connector of another Telindus device with a crossed male-male DB9 cable. This enables you to manage
this device with the Telindus 1031 Router (i.e. the Telindus 1031 Router as
management concentrator).
Refer to …
• Refer to the Telindus 1030 Router Orchid function
manual for more informa-
tion on managing Telindus devices.
• 17.3 - Control connector specifications on page 364 for the specifications of
this connector.
This female 9-pins subD connector is the auxiliary connector.
You can connect this connector to the control connector of another Telindus
1
device with a straight male-male DB9 cable
. This allows you to manage this
device with the Telindus 1031 Router (i.e. the Telindus 1031 Router as management concentrator). Refer to …
• Refer to the Telindus 1030 Router Orchid function
manual for more informa-
tion on managing Telindus devices.
• 17.4 - Auxiliary connector specifications on page 365 for the specifications
of this connector.
5 G703 This RJ45 connector is the serial G703 interface towards the WAN.
Refer to 17.1 - G703 interface specifications on page 362 for the specifications
of this connector.
 Loading...