

Page 1
FOCUSMATE DRIVER INSTRUCTIONS
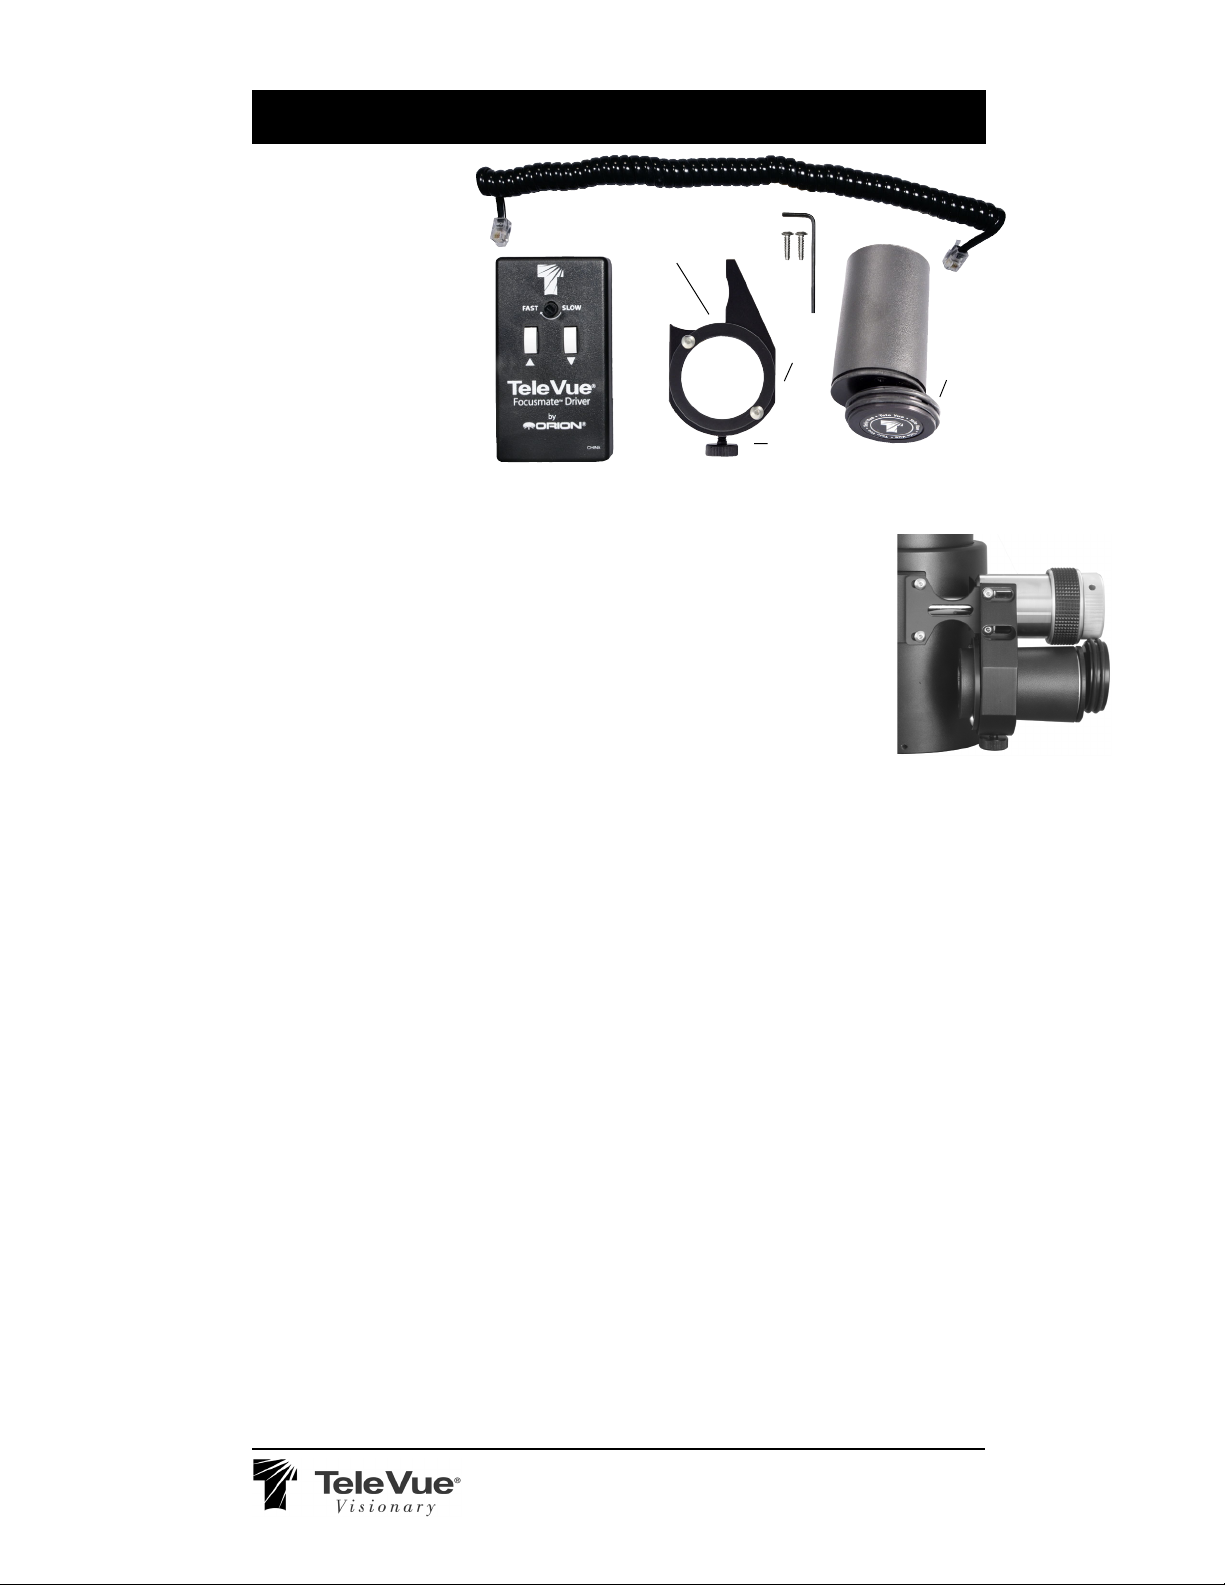
Parts List:
for Focusmate Driver
FDU-2003
- Hand Controller
- cable
- Universal Motor Bracket
- Motor
- 9V Battery (not shown)
- (2) Allen key screws
- 5/64 Allen Key
Installation
These instructions assume
that the Tele Vue Focusmate
has already been installed
as it is required for the use of
the Focusmate Driver.
The Focusmate Driver
comes set up for right side
installation. If your Focusmate is on the left side of
your telescope you will need
to remove the button head
screws holding the Motor
Holder Ring to the Motor
Bracket and switch it to the
opposite side of the Motor
Bracket.
Step 1)Step 1)
Step 1) Remove the two
Step 1)Step 1)
screws holding the Focusmate bracket to the
Focusmate's barrel.
Step 2)Step 2)
Step 2) Position the Motor
Step 2)Step 2)
Bracket so it is forward (toward the front of the telescope) of the Focusmate on
all scopes except the Tele
Vue-60is. For the Tele Vue60is, the Motor Bracket must
go on the right side of the
scope with the Motor to the
rear of the scope. (NOTE:
The Motor Holder Ring
needs to be moved to the
opposite side of the Motor
Bracket.)
Step 3)Step 3)
Step 3) The two slotted holes
Step 3)Step 3)
in the Motor Bracket should
be in line with the holes in
the Focusmate bracket.
Using the supplied screws
and Allen key, lock the Motor Bracket in place.
Step 4)Step 4)
Step 4) Slip the Motor into
Step 4)Step 4)
the Motor Bracket so it is
Cable
Motor Holder
Ring
Hand Controller
snug but still can rotate. The
Drive Wheel should now be
in line with the fine focus
knob of the Focusmate. Rotate the Motor until the Orings make contact with fine
focus knob.
Step 4a)Step 4a)
Step 4a) If necessary, it is
Step 4a)Step 4a)
possible to adjust the motor
position in or out slightly in
order to obtain better alignment of the O-rings to the
Focusmate. To make an
adjustment, loosen the two
screws that hold the Motor
Bracket onto the Focusmate
Barrel. The holes are slotted
to allow a push or pull of the
bracket in or out to center
the O-ring contact on the
fine focus knob. Retighten
the Motor Bracket attachment screws.
Step 4b)Step 4b)
Step 4b) Tighten the Motor
Step 4b)Step 4b)
Lock Knob.
Step 5)Step 5)
Step 5) Remove the back
Step 5)Step 5)
cover of the Hand Controller and connect the 9V battery to the terminal. Note:
the battery cover installs
easier if the battery is placed
in the Hand Controller with
the connector wires facing
toward you (near cover).
Step 6)Step 6)
Step 6) Plug one end of the
Step 6)Step 6)
cord into the back of the
Motor and the other end
into the receptacle located
in the top of the Hand Controller.
Motor
Motor
Bracket
Motor Lock Knob
Drive
Wheel
Operation
It is easiest to
start your observing or
photography
session with
the motor disengaged.
Loosen the
Lock Knob on
the Motor
Bracket and
rotate the
Motor housing so the Orings disengage from the
fine focus
wheel on the
Installed Focusmate Driver shown
from below to illustrate finished
assembly (front of the scope is
facing down). Notice the contact
between the Drive Wheel and the
fine focus knob on the Focusmate.
Also, the Drive Wheel is off-center
of the motor so that when the motor
is rotated, the Drive Wheel disengages from the Focusmate.
Focusmate.
Achieve a
rough focus manually and
then engage the Focusmate
Driver, remembering to
tighten the Motor Lock Knob.
To drive the focuser
simply push either of the
arrow buttons for the desired direction of travel.
The speed of the driver
is varied by turning the knob.
At the slowest setting a quick
click of the driver will move
the focus about half-a-thousandth of an inch!
32 Elkay Drive, Chester, New York 10918 845.469.4551 www.televue.com
 Loading...