

Page 1
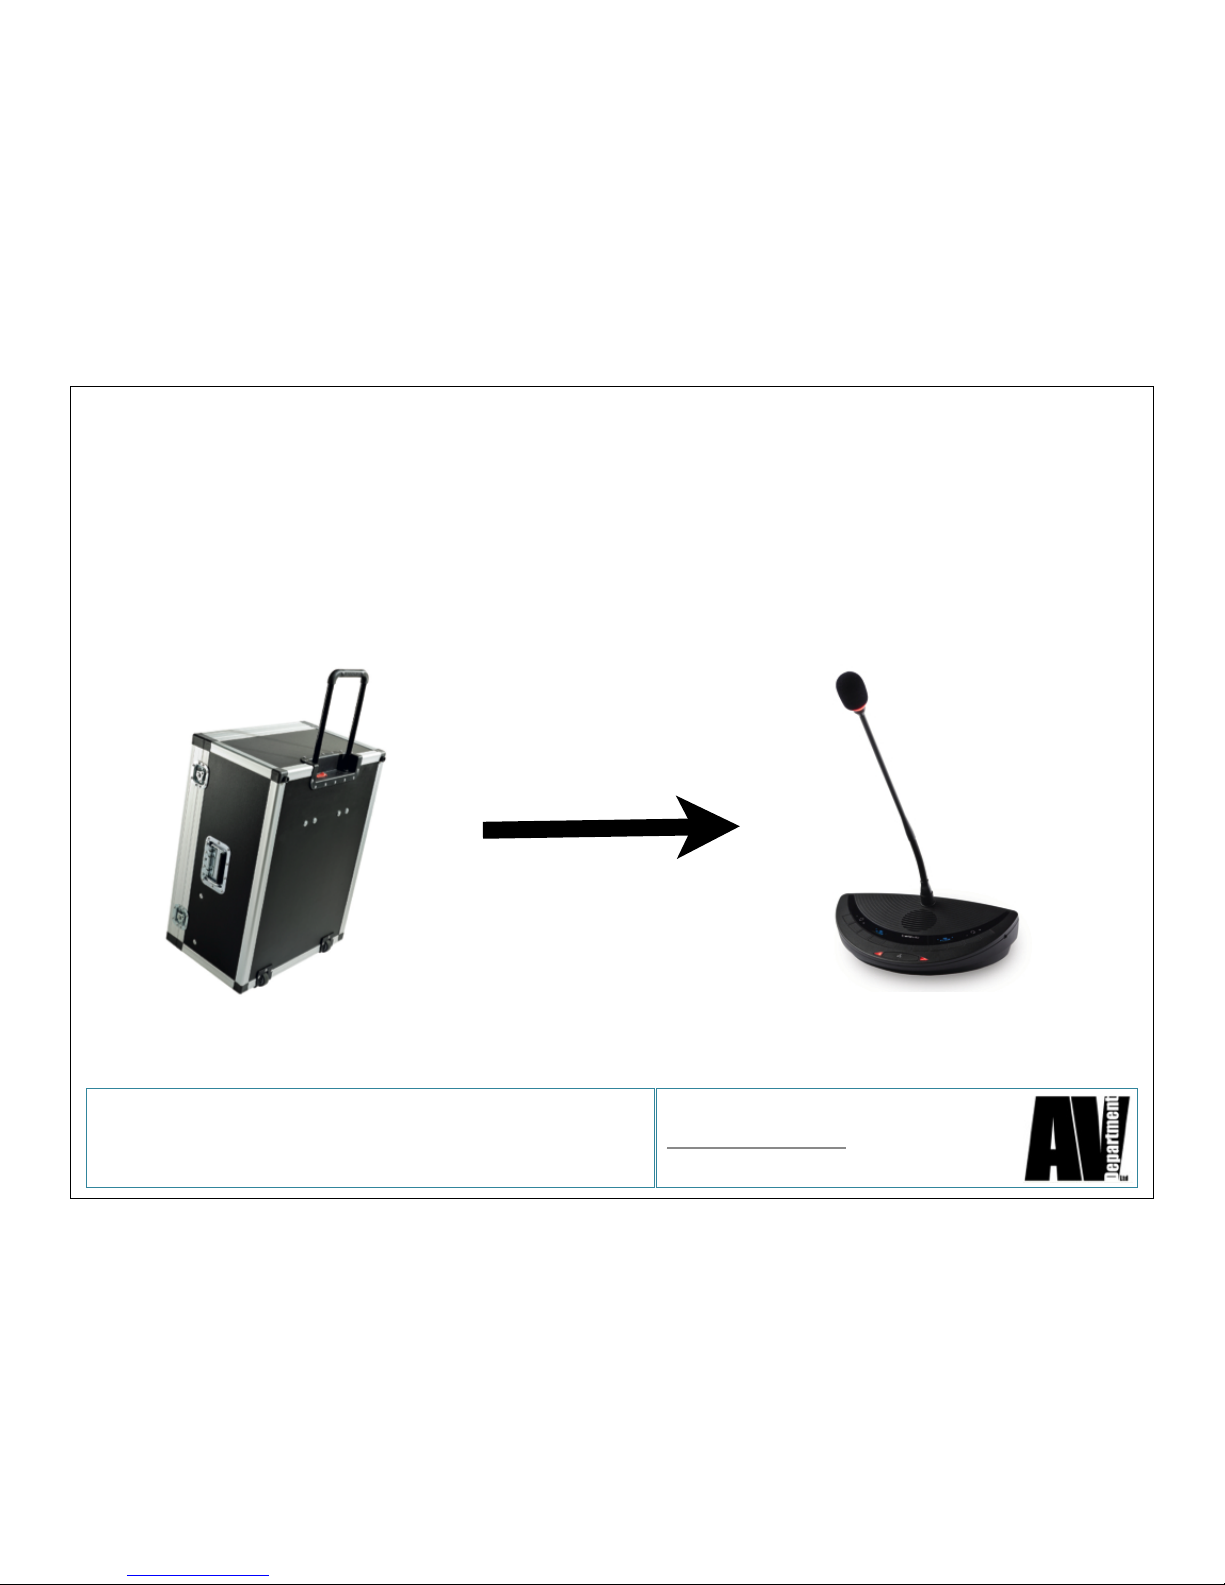
AV Department Limited
www.avdept.co.uk
01383 825709
Title: Guide to Confidea Wireless Microphones
Quick Guide
Page 2
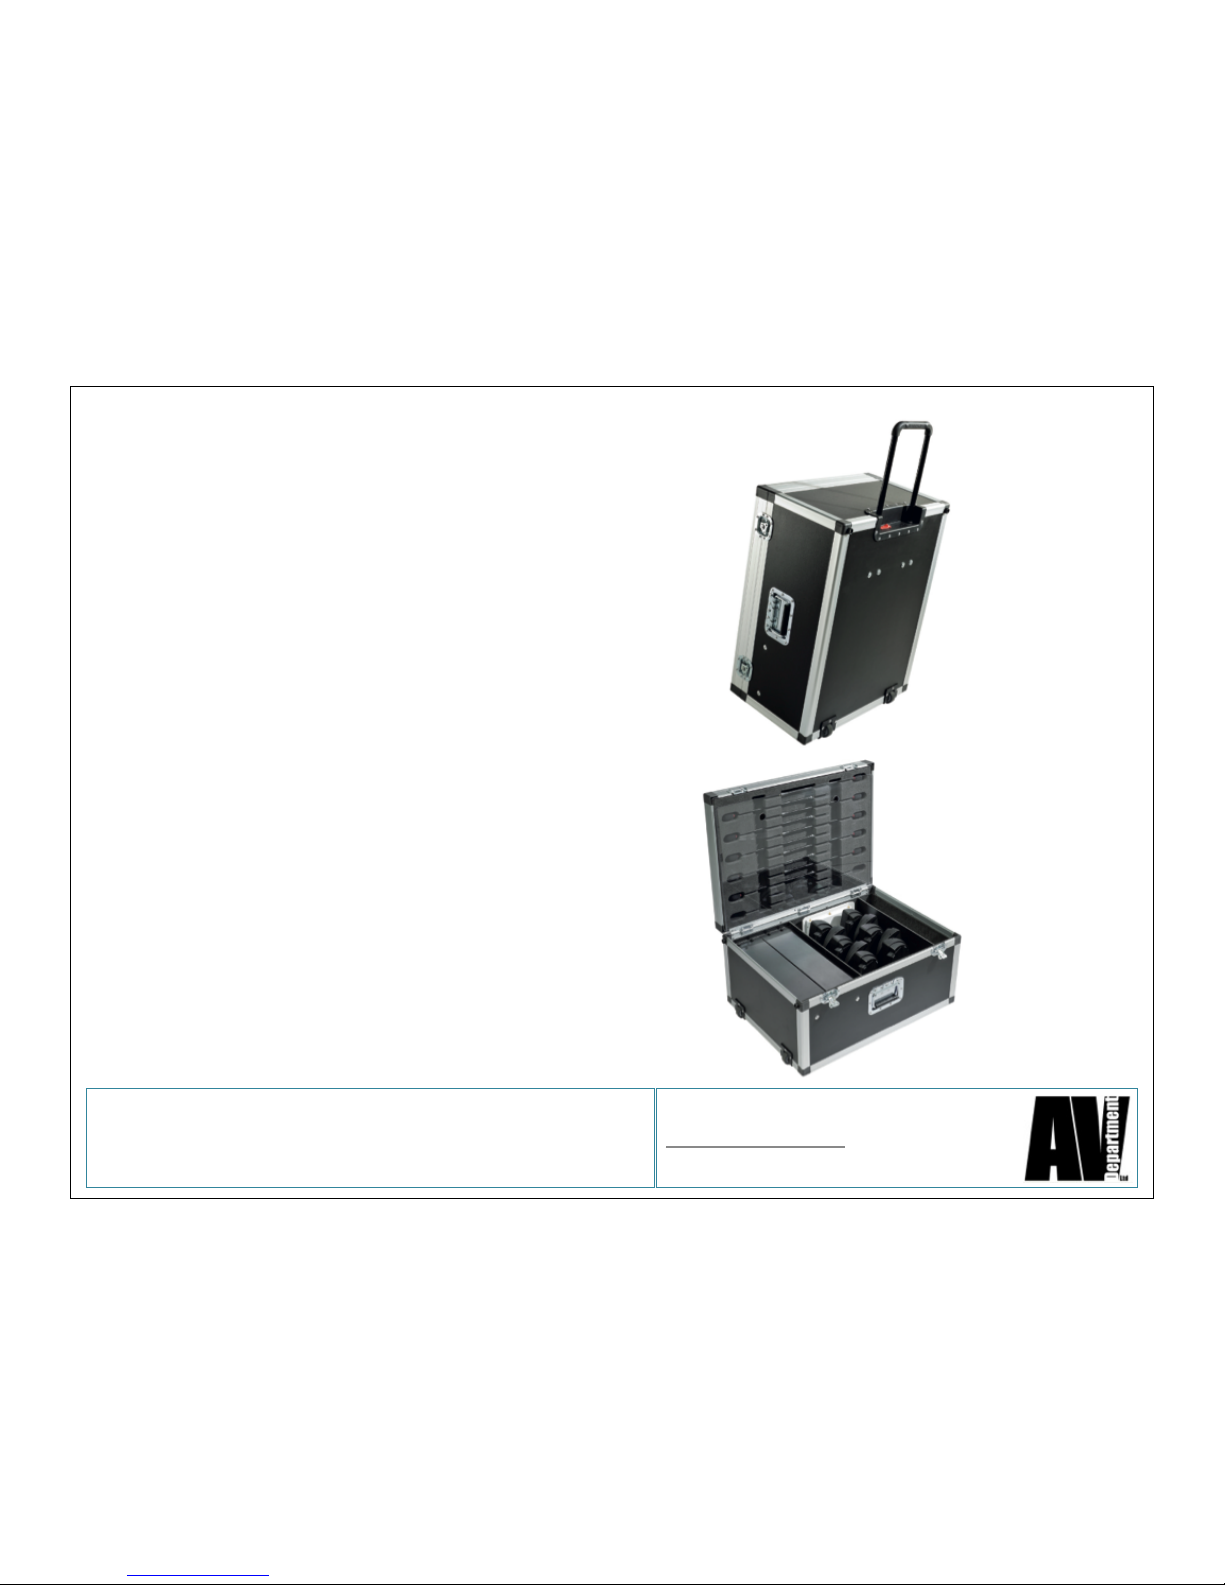
System case contents
1 x Access Point + PSU
11 x Delegate Microphone Bases
1 x Chair Microphone Base
12 x Batteries
12 x Microphone stems
2 x Battery Chargers
1 x Netbook PC + PSU + Cat 5 cable
Charge the batteries when you receive system!
Do not transport system with batteries in charger!
AV Department Limited
www.avdept.co.uk
01383 825709
Title: Guide to Confidea Wireless Microphones
Page 3
Stage 0
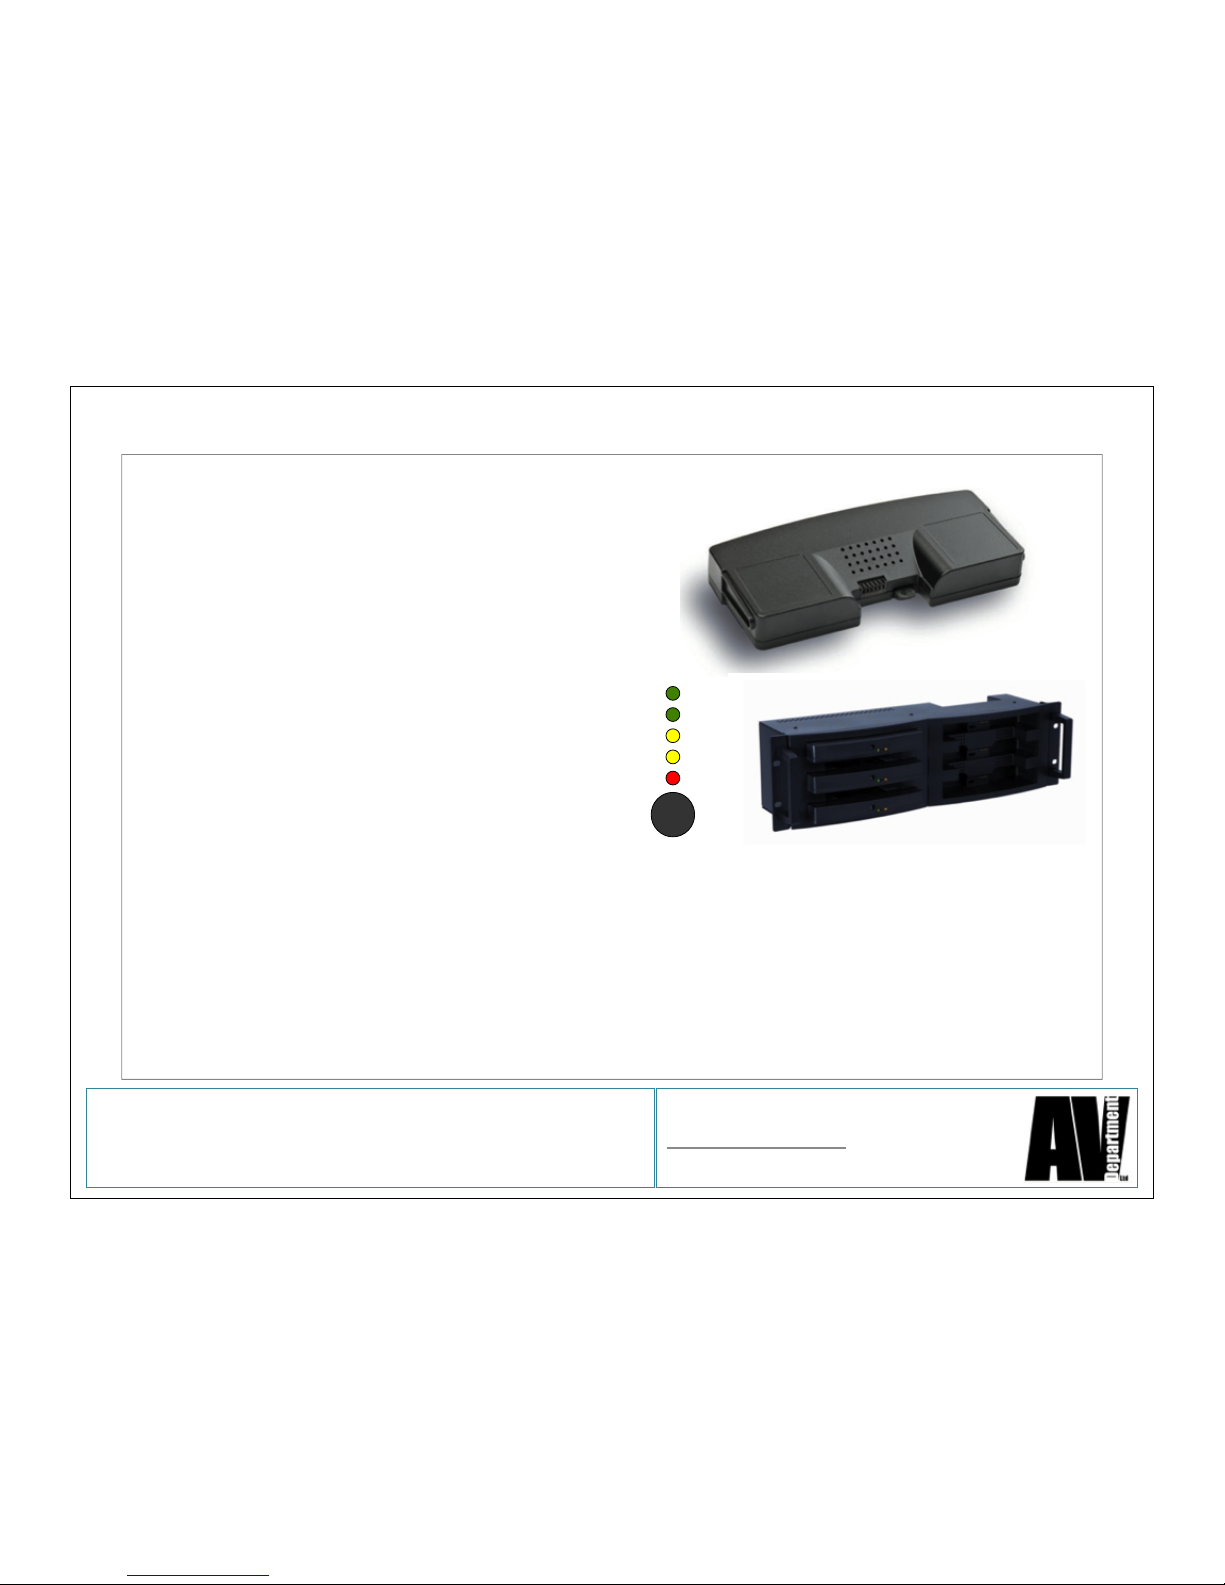
A word about battery management...
Lithium Ion battery (Like a laptop)
Charge before use. Check battery capacity with
status test button on the battery pack itself.
5 LEDs indicates a full charge 16 - 20 hours
4 LEDs indicates 12 - 16 hours
3 LEDs indicates 8 - 12 hours
2 LEDs indicates 4 - 8 hours
1 LEDs indicates less than 4 hours
LED 3 flashing after battery test shows the charging circuitry is OK.
Do not charge with the lids on the chargers as there is a heat build up.
Do not charge after use if going back into storage as it is best to leave batteries at
about 50% charge if stored for a prolonged period.
AV Department Limited
www.avdept.co.uk
01383 825709
Title: Guide to Confidea Wireless Microphones
Page 4
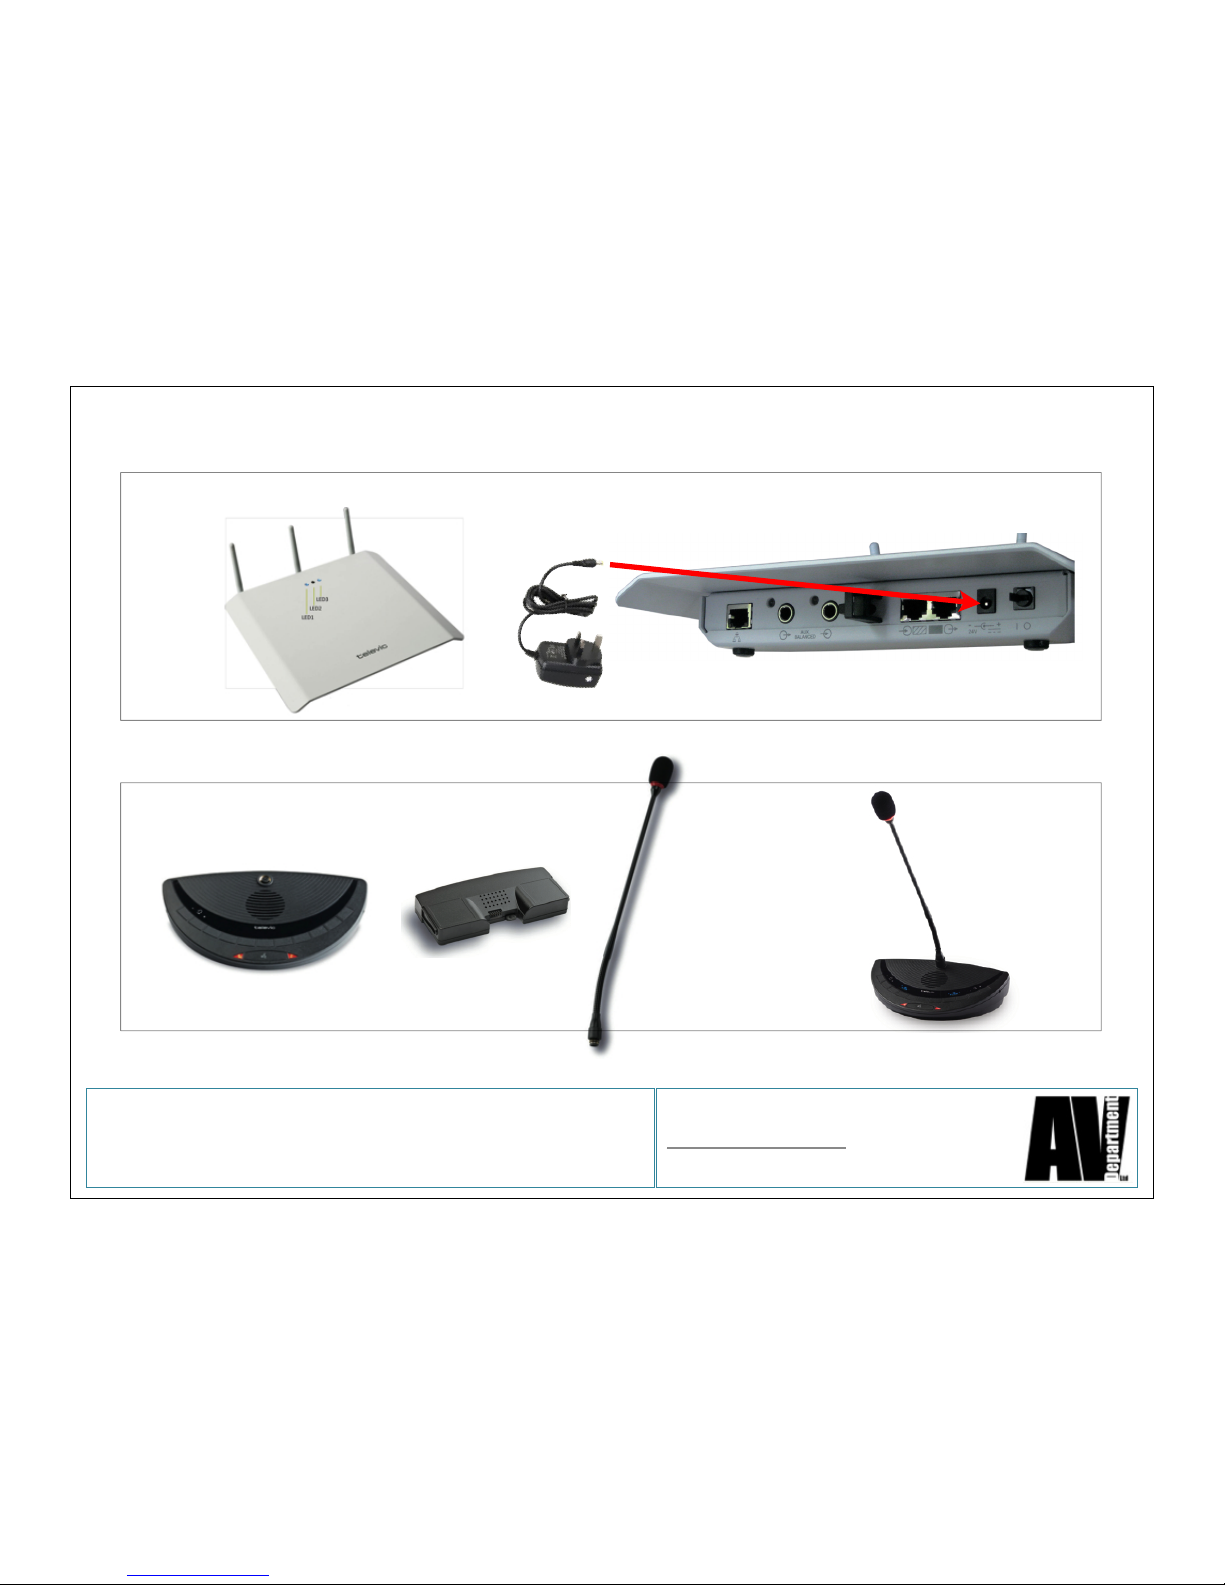
Power the Access Point Plug in PSU and switch on
Stage 1
Stage 2
Put together the microphone bases
+ + =
AV Department Limited
www.avdept.co.uk
01383 825709
Title: Guide to Confidea Wireless Microphones
Page 5
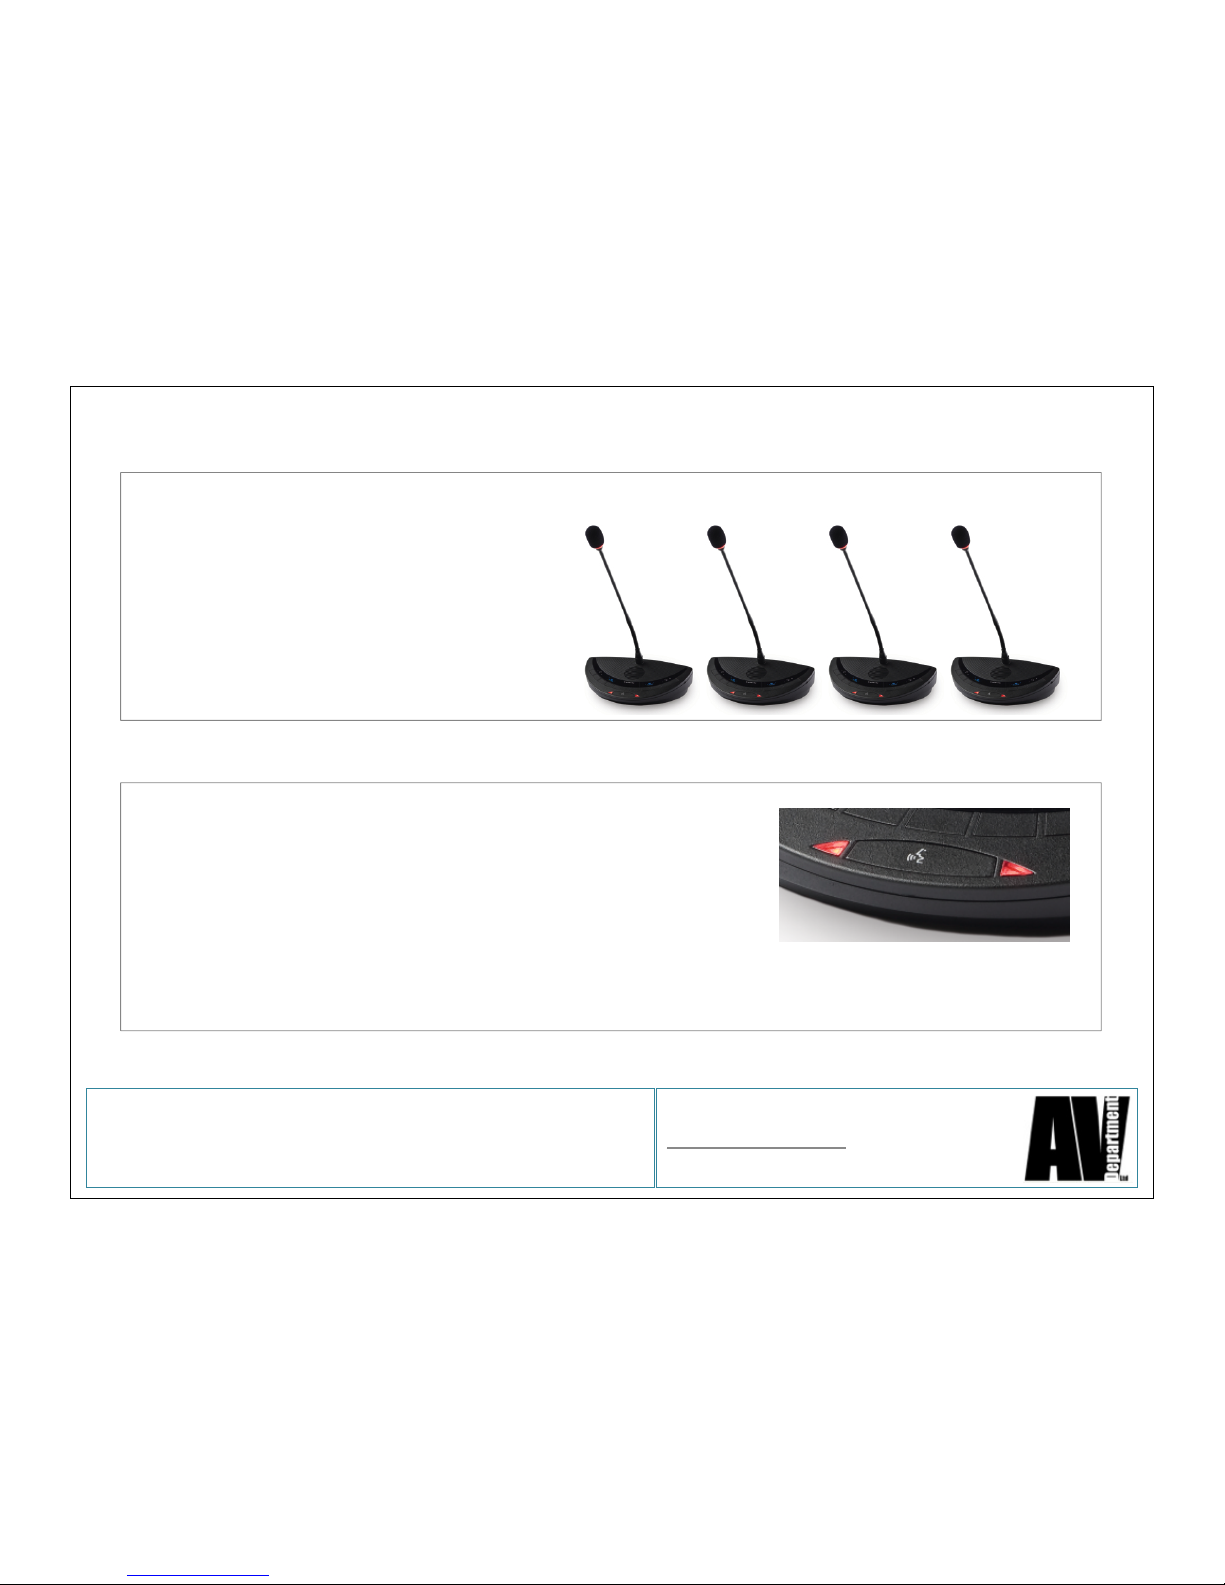
Place microphones on table
Stage 3
Stage 4
Press the microphone button on each unit in sequence.
The lights will flash green and red as the microphone
is registered onto the system via the access point.
AV Department Limited
www.avdept.co.uk
01383 825709
Title: Guide to Confidea Wireless Microphones
Page 6
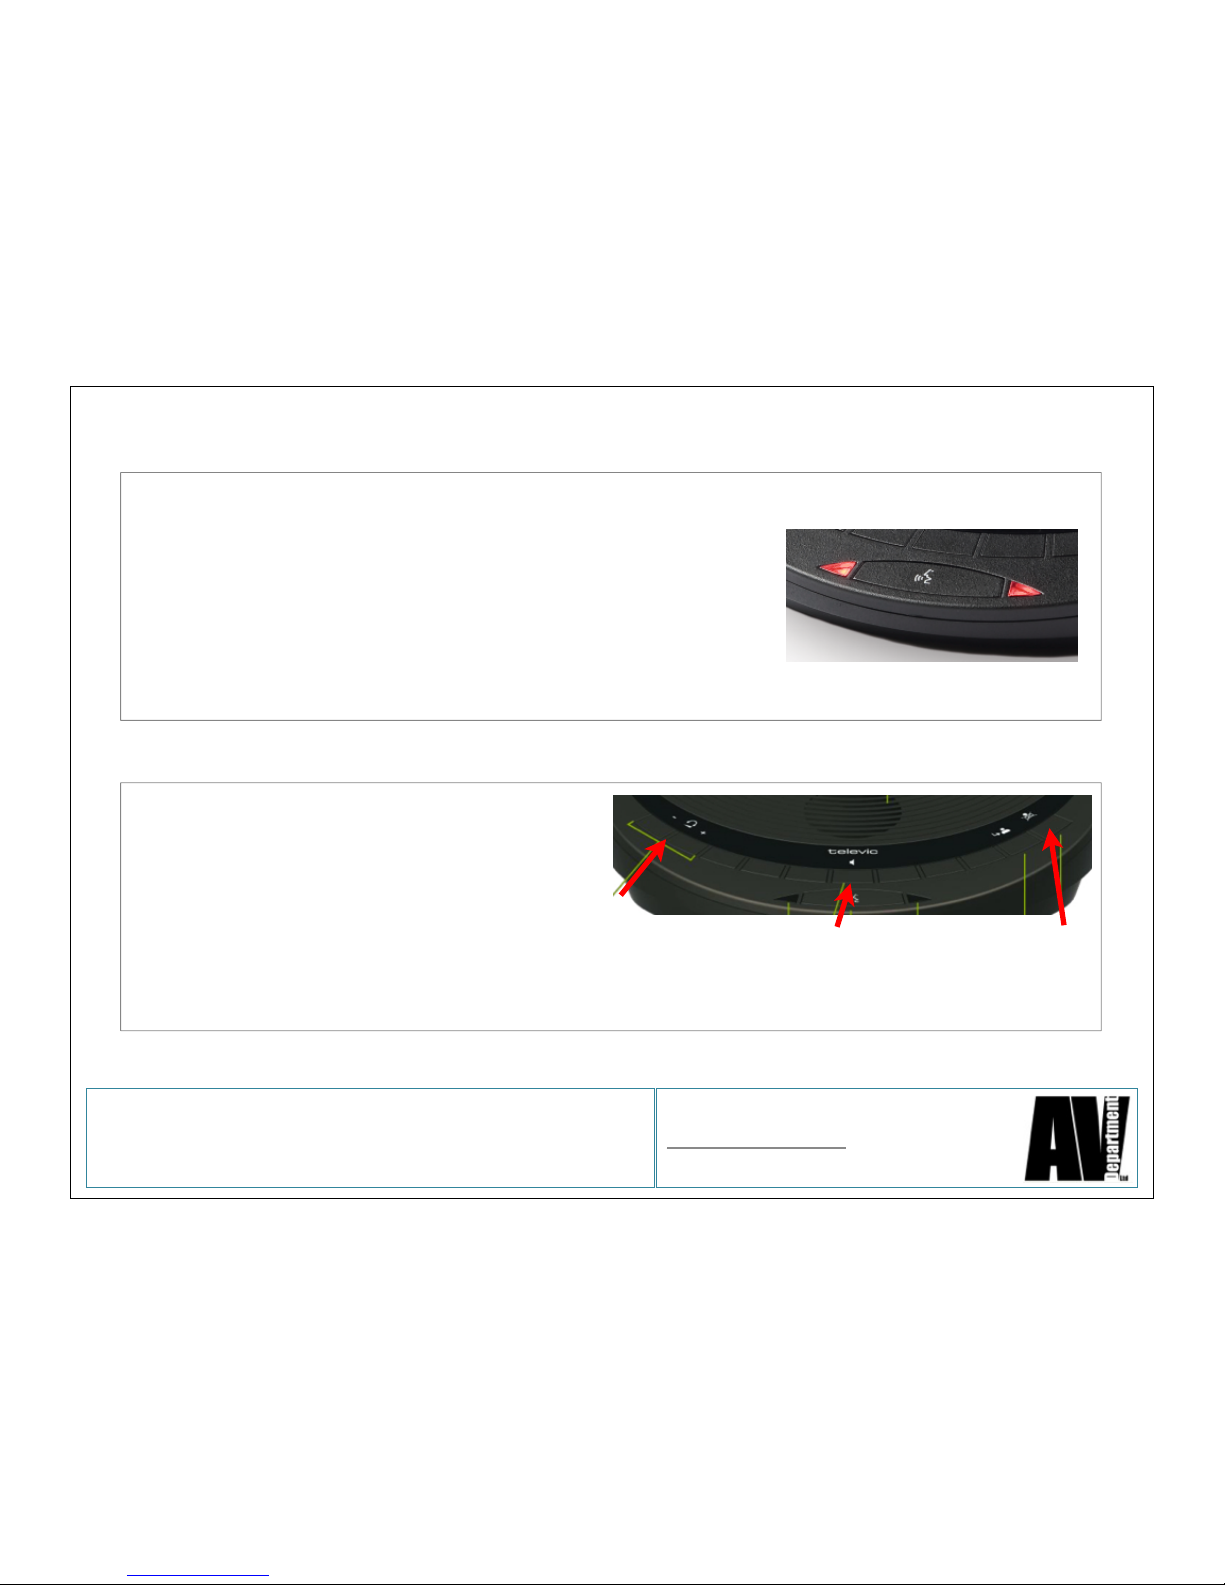
To use the system press, and release, the microphone
button. The lights will come on red and you will have
access to speak.
N.B. Do not press and hold as this will switch the
microphone off completely and will need to re-register
to be used again.
Stage 5
Stage 6
The Chair’s microphone can cut off all
microphones by pressing ‘A’
The Chair can adjust system speaker
volume by pressing ‘B’ and using the ‘headset’
volume to adjust up and down ‘C’. This adjusts only the speakers in the microphone
bases and not any connected PA speaker volume.
AB
C
AV Department Limited
www.avdept.co.uk
01383 825709
Title: Guide to Confidea Wireless Microphones
Page 7
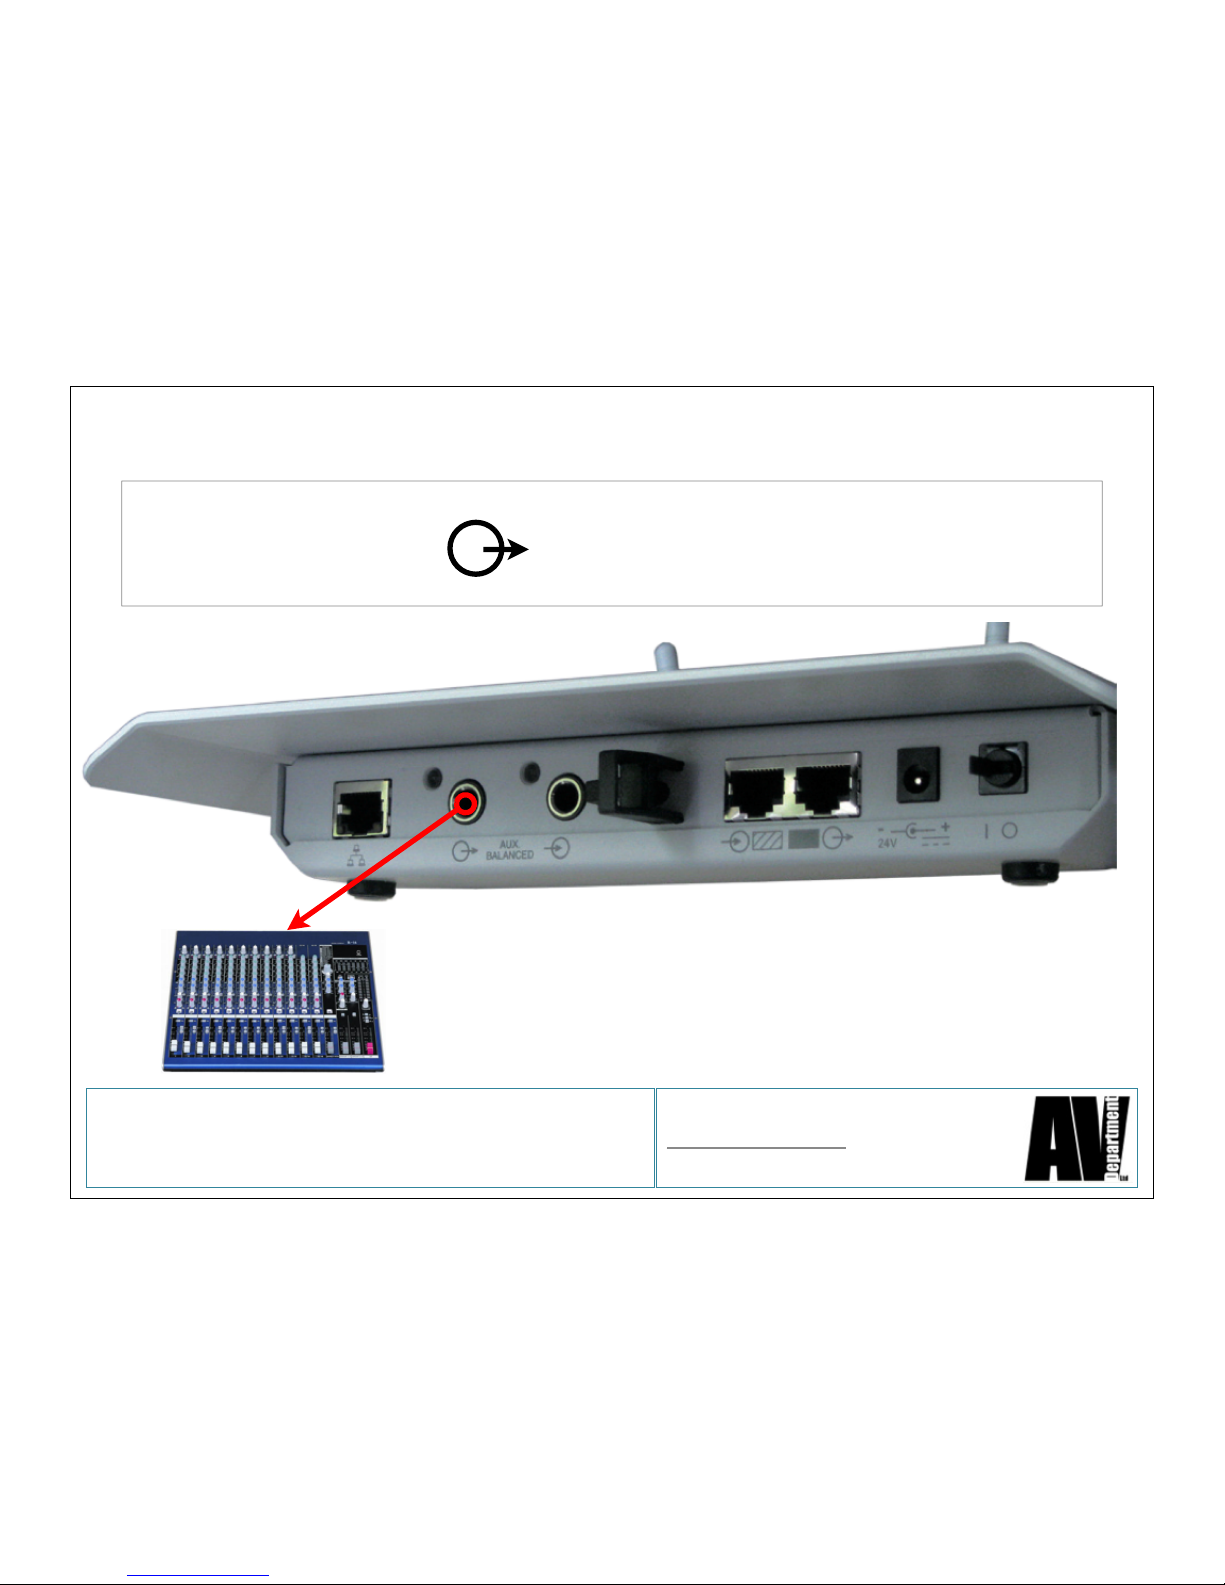
Stage 7
Connect the Access Point to an external PA using the TRS Jack socket
marked ‘AUX BALANCED’
The out put is a standard balanced line level analogue
audio signal and can connect to a PA system, a
Recording devise, a Video / Telephone conference codec,
or any other audio device.
AV Department Limited
www.avdept.co.uk
01383 825709
Title: Guide to Confidea Wireless Microphones
Page 8
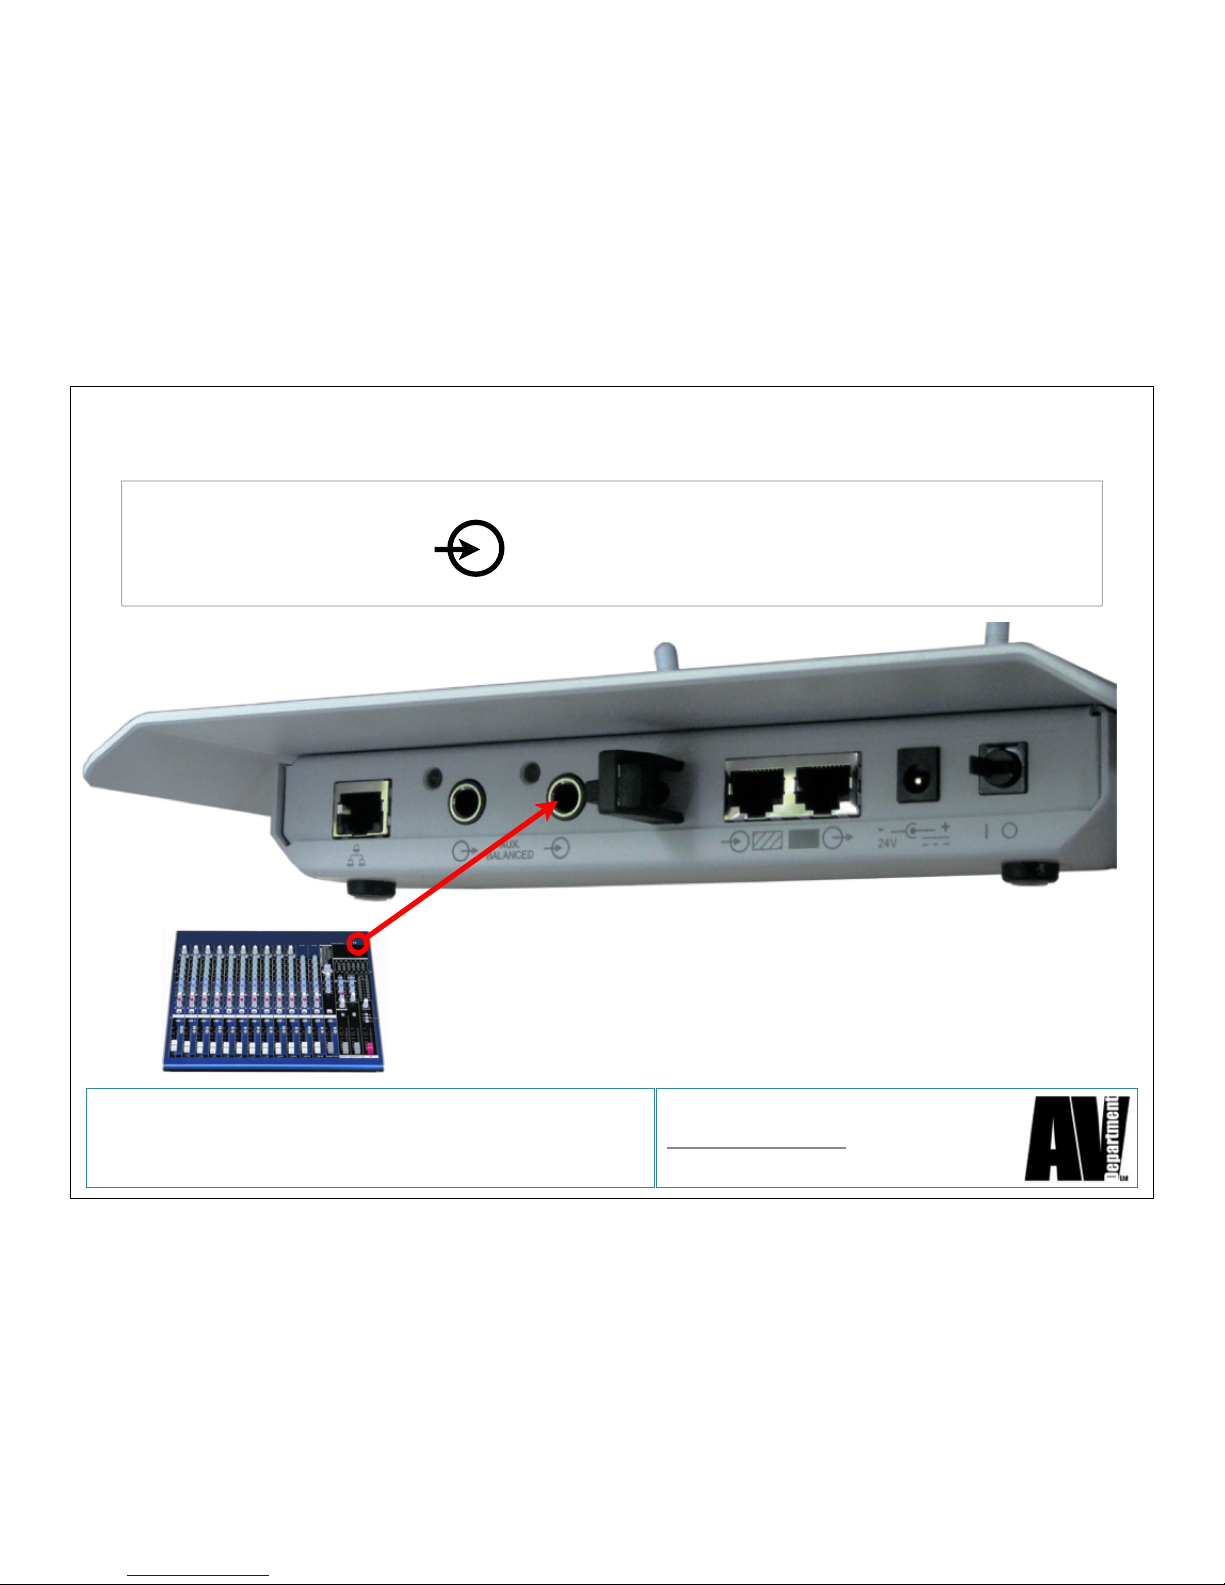
Stage 8
Connect external audio to the Access Point via the TRS Jack socket
marked ‘AUX BALANCED‘
This allows the speakers in the microphone bases to carry
the PA audio. In ‘Conference Management’ under the
‘Aux’ tab check ‘Distance Conferencing’ is set to
‘On’ (default is ‘on’) or the input will be fed to the output
and a feedback loop may occur.
AV Department Limited
www.avdept.co.uk
01383 825709
Title: Guide to Confidea Wireless Microphones
Page 9
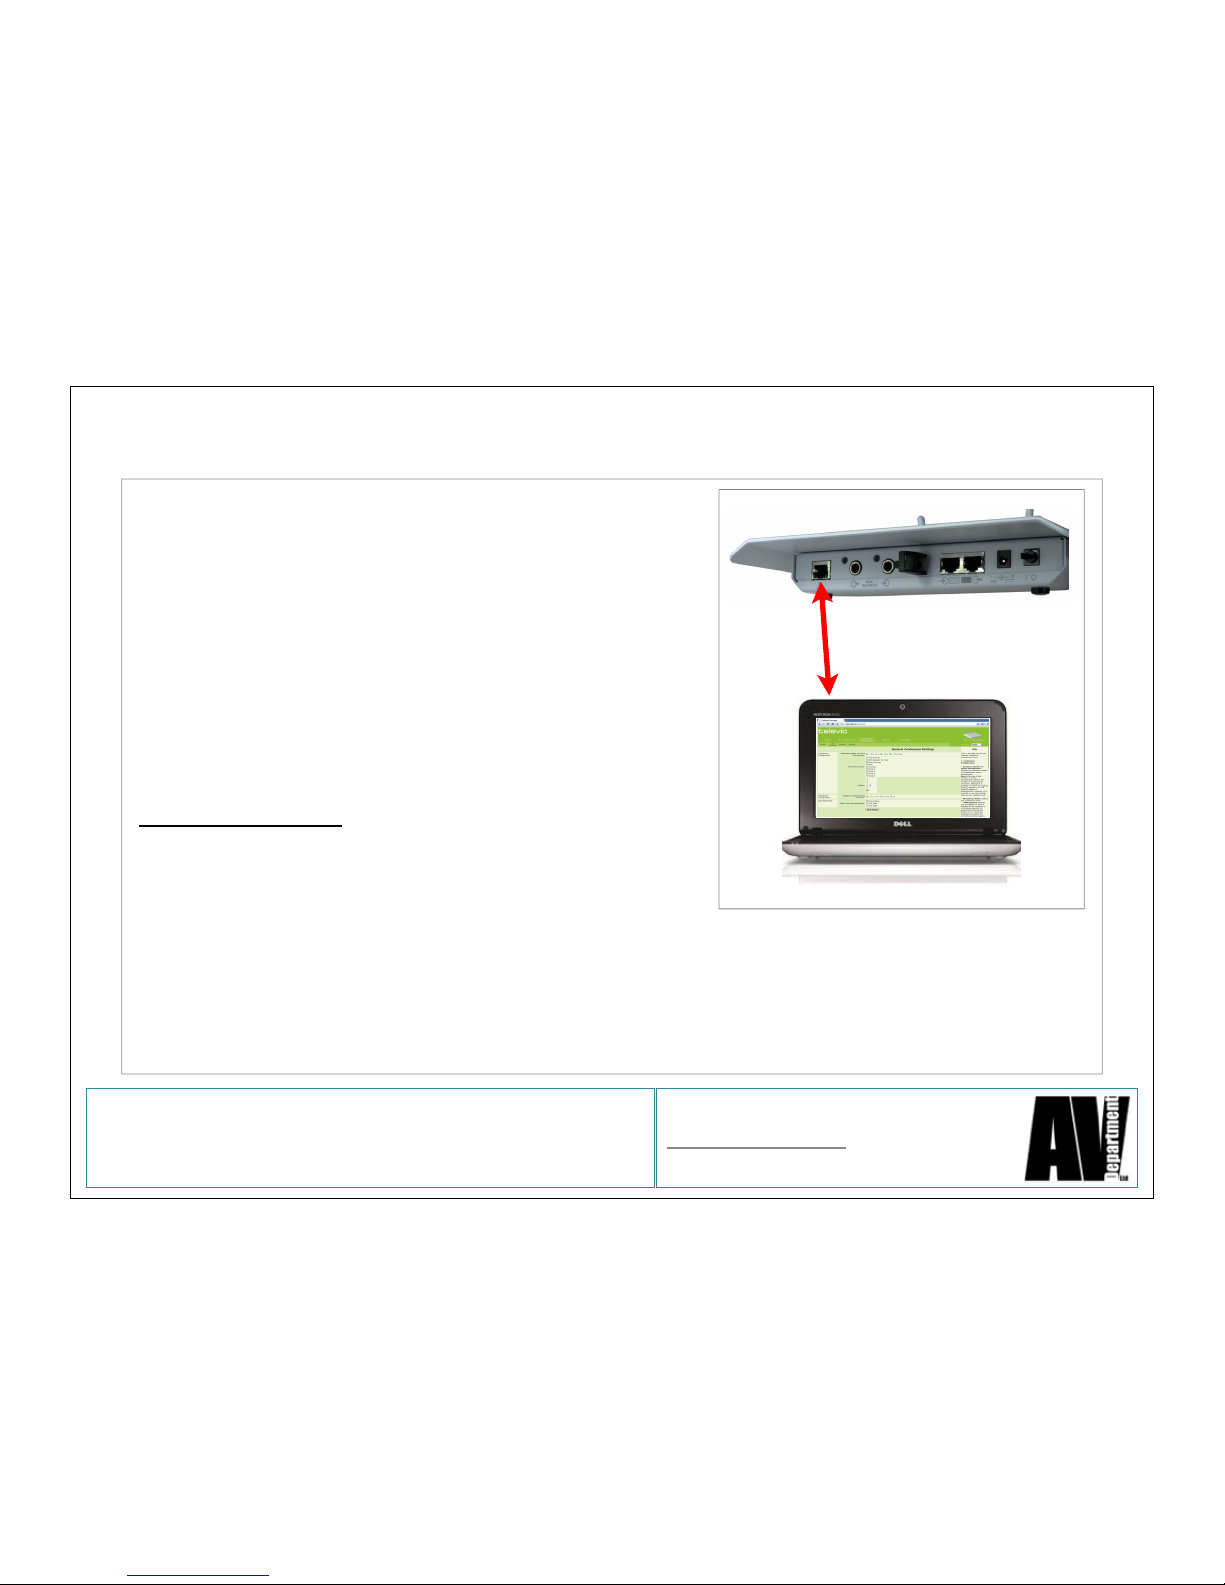
Stage 9
To make adjustments to levels and operational
modes, connect the supplied Netbook to the Access
Point using the ‘Cat 6 RJ45 network cable’ cable.
No special software is required as the server is built
into the Access Point.
Start the Netbook and a web browser should start
and connect to the Access Point server.
In the address line type:
http://192.168.0.10 (Noted on Access Point)
Once connected you will be asked to log in, the
default log in is ‘123’
Please follow the system manual for further
information and functionality.
AV Department Limited
www.avdept.co.uk
01383 825709
Title: Guide to Confidea Wireless Microphones
Page 10
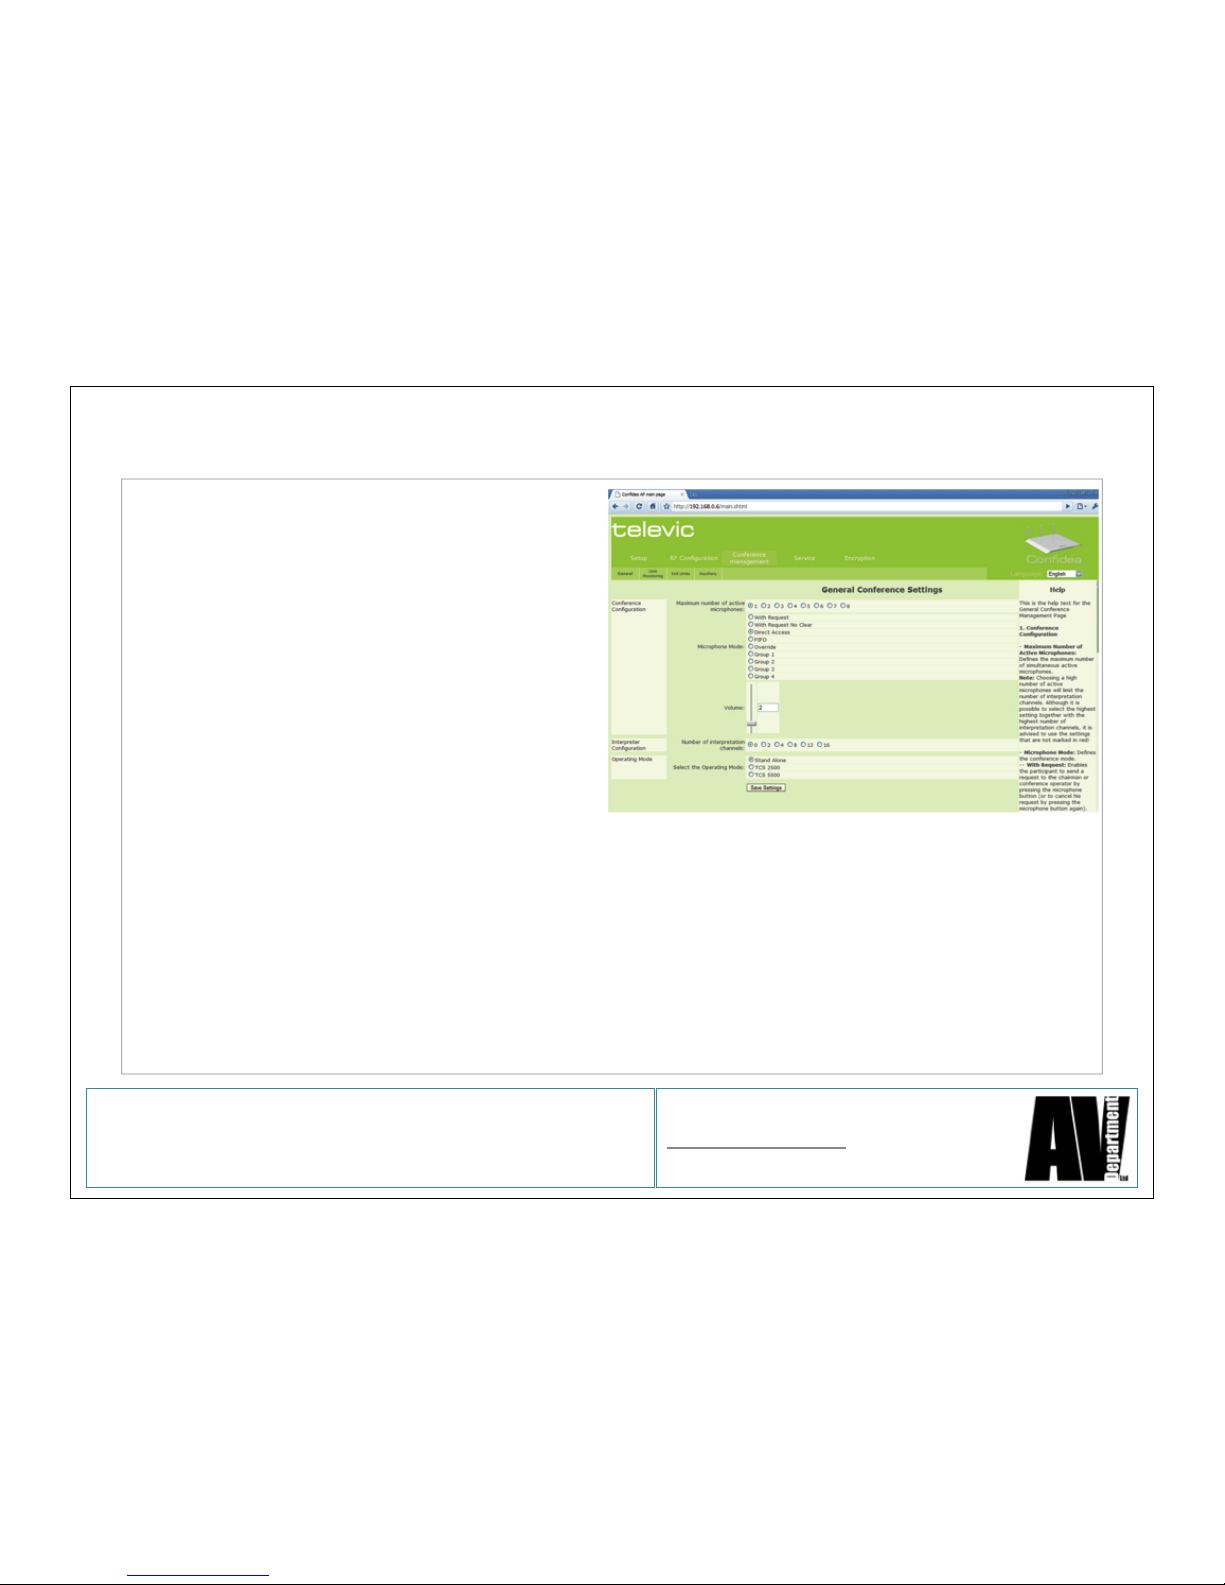
Stage 12
Default settings are as follows:
Conference Management - General tab
•
Max chair microphones ‘1’
•
Max active microphones ‘4’
•
Microphone mode ‘Direct’
•
Volume ‘6’
•
Stand alone mode ‘enabled’
Conference Management - Aux tab
•
Aux In (radio microphone connection) ‘16’
•
Aux Out (PA system connection) ‘16’
•
Distance conferencing ‘On’
•
External processing ‘Off’
RF Config
•
Room size ‘Big’
•
Frequency selection ‘Auto 5.745 - 5.805 GHz’
AV Department Limited
www.avdept.co.uk
01383 825709
Title: Guide to Confidea Wireless Microphones
Page 11
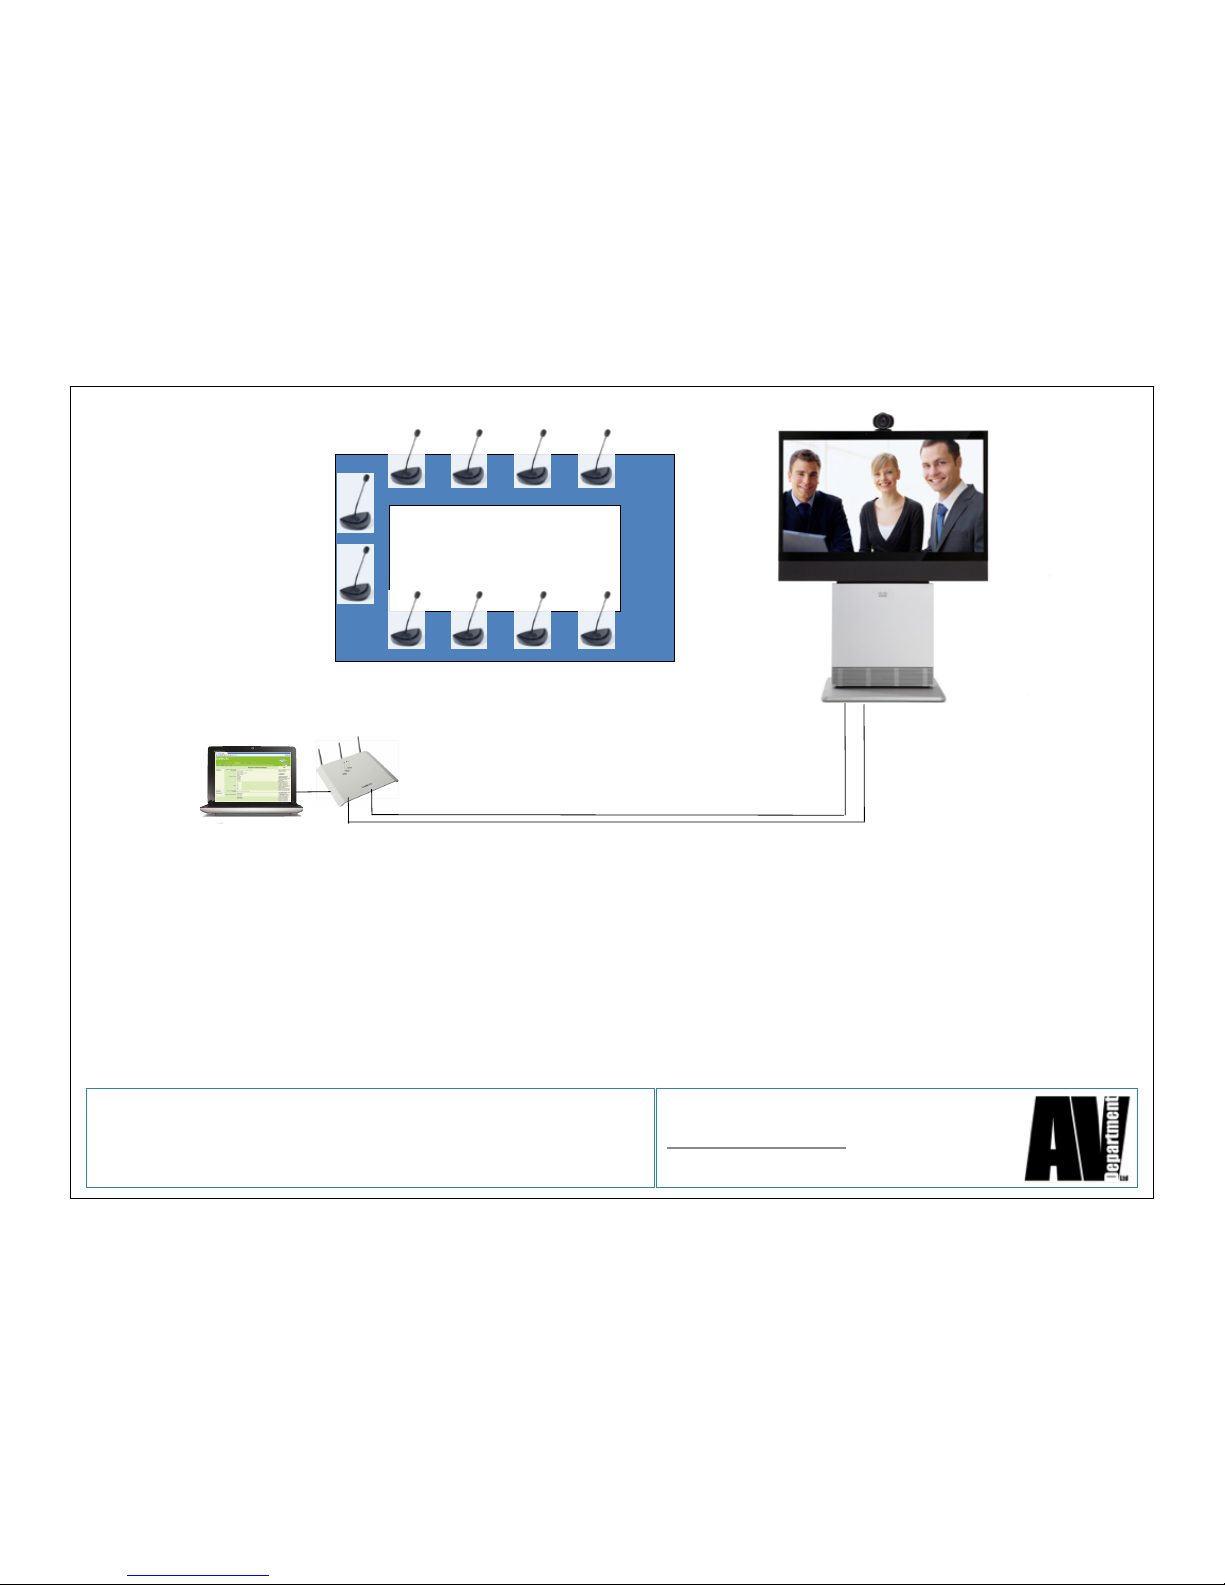
Seated observersBoardroom table
VC audio output connected to Access Point Aux in.
Access Point Aux out connected to VC audio input.
Distance Conferencing set to ‘On’ in ‘Conference Management’, ‘Aux’ tab on Access
Point server control. This will allow the microphone speakers to carry all audio but
remove incoming VC audio from the audio going back to the VC so eliminating
feedback / echo.
AV Department Limited
www.avdept.co.uk
01383 825709
Title: Guide to Confidea Wireless Microphones
Page 12
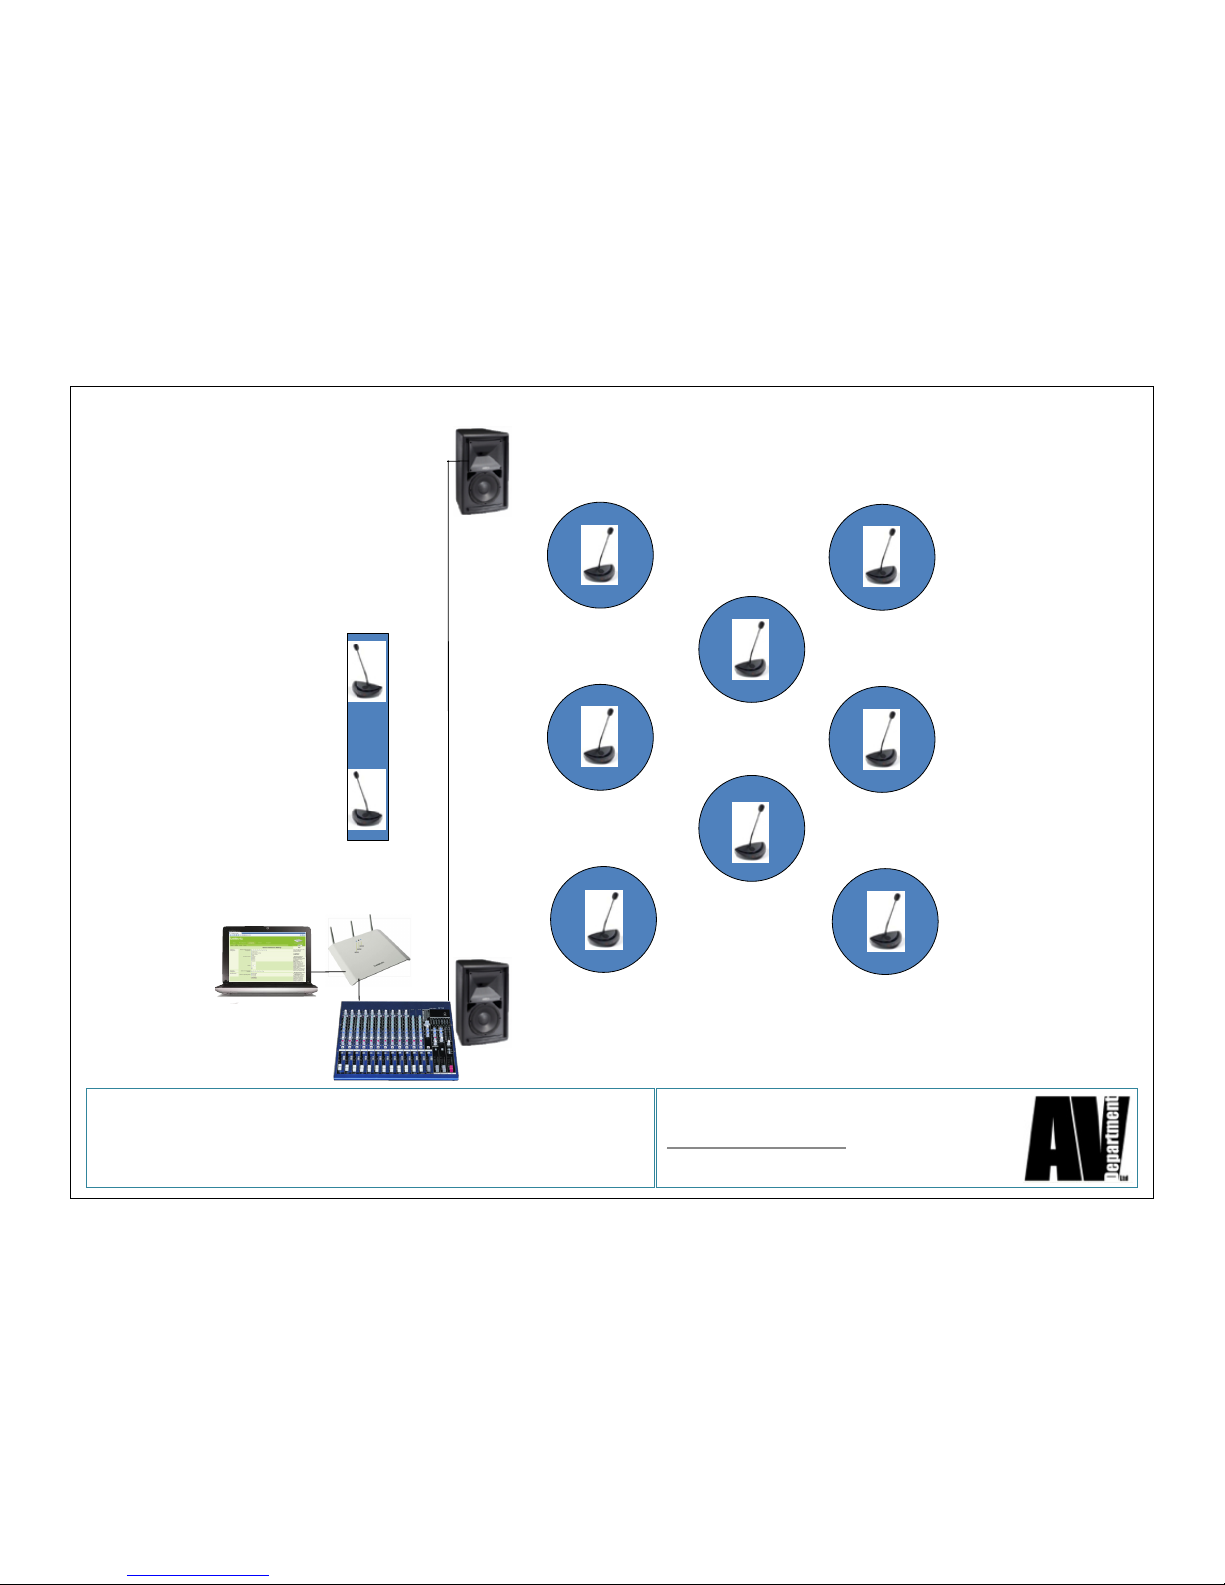
Cabaret tables
Top table
AV Department Limited
www.avdept.co.uk
01383 825709
Title: Guide to Confidea Wireless Microphones
Page 13
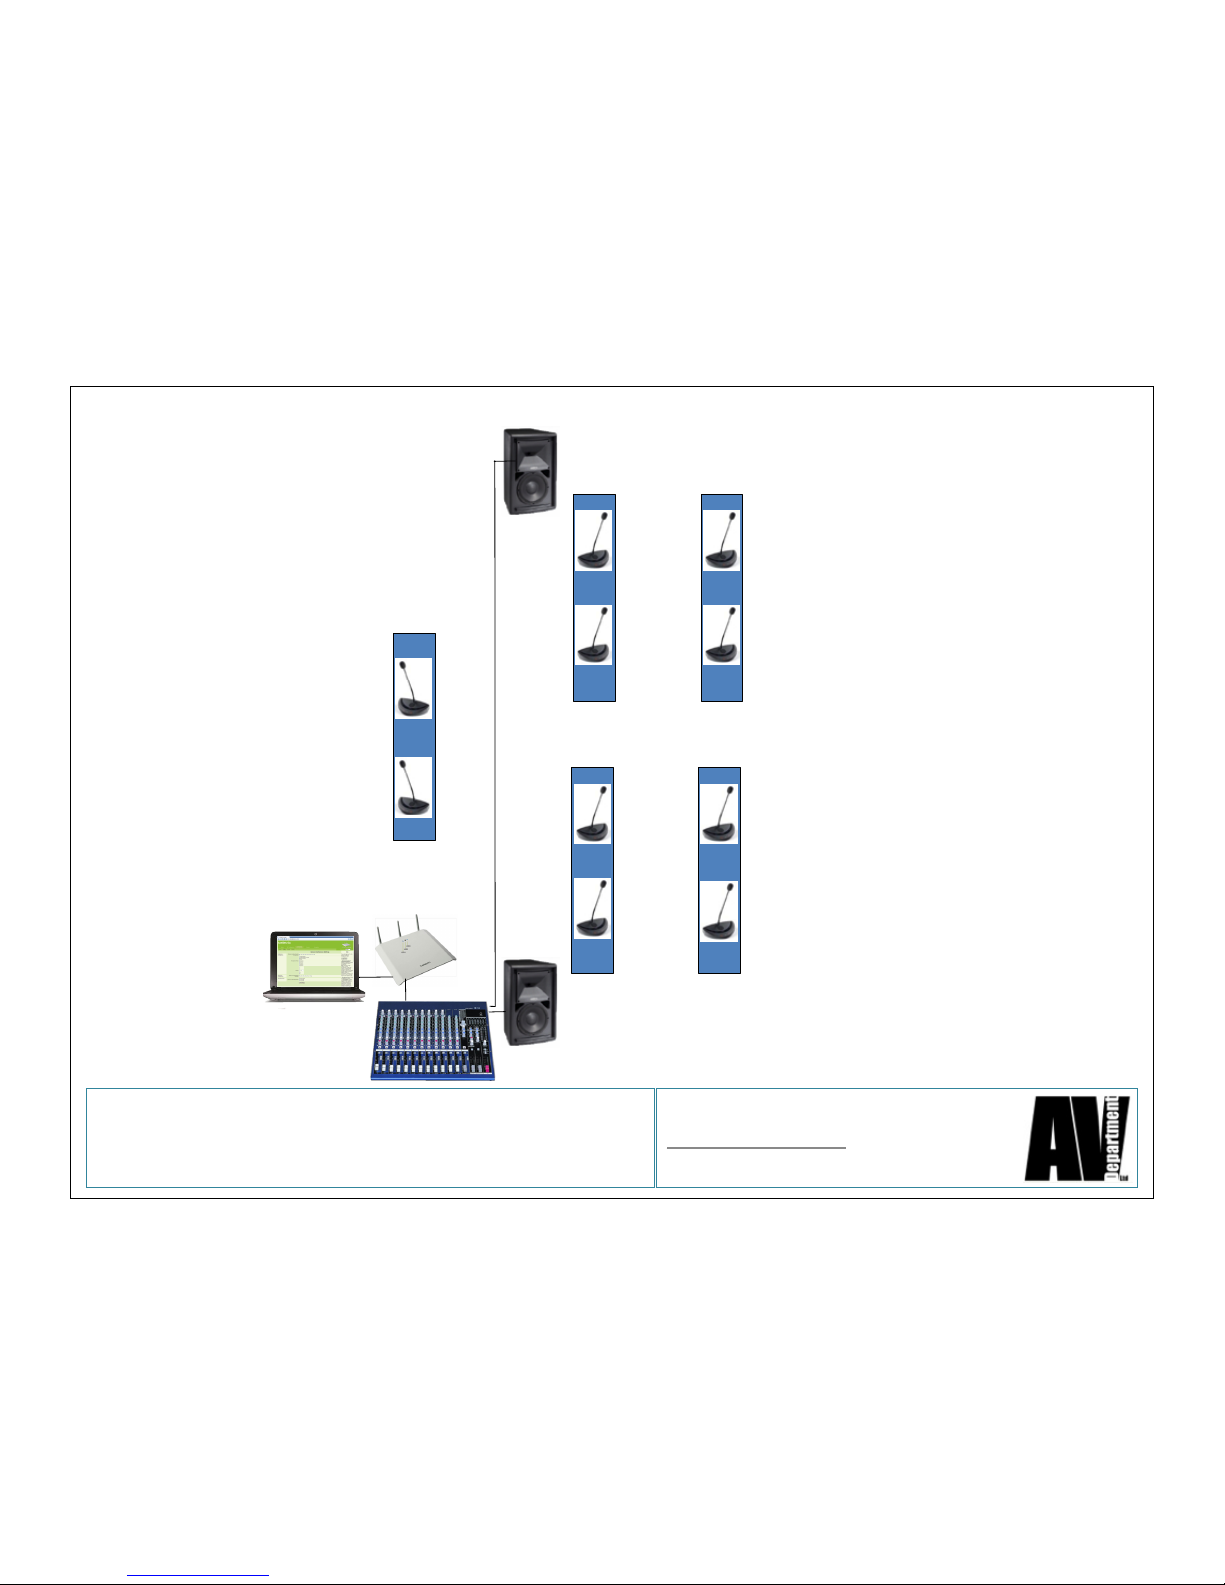
Classroom tables
Top table
AV Department Limited
www.avdept.co.uk
01383 825709
Title: Guide to Confidea Wireless Microphones
Page 14
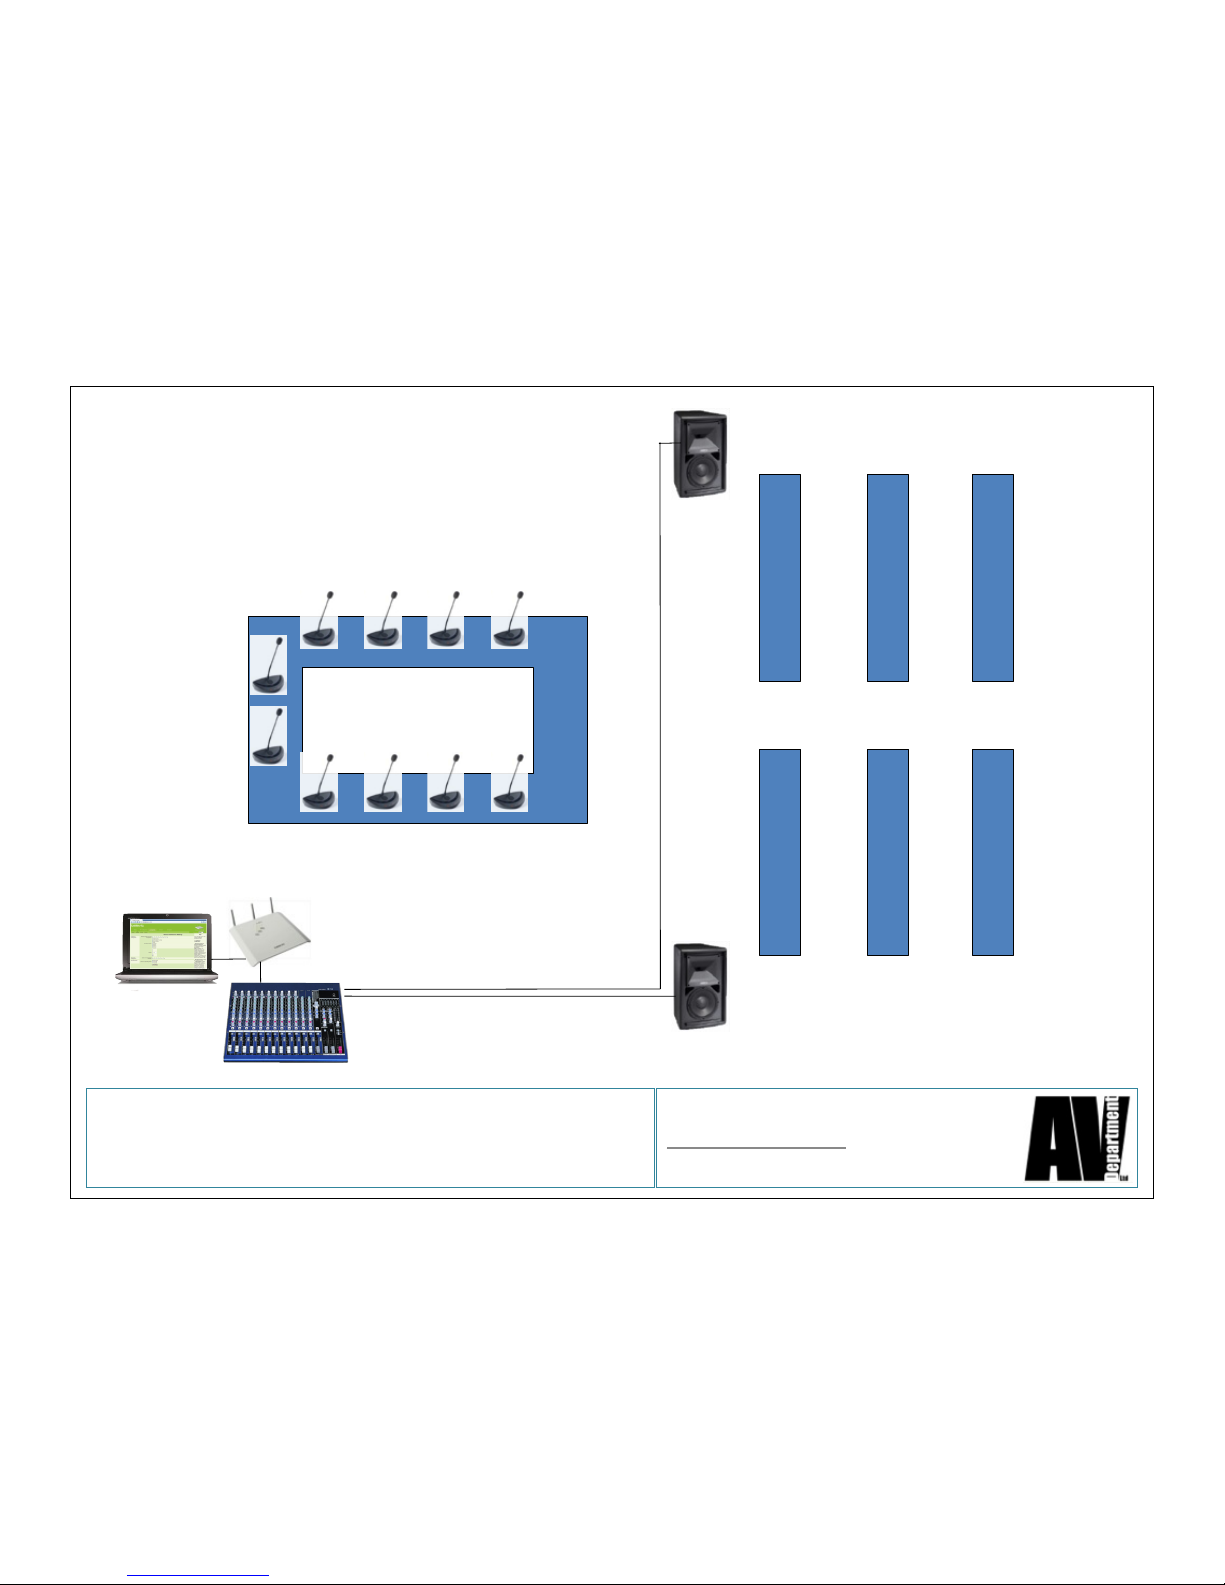
Seated observersBoardroom table
AV Department Limited
www.avdept.co.uk
01383 825709
Title: Guide to Confidea Wireless Microphones
 Loading...