

Page 1
All rights reserved. No parts of this work may be reproduced in any
form or by any means - graphic, electronic, or mechanical, including
photocopying, recording, taping, or information storage and retrieval
systems - without the written permission of the publisher.
Products that are referred to in this document may be either
trademarks and/or registered trademarks of the respective owners.
The publisher and the author make no claim to these trademarks.
While every precaution has been taken in the preparation of this
document, the publisher and the author assume no responsibility for
errors or omissions, or for damages resulting from the use of
information contained in this document or from the use of programs
and source code that may accompany it. In no event shall the
publisher and the author be liable for any loss of profit or any other
commercial damage caused or alleged to have been caused directly or
indirectly by this document.
Hardware User Guide
© 2014 TeleType GPS
Page 2

Contents
3
Table of Contents
Part I Getting Started
6
..........................................................................6
1 Disclaimer
..........................................................................7
2 Introduction
..........................................................................7
3 Navigation Software
..........................................................................8
4 What's In the Box
..........................................................................8
5 Specifications
..........................................................................11
6 Device Back View
Part II Basic Operation
14
..........................................................................14
1 Power On/Off Charging
..........................................................................16
2 Window Mount
..........................................................................16
3 Audio Out
..........................................................................17
4 Stylus
..........................................................................17
5 Micro SD Slot
..........................................................................17
6 USB Port
..........................................................................18
7 Reset
..........................................................................18
8 AV-IN
Part III Main Menu
20
..........................................................................21
1 Navigation
..........................................................................21
2 Bluetooth
..........................................................................24
3 Entertainment
..........................................................................25
4 Tools
..........................................................................27
5 FM Transmitter
..........................................................................29
6 System
..........................................................................32
7 AV-in
Hardware User Guide
4
Part IV Troubleshooting
36
..........................................................................36
1 Hardware FAQ
..........................................................................37
2 Maintenance
Page 3

Part
I
Hardware User Guide
6
1 Getting Started
1.1 Disclaimer
For use in vehicles, it is the sole responsibility of the operator of the
TeleType GPS WorldNav to place and secure the GPS unit so that it will not
interfere with the vehicle operating controls and safety devices, obstruct
the driver's view of driving conditions, or cause damage or personal injury in
the event of an accident. Do not mount the TeleType GPS WorldNav in a
place where the driver or passengers are likely to impact it in an accident or
collision. The mounting hardware supplied by TeleType Co. is not warranted
against collision damage or the consequences thereof. It is the sole
responsibility of the driver of the vehicle to operate the vehicle in a safe
manner, to maintain full surveillance of all driving conditions at all times,
and not become distracted by the GPS system to the exclusion of safe
driving practices. It is unsafe to operate the controls of the GPS system
while you are driving. Failure by the driver of a vehicle equipped with a
TeleType GPS system to pay full attention to operation of the vehicle and
road conditions while the vehicle is in motion could result in an accident or
collision with property damage and personal injury.
While every precaution has been taken in the preparation of this document,
the publisher and the author assume no responsibility for errors or
omissions, or for damages resulting from the use of information contained
in this document or from the use of programs and source code that may
accompany it. In no event shall the publisher and the author be liable for
any loss of profit or any other commercial damage caused or alleged to
have been caused directly or indirectly by this document or the products
described herein.
IN NO EVENT SHALL TELETYPE CO BE LIABLE FOR ANY INCIDENTAL, SPECIAL,
INDIRECT OR CONSEQUENTIAL DAMAGES, WHETHER RESULTING FROM
THE USE, MISUSE, OR INABILITY TO USE THIS PRODUCT OR FROM DEFECTS
IN THE PRODUCT. SOME STATES DO NOT ALLOW THE EXCLUSION OF
INCIDENTAL OR CONSEQUENTIAL DAMAGES, SO THE ABOVE LIMITATIONS
MAY NOT APPLY TO YOU.
Page 4
7
Getting Started
1.2 Introduction
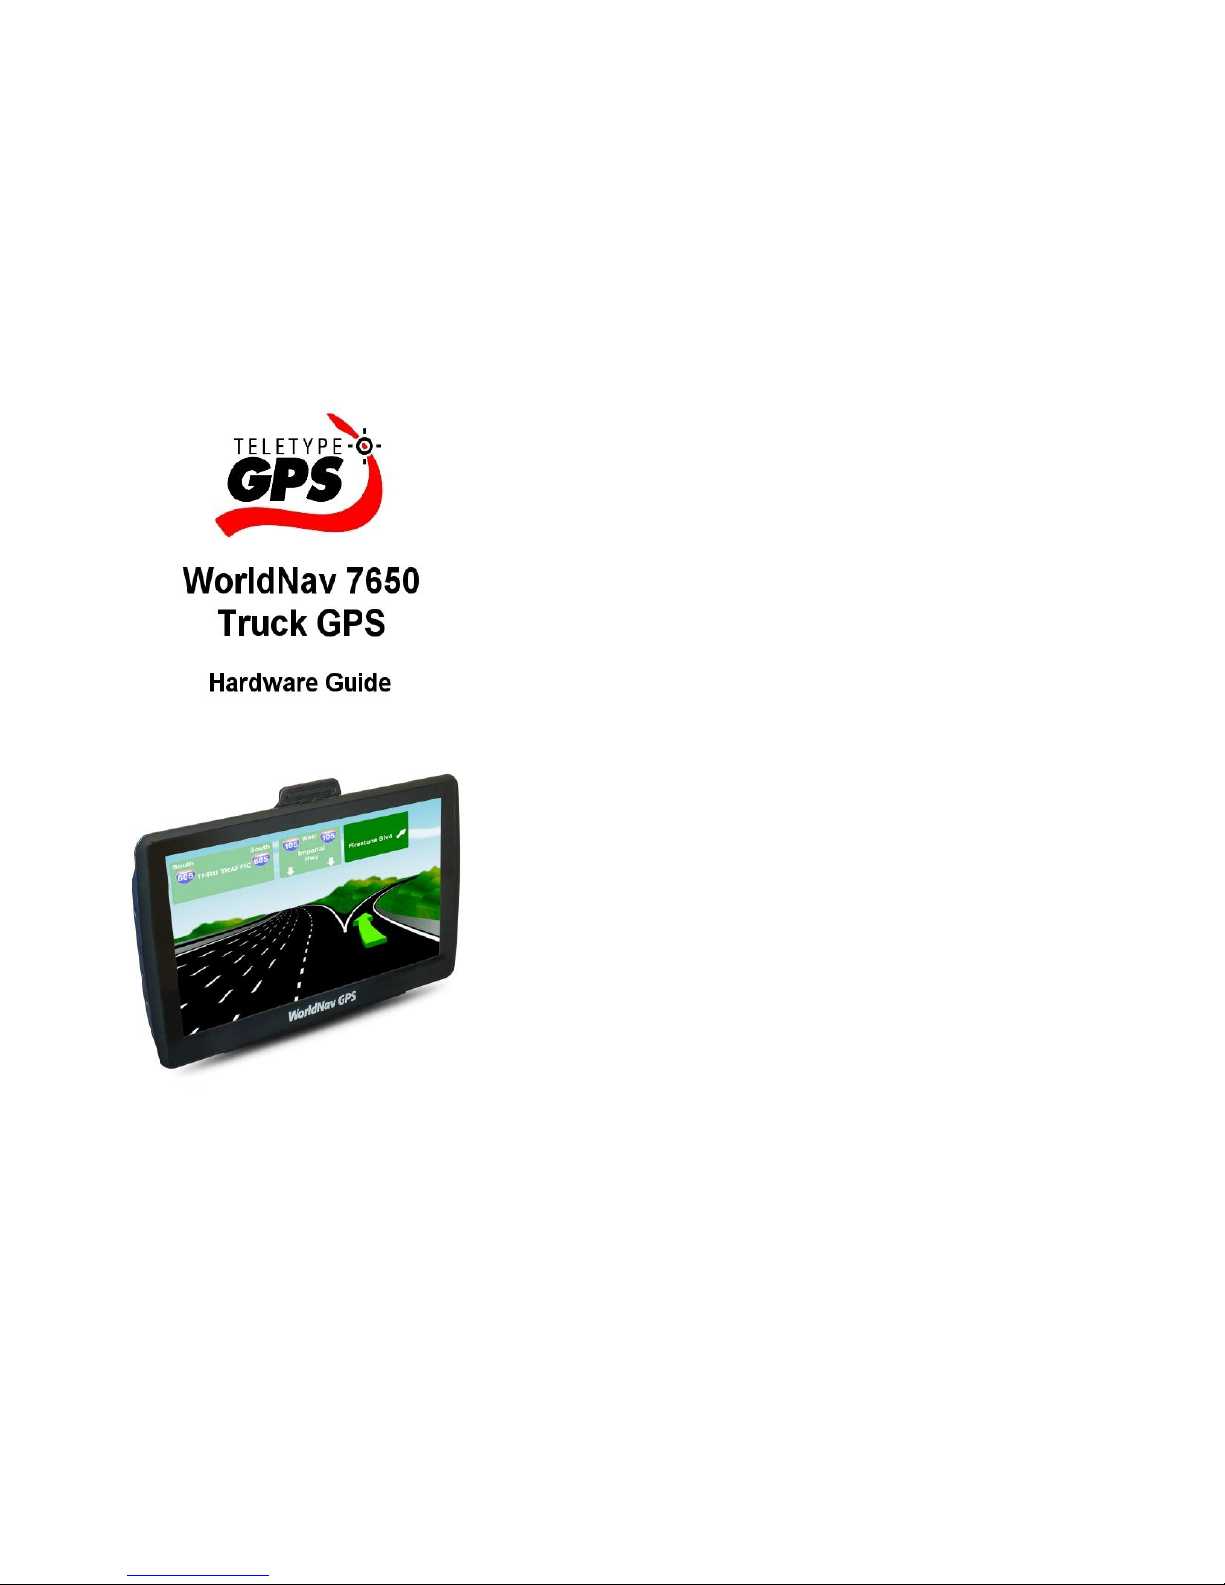
Thank you for purchasing the WorldNav 7650 Truck
GPS. The main purpose of this GPS is for commercial
drivers to navigate using truck specific routes. For
information regarding the navigation software
please visit www.teletype.com/guides. The GPS also
offers Bluetooth hands free, Video player, Music
player, FM tuner, Photo viewer, and E-Book text
reader. The AV port can be used to connect a
rear-view camera available as an optional accessory.
This guide will explain the additional features of this
GPS.
1.3 Navigation Software
While this guide is intended to describe the physical
features and menus related to the GPS hardware,
you can rest assured that your GPS has been tested
and the navigation software is already configured
for use by truckers. The WorldNav GPS software user
guide is located at http://tinyurl.com/kqqo6um
Hardware User Guide
8
1.4 What's In the Box
WorldNav Truck GPS Navigator
DC charger (vehicle plug)
Mini USB cable
Windshield cradle
Windshield mount
AC charger (wall outlet)
User Guides (optional in box, available on line)
1.5 Specifications
ITEM
DESCRIPTION
CPU
Mstar MSB2531 800MHZ
Flash Memory
8GB Flash
DDR RAM
256M DDR
LCD display
7.0’’ TFT LCD display, Resolution :
800RGB(H)x480(V)
Touch-screen
High-accuracy, endurable touch-screen
USB
USB Client 2.0, MINI USB port
SD Card
microSD slot, maximum capacity 32GB
Audio
Built-in high fidelity speaker; High fidelity
stereo earphone
AV-IN
2.5mm video barrel, CVBS
Page 5

9
Getting Started
ITEM
DESCRIPTION
Bluetooth
Compliant with Bluetooth specification 2.1
+EDR
Dimensions
112 mm * 183 mm (4.4 in x 7.20 in)
GPS
Cold start:<35s; Hot start:<2s(in the open
area); Warm start:<32s
Battery
Built-in rechargeable Li-ion battery
Battery Charging
port
DC 5V port
AC Wall Charger
100/230V charger, 5V/1.5-2A
DC Vehicle
Charger
DC12-24V, 5V/1.5-2A
LED Status
Red - Charging; Blue - Charge Complete
Operating System
Microsoft Windows CE 6.0
Navigation
Software
WorldNav Truck GPS software stored
internally (within Flash memory)
Video Player
MP4/ASF/WMV/AVI/FLV/DIVX/XVID
;
Video Decode WVGA (800x480)
Audio Player
MP3 and WMA
Photo viewer
E-Album, JPG, BMP, PNG
EBook Viewer
Supports the display of TXT files.
Hardware User Guide
10
ITEM
DESCRIPTION
System setting
[FM Transmitter] [Screen adjustment]
[Default set] [Volume] [Power] [Backlight]
[Time and Date] [Language] [Sys Info]
Temperature
Working temperature: 0 °C - 60 °C (32°F 140°F)
Storage temperature: -20 °C - 60 °C (-4°F 140°F)
Working humidity
range
45% to 80%RH
Storage humidity
range
30% to 90%RH
Atmospheric
pressure
86KPa to 106KPa
Page 6

11
Getting Started
1.6 Device Back View
Back View of Device
A. Stylus
E. USB Power Port
B. Audio Out
F. Reset hole
C. Micro SD Slot
G. Serial number
D. AV-In Port
H. Power On/Off
Page 7

Part
II
Hardware User Guide
14
2 Basic Operation
2.1 Power On/Off Charging
Use only the power cords that are supplied with the
GPS to charge your system. Use of other cords is not
recommended and can void your warranty as they
may look the same as the provided cords but may
not provide sufficient power to fully charge the GPS.
Plug in the GPS power cord into the slot marked
USB. Use the power button found at the top of the
GPS to turn ON and OFF the device. Do not attempt
to charge the GPS by plugging it into a computer as
the charge will not be sufficient. It is recommended
to completely power down the GPS each night after
using. Hold the power button down a few seconds
until you see "Sleep" and "Shut", select "Shut" as it is
an abbreviation for "Shut Down". The "Sleep"
function can be used if you are simply stopping to
fuel the vehicle and plan to resume your trip within
an hour or two.
Page 8

15
Basic Operation
TIP - Turn on the vehicle then attach the power cord
to the GPS to avoid the possibility of a damaging
electrical surge. Avoid the use of an inverter until you
are sure you have the correct power. Refrain from
sharing the GPS with the same power outlet as other
devices as the GPS requires more power than the
external accessories support. The two to three plug Y
adapters distribute power among the devices and will
therefore most likely leave an insufficient amount of
power for the GPS.
Truck and coach drivers should always use the
provided vehicle power cord to power the GPS while
in use in the vehicle. Power the GPS using either the
DC (vehicle charger), the AC (wall charger), or the
built-in battery. Please keep in mind that the built in
battery is strictly for back up use and should not be
relied upon for commercial drivers.
NOTE - USB computer cables do not provide sufficient
power to charge the GPS. Use the provided wall
charger or the vehicle charger instead.
Hardware User Guide
16
The GPS features a built-in Li-On battery to supply
power when it is not connected to a power source.
The battery indicator will show bars flashing as it is
charging. When fully charged, the LED will change
from red to blue. The battery icon will not
change colors.
Depending on the Backlight brightness level, and
other functions such as Bluetooth and FM
connection, you can expect approximately 45-90
minutes of use without a charger. It is
recommended to always drive with the vehicle
charger cord plugged into the GPS. Be sure to take
proper precautions to protect the GPS. Do not leave
near a fire, do not allow it to get wet, do not
attempt to open the GPS.
2.2 Window Mount
Assemble the plastic cradle to the window mount.
Attach the GPS to the included window mount and
position in a location where it has an unobstructed
view of the sky so it receives a strong satellite signal.
2.3 Audio Out
Attach an external speaker or headphones as
desired.
Page 9

17
Basic Operation
2.4 Stylus
Use of the stylus is generally not necessary.
However, in the case that you need to reset or
recalibrate the GPS you will want to use the stylus.
The stylus can be found in a slot on the back on the
bottom left of the GPS. Be sure to replace the stylus
in the slot for future use. Do not attempt to use a
sharp object such as a pen or pencil as it will damage
the screen.
2.5 Micro SD Slot
The memory card slot is intentionally left empty. You
can use any micro SD card for music, video, and
picture use on the GPS. Program and map updates
are released on micro SD cards which have a self
installer. Contact TeleType for details regarding the
purchase of an update plan.
2.6 USB Port
Use the USB port to power the GPS using one of the
power cords provided with your GPS. (See the
section above about Power). The purpose of
connecting the GPS to a computer is only to copy
your entertainment files such as music, video, and
photos to a memory card. You can alternatively copy
directly to a memory card without connecting the
GPS to the computer. Updates are done via SD card
so please do not attempt to update the GPS by
Hardware User Guide
18
connecting it to a computer.
2.7 Reset
After installing an update, or if the device seems to
be permanently frozen on a particular screen, you
may need to reset the GPS. Insert the stylus (or
gently use a paper clip) into the tiny hole which
appears to have a golden plate on the back of the
GPS. The hole is unmarked (refer to the photo above
marked with letter "F").
2.8 AV-IN
Attach a rearview camera using a 2.5mm set of RCA
cables. (Camera and cables sold separately). Once
you attach the camera it will appear automatically
on the screen. Contact TeleType for assistance with
wiring.
Page 10

Part
III
Hardware User Guide
20
3 Main Menu
The primary purpose of this GPS is to provide
navigation for commercial drivers. In most cases you
will not need to use the Main Menu functions very
often. Usually you will simply tap "Navigation" to
launch the navigation software. Swipe the screen up
to reveal the second page. The other functions are
some added extras for the device.
Main Menu Screen 1
Swipe Up from Menu 1 to reveal Main Menu Screen 2
Page 11

21
Main Menu
3.1 Navigation
The WorldNav 7650 Truck GPS features truck
specific routing keeping you away from low bridges,
commercially restricted areas, and more .
Keep in mind that many factors such as high, dense
buildings (in the tunnel, between the high building,
underground parking, under the trestle), various
weather condition, and closure of the satellite will
affect the ability to receive signal so as to result in
inaccurate position, inefficiency of navigation
operation and system function. To learn more about
the navigation software please refer to the
WorldNav GPS Software guide.
3.2 Bluetooth
This GPS device has the ability to connect with a
supported Bluetooth-enabled cell phone, allowing
you to make and receive calls directly from your
GPS. Most of the functions on the Bluetooth menu
have now been replaced by your phone functions,
therefore you will just need to pair the GPS to your
phone. The other functions on the Bluetooth menu
are no longer needed and will be disregarded in this
guide. Instructions for pairing the GPS with your
phone are given below.
Hardware User Guide
22
TIP - If you have trouble connecting to your phone you
might want to have your phone search for the GPS.
The Bluetooth passcode for the GPS is 1234.
1. Begin by enabling the Bluetooth setting on your
cell phone. Be sure your phone is in "discoverable"
mode before proceeding.
2. Tap the Bluetooth icon on the GPS Main Menu
screen. The red X will change to a green check mark
when Bluetooth has been successfully turned on.
You will need only the buttons outlined above. Notice that
Bluetooth has been turned on.
3. Tap the Pair/Connect icon
Page 12

23
Main Menu
Once you have connected the GPS to your phone it will
remember the name. Press Connect to re-connect to that phone.
At some point in the process your phone will require
you to enter the GPS passcode in order to proceed.
At that point you need to enter the number: 1234.
(You can change that number later by using the
"Modify the PIN" button on the GPS).
Check the box marked Auto-Connect to
automatically pair the GPS to this phone each time
you start the GPS.
Check the box marked "Auto-answer" if you want
the GPS to automatically pick up the call even while
you are driving.
4. To exit the menu press the circular arrow
found in the top right of the menu.
Hardware User Guide
24
Incoming call is displayed. Use the Auto Answer feature
if you wish to eliminate the need to accept a call.
3.3 Entertainment
Music, Video, Photo, and E-Book
See the supported entertainment formats in the
Specifications table above for the Music, Video,
Photo, and E-Book functions. Copy the files to any
folder on a micro SD card (sold separately). These
function are NOT intended for use while driving and
will not work if you attempt to use them with
navigation.
Page 13

25
Main Menu
3.4 Tools
GPS Information
The GPS Information menu lets you test the GPS
device without using the WorldNav navigation
software. You need at least 4 satellites to lock into
position with accuracy. The blue bars will turn green
as the GPS obtains proper positioning information. If
this menu shows that you are not able to lock into
position, you can press the "Reset" (on the bottom
left of the menu). The system will try again from the
beginning to lock into position.
GPS Information
Unit Conversion
For your convenience, a unit conversion function is
included. The function allows you to convert
distances, weights, and more, from pounds to
kilometers for example.
Hardware User Guide
26
Calculator
For your convenience, a calculator function is
included.
Screen Calibration
Occasionally you may need to recalibrate the touch
screen if you notice that incorrect letters or
functions are appearing. Press the Calibration icon.
Use the stylus provided with the GPS (or any other
stylus) to accomplish the task. Use the stylus to
press on the target which looks like a plus sign [+].
The target will move around the screen. Continue
this process as it moves to the left, right, upper, and
lower parts of the screen. You may need to repeat
the entire process once or twice if the screen is
more severely out of alignment. Tap <OK> when
complete.
Calibration Screen
Page 14

27
Main Menu
Press the target and follow it around the screen to calibrate.
3.5 FM Transmitter
The FM feature enables you to link your device
to an unused radio frequency channel, thereby
allowing you to hear your route instructions over
the radio speakers which means you can turn the
volume up very high on the radio in case your truck
is noisy. Select a frequency from the FM menu and
then set your radio dial to that frequency.
Set the desired FM frequency on the GPS. Set the
same frequency on the FM radio of your vehicle.
Example: Set the GPS to 76.0 and the vehicle radio
to 76.0. The function is intended for use while you
are not playing music. However, in some cases
depending upon the strength of the FM signal the
GPS instructions will play over a muted sound of the
music. Be sure to keep the GPS powered with the
proper cord as the FM function will not work when
strictly on battery power.
Hardware User Guide
28
Turn On FM to hear voice instructions through your FM Radio.
FM transmitter is to transmit the audio signal into
receiving device, Take FM 90.0mhz for example, now
the navigation frequency is same as receiving
frequency, is 90.0MHZ, now the two devices are in
same frequency band, which make the navigation
can output the sound.
NOTE - When FM is turned on you will not hear any
sound from the GPS. Be sure to turn off the FM option if
you want to resume hearing sound directly from the
GPS.
Page 15

29
Main Menu
3.6 System
Volume
The GPS is set to the loudest volume setting for the
speaker. If you prefer not to hear the taps on the
screen you can tap the arrows to change the setting
to be turned off or made lower.
Factory Defaults are set to the loudest settings.
Hardware User Guide
30
Backlight
It is recommended to always keep the GPS powered
by a charging cord, this will allow you to keep the
backlight setting to "Always ON", and keep the
brightest setting during the day, without worrying
about the battery drain. The WorldNav navigation
software can automatically dim the screen for night
driving. If however you would like to manually adjust
the brightness, use the backlight function.
Adjust the brightness to your liking and keep "Always ON".
Date and Time
Changing the date and time on the device will have
no effect on the information you see in the
navigation portion of the device as that information
is automatically taken from the GPS satellites after
you lock into position.
Page 16

31
Main Menu
Language
Select language to set system language. Note that
the language choice here does not apply to the
navigation software.
System Information
In general you will not need to access this menu as it
relates strictly to the hardware, none of the
information relates to the navigation software.
Navi Path
It is recommended to leave the Auto run GPS setting
on the default position of OFF. If however you would
rather not have to press "Navigation" each time you
want to use the GPS you can move the slider bar to
the left. This means that each time you turn on the
GPS it will automatically go into Navigation mode.
Be careful, if you do this then it will be more difficult
to access the other menus of the GPS such as
Calibration, Backlight, FM, Bluetooth, etc.
Hardware User Guide
32
The bottom portion of this menu stores the location
of the WorldNav navigation software so that when
you push "Navigation" on your GPS it knows where
to find the software. Do not change this setting
unless specifically instructed by a TeleType support
technician. If you change this by mistake you will not
be able to use the navigation function.
It is best not to change anything in the Navigation Path Setting
3.7 AV-in
Attach a rearview camera using a 2.5mm cable.
(Camera and cables sold separately). Once you
attach the camera it will appear automatically on
the screen. Contact TeleType for assistance with
wiring.
Page 17

33
Main Menu
Page 18

Part
IV
Hardware User Guide
36
4 Troubleshooting
4.1 Hardware FAQ
Problem
Solution
GPS will not power
on or suddenly turns
off
Plug in the device to the AC or DC
power cord provided and press the
power button.
Screen is too dark
Adjust the backlight to a brighter
setting. Touch the screen to turn the
screen on.
Abnormal touch
screen function
Recalibrate the screen.
No GPS signal
(1) Mount the GPS on the windshield
with a clear view of the sky
(2) Try obtaining a signal outside your
vehicle
(3) note that some electronics and
windshield treatments interfere with
GPS signal strength.
(4) Try moving or tilting the GPS to
another position.
(5) Allow at least 3 minutes to lock in
especially in difficult areas.
Cannot
communicate with
computer
Re-connect the USB cable or try
another computer.
Page 19

37
Troubleshooting
Problem
Solution
No Sound
(1) Check the connection to the
earphones
(2) Increase the volume
(3) Properly tune the GPS to your FM
radio or turn OFF the FM Tuner
function on the GPS
Unable to use
navigation function
Contact TeleType GPS Support
help@teletype.com.
4.2 Maintenance
To properly maintain your GPS to protect your
investment:
Protect the screen by pressing gently when using the
device.
Use your fingertip or the stylus rather than any
sharp object such as a pen or pencil to operate the
navigator.
Turn off the GPS daily - after driving for the day,
hold the power button down until the device fully
powers down.
Do not spray glass cleaner directly on the screen,
turn off the GPS, then spray a small amount of glass
cleaner on a soft cloth (preferably lint free) and
gently clean the screen.
Hardware User Guide
38
Properly secure the GPS to avoid breakage and
damage to the internal high precision components.
Note that physical damage is not covered in the
warranty. If you plan to carry the GPS from one
vehicle to another, consider purchasing a specially
designed leather case to protect the GPS.
Avoid environmental issues such as high or low heat
(refer to the technical specifications above for
details), high voltage, dust, electrostatic
interference, and liquids.
Avoid electronic interference from other electronic
products. Keep the GPS positioned sufficiently far
from other electronics to minimize interference
which can affect the display and operation of the
GPS.
Page 20

Index
39
Index
- A -
AC Power 14
Accessories 7
AV Settings 32
AV-in 32
- B -
Backlight 29
Bluetooth 21
- C -
Calculator 25
Calendar 25
Calibration 25
Cell Phone 21
- D -
Date 29
DC Power 14
- E -
Ebook 24
- F -
FAQ 36
Flash Movie 24
FM 27
Frequency 27
- H -
Hardware Reset 14
- M -
Maintenance 37
Micro SD Card 14
Movies 24
Music 24
- N -
Navigation 21
- P -
Photo 24
Power 29
Power Cord 7
Power off 14
Power on 14
Power Supply 14
- R -
Radio 27
Rearview Camera 32
- S -
Set 27
Specs 8
Stylus Pen 14
System Info 29
- T -
Technical Specfications 8
Time 29
Tools 25
Touch Screen 14
Troubleshooting 36
- U -
Updates 17
- V -
Volume 29
- W -
What's in the Box 7
Window Mount 14
 Loading...