

Page 1

User Guide
EZMesh
Multi-Radio Wireless Mesh Network
Access Point
Teletronics Inc.
2 Choke Cherry Road
Suite 100
Rockville, MD 20850
USA
Page 2

User Guide - EZMesh Full Duplex Mesh Network Access Point Table of Contents
Table of Contents
Overview.................................................................................................................................................................2
Features...................................................................................................................................................................2
Reliable, Intelligent, High Performance Mesh Network.....................................................................................2
Fully Compatible with Existing Access Servers, Routers, and Gateways.........................................................3
Management and Security.....................................................................................................................................3
Power.......................................................................................................................................................................4
External Antennas..................................................................................................................................................4
Ethernet Port..........................................................................................................................................................4
Metal Enclosure .....................................................................................................................................................4
Outdoor Wireless Benefits.....................................................................................................................................4
Outdoor Wireless Challenges................................................................................................................................4
Solution Features and Benefits.............................................................................................................................5
Auto-recovery Auto-configuring mesh.................................................................................................................5
Safety Warnings.....................................................................................................................................................6
Installation Guidelines...........................................................................................................................................6
Site Survey..............................................................................................................................................................7
Package Contents...................................................................................................................................................8
Optional Equipment ..............................................................................................................................................8
Installation Components........................................................................................................................................8
Default Setting........................................................................................................................................................8
Installation Options..............................................................................................................................................10
Installing the MeshAP Access Point on a Pole...................................................................................................10
Installing the MeshAP Access Point on a Wall..................................................................................................12
MeshAP Infrastructure.......................................................................................................................................13
Mesh Manager Mode ..........................................................................................................................................13
Station Mode.......................................................................................................................................................13
Accessing the MeshAP Access Point (Login)..................................................................................................... 14
Direct Ethernet Connection ................................................................................................................................14
Page 3

User Guide - EZMesh Full Duplex Mesh Network Access Point Table of Contents
Wireless LAN Access...........................................................................................................................................15
Access MeshAP unit via Mesh Manager’s Topology Page...............................................................................17
Mesh Manager Configuration.............................................................................................................................18
Setup Mesh Manager Unit...................................................................................................................................18
Http Port .............................................................................................................................................................. 20
Https Port ............................................................................................................................................................20
Weight.................................................................................................................................................................20
Mesh ID...............................................................................................................................................................21
Station Configuration..........................................................................................................................................22
Mesh Link Connection Mode..............................................................................................................................22
Setup Station in Auto Mode................................................................................................................................22
Mesh ID...............................................................................................................................................................24
Connect a MeshAP Station to other Stations/Mesh Managers under Auto Mode...............................................25
Managing the Topology of the Mesh Manager unit..........................................................................................26
Accessing the Topology Page.............................................................................................................................26
Topology Tree Expanded .................................................................................................................................... 26
Managing the MeshAP on the Topology Tree....................................................................................................27
Go back to the Mesh Manager unit..................................................................................................................... 27
Setup Mesh Wireless (Backhaul)........................................................................................................................29
Mesh Wireless Channel (Backhaul)....................................................................................................................30
Mesh Wireless Security (Backhaul)....................................................................................................................30
Mesh Wireless Security.......................................................................................................................................30
WPA2 Key.......................................................................................................................................................... 30
WPA Key............................................................................................................................................................ 30
Wireless Diagnostic..............................................................................................................................................31
Local Link Quality.............................................................................................................................................. 31
Mesh Link Quality ..............................................................................................................................................32
Topology Change Log.........................................................................................................................................33
Radio Self-Test....................................................................................................................................................34
Setup AP Wireless................................................................................................................................................35
Wireless Mode......................................................................................................................................................35
802.11b/g Mode..................................................................................................................................................35
Wireless Channel .................................................................................................................................................35
Changing and modifying the SSID.....................................................................................................................36
Wireless Security..................................................................................................................................................37
Disable Wireless Security (Default)....................................................................................................................37
Configure WEP Wireless Security......................................................................................................................37
Multiple SSID / VLAN Configuration................................................................................................................40
SSID / VLAN Page............................................................................................................................................. 40
Understand SSID “span” and “arrow..................................................................................................................40
Page 4

User Guide - EZMesh Full Duplex Mesh Network Access Point Table of Contents
VLAN Tag.............................................................................................................................................................41
Access Mode.......................................................................................................................................................41
Trunk and Native VLAN Mode..........................................................................................................................41
Pure Mode...........................................................................................................................................................42
Firmware Upgrade...............................................................................................................................................44
Direct Upgrade – Mesh Station...........................................................................................................................44
Smart Firmware Upgrade...................................................................................................................................47
Specification..........................................................................................................................................................49
Power Consumption and PoE Injector Pin Assignments .................................................................................52
Warranty Policy...................................................................................................................................................53
RMA Policy..........................................................................................................................................................54
Page 5

User Guide - EZMesh Full Duplex Mesh Network Access Point
IMPORTANT:
Information presented are based on information available and they are subject to change without notice.
TELETRONICS INTERNATIONAL, INC. - 1 -
Page 6

User Guide - EZMesh Full Duplex Mesh Network Access Point
Chapter 1
Overview
Teletronics ’s Triple RF mesh access point extends hotspot coverage using multi 5GHz
wireless technology as a backhaul connection between mesh access points, and uses one
802.11b/g as a client connection.
The EZMesh is designed for maximum performance, scalability, and ease of use. The
EZMesh is ideal for metro Wi-Fi solutions and offers full 802.11b/g client compatibility,
along with mesh network protection wi t h user defined Mesh ID. The multiple wireless pa t h
design for both backhaul and user traffic eliminates adjacent AP signal interference and
provides zero performance degradation.
Features
• Dual Radio Backhaul, Single Radio Client AP access
Backhaul Encryption: WEP, WPA, WPA2
•
Client AP Encryption: WEP, WPA2
•
•
Full VPN compatibility
MAC address access control lists
•
Secure local and remote configuration via HTTPS
•
Web (HTML) Browser-based management tool supports both http and https
•
Network and client monitoring and statistical capture features
•
•
Full 802.11b/g client compatibility
Layer 2 support
•
Reliable, Intelligent, High Performance Mesh Network
• Patented Auto-discovery, auto-configure, and auto-healing POP (Predictable Optimum
Path) mesh routing algorithm
• Multiple wireless path design for both backhaul and user traffic eliminates adjacent AP
signal interference and provides zero performance degradation
• Best network throughput via layer 2 fast switching and bridging from AP to AP to
support real time video, voice, and data applications
TELETRONICS INTERNATIONAL, INC. - 2 -
Page 7
User Guide - EZMesh Full Duplex Mesh Network Access Point
Fully Compatible with Existing Access Servers, Routers, and Gateways
• Transparent to layer 3 and up protocols, fully compatible with existing network
equipment
• Directly connects to existing Routers, Gateways, or APs through 10/100 Ethernet
Management and Security
• GPS Receiver(optional) Antenna provides physical location information of each
MeshAP, simplifies maintenance task and adds a new potential of location related
services (outdoor version only)
• Web Based HTML browser management interface
• Supports WEP, WPA, MAC filtering, and AES encryption security across wireless mesh
network
• Unique mesh network protection with user defined Mesh ID
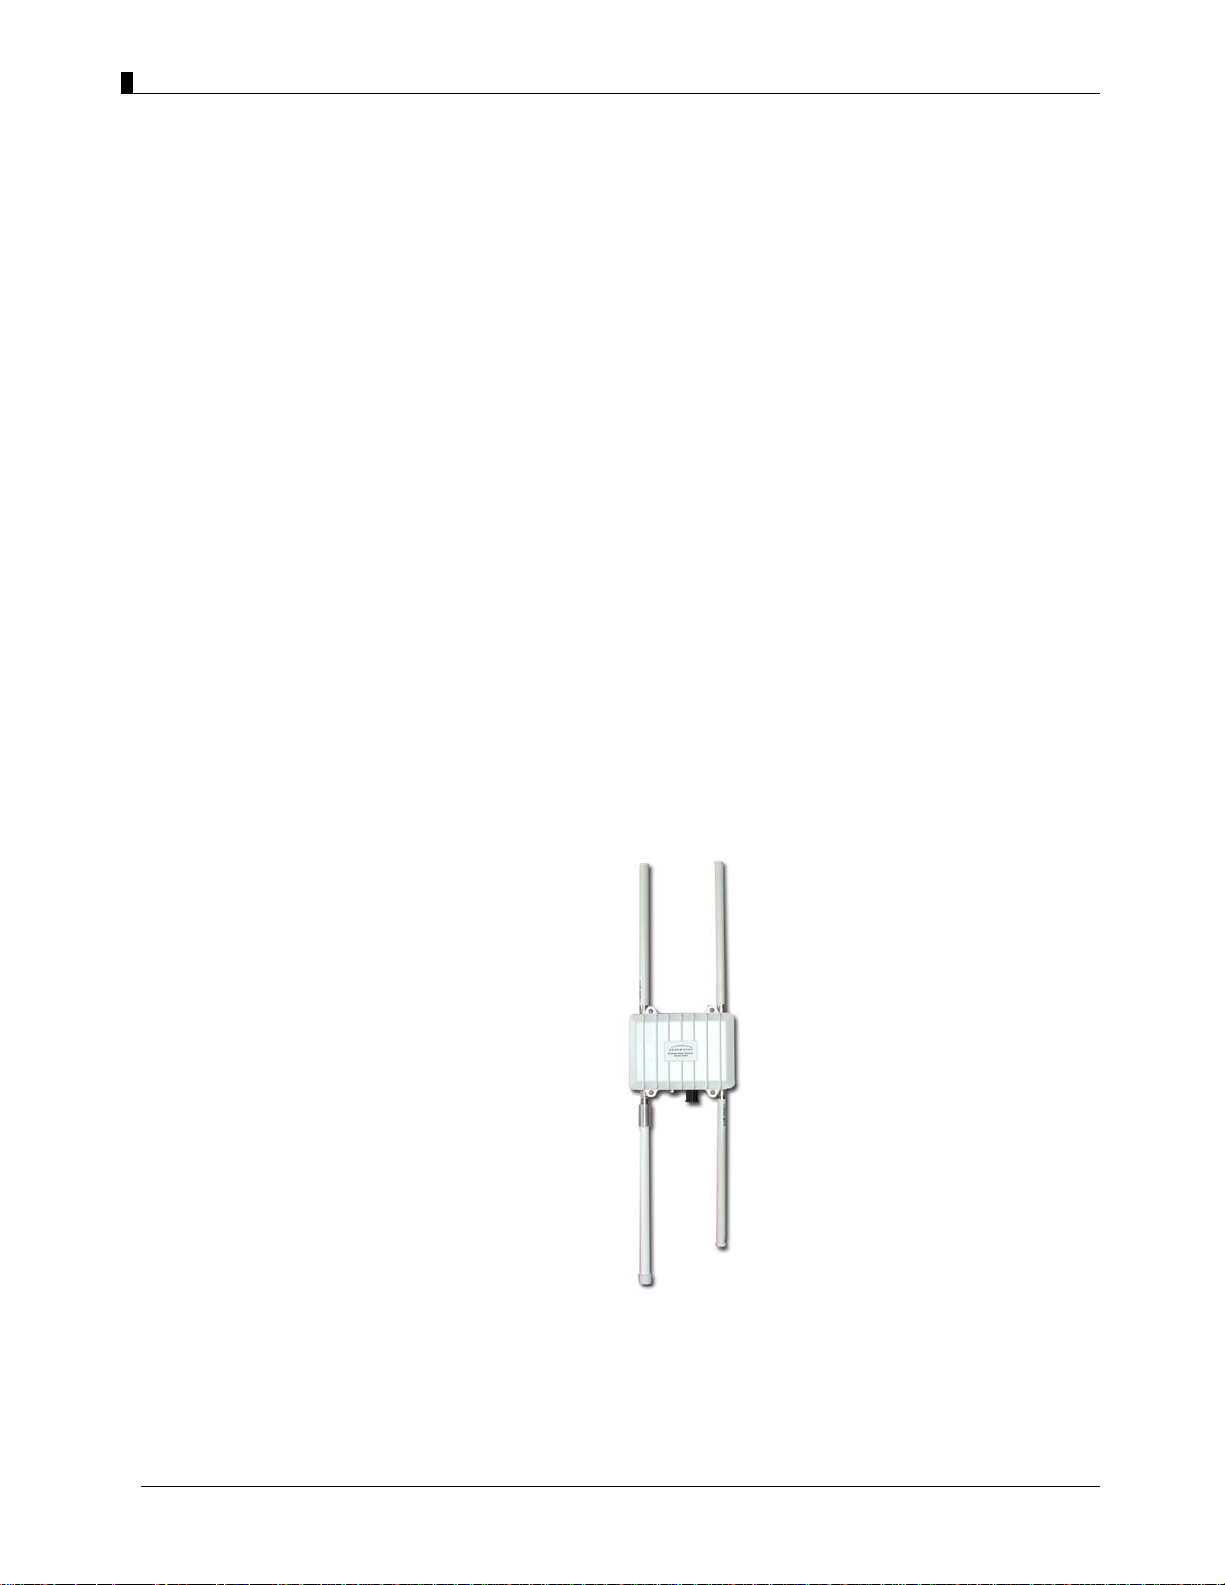
Figure 1-1
EZMesh Full-Duplex Wireless Mesh Network Access Point
TELETRONICS INTERNATIONAL, INC. - 3 -
Page 8

User Guide - EZMesh Full Duplex Mesh Network Access Point
Power
Teletronics’s EZMesh outdoor access point receives power from the power injector. It uses
an external 48-VDC power module and injects the DC voltage into the Ethernet cables to
power the outdoor access point.
External Antennas
Teletronics’s EZMesh access point is designed for use with an external 2.4GHz antenna
with an N-type male connector, and three external 5GHz antenna with an N-type male
connector.
Ethernet Port
Teletronics’s EZMesh access point is able to link to your 100BASE-T Ethernet LAN
through the optional power injector. The Ethernet cables are used to supply inline 48-VDC
power from the power injector.
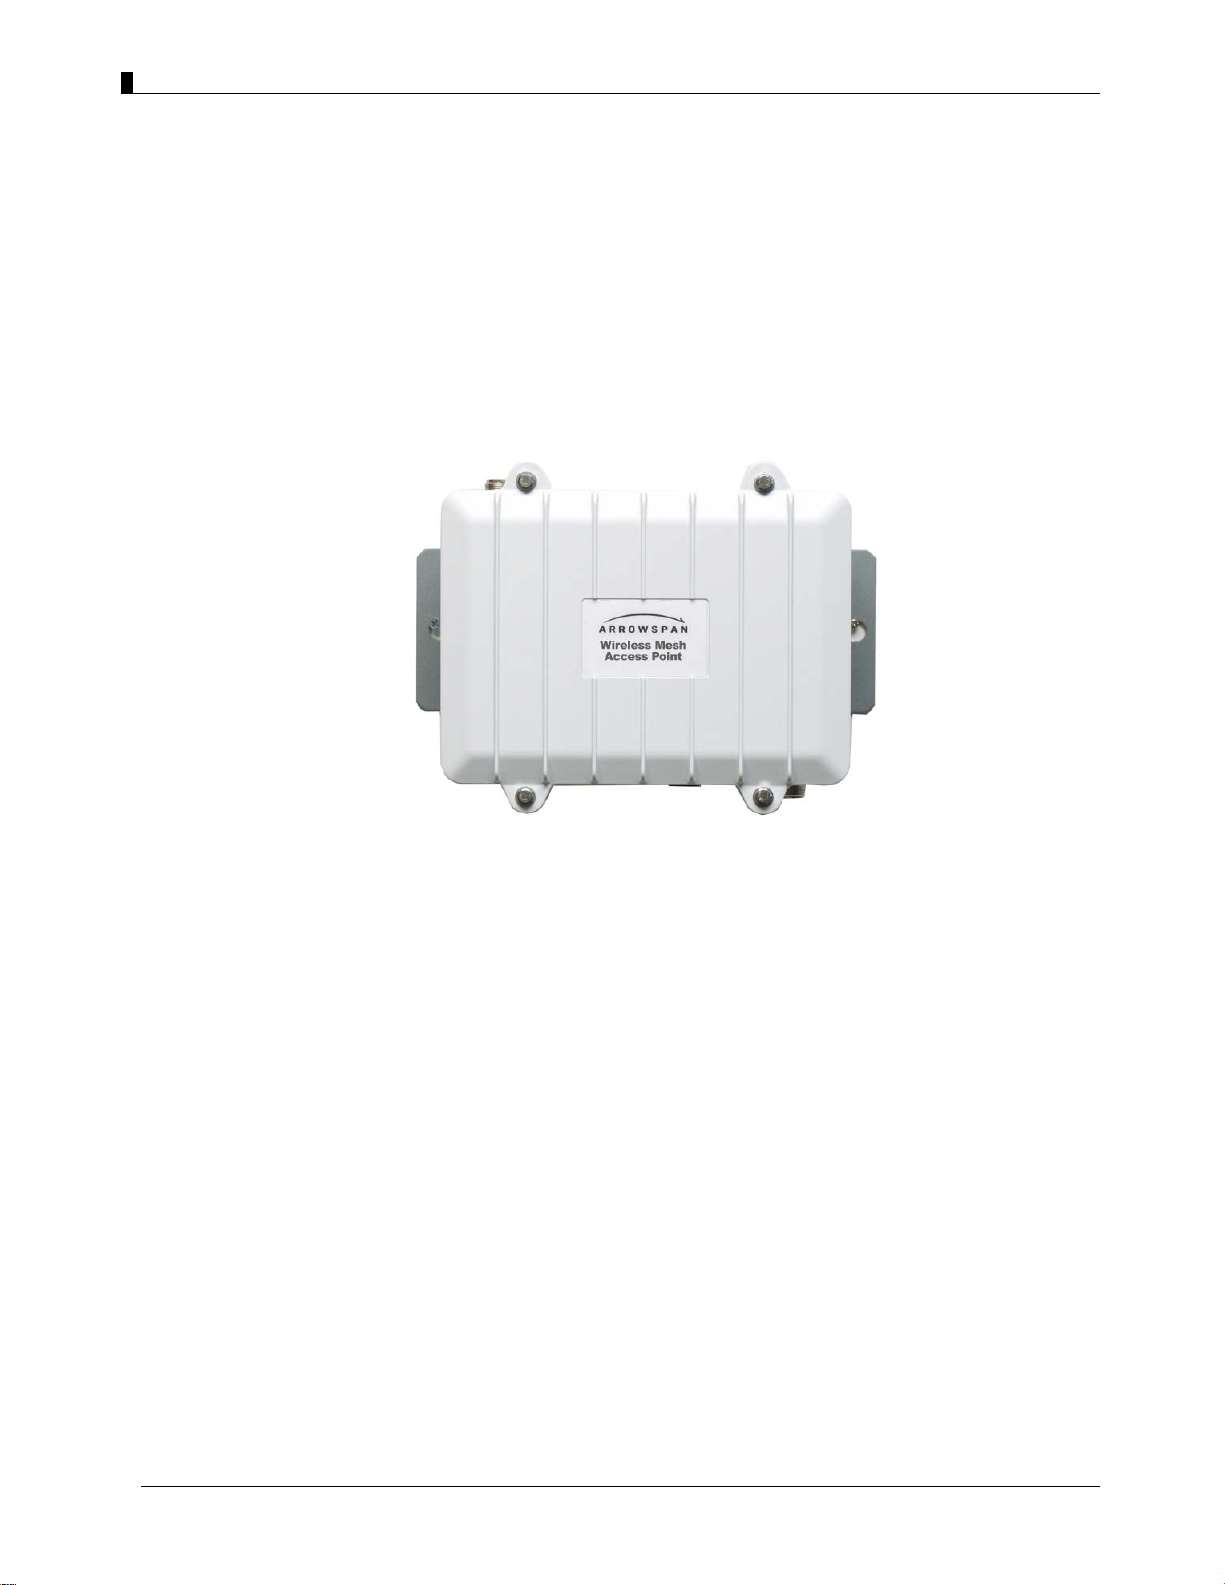
Metal Enclosure
Teletronics’s EZMesh access point consists of a weatherproof metal enclosure, providing
an industrial grade temperature support of -40°F to 131°F (-40°C to 55°C).
Outdoor Wireless Benefits
Teletronics’s EZMesh wireless solutions allow users to deploy a scalable, secure and costeffective outdoor wireless network. The MeshAP solutions deliver a true wireless
broadband network over large geographic areas or other locations where wiring is too
difficult or expensive to install.
Outdoor Wireless Challenges
TELETRONICS INTERNATIONAL, INC. - 4 -
Page 9

User Guide - EZMesh Full Duplex Mesh Network Access Point
Outdoor wireless deployments offer a number of challenges, with the main one being
interference. Special equipment may be needed in order to overcome signal
Listed below is a list of challenges that may affect an outdoor wireless network, compared
to a standard indoor WLAN:
• Coverage
• Environment
• Equipment cost
Solution Features and Benefits
Auto-recovery Auto-configuring mesh
Teletronics ’s intelligent wireless routing is based on the Predictable Optimum Path (POP).
The POP mesh routing algorithm examines the network and makes appropriate connections
among MeshAP access points in real time and dynamically optimizes the best route to the
connected network within the mesh. This helps ensure high network capacity and provides
resiliency to interference. The POP automatically determines the best path back to the
Mesh Manager by calculating the cost of each path in terms of signal strength and hops.
interference.
The POP continuously monitors changes in conditions and changes routes to reflect those
changes.
TELETRONICS INTERNATIONAL, INC. - 5 -
Page 10

User Guide - EZMesh Full Duplex Mesh Network Access Point
Chapter 2
Safety Warnings
Warning: Do not place antennas near power circuits or power lines. Choose your location
carefully and keep in mind that power lines look similar to phone lines so always use
caution. Make sure not to come into contact with any such circuits while installing th e
antenna because it may cause serious injury or death.
Warning: Only qualified personnel should be allowed to install and/or replace the
equipment.
Warning: Make sure to read the installation instructions thoroughly before you install the
unit(s).
Warning: To avoid the risk of being electrocuted, do not work on the unit(s) during a
lightning storm.
Warning: Disposal of any unit(s) should be handled according to national laws and
regulations.
Installation Guidelines
Follow the guidelines below to ensure the best possible performance:
1. Before you install your outdoor unit(s), choose a location where buildings and trees
will not block the signal.
2. Make sure to install your outdoor unit at a moderate height (approximately 40 feet), so
it can provide a clear signal to neighboring nodes.
3. Before you install your outdoor unit(s), choose a location where power circuits or
power lines are not near. Failing to do so could cause serious injury or death.
4. Plan your complete installation before you begin. It is best to have one person
chaperone the installation team to be able to spot any signs of trouble.
TELETRONICS INTERNATIONAL, INC. - 6 -
Page 11

User Guide - EZMesh Full Duplex Mesh Network Access Point
5. When installing the antenna, make sure to do the following:
• Wear shoes with rubber soles, rubber gloves, long sleeved shirt or jacket.
• Do not use a metal ladder
• Do not work on a wet or windy day
6. If the assembly starts to drop, let if fall. All the attachments are excellent conductors
of electrical current, so even the slightest touch of any of the parts could electrocute
you.
7. If any part of the unit comes in contact with a power line, do not touch it or remove it
yourself. Call your local power company and they will safely remove it.
8. Mounting units on a “vertical” mount metal objects may interfere the signal pattern of
Site Survey
the antenna. (Note: A horizontal mount metal object will not have this effect.)
9. Provide a clear signal to neighboring nodes.
10. When installing the unit(s), allow at least 20 feet of separation between each unit.
11. All the antennas need to be properly connected. The unit may experience permanent
hardware failure if the antennas are not properly connected and the unit is powered on.
12. EZMesh unit MUST be properly grounded, surge protected, and lighting protected to
avoid unit being damage with electrical stresses.
IMPORTANT: Any damages due to improper installation voids warranty.
Before any Wi-Fi mesh network is installed, a site survey is needed to determine how to
maximize the coverage and network performance.
Data rates – Sensitivity and range are inversely proportional to data bit rates. The
maximum radio range is achieved at the lowest workable data rate. A decrease in receiver
sensitivity occurs as the radio data increases
Antenna type and placement – Do not place the antenna higher than necessary. The extra
height could cause possible interference.
TELETRONICS INTERNATIONAL, INC. - 7 -
Page 12

User Guide - EZMesh Full Duplex Mesh Network Access Point
Physical environment – Open areas provide a better signal than closed areas.
Obstructions – Avoid placing the access points in a location where there are obstructions
between the sending and receiving antennas such as trees, buildings or hills.
Package Contents
Each EZMesh contains the following items:
• Outdoor Wireless Mesh Access Point
• Quick Installation Guide
• CD (User Guide, Quick Installation Guide)
Optional Equipment
• Pole mounting kit
• Street light adapter
• PoE Injector
• 8dbi 5GHz Antenna
• 8dbi 2.4GHz Antenna
Installation Components
Review the figure below to familiarize yourself with the system components and
connectors
Default Setting
User Name: admin
Password: admin
Wireless Network Name (SSID): mymesh
No Mesh Link (SSID): arrow (unchangeable)
IP Address: 192.168.1.8
Subnet Mask: 255.255.255.0
Mesh Link Connection: station
TELETRONICS INTERNATIONAL, INC. - 8 -
Page 13

User Guide - EZMesh Full Duplex Mesh Network Access Point
TELETRONICS INTERNATIONAL, INC. - 9 -
Page 14

User Guide - EZMesh Full Duplex Mesh Network Access Point
Chapter 3
Installation Options
There are two common installation options:
• Installing the EZMesh access point on a pole
• Installing the EZMesh access point on a wall
Installing the EZMesh Access Point on a Pole
When removing the access point from its box, make sure not to remove the foam blocks
attached to the antenna connectors, until after your unit is installed. This will protect the
antenna connectors during installation.
Figure 3-1
Pole Mounting Kit with EZMesh Full-Duplex Wireless Mesh Network Access Point
TELETRONICS INTERNATIONAL, INC. - 10 -
Page 15

User Guide - EZMesh Full Duplex Mesh Network Access Point
1. You can attach any outdoor EZMesh access point to any light pole
2. Mount the access point to the pole within 3ft. of the outdoor lighting control.
3. Connect a 10-AWG or larger ground wire to one of the EZMesh access point screw.
Make sure it is connected to a reliable earth ground, such as a grounded pole or a
grounding rod.
Warning: This equipment must be externally grounded using a customer supplied ground
wire before power is applied. Contact an electrician if you are uncertain that suitable
grounding is available.
Notes: When powering the product with AC power the power plug should be installed
where it can be conveniently accessed to de-energize power from the unit. Power should
not be removed by disconnecting the AC power connector itself and where it is not
subjected to water or outdoor elements.
Warning: Be careful when connecting the street light adapter to the pole. You may fall or
electrocute yourself
4. Disconnect the lightning control from its fixture.
5. Make sure that the voltage available is between 100 and 240 VAC 50/60Hz.
6. Turn off power to the fixture at the designated circuits
7. Connect the adapter to the access point AC power connector.
8. Make sure the antennas are connected before the MeshAP is connected to electrical
power. Failure to do so may result in permanent hardware damage to the MeshAP unit.
9. Plug the street light adapter into the outdoor control fixture
10. Plug the lighting control into the street light adapter
Note: Use your hands to tighten the cable until the connector locks.
11. Use either a level or the attached circular level to align the MeshAPs external antennas.
Loosely assemble the rest of the pole mount kit around the pole
Note: Each pole clamp is equipped with the bolts of the appropriate length. If a different
length is required, purchase 3/16-16 bolts of the correct length for your installation.
Note: Leave the screws somewhat loose so you can adjust the access point’s orientation.
TELETRONICS INTERNATIONAL, INC. - 11 -
Page 16
User Guide - EZMesh Full Duplex Mesh Network Access Point
12. Use a level to verify that the top edge of the pole clamp subassembly is horizontal, and
tighten its adjustment screws.
Installing the EZMesh Access Point on a Wall
Figure 3-3
EZMesh with wall mounting kit installed
1. Use the mounting plate as a template to mark four screw hole locations on your
mounting surface.
2. Mount the mounting plate on the back of the enclosure with two screws.
3. Mount the unit on the wall with 4 screws.
IMPORTANT: The EZMesh must be mounted level. A circular level is attached to assist
with this.
TELETRONICS INTERNATIONAL, INC. - 12 -
Page 17

User Guide - EZMesh Full Duplex Mesh Network Access Point
Chapter 4
MeshAP Infrastructure
Teletronics Wireless Mesh Network consists of multiple wireless nodes (MeshAP Access
Points). In a typical Teletronics Wireless Mesh Network, one or more MeshAP units will
be assigned as a Mesh Manager and other node will be assigned as Mesh Station. Any
MeshAP access point can be assigned as a Mesh Manager Mode or Station Mode. (The
default setting for a MeshAP Access Point is set as Station Mode.)
Mesh Manager Mode
The MeshAP unit configures as the Mesh Manager and has a direct-wired link to the
Internet Gateway/Router/Access Server. It is used as the management unit and Internet
Gateway for the MeshAP unit (Station) on the mesh network. (Any MeshAP access point
can be configured as the Mesh Manger unit.)
Internet
Mesh Manager
Gateway
Station Mode
The MeshAP unit configured as the Station (node), and is the child unit of the Mesh
Manager unit. Station units expand the wireless signal coverage for the mesh network.
Stations could be added to the mesh network based on network signal quality needs.
TELETRONICS INTERNATIONAL, INC. - 13 -
Page 18

User Guide - EZMesh Full Duplex Mesh Network Access Point
Chapter 5
Accessing the MeshAP Access Point (Login)
Important Default Settings of the MeshAP
User Name: admin
Password: admin
Wireless Network Name (SSID): mymesh
No Mesh Link [AP] (SSID): arrow (unchangeable)*
No Mesh Link [Backhaul] (SSID): span (unchangeable)*
IP Address: 192.168.1.8
Subnet Mask: 255.255.255.0
Mesh Link Connection: station
Default Mesh Manager IP Address: 192.168.1.254
**This ONLY applies when MeshAP “Working Mode” is set to “Manager” mode
*The SSID, “arrow”, is reserved for a MeshAP Station that has not
associated with(or formed an uplink) with another MeshAP.
**
Direct Ethernet Connection
WARNING---The antennas must be connected before the MeshAP is
powered on.
Step 1. Make sure the MeshAP unit is Powered On and Ready. Once it is powered on, it
takes about 35 seconds for the MeshAP unit to completely get booted and be ready
for service and configuration.
Use wireless WLAN utility application on PC to scan for SSID: mymesh. Make
Note: The SSID for Client AP(802.11b/g), “arrow”, is reserved for a MeshAP Station that
The SSID for Backhaul Radio, “span”, is reserved for a MeshAP Station that has
This can prevent end users from accidentally connecting to APs that are not part of a
sure the SSID: mymesh MeshAP unit has the correct Mac address.
has not associated with(or formed an uplink) with any MeshAP network.
not associated with(or formed an uplink) with any MeshAP network.
mesh network. They will not get internet access when they connect to APs that are not
part of a mesh network.
TELETRONICS INTERNATIONAL, INC. - 14 -
Page 19

User Guide - EZMesh Full Duplex Mesh Network Access Point
Step 2. Change PC IP address to 192.168.1.XXX Subnet mask: 255.255.255.0
Step 3. Access MeshAP via WAN Ethernet Port
Make sure the Ethernet cable is properly connected to both MeshAP - WAN
Ethernet Port and PC - Ethernet Port. (Connect via PoE Injector)
Note: Please review the Hardware installation Guide for more information.
Step 4. Open a Web Browser and type 192.168.1.8 to access the MeshAP Access Point.
Step 5. User Name: admin
Password: admin
Click "OK
Wireless LAN Access
Step 1. Make sure the MeshAP unit is Powered On and Ready. Once it is powered on, it
takes about 35 seconds for the MeshAP unit to completely get booted and be ready
for service and configuration.
Use wireless WLAN utility application on PC to scan for SSID: mymesh. Make
sure the SSID: mymesh unit has the correct Mac address.
TELETRONICS INTERNATIONAL, INC. - 15 -
Page 20

User Guide - EZMesh Full Duplex Mesh Network Access Point
Note: The SSID for Client AP(802.11b/g), “arrow”, is reserved for a MeshAP Station that
has not associated with(or formed an uplink) with any MeshAP network.
The SSID for Backhaul Radio, “span”, is reserved for a MeshAP Station that has
not associated with(or formed an uplink) with any MeshAP network.
This can prevent end users from accidentally connecting to APs that are not part of a
mesh network. They will not get internet access when they connect to APs that are not
part of a mesh network.
Step 2. Change the PC IP address to 192.168.1.XXX Subnet mask: 255.255.255.0
Step 3. Access the MeshAP via Wireless LAN
Make sure the PC is connected to the SSID: MeshAP (The default SSID for MeshAP)
Note: Please review the Hardware installation Guide for more information.
Step 4. Open a Web Browser and type 192.168.1.8 to access the MeshAP Access Point.
Step 5. User Name: admin
Password: admin
Click "OK
TELETRONICS INTERNATIONAL, INC. - 16 -
Page 21

User Guide - EZMesh Full Duplex Mesh Network Access Point
Access MeshAP unit via Mesh Manager’s Topology Page
(See Chapter 8 - Managing the Topology on the Mesh Manager unit)
TELETRONICS INTERNATIONAL, INC. - 17 -
Page 22

User Guide - EZMesh Full Duplex Mesh Network Access Point
Chapter 6
Mesh Manager Configuration
Setup Mesh Manager Unit
The Mesh Manager has a direct wired link to the existing network and Internet. The Mesh
Manager unit also manages all the Station units associated with the MeshAP.
Note: ANY MeshAP unit could be setup as the Mesh Manager unit.
Step 1. Login to the MeshAP Access Point.
Step 2. Go to the Setup page.
Step 3. Select “Mesh Manager” to assign a MeshAP unit to become a Mesh Manager unit
on the mesh network.
Click “Save Setting and Apply” The unit will app ly the change and reboot.
TELETRONICS INTERNATIONAL, INC. - 18 -
Step 3
Page 23

User Guide - EZMesh Full Duplex Mesh Network Access Point
Step 4. Assign IP Address to Mesh Manager unit.
IMPORTANT: The default IP Address for Mesh Manager is 192.168.1.254
The IP address will be automatic assign to Mesh Manager unit once the “MeshAP Working
Mode Change from “Mesh Station” to “Mesh Manager”
There are two modes available to assign IP address to the Mesh Manager unit
DHCP Mode – Auto Assign an IP address to Mesh Manager unit vi a Net work
Gateway/Router.
Static Mode – Assign IP address manually to Mesh Manager unit
Step 4
o Replace the default IP address to an IP address of your choice that could
be reached from the existing network. You can also select an IP address
provided by the ISP as your MeshAP IP Address
o Replace the default Subnet Mask with the one belonging to the above IP
address.
o Enter the Gateway IP of the above IP address or the IP address provided
by your ISP as a Gateway IP address. (For Remote Management)
IMPORTANT: Make sure the gateway address and the IP address of the unit are under the
same network. If not, the unit may not be able to log-on because the network is not
logically connected.
TELETRONICS INTERNATIONAL, INC. - 19 -
Page 24

User Guide - EZMesh Full Duplex Mesh Network Access Point
EXAMPLE: (IP address and Gateway should under same domain.)
Mesh IP Address: 192.168.0.120, and Gateway IP: 192.168.0.1
Http Port
The default Http Port for MeshAP is 80. Http Port could be set to any port number based
on the network administrator’s requirement.
To reassign a number Http Port enter the desire port number to Http Port field. And Click
Save Setting and Apply
Https Port
The default Https Port for MeshAP is 443. Http Port could be set to any port number based
on the network administrator’s requirement.
To reassign a number Http Port enter the desire port number to Https Port field. And Click
Save Setting and Apply
Weight
Weight number (1 – 10) help identify the level of connection desire for the nodes (Stations)
to connect to particular Mesh Manager unit on the Mesh. Setting a Mesh Manager’s Weight
to “10” may force all nodes on the mesh network to associate with this Mesh Manager than
other Mesh Manager on the mesh. Whereas Setting Mesh Manager to “1” may force this
Mesh Manager low chance for Nodes to associate to compare with other high Weight
number Mesh Manager on the mesh.
Note: Total Bandwidth score is based on Hop Count, Signal Quality, and Mesh Manager
Weight. This guideline affects the routing decision of each node on the mesh to decide
which Mesh Manager to associate
To set Mesh Manager weight, Enter number (1-10) in the “Weight of this Mesh Network”
field and Click Save Setting and Apply
TELETRONICS INTERNATIONAL, INC. - 20 -
Page 25

User Guide - EZMesh Full Duplex Mesh Network Access Point
p
p
Mesh ID
The Mesh ID is a unique identification for a mesh network. Only MeshAP Access Points
with the same Mesh ID will be able to associate with each other on the mesh network.
Step 6. Replace the default Mesh ID with a preferred name.
Note: MeshAP Stations MUST have the same Mesh ID to be able to associate with each
other and to be managed by the Mesh Manager unit.
Step 7. Update Station Name. (Station Name is NOT required, it is recommended for easy
identification of each Station.) The Station Name will appear on the Mesh
Manager’s topology page.
Step 8. Update Station Location. (Station Location is NOT required, it is recommended
for easy identification of each Station.)
Step 9. Click "Save Settings and Apply" to confirm changes.
Ste
Step 8
Ste
Step6
7
9
TELETRONICS INTERNATIONAL, INC. - 21 -
Page 26

User Guide - EZMesh Full Duplex Mesh Network Access Point
Chapter 7
Station Configuration
Mesh Link Connection Mode
There are two modes available for the MeshAP Station, Auto and Manual.
Auto Mode – The MeshAP Station automatically determines which MeshAP to form an
upstream link, or uplink, with. The POP algorithm uses the Bandwidth Score to make this
determination.
Manual Mode – The upstream link, or uplink, is selected from the Site Survey page on the
MeshAP Station. From the Site Survey page, it possible to select one or more MeshAP
devices to be the uplink.
Setup St ation in Auto Mode
IMPORTANT: To access a MeshAP Station unit on the mesh network, you need to
access the MeshAP Mesh Manager unit fist and then you could access the
MeshAP station from the Topology page.
(See Chapter 5 for more detail information)
Step 1. Login to the MeshAP Access Point.
Step 2. Go to Setup page.
TELETRONICS INTERNATIONAL, INC. - 22 -
Page 27

User Guide - EZMesh Full Duplex Mesh Network Access Point
p
Step 3. Select “Station” for This MeshAP Working Mode.
Step 3
Step 4. Select “Auto” for a Mesh Link Connection
Ste
4
Note: The system will reboot when changed from “Manual” mode to “Auto” mode. It
takes about 40 seconds and requires re-login to the unit
(See Step 1 in Chapter 1).
TELETRONICS INTERNATIONAL, INC. - 23 -
Page 28

User Guide - EZMesh Full Duplex Mesh Network Access Point
p
Note: “Minimum Mesh Link SNR” is 24dB. This setting could not be change to ensure the
routing protocol is function property under the Auto mode.
*SNR - Signal to Noise Ratio
Note: The grayed out area is the default IP address and subnet mask for the unit. This
setting should be used to access the MeshAP Station unit if the MeshAP Station unit lost
the mesh link connection with the Mesh Manager unit.
Mesh ID
The Mesh ID is a unique identification for a mesh network. Only MeshAP Access Points
with the same Mesh ID will be able to associate with each other on the mesh network.
Step 5. Replace the default Mesh ID with a preferred name that is identical with the Mesh
Manager. MeshAP Stations MUST use the same Mesh ID in order to be managed
by the Mesh Manager unit.
Step 6. Update Station Name. (The Station Name is NOT required, it is recommended for
easy identification of each Station.)
Step 7. Update Station Location. (The Station Location is NOT required, it is
recommended for easy identification of each Station.)
Step 6
7
Ste
Step8
Step 8. Click "Save Settings and Apply" to confirm changes.
TELETRONICS INTERNATIONAL, INC. - 24 -
Page 29

User Guide - EZMesh Full Duplex Mesh Network Access Point
Step8
Connect a MeshAP Station to other Stations/Mesh Managers under Auto Mode
MeshAP Stations with identical Mesh IDs under the Auto Mode will automatically
associate with the Mesh Manager or the Stations on the mesh network. The association will
be based on the wireless signal quality and hop counts of the adjacent unit.
Each MeshAP Access Point will only accept up to five (5) child Stations.
Step 1. Power ON the MeshAP Station with Auto Mode.
Step2. Login to the Mesh Manager unit.
Step 3. Review the Topology section to manage the Stations on the mesh network.
Note: The MeshAP Station under Auto Mode should automatically associate with the Mesh
Manager unit or the other Stations on the mesh network. The only way to make sure the
Station is properly associated with the mesh network is to review the Topology in the Mesh
Manager.
TELETRONICS INTERNATIONAL, INC. - 25 -
Page 30

User Guide - EZMesh Full Duplex Mesh Network Access Point
Chapter 8
Managing the Topology of the Mesh Manager unit
Accessing the Topology Page
Step 1. Login to the Mesh Manager unit
Step 2. Go to the Topology page under Mesh
Topology Tree Expanded
Step 3. Click the “+” to expand the topology tree. The color Red represents the MeshAP
under Channel 1, Black represents the MeshAP under Channel 6, and Blue
represents the MeshAP under channel 11
TELETRONICS INTERNATIONAL, INC. - 26 -
Page 31

User Guide - EZMesh Full Duplex Mesh Network Access Point
Managing the MeshAP on the Topology Tree
To manage any MeshAP under the Topology, click the Station Name on the Topology
tree, the GUI will automatically enter into the station for management.
Once the user enters the Station unit, the screen will change to the Mesh Station
Administration page.
Go back to the Mesh Manager unit
Click on the Topology page link to re-enter the Mesh Manager unit.
TELETRONICS INTERNATIONAL, INC. - 27 -
Page 32

User Guide - EZMesh Full Duplex Mesh Network Access Point
Back to the Mesh Manager unit.
TELETRONICS INTERNATIONAL, INC. - 28 -
Page 33

User Guide - EZMesh Full Duplex Mesh Network Access Point
Chapter 9
Setup Mesh Wireless (Backhaul)
Step 1. Login to the MeshAP Access Point.
Note: To access a MeshAP Access Point on the mesh network, login to the Mesh Manager
unit, and access the Topology page to locate the MeshAP Access Point unit needing
configuration.
Step 2. Go to the Wireless page under the MESH section.
Step 3. Select the Auto Assign or User Assign for the wireless backhaul
TELETRONICS INTERNATIONAL, INC. - 29 -
Note: the Channels shown on the interface may vary base on country of regulation.
The image captured above is based on the US version.
Page 34

User Guide - EZMesh Full Duplex Mesh Network Access Point
Mesh Wireless Channel (Backhaul)
Channel/Frequency. This field identifies which operating frequency will be used. The
selection is set automatically by the MeshAP unit based on the environmental conditions.
MeshAPs associated with a Mesh Manager unit will automatically calibrate its channel to
reduce interference between MeshAPs on the mesh network.
Mesh Wireless Security (Backhaul)
Mesh Wireless Security
The Mesh Wireless (Backhaul) Security could only be configured at Mesh Manager unit
The default setting of the wireless security mode for the MeshAP unit is “WPA2.”
WPA2 Key
Step 1. To automatically program the data encryption Enter a Passphrase in the WPA2
Key field.
Note: It is important to remember the WPA2 key. This key needs to be applied for both
MeshAP units on the mesh network.
Step 2. Click “Save Settings and Apply” to apply the new setting.
WPA Key
Step 1. To automatically program the data encryption Enter a Passphrase in the WPA Key
field.
Note: It is important to remember the WPA key. This key needs to be applied for both
MeshAP units on the mesh network.
TELETRONICS INTERNATIONAL, INC. - 30 -
Page 35

User Guide - EZMesh Full Duplex Mesh Network Access Point
Step 2. Click “Save Settings and Apply” to apply the new setting.
Wireless Diagnostic
Diagnostic page provides Link Speed, Signal Noise Ratio, and Noise Floor rate for the
Station.
Local Link Quality
Local Link Quality provides link quality for both the uplink and downlink data rate, signal
to noise ratio(SNR), and noise floor are displayed.
Tx Link Speed: (in Mbps)
SNR: (in dB)
Noise Floor Level: (in dBm)
Tx Error, Tx Dropped, Rx Error, and Rx Dropped: (Number of packets)
Tx and Rx Error Rates: (% difference between dropped and total packets)
Note: The data is updated every second and the last five samples are displayed.
TELETRONICS INTERNATIONAL, INC. - 31 -
Page 36

User Guide - EZMesh Full Duplex Mesh Network Access Point
Mesh Link Quality
The Mesh Link Quality page only appears on the Mesh Manager. It displays the link data
for every link in the mesh network.
The MeshAP Name column lists all the devices that are a part of this mesh. Uplink-Downlink column lists the MeshAP that each of those devices have a mesh link with. An
Uplink is a link in the direction toward a mesh manager. A Downlink is a link in the
direction away from a mesh manager. Downlinks are displayed in italics text. Uplinks are
displayed in normal text and their text is blue.
A Mesh Manager will only have downlinks.
The packet count listed in the following columns: Tx Total, Rx Total, Tx Error, RxError,
Tx Dropped, and Rx Dropped, are the number packets that have passed in the previous five
seconds.
Note: The data is updated every second and the last five samples are displayed.
TELETRONICS INTERNATIONAL, INC. - 32 -
Page 37

User Guide - EZMesh Full Duplex Mesh Network Access Point
Topology Change Log
Topology Change Log shows the history of the Topology. The Time column represents the
Time and the Date the log was generated. The Topology column shows the structure of
Topology when the log was generated.
Example:
Node 1
Node 2 === Node1
The Left side of the Topology shows the Root node, and Child node. The Right side of the
Topology shows the Parent node.
The Link Line between Child node, and Parent node
=== Normal link
- - - Weak Link
TELETRONICS INTERNATIONAL, INC. - 33 -
Page 38

User Guide - EZMesh Full Duplex Mesh Network Access Point
Radio Self-Test
The Radio Test tests backhaul radios in the MeshAP device. The test runs in two cycles.
One radio transmits while the other listens during the first cycle. During the second cycle,
the other radio transmits while the first one listens.
The results of the previous test are displayed. Prior to running a radio self-test, the results
will be zero.
TELETRONICS INTERNATIONAL, INC. - 34 -
Page 39

User Guide - EZMesh Full Duplex Mesh Network Access Point
Chapter 10
Setup AP Wireless
This section demonstrate how to change SSID, and channel setting for the mesh network
Wireless Mode
802.11b/g Mode
MeshAP is set under “Auto Mode”, MeshAP Access Point will accept both only 802.11g
and 802.11g clients.
Wireless Channel
Channel/Frequency. This field identifies which operating frequency will be used. The
selection is set automatically by the MeshAP unit based on the environmental conditions.
To Manually setup Wireless Channel simply use the drop down menu to select the ideal
channel.
TELETRONICS INTERNATIONAL, INC. - 35 -
Page 40

User Guide - EZMesh Full Duplex Mesh Network Access Point
Changing and modifying the SSID
Step 1. Login to the MeshAP Manager unit.
Step 2. Go to the Wireless page under the SSID/Security/VLAN tab at the 802.11b/gAP
section.
Step 3. click on the SSID “mymesh” to change to the appropriate SSID. The SSID will
propagate to all mesh units in the mesh network.
TELETRONICS INTERNATIONAL, INC. - 36 -
Page 41

User Guide - EZMesh Full Duplex Mesh Network Access Point
Note: Certain PCs or laptops may not reflect SSID changes instantly. If this occurs, disable
and re-enable the Wireless Network Connection in the Operation System, doing this will
ensure that all the updates are received.
Wireless Security
Disable Wireless Security (Default)
The default setting of the wireless security mode for the MeshAP unit is “Disable".
Configure WEP Wireless Security
To configure WEP data encryption, follow these steps:
Step 1. Go to the Security section under Administration.
Step 2. Use the drop down menu to select WEP Mode.
Step 3. Select the Encryption Strength, and Select 64- or 128-bit encryption
TELETRONICS INTERNATIONAL, INC. - 37 -
Page 42

User Guide - EZMesh Full Duplex Mesh Network Access Point
Note: You can manually or automatically program the four data encryptions to be identical
on all PCs and access points in your network.
Step 4. To automatically program the data encryption, Enter a Passphrase in the
Passphrase field and Click “Generate” to generate the WEP key.
There will be four sets of WEP Keys generated from the Passphrase. You could choose any
set of the WEP Keys from the Index by selecting the radio button of the Key Index.
Note: It is important to remember the WEP key. This key needs to be applied for both
MeshAP units on the mesh network and for the client devices that need to access the mesh
network.
Step 5. Click “Save Settings and Apply” to apply the new setting.
TELETRONICS INTERNATIONAL, INC. - 38 -
Page 43

User Guide - EZMesh Full Duplex Mesh Network Access Point
TELETRONICS INTERNATIONAL, INC. - 39 -
Page 44

User Guide - EZMesh Full Duplex Mesh Network Access Point
Chapter 11
Multiple SSID / VLAN Configuration
SSID / VLAN Page
MeshAP access point has the ability to set up to sixteen(16) sets of SSID and
VLAN.
To Set Multiple SSID and VLAN
Step 1. Login to the Mesh Manager unit and access the 802.11b/g AP Wireless
page
Step 2. Go to SSID/Security/VLAN tab
Step 3. Check the Enable box for the next available VLAN ID.
Enter the appropriate SSID, and Security to finish the configuration.
Step 4. Click Save Setting and Apply
Understand SSID “span” and “arrow
As for the "span", it is the default name for SSID to indicate that this MeshAP has
not joined any mesh network yet. It serves as a warning and provides a way for
fast meshing. Once the station joins a mesh network, the "span" is replaced with
last 3 bytes of MAC address.
TELETRONICS INTERNATIONAL, INC. - 40 -
Page 45

User Guide - EZMesh Full Duplex Mesh Network Access Point
The other question regarding MAC addresses is a little bit complicated. Each
MeshAP has many networking interfaces, which has ONE or MORE MAC
addresses associated with each interface. This is why you may see MAC addresses
differ from the MAC address on label.
VLAN Tag
Access Mode
Untagged (no VLAN ID) frames entering (ingress) the Ethernet port will be
accepted, and transit the network with the VLAN ID and priority specified in the
VLAN ID field. Tagged (with a VLAN tag) frames entering the Ethernet port will
be dropped. The VLAN tag will be removed from frames leaving (egress) the
Ethernet port.
Setup Access Mode
Step 1. Login to the Ethernet/VLAN
Step 2. Check “Access” radio button under the VLAN Ethernet Mode
Step 3. Click Save Setting and Apply
Trunk and Native VLAN Mode
Trunk and Native VLAN - Both untagged and tagg ed (VLAN IDs and priority
included) frames entering the Ethernet port will be accepted. Untagged frames will
be on Native or Management VLAN. Tagged frames will pass through the mesh
network unchanged. Egress (outgoing) frames will exit the Ethernet port unaltered.
If the frame leaving the Ethernet port contains a VLAN tag, it will be transmitted
with that same tag. If the frame leaving the Ethernet port does not contain a VLAN
tag, the frame will be transmitted without a tag.
TELETRONICS INTERNATIONAL, INC. - 41 -
Page 46

User Guide - EZMesh Full Duplex Mesh Network Access Point
Setup Trunk and Native VLAN Mode
Step 1. Login to the Ethernet/VLAN
Step 2. Check “Trunk and Native VLAN” radio button under the VLAN Ethernet
Mode
Pure Mode
Step 3. Click Save Setting and Apply
Pure Trunk - Only tagged (VLAN IDs and priority included) frames entering the
Ethernet port will be accepted. Egress frames will exit the Ethernet port unaltered.
If the frame leaving the Ethernet port contains a VLAN tag, it will be transmitted
with that same tag. If the frame leaving the Ethernet port does not contain a VLAN
tag, the frame with be transmitted without a tag. In this mode, the MeshAP must
be connected to a VLAN capable device and the port on that device must be
configured as a Trunk port.
Setup Pure Mode
Step 1. Login to the Ethernet/VLAN
Step 2. Check “Pure” radio button under the VLAN Ethernet Mode
TELETRONICS INTERNATIONAL, INC. - 42 -
Page 47

User Guide - EZMesh Full Duplex Mesh Network Access Point
Step 3. Click Save Setting and Apply
TELETRONICS INTERNATIONAL, INC. - 43 -
Page 48

User Guide - EZMesh Full Duplex Mesh Network Access Point
Chapter 12
Firmware Upgrade
Direct Upgrade – Mesh Station
Step 1. Login to the MeshAP Access Point.
Step 2. Go to the Status link under the AP section, and check the current firmware
version/build date.
Step 3. Go to Administration: Firmware Update link,
Enter a Temporary IP for firmware update. The IP must be reachable from the
network.
Click on “Enable” to temporary enable to IP for the unit
IMPORTANT: Once the temporary IP has assigned the unit will prompt for re-login.
Follow the Login prompt to login with username/password.
TELETRONICS INTERNATIONAL, INC. - 44 -
Page 49

User Guide - EZMesh Full Duplex Mesh Network Access Point
Step 4. Click “Browse…” to select the firmware bin file on the local hard drive for update
Step 4. Click Upgrade to start the firmware upgrade process. The firmware upgrade
process takes about 2 minutes.
TELETRONICS INTERNATIONAL, INC. - 45 -
Page 50

User Guide - EZMesh Full Duplex Mesh Network Access Point
Step 5. When the firmware upgrade is ready, the following page will be displayed on the
screen. Click “Continue”.
If after 30 seconds the same image still appears on the screen, please click on the Continue
button and re-login to the unit.
TELETRONICS INTERNATIONAL, INC. - 46 -
Page 51

User Guide - EZMesh Full Duplex Mesh Network Access Point
Smart Firmware Upgrade
Smart Firmware update propagate flash update to all Mesh Stations via Mesh Manager
Step 1. Login to the Mesh Manager unit.
Step 2. Go to Firmware Batch Update tab under the Administration page.
Step 3. Check the appropriate MeshAP units for firmware update
TELETRONICS INTERNATIONAL, INC. - 47 -
Page 52

User Guide - EZMesh Full Duplex Mesh Network Access Point
Step 4. Browse the appropriate firmware update file, and Enter a temporally IP Address in
the IP Address file. The IP Address must be reachable in the mesh network.
Step 5. Click Start to begin the update.
Once the batch update is complete the MeshAP Name will have a check mark next to the
unit.
TELETRONICS INTERNATIONAL, INC. - 48 -
Page 53

User Guide - EZMesh Full Duplex Mesh Network Access Point
APPENDIX A
Specification
Wireless
Standards: IEEE 802.11a, IEEE 802.11g, IEEE 802.11b Media Access Protocol:
CSMA/CA with ACK
Frequency: 5GHz ISM radio band
2.4GHz ISM radio band
Modulation
802.11a: OFDM(64-QAM, 16-QAM, QPSK, BPSK)
802.11g: OFDM(64-QAM, 16-QAM, QPSK, BPSK)
802.11b: CCK(11, 5.5MHz), DOPSK(2Mbps), DQPSK(1Mbps)
Data Rates
802.11a: 6, 9, 12, 18, 24, 36, 48, 54Mbps
802.11g: 6, 9, 12, 18, 24, 36, 48, 54Mb ps
802.11b: 1, 2, 5.5, 11Mbps
Tx Power
802.11a: typical 22.5dBm
802.11g: typical 23dBm
802.11b: typical 24dBm
Wireless Channels
802.11a:
USA, Canada: 12 non-overlapping channels (5.15 ~ 5.35GHz, 5.725~5.825GHz
Europe: 19 non-overlapping channels (5.1 5 ~ 5. 35GHz)
Japan: 8 non-overlapping channels (4.9~5.1GHz and W56 channels)
China: 5 non-overlapping channels (5.725~5.85GHz)
802.11g:
USA, Canada: 11
Most European countries: 13
France: 4
Japan: 13
China: 13
802.11b:
USA, Canada, Taiwan: 11
Most European countries: 13
France: 4
Japan: 14
China: 13
Antenna (Not included in package)
(3x) 8dbi 5GHz omni directional antenna
(1x) 8dbi 2.4GHz omni directional antenna
(1x) GPS Antenna (MA3100G series)
TELETRONICS INTERNATIONAL, INC. - 49 -
Page 54

User Guide - EZMesh Full Duplex Mesh Network Access Point
Operating Range
Backhaul
Outdoor: 304m(1000ft)@54Mbps
802.11g
Outdoor: 150m@54Mbps
(Transmission speed may vary according to the environment)
Network Management
Web (HTML) based Management, and SNMP
Encryption & Security
64bit, 128bit WEP encryption (Hardware Accelerated)
WPK (Hardware Accelerated)
SSID broadcast enable/disable
Mesh operator username/password
Mesh ID protection
RESET button to factory default (Inside Enclosure)
Network Ports
(1) 10/100Mbps auto crossover Ethernet WAN Port
(For connecting to 3rd party network device)
IEEE 802.3, 802.3u compliant
Power
Power Interface: POE
Input: 48VDC 380mA
Environmental Conditions
Operating Temperature:
-40°F to 131°F (-40°C to 55°C)
Storage Temperature:
-50°F to 158°F (-58°C to 70°C)
Humidity: 95% maximum relative humidity, non-condensing
Physical Specifications
Enclosure Rating: IP 66
Antenna Connector: (3) weatherproof antenna connectors
Power Connector:
(1) weatherproof Power/Data connector
(1) 100V-240V power connector
TELETRONICS INTERNATIONAL, INC. - 50 -
Page 55

User Guide - EZMesh Full Duplex Mesh Network Access Point
Dimension: 23.4cm x 17cm x6.3cm
Weight: 3.4lb (1.5kg)
Regulatory Compliance
FCC Part 15
UL 60950-1
TELETRONICS INTERNATIONAL, INC. - 51 -
Page 56

User Guide - EZMesh Full Duplex Mesh Network Access Point
APPENDIX B
Power Consumption and PoE Injector Pin Assignments
Power Consumption
48V DC 380mA
Maximum power consumption
18W
PoE Injector Pin assignments of RJ45 connector
EZMesh has a RJ45 modular jack for data connection and PoE power input. The pin
assignments of RJ45 connector are
Data Line:
Pair 1: Pin 1 and pin 2
Pair 2: Pin 3 and pin 6
Power Pins:
+VDC: Pin 4 and pin 5
-VDC: Pin 7 and pin 8
Caution: EZMesh does not support reverse polarity power input.
TELETRONICS INTERNATIONAL, INC. - 52 -
Page 57

User Guide - EZMesh Full Duplex Mesh Network Access Point
Appendix C: Warranty Policy
Limited Warranty
All Teletronics’ products are warranted to the original purchaser to be free from defects in materials and workmanship
under normal installation, use, and service for a period of one (1) year from the date of purchase.
Under this warranty, Teletronics International Inc. shall repair or replace (at its discretion) during the warranty period,
any part that proves to be defective in material of workmanship under normal installation, use and service, provided
the
product is returned to Teletronics International Inc. or to one of its distributors with transportation charges prepaid.
Returned products must include a copy of the purchase receipt. In the absence of a purchase receipt, the warranty
period shall be one (1) year from the date of manufacture.
This warranty shall be voided if the product is damaged as a result of defacement, misuse, abuse, neglect, accident,
destruction or alteration of the serial number, improper electrical voltages or currents, repair, alteration or maintenance
by any person or party other than a Teletronics International, Inc. employee or authorized service facility, or any use in
violation of instructions furnished by Teletronics International, Inc.
This warranty is also rendered invalid if this product is removed from the country in which it was purchased, if it is
used
in a country in which it is not registered for use, or if it is used in a country for which it was not designed. Due to
variations in communications laws, this product may be illegal for use in some countries. Teletronics International,
Inc.
assumes no responsibility for damages or penalties incurred resulting from the use of this product in a manner or
location other than that for which it is intended.
IN NO EVENT SHALL TELETRONICS INTERNATIONAL, INC. BE LIABLE FOR ANY SPECIAL,
INCIDENTAL OR
CONSEQUENTIAL DAMAGES FOR BREACH OF THIS OR ANY OT HER WARRANTY, EXPRESSED OR
IMPLIED,
WHATSOEVER.
Some states do not allow the exclusion or limitation of special, incidental or consequential damages, so the abov e
exclusion or limitation may not apply to you.
This warranty gives you specific legal rights, and you may also have other rights that vary from state to state.
TELETRONICS INTERNATIONAL, INC. - 53 -
Page 58

User Guide - EZMesh Full Duplex Mesh Network Access Point
Appendix D: RMA Policy
Product Return Policy
It is important to us that all Teletronics’ products are bought with full confidence. If you are not 100%
satisfied with any
product purchased from Teletronics you may receive a prompt replacement or refund subject to the terms
and
conditions outlined below.
IMPORTANT: Before returning any item for credit or under warranty repair, you must obtain a Return
Merchandise
Authorization (RMA) number by filling out the RMA form. Products will not be accepted without an RMA
number. All
products being shipped to Teletronics for repair / refund / exchange must be freight prepaid (customer pays
for
shipping). For all under warranty repair/replacement, Teletronics standard warranty applies.
30-Day full refund or credit policy:
1. Product was purchased from Teletronics no more than 30 day prior to the return request.
2. All shipping charges associated with returned items are non-refundable.
3. Products are returned in their original condition along with any associated packagi ng, accessories,
mounting
hardware and manuals. Any discrepancy could result in a delay or partial forfeiture of your credit.
Unfortunately Teletronics cannot issue credits for:
1. Products not purchased from Teletronics directly. If you purchased from a reseller or distributor you must
contact
them directly for return instructions.
2. Damaged items as a result of misuse, neglect or improper environmental conditions.
3. Products purchased directly from Teletronics more than 30 days prior to a product return request.
To return any product under 1 year warranty for repair/replacement, follow the RMA procedure.
TELETRONICS INTERNATIONAL, INC. - 54 -
 Loading...