


Index
1 Safety regulations ....................................................................................................................................... 2
2 Product description and connections .......................................................................................................... 3
2.1 Front panel ....................................................................................................................................... 3
2.2 Back panel and connections ............................................................................................................ 3
2.3 Remote control ................................................................................................................................. 4
2.3.1 Batteries ................................................................................................................................... 4
2.3.2 Remote control buttons and functions ..................................................................................... 4
3 First time installation ................................................................................................................................... 5
4 Menu and sub-menus ................................................................................................................................. 5
4.1 Setup ................................................................................................................................................ 5
4.1.1 Installation ................................................................................................................................ 5
4.1.2 TV setup .................................................................................................................................. 6
4.1.3 Password ................................................................................................................................. 7
4.1.4 Timer setup .............................................................................................................................. 7
4.1.5 SW updating ............................................................................................................................ 7
4.1.6 Factory reset ............................................................................................................................ 8
5 TV ................................................................................................................................................................ 8
5.1.1 TV list ....................................................................................................................................... 8
5.1.2 TV guide .................................................................................................................................. 8
6 Radio ........................................................................................................................................................... 8
6.1.1 Radio list .................................................................................................................................. 8
6.1.2 Radio guide .............................................................................................................................. 8
7 Multimedia ................................................................................................................................................... 8
7.1 Album ............................................................................................................................................... 9
7.2 Music ................................................................................................................................................ 9
7.3 Film ................................................................................................................................................... 9
7.4 Recording ......................................................................................................................................... 9
7.4.1 Recordings list ......................................................................................................................... 9
7.4.2 Recording device ..................................................................................................................... 9
7.4.3 Recording preferences ............................................................................................................ 9
7.5 TV program recording .................................................................................................................... 10
7.6 Timeshift ......................................................................................................................................... 10
7.7 File recognition ............................................................................................................................... 10
8 Menu organisation ..................................................................................................................................... 11
9 Troubleshooting guide ............................................................................................................................... 12
10 Technical specifications ............................................................................................................................ 13
Dear Customer,
Thank you for choosing our product. In this manual you will find all the necessary information regarding the
use of this appliance.
Besides explaining the different functionalities, this manual contains safety regulations for the correct use of
this product.
Please read the manual carefully and preserve it for future reference.
The TELE System Electronic staff
CAUTION!
TELE System Electronic Srl states that modifications made to software and/or hardware in order to improve the
product could result in incongruities between this manual and the product in your possession.
English

TELE System
1 Safety regulations
We advise you to read the following information concerning the safety regulations carefully in order to ensure
safe use of the appliance.
ELECTRICAL SUPPLY
The receiver must be supplied by a 230 Volt AC, 50Hz current.
Do not remove the cover
user. High voltage is also present when the appliance is on standby. The receiver should be disconnected
from the power supply before performing an intervention. Non-authorised removal of the cover will mean that
the warranty is no longer valid!
POWER CABLE
Before installing the appliance, make sure the cable is intact, paying particular attention to its connection to
the power supply and to the receiver. If the cable is damaged do not attempt to connect the appliance and
refer the problem to an authorised centre for assistance.
When installing the cable make sure that it can not be flattened in any way by items placed above or next to
the appliance. Avoid placing the cable in an area where it could accidentally be stepped on, removed from the
wall or damaged in any way.
If the cable is damaged in any way carefully disconnect the receiver from the power supply and refer to
specialised technicians or to the centre for assistance for repair.
LIQUIDS
Keep the appliance far from any liquids. Do not place objects containing liquids on the appliance, such as
vases, humidifiers, etc. The appliance must not be installed in areas where it could come in contact with
sprays or drops of water or in an environment with a high level of humidity where condensation could occur.
If the receiver should accidentally come in contact with liquids, immediately disconnect it from the power
socket. DO NOT TOUCH the appliance until it has been disconnected.
SMALL OBJECTS
Keep the receiver away from coins or other small objects. Objects which fall into the appliance via the
ventilation gaps could cause serious damage.
CLEANING
Before cleaning, disconnect the receiver from the power supply.
To clean the outside of the receiver use a soft and dry or slightly damp cloth. Avoid using products which
contain chemicals or solvents.
VENTILATION
Make sure that the area where the appliance is to be installed has good air circulation so that the heat can be
dissipated well in order to avoid overheating.
In order to allow enough ventilation it is necessary to have a distance of at least 10 cm on either side of the
appliance and 15 cm above the appliance.
The vents must be kept clear of any obstructions such as newspapers, tablecloths, furniture materials, etc.
Avoid installing the receiver close to any heat sources (i.e. radiators, stoves, etc.) or on top of any other
appliances which omit heat (video recorders or DVD players, etc).
WARNING!
Keep the appliance out of the reach of children.
The plastic bags used for packaging can be dangerous. To avoid suffocating keep the bags out of the reach of
children.
Do not expose the receiver or remote control to direct sunlight.
The appliance must be placed on a solid and stable base.
Connect the receiver to the power supply only after installation is complete.
Dispose of the product correctly so as to avoid damage to the environment and human health as well as to
facilitate recycling of the components/materials in the appliance. If the product is not disposed of properly this
could be punishable according to the existing law.
The manufacturer recommends that the parts be recycled separately and be taken to sites which conform to
current regulations.
When no longer usable, take the product (including accessories and batteries), which must be kept
separate from regular household waste, to a collection point authorised to handle waste from
electrical or electronic appliances. Otherwise, it is possible to return the used or unusable
appliance to your distributor when you decide to purchase a new one.
. The inside of the appliance could contain high voltages which could endanger the
2

TS6282
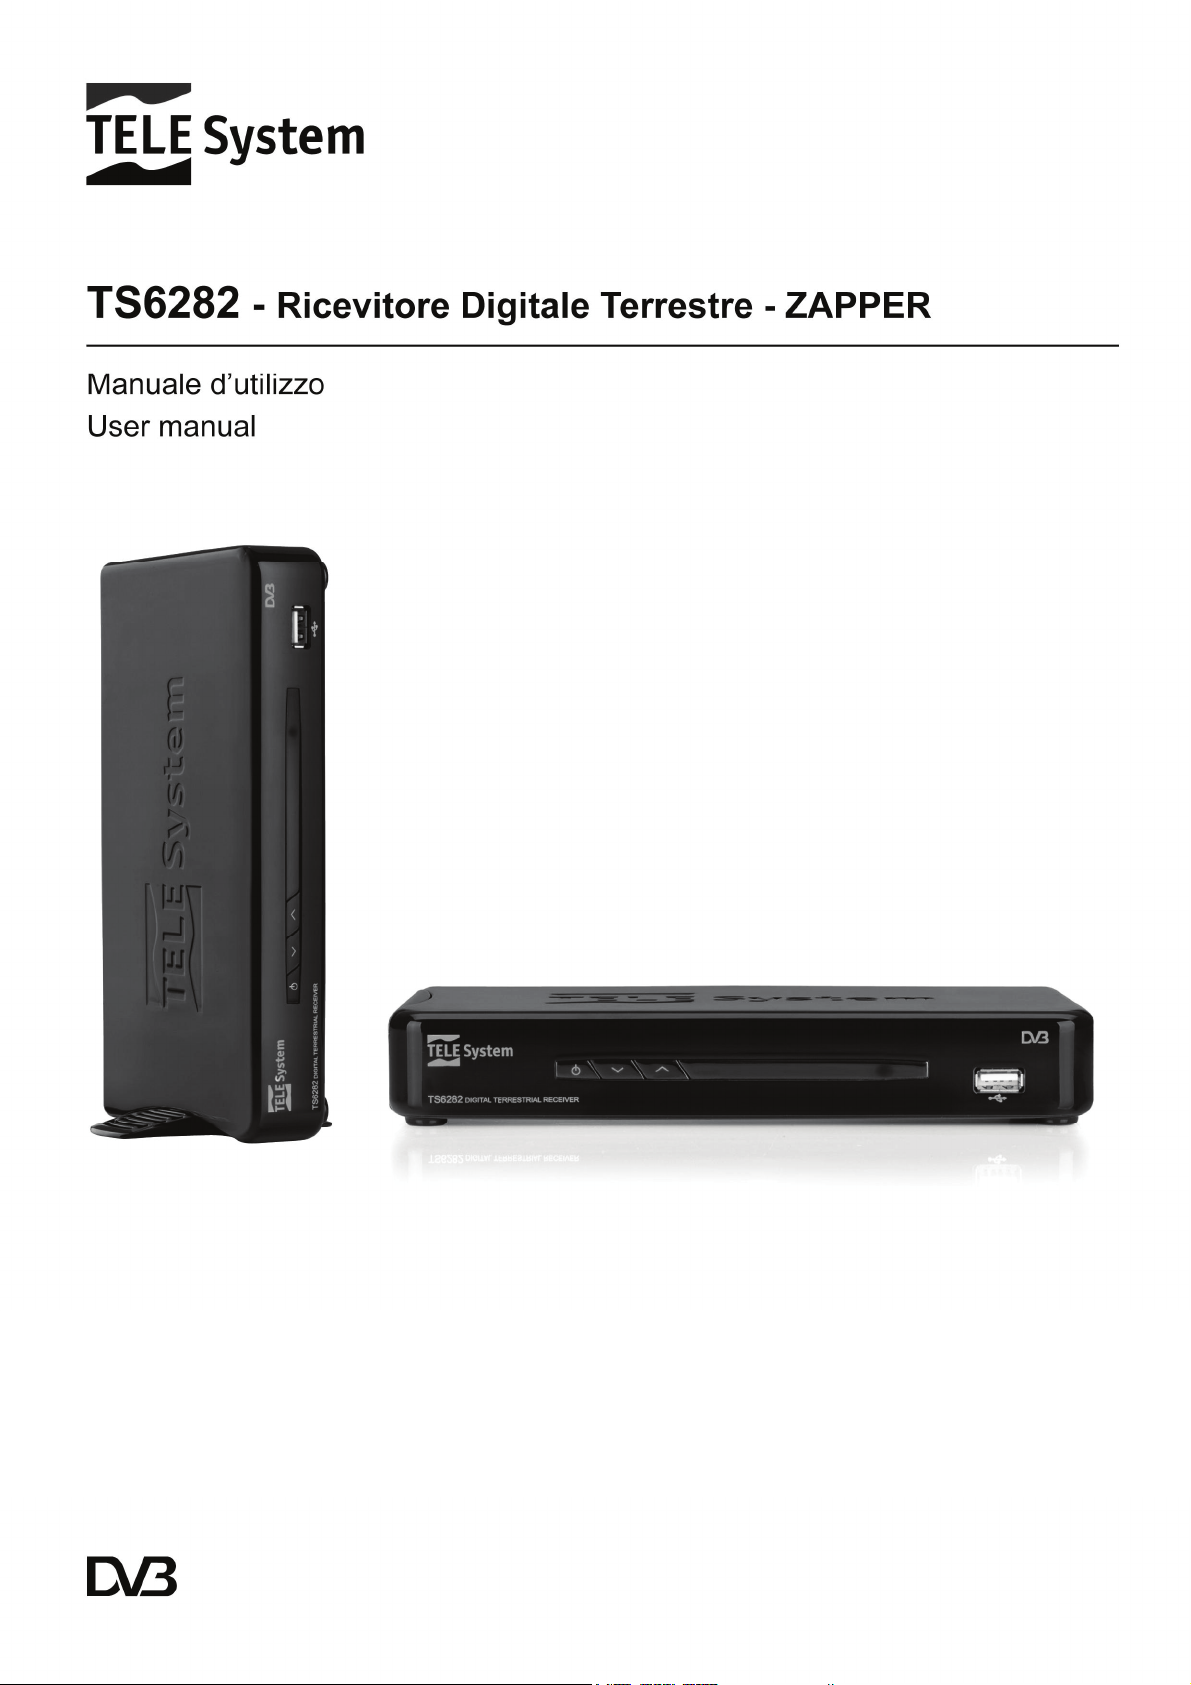
2 Product description and connections
2.1 Front panel
ON / Standby (ST.BY) button.
▼ Previous channel.
▲ Next channel.
IR Infrared sensor for remote control.
LED Status indicator: If off, the decoder is on. If Red, the decoder is on standby.
USB USB port for reading photos:*.jpg / *.gif / *.bmp, audio: *.mp3, video: mpg / mpeg2 / mpeg4 and
to record in SD/MPG format from the digital terrestrial tuner.
CAUTION!
Compatible with USB memory devices formatted with FAT16/FAT32 file systems.
Full compatibility with all USB memory devices on the market is not guaranteed.
Some USB hard-disks could require auxiliary power. It is advised that disks with external power cables be used.
English
2.2 Back panel and connections
CAUTION!
It is good practise to connect the appliance to other devices (e.g. TV, VCR, HI-FI, etc.) and the antenna before
plugging in into the main power supply. When the receiver is powered electrical voltage differences may be created
when plugging in the jacks, which may generate currents that could damage the devices.
The direct TV Scart connection should always be used as a first operating test since other more complex connection
sequences could lead to malfunctions that are not caused by faults and/or defects of the actual devices but by
problems of incompatibility.
1. RF IN Antenna signal input.
2. RF LOOP THROUGH Loop through antenna signal to TV.
3. SPIDF Coaxial digital audio output for home-theatre amplifiers.
4. VCR Scart connection for video recording.
5. TV Scart output connection for TV.
6. ON/OFF on/off switch
7. CABLE Integrated power cable for connection to a
230 Volt AC, 50Hz power socket.
3

TELE System
2.3 Remote control
Get well-acquainted with your remote control and you will find it much easier to navigate through the various
menu options.
2.3.1 Batteries
Information and warnings
Substitute or insert the batteries the first time you use the product or when the remote control doesn’t
properly respond to pressure on the buttons. Compatible batteries: 2 x AAA, 1.5V.
To avoid having corrosive liquid damage the remote control, remove the batteries when the appliance is not
used for long periods of time.
Avoid using different kinds of batteries or old and new batteries at the same time.
Insertion and removal
Open the battery cover on the back of the remote control and insert 2 AAA batteries making sure their
polarity matches that indicated inside the compartment. Close the cover.
Remove used batteries and insert new batteries. The used batteries should be disposed of separately and
taken to sites which conform to current regulations.
2.3.2 Remote control buttons and functions
1. STANDBY Turns the receiver on (ON) / or puts it on Standby
(ST.BY).
2. REW ◄◄ / FWD ►► Fast back/forward during Timeshift.
3. ► PLAY / || PAUSE
a. In viewing mode: Freeze image or Timeshift
4. FAV Favourites list
5. FILE Direct access to multimedia menu.
6. ■ STOP Stops Timeshift.
7. VCR Swap between the TV SCART connection. Go from viewing
the decoder’s channels to those of the device connected to the
decoder’s SCART and viceversa.
8. Colour buttons Context function buttons.
9. AUDIO Select tracks and audio mode.
10. SUB Activates DVB subtitles or indexed Teletext.
11. TEXT Teletext.
12. TIMESHIFT Direct access to the start of timeshift reproduction.
13. EXIT Quits current menu or operation.
14. BACK Returns to the previous channel or menu.
15. ▲ / ▼ ARROWS Navigate between menu items and options.
16. ◄ / ► ARROWS Modify menu parameters/options.
17. OK Has several functions:
a. In viewing mode: Direct access to channel list.
b. In menu mode: Confirm selection/modification.
18. PREV
reproducing personal multimedia files.
19. INFO View information
20. MENU Main receiver menu.
21. VOL+ / VOL- Volume up/down.
22. CH+ / CH- Next/previous channel.
23. ● Activates instant recording.
24. EPG Electronic Program Guide.
25. 0-9 number buttons Select channels or modify some menu fields.
26. TV/RADIO Select TV or Radio programs.
27.
▐◄◄ / NEXT ►►▌ Move to previous/next track when
a. In viewing mode: View information on current channel (i.e.
channel number and name).
b. In USB mode: View information on the reproduction or
recording underway.
MUTE Audio mute button.
4

TS6282
3 First time installation
After connecting the receiver (section 0) and inserting the power cable in the main power socket, the receiver
will automatically turn on. If this doesn’t happen, turn on the receiver using the ON/ST.BY button on the front
panel or on the remote control.
The Installation menu will appear on the screen where you will have to confirm or modify some parameters.
4 Menu and sub-menus
4.1 Setup
4.1.1 Installation
Country setup
Press the ◄/► arrows to select your Country from the list. Press the ▼ arrow to go to the next
parameter.
CAUTION!
Wrong Country setting can cause you to receive few or no channels at all.
OSD language
Using the ◄/► arrows, select the language desired from the On Screen Display (OSD). Press the ▼
arrow for the next setup.
Audio language
Using the ◄/► arrows, select the audio language desired from those available (in case the TV program
is transmitted in several languages the receiver will automatically choose the language selected, if
available). Press the ▼ arrow for the next setup.
English
Subtitles language
Using the ◄/► arrows, select the subtitles language desired from those available (in case the TV
program is transmitted with subtitles the receiver will automatically choose the language selected, if
available). Press the ▼ arrow for the next setup.
LCN
After scanning the channels, Logical Channel Numbering (LCN) automatically orders the list of TV and
Radio channels according to the position requested by television stations. We advise you keep this
function active. However, you can modify it using the ◄/► arrows. Press the ▼ arrow for the next step.
NOTE
If the LCN Mode is active, we suggest you not use the move channel function available from the TV – TV/Radio
List menu.
Sleep timer
This receiver comes with an energy saving function: after three hours of user inactivity, the receiver will
automatically go into standby mode. Two minutes before this happens, a message will appear on the
screen so that the user can stop the appliance from going into standby.
Using the ◄/► arrows, chose ON to keep the option active, or OFF to deactivate it.
Press the ▼ arrow for the next step.
CAUTION
If the on-off timer or a recording from the menu System Setup – Program Timer is set to more than three hours, it
is suggested you deactivate Sleep timer
Use of GMT
Select using the ◄/► arrows:
o “ON”: date and time related to the Country chosen are set automatically.
o “OFF”: user manually sets the date and time.
Press the ▼ arrow for the next step.
Time zone
Using the ◄/► arrows, select the time zone of the country where the decoder is installed.
Press the ▼ arrow for the next step.
5

TELE System
Date setup
o Using the numbers buttons and the ◄/► arrows, set the current date (the date cannot be modified
if “Use of GMT” is set to ON). Press the ▼ arrow for the next step.
Hour setup
Using the numbers buttons and the ◄/► arrows, set the current hour (the hour cannot be modified if
“Use of GMT” is set to ON). Press the ▼ arrow for the next step.
Auto search in Standby
Using the ◄/► arrows, select the frequency with which you want the channels to be updated in standby
mode (available options are: Daily, Weekly, Monthly and OFF).
Press the ▼ arrow for the next step.
Auto search time in Standby
Using the numbers buttons and the ◄/► arrows, set the time for an automatic channels search in
Standby mode. Press the ▼ arrow for the next step.
Hotel function
Using the ◄/► arrows, set to ON to activate the function.
CAUTION!
Once the Hotel function has been activated, you will no longer have access to the main menu. To access the main
menu again you need to deactivate the Hotel function by pressing the following buttons in order 16888+OK.
Auto scan
Press the red “Auto search” button to start an automatic channel search (you will be requested to insert
your password). At the end of the scan, if no LCN channel position conflicts are detected, the receiver
will automatically go into viewing mode.
LCN conflict solutions
If the LCN function is on (see above) and more one TV or radio station has requested the same position
on the channels list, the receiver will detect the conflict and a list of the stations involved will appear on
the screen. With the ▼ / ▲ arrows select a channel and confirm with the OK button. Press Exit to
memorise your choice and close the display window.
If the user doesn’t intervene, the receiver will automatically resolve the conflicts after about one minute
and the user can proceed with viewing the channels.
Manual scan
Press the green “Man Search” button to manually search for channels (you will be requested to insert
your password). Using the ◄/► arrows, select the frequency on which you want to search for channels
and press OK.
4.1.2 TV setup
TV format
Define the Video Format Rate value (16:9 Full Screen/Pillar Box or 4:3 Letter Box/Pan Scan) best fitted
to the characteristics of the TV screen connected to the receiver.
TV mode
Choose the standard (PAL or NTSC) in which to receive TV signals.
OSD transparency
Modify the transparency of the OSD menu when recalled.
Banner duration
Modify the viewing time of the channel banner.
Video output
Define the value of the video output (RGB or CVBS) best fitted to the characteristics of the TV screen
connected to the receiver.
Improve video
Adapt the image on screen, by regulating two parameters (Skin tone and Black/white extension),
according to the characteristics of the transmission, the TV room, and personal taste.
6

TS6282
4.1.3 Password
To modify some important menu parameters or view programs protected by Parental Lock, the receiver
requires a PIN (a four number password). The factory set password is “0000” (four times zero), but it can be
personalised through the Change password option.
Menu lock
If set to ON access to the main menu is protected by password.
Channel block
If set to ON, you can manually and individually block channels, using the Block option on the “TV list” or
“Radio list” menu.
Parental Lock
The Parental Lock function allows for the viewing of sensitive material to be controlled. If a channel
transmits a program with view control aimed at a public of the same age or older than the age level
selected from the menu, the receiver will block the channel and a message will appear on the screen. To
see the program, the PIN must be entered. (see section 4.1.3).
The default age level is 18 years old. To modify the age level, use the ◄/► arrows.
Change password
Personalise password (PIN).
CAUTION!
Write down and save your new PIN in a secure place. If you forget it, use the universal code “8888” to access the
Password menu and set a new password.
English
4.1.4 Timer setup
To set the decoder’s on-off timer: press the red button, insert the data requested and press OK.
Select the Record option on the “Timer Mode” to start recording a program.
CAUTION!
If the Record option is activated make sure you have inserted a memory device in the USB slot.
4.1.5 SW updating
In order to improve or add new functions to the receiver, it may be necessary update the software. Keeping
the receiver updated is advised.
Via USB
If an USB update is available from the manufacturer’s website, download it onto a USB pendrive. After
connecting the pendrive to the receiver’s USB port, launch the upgrade from the “SW Update –
Updating via USB” menu.
CAUTION!
During the process, do not interact with the receiver or unplug the power cable: the receiver may be irreversibly
blocked!
Via OTA (Over the Air)
The receiver can detect the software updating data from the digital terrestrial signal coming from the
antenna when the data is transmitted by a television station.
CAUTION!
Downloading and installing new software can require a lot of time especially with bad reception. During the process,
do not interact with the receiver or unplug the power cable: the receiver may be irreversibly blocked!
Manually
Access the “SW Update – Update via OTA” menu and press OK to start the manual search function to
update new software.
Automatically
Access the “SW Update – Update via OTA” menu to personalise the automatic search for software
updates. Two options will appear from the “OTA in Operative Mode” parameter:
OFF: when the new software control in operative mode is deactivated, a search in “Standby Mode”
(if activated) will start up 45 min. after going into standby.
7

TELE System
ON: by activating “OTA in Operative mode”, the receiver will control the time indicated in the Time
field on a daily basis and with the frequency indicated in the “OTA Frequency” field. In this case, a
control in “Standby Mode“ (if active) will start only at the time displayed in the menu.
4.1.6 Factory reset
If necessary, reset the receiver to its factory settings through a software reset. Go to the Tools – Factory
Reset menu and press the OK button. You will be asked to confirm.
CAUTION!
Factory Reset means you will lose all the channels that were memorised and all personalised settings, but not the last
version of the software installed.
5 TV
5.1.1 TV list
Access to the channels list allows you to modify and organise the list itself and each channel. It is possible to
create favourites lists, to move and/or jump channels to create a personalised list or to
block/rename/eliminate one or more channels. A PIN number is required to access this function.
5.1.2 TV guide
It is possible to view the TV programming of each channel, reserve the viewing of a program and/or record it
from the Electronic Program Guide (EPG).
NOTE
The information present in the EPG depends on the information sent by television stations.
6 Radio
6.1.1 Radio list
Access to the Radio channels list allows you to modify and organise the list itself and each channel. It is
possible to create favourites lists, to move the Radio channels to create a personalised list or to
block/rename/eliminate one or more Radio channels. A PIN number is required to access this function.
6.1.2 Radio guide
It is possible to view the TV programming of each Radio channel, reserve the viewing of a program and/or
record it from the Electronic Program Guide (EPG).
NOTE
The information present in the EPG depends on the information sent by television stations.
7 Multimedia
The USB port on the front of this receiver allows for multimedia files to be read and for unencrypted digital
terrestrial programs to be recorded.
CAUTION!
The receiver is compatible with USB memory devices formatted with FAT16/FAT32 file systems.
When connecting a hard disk, free memory space of at least 300 GB is required.
To work properly, some hard disks that are auto-powered via USB could require an external power supply.
Full compatibility with all USB memory devices on the market is not guaranteed.
Formatting the memory device from the “Recording Device” menu is strongly advised.
The use of a device with at least 4 GB of free (unused) memory is advised.
USB memory connection
After the USB is connected, and after each decoder start-up, a control of the device is undertaken that could
last a few seconds depending on the amount of memory in the device.
After the first recording, a folder called MYRECORD is created, that acts as the receiver’s working folder for
recordings.
CAUTION!
Never disconnect the USB memory device during multimedia reproduction, while recording, formatting or in the presence
of an recording even timer: the devices involved may be irreversibly damaged!
8

TS6282
7.1 Album
Select an option and press the OK button to view the images saved on the memory device.
7.2 Music
Select an option and press the OK button to listen to the music files saved on the memory device.
7.3 Film
Select an option and press the OK button to view the video files saved on the memory device.
7.4 Recording
Allows access to personal recordings (and therefore their viewing and/or cancellation) and the organisation
of the memory device connected to the decoder.
7.4.1 Recordings list
Using the ▼/▲ arrows, select the recording you wish to reproduce and press OK to see a preview. Press
OK again and the recording appears full screen.
Press the Red button to eliminate the file (you will be asked to confirm).
Press the Info button to enter the menu and organise the memory device.
7.4.2 Recording device
Allows the memory device to be organised and totally or partially formatted according to its partition capacity.
o Format disk (green button): use this function to completely format the device connected to the
receiver.
o Format (red button): use this function if there are two or more partitions present in the device and if
you wish to format only the partition previously selected in the “Partition” field.
CAUTION!
o If the message “PVR initialisation incomplete” appears, it is necessary to (totally or partially) format the device that is
connected to the USB port.
o Formatting the memory device from the “Recording Device” menu is strongly advised.
English
7.4.3 Recording preferences
Dim Timeshift
View the size of the memory dedicated to Timeshift registration.
CAUTION!
o The memory size is automatically set based on the total size of the disk.
o The use of a device with at least 4 GB of free (unused) memory is advised.
Timeshift
Set to OFF to deactivate the function, Pause to start it manually or Automatic for the automatic mode
function.
Instant recording
If set to OFF, after pressing the “●” button the decoder will ask for confirmation of the maximum duration
of the recording before starting it. It is possible to vary the duration with the ◄/► arrows.
If set to ON, after pressing the “●” button the decoder will start recording and the maximum duration will
be equal to that set in the Multimedia/Recordings/Recording Preferences/Recording Time menu.
Recording Time
Set the maximum duration of time for the recording.
NOTE:
It is necessary to confirm the modifications by pressing the “OK” button before leaving the menu.
9

TELE System
7.5 TV program recording
Before recording, check the state of the USB memory device and the space available from the menu
Multimedia/Recordings/Recording Device.
Instant Recording
By default, after connecting the USB memory device, to start recording manually, switch to the program of
interest, press the “●” button on the remote control and confirm the duration of the recording. (It is possible to
modify the duration with the ◄/► arrows).
To end the recording early, press the STOP button and confirm.
To modify this functionality, see section “7.4.3 Recording preferences”.
Programmed Recording
The “Setup – Timer Setup” menu allows you to manually set several recordings timers. In the timer
definition, besides setting the channel, the date, start and end times, make sure the Recording option is
selected.
Otherwise, from the EPG menu press the Red button “Set program” after having selected the program.
NOTE
Make sure you have enough memory space before proceeding to record.
Remember to leave the USB memory device connected.
7.6 Timeshift
Timeshift temporarily records a program until you switch channels or press the Stop button. It is therefore
possible to resume viewing a program being recorded by pressing the PLAY/PAUSE button. To
activate/deactivate this function, go to the “Recordings – Recording preferences - Timeshift” menu.
Three modes are available:
o OFF: function disabled
o Pause: Timeshift function is manually controlled using the Play/Pause button during program
viewing.
o Automatic: the function automatically activates when you switch channels.
7.7 File recognition
The multimedia files that can be read by this device are:
Photo: .JPG - GIF - BMP
Music: .MP3
Video: .MPG – MPEG2 – MPEG4
Playing recorded files
To view a recording made with the receiver, among the files located in the correct working folder, press the
FILE button on the remote control and access the “Multimedia – Recordings” menu. Chose the file from the
list available and press OK to see a preview. Press OK again and the registration appears full screen.
Reading personal files
To access a video, music or photos located in a personal folder on the USB memory device connected to the
receiver, press the FILE button on the remote control and access the “Multimedia” menu. Select the type of
file to reproduce from the options available Album – Music – Film. Navigate between the files using the
▼/▲ buttons and press OK to view/listen.
10

TS6282
8 Menu organisation
The receiver menu is organised as follows:
Setup
▼
- Installation
- TV setup
- Password
- Timer setup
- SW updating
- Factory preset
NOTE
Navigating the menus is simple and intuitive. Use the MENU, BACK, EXIT, arrow, OK and numerical buttons on the
remote control. Follow the indications on each menu display window.
TV
▼
- TV list
- TV guide
Radio
▼
- Radio list
- Radio guide
Multimedia
▼
- Album
- Music
- Film
- Recordings
English
11

TELE System
9 Troubleshooting guide
PROBLEM PROBABLE CAUSE SOLUTION
1. The receiver doesn’t turn on (the
LEDs on the front panel don’t light
up)
2. No image or sound - Antenna signal weak or absent..
3. Channels don’t load -Lack of antenna signal.
4. The settings aren’t memorised. -Did not confirm after modifying the
5. The remote control doesn’t work. -The receiver is on standby.
6. Forgotten password. -The factory set PIN is 0000 (four
7. The programmed timers don’t
work correctly.
8. The receiver doesn’t respond to
the remote control buttons.
9. The USB memory device isn’t
recognised or doesn’t work
correctly.
10. The receiver automatically shuts
down.
11. Timeshift doesn’t work - The function is set to OFF
INFORMATION
Generally, in case the receiver doesn’t respond correctly, a Factory Reset (section 4.1.6 Factory reset) can help solve
the problem.
-The receiver is not plugged into the
power socket.
-The receiver is plugged in but the box
still doesn’t work.
- The receiver is turned onto a
channel that doesn’t transmit a video
signal.
-The SCART cable or antenna cable
is disconnected or damaged.
-Low or no volume.
-The TV is not switched on to the
appropriate audio/video channel.
-The antenna system is not
compatible with the digital terrestrial
system.
settings.
-The remote control is not pointed at
the infrared sensors on the receiver.
-Flat batteries.
-Batteries are charged but inserted in
the wrong way.
-The remote control was dropped and
the internal components are
damaged.
-The receiver’s time is not set
correctly.
- Receiver is temporarily blocked.
-A television station is transmitting
wrong data.
- Problem with the remote control.
-Memory device not formatted
correctly or not compatible.
-Memory speed not sufficient for
recording.
-Type of file not supported.
-The receiver’s single USB port is not
enough to feed the memory.
- Sleep timer function active. -Deactivate the energy saving
-Make sure the power cable is
properly plugged into the power
socket.
-After unplugging the receiver, check
that the power supply cable isn’t
damaged (Warning!: Danger of
electrical shock!).
-Make sure the SCART is properly
connected, check the antenna
installation and the quality of the
signal received.
-Make sure the volume on the TV or
the receiver is not at zero.
-Make sure the TV is switched to the
AV channel (consult TV manual).
-Perform Factory reset.
-Check that there is an antenna signal
coming through the receiver.
-Consult a trusted technician.
-Perform a manual channels search.
-Perform Factory reset.
-Before exiting a menu, press the
corresponding confirm button.
-Press the ON/ST.BY button on the
front panel to check that the receiver
is working.
-Make sure there are no obstacles in
front of the front panel.
-Insert new batteries.
-Make sure the batteries are inserted
correctly.
-Contact a distributor to purchase a
new remote control.
times zero).
-Set the time.
-Disconnect the receiver from the
power supply for at least a minute
then re-connect.
-Re-start the receiver with the antenna
disconnected, delete the problematic
channel and re-connect the antenna.
-Try a factory reset (section 4.1.6
Factory reset).
function.
-Activate the function from the menu
“Recordings – Recording preferences
- Timeshift”
12

TS6282
10 Technical specifications
Type of product Digital terrestrial receiver (ETSI EN 300 744) for unencrypted channels with
USB
Input frequency 147÷230 MHz (VHF) / 470÷862 MHz (UHF)
Channel bandwidth 6 / 7 / 8 MHz
Display Language menu
OSD menu ●
Teletext (ETSI EN 300 472) ●
Subtitles ( ETSI EN 300 706) ●
Electronic Program Guide (EPG) ●
RF modulator Integrated modem Video Format Rate 4:3 Letter Box / 4:3 Pan Scan / 16:9 Full / 16:9 Pillar Box
Coaxial Digital Audio Output (SPDIF) ●
Optical Digital Audio Output (SPDIF) TV SCART output Out: Video RGB / CVBS, audio L+R
VCR SCART connection Out/In: Video CVBS, audio L+R
RCA Audio Stereo Connectors RCA Video Connector RS232 Data Serial Port USB Port Frontal - USB 2.0 - 5V, 500mA MAX
Multimedia file reader via USB
Recording via USB
Software updating
Factory reset function ●
Favourite Channels List ●
Event timer On-Off / recording
Sleep timer (energy saving) ● (can be disabled)
Auto-updating of channels ● (can be disabled)
Active antenna power supply Power supply 230V~ 50Hz
Power Consumption
Dimensions 210 x 128 x 32 mm
photo: jpg / gif / bmp, audio: mp3 video: mpg / mpeg2 / mpeg4
From internal TV tuner, in original .MPG format.
ON mode: (Max)7,50 W (USB current absorption equal to 500 mA)
6 : IT– RU –EN – DE – FR– SP
Via USB
Via OTA (Over the Air)
Standby mode: (Max) 0.96 W
English
13

Product code 21005183 Zapper Digital terrestrial receiver
TELE System TS6282
CE conformity declaration
Tele System Electronic states that this product meets the basic European requirements of 2004/108/CE
(EMC - Electromagnetic Compatibility), 2006/95/CE (LVD - Low Voltage Directive) and 2009/125/CE (ERP-
Ecodesign requirements for energy-related products), following the technical directives:
Electromagnetic Compatibility:
EN 55013: 2001 + A1:2003 + A2:2006
EN 55020: 2007
EN 61000-3-2: 2006
EN 61000-3-3: 2008
Low Voltage:
EN 60065: 2002 + A1:2006 + A11:2008
Bressanvido, December 2010
Flavio de Poli
General Management
ITALY
TELE System Electronic
Via S. Benedetto, 14 M
36050 Bressanvido (VI)
Internet: www.telesystem-world.com
Customer assistance tel.:
199 214 444 (Italy only)
Rev01 09/12/2010
 Loading...