

TeleSynergy AbovEdge SS-7010, AbovEdge MV-6432 Quick Installation Manual
Quick Installation Guide
Table of Content
Startup and Shut down ........................................................................................................ 1
IP Network connection ....................................................................................................... 1
Connect power cord and power on the AbovEdge SS-7010/MV6432 ............................... 6
Connect power cord and power on the Extension Expansion Module ES-0624/0030 ....... 7
Log in the AbovEdge Administrator Interface through Host PC ....................................... 8
Startup and Shut down
Plug power cord into the AbovEdge SS-7010/MV-6432, the system will power up and
start running.
When shut down the system, press and hold the red power switch for one
seconds for AbovEdge SS-7010/MV-6432 to do a “soft” shutdown. Do not
hold more than 4 seconds, which will result in a “forced shutdown” of the
system.
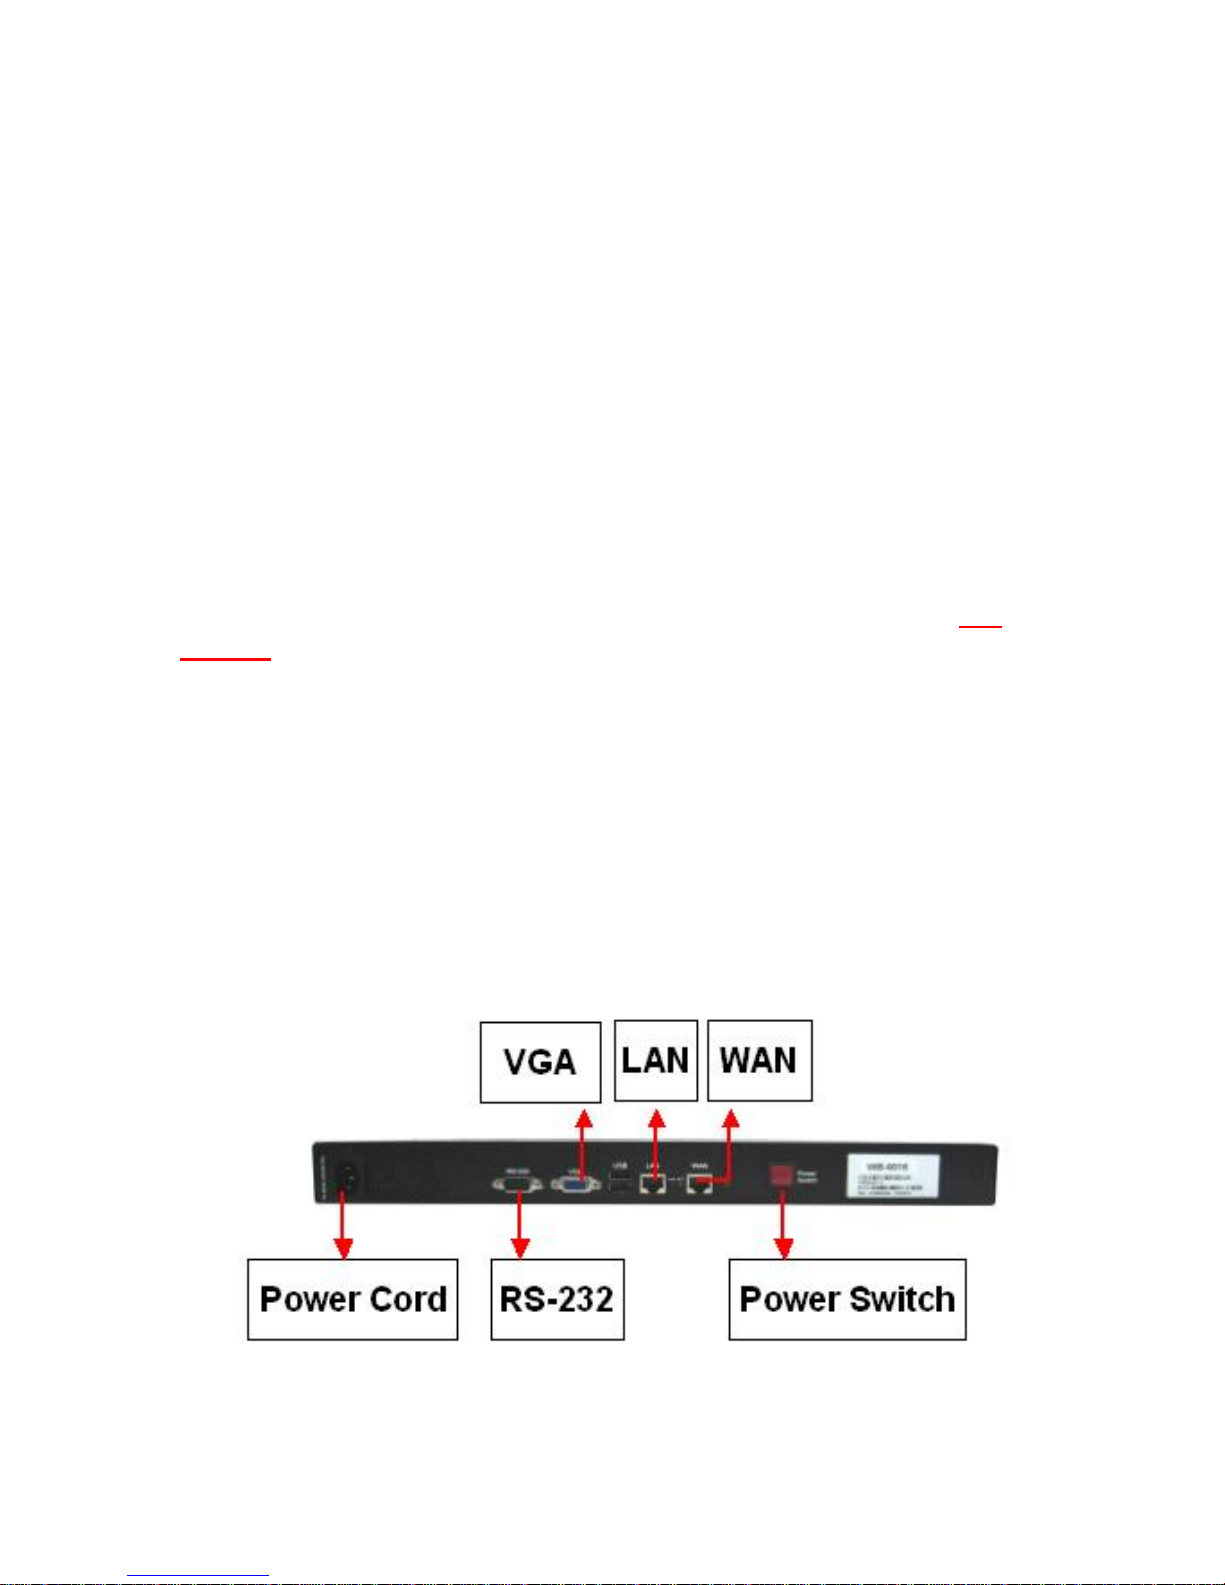
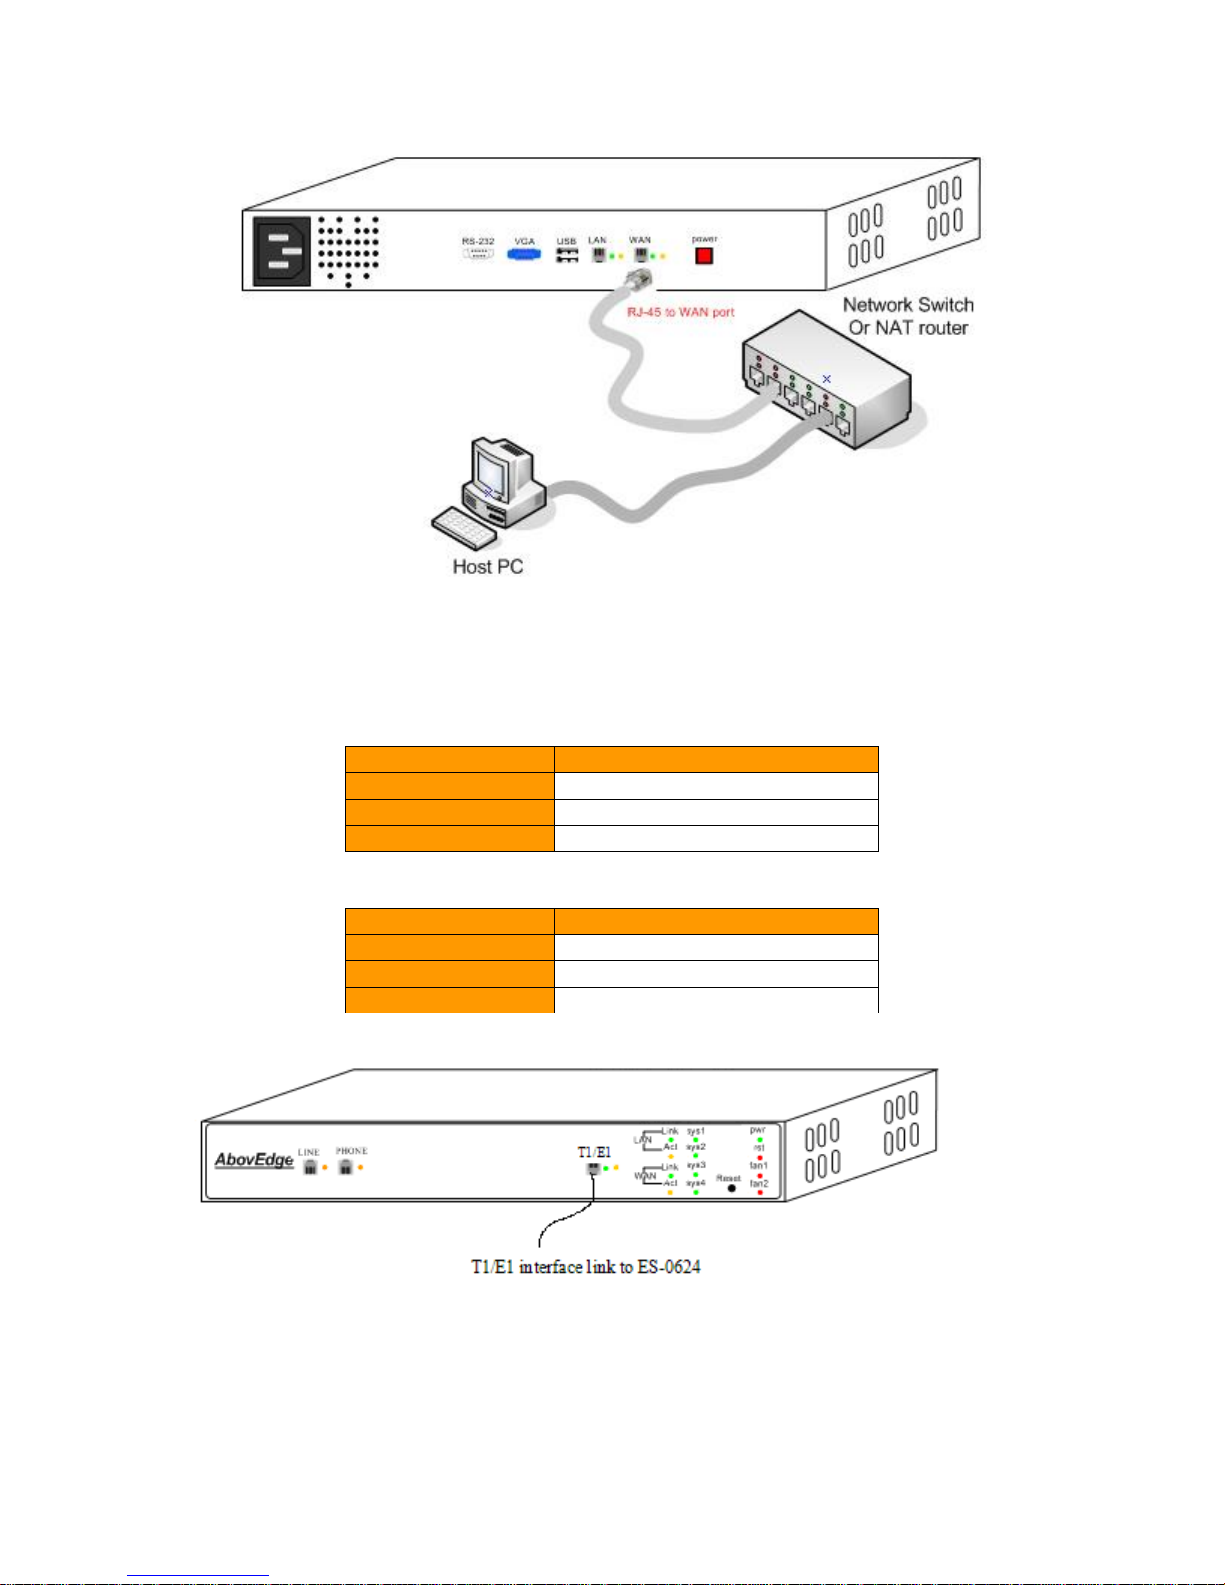
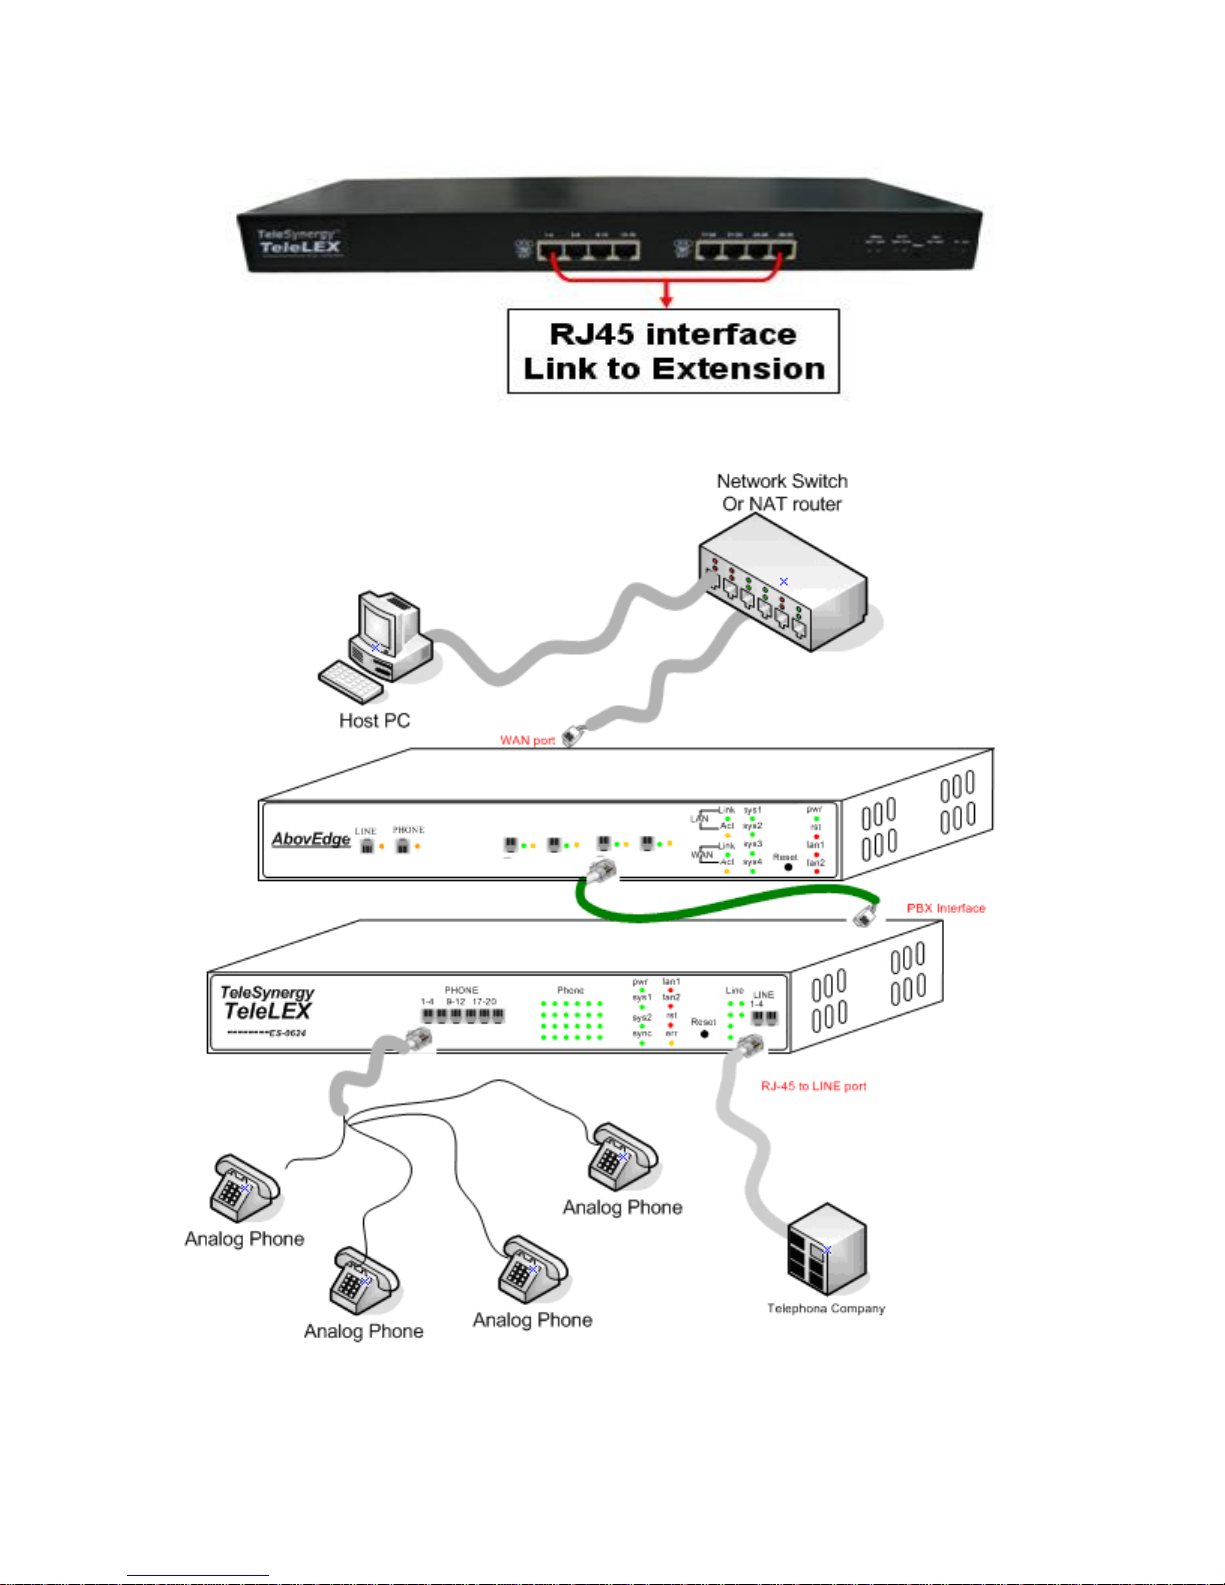
IP Network connection
Connect AbovEdge SS-7010/MV-6432’s WAN port to a network Switch. Do NOT
connect to the LAN port. LAN port is for TeleSynergy’s internal usage only. Wait for
AbovEdge finish startup, you can configure AbovEdge through HOST PC by default IP
address.
Picture 1. AbovEdge-SS7010/MV-6432 Rear View
WAN Port
IP Address
192.168.1.5
Subnet Mask
255.255.255.0
Default Gateway
192.168.1.1
WAN Port
IP Address
192.168.1.5
Subnet Mask
255.255.255.0
Default Gateway
192.168.1.1
AbovEdge Default Network Setting:
SS-7010
MV-6432
The Link and Act LED beside the WAN port will display its status when the
power-up process of the AbovEdge is completed.
Picture 2. AbovEdge-SS7010 Front View
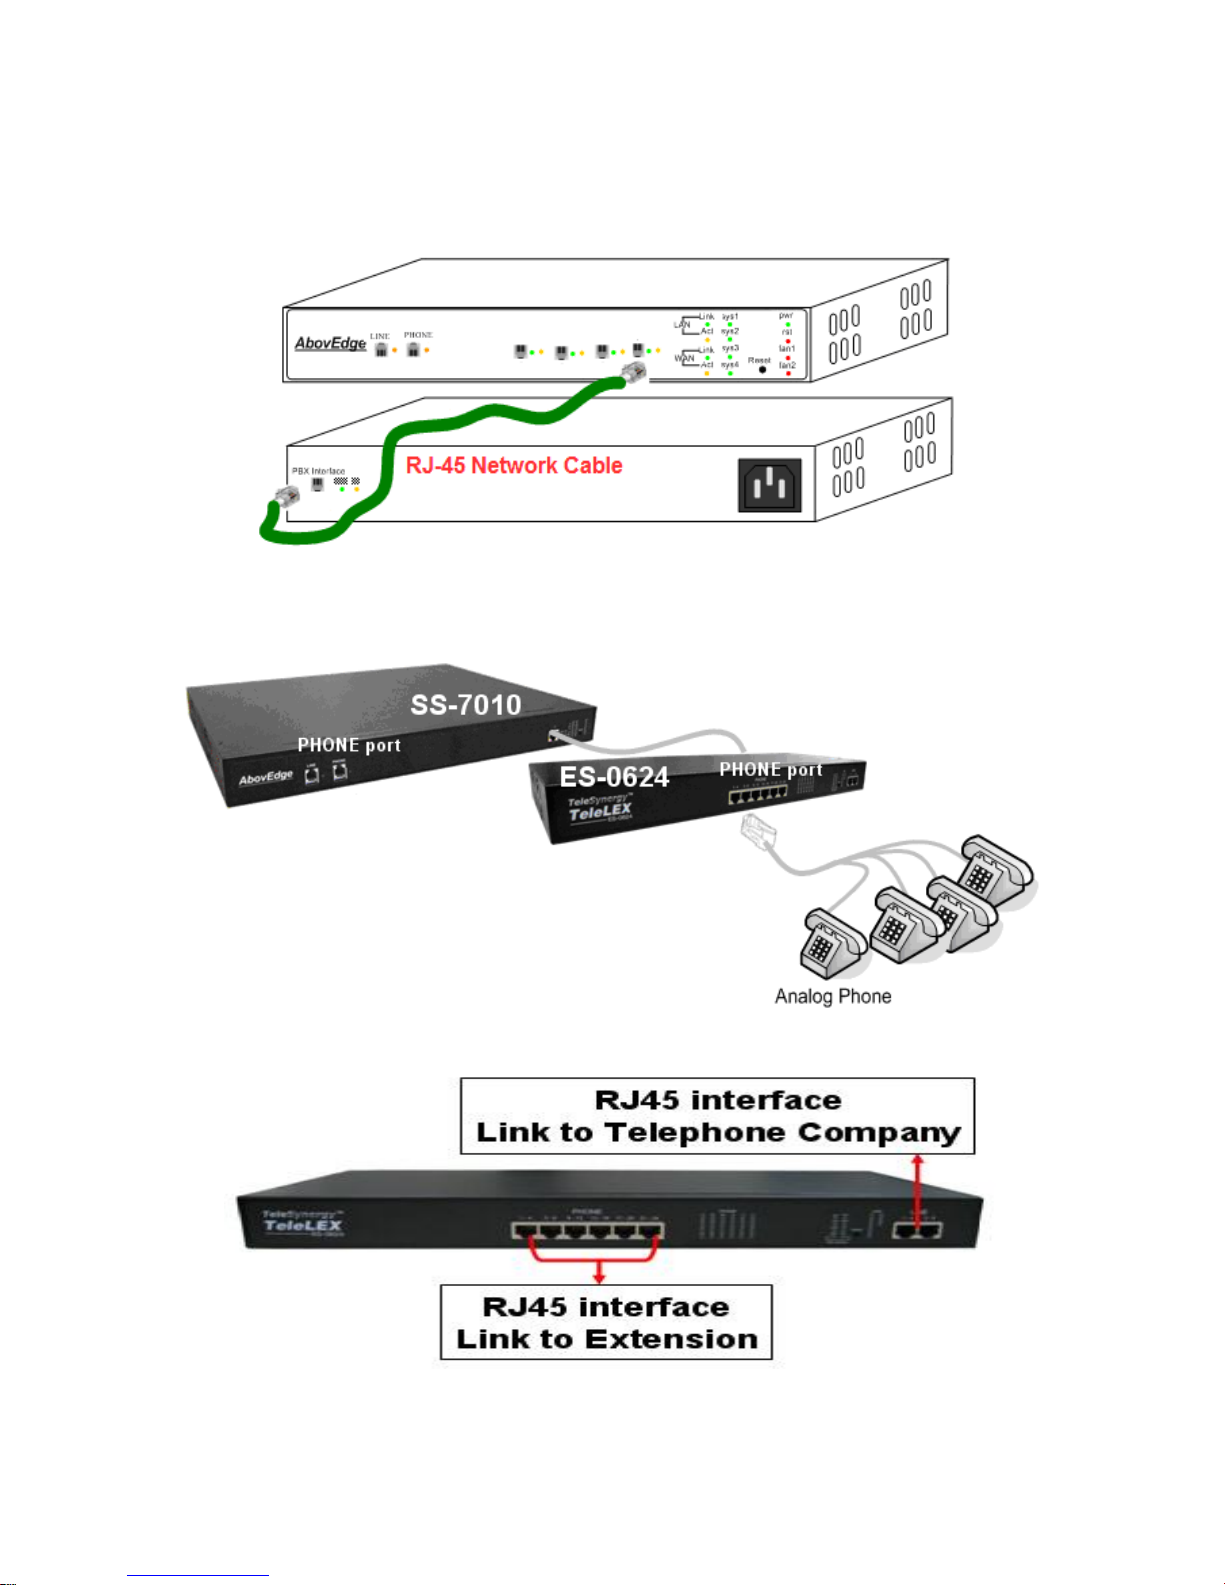
Use a network cable to connect between SS-7010 and ES-0624; MV-6432
and ES-0624/0030.
Picture 3. Connecting AbovEdge SS-7010 and Extension Expansion Module ES-0624
Picture 4. ES-0624 Front View
Picture 5. ES-0030 Front View
Picture 6. Cable connection: AbovEdge MV-6432 and ES-0624

MV-6432
PHONE port
Analog Phone
RJ-11
RJ-45
Analog
Trunk x 1
PHONE port
ES-0624
PHONE ports
Analog Phone
RJ-45
Analog Trunk x 6
ES-0030
Picture 7. Cable connection: AbovEdge MV-6432 and ES-0624/0030
ES-0624 LINE Port RJ-45 line layout,
Picture 9. ES-0624 Trunk RJ45 Line layout
Picture 8. RJ45 to 4 RJ11 extension cable
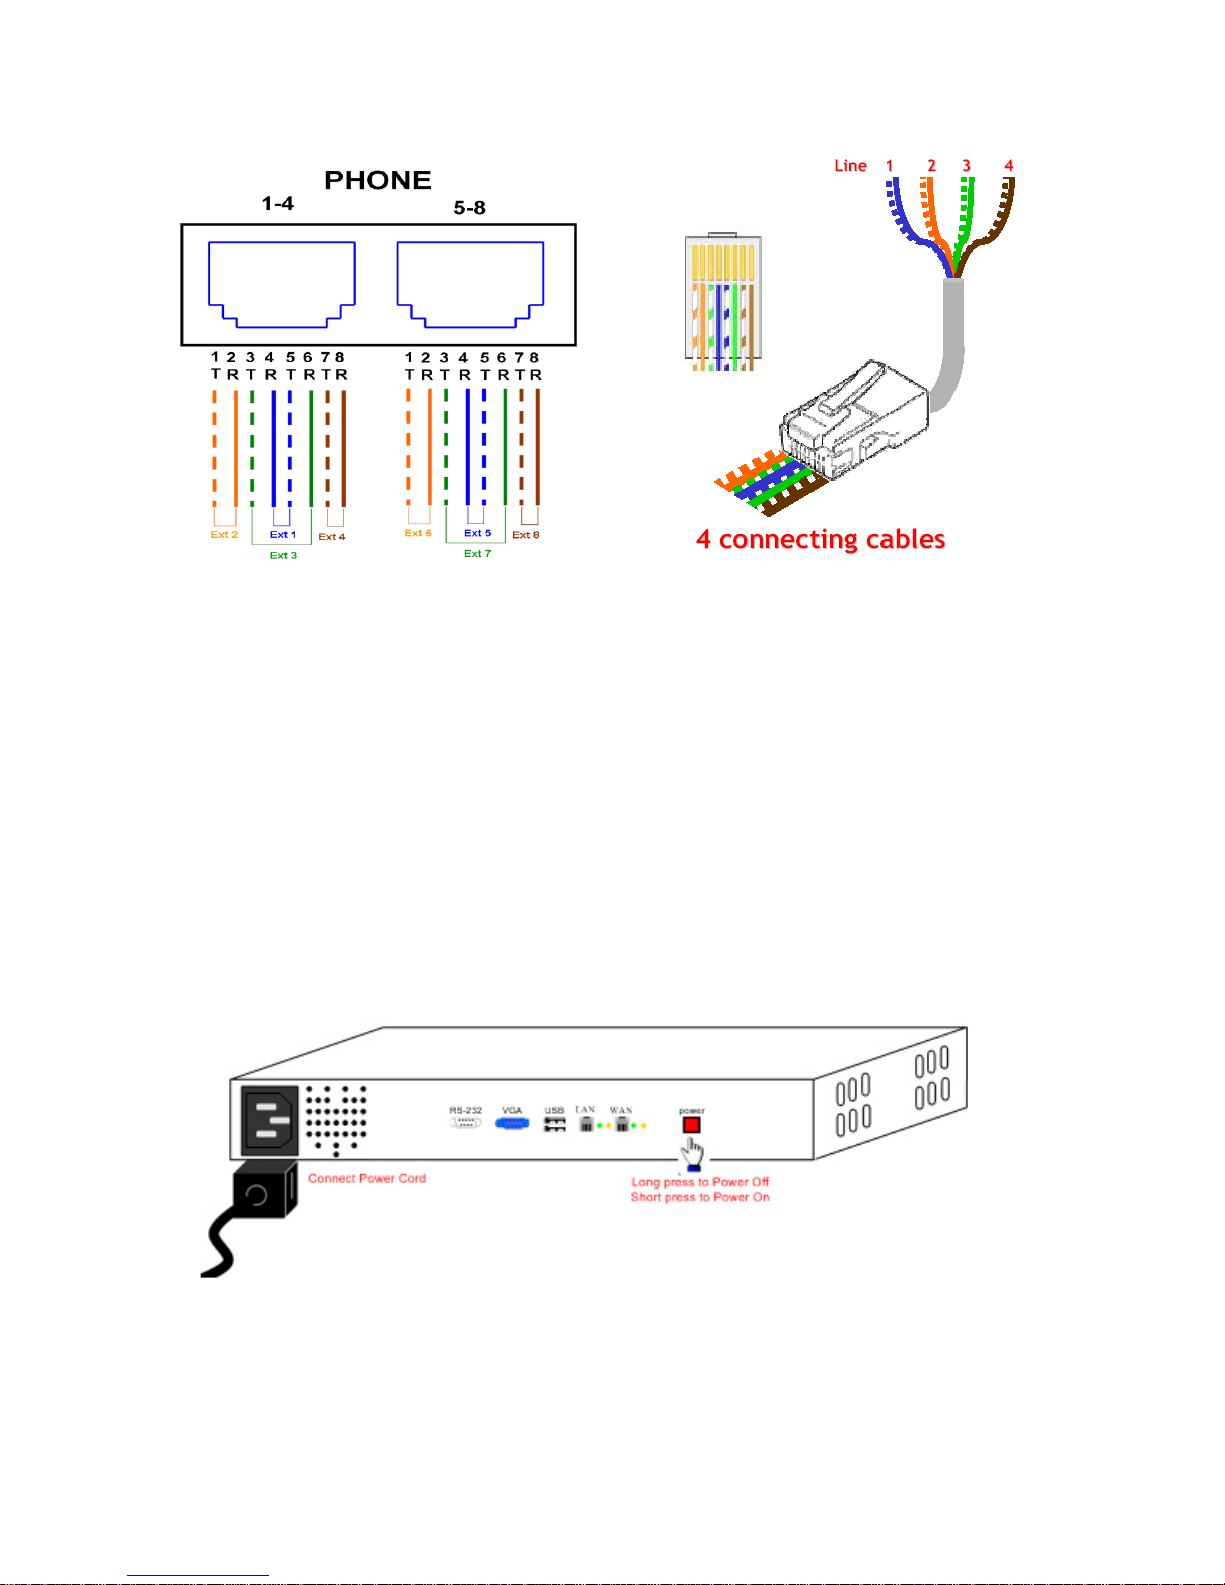
Picture 10. ES-0624/0030 RJ45 to 4 RJ11 extension cable
Connect power cord and power on the AbovEdge SS7010/MV-6432
Plug power cord into the AbovEdge SS-7030, the system will automatically start.
In rare cases that the system has already been shut down, and you need to start the
system, just press red power switch and quickly(less than one second) release it to start
the AbovEdge.
When the AbovEdge completes the power on process, usually less than 1 minute, the
status LED will show normal as below,
sys1~4:green light blink with certain time interval
 Loading...