


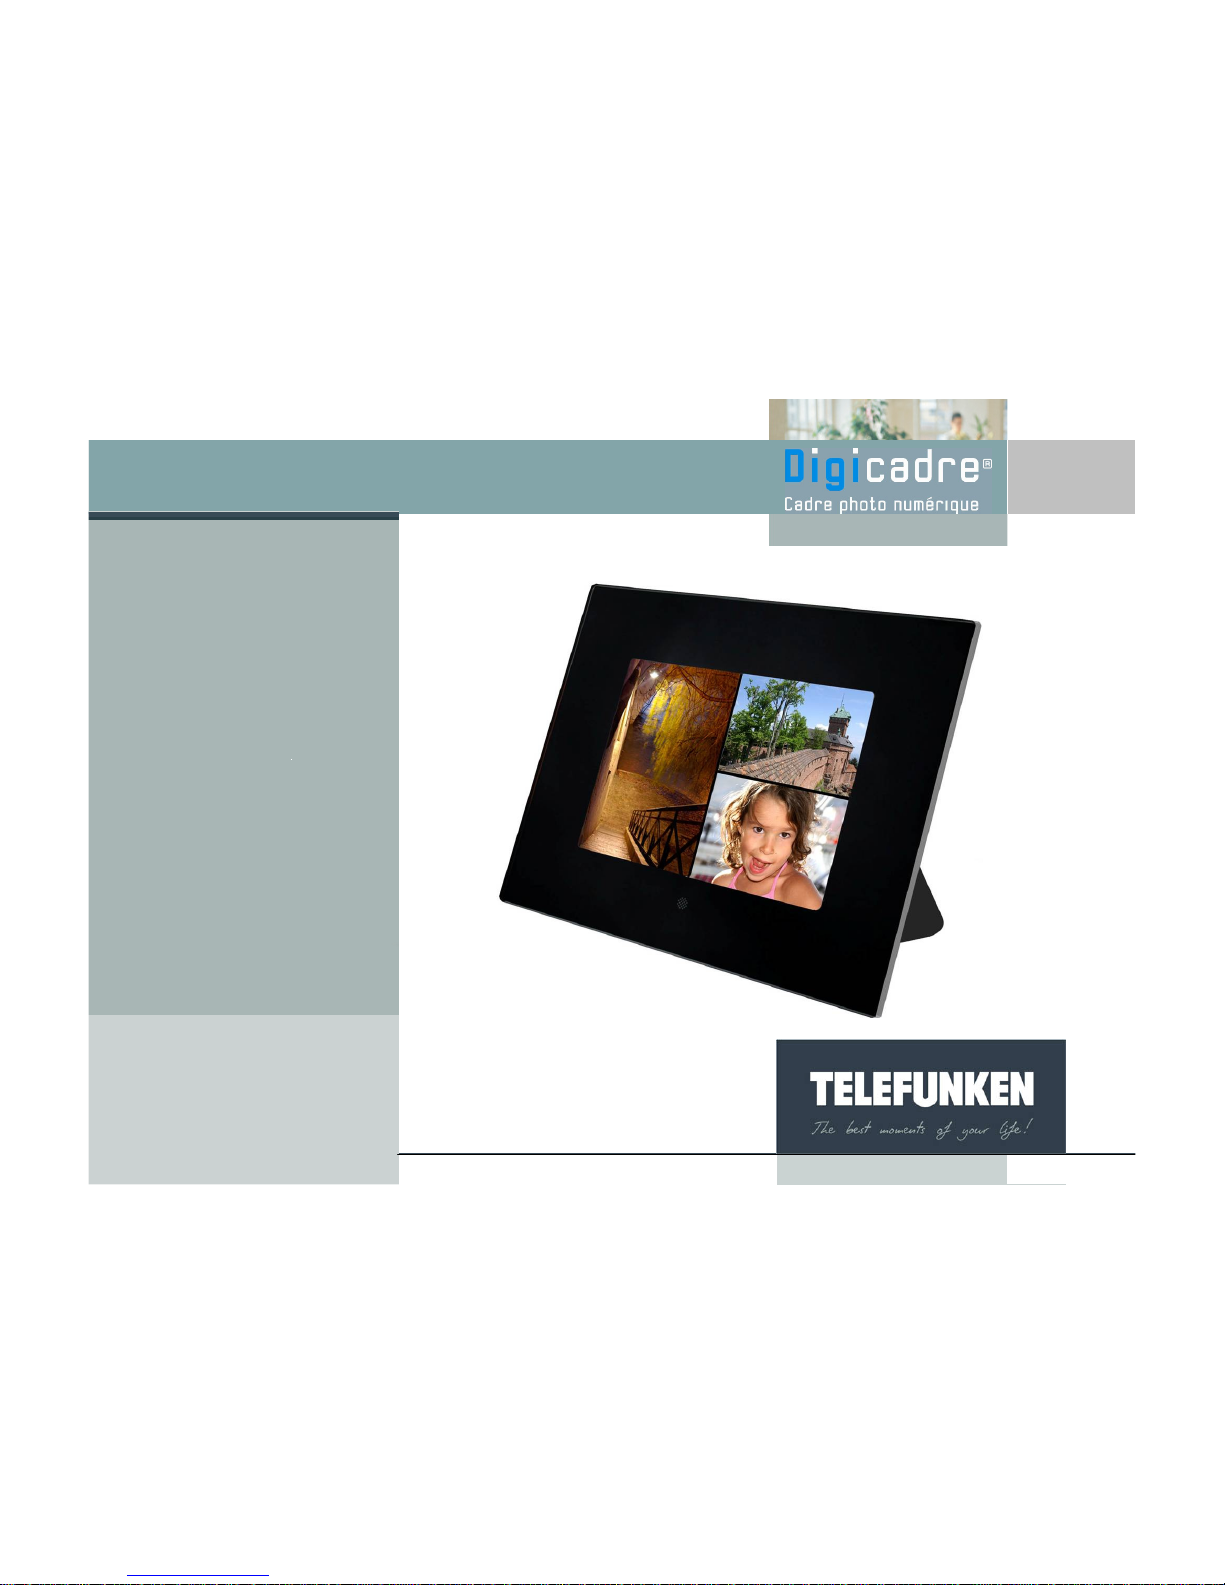
Telefunken Digicadre 8001 User Manual
User
guide
Model 8001

INDEX
I. Contents of the box..……………………………..………....…….06
II. Description of the frame.............……………………...….……...06
III. Description of the remote control………......……....……...……10
IV. Installing the frame..………………………………...……..…..…11
V. Starting up........………………………………..…………………..12
1. Which images are read by the DIGICADRE...................................12
2. Inserting a card…………........…………………………….....….……12
3. Switching on…….........………………………………….....….………13
4. Choosing the image source…….………………….……….………...13
5. Selecting a fixed image………….....……….…..………….….….….14
6. Selecting a slide show……………….......………….……..…….…...15
Non binding document, subject to modification in the event
of misprint(s) – MKG0207
3

Fig.8
INDEX
VI. Using the menu……………………………..………………..…...16
1. Choosing the language………………………………..….…...……...16
2. Selecting the display type…………………….......………….……….17
3. Transitions between images…………………..........……….……….18
4. Display duration of the photos…..………..……….………...……….20
5. Slide show type………………………………………….............…….21
6. Image operations..........……………………………….…...…........…23
a. Copying photos…………………………………………………..………...…23
b. Deleting photos….............………………….……………………..….……..25
c. Rotating images…………........………………………………..……….……27
d. Zoom………………………….……………………………….……….……...29
Non binding document, subject to modification in the event
of misprint(s) – MKG0207
4

INDEX
e. Selecting favourite images ………………..........……………..…………………..…30
f. Reinitialising…………………………………..............………....……………….……32
g. Brightness adjustment..…………………………..…..........……..….……….………33
h. Contrast adjustment……………………………..…………..........…………….…….34
i. Colour adjustment……………………..……………..………….........……...……….35
j. Hue adjustment……………………..………………..……………..…..............…….36
VII. Connecting to a computer……...............………………...…..…37
1. Transferring images from the computer to the Digicadre...............39
2. Transferring images from the Digicadre to the computer……...….39
VIII. Removing the back cover and cleaning...........……...…….......40
IX. F.A.Q………….…………………………......……………….…….41
X. Safety…………..........………………………………….…..……..42
XI. Warranty…………….......………………………………......…….44
XII. Technical properties…….....................…………….…..….……47
Non binding document, subject to modification in the event
of misprint(s) – MKG0207
5

Congratulations on your purchase of the TELEFUNKEN Digicadre 8’’. Please read the
instructions and advice contained in this manual carefully before using the digital photo
frame.
Important: keep the packaging and all objects contained therein.
Also keep this user manual for your own reference when needed.
I. CONTENTS OF THE BOX
• One digital photo frame
• One black acrylic back cover
• One mains voltage adaptor
• One remote control
• One user manual
• One USB lead
• One cleaning swab
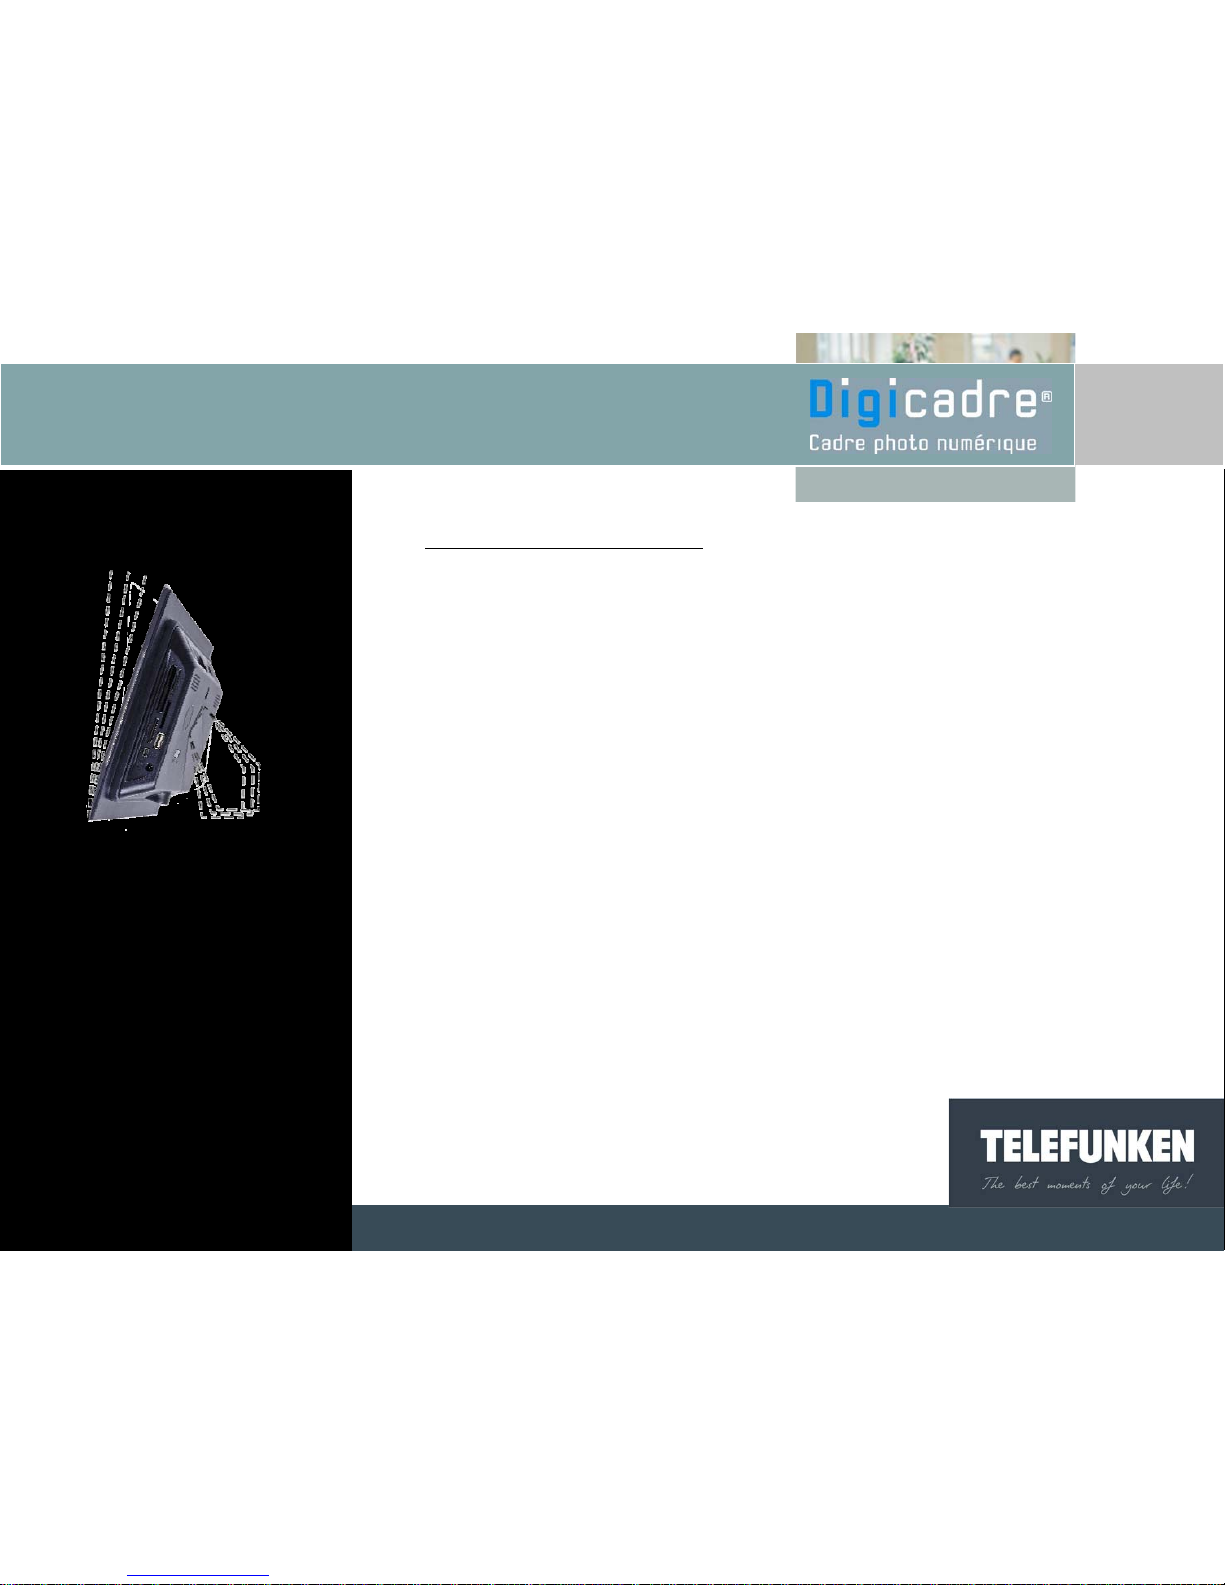
II. DESCRIPTION OF THE FRAME
Your TELEFUNKEN Digicadre includes an acrylic back cover that can be removed, a
main voltage adaptor, a remote control and an LCD screen equipped with 2 USB ports,
and a multiple card reader that is compatible with most memory cards available on the
market.
Non binding document, subject to modification in the event
of misprint(s) – MKG0207
6
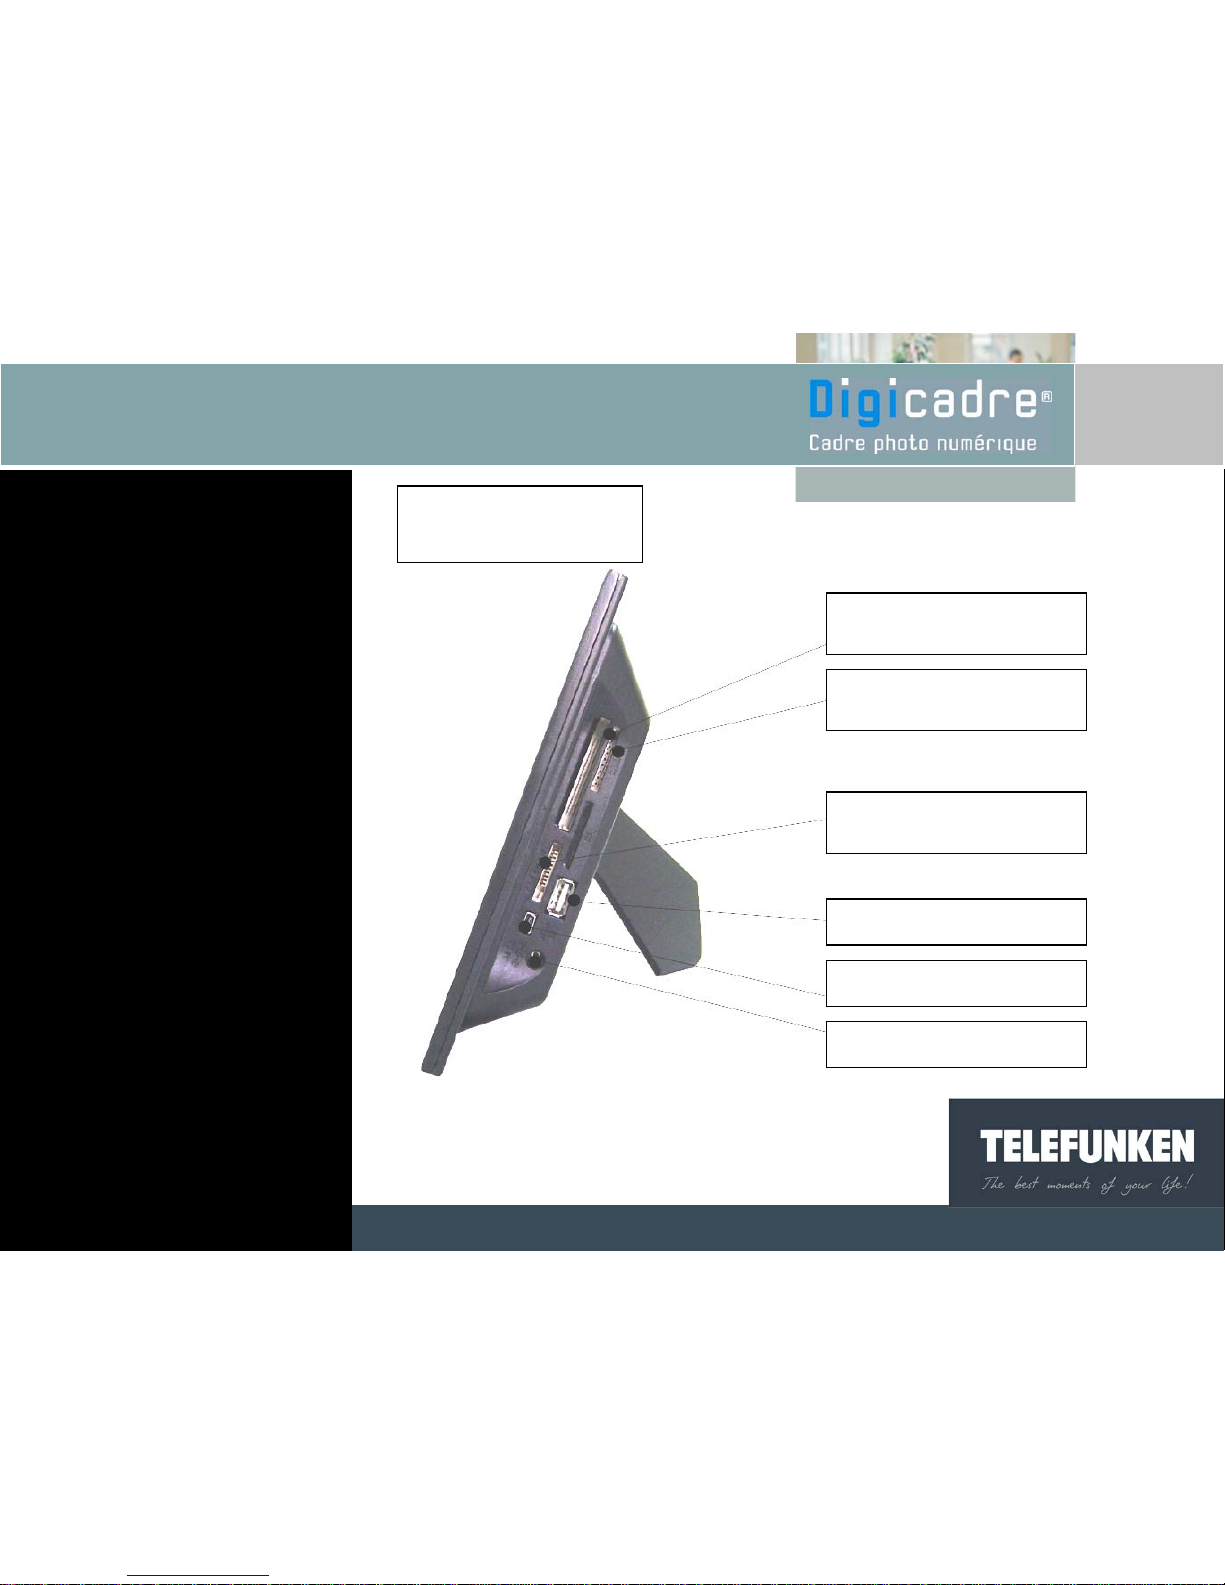
Card reader
Non binding document, subject to modification in the event
of misprint(s) – MKG0207
7
Lecteur de
cartes
USB HOST port
Mains voltage socket
USB mini port
SD cards, mini SD cards –
slot 1
CF cards – slot 2
Memory stick card
- slot 3
Card reader
Non binding document, subject to modification in the event
of misprint(s) – MKG0207
8
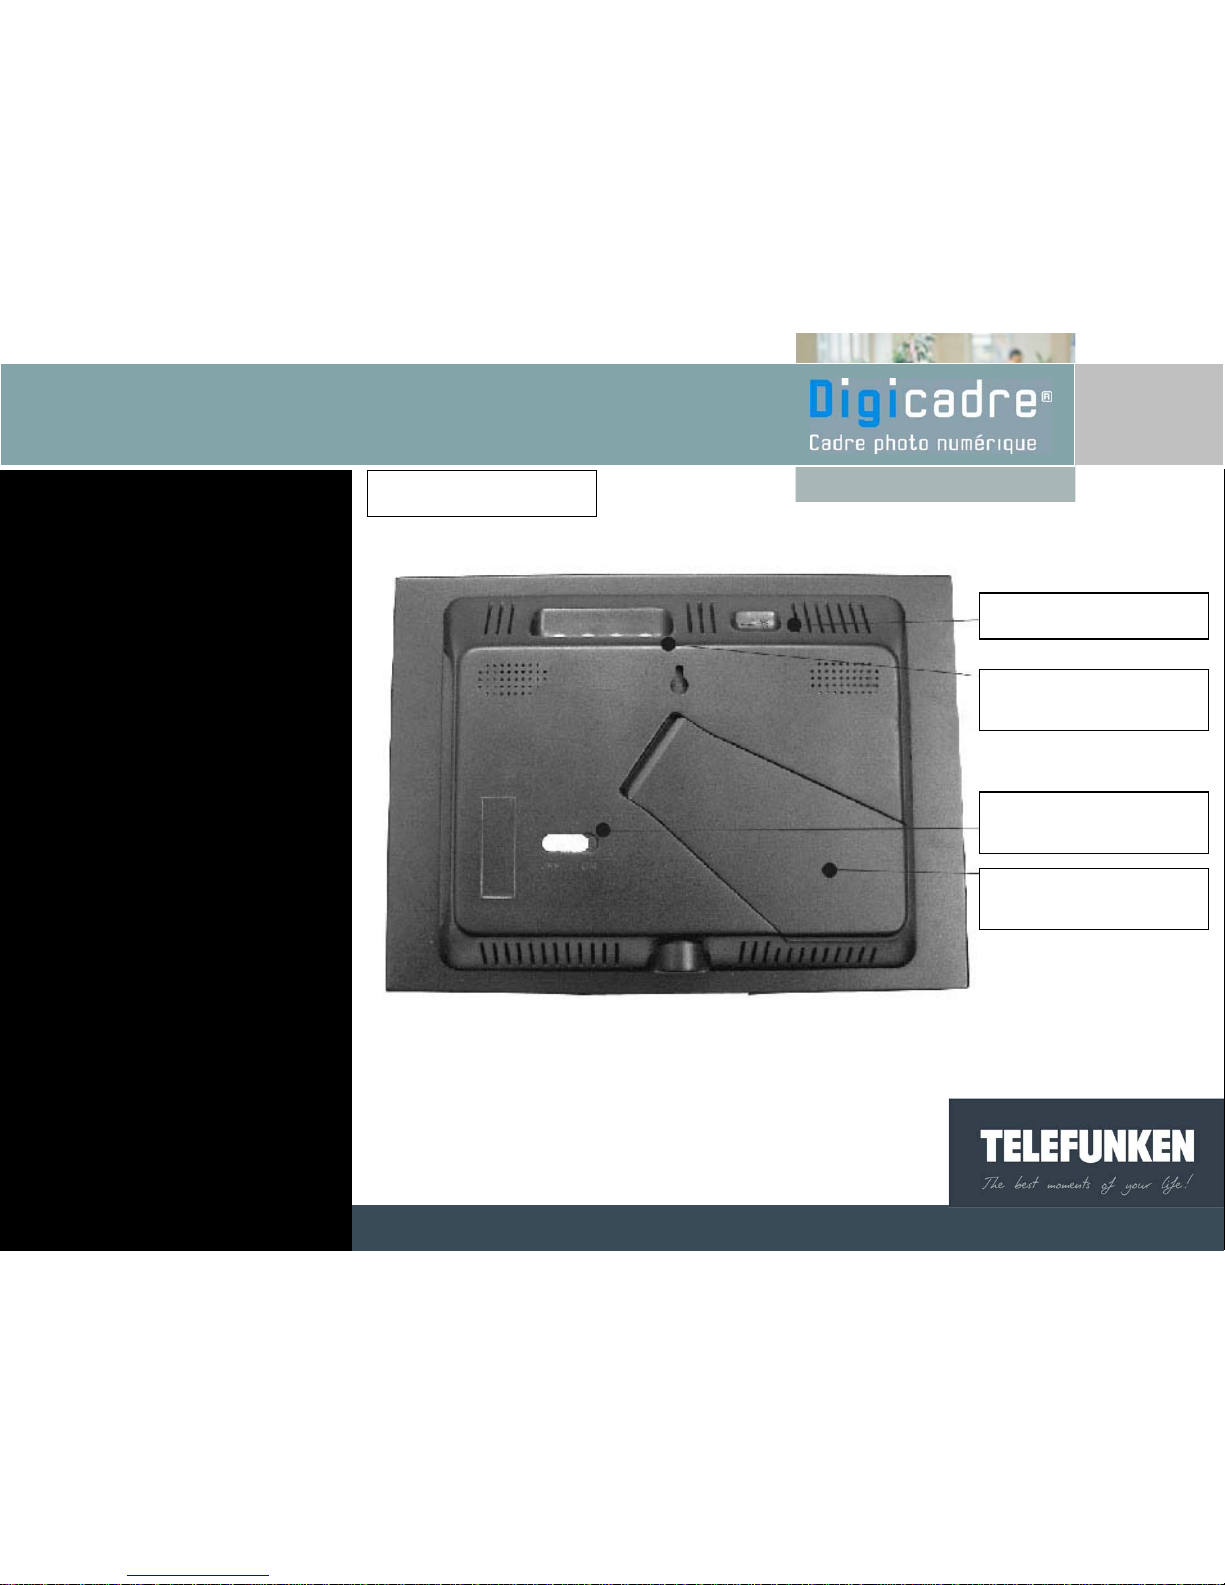
Back of the frame
Adjustable support
On/off button
Menu access buttons
Brightness button
Non binding document, subject to modification in the event
of misprint(s) – MKG0207
9
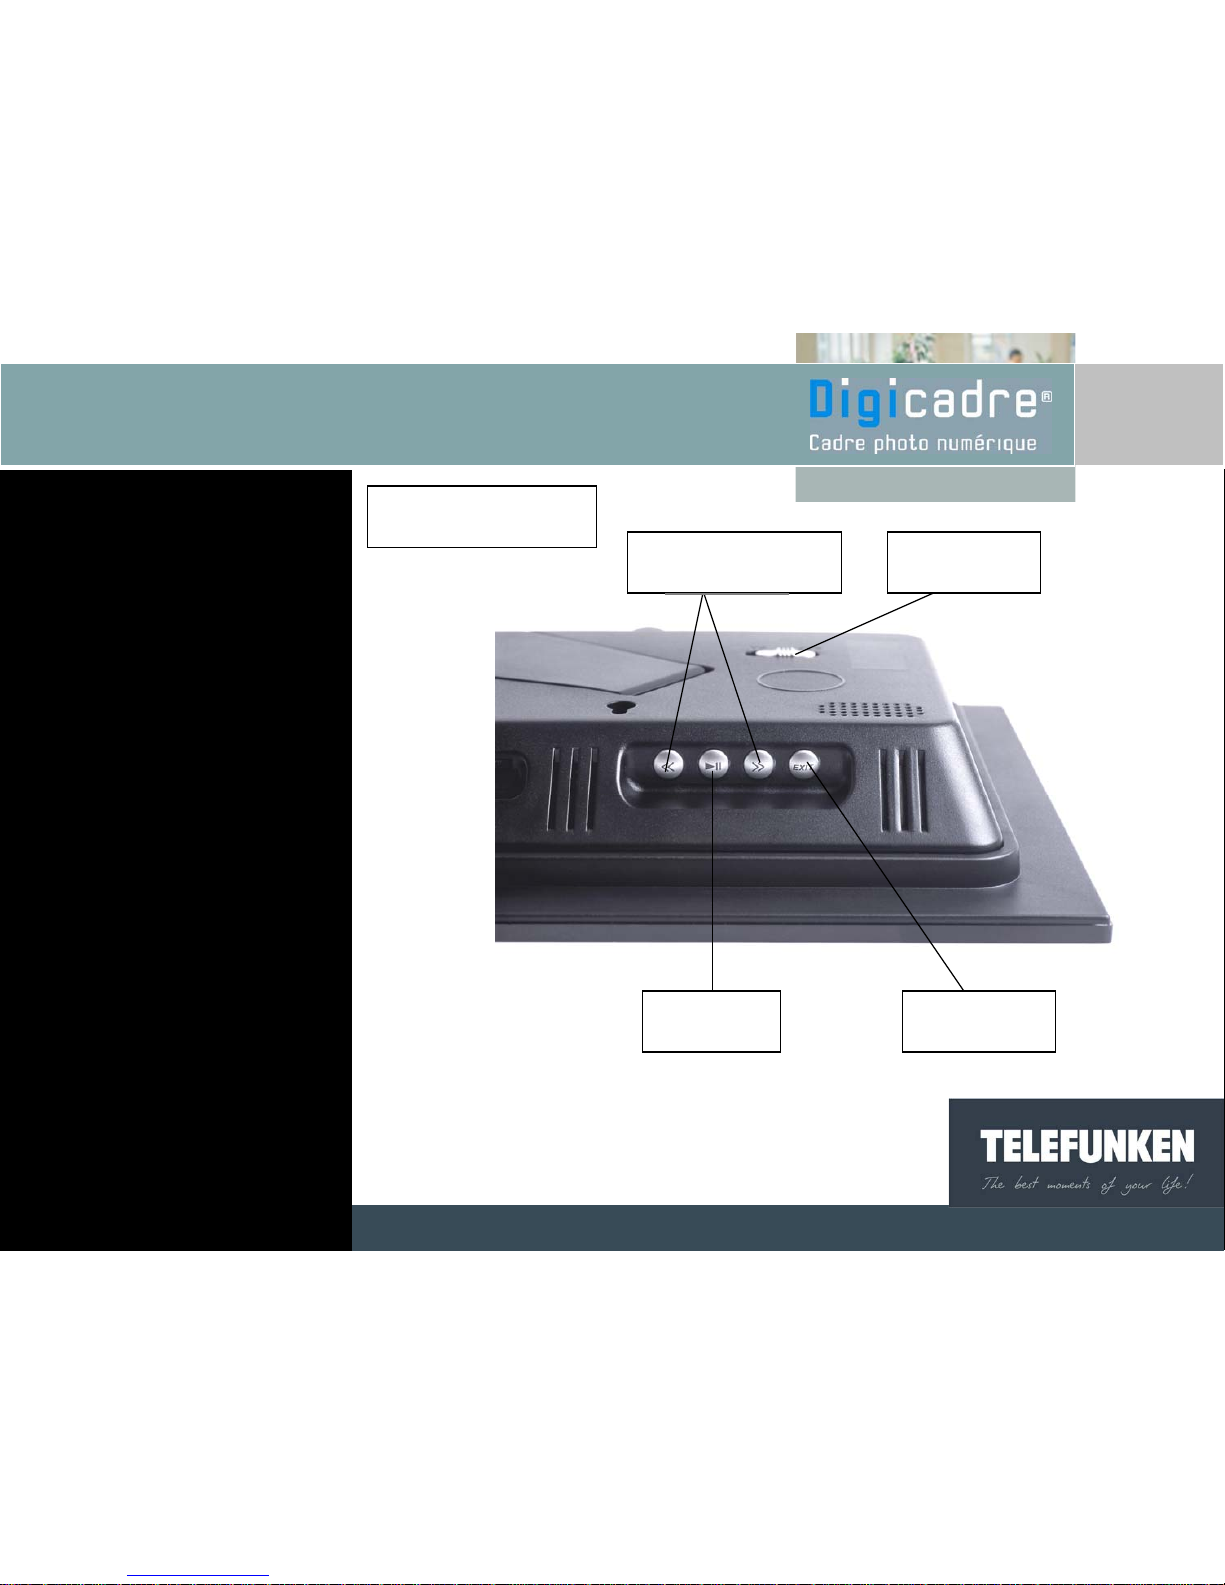
Frame’s buttons
Backward/Forward
buttons
On/off button
Exit button
Confirmation
button

10
III. DESCRIPTION OF THE REMOTE CONTROL
Non binding document, subject to modification in the event
of misprint(s) – MKG0207
Zoom
Exit
Up
Left
Launch the Slide
Show
Menu access
Confirmation button
Down
Right
Non binding document, subject to modification in the event
of misprint(s) – MKG0207
11
Fig.1
IV. INSTALLING DIGICADRE
1. Inclining the frame
Your Digicadre’s inclination can be adjusted by pulling on the adjustable support down.
Choose the inclination that suits you best among the 6 different levels (fig. 1).
To do it, lift the support, pinch notches and pull on the support to reach the slope of your
choice.
2. Electrical connection
Plug the end of the mains adaptor into its socket and then connect the other end to the
wall-socket.

V. STARTING UP
1. Which images can be read by DIGICADRE?
DIGICADRE reads JPEG images, i.e. images from digital cameras.
If you use image editing software (Photoshop, Paint shop pro, etc.), make sure to save
only as an entry-level JPEG and not as a progressive JPEG, or any other type of JPEG.
If you want to view images in black and white on your DIGICADRE, make sure that they
are in RGB format and not in grey-level format. If they are saved in grey-level format,
you can display these as thumbnail images, but not in full-screen
DIGICADRE’s screen resolution is 800 x 600 pixels. You can read images with a higher
resolution but the display time may be slowed down.
2. Inserting a memory card
Insert the memory card containing images to be read into its intended slot.
Slot 1: for SD, mini SD or MMC cards
Slot 2: for Compact Flash or MD cards
Slot 3: for Memory Stick, Memory Stick Pro, Memory Stick Duo or Memory Stick Pro
Duo cards.
Non binding document, subject to modification in the event
of misprint(s) – MKG0207
12
Fig.2
1
2
3

With the remote contro
l
With the frame
3. Switching on
Press the ON/OFF button at the back of the frame : the slide-show begins after a few
seconds
4. Choosing the image source
With the remote contro
l
When the frame is in slide-show mode and photos are being displayed, point the remote
control (fig.3) at the frame and then press EXIT twice. The screen on the left appears
(fig.4). Select the desired source (memory card or internal memory) with the left and right
arrows of the remote control (fig 3), then press the remote control’s "ENTER" button to
confirm your choice. Press “ENTER” again to launch the slide show that you have
chosen.
Non binding document, subject to modification in the event
of misprint(s) – MKG0207
Fig.4
Fig.3
13

With the frame
When the frame is in slide-show mode and photos are being displayed, press twice.
The screen on the left appears (fig. 4). Select the desired slide-show (card or internal
memory) with the buttons; then press twice (fig. 5)
5. Selecting a fixed image
With the remote contro
l
When the frame is in slide-show mode and photos are being displayed, point the remote
control at the frame and then press EXIT once. The frame then displays the image’s
thumbnails. Select the desired photo using the remote control’s arrow buttons (left, right,
up and down), then press ENTER. The selected image is displayed and doesnot change.
If you press ENTER once more, the slide show begins again.
Non binding document, subject to modification in the event
of misprint(s) – MKG0207
Fig.4
Fig.5
14

With the frame
When the frame is in slide-show mode and photos are being displayed, press once:
the images are displayed in thumbnail form. Select the desired photo using the
buttons, and then press ENTER. The selected image is displayed and does not
change. To return to the slide show, press and the slide show begins again.
6. Selecting a slide show
With the remote contro
l
When the frame is in thumbnail display mode, press the remote control’s “Slide show”
button once.
With the frame
When the frame is in thumbnail display mode, press the button twice.
Non binding document, subject to modification in the event
of misprint(s) – MKG0207
15

VI.
USING THE MENU
1. Choosing the language
The default language is French. To choose another one, the menu must first be
accessed.
With the remote contro
l
When the frame is in slide show mode and photos are being displayed, press the EXIT
button to leave the slide show, and then press SETUP to display the menu screen. On the
thirteenth line, the language is displayed (fig. 6). If you would like to change it, use the
remote control’s UP or DOWN buttons, until the language line is highlighted (in blue), then
press ENTER. Every time this button is pressed, a different language is displayed.
(French, Spanish, Portuguese, Dutch, English, Italian, German). Once the menu is
displayed in the desired language, press EXIT followed by ENTER.
With the frame
When the frame is in slide show mode and photos are being displayed, press to leave
the slide show, then press second time for 3 seconds.
The menu screen is displayed.
Non binding document, subject to modification in the event
of misprint(s) – MKG0207
Fig.6
16