

Page 1
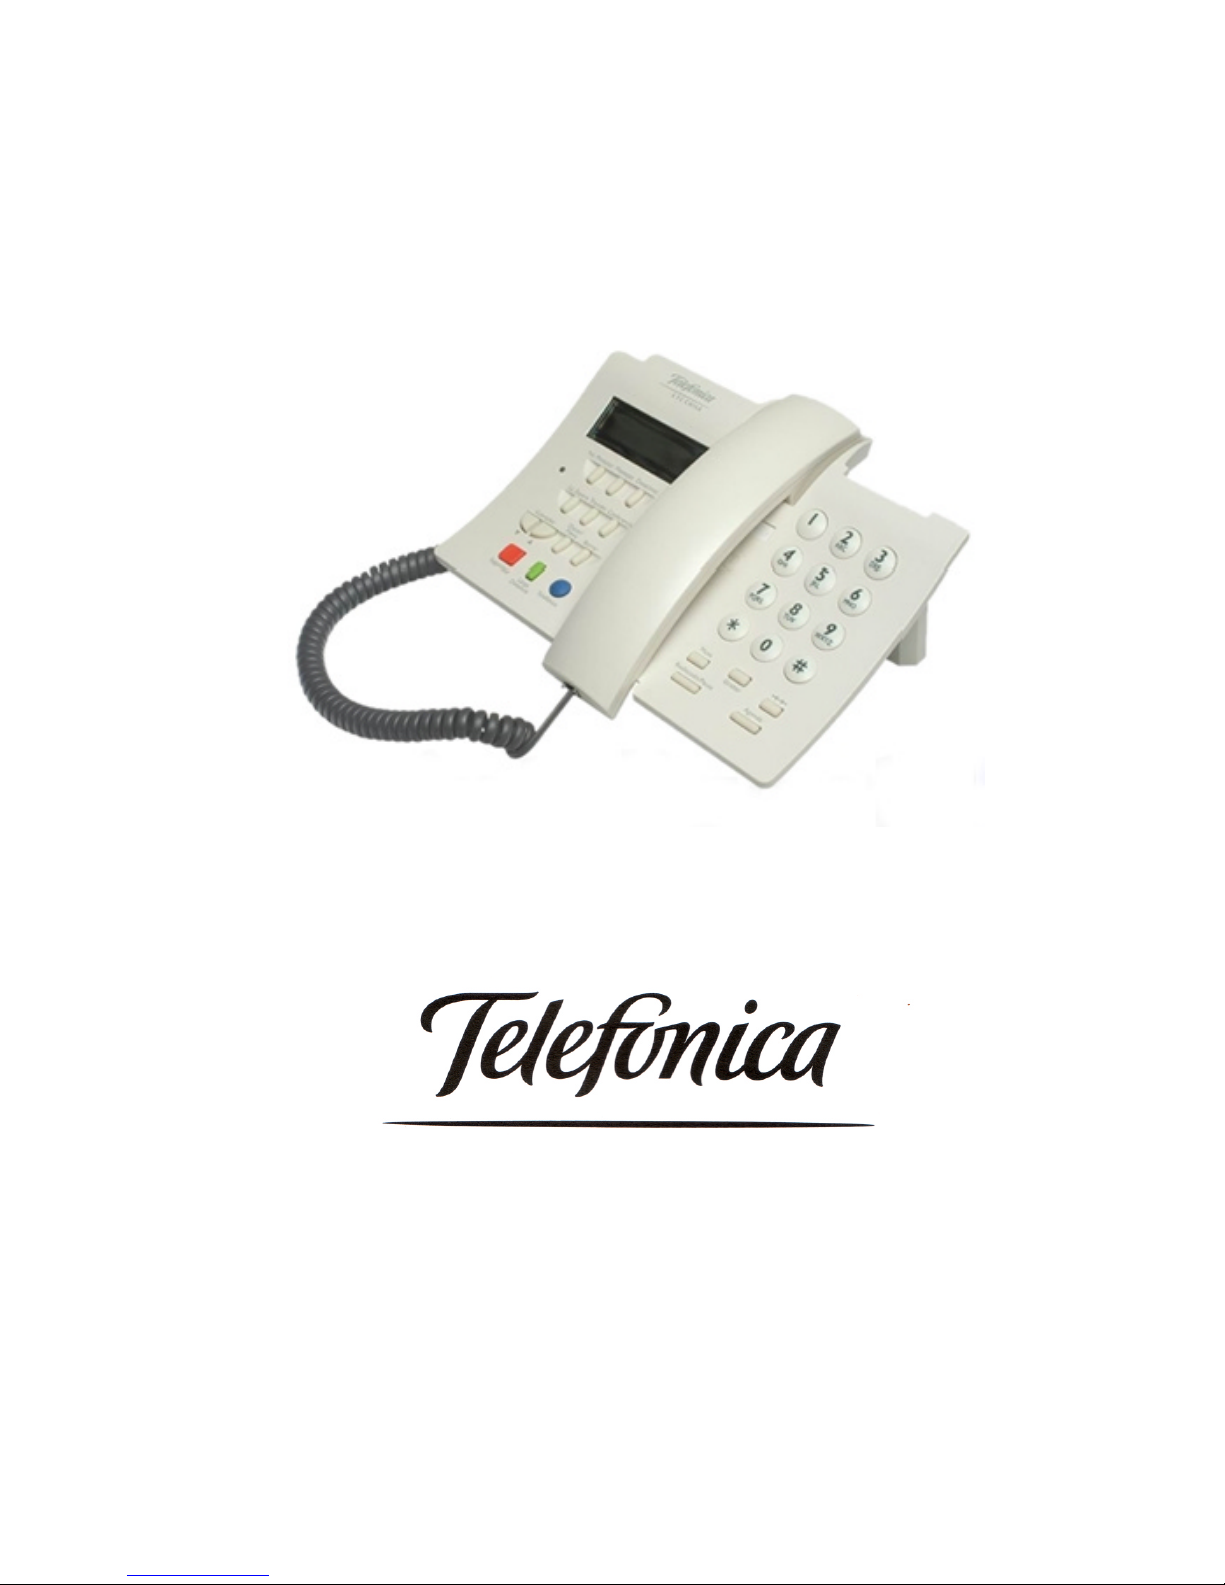
Teléfono DOMO
English Translation
English Users Guide
Page 2
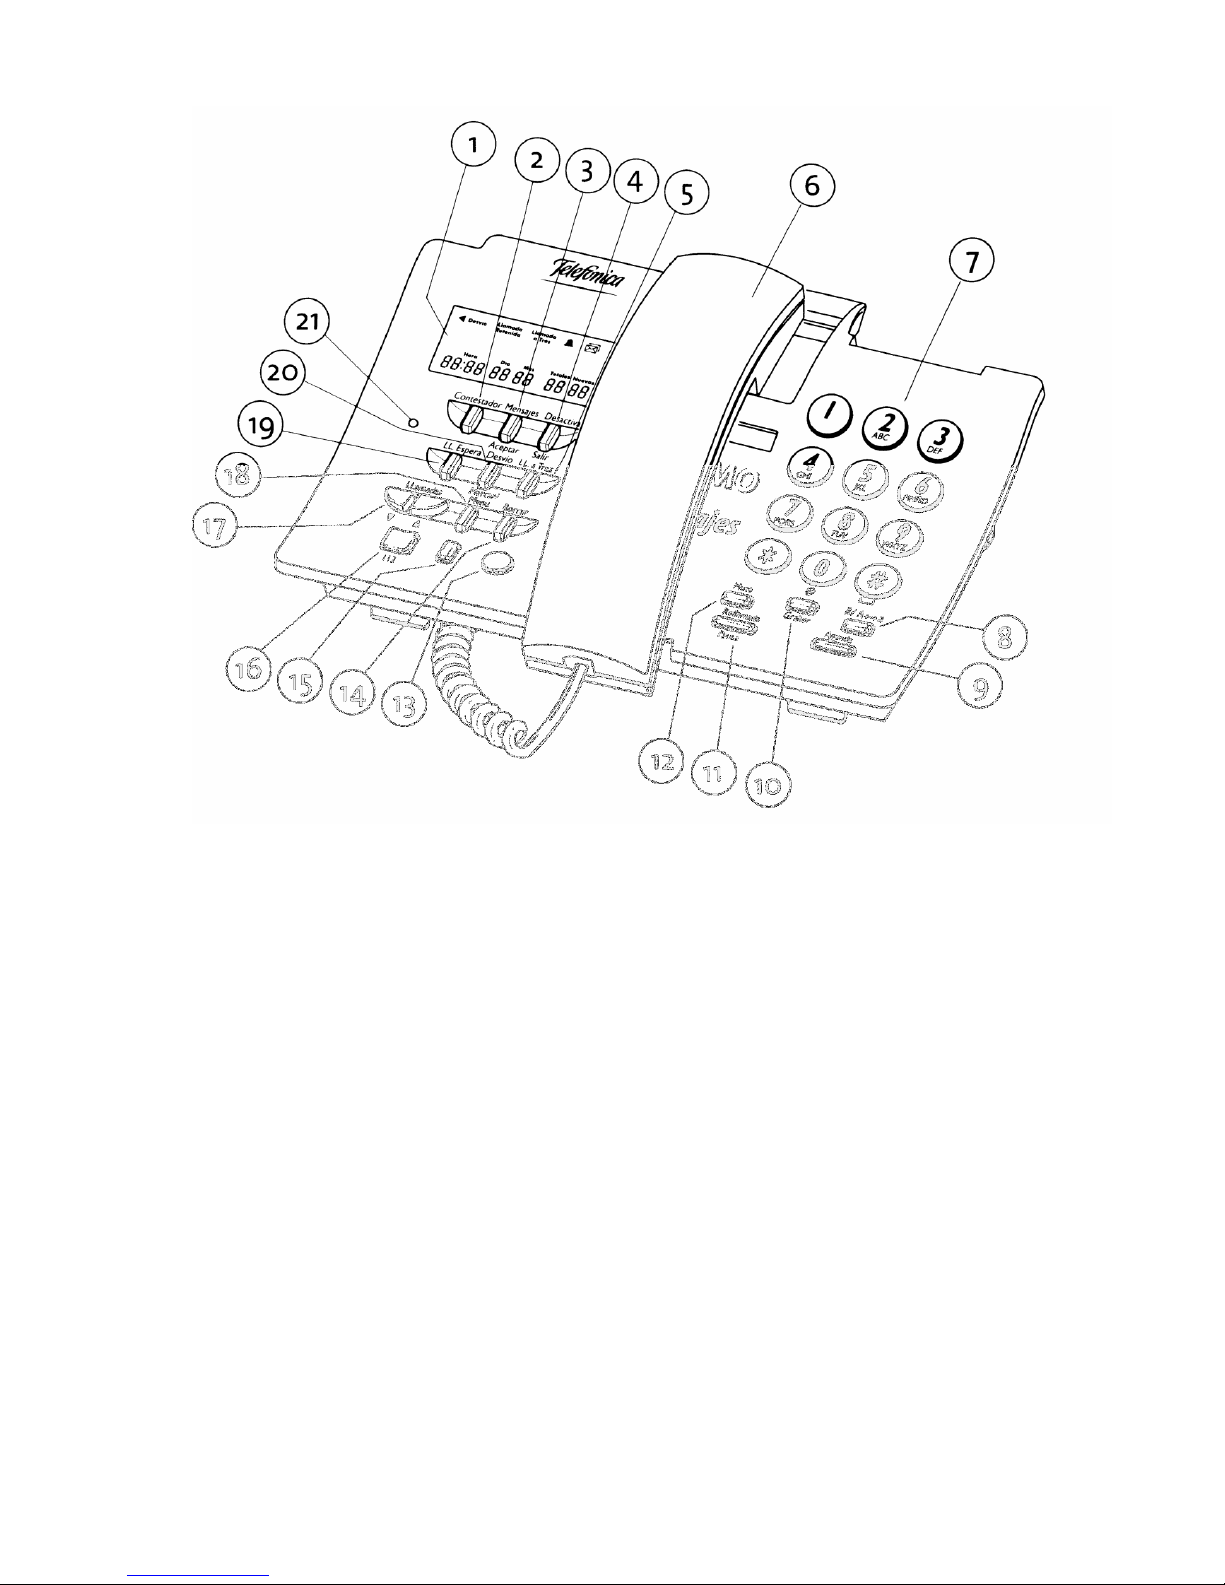
1. SCREEN
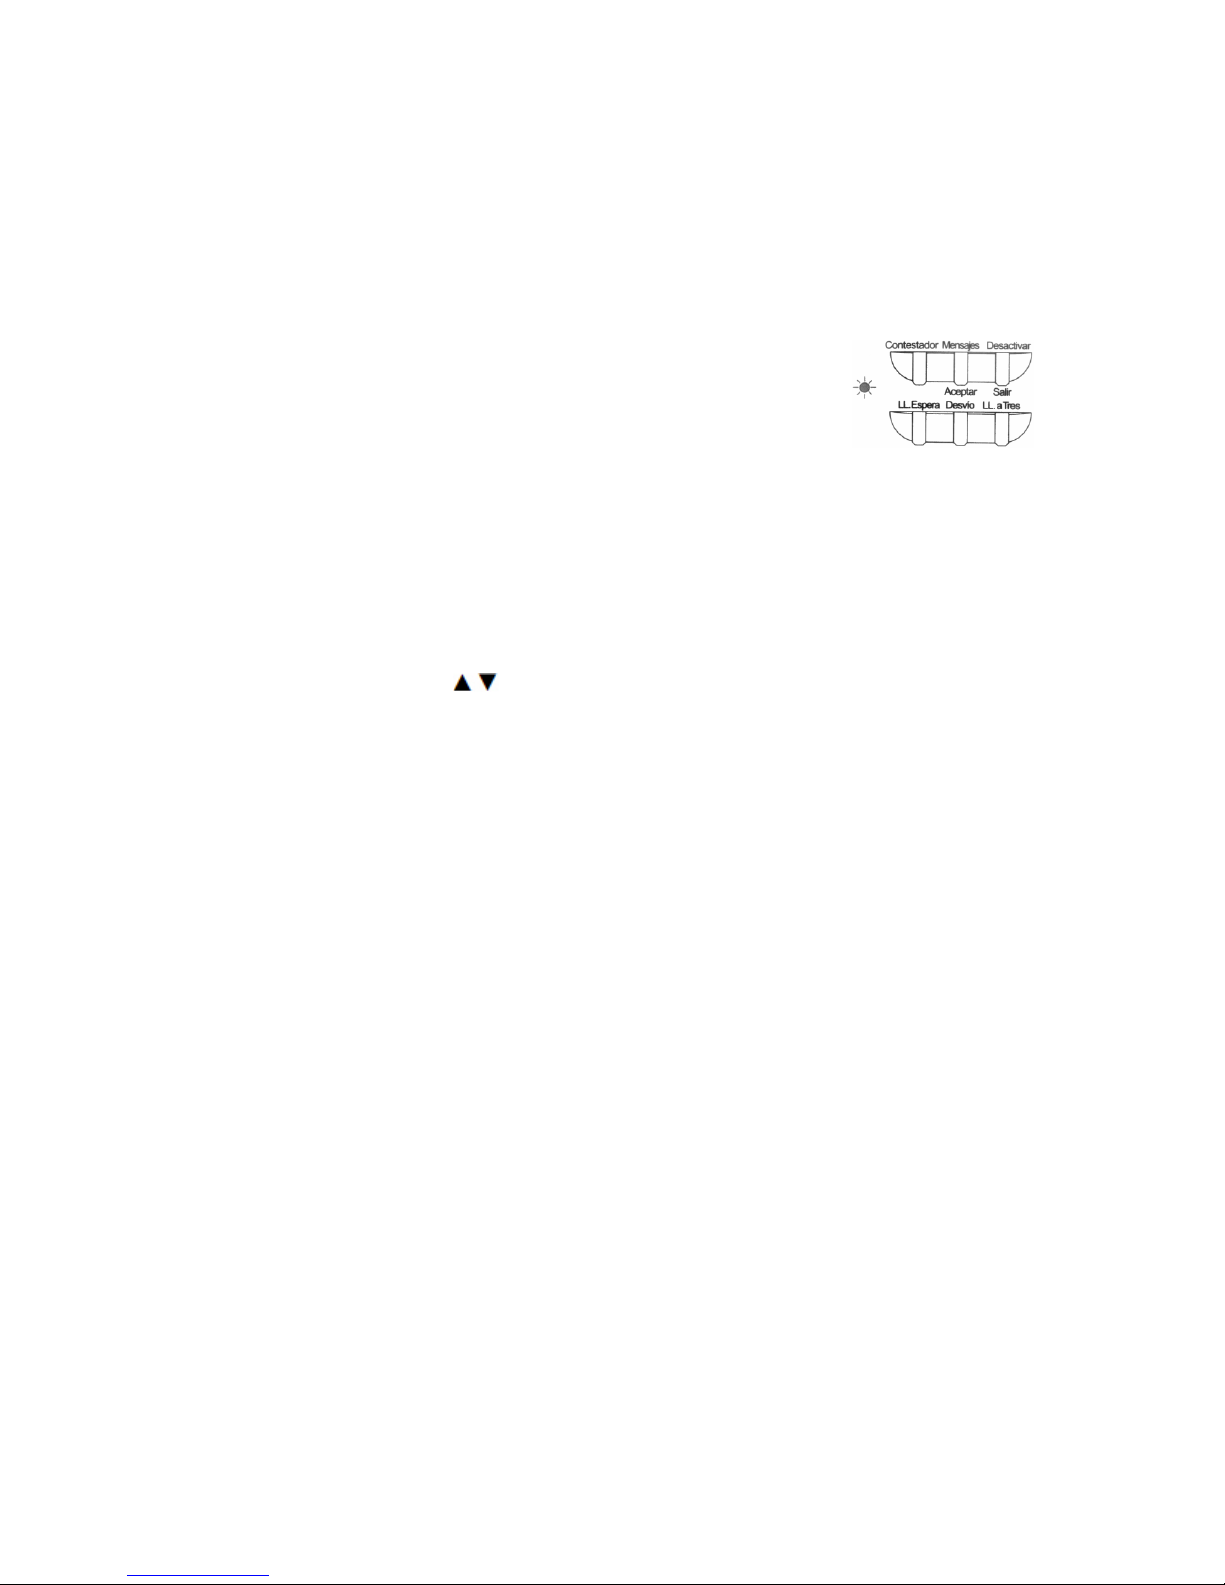
2. ANSWERPHONE KEY
3. MESSAGE KEY
4. DEACTIVATE KEY
5. CALL DIVERT
6. HANDSET
7. KEYPAD
8. R KEY; UPPERCASE/LOWERCASE
9. AGENDA DIRECTORY KEY
10. RECORD-KEY
11. RECALL/PAUSE KEY
12. MUTE KEY
13. DIRECT 1004 KEY
14. ERASE KEY
15. OPERATOR 1077 KEY
16. EUROPEAN EMERGENCY
SERVICE NUMBER 112 KEY
17. UP AND DOWN ARROWS /
CALLS KEY
18. DIAL / MENU KEY
19. HOLD ON LINE CALL KEY
20. DIVERT KEY
21. INDICATOR LIGHT
Page 3

INDEX
1. INTRODUCTION ............................................................................................................................5
2. INSTALLATION ..............................................................................................................................6
Connecting the cables to the telephone............................................................................................. 6
Connecting the telephone to the line.................................................................................................. 6
Fitting the base support stand............................................................................................................ 6
Wall mounting .................................................................................................................................... 7
3. SETTING UP THE DOMO TELEPHONE...................................................................................7
Selecting the ringing tone................................................................................................................... 7
Selecting the ringing volume.............................................................................................................. 7
Adjusting the screen contrast ............................................................................................................ 7
Selecting the time and date................................................................................................................ 8
Tone confirmation .............................................................................................................................. 8
Correct and incorrect tones ............................................................................................................... 8
Activating and De-activating code 1077............................................................................................. 9
Activating code 1077 .......................................................................................................................... 9
De-activating code 1077 .................................................................................................................... 9
4. DIALLING.......................................................................................................................................10
Manual dialling .................................................................................................................................. 10
Dialling with the receiver .................................................................................................................. 10
Dialling with the receiver down......................................................................................................... 10
Inserting pauses ............................................................................................................................... 10
Transferring a Call............................................................................................................................ 10
Automatic dialling ............................................................................................................................. 10
Automatic dialling from Directory..................................................................................................... 10
Automatic dialling from Recall.......................................................................................................... 10
5. USING THE DIRECTORY...........................................................................................................11
Recording a number in the Directory............................................................................................... 11
Recording recalls in the Directory.................................................................................................... 12
Recording from the call list .............................................................................................................. 12
6. DIRECT SERVICES KEYS ........................................................................................................14
7. MUTE FUNCTION........................................................................................................................15
8. ANSWERING A TELEPHONE CALL.......................................................................................15
9. CALL IDENTIFICATION SERVICE...........................................................................................15
10. OTHER SERVICES...................................................................................................................18
Divert incoming calls ........................................................................................................................ 18
Answer phone service...................................................................................................................... 19
Accessing your messages .............................................................................................................. 19
Call waiting ....................................................................................................................................... 19
Third party calling ............................................................................................................................. 20
11. SHORT MESSAGES.................................................................................................................21
Activating the short message service.............................................................................................. 21
De-activating the short message service........................................................................................ 21
Short message configuration........................................................................................................... 22
Extension.......................................................................................................................................... 22
Private Mail ....................................................................................................................................... 23
Private Mail account ......................................................................................................................... 23
Modify User....................................................................................................................................... 23
Delete a User ................................................................................................................................... 24
Page 4

1. INTRODUCTION
To start with, Telefonica thanks you for choosing a Domo Message Telephone. We recommend you read this
guide carefully before using this telephone. It is organized in such a way that you can find quick answers to the
different services and functions the equipment offers, together with the messages that appear on the screen every
moment.
The Domo Message is a modern telephone with the following features:
- Multifrequency dialling
- Alphanumeric Keypad
- Directory with capacity for 50 memories ( names and numbers )
- R – key
- Redial via outgoing calls list
- Dial with pause function
- 3 Line LCD display
- Direct access to extra services: Hold on call, 3rd party call, Divert call, and Answer phone service.
- Access to short message service. Sending, reception and use of short messages.
- Access to call identification services.
- On screen CLI – “Caller Line Identification” (receiver up or down) allows you to see who is calling you
before answering. Received calls register.
- Missed calls indicator for calls, short messages new e-mail messages stored in the mailbox service (if
available).
- One touch access to Telefonica’s customer service line 1004 ( blue key )
- One touch access to the Universal Emergency Services 112 ( red key )
- One touch to Telefonica’s Operator service 1077 ( green key )
- Mute function with optical warning system.
- 1077 Activation/deactivation
- Supplied only by Telefonica
- Reception aid for the deaf or hard of hearing
- Easy disconnection of receiver and line for easy re-location
- Telephone installation template (free standing or wall mounting)
- Clock
Domo Message telephone box contents:
- Telephone Base Unit
- Handset
- Base Support
- Handset Connection Cable
- Line Connection Cable
- User guide with warranty card, and schematic user´s guide.
Page 5
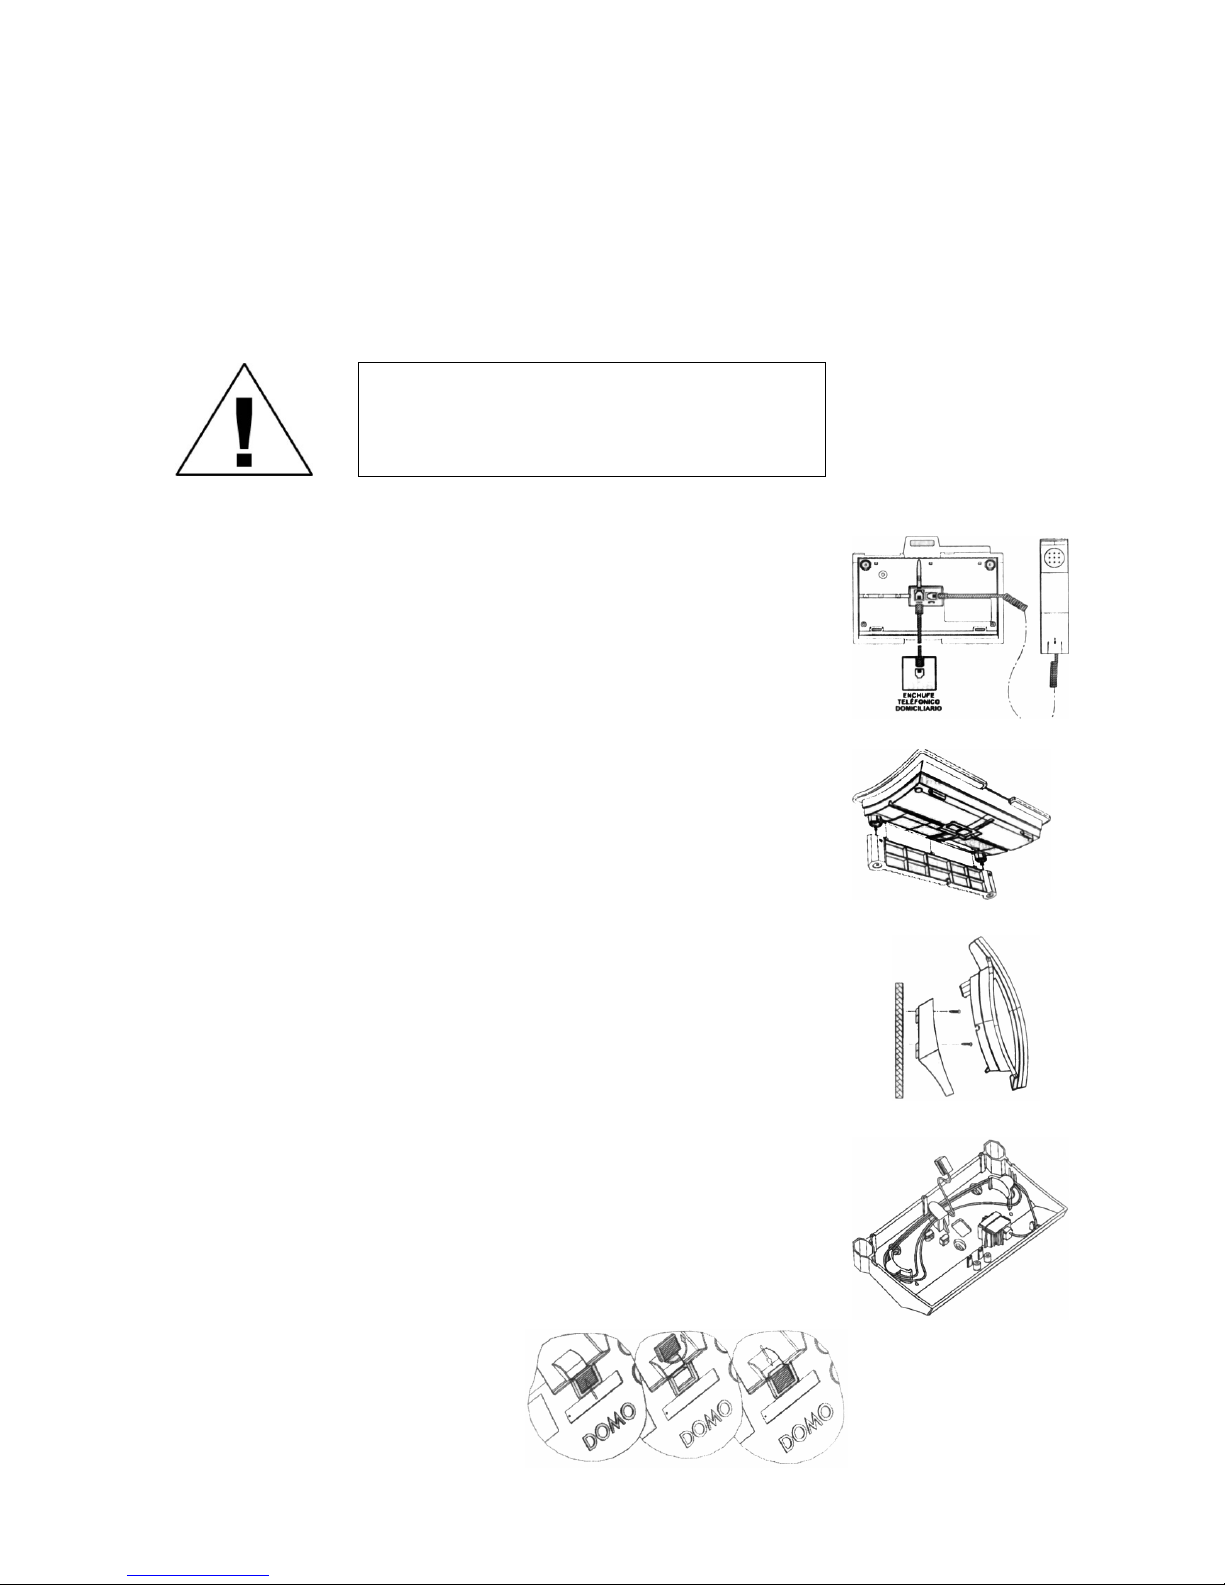
2. INSTALLATION
In order to use your DOMO message telephone the unit MUST be connected to an active telephone line.
THIS TELEPHONE MUST ONLY BE
CONNECTED TO LINES WITH
MULTIFREQUENCY DIALLING
CAPABILITY.
Connecting the
cables to the
telephone
Connect the longest (flat) cable to the telephone base,
and the coiled cable to the receiver, as shown in the
picture.
Connecting the
telephone to the line
Connect one end of the flat cable to the LINE socket
on the telephone base unit and the other end into a
telephone socket on the wall.
Fitting the base
support stand
To raise the angle at which the telephone sits you
need to insert the base support stand. Insert the heel
of the stand into the raised feet on the base of the
telephone and push firmly until secure. You may then
clip the cable that goes from the LINE socket on the
telephone to the socket on the wall into the base
support unit for tidiness.
Finally reverse the wall mounting catch on the handset
as shown.
Page 6

3. SETTING UP THE DOMO TELEPHONE
Once the telephone is connected to the telephone line, you are ready to make and receive calls. However, if you
wish you can configure the ringing tone and volume of the telephone. You may also adjust the screen contrast,
program the time and date, activate or deactivate confirmation, validity and error tones. Additionally you may
select the Telefonica’s Operator Code.
These adjustments will be made with the receiver down, and by pressing the MARCAR/MENU (18) key until
you have selected the function you require.
Selecting the ringing
tone
Press the MARCAR/MENU (18) key until the message
CAMBIO RING appears on the screen.
CAMBIO RING: ì
Using the (17) keys you can cycle through the
three ring tones available, each one will be heard
during the selection process.
Press the DESACTIVAR/ SALIR (4) key to return to
the previous menu (REPOSO).
Selecting the ringing
volume
Press the MARCAR/MENU (18) key until the message
CAMBIO VOLU appears on the screen.
CAMBIO VOLU: ì
Using the (17) keys you can increase or
decrease the volume of the ringing tone. The selected
symbol (high volume) or (low volume) will
appear in the display screen.
Press the DESACTIVAR/SALIR (4) key to return to
previous menu.
Adjusting the screen
contrast
Press the MARCAR/MENU(18) key until the message
CONTRASTE appears on the screen
CONTRASTE:í 3 ì
.
Page 7

(17) keys to increase or decrease the
contrast. There are five contrast degrees.
Press the DESACTIVAR/SALIR (4) key to return to the
previous menu.
Selecting the time
and date
Press the MARCAR/MENU (18) key until the message
PULSE HORA/FEC appears on the screen.
PULSE HORA/FEC.
With the receiver down, type the time and date on
the keypad. Complete all the numbers. If you make a
mistake, press BORRAR (14)
For example: If it is 20:00 November 2, you will have to
type – 20:00 02 11.
PULSE HORA/FEC.
20.00 02 11
Once you have typed the last digit correctly, the new
date and time will be displayed on the screen. If for
any reason the function is not completed, the previous
time and date will remain on the screen.
When you have entered the time and date, you can
proceed with the next menu function by pressing the
MARCAR/MENU (18) key or return to the usual
telephone display by pressing the
DESACTIVAR/SALIR (4) key.
If you have activated the Call Identification service, the
time and date of each call received will be recorded
automatically.
If you accidentally delete the time and date, you will
need to reset it following the instructions above.
Tone confirmation This feature activates the tone key function – this
means that a tone will sound each time a key is
pressed on the main keypad.
Press the MARCAR/MENU (18) key until one of the
following messages appears on the screen. If the beep
tone is activated the screen will display (SONIDO
TECLA: SI).
SONIDO TECLA: SI
If the beep tone is de-activated, the screen will display
(SONIDO TECLA: NO).
SONIDO TECLA: NO
Using the (17) keys activates and de-activates
the key tone (signal).
Press the DEACTIVATE/SALIR (4) key to exit and
return to the standard display.
Correct and incorrect
tones
This option allows you to listen to the correct or
incorrect tones. The correct tone is a long tone which
indicates that the function has been properly executed
.If the function has been incorrectly executed you will
hear three short tones.
Page 8

SONIDOS V/E: SI
If the tones are de-activated, the message (SONIDOS
V/E: NO) appears on the screen.
SONIDOS V/E: NO
Using the (17) keys activates and de-activates
the correct and incorrect tones function.
Press the Desactivar/Salir (4) key to exit and return to
the standard display.
Activating and Deactivating code 1077
Activating code 1077 By default, this option is de-activated when you
purchase your telephone. If you wish to activate it, so
that Telefonica’s Code 1077 appears when you dial
you will have to proceed as follows:
Press the MARCAR/MENU (18) key until the message
ACTIVAR 1077 appears on the screen.
ACTIVAR 1077
Type *1077#.
The message 1077 ACTIVO will appear on the screen
for two seconds.
1077 ACTIVO
If you have not typed the code *1077# correctly, the
message ACTIVAR 1077 appears on the screen.
ACTIVAR 1077
You can leave this menu any time by pressing the
DESACTIVAR/SALIR (4) key. In this case the
configuration will not be altered and you will not have
activated the Telefonica 1077 function.
De-activating code
1077
Press the MARCAR/MENU (18) key. If the code 1077
is activated this will appear on your screen.
DESACTIVAR 1077
Type #1077#.
The message 1077 INACTIVO will appear on the
screen for two seconds.
1077 INACTIVO
If you have not entered the code #1077# correctly, the
message DESACTIVAR 1077 appears on the screen.
DESACTIVAR 1077
Page 9
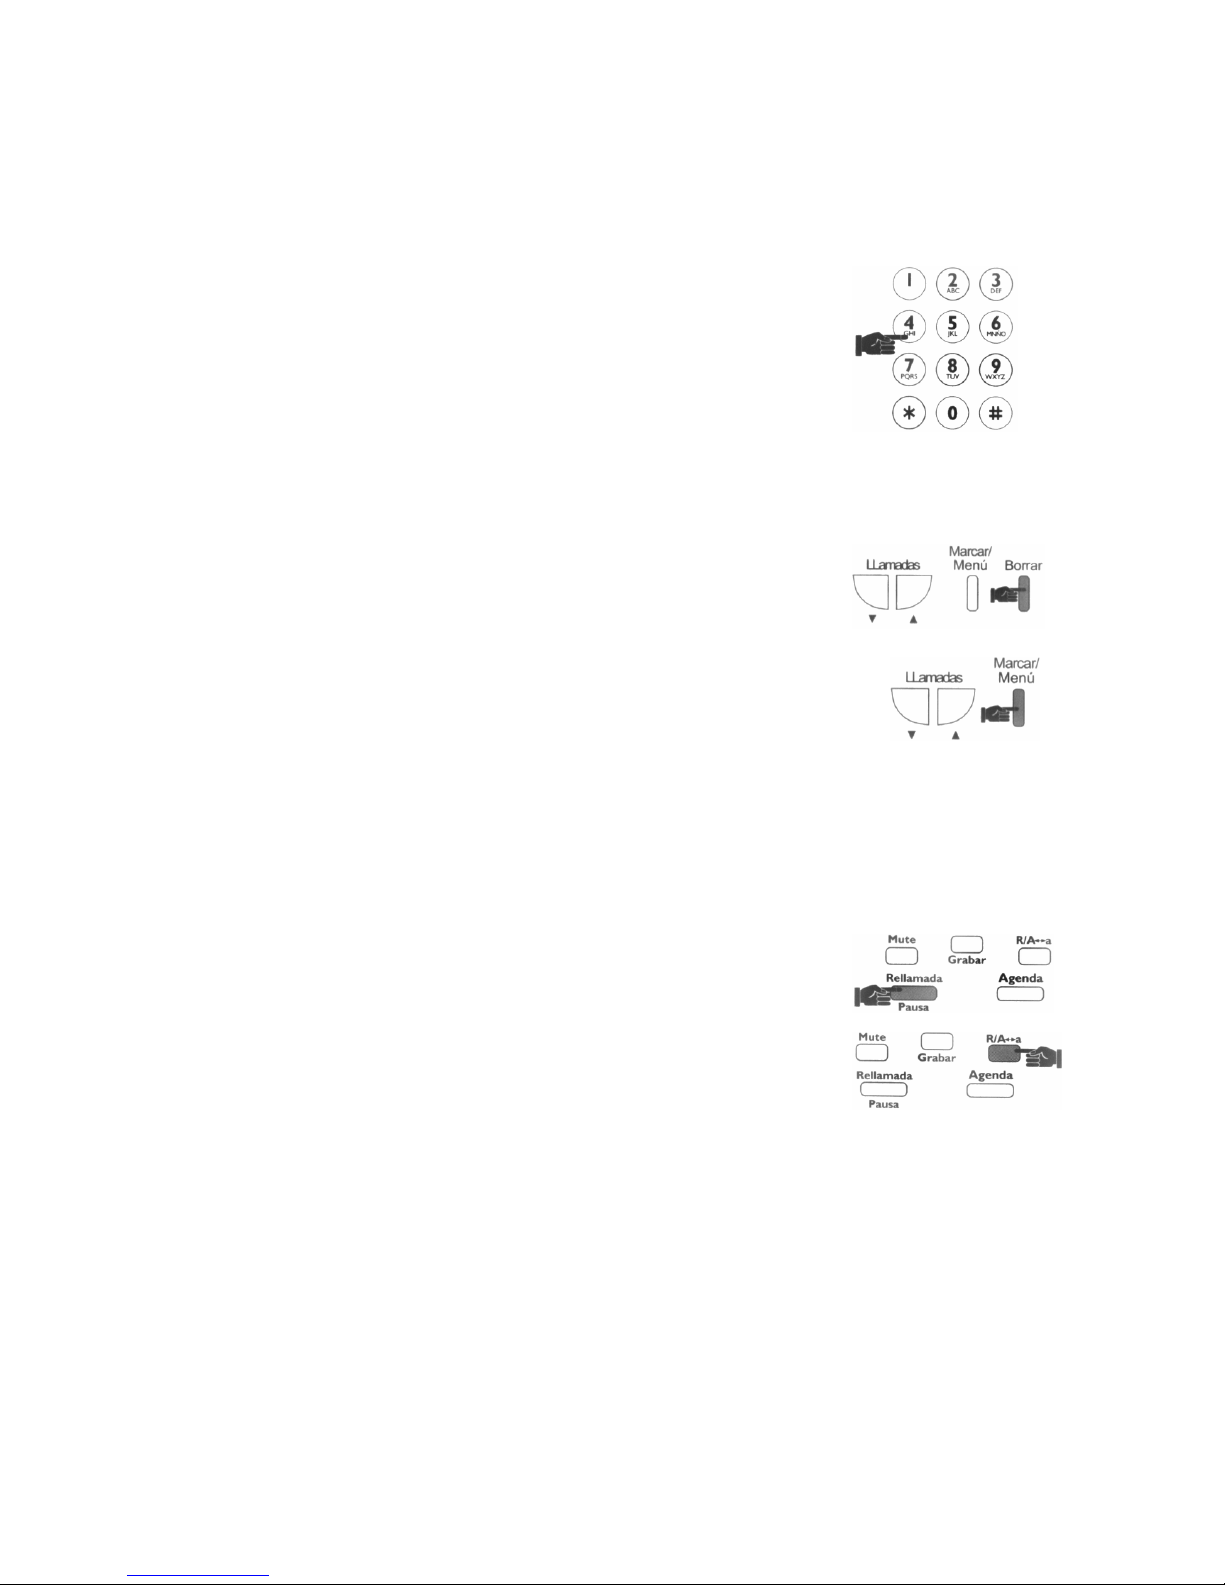
4. DIALLING
Manual dialling
Dialling with the
receiver up
Lift the receiver. Wait for the tone, and then dial the
telephone number. While you are dialling the numbers
are dialled and appear on the display.
Dialling with the
receiver down
With the handset down, dial the telephone number you
wish to call, the number will appear on the screen as
you dial.
432
To delete wrong numbers use the BORRAR (14) key.
This will delete each number in turn starting at the
most recent digit you entered.
Now lift the receiver until you hear the tone to start
dialling, press the MARCAR/MENU (18) key.
10 seconds after you have dialled the last number, an
on-screen timer will start timing the call.
You can reset the timer to 0 any time by pressing the
BORRAR (14) key. This timer does not show the
actual time of the call and should only be used as a
guide.
Inserting pauses To stop dialling temporarily (i.e. to wait for a second
tone), press the RELLAMADA/PAUSA (11) key. This
will insert a two second pause into the dialled number.
Transferring a Call If your telephone is connected to an internal exchange
or PABX, press the R/A-a (8) key followed by the
extension number you wish to transfer the call to.
Automatic dialling This form of dialling is made without using the numeric
keyboard. Leaving the receiver up or down you may
dial automatically using one of these three functions:
Automatic dialling
from Directory
Please refer to chapter 5 in this Guide book.
Automatic dialling
from Recall
Domo Mensajes stores a list with the last calls made
in chronological order. To recall these numbers from
the list follow these instructions:
With the handset up or down:
Page 10

(17) keys to locate the number you
wish to dial.
Once selected, press the MARCAR/MENU (18) key.
Automatic dialling
from call list
Domo Mensajes stores a list with the last 50 calls
(received or made), in chronological order, so that the
received calls appear on the list. In order to use this
function the Caller Line Identification service must be
activated (See your Telefonica contract).
To recall these numbers from the list follow these
instructions:
With the handset up or down:
Press the LLAMADAS (17) key and select the
required number with the (17) keys.
08! î MARINA ARAG
When you have found the desired number, lift the
handset (if necessary) and press the MARCAR/MENU
(18) key to start the call.
5. USING THE DIRECTORY
The DOMO Mensajes telephone has a directory with a maximum capacity of 50 numbers, you may enter and
store numbers of up to 24 digits and enter a name associated to that number. The name may be up to 15
characters. Once a number and name is entered, these are kept in alphabetical order in the directory.
Entering a number in
the Directory
To enter numbers with the handset up or down, and
during the course of a conversation, follow these
instructions:
Press the GRABAR (10) key. The message GRABAR
NOMBRE will appear on the screen.
GRABAR NOMBRE
The name to be associated with the number will be
required as your telephone will alphabetically store the
names in the directory.
Enter a name (up to 15 characters), using the keypad
keys. By pressing each key the required number of
times you can access all of the following characters
and symbols:
FERNANDO ARAG_
Key 1: ! . - > 1 ;
Key 2: A B C 2 “ Ç
Key 3 : D E F 3 $
Key 4 : G H I 4 %
Key 5. J K L 5 &
Key 6 : M N Ñ O 6
Key 7 : P Q R S 7
Key 8: T U V 8 ? ü
Key 9 : W X Y Z 9 d
Key *: + ; ) ( *
Key 0 : - , ‘ / o @
Key # :(Blank) = < #
Page 11

GRABAR NUMERO
Now enter the number you want to store alongside the
name you entered in the directory, (24 digits
maximum).
912397657
Once you have finished, press the GRABAR (10) key
(record). And GRABAR NOMBRE appears on the
screen. This means you can now enter another name
and number if you desire.
GRABAR NOMBRE
If you to wish to enter another name and number at
this point, then simply repeat the previous steps. You
can exit this function at any time by pressing the
DESACTIVAR/ SALIR (4) key.
Entering redial
numbers in the
Directory
This feature allows you to create directory entries from
the phones redial function.
With the handset up or down, press the
RELLAMADA/PAUSA (11) key
Now press the (17) keys to select the number
you want to record in the directory.
Press the GRABAR (10) key and GRABAR NOMBRE
appears on the screen.
GRABAR NOMBRE
Enter a name and press the GRABAR (10) key. The
telephone will store this number in the directory.
MIGUEL_
Creating entries from
the call list
Press the (17) keys until you see the number
you want to record.
Press the GRABAR (10) key and the message
GRABAR NOMBRE appears on the screen.
GRABAR NOMBRE
Enter a name (as before) and press the GRABAR (10)
key. The telephone will store this number in the
directory
If the stored number has only got one name related to
it, you can modify it by dialling it again. Finish off by
pressing GRABAR (10)
Page 12

Press the key in which the first letter of the name you
are looking for appears once or several times,
For example if you are looking for a name that begins
with “R” then press the 7 key 4 times in quick
succession.
You will see on the screen the first name that starts
with that letter.
If the displayed name does not match the name you
are looking for, press the (17) keys until you find
the name you need.
If the number shown consists of more than 15 digits
then the ƒ„ will be displayed to indicate that the
number extends beyond the screen. The remaining
numbers will be displayed 4 seconds later.
ƒ „
912397657234234
P:01
The third line of this screen displays the memory
position of this particular number i.e. P:01 would
indicate that this number is in memory Position 01
ƒ
912397657
P:01
If you leave this function at any time by pressing the
DESACTIVAR/SALIR (4) key.
Automatic dialling
from the Directory
Press the AGENDA (9) key.
Press the key in which the first letter of the name you
are looking for appears once or several times,
For example if you are looking for a name that begins
with “R” then press the 7 key 4 times in quick
succession.
You will see on the screen the first name that starts
with that letter.
If the displayed name does not match the name you
are looking for, press the (17) keys until you find
the name you need.
Once you have your chosen number, put the receiver
down if necessary, press the MARCAR/MENU (18)
key and the number will be dialled.
Erasing a number
from the Directory
While viewing the directory, press the BORRAR (14)
key to erase the number shown. Confirmation will be
required. To confirm press the # key.
CONFIRMAR CON #
If you want to cancel this function, press the
DESACTIVAR/SALIR (4) key.
Page 13
6. DIRECT SERVICES KEYS
Access to direct
attention line
Direct access to Telefonica´s Customer Service Line.
(1004).
Telefonica line (1004) Lift the receiver and wait for the dial tone.
Press the blue (13) key.
Telefonica will appear on the screen. TELEFONICA
Access to European
Emergency number
Lift the receiver and wait for the dial tone.
Press the red (16) key.
EMERGENCIA will appear on the screen. EMERGENCIA
Access to Telefonica
operator service
Press the green (15) key.
Dial the number you wish to call, leaving your receiver
down. Lift the receiver and press the Green (15) key.
Telefonica´s Operator Code will appear before the
number you have dialled, and the call will be
established.
1077912397657
You can also leave the receiver down, and press the
green (15) key then dial the number, lift the receiver
and press the MARCAR/MENU (18) key.
If you start dialling after lifting the receiver, press the
green (15) key followed by the number.
OPERADOR
Page 14

7. MUTE FUNCTION
Your telephone includes a mute function, so that the person on the other end of the line can not hear you or
any other conversation you may wish to have with others in the same room as you.
Press the Mute (12) key while you are talking.
The screen will display MUTE ACTIVO. MUTE ACTIVO
The pilot light will start flashing slowly.
To de-activate this function and continue you
telephone conversation, press the MUTE (12) key
again.
The screen will display MUTE INACTIVO MUTE INACTIVO
While the MUTE function is on, you can also access
any of the other functions available while the receiver is
lifted.
8. ANSWERING A TELEPHONE CALL
When you receive a telephone call, you will hear the
bell, according to the volume and tone chosen. At the
same time the red light will flash.
To start the conversation, hold the receiver. The red
light will then stay on.
If the Call Identification Services are included in your
contract, you will be able to read the number calling,
as shown in chapter 9.
9. CALLING LINE IDENTIFICATION SERVICE (CLI)
This feature allows you to see the telephone number of the person calling as well as those on the call waiting
list. However, it is necessary to activate this service with Telefonica in order to send short messages.
When the phone rings, the telephone number of the
person calling is displayed on the screen.
912397657
Page 15
NUMERO PRIVADO
• The caller identity cannot be ascertained for
some reason
No NO DISPONIBLE
• The call is made from a telephone booth. TELEF. PUBLICO
Displaying screen
information
When the receiver is down you can read the time and
date, phone numbers, the number of telephone calls
(made and received), the number of new calls received
since the last time you checked, and the number of
repeat calls received.
20:00 02 11 10 6 3
If you are away from the telephone when you receive
new calls and they have not been answered, the red
light will flash showing there are new calls to check.
The red light will switch off when you have pressed the
(5) key, you can switch the light of without checking
any calls that may have been received in your
absence.
Received and dialled
calls
The telephone can keep a list up to 50 calls (received
and dialled), and you can check them with the receiver
up or down.
Press the (17) keys to scroll through the call
lists. The list runs in chronological order with the calls
received most recently being displayed first.
On the top line of the display screen you will see:
Order number in the list. i.e number 49 means that
this is the number stored at position 49 in the
memory.
02 ì 917404119
• A new call has been received
02! î 917404119
• A new received and answered call
02P î 917404119
Telephone number:
If the number matches any of those kept in the
directory, and has a name attached to it, you will see
the name first and then the number, the display will
rotate between name and number every 5 seconds.
If there is more information the symbol ƒor„ will be
displayed indicating that the number contains more
than 11 digits or that the owner’s number exists in the
directory or both.
On the bottom line of the display you will see:
• Time and date (day and month) when the call
was received or made.
• Indication of repeated call:
If you wish to make a call to any of the numbers
stored in this memory, after you have reached the
desired number lift the receiver and press the
MARCAR/MENU (18) key.
Page 16

The number checked or answered will be marked with
a P which appears to the right of the telephone
number.
01P î FRANCIS GAL
To return to the normal display, press the
DESACTIVAR/SALIR (4) key and (17) keys.
Alternatively the display will revert after a short while
with no intervention from you.
Erasing numbers in
the call memory:
Selectively: To erase call information that appears on the screen,
press the BORRAR (14) key while checking the call
list.
BORRANDO…
IMPORTANT: No confirmation will be asked for after
pressing BORRAR (14) key.
Delete all numbers: With the receiver down, press the BORRAR (14) key.
If there are no numbers for you to review (i.e. you have
reviewed all numbers), and providing the screen does
not display (NUEVAS) under the number. Confirmation
to delete ALL numbers is asked for as shown.
CONFIRMAR CON #
LL. SIN REVISAR
If you want to cancel the function, press the
DESACTIVAR/SALIR (4) key.
Page 17

10. OTHER SERVICES
This telephone enables you to use extra services, as long as they are included in your contract.
Divert incoming calls
Activation:
Lift the receiver, and press the DESVIO (20) key. PULSE No + DESVIO
Dial the number to which you wish to divert all your
calls to.
Press the DESVIO (20) key. DESVIO ACTIVO
While the divert is on the display will show the number
to which your calls will be diverted to.
While this service is active, it will not be possible to
receive short messages.
De-activation
Leave the receiver down
Press the DESACTIVAR/SALIR (4) key DESV. O CONTES?
Press the DESVIO (20) key. DESVIO INACTIVO
Now the sign DESVIO will disappear.
Important:
The divert and answerphone function are exclusive to
the telephone you activate them on. In certain
environments activating or de-activating these features
from another extension may not be confirmed
correctly. In some cases these services may or may
not activate and deactivate correctly due to the type of
environment.
Lift the receiver.
Press the CONTESTADOR (2) key.
The screen will display a “tape” symbol indicating that
the answering machine feature is active.
CONTEST. ACTIVO
De-activating:
Lift the receiver.
Press the DESACTIVAR/SALIR (4) key.
DESV. O CONTES?
Press the CONTESTADOR (2) key. CONTES. INACTIVO
The tape symbol will disappear.
Page 18

Accessing your
messages
If you have received calls, and the caller left a
message, then these will be stored as messages in
your mailbox, on your return the red light will be
flashing (indicating missed calls and/or new
messages) and will flash while you review your
messages. (Subject to line type).
MENSAJES VOZ:01
To listen to messages messages:
Leave the receiver down and press the
MENSAJES/ACEPTAR (3) key.
The screen will display “OIR MENSAJES” OIR MENSAJES
NOTE: If you collect your messages from another
telephone the indicator light may turn on more slowly.
Call waiting While you are on the phone, you might receive a
second call. If this happens you will hear several tones
during your conversation. If your telephone contract
has Caller Line Identification Service (CLI) included,
then the number of the second caller (llamada en
espera) will be displayed.
Answering the waiting call
Press the LL. ESPERA (19) key.
The message LLAMADA RETENIDA appears on your
screen.
LLAM. RETENIDA
The symbol Llamada retenida turns on. Llamada
Retenida
Page 19

PULSE LL. ESPERA
Then press the LL.Espera (19) key.
3 way calling You can start a conversation with two people from
different telephone lines.
During a conversation, you can make another call, this
will start the third party call conversation.
Press the Ll. A TRES (5) Key. PULSE NUMERO
Dial the number of the party you wish to bring into the
conversation.
When the new party answers, press the LL. A Tres (5)
key.
The message LLAMADA A TRES appears on the
screen.
LLAMADA A TRES
The line will confirm that the function has been
activated. And you will hear a specific tone.
To finish this call with all callers, replace the receiver.
You can separate both conversations at any time.
Press the LL.ESPERA (19) key. LLAM. RETENIDA
By pressing the above key you will be able to switch
from one conversation to another.
If you receive a second call, after answering it you can
start another third party conversation again.
After pressing the LL. ESPERA (19) key. LLAM. RETENIDA
Press the LL.A TRES (5) key. LLAMADA A TRES
The process is the same as before.
When you separate both calls, you can finish the one
you are dealing with.
Press the DESACTIVAR/SALIR (4) key. PULSE LL. ESPERA
Press the LL.Espera (19) key.
Page 20

11. SHORT MESSAGES
Domo Mensajes allows you to access the Short Message service. This Telephone offers you the
possibility to:
• Receive short messages coming from other
telephones or mobiles, or from e-mails.
• Send short messages to other telephones,
mobiles, e-mails and fax (*) = these services
are not yet available).
When there are two or more telephones connected to the same line, and adapted to work with short
messages, each telephone must initiate these service in the contract and each must have a different
identification. This identification, also called an extension, is a number between 1 and 9. The telephone will
provide the extension to you starting at 1 (the default extension number built into the phone). If you wish to
change this number, read the chapter entitled EXTENSION.
One telephone can be used by more than one person, Domo Mensajes also offers you the possibility to receive
and send private messages to which only the person who has applied for any 1 of the 5 private mail accounts
will have access. For more information please see the chapter entitled Private Mail (Correo Privado).
To activate and configure the service follow these
instructions:
Any new function in the Message Service should only be initiated when the telephone is not being used and
with the receiver down. The MENSAJES/ACEPTAR (3) key will let you enter the Message menu and confirm
any function. The (17) keys will let you navigate through the different menu options. To return to the
previous screen, press the DESACTIVAR/SALIR (4) key.
Activating the short
message service
With the receiver down, press the
MENSAJES/ACEPTAR (3) key. Then press the
(17) keys until ACTIVAR is displayed.
ACTIVAR
If you wish to activate the service, press the
MENSAJES/ACEPTAR (3) key.
ESPERE…
Wait until ACTIVADO appears on the screen. ACTIVADO
If there is a problem, the message ACTIVAR
reappears, you can try again by pressing
MENSAJES/ACEPTAR (3) key.
ACTIVAR
If you wish to connect your telephone to the short
message service which has already been activated on
another telephone line, de-activate the service on the
current line before changing it, then you may connect
to the service on your new line.
De-activating the
short message
service
With the receiver down, press the
MENSAJES/ACEPTAR (3) key. Then press the
(17) keys until DESACTIVAR is displayed.
DESACTIVAR
Page 21

DESACTIVADO
If there is a problem, the message DESACTIVAR
reappears, you can try again by pressing
MENSAJES/ACEPTAR (3) key.
DESACTIVAR
Short message
configuration
Once the service is activated, you will be able to
receive and send messages. However, it is important
that you read the following information concerning the
configuration of the private mail service.
Extension You can have several telephone services with Short
Messages Service connected to the same telephone
line. You will need to assign each telephone a different
extension number from 1 to 9. This procedure should
be done before connecting the new telephone to the
short Message Service. Domo Mensajes is supplied
with an extension number equal to 1 by default.
Changing the extension number is only advised when
you already have another telephone connected to the
same line with access to Short Message Service.
If your Telephone Short Message Services is already
activated and you just want to change the extension,
de-activate the service from that telephone, before
making with the change.
To change the extension number, follow these
instructions:
With the receiver down, press the
MENSAJES/ACEPTAR (3) key.
Then press the (17) keys until the option
CONFIGURAR is displayed on the screen.
ƒ „
CONFIGURAR
Press the Mensajes/Aceptar (3) key. You will enter
the CONFIGURACION menu. Press the (17)
key until you see EXTENSION.
ƒ „
EXTENSION (1)
Your telephone extension will be displayed in
brackets. If you need to change this, press the
MENSAJES/ACEPTAR (3) key.
The message PULSE NUMERO will appear, asking
you for the new number of the extension. Press the
number you wish to use on the keypad. Remember
you can only choose from 1 to 9.
PULSE NUMERO
4
Page 22

ƒ „
EXTENSION (4)
Private Mail Domo Mensajes also offers you the possibility to send
and receive private messages. You can create private
mail accounts (up to 5), to which you will have access
when you have defined the following parameters:
Name: A Unique user identification. You can opt to send this
information when you send a message to a defined to
a private mail destination. This parameter may
consists of 1, 2, 3 or 4 characters.
Key: Grants mailbox access to each registered user. This
is why it is important to choose a key you can
remember. This parameter is numeric and consists of
4 digits.
Shown below is how to create, modify and erase
Private Mail Accounts.
Private Mail account Press the MENSAJES/ACEPTAR (3) key with the
receiver down to enter the SMS menu.
Press the (17) keys. Until you see
CONFIGURAR, now press the MENSAJES/ACEPTAR
(3) key.
CONFIGURAR
A submenu will guide you to the options “Private mail”
and “extensions”. Using the (17) keys, press
MENSAJES/ACEPTAR (3) key until you see “Correo
Privado” appears on the screen.
Select “Crear usuario”. Press the Mensajes/Aceptar
(3) key
ƒ „
CREAR USUARIO
You will be asked to enter a name consisting of 1, 2, 3
or 4 characters. Enter a name and press the
Mensajes/Aceptar (3) key when you have finished.
¿NOMBRE?
Now you will be asked for a key consisting of 4 digits.
Enter a key and then press Mensajes/Aceptar (3).
CLAVE
CORREO PRIVADO
Modify User To change the name or key related to a private mail
account, press the (17) keys and Mensajes (3)
key, go to submenu “Correo Privado” as explained in
the previous option.
When you see * MODIF.USUARIO*displayed, press
Mensajes/Aceptar (3) key.
ƒ „
MODIF. USUARIO
Page 23

(17) keys select the
account you wish to modify by pressing the
MENSAJES/ACEPTAR (3) key.
Each name is related to a key which you will need to
change. Press the Mensajes/Aceptar (3) key once you
have found the name (account) you wish to make
changes to.
If you wish you may change the account name and
then press the Mensajes/Aceptar (3) key to see the
key related to this name.
If you want to change the key press the
Mensajes/Aceptar (3) key.
Delete a User To delete a user, go to the submenu “Correo Privado”
using the (17) keys and press the
Mensajes/Aceptar (3) key as explained in the option
‘Private mail account’.
When you see the option “Borrar usuario” (erase user),
press the Mensajes/Aceptar (3) key.
ƒ „
BORRAR USUARIO
Now you can see a list of the names already created
and filed. Using the (17) keys select the
account you wish to modify.
Press the Mensajes/Aceptar (3) key. You will be
asked for the key. Write this down then press the
Mensajes/Aceptar (3) key.
You will see BORRANDO… (Deleting) appear, which
means the deletion process has begun.
BORRANDO…
If you have forgotten the name or key, the computer
also offers you the possibility of deleting the account
(emergency measure). Remember that not only the
user’s name but the messages will be deleted as well.
When asked for the new key, enter this new key three
times in a row as prompted.
Writing a New
Message
With the receiver down. Press the Mensajes /Aceptar
(3) key.
Use the (17) key and look in the menu for the
message ENVIAR. When you can see this word,
press the Mensajes/Aceptar (3) key.
ENVIAR
Now enter the message text up to 640 characters.
Each block of characters is shown on the bottom left
corner of the screen (from 1 to 4). Once this number is
reached, an envelope will appear on the top part of
your screen. The symbols are designed and assigned
as follows:
HOLA_
Page 24

ENVIAR MENSAJE
The other options, sending E-Mail and sending a Fax,
can be accessed by pressing the (17) key. We
will explain how to send each type of message in
detail later in this manual.
Sending a message When ENVIAR MENSAJES is displayed on the
screen.
ENVIAR MENSAJE
Press the Mensajes/Aceptar (3) key. You will be
asked for the telephone number that you wish to send
to. Select the number you have chosen from your
directory (9) and press the Mensajes /Aceptar (3) key.
DESTINATARIO
You will be asked for the name of the sender, whether
you wish to write a “private message” and the
extension just in case the extension has more than
one telephone with short message service and you
wish to send it to one in particular. Both requests are
optional. If you do not wish choose either option, press
Mensajes/Aceptar (3) key until ENVIAR: SI. Appears.
¿ NOMBRE?
¿ EXTENSION?
ENVIAR: SI
If you wish to continue with the message, press
Mensajes/Aceptar (3) key and ENVIANDO will appear
on the screen.
ENVIANDO
Otherwise, press the (17) key until you see
ENVIAR: NO. Displayed on the screen.
ENVIAR: NO
Press the Mensajes/Aceptar (3) key and use the
(17) keys to choose between the options (save
or delete) and press Mensajes/Aceptar (3) key.
Sending an e-mail When ENVIAR E_MAIL is displayed on the screen.
ENVIAR E-MAIL
Page 25

DESTINATARIO
When ENVIAR: SI is displayed on the screen. ENVIAR: SI
If you wish to continue sending the message, press
Mensajes/Aceptar (3) key, and ENVIANDO will appear
on the screen.
ENVIANDO…
If you do not wish to send the message, press the
(17) keys until ENVIANDO appears.
ENVIAR: NO
Press the Mensajes/Aceptar (3) key and choose the
options save or delete (guarder o borrar) and press
Mensajes/Aceptar (3) key.
Sending a Fax When ENVIAR FAX is displayed on the screen.
ENVIAR FAX
Press the Mensajes /Aceptar (3) key. You will be
asked for the Subject (optional). You can a subject
you wish (up to 255 characters). Press the
Mensajes/Aceptar (3) key again.
¿ ASUNTO?
You will then be asked for the number. Dial it or
choose it from the directory by pressing Agenda (9)
key and press the Mensajes /Aceptar (3) key.
DESTINATARIO
Press the Mensajes/Aceptar (3) key and ENVIAR: SI
ENVIANDO will be displayed on the screen.
ENVIAR: SI
ENVIANDO…
If you choose not to continue sending the fax, use the
(17) keys until you read ENVIAR:NO
ENVIAR: NO
Press the Mensajes/Aceptar (3) key and with the
(17) keys choose the option to save (guardar) or
to delete (borrar) and press Mensajes/Aceptar (3) key.
If a message can not be received by the recipient, you
will receive a message telling you the reason (deactivated service, no agreement with the operator,
etc…)
Regardless of the type of message, the option to send
it can be cancelled any time pressing key
Desactivar/Salir, although if you wish to send the
message, it will be necessary to enter all the data
required until you see the message ENVIAR: SI
displayed then select “ENVIAR: NO” with the help of
the arrow keys (17). Now press the Mensajes/Aceptar
(3) key. You will find a menu with two options
BORRAR y GUARDAR (Read the chapters BORRAR
MENSAJES, and GUARDAR MENSAJES).
Reading messages If there are new messages, you will know because the
envelope symbol *will start flashing and the
message MENSAJES TEXTO will appear.
MENSAJES TEXTO
Page 26

LEER MENSAJE
The information related to the message is:
1. Message Number
2. Symbol ! Or P which will tell you whether it is
a new or a saved message.
01! î ALMUDENA
3. The arrows characters, ì and î show
whether it is an in-coming or out-going
message.
4. As follows:-
• If it is a public and in-coming
message the sender’s number or
name will appear.
• If it is a private in-coming message,
the user’s name will appear in
brackets.
• If it is an out-going message the
destination number can be seen. i.e
telephone number, fax number, or an
internet address.
02 Pì ROSA ROMERO
By pressing the (17) keys you can scroll
through the message list from the newest to the oldest
message and vice versa.
Press the Mensajes/Aceptar (3) key to read the
message and the (17) keys to scroll through it
If it is a private message you will see:
02 Pî (PEPE)
Enter the private key (4 numbers) and press
Mensajes/Aceptar (3). Key. If the key is correct, you
will see the name or number of the sender, and then
the message text. Use the (17) keys to scroll
through it.
If it is a received message, press Mensajes/Aceptar
(3) and you will see RESPONDER (respond)
RESPONDER
By using the (17) keys you will gain access to
other options on this menu.
REENVIAR
For received messages, the menu options are:
REENVIAR, BORRAR, GUARDAR (SEND AGAIN,
DELETE, SAVE).
BORRAR
GUARDAR
Answering received
messages
When you have read your message an can see
RESPONDER as shown in chapter LEER MENSAJES
(HOW TO READ MESSAGES) press
Mensajes/Aceptar (3). Type your reply then proceed,
as explained in chapter “Ways to a message”.
RESPONDER
Page 27

REENVIAR
Deleting messages To delete a message and can see BORRAR (as
explained in chapter How to read a Message), press
Mensajes/Aceptar (3) key.
BORRAR
If you read through the message list, as shown under
the LEER (read) option, choose the message you
want to delete and then press BORRAR (14), you will
then be asked to confirm. Messages that have not
been read can not be deleted, the phone will beep (this
is an error tone).
Saving a message To save a message and you can see GUARDANDO…,
as explained in chapter How to read a Message, press
Mensajes (3) key.
GUARDANDO…
12. DISTRIBUTION LISTS
IMPORTANT: This service is not yet available.
The distribution lists will allow you to send the same message to different destinations easily.
Requirements for a distribution list are:
• Name of distribution list
• Destination: clients you wish to send the messages to.
Domo Mensajes will allow you to create 10 distribution lists and 10 destination lists for every distribution list.
No access key is required and you can work from any telephone connected to that line (since the lists are
common to all telephones).
Any work on groups (create, erase-add., consult, send) are made sending specific messages or commands to
the telephone number 4545, which will not be charged. The title of the messages should be written in capital
letters.
Creating a group Insert the following message using these keys:
##CGR#TRABAJO##
##CGR#<Name-of-the-new-group>##
i.e if you wanted a group called “friends” you would
enter
##CGR#FRIENDS##
After creating the group, you will receive a message
informing you that the request has been accepted.
SE HA CREADO
TRABAJO
“se ha creado <name-of-the-new-group>”
Page 28

##AI#TRABAJO*91396751*
1*INMA##
• ##AI#<Name-of-the-group>*>telephone-
number>*machine-number>*<public-key>##
• ##AEI#>name-of-the-group>*<e-mail-
address>##
##AEI#TRABAJO*INMA@
HOTMAIL.COM##
After adding a new member to the group, you will
receive a message informing you that the request has
been accepted:
EL INTEGRANTE INMA SE
HA INCLUIDO EN
TRABAJO
“ The- member-<member’s-data> has been included in
<Name-of-the-group>”
Deleting Members
from a group
The message confirmation will vary according to the
destination type:
##BI#TRABAJO*91396751*
1*INMA##
• ##BI#<Name-of-the-group>*<telephone-
number>*<machine-number>*<public key>##
• ##BEI#<Name-of-the-group>*>e-mail-
address>##
##BEI#TRABAJO*INMA@
HOTMAIL.COM##
After erasing the member of the group, you will be sent
a message informing you that the request has been
accepted: “The-member<member’s-data> has been
erased from <name-of-the-group>
EL INTEGRANTE INMA SE
HA BORRADO DE
TRABAJO
Changing Member
Names in a group
If you wish to modify the data of a member of a group,
so as to make it easy and avoid unnecessary
commands you must :
1. Erase the member whose data you wish to change.
2. Re-add the member to the group with the new data.
Deleting a group Enter the following message:
##BG# TRABAJO
##BG#<Name-of-the-group>##.
This action will simply delete all the members in a
group, as well as the group. After this you will receive
a message informing you that your request has been
accepted.
SE HA BORRADO
TRABAJO
“se-ha-borrado<Name-of-the-group>.”
Looking up groups The message form will be:
##CG##
##CG##.
The confirmation will consist of sending the message
with the names of the groups seprated by the asterisk:
your groups are:
SUS GRUPOS SON:
TRABAJO*AMIGOS*
FUTBOL
Page 29

##CI#TRABAJO##
##CI#<Name-of-the-group>##
You will receive a message containing a list of all the
members of that group. “The-members-of<Name-ofthe-group< are: <member’s-data-1>*< member’s -data2>*…< member’s -data-3>. The different parts of the
member’s data will appear separated by the symbol”;”
LOS INTEGRANTES DE
TRABAJO SON:
91396751;INMA*912
55180;FRANCIS*9139
7657;ROSA.
Sending a message
to a group
To send a message, insert the following: ##E#TRABAJO##
MANANA REUNION A
LAS 11H
##E#<Name-of-the-group>##<message-text>.
This will send a message <message-text> to all the
members of the group.
When sending a message, if you see the words ERROR ENVIO, check chapter 13. WHAT TO DO IF…? If the
function has not been completed for some other reason, you will see a different message enabling you to try
again.
13. WHAT TO DO IF?
PROBLEM SOLUTION
You send a message, e-mail or fax and you seet:
ERROR ENVIO
You can try pressing the Mensajes (3) key or cancel,
using the (17) keys, and then you can delete or
save the message, e-mail or fax.
You send a message, e-mail or fax and any of the
follwing messages - ERROR ACTIVESE, or ERROR
DESTINO
Firstly, check you have activated the service. ERROR
DESTINO appears if the receiver has not activated the
service. In any case it’ easier to keep a copy of the
message. To do this choose option ENVIAR: Now,
press the (17) keys until you see GUARDAR.
If you press the Mensajes key with the receiver
down, and you see POCA MEMORIA BORRE
MENSAJES
Erase any messages no longer required, you may not
be able to receive new message until you do this.
You try to create a private list and the message
MEMORIALLENA, appears.
This message means that the 5 private mail lists
available already exist. If you need to create a new one
you will have to erase one of the existing ones first.
If the screen does not work and you hear nothing. Check the phone is set-up properly and connected to
an active telephone line. If the problem persists call the
telephone company.
If the DESVIO (divert) symbol switches off. The divert was not actually activated when you received
a call. Activate the divert service again.
Page 30

The LED turns on when you hold the receiver but you
hear no tones in the receiver earpiece.
Check the cord is connected to the receiver.
There is nothing in the display screen, but you can
dial and hear perfectly.
Insert the heel, and change the contrast.
The ringer volume is too low. Change the volume.
The screen will not show the person’s calling
identity.
Make sure you have the Call Identification Service
included and activated in your contract.
To return the telephone functions to factory defaults. Simultaneously press 1 and 3 keys. Pick up the
receiver, stop pressing the keys and put the receiver
down.
14. MAINTENANCE
The Domo Telephone will not require any special maintenance. To clean it, use a dry cloth. Do no use
corrosive or aggressive products as these could damage the telephone. Avoid dropping the unit. Do not expose
the telephone to fire, high temperatures, or the sun.
Page 31

15. TECHNICAL SPECIFICATIONS
Minimum isolating resistance 100M
Minimum dialectric 500V
Return losses 14dB
Multifrequency dialling codes CCITTQ.23
Emission time 70 ms +-5%
Pause time 140 ms +- 5%
Programmed starting period 100 ms + 5%
Dialling pause time 25+-5%
Directory time, incoming and outgoing calls phone
unplugged
Limited
Calling part identification code FSK ETSI 300778-1 and 2
Received calls list capacity 50/15/24
Directory capacity: memories, characters, numbers 50/15/24
Message capacity list : number of messages and
characters
50/80 or 25/160
Ringer level: (high level) 81dBPWL
Weight 600 grams
Size LxHxA:226x63x149 mm
Functioning temperature 0º to 55ºC
stock temperature -20º to 70ºC
Maximum humidity 95%
Page 32

16. DECLARATION OF CONFORMITY
Declaration of conformity
Name: Interisa Electronica,S.A.
Address: Avd. De la Industria,29 28760 Tres Cantos(Madrid)
Telephone: 918033821 Fax: 918038630
Identification document NIF: A-28341055
Declares under its own responsibility that:
Equipment: Telephone
Manufactured by: Interisa Electronica,S.A.
In: SPAIN
Trademark: Telefonica
Model: Domo Mensajes
Name: Domo Mensajes
Complies with the following rules:
UNE-EN 60950:1995+A1:1996+A2:1996+A3:1998 Seguridad de los equipos de tratamiento de la informacion
incluyendo los equipos electricos de oficina.
UNE-EN 55022:1995+A1:1997+A2:1998 Limites y metodos de medida de las caracteristicas relativas a las
perturbaciones radioelectricas de los equipos de tecnología dela información.
ITE-CA-001 Interfaz de linea analogica de Telefonica de España,S.A.
ETSI TC AT TD=(r2”AT Features on SMS:Short Message Service”.
ETSI Draft DES/SPAN-110093 V0.1.5 (2001-03) “Point to point universal short Message Service; Service
description”.
Recepcion de Mensajes Cortos TESAV-S1-SMS,V-1ª.01-12-2001
Agreeing with the Directive de la UE:
1995/05/Ec Sobre equipos terminales de telecomunicación.
 Loading...