

Page 1
TT
TT
T
elephoneelephone
elephoneelephone
elephone
DOMODOMO
DOMODOMO
DOMO
MessagesMessages
MessagesMessages
Messages
hands freehands free
hands freehands free
hands free
USER MANUAL
Page 2
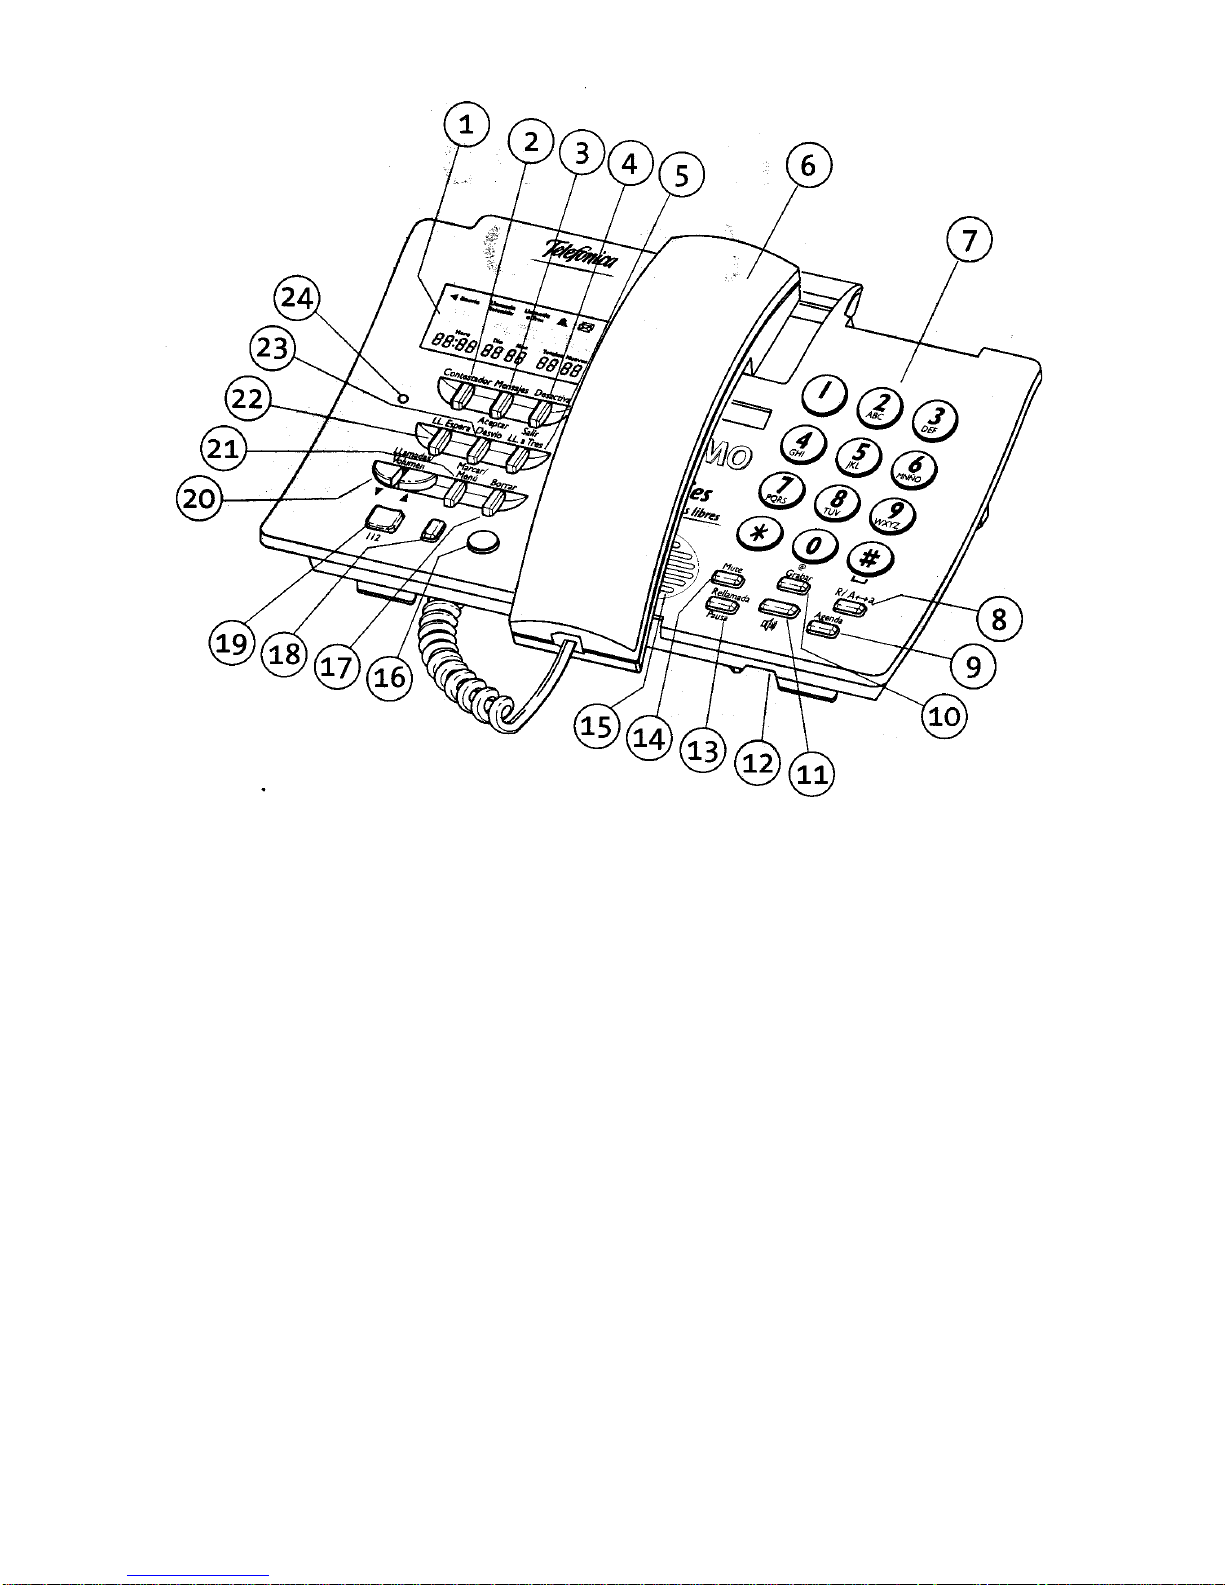
1. Viewer.
2. Key Answering machine.
3. Key Messages/Accept.
4. Key Deactivate/Exit.
5. Key LL. at Three.
6. Handset.
7. Keyboard of Machine.
8. Key R; change from/to Uppercase/Lowercase.
9. Key Phone Book.
10. Key to Record.
11. Key Free Hands
12. Microphone.
13. Key Rellamada / To Pause.
14. Key Mute.
15. Speaker.
16. Key to access Personal Attention of Telefónica 1004.
17. Key to Erase.
18. Key to Telefónica operator 1077.
19. Key to access European Emergency Number 112.
20. Scroll Keys and Volume.
21. Key for Menu and Selecting
22. Key to hold second caller.
23. Key to Divert
24. Indicator light
Page 3

DOMO Messages Hands Free
3
INDEX
DOMO Messages Hands Free
3
1. INTRODUCTION ........................................................................................... 4
2. INSTALLATION.............................................................................................. 6
3. CHANGING THE SETTING .......................................................................... 7
4. DIALLING .................................................................................................... 11
5. USE OF THE PHONEBOOK....................................................................... 13
6. ACCESSING TELEFÓNICA SERVICES ..................................................... 16
7. MUTE FUNCTION ....................................................................................... 17
8. CALLER INDICATION ................................................................................. 18
9. HANDS FREE FUNCTION .......................................................................... 18
l0. VIEWING CALLER NUMBER ..................................................................... 20
11. SUPPLEMENTARY SERVICES .................................................................. 23
DIVERTING INCOMING CALLS ................................................................. 23
ANSWER MACHINE SERVICE .................................................................. 24
ACTIVATING THE ANSWERING MACHINE .............................................. 24
TRANSFERRING CALLS ............................................................................ 25
THREE-WAY CALLS ................................................................................... 25
12. TEXT MESSAGING (SMT).......................................................................... 27
ACTIVATING / DEACTIVATING MESSAGING SERVICE (SMT) ............... 28
CHANGING EXTENSION .......................................................................... 29
PRIVATE MAIL ............................................................................................ 31
EDITING AND SENDING A NEW MESSAGE ............................................ 33
RECEIVING A MESSAGE ........................................................................... 37
READING MESSAGES ............................................................................... 37
13. DISTRIBUTION LIST FOR MESSAGING ................................................... 40
14. CHANGE ANSWERPHONE LANGUAGE TO ENGLISH ........................... 43
15 TROUBLESHOOTING ................................................................................ 44
16. MAINTENANCE ........................................................................................... 45
17. TECHNICAL SPECIFICATIONS ................................................................. 45
18. CERTIFICATE OF GUARANTEE ................................................................ 46
19. CONDITIONS OF GUARANTEE ............................................................... 47
Page 4
DOMO Messages Hands Free
4
1.INTRODUCTION
This booklet is provided with the DOMO Messages Hands Free telephone equipment. It is recommended that you read it thoroughly before using the new telephone.
It is laid out in an order that makes subjects easy to find, and includes the methods
to access the various services provided by Telefónica and describes the messages
that are displayed in the viewer.
The DOMO Messages Hands Free is an electronic telephone of modern design that
incorporates the following characteristics -
- Dialling.
- Numeric keyboard with alphabetic characters.
- On-screen display of the dialled number.
- Phonebook with a memory for up to 50 names and number.
- A listing with the last 50 incoming or outgoing calls.
- Hands Free function
!))).
- Adjustment of the volume of the speaker.
- Adjustment of the volume of the microphone.
- Key R.
- Redailling from a list of outgoing Calls.
- Insertion of pauses while dialling.
- Viewer window with three lines of information.
- Shortcuts to the Telefonica’s Supplementary Services: Call Waiting, Three-Way
Calls, Call Diversion and Answering Machine Service.
- Text Messaging (SMT) - sending, receiving and editing text messages (SMT).
- Identification of incoming call numbers.
- Indicator light showing New Calls, Text Messages (SMT) and messages stored in
the Answering Machine (if available from the telephone network).
- Shortcut to the Telefónica Personal Attention line - 1004 (Blue Key).
Page 5
DOMO Messages Hands Free
5
Shortcut to the European Emergency number - 112 (Red Key).
Shortcut to the Telefónica Operator - 1077 (Green Key).
Mute Function, with optical warning.
Activation / Deactivation of the 1077 Code.
All services available using one telephone line.
Reception capsule giving help to people with hearing difficulties.
Handset assessories such as line cords.
Installation possible during evenings.
Real-time clock.
Selection of three melodies and two-tone levels.
The DOMO Messages Hands Free comes with -
The Telephone.
The Handset.
Spiral cord for handset/base.
Line cord.
User Manual with guarantee card and Quick Guide of Use.
NOTE:
To be able to use the Identification of Calls option and other Supplementary
Services that are offered with the DOMO Messages Hands Free telephone, it is
necessary to have made a request for those services from Telefónica.
To send or to receive text messages, it will be necessary to activate the service
according to instructions in section 12 of this manual - SERVICE OF
MESSAGES OF TEXT (SMT). Keep in mind that it is necessary to have
requested the Identification of Calls Service.
IMPORTANT NOTICE:
To connect two or more handsets for using messages, use DIFFERENT
EXTENSION, read details on Extensions on page 27.
Page 6
DOMO Messages Hands Free
6
2. INSTALLATION
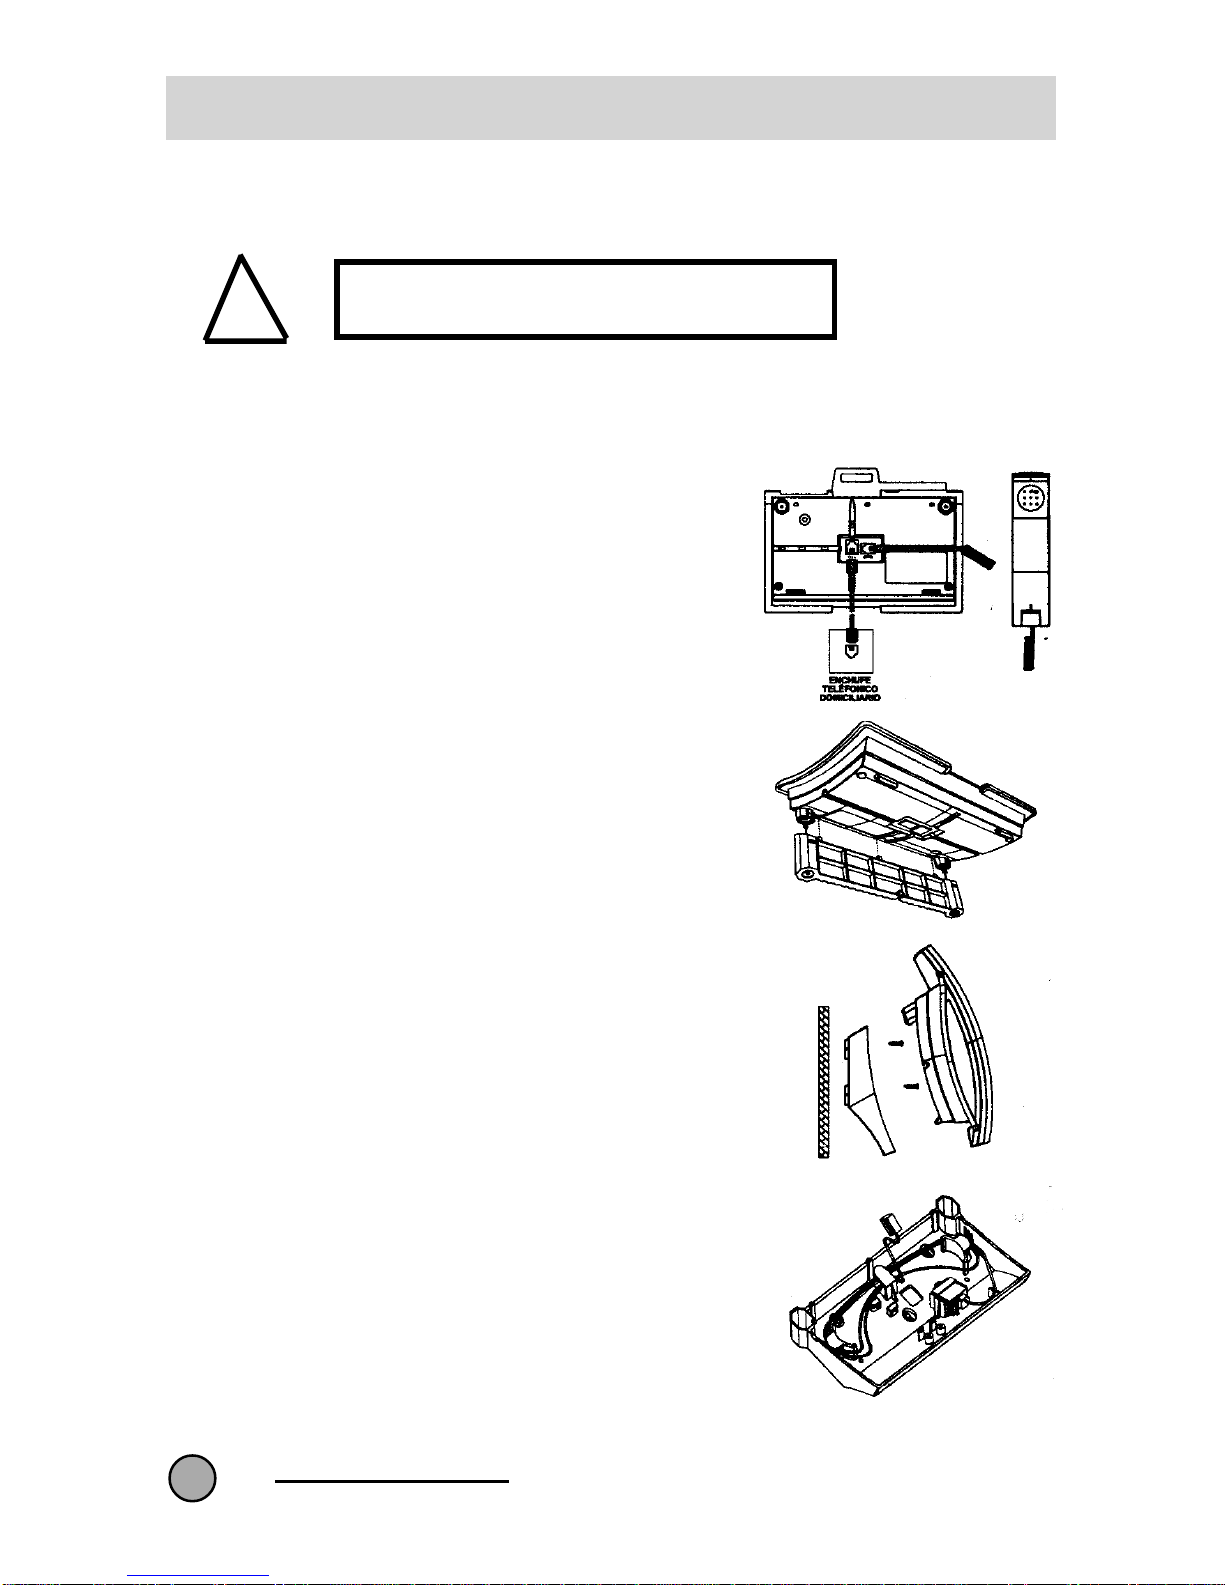
Connect the longest end into the
telephone base and the other end in
the hand piece as shown in the figure.
Connect the end of the input cable to
the apparatus and the other end into
the socket of the phone plug.
If you need to increase the apparatus
inclination on the table, insert the base
support bar into the apparatus and
press until it clicks into place.
Adjust the cables under the apparatus
to ‘exit’ in the best direction.
Fix a base support (optional) for wall
assembly, if necessary.
Use the template provided with the
base support, to mark the two holes
to be drilled in the wall.
Connect the cable of external line in
the screws located inside base.
Connect the cable of telephone line in
the connector so it is housed internally.
Wind up surplus in the flukes as shown
in the figure.
Installing DOMO Telephone and connecting it to a landline.
This telephone should only be connected to
lines that have Multifrequency.
!
Connection
of cord to the
handset
Connecting
the telephone
line
Assembly of
base stand
Assembly of
hand piece
Page 7
DOMO Messages Hands Free
7
Once connected to the telephone line, you may need to change phone settings to
suit your own requirements. You can change the ringtone and volume of the bell,
adjust the viewer contrast, to program the hour and date, to activate or disable the
tones of confirmation, validation and error, and to select the Code of Operator of
Telefónica.
These adjustments are carried out with the telephone handset down and by
pressing the Marcar/Menú key (21) repeated times until selected function is displayed
in the viewer.
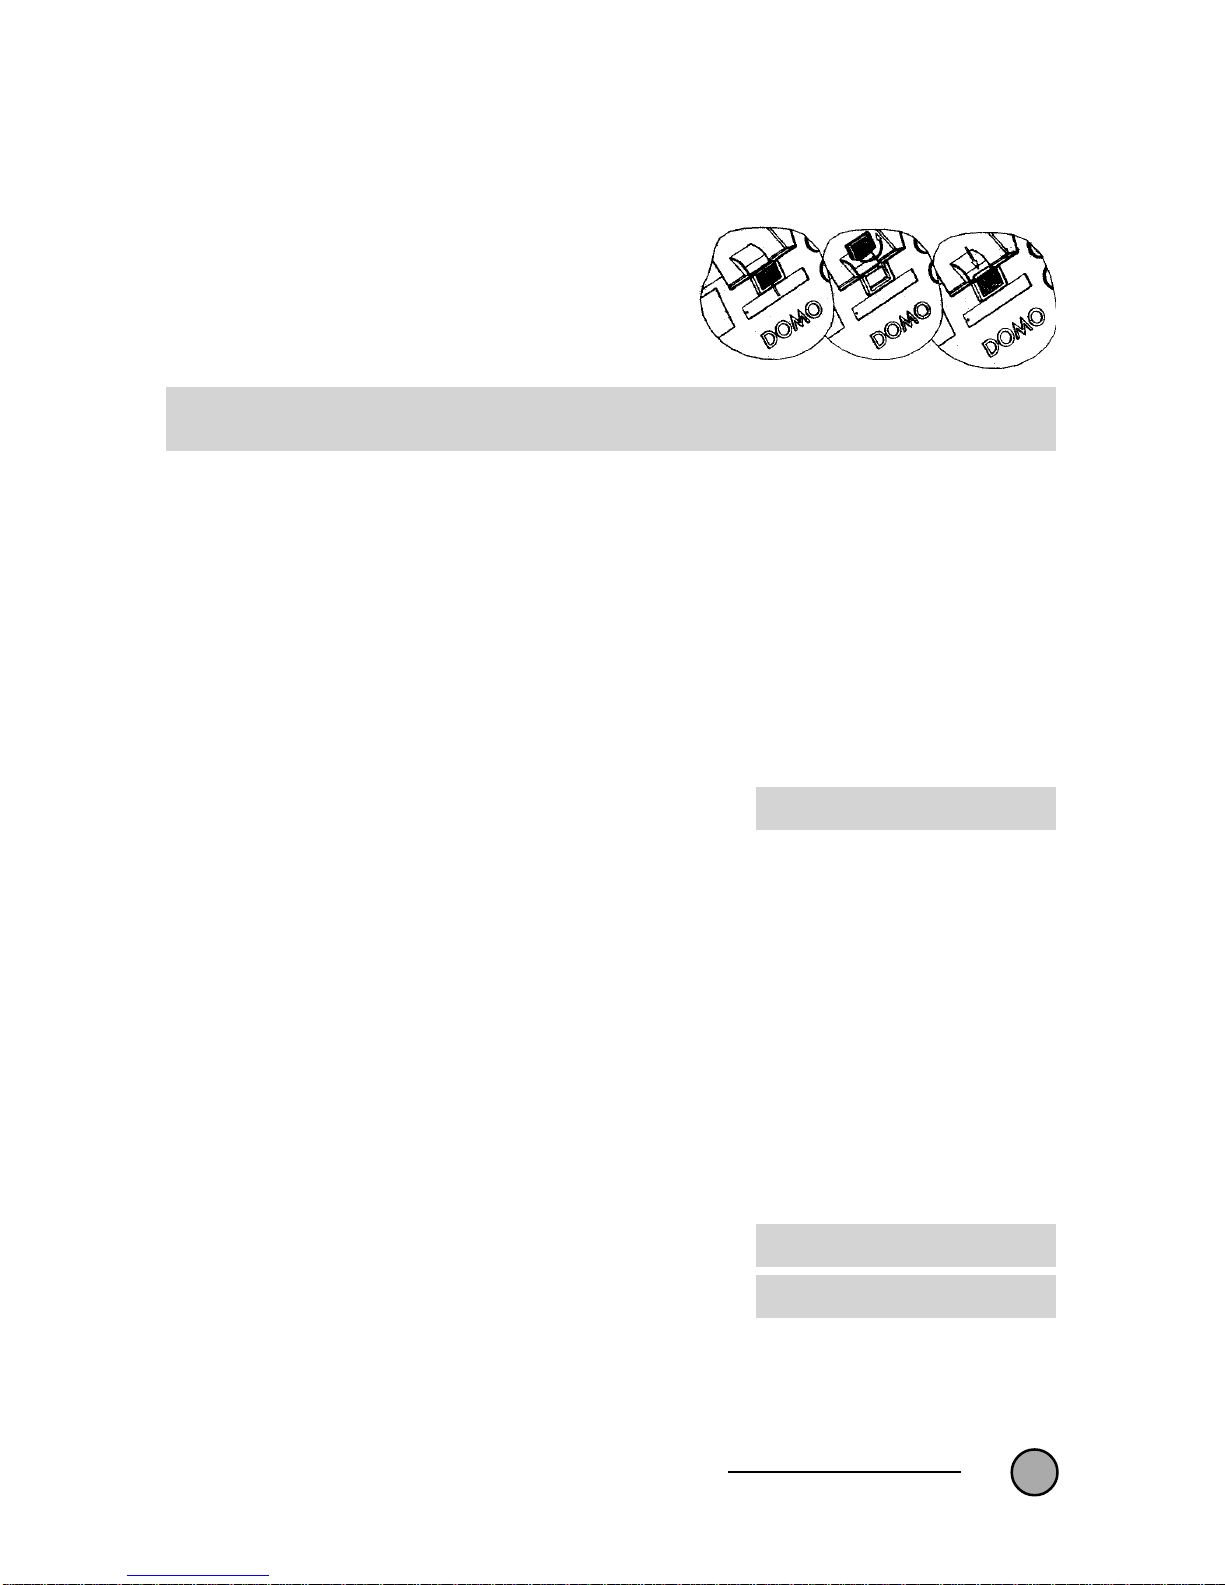
So that the handset stays in place
when the apparatus is hung on a wall,
it is necessary to take remove and rotate the piece of assembly as shown
in the figure..
3. TELEPHONE SETTING
Press the Marcar/Menú key (21) until
the message appears in the viewer.
With the keys cursor
!" (20) one of
the three available ring tones can be
selected and will be heard during
selection.
Press Desactivar/Salir (4) when
selection is complete.
Press the key Marcar/Menú (21), un-
til the Timbre option is shown in the
viewer.
With the keys !" (20), select high
level or low level of sound. In the viewer
the selected level will be shown as a
message, and with an Black bell icon
(high) or half Black bell (low).
Selection of
the melody
tones
Selection
bell level
sound
CAMBIO RING: #
TIMBRE: $ HIGH #
TIMBRE:$ LOW #
Page 8
DOMO Messages Hands Free
8
Press Desactivar/Salir (4) to return
to the normal display.
Press the Marcar/Menú key (21) until the message appears in the viewer.
Press the
!"!"
!"!"
!" keys (20) to increase
or decrease the contrast. The level
selected will be shown in the viewer.
Press the Desactivar/Salir key (4) to
return to the normal display.
Press the Marcar/Menú key (21)
again until PULSE HORA/FEC. Is displayed.
With the handset down adjust the hour
and date by typing them directly into
the keyboard. If you make a mistake,
use the Borrar key (17) to Erase.
For example, if the hour and date is
the 20th. of November and 2:11am,
type: 20100211.
Once the last digit of the date has been
typed, the new hour and date will be
displayed in the viewer. If the process
is not completed, the previous and
date will remain displayed.
After finishing this operation, you will
be able to select the next option by
pressing the Marcar/Menú (21) key
again, or return to the normal display
by pressing the Desactivar/Salir key
(4).
Remember, if you have the caller
Identification service enabled, when
receiving a call, the hour and date
display will be adjusted automatically.
Adjusting
the contrast of the
viewer
Setting the
hour and
dates
CONTRAST. #3$
HORA/FEC PULSE.
HORA/FEC PULSE.
Page 9
DOMO Messages Hands Free
9
This Menu option lets you activate or
deactivate the beep tone, which
sounds when you press a key.
Press the Marcar/Menú key (21) until
the viewer shows one of the following
messages. If the beep has already
been activated, this message appears
in the viewer.
If the beep has already been
deactivated, this message appears in
the viewer.
Using the cursor keys
!" (20) you
can activate or deactivate the beep.
Press the Desactivar/Salir key (4) to
return to the normal display in the
viewer.
This Menu option allows you hear validation and error tones. The validation
tone is a long tone which indicates that
a function has been executed correctly.
If the operation was incorrect, three
short tones will be heard.
Press the Marcar/Menú key (21) until
the viewer shows one of the following
messages. If the validation and error
tones are activated, this message is
shown in the viewer.
If the tones are disabled, this message
is shown in the viewer.
Using the cursor keys !" (20) you
can activate or deactivate the
validation and error tones.
Press the Desactivar/Salir key (4) to
return to the normal display in the
viewer.
Tone
confirmation of a
pressed
key
Validation
and error
tones
SONIDOS TECLA: SI
SONIDOS TECLA: NO
SONIDOS V/E: SI
SONIDOSV/E: NO
Page 10
DOMO Messages Hands Free
10
Activating the 1077 code.
This option is disabled when you
receive your DOMO telephone. This
means that the numbers of missed
calls, etc. cannot be viewed in the
viewer.
To activate, press the Marcar/Menú
key (21) until this message is displayed in the viewer -
Type the sequence: *1077#-
In the viewer this message will appear
for 2 seconds -
If *1077# has not been typed correctly,
the viewer will display -
You can abandon the programming by
pressing the key Desactivar/Salir (4),
in which case the configuration will not
have been changed.
Deactivating the 1077 code.
Press the Marcar/Menú key (21). If
the Code 1077 is already activated,
this message will be displayed in the
viewer.
Type the sequence: #1077 #.
In the viewer, this message will be
displayed for 2 seconds -
If #1077# has not been typed correctly,
the message in the viewer will show -
Activation /
deactivation
of the 1077
code
ACTIVAR 1077
1077 ACTIVO
ACTIVAR 1077
DESACTIVAR 1077
1077 INACTIVO
DESACTIVAR 1077
Page 11
DOMO Messages Hands Free
11
1 2 3
4 5 6
7 8 9
* 0 #
%
Llamadas/
Volumen
" !
%
Marcar/
Menu
Borrar
Marcar/
Menu
Borrar
Llamadas/
Volumen
" !
%
%
!
Grabar
R/A - aMute
AgendaRellamada
Pausa
!)))
Grabar
R/A - aMute
AgendaRellamada
Pausa
!)))
'
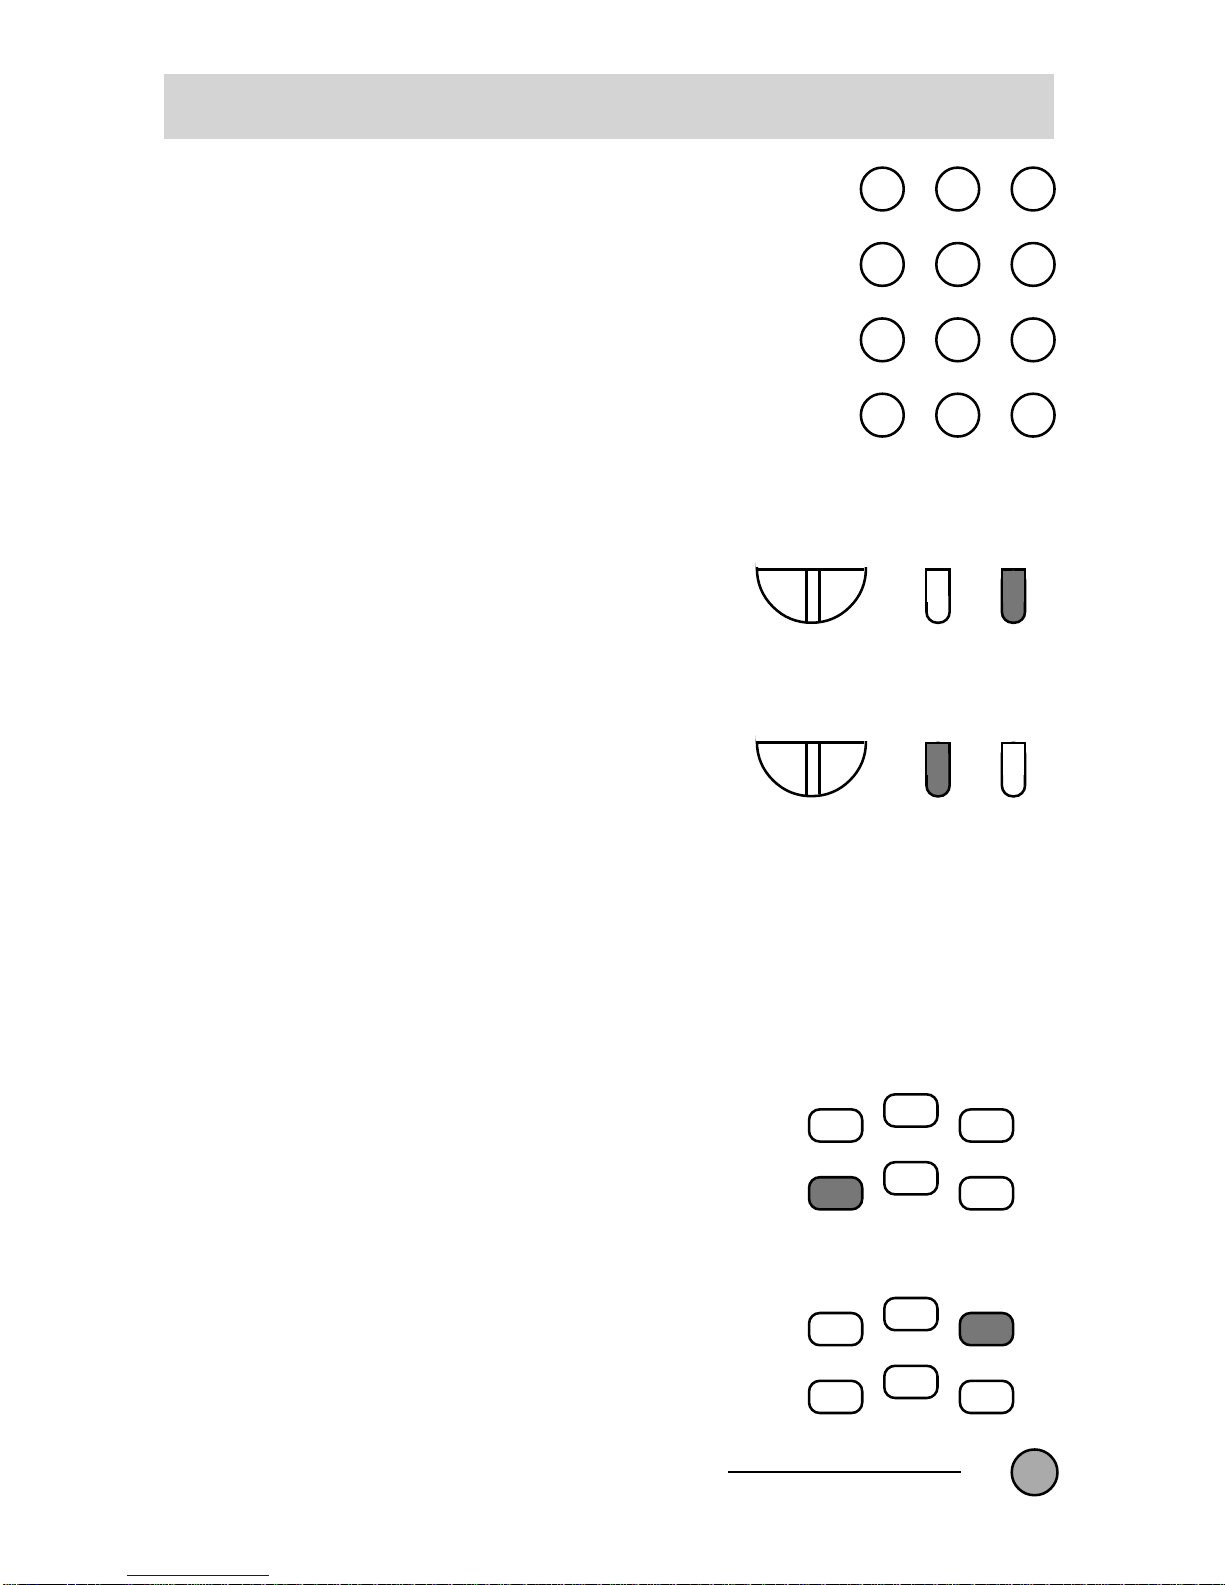
Dialling with the handset down or
in hands free mode.
Pick up the hand piece or activate the
hands free function. Wait for the
dialling tone and then press the keys
for the required telephone number. As
you type, the numbers will be displayed
in the viewer.
Dialling with the hands free function
disabled.
Press the keys of required telephone
number, which will be shown in the
viewer as they are typed. To clear any
number incorrectly typed, press the
Borrar key (17).
To pick up the handset or activate the
free hands function, and then listen for
the dialling tone. Press the Marcar/
Menú key (21).
With any dialling type, the viewer will
display the length of time of the call
after the last digit has been typed.
You can zero the chronometer in any
time by pressing the key to Borrar key
(17). This chronometer doesn’t show
the real time of the duration of the call.
To stop dialling momentarily, press the
Rellamada/Pausa (13) key. There will
be a pause of 2 seconds.
If the DOME Messages Hands Free
apparatus is connected to a
switchboard, press the key R/A-a key
(8) followed by the extension number
to which the call has to be transferred.
Dialling
Instructions
To pause
during
dialling
Transfer of
calls to an
extension
(R/A-a key)
4. DIALLING
Page 12
DOMO Messages Hands Free
12
%
!
Grabar
R/A - aMute
AgendaRellamada
Pausa
!)))
This way of dialling is carried out
without the necessity of using the
numeric keyboard, so that with the
handset not picked up, or with the
activated or disabled hands free
function, it provides three options.
Automatic Dialling from the
Phonebook.
See information on storing names and
numbers in the Phonebook in Chapter 5 of this manual.
Automatic Dialling from list of
previous callers.
The DOMO Messages Hands Free
phone stores a chronologically list of
calls in its memory. To view the stored
numbers, do the following –
With the Handset down or picked up,
or with the disabled or activated hands
free function:
Press the Rellamada/Pausa (13) key.
Use the cursors keys
!" (20) to find
the number to be called.
Once selected (you can put down the
handset or use the hands free function), press the Marcar/Menú (21) key.
Automatic Dialling from the List of
Calls.
The DOMO Messages Hands Free has
a list of the last 50 calls (incoming and
outgoing) in chronological order. To
initiate this list, make sure that you
have ordered the caller Identification
Service.
To automatically ring a number from
the stored list, do the following -
Automatic
Dialling.
Page 13
DOMO Messages Hands Free
13
- With the handset down or picked
up, or with the disabled or activated
hands free function :
Use the cursors
!" (20) to select
the number to wish to call.
Once the number is selected (put down
the handset, or activate the hands free
function if you wish), press the Marcar/
Menú key (21) to begin the call.
o8!
$ MARINE ARAG
5. USE OF THE PHONEBOOK
The Phonebook has a maximum capacity of 50 entries into which you can type
numbers of up to 24 digits plus an associated name of 15 characters. Once entered,
a number and the associated name will be stored in alphabetical order in the
Phonebook.
You can make a Phonebook entry
during a conversation. This can be
done with the handset down or picked
up, or with the disabled or activated
hands free function.
Press the Grabar key (10) and this
message will be shown in the viewer.
A name is required for each entry as
each number is stored alphabetically.
Type the name (up to 15 characters)
using the letters on the numeric keys.
These keys offer the following
characters and numbers -
Key 1: 1. - > 1 i Key 7: P Q R S 7
Key 2: A B C 2 " Ç Key 8: T U V 8 ? ü
Key 3: D E F 3 $ Key 9: W X Y Z 9 ¿
Key 4: G H I 4 % Key *: * + ; ) ( €
Key 5: J K L 5 & Key 0: @ _ , ’ / o
Key 6: M N Ñ 0 6 Key #: (Space _) # : = <
Dialling
from the
Phonebook
GRABAR NOMBRE
FERNANDO ARAG_
Page 14
DOMO Messages Hands Free
14
For example, to enter the letter S,
press the 7 key quickly four times.
Press the Grabar key (10) again to
record the name in the phonebook.
The viewer will display this message -
Enter the telephone number associated with the name in up to 24 digits.
To conclude, press the Grabar key (l0)
to record the number. The viewer display will now request the next name.
If you need to, you can enter another
name and number using the previous
instructions. If you have no more to
be entered, press the Desactivar/Salir
key (4) to return to the normal display.
With the handset down or picked up,
press the Rellamada/Pausa key (13).
Press the keys cursor
!" (20) to
select the number that you want to
record in the Phonebook.
Press the Grabar key (l0) and the
viewer will display -
Type the name and press the Grabar
key (l0). The telephone will store the
name and number.
With the handset down or picked up,
or the hands free function disabled or
activated, press the cursor keys
!"
(20) until you can see the number you
want to record in the Phonebook.
Press the Grabar key (l0) and in the
viewer this message will be displayed.
Type the name and press the Grabar
key (l0). The telephone will store the
name and number.
Recording
of the
rellamada in
the calendar
Recording
of the
rellamada in
the calendar
GRABAR NUMERO
912397657
GRABAR NOMBRE
GRABAR NUMERO
MIGUEL_
GRABAR NOMBRE
Page 15
DOMO Messages Hands Free
15
If the stored number has a name
associated with it, you can modify it
by typing it again. To conclude it press
Grabar key (l0).
Press the Agenda key (9).
Press the (7) key, which is the initial of
the name you want to find, or several
times, until in the viewer the first name
is displayed. If there is more than one
name starting with that letter, press the
cursor keys
!" (20) until it is found.
If the number shown has more than
15 digits, the symbols
() will be
displayed to indicate that there is
additional information, which will be
shown after 4 seconds.
On the third line of the viewer, the
number of the alphabetical position in
the phonebook, will be displayed.
You can abandon the operation at any
time by pressing the Desactivar/Salir
key (4).
With the Handset up or down, or the
hands free function disabled or
activated:
Press the Agenda key (9).
Press the (7) key, which is the initial of
the name you want to find, or several
times, until in the viewer the first name
is displayed. If there is more than one
name starting with that letter, press the
cursor keys
!" (20) until it is found.
Using the
Phonebook
Automatic
dialling
from the
phonebook
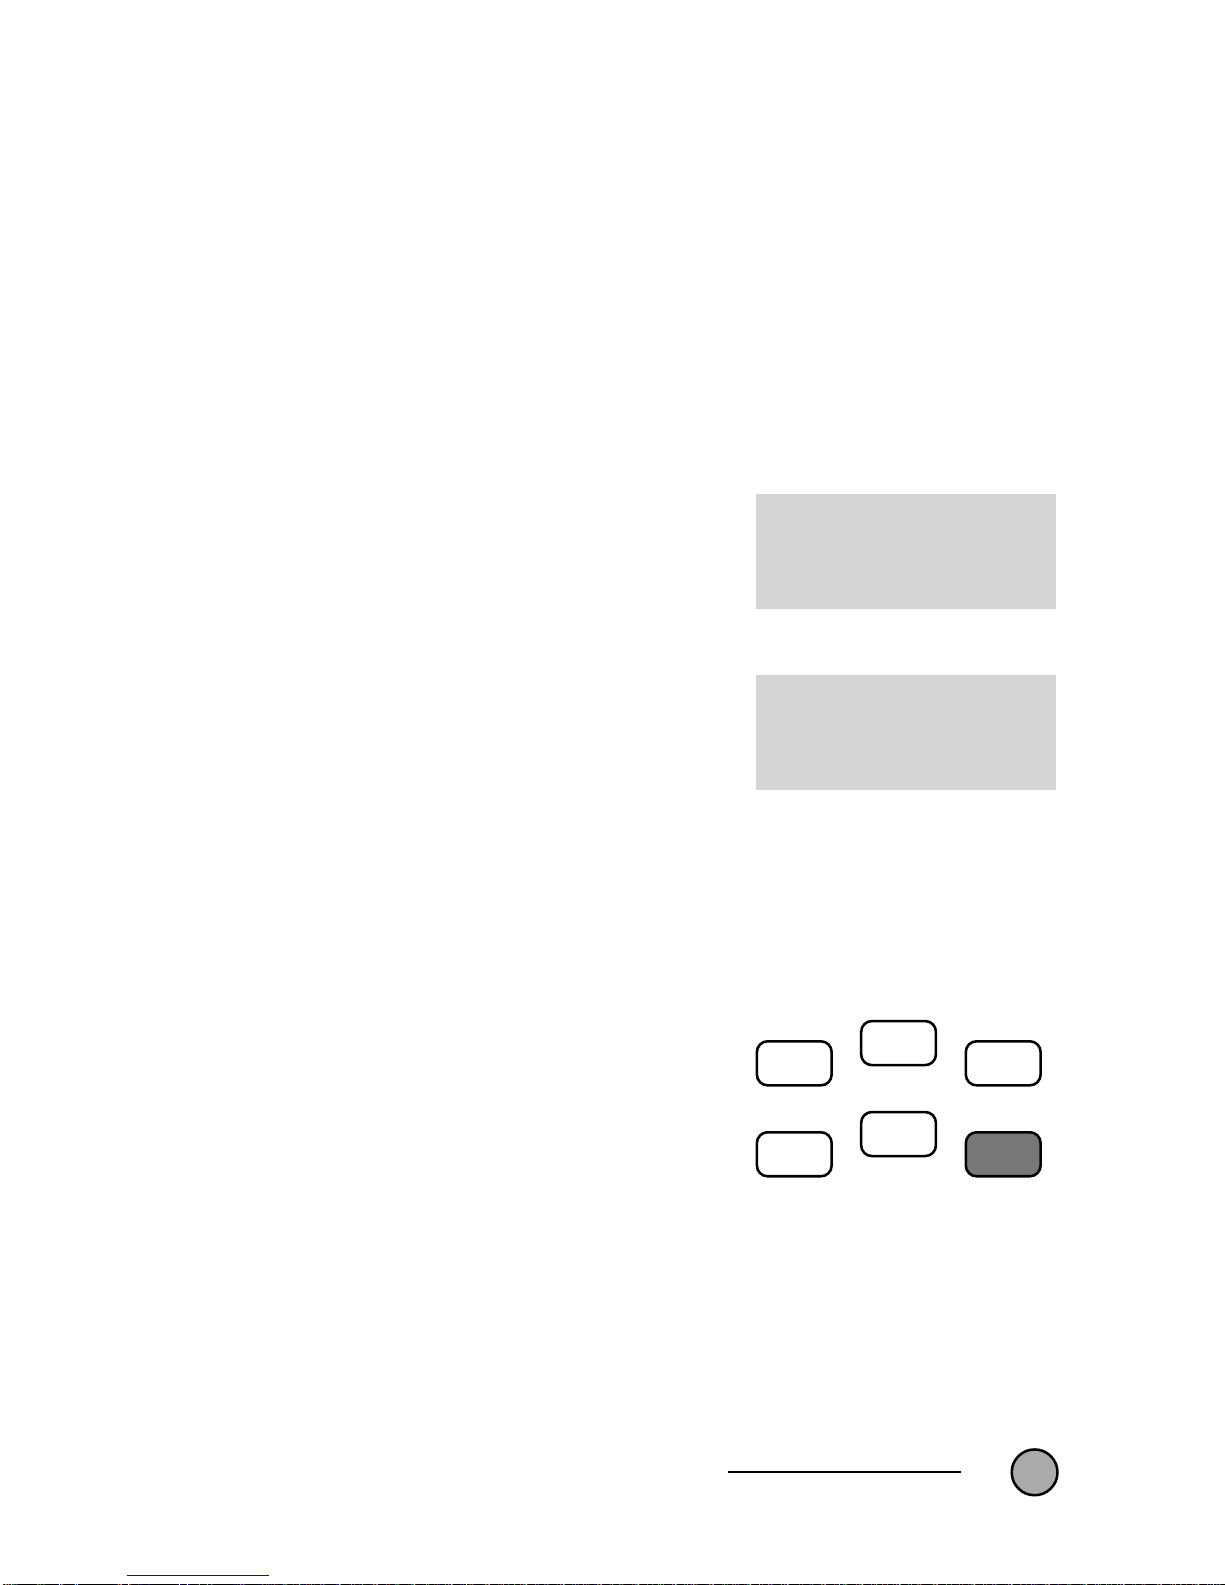
( )
912397657234234
P:01
( )
912397657
P:01
%
!
Grabar
R/A - aMute
AgendaRellamada
Pausa
!)))
Page 16
DOMO Messages Hands Free
16
Once the number is selected, put down
the handset, or activate the hands free
function, and press the Marcar/Menú
key (21) and the number will be dialled.
While looking at a Phonebook entry,
pressing the Borrar key deletes that
entry. In the viewer a request for confirmation to delete will be displayed.
Press the # key to confirm, or press
Desactivar/Salir (4) to cancel.
6. DIRECT SERVICES KEYS
With the handset up or down and with
the hands free function activated,
listen for the dialling tone.
Press the Blue key (16).
See the viewer display.
With the handset up or down and with
the hands free function activated,
listen for the dialling.
Press the Red key (19).
See the viewer display.
Dial the number of the Telefónica
service required and with the handset
up or down and the hands free function
activated, press the Green key (18).
The number of the Telefónica service
required will be prefixed to the number
you dialled and the call will be started.
Deleting a
Phonebook
entry
Shortcut to
the
Telefónica
personal
attention
line (1004)
Access to
the European
emergency
number
Shortcut to
the
Telefónica
operator
selection
CONFIRMAR CON #
TELEFONICA
EMERGENCIA
1077912397657
%
!
%
!
%
!
Page 17
DOMO Messages Hands Free
17
You can also press the Green key (18)
with the handset down, to dial the
number, to pick up the handset or to
activate the hands free function and
to press the Marcar/Menú key (21).
If it begins to dail after you put down
the handset in active hands free
function, press the Green key (18)
followed by the number.
7 FUNCTION MUTE
Press the Mute key (14) during a
conversation.
In the viewer this message will be
displayed.
The Red light will blink slowly.
To disable this function and recapture
the conversation again, press the Mute
key (14) again.
In the viewer this message will be
displayed momentarily.
During the period while the Mute is
activated, you can use any of the
functions that you would normally carry
out with the taken handset down or the
active hands free function.
During a call it is possible to turn off the sound to the speaker so that the speaker
cannot listen to you. To activate it:
OPERADOR
MUTE ACTIVO
MUTE INACTIVO
%
!
Grabar
R/A - a
Mute
AgendaRellamada
Pausa
!)))
Page 18
DOMO Messages Hands Free
18
8. LISTENING TO A CALL
When a call is received, the sound will be that of the pre-selected tone and volume.
At the same time the Red light will be blinking.
To enter into conversation with the caller, pick up the handset or activate the hands
free function.
If you have requested the Caller Identification Service, you will see the telephone
number of the person calling displayed in the viewer. For more information on this
service, see Chapter 10.
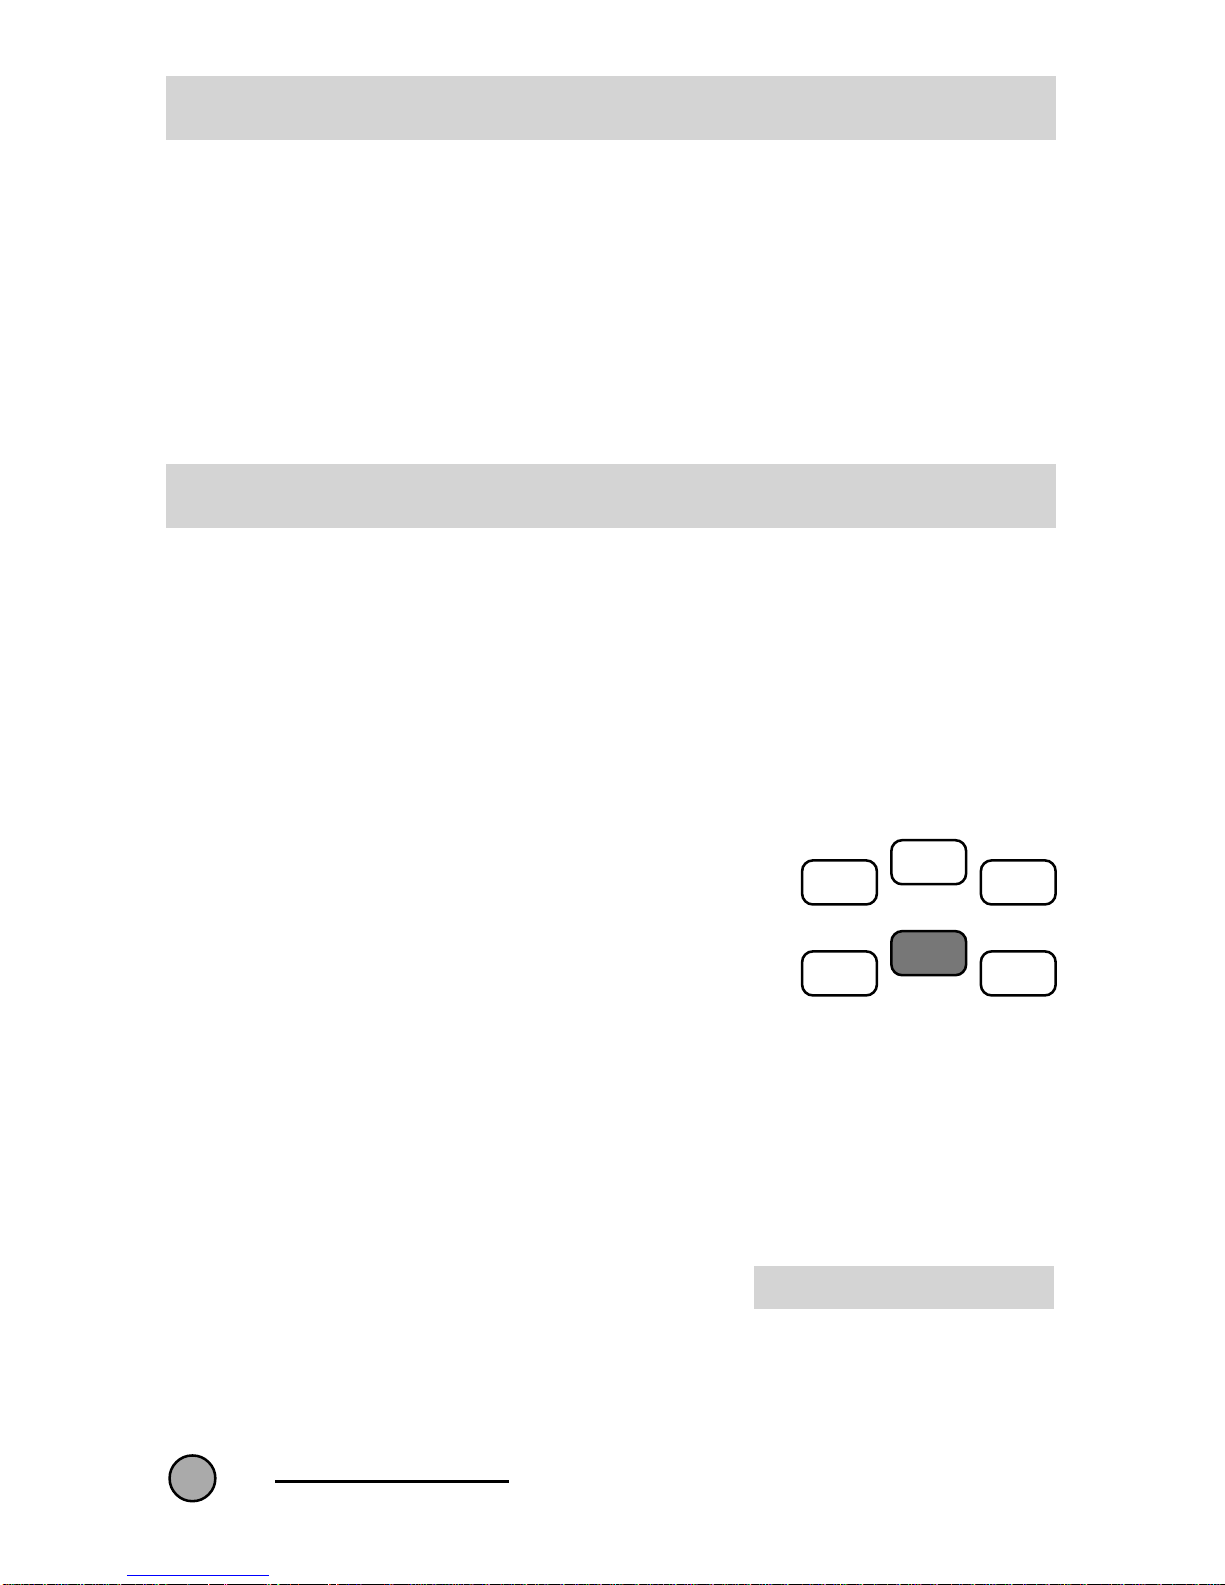
9. HANDS FREE FUNCTION
The DOMO Messages Hands Free phone incorporates a speaker (15) and a microphone (12) that allows you to speak and listen to the caller without having to pick up
the handset. The
!))) key (11) will toggle this option between active and disabled.
All the functions of the phone will remain active during the conversation in the hands
free way.
You can activate the hands free option
by pressing the !))) key (11) while
the handset is operating in picked up
mode.
The Red light shows the hands free
mode is in operation, and you can
communicate with the caller (to See
remote 8) or begin a new call by
means of the dialling procedures described previously (to See remote 4).
If during hands free conversation it is
necessary to pick up the handset, the
viewer shows this message during the
following seconds.
If while maintaining a conversation
using the handset, you want to continue the same on
e in hands free
mode,
Activation
of hands
free mode
Changing
hands free
mode
during
conversation
MICROTELEFONO
%
!
Grabar
R/A - a
Mute
AgendaRellamada
Pausa
!)))
Page 19
DOMO Messages Hands Free
19
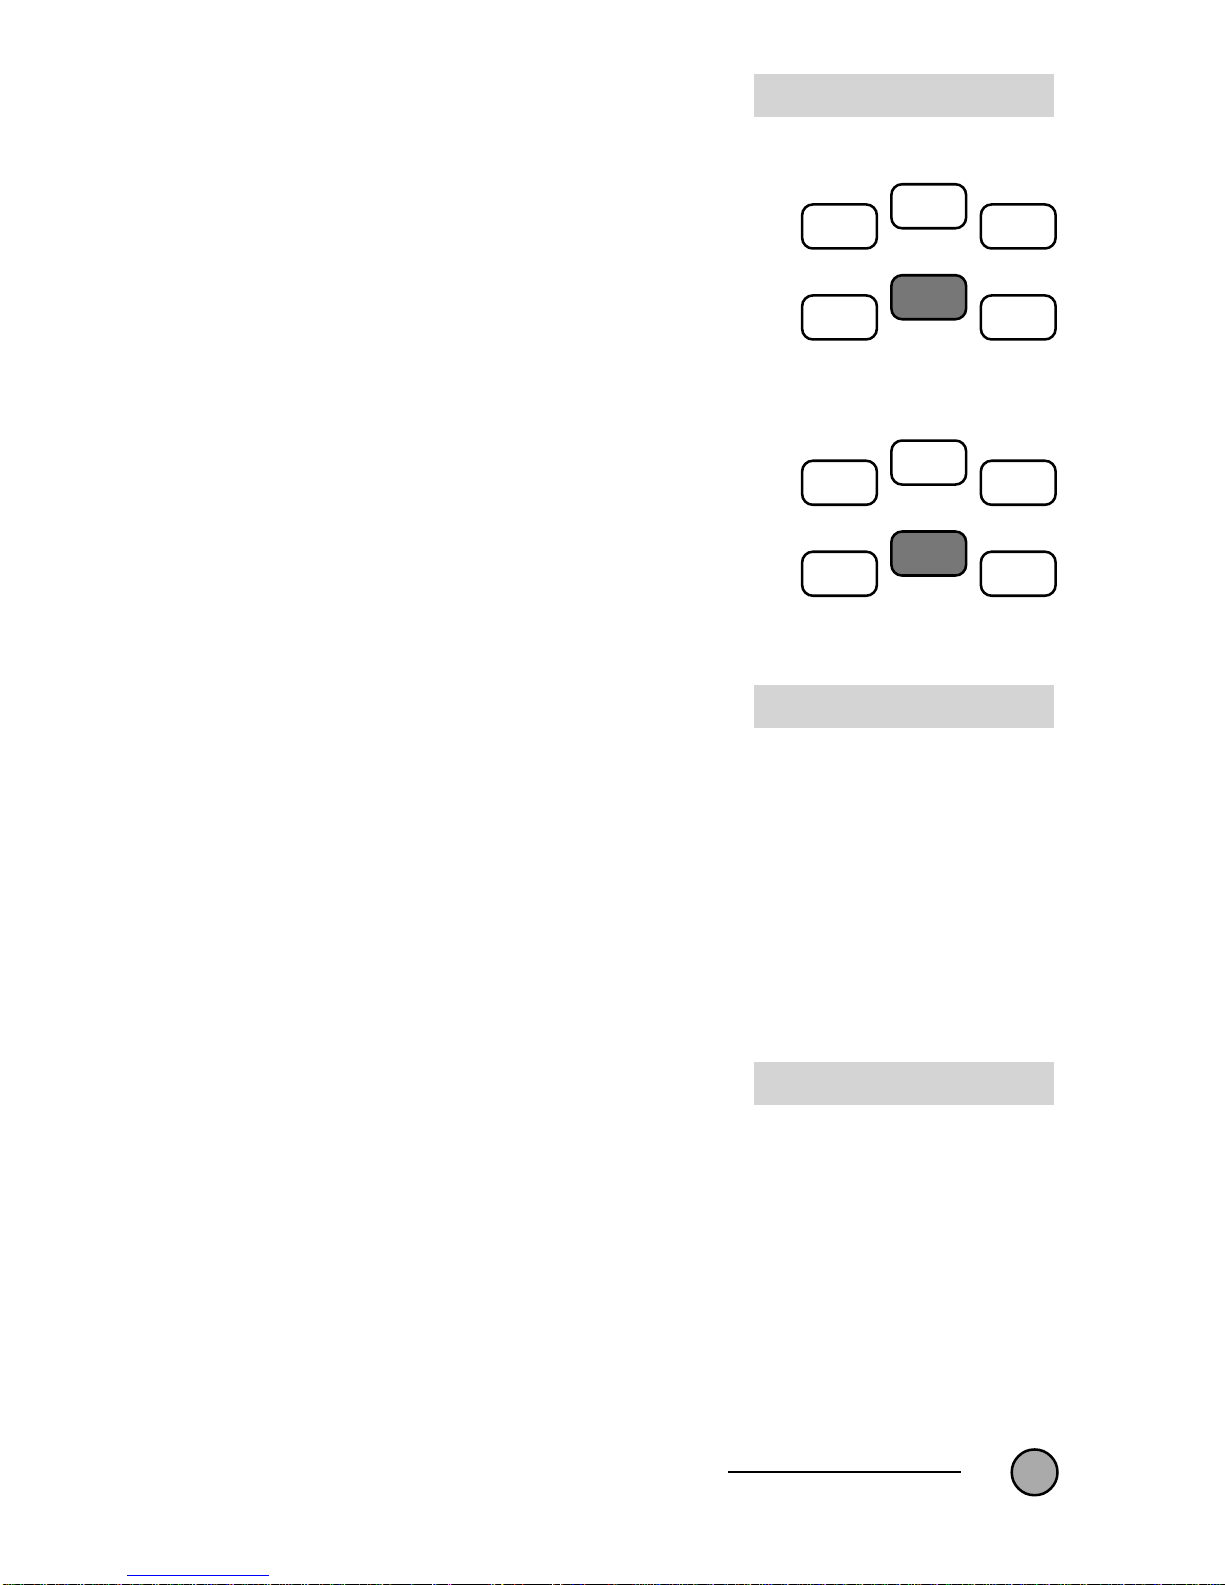
press the !))) key (11). The handset is
disabled and the conversation
continues in the hands free mode. The
viewer will display this message after
a few seconds -
To return to using the handset, simply
press the
!))) key again (11).
While in the hands free mode, you can
end your conversation by pressings the
!))) key (11). If however you are using
the telephone with the handset picked
up, you should press the
!))) key (11).
Either way, the indicator light will go
out.
During a conversation in hands free
mode, you can adjust the volume of
the speaker by pressing one of the
cursor
!" keys (20) until in the viewer
the message is displayed (Corresponding to the last level of recorded
volume).
Next you can increase the volume by
pressing the cursor
! key (20) or
diminish the volume by pressing the
cursor
" key (20).
During a conversation while using the
handset, you can adjust the volume of
the headphone. To do this press one
of the cursor
!" keys (20) until this
message is displayed in the viewer.
(Corresponding to the last level of
recorded volume),
Next you can increase the volume by
pressing the cursor
! key (20) or
diminish the volume by pressing the
cursor
" key (20).
You will notice that the volume
adjustments of the speaker and
headphone are set independently.
Deactivating
the hands
free mode
while in conversation
Adjusting
the volume
of the
speaker
Adjusting
the volume
of the handset
" VOLUMEN: # 3 $
! VOLUMEN: # 8 $
MANOS LIBRES
%
!
Grabar
R/A - a
Mute
AgendaRellamada
Pausa
!)))
%
!
Grabar
R/A - a
Mute
AgendaRellamada
Pausa
!)))
Page 20
DOMO Messages Hands Free
20
When receiving the call, the number
of the caller is displayed.
If the caller’s number coincides with
one of those stored in the Phonebook,
and there is an associate name with
that number, the recorded name only
will be displayed. When picking up the
handset or using the hands free mode,
the number associated with that name
will be displayed. The hour and current
date are also displayed, which can be
viewed at a later time.
The number or name is displayed during the whole conversation, disappearing on hanging up the handset or disabling the hands free function, or if you
carry out another operation on the
phone during the conversation.
There may be a number of reasons
for the information not to be displayed
in the viewer. They could be -
- The caller doesn’t want to be
identified.
- The identity of the caller cannot be
assertained (an example could be
international calls).
- The call is made from a public
telephone (from a different network).
With the handset picked up and with
the hands free function disabled, the
viewer displays the hour and date, the
total number of stored calls (received
and outgoing), the number of new
received calls from the last time it was
inspected, and the number of received
calls that have been repeated.
l0. IDENTIFICATION OF CALL SERVICE
Requesting the Identification of Call service allows you to see in the viewer the callers number (or name). This number remains displayed before you answer the call
and during it. It is necessary to have the Messages of Text (SMT) service activated.
Information
in the
viewer
(when the
indicator
light is not
lit)
912397657
NUMERO PRIVADO
No NO DISPONIBLE
TELEF. PUBLICO
20:00 02 11 10 63
Page 21
DOMO Messages Hands Free
21
When new calls are received the Red
indicator light will flash to indicate a
call is waiting to be answered.
The indicator light will switch off
automatically when the call is
answered or the caller rings-off.
The phone can store up to 50 calls
(received and outgoing) and it can
update them with the handset picked
up or with the hands free disabled or
activated.
Press the key
!" (20) to move
through the list of calls from the most
recent to the oldest or vice versa.
The viewer will display -
* On the first line is -
- the record number in the list.
- if the call was outgoing or
incoming, and if it is an assisted
incoming call.
- Telephone number.
If the number coincides with one of
those stored in the Phonebook and
where there is an associate name, it
will display the name first, and later
the number after a few seconds.
If the number displayed is longer than
that which will fit in the viewer, the
symbols ( or ) , will be shown
indicating that you can assess the
remainder by using those keys.
Viewing the
incoming
and outgoing calls.
!
Contestador Mensajes Desactivar
Aceptar Salir
LL.Espera Desvio
LL.a Tres
02 * 917404119
02!
+ 917404119
02
""
""
" + 917404119
Page 22
DOMO Messages Hands Free
22
On the second line of the viewer -
- Hours and dates (day and month)
the time the call was received or a
call was made.
- Indication of a repeated call.
If you want to make a call to any of
the stored numbers with the handset
picked up or in activate hands free
function mode, press the Marcar/
Menú key (21).
The numbers on those that you have
dialled or assisted calls, are shown
with a tick symbol
""
""
" to the right of the
caller.
To return to the normal display, press
the Desactivar/Salir key (4) followed
by a
! or " key (20) and allow time
for it to happen.
Deleting Call records -
Whilst looking at the Call entries in the
viewer, you can erase the current entry by pressing the Borrar key (17). It
will be necessary to confirm the deletion of the entry by pressing the # key.
Deleting all Call records -
With the handset picked up and hands
free function disabled, press the Borrar
key (17)
If call entries are not currently being
viewed, and are not displayed in the
viewer, confirmation is requested with
the # key.
If you have not viewed all the received
calls, you won’t be able to erase them.
If you want to cancel the operation,
press the Desactivar/Salir key (4).
LL. SIN REVISAR
CONFIRMAR CON #
BORRANDO...
01
""
""
" +FRANCISCO
Deleting
Calls
Page 23

DOMO Messages Hands Free
23
Activation
With the handset picked up or the
hands free function activated, press the
Desvio key (23).
Type the number that is to receive your
diverted calls.
Press the Desvio key again (23).
While the diversion number is activated, an icon will be displayed in the
viewer.
When picking up the handset or in the
hands free mode, the number
displayed will be the one that the calls
have been diverted.
While this service is activated, you
cannot receive Text Messages (SMT).
Deactivation
With the handset lifted or the hands
free function activated -
Press the Desactivar/Salir key (4).
Press the Desvio key (23).
The icon will cease to be displayed in
the viewer.
Make a
Record in the
Phonebook
from the list
of received
calls
Diverting
Calls
PULSE No + DESVIO
PULSE No + DESVIO
The following Supplementary Services have to be requested before they can become
available.
The procedure is described on
page 12.
Desvio
DESV. O CONTES?
DESVIO INACTIVO
11. SUPPLEMENTARY SERVICES
Page 24
DOMO Messages Hands Free
24
Activation
Pick up the handset or using the hands
free function -
Press the Contestador key (2).
The Answering Machine icon will be
displayed in the viewer.
Desactivacion
Pick up the handset or using the hands
free function -
Press the Desactivar/Salir key (4).
Press the Contestador key (2).
The Answer Machine icon will cease
to be displayed.
If you have received calls and
messages that were stored in the
Answering Machine, the indicator light
will be lit in the viewer and a suitable
message will be displayed (if the
telephone network provides one).
To listen to messages -
Pick up the handset or using the hands
free function, press the Mensajes/
Aceptar key (3).
In the viewer this message appears -
IMPORTANT: The Redirect and Answering Machine can only be activated or
deactivated from your own DOMO Hands Free telephone. If you attempt to activate
and deactivate from different telephone or by means of the direct dialling codes of
performance from a keyboard of the services, the telephone viewer will not indicate
the correct situation of the service. Also if some failure of the telephone network
takes place during the selection of these services, once again the viewer will not
shown the correct situation.
ANSWERING
MACHINE
SERVICE
ACCESSING
the
ANSWERING
MACHINE
CONTEST.ACTIVO
DESV. O CONTES?
CONTES. INACTIVO
MENSAJES VOZ
OIR MENSAJES
To change the language of this service to English - see page 41.
Page 25
DOMO Messages Hands Free
25
The Indicator Light will switch off after
a certain time when a messages is
received from another telephone.
During a conversation you can receive
a second call. You will hear tones
superimposed over your conversation
and the viewer will display the callers
number (if available from the telephone
network and providing Call
Identification has been requested).
To take the call –
Press the Ll Espera key (22). Wait a
moment.
In the viewer this message will be
displayed,
These words will now be displayed -
To get back to the first caller, press the
Ll Espera key (22). Wait a moment.
Pressing this key again will allow you
to talk with alternate callers.
To end the active conversation -
Press the Desactivar/Salir key (4)
Press the Ll Espera key (22). Wait a
moment.
You can have a conversation with two
people on different lines.
To enter into a three-way conversation
during a call -
Press the LI. a Tres key (5).
Type the second speaker’s number.
Once in conversation with the second
person, press LI. a Tres again (5).
CALL
WAITING
MAKING A
THREE-WAY
CALL
LLAM. RETENIDA
PULSE LL. ESPERA
PULSE NUMERO
Llamada Retenida
Page 26
DOMO Messages Hands Free
26
In the viewer this message will be
displayed -
together with these words -
The telephone network will confirm
that the function has been activated
with a periodic tone.
To conclude the three-way call, hang
up the handset or disable the hands
free function.
At any time you can separate the two
conversations -
Press the Ll Espera key (22) and wait
a moment.
Each press of the Ll Espera key (22)
will toggle between the other callers.
If during a communication you receive
a second call, you can enter into a
three-way conversation -
After pressing the Ll Espera key (22),
wait a moment.
Press the Ll a Tres key (5).
The process is the same as in the
previous case.
Once separated, the two conversations can completed with the one that
is in course -
Press the Desactivar/Salir key (4).
Press the Ll Espera key (22) and wait
a moment.
LLAM. A TRES
LLAM. RETENIDA
LLAM. RETENIDA
LLAMADA A TRES
PULSE LL. ESPERA
Llamada a Tres
Page 27
DOMO Messages Hands Free
27
The DOMO Hands Free Messages telephone allows you to use the Text Messaging
service provided by the telephone network. This allows for -
- Receiving text messages (SMT) coming from other fixed terminals or mobiles
or from email addresses (*).
- Send text messages (SMT) to other fixed or mobile phones, and to email
addresses and Fax telephones (*).
(*) the telephone network may not offer all these options.
If two or more telephones are connected to the same line, to text messages, each
extension must be given a different extension number which must be between 1
and 9. As standard, the DOMO Hands Free Messages telephone is programmed at
the factory with the extension as 1. If it is necessary to change this number, see the
section on Change of Extension on page 27.
PLEASE NOTE: The relative information regarding the extension number for text
messages purposes is displayed in the viewer in the following way -
- If the extension number appears in parenthesis,
the phone cannot receive messages as another
telephone exists with the same extension number.
If it is the only extension with that number, the
extension number will be displayed without
parenthesis.
- If the extension number appears without
parenthesis, the telephone you will receive
messages on will be number 1
Because each telephone can be used for more than an one user, the DOME Hands
Free Messages telephone also offers the option to receive and to send private messages, to those 5 recipients that you will only have given high priority to. For more
information, consult the section on remote Private Mail on page 29.
To activate and configure the Messaging Service, use the following instructions -
All the performances in the Service of Messages of Text (SMT) are carried out
with the handset down and the hands free function disabled. The Mensajes/
Aceptar key (3) allows you to see the menu of Text Messages (SMT) and also
confirms any action needed. The cursor keys !
and " (20) allow you to navi-
gate through the different menu options. To return to the previous screen, press
the Desactivar/Salir key (4).
12. TEXT MESSAGING OF (SMT)
TELEFONICA (1)
TELEFONICA 1
TELEFONICA 1
Page 28
DOMO Messages Hands Free
28
To Activate the Text Messaging
Service (SMT)
With the handset down and the hands
free function disabled, press the
Mensajes/Aceptar key (3) to view the
text messaging menu. Next press the
cursor keys !
and " (20) until in the
viewer the following message is
displayed -
Only on the first occasion that you
press the Mensajes/Aceptar key (3)
will you be offered this option.
To activate the Service, press the
Mensajes/Aceptar key (3) and you
will be requested to type the extension
number of the terminal.
During this request, the last stored
extension number will be displayed. If
a terminal with that number already
exists the terminal will suggest another
number. Press the Mensajes/Aceptar
key (3) and a message will be
displayed showing the proposed
extension number.
To confirm this extension number,
press the Mensajes/Aceptar key (3)
again to continue.
Wait until the viewer displays this
message –
This message will remain displayed for
several seconds.
In the case of a problem that doesn’t
allow to activation of the service, an
error message (see page 37) will be
displayed for several seconds. You will
then be able to retry the operation by
pressing the Mensajes/Aceptar key
(3).
To
ACTIVATE /
DISABLE
the Text
Messaging
Service
(SMT)
( )( )
( )( )
( )
ACTIVAR SMT
EXTENSION: ¿1?
ACTIVAR EXT (1)
ESPERE
ACTIVADO
TELEFONICA (1)
ACTIVAR (1)
Page 29
DOMO Messages Hands Free
29
If at any time before confirming the
activation (detailed below), you want
to stop the process, press the
Desactivar/Salir key (4).
If you want to connect your DOMO
Free Hands Messages telephone to
the Text Messaging Service (SMT)
to a different telephone extension
number, it must first be
disconnected from the previous
extension number.
Deactivation of Service of Messages
of Text (SMT)
With the handset down and the hands
free function disabled, press the
Mensajes/Aceptar key (3). Next press
the cursor keys !
and " (20) until
the viewer displays this message -
If you want to disable the Service,
press the Mensajes/Aceptar key (3)
Wait until the viewer displays this
message -
This message will remain for several
seconds.
In the case of a problem that doesn’t
allow you to activate the service, the
viewer will show an error message
(page 37) for several seconds, followed
by this message -
You will be able to retry the operation
by pressing the Mensajes/Aceptar
key (3).
If you use more than one extension on
the same telephone line for Text
Messaging, each extension must have
a different extension number, between
1 and 9.
CHANGING
THE
EXTENSION
NUMBER
DESACTIVAR SMT
ESPERE...
DESACTIVADO
( )( )
( )( )
( )
DESACTIVAR SMT
Page 30
DOMO Messages Hands Free
30
If you have already activated the
Text Messaging Service (SMT)
and you need to change the
extension number, first you must
first disable the service from the
current number before proceeding
with the change.
To change the extension number
follow these instructions -
With the handset down and the hands
free function disabled, press the
Mensajes/Aceptar key (3). Press the
cursor keys !
and " (20) until this
option is displayed in the viewer -
Press the Mensajes/Aceptar key (3)
and you will be requested to assign a
new number.
The last stored extension number will
be displayed in the viewer. If an
extension already exists with the
number requested, the telephone will
offer an alternative number. Press the
Mensajes/Aceptar key (3) and a
message will appear showing the
proposed extension number.
To confirm the new number, press the
Mensajes/Aceptar key (3).
Wait until this message is displayed
in the viewer -
The message will remain displayed for
several seconds.
If there is a problem that doesn’t allow
activation of the service, an error
message (page 37) will be displayed
for several seconds.
You will be able
to retry the operation by pressing the
Mensajes/Aceptar key (3).
EXTENSION: ¿1?
ACTIVAR EXT (2)
ESPERE...
TELEFONICA (2)
ACTIVAR (2)
ACTIVADO
( )( )
( )( )
( )
CAMBIAR EXTENS.
Page 31
DOMO Messages Hands Free
31
The DOMO Hands Free Messages
telephone offers the option to receive
and send up to 5 ‘private mail’
messages, to those who have access
to such mail, and who have been
defined using the
following parameters
-
Name: Identification of a user with
private mail. This parameter can consist
of 1, 2, 3 or 4 characters.
Pin Number: This allows a user of
private mail to read messages having
first keyed in an easy to remember
security number. This parameter is
numeric and consists of 4 digits.
Next, you can see how to create, edit
and erase Private Mail.
With the handset down and the hands
free function disabled, press the
Mensajes/Aceptar key (3) to view the
menu of text messages (SMT). Next
press the cursor keys ! and " (20)
until
the viewer displays this message -
To continue, press the Mensajes/
Aceptar key (3) and this message will
be displayed -
Again press the Mensajes/Aceptar key
(3) and you will be requested to type
the user’s name. This is done using the
characters on the numeric keyboard (7),
This can consist of 1, 2,3 or 4
characters. When complete, press the
Mensajes/Aceptar key (3). If the name
already exists, the viewer will display -
You will then be requested to enter the
user’s name again.
Next enter the security number
consisting of 4 digits. Press the
Mensajes/Aceptar key (3). Once
created, it will be displayed again.
To create
user
PRIVATE
MAIL
( )( )
( )( )
( )
CORREO PRIVADO
( )( )
( )( )
( )
CREAR USUARIO
( )( )
( )( )
( )
CORREO PRIVADO
¿NOMBRE?
JOSE
ERROR: YA EXISTE
¿CLAVE?
1234
Page 32
DOMO Messages Hands Free
32
To modify the name and/or the key
associated to a recipient of private
mail, access the submenu ‘Correo
Privado’ using the cursor keys
! and
"
(20) and press the Mensaje/
Aceptar key (3) and follow the instruc-
tions for remote ‘Correo Privado’ on
page 28.
When displayed in the viewer, press
the Mensajes/Aceptar key (3).
Next the viewer will display a list of
names that they have already been
created and stored. Using the cursor
keys
! and "
(20), select the name to
be modified, and when found, press
the Mensajes/Aceptar key (3).
Change the name as required using
the characters on the numeric
keyboard (7), and press the Mensaje/
Aceptar key (3) when complete.
If you need to erase all the characters
of the name, use the Borrar key (17).
Type the new name using the characters on the numeric keyboard (7) and
press the Mensajes/Aceptar key (3).
The modified name will now be
displayed in the viewer.
The modified name will be displayed
in the viewer under the associated key.
You can modify it, erase the currently
displayed name and add a new name,
following the same procedure.
To confirm the modification, press the
Mensaje/Aceptar key (3).
To erase a user name, from the ‘Correo
Privado’ menu (see page 29), press
the Mensajes/Aceptar key (3). Using
the cursor keys
! and "
(20) access
the ‘Borrar Usuario’ option and press
the Mensajes/Aceptar key (3).
To modify a
user name
To delete a
user name
( )( )
( )( )
( )
MODIF. USUARIO
¿CLAVE?
1234
JOSE
JUAN
1234
4321
( )( )
( )( )
( )
BORRAR USUARIO
Page 33
DOMO Messages Hands Free
33
Access the list of names that they have
already been created and stored. Move
through the list using the cursor keys
! and "
(20) and select the user name
to be deleted.
Press the Mensajes/Aceptar key (3).
A confirmation key will be requested.
Type this key and press the Mensajes/
Aceptar key (3) again.
The actions you take will be displayed
in the viewer.
If you type an incorrect confirmation
key, this massage will be displayed in
the viewer -
If you make a second mistake, the
operation will fail and this message will
be displayed -
Attempting a third try will erase all the
messages associated with the name..
If you have forgotten the key associated with the name, an
emergency option is offered.
Note - all messages associated
with that name will also be
erased. When you are requested to enter
the key, type it 3 times.
With the handset down and the hands
free function disabled, press the
Mensajes/Aceptar key (3) to access
the menu of text messages (SMT).
Next press the cursor keys
! and "
(20) until the name required is
displayed in the viewer.
Press the Mensajes/Aceptar key (3)
and next type the message text using
the characters on the numeric keyboard (7). A messages can be up to
640 characters in total, in blocks of 160
characters as indicated in the corner
SENDING A
MESSAGE
!
¿CLAVE?
1234
BARRANDO
CLAVE ERRONEA
OTRO FALLO
HOLA_
( )( )
( )( )
( )
ENVIAR / EDITAR
Page 34
DOMO Messages Hands Free
34
of the viewer (e.g. 1 of 4). Once you
have typed over 160 characters, a
double envelope will also be displayed
in the main part of viewer. The assignment of characters and symbols on
the keyboard are as follows -
Key 1: 1 . - > 1 i Key 7: P Q R S 7
Key 2: A B C 2 " Ç Key 8: T U V 8 ? ü
Key 3: D E F 3 $ Key 9: W X Y Z 9 ¿
Key 4: G H I 4 % Key *: * + ; ) ( €
Key 5: J K L 5 & Key 0: @ _ , ’ / o
Key 6: M N Ñ 0 6 Key #:
(Space)
# : = <
You can change between uppercase
and lowercase (and vice versa) by
pressing the R/A-a key (8).
If correct a mistake, press the Borrar
key (17), which will delete the last
entered character.
If a message cannot be sent immediately, it will be stored as indicated in
the viewer by a flashing envelope
,,
,,
,.
The DOMO Hands Free Messages
telephone allows you to send text
messages (SMT), e-mail and faxes.
Once you have typed a message, or
modified an existing one, pressing
Mensajes/Aceptar key (3) will allow
you to select the despatch format for
the message.
Text Messaging (SMT) is the default
option with E-MAIL and FAX being
accessed by using the
! and "
keys
(20). The following instructions details
how to proceed for each of these
options.
1. - To send a Text Message (SMT)
When this message is displayed in the
viewer -
Choosing
the
despatch
format
(Message,
E-Mail or
Fax)
( )( )
( )( )
( )
ENVIAR MENSAJE
( )( )
( )( )
( )
ENVIAR MENSAJE
Page 35
DOMO Messages Hands Free
35
Press the Mensajes/Aceptar key (3).
The user’s telephone number will be
requested. Type the number using the
numeric keyboard (7) or
select it from the Phone Book by
pressing the Agenda key (9). Press the
Mensajes/Aceptar key (3) again.
Next you will be asked (optionally) to
type the user’s name (for purposes of
creating a Private Message). Press the
Mensajes/Aceptar key (3) anyway.
Next the destination extension will be
requested (optional - if there is more
than one extension on the telephone
number). Press the Mensajes/
Aceptar key (3) anyway. The message
will be displayed in the viewer.
To complete despatch of the message,
press the Mensajes/Aceptar key (3).
Otherwise, press the cursor keys
! and
"
(20) until an M is displayed.
Press the Mensajes/Aceptar key (3)
and use the cursor keys
! and "
(20)
to choose between the options to keep
or erase. Press the Mensajes/Aceptar
key (3) to confirm the selected option.
2. - To send an E-mail
When the E-mail option is displayed
in the viewer, press the Mensajes/
Aceptar key (3). Type the email
address and press the Mensajes/
Aceptar key (3) again.
This message will be displayed -
To send the E-mail, press the
Mensajes/Aceptar key (3) and this
message will be displayed -
If you decide not to send the e-mail,
press the cursor keys
! and "
(20) until
this message is displayed -
DESTINATARIO
( )( )
( )( )
( )
ENVIAR: NO
¿NOMBRE?
¿EXTENSION?
ENVIANDO
( )( )
( )( )
( )
ENVIAR: SI
ENVIAR: NO
( )( )
( )( )
( )
ENVIAR E-MAIL
( )( )
( )( )
( )
ENVIAR: SI
DESTINATARIO
ENVIANDO
Page 36
DOMO Messages Hands Free
36
Press the Mensajes/Aceptar key (3)
and choose between the options to
keep or erase. Press the Mensajes/
Aceptar key (3) again to confirm.
3. - To send a Fax
When this message is displayed -
Press the Mensajes/Aceptar key (3).
First the subject title will be requested
(optional). Type this, if required, in up
to 255 characters and press the
Mensajes/Aceptar key (3) anyway.
Next, the addressee’s number will be
requested. Type it using the characters
on the numeric keyboard (7) or select
it from the Phone Book by pressing
the Agenda key (9) and pressing the
Mensajes/Aceptar key again (3).
When this message is displayed -
To send the Fax, press the Mensajes/
Aceptar key (3). See this message -
If you decide not to send the Fax, use
the cursor keys
! and "
until this
message is displayed -
Press the Mensajes/Aceptar key (3),
and select the option to keep or to
erase the message by using cursor
!
and "
keys (20) and pressing the
Mensajes/Aceptar key (3) to confirm
the selected option.
If a message cannot be delivered, you
will receive a message indicating the
reason (disabled service, agreement
doesn’t exist with the operator, the
extension doesn’t exist, etc.).
At any time during the above process,
you can cancel the operation by
pressing the Desactivar/Salir key (4).
( )( )
( )( )
( )
ENVIAR: NO
¿ASUNTO?
( )( )
( )( )
( )
ENVIAR FAX
DESTINATATIO
ENVIANDO...
( )( )
( )( )
( )
ENVIAR: SI
Page 37
DOMO Messages Hands Free
37
When a text message is about to be
received, the telephone will produce a
tone and display this message -
When the message has been received
the telephone gives a second tone,
indicating that the message has been
received correctly, and this message
will be displayed -
When a communication error
happens, the message will be -
The existence of new messages is
indicated in the viewer with flashing
envelope
,,
,,
,.
To read messages, press the
Mensajes/Aceptar key (3) with the
handset down and the hands free
function disabled. The display will be -
Information about the message will be
listed -
1. The position of the message in the
list.
2. Symbols ! or
--
--
-
indicate if it is a new
or saved message, respectively.
3. The characters + or * shows if it is
an incoming or outgoing message.
4. Next,
- if the message is incoming, and
not private, the sender’s number
or the name if it is in the Phone
Book.
- if it is a private incoming message,
private user’s name will appear in
parenthesis.
- if the message is outgoing, the
destination will appear which that
can be, a telephone number or
user’s name if it is in the Phone
Book, a fax number or an Internet
address.
( )( )
( )( )
( )
LEER
ESPERE...
RECIBIDO
ERROR RECEPCION
MENSAJES TEXTO
01! + ALMUDENA
01! + 91445566
01! + ALMUDENA
01! + (ALMU)
02!
--
--
- + 91445566
02!
--
--
- + ROSA ROMERO
RECEIVING
MESSAGES
TO READ
MESSAGES
Page 38
DOMO Messages Hands Free
38
Pressing the cursor keys
! and "
(20)
you can move through the list of
messages from the most recent to the
oldest or vice versa.
Having selected a message, press the
Mensajes/Aceptar key (3) to view the
text and with the cursor keys
! and "
(20) to access it.
If it is a private message, in the finder
this message will be displayed -
Type the security key (of 4 digits) and
press the Mensajes/Aceptar key (3).
If the key is correct, the number (or
name) will be displayed, followed by
the text. Move through the text using
the cursor keys
! and "
(20).
To leave the message, press the
Desactivar/Salir key (4).
If the message is incoming (received),
press the Mensajes/Aceptar key (3)
to displayed in the viewer, these
options - to Respond, to Forward, to
Erase and to Keep.
For outgoing messages, the options
are - to Forward, to Erase and to Keep.
Using the cursor keys
! and "
(20),
you can access any of them.
When this message is displayed –
(as indicated in the section on reading
Messages on page 35), press the
Mensajes/Aceptar key (3). To
respond to the message, proceed as
detailed on page 32.
When this message is displayed –
(as indicated in the section on reading
Messages page 35), press the
Mensajes/Aceptar key (3),and you
can modify the message content.
To respond
to received
messages
To forward
messages
( )( )
( )( )
( )
REENVIAR
01!
--
--
- + (PEPE)
¿CLAVE?
1234
( )( )
( )( )
( )
RESPONDER
( )( )
( )( )
( )
REENVIAR
( )( )
( )( )
( )
BORRAR
( )( )
( )( )
( )
GUARDAR
( )( )
( )( )
( )
RESPONDER
Page 39
DOMO Messages Hands Free
39
Press the Mensajes/Aceptar key (3)
and proceed as indicated in the
‘Despatch of Messages’ on page 32.
On seeing this message (as indicated in the section on Reading
Messages on page 35), press the
Mensajes/Aceptar key (3) and the
message will be deleted.
From the list of messages that have
been ‘Read’, access the message
required and press the Borrar key (17)
to Erase it. Confirm by pressing the #
key. You cannot erase messages that
have not been read.
On seeing this message (as is indicated in the section on
Reading Messages on page 35), press
the Mensajes/Aceptar key (3), and it
will store the message.
During the activation or deactivation
of the text messaging service (SMT),
as well as during the despatch or
reception of a text message, the
following errors may occur -
1. – Despatch Error
This error appears if the message has
not been possible to despatch because
of communication failure.
In the viewer this message will be
displayed for a few seconds.
2. Error. Service not activated
This error happens when you try to
send a text message without first
activating the service. Displayed in the
viewer will be -
3. - Destination Error
When the addressee doesn’t have the
text messaging service activated. The
message in the viewer will be -
To erase
messages
To keep
messages
Error types
ERROR ENVIO
( )( )
( )( )
( )
BORRAR
BORRANDO
CONFIRME CON #
BORRANDO
( )( )
( )( )
( )
GUARDAR
GUARANDO
ERROR, ACTIVESE
ERROR DESTINO
Page 40
DOMO Messages Hands Free
40
4.- Error reception
If during the reception of the message
an communication error happens, the
telephone will display this message -
13. DISTRIBUTION LISTS
IMPORTANT: This option is only available if supplied by the telephone network.
The distribution list allows sending a message to several different destinations.
The necessary parameters in a ‘distribution group’ are -
- Name of the distribution group.
- Destinations list - these are the destinations to which the message will be sent.
The DOMO Hands Free Messages telephone will let you configure the group names
and the destinations.
Once defined, the process is automatic, and will send the message to all the recipients
in the distribution group.
As explained below, there can be many groups and each allow for the operator to
create, to erase, to include, to remove, to view and to send entries. They are carried
out by means of despatch of specific messages or commands to the telephone number
4545 that will not be charged for. The editing of these messages sould be carried out
in UPPERCASE characters.
To create a group, type the following
message using the dialling keys (7) -
##CRG#<Group Name> ##
After creating the group, you will be
sent a text message stating that the
request has been accepted -
It has been created < Group Name >.
Depending on the destination, the
message format should be -
Creating a
group
Adding a
Destination
to a group
##CRG#TRABAJO##
SE HA CREADO
TRABAJO
##A1#TRABAJO*91396
751*1*INMA##
ERROR RECEPCION
Page 41
DOMO Messages Hands Free
41
* ##AI#<Group_Name>*<Telephone_No>
* < No_of_terminal>*<Security_Code> ##
* ##AEI#<Group_Name>*<direction_ E-
mail>##
After including the new member in the
group, you will receive a text message
informing you that the request has
been accepted - “The member
<Datos_del_integrante> has been included in
<Group_Name>.”
The format message will vary,
according to the type of destination -
* ##B1#<Group_Name>*<Telephone_No>
* <No_of_terminal>*<Security_Code>##
* ##BEI#<Group_Name>*<direction_E-
mail>##
After erasing the member of the group,
you will be sent a text message confirming the request has been accepted
– “The member <Group_Data> has been
removed <Group_Name>.”
If you want to change the data of a
member of a group, and so as not to
complicate matters with unnecessary
commands, you should -
1. Remove the group to which the
member belongs.
2. Add to the group the member with
the changed data.
Introduce the following message -
##BG#<Group_Name>##
This action will erase all the members
of the group and the group name. Next,
you will be sent a text message
informing you that the request has
been accepted – “This has been erased
<Group_Name>.”
To erase
member of
a group
To change a
member of
a group
To erase a
group
##AE1TRABAJO*INMA
@HOTMAIL.COM##
##BG#TRABAJO##
SE HA BORRADO
TRABAJO
EL INTEGRANTE INMA SE
HA INCLUIDO EN
TRABAJO
##B1#TRABAJO*91396
751*1*INMA##
EL INTEGRANTE INMA SE
HA BORRADO DE TRABAJO
##AE1TRABAJO*INMA
@HOTMAIL.COM##
Page 42
DOMO Messages Hands Free
42
The message format should be -
##CG##
The confirmation of the requested
action will consist of a text message
with the names of the groups –
“The groups are: <Group_Name> *
<Group_Name_2> * … *
<Group_Name_N>.
Type the following message -
##CI#<Group_Name>##
You will receive a message in which
will include the members of group -
“The members of <Group_Name> are:
<data-of-member_1> *
<data_of_member_2> *... *
<data_of_member_N>.
The fields that make up the data of
the members, are separated with the
symbols “;”.
To send a message, type the following
format -
##E#<Group_Name>##<Message_Text>
By following these actions you will be
sending the message included in the
command <Message_Text> to all the
members in the group.
To view the
defined
groups
To view
members of
a group
To send a
message to
a group
If when sending a message, ERROR ENVIO is displayed in the viewer, consult the
Troubleshooting section of this manual. If there is another reason for the error,
a different message will be displayed, allowing you another attempt to send the
message.
##CG##
¿NOMBRE?
SUS GRUPOS SON:
TRABAJO*AMIGOS*
FUTBOL
LOS INTEGRANTES DE
TRABAJO SON:
91396751;INMA*91255180;
FRANCIS*91397657;ROSA.
##E#TRABAJO##
MANANA REUNION A
LAS 11H
Page 43
DOMO Messages Hands Free
43
14. CHANGE ANSWERING SERVICE LANGUAGE TO ENGLISH
Pick up the DOMO handset and
press the key Contestador .
When this message will be
displayed in the viewer, replace
the handset.
Now complete the following
steps -
1. Lift DOMO handset and press
the Mensajes key.
2. When the message you hear
ends, press No.1 on the
keypad.
3. When the next message you
hear ends, press No.4 on the
keypad.
4. Enter a four digit code e.g.
0000 (You must remember
this code).
5. When the next message you
hear ends, press No.3 on the
keypad.
6. When the next message you
hear ends, press No.1 on the
keypad.
7. Finally, when the next mes-
sage ends, press No.1 again.
8. Replace the handset.
When the phone rings and you are
unable to answer, the answer
machine message will cut in after
5 rings.
To retrieve messages, pick up the
handset and press the Mensajes
key. Follow the instructions which
will now be in English.
Activo
Page 44
DOMO Messages Hands Free
44
15. TROUBLESHOOTING
PROBLEM
If when sending a message, E-mail or fax,
the message ERROR ENVIO is displayed.
If, when sending a message, E-mail or fax,
one of these messages is displayed –
ERROR, ACTIVESE or ERROR DESTINO
When pressing the Messages key the
message POCA MEMORIA BORRE
MENSAJES is displayed.
If when trying to create a private list, the
message MEMORIA LLENA is displayed.
The Viewer remains blank.
The redirection symbol is not displayed.
Nothing is displayed in the viewer when I pick
up the handset.
The telephone works perfectly but the viewer
shows nothing.
The ring (tone) is too quiet.
The viewer doesn’t show the callers identification.
The telephone doesn’t respond to the actions
made by the user, as requested. Example:
pressing keys, etc.
SOLUTION
Try pressing the Mensaje/Aceptar key (3) or to
Cancel, press the cursor keys. You will be able
to erase or to keep the message, E-mail or fax.
In the first case you have not activated the Text
Messaging service. ERROR DESTINO appears
if the addressee has not activated the service. In
either case, use the options to Keep the message
and send it when the errors have been retified.
The telephone has used up all available memory.
Erase messages no longer necessary. Until this
is done new messages cannot be sent or
received.
This message indicates that you already have
the maximum number of 5 groups (lists). To create a new one you must first delete one or more
of those already created.
Reinstall and connect the phone directly in the
PTR. If the problem persists, contact Telefónica.
The redirection was not really activated and a
call was received. Activate the deviation again.
Make sure the cord to handset is correctly connected.
Modify the contrast.
Change the volume.
Check that you have activated the Identification
of Calls service.
Where it accepts actions, but the data, Phone Book,
and other data stored in the telephone at factory
configuration, do not respond.
Hold down the 1 key followed by the 3
key, pick up the handset, stop to
pressing the keys and then put the
handset down.
!
Page 45
DOMO Messages Hands Free
45
16. MAINTENANCE
The DOMO Hands Free Message telephone doesn’t require any special maintenance.
To clean use a damp cloth. Do not use abrasives or solvents for cleaning as these
could damage the equipment. Avoid blows and/or possible falls to the floor, and do
not locate near sources of heat or exposed directly to the sun.
17. TECHNICAL SPECIFICATIONS
Minimum isolation resistance between earth and accessible parts 100 M
Minimum dielectric strength 500V
Return losses > 14 dB
Codes of dialling frequency CCITT Q.23
Time Emission 70ms ± 5%
Time Pauses 140ms ± 5%
Duration of the temporised opening 100ms ± 5%
Time of pause between dialling 25± 5%
Time of maintenance of the Phone Book, lists of incoming calls,
lists of outgoing calls with the disconnected telephone limited
Code call-up identification FSK ETSI 300 778-1 and 2
Size available to list of callers: memory/characters/digits 50/15/24
Size available to the Phone Book: memory/characters/digits 50/15/24
Size available to list of messages: No. of Messages/Characters 50/80 or 25/160
Acoustic level of the call signal (high level) 81 dBPWL
Total weight 6oo gr
External size W x H x D: 226 x 63 x 149 mm
Operating temperature O° and 55°C
Storage temperature -2O° and 70°C
Maximum humidity 90%
Page 46
DOMO Messages Hands Free
46
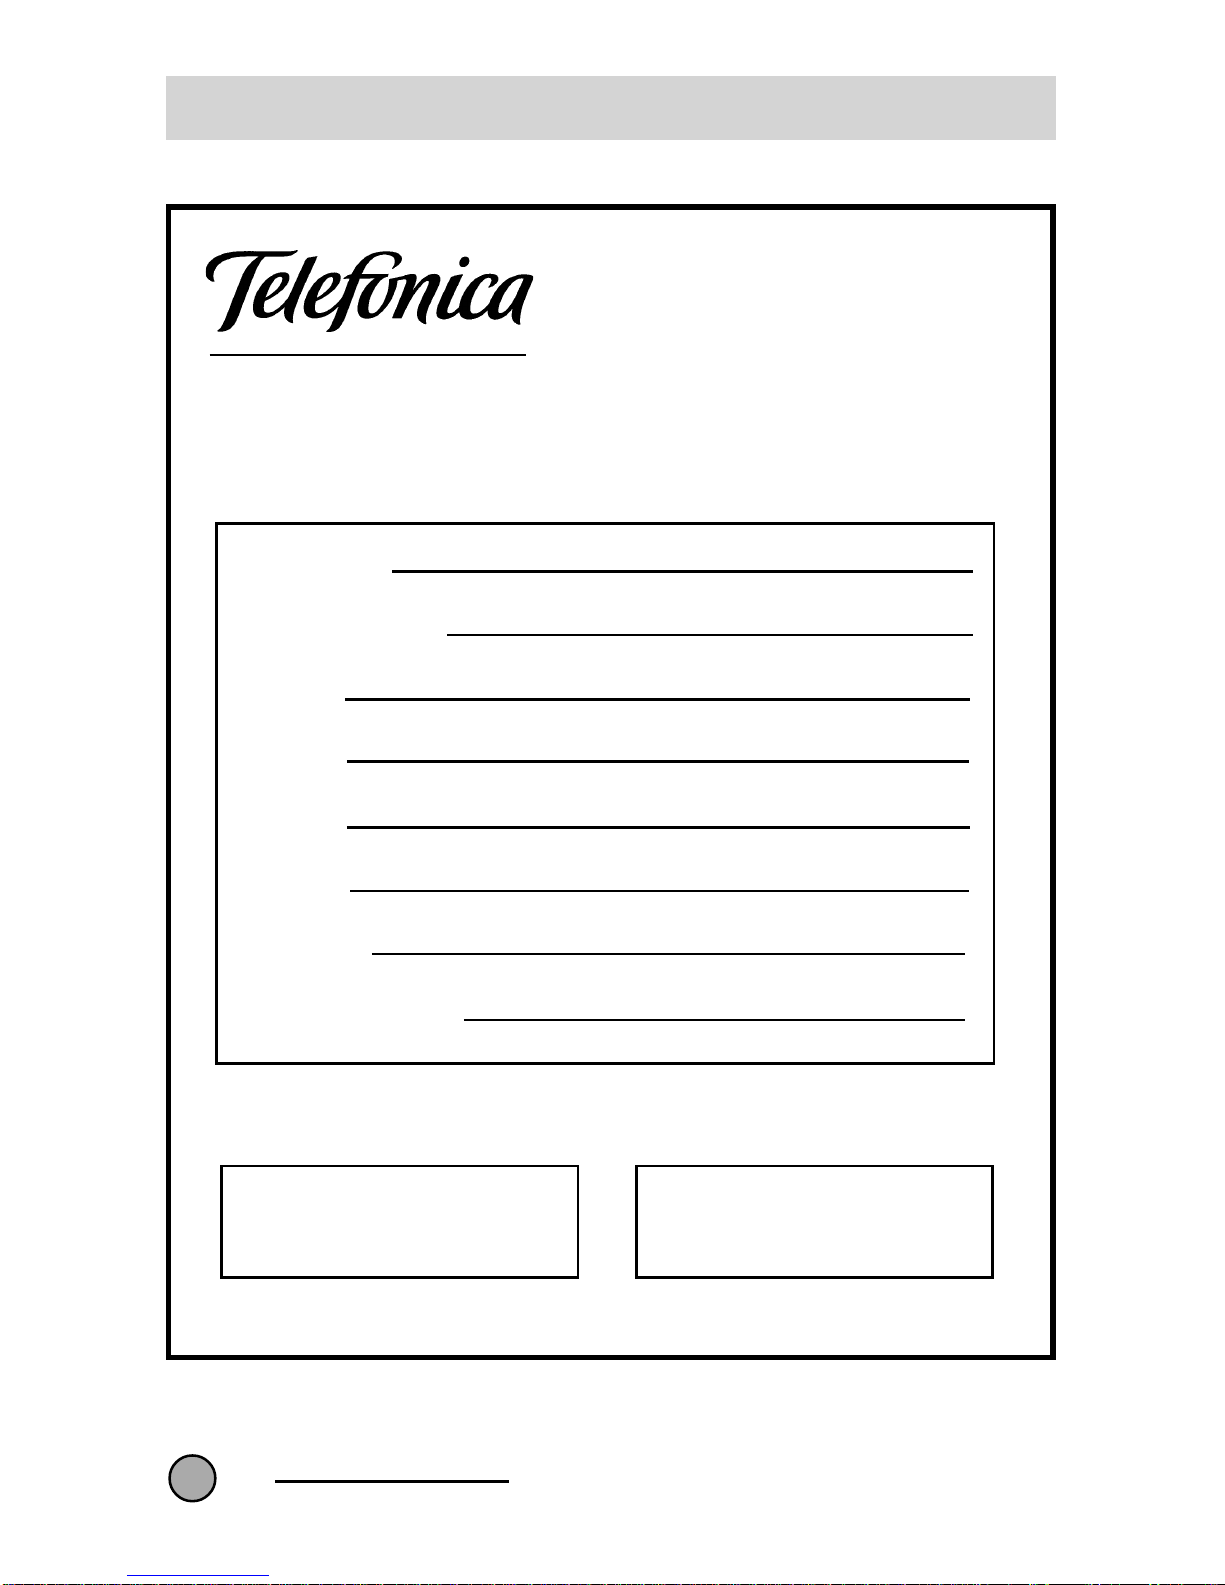
18. GUARANTEE CERTIFICATE
CERTIFICATE OF GUARANTEE
Telefónica de España S.A.U.
Gran Via, 28 Madrid
Details of Customer
Aquired from
Customers Name
Address
Town
Province
Post Code
Telephone Number
IDENTIFICATION DETAILS TYPE OF GUARANTEE
Type - Serial No.
DOMO Mensajes
Manos Libres
See conditions of
guarantee overleaf
Page 47
DOMO Messages Hands Free
47
CONDITIONS OF GUARANTEE
The DOMO covered by this guarantee has been manufactured to normal standard of quality,
and has been subject to approval tests.
In the event of non-conformity to the contract, the user will be able to exercise his rights
under the conditions and fixed terms detailed under Law 2312003 of Covenants of ownership
for the Sale of Goods of use, the right to a repair, substitution, reduction of the price or
change of contract. It will be necessary for the user to provide an invoice or delivery note.
The user will be informed how the substitution of the Domo will take place to conform to
legal requirements.
Telephone 1002 and 1004
The substitution for a Domo, which has been subject to a mishap, is not included in the
guarantee.
A mishap includes the incorrect use or treatment, or incorrect manipulations and installations
after the sale from TELEFÓNICA OF SPAIN.
Also not included are mishaps caused by catastrophic causes (fire, floods... ), atmospheric
problems (lightning, etc.), blows and drops.
In the case of having a maintenance contract with Telefónica of Spain, you will get
on-site attention from engineers.
18. CONDITIONS OF GUARANTEE
Page 48

 Loading...