

Teledyne Cetac Technologies Oils 7400 Series Installation Manual
Quick Installation Guide
Manual Part Number 32-0356-048 Rev0, July 18, 2018
© 2018 Teledyne Technologies Incorporated. All rights reserved. Printed in USA.
Oils 7400 Series
Homogenizing Autosampler
Preparing for Installation
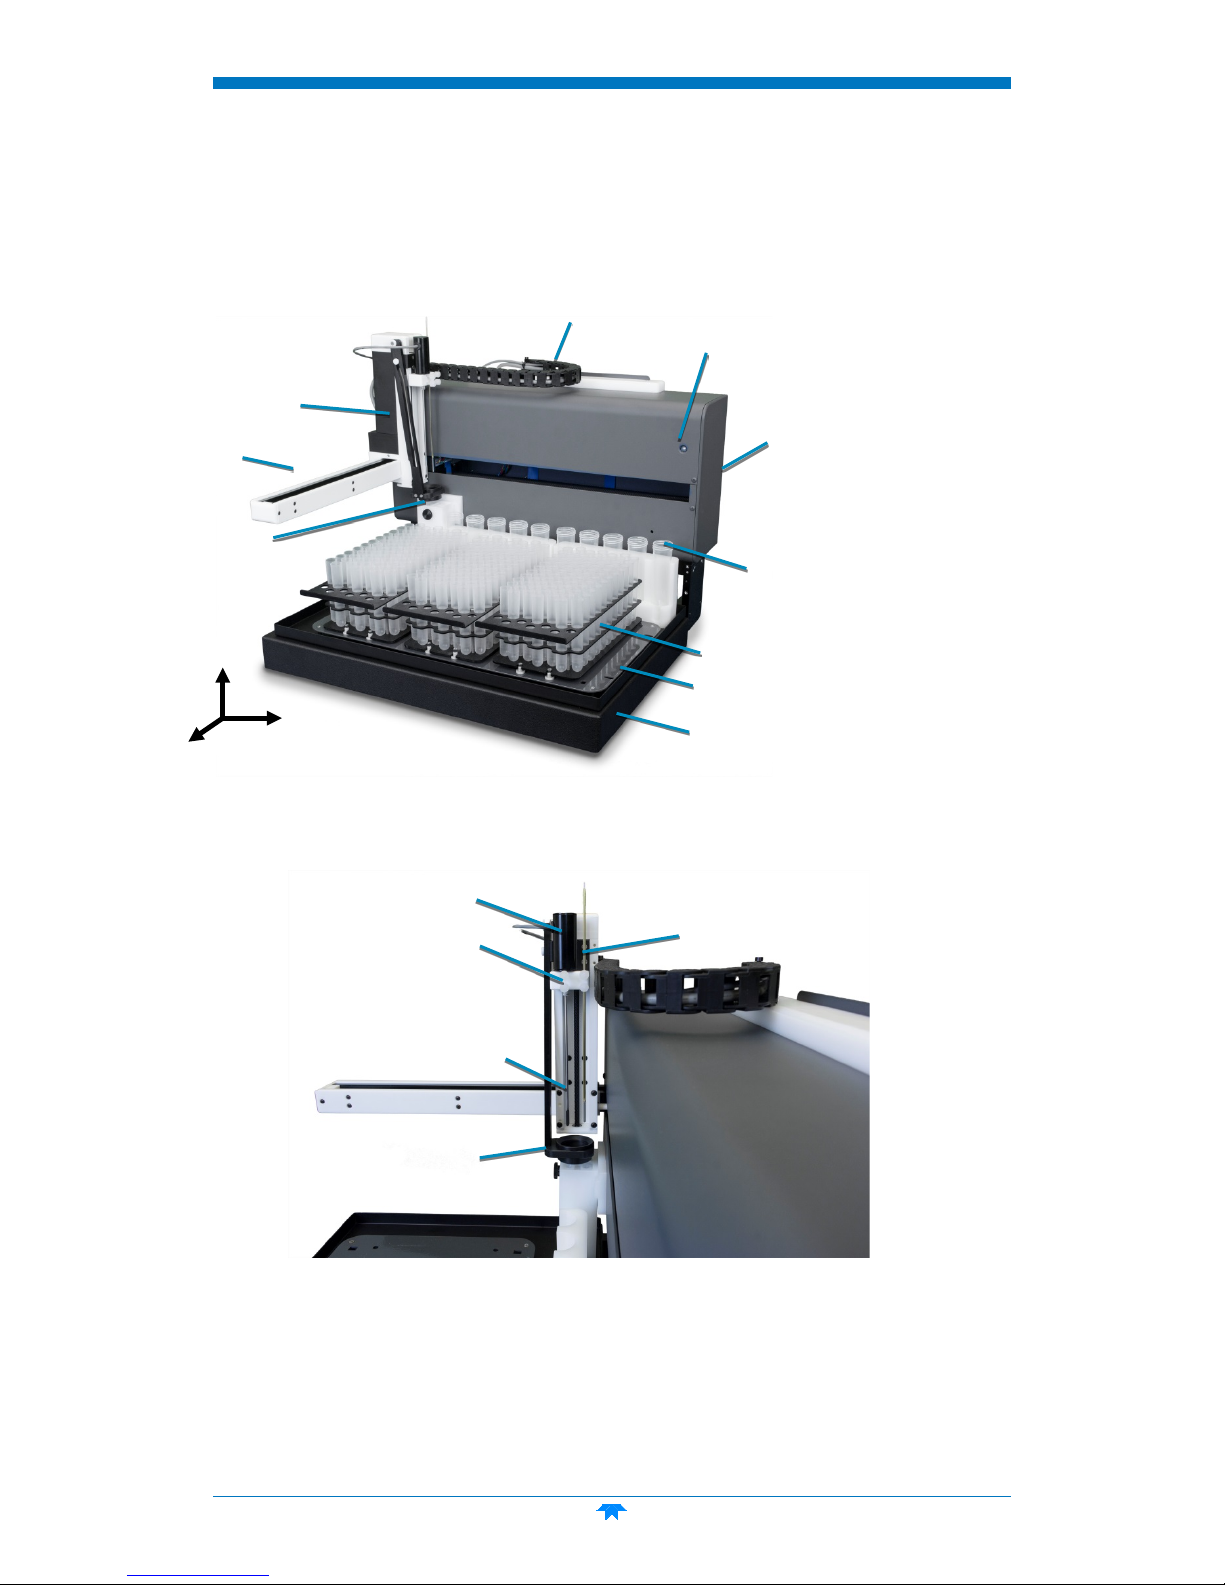
Autosampler Head
Stirring Paddle
Sample Probe
Sample Tray
Standards Vials
Sample Vial Racks
Rinse Station
Arm
Power
Indicator Lamp
Autosampler Base
Cable Chain
Drip Cup
Z Drive Assembly
Probe/Stirrer Block
Stirrer Motor
This document shows you how to install the hardware components of the Teledyne CETAC
Oils 7400 homogenizing autosampler. See the Oils 7400 Series Operators Manual (on the CD)
for instructions on installing the software and information on using and caring for the
system.
System Components
Z
X
Y
FIGURE 1 Oils 7400 Autosampler—Front View
FIGURE 2 Z-Drive Assembly—Right Side View
2
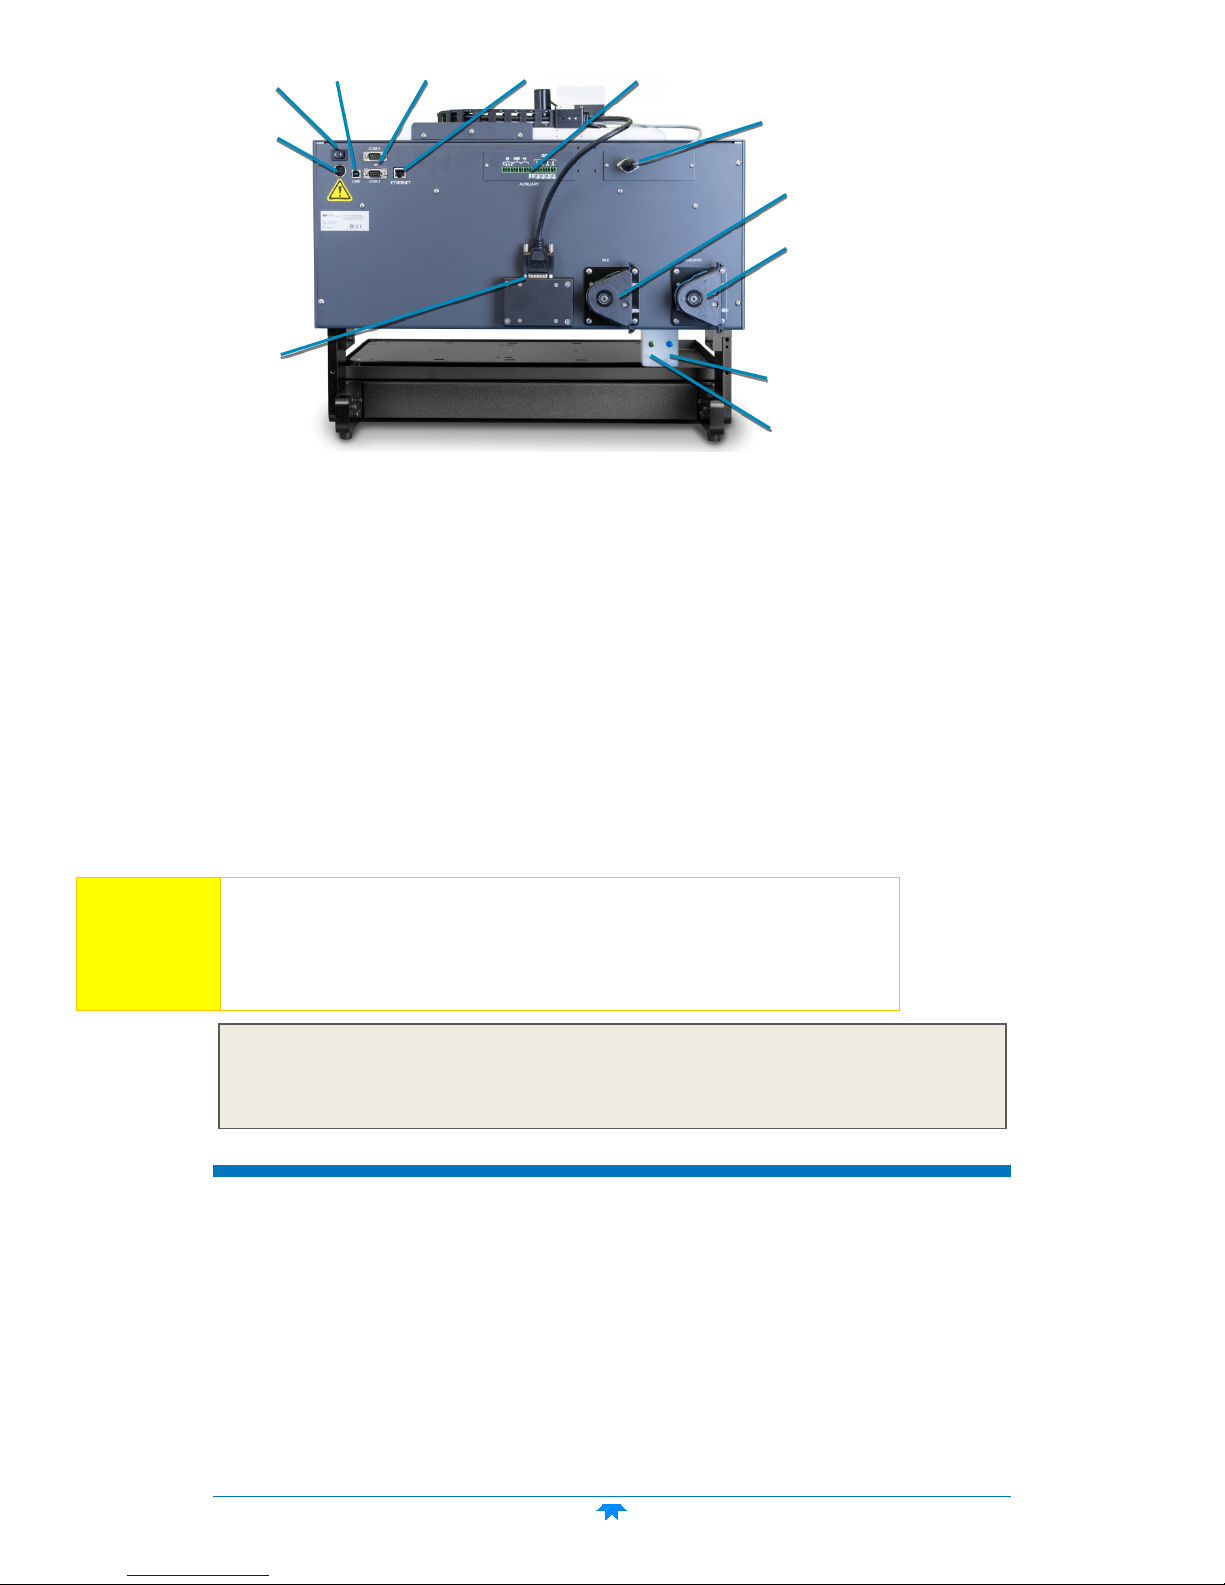
FIGURE 3 Oils 7400 Autosampler—Back View
Power Switch
Serial Ports
Ethernet Port
Power Connector
Z-Drive Connector
Peristaltic Pump
(Coolants)
Stirrer Connector
Auxiliary Port
USB Port
Peristaltic Pump
(Oils)
Rinse Station
Fittings (Coolants)
Rinse Station
Fittings (Oils)
Equipment Required
You will need to choose a sample probe and sample racks appropriate for your application.
The probe/stirrer block determines the spacing between the probe and stirrer; this spacing
must match the vial-to-vial spacing of the rack which is in use.
You will need to supply the following items:
Liquid waste containers, 10 liters or larger
Solvent bottles
Computer
Choosing a Location
Position the autosampler on a sturdy surface as close as possible to the ICP nebulizer.
LIFTING HAZARD
CAUTION
Two people are required to lift the autosampler. Lifting should be done with a
person situated on either side of the instrument. Lifting without assistance may
cause injury.
NOTE
Keep the original packaging for use in case the product ever needs to be returned or shipped
to another location.
Installing the ASX-7x00 Dashboard Software
1 On the included CD, double-click the ASX Dashboard installation file and follow the prompts
to complete the installation.
You do not need to run the software yet. The installation includes a USB driver which
Windows should automatically find when you connect the autosampler to the PC.
3
Mounting the Tray
1 Place the tray on the base of the autosampler.
Make sure the locating pins on the tray fully seat into the locating holes in the base.
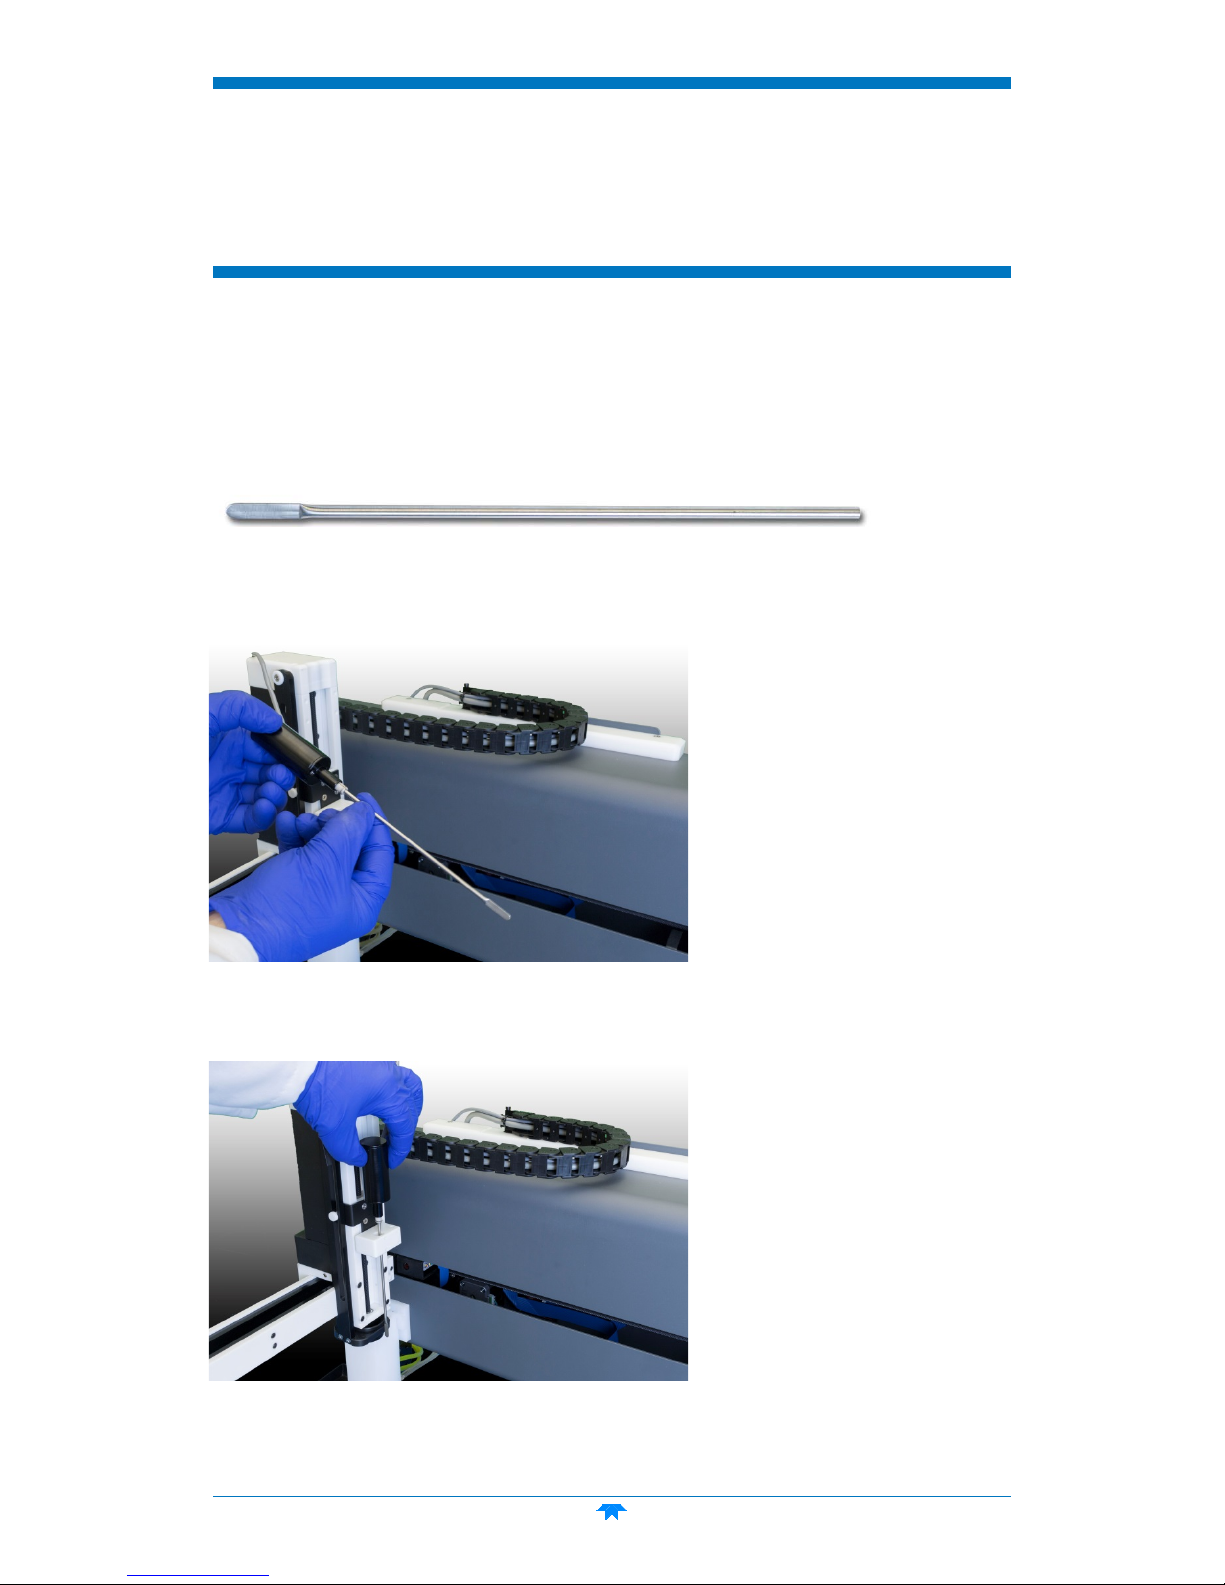
Installing the Stirrer
When the autosampler is used for oils, install the stirrer paddle. When the autosampler is
used for coolants, the stirrer paddle should be removed (or replaced with the optional
coated coolants stirrer paddle).
1 Locate the oils stirrer paddle.
FIGURE 4 Stirrer Paddle for Oils
2 Press the stirrer paddle into the hole on the bottom of the stirrer motor.
FIGURE 5 Inserting the Stirrer Paddle
3 Place the stirrer motor into the larger hole in the probe/stirrer block on the Z-drive.
FIGURE 6 Placing the Stirrer Motor
4
 Loading...