

Page 1
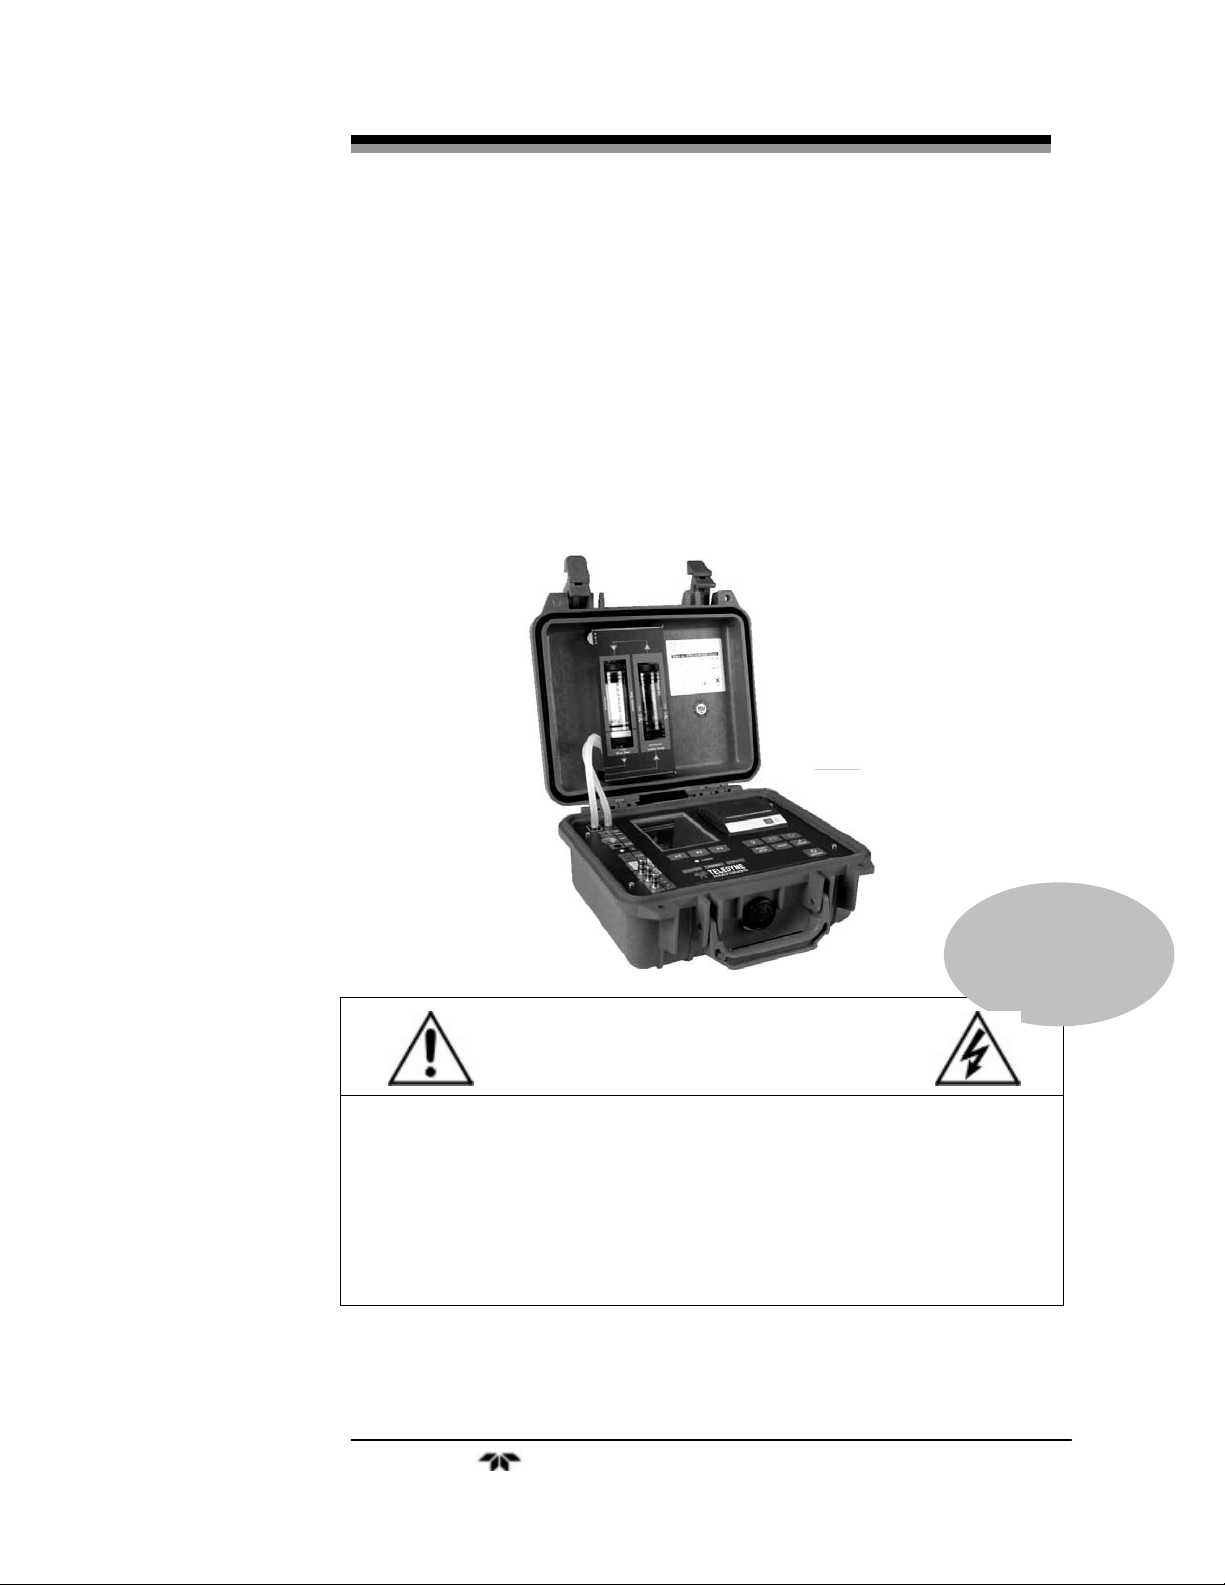
Portable Emissions Analyzer
OPERATING INSTRUCTIONS FOR
PEM-9004
Portable Emissions Analyzer
P/N MPEM9004
ECO: XX-XXXX
DANGER
Toxic gases may be present in this monitoring system.
Personal protective equipment may be required when servicing this instrument.
Hazardous voltages exist on certain components internally which may persist
for a time even after the power is turned off and disconnected.
Only authorized personnel should conduct maintenance and/or servicing.
Before conducting any maintenance or servicing, consult with authorized
supervisor/manager.
Teledyne Analytical Instruments i
Page 2

PEM-9004
Copyright © 2008 Teledyne Analytical Instruments
All Rights Reserved. No part of this manual may be reproduced, transmitted, transcribed,
stored in a retrieval system, or translated into any other language or computer language in
whole or in part, in any form or by any means, whether it be electronic, mechanical,
magnetic, optical, manual, or otherwise, without the prior written consent of Teledyne
Analytical Instruments, 16830 Chestnut Street, City of Industry, CA 91749-1580.
Warranty
This equipment is sold subject to the mutual agreement that it is warranted by us free from
defects of material and of construction, and that our liability shall be limited to replacing or
repairing at our factory (without charge, except for transportation), or at customer plant at
our option, any material or construction in which defects become apparent within one year
from the date of shipment, except in cases where quotations or acknowledgements provide
for a shorter period. Components manufactured by others bear the warranty of their
manufacturer. This warranty does not cover defects caused by wear, accident, misuse,
neglect or repairs other than those performed by Teledyne or an authorized service center.
We assume no liability for direct or indirect damages of any kind and the purchaser by the
acceptance of the equipment will assume all liability for any damage which may result from
its use or misuse.
We reserve the right to employ any suitable material in the manufacture of our apparatus,
and to make any alterations in the dimensions, shape or weight of any parts, in so far as
such alterations do not adversely affect our warranty.
Important Notice
This instrument provides measurement readings to its use r, an d serves as a tool b y whic h
valuable data can be gathered. The information provided by the instrument may assist the user
in eliminating potential hazards caused by his process; however, it is essential that all
personnel involved in the use of the instrument or its interface, with the process being
measured, be properly trained in the process itself, as well as all instrumentation related to it.
The safety of personnel is ultimately the responsibility of those who control process
conditions. While this instrument may be able to provide early warning of imminent
danger, it has no control over process conditions, and it can be misused. In particular, any
alarm or control systems installed must be tested and understood, both as to how they
operate and as to how they can be defeated. Any safeguards required such as locks, labels,
or redundancy, must be provided by the user or specifically requested of Teledyne at the
time the order is placed.
Therefore, the purchaser must be aware of the hazardous process conditions. The purchaser
is responsible for the training of personnel, for providing hazard warning methods and
instrumentation per the appropriate standards, and for ensuring that hazard warning devices
and instrumentation are maintained and operated properly.
Teledyne Analytical Instruments, the manufacturer of this instrument, cannot accept
responsibility for conditions beyond its knowledge and control. No statement expressed or
implied by this document or any information disseminated by the manufacturer or its
agents, is to be construed as a warranty of adequate safety control under the user’s process
conditions.
Teledyne Analytical Instruments ii
Page 3

Portable Emissions Analyzer
Specific Model Information
It is not recommended that this instrument be used for analysis on
any other gas or gas mixture than that specified at the time of purchase.
Using this instrument to analyze any other gas mixture may result in
serious error. Consult the factory for additional information for gas
analysis not specified at the time of purchase.
Instrument Serial Number: _______________________
Teledyne Analytical Instruments iii
Page 4

PEM-9004
Important Notice
The PEM-9004 is a gas analysis computer for measuring and
computing the concentration of various gases in a combustion process.
Both toxic and combustible gasses may at times be present in and
around the analyzer. This instrument is designed to safely handle
specific combustible gas mixtures as outlined in the product
specification. Since Teledyne cannot control the end use of this
instrument, it is the responsibility of the user to establish whether or not
the total system of instrument, environment, alarm components, and any
other relevant devices actually will assure safety under the particular
circumstances of use.
Location of the equipment and sensors that will insure proper
operation is the responsibility of the user.
The safety checklist outlined below is only a guide. It is up to the
user to establish practical safety precautions given his/her own specific
circumstances. It is vital that the operator understand and test the
operation of the total system.
Safety Checklist
Verify that the instrument is powered correctly.
Verify that the instrument works properly (all functions).
Verify that measured values are correct.
Verify that unauthorized personnel cannot tamper with the
instrument or its auxiliary equipment.
Institute routine test/calibration procedures.
Identify and handle any potential problems in sampling or
location.
Train all operators to understand all operations and functions
of the analyzer and the system.
Identify and handle any environmental or other influences that
could affect the operation of the instrument.
Teledyne Analytical Instruments iv
Page 5
Portable Emissions Analyzer
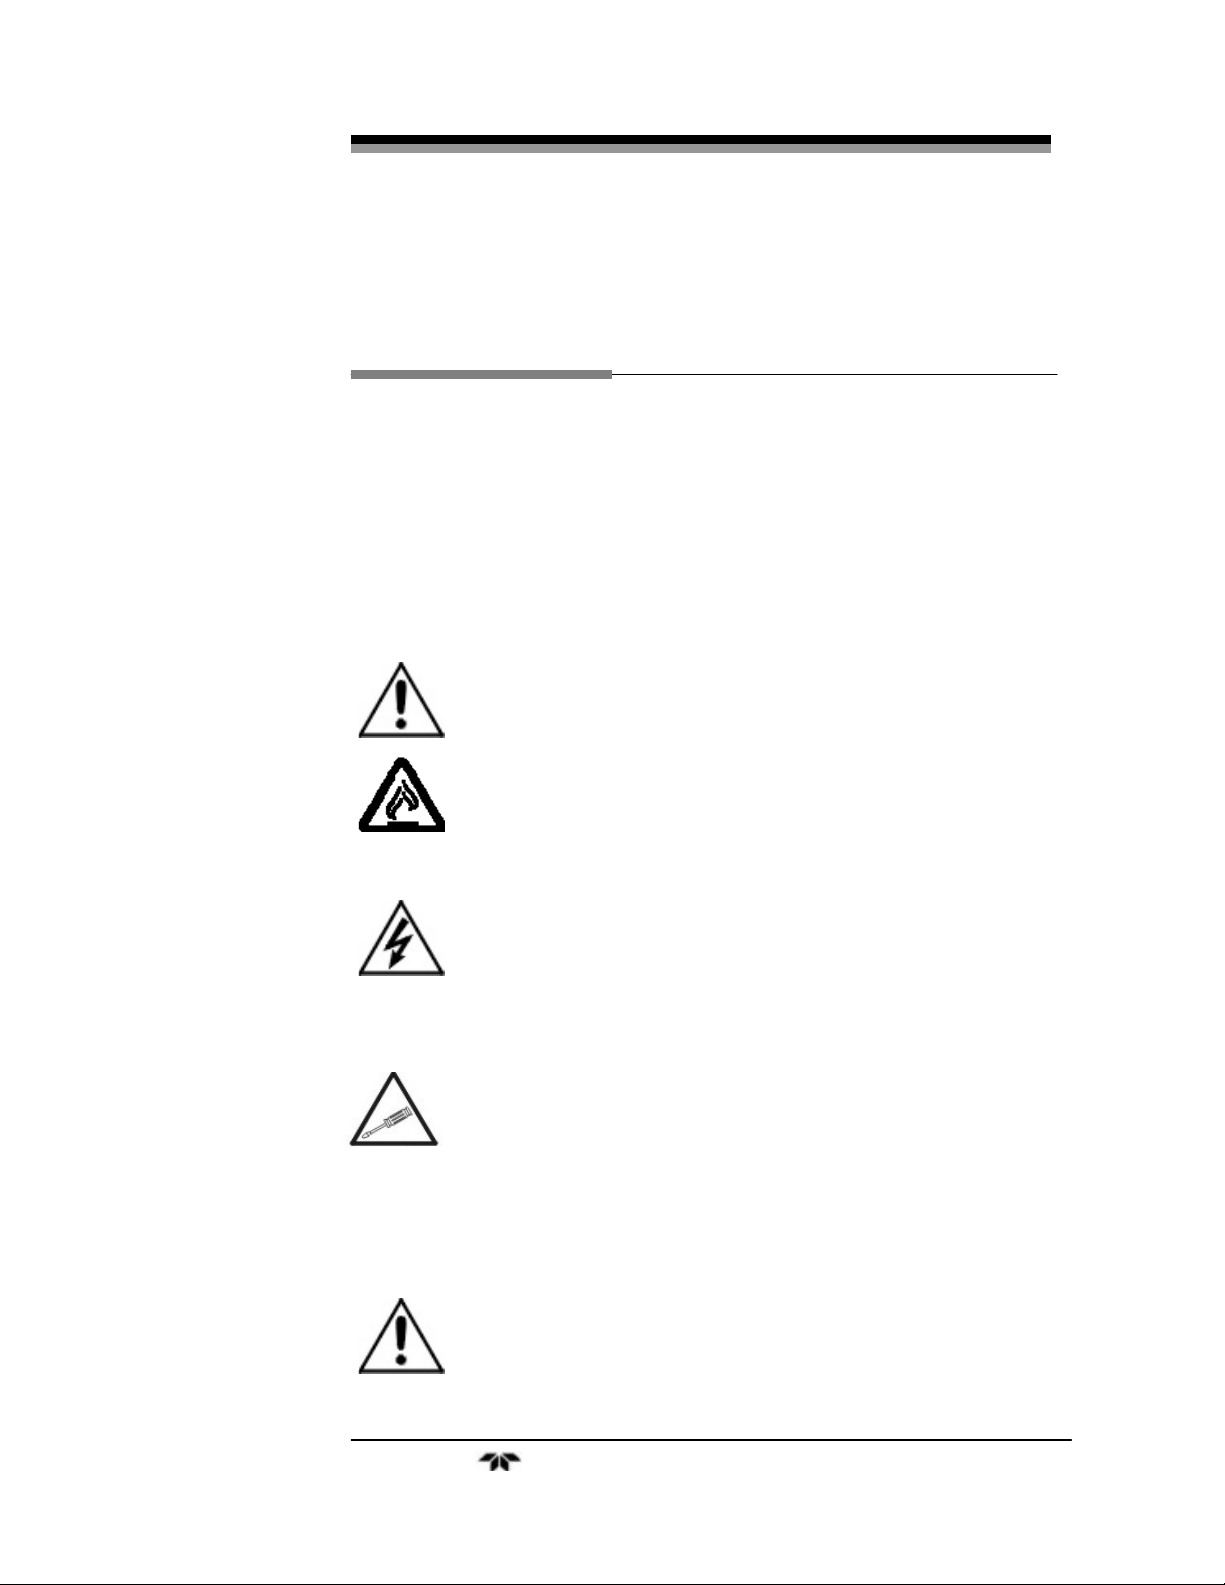
Safety Messages
Your safety and the safety of others is very important. We have
provided many important safety messages in this manual. Please read
these messages carefully.
A safety message alerts you to potential hazards that could hurt you
or others. Each safety message is associated with a safety alert symbol.
These symbols are found in the manual and inside the instrument. The
definition of these symbols is described below:
GENERAL WARNING/CAUTION: Refer to the instructions
for details on the specific danger. These cautions warn of
specific procedures which if not followed could cause bodily
Injury and/or damage the instrument.
CAUTION: HOT SURFACE WARNING: This warning is
specific to heated components within the instrument. Failure
to heed the warning could result in serious burns to skin and
underlying tissue.
WARNING: ELECTRICAL SHOCK HAZARD: Dangerous
voltages appear within this instrument. This warning is
specific to an electrical hazard existing at or nearby the
component or procedure under discussion. Failure to heed this
warning could result in injury and/or death from
electrocution.
Technician Symbol: All operations marked with this symbol
are to be performed by qualified maintenance personnel only.
No
Symbol
CAUTION: THE ANALYZER SHOULD ONLY BE USED FOR THE
NOTE: Additional information and comments regarding a
specific component or procedure are highlighted in the form
of a note.
PURPOSE AND IN THE MANNER DESCRIBED IN
THIS MANUAL.
Teledyne Analytical Instruments v
Page 6

PEM-9004
IF YOU USE THE ANALYZER IN A MANNER OTHER
THAN THAT FOR WHICH IT WAS INTENDED,
UNPREDICTABLE BEHAVIOR COULD RESULT
POSSIBLY ACCOMPANIED WITH HAZARDOUS
CONSEQUENCES.
This manual provides information designed to guide you through
the installation, calibration operation and maintenance of your new
analyzer. Please read this manual and keep it available.
Occasionally, some instruments are customized for a particular
application or features and/or options added per customer requests.
Please check the front of this manual for any additional information in
the form of an Addendum which discusses specific information,
procedures, cautions and warnings that may be peculiar to your
instrument.
Manuals do get lost. Additional manuals can be obtained from
Teledyne at the address given in the Appendix. Some of our manuals are
available in electronic form via the internet. Please visit our website at:
www.teledyne-ai.com.
Teledyne Analytical Instruments vi
Page 7

Portable Emissions Analyzer
Table of Contents
List of Figures................................................................................x
List of Tables................................................................................xi
Introduction ...................................................................................1
1.1 Overview 1
1.2 Features 3
1.3 Operator Interface 4
Operational Theory .......................................................................5
2.1 Introduction 5
2.2 Sensor Cell 5
2.3 Specific Sensor Network 6
2.4 Combustion Efficiency 6
2.4.1 Calculating the CO2 Composition of Exhaust Gas 6
2.4.2 Calculating the Waste Gas Loss 7
2.4.3 Calculating the Combustion Efficiency 7
2.4.4 Calculating Excess Air Value (Lambda) 8
2.4.5 Calculating Undiluted CO Concentration 9
2.5 Sample System 9
Installation ...................................................................................13
3.1 Unpacking the Analyzer 13
3.2 Attaching the Probe and Thermocouples 13
3.3 Initial Calibration 14
3.4 Battery Power 15
3.4.1 Charging the Battery 15
3.4.2 Battery Replacement 16
3.5 Sensor Replacement 16
Operation .....................................................................................17
Teledyne Analytical Instruments vii
Page 8

PEM-9004
4.1 User Interface 17
4.2 Startup Screen 19
4.3 Main menu 20
4.3.1 Status Line 20
4.3.2 Available Programs 20
4.4 Configure Menu 21
4.4.1 Display 21
4.4.2 Fuel 23
4.4.2.1 Remove a Fuel from the List 23
4.4.2.2 Reinstate a Previously Removed Fuel 23
4.4.2.3 Insert a New Fuel 24
4.4.3 Settings 26
4.4.3.1 Units for Draft and Pressure 26
4.4.3.2 Instrument Sound On/Off 26
4.4.3.3 Select Printer 27
4.4.3.4 User Address 27
4.4.3.5 Automatic Timer 28
4.4.4 Set Default 29
4.5 Measurement Screen 30
4.5.1 Flue Gas 31
4.5.1.1 Draft 32
4.5.1.2 Info 33
4.5.1.3 Draught Detection 34
4.5.1.4 Units 35
4.5.1.5 O
Referenece 36
2
4.5.1.6 Extended Data 36
4.5.1.7 Graphic 39
4.5.1.8 Fuel 40
4.5.1.9 Config 40
4.5.1.10 Program Macros 40
4.5.1.11 Hold 41
4.5.1.12 Zoom 42
Teledyne Analytical Instruments viii
Page 9

Portable Emissions Analyzer
4.5.1.13 CO Protect 43
4.5.1.14 Print 44
4.5.2 Temperature 45
4.5.3 Pressure 46
4.5.4 CO (O
) Measurement 47
2
4.6 Macro Start 48
4.7 Time-Date 49
4.8 Memory 51
4.9 USB-Interface 54
4.10 Charge Control 54
4.11 Battery / Line Voltage Operation 55
4.11.1 Charging the Battery 55
4.11.2 Battery Replacement 56
Maintenance.................................................................................57
5.1 Routine Maintenance 57
Appendix......................................................................................59
Specifications 59
Recommended Spare Parts List 62
Reference Drawings 63
Index.............................................................................................65
Teledyne Analytical Instruments ix
Page 10

PEM-9004
List of Figures
Figure 2-4: Gas Conditioning System ........................................... 10
Figure 3-1: PEM-9004 Front Panel ...............................................14
Figure 4-1: PEM-9004 Front Panel ...............................................17
Figure 4-2: Additional Functions Available from Flue Gas Menu...19
Figure 4-3: Data Memory Structure...............................................52
Figure 5-1 Water Trap and Filter...................................................58
Teledyne Analytical Instruments x
Page 11

Portable Emissions Analyzer
List of Tables
Table 1-1: Measurement Capabilities of the PEM-9004 Analyzer...2
Table 1-2: Parameters Calculated by the PEM-9004......................2
Table 4-1: Function Keys...............................................................18
Teledyne Analytical Instruments xi
Page 12
PEM-9004
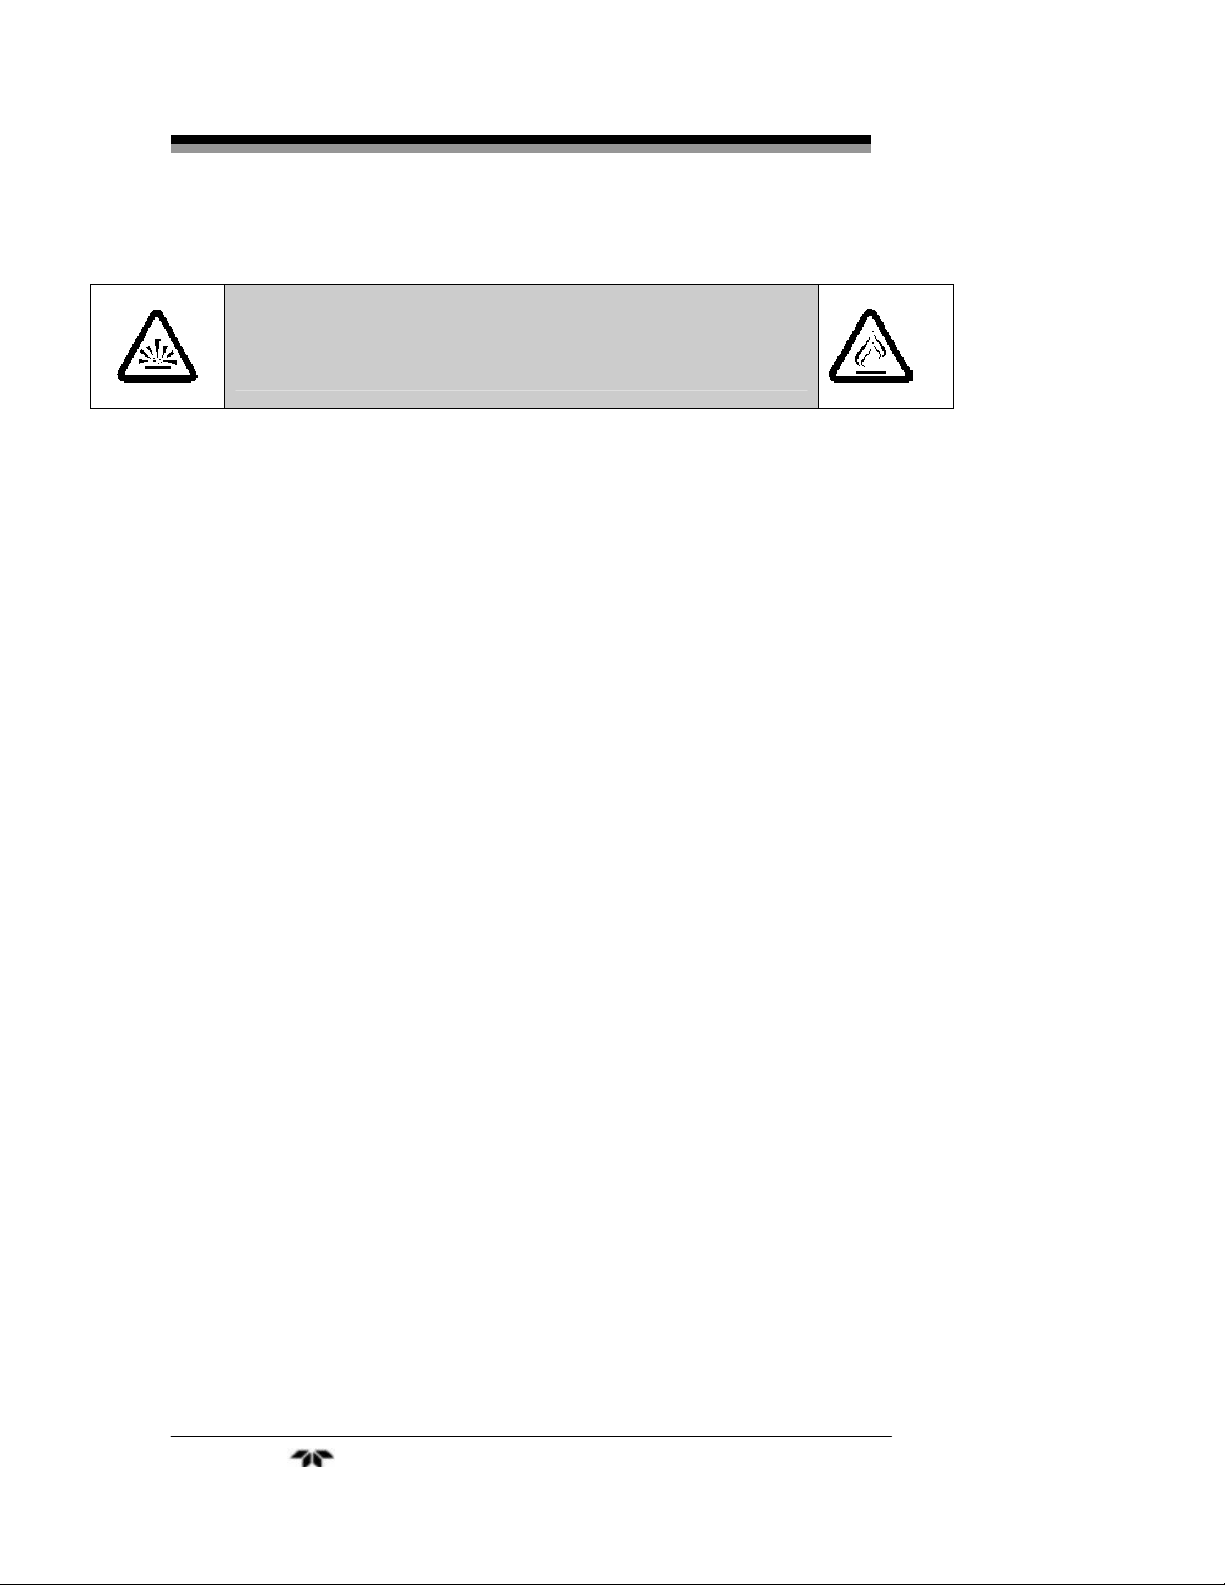
DANGER
COMBUSTIBLE GAS USAGE
It is the customer's responsibility to ensure safety especially
when combustible gases are being analyzed since the
potential of gas leaks always exist.
The customer should ensure that the principles of operating
of this equipment is well understood by the user and that the
instrument as well as any approved support equipment is
properly installed. Misuse of this product in any manner,
tampering with its components, or unauthorized substitution
of any component may adversely affect the certification and
the safety of this instrument.
WARNING
Since the use of this instrument is beyond the control of
Teledyne, no responsibility by Teledyne, its affiliates, and
agents for damage or injury from misuse or neglect of this
equipment is implied or assumed.
Teledyne Analytical Instruments xii
Page 13

Portable Emissions Analyzer Introduction
Introduction
1.1 Overview
The Teledyne Analytical Instruments (TAI) Model PEM-9004 Gas
Analysis Computer is a multifunction analyzer with integrated
calculating functions. The system is ideally suited for monitoring
heaters, exhaust lines, and other flue gas installations.
The PEM-9004 analyzes the gaseous products of a combustion
process and provides critical information on the state of the effluent
stream. Information is available on-screen and via printed reports. Data
can also be output to a remote device via the USB communication port.
The system is battery operated, lightweight yet rugged so it can be
moved and rapidly setup at any location.
The analyzer measures and displays the O2, CO, and with the
appropriate option, SO2, and NO content of a gas. It also senses and
measures draft or pressure and the gas temperature at the sampling point
as well as the ambient temperature. An internal database of common
fuels supplies thermodynamic data for calculations that the monitor
performs on the sampled data, to determine the CO2 and NOx
concentrations when equipped with the appropriate optional sensors.
The instrument also calculates combustion efficiency, excess air and
other parameters critical in assessing efficiency in a combustion process.
Measured data and test results can be stored in a 100 record
database for later recall and printed on demand from the monitor’s
integral printer. Data can also be monitored remotely via an integral
USB communications port. Numerical data can be output in a variety of
units for customer reports.
Gas and electrical ports along with the display and all operator
controls are accessible from the front panel.
Table 1-1 and 1-2 highlight the PEM-9004 monitoring capability.
They show the actual measured parameters and derived (calculated)
values respectively.
Teledyne Analytical Instruments 1
Page 14

Introduction PEM-9004
Table 1-1: Measurement Capabilities of the PEM-9004 Analyzer
Measured
Values
T.Gas Waste or flue gas
temperature
T.Room Air or ambient
temperature
O2 Oxygen content % Volume
CO Carbon monoxide ppm-mg/mm3-mg/kWh
NO Nitrogen monoxide
(option)
SO2 Sulphur dioxide
(option)
Draft Draft or Pressure inches of H
°F or °C
°F or °C
ppm-mg/mm3-mg/kWh
ppm-mg/mm3-mg/kWh
Table 1-2: Parameters Calculated by the PEM-9004
Calculated
Values
CO2 Carbon dioxide % Volume
CO 0% Carbon monoxide,
undiluted
ppm
0 (iWC)
2
Effi. Combustion efficiency %
Ex.air Excess air value
qA Waste gas losses %
Dewpnt Fuel specific dewpoint °F or °C
T.Diff Differential temperature
°F or °C
(TG-TA)
NOx Nitrogen oxides (option) ppm-mg/mm3-mg/kWh
NOx ref. Nitric oxides, undiluted
ppm
(option)
SO2 ref. Sulphur dioxide,
ppm
undiluted (option)
Teledyne Analytical Instruments 2
Page 15

Portable Emissions Analyzer Introduction
1.2 Features
• Analysis Ranges: The PEM-9004 is available with the
following analysis ranges:
• O
2
0-20.9%
• CO 0-4000 ppm
(with H2 compensation)
• CO2 (calculated from O2 measurement)
0-CO2 max (fuel specific)
And optionally:
• CO 0-2% (0-20,000 ppm)
(without H2 compensation)
• NO 0-2000 ppm (optional)
• SO2 0-2000 ppm (optional)
• NO2 0-200 ppm
• CO Sensor Protection: The PEM-9004 incorporates a special
CO sensor protection feature utilizing a separate pump that
automatically flushes the CO sensor when an upper CO
threshold of 4000 ppm is exceeded.
• Pressure/Draft Measurement: A piezoresistive pressure
sensor with internal temperature compensation is installed for
measuring pressure up to ± 60 inches of water (iWC). A
convenient port is located on the front panel for positive or
negative pressure measurements.
• Temperature Measurement: Both ambient and gas
temperatures up to 1850°F (1000°C) are monitored using Ktype (NiCr-Ni) thermocouples. These parameters are used by
the internal processor in calculating combustion efficiency,
waste gas loses, excess air and undiluted CO concentration.
• Waste Gas Sampling: Via an external water separator and
filter, the waste gas is fed to the sensors by means of a gas
feed pump. It accepts either a one point measurement probe
(combi-probe) or multi-point measurement probe (multi-hole
probe).
Teledyne Analytical Instruments 3
Page 16

Introduction PEM-9004
• Unit Conversion: Gas, temperature and pressure information
is displayed and/or stored in several different units depending
on the user’s preference.
• Internal Infrared Thermal Printer: The PEM-9004 is
equipped with a printer for immediate hard copy of data. If
desired, the printed reports can contain a header with the
company name or other convenient designation.
• Display: Hi-res LCD module with 5 or 10 line text and
graphical display plus menu line.
• Data Communication: USB interface. Optional radio-
interface (Bluetooth).
• Memory: 100 memory blocks max. including dynamic
memory management and directory/file structure.
• Power: NiCd battery 6V/4Ah with external power adapter and
charger. Integral power management system controls battery
charging and prolongs battery life.
1.3 Operator Interface
All user controls and connections are accessible from the front
panel after opening the top case. Figure 1 shows the front panel of the
PEM-9004. There are 3 function buttons and 7 menu select buttons (also
referred to as keys) which control all operations of the analyzer. Chapter
4 describes in detail the use of the menu select and function buttons in
operating the analyzer. In addition to operator controls, gas and
thermocouple ports are installed and clearly identified on the front panel.
Teledyne Analytical Instruments 4
Page 17

Portable Emissions Monitor Operational Theory
Operational Theory
2.1 Introduction
The PEM-9004 uses state-of-the-art sensor technology for accurate
measurements of O
sensors employed are electrochemical cells specific for each component.
The instrument will measure and display the actual gas
concentration for O
the time of purchase, the PEM-9004 can also measure and display the
NO, CO (high), and SO2 concentration of a flue gas. The analyzer, based
on measurements of draft pressure, temperature, and data entered for the
combustion fuel plus pertinent thermodynamic data internally stored as
part of the instrument’s database, will calculate and display the
following combustion related information:
, CO/H2, CO-high and optionally, NO and SO2. The
2
and CO(H2). Depending on the options selected at
2
• CO2 concentration
• Non-diluted CO concentration
• Pressure and temperature differential
• Efficiency (Eta)
• Waste gas losses (qA)
• NOx concentration
• Dew point
• Eta combustion value
2.2 Sensor Cell
At the heart of the analyzer are the sensors. Up to 5 sensor cells are
installed depending on the options selected at the time of purchase. Each cell
is specific to a particular gaseous component.
Teledyne Analytical Instruments 5
Page 18

Operational Theory PEM-9004
2.3 Specific Sensor Network
The sensors employed in the PEM-9004 operate according to
Faraday's Law of Electrolysis: In an electrochem ical ce ll, the rate a t which
gas is produced at one pole is directly proportional to the quantity of
electric current flowing through the electrodes. Conversely, the current
produced by the cell is directly proportional to the consumption of gas at
the pole.
The PEM-9004 incorporates a network of up to five individual sensors
for analyzing oxygen, carbon monoxide, and optionally, sulphur dioxide,
and nitrogen oxides. The individual sensors are arranged on a sensor block
located underneath the front panel of the unit. Each sensor produces an
output current proportional to the consumption rate of the particular gas for
which it is sensitive. Typically, the sensor output is in the microampere
range. Cross-sensitivity between sensors is measured and corrected for,
using an internal algorithm. The sensor output is fast and stable and only
mildly affected by changes in relative humidity or temperature.
2.4 Combustion Efficiency
The PEM-9004 measures oxygen, combustion gas temperature,
draft pressure and ambient air temperature, and it contains an internal
database of the thermodynamic properties of several common fuels. It
uses these to calculate combustion efficiency as follows:
2.4.1 Calculating the CO2 Composition of Exhaust Gas
It first calculates the CO
basis using data extracted from the selected fuel. The following equation
is used to calculate the CO2 concentration in volume %.
Where: CO
is the fuel specific theoretical maximum CO
2MAX
concentration in volume %
O
is the measured oxygen concentration in volume %
2
20.9 is the oxygen content in air (volume %).
composition of the exhaust gas on a dry
2
O
22
MAX
⎛
1COCO
−×=
⎜
⎝
⎞
2
⎟
9.20
⎠
2
Teledyne Analytical Instruments 6
Page 19

Portable Emissions Monitor Operational Theory
=
2.4.2 Calculating the Waste Gas Loss
The analyzer uses the measured oxygen concentration and the
exhaust gas and ambient temperature of the stack to calculate the total
energy loss in the exhaust gas. The total energy loss is calculated by
adding in the work done to expand the exhaust gas against atmospheric
pressure and the heat required to vaporize the water generated in the
burning process.
The waste gas loss calculation involves multiplying the heat
capacity of each component by the difference in temperature between
ambient air and exhaust gas. The following equation is used to calculate
the waste gas loss (qA) in %:
2
+×= B
⎞
⎟
⎟
⎠
Where: T
T
gas
is the combustion ambient temperature in °F or °C
air
⎛
2
A
⎜
)T-(TqA
airgas
⎜
-O21
⎝
is the waste/flue gas temperature in °F or °C
A2 and B are fuel-specific factors stored internally in the
PEM-9004 database.
2.4.3 Calculating the Combustion Efficiency
The combustion efficiency of a combustion process is determined
from the relation:
Efficiency = (E
fuel
- E
lost
) 100
The instrument subtracts the waste gas loss as previously calculated
for a specific fuel from the total energy of the selected fuel to arrive at
the overall combustion efficiency (Eta). The PEM-9004 uses the
following equation:
qA-100Eta
Where: Eta is the combustion efficiency expressed as a
percentage.
qA is the heat loss calculated for the given fuel.
Teledyne Analytical Instruments 7
Page 20

Operational Theory PEM-9004
The calculation is done on a dry basis. This means that the term
representing the energy necessary to heat the water vapor from ambient
to exhaust temperature is omitted.
To obtain the precise value for combustion efficiency one must
account for many variables. The most important are:
• Radiative heat losses
• Variation in fuel composition
• Air that leaks into the flue gas mixture raising oxygen
reading
• Heat loss in ash
• Incomplete combustion
• Boiler blowdown.
The PEM-9004 necessarily makes simplifying assumptions in its
determination of efficiency. Therefore it must be considered a trend
indicator that will correctly show an increase or decrease in efficiency,
whereas the absolute value of the number applies to the ideal case only.
2.4.4 Calculating Excess Air Value (Lambda)
The minimum amount of air that supplies sufficient oxygen for the
complete combustion of a fuel is referred to as the theoretical or
stoichiometric amount of air. Most combustion processes involve an
amount of air different than stoichiometry requires. The differential is
called
excess air and can be a positive or negative amount. The
stoichiometric requirement for air depends on the type of fuel used and
to a lesser extent, the temperature and pressure of the reaction. Nitrogen
is normally considered unaltered in lower temperature reactions and
simply adds to the heat balance of the combustion process. As the
combustion temperature increases however, increasing amounts of
nitrogen oxides are formed which must be considered in the overall
chemical balance.
In the PEM-9004, the excess air (Lambda) value is calculated from
the ratio of CO
2max
to CO
Lambda
2observed
as follows:
CO
2MAX
==
CO
9.20
O9.20
−
22
Teledyne Analytical Instruments 8
Page 21

Portable Emissions Monitor Operational Theory
×
=
2.4.5 Calculating Undiluted CO Concentration
To calculate the uncompensated CO concentration the PEM-9004
uses the excess air as calculated above and the hydrogen compensated
value sensed by the CO electrochemical cell to arrive at an undiluted CO
concentration in ppm. The following equation is used:
LambdaCOCO(0%)
Where: Lambda is the excess air as calculated above.
2.5 Sample System
The built-in sample system on the PEM-9004 can be though of as a
fully integrated data acquisition system. In addition to sampling the gas
stream and safely diverting a portion through the analyzer, it also gathers
data on pressure, temperature of the gas stream, and ambient
temperature.
The sample system is comprised of the following sections:
sample probe
•
•
sample and CO sensor protect pumps
•
gas conditioning section
temperature and pressure measurement
•
The probe is a steel tube connected to several feet of neoprene
tubing. It samples the exhaust gas stream and directs a portion into the
analyzer via the neoprene tubing. Integral with the sample probe are 2
type K (NiCr-Ni) thermocouples, one which measures the gas stream
temperature at the tip and the other sensing the air or ambient
temperature. A piezioresistive element is also contained within the probe
for converting pressure of the gas to an electronic signal used by the
microprocessor to determine the gas or draft pressure.
Waste gas is sampled through the probe and drawn into a filter
section in the analyzer by means of an 0.8 lpm pump through the Gas In
port on the front panel. Figure 2-4 shows the sample conditioning
section of the PEM-9004.
Teledyne Analytical Instruments 9
Page 22
Operational Theory PEM-9004
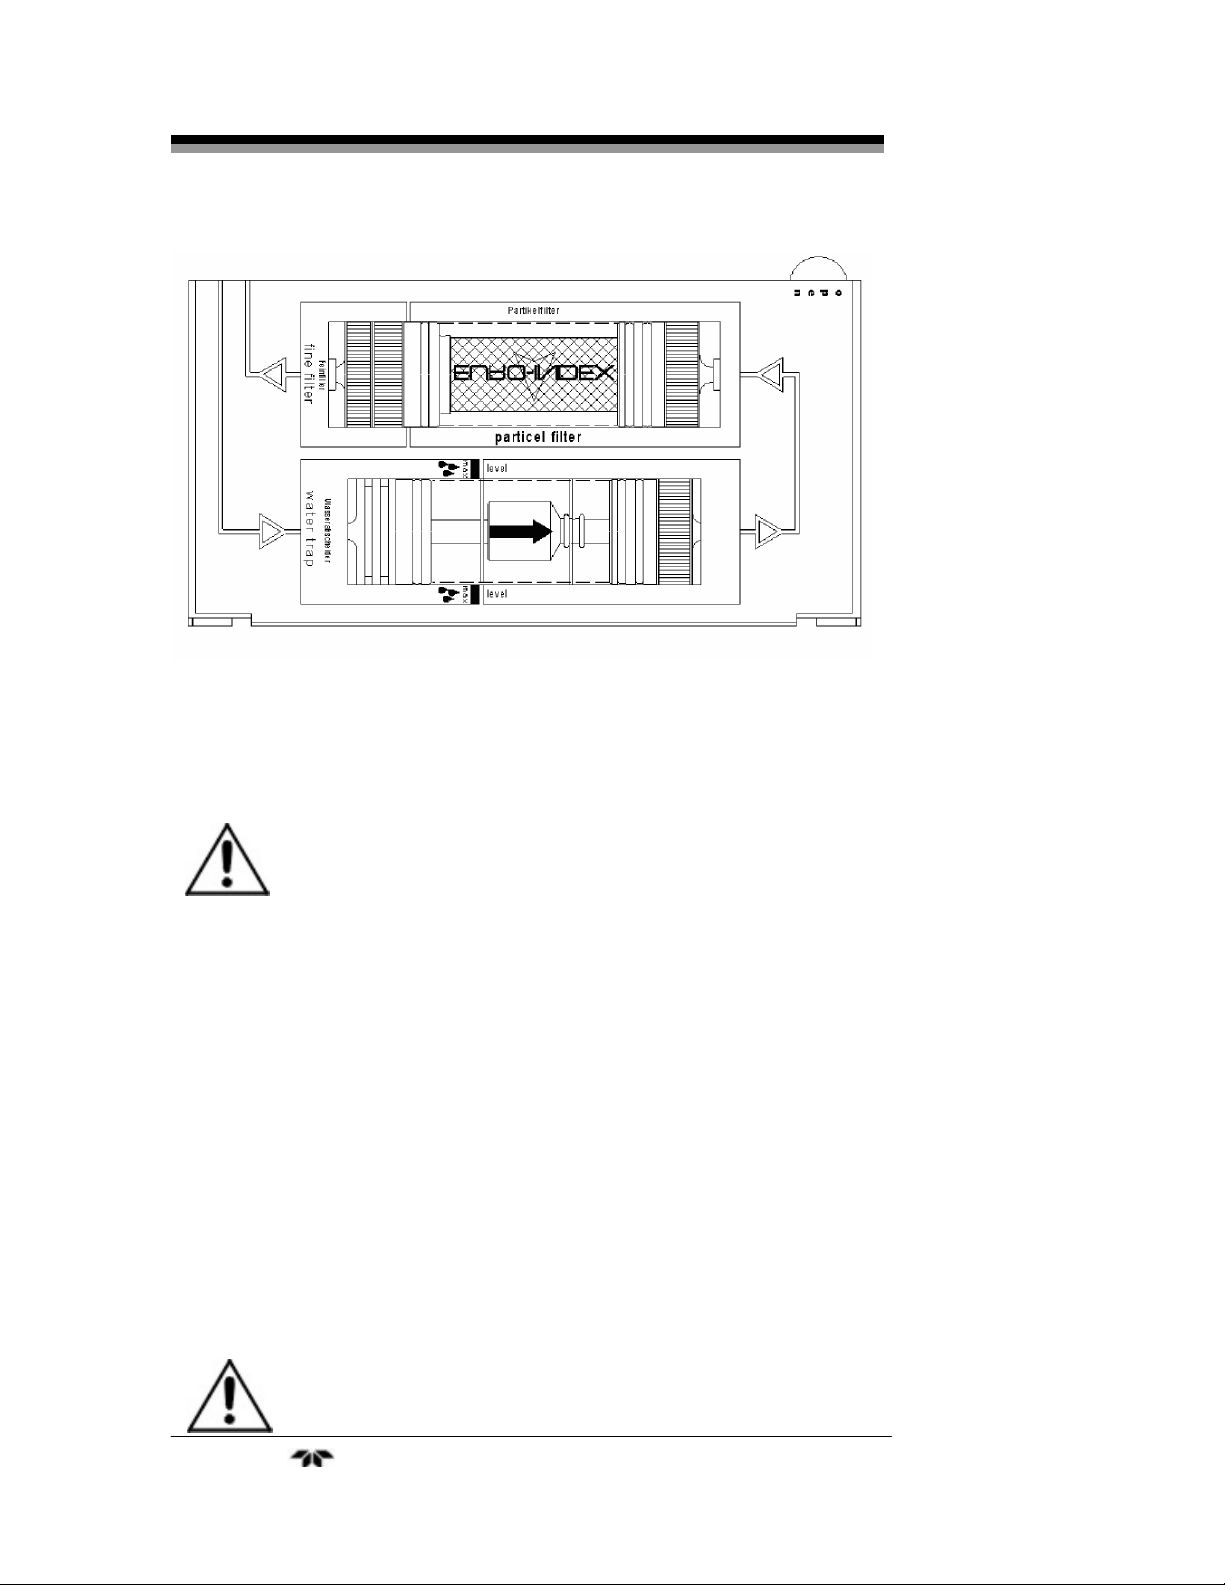
Figure 2-4: Gas Conditioning System
The gas is passed through a condensation trap to remove moisture
which would otherwise interfere with the measuring process.
CAUTION: THE WATER TRAP SHOULD BE EMPTIED AFTER
EACH USE. IF WATER IS ALLOWED TO COLLECT IN
THE TRAP IT COULD BACK FLOW INTO THE GAS
LINE AND DAMAGE THE PUMP AND SENSORS.
The sample gas is then drawn through a coarse particle filter in
series with a fine filter to remove any solid residue from the combustion
process prior to directing the gas to the sensor block.
The gas is fed to the sensor cells which are arranged in series. The
cell outputs a signal proportional to the concentration of the specific gas
it is sensitive to. Three to five cells are installed depending on the
options installed. A special purge line equipped with a separate pump is
installed to protect the CO sensor from prolonged exposure to high
concentration of oxygen such as atmospheric air. The pump is activated
automatically when the concentration exceeds 4000 ppm. It can also be
operated manually. See Section 4.5.1.13
CO Protect.
After traversing the sensor block, the sample gas is passed back out
through the Gas Out port on the front panel of the instrument.
CAUTION: BOTH TOXIC AND FLAMMABLE GASES ARE
PRESENT IN THE SAMPLE SYSTEM—INCLUDING
THE FILTERS! MAKE SURE THE EXHAUST LINE IS
Teledyne Analytical Instruments 10
Page 23

Portable Emissions Monitor Operational Theory
CONNECTED TO THE GAS OUT PORT AND VENTED
PROPERLY.
USE CAUTION WHEN CHANGING FILTER
ELEMENTS OR OTHERWISE OPENING ANY
PORTION OF THE SAMPLE SYSTEM. ALWAYS
PURGE THE SAMPLE SYSTEM TO REMOVE ANY
TOXIC OR FLAMMABLE GAS FROM THE LINES
BEFORE PERFORMING ANY MAINTENANCE ON
THIS INSTRUMENT.
Teledyne Analytical Instruments 11
Page 24

Operational Theory PEM-9004
Teledyne Analytical Instruments 12
Page 25

Portable Emissions Monitor Installation
Installation
Installation of the analyzer includes:
1.
Unpacking the system
2.
Connecting the Probe
3.
Making the gas and thermocouple connections
4.
Calibration and testing the installation
Also covered in this section are battery issues, and information
regarding battery replacement.
3.1 Unpacking the Analyzer
The TAI PEM-9004 Portable Emissions Monitor is generally
shipped fully functional and ready to work. Carefully unpack the
analyzer and inspect it for damage. Immediately report any damage to
the shipping agent. Note the probe and connectors and make sure there
is no shipping damage.
3.2 Attaching the Probe and Thermocouples
All connections are made on the front panel. Figure 2-1 illustrates
the front panel and identifies the connector locations.
Connect the exhaust gas thermocouple jack to the port labeled T Gas
•
•
Connect the ambient air thermocouple jack to the ambient air port
connector
Connect the gas line from the probe to the gas port
•
Connect the pressure sensor line to the port labeled P+ which is the
•
port for measuring a positive pressure.
NOTE: If you are monitoring a process which is below
atmospheric pressure, connect the pressure sensor to the
P- port.
Teledyne Analytical Instruments 13
Page 26

Installation PEM-9004
• Connect the gas out port to a suitable vent.
WARNING: TOXIC AND FLAMMABLE GASES ARE PRESENT IN
THIS INSTRUMENT. THESE GASES CAN BE
HARMFUL AND/OR FLAMMABLE EVEN AT LOW
CONCENTRATIONS. THE ANALYZER’S EXHAUST
PORT MUST BE VENTED TO A SAFE AREA.
PERSONAL PROTECTIVE EQUIPMENT MUST BE
WORN WHEN USING OR SERVICING THIS
INSTRUMENT.
AFTER EACH USE, BEFORE TURNING OFF THE
POWER OR DISCONNECTING ANY TUBING
CONNECTED TO THE ANALYZER, REMOVE THE
PROBE AND FLUSH THE UNIT WITH AIR FOR FIVE
MINUTES
Figure 3-1: PEM-9004 Front Panel
3.3 Initial Calibration
The instrument, when first powered up will go through a self-
diagnostic test routine and auto calibrate. For this reason, when
Teledyne Analytical Instruments 14
Page 27

Portable Emissions Monitor Installation
powering up for the first time or after a lengthy period of inactivity (1
week or longer) turn the analyzer on without the probe attached.
Ambient air will be drawn in through the gas in port and used to set a
zero reference for the sensors.
The front panel display will indicate any problems encountered
during the initial calibration. It will also display the battery status using
a series of 10 battery icons. Each filled battery icon indicates 10% of
full charge remaining. For instance, if 7 filled batteries are indicated, the
state of charge of the battery is 70%.
Note: The initial auto calibration with the probe and
thermocouples unattached will cause a temperature sensor
warning. The display will indicate a T-Room Sensor and TGas Sensor failure. This is normal if the thermocouples are
left unattached.
3.4 Battery Power
The PEM-9004 has a 6V NiCad battery installed and is designed to
operate only from battery power. Continuous monitoring (although not
recommended) for up to 36 hours is possible from a single charge. The
analyzer is equipped with a 120V 60 Hz AC battery charger for
recharging the battery. The unit should be OFF when the battery charger
is connected.
CAUTION: THE ANALYZER IS NOT DESIGNED TO OPERATE IN
MONITOR MODE WITH THE BATTERY CHARGER
CONNECTED. USE ONLY THE 6V NICAD BATTERY
TO POWER THIS INSTRUMENT.
3.4.1 Charging the Battery
When recharging is necessary, turn the instrument OFF and connect
the charger to the instrument at the port labeled CHARGE. Connect the
power end of the charger to 120VAC 60 Hz power source or 220VAC
50/Hz depending on your model.
The service life and capacity of the battery are considerably
affected by the way the instrument is charged and used. In order to make
handling safer, the instrument has a load management unit.
The load management feature is responsible for maintaining the
state of charge of the battery and monitors the temperature of the battery
Teledyne Analytical Instruments 15
Page 28

Installation PEM-9004
when charging. If a NiCad battery is always charged from 80% to 100%
i.e. the state of discharge of the battery never falls below 80% before the
battery is recharged, the battery will lose some of its capacity. This is
called “memory effect” and is a well-know problem in rechargeable
batteries. The battery remembers to what extent it is run down.
A part of this memory effect is suppressed by the load management
unit. It senses the state of discharge of the battery and will not allow
recharging until battery capacity has dropped below 60%.
Constant overcharging has adverse effects on the NiCad battery as
well. The load management feature monitors the state of charge, the
voltage, and the battery temperature. When predefined limits are
exceeded, the charging process is interrupted. After the appropriate
parameters are restored, the charging process is automatically restarted.
The service life of the NiCad battery can be significantly reduced
when the instrument is operated at temperatures below 40°F (5°C).
The graphic charge level indicator on the front panel display is
comprised of 10 battery symbols and is located in the one-line status
display during the calibration phase. The PEM-9004 load management
unit continuously monitors the incoming and outgoing current during
operation and charging. Under normal operating conditions, the
instrument should be operated until the battery is completely run down
(10 empty battery icons as opposed to dark, filled icons). When this is
routinely followed, the actual capacity of the NiCad battery is accurately
shown on the display.
3.4.2 Battery Replacement
Contact factory for battery replacement
3.5 Sensor Replacement
Up to 5 electrochemical cells are installed in the PEM-9004 analyzer
depending on the options ordered. When new cells are ordered, they are
packaged in a controlled atmosphere. The instrument is shipped with the
required sensor cells installed.
Teledyne Analytical Instruments 16
Page 29

Portable Emissions Monitor Operation
Operation
4.1 User Interface
Operation of the PEM-9004 is accomplished entirely from the front
panel using the 7 function keys on the right plus the 3 menu select keys
below the screen. The menu select keys take on additional functions
depending on the menu context. Figure 4-1 shows the location of the
function and menu select keys. Table 4-1 identifies each function key
and provides a brief description of its use.
Figure 4-1: PEM-9004 Front Panel
Teledyne Analytical Instruments 17
Page 30

Operation PEM-9004
Table 4-1: Function Keys
Key Function Action
ON/OFF switch Switches the power on or off
to the instrument.
Backlight key Turns the display backlight
on or off.
Change layout Used to alter the layout of
the menu specific F1, F2,
Change display Alters line by line the way the
and F3 keys.
display is arranged.
Pump ON/OFF switch Turns the gas feed pump on
or off.
Clear key Close/cancel/reset a
function, menu or display
Enter key Confirms an entry or action.
item.
The function buttons are used to select specific options from the
displayed menu. Some menus have numerous options to select from
such as the Flue Gas menu shown in Figure 4-2. In this case the
function buttons (F1, F2, F3) will correspond to the functions on the
selected line. For instance, if line 3 is selected by scrolling down with
the “Change Layout” key (
), then pressing F1 will select the “Save”
function, F2 will select “Draught detection”, and F3 will select “CO
protect”.
Note that the screen display will list: “Save”, “Draught detection”
and “CO protect” instead of F1, F2, and F3.
Teledyne Analytical Instruments 18
Page 31

Portable Emissions Analyzer Operation
Figure 4-2: Additional Functions Available from Flue Gas Menu
4.2 Startup Screen
• Press the ON/OFF button to turn the instrument ON.
The screen that appears includes information about the
version, part-no., hours in use, etc. This initial startup screen is
shortly replaced by the Main menu screen.
•
To hold this initial screen on the display press the ENTER
button during the startup routine.
Teledyne Analytical Instruments 19
Page 32

Operation PEM-9004
• Press the CLEAR button to close it.
You can switch the backlight on/off using the backlight button) but
the other buttons have no function in this initial menu.
4.3 Main menu
The Main menu screen appears automatically after the initial
startup screen. The Main menu includes a status line and a list of
available programs associated with the 3 function buttons.
4.3.1 Status Line
The status line appears at the top of most screens and continuously
updates and displays the status of certain information such as remaining
battery power, HOLD-function, sensor-alerts, operation of the pump,
chosen fuel, time, etc. It is context sensitive and depends on the
presently displayed screen.
4.3.2 Available Programs
Below the status line is a list of available programs accessible from
the Main menu. Each program is launched by the appropriate button
indicated to the right of the program name. In most cases additional
menus and additional screens will be available from within the selected
program.
Teledyne Analytical Instruments 20
Page 33

Portable Emissions Analyzer Operation
4.4 Configure Menu
The Configure menu is used to set up the analyzer for your specific
process. From this screen you can:
Change the display order so that the information on the screen
•
is in a convenient sequence.
Select a specific fuel from a list or add a new fuel to the list.
•
•
Change the general settings of the instrument.
Return to the default configuration of the instrument.
•
To enter the Configure menu press the F2 key from the Main menu.
The following screen appears:
4.4.1 Display
The sequence of the measured or calculated parameters can be
repositioned in any way to suit your preference. This is accomplished
from the Display screen. To rearrange the measurement screen:
From the Configuration menu press F1 to bring up the Display
•
screen. The following screen appears:
Teledyne Analytical Instruments 21
Page 34

Operation PEM-9004
•
Use the arrow keys to move the underline cursor to the line
you want to move. Then press OK to activate the line for
repositioning.
Move the selected line up or down using the arrow keys.
•
When it is in the chosen position, press OK. The following
screen shows the CO measurement line repositioned to the
second line from the top.
•
Press ENTER to save the setting or CLEAR to cancel the
move.
Note: The same line cannot be displayed more than once.
Teledyne Analytical Instruments 22
Page 35

Portable Emissions Analyzer Operation
4.4.2 Fuel
The Fuel menu is used to add or remove a fuel from the list of
available fuels stored in the analyzer’s memory. Up to five additional
fuels can be configured and stored in the list. To enter the Fuel menu
press F2 from the Configuration menu. The following screen appears:
From this screen you can remove a fuel from the list, add a fuel to
the list or include all the fuels programmed into the analyzer memory
including those that have been removed.
4.4.2.1 REMOVE A FUEL FROM THE LIST
• Press the button corresponding to “Remove”. The fuel that is
highlighted in the frame will be removed from the list.
Note: The removed fuel can be reinstated using the “Include all”
function.
4.4.2.2 REINSTATE A PREVIOUSLY REMOVED FUEL
• Press the button corresponding to “Include all”. Any
previously removed fuel will be reinstated in the fuel list.
It is possible to add up to 5 additional fuels to the preinstalled list of
fuels. In order to create a new fuel the first three fuel-specific factors
(CO
, A2 and B) have to be entered. If units than ppm or % are used
2max
additional factors must be entered in order to perform the conversion to
3
mg/m
, mg/kWh or MJ/m3 correctly.
Teledyne Analytical Instruments 23
Page 36

Operation PEM-9004
4.4.2.3 INSERT A NEW FUEL
• Press the button corresponding to “Insert”. The following
screen appears:
•
Use the arrow buttons to select where you want the fuel to be
added (Fuel 1, Fuel 2 . . . etc.). Press OK when the proper
location is highlighted. the following screen appears:
Press OK again to enter the editor screen. From this screen you can
enter or edit the name of the fuel.
Teledyne Analytical Instruments 24
Page 37

Portable Emissions Analyzer Operation
•
Use the arrow keys to scroll to the appropriate character and
then press OK to accept the letter. The character will appear
on screen and the position marker incremented to the next
letter position. If you make a mistake, continue pressing the
OK button until the cursor returns to the letter in error. Then
reselect the appropriate character using the arrow keys and
press OK once again to accept the new character.
Use the cycle button to toggle between all capital letters, lower
•
case and numerical input.
When the fuel name has been entered, save the input by
•
pressing ENTER or cancel the input by pressing CLEAR.
Once the fuel name has been input and accepted, the fuel properties
can be entered in the same fashion. Use the arrow keys to scroll the
highlighted line to the parameter you want to input and press OK.
Repeat the above procedures for editing each parameter required to
specify the fuel. The parameters include:
2max
CO
A2
B
HW (heating value without condensation)
BW (heating value with condensation)
H
O (water content)
2
Vatr (quantity of fuel gas, dry)
Teledyne Analytical Instruments 25
Page 38

Operation PEM-9004
4.4.3 Settings
The Settings screen is used to set the following instrument
parameters:
Units used for draft and pressure
•
Sound off/on
•
•
Printer
User address
•
Automatic shut down of the instrument and display
•
illumination
Pressing F3 from the Configuration menu brings up the Settings
screen.
4.4.3.1
UNITS FOR DRAFT AND PRESSURE
• Use the cycle button to highlight the Draft/Press line on the
screen.
•
Use the arrow keys to toggle between the available units.
When the desired unit appears, press OK.
4.4.3.2 INSTRUMENT SOUND ON/OFF
• Use the cycle button to highlight the Sound line on the screen.
Use the arrow keys to cycle between Yes (ON) and No (OFF).
•
Press OK to save the setting.
•
Teledyne Analytical Instruments 26
Page 39

Portable Emissions Analyzer Operation
4.4.3.3 SELECT PRINTER
Two printers are available in the the PEM-9004: EUROprinter
(Euro-Ir) and HP84420B (HP-Ir). To select the printer to use:
•
Use the cycle button to move the highlight to the Printer line.
Use the arrow keys to toggle between Euro-Ir and HP-Ir.
•
When the correct printer appears, press OK.
4.4.3.4 USER ADDRESS
The User address can be included in various reports printed by the
analyzer. To enter the user address:
•
Use the cycle button to highlight the User Address line on the
screen. Press OK and the following screen appears:
•
Use the arrow keys to move the highlight to the line you want
to edit. Press OK and the edit window appears.
Teledyne Analytical Instruments 27
Page 40

Operation PEM-9004
• Use the arrow keys to select the character to enter then press
OK. The cursor moves to the next position. Repeat the process
to enter or edit the correct address line. Each line is entered
separately. When the line is correct, press ENTER to save the
result or CLR to cancel the input. The editing screen
disappears.
Note: The cycle key can be used to toggle between caps, lower
case and numerical input.
• Use the arrow keys to move the highlight to the next line for
editing. Press OK and the editing window opens. Repeat the
above procedure to enter the user address line by line pressing
ENTER after each line is completed.
After the final line is entered and saved you will be returned to
•
the Settings screen.
4.4.3.5 AUTOMATIC TIMER
The PEM-9004 is equipped with automatic timers that will turn off
the display illumination and/or shut the instrument off to conserve
battery power. Both automatic features operate independently and
initiate if no key press is detected within the user-specified intervals.
To set the automatic power off feature:
Use the cycle button to highlight the Auto Off line on the
•
screen then press OK.
•
Use the arrow keys to increase or decrease the interval. Press
ENTER to save the setting or CLEAR to cancel the input.
Note: The Auto Off interval can be set in 5 minute intervals from
0 to a maximum 60 minutes.
The automatic shut off feature is disabled if an interval is
set to 0 minutes.
To set the automatic backlight off feature:
•
Use the cycle button to highlight the Illum. Off line on the
screen then press OK.
Teledyne Analytical Instruments 28
Page 41

Portable Emissions Analyzer Operation
• Use the arrow keys to increase or decrease the interval. Press
ENTER to save the setting or CLEAR to cancel the input.
Note: The Illum Off interval can be set from 0 to a maximum of
30 seconds in one second intervals.
The automatic illumination off feature is disabled if an
interval is set to 0 seconds.
4.4.4 Set Default
The Set Default function is used to return the instrument to the
initial factory programmed settings.
CAUTION: RESTORING THE INSTRUMENT TO FACTORY
DEFAULT SETTINGS WILL RESULT IN THE LOSS OF
ALL INDIVIDUAL SETTINGS AND CANNOT BE
UNDONE EXCEPT BY REENTERING THE USER
SETTINGS! THE DATA MEMORY IS NOT AFFECTED.
To restore the instrument to the default settings:
•
Press ENTER from the Configuration Main menu. The
following screen will appear:
•
Confirm the restoration operation by pressing ENTER or
cancel the request by pressing CLEAR.
Teledyne Analytical Instruments 29
Page 42

Operation PEM-9004
4.5 Measurement Screen
The Measurement screen is the main operation mode of the
instrument. It allows you to calibrate the specific flue gas for
measurement, perform gas measurements and calculations, and perform
pressure and temperature measurements.
In the Measurement menu the following button combinations are
available:
Cycle: Scroll line by line or toggle between
available options.
Change Layout: Change the layout of the function buttons.
Gas pump: Turn the sample gas pump on or off.
Backlight: Turn backlight on the display on or off.
Reset CO2max-value:
Enter a new value for the CO
(fuel specific).
To enter the Measurement screen press ENTER from the Main
menu. The following screen appears:
2max
value
Teledyne Analytical Instruments 30
Page 43

Portable Emissions Analyzer Operation
4.5.1 Flue Gas
To calibrate the instrument on a specific flue gas or change the
current flue gas, press the cycle button from the Measurement screen.
The following screen appears:
The instrument begins an automatic calibration cycle which takes
approximately 60 seconds from a cold start. If a restart is performed
from the Measurement screen, the calibration process only takes 10
seconds. The instrument probe should not be attached during this
calibration.
After the calibration the last used fuel appears on the screen as
shown below.
At this point, either the fuel in the framed box can be chosen or
any another fuel from the database of fuels in memory. The selected fuel
has to be in the framed box.
Teledyne Analytical Instruments 31
Page 44

Operation PEM-9004
• If the correct fuel is displayed, press ENTER to confirm the
selection.
•
If it is not correct press the cycle button to cycle through the
internal list of fuels.
Press ENTER when the desired fuel is displayed.
•
Once a fuel has been selected, a range of other functions are
available and assigned to the F1, F2, F3 function buttons as shown in
Figure 4-2.
Use the cycle button to scroll line by line through the available
functions. Note that the on screen representation of F1, F2 and F3
change appropriately to the named function.
It may be more convenient to alter the position of some functions
so that they appear on the same line. For instance, if you routinely
change fuels, make a measurement then , print and save the data, it may
be more efficient to have “fuel”, “print”, and “save” buttons on the same
line to avoid having to constantly scroll back and forth to the various
lines. Use the Change Layout button to move all three functions to the
same line.
4.5.1.1 DRAFT
This button is used to start a draft measurement. When pressed, the
following screen appears:
Hold (F1): Holds the reading for the draft measurement.
Set Zero (F2): Performs a zero calibration.
Teledyne Analytical Instruments 32
Page 45

Portable Emissions Analyzer Operation
Take (F3): Transfers the draft value to the Flue Gas menu.
Note: To determine the zero point in relation to the surrounding
air pressure, unplug the air tube (with the blue connector)
before every draft measurement. Then press the F2 button
and connect the air tube again.
Cycle button: Scroll line by line through the available
functions within the Flue Gas menu.
4.5.1.2 INFO
Pressing the Info button launches the Info screen which displays
important fuel parameters, current sensor status and the O
reference
2
value.
Function buttons active in this menu are:
Cycle: Change values in the various fields.
Change Layout: Opens the sensor status screen as shown below.
CLEAR: Close the Info screen
Teledyne Analytical Instruments 33
Page 46

Operation PEM-9004
Sensor quick-diagnosis:
O2-value > 50 %
Oxygen cell OK
CO- and H
CO- sen sor with 1-12-compensation OK *
-value: 0 to 1 %
2
CO%-value: 0 to 1 %
CO-senso r for upper range OK*
NO- and/or SO2-value: 0 to 1 %
NO- and/or SO
-value OK*
2
* indicates the respective sens or opti on is disabled.
Note: If any other values are displayed, the corresponding
sensor is either in need of service or the electrolyte is
depleted.
4.5.1.3 DRAUGHT DETECTION
The function "Draught detection" displays the flue gas temperature
graphically. Changes in the temperature of the flue gas are shown with a
black bar. No bar appears if the temperature is constant.
Press the Draught Detection button to open the Draught Detection
screen.
Teledyne Analytical Instruments 34
Page 47

Portable Emissions Analyzer Operation
Draught detection is only available for the measurement of the flue
gas temperature in the Flue Gas menu.
Function buttons active in this menu are:
Cycle: Change representation of readings in the Main
menu line by line.
4.5.1.4 UNITS
The PEM will automatically convert units to the specified type as
determined from the Units menu. Press the units button to display the
Units screen.
•
Use the arrow keys to select the desired units.
Press OK to confirm the selection.
•
Teledyne Analytical Instruments 35
Page 48

Operation PEM-9004
• Press ENTER to save the unit selection or CLEAR to cancel
the operation.
The data on the Flue Gas screen will be converted and updated to
the selected units. The units will remain in use until another unit is
selected.
4.5.1.5 O
REFERENECE
2
In some instances in order to correctly convert the measured gas
values it may be necessary to modify the O
reference value. For gas and
2
oil fuels a value of 3% is preset. For solid fuels a value of 13% is preset.
To change the O
reference value, press O2 Ref from the Flue Gas
2
menu. The following screen will appear:
•
Use the arrow keys to select the desired digit.
Press OK to confirm the selection.
•
•
Press ENTER to save the new value selection or CLEAR to
cancel the operation.
4.5.1.6 EXTENDED DATA
The following data can be entered and transferred to the
measurement protocol:
Smoke-no. (soot content according to the Bacharach scale).
•
Oil derivatives.
•
•
Temperature of boiler and heat carrier.
Teledyne Analytical Instruments 36
Page 49

Portable Emissions Analyzer Operation
To enter the data, press the Extended Data button from the Flue
Gas menu. The following screen appears:
Smoke-no. input menu
The value that was determined through the mechanical soot pump
can be entered using the function button F1.The following screen
appears:
•
Use the arrow keys to select the desired digit.
•
Press OK to confirm the selection.
Press ENTER to save the new value selection or CLEAR to
•
cancel the operation.
Oil derivatives input menu
Teledyne Analytical Instruments 37
Page 50

Operation PEM-9004
Pressing F2 from the Extended Data menu displays the Oil Derivates
Input screen. In this screen there is a choice between "Yes" (oil derivatives
exist) a nd "N o" (no oil derivatives exist).
•
Press F1 if oil derivatives are present.
•
Press F3 if oil derivatives are not present.
•
Press ENTER to save the result or CLEAR to cancel the
operation.
Temperature and heat carrier
Pressing F3 from the Extended Data menu displays the Boiler
Tempera t u r e s c r e en . I n t h i s s c r e en , t he measured temperature can be
entered through the editor.
Use the arrow keys to select the desired digit.
•
Press OK to confirm the selection.
•
•
Press ENTER to save the entered temperature or CLEAR to
cancel the operation.
Teledyne Analytical Instruments 38
Page 51

Portable Emissions Analyzer Operation
Note: When the input menu for the extended data (Smoke-no.,
oil derivatives and boiler temperature) is closed all data
that has been con fir me d with the ENTER button will be
stored in the measurement protocol. Inputs of data that
have been cancelled will be discarded.
4.5.1.7 GRAPHIC
The Graphic function uses a graphical display to show the
numerical values according to the chosen fuel. The remaining content
of oxygen (O
) and the calculated waste gas losses (qA) are thereby set
2
in a relation to the excess air value (λ) and to the classical combustion
diagram.
Press Graphic from the Flue Gas menu to bring up the graphic
display as shown below:
Teledyne Analytical Instruments 39
Page 52

Operation PEM-9004
Note: If both bars extend to the optimal fuel-air relation (the gap
indicated λopt) the firing facility in question is set
correctly.
Press ENTER to close the graphics display.
4.5.1.8 FUEL
The Fuel menu is used to select a fuel from the list of stored fuels
in memory.
Press the button corresponding to Fuel from the Flue Gas menu.
The following screen appears:
In order to select the new fuel it must appear in the framed box. To
change the current fuel:
•
Use the cycle button to scroll through line by line the available
fuels in memory.
When the desired fuel appears in the framed box, press
•
ENTER or press CLEAR to abort the operation and return the
previous fuel. Pressing either ENTER or CLEAR returns the
display back to the Flue Gas menu.
4.5.1.9 CONFIG
See Section 4.4.
4.5.1.10 PROGRAM MACROS
Up to three customized measuring configurations can be created
and stored as programmed macros. These macros can be started directly
Teledyne Analytical Instruments 40
Page 53

Portable Emissions Analyzer Operation
from the Main menu. The operation of these macros can be reduced to a
few button inputs only.
Program macros can have configurations as shown below:
•
Order of the readings that are shown on the screen
•
Font size of the readings (5 or 10 characters)
Predefined fuel
•
•
Preset measuring units
To enter a programmed macro:
•
Set the configuration to the desired state
Press Macro 1, Macro 2 or Macro 3 to inform the instrument
•
which button is to be assigned the macro configuration.
•
Press ENTER to save the configured macro to the assigned
macro button or CLEAR or abort the operation.
4.5.1.11 HOLD
The Hold function is used to temporarily freeze the screen keeping
the measured data from changing, When the HOLD function is activated
all displayed measured data at the time the button was pressed will be
kept.
Note: When the HOLD function is activated the alert "HOLD"
appears in the top left corner of the status line replacing
the name of the fuel.
Teledyne Analytical Instruments 41
Page 54

Operation PEM-9004
To initiate a Hold, press Hold from the Flue Gas menu. The
following screen is representative of a hold screen:
4.5.1.12 ZOOM
The Zoom function is used to change the displayed font size and
the number of lines capable of displaying on a single screen.
There are two fonts and therefore types of layout available:
•
10-line layout
The 10-lines layout is the default layout set at the factory.
Measured parameters are shown on the left whereas readings
and units are shown on the right.
5-line layout
•
This layout reduces the number of displayed lines and
increases the font size to facilitate the reading of the display
from a greater distance. In this layout, measured parameters
and units are on the left and readings only are on the right.
The zoom button toggles the screen display between the two
layouts as shown in the following screen displays.
Note: After the device is switched off and on again, the display
resets to the 10-lines layout automatically unless the 5lines layout was a measurement configuration activated by
a macro.
Teledyne Analytical Instruments 42
Page 55

Portable Emissions Analyzer Operation
10-Line Layout
5-Line Layout
4.5.1.13 CO PROTECT
The PEM-9004 is equipped with a second pump (CO-flushingpump) in order to protect the sensitive CO-sensors from CO-overload.
The CO-flushing-pump switches on automatically when necessary,
i.e. when the admitted CO-range is exceeded or it can be switched on
manually using the CO Protect button.
When the CO Protect button is pressed the CO pump will start.
Pressing CO Protect button again will turn the pump off as long as the
Teledyne Analytical Instruments 43
Page 56

Operation PEM-9004
CO concentration is below a factory preset threshold the value of which
depends on the sensor installed.
Whenever the CO pump is on (whether it is started automatically or
manually) a scored out CO-symbol appears in the status line as shown in
the screen display below.
.
If the CO-flushing-pump starts automatically due to an excess
concentration of CO it cannot be switched off manually until the COconcentration falls below a factory preset value.
Once the CO-concentration has reached the lower range the COflushing-pump will automatically shut off.
If the analyzer is equipped with two CO-sensors the result of the
higher range sensor will be displayed when the lower range sensor is
flushed.
The active CO-flushing-pump has no influence on any other
sensors within the analyzer.
4.5.1.14 PRINT
The measured data can be printed out by means of a wireless
infrared printer.
The printer in use can be selected from the Configuration menu.
See Section 4.4.3.3. The print speed depends on the printer selected.
Make sure the proper printer is activated to avoid possible failures while
printing.
Teledyne Analytical Instruments 44
Page 57

Portable Emissions Analyzer Operation
The PEM-9004 is capable of multi-tasking so the analyzer can be
taking measurements, performing calculations, etc during the printing
procedure. Printing takes place simultaneously in the background as
other analyzer operations are being performed.
To print a screen, press the Print button from the Flue Gas menu.
4.5.2 Temperature
The temperature program can be started by pressing F1 from the
Measurement screen.
The PEM-9004 supplies two temperature measurement channels
(T1 and T2). Measurement channel T1 is displayed with a resolution of
0.1°C whereas channel T2 has a resolution of 1°C.
The Temperature screen is shown below:
Available functions from within the temperature program are:
Hold: Freezes the current temperature readings.
Max/Min Reset: Resets the current temperature readings.
Print: Prints out the currently displayed temperature
screen
Cycle button: Change units (°C or °F).
Teledyne Analytical Instruments 45
Page 58

Operation PEM-9004
4.5.3 Pressure
The pressure program can be started by pressing F2 from the
Measurement screen.
Available functions from within the pressure program are:
Hold: Freezes the current pressure readings.
Max/Min Reset: Resets the current pressure readings.
Print: Prints out the currently displayed pressure screen
Cycle button: Change units (°C or °F).
ENTER button: Reset the pressure to zero.
The following units for pre s sure can be selected:
hPa,
mbar,
mmWC (millimeter water column)
mmHg (millimeter mercury column)
inWC (inches water column)
inHg (inches mercury column)
Psi (pounds per square inch)
Teledyne Analytical Instruments 46
Page 59

Portable Emissions Analyzer Operation
The conversion takes place in the active measurement program as
well as in the HOLD-mode.
4.5.4 CO (O2) Measurement
This is a reduced measurement (without temperature measurement)
for analyzing the flue gas. For this measurement program the same
keypad functions apply as described in Section 4.5.1
that the number of readings is reduced to five significant flue gas values.
Flue Gas except
The font size of the readings can be changed with the Zoom
function. See Section 4.5.1.12
Zoom.
Important notice concerninq measurement of
S02 and N02 (option)
Teledyne Analytical Instruments 47
Page 60

Operation PEM-9004
SO2 and NO2 gases have a high solubility in water. For
measurement of SO
and NO2 concentrations it is necessary to remove
2
the condensate residues form the gas filtration and drying system. These
residues can absorb SO
and NO2 which could cause erroneous
2
measurements.
Furthermore, when carrying out SO
and NO2 relevant
2
measurements no additional desiccant should be used. Even when dry
the dessicant can absorb a significant amount of SO
and NO2.
2
4.6 Macro Start
The Macro Start function launches configuration settings
previously programmed and saved as a macro. See Section 4.5.1.10.
Macros greatly facilitate the efficient operation of the PEM-9004
by loading and initiating convenient configuration settings using only a
few keystrokes. Up to three customized macros can be programmed and
used.
To launch a previously saved macro call the Macro Start function
by pressing the cycle button from the Main menu.
Teledyne Analytical Instruments 48
Page 61

Portable Emissions Analyzer Operation
Press F1, F2, or F3 to start a previously programmed and saved
macro.
When the macro is launched, the macro the settings it is based on
will be activated automatic a l l y after the calibr a t i o n p h as e a n d w i t h o u t
displaying the list of fuels.
If a Set Default operation (restore default settings) i s carried out, all
macro-settings will be lost. See Section 4.4.4. Without customized
settings, the settings for the fuel gas analysis will be used.
4.7 Time-Date
The integrated clock (time and date) can be set from the Time-Date
screen available from the Main menu.
To set the time and date, press F2 from the Main menu. The
following screen will appear:
Teledyne Analytical Instruments 49
Page 62

Operation PEM-9004
The time will be displayed in the top left corner of the status line if
not replaced by an alert or other superimposed information.
Time and date will be saved together with the corresponding data
and will appear on any print-outs of the measured data.
Note: The time value will not automatically adjust for daylight
savings changes but the date value will account for leap
years.
To set the time:
• Press F1 from the Time-Date screen. The following screen
will appear:
•
Use the arrow keys to select the desired digit.
Teledyne Analytical Instruments 50
Page 63

Portable Emissions Analyzer Operation
• Press OK to confirm the selection and move to the next digit.
•
Press ENTER to save the entered tim e or CLEAR to cancel the
operation.
Note: While setting the time, the clock in the editor window will be
stopped and will not restart until the new time is confirmed.
To set the date:
• Press F2 from the Time-Date screen. The following screen
will appear:
•
Use the arrow keys to select the desired digit.
•
Press OK to confirm the selection and move to the next digit.
Press ENTER to save the entered date or CLEAR to cancel the
•
operation.
4.8 Memory
The data memory is structured according to the menu structure
shown in Figure 4.3.
Teledyne Analytical Instruments 51
Page 64

Operation PEM-9004
Figure 4-3: Data Memory Structure
The organization of the memory is dynamic, i.e. only already existing
directories and files are available for saving data. Additional directories
and files can be created at any time.
Names of both directories and files can be defined by the user. Directories
could for instance be used for the names of clients or facilities (or client
numbers). Files could be named after the types of measurement.
The PEM-9004 instrument is shipped without preset directories and
files.
Memory is accessed from the Memory menu available by pressing
F3 from the Main menu. The following screen appears:
Teledyne Analytical Instruments 52
Page 65

Portable Emissions Analyzer Operation
From this menu you can:
•
Open an existing directory (F1)
•
Create a new directory (F2)
Erase an existing directory (F3)
•
To save a file to memory it must be saved to an existing directory.
To save a file to an existing directory:
Press F1 to bring up a list of available directories.
•
•
Use the arrow keys to move to the desired directory.
Press OK. The standard editor window will appear.
•
Use the arrow keys to select the character or digit. Use the
•
cycle button to toggle between all capital letters, lower case
and numerical input.
Press OK to accept the character and move to the next
•
position.
When the file name is correctly entered, press ENTER to save
•
the file or CLEAR to quit without saving.
To create a new directory:
•
Press F2 to open the directory editing window.
•
Use the arrow keys to select the character or digit. Use the
cycle button to toggle between all capital letters, lower case
and numerical input.
Teledyne Analytical Instruments 53
Page 66

Operation PEM-9004
• Press OK to accept the character and move to the next
position.
•
When the directory name is correctly entered, press ENTER to
create and save the directory or CLEAR to quit without
creating the directory.
To erase and existing file or directory:
•
Press F3 from the Memory menu.
Use the arrow keys to move to the directory or file.
•
•
Press OK to select the directory or file.
Press ENTER to erase the directory or file or press CLEAR to
•
abort the action.
4.9 USB-Interface
A USB connection port is provided for special service and data
communication via PC, laptop, notebook, etc. See Figure 3-1.
4.10 Charge Control
The battery is charged automatically when the analyzer is switched
on and off after the battery charger has been connected. The battery can
be recharged as well with the analyzer on. The charge control has both
an active phase and a passive phase.
During active recharging, parameters related to the battery and the
recharging process are displayed on the charge control screen.
Teledyne Analytical Instruments 54
Page 67

Portable Emissions Analyzer Operation
U batt. = current voltage
I Bat = current amperage
T Bat = measured battery temperature
Cap. = current battery capacity
To perform a measurement while charging, press ENTER from the
Charge Control menu. While in the measurement mode the battery will
be recharging and continuously monitored by the system.
When the battery is fully charged, the analyzer automatically
switches to the passive recharging mode (trickle charging) and the
charge control screen disappears.
When active recharging is finished the charger can remain
connected to the device without damaging the battery.
CAUTION: USE ONLY THE SUPPLIED OR FACTORY
AUTHORIZED
THE BATTERIES. ANY OTHER CHARGER MAY
CAUSE
DAMAGE TO THE BATTERY AND/OR
CHARGER UNIT FOR RECHARGING
THE ANALYZER.
4.11 Battery / Line Voltage Operation
Battery operation: Maximum of 36 hours of continuous
measuring (with backlight).
Battery charger: 95-135 VAC 60 Hz USA version
200-250 VAC European version
The analyzer employs Intelligent monitoring by means of an
integrated charge-management-system. To maintain the service life and
performance of the NiCd battery, please observe the following battery
charging instructions.
4.11.1 Charging the Battery
The PEM-9004 is equipped with an NiCd storage battery. The
service life and capacity of the battery are considerably affected by the
way the instrument is charged and used. In order to make the handling
Teledyne Analytical Instruments 55
Page 68

Operation PEM-9004
safer, the instrument has an efficient battery management system unit for
battery charging.
The service life of the NiCd battery can be significantly reduced
when the instrument is operated at temperatures below 5°C (40 °F).
The graphic charge-level indicator of the analyzer consists of 5
elements of a battery symbol and visually informs the user of the battery
status.
During normal use it is recommended not to recharge the battery
until it is run down completely. The battery can be recharged at any time
however, since the load management unit recognizes the charging needs
of the the battery. If the battery has sufficient capacity remaining the
load management unit may deny further recharging until the remaining
capacity drops further.
The charge-level indicator may not accurately indicatethe true
charge-level under the following circumstances:
The device is used outside the permitted temperature range.
•
•
The battery is old.
•
Incomplete charging cycles (charging/discharging) are carried
out.
If incomplete charging cycles have been used, the indicator can be
corrected by discharging the batteries by switching on the device until it
runs out of battery power and switches off automatically. Then connect
the device to the charger and start the charging function (recharging
completely takes approx. 5 hours, depending on the ambient
temperature). After active recharging is complete, the PEM-9004 will
switch off automatically. This "reconditioning cycle" can be repeated as
often as necessary.
4.11.2 Battery Replacement
For replacement of a used or dead battery, the analyzer
must be returned to the factory or authorized service facility.
Teledyne Analytical Instruments 56
Page 69

Portable Emissions Analyzer Maintenance
Maintenance
5.1 Routine Maintenance
Aside from normal cleaning and checking for leaks at the gas
connections, routine maintenance is limited to the following items:
WARNING: SEE WARNINGS ON THE TITLE PAGE OF THIS
MANUAL.
•
Waste Gas Cleaning System
Refer to Figure 5-1. Empty the condensate reservoir
completely after each measuring operation. Water residues
within the measuring instrument will destroy the pumps and
sensors.
CAUTION: A DAMAGED FILTER AND / OR IMPROPERLY
INSTALLED FILTER WILL GREATLY DECREASE OR
ELIMINATE THE FILTERING FUNCTION. CONTINUED
USE WILL RESULT IN DAMAGE TO THE PUMPS AND
SENSORS.
•
Filter Maintenance
Check the micro filter for contamination. Replace if
necessary.
If the pump capacity is reduced, exchange the diaphragm
filter.
General Maintenance
•
Make sure that threaded parts are straight when installed
and tighten them moderately.
Check O-rings for proper sealing.
Check all connectors and fittings. Makes sure all
connections are secure and leak tight for gas connections.
Teledyne Analytical Instruments 57
Page 70

Maintenance PEM-9004
Remove any gas residue.
•
Storage
Store in a cool and dry environment at a temperature of
approx. 20°C (60°F).
Damage:
•
Warranty obligations do not apply to damage caused by
improper handling, negligence and grave external
influences.
Figure 5-1 Water Trap and Filter
Teledyne Analytical Instruments 58
Page 71

Portable Emissions Analyzer Appendix
Appendix
Specifications
Sensors:
O
Measurement _____________________________
2
Sensor: Electrochemical, cel l
Range: 0-20.9 vol.% O
2
Resolution: 0.1 vol. %
Accuracy: ± 0.2% vol.
Response Time (T97): <70 sec
CO2 Determination _____________________________
(Calculated from O2)
Sensor: none—calculated value
Display Range: 0-CO
2max
vol. %
Resolution: 0.1 vol. %
Accuracy: 0.2% vol.
Response time (T97): <70 sec
CO Measurement _____________________________
(with H2 compensation)
Sensor: Electrochemical, cell
Measurement Range: 0-4000 ppm
Resolution: 1 ppm
Accuracy: ± 5 ppm (up to 150 ppm)
± 5% of reading (up to 4000 ppm)
Response Time (T90): <60 sec
NO Measurement _____________________________
(Option)
Sensor: Electrochemical, electrochemical cell
Measurement Range 0-2000 ppm
Resolution: 1 ppm
Teledyne Analytical Instruments 59
Page 72

Appendix PEM-9004
Accuracy: ± 5 ppm (up to 150 ppm)
± 5% of reading (up to 2000 ppm)
Response Time (T90): <60 sec
CO Measurement _____________________________
(without H2 compensation)
(Option)
Sensor: Electrochemical, electrochemical cell
Range: 0-2.0% vol (20,000 ppm)
Resolution: 0.01% vol
Response Time (T90): <60 sec
SO2 Measurement _____________________________
(Option)
Sensor: Electrochemical, electrochemical cell
Range: 0-2000 ppm
Resolution: 1 ppm
Accuracy: ± 5 ppm (up to 150 ppm)
± 5% of reading (up to 2000 ppm)
Response Time (T90): <60 sec
Waste or Flue Gas Temperature Measurement _____________
Sensor: K-type thermocouple (NiCr-Ni)
Range: + 32—1850°F (0—1000°C)
Resolution: 0.1°F or °C
Accuracy: ± 2°F, ± 1°C (0—400°C)
±0.5% of reading (up to 1000°C)
Combustion Air or Ambient Air
Temperature Measurement _____________________________
Sensor: K-type thermocouple (NiCr-Ni)
Range: -5—212°F (-20—100°C)
Resolution: 0.1°F or °C
Accuracy: ± 2°F, ± 1°C (0—100°C)
± 6°F, ± 3°C (-20—0°C)
Teledyne Analytical Instruments 60
Page 73

Portable Emissions Analyzer Appendix
Draft or Pressure Measurement __________________________
Sensor: Piezoresistive pressure sensor
Range: ± 60 in. H
Resolution: 0.01 in. H
Accuracy: ± 0.08 in. H
(up to ± 8.0 in. H
± 1% or reading (up to ± 80.0 in. H
± 3% or reading (above ± 80.0 in. H
O or ± 150 hPa
2
O or hPa
2
O or ± 0.02 hPa
2
O or ±2.00 hPa)
2
O/ ±20.0 hPa)
2
O / ±20.0 hPa)
2
Power: NiCad storage battery 6V/4Ah with
battery charger.
Up to 30 hours continuous operation per
charge
On board Power Management Unit
Battery Charger: 95-135 VAC 60 Hz USA version
200-250 VAC European version
Display: LCD with backlight. 5 or 10 line display.
Large or small font user selectable.
Gas Handling: Internal, with 0.8 lpm sample pump and
separate purge pump, integrated gas
cleaning system with water trap and filters
External probe with retainer cone
Internal memory: 100 blocks available
Computer Interface: USB standard
Printer: Integral PIN printer
Dimensions:
Housing: 273 x 247 x 178 mm (L x W x H)
10.75 x 9.72 x 7 inches
Dustproof, waterproof
Weight: Approx. 8 lbs. (3.8 kg)
Mechanical Connections: 7.8mm dia.
Thermocouple Connectors: Omega
Teledyne Analytical Instruments 61
Page 74

Appendix PEM-9004
Recommended Spare Parts List
Teledyne Analytical Instruments 62
Page 75

Portable Emissions Analyzer Appendix
A minimum charge is applicable to spare parts orders.
Note: Orders for replacement parts should include the part
number (if available) and the model and serial number of
the instrument for which the parts are intended.
Orders should be sent to:
TELEDYNE Analytical Instruments
16830 Chestnut Street
City of Industry, CA 91749-1580
Phone (626) 934-1500, Fax (626) 961-2538
Web: www.teledyne-ai.com
or your local representative.
Reference Drawings
Teledyne Analytical Instruments 63
Page 76

Appendix PEM-9004
Teledyne Analytical Instruments 64
Page 77

Portable Emissions Analyzer Index
Index
active recharging ............................. 54
address............................................. 63
ambient air temperature................... 60
ambient temperature.......................... 9
analysis range.................................... 3
applications........................................ 1
auto calibrate ................................... 14
automatic shut down........................ 26
automatic timer...................... See timer
Bacharach scale............................... 36
battery.............................................. 15
battery capacity.......................... 15, 16
battery charger........................... 15, 61
b a t t ery r e p l a c e m e n t .................... 56
battery status display ....................... 15
boi ler t e m p erat u r e s c r e en ................... 38
calculated values............................ 2, 5
calibration.................................. 14, 31
caution sign........................................ v
change font size............................... 42
charge control.................................. 54
charge level indicator ...................... 16
charge-level indicator...................... 56
charge-management......................... 55
clock................................................ 49
CO concentration....................... 3, 5, 9
CO measurement
with compensation...................... 59
without compensation................. 60
CO protect button............................ 43
CO sensor........................................ 59
CO sensor protection................... 3, 10
CO threshold...................................... 3
CO undiluted ..................................... 9
CO
calculation.................................. 6
2
CO
concentration ............................. 1
2
CO2 determination.......................... 59
CO2 max ........................................... 6
combustible gas warning................. xii
combustion........................................ 1
combustion efficiency ............1, 3, 6, 7
combustion value............................... 5
condensate reservoir........................ 57
condensation trap...........See water trap
configure menu................................ 21
continuous monitoring..................... 15
copyright............................................ii
create directory................................53
cross-sensitivity................................... 6
damage............................................. 13
database ............................................. 1
dew point ...........................................5
display................................................4
display screen .................................. 21
draft..................................................32
draft pressure ..................................... 5
draught detection ............................. 34
drawings...........................................63
dry basis.............................................8
efficiency.......................................5, 7
electrochemical cell............. 5, 6, 9, 16
equation ..................................... 6, 7, 9
Eta..................................See efficiency
excess air........................................1, 3
excess air calculation.........................8
excess air value................................ 39
Fara day's L a w o f E l e c t r o l y s i s.............. 6
figures listing.....................................x
file save............................................ 53
filter ......................................... 3, 9, 57
fine filter..........................................10
flue gas......................................... 5, 31
flue gas temperature......................... 35
front panel.................................... 4, 14
fuel menu................................... 23, 40
fuel name ......................................... 25
fuels list..............................................1
function button................................... 4
function key.....................................17
gas...................................................... 1
gas concentration...............................5
gas conditioning................................. 9
gas stream temperature......................9
graphic function...............................39
heat capacity ......................................7
hold.................................................. 41
Teledyne Analytical Instruments 65
Page 78

Index PEM-9004
info screen........................................33
installation........................................13
instrument description........................3
lambda................................................8
LCD..............................................4, 61
load management .............................15
macro................................................40
manuals, additional ...........................vi
measured parameters..........................1
measurement ....................................47
measurement screen.........................30
measuring capibility...........................2
memory......................................51, 61
memory effect..................................16
menu select button..............................4
menu select key................................17
model information............................ iii
NO concentration...............................5
NO sensor.........................................59
O
concentration.................................5
2
O
reference value......................33, 36
2
O2 sensor..........................................59
oil der i v a t e s inpu t...............................38
open directory ..................................53
operation...........................................17
operator interface ...............................4
O-ring...............................................57
output................................................10
fuel cell..........................................6
overcharging battery.........................16
particle filter.....................................10
passive recharging ............................55
piezoresistive sensor.........See pressure
sensor
port.......................................1, 4, 9, 13
power................................................61
pressure............................................13
pressure differential............................5
pressure measurement..................3, 61
pressure program..............................46
pressure sensor...............................3, 9
printer.....................1, 4, 26, 27, 44, 61
probe ..............................................3, 9
probe connection..............................13
programs list.....................................20
pump ..................................3, 9, 43, 57
purge line..........................................10
qA............................See waste gas loss
reference drawings..........See drawings
residue..............................................10
routine maintenance......................... 57
safety information.............................. v
sample system.................................... 9
sensor........................................... 5, 59
sensor cell........................................ 10
sensor protection........... See CO sensor
protection
sensor status..................................... 33
serial number....................................iii
service life
battery......................................... 16
set default ........................................ 29
settings screen.................................. 26
smoke no. input ............................... 37
SO
concentration.............................. 5
2
SO2 sensor....................................... 60
sound ............................................... 26
spare parts........................................ 62
spare parts listing............................. 62
status line......................................... 20
stoichiometry..................................... 8
tables listing...................................... xi
technician symbol.............................. v
Teledyne address............................. 63
temperature differential..................... 5
temperature program ....................... 45
temperature range.............................. 3
thermocouple..................................... 9
thermocouple jack ........................... 13
time- d a t e screen ............................... 49
timer ................................................ 28
total energy loss................................. 7
trend indication.................................. 8
type K thermocouple......................... 3
unit conversion.................................. 4
units....................................1, 4, 26, 35
USB....................................1, 4, 54, 61
user address ............................... 26, 27
user responsibility............................. iv
variables ............................................ 8
vent.................................................. 14
warning sign...................................... v
warranty............................................. ii
waste gas ........................................... 9
waste gas loss ............................ 3, 5, 7
waste gas sampling............................ 3
waste gas temperature...................... 60
water separator .................................. 3
water trap......................................... 10
web address ..................................... 63
Teledyne Analytical Instruments 66
Page 79

Portable Emissions Analyzer Index
website address................................. vi
zero reference.................................. 15
zoom................................................42
Teledyne Analytical Instruments 67
 Loading...