

Page 1

Telecor™ Display Phone
Model 200 (DP200)
User’s Guide
Telecor, Inc.
Page 2

Copyright Notice
This manual and the software described in it are copyrighted, with all rights reserved. Under the copyright laws, neither this manual nor
the software may be copied, in whole or in part, without the written consent of Telecor, Inc. except as provided in the applicable Telecor,
Inc. software license agreement. Under the law, copying includes translating into another language or format.
The software contains proprietary, confidential and unpublished information of Telecor, Inc. No use or disclosure of any portion of this
manual may be made without the prior express written consent of Telecor, Inc.
© 1992–2001 Telecor, Inc. All Rights Reserved.
Printed in the People’s Republic of China.
Special Note for Government Users
This manual and the software described in it are provided with “Restricted Rights.” Please refer to the applicable Telecor, Inc. license
agreement for a complete description of the rights granted.
Manufacturer:
Telecor, Inc.
1114 Westport Crescent
Mississauga, ON, L5T 1G1
Hardware Warranty
Please refer to the Telecor, Inc. “Limited Hardware Warranty” which is Appendix A of this guide.
Software Provided Under License
All software is provided pursuant to a license. Please refer to the “Software License Agreement” which is Appendix B of this guide.
Disclaimer
The Software and related documentation are provided “AS IS” and without warranty of any kind and Telecor, Inc. EXPRESSLY
DISCLAIMS ALL WARRANTIES, EXPRESS OR IMPLIED, INCLUDING, BUT NOT LIMITED TO, THE IMPLIED WARRANTIES OF MERCHANTABILITY, FITNESS FOR A PARTICULAR PURPOSE AND NON-INFRINGEMENT. TELECOR, INC. DOES
NOT WARRANT THAT THE FUNCTIONS CONTAINED IN THE SOFTWARE WILL MEET YOUR REQUIREMENTS, OR THAT
THE OPERATION OF THE SOFTWARE WILL BE UNINTERRUPTED OR ERROR-FREE, OR THAT DEFECTS IN THE SOFTWARE WILL BE CORRECTED. FURTHERMORE, TELECOR, INC. DOES NOT WARRANT OR MAKE ANY REPRESENTATIONS REGARDING THE USE OR THE RESULTS OF THE USE OF THE SOFTWARE OR RELATED DOCUMENTATION IN
TERMS OF THEIR CORRECTNESS, ACCURACY, RELIABILITY, OR OTHERWISE. NO ORAL OR WRITTEN INFORMATION
OR ADVICE GIVEN BY TELECOR, INC. OR A TELECOR, INC. AUTHORIZED REPRESENTATIVE SHALL CREATE A WARRANTY OR IN ANY WAY INCREASE THE SCOPE OF THIS WARRANTY. SHOULD THE SOFTWARE PROVE DEFECTIVE,
YOU (AND NOT TELECOR, INC. OR A TELECOR, INC. AUTHORIZED REPRESENTATIVE) ASSUME THE ENTIRE COST OF
ALL NECESSARY SERVICING, REPAIR, OR CORRECTION. UNDER NO CIRCUMSTANCES, INCLUDING NEGLIGENCE,
SHALL TELECOR , INC. BE LIABLE FOR ANY INCIDENTAL, SPECIAL, OR CONSEQUENTIAL DAMAGES THAT RESULT
FROM THE USE OF OR INABILITY TO USE THE SOFTWARE OR RELATED DOCUMENTATION, EVEN IF TELECOR , INC.
OR A TELECOR , INC. AUTHORIZED REPRESENTATIVE HAS BEEN ADVISED OF THE POSSIBILITY OF SUCH DAMAGES.
The Software is not designed or licensed for use in in-line control of equipment in hazardous environments such as operation of nuclear
facilities, aircraft navigation or control, or direct life support machines.
Telecor, Inc. reserves the right to revise this publication and to make changes to its content, at any time, without any obligation to notify
any person or entity of such revisions or changes.
Trademarks
Telecor, the Telecor logo, VS1, Attendant98, Connect98, and When Business Communications Mean Business are trademarks or
registered trademarks of Telecor, Inc.
Patents
Patents Pending
Additional Information
This document is not a comprehensive technical reference guide.
E:\V-01/ku
January, 2001
Page 3

FCC Information
This equipment complies with Part 68 of the FCC rules. On the bottom of this equipment, there is a label that contains, among other
information, the FCC Registration Number and Ringer Equivalence Number (REN) for this equipment. The telephone company may
require this information prior to connection of this equipment.
This equipment requires USOC: RJ11 and FIC: 02LS2 which are provided in the installation of the Telecor VS1 Phone System.
An FCC compliant telephone cord and modular plug is provided with this equipment. This equipment is designed to be connected to the
telephone network or premises wiring using a compatible modular jack which is Part 68 compliant.
The REN is useful to determine how many devices you may connect to a single telephone line and still have all of those devices ring when
your number is called. In most, but not all areas, the sum of all RENs per line should be five (5.0) or less. Your local telephone company
can verify the maximum REN per line for your calling area.
If this equipment causes harm to the telephone network, the telephone company may notify you in advance that temporary discontinuance
of service is required. If advance notice is not practical, the telephone company will notify you of discontinuance as soon as possible. You
will also be advised of your right to file a complaint with the FCC.
The telephone company may make changes in its facilities, equipment, operations or procedures that could affect the operation of your
telephone equipment. If this happens, the telephone company will provide advance notice so that you can modify your equipment to
maintain uninterrupted service.
If the trouble causes harm to the network, the telephone company may ask you to disconnect this equipment from the network until the
problem has been solved. If you experience trouble with this telephone equipment, please contact:
Telecor, Inc., 1114 Westport Crescent, Mississauga, ON, L5T 1G1; 905-564-0801.
You should not try to repair this equipment yourself.
This equipment may not be used on public coin service provided by the telephone company. Connection to party lines is subject to state
tariffs. (Contact your state public utility commission or corporation commission for information.)
This equipment is hearing aid compatible.
Note: This equipment has been tested and found to comply with the limits for a Class A digital device, pursuant to part 15 of the FCC
Rules. These limits are designed to provide reasonable protection against harmful interference when the equipment is operated in a
commercial environment. This equipment generates, uses and can radiate radio frequency energy and if not installed and used in
accordance with the instruction manual, may cause harmful interference to radio communications. Operation of this equipment in a
residential area is likely to cause harmful interference in which case the user will be required to correct the interference at their own
expense.
Telecor Display Phone Model 200 (DP200)
Model Number: HAC DP200
FCC Registration Number: FTZCHN-31227-KX-E
IC Certification Number: 2760 7997 A
AC REN: 1.6B
Connectors: (FCC USOC) RJ11C and (IC) CA11A
Authorized Network Port: (FCC FIC) 02LS2 and (IC) LS
Page 4

CS-03 Information (Canada)
NOTICE: The Industry Canada label identifies certified equipment. The certification means that the equipment meets certain telecommuni-
cations network protective, operational and safety requirements. The Department does not guarantee the equipment will operate to the
user's satisfaction.
Before installing this equipment, users should ensure that it is permissible to be connected to the facilities of the local telecommunications
company. The equipment must also be installed using an acceptable method of connection. The customer should be aware that compliance
with the above conditions may not prevent the degradation of service in some situations.
Repairs to certified equipment should be made by an authorized Canadian maintenance facility designated by the supplier. Any repairs or
alterations made by the user to this equipment, or equipment malfunctions, may give the telecommunications company cause to request the
user to disconnect the equipment.
Users should ensure for their own protection that the electrical ground connections of the power utility, telephone lines and internal metallic
water pipe system, if present, are connected together. This precaution may be particularly important in rural areas.
CAUTION: Users should not attempt to make such connections themselves, but should contact the appropriate electric inspection authority
or electrician as appropriate.
NOTICE: The Ringer Equivalence Number (REN) assigned to each terminal device provides an indication of the maximum number of
terminals allowed to be connected to a telephone interface. The termination on an interface may consist of any combination of devices
subject only to the requirement that the sum of the Ringer Equivalence Numbers of all the devices does not exceed 5.
CS-03 Information (Canada)
AVIS: L'étiquette d'Industrie Canada identifie le matériel homologué. Cette étiquette certifie que le matériel est conforme aux normes de
protection, d'exploitation et de sécurité des réseaux de télécommunications, comme le prescrivent les documents concernant les exigences
techniques relatives au matériel terminal. Le Ministère n'assure toutefois pas que le matériel fonctionnera à la satisfaction de l'utilisateur.
Avant d'installer ce matériel, l'utilisateur doit s'assurer qu'il est permis de le raccorder aux installations de l'entreprise local de télécommunication. Le matériel doit également être installé en suivant une méthode acceptée de raccordement. L'abonné ne doit pas oublier qu’il est
possible que la conformité aux conditions énoncées ci-dessus n'empêche pas la dégradation du service dans certaines situations.
Les réparations de matériel homologué doivent être coordonnées par un représentant désigné par le fournisseur. L'enterprise de télécommunications peut demander à l'utilisateur de débrancher un appareil à la suite de réparations ou de modifications effectuées par l'utilisateur ou
à cause de mauvais fonctionnement.
Pour sa propre protection, l'utilisateur doit s'assurer que tous les fils de mise à la terre de la source d'énergie électrique, de lignes téléphoniques
et des canalisations d'eau métalliques, s'il y en a, sont raccordés ensemble. Cette précaution est particulièrement importante dans les régions
rurales.
AVERTISSEMENT: L'utilisateur ne doit pas tenter de faire ces raccordements lui-même; il doit avoir recours à un service d'inspection des
installations électriques, ou à un électricien, selon le cas.
AVIS: L'indice d'équivalance de la sonnerie (IES) assigné à chaque dispositif terminal indique le nombre maximal de terminaux qui peuvent
être raccordés à une interface. La terminaison d'une interface téléphonique peut consister en une combinaison de quelques dispositifs, à la
seule condition que la somme d'indices d'équivalence de la sonnerie de tous les dispositifs n'excède pas 5.
Page 5

Contents v
Contents
Welcome .................................................................................. ix
Conventions in this Guide ...................................................... x
Font Styles Used...................................................................... x
OVERVIEW ............................................................................................ 1
Overview of the Telecor Display Phone Model 200 (DP200) . 3
The Character Display ............................................................. 4
Internal Call Display ....................................................................... 5
External Calls Transferred by a Receptionist .................................. 5
Feature Status Display ................................................................... 6
External Calls Transferred by an Auto Attendant .......................... 6
Voice Mail Status Display ............................................................... 7
Automatic Call Distribution Status Display ................................... 7
Standard Feature Buttons ....................................................... 8
Custom Feature Buttons .......................................................... 8
BASIC OPERATION .............................................................................. 11
Overview of Basic Operation ................................................ 13
Making an Internal Call ......................................................... 13
Making an External Call ........................................................ 14
Direct External Dial Tone .............................................................. 14
Enabling Direct External Dial Tone ........................................ 15
Disabling Direct External Dial Tone ....................................... 15
Disconnecting a Call ............................................................. 15
Answering a Call ................................................................... 16
Caller ID ........................................................................................ 16
Answering Multiple Calls ............................................................. 17
Placing a Call On Hold .......................................................... 18
Taking a Call Off Hold ........................................................... 18
Transferring a Call ................................................................. 18
Redialing an External Number ............................................. 19
Using the Speakerphone ...................................................... 19
Making a Call with the Speakerphone .......................................... 19
Answering a Call with the Speakerphone ..................................... 20
Disconnecting a Call with the Speakerphone ............................... 20
Page 6

vi Telecor DP200 Display Phone User’s Guide
ADVANCED FEATURES ....................................................................... 21
Advanced Features ................................................................ 21
Overview of Advanced Features .......................................... 23
Blind Call Processing ............................................................ 23
Blind Hold .................................................................................... 23
Blind Transfer to Voice Mail ......................................................... 24
Blind Transfer to a Specific Extension .......................................... 24
Conference Rooms ................................................................ 24
Gaining Access to a Conference Room ........................................ 25
Locking or Unlocking a Conference Room ................................... 25
Conference Calling ................................................................ 26
Forwarding Calls ................................................................... 27
Forwarding Calls to Another Extension ....................................... 27
Forwarding Calls to Your Voice Mail ............................................ 28
Do Not Disturb (DND) .......................................................... 28
Forwarding Calls From an Extension ............................................ 29
Cancelling Forwarding ................................................................. 30
Picking Up a Call Ringing at Another Extension ................ 30
Picking Up a Call in a Group ......................................................... 31
Parking a Call ........................................................................ 31
Retrieving a Parked Call ................................................................ 32
Paging Over a Paging Zone ................................................. 32
Using Personal Speed Dials ................................................. 33
System Speed Dials ...................................................................... 33
Customizing the DP200 Display Phone ................................ 34
Feature Buttons ............................................................................ 34
Customizing Feature Buttons ................................................ 34
Reviewing Feature Buttons ................................................... 36
Customizing Extension View Buttons (DSS/BLF) ......................... 36
Customizing an Individual Extension View Button ................ 37
Additional Monitoring Features .................................................. 37
Guest Mailboxes .................................................................... 38
Work Groups ......................................................................... 38
Conference Rooms ................................................................ 38
Automatic Call Distribution (ACD) ....................................... 38
Changing the Number of Phone Lines ......................................... 38
Programming Personal Speed Dials .............................................. 39
Reviewing Personal Speed Dials .................................................. 40
Setting Up Office or Warehouse Mode ........................................ 41
Changing the Page Volume .................................................... 42
Changing Ring Select ............................................................ 42
Changing the Ringer Volume ................................................. 43
Page 7

Contents vii
Switching to Headset Mode ......................................................... 44
Cordless Phone and Modem Port ................................................. 45
Disabling Call Waiting Tones ....................................................... 45
Handsfree ..................................................................................... 46
Turning the Ringer On or Off ....................................................... 47
VOICE MAIL ......................................................................................... 49
Overview of Voice Mail ......................................................... 51
Gaining Access to Your Voice Mail....................................... 51
The Voice Mail Prompts ................................................................ 51
Stopping a Recording ................................................................... 52
Using the Keypad for Voice Mail
Features ................................................................................. 52
Listening to a Voice Mail Message ....................................... 53
Setting Up Voice Mail Features ............................................. 54
Creating or Changing Your
Voice Mail Passcode .............................................................. 55
Recording a Voice Mail Greeting .......................................... 55
Setting Up Your Name in the
Dial By Name Directory ......................................................... 56
Blind Transferring a Call to Voice Mail ................................. 56
Sending a Message to an Individual, Group, or Range of
Extensions ............................................................................. 57
Sending a Message to an Individual or Group ............................. 57
Sending a Message to a Range of Extensions .............................. 58
Forwarding a Voice Mail Message to an Individual, Group, or
Range of Extensions ............................................................. 58
Forwarding a Voice Mail Message to an Individual or Group ..... 59
Forwarding a Voice Mail Message to a Range of Extensions ...... 59
Gaining Access to Your Voice Mail From Another
Internal Phone ........................................................................ 60
Gaining Access to Your Voice Mail From an
External Line .......................................................................... 60
Voice Mail Notification on a Digital Pager ............................ 61
Basic Voice Mail Notification ...................................................... 61
Gaining Access to Basic Voice Mail Notification Settings ... 62
Turning On Basic Voice Mail Notification on a
Digital Pager ......................................................................... 62
Turning Off Basic Voice Mail Notification on a
Digital Pager ......................................................................... 63
Page 8

viii Telecor DP200 Display Phone User’s Guide
Advanced Voice Mail Notification ............................................... 63
Gaining Access to the Advanced Voice Mail
Notification Options ............................................................. 63
Setting Up Voice Mail Notification to up to Three
Digital Pagers ........................................................................ 64
Cancelling Voice Mail Notification to Multiple Pagers ........ 65
Setting Up the Number of Paging Attempts .......................... 65
Setting Up the Paging Interval .............................................. 65
Redirecting New Voice Mail Messages to Other
Extensions ............................................................................. 66
Turning Off Redirecting New Voice Mail Message .............. 66
INSTALLATION .................................................................................... 67
Installation Overview ............................................................. 69
Installing Your DP200 Display Phone ......................................... 69
For a Desktop Phone ............................................................. 70
For a Wall Mount Phone ....................................................... 71
REFERENCE ....................................................................................... 73
Feature Buttons and Access Codes ..................................... 75
Feature Keystrokes ............................................................... 78
Appendix A ............................................................................. 79
Appendix B ............................................................................. 81
Index ....................................................................................... 83
Page 9

Welcome
Welcome ix
Welcome to the Telecor™ Display Phone Model 200
(DP200) User’s Guide. This guide is designed to help you
use the DP200 Display Phone for effective and efficient
call processing. Please read this guide carefully. Follow the
instructions and recommendations provided to ensure
proper operation of the DP200 Display Phone.
This guide is organized into six sections:
• Section 1 gives an introduction to the DP200
Display Phone.
• Section 2 provides instruction for basic operation
of the DP200 Display Phone.
• Section 3 describes advanced call processing
features of the DP200 Display Phone.
• Section 4 includes a comprehensive overview of
the DP200 Display Phone Voice Mail features.
• Section 5 describes the installation of the DP200
Display Phone.
• Section 6 provides Feature button access codes
and keystrokes, Appendices, an Index, and a
Quick Reference Guide.
Page 10
x Telecor DP200 Display Phone User’s Guide
Conventions in this Guide
The Telecor™ Display Phone Model 200 (DP200) User’s
Guide can help you use your phone quickly and effi-
ciently. There are some word and symbol conventions to
help you along the way.
• You are asked to Press certain buttons on your
phone to perform a series of steps.
DEF
3
2
2
2
• When you see a graphic in the left margin, it
means that you are to press the corresponding
button on the DP200 Display Phone. The
graphics are placed next to numbered steps and
information set off by bullets. (•)
• When you see a graphic like the one in the left
margin, it means that the status lamp is blinking.
• When you see a graphic like the one in the left
margin, it means that the status lamp turned on.
• When you see a graphic like the one in the left
margin, it means that the status lamp is turned
off.
Font Styles Used
SMALL CAPS Feature buttons on the DP200 Display
Warning! Instructions that must be followed.
!
WARNING
Phone.
Bold Number and symbol buttons on the DP200
Display Phone.
Note Important or additional information.
Page 11

Overview of the Telecor Display
Phone Model 200 (DP200)
The Telecor Display Phone Model 200 (DP200) is de-
signed for use with the Telecor VS1 business telephone
system. The DP200 Display Phone has the capability to
handle five calls. Three of the five lines can be customized
as Extension View buttons known as Direct Station Select/
Busy Lamp Field (DSS/BLF) buttons. Each Extension View
button provides a visual display of a call’s status.
Five standard Feature buttons—Mute, Flash, Voice Mail,
Redial, and Hold—and 12 custom Feature buttons are
included on the DP200 Display Phone. Custom Feature
buttons enable you to program the features you use the
most by dialing a two-digit code and following the voice
prompts.
Overview 3
A
B
PRGM
The DP200 Display Phone has a 2 line by 16 character
display, which gives you useful information about the calls
you are handling. The A Feature button enables you to
switch between name and extension. Pressing the B
Feature button enables you to gain access to features such
as Do Not Disturb, Call Forwarding, Handsfree, Call
Waiting, Voice Mail, and Automatic Call Distribution
(ACD) groups.
The DP200 Display Phone is equipped with a data port
that enables a you to plug in any 900 megahertz cordless
phone or a modem. When your station receives a call,
both the cordless phone and the DP200 Display Phone
ring; or plug your modem into this port and your computer
can process data.
Using the PROGRAM switch, you can customize the DP200
Display Phone for office settings or warehouse settings. In
Office Mode, settings for Page Volume, Ring Select and
Ringer Volume are lower in volume than they are in
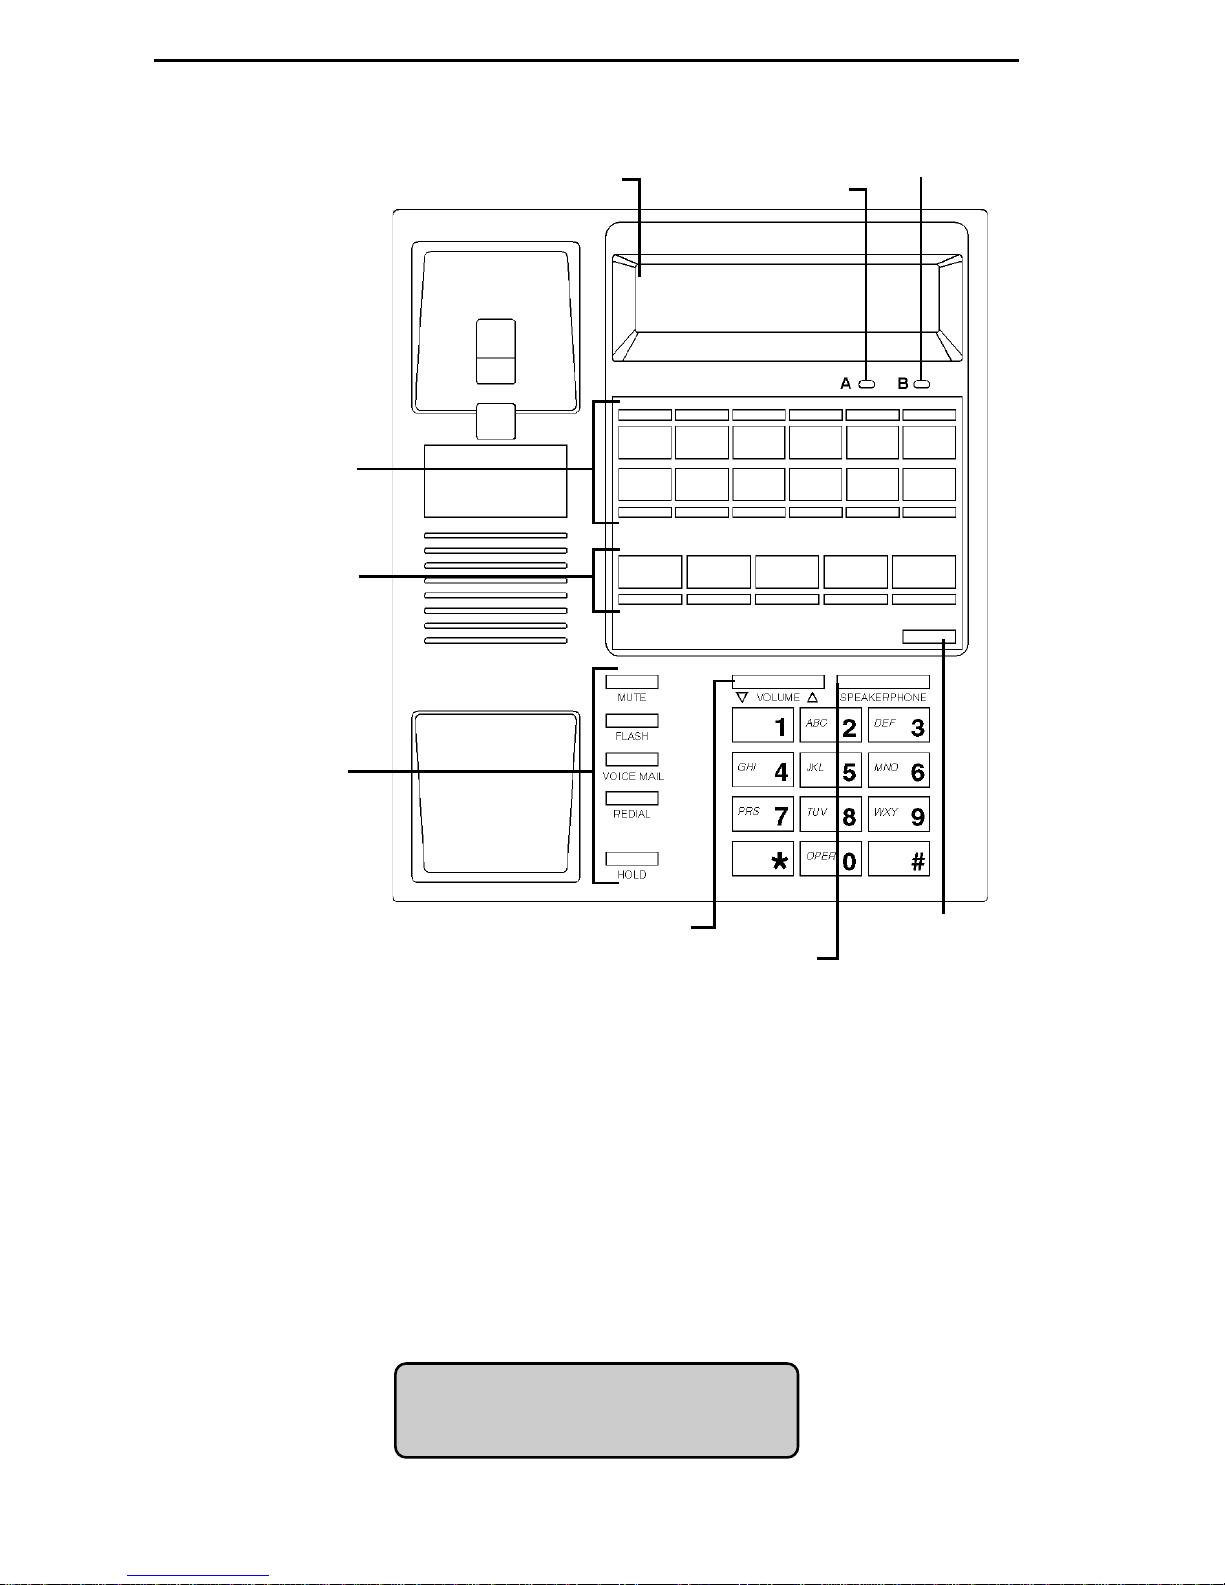
Warehouse Mode. Figure 1 shows the DP200 Display
Phone layout.
Page 12
4 Telecor DP200 Display Phone User’s Guide
12 Customizable
Feature buttons
Line 1 and 2 buttons
and Extension View
(DSS/BLF) buttons)
2x16 character display
B Feature button
A Feature button
Standard Feature
buttons
Figure 1
DP200 Display Phone
Volume Control button
Speakerphone on/off button
The Character Display
The DP200 Display Phone is equipped with a 2 line by 16
character display that gives you useful information about
the calls you are handling.
When the DP200 Display Phone is not in use, your name
or station appears on the top line and the date and time are
displayed on the second line.
Voice Mail
message light
Norm Stenger
Figure 2
Main status display
Oct 24 4:00PM
Page 13
Internal Call Display
When a call rings at your station, the display changes to
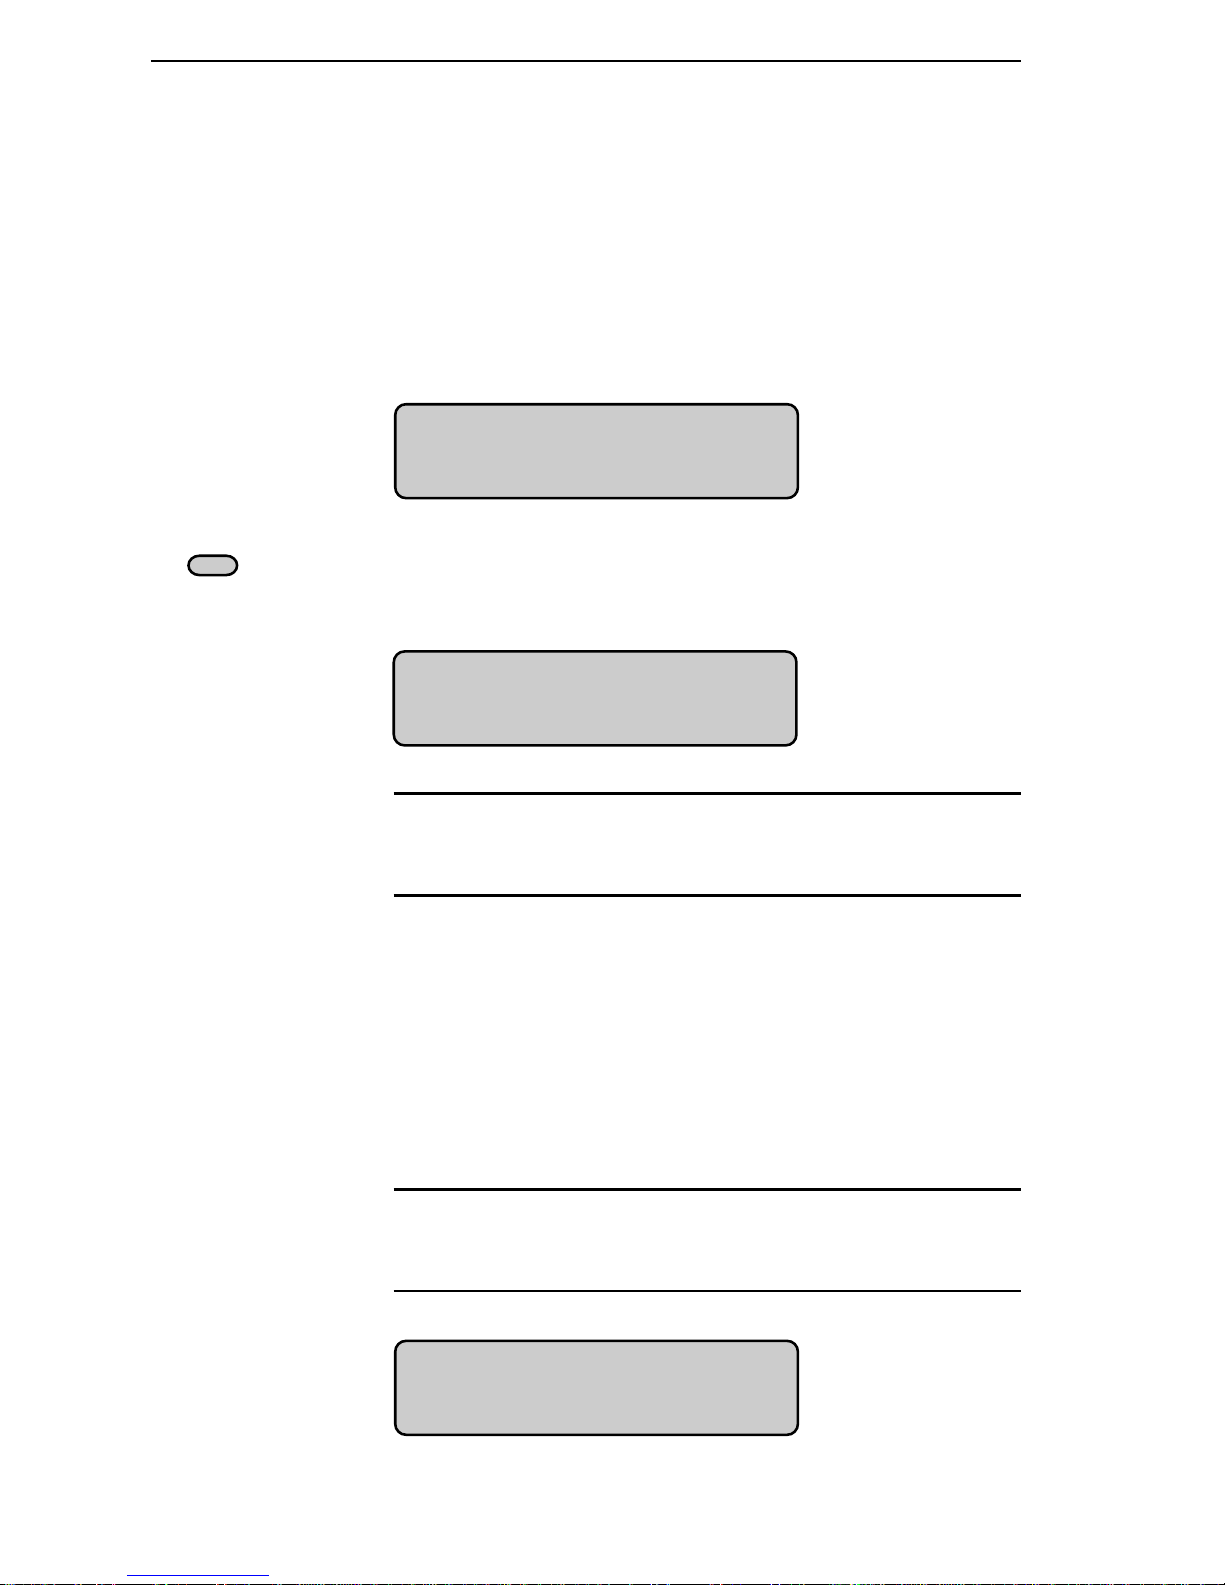
show information about the caller. The display shows
which line the call is ringing on and whether it’s an
internal or external call.
Overview 5
Figure 3
Internal call with
name display
A
Figure 4
Internal call with
extension display
External Calls Transferred by a
Receptionist
1*Ring: Internal
Cliff Fitzgerald
1. Press the A Feature button (located just below the
display) to switch between name and extension.
1*Ring: Internal
402
Note The * indicates that the call is not connected. The *
indicates to the person reading the display that this
call is in preview mode.
If your company has a receptionist who uses the Telecor
Attendant98™ CTI client application, the receptionist can
transfer calls with a Text Message and Caller ID.
Note Stations using the Telecor Connect98™ CTI client
Figure 5
External call with
Attendant message
1*Xfer:Attendant
Bill/ With ACME
application can also send Text Messages that can
be viewed at DP200 Display Phone stations.
Page 14
6 Telecor DP200 Display Phone User’s Guide
A
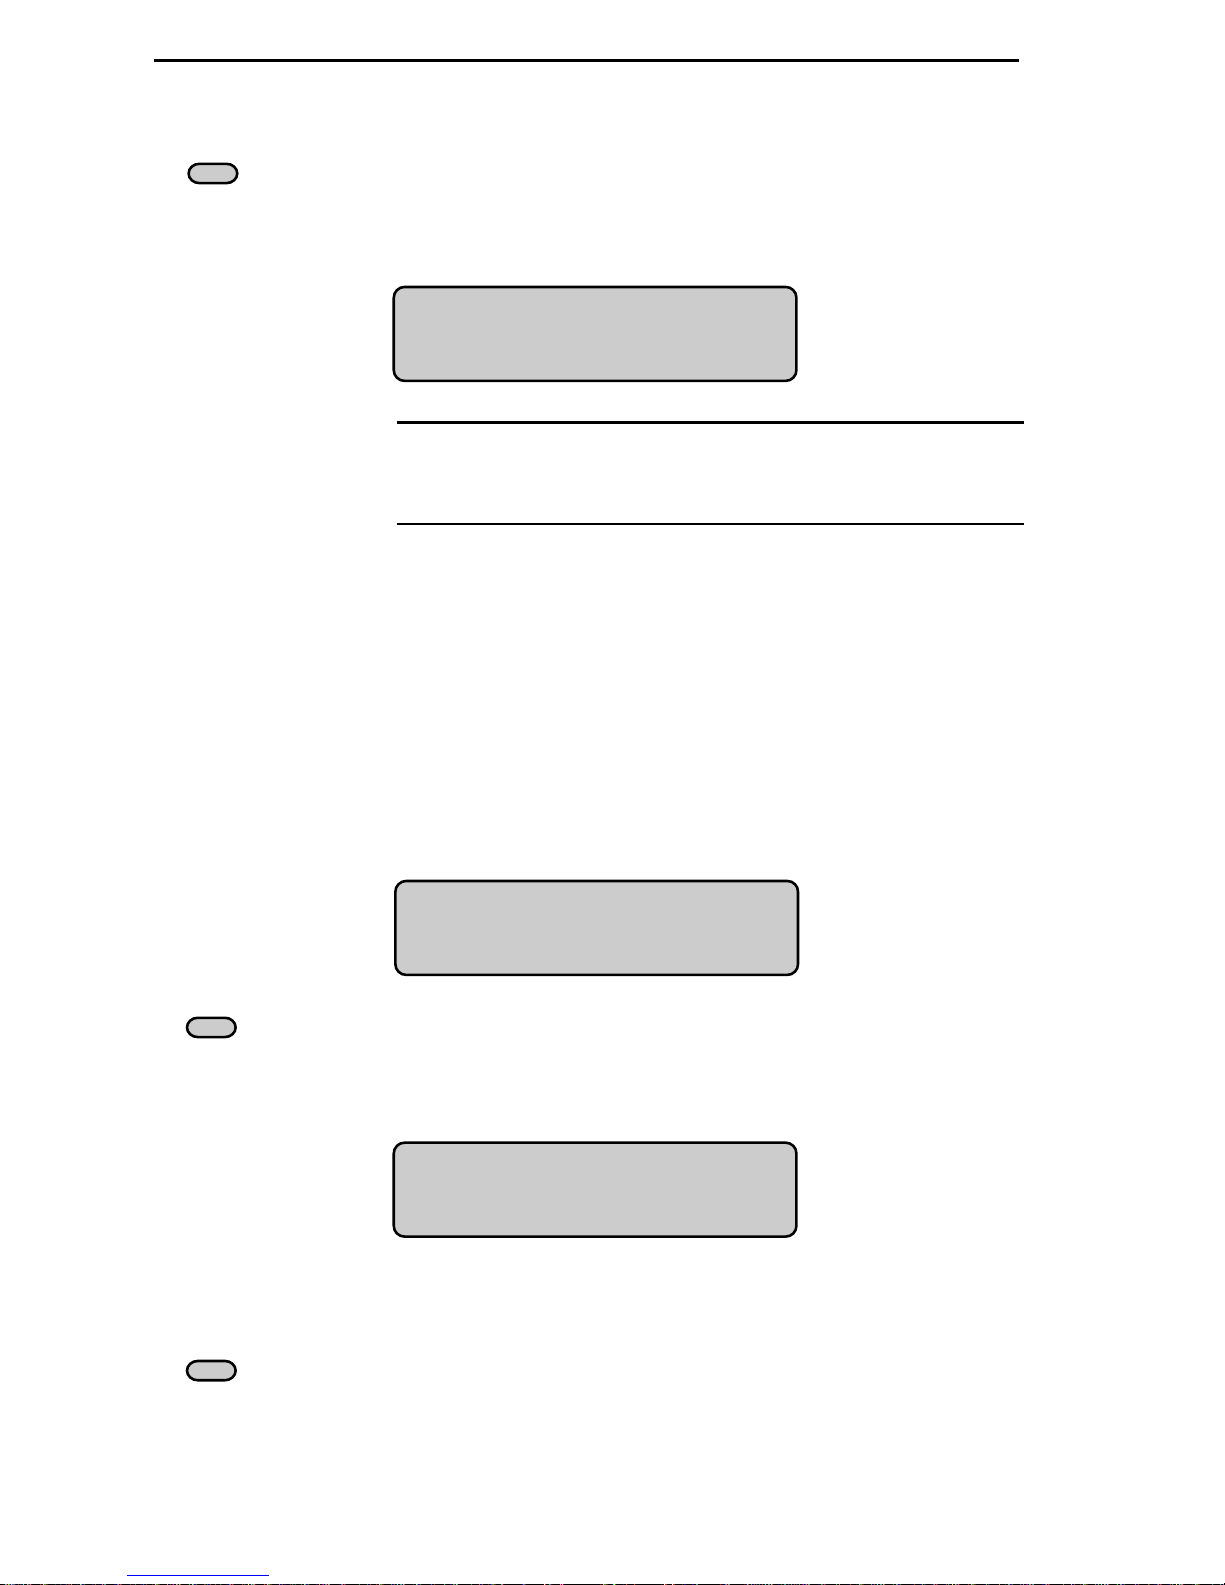
Figure 6
External call with
Caller ID display
External Calls Transferred by an
Auto Attendant
1. Press the A Feature button to switch between the
Text Message display, Caller ID Name, and
Caller ID Number display.
1*Xfer:Attendant
(913) 555-6676
Note Caller ID must be installed to support this feature.
Some phone companies do not offer Caller ID
Name.
If your company is using an Auto Attendant, the first line
displays the Auto Attendant the caller dialed, and the
information shown on the second line is what your system
configuration is set up to display when that Auto Attendant
is dialed.
Figure 7
External call with
text message
A
Figure 8
External call with
Caller ID display
Feature Status Display
B
1*Xfer: AA#1
Sales Call
1. Press the A Feature button to switch between the
Text Message display, Caller ID Name, and
Caller ID Number display.
1*Xfer: AA#1
(913) 555-6676
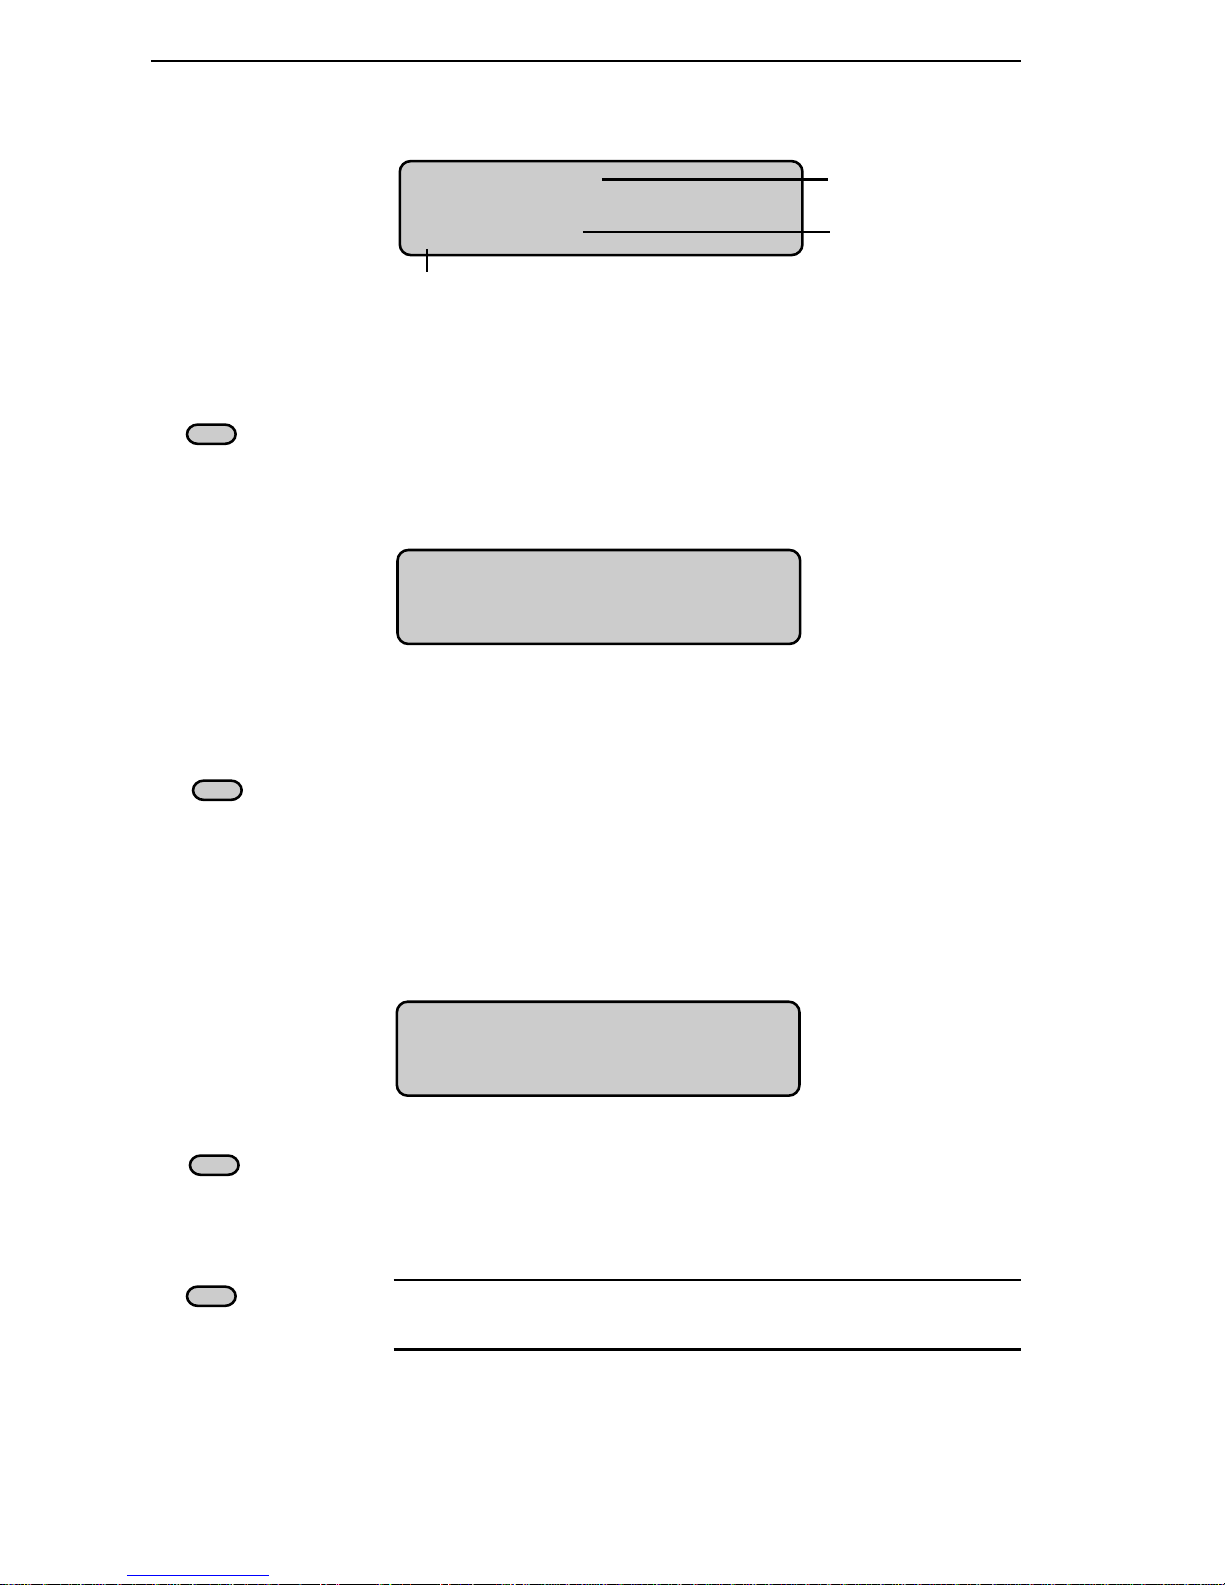
Press the B Feature button (located just below the display)
once to show the current status of some features such as
Do Not Disturb, Call Forwarding, Handsfree and Call
Waiting. The + means that feature is turned on. The –
means that feature is turned off. See Figure 9.
Page 15
Overview 7
Figure 9
Status display
Voice Mail Status Display
B
Figure 10
Voice Mail status
display
Automatic Call Distribution Status Display
Fwd to DND
HF+ CWT–
Handsfree on/off
Press the B Feature button twice to display the number of
new Voice Mail messages and the number of old messages
stored in your Voice Mail.
Forward to DND on
Call waiting on/off
New VM: 2
Old VM: 3
B
Figure 11
External call with
Caller ID display
A
B
Press the B Feature button three times to show the
Automatic Call Distribution (ACD) display. This display
shows the ACD group number followed by the number of
calls waiting in queue, the number of agents logged on to
the ACD, the time of the caller who has been waiting the
longest, and if you are in wrap-up mode.
5 :Q03 A03 01:09
Wrap Up
• After the ACD status appears, press the A
Feature button to scroll through the ACD groups
until you get to the group number you want.
Note Press the B Feature button four times to return to
the main status display.
Page 16
8 Telecor DP200 Display Phone User’s Guide
Standard Feature Buttons
The DP200 Display Phone has five standard Feature
buttons.
Mute—Press the MUTE Feature button to turn off the
MUTE
FLASH
microphone in your handset. This prevents the caller from
hearing you or background noise.
Flash—Press the FLASH Feature button to gain access to
advanced features such as Park, Forwarding, and so on.
Many of these advanced features can be set up as Feature
buttons on the DP200 Display Phone. Press FLASH to
cancel a transfer if the person at the other extension does
not answer. You must press FLASH before you make an
internal call if you enable Direct External Dial Tone. For
complete instructions, see “Making an External Call,”
page 14, or “Basic Operation,” page 11.
Voice Mail—Press the VOICE MAIL Feature button to gain
VOICE MAIL
access to your new and old Voice Mail. For complete
instructions, see “Voice Mail,” page 49.
Redial— Press the REDIAL Feature button to dial the
REDIAL
previous number dialed. This feature is for external calls
only.
Hold—Press the HOLD Feature button to place the
HOLD
selected line on Hold. The status lamp for the selected line
blinks, indicating the Hold status. To take a call off Hold,
press the blinking line button once.
Custom Feature Buttons
The DP200 Display Phone has 12 Custom Feature buttons.
Each Feature button has a system default setting. However,
you can set up the features you use the most by dialing a
two-digit code, and then following the voice prompts. See
“Customizing Feature Buttons,” page 34, or “Feature
Buttons and Access Codes,” page 75.
Page 17
Overview 9
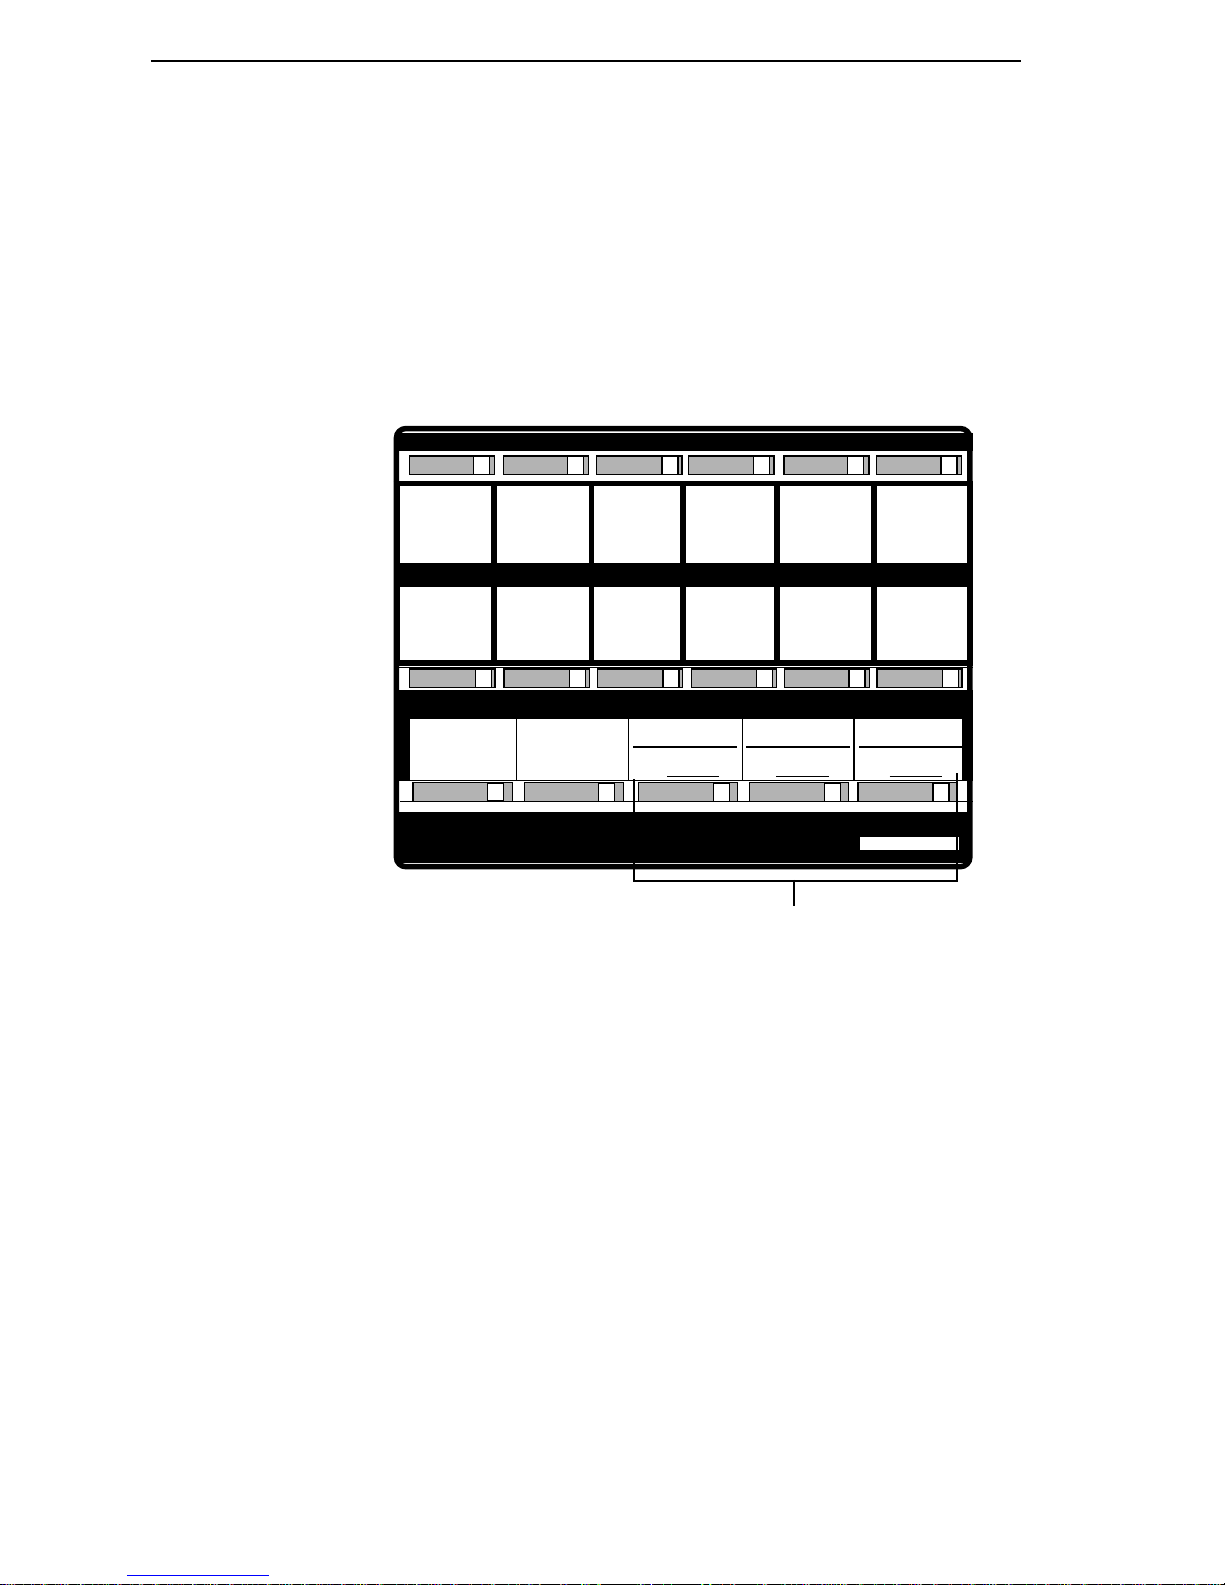
In addition to the 12 Custom Feature buttons, the DP200
Display Phone also has five Line Appearance buttons for
incoming calls. Three of the five buttons can be changed
to Extension View buttons, otherwise known as DSS/BLF
buttons or Direct Station Select/Busy Lamp Field. You can
use the A, B and C Extension View buttons to call or
transfer calls to the extensions you dial most often.
Figure 12
Custom Feature
buttons
1
PAGE
ALL
7
FORWARD
TO
1
2
CONFERENCE
8
FORWARD
CANCEL
2
3
PICK UP
GROUP
9
P. SPEED
DIAL
A
EXT
4
PICK UP
EXTENSION
10
TRANSFER
Walter Cliff Jenny
101 104
5
BLIND
HOLD
11
DND
ON
B
EXT
/OFF
6
BLIND XFER
TO
12
PARK
C
109
EXT
VM
Line Appearance buttons
The extension status lamp on each Extension View button
stays on when the extension you customize it for is in use,
and flashes when a call is ringing at that extension.
Page 18
Basic Operation 13
Overview of Basic Operation
This section describes how to use the Telecor Display
Phone Model 200 (DP200) for basic call processing.
Making an Internal Call
To make an internal call using the DP200 Display Phone,
complete the following steps:
1. Lift the handset.
1
Figure 1
Internal call
FLASH
• The LINE 1 button status lamp turns on, and
the internal dial tone sounds on the handset.
2. Dial the extension you want to call.
• The first line of the display shows the
number of active calls at the extension you
dialed. The second line shows the name of
the person you are calling.
1> Wait:Calls 0
Cliff Fitzgerald
Note If the Direct External Dial Tone feature is enabled,
press the FLASH Feature button, and then dial the
extension. For more information, see “Direct
External Dial Tone,” page 14.
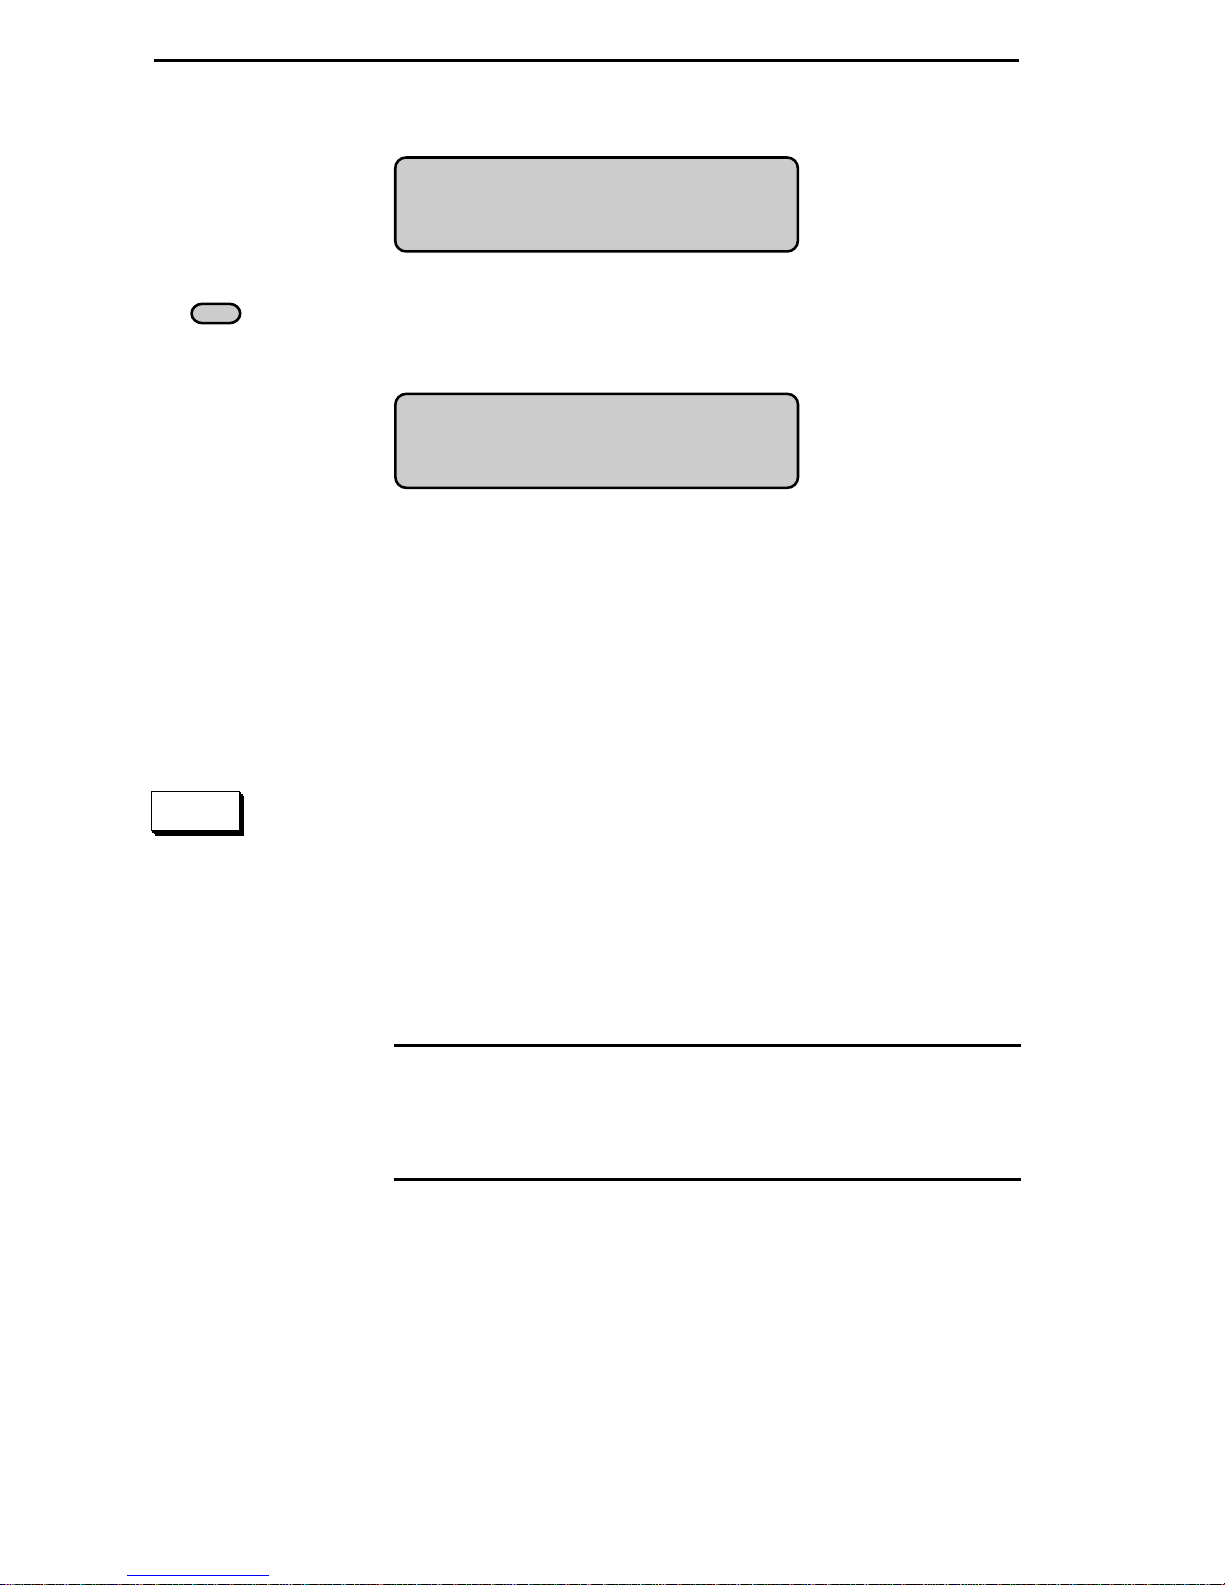
3. When the person answers, the first line of
the display changes to show the length of the call
and the type of call. The second line shows the
description (usually a person’s name) for the
extension you are calling. See Figure 2.
Page 19
14 Telecor DP200 Display Phone User’s Guide
Figure 2
Internal call with
name displayed
A
Figure 3
Internal call with
extension displayed
1> 00:04 Internal
Cliff Fitzgerald
• Press the A Feature button to switch
between name and extension.
1> 00:04 Internal
104
Making an External Call
To make an external call using the DP200 Display Phone,
complete the following steps:
1. Lift the handset.
WXY
WXY
9
9
2. Press 9 for an external line.
• An external dial tone sounds, enabling you
to make your call. A busy signal means that
all external lines are in use. An error signal
(a series of beeps) means that your extension
can’t be used to make an external call.
Note By enabling Direct External Dial Tone, you don’t
have to press 9 to get an external dial tone. For
more information, see “Enabling Direct External
Dial Tone,” page 15.
3. Dial the phone number.
Direct External Dial Tone
You can customize your DP200 Display Phone so that you
don’t have to press 9 to get an external dial tone.
Page 20
Basic Operation 15
FLASH
#
GHI
4
Note To make an internal call when Direct External Dial
Tone is enabled, press the FLASH Feature button,
and then dial the extension.
Enabling Direct External Dial Tone
To enable the Direct External Dial Tone feature, complete
the following steps:
1. Lift the handset.
2. Press # # 4.
• Two beeps sound.
3. Hang up the handset.
Disabling Direct External Dial Tone
To disable the Direct External Dial Tone feature, complete
the following steps:
1. Lift the handset.
#
GHI
4
2. Press # # 4.
• Two beeps sound.
3. Hang up the handset.
Disconnecting a Call
To disconnect a call, hang up the handset, or press the
SPEAKERPHONE button. For more information on using the
Speakerphone, see “Using the Speakerphone,” page 19.
Page 21
16 Telecor DP200 Display Phone User’s Guide
Answering a Call
1
1
Figure 4
External call with
text message
Caller ID
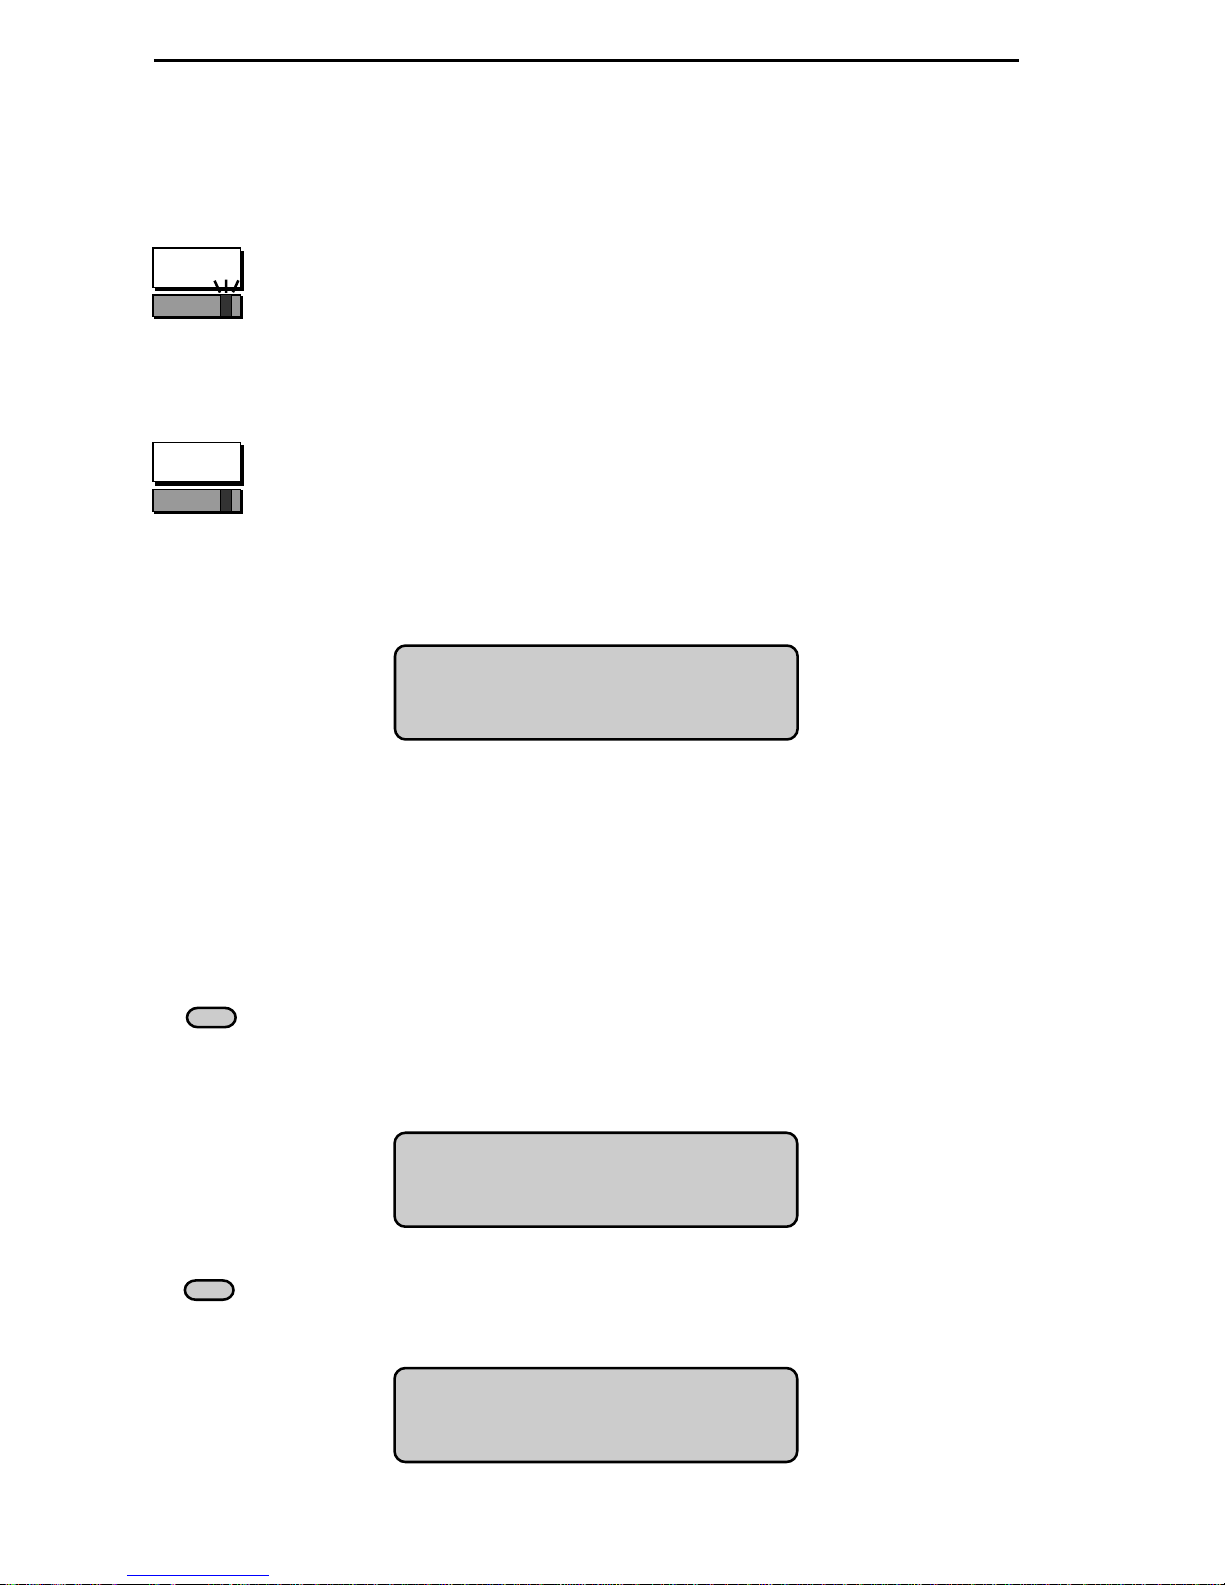
When a call arrives and your DP200 Display Phone is idle,
the phone rings and the LINE 1 button status lamp blinks.
1. Lift the handset.
• The LINE 1 button status lamp turns on. The
first line of the display shows the length of
the call, and who is transferring it. If your
receptionist transfers the call with a Text
Message, it appears on the second line.
1>00:04Attendant
Bill With Acme
A
Figure 5
Caller ID
information
A
Figure 6
Text Message
display
You can display Caller ID information if your system is
set up with Caller ID when your receptionist transfers a
call with a Text Message.
1. Press the A Feature button once to display the
Caller ID Name. Press the A Feature button twice
to display the Caller ID Number.
1>00:04Attendant
(913) 555-1212
2. Press the A Feature button again to return to the
Text Message display.
1>00:04Attendant
Bill With Acme
Page 22
Answering Multiple Calls
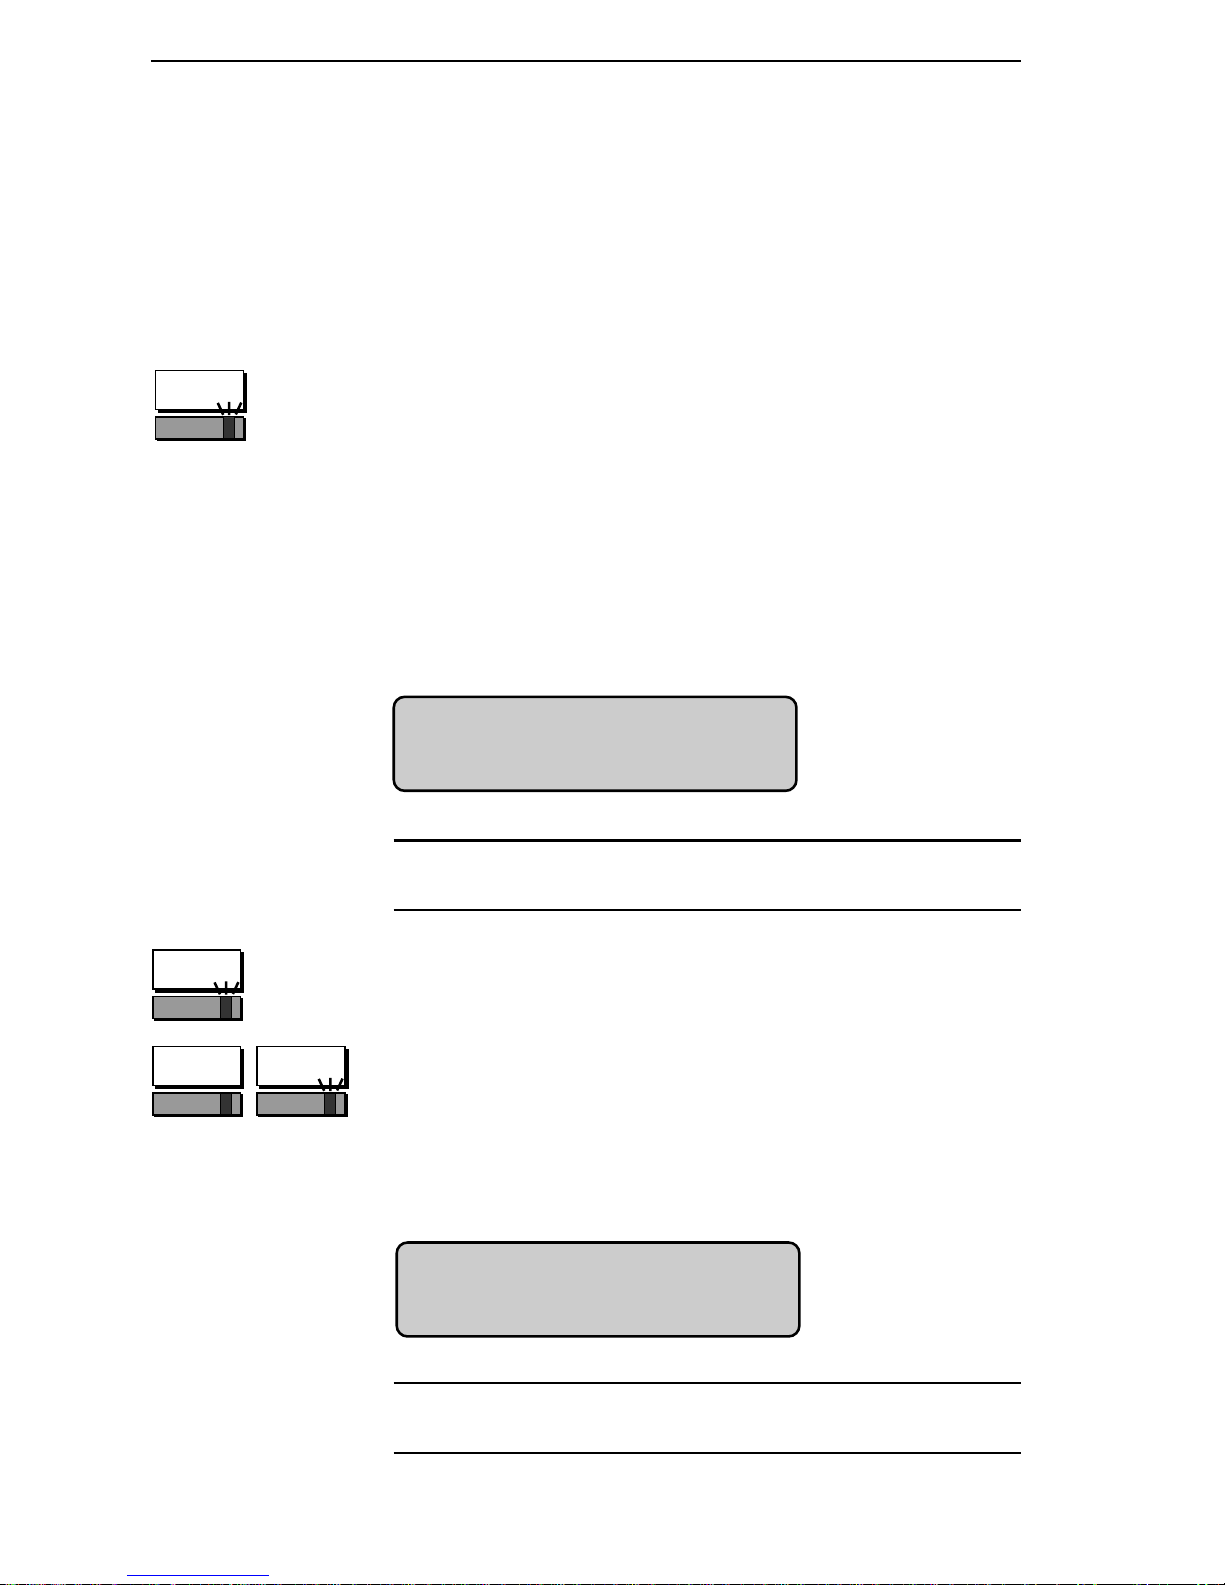
If you are using LINE 1 and you receive a second call, a
two-beep call waiting tone sounds and the status lamp for
the incoming call on LINE 2 blinks.
Basic Operation 17
2
Figure 7
Second incoming
call
1. Press the LINE 2 button once to preview the call.
The LINE 2 button status lamp continues to blink.
• The first line of the display shows the status
of the call and who is transferring it. The *
character indicates that the call is not
connected. If the receptionist transfers the
call with a Text Message, it appears on
the second line.
2*Ring:Attendant
Norm with ABC
Note Previewing a second call doesn’t interrupt your
current call.
2
2 1
Figure 8
Connected call
2. Press the LINE 2 button a second time to answer
the call and place the first call on hold.
• The LINE 2 button status lamp turns on and
the LINE 1 button status lamp blinks.
• The > character on the display indicates that
the call is connected.
2>00:08 Attendant
Norm with ABC
Note Answering the second call places the current call on
hold.
Page 23
18 Telecor DP200 Display Phone User’s Guide
Placing a Call On Hold
The HOLD Feature button enables you to suspend a call
without completely disconnecting. Callers placed on hold
will hear Music On Hold or Promotions On Hold. Calls
can also be taken off hold at other extensions using the
Call Pickup feature. See “Feature Keystrokes,” page 78.
1. Press the HOLD Feature button once to place a
HOLD
call on hold.
1
• The LINE 1 button status lamp blinks while
the call is on Hold, and the > character on
the display changes to an * indicating the
line is not connected.
Taking a Call Off Hold
1
1
2. Press the LINE 1 button to take a call off hold.
• Both you and the caller hear two beeps, and
the * character on the display changes to an
>, indicating your call is again connected.
• The LINE 1 button status lamp remains on.
Transferring a Call
To transfer a call to another extension, complete the
following steps:
TRANSFER
1. With a call on the line, press the TRANSFER
Feature button. The caller is put on hold.
2. Dial the extension to which you want to transfer
the call, or press the Extension View button.
Page 24

Basic Operation 19
3. Hang up the handset to complete the transfer
unannounced.
• To announce the transfer, wait until the
extension to which you are transferring the
call answers. Announce the transfer, and
then hang up.
Redialing an External Number
To redial the last external number you called:
1. Press the REDIAL Feature button.
REDIAL
• The last external number is redialed.
Using the Speakerphone
The DP200 Display Phone is equipped with a Speakerphone that enables you to speak to callers without picking
up the handset. You can use the Speakerphone when
making and receiving calls.
You can adjust the volume of the Speakerphone by
VOLUME
Making a Call with the Speakerphone
pressing the VOLUME button, which is located next to the
SPEAKERPHONE button.
Note You can’t use the Speakerphone with a headset.
To make a call with the Speakerphone:
SPEAKERPHONE
SPEAKERPHONE
1. Press the SPEAKERPHONE button.
• The SPEAKERPHONE button status lamp il-
luminates and you hear the internal dial tone.
Page 25

20 Telecor DP200 Display Phone User’s Guide
2. Dial the extension or number you want to call.
• If dialing an external number, press 9 + the
number.
Answering a Call with the Speakerphone
To answer a call ringing at your station with the Speakerphone:
1. Press the SPEAKERPHONE button and you are
SPEAKERPHONE
connected to the call.
• The Speakerphone status lamp illuminates.
Disconnecting a Call with the
Speakerphone
SPEAKERPHONE
SPEAKERPHONE
To disconnect a connected call with the Speakerphone:
1. Press the SPEAKERPHONE button.
• The Speakerphone status lamp turns off.
Page 26

Advanced Features 23
Overview of Advanced Features
In addition to the call processing features described in the
“Basic Operation” section, the Telecor Display Phone
Model 200 (DP200) provides you with powerful advanced
call processing capabilities. This section describes the
advanced features, and explains how to customize your
DP200 Display Phone.
Many of the call processing features described in this
section are performed by using the 12 customizable
Feature buttons. Each Feature button has a system default
setting that you can change for your station using the
Feature button programmer. For more information, see
“Customizing Feature Buttons,” page 34.
Note Check with your system installer to see if any
changes were made to the system default settings.
Blind Call Processing
The DP200 Display Phone gives you the ability to decide
what to do with your calls. “Blind” call processing means
that you do not have to answer a call to use the DP200
Display Phone features.
Blind call processing is performed only by using the
customizable Feature buttons on the DP200 Display
Phone. If you changed the settings for your Feature
buttons, you may need to reprogram them or blind call
processing features will not work. For more information
on programming a Feature button, see “Customizing
Feature Buttons,” page 34.
Blind Hold
Blind Hold enables you to put a call on hold without
answering it. If you are connected to a call on Line 1, for
example, and a second call rings at your station on Line 2,
you can place the second call on blind hold.
Page 27
24 Telecor DP200 Display Phone User’s Guide
BLIND
HOLD
2
BLIND XFER
TO
VM
1. When a call is ringing, press the BLIND HOLD
Feature button.
• The call is automatically placed on hold and
the LINE 2 button status lamp flashes.
• A message plays stating that the caller has
been placed on hold, and then the caller
hears music on hold or promotions on hold.
Blind Transfer to Voice Mail
Blind Transfer to Voice Mail enables you to transfer a call
directly to your Voice Mail without answering it. To blind
transfer a call to your Voice Mail:
1. When a call is ringing, press the BLIND XFER TO
VOICE
MAIL Feature button.
• The call is transferred to your Voice Mail.
Blind Transfer to a Specific Extension
You can blind transfer a call to a specific extension
without connecting to the call. For example, you want to
blind transfer a call to Extension 101. By customizing a
Feature button for Blind Transfer to Extension 101, you
can blind transfer calls to Extension 101. For more
information, see “Customizing Feature Buttons,” page 34.
Conference Rooms
The Telecor VS1 phone system includes three Conference
Rooms that you can gain access to by dialing the extension
assigned to the Conference Room. Each Conference Room
accepts up to 16 callers (this can be any combination of
internal and external callers). All three Conference Rooms
can be used simultaneously. Check with your system
installer to find out which extensions have been assigned as
Conference Rooms on your Telecor VS1 phone system.
Page 28

Advanced Features 25
Gaining Access to a Conference Room
Each Conference Room can be accessed by anyone
connected to the Telecor VS1 phone system. You can use
the DP200 Display Phone to transfer calls into a Conference Room, or join the conference. The conference
terminates automatically after all callers hang up. The
Conference Room is then available for a new conference.
To enter a conference in a Conference Room from your
DP200 Display Phone:
1. Lift the handset, or press the SPEAKERPHONE
button.
Figure 1
Conference Room
Locking or Unlocking a Conference Room
2. Dial the Conference Room extension.
• Two beeps sound indicating that you are
transferred to the Conference Room. The
second line of the display briefly shows the
number of connected calls to the Conference
Room, and then reads Conference Room.
1>00:35 Internal
Conference Room
After all callers have entered the Conference Room,
anyone in the Conference Room can lock it. When a
Conference Room is locked, users attempting to enter it
receive a busy signal.
#
Anyone in the Conference Room can also unlock it.
*
1. Press # to lock the Conference Room.
1. Press * to unlock the Conference Room.
Page 29
26 Telecor DP200 Display Phone User’s Guide
Conference Calling
The CONFERENCE Feature button enables you to create a
conference call between three people without using the
Conference Rooms.
Note When the person who initiates the conference call
hangs up, the conference is terminated.
To set up a conference call, complete the following steps:
1. Answer or make a call on Line 1, and then place
the call on hold.
1
2
CONFERENCE
1
• The
2. Use Line 2 to answer a second call, or make a
second call.
• The LINE 2 button status lamp illuminates.
4. Press the CONFERENCE Feature button.
• Both calls are placed on hold, and the LINE 1
5. Press the LINE 1 button.
• All three parties are now connected.
• Callers connected to the conference hear a
LINE 1 button status lamp blinks.
and LINE 2 button status lamps blink.
three-beep entrance tone.
Note You must press the line button of the first caller
Note If the person who initiates the conference hangs up,
within 10 seconds after pressing the CONFERENCE
Feature button, or the call will be disconnected.
the conference is terminated.
Page 30
Forwarding Calls
The DP200 Display Phone enables you to forward your
calls directly to another extension on the Telecor VS1
phone system or to your Voice Mail. In addition, you can
forward calls from another extension to ring at your
extension.
By placing your station on Do Not Disturb (DND),
incoming calls are forwarded based on your system
settings. Check with your system installer.
Forwarding Calls to Another Extension
Advanced Features 27
SPEAKERPHONE
FORWARD
TO
Figure 2
Forward to
Extension 106
To forward your calls to another extension on the Telecor
VS1 phone system, complete the following steps:
1. Lift the handset, or press the SPEAKERPHONE
button.
2. Press the FORWARD TO Feature button.
• You hear a two-beep tone.
3. Dial the extension to which you want your calls
forwarded.
• You hear a two-beep tone, and the second
line of the display shows the extension to
which you are forwarding your calls.
Norm Stenger
Fwd To 106
4. To cancel forwarding, press the FORWARD
CANCEL
Feature button. For more information,
see “Cancelling Forwarding,” page 30.
Page 31
28 Telecor DP200 Display Phone User’s Guide
Forwarding Calls to Your Voice Mail
To forward calls to your Voice Mail:
1. Lift the handset, or press the SPEAKERPHONE
SPEAKERPHONE
button.
DEF
#
Figure 3
Forward to Voice
Mail display
FORWARD
CANCEL
3
2. Press # # 3.
• Two beeps sound.
3. Hang up.
• The display reads Fwd To VM.
Norm Stenger
Fwd To VM
4. To cancel forwarding to Voice Mail, press the
FORWARD CANCEL Feature button.
Do Not Disturb (DND)
You can set up the DP200 Display Phone to forward calls
to your Voice Mail using the Do Not Disturb (DND)
feature.
Do Not Disturb blocks calls from your station and
forwards them based on the system settings, such as to
your Voice Mail or to other stations. See your system
installer for information about system settings.
DND
ON
/OFF
Figure 4
Forward to Do Not
Disturb
Norm Stenger
Fwd To DND
1. Press the DND ON/OFF Feature button.
• The second line of the display reads Fwd To
DND.
Page 32
Advanced Features 29
DND
ON
/OFF
Forwarding Calls From an Extension
SPEAKERPHONE
2. Press the DND ON/OFF Feature button a second
time to turn off Do Not Disturb.
• The second line of the display shows the
date and time.
You can use your DP200 Display Phone to forward calls
from a specific extension to ring at your station.
To forward calls from a specific extension to ring at your
station:
1. Lift the handset, or press the SPEAKERPHONE
button.
#
FORWARD
CANCEL
DEF
3
2. Press # 3 and the extension from which you
want to forward calls.
• Two beeps sound, indicating calls from the
specified extension are being forwarded to
your extension.
Note If you forward calls from an extension using a
DP200 Display Phone or a Telecor Connect98 CTI
client application station, the extension’s display
shows that calls are being forwarded to your
extension.
3. To cancel forwarding, press the FORWARD
CANCEL
Feature button on the station extension
from which you forwarded calls.
Note If you do not cancel forwarding at the station from
which you forwarded calls, calls are still forwarded
to your extension.
Note You can customize a Feature button to forward
calls from an extension. For more information, see
“Customizing Feature Buttons,” page 34.
Page 33
30 Telecor DP200 Display Phone User’s Guide
Cancelling Forwarding
To cancel forwarding features, complete the following
steps:
1. Lift the handset, or press the SPEAKERPHONE
SPEAKERPHONE
button.
FORWARD
CANCEL
2. Press the FORWARD CANCEL Feature button.
• You hear a two-beep tone.
• The second line of the display shows the
date and time.
Note If you forwarded calls from another extension to
ring at your extension, you have to cancel forwarding at that extension.
Picking Up a Call Ringing at Another
Extension
To pick up a call that is ringing or on hold at another
extension, complete the following steps:
SPEAKERPHONE
PICK UP
EXTENSION
1. Lift the handset, or press the SPEAKERPHONE
button.
2. Press the PICK UP EXTENSION Feature button.
• You hear a two-beep tone.
3. Dial the extension of a ringing or holding call.
• Pickup Extension first attempts to pick up
any ringing calls at the specified extension.
If no call is ringing, it will pick up a call on
hold at that extension.
• The display shows the caller information.
Page 34
Picking Up a Call in a Group
SPEAKERPHONE
Advanced Features 31
Note You can pick up a call ringing or on hold at a
specific extension. For example, you want to pick
up calls ringing at Extension 101. By customizing a
Feature button for Pickup Extension 101, you can
pick up calls from Extension 101. For more
information, see “Customizing Feature Buttons,”
page 34.
You can pick up any ringing call in your group.
1. Lift the handset, or press the SPEAKERPHONE
button.
PICK UP
GROUP
2. Press the PICK UP GROUP Feature button.
Note Check with your system installer for extensions in
Parking a Call
The Park feature enables you to park a call in one of 10
Park Zones on the Telecor VS1 phone system. Parked calls
can be retrieved from any extension. While parked, callers
hear on hold music.
To park a call, complete the following steps:
1. Connect to a call on line 1.
• Any ringing call is picked up in your group.
your group.
PARK
2. Press the PARK Feature button.
• The call is parked in the first available Park
Zone, which is shown on the first line of the
display.
• The Line 1 status lamp blinks.
Page 35
32 Telecor DP200 Display Phone User’s Guide
3. Press the PARK Feature button again to make Line
1 available.
Note If a parked call is not retrieved after a certain
amount of time, the call rings back to your extension.
Retrieving a Parked Call
To retrieve a parked call, complete the following steps:
1. Lift the handset, or press the SPEAKERPHONE
SPEAKERPHONE
button.
*
ABC
2
2. Press * 2, and then press the Park Zone number
(0–9).
• The call is transferred to your station.
Paging Over a Paging Zone
The Page Over Zone feature enables you to make an
announcement that is heard on all speakers and speakerphones in the Page Zone that you dial. Use Page All to
make an announcement that is broadcast over all Page
Zones set up on your Telecor VS1 phone system.
PAGE
ALL
Note Page Zones are set up by your system installer.
To make an announcement over all Paging Zones,
complete the following steps:
1. Lift the handset.
2. Press the PAGE ALL Feature button, or dial the
Page Zone extension.
3. Speak into your headset or handset microphone.
4. Hang up when you are finished speaking.
Page 36

Advanced Features 33
Note Do not use the Speakerphone to make paging
announcements.
Note By customizing a Feature button for Page Over
Zone, you can make a paging announcement over a
specific Page Zone. See “Customizing Feature
Buttons,” page 34.
Using Personal Speed Dials
You can program 10 Personal Speed Dials on your DP200
Display Phone using the Feature button programmer.
Personal Speed Dials are assigned numbers 0–9. For more
information on programming a Personal Speed Dial, see
“Programming Personal Speed Dials,” page 39.
SPEAKERPHONE
P. SPEED
DIAL
System Speed Dials
To use a Personal Speed Dial, complete the following
steps:
1. Lift the handset, or press the SPEAKERPHONE
button.
2. Press the PERSONAL SPEED DIAL Feature button
• You hear a two-beep tone.
3. Press the number (0–9) of the Personal Speed
Dial you want to use.
• If you select a number that isn’t assigned a
Personal Speed Dial, you hear an error tone.
The Telecor VS1 phone system has 99 System Speed Dials
that are shared by everyone on the system. Each System
Speed Dial has a two-digit code (01-99) assigned to it. By
customizing a Feature button for System Speed Dial, you
can gain access to the System Speed Dials. See “Customizing Feature Buttons,” page 34.
Page 37

34 Telecor DP200 Display Phone User’s Guide
To use a System Speed Dial, complete the following steps:
1. Lift the handset, or press the SPEAKERPHONE
SPEAKERPHONE
button.
2. Press the Feature button customized for System
Speed Dial.
• You hear a two-beep tone.
3. Dial the number (01–99) of the System Speed
Dial you want to use.
• If you select a number that isn’t assigned a
System Speed Dial, you hear an error tone.
Customizing the DP200 Display
Phone
Your DP200 Display Phone can be customized according
to how you want to process calls. The information on the
following pages gives you instructions for customizing
your DP200 Display Phone features.
Feature Buttons
You can use the 12 Feature buttons to gain access to the
advanced call processing features of the DP200 Display
Phone. Each Feature button has a default system setting.
However, you can use the Feature button programmer to
customize the Feature buttons to fit your call processing
needs. See “Feature Buttons and Access Codes,” page 75,
for a list of customizable Feature button codes.
Customizing Feature Buttons
Feature buttons can be changed by entering a new twodigit Feature Code using the Feature button programmer.
For a list of features and codes, see “Feature Buttons and
Access Codes,” page 75.
Page 38
Advanced Features 35
D
12
PARK
To customize a Feature button, complete the following
steps:
1. Lift the handset, or press the SPEAKERPHONE
button, and then dial 7801.
• A voice prompt says “You have accessed the
Feature button programmer.”
ABC
1
2
2. Press 2, when prompted, to program a new
Feature button. A voice prompt says “Press
the Feature button you wish to program.”
Note If you want to review a Feature button before
changing it, press 1 to review Feature buttons. For
more information, see “Reviewing Feature Buttons,” page 36.
3. Press the Feature button you want to change. A
voice prompt says “Enter the desired Feature
Code.”
4. Dial the two-digit feature code. For example,
Handsfree–14. For a list of feature codes, see
“Feature Buttons and Access Codes,” page 75.
• If you enter a code not on the list, a voice
prompt says “I’m sorry. That is not a valid
code.”
Note To set a Feature button to the default setting, dial 04.
*
HANDSFREE
• If you enter a correct code, a voice prompt
confirms your selection.
5. Repeat Steps 4–5 for each Feature button you
want to program. When finished, press * to
return to the Feature button programmer main
menu, or hang up.
• Change your template to show the Feature
buttons you customized.
Page 39
36 Telecor DP200 Display Phone User’s Guide
Reviewing Feature Buttons
To review a Feature button, complete the following steps:
1. Lift the handset, or press the SPEAKERPHONE
SPEAKERPHONE
button, and then dial 7801.
• A voice prompt says “You have accessed the
Feature button programmer.”
1
*
2. Press 1 to review Feature buttons currently
assigned. A voice prompt says “Press the Feature
button you wish to review.”
3. Press the Feature button you want to review.
• The voice prompt tells you what feature has
been programmed for the selected Feature
button.
4. Repeat Step 3 for each Feature button you want
to review. When finished, press * to return to the
main menu or hang up.
Customizing Extension View Buttons
(DSS/BLF)
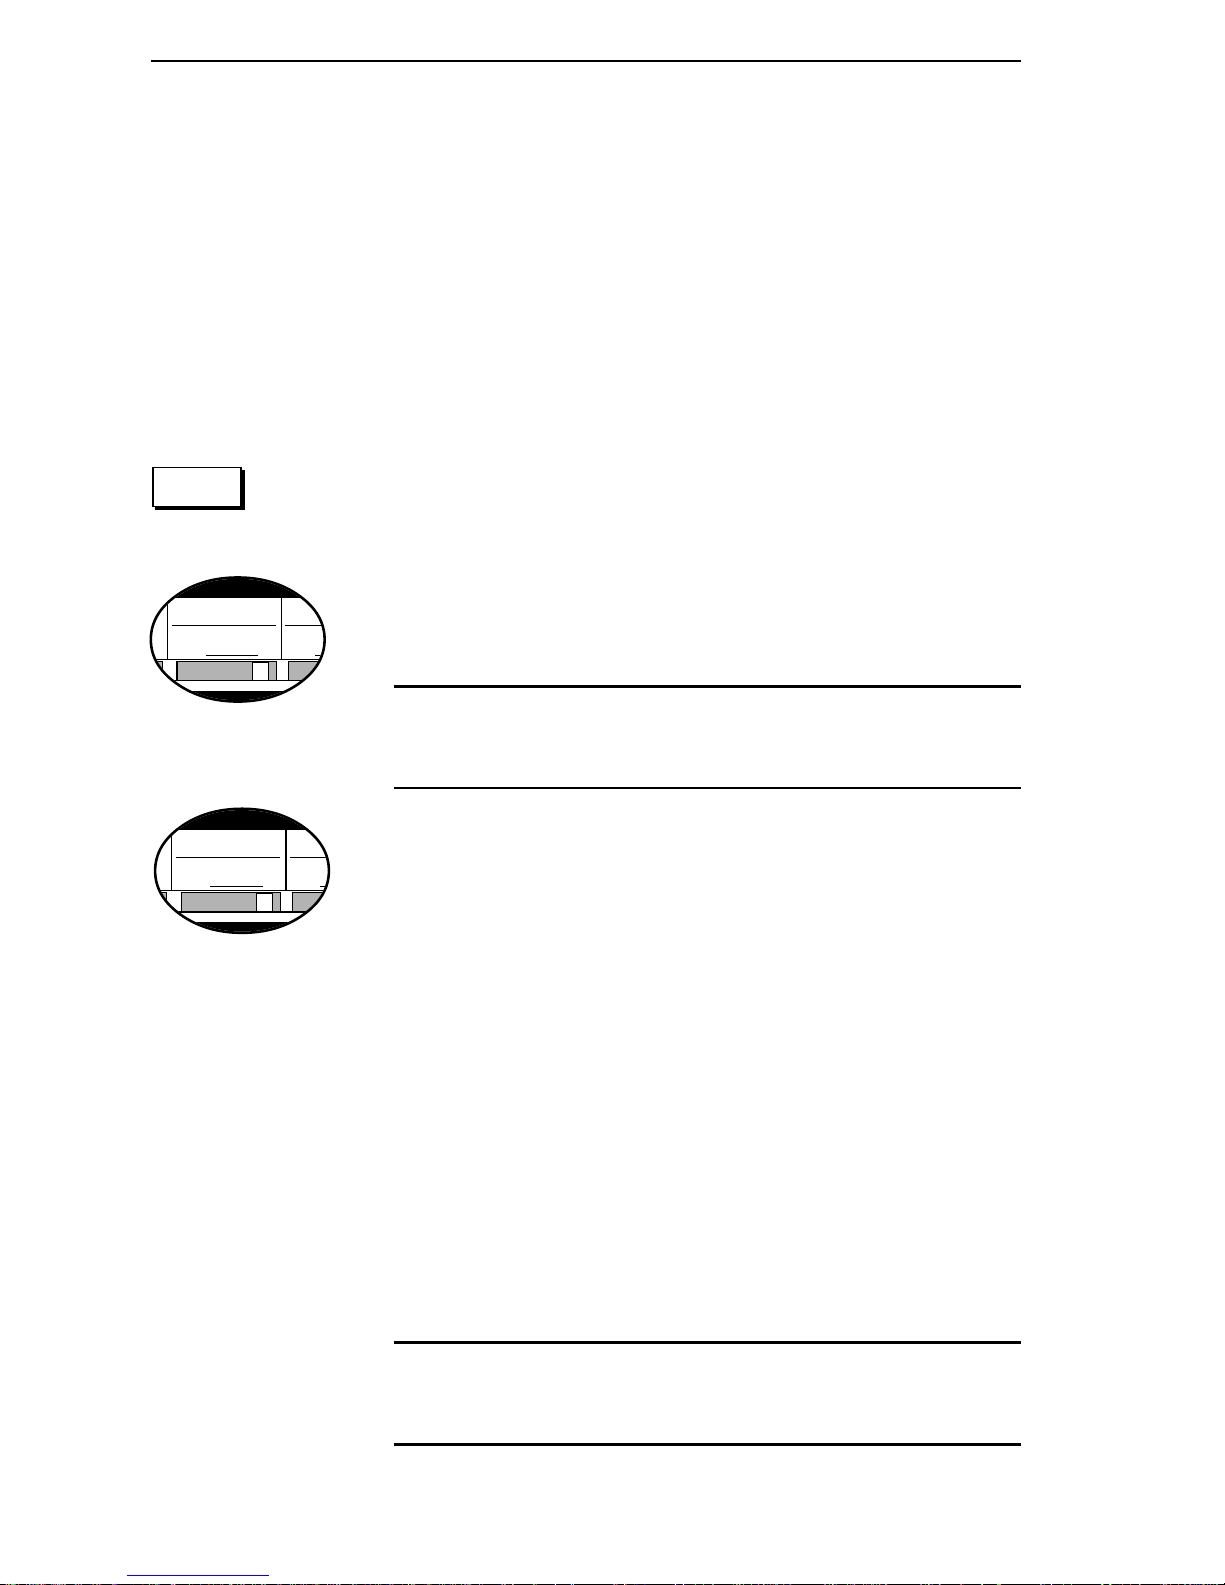
Three of the five Line Appearance buttons on the DP200
Display Phone can be customized as Extension View
buttons, known as Direct Station Select/Busy Lamp Field
(DSS/BLF) buttons.
Note Line Appearance buttons used for additional phone
This feature enables you to dial, view the status of the
customized extension, or transfer a call to that extension.
A blinking lamp indicates that extension is ringing. When
the lamp is turned on, the person at that extension is on the
phone.
lines cannot be used as Extension View buttons. See
“Changing the Number of Phone Lines,” page 38.
Page 40
Advanced Features 37
EXT
B
EXT
A
C
EXT
B
EXT
A
Walter C
101
Customizing an Individual Extension
View Button
1. Lift the handset, or press the SPEAKERPHONE
button, and then dial 7801.
• A voice prompt says “You have accessed the
Feature button programmer.”
ABC
2
2. Press 2, when prompted, to program a new
Feature button. A voice prompt says “Press
the Feature button you wish to program.”
3. Press the Extension View button (A, B, or C) that
you want to customize.
Note If a button is customized as a Line Appearance
button, the voice prompt says “Invalid Feature
button selection.”
4. Dial the extension you want to view. For example, dial extension 101.
• Repeat Steps 3 and 4 to customize additional
Extension View buttons.
Additional Monitoring Features
You can customize the Extension View buttons (DSS/BLF)
to monitor the status of Guest Mailboxes, Work Groups,
Conference Rooms and Automatic Call Distribution
(ACD) Groups. For more information on customizing an
Extension View button, see “Customizing an Individual
Extension View Button,” page 37.
Note Check with your system installer for Guest Mail-
box, Work Group, Conference Room and ACD
extensions.
Page 41

38 Telecor DP200 Display Phone User’s Guide
Guest Mailboxes
When the Guest Mailboxes Extension View status lamp is
off, there are no messages. A blinking status lamp indicates a new message, and when the lamp is on, there is an
old message.
Work Groups
When the Work Groups Extension View status lamp is off
there are no current calls. A blinking status lamp indicates
the extension is ringing, and when the lamp is on, it means
a call is connected.
Conference Rooms
When the Conference Room Extension View status lamp
is off, the Conference Room is empty. A blinking status
lamp indicates the Conference Room is in use, and when
the lamp is on, it means the Conference Room is locked.
Automatic Call Distribution (ACD)
When the Automatic Call Distribution (ACD) Extension
View status lamp is off, there are no calls in the queue. A
blinking status lamp indicates a call in the queue, and
when the lamp is on, it means a call is connected.
Changing the Number of Phone Lines
The DP200 Display Phone can be customized for up to
five phone lines. The A, B, and C Extension View buttons
can be used for additional phone lines.
Note Changing the number of phone lines erases any
customized Extension View buttons.
Page 42

SPEAKERPHONE
Advanced Features 39
To change the number of phone lines, complete the
following steps:
1. Lift the handset, or press the SPEAKERPHONE
button, and then dial 7801.
2. Dial 677 while the voice prompt is playing.
• Do not wait for the announcement to end
before dialing 677.
• A voice prompt says “Use the Keypad to
select whether you want this phone to be a 2,
3, 4 or 5 line phone.”
3. Press 2 for a two-line phone; 3 for a three-line
phone; 4 for a four-line phone; 5 for a five-line
phone. Hang up.
Note You do not receive any confirmation after you
select the number of phone lines.
Programming Personal Speed Dials
You can program up to 10 Personal Speed Dials (0–9) on
the DP200 Display Phone. For more information on using
Personal Speed Dials, see “Using Personal Speed Dials,”
page 33.
To program a Personal Speed Dial, complete the following steps:
SPEAKERPHONE
1. Lift the handset, or press the SPEAKERPHONE
button, and then dial 7801 to gain access to
the Feature button programmer. A voice prompt
says “You have accessed the Feature button
programmer.”
Page 43
40 Telecor DP200 Display Phone User’s Guide
DEF
ABC
2
#
3
2. Press 3, when prompted, to gain access to the
Personal Speed Dial menu. A voice prompt says
“To review a Personal Speed Dial, press 1; to
program a Personal Speed Dial, press 2; to
program other Feature buttons, press *.”
3. Press 2. A voice prompt says “Press the Keypad
number you wish to program.”
4. Press the Keypad number (0–9) to which you
want to assign a Personal Speed Dial.
5. Dial the phone number, and then press #. Dial 1
+ the phone number if it is a long distance
number. Do not dial 9.
• The voice prompt confirms your Personal
Speed Dial.
*
Reviewing Personal Speed Dials
SPEAKERPHONE
DEF
3
6. Press * to return to the Personal Speed Dial
menu.
• Repeat Steps 3–5 for each Personal Speed
Dial you want to program.
1. Lift the handset, or press the SPEAKERPHONE
button, and then dial 7801 to gain access to
the Feature button programmer. A voice prompt
says “You have accessed the Feature button
programmer.”
2. Press 3, when prompted, to gain access the
Personal Speed Dial menu. A voice prompt says
“To review a Personal Speed Dial, press 1; to
program a Personal Speed Dial, press 2; to
program other Feature buttons, press *.”
1
3. Press 1. A voice prompt says “Press the Keypad
number you wish to review.”
Page 44
Advanced Features 41
4. Press the number (0–9) you want to review.
• The voice prompt tells you what phone
number is assigned to the number you
selected.
5. Press * to return to the Personal Speed Dial
*
menu.
• Repeat Steps 3–5 for each Personal Speed
Dial you want to review.
Setting Up Office or Warehouse Mode
PRGM
PRGM
VOLUME
Using the PROGRAM switch, you can set up the DP200
Display Phone for Office Mode or Warehouse Mode to
accommodate your working environment. When you are
in Office Mode, volume settings are lower than they are in
Warehouse Mode.
You can change the Page Volume, Ring Select, and Ringer
Volume for each Mode.
To change the Mode, complete the following steps:
1. Slide the PROGRAM switch to the right. (The
Program switch is located on the right side of
your DP200 Display Phone.)
• By default, the DP200 Display Phone is set
for Office Mode.
2. Press the VOLUME button to switch between
Office Mode and Warehouse Mode.
Figure 5
Warehouse Mode
• The selected Mode appears in all caps on the
display.
Program Mode
Office WAREHOUSE
Page 45
42 Telecor DP200 Display Phone User’s Guide
Note Switching between Office Mode and Warehouse
Mode automatically returns the Page Volume, Ring
Select and Ringer Volume settings to the program
defaults.
3. Slide the PROGRAM switch to the left to return to
PROGRAM
the main status display.
Changing the Page Volume
To change Page Volume settings, complete the following
steps:
PGRM
*
VOLUME
Figure 6
Page Volume
1. Slide the PROGRAM switch to the right.
2. Press * to display Page Volume.
Note You can scroll through Program options by
pressing either the * key or the # key.
3. Press the VOLUME button next to the
SPEAKERPHONE button to increase or decrease
the Page Volume.
Program Mode
Page Volume 4
Note Page Volume has eight volume settings and an Off
setting.
PRGM
Changing Ring Select
To change Ring Select settings, complete the following
steps:
PGRM
4. Slide the PROGRAM switch to the left to return to
the main status display.
1. Slide the PROGRAM switch to the right.
Page 46
Advanced Features 43
*
VOLUME
Figure 7
Ring Select
PRGM
#
2. Press * or # to display Ring Select.
3. Press the VOLUME button next to the
SPEAKERPHONE button to change the sound of
your ringer.
Program Mode
Ring Select 2
Note The DP200 Display Phone has 12 different ringer
sounds. When you press the VOLUME button, you
hear a sample of each ring.
4. Slide the PROGRAM switch to the left to return to
the main status display.
PRGM
*
VOLUME
Figure 8
Ringer Volume
Changing the Ringer Volume
To change the Ringer Volume, complete the following
steps:
1. Slide the PROGRAM switch to the right.
2. Press * or # to display Ringer Volume.
#
3. Press the VOLUME button next to the
SPEAKERPHONE button to increase or decrease
the Ringer Volume.
Program Mode
Ringer Volume 5
Note There are eight settings for Ringer Volume. When
you press the VOLUME button, you hear a sample of
each ringing volume.
PRGM
4. Slide the PROGRAM switch to the left to return to
the main status display.
Page 47
44 Telecor DP200 Display Phone User’s Guide
Switching to Headset Mode
You can use your DP200 Display Phone with either a
headset or handset. To install the headset, plug it into the
handset jack, which is located on the bottom of the DP200
Display Phone. Leave the handset in the cradle.
Note You can’t use the Speakerphone when using a
headset.
To switch your DP200 Display Phone to headset mode,
complete the following steps:
PRGM
#
Figure 9
Headset Mode
VOLUME
PRGM
1. Slide the
2. Dial 3274 to gain access to additional programming
features. You do not need to pick up the headset.
3. Press # until the display shows the Headset setting.
PROGRAM switch to the right.
Program Mode
Headset On
4. Press the VOLUME button to turn the Headset on or
off.
5. Slide the PROGRAM switch to the left to return to the
main status display.
Warning! Do not change the settings of the other
!
WARNING
additional programming features including: Mic Volume,
Ear Volume, Speaker Volume, Volume Mode, Side Tone,
Data Mode, Baud Rate, and Repeat Rate. The DP200
Display Phone will not function properly if changes are
made to these settings. Contact your system installer for
more information.
Page 48

Advanced Features 45
Cordless Phone and Modem Port
The DP200 Display Phone is equipped with a port that you
can use to plug in a 900 MHz cordless phone or a modem.
• Both the cordless phone and your DP200 Display
Phone ring when you receive a call.
• Plug your modem into this port and your com-
puter can process data or dump information.
Note You can’t use your phone and modem simulta-
neously. Disable Call Waiting tones or turn on Do
Not Disturb to prevent a second call from interrupting your modem connection.
To pick up a another line while using your cordless phone,
press Flash + # # + the number of the line you want to
pick up.
Disabling Call Waiting Tones
Call Waiting tones alert you of a second call when you are
connected to a call. By customizing a Feature button for
Call Waiting On/Off, you can enable or disable Call
Waiting tones.
To disable Call Waiting tones, complete the following
steps:
1. Press the Feature button customized for Call
Waiting On/Off. You do not need to pick up the
handset.
B
2. Press the B Feature button to show the Feature
Status display for Call Waiting tones.
• When Call Waiting is off, CWT is followed
by a – sign. See Figure 10.
Page 49

46 Telecor DP200 Display Phone User’s Guide
Figure 10
Call Waiting tones
turned off
Handsfree
Fwd to DND
H F+ CWT–
3. Press the CALL WAITING ON/OFF Feature button
again to enable Call Waiting tones.
• When Call Waiting is on, CWT is followed
by a + sign.
Handsfree enables you to answer internal calls without
using your handset or headset. When Handsfree is turned
on, internal calls ringing at your extension are automatically connected and you are on Speakerphone. A tone
sounds to indicate that a call is connected. When
Handsfree is turned off, you must use your handset or
headset to answer ringing internal calls at your extension.
By customizing a Feature button for Handsfree On/Off,
you can turn Handsfree on or off.
B
Figure 11
Handsfree
turned on
To turn on Handsfree, complete the following steps:
1. Press the Feature button customized for
Handsfree. You do not need to pick up the
handset.
2. Press the B Feature button to show the Feature
Status display for Handsfree.
• When Handsfree is on, HF is followed
by a + sign.
Fwd to DND
H F+ CWT–
Page 50
Advanced Features 47
RINGER
RINGER
3. Press the
HANDSFREE ON/OFF Feature button
again to turn off Handsfree.
• When Handsfree is off, HF is followed
by a – sign.
Turning the Ringer On or Off
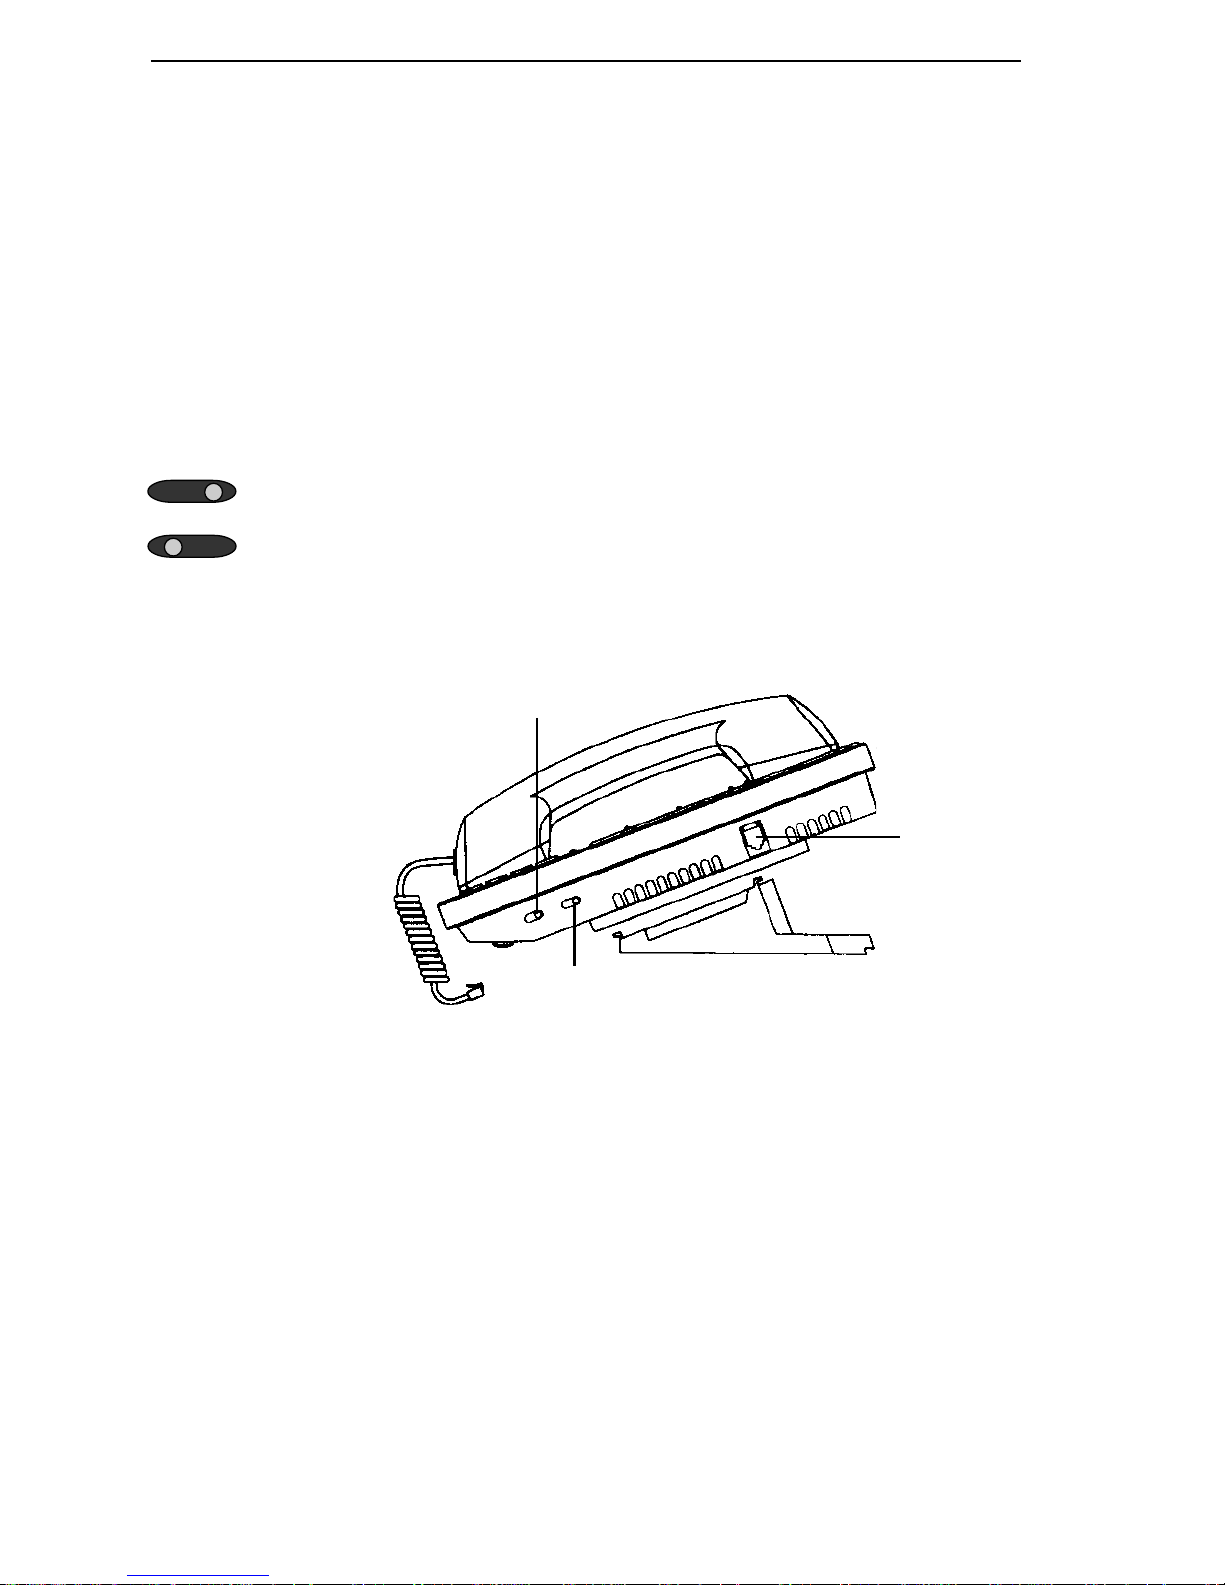
Using the RINGER switch on your DP200 Display Phone,
you can turn the ringer on or off. The RINGER switch is
located on the right side of your DP200 Display Phone
next to the PROGRAM switch. Slide the RINGER switch to
the right to turn your ringer on; slide the RINGER switch to
the left to turn your ringer off.
Program switch
Figure 12
DP200
Data Port
Ringer On/Off switch
Page 51
Voice Mail 51
Overview of Voice Mail
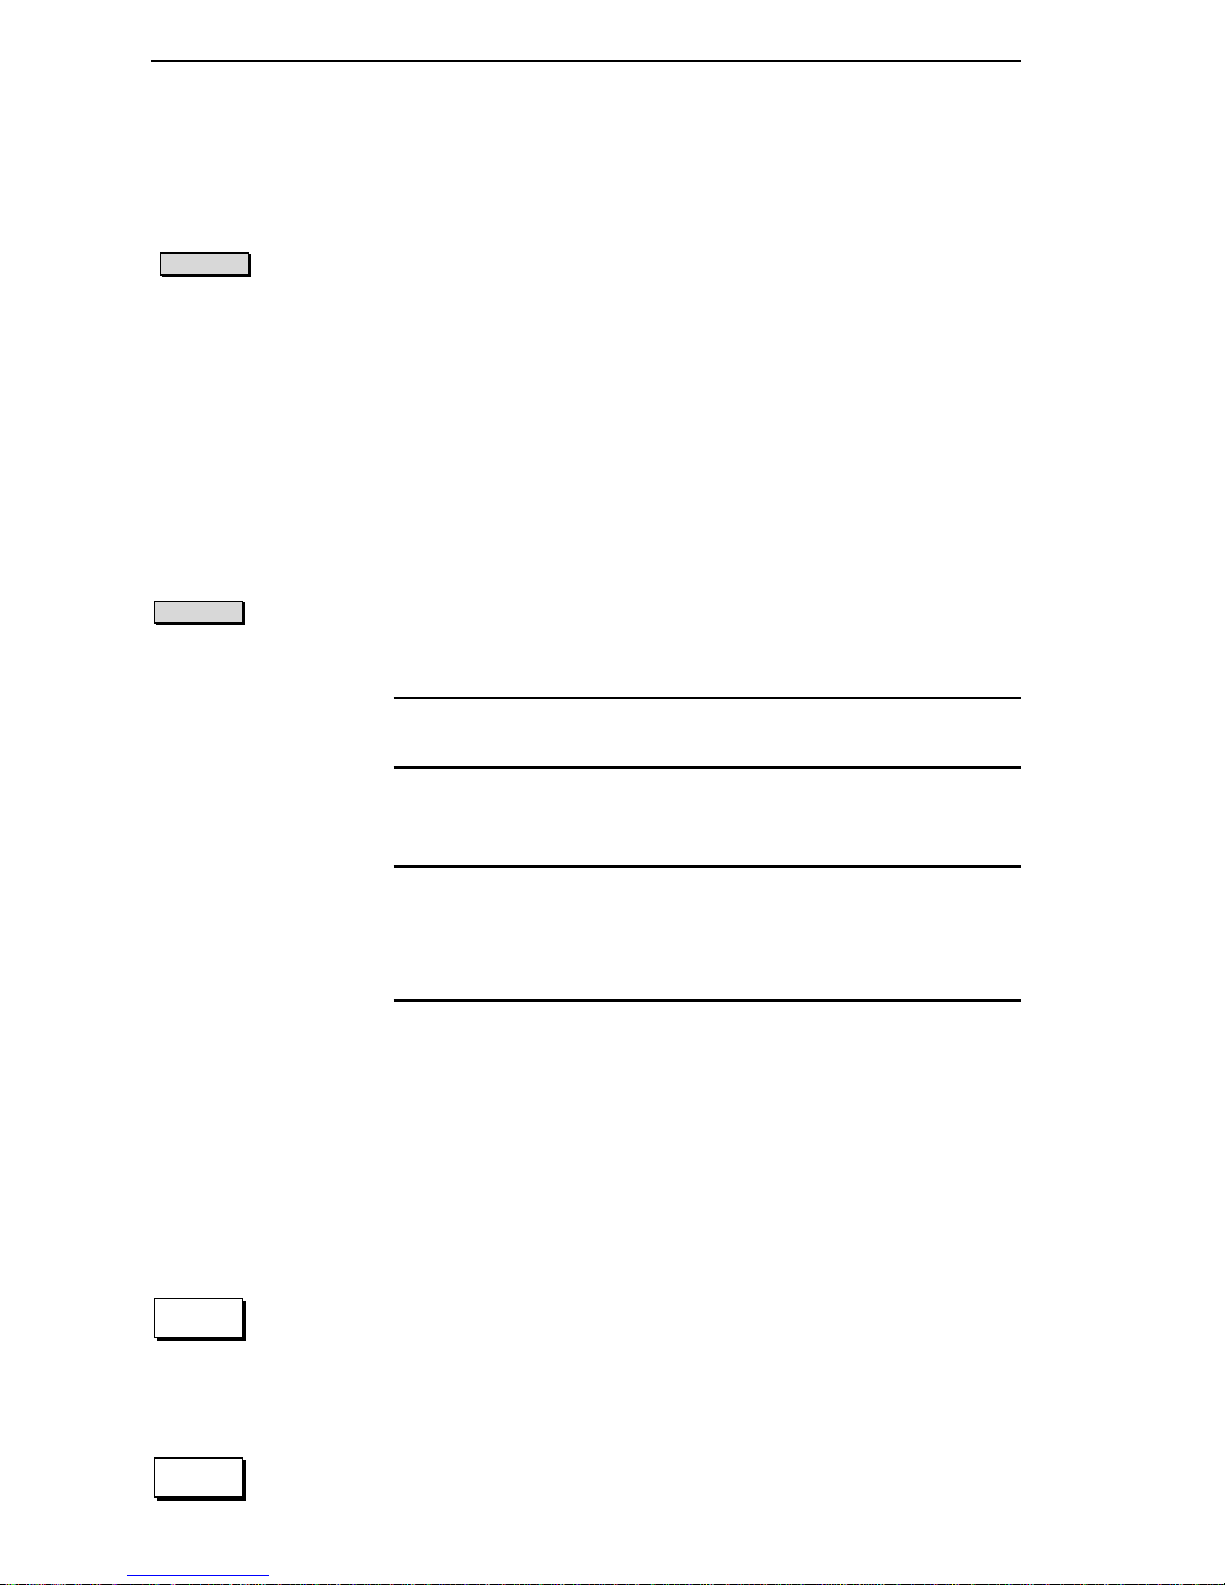
Lift the handset, or press the SPEAKERPHONE button, and
VOICE MAIL
then press the VOICE MAIL Feature button at any time to
gain access to Voice Mail features.
To use the Voice Mail features when you have gained
access to Voice Mail, use the DP200 Display Phone
keypad.
Gaining Access to Your Voice Mail
1. Lift the handset, and then press the VOICE MAIL
VOICE MAIL
Feature button.
Note You can also dial 6 + your extension to gain access
to your Voice Mail.
2. If prompted, dial your passcode.
Note If Voice Mail passcodes are not configured during
your system setup, there is no passcode voice
prompt. For more information, see “Creating or
Changing Your Voice Mail Passcode,” page 55.
The Voice Mail Prompts
After gaining access to Voice Mail, an announcement tells
you how many new and old Voice Mail messages you
have. The voice prompts you hear at this point lead you
through the other Voice Mail features.
1
ABC
2
• Press 1 to listen to your new messages. After
listening to new messages, you can listen to old
or saved messages, see “Listening to a Voice
Mail Message,” page 53.
• Press 2 to gain access to the Setup Options
menu, see, “Setting Up Voice Mail Features,”
page 54.
Page 52
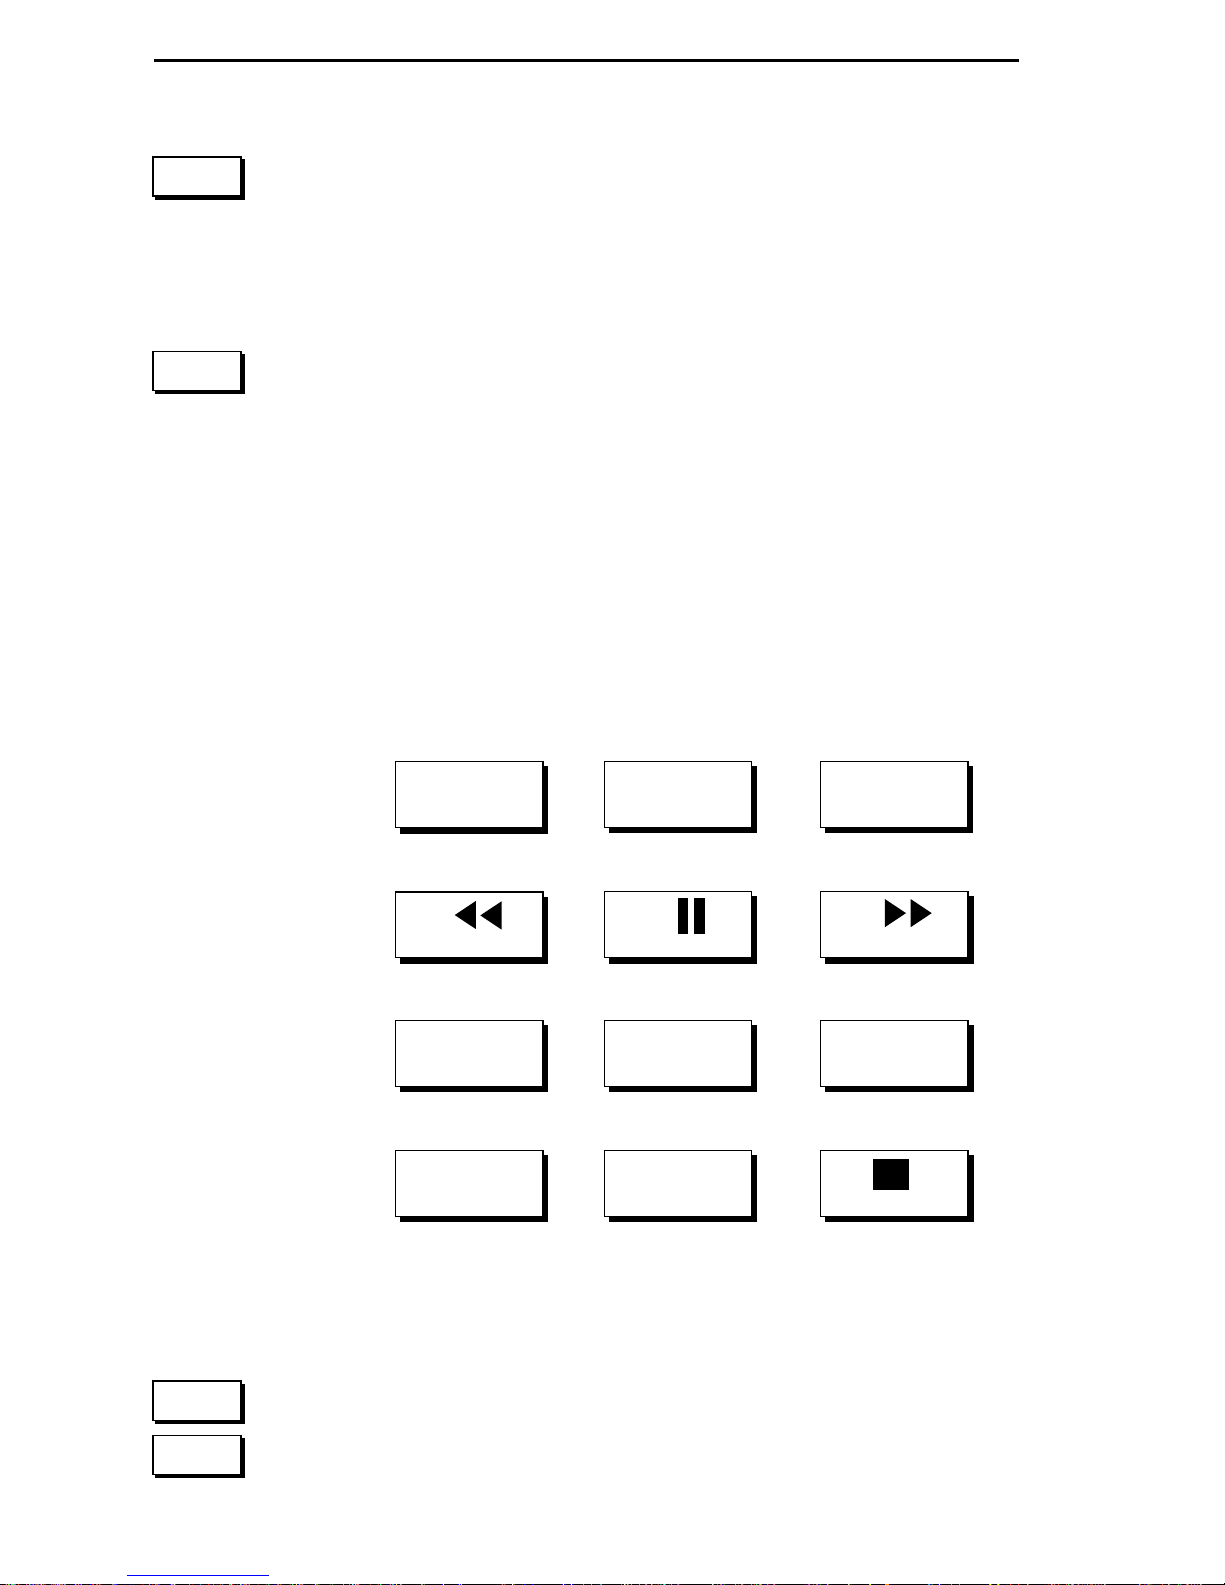
52 Telecor DP200 Display Phone User’s Guide
PRS
7
• Press 7 to send a message or forward a Voice
Mail message to one or more extension, see
“Sending a Message to an Individual or Group,”
page 57 or “Forwarding a Voice Mail Message to
an Individual or a Group,” page 58.
• Press * to exit your Voice Mail, and then hang up.
*
Using the Keypad for Voice Mail
Features
Use the Keypad to handle your Voice Mail calls the way
you want. Figure 3 illustrates how to use the Keypad, see
“Listening to a Voice Mail Message,” page 53 for complete
instructions.
Figure 3
Voice Mail features
on the Keypad
Stopping a Recording
1
GHI
Rewind Pause Fast Forward
PRS
4
7
Forward Message
ABC
JKL
TUV
Caller ID
OPER
2 3
5
8
0
DEF
MNO
WXY
Time & Date
*
Stop Message
6
9
#
#
OPER
0
Press # or 0 to stop recording, and then follow the voice
prompts for further options.
Page 53
Voice Mail 53
Listening to a Voice Mail Message
Buttons on the DP200 Display Phone can act similar to the
controls of a tape recorder while listening to your Voice
Mail.
1. Lift the handset, and then press the VOICE MAIL
VOICE MAIL
Feature button. If prompted, dial your passcode.
ABC
DEF
GHI
JKL
1
1
2
3
4
5
2. Press 1 to listen to a message.
The voice prompt offers nine features to choose from
when the message is finished.
• Press 1 to play the next message.
• Press 2 to replay the message.
• Press 3 to delete the message.
Note If you don’t delete your Voice Mail messages they
are automatically saved. Check with your system
installer to learn how long messages remain saved.
• Press 4 to rewind the message for five seconds.
• Press 5 to pause during the message (the
message resumes in 20 seconds).
MNO
6
PRS
7
TUV
8
Note Caller ID numbers are played for external calls only
• Press 6 to fast forward the message five seconds.
• Press 7 to forward the message to another Voice
Mail extension (you can record comments about
the message you forward). For more information,
see “Forwarding a Voice Mail Message to an Individual, Group, or Range of Extensions,” page 58.
• Press 8 to hear Caller ID.
if this option is set up on your phone system.
Page 54
54 Telecor DP200 Display Phone User’s Guide
WXY
9
• Press 9 to hear the date and time of the message.
• Press * to exit your Voice Mail.
*
Setting Up Voice Mail Features
The following is a list of the Voice Mail Setup Options
menu.
1. Lift the handset, and then press the VOICE MAIL
VOICE MAIL
ABC
2
1
ABC
2
Feature button. If prompted, dial your passcode.
2. Press 2 to gain access to the Setup Options
menu. Voice prompts are given for each option.
• Press 1 to record a new greeting. When you have
finished recording your greeting, press # to stop.
Press 2 to play back your recording.
DEF
GHI
JKL
MNO
PRS
TUV
3
4
5
6
7
8
• Press 3 to create or change your passcode. Dial
the four numbers of your new passcode.
• Press 4 to turn on or off the time and date
notation with each message you retrieve.
• Press 5 to turn on or off the Caller ID announced
after each message.
• Press 6 to change the playback order of your
messages (last-in/first-out or first-in/first-out).
• Press 7 to set up your Voice Mail Notification
number. Follow the voice prompts. For more
information, see “Voice Mail Notification on a
Digital Pager,” page 61.
• Press 8 to set up Dial by Name options. For
more information, see “Setting Up Your Name in
the Dial by Name Directory,” page 56.
*
• Press * to exit the Setup Options menu.
Page 55
Creating or Changing Your
Voice Mail Passcode
Creating a passcode for your Voice Mail is recommended
to ensure security.
1. Lift the handset, and then press the VOICE MAIL
VOICE MAIL
Feature button.
Voice Mail 55
ABC
DEF
2
3
2. Press 2 to gain access to the Setup Options
menu.
3. Press 3 to create or change your passcode.
• You are prompted to dial a four-digit
passcode. After dialing a new passcode, a
voice announcement tells you what numbers
you pressed.
Recording a Voice Mail Greeting
A Voice Mail greeting is a recording of your voice that
callers hear before they record a message in your Voice
Mail.
1. Lift the handset, and then press the VOICE MAIL
VOICE MAIL
Feature button.
ABC
2
1
#
ABC
2
• If prompted, dial your passcode.
2. Press 2 to gain access to the Setup Options
menu.
3. Press 1 to record a Voice Mail greeting.
• Press # when finished recording.
• Press 2 to play back your greeting. If you
need to make changes, repeat Step 3.
Page 56
56 Telecor DP200 Display Phone User’s Guide
Setting Up Your Name in the
Dial By Name Directory
A caller trying to reach you without knowing your
extension can reach you by entering the first three letters
of your last name in your company’s Dial by Name
directory.
1. Lift the handset, and then press the VOICE MAIL
VOICE MAIL
Feature button. If prompted, dial your passcode.
ABC
2
2. Press 2 to gain access to the Setup Options
menu.
TUV
8
3. Press 8, and then choose from three options:
• Press 1 to make a voice recording of your
1
name. Press # to stop recording. You are
prompted to dial the first three letters of
your last name on the Keypad.
ABC
DEF
2
3
• Press 2 to play back your recording.
• Press 3 to remove your name from the
Dial by Name directory.
Blind Transferring a Call to Voice Mail
Blind Transfer means that you don’t have to answer a call
to transfer it to Voice Mail. Suppose you want to Blind
Transfer a call that you know is not important because of
the Caller ID or the Text Message sent to you by the
receptionist.
BLIND XFER
TO
VM
1. Press the BLIND TRANSFER TO VOICE MAIL
Feature button while the phone is ringing to
transfer the call to your Voice Mail.
• The call is transferred to your Voice Mail.
Page 57
Voice Mail 57
Sending a Message to an Individual,
Group, or Range of Extensions
At some point, you may need to send a message to an
individual, group, or a range of extensions.
Sending a Message to an Individual or
Group
To send a Voice Mail message to an individual or group,
complete the following steps:
VOICE MAIL
PRS
7
TUV
8
#
1. Lift the handset, and then press the VOICE MAIL
Feature button.
• If prompted, dial your passcode.
2. Press 7.
3. Dial the extension of the individual or group
receiving the message.
• Dial additional extensions when prompted.
Note If you don’t know the extension of the person you
are calling, press 8 and you are prompted to dial
the first three letters of the person’s last name to
use the Dial by Name feature.
4. Press # when your list is completed.
• Follow the voice prompts to record your
message.
Page 58
58 Telecor DP200 Display Phone User’s Guide
Sending a Message to a Range
of Extensions
To send a message to a range of extensions, complete the
following steps:
1. Lift the handset, and then press the VOICE MAIL
VOICE MAIL
Feature button.
• If prompted, dial your passcode.
PRS
7
2. Press 7.
For example, to dial the range of extensions 100 to 125:
1. Dial the first extension in the range—100.
2. Press *.
*
3. Dial the last extension in the range—125.
#
Forwarding a Voice Mail Message to
an Individual, Group, or Range of
4. Press #.
• Follow the voice prompts to record your
message.
Extensions
At some point, you may need to forward a Voice Mail
message you received to another individual extension,
group, or range of extensions.
Page 59
Voice Mail 59
Forwarding a Voice Mail Message to an
Individual or Group
To forward a Voice Mail message to an individual or group,
complete the following steps:
PRS
TUV
#
7
8
1. Press 7 after listening to a Voice Mail message.
2. Dial the individual extension of the person or
group receiving the message.
• Dial additional extensions, when prompted.
Note If you don’t know the extension of the person you
are calling, press 8 and you are prompted to dial
the first three letters of the person’s last name to
use the Dial by Name feature.
3. Press # when your list is complete.
• You are prompted to record a prefacing
message. Use this time to give any necessary
information to the person(s) receiving the
message.
Forwarding a Voice Mail Message to a
Range of Extensions
To forward a Voice Mail message to a range of extensions,
complete the following steps:
PRS
7
For example, to dial the range of extensions 200 to 225:
*
1. Press 7 after listening to a Voice Mail message.
2. Dial the first extension in the range—200.
3. Press *.
Page 60
60 Telecor DP200 Display Phone User’s Guide
4. Dial the last extension in the range—225.
#
5. Press #.
• You are prompted to record a prefacing
message. Use this time to give any necessary
information to those receiving the message.
Gaining Access to Your Voice Mail
From Another Internal Phone
1. Lift the handset and dial 6 + your extension.
• Wait for your greeting.
#
2. Press # when your greeting begins. If prompted,
dial your passcode.
3. Follow the voice prompts accordingly.
Gaining Access to Your Voice Mail
From an External Line
1. Dial your company telephone number.
2. Dial 6 + extension when the Auto Attendant
prompts you.
#
3. Press # when you hear your greeting. If
prompted, dial your passcode.
4. Follow the voice prompts accordingly.
Page 61

Voice Mail Notification on a
Digital Pager
The Telecor VS1 business telephone system can be
customized to place a call to your pager when you receive
a new Voice Mail message. This is an important feature
when you are expecting a call, or message, and you are
not at your office. Voice Mail Notification on a Digital
Pager is also a good feature for after-hours emergencies
or technical assistance.
In addition to sending a preassigned numeric message
alerting you to new Voice Mail, Caller ID can be sent with
the page so you can see who is leaving the message. You
can even choose the number of times the page is repeated,
and how often, until you check your new messages. You
can customize your Voice Mail to alert up to three
different pagers when you receive a new message.
Voice Mail 61
It is also possible to redirect your new Voice Mail to up to
20 other extensions. Only new messages are redirected;
old messages are left untouched.
There are two levels of settings for Voice Mail Notification: Basic Voice Mail Notification and Advanced Voice
Mail Notification. Basic Voice Mail Notification is used
to send a notice to a single pager. The Advanced settings
are used to send a notice to multiple pagers, and redirect
your new messages to other extensions.
Basic Voice Mail Notification
Basic Voice Mail Notification sends a notice to a single
pager when you receive a new Voice Mail message. Basic
Voice Mail Notification sends three paging attempts, with
15 minute intervals between attempts. These settings
cannot be changed at the Basic level.
Page 62
62 Telecor DP200 Display Phone User’s Guide
Gaining Access to Basic Voice Mail
Notification Settings
1. Lift the handset, and then press the VOICE MAIL
VOICE MAIL
Feature button. If prompted, dial your passcode.
ABC
PRS
1
2
7
#
2. Press 2 to gain access to the Voice Mail Setup
Options menu, and then press 7 to gain access to
Voice Mail Notification.
3. Press 1 to set up Basic Voice Mail Notification.
Turning On Basic Voice Mail Notification
on a Digital Pager
1. Dial the pager number for Voice Mail Notification followed by the # key. You do not need to
enter a 9 prior to the pager telephone number.
2. Dial your Personal Identification Number (PIN)
followed by the # key. If your pager does not
require a PIN, press the # key only.
#
1
ABC
2
3. Dial the numeric message you want displayed
on your pager followed by the # key. You can
enter up to 24 digits.
4. To turn on Caller ID display, press 1, or to turn
off Caller ID display, press 2.
Note Caller ID must be installed on your phone system
for this feature to be active. See your system
installer.
• You will hear a playback of all the numbers
entered—pager number, PIN (if needed),
numeric message—and if Caller ID is turned
on or off. If any of these numbers or settings
are incorrect, you can change them by
repeating Steps 1-4.
Page 63

Voice Mail 63
Turning Off Basic Voice Mail Notification
on a Digital Pager
1. Gain access to the Basic Voice Mail Notification
settings by following Steps 1-4 of “Gaining
Access to Basic Voice Mail Notification Settings,” page 62.
#
2. Press only the # key when prompted to enter a
pager number for Voice Mail Notification. This
clears the pager number entered, if any, and
no pages will be sent upon receipt of new Voice
Mail.
Note To turn Basic Voice Mail Notification on a Digital
Pager back on, you must repeat Steps 1–4 of
“Turning On Basic Voice Mail Notification on a
Digital Pager,” page 62.
Advanced Voice Mail Notification
Advanced Voice Mail Notification gives you several
options for sending pager notification upon receipt of a
new Voice Mail message. Through the Advanced options
you can customize your Voice Mail to contact up to three
pagers, set the number of times pages are sent until
answered, and set the time interval between pages. The
Advanced level also gives you the option to redirect your
new Voice Mail messages to other extensions in your
office.
Gaining Access to the Advanced Voice
Mail Notification Options
VOICE MAIL
1. Lift the handset, and then press the VOICE MAIL
Feature button.
• If prompted, dial your passcode.
Page 64
64 Telecor DP200 Display Phone User’s Guide
ABC
PRS
ABC
1
2
7
2
#
2. Press 2 to gain access to the Voice Mail Setup
Options menu, and then press 7 to gain access to
Voice Mail Notification.
3. Press 2 to set up the Advanced Voice Mail
Notification options.
Setting Up Voice Mail Notification to up
to Three Digital Pagers
1. Press 1 while in the Advanced Voice Mail
Notification options of your Voice Mail. This
enables you to enter the settings for the first
pager.
2. Dial the pager number for Voice Mail Notification followed by the # key. You do not need to
enter a 9 prior to the pager telephone number.
ABC
DEF
#
#
2
3
3. Dial your PIN followed by the # key. If your
pager does not require a PIN, press the #
key only.
4. Enter the numeric message you want displayed
on your pager followed by the # key. You can
enter up to 24 digits.
• You will hear a playback of all the numbers
you have entered—pager number, PIN
(if needed), numeric message. If anyof these
numbers or settings are incorrect, you can
change them by repeating Steps 1-4.
5. Repeat Steps 1-4 to enter the settings for a
second and third pager. In Step 1, press 2
or 3 respectively, for the second or third pager.
Page 65
Voice Mail 65
Cancelling Voice Mail Notification to
Multiple Pagers
ABC
DEF
1
#
2
3
1. Press 1 while in the Advanced Voice Mail
Notification options of your Voice Mail. This
enables you to enter the settings for the first
pager.
2. Press only the # key when prompted to enter a
pager number for Voice Mail Notification. This
clears the pager number entered, if any, and
no pages will be sent.
3. Repeat Steps 1-2 for the second and third pagers
if cancelling notification to those as well, press 2
or 3 respectively, for the second or third pager.
Note If cancelling notification to only one of the pagers,
change only that pager’s settings. Notification to
the other pagers remains as customized.
JKL
MNO
5
#
6
Setting Up the Number of Paging
Attempts
1. Press 5 while in the Advanced Voice Mail
Notification options of your Voice Mail.
2. Press the maximum number of times to be paged,
followed by the # key.
Note 10 is the highest number of attempts that can be set
up. If you enter a value greater than 10, the system
sets the attempts to 10.
Setting Up the Paging Interval
1. Press 6 while in the Advanced Voice Mail
Notification options of your Voice Mail.
Page 66
66 Telecor DP200 Display Phone User’s Guide
PRS
#
7
2. Press the number of minutes between pages,
followed by the # key.
Note The Paging Interval can be set up from a minimum
of 1 minute to a maximum of 34,464 minutes. If
you enter an interval greater than 34,464 minutes,
the system sets the interval to 34,464 minutes.
Redirecting New Voice Mail Messages to
Other Extensions
1. Press 7 while in the Advanced Voice Mail
Notification options of your Voice Mail.
2. Press the list of extensions for Voice Mail
redirect. After you enter an extension, a voice
recording verifies the extension entered.
TUV
PRS
8
#
7
#
Note If you do not know the extension of a person, press
8 to enter a Dial by Name directory. This directory
allows you to enter the first three letters of a
person’s last name, instead of their extension.
• You can enter up to 20 extensions.
3. Press the # key when your extensions list is
complete.
Turning Off Redirecting New Voice Mail
Message
1. Press 7 while in the Advanced Voice Mail
Notification options of your Voice Mail.
2. Press only the # key when prompted to enter the
list of extensions for Voice Mail redirect. This
clears any extensions set up to receive your
redirected Voice Mail messages.
Page 67
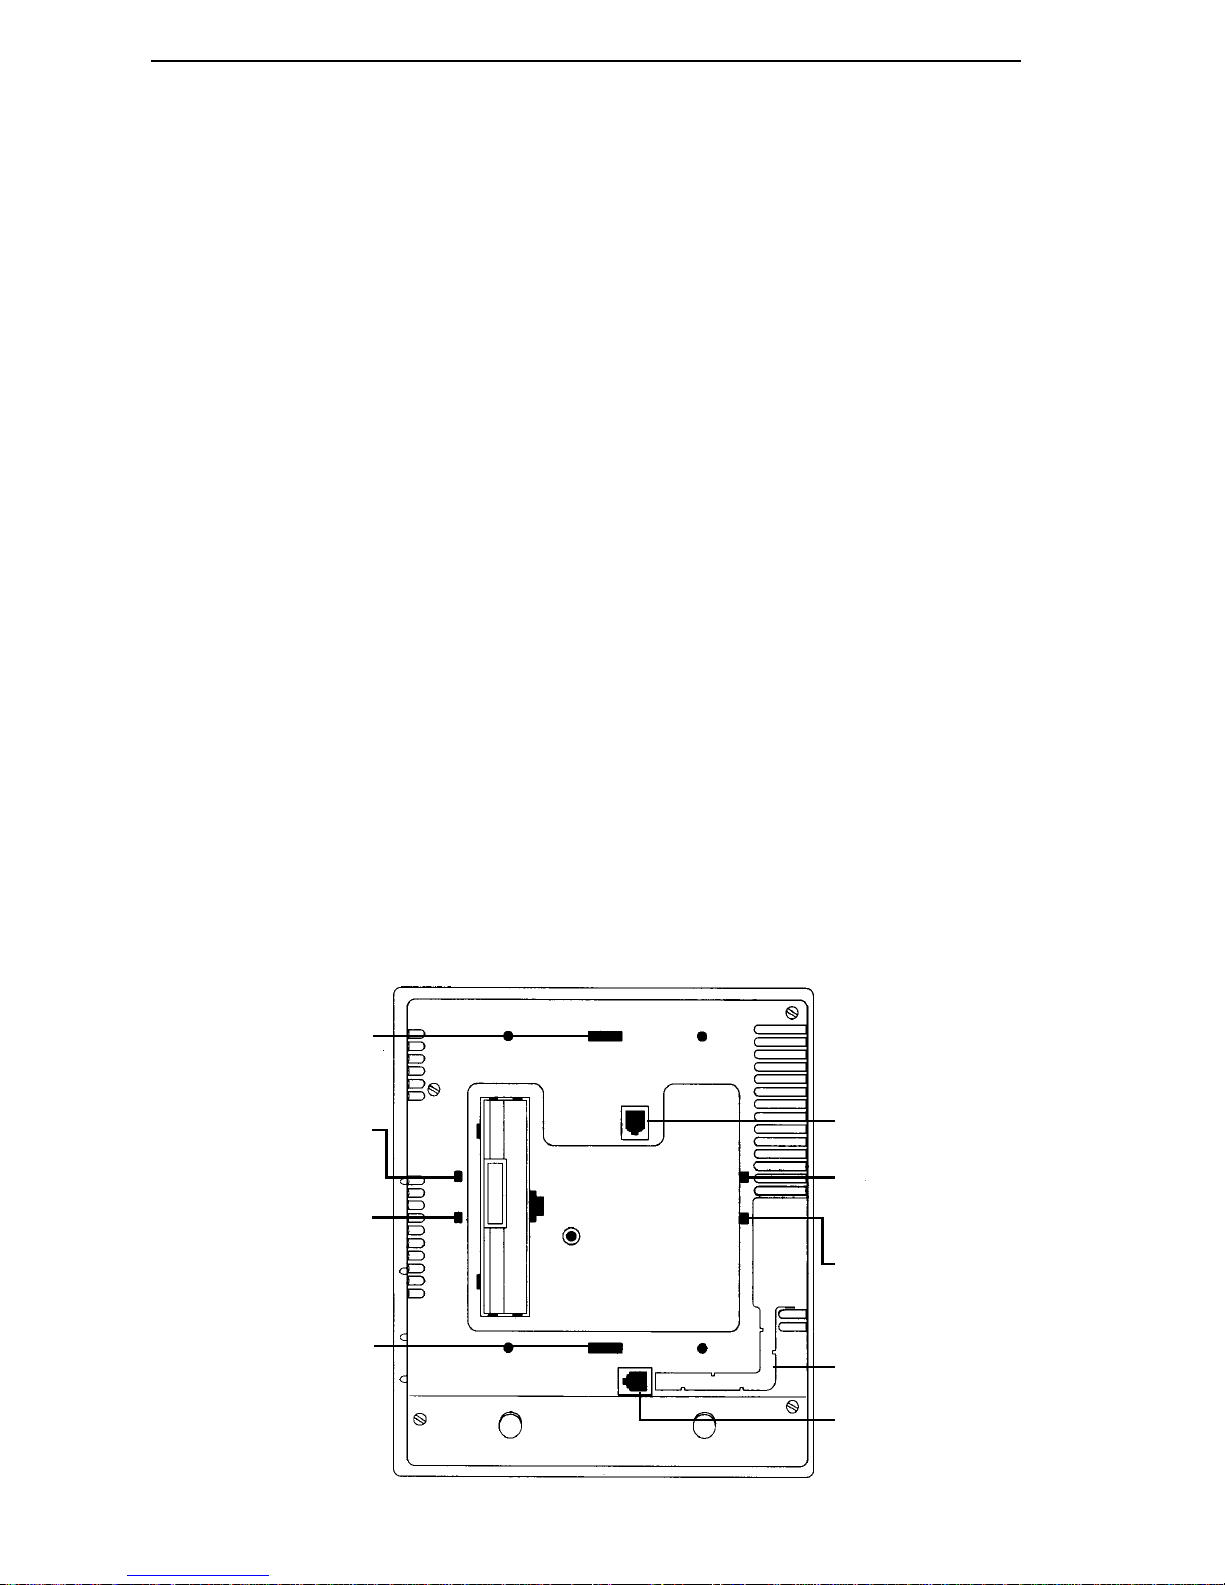
Installation Overview
The DP200 Display Phone can be installed for either
desktop or wall mount use.
To begin assembling your phone, remove the phone, the
handset and cord, the baseplate, and the line cords from
the package.
Installing Your DP200 Display Phone
To install your DP200 Display Phone, complete the
following steps, and then follow the instructions for the
type of mounting to be used.
Installation 69
Locking Slot
(Wal Mount)
Mounting Post Holes
(Desktop)
Mounting Post Holes
(Wal Mount)
Locking Slot
(Desktop)
1. Turn the phone face down so that you see the
bottom of the housing, as shown in Figure 1.
2. Plug one end of the handset cord into the
handset jack, located on the bottom of the
housing. The end clicks into place when
properly inserted. Route the handset cord
through the handset channel in the housing.
Line Jack
Mounting
Post Holes
(Desktop)
Mounting
Post Holes
(Wal Mount)
Handset Channel
Figure 1
DP200 Display Phone
base and connectors
Handset Jack
Page 68
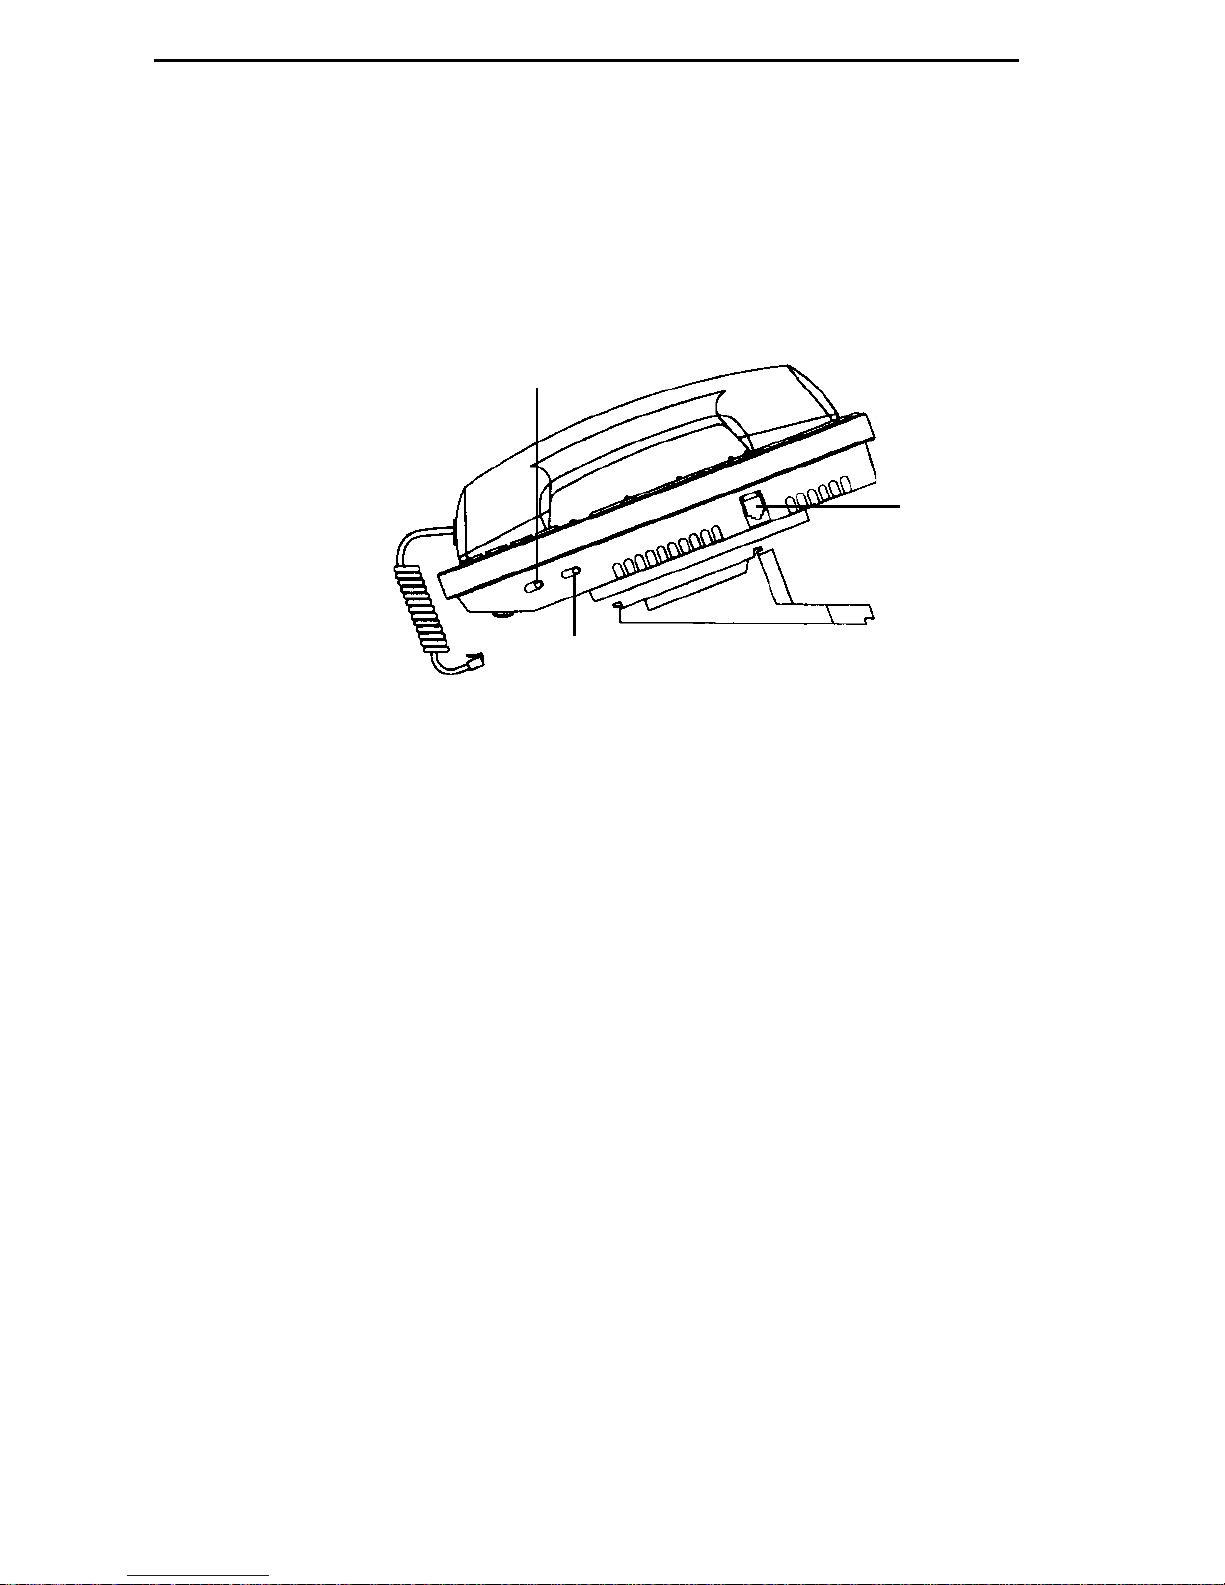
70 Telecor DP200 Display Phone User’s Guide
For a Desktop Phone
When the DP200 Display Phone is assembled for desktop
use, the upper end of the housing is positioned higher than
the lower end, as shown in Figure 2.
Program switch
Figure 2
Desktop
installation
Ringer On/Off switch
Data Port
1. Plug the line cord into the line jack on the bottom
of the housing.
2. Turn the baseplate face down. Orient the baseplate so that its wide end is toward the upper
half of the phone housing.
3. Insert the baseplate mounting posts into the
topmost pair of mounting post holes in the
housing.
4. Squeeze the baseplate latch into the locking slot
on the housing. Verify the baseplate is firmly
attached.
5. Plug the other end of the handset cord into the
handset. The end clicks into place when
properly inserted.
6. Turn the phone right side up and put the
handset in the cradle.
7. Plug the line cord into the appropriate wall
jack, and then check for a dial tone.
Page 69
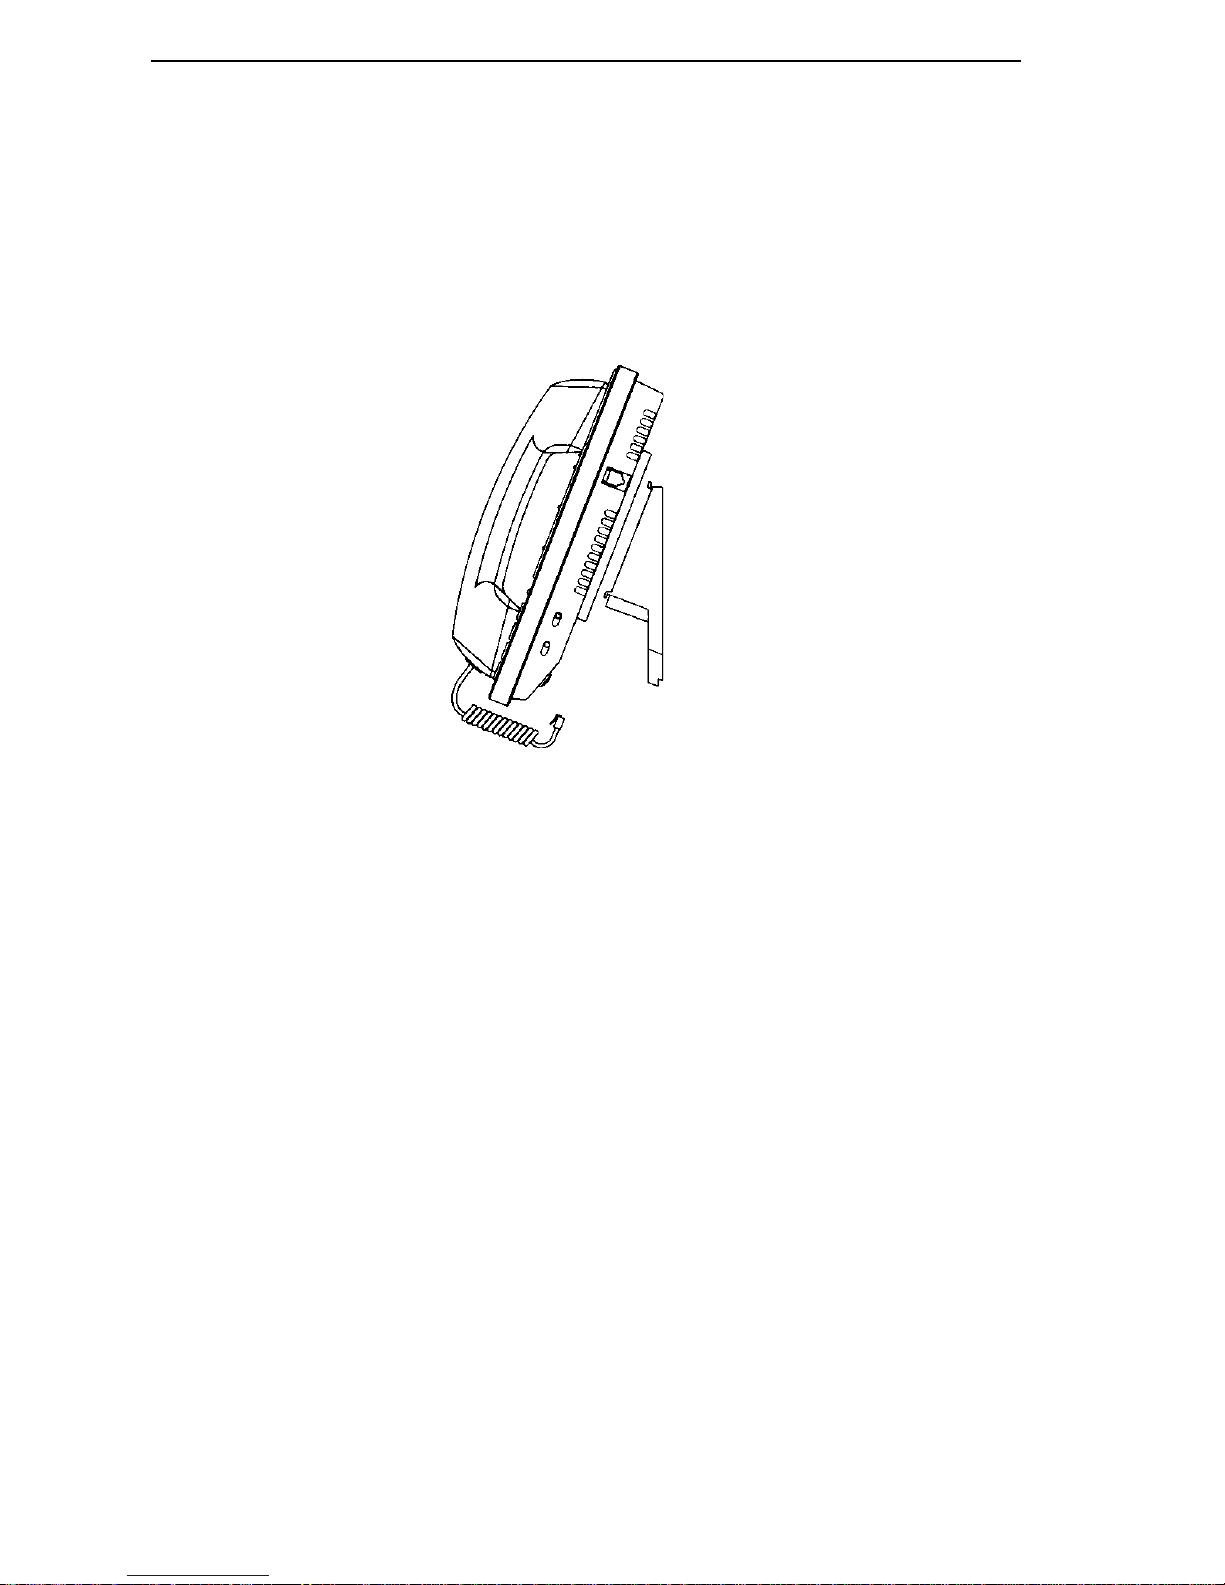
Installation 71
For a Wall Mount Phone
When the DP200 Display phone is assembled for wall
mount use, the upper end of the housing is tilted back, as
shown in Figure 3.
Figure 3
Wall Mount
installation
1. Plug the short line cord into the line jack in the
housing.
2. Turn the baseplate face down so that its narrow
end is toward the upper half of the phone
housing.
3. Thread the free end of the line cord up through
the hole in the center of the baseplate. The cord
should come out the back side of the baseplate.
4. Insert the baseplate mounting posts into the
lower pair of mounting post holes in the housing.
5. Insert the two provided screws in the phone to
hold the baseplate.
6. Squeeze the baseplate latch into the locking slot
on the housing. Verify the baseplate is firmly
attached, and turn the phone right side up.
Page 70

72 Telecor DP200 Display Phone User’s Guide
7. Plug the short line cord into the wallplate.
8. Align the keyholes in the baseplate bottom with
the mounting posts on the wallplate. Slip the
baseplate over the wallplate posts and slide the
phone down as far as it will go. Verify the
phone is securely fastened before letting go.
9. Adjust the position of the handset retaining
hook, located on the face of the housing, by
lifting up the hook and rotating it 180°. When
properly positioned, the edge of the hook
extends beyond the lip of the handset well.
10. Plug the free end of the handset cord into the
handset. Hang the handset cradle in the cradle,
and then check for a dial tone.
Page 71

Reference 75
Feature Buttons and Access Codes
This following list contains all Feature button codes and a
description of each function. Use these codes to customize your DP200 Display Phone Feature buttons.
Note You must dial a zero if the second digit in the
access code is preceded by a zero. To customize a
Feature button for Pickup Group (03), for example,
press 0, then press 3. The numbers and instructions in parenthesis are customizing codes, not
steps to follow when using these features.
ACD Log Off (17)—Log off all ACD groups onto which
you are logged.
ACD Log On With Specific Code (19 + ACD code)—Log
on to an ACD using a preassigned account code.
ACD Wrap-Up Cancel (42)—Cancel the automatic wrapup mode so that you can receive more calls from the ACD
queue.
Blind Hold (26)—Place an incoming call on hold without
first answering the call.
Blind Transfer (05 + Extension)—Transfer a call ringing
at your extension to another extension without connecting
to the call.
Blind Transfer to Voice Mail (40)—Transfer a call ringing
at your extension to your Voice Mail without connecting
to the call.
Call Waiting On/Off Toggle (06)—Turn call waiting tones
on or off.
Conference (44)—Connect two other callers without
using a conference room.
Page 72

76 Telecor DP200 Display Phone User’s Guide
Dial (07 + number)—Dial a specific number. If programming an outside number, include a 9 and appropriate long
distance digits prior to the number.
Do Not Disturb On/Off (08)—Turn on or off the Do Not
Disturb setting.
Forward Cancel (09)—Cancel any call forwarding that
you previously programmed at your extension.
Forward From (10)—Forward incoming calls received at
another extension to your extension.
Forward From a Specific Extension (11 + Extension)
Forward calls that ring at a preassigned extension to ring
at your extension.
Forward To (12)—Forward your calls to another extension.
Forward To Specific Extension (13 + Extension)—Forward
your calls to a specific extension.
Handsfree On/Off (14)—Turn on or off the Handsfree
mode.
Music Over Speaker (39)—Hear music over the phone
speaker, if your system is connected to a music source.
Page Over Specific Zone (25 + Zone Number)—Gain
access to a specific Paging Zone to make an announcement over a specific preassigned Page Zone. To page all
zones, dial Page Zone 04.
Page Over Zone (24)—Gain access to the Paging feature.
Then dial the Page Zone number. You can make an
announcement that is heard on all speakers and speakerphones in the Page Zone that you selected.
Park (27)—Park the current call.
Park Retrieve (28)—Retrieve a parked call.
Page 73

Reference 77
Personal Speed Dial (38)—Gain access to the Personal
Speed Dial feature.
Pickup Extension (01)—Answer a call ringing at another
extension.
Pickup Group (03)—Answer a call ringing at any phone
in your group.
Pickup Specific Extension (02 + Extension)—Answer a
call ringing at a specific extension.
Relay 1 (29)—Activate the dry contact relay #1 on the
Port Expansion Unit. For example, the contact could be
connected to a security door lock.
Station Status (16)—Hear the system port number and
extension number of the station.
System Speed Dial (33)—Gain access to System Speed
Dial numbers. There are 99 System Speed Dial numbers
shared by everyone on the system. Each Speed Dial
number has a code (01-99) associated with it that must be
dialed after pressing the System Speed Dial button.
System Speed Dial with Specific Number (34 + Code)—
Gain access to a specific System Speed Dial number.
Transfer (35)—Transfer the call to another extension.
Transfer to a Specific Extension (36 + Extension)—
Transfer a call to a specific extension.
Voice Mail (37)—Gain access to your Voice Mail.
Page 74

78 Telecor DP200 Display Phone User’s Guide
Feature Keystrokes
You can use any of the following features by using the appropriate keystrokes
on the phone keypad.
Feature Keystroke Sequence
ACD Log Off 7001
ACD Log On 7000 + ACD Account Code
ACD Wrap-Up Cancel 7002
Direct External Dial Tone # # 4
Do Not Disturb - On # 5
Do Not Disturb - Off # # 5
Extension Status # # 7
External Flash Flash + * 2
Forward Cancel * * 3
Forwarding From # 3 + Extension
Forward To * 3 + Dial Extension
Forward To Your Voice Mail # # 3
Page - All Zones * * 9
Page - Zone 1 * 9
Page - Zone 2 # 9
Park–Place Flash + #, 0–9
Park Retrieve * 2 + 0–9
Personal Speed Dial # 4 + 0–9
Pick Up Extension # 8 + Extension
Pick Up Group * 8
Redial * 0
Reset Extension * # + 8 6
System Speed Dial * 4 + 01–99
Transfer–Announced Flash + * 7 + Extension
Transfer–Unannounced Flash + * 7 + Extension + hang up
Voice Mail 6 + Extension
Page 75

Appendix A 79
Index 79
Appendix A
LIMITED HARDWARE WARRANTY
This is the warranty between Telecor, Inc., together with entities under its control (hereinafter called “we”, “us” or “Telecor”), and the
original end user of Telecor brand product (hereinafter called “you”).
Warranty Term
We warrant all products manufactured by us to be free from defects in material and workmanship under normal use and service for
one (1) year. This warranty is offered only to you, the original end user, and is subject to all of the terms and conditions set forth herein.
For purposes of determining the warranty period, the warranty period will commence with the later of: 1) the date the product was
manufactured, or 2) the date of your purchase as evidenced by your Product Registration Card. The date of your purchase will be
deemed to be the date the product was manufactured unless you provide us with the correctly completed Product Registration Card.
THIS WARRANTY DOES NOT BECOME EFFECTIVE UNTIL TELECOR RECEIVES A COMPLETED PRODUCT REGISTRATION CARD FOR THE PRODUCT.
Exclusions
No warranty is extended regarding products which we determine have, by you or another, been subjected to operating conditions and/
or environmental conditions in excess of the maximum values therefor in the applicable specifications or otherwise have been subjected
to misuse, neglect, improper installation, repairs not authorized by us, alteration or damage. We make no warranty as to experimental,
developmental, or nonstandard products and no warranty as to items not manufactured by us but included in a product sold hereunder.
NO WARRANTY IS MADE WITH REGARD TO SOFTWARE. Software is licensed for use pursuant to the terms of a separate
software license agreement.
The products covered by this warranty are not consumer products and are not intended for personal, family or household purposes.
Exclusive Remedies
Our entire liability and your exclusive remedy shall be, at our sole option, the repair or replacement of defective products after the
defective products have been returned to us. Repair parts and products may be either reconditioned or new, but, if reconditioned, shall
be of the same quality as new parts or products. All replaced parts become the property of Telecor.
Telecor may, at its sole option, refuse to accept as defective product that
a) is subject to the Exclusions provision set forth prior; or
b) cannot be demonstrated to be defective by Telecor and you are unable to provide adequate information describing how
the product failed.
Such product will, at your option and expense, either be:
a) returned to you in the state received, or
b) repaired and returned to you.
Service Covered by Warranty
This warranty is fulfilled through your Telecor Authorized Reseller. If you need service during the warranty period, you must contact
the Telecor Authorized Reseller from whom you purchased the product. If your Telecor Authorized Reseller determines that the product
is defective, then follow the procedures listed in the section entitled “Telecor Return Procedures”.
Out-of-Warranty Service
Out-of-warranty product service is fulfilled by your Telecor Authorized Dealer. If you desire repairs after the warranty is over, contact
the Telecor Authorized Reseller from whom you purchased the equipment. You must follow the procedures listed below in the section
entitled “Telecor Return Procedures”. For out-of-warranty period services, you are responsible for all freight and insurance charges.
Telecor Return Procedures
Please follow this procedure:
a) Contact your Telecor Authorized Reseller and request a Return Material Authorization (RA) number. Please be prepared
to provide the serial number of the product, the name of the reseller from whom you purchased the product, the date of
purchase, and a description of the failure that is as complete as possible.
b) Pack the product in its original container and packing or an equivalent. If you need instructions on packing the product, your
Telecor Authorized Reseller can help you with this at the time that the RMA number is issued.
c) Write the RMA number CLEARLY on the outside of the shipping box.
d) For services during the warranty period, you are responsible for the shipping and insurance charges to your Telecor Authorized
Reseller and your Telecor Authorized Reseller will pay the shipping charges, including insurance, to return the product to you.
For out-of-warranty period services, you are responsible for all freight and insurance charges.
Page 76

80 Telecor DP200 Display Phone User’s Guide
PRODUCTS RETURNED WITHOUT A DULY ISSUED RMA NUMBER WILL BE RETURNED TO YOU AT YOUR EXPENSE.
PRODUCTS SENT DIRECTLY TO TELECOR WILL BE RETURNED TO YOU AT YOUR EXPENSE.
Warranty Disclaimers
THE FOREGOING LIMITED WARRANTY AND REMEDIES ARE EXCLUSIVE AND EXPRESSLY IN LIEU OF ALL OTHER
WARRANTIES EXPRESS OR IMPLIED, EITHER IN FACT OR BY OPERATION OF LAW, STATUTORY OR OTHERWISE,
INCLUDING WARRANTIES OF A NEW DESIGN, MERCHANTABILITY, FITNESS FOR A PARTICULAR PURPOSE OR NONINFRINGEMENT. TELECOR NEITHER ASSUMES NOR AUTHORIZES ANY OTHER PERSON TO ASSUME FOR IT OTHER
LIABILITY IN CONNECTION WITH THE SALE, INSTALLATION OR USE OF ITS PRODUCTS. AS WARRANTED ABOVE,
YOUR SOLE AND EXCLUSIVE REMEDY SHALL BE THE REPAIR OR REPLACEMENT OF THE PRODUCT. SOME JURISDICTIONS DO NOT ALLOW THE EXCLUSION OF IMPLIED WARRANTIES, SO THE ABOVE EXCLUSION MAY NOT APPLY
TO YOU. IN THE EVENT THAT IMPLIED WARRANTIES EXIST BY OPERATION OF LAW, ANY IMPLIED WARRANTIES,
INCLUDING THE IMPLIED WARRANTY OF MERCHANTABILITY AND THE IMPLIED WARRANTY OF FITNESS FOR A
PARTICULAR PURPOSE, ARE LIMITED IN DURATION TO NINETY (90) DAYS FROM THE DATE OF DELIVERY.
Limitation of Liability
UNDER NO CIRCUMSTANCES, INCLUDING NEGLIGENCE, WILL TELECOR COMMUNICATIONS, INC. BE LIABLE FOR
ANY DAMAGES, INCLUDING LOST PROFITS, LOST DATA, LOST SAVINGS OR INCIDENTAL, SPECIAL, OR CONSEQUENTIAL DAMAGES ARISING OUT OF THE USE OF OR INABILITY TO USE THE PRODUCT, EVEN IF TELECOR OR A TELECOR
AUTHORIZED REPRESENTATIVE HAS BEEN ADVISED OF THE POSSIBILITY OF SUCH DAMAGES. IN NO EVENT WILL
TELECOR BE LIABLE FOR ANY CLAIM BY ANY OTHER PARTY.
In no event shall Telecor’s total liability to you for all damages, losses, and causes of action (whether in contract, tort [including
negligence], or otherwise) exceed the amount paid by you for the product.
Product Changes
TELECOR RESERVES THE RIGHT TO MAKE CHANGES IN ITS PRODUCTS WITHOUT OBLIGATION TO INCORPORATE
SUCH CHANGES INTO ANY PRODUCT PREVIOUSLY MANUFACTURED.
Production Status
Each product is manufactured from new parts or new and serviceable used parts (which perform like new parts). In some cases, the
product may not be new and may have been previously installed. Regardless of the product’s production status, our warranty terms
apply.
Controlling Law and Severability
This Limited Warranty shall be governed by and construed in accordance with the laws of the State of California, except that body of
California law concerning conflicts of law. If for any reason a court of competent jurisdiction finds any provision of this Limited
Warranty, or portion thereof, to be unenforceable, that provision of the Limited Warranty shall be enforced to the maximum extent
permissible so as to effect the intent of the parties, and the remainder of this Limited Warranty shall continue in full force and effect.
Complete Agreement
This Limited Warranty constitutes the entire agreement between the parties with respect to the use of the product and supersedes all
prior or contemporaneous understandings or agreements, written or oral, regarding such subject matter.
Page 77

Appendix B 81
Index 81
Appendix B
SOFTWARE LICENSE AGREEMENT
(End-User Computer Telephony Software)
PLEASE READ THIS DOCUMENT CAREFULLY BEFORE USING THE SOFTWARE. PRIOR TO USING THE SOFTWARE YOU
MUST COMPLETE AND RETURN A PRODUCT REGISTRATION CARD. NO LICENSE IS GRANTED UNTIL THE PRODUCT
REGISTRATION CARD IS DISPATCHED TO TELECOR INC.. IF YOU DO NOT AGREE TO THE TERMS OF THIS LICENSE,
PROMPTLY RETURN THE UNUSED SOFTWARE TO THE PLACE WHERE YOU OBTAINED IT.
License
Computer telephony application, demonstration, and system software, whether downloaded electronically, on disk, CD-ROM, tape or
other media or embedded in ROM (the “Software”), and any associated documentation, are licensed to you by Telecor, Inc. (“Telecor”)
for use with Telecor brand telephone system hardware. You own the media, if any, on which the Software is recorded, and the physical
embodiment of the written documentation, if any, but Telecor retains title to the Software. Copying of the written documentation is
prohibited without the express written permission of Telecor. This license also allows you to make one copy of the Software in machinereadable form for backup purposes only. You must reproduce on all copies the Telecor copyright notice and any other proprietary legends
that were on the original copy of the Software. This license does not grant you the right to create derivative works based upon the Software
in whole or in part. You may not transfer the Software. The Software is not designed or licensed for use in in-line control of equipment
in hazardous environments such as operation of nuclear facilities, aircraft navigation or control, or direct life support machines. System
software elements of the Software are licensed for use only on a “Designated Machine”. Only a “Designated Machine” is the Telecor
brand telephone hardware that you identify to Telecor by returning the Product Registration Card. You are licensed to use only those
components of the Software which are licensed to you as evidenced by an invoice from Telecor or a Telecor Authorized Reseller.
Restrictions
The Software contains copyrighted material, trade secrets, and other proprietary information, and in order to protect them you may
not decompile, reverse engineer, disassemble, or otherwise reduce the Software to a human-perceivable form. You may not use the
Software for the purpose of determining how the Software functions nor to develop, create or improve products (whether software and/
or hardware) which perform functions similar to the Software. If you wish to exercise any rights under Article 6.1 b of the EC Directive
on the Legal Protection of Software, (Directive 91/250), you shall, prior to any such exercise, write to the Legal Department of Telecor.
Except as set forth above, you may not modify, network (except as required for normal use of the Software), rent, lease, loan, sell,
distribute, or create derivative works based upon the Software in whole or in part. You may not electronically transfer the Software from
one computer to another over a network, except as required for normal use of the Software.
Termination
This license is effective until terminated. You may terminate this License at any time by destroying the Software and all copies thereof.
This License will terminate immediately without notice from Telecor if you fail to comply with any provision of this License. Upon
termination you must destroy the Software and all copies thereof.
Export Law Assurances
You agree and certify that neither the Software nor any other technical data received from Telecor, nor the direct product thereof, will
be exported outside the United States except as authorized in advance by Telecor, in writing, and as permitted by the laws and regulations
of the United States.
Government End Users
(a ) If this Software is acquired by or on behalf of a unit or agency of the United States Government, this provision applies. This
Software (i) was developed at private expense, and no part of it was developed with government funds; (ii) is a trade secret
of Telecor which is subject to exemption of 5 USC §552(b)(4) for all purposes of the Freedom of Information Act; (iii) is
“commercial computer software” subject to limited utilization as provided in the contract between the vendor and the
governmental entity; and (iv) in all respects is proprietary data belonging solely to Telecor.
(b) For units of the Department of Defense (DOD), this Software is sold only with “Restricted Rights” as that term is defined in
the DOD Supplement to the Federal Acquisition Regulations (“DFARS”) 52.227-7013 (c)(1)(ii), and use, duplication, or
disclosure is subject to restrictions as set forth in subparagraph (c)(1)(ii) of the Rights in Technical Data and Computer Software
clause at DFARS 52.227-7013. Manufacturer: Telecor Inc., 1114 Westport Crescent, Mississauga, ON L5T 1G1.
(c ) If this Software was acquired under a GSA Schedule, the Government has agreed (i) to refrain from changing or removing
any insignia or lettering from the Software that is provided and from producing copies of manuals or media (except one copy
for backup purposes); (ii) that title to and ownership of this Software and any reproductions thereof shall remain with Telecor;
(iii) that use of this Software shall be limited to the facility for which it is acquired; and (iv) that if use of the Software is
discontinued at the installation specified in the purchase/delivery order and the Government desires to use it at another location,
it may do so by giving prior written notice to Telecor, specifying the type of computer and new location site.
(d) Government personnel using this Telecor Software, other than under a DOD contract or GSA Schedule, are hereby on notice
that use of this Software is subject to restrictions that are the same as, or similar to, those specified above.
Page 78

82 Telecor DP200 Display Phone User’s Guide
Limited Warranty on Media and Physical Embodiment of the Documentation
To the extent you are receiving Software on media, Telecor warrants that such media is free from defects in materials and workmanship
under normal use for a period of ninety (90) days from the date of purchase as evidenced by a copy of the receipt. Telecor warrants
that the physical embodiment of the written documentation is free from defects in materials and workmanship under normal use for
a period of ninety (90) days from the date of purchase as evidenced by a copy of the receipt. Telecor’s entire liability and your exclusive
remedy will be replacement of the media and/or written documentation that does not meet Telecor’s limited warranty and is returned
to Telecor or a Telecor authorized representative with a copy of the receipt. Telecor will have no responsibility to replace media or written
documentation damaged by accident, abuse, or misapplication. ANY IMPLIED WARRANTIES ON THE MEDIA AND/OR THE
PHYSICAL EMBODIMENT OF THE WRITTEN DOCUMENTATION, INCLUDING THE IMPLIED WARRANTIES OF MERCHANTABILITY AND FITNESS FOR A PARTICULAR PURPOSE, ARE LIMITED IN DURATION TO NINETY (90) DAYS
FROM THE DATE OF DELIVERY.
Disclaimer of Warranty on Software
You expressly acknowledge and agree that use of the Software is at your sole risk. The Software and related documentation are provided
“AS IS” and without warranty of any kind and Telecor EXPRESSLY DISCLAIMS ALL WARRANTIES, EXPRESS OR IMPLIED,
INCLUDING, BUT NOT LIMITED TO, THE IMPLIED WARRANTIES OF MERCHANTABILITY, FITNESS FOR A PARTICULAR
PURPOSE AND NON-INFRINGEMENT. TELECOR DOES NOT WARRANT THAT THE FUNCTIONS CONTAINED IN THE
SOFTWARE WILL MEET YOUR REQUIREMENTS, OR THAT THE OPERATION OF THE SOFTWARE WILL BE UNINTERRUPTED OR ERROR-FREE, OR THAT DEFECTS IN THE SOFTWARE WILL BE CORRECTED. FURTHERMORE, TELECOR
DOES NOT WARRANT OR MAKE ANY REPRESENTATIONS REGARDING THE USE OR THE RESULTS OF THE USE OF THE
SOFTWARE OR RELATED DOCUMENTATION IN TERMS OF THEIR CORRECTNESS, ACCURACY, RELIABILITY, OR OTHERWISE. NO ORAL OR WRITTEN INFORMATION OR ADVICE GIVEN BY TELECOR OR A TELECOR AUTHORIZED
REPRESENTATIVE SHALL CREATE A WARRANTY OR IN ANY WAY INCREASE THE SCOPE OF THIS WARRANTY. SHOULD
THE SOFTWARE PROVE DEFECTIVE, YOU (AND NOT TELECOR OR A TELECOR AUTHORIZED REPRESENTATIVE)
ASSUME THE ENTIRE COST OF ALL NECESSARY SERVICING, REPAIR, OR CORRECTION.
Limitation of Liability
UNDER NO CIRCUMSTANCES, INCLUDING NEGLIGENCE, SHALL TELECOR BE LIABLE FOR ANY INCIDENTAL, SPECIAL, OR CONSEQUENTIAL DAMAGES THAT RESULT FROM THE USE OF OR INABILITY TO USE THE SOFTWARE OR
RELATED DOCUMENTATION, EVEN IF TELECOR OR A TELECOR AUTHORIZED REPRESENTATIVE HAS BEEN ADVISED
OF THE POSSIBILITY OF SUCH DAMAGES.
In no event shall Telecor’s total liability to you for all damages, losses, and causes of action (whether in contract, tort [including
negligence], or otherwise) exceed the amount paid by you for the Software.
Controlling Law and Severability
This License shall be governed by and construed in accordance with the laws of the State of California, except that body of California
law concerning conflicts of law. If for any reason a court of competent jurisdiction finds any provision of this License, or portion thereof,
to be unenforceable, that provision of the License shall be enforced to the maximum extent permissible so as to effect the intent of the
parties, and the remainder of this License shall continue in full force and effect.
Unregistered Software
Certain of Telecor Software will exhibit modified functioning if such Software is not registered as required.
Complete Agreement
This License constitutes the entire agreement between the parties with respect to the use of the Software and related documentation,
and supersedes all prior or contemporaneous understandings or agreements, written or oral, regarding such subject matter. For purposes
of this License the term “Telecor” includes the entities under the control of Telecor Inc.
Page 79

Index
Index 83
A
A Feature button 6, 14, 16
answering a call 16–17, 20
multiple calls 17
using the Speakerphone 20
Automatic Call Distribution (ACD) 7,
38, 75, 78
ACD Log Off 75, 78
ACD Log On 75, 78
monitoring 38
status display 7
Wrap-Up Cancel 75, 78
B
B Feature button 6–7, 45–46
blind call processing 23–24, 56, 75
Blind Hold 75
Blind Transfer 56, 75
to a specific extension 24
to Voice Mail 24
to your Voice Mail 56, 75
Blind Hold Feature button 24
Blind Transfer to Voice Mail Feature
button 24
C
Call Forwarding 6
Call Pickup 18
Call Waiting 6
Call Waiting On/Off Feature button 45
Call Waiting tones 45–46, 75
disabling 45–46
enabling 45–46
Caller ID 16, 54
announcement with Voice Mail 54
character display 4–9
external calls 5–6
transferred by a receptionist 5
transferred by an Auto
Attendant 6
internal call 5–6
Conference Calling 26
Conference Feature button 26
Conference Rooms 24–25
entering 25
gaining access to 25
locking or unlocking 25
monitoring 38
cordless phone port 45
Custom Feature Buttons 8–9
D
desktop installation 70
Dial by Name 54, 56–57, 59
using 57, 59
Voice Mail 54
setting up your name 56
Digital Pager 61–66
notification of new
Voice Mail 61–66
Direct External Dial Tone 13–16, 78
disabling 15
enabling 15
Direct Station Select/Busy Lamp Field
(DSS/BLF) 3
disconnecting a call 15, 20
using the Speakerphone 20
DND On/Off Feature button 28–29
Do Not Disturb 6, 28, 76, 78
dry contact relay 77
DSS/BLF buttons 9, 36
Page 80

84 Telecor DP200 Display Phone User’s Guide
E
Extension Status 78
Extension View buttons 3, 9, 36–37
additional monitoring
features 37–38
Automatic Call Distribution
(ACD) 38
Conference Rooms 38
Guest Mailboxes 38
Work Groups 38
customizing 36–37
individual buttons 37
external call 14–15
Direct External Dial Tone 14–15
making 14–15
external dial tone 14
External Flash 78
F
Feature button programmer
23, 33, 35, 37, 39–40
Personal Speed Dials 33
Feature Buttons 8–9, 18, 24, 26, 28,
30, 32–47
Blind Hold 24
Blind Transfer to Voice Mail 24
Call Waiting On/Off 45
Cancel Forwarding 28, 30
Conference 26
customizing 8–9, 24, 34–36
default setting 35
DND On/Off 28–29
Handsfree On/Off 46
Page All 32
Page Over Zone 33
Pickup Extension 30
Pickup Group 31
Redial 8
reviewing 36
standard 8
Flash 8
Hold 8, 18
Mute 8
Voice Mail 8
System Speed Dial 34
Voice Mail 51
Feature buttons 3
Feature keystrokes 78
Feature Status Display 6
Flash button 3, 8, 13
Forward Cancel 76, 78
Forward From 76, 78
specific extension 76
Forward To 78
specific extension 76
Forwarding a Voice Mail
message 58–59
to a group 60
to a range of extensions 59
to an individual 59
Forwarding calls 27–30
cancelling 30–31
from an extension 29
to another extension 27
to your Voice Mail 28–29
Do Not Disturb 28–34
using Do Not Disturb 28
G
Greeting 54–55
Voice Mail 54
recording 55
Guest Mailboxes 38
monitoring 38
H
Handsfree 6, 46
Handsfree On/Off Feature button 46
Headset Mode 44
switching to 44
Hold 18
placing a call on hold 18
taking a call off hold 18
Hold button 3, 8, 18
Page 81

Index 85
I
installation 69–71
desktop 70
wall mount 71–72
internal call 13–14
making 13–14
internal dial tone 19
K
Keypad 40–41, 52
L
line 1 button 13, 26
line 2 button 17, 24, 26
Line Appearance buttons 9, 36
M
making a call 13–15, 19–20
external 14–15
internal 13–14
using the Speakerphone 19–20
Mode 41–47
Headset 44–47
Office 41–43
setting up 41–43
Paging Volume 42
Ring Select 42
Ringer Volume 43
Warehouse 41
setting up 41
Modem Port 45
Music Over Speaker 76
Mute button 3, 8
O
Office Mode 41–43
setting up 41–43
P
Page All Feature button 32
Page Over Zone 76
Page Over Zone Feature button 33
Page Volume 41–42
changing settings 42
Page Zone 1 78
Page Zone 2 78
Paging 32, 76, 78
over a Paging Zone 32
over all Paging Zones 32, 78
over specific zone 76
Park 76, 78
Park Retrieve 76, 78
parking a call 31–32
retrieving 32
Passcode 54, 55
Voice Mail 54
creating or changing 55
Personal Speed Dial Feature button 33
Personal Speed Dials 39–40, 76, 78
programming 39–40
reviewing 40–41
using 33
phone lines 38–39
changing the number of 38–39
Pick Up Extension 78
Pick Up Group 78
picking up a call 30–31
in a group 31
ringing at another extension 30–31
pickup 77
extension 77
group 77
specific extension 77
Pickup Extension Feature button 30
Pickup Group Feature button 31
previewing a call 17
Program switch 41
Page 82

86 Telecor DP200 Display Phone User’s Guide
R
Redial button 3, 8, 19
redialing a number 19, 78
Redirecting Voice Mail Messages 66
Reset Extension 78
Ring Select 41–43
changing 42–43
Ringer 47
turning off 47
turning on 47
Ringer Volume 41, 43
changing 43
S
sending a Voice Mail message 57–58
to a group 58
to a range of extensions 57
to an individual 57
Speakerphone 19–20
answering a call 20
disconnecting a call 20
making a call 19–20
using 19
Speakerphone button 19–20
Speed Dials 33-34
Personal 33–34
System 33–34
Standard Feature Buttons 8
Flash 8
Hold 8
Mute 8
Redial 8
Voice Mail 8
Station Status 77
Status Display 6–7
Automatic Call Distribution 7
Feature 6
Voice Mail 7
System Speed Dials 33-34, 77–78
T
Text Message 16
Transfer 56, 77
blind 56
to your Voice Mail 56
to a specific extension 77
Transfer button 18
transferring a call 18–19, 78
announced 19, 78
unannounced 19, 78
V
Voice Mail 24, 51–66, 77–78
blind transferring a call to 56
Dial by Name Directory 56
setting up your name 56
exiting 52
forwarding a message 52, 58–59
to a group 59
to a range of extensions 59
to an individual 59
gaining access 51, 60
from an external line 60
to your Voice Mail 51
Greeting 54, 55
recording 55
listening to a message 51, 53
Caller ID 53
delete 53
fast forward 53
forward to another extension 53
next message 53
pause 53
replay 53
rewind 53
Passcode 54, 55
creating or changing 55
prompts 51
sending a message 57
to a group 57
Page 83

Index 87
to a range of extensions 57
to an individual 57
setting up features 54, 61–66
Caller ID announcement 54
Dial by Name 54
greeting 54
passcode 54
playback order 54
Setup Options menu 54
time and date 54
Voice Mail Notification 54,
61–66
setup options 51, 54
stop recording 52
using the Keypad 52
key functions 52
Voice Mail Notification on a
Digital Pager 61–66
Voice Mail button 3, 8
Voice Mail feature button 51
Voice Mail Notification on a
Digital Pager 61–66
Advanced settings 63–66
cancelling notification to
multiple pagers 65
gaining access 63
redirecting new messages to
other extensions 66
setting up notification to up to
three pagers 64
setting up the paging
interval 65
setting up the number of paging
attempts 65
turning off redirecting 66
Basic settings 61–63
gaining access 62
turning off 63
turning on 62
Voice Mail Status Display 7
Volume button 19, 41
W
wall mount installation 71–72
Warehouse Mode 41-43
setting up 41–43
Work Groups 38
monitoring 38
 Loading...