

Teleco TSV20D Operating Instruction
- 76 -
Contents
Safety Information ................................................ 76
Markings on the Product.......................................77
Environmental Information....................................78
Features ............................................................... 78
Accessories Included............................................78
Standby Noti cations ............................................ 78
TV Control Switch & Operation.............................78
Inserting the Batteries into the Remote ................ 79
Connect Power ....................................................79
Antenna Connection ............................................. 79
Noti cation ............................................................ 79
Speci cation .........................................................80
Remote Control .................................................... 81
Connections..........................................................82
Switching On/Off ................................................... 83
First Time Installation............................................ 83
Media Playback via USB Input .............................84
Recording a Programme ...................................... 84
Timeshift Recording .............................................. 85
Instant Recording ................................................. 85
Watching Recorded Programmes ....................... 85
Recording Con guration ....................................... 85
Media Browser Menu............................................85
FollowMe TV (if available) ....................................85
CEC and CEC RC Passthrough ...........................86
E-Manual ..............................................................86
General TV Operation .......................................... 90
Using the Channel List ......................................... 90
Con guring Parental Settings ............................... 90
Electronic Programme Guide (EPG) ....................91
Teletext Services .................................................. 91
Software Upgrade.................................................91
Troubleshooting & Tips ......................................... 92
PC Input Typical Display Modes ........................... 93
AV and HDMI Signal Compatibility .......................93
Supported Video File Formats for USB Mode ...... 94
Supported Picture File Formats for USB Mode .... 94
Supported Audio File Formats for USB Mode ......95
Supported Subtitle File Formats for USB Mode ...96
Supported DVI Resolutions ..................................97
Internet Portal .....................................................100
Internet Browser .................................................101
HBBTV System...................................................101
Smart Center ......................................................102
DVD Mode ..........................................................104
Remote Control .................................................. 107
General DVD Operation (depending on model) . 108
MOBIL TV INSTRUCTIONS ...............................109
CAUTION: TO REDUCE THE RISK OF ELECTRIC SHOCK DO
NOT REMOVE COVER (OR BACK).
NO USER-SERVICEABLE PARTS INSIDE. REFER
SERVICING TO QUALIFIED SERVICE PERSONNEL.
Follow the on scree n ins tructions for operating the
related features.
In extreme weather (storms, lightning) and long inactivity periods
(going on holiday) disconnect the TV set fr om the mains.
The mains plug is used to disconnec t TV set from the mains
and therefore it must remain readily operable. If the TV set is
not disconnected electrically from the mains, the device wi ll
still draw power for all situations even if the TV is in standby
mode or switched off.
Use this TV set at an altitude of less than 2000 meters
above the sea level, in dry locations and in regions with
moderate or tropical climates.
The TV set is intended for household and similar
general use but may also be used in public places.
For ventilation purposes, leave at least 5cm of free
space around the TV.
The ventilation should not be impeded by covering or
blocking the ventilation openings with items, such as
newspapers, table-cloths, curtains, etc.
The power cord plug should be easily accessible.
place the TV, furniture, etc. on the power cord.
A damaged power cord/plug can cause re or give
you an electric shock. Handle the power cord by the
plug, unplug the TV by pulling the power cord.
Never touch the power cord/plug with wet hands
as this could cause a short circuit or electric shock.
Never make a knot in the power cord or tie it with
other cords. When damaged it must be replaced, this
should only be done by quali ed personnel.
Do not expose the TV to dripping or splashing of liquids
and do not place objects lled with liquids, such as
vases, cups, etc. on or over the TV (e.g., on shelves
above the unit).
Do not expose the TV to direct sunlight or do not
place open ames such as lit candles on the top of
or near the TV.
Do not place any heat sources such as electric heaters,
radiators, etc. near the TV set.
Do not place the TV on the oor and inclined surfaces.
To avoid danger of suffocation, keep plastic bags out of
the reach of the babies, children and domestic animals.

- 77 -
Carefully attach the stand to the TV. If the stand is
provided with screws, tighten the screws rmly to
prevent the TV from tilting. Do not over-tighten the
screws and mount the stand rubbers properly.
Do not dispose of the batteries in re or with haardous
or ammable materials.
Batteries must not be exposed to excessive
heat such as sunshine, re or the like.
Caution
Serious injury or death risk
Risk of electric shock
Dangerous voltag e risk
Maintenance
Important mainten ance
component
The following symbols are used as
a marker for restrictions and precautions and safety
instructions. Each explanation shall be considered
where the product bears related marking only. Note
such information for security reasons.
This applian ce is
designed in such a way that it does not require
a safety connection to electrical earth.
This appliance is designed in such
a way that it doe s not require a safe ty
connection to electrical earth, the earth connection is
used for functional purposes.
The marked
terminal is intended for connection of the
protective earthing conductor associated with
the supply wiring.
Th e marked
terminal(s) is/are haardous live under normal
operating conditions.
The
marked area(s) contain(s) user replaceable
coin or button cell batteries.
This product contains Class
1 laser source that is safe
under reasonably foreseeable
conditions of operation.
Apparatus connected to the protective earthing of the
building installation through the MAINS connection or
through other apparatus with a connection to protective
earthing and to a television distribution system using
coaxial cable, may in some circumstances create a
re haard. Connection to a television distribution
system has therefore to be provided through a device
providing electrical isolation below a certain frequency
range (galvanic isolator, see EN 60728-11)
Do not ingest the battery, Chemical Burn Haard
This product or the accessories supplied with the
product may contain a coin/button cell battery. If the
coin/button cell battery is swallowed, it can cause
severe internal burns in just 2 hours and can lead
to death.
Keep new and used batteries away from children.
If the battery compartment does not close securely,
stop using the product and keep it away from children.
If you think batteries might have been swallowed or
placed inside any part of the body, seek immediate
medical attention.
Never place a television set in unstable or inclined
locations. A television set may fall, causing serious
personal injury or death. Many injuries, particularly
to chil dren , can be avoided by taking simple
precautions such as
Using cabinets or stands recommended by the
manufacturer of the television set.
Only using furniture that can safely support the
television set.
Ensuring the television set is not overhanging the
edge of the supporting furniture.
Not placing the television set on tall furnit ure
(for example, cupboards or bookcases) without
anchoring both the furniture and the television set
to a suitable support.
Not standing the television set on cloth or other
materials placed between the television and
supporting furniture.
Educating children about the dangers of climbing
on furniture to reach t he televisi on set or its
controls. If your existing television set is being
retained and relocated, the same considerations
as above should be applied.
Read the instructions before mounting your TV
on the wall.
The wall mount kit is optional. ou can obtain from
your local dealer, if not supplied with your TV.
Do not install the TV on a ceiling or on an inclined
wall.
Use the speci ed wall mounting screws and other
accessories.
Tighten the wall mounting screws rmly to prevent
the TV from fall. Do not over-tighten the screws.
- 78 -
This television is designed to be environment friendly.
To reduce energy consumption, you can follow these
steps
If you set the to ,
or the TV will reduce the energy
consumptio n accordingly. If you like to set the
to a xed value set as and adjust
the (located under the
setting) manually using Left or Right buttons on the
remote. Set as to turn this setting off.
Available options may differ depending
on the selected in the menu.
The settings can be found in the
menu. Not e that some pict ure
settings will be unavailable to be changed.
If pressed Right button while option is selected or
Left button while option is selected,
message will be displayed
on the screen. Select and press OK to turn
the screen off immediately. If you dont press any
button, the screen will be off in 15 seconds. Press
any button on the remote or on the TV to turn the
screen on again.
Note: Screen Off o ption is n ot available if the Mode is set
to .
When the TV is not in use, please switch off or
disconnect the TV from the mains plug. This will also
reduce energy consumption.
Remote controlled colour TV
Fully integrated digital terrestrial/cable/satellite TV
(DVB-T-T2/C/S-S2)
Fransat Installation Option
HDMI inputs to connect other devices with HDMI
sockets
USB input
OSD menu system
Scart socket for external devices (such as DVD
Players, PVR, video games, etc.)
Stereo sound system
Teletext
Headphone connection
Automatic programming system
Manual tuning
Automatic power down after up to eight hours.
Sleep timer
Child lock
Automatic sound mute when no transmission.
NTSC playback
AVL (Automatic Volume Limiting)
PLL (Frequency Search)
PC input
Game Mode (Optional)
Picture off function
Programme recording
Programme timeshifting
802.11 a/b/g/n WIFI Support via USB dongle
Audio Video Sharing
HbbTV
Remote Control
Batteries 2 x AAA
Instruction Book
DC 12 V Input Power Adaptor
Car Plug
If the TV does not receive any input signal (e.g. from
an aerial or HDMI source) for 3 minutes, it will go
into standby. When you next switch-on, the following
message will be displayed
Press OK to continue.
If the TV is on and it isnt being operated for a while
it will go into standby. When you next switch-on, the
following message will be displayed.
Press OK to continue.
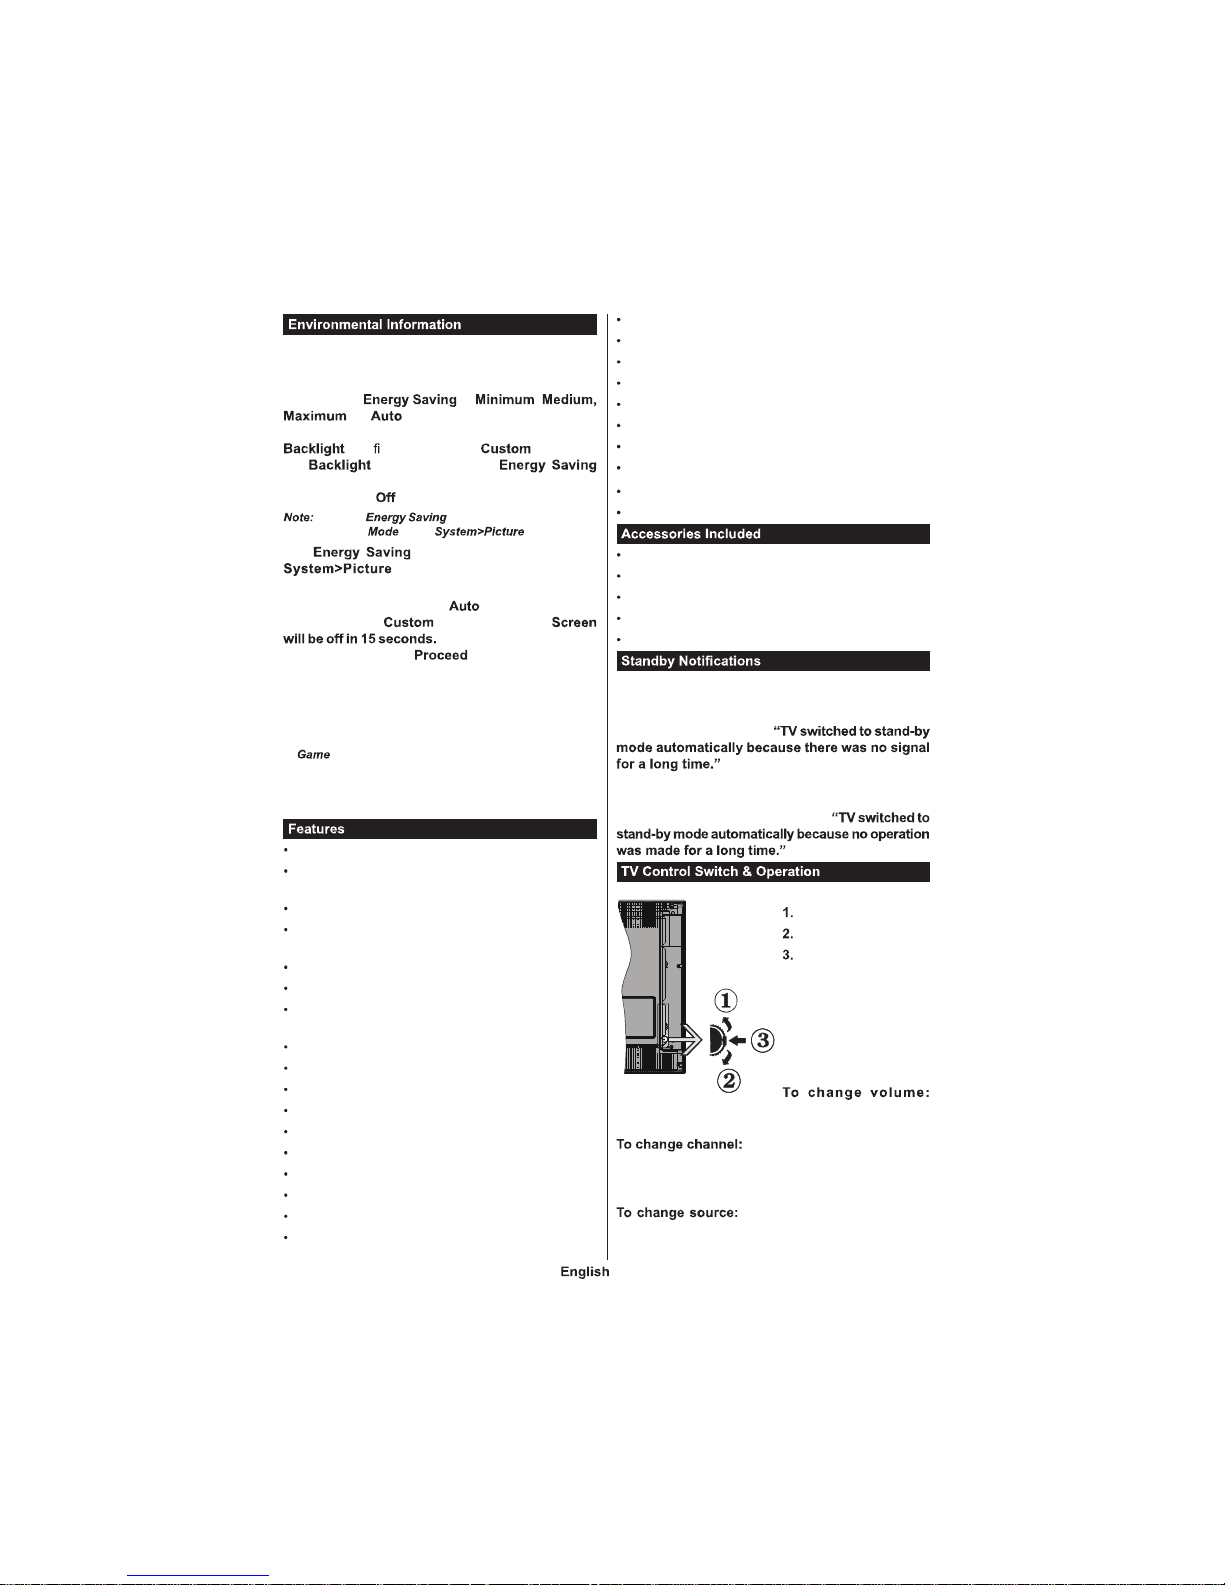
Up direction
Down direction
Vol u m e / I n f o /
Sou rces Lis t se lection
and Standby-On switch
T he C on tr ol bu tt on
allows you to control the
Volume / Programme /
Source and Standby-On
functions of the TV.
Increase the volume by pushing the button up.
Decrease the volume by pushing the button down.
Press the middle of the button,
the information banner will appear on the screen.
Scroll through the stored channels by pushing the
button up or down.
Press the middle of the button
twice(for the second time in total), the source list will
- 79 -
appear on the s creen. Scroll through the available
sources by pushing the button up or down.
Press the middle of the button
down and hold it down for a few seconds, the TV will
turn into standby mode.
I f you turn the TV off, this circle sta rts agai n
beginning with the volume setting.
Main menu OSD cannot be displayed via control
button.
Press the button on your remote control to
display main menu screen. Use the directional buttons
to select a menu tab and press OK to enter. Use the
directional buttons again to select or set an item. Press
or button to quit a menu screen.
Once you have connected external systems to your
TV, you can switch to different input sources. Press the
button on your remote control consecutively
to select the different sources.
ou can change the channel and adjust the volume
by using the and buttons
on the remote.
Remove the screw that
secur e th e b atte ry
compartment cover on
the bac k side of the
remot e co ntr ol firs t.
Re mo ve t he c ov e r
gently. Insert two
batteries. Make sure the () and (-) signs match (observe
correct polarity). Do not mix old and new batteries.
Replace only with same or equivalent type. Place the
cover back on. Then screw the cover back on again.
The TV set is designed to operate on
. For this, an adaptor is used which gives
voltage. Connect this adaptor to a system that
supplies .
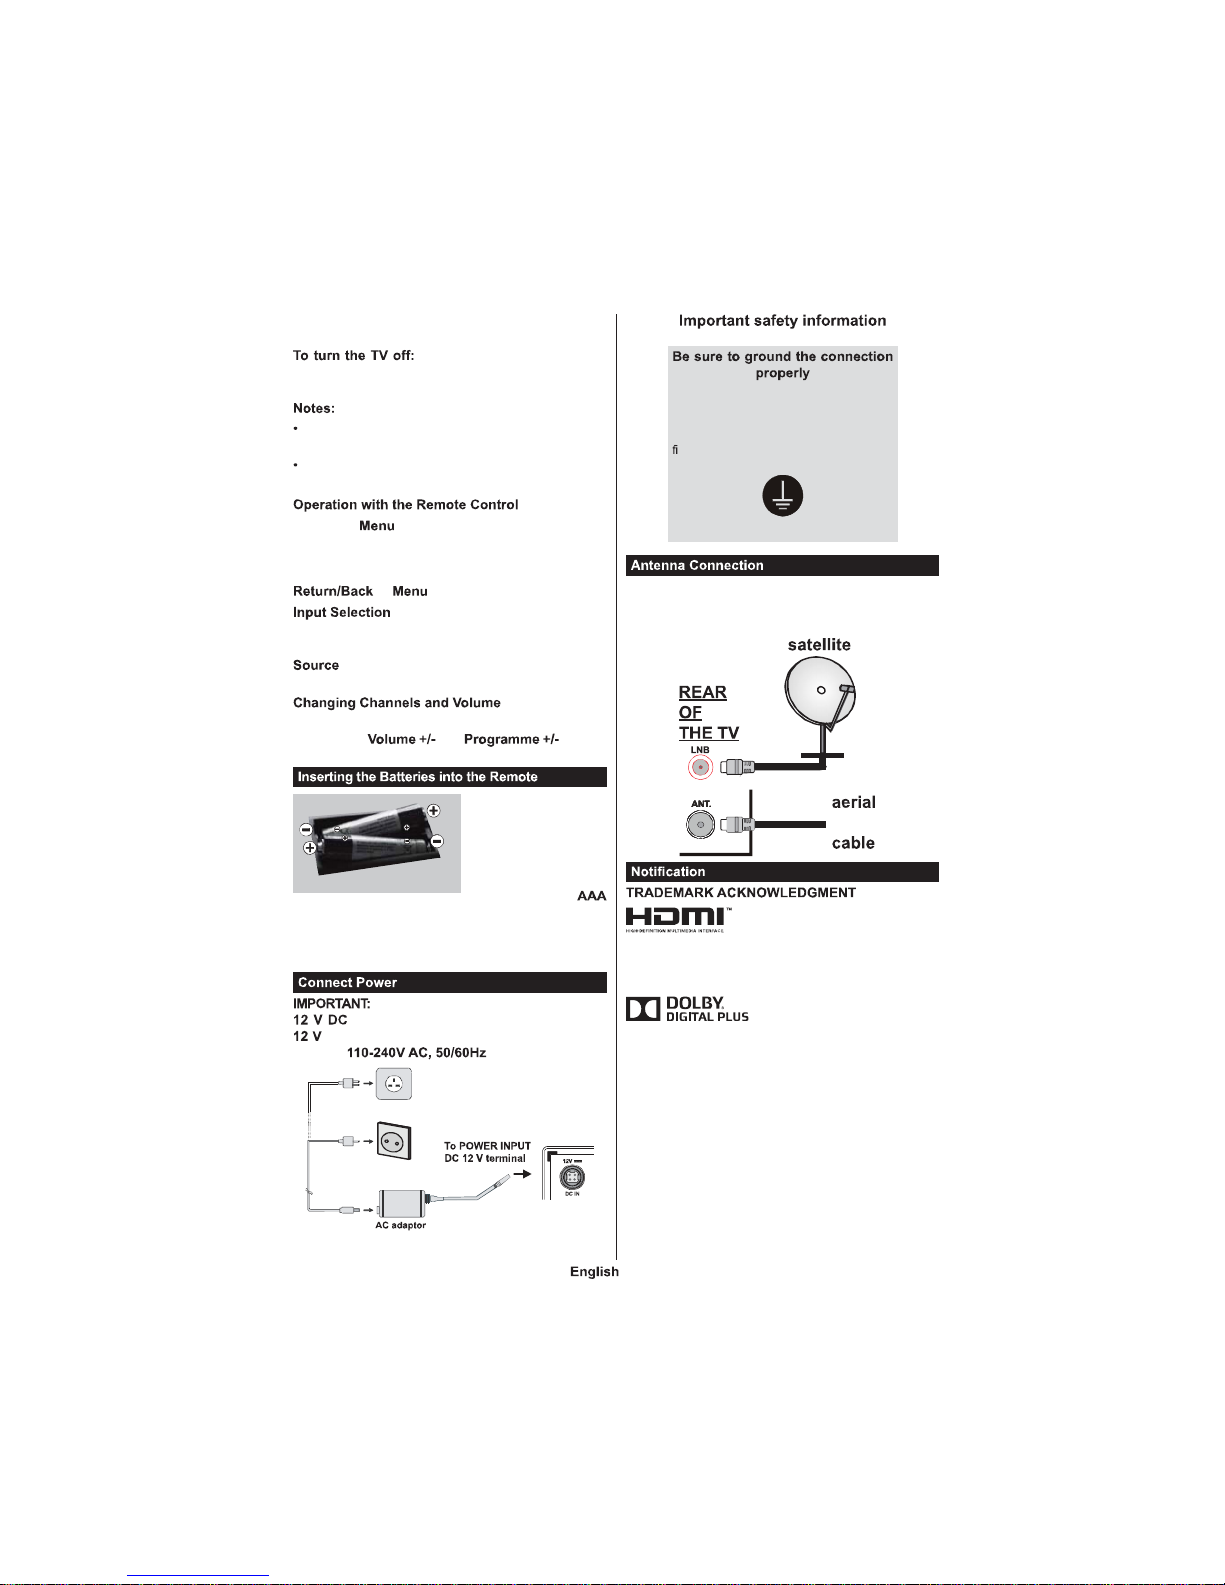
Conne ct t he ground termina l of the AC
adaptor wi th the ground terminal provided
at the power outl et using the enclose d
power cord. If t he provided plug does not
t your outlet, consult an electri cian for
replacement of th e obsolete outlet.
Surely connect the ground wire.
Connect t he aerial or cable TV plug to the AERIAL
INPUT (ANT) socket or satellite plug to the SATELLITE
INPUT (LNB) socket located on the back of the TV.
or
Th e te rms HD MI and H ig h-
Defi nition Multi media I nterface,
and the HDMI Logo are trademarks or registered
trademarks of HDMI Licensing Administrator, inc. in
the United States and other countries.
Man ufactured under lice nse
from Dolby Laboratories. Dolby
and the double-D symbol are trademarks of Dolby
Laboratories.
ouTube and the ouTube logo are trademarks of
Google Inc.
This product contains technology subject to certain
intellectual property rights of Microsoft. Use or distribution
of this technology outside of this product is prohibited
without the appropriate license(s) from Microsoft.
Content owners use Microsoft PlayReady content
access technology to protect their intellectual property,
incl uding copyrighted content. This devi ce uses
PlayReady technology to access PlayReady-protected
content and/or WMDRM-protected content. If the
device fails to properly enforce restrictions on content
- 80 -
usage, content owners may require Microsoft to revoke
the device’s ability to consume PlayReady-protected
content. Revocation should not affect unprotected
content or content protected by other content access
technologies. Content owners may require you to
upgrade PlayReady to access their content. If you
decline an upgrade, you will not be able to access
content that requires the upgrade.
Products
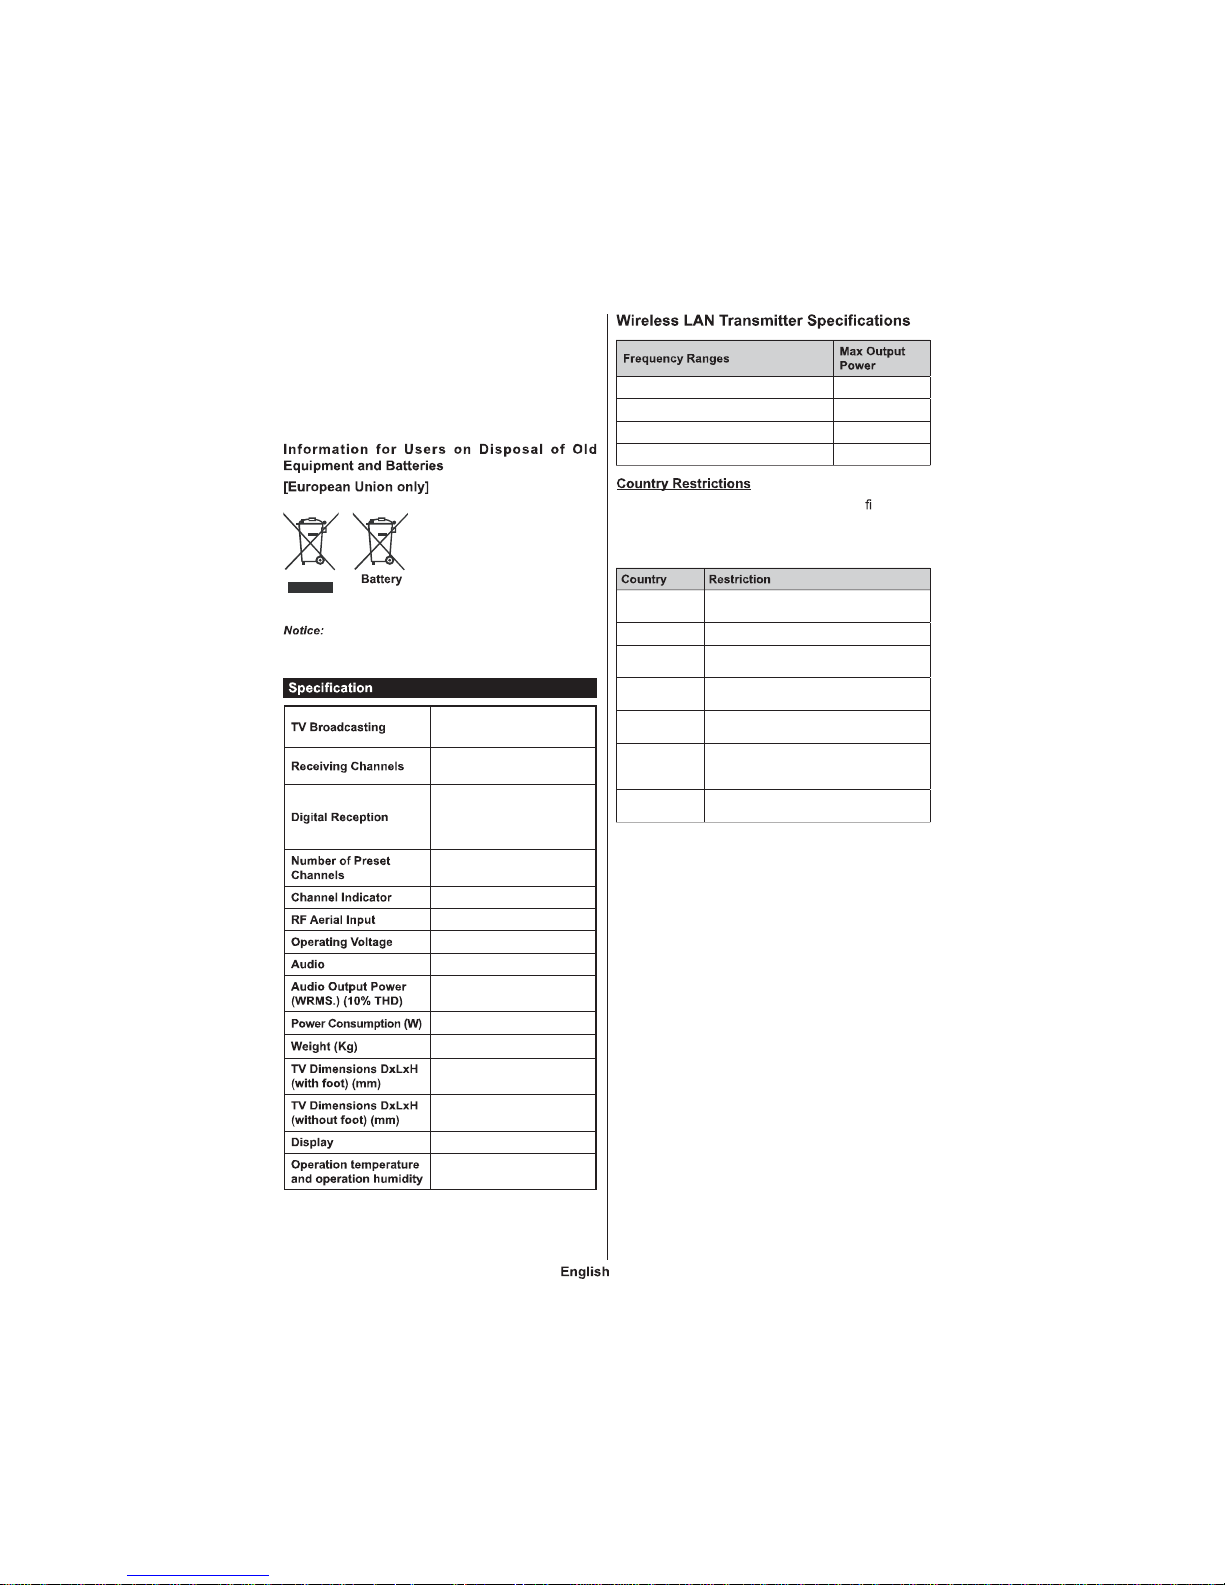
Equip me nt bea ri ng t he se
symbols should not be disposed
as general household waste.
You should look for appropriate
recycling facilities and systems
fo r the di sp osal of the se
products.
The sign Pb below the symbol for batteries indicates
that this battery contains lead.
PAL BG/DK/II’
SECAM BG/DK
VHF (BAND I/III) - UHF
(BAND U) - HYPERBAND
Fully integrated digital
terrestrial-cable-satellite
TV(DVB-T-C-S)
(DVB-T2, DVB-S2 compliant)
10 000
On Screen Display
75 Ohm (unbalanced)
100-240V AC, 50Hz.
German+Nicam Stereo
2 x 2,5
40
3,30
134 x 473 x 328
34 x 473 x 294
19,6”
0ºC up to 40ºC, 85%
humidity max
2400 - 2483,5 MHz (CH1-CH13) < 100 mW
5150 - 5250 MHz (CH36 - CH48) < 200 mW
5250 - 5350 MHz (CH52 - CH64) < 200 mW
5470 - 5725 MHz (CH100 - CH140) < 200 mW
This device is intended for home and of ce use in
all EU countries (and other countries following the
relevant EU directive) without any limitation except
for the countries mentioned below.
Bulgaria
General authorization required for outdoor
use and public service
France In-door use only for 2454-2483.5 MHz
Italy
If used outside of own premises, general
authorization is required
Greece
In-door use only for 5470 M Hz to 5725
MHz band
Luxembourg
General authorization required for network
and service supply(not for spectrum)
Norway
Radio transmission is prohibited for the
geographical area within a radius of 20 km
from the centre of Ny-Ålesund
Rus sian Federation
In-door use only
The requirements for any country may change at any
time. It’s recommended that user checks with local
authorities for the current status of their national regulations for both 2.4 GHz and 5 GHz wireless LAN’s.
- 81 -
Remote Control
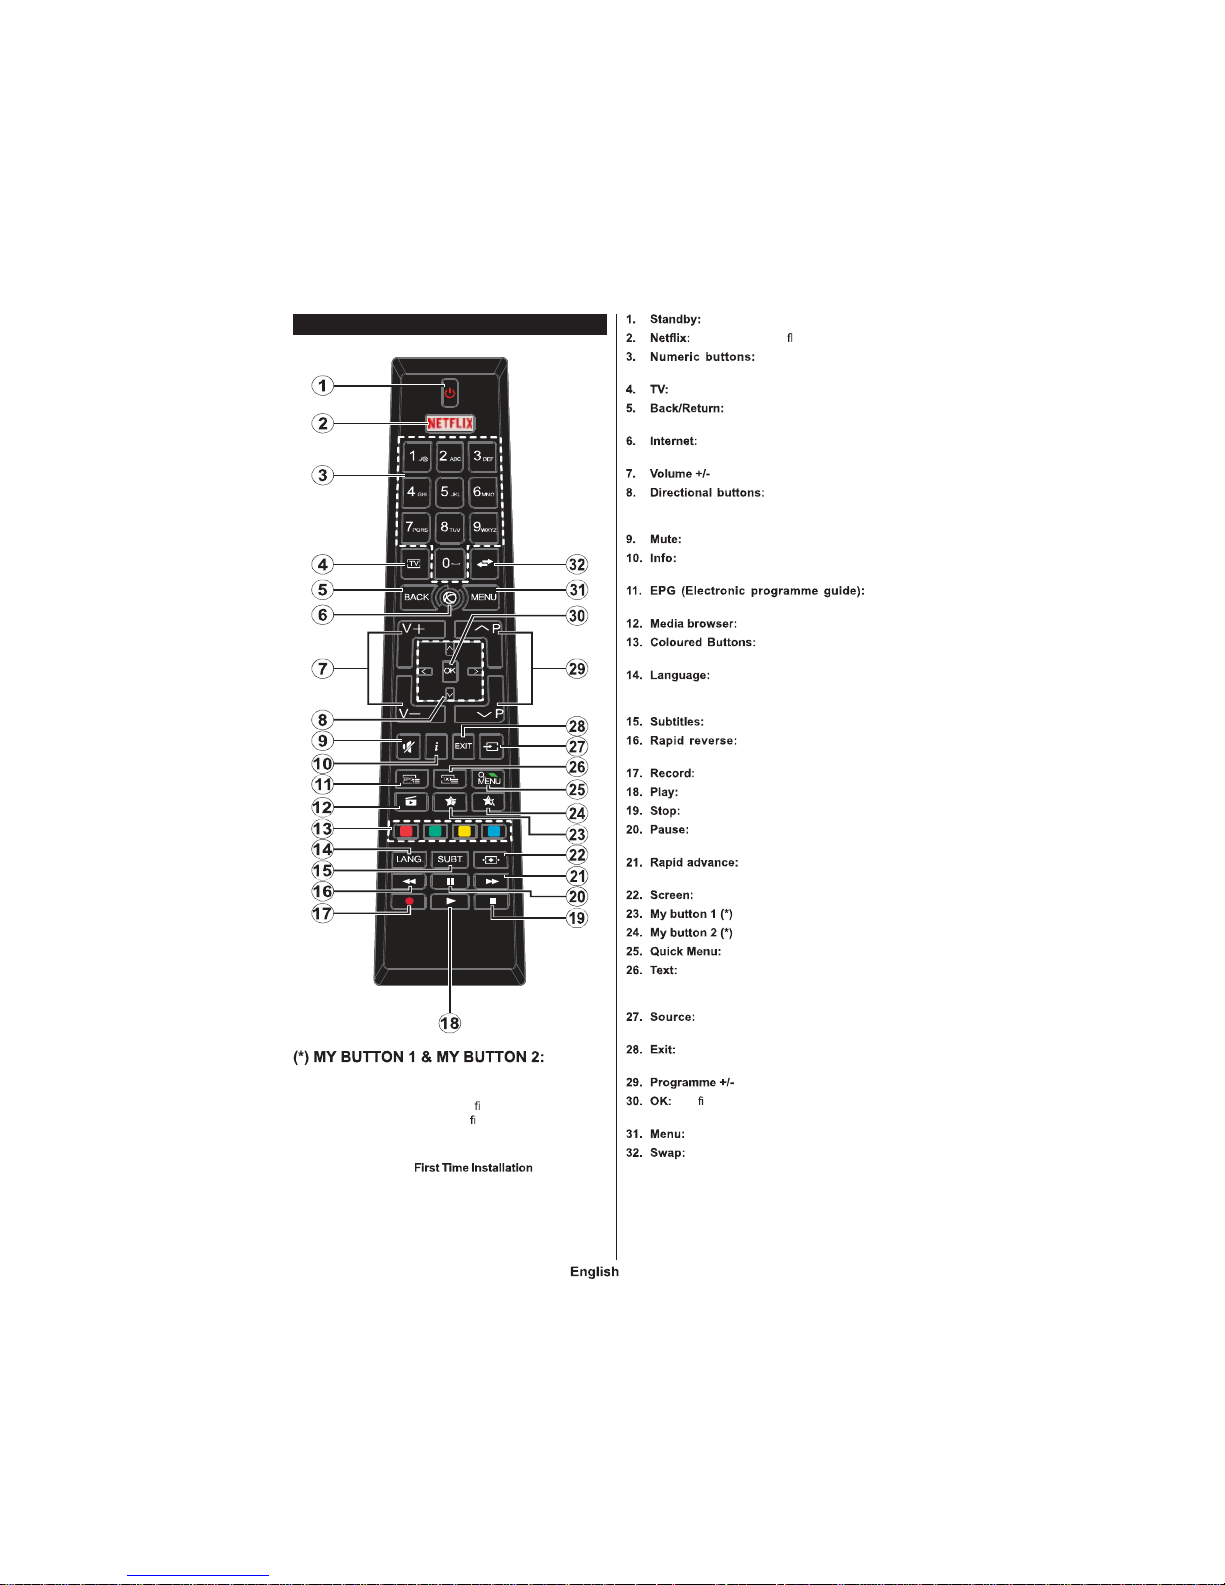
These buttons may have default functions depending on
the model. However you can set a special function to these
buttons by p ressing on them for ve seconds when o n a
desired s ource or channel. A con r mation message will be
displayed on the screen. Now the se lected MY BUTTON is
associated with the se lected function.
Note that if you perform , MY BUTTON
1&2 will return to their default function.
Switches On / Off the TV
Launches the Ne t ix application
Switches the channe l, ente rs a
number or a let ter in the text box on the sc reen.
Displays chann el list / Switches to TV Sourc e
Returns to previous screen, ope ns index
page (in TXT mode)
Opens th e portal page, where you can reach
many web based applications
Helps navigate menus, content
etc. an d display s the subpages in TXT mode when
pressed Right or Left
Completely turns off the volume of the TV
Displays information about on-scre en conten t,
shows hidden information (reveal - in TXT mode)
Displa ys the
electronic progra mme guide
Opens the media browsing screen
Follow the on-sc reen ins tructions
for coloured button functions
S witches a mong sound modes (analogue
TV) , displa ys and changes audio /subti tle langua ge
(digital TV, where available)
Turns subtitles on and off (whe re available)
Moves frames backwa rds in media
such as movies
Records program mes
Starts to play selected media
Stops the media b eing played
Pauses the media being played, starts timeshift
recording
Moves frames forward in media such
as movies
Changes the asp ect ratio of the screen
Displays a list of menus for quick access
Displays teletext (where a vailable), p ress again
to superimpose the teletext over a normal broadcast
picture (mix)
Shows a ll availabl e broadcas t and content
sources
Closes and exits from d isplayed menus or returns
to previous scre en
Con rms user selectio ns, holds the p age (in TX T
mode), views ch annel list (DTV mode)
Displays TV menu
Quickly cycles between previous and current
channels or sou rces
- 82 -
(side)
YPbPr/PC Audio Cable
HDMI
(side)
AV Cable
(side)
PC to YPbPr Connection Cable
(side)
(side)
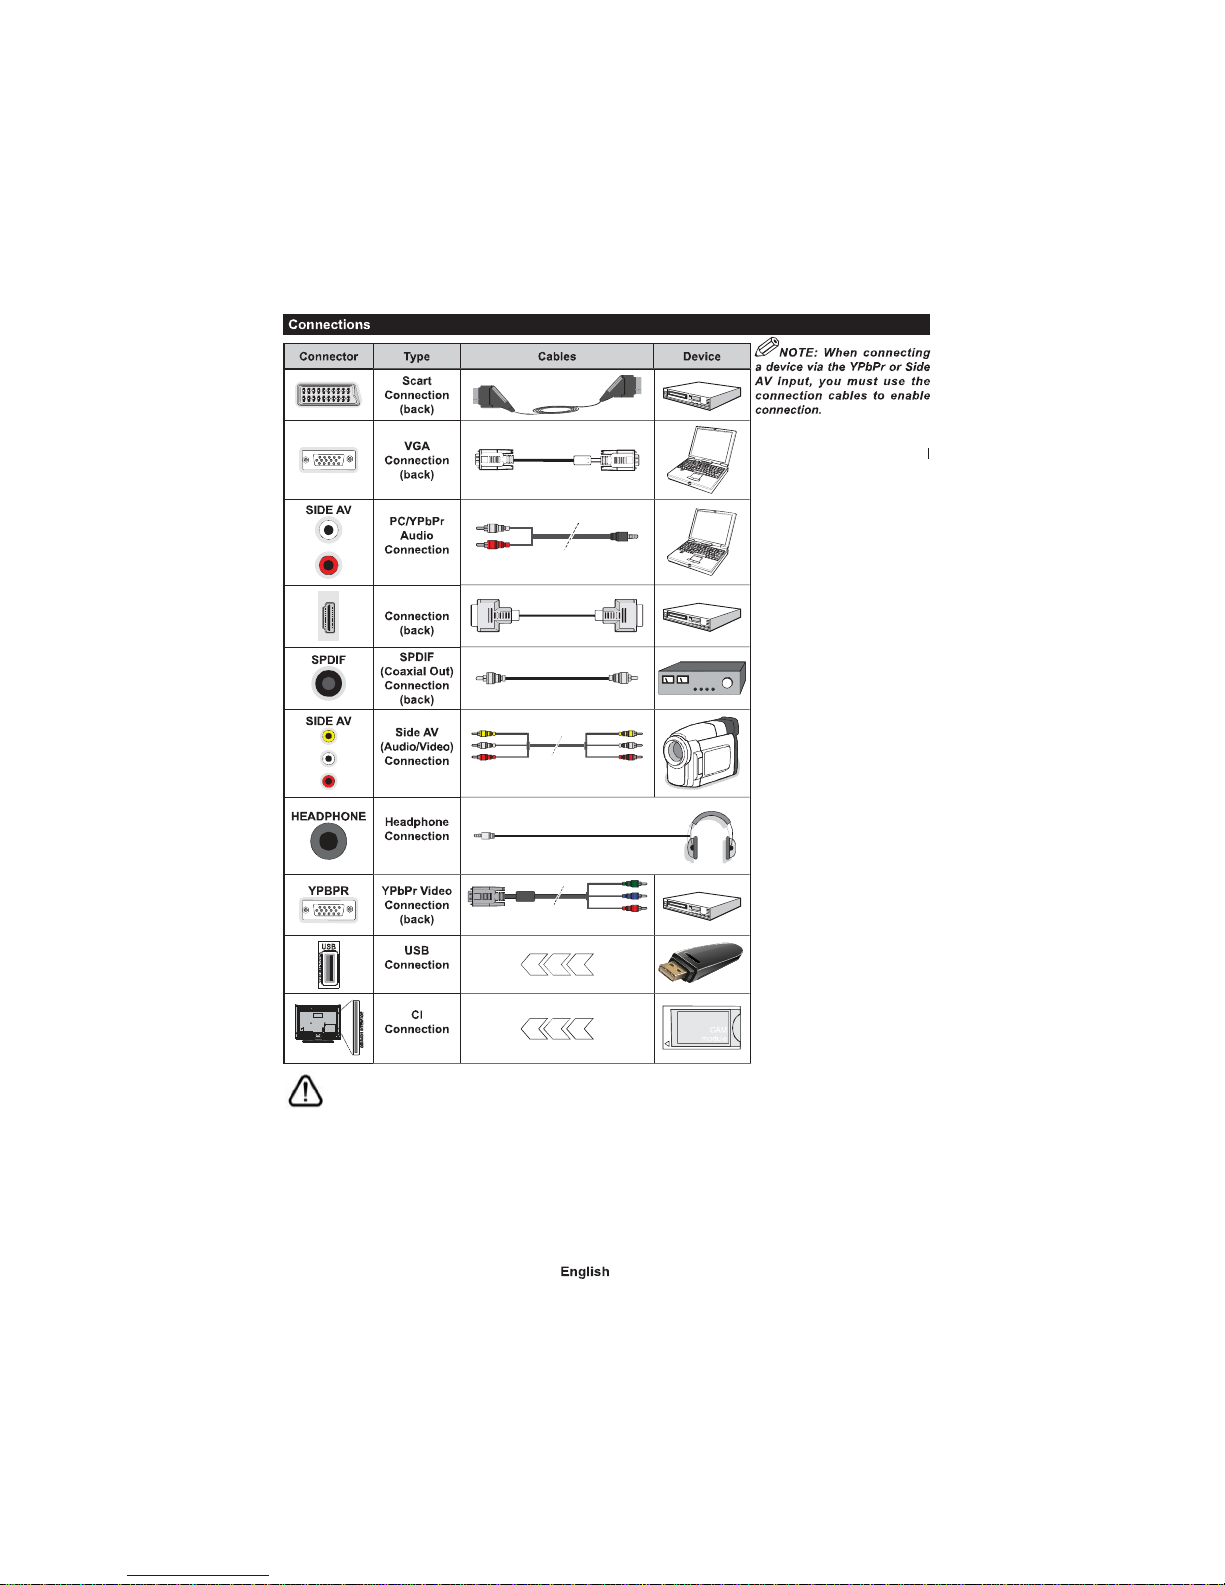
See t he illustrations
on the lef t side . | You can use
YPbP r to VGA cable to enable
YP bPr sign al via VGA inp ut.
You cannot use VGA and YPbPr
at the same time . | To enable
PC/Y PbPr audio, you will need
to use th e si de aud io in pu ts
wi th a YPb Pr/P C aud io cab le
fo r au dio co nnect ion. | If an
external device is connected via
the SCAR T socket , t he TV will
automatically switch to AV mode.|
When receiv ing DTV cha nnels
(Mpeg4 H. 264) or while in Media
Browser mo de, output wil l not be
availa ble via the scart socket. |
When usin g the wall mou nting
kit (av ail abl e fro m thi rd par ty
in the marke t, i f not supp lied ),
we recommend that you plug all
your cables in to the back of the
TV before mounting on the wall.
| Inser t or remo ve the CI module
only when the TV is SWITCHED
OF F. You sh oul d ref er t o the
mod ule inst ruct ion ma nual for
details of the settings. | The/Each
USB input of your TV support s
devices up to 500mA. Connecting
devices t hat have current value
above 5 00mA may damage your
TV. | By connecting an HDMI cable
to your TV, you have to use only a
shielded HDMI cable to guarantee
a su ffi cien t imm unity ag ain st
parasitic freque ncy radiation.
f you want to connect a device to the TV, make sure that both the TV a nd the device are turned off before mak ing
any connection. After the connect ion is done, you can turn on the units and use them.
- 8 -
Connect the power cord to a power source such as a
wall socket (11-2V AC, / H).
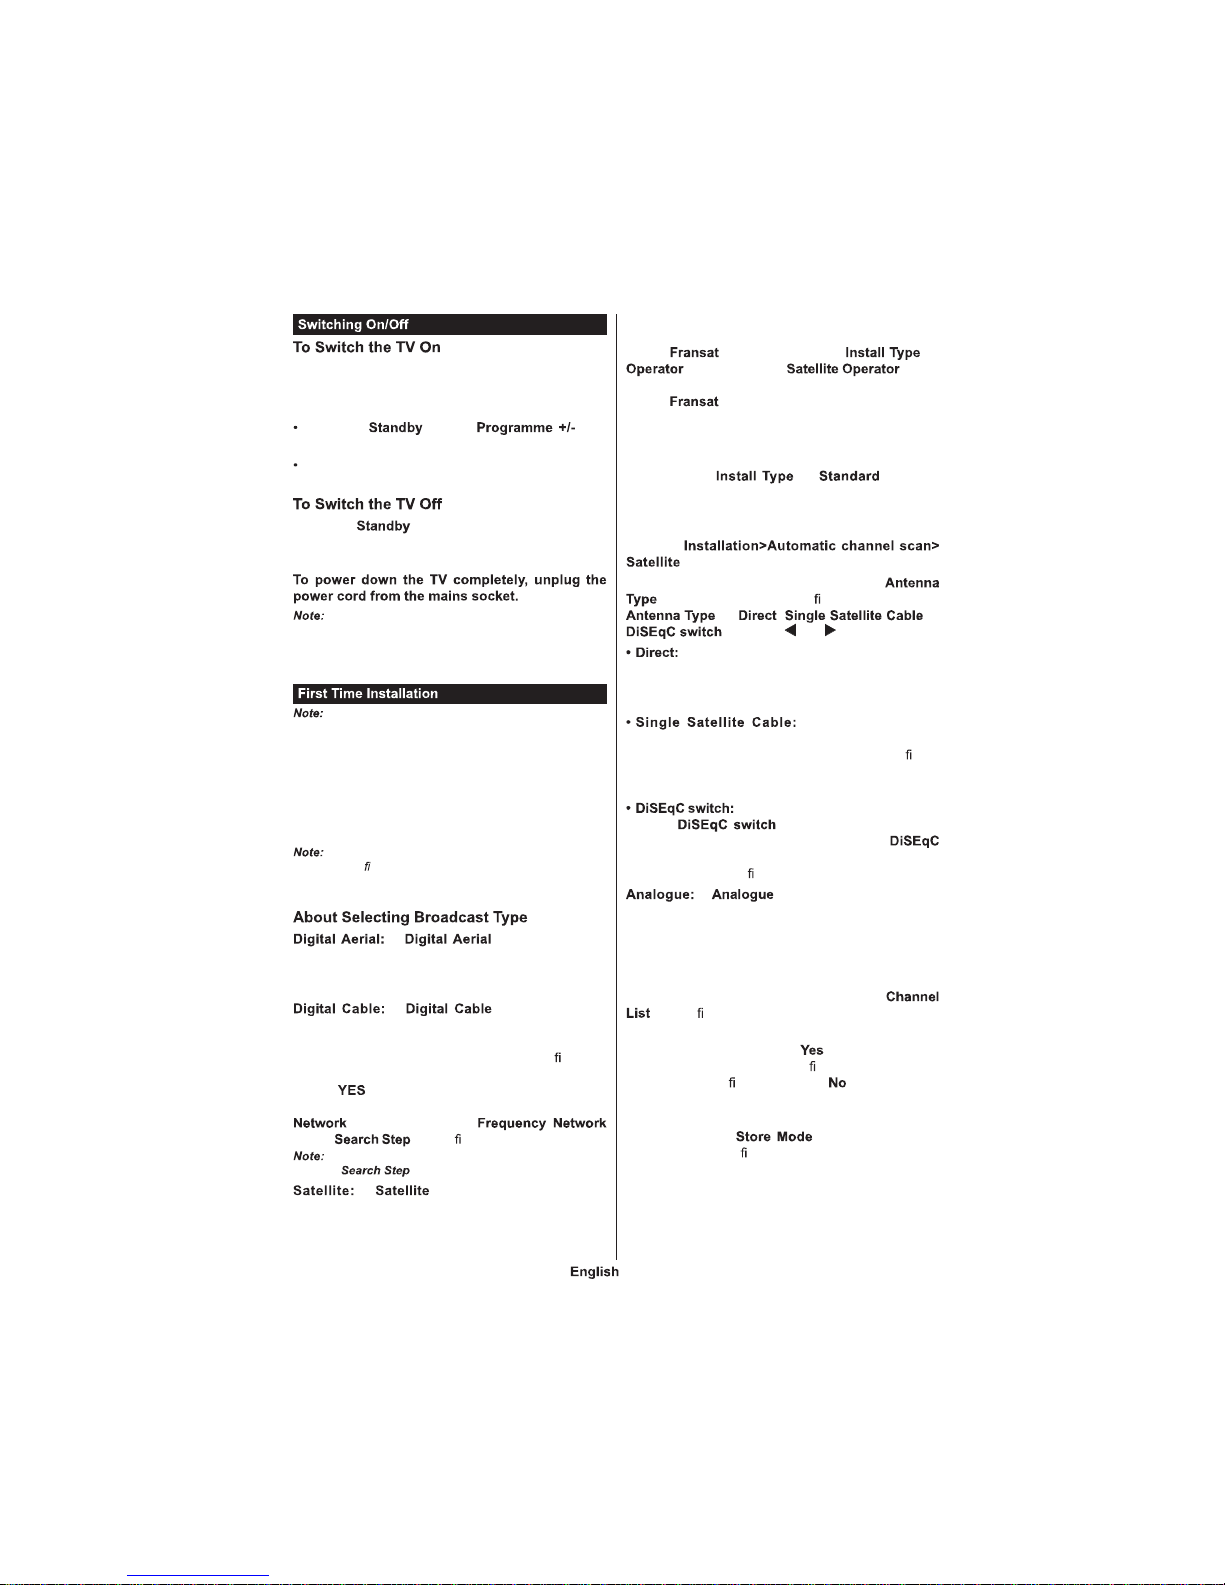
To switch on the TV from standby mode either
Press the button, or a
numeric button on the remote control.
Press the side function switch on the TV until the TV
comes on from standby.
Press the button on the remote control or
press the side function switch on the TV until the TV
switches into standby mode.
When the TV is s witched int o standby m ode, the
standby LED can blink to indicate that features such as
Standby Search, Over Air Download or Ti mer is active. The
LED can also blink when you switch on the TV from standby
mode.
If you are going to perform FRANSAT installation, insert
the FRANSAT card (optional) into the Conditional Access
terminal of your TV before switching on your TV.
hen turned on for the first time, the language
selection screen is displayed. Select the desired
language and press OK.
On the next screen, set your preferences using the
directional buttons.
Depending on the Country selection you may be asked
to set and con rm a PIN at t his point. Th e selected PIN cannot
be 0000. You have to enter it if you are asked to enter a PIN
for any menu operation later.
f broadcast search
option is turned on, the TV will searc h for digital
terrestrial broadcasts after other initial settings are
completed.
f broadcast search
option is turned on, the TV will search for digital cable
broadcasts after other initial settings are completed.
According to your other preferences a con rmation
message may be displayed before starting to search.
Select and press OK to proceed . To cancel
operation, select NO and press OK. You can select
or set values such as ,
ID and . hen nished, press OK button.
Searching duration will change depend ing on t he
selected .
f broadcast search option is
turned on, the TV will search for digita l satel lite
broadcasts after other initial settings are completed.
Before satellite search is performed some settings
should be made. Before the satellite search starts,
a menu will be displayed where you can select to
start a installation. Set the as
and than set the as the
related Fransat operator. Then press the OK button
to start installation. You can select to start an
automatic or manual installation.
Press OK to proceed. Fransat nstallation will be
performed and broadcasts will be stored (if available).
f y ou set the as , you can
continue with regular satellite installation and watch
satel lite channels.
You can start a Fransat i nstallation at any time later
from the
menu .
There are three types of antenna selection.
menu will be displayed rst. You can select
as , or
by using or buttons.
f you have a single receiver and a direct
satellite dish, select this antenna type. Press OK to
continue. Select an available satellite on the next
screen and press OK to scan for services.
f you have mul tiple
receivers and a single satellite cable system, select
this antenna type. Press OK to continue. Con gure
settings by following instructions on the next screen.
Press OK to scan for services.
f you have multiple satellite dishes
and a , select this antenna type.
Press OK to continue. You can set four
options (if available) on the next screen. Press OK
button to scan the rst satellite in the list.
f broadcast search option is
turned on, the TV will search for analogue broadcasts
after other initial settings are completed.
Additionally you can s et a broadcast type as your
favourite one. Priority will be given to the selected
broadcast type during the search process and the
channels of it will be listed on the top of the
. hen nished, press OK to continue.
A dialogue screen asking to activate parental control
will be displayed. f you select , parental restriction
options will be displayed. Con gure as desired and
press OK when nished. Select and press OK
to advance, if you dont want to activate parental
restrictions.
You can activate option at this point.
This option will con gure your TVs settings for store
environment and depending on the TV model being
used, the supported features of it may be displayed
on the top of the screen as an info banner. This option
is intended only for store use. t is recommended to
select Home Mode for home use. This option will be
- 84 -
available in menu and can
be turned off/on later.
Press OK button on the remote control to continue
and the menu will be
displayed, if you con rm the previously displayed
message asking whether you want to do the network
settings. Please refer to section to
con gure a wired or a wireless connection. After the
settings are completed press OK button to continue.
To skip to the next step without doing anything select
and press the OK button when the message is
displayed asking whether you want to do the network
settings.
After the initial settings are completed TV will start
to search for available broadcasts of the selected
broadcast types.
After all the available stations are stored, scan results
will be displayed. Press OK to continue. The
menu will be displayed next. You can
edit the channel list according to your preferences or
press the button to quit and watch TV.
While the search continues a message may appear,
asking whether you want to sort channels according
to the LCN . Select and press to con rm
LCN is the Logical Channel Number system that organizes
avai lable broadca sts in accordan ce w ith a re cognizable
channel numbe r sequence (if available).
Do not turn off the TV while initializing first time
installation. Note t hat, some option s may not be available
depending on the country selection.
You can perform SatcoDX operations using the
menu. In the
menu, there are two options regarding to the SatcoDx.
You can download or upload SatcoDX data. In order
to perform these functions a USB device must be
connected to the TV.
You can upload current services and related satellites
& transponders in TV, to a USB device.
Additionally you can download one of the SatcoDx
les stored in USB device, to the TV.
When you select one of these les, all services and
related satellites and transponders in the selected
le will be stored in the TV. If there are any installed
terrestrial, cable and/or analog services, they will be
kept and only satellite services will be removed.
Afterwards, check your antenna settings and make
changes if necessary. An error message stating “
” may be displayed if the antenna settings are
not con gured properly.
You can connect 2.5” and 3.5” inch (hdd with external power
supply) external hard disk drives or USB memory stick to your
TV by using the USB inputs of the TV.
Back up the les on your storage devices
before connecting them to the TV. Manufacturer will
not be responsible for any le damage or data loss.
Certain types of USB devices (e.g. MP3 Players)
or USB hard disk drives/memory sticks may not be
compatible with this TV. The TV supports FAT32
and NTFS disk formatting but recording will not be
available with NTFS formatted disks.
While formatting USB hard dri ves which have
more than 1TB (Tera Byte) storage space you may
experience some problems in the formatting process.
Wait a little while before each plugging and unplugging
as the player may still be reading les. Failure to do
so may cause physical damage to the USB player
and the USB device itself. Do not pull out your drive
while playing a le.
You can use USB hubs with your TV’s USB inputs.
External power supplied USB hubs are recommended
in such a case.
It is recommended to use the TV’s USB input(s)
directly, if you are going to connect a USB hard disk.
When viewing image les the menu
can only display 1 000 image les stored on the connect ed
USB device.
When using a new USB hard disk
drive, it is recommended that you rst format the disk
using your TV’s option in the
menu.
To record a programme, you should rst connect a
USB disk to your TV while the TV is switched off. You
should then switch on the TV to enable the recording
feature.
To use recording your USB drive should have 2 GB
free space and be USB 2.0 compatible. If the USB
drive is not compatible an error message will be
displayed.
To record long duration programmes such as movies,
it is recommended to use USB Hard disk drive s
(HDD’s).
Recorded programmes are saved into the connected
USB disk. If desired, you can store/copy recordings
onto a co mputer; however, these les will not be
available to be played on a computer. You can play
the recordings only via your TV.
Lip Sync delay may occur during the timeshifting.
Radio record is supp orted. The TV can record
programmes up to ten hours.
Recorded programmes are split into 4GB partitions.
If the writing speed of the connected USB disk is not
suf cient, the recording may fail and the timeshifting
feature may not be available.
It is recommended to use USB hard disk drives for
recording HD programmes.
Do not pull out the USB/HDD during a recording. This
may harm the connected USB/HDD.

- 85 -
If the AC cord is unplugged while there is an active
USB-recording timer setting, it will be cancelled.
Multipartition support is available. A maximum of two
different partitions are supported. The rst partition of
the USB disk is used for PVR ready features. It also
must be formatted as the primary partition to be used
for the PVR ready features.
Some stream packets may not be recorded because
of signal problems, as a result sometimes videos may
freeze during playback.
Record, Play, Pause, Display (for PlayListDialog) keys
can not be used when teletext is on. If a recording starts
from timer when teletext is on, teletext is automatically
turned off. Also teletext usage is disabled when there
is an ongoing recording or playback.
Press button while watching a broadcast to
activate timeshifting mode. In timeshifting mode, the
programme is paused and simultaneously recorded
to the connected USB disk.
Pres s but ton again to resume the paused
programme from where you stopped. Press the
button to stop timeshift recording and return to the
live broadcast.
Timeshift cannot be used while in radio mode.
You cannot use the timeshift fast reverse feature before
advancing the playback with the fast forward option.
Press button to start recording an event
instantly while watching a programme. You can press
button on the remote control again to record
the next event after selecting the next programme
from within the EPG. Press button to cancel
instant recording.
You can not s witch broadcasts or v iew the media
browser during the recording mode. While recording
a programme or during t he timeshifting, a warning
message appears on the screen if your USB device
speed is not suf cient.
Select from the r menu.
Select a r ecorded item from the list (if previously
recorded). Press the OK button to view the
. Select an option then press OK button.
Viewing main menu a nd menu item s will n ot be
available during the playback.
Press the button to stop a playback and return
to the .
If you press button while watching recorded
programm es, th e slow forwa rd fe ature wil l be
available. You can use button to
slo w forw ard. Pressi ng butto n
consecutively will change slow forwarding speed.
Select the item in the
menu to con gure the recording
settings.
You can use the feature
for formatting the connected USB disk. Your PIN is
required to use the feature.
Defau lt PIN ca n be se t to or . If you ha ve
de n ed the PIN(is r equest ed depen ding on the country
selection) during the use t he P IN
that you have de ned.
Formatting your USB drive will erase
ALL the data on it and it’s le system will be converted
to FAT32. In most cases operation errors will be xed
after a format but you will lose ALL your data.
If “ ”
message is displayed on the screen while starting a
recording, try restart ing the recording. If you still get
the same error, it is possible that your USB disk does
not meet the speed requirements. Try connecting
another USB disk.
You can play photo, music and movie les stored on a
USB disk by connecting it to your TV. Connect a USB
disk to one of the USB inputs located on the side of
the TV. Pressing the button while in the
mode will access the , and
menu options. Pressing the button
again will exit from this screen. You can set your
preferences by using the menu.
Start playback with the
button and activate
All les in the list will be
continuously played in original
order
Start playback with the
button and activate
The same le will be played
continuously (repeat)
Start playback with the
button and activate
All les in the list will be
played once in random order
Start playback with the
button and activate ,
All les in the list will be
continuously played in the
same random order.
With your mobile device you can stream the current
broadcast f rom your smart TV using the
featu re. Install the appropriate Smart Center
application to your mobile device. Start the application.
For further information on using this feature refer to
the instructions of the application you use.
This application may not be compatible with all mobile
devices. HD c hannels are no t supported and both of the
devices must be connected to the same netwo rk.
- 86 -
This function allows to control the CEC-e nabled
devices, that are connected through HDMI ports by
using the remote control of the TV.
The option in the menu
should be set as at rst. Press the
button and select the HDMI input of the connected
CEC device from the menu. When
new CEC source device is connected, it will be listed
in source menu with its own name instead of the
connected HDMI ports name(such as DVD Player,
Recorder 1 etc.).
The TV remote is automatically able to perform the
main functions after the connected HDMI source has
been selected.
To terminate this operation and control the TV via
the remote again, press button on the
remote, highligh t the and
set as by pressing Left or Right button. This
feature can also be enabled or disabled under the
menu.
The TV supports also ARC(Audio Return Channel)
feature. This feature is an audio link meant to replace
other cables between the TV and the audio system
(A/V receiver or speaker system).
When ARC is active, TV does not mute its other audio
outputs automatically. So you need to decrease TV
volume t o zero manually, if you want to hear audio
from connected audio device only (same as other
optical or co-axial digital audio outputs). If you want
to change connected device’s volume level, you
should select that device from the source list. In that
case volume control keys are directed to connected
audio device.
ARC is supported only vi a the HDMI1 input.
Allows an Audio Ampli er/Receiver to be used with
the TV. The volume can be contro lled using the
remote control of the TV. To activate this feature set
the option in the
menu as . The TV speakers will be muted
and the sound of the watched source will be provided
from the connected sound system.
The audio device should support System Audio Control
feature and option should be set as .
You can nd instructions for your TV’s features in
the E-Manual.
To use E-Manual, press to the button while main
menu is displayed on the screen or press
button, select and press OK.
By using the directional buttons select a desired
category. Every category includes different topics.
Select a topic and press OK to read instructions.
To close the E-Manual screen press the or
button.
The co ntents of the E-Manual may var y according to
the model.
 Loading...