

Page 1

Digital DVB
TSDR5000CI
receiver
Menu
Camping
VOLT
GB
V. 002
Page 2

2 - Digital DVB TSDR5000CI receiver
Ta ble of Contents
Table of Contents
Contents
Figures and Tables
Information
Safety information
General view
Remote control
Front view
Rear view
Technical specifications
Definition
Technical specifications
List of accessories
Installation
Introduction
Main connections
Connecting the lead from the satellite dish
Connecting the SCART cable between the receiver and the TV or monitor
Connecting the coaxial cable between receiver and TV
Connecting the remote control infrared sensor
Connecting to the power supply
Additional connections
Connecting to a video recorder
Connecting to a monitor in S-VHS
Connecting a Home Theatre system
Immediate use of the receiver
Introduction
Switching on the receiver
Changing service
Favourites lists which were factory loaded
Other immediate functions
Menu and advanced functions
Introduction
Accessing the menu
The favourites list
Creating a list
Modifying a list
Deleting a list
Installation
Antenna/Satellite configuration
Antenna configuration
2
3
5
6
7
7
9
9
11
11
11
12
13
13
13
13
13
13
13
13
14
14
14
14
15
15
15
15
16
16
19
19
19
19
20
22
24
24
25
25
Page 3

Ta ble of Contents
Digital DVB TSDR5000CI receiver - 3
Satellite configuration
Adding a new satellite
Modifying the satellites list
Deleting a satellite
Adding a transponder
Deleting a transponder
LNB configuration
Motor configuration
Service installation
TV configuration
Set time
VCR configuration
Reinstallation
System update
User settings
Language configuration
Access control
Modifying the PIN code
Information about system
Conditioned access
Reinstalling your receiver
Introduction
Re-installation sequence
Glossary
Figures and Tables
Figure 1 – frontal panel
Figure 2 – rear panel
Figure 3 – info banner
Figure 4 – Camping menu
Figure 5 - volume
Figure 6 – mute function
Figure 7 - EPG and info function
Figure 8 – audio service selection
Figure 9 – Main menu
Figure 10 – Service list management
Figure 11 – Creating a list
Figure 12 – Modifying a list
Figure 12 A – Modifying a list
Figure 12 B – Modifying a list
Figure 13 – Deleting a list
26
27
28
28
28
29
30
30
31
33
34
35
36
36
37
37
38
38
39
39
42
42
42
48
9
9
15
16
17
17
17
18
19
20
20
22
23
23
24
Page 4

4 - Digital DVB TSDR5000CI receiver
Figure 14 – Installing the receiver
Figure 15 – Antenna/satellite configuration
Figure 16 – Configuring the antenna
Figure 17 – Services resetting message
Figure 18 – Configuring satellites
Figure 19 – Adding a new satellite
Figure 20 – Modifying the satellites list
Figure 21 – Adding a transponder
Figure 22 – Deleting a transponder
Figure 23 – LNB configuration
Figure 24 – Motor configuration
Figure 25 – Service installation mode
Figure 26 – Service acquisition
Figure 27 – Service acquisition over
Figure 28 – Services saved on the receiver
Figure 29 – TV configuration
Figure 30 – Setting the clock
Figure 31 – VCR configuration
Figure 32 – System update
Figure 33 – User settings menu
Figure 34 – Menu/audio language settings
Figure 35 – Controlling access to receiver functions
Figure 36 – PIN code
Figure 37 – System information
Figure 38 – Conditioned access
Figure 39 – Access to CAM information
Figure 40 – Example of information on the CAM
Figure 41 – Example of information on the SmartCard
Figure 42 – Confirm reinstallation
Figure 44 – Welcome message
Figure 45 – Setting the language during re-initialisation
Figure 46 – TV configuration
Figure 47 – LNB configuration
Figure 48 – Service installation
Figure 49 – Services being installed
Figure 50 – Service reception complete
Figure 51 – Services saved
Figure 52 – Clock setting
Figure 53 - Reinstallation completed
Ta ble of Contents
24
25
26
26
27
27
28
30
30
30
31
32
32
33
33
34
35
35
36
37
37
38
38
39
39
40
40
41
42
43
43
44
44
45
45
46
46
47
47
Page 5

Information
Digital DVB TSDR5000CI receiver - 5
Information
Congratulations on purchasing our TSDR5000CI receiver, one of the most technologically advanced
products in the satellite TV reception field. This handbook has been drawn up to provide information
on installation, use and maintenance of your TSDR5000CI system.
This handbook contains all the information pertaining to the TSDR5000CI receiver:
Issue date: 15th July 2006
Document version: TSDR5000CI rev. 2.0
Software version: 1.9
Electronics version: V2
Should you require further information please contact your local dealer or:
TELECO s.p.a.
Via E. Majorana 49
I-48022 LUGO (RA)
Web site: www.telecogroup.com
Technical Assistance : lab@telecogroup.com
Technical Assistance 899.899.856
Newsgroup : news:\\85.47.106.113
Ftp: ftp: \\ 85.47.106.113
TELECO s.p.a. shall not be held responsible for any errors in drawing up this manual. All information
which is contained herein is updated on the date of issue and the aforementioned revisions.
TELECO s.p.a. reserves the right to make modifications according to technological changes.
Page 6
6 - Digital DVB TSDR5000CI receiver
Information about safety
Information about safety
The following safety information refers to installation, use and maintenance. The handbook contains
specific info/safety warnings on specific topics. Always observe safety information with the utmost
care.
Electronic devices on the TSDR5000CI receiver can generate potentially dangerous
voltages. Electronic device covers must only be removed for maintenance and
set-up purposes and only after taking all the required precautions.
Before removing the electronic device covers always check that the
mains power supply is OFF and that the power lead
has been disconnected.
Installation and maintenance work must only be carried out
by qualified personnel.
Always disconnect the unit from the mains power supply before cleaning it.
Use a dry cloth and clean the outer shell only.
Protect the unit against condensation and splashes. The unit must be positioned
so that adequate ventilation is provided via the grilles.
Maximum working temperature = 45 C
Page 7
General view
Digital DVB TSDR5000CI receiver - 7
General view
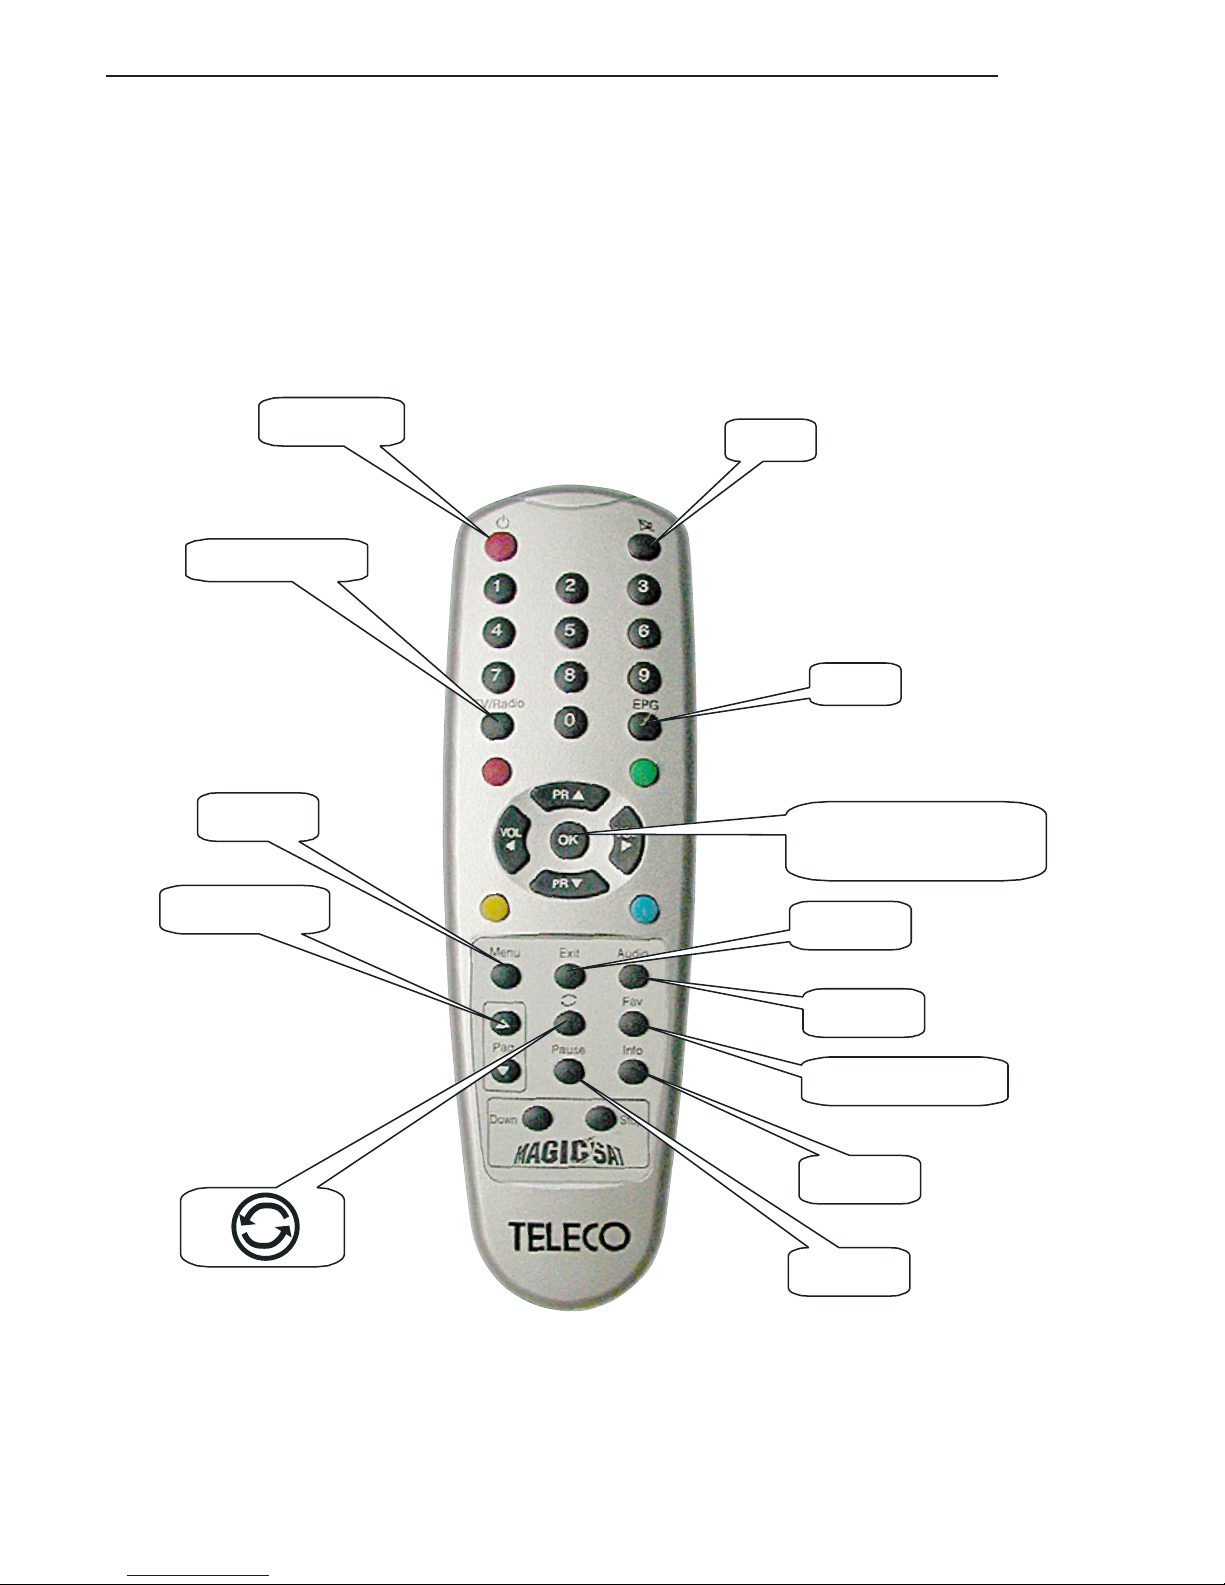
Remote control
ON/OFF
TV/RADIO
Menu
Page + e -
Mute
EPG
Right, left, up, down
and OK keys
Exit
Audio
Favourites list
Info
Pause
Page 8

8 - Digital DVB TSDR5000CI receiver
General view
ON / OFF
TV/RADIO
EPG
Menu
0..9
Right, Left, Up, Down, OK
Exit
Audio
Favourites list
Info
Pause
Page + / -
Mute
Switches the receiver on and off
Switches from TV to radio reception
Electronic Program Guide
Access to advanced receiver functions
Numerical keypad
Multi-function keys: volume control, Camping menu access key,
next or previous service (program) and other functions.
Exits the currently selected page.
Chooses which audio service to listen to (if the broadcaster has
activated the multi-audio service)
Selects which service list to use from among those available
(general, favourite, satellite).
Additional information on the currently selected service
Image freeze (analogous to VHS pause function)
Sat Finder: sound level and quality tone of the signal
Goes to next or previous page on a list.
Audio service disabled
Page 9
General view
Digital DVB TSDR5000CI receiver - 9
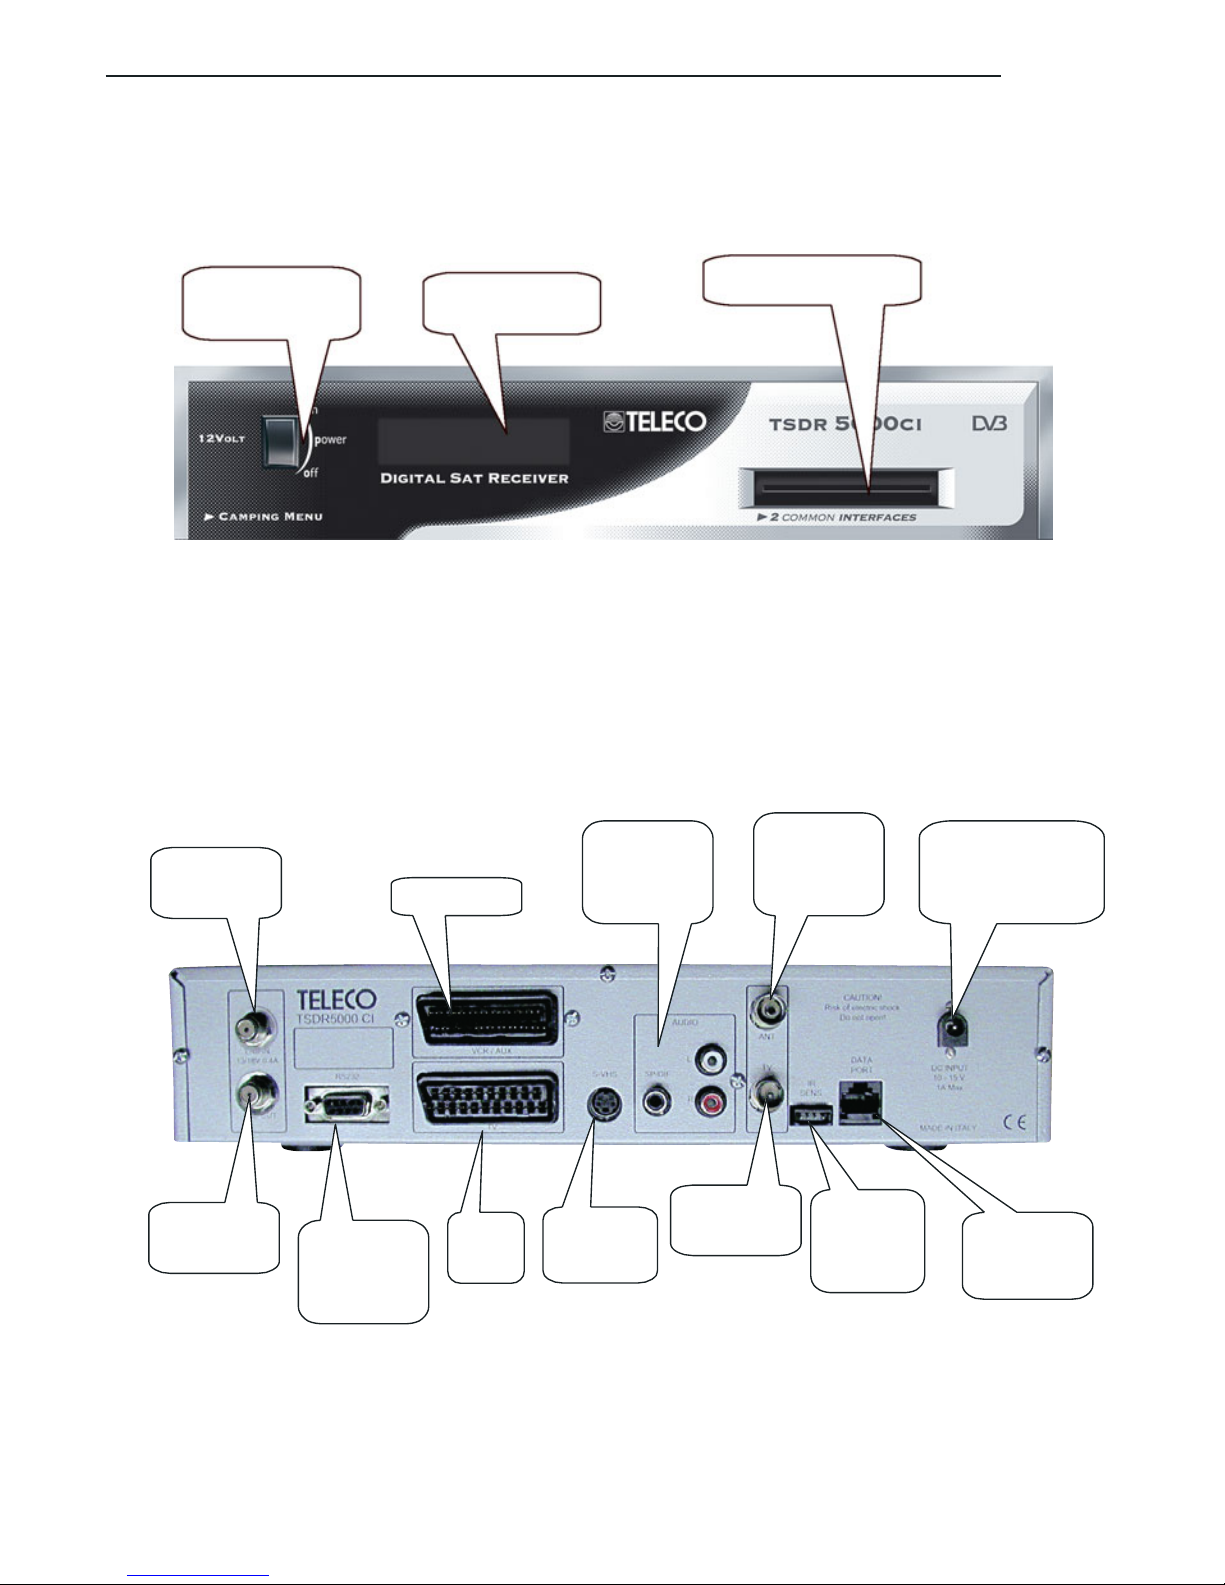
Fronte view
On/off
Display
CAM modules (2)
Figure 1 - frontal panel
Rear view
Figure 2 - rear panel
LNB input
(1)
VCR (4)
Audio
outputs
(7)
Antenna
input (9)
Power supply
12V
(12)
LNB
output (2)
Computer
port (3)
TV
(5)
S-VHS
(6)
TV output
(8)
IR-
remote
(10)
DataPort
(11)
Page 10

10 - Digital DVB TSDR5000CI receiver
General view
On/off switch
CAM modules
LNB input
LNB output
Computer port
VCR
TV
S-VHS
Audio outputs
Antenna input
TV output
IR_Remote
DataPort
12V Power supply
General power switch
Tw o slots for CAM PCMCIA modules
F-type connector for satellite dish lead.
F-type connector for second receiver (e.g. an analogue receiver) to make
use of the same satellite dish connection.
DB9 connector for computer link
SCART socket for video recorder connection
SCART socket for TV connection
Video output connector in S-VHS
Auxiliary audio output connectors. L & R connectors are available as is
a S/PDIF connector for PCM (Digital) format audio output
TV signal output connector for signals from traditional antenna mixed
with UHF band digital receiver signal. These connections should only be
used if the TV does not have a SCART connector or a base band
audio/video input.
Remote control IR sensor connector
DataPort connector for additional devices
12 Volt power connector.
Tr aditional VHF/UHF band antenna input connector
Page 11

Technical specifications
Digital DVB TSDR5000CI receiver - 11
Technical specifications
Definition
Digital receiver in compliance with DVB-S and DVB-CI specifications and EN 300 421, TR 101
198, EN 50221, TS 101 699 standards.
• up to 5000 saveable services.
• 256-colour OSD.
• SP-DIF audio output.
•2 SCART sockets.
• One S-VHS output
•Aux audio output
• RS232 port for software update and service list management.
• Software can be updated via satellite.
• DataPort for connection with other TELECO devices.
• 12 Volt power supply (-20 +20 %), 1 A max.
Technical specifications
Tuner
•F IEC169-24 female connector
•Working frequency 950 2150 MHz
• Rated input impedance 75
• Acceptable signal level from –25 to –65 dBm.
• DiSEqC control version 1.0 and 1.2
• QPSK modulation
• Symbol rate from 2 to 31 Ms/s
• FEC from 1/2 to 7/8
MPEG demodulator
• Video MPEG-2 ISO/IEC 13818
• Video compression MPEG-2 ML@MP
• Screen format 4/3 and 16/9
• Resolution 720 x 576
• MPEG Musicam Layer I and II audio decode
Conditioned access
•2 PCMCIA slots
Output connections
• TV SCART video output CCVS and RGB
• VCR SCART output CVBS and input CVBS and RGB
• MiniDIN connector for s-VHS
•Aux. L/R audio in Cinch
• S/PDIF digital audio in Cinch
• RS232C 9-pin, type SubD
Page 12
12 - Digital DVB TSDR5000CI receiver
Technical specifications
RF modulator
• Male/female RF IEC 169-2 connector 75
•Working frequency 470 – 860 Mhz (21 – 69 channels)
•PAL I/G/K/M system selectable from menu
Power supply
• Stabilised 12V DC power supply, -20 +20 %
• Maximum consumption 1°
• Internal automatic reset fuse
Dimensions
• (L x H x D) 310 x 70 x 200 mm
•Weight 1.7 Kg
•Working temperature from 0 to 45 C.
• Storage temperature from 0 to 70 C.
•To be stored at a relative humidity of 5 - 95 % (not condensable)
List of accessories
The TSDR5000CI receiver is delivered inside a cardboard box to protect it from impact and
compression. The receiver is supplied with the following accessories:
• Remote control complete with two AAA batteries
•Auxiliary 12 V power lead.
• Handbook.
• MIR Module.
RECYCLING: with a view to reducing disposal of waste electrical
and electronic equipment as much as possible, do not throw
out this end of life cycle appliance together with other unsorted
municipal waste, but make use of a recycling centre.
Page 13

Technical specifications
Digital DVB TSDR5000CI receiver - 13
Installation
Introduction
To perform properly the TSDR5000CI receiver needs to be connected properly. If your receiver
has been installed by a technician it will be ready for operation and you can go straight to the
section on “Immediate use of the receiver”. If you are installing the unit yourself follow the instructions
below.
Main connections
Connecting the lead from the satellite dish
Connect the coaxial lead from the satellite dish using an F-connector on the input socket (1).
Make sure that the central conductor of the coaxial lead is inserted correctly in the receiver and
is not bent or twisted.
Connecting the SCARTcable between the receiver and the TV or monitor
Insert one end of the SCART cable in the socket (5) and connect the other end to the TV set. It
is always best to use a complete SCART plug (i.e. one with 21 pins); doing so allows you to use
RGB mode (where the TV set has this feature), which gives better image quality. If your TV set
does not have a SCART connection (or a base band audio/video input), the TSDR5000CI receiver
can be connected with the modulator as described below.
Connecting the coaxial cable between receiver and TV
Insert the coaxial cable in the socket (8) and connect the other end to the TV antenna. If you have
an antenna for reception of terrestrial TV signals it can be connected to the antenna input socket
(9). In this case it is necessary to ensure that the output channel set on the receiver (between
channel 21 and channel 69) is free from any terrestrial TV antenna interference.
Connecting the remote control infrared sensor
All TSDR5000CI receiver functions can be controlled via the remote control. The remote control
emits infrared signals that are captured by a remote sensor supplied with the receiver. Position
the remote infrared sensor within view of the remote control unit (e.g. near the TV). The remote
infrared sensor has an adhesive base so that it can be installed where desired.
Warning: do NOT install the remote infrared sensor near fluorescent lighting or strong electrical
fields as they can reduce the capacity of the sensor to capture signals emitted by the remote
control.
Connecting to the power supply
Using the supplied lead, connect up to an electrical power source. The electrical power supply
specifications are:
•Voltage included between 9.5 and 15 V DC, stabilised and filtered.
• Socket-available current, minimum 1 Ampere.
Electrical power supplies provided via adapters must comply with the above-indicated minimum
requisites.
Page 14

14 - Digital DVB TSDR5000CI receiver
Technical specifications
Use of unsuitable power supply devices such as rectified but non-stabilized adapters,
battery chargers, AC adapters or switching battery chargers may cause malfunctions or
damage. In this case the warranty is null and void.
Additional connections
Connecting to a video recorder
Insert the SCART cable in the socket (4) of the TSDR5000CI receiver (labelled VCR). This allows
you to record the selected service on tape or play a VHS cassette.
Connecting to a monitor in S-VHS
If you are using a monitor or TV with a S-VHS input the TSDR5000CI receiver can be connected
via the socket (6) labelled S-VHS. This type of connector provides a CVS video signal (i.e. with
luminance and chrominance signals separated); for the audio signal it will be necessary to use
the relevant sockets (7).
Connecting a Home Theatre system
The TSDR5000CI can receive an audio signal in S/PDIF (PCM) digital format via the RCA socket
in the audio zone (7). Using a RCA-RCA lead, the digital audio signal can be sent to an amplifier
or Home Theatre system: this raises the audio on the received service to CD-level quality.
Page 15
Immediate use of the receiver
Immediate use of the receiver
Introduction
Your receiver is supplied pre-programmed with a wide range of TV and radio stations. Therefore,
once it has been connected your receiver can be used immediately.
Switching on the receiver
The main on-off switch is on the front panel of the receiver. This connects/disconnects the power
supply. This switch is useful when the receiver is left idle for long periods: when using the receiver
on a daily basis it is advisable to use the STANDBY function on the remote control.
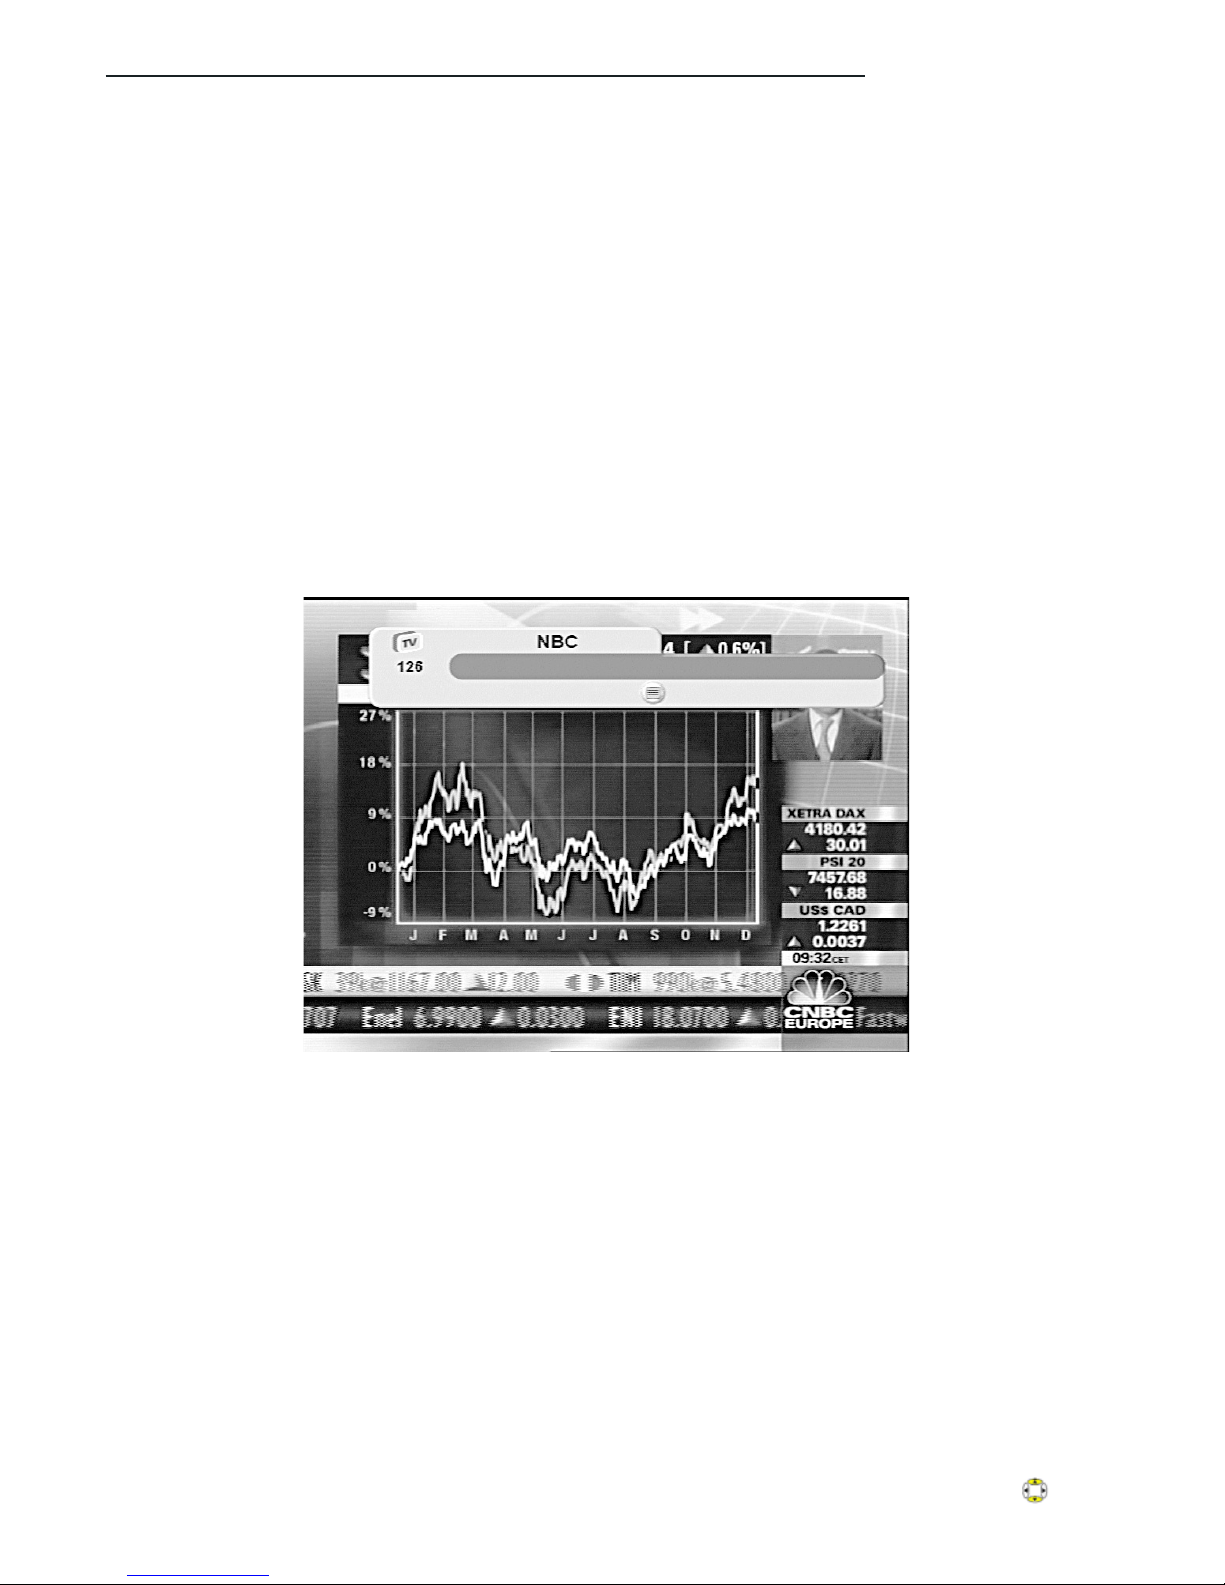
When you press the ON/OFF key on the remote control the receiver comes on and the frontal
display shows the legend ON followed by the previously selected service (if this is the first time
the receiver is used the number 1 appears). An info banner indicating the (TV or Radio) service
being received appears on your TV screen (figure 3).
Figure 3 - info banner
The info banner shows the following information:
• The type of service (TV or RADIO)
• The service number
• The service name
• A description of the event in progress (generally the name)
• Duration of event (where available)
• Icons showing details of the event and service being broadcast, any Teletext, language, access
control.
The info banner disappears after a few seconds to provide an unhindered view of the screen.
Changing service
To change service press the number key(s) on the remote control keypad that correspond to the
number of the desired station. The info banner will reappear and the figure you have just keyed
in will appear in the upper-right corner of the screen.
The service number can be incremented or decremented by one unit via the keys.
15 - Digital DVB TSDR5000CI receiver
Page 16
16 - Digital DVB TSDR5000CI receiver
Immediate use of the receiver
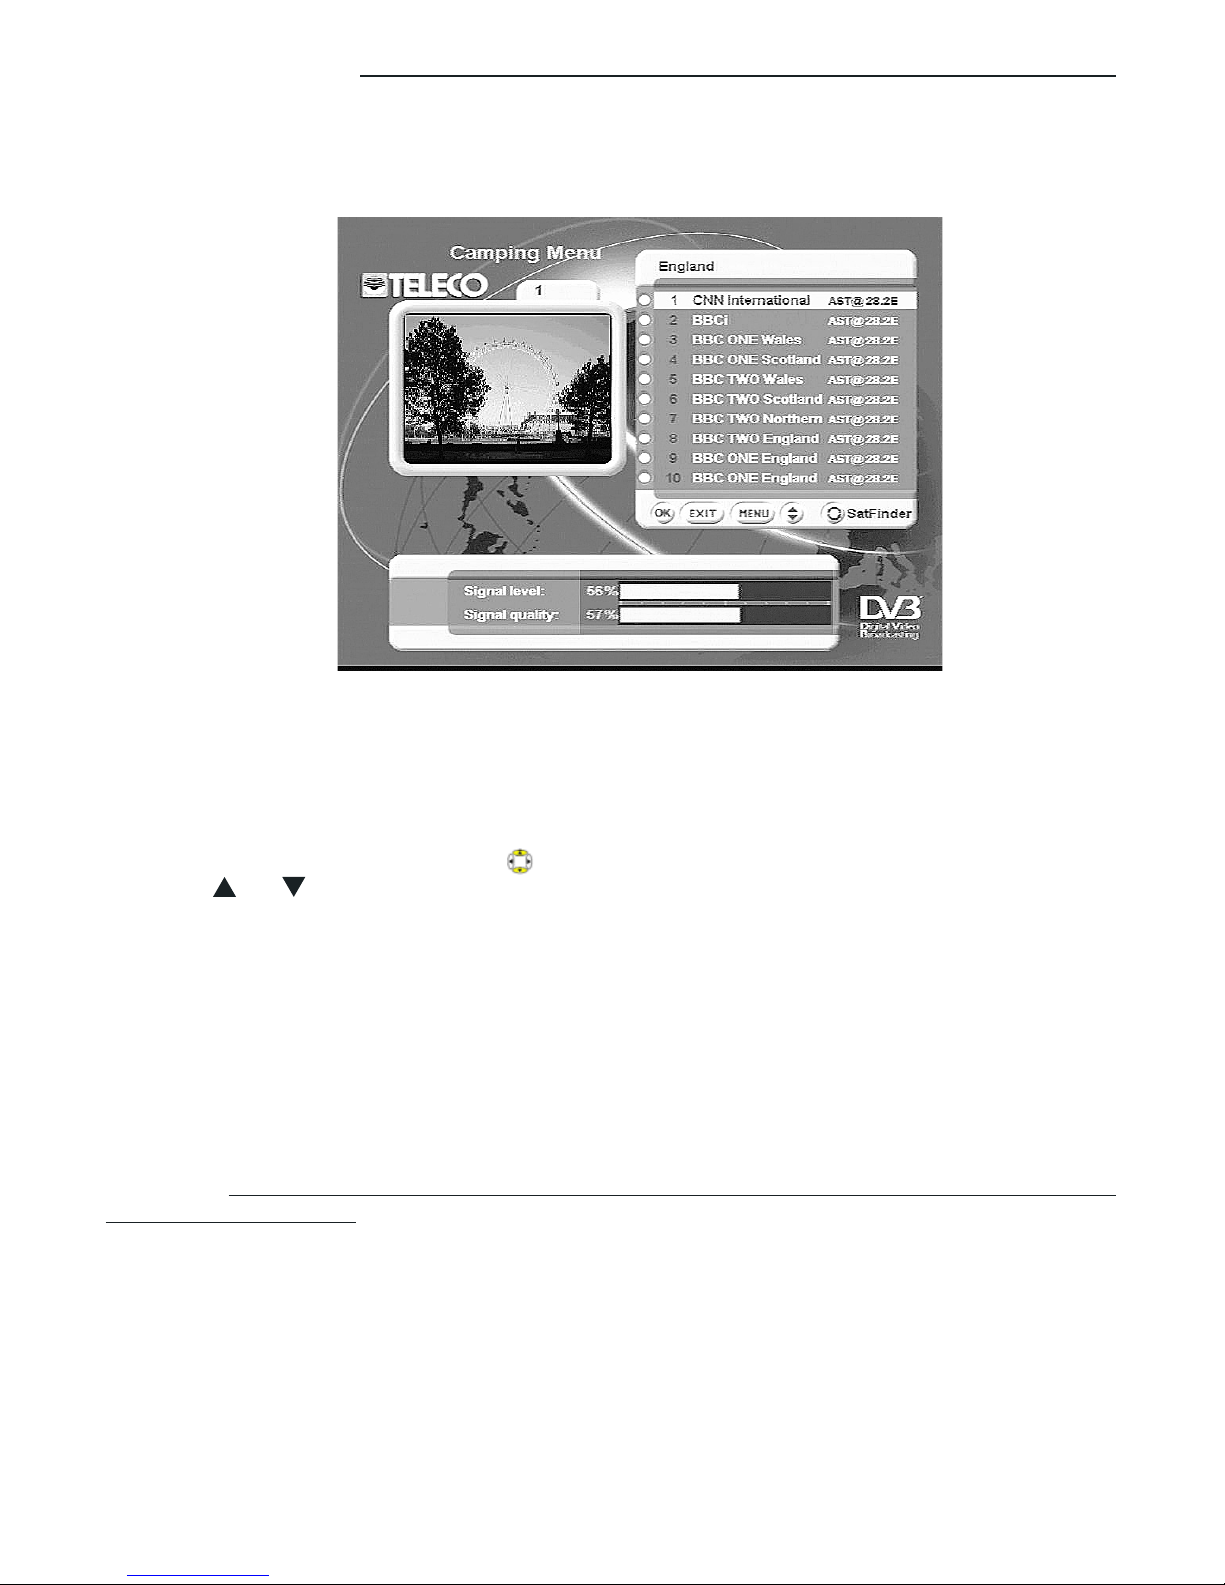
Alternatively you can use the CAMPING MENU: this gives immediate access to a complete list
of available services. You can access this function by pressing the OK key on the remote control
or selecting the appropriate item in the main menu (MENU key) :
Figure 4 - Camping menu
The current program is shown in the window at left. Two other fields appear: the top-right field is used
to select the desired service while the field at the bottom of the screen provides information on the
strength/quality of the received signal. To select a service from the list use the following keys:
• To select tv or radio service lists, press the TV/Radio key.
• To change the service list (to shift, for example, from one favourites list to another) use the FAV key.
• On the arrow cursor, use the keys to switch to another service on the list.
• Via the and arrows, you can change the service list by ten positions at a time.
• To enjoy the service, once it has been selected, press the OK key.
• To exit without enjoying any service, press the EXIT key.
• To access the main menu, press the MENU key.
Favourites lists which were factory-loaded
At the time of being sold, the receiver can be provided with some favourites lists which were
factory-loaded in order to help a less experienced user upon its first use. Each of these lists
contains the most widespread services in a given geographical area, it is therefore intended for
such area.
These lists are in every respect a first customization of the receiver, which can easily be removed
by the user.
As such it CANNOT be restored any more if the receiver is brought back to its minimum
setting (factory default).
Page 17

Immediate use of the receiver
Digital DVB TSDR5000CI receiver - 17
Press the EPG key to view comments (where available) or use the keys to select information
on the event in progress (the first) or the next one (the second).
Per uscire premere il tasto EXIT.
Another immediate-access function is selection of the audio service (AUDIO key). If the event is
being broadcast with more than one audio service you can choose from among those available:
Other immediate functions
When viewing a service you can access several other immediate functions that allow you to modify
receiver operation. Some of these - such as volume control and the
MUTE
function - act directly
on the service being watched:
Figure 5 - Volume
Figure 6 - Mute function
Figure 7 - EPG and info function
Other functions, instead, provide additional information on the event/program being broadcast,
such as title, start/end times, a brief synopsis or summary. For example, pressing the INFO key
on the remote control will provide a short summary of the event in progress as illustrated in the
figure 7:
Page 18

18 - Digital DVB TSDR5000CI receiver
Immediate use of the receiver
Figure 8 - audio service selection
To choose the desired audio service, use the right/left arrow keys then press OK to confirm.
To exit without selecting any service, press the EXIT key.
Page 19

Menu and advanced functions
Digital DVB TSDR5000CI receiver - 19
Menu and advanced functions
Introduction
The receiver is a particularly sophisticated digital receiver with numerous options. For day-to-day
use you do not need to access the settings menu: however, if you wish to modify the service lists
or the key receiver settings, you will need to access the advanced functions. Important: note that
modifying the technical parameters of your receiver can cause malfunctions and/or data loss.
Always proceed with caution when modifying settings.
Accessing the menu
To access the main menu just press the MENU key on the remote control:
Figure 9 - Main menu
To select an item from the list, use:
• the arrow keys to move up and down
• the
OK
key to confirm your choice
• the
EXIT
key to leave the menu.
The favourites list
This sub-menu can be used to create, modify or delete a services list.
Page 20

20 - Digital DVB TSDR5000CI receiver
Menu and advanced functions
Figure 10 - Service list management
The available lists are:
• The TV and RADIO service lists
• The factory-loaded favourites lists (see para.at page 16)
• The user-created favourites lists (see next para.)
Creating a list
After selecting this item and pressing the OK key, you will enter the menu as shown in fig. 11. Key
in the name of the list in the suitable field via the numerical keys or the page + and page keys for the letters. Use the right-left keys to move along the string
Figure 11 - Creating a list
Once the name of the list has been defined, use the keys to select the properties (Services,
Coding mode, List type, Satellite) of the list being created and use the keys to choose the following
options:
Page 21
Menu and advanced functions
Digital DVB TSDR5000CI receiver - 21
Services:
- TV and Radio - the list will consist of all services, both TV and Radio.
- TV services - the list will only consist of the TV services.
- Radio Services -the list will only consist of the Radio services.
Encoding mode:
- All - the list will consist of all the services picked up by the receiver.
- Coded - the list will only consist of the services for which the Network or Broadcaster
provided for a managed coding system (Control Access): to make use of these
services you must have the suitable authorizations (generally made available
by electronic devices such as the CAM module and the SmartCard) allowing
for the received signal to be decoded.
- Free - the list will
only consist of the services which can be used free.
List type:
- All Services - in the list
all services are marked as ON
- None - in the list all services are marked as OFF
NOTE: we suggest you select the - All Services - option should you wish to create a list containing
a very high number of usable services.
Vice versa, we suggest you select the - None - option should you wish to create a list containing
a low number of usable services. In both cases the lists can be properly modified via the “Skip/Add”
and “Delete” controls in the suitable menu (for more details see “Modifying a list “ section).
Page 22
22 - Digital DVB TSDR5000CI receiver
Menu and advanced functions
Satellite:
- All satellites - the list will consist of all services independently of the broacasting satellite.
“NAME” of the satellite the list will only consist of the services which are broadcast by the selected
satellite.
Once the name has been defined and the properties have been set, press the OK key to create
the list.
NOTE: bear in mind that creating a list allows for maximum performance in terms of service callup speed.
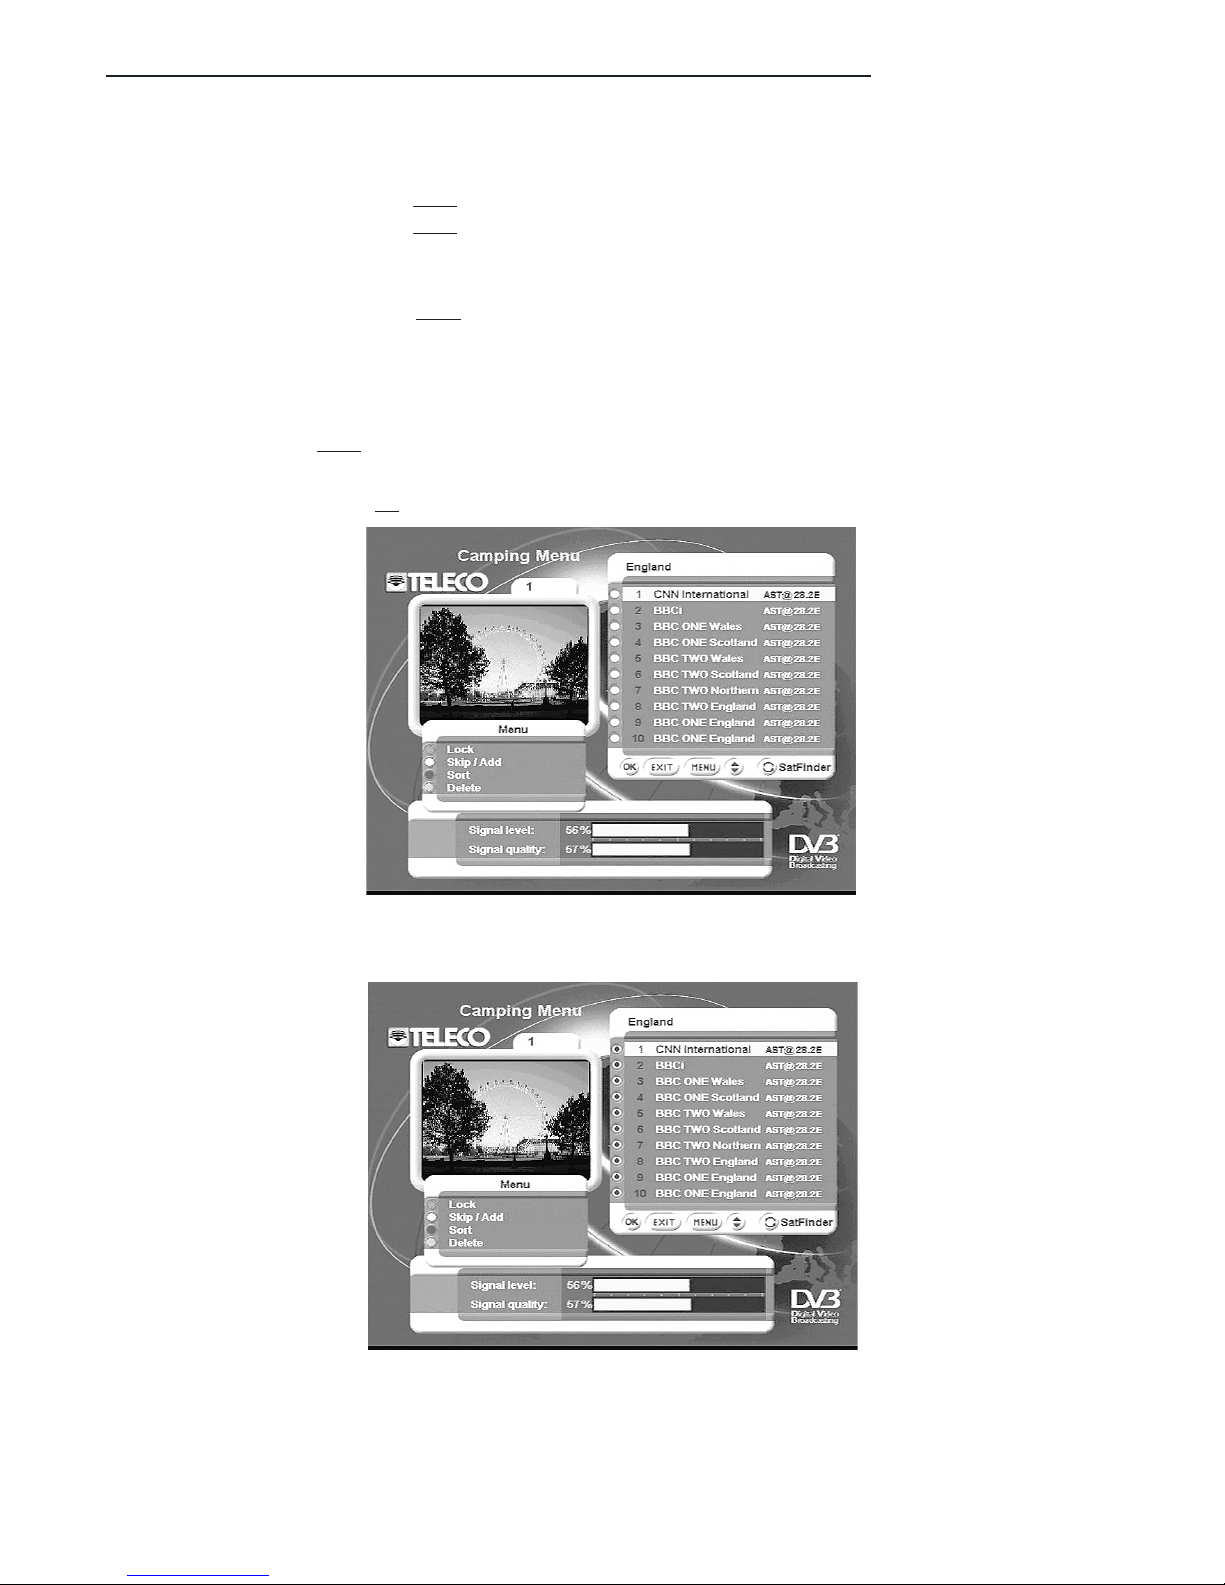
Modifying a list
This menu allows you to customize the available lists.
Figure 12 – Modifying a list
To choose the list you wish to modify press the TV/Radio key (selects TV or Radio service lists)
or the FAV key (selects favourites lists).
In this condition the following controls are available:
• The keys to select a service from the list.
• The and arrows to change the service list by ten positions at a time.
• The RED, YELLOW, BLUE and GREEN keys to select the options offered by the Menu.
• The OK key to confirm changes to the list.
• The EXIT key to leave the list without modifying it.
Lock menu (Red key): allows you to lock/unlock any selected service by pressing the OK key.
You must key in the PIN code to access any locked service
(for entering or modifying the PIN code and for enabling/disabling the set Access controls see
the related paragraphs at page 38).
Skip/Add menu (Yellow key): allows you to set Off/On the selected services by pressing the OK
key.
When the service is On, it can be used under the normal navigation modes (Camping Menu or
Full Screen display).
When the service is Off, it cannot be used under the normal navigation modes, but it is inside the
list which can be customized.
Page 23

Menu and advanced functions
Digital DVB TSDR5000CI receiver - 23
Figure 12 A – Modifying a list
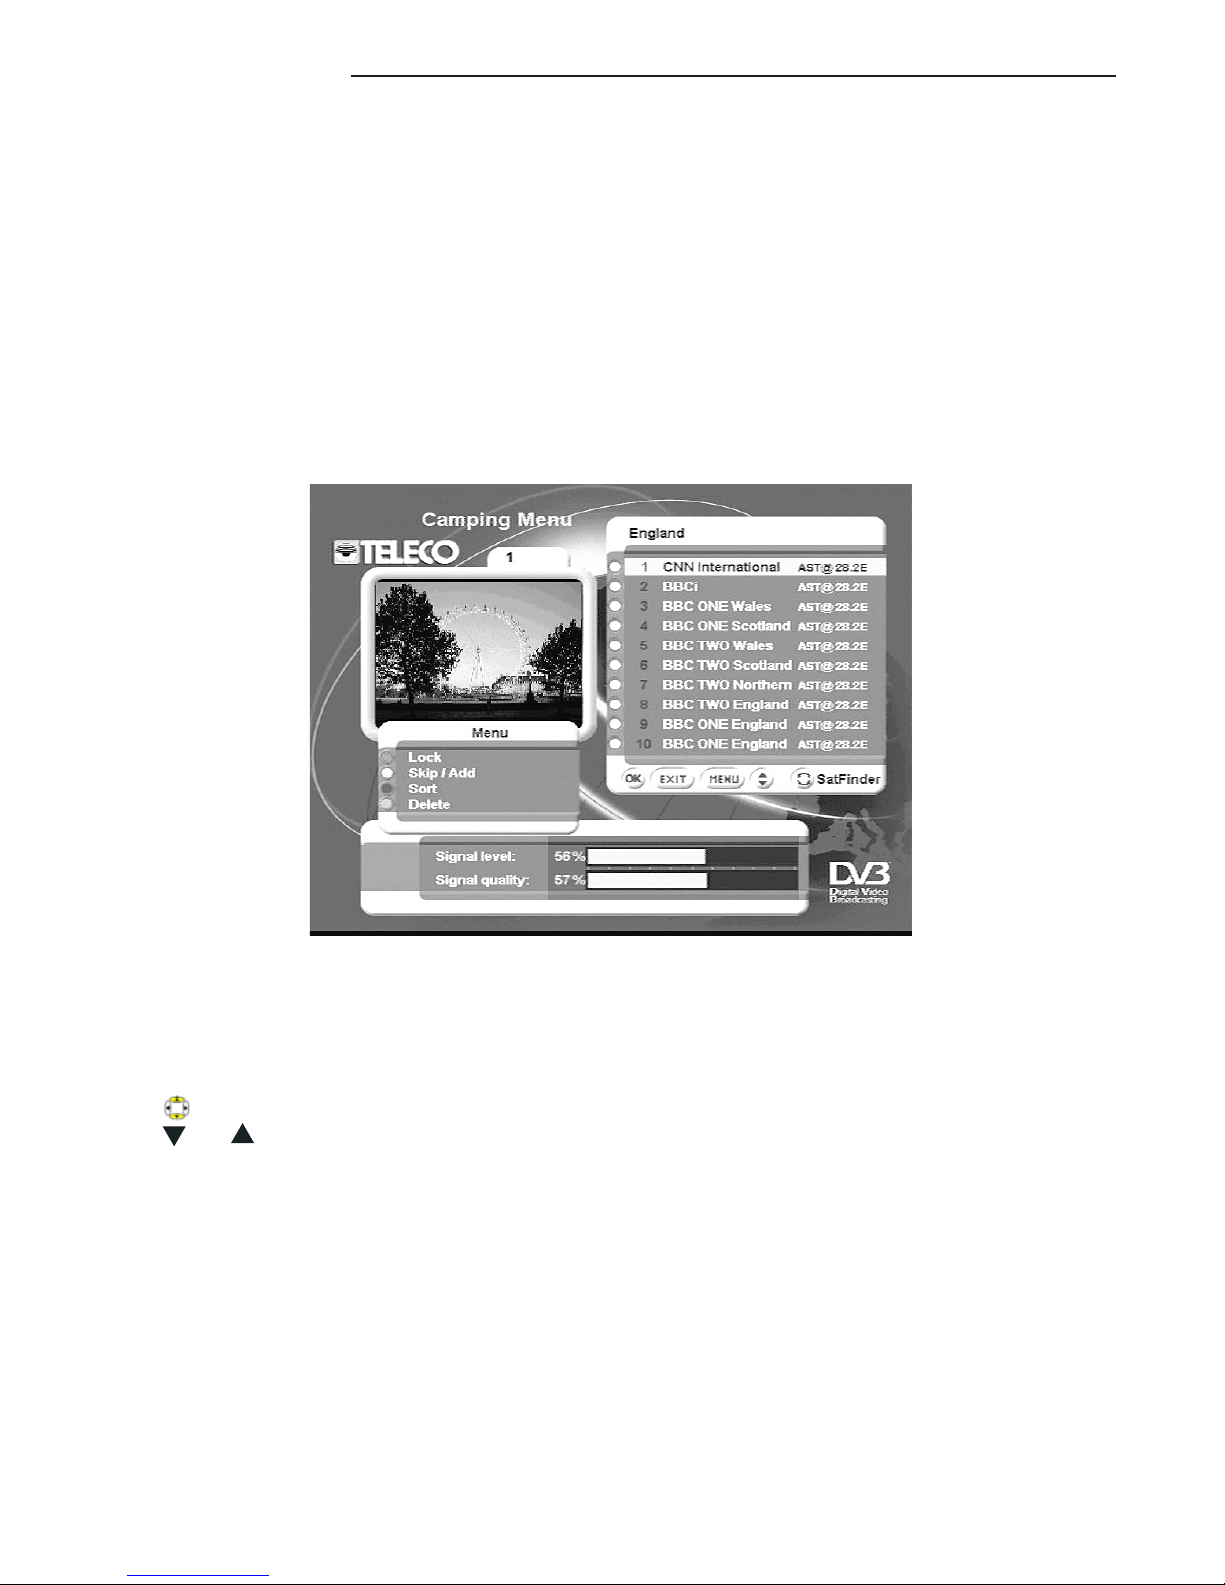
Sort menu (Blue key): allows you to arrange the services in the list.
Figure 12 B – Modifying a list
The following options are available:
Alphabetical (Red key): the services in the list are arranged in alphabetical order.
Manual (Yellow key): the order of the services in the list is arranged by the user.
Example: if you wish to move a service from pos. 1 to pos. 6, select pos. 1, press the Yellow key
and press OK to confirm. Then select pos. 6, press the Yellow key and press OK to confirm.
Network ID (Blue key): the services in the list are arranged by Network ID.
Satellite ID (Green key): the order of the services in the list is determined by the Satellites which
Page 24

24 - Digital DVB TSDR5000CI receiver
Menu and advanced functions
Figure 13 - Deleting a list
Figure 14 - Installing the receiver
broadcast them. A list of services in alphabetical order will be displayed for each Satellite.
Delete menu (Green key): allows you to remove any selected service by pressing the OK key.
Deleting a service will remove such service completely from the list.
To exit without saving the changes press EXIT
To save the changes made in the list you must always press the
OK
key
Deleting a list
To delete a list, select the relevant option and press OK. You must then indicate which list you
wish to delete:
To delete a list just select it and press
OK
. Remember that a deleted list cannot be recovered.
Installation
This sub-menu allows you to set all the main functions of your TSDR5000CI receiver. Note: these
settings are important and must, therefore, always be modified with due care and attention as
some parameters can limit or prevent proper operation of the receiver. This sub-menu takes you
to the topic-specific setting options:
Page 25

Menu and advanced functions
Digital DVB TSDR5000CI receiver - 25
These are:
• Antenna/Satellite configuration, used to indicate the current connection type between
receiver and signal source.
• Services installation (i.e. reception of the list of programs from the satellite requested
and/or in use).
• TV configuration (i.e. settings regarding receiver-TV connection specifications).
• Time and time zone settings
• VCR configuration and timer-controlled video recorder use.
• Reinstallation (i.e. resetting of all services and settings).
• System update (i.e. loading the base software via satellite).
To select an item from the menu use the keys and confirm with the
OK
key: To leave this menu
press the
EXIT
key.
Antenna/Satellite configuration
This sub-menu indicates the type of equipment and/or connection between your receiver and the
satellite dish. Once this sub-menu has been selected it gives access to further sub-menus:
Figure 15 - Antenna/satellite configuration
These are:
• Antenna configuration (i.e. type of connection and/or antenna connected to your receiver).
• Satellite Configuration (i.e. main characteristics of the satellite you wish to receive).
• LNB configuration (i.e. technical specifications of the LNB converter on the satellite
antenna).
• Motor configuration (i.e. the settings of the motorized system – where applicable).
Select an item using the keys and confirm your choice by pressing the OK key. To leave the
menu press the
EXIT
key.
Antenna configuration
Use this sub-menu to set the type of connection between your receiver and the antenna system:
Page 26

Menu and advanced functions
26 - Digital DVB TSDR5000CI receiver
The options are:
• Mono (i.e. antenna connected directly to the receiver as with TELECO Voyager systems).
• Multi (i.e. connections with multiswitch systems).
• Motor (i.e. connection with motorised systems based on the DiSEqC protocol)
• MagicSat (i.e. connection to the motorised TELECO MagicSat system).
Select an item using the keys and confirm your choice by pressing the
OK
key. To leave the menu
press the
EXIT
key.
Once you have confirmed, your receiver may inform you that it is necessary to re-set the services list:
Figure 17 - Services resetting message
In this case it is necessary to re-update the services list (see following paragraph).
Satellite configuration
This sub-menu provides information on the satellites you wish to receive. The maximum number
of configurable satellites is 32.
Figure 16 - Configuring the antenna
Page 27

Menu and advanced functions
Digital DVB TSDR5000CI receiver- 27
Figure 19 - Adding a new satellite
The available options are:
• Add a new satellite to the general satellite list.
• Modify the satellite list (i.e. modify the technical information of each satellite).
• Remove a satellite from the list.
• Add a transponder to a selected satellite.
• Delete a transponder from the selected satellite.
Select an item using the keys and confirm your choice by pressing the
OK
key. To leave the
menu press the
EXIT
key.
Adding a new satellite
This sub-menu allows the user to add the name and technical specifications of a new satellite
to the general satellites list. The list can contain up to 32 satellites.
Figure 18 - Configuring satellites
Page 28

28 - Digital DVB TSDR5000CI receiver
Menu and advanced functions
The available fields are:
• Name of the satellite
• Orbital position expressed in degrees
• Satellite orientation (i.e. Eastwards or Westwards).
•Frequency of reference transponder
•Polarisation emitted for the above transponder frequency
• Symbol rat.
• FEC
Select an item using the and number keys and confirm your choice by pressing the
OK
key.
To leave the menu press the
EXIT
key.
Modifying the satellites list
Use this sub-menu to select the satellite on which you wish to modify the parameters:
Figure 20 - Modifying the satellites list
Select an item using the keys and confirm your choice by pressing the OK key. To leave the
menu press the
EXIT
key.
Deleting a satellite
Use this sub-menu to delete a satellite from the list. You will be presented with a list of satellites
(as illustrated in the previous diagram) from which you can select the satellite you wish to delete.
Select an item using the keys and confirm your choice by pressing the
OK
key. To leave the
menu press the
EXIT
key.
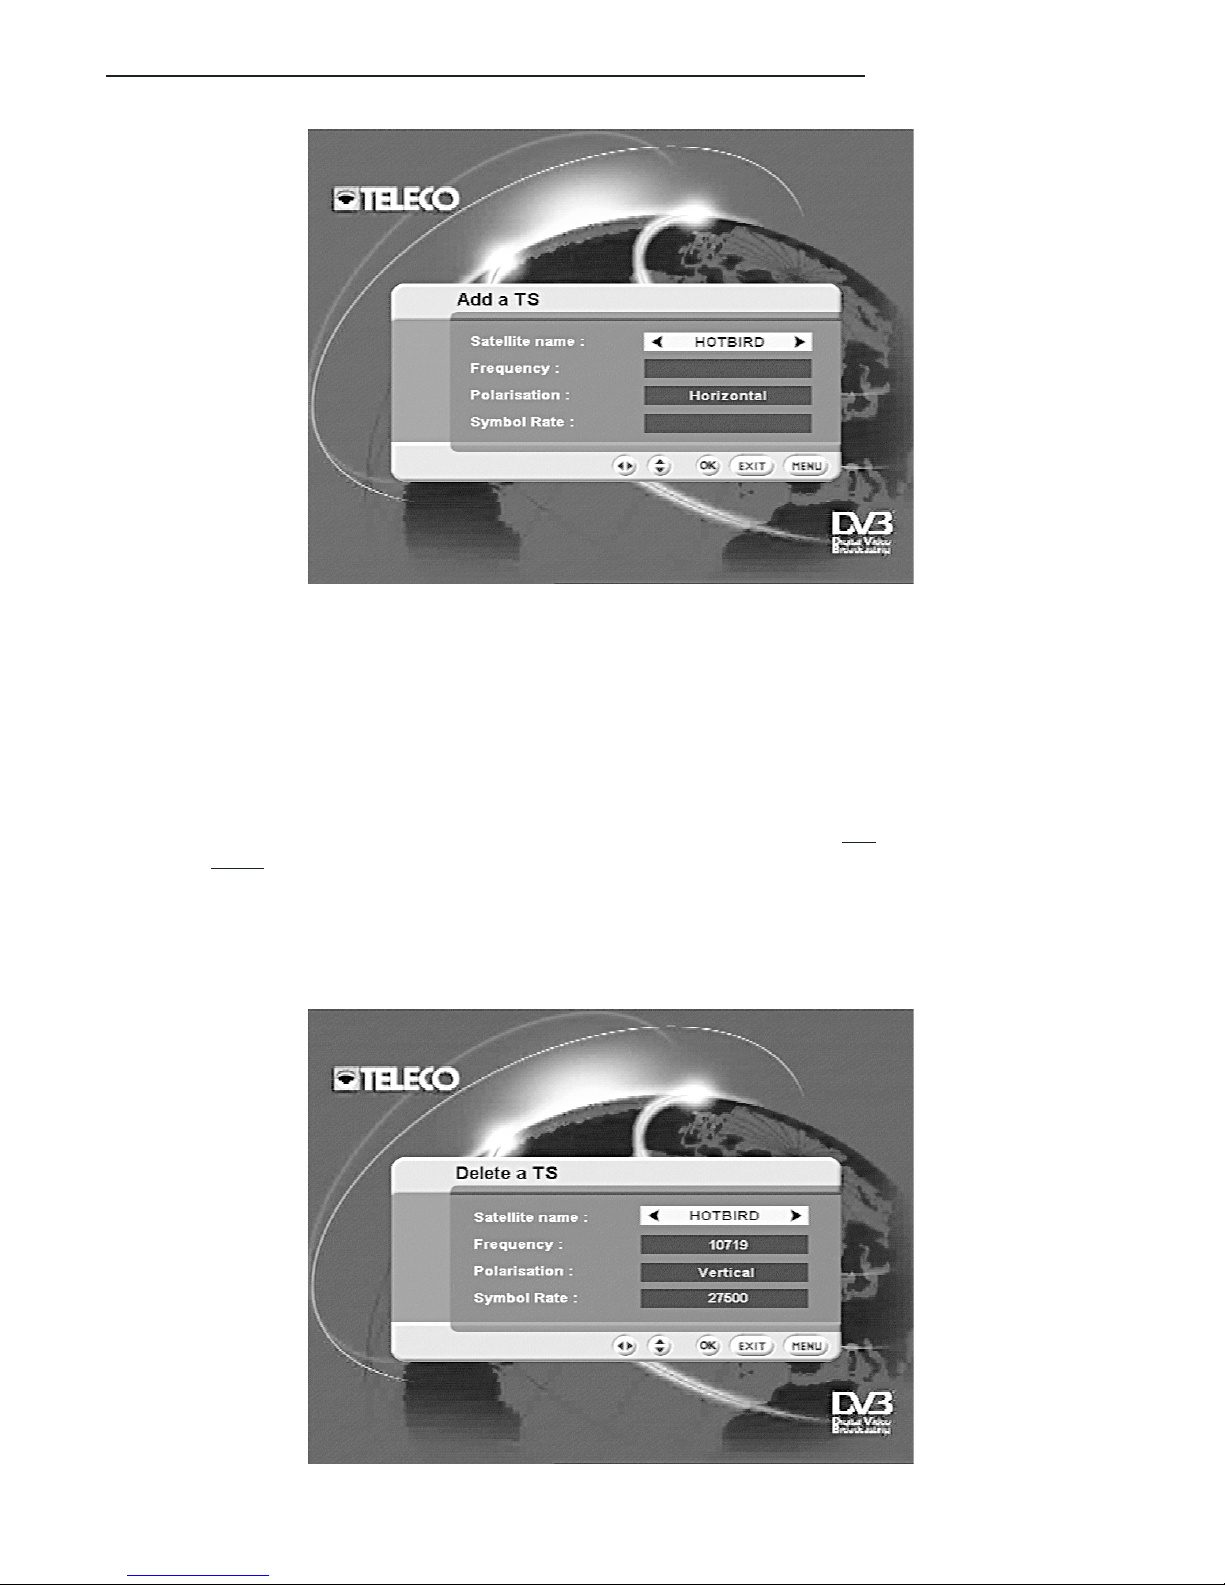
Adding a transponder
Use this sub-menu to add a transponder associated with the desired satellite.
Once you have selected a satellite the ‘Add a new satellite’ option appears with the relative
modifiable parameters.
Page 29
Menu and advanced functions
Digital DVB TSDR5000CI receiver - 29
Figure 21 - Adding a transponder
The available options are:
• Name of satellite
•Transponder frequency
•Transponder polarisation
•Transponder symbol rate
This information will be used to search for any new services available from the indicated satellite.
Select an item using the keys and confirm your choice by pressing the
OK
key. To leave the menu
press the
EXIT
key.
Deleting a transponder
Use this sub-menu to delete a transponder associated with the desired satellite.
Figure 22 - Deleting a transponder
Page 30

30 - Digital DVB TSDR5000CI receiver
Menu and advanced functions
Select an item using the keys and confirm your choice by pressing the OK key. To leave the
menu press the
EXIT
key.
LNB Configuration
This sub-menu provides the technical specifications of the LNB converter on your satellite dish:
The available fields are:
•Type of LNB (name of defined LNB)
•low LNB (i.e. local oscillator frequency used in low band)
• high LNB (i.e. local oscillator frequency used in high band)
• Switching frequency (i.e. the frequency with which you decide to switch from low to high
band)
• Band type (Ku or C).
As a general rule, these fields need not be modified as the LNB converters marketed in Europe
are of the UNIVERSAL type and are defined inside the receiver.
Select an item using the and number keys and confirm your choice by pressing the
OK
key.
To leave the menu press the
EXIT
key.
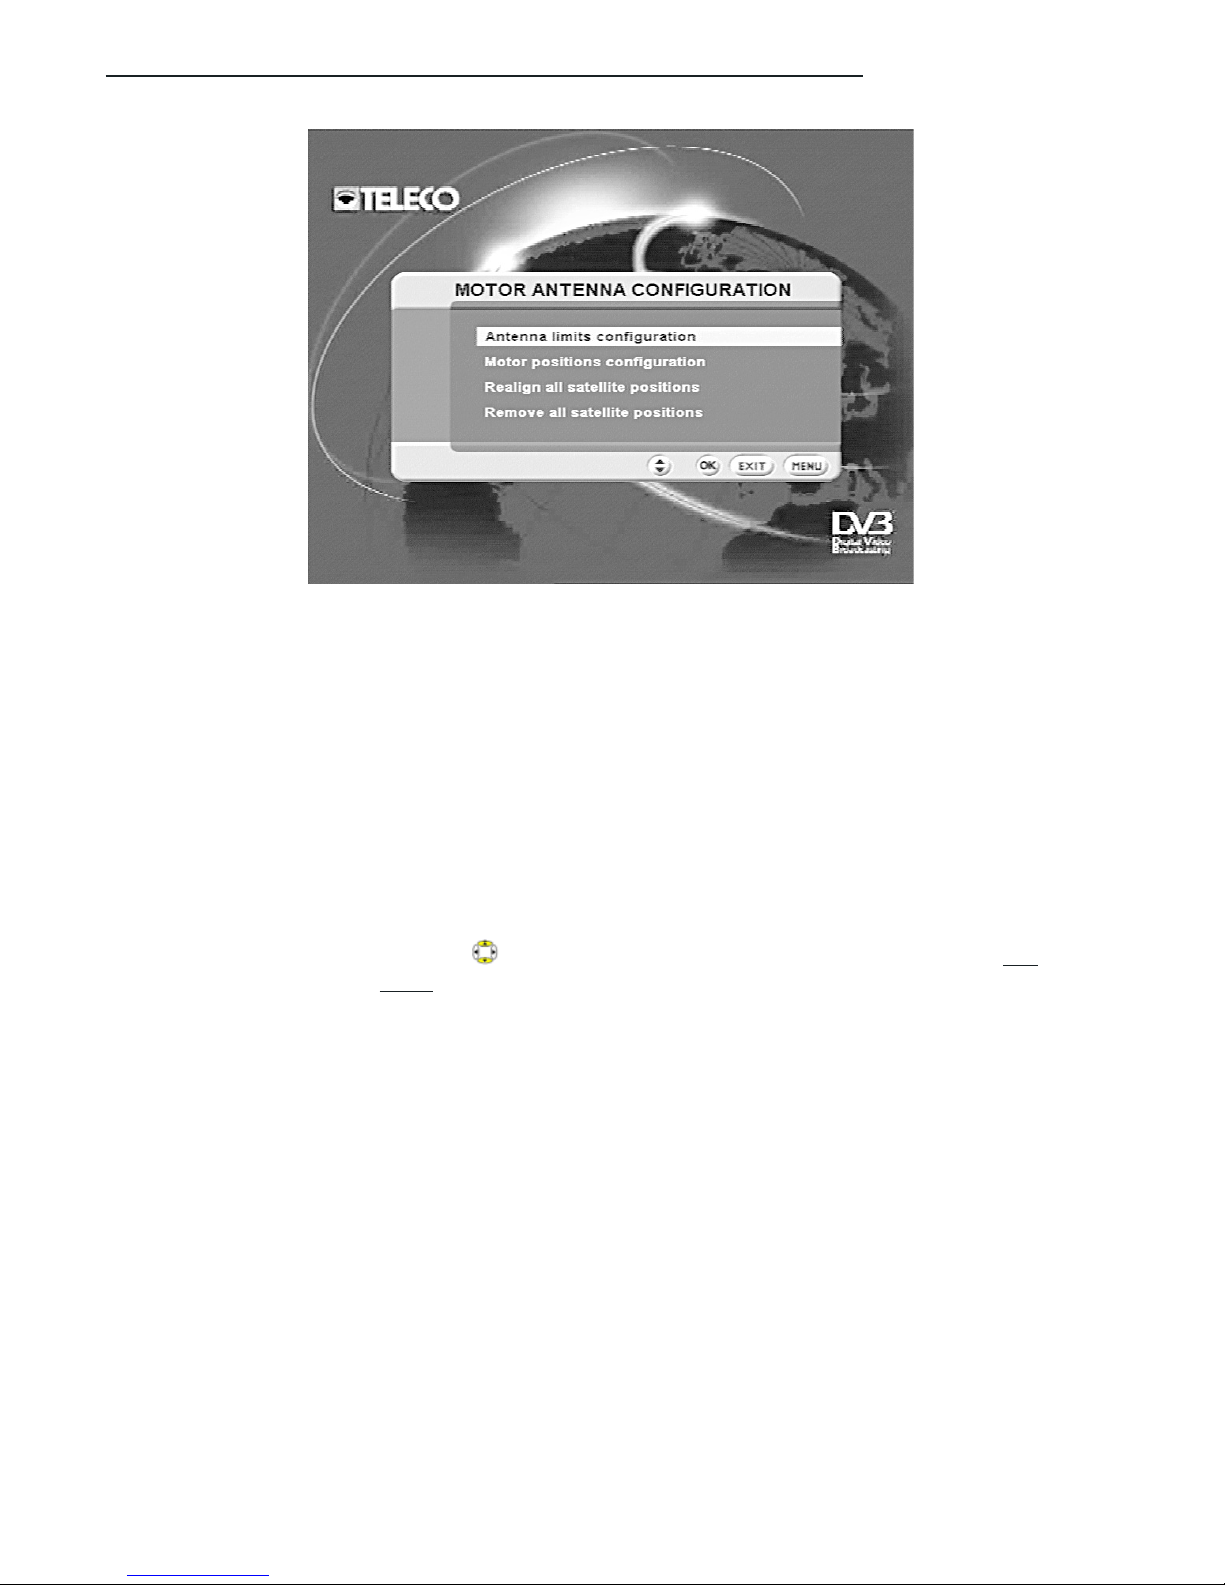
Motor configuration
Use this sub-menu to set the mechanical specifications of any DiSEqC motor connected to your
receiver.
Figure 23 - LNB Configuration
Page 31
Menu and advanced functions
Digital DVB TSDR5000CI receiver - 31
Figure 24 - Motor configuration
The available options are:
• Motor limit options (i.e. maximum excursion of the DiSEqC motor).
• Motor position configuration (i.e. assignment of a motor position for each satellite).
• Re-alignment of all satellite positions, to be used if limit settings have been modified.
• Delete all satellite positions.
These functions must only be used if the receiver is connected to a DiSEqC motor. These functions
are not available where the receiver is an incorporated part of the TELECO MagicSat system.
To use the DiSEqC motor refer to the instructions provided by the makers.
Select an item using the up/down keys and confirm your choice by pressing the
OK
key. To
leave the menu press the
EXIT
key.
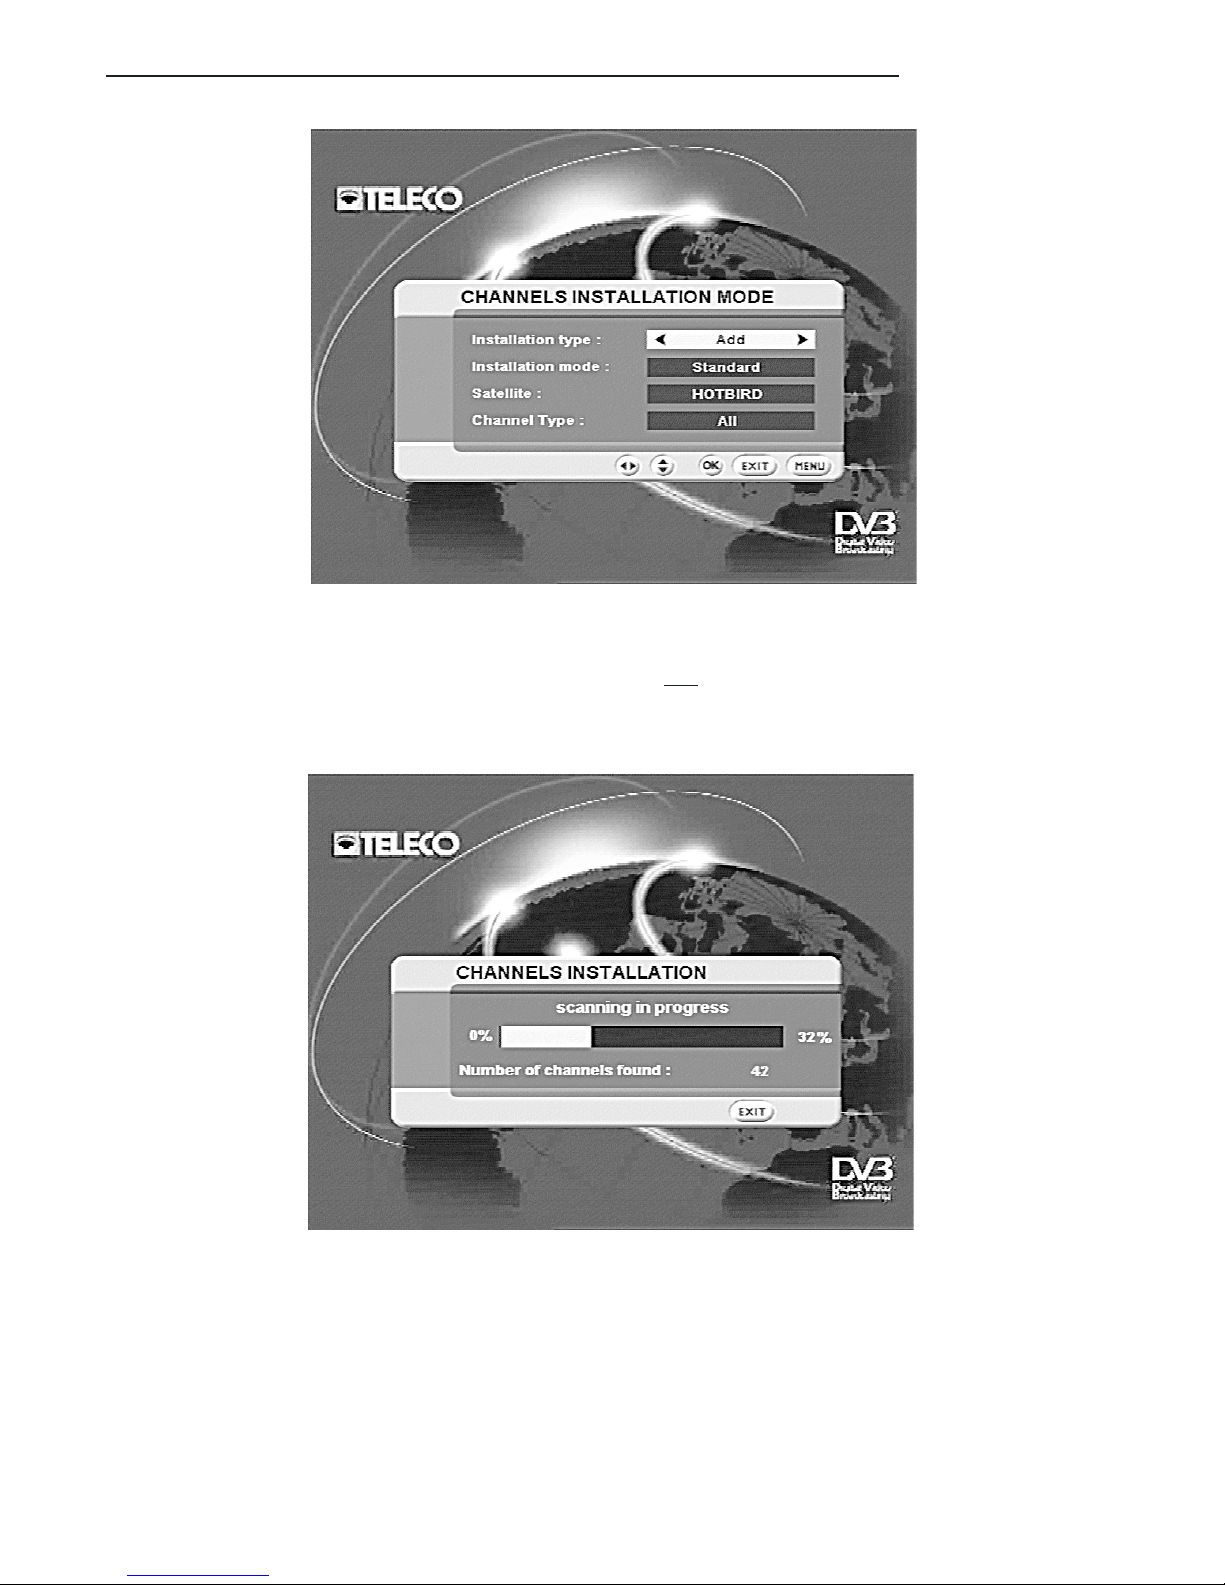
Service installation
Use this sub-menu to install new services or add new services to existing ones.
Page 32

32 - Digital DVB TSDR5000CI receiver
Menu and advanced functions
Figure 25 - Service installation mode
The available options are:
•Type of installation (i.e. whether you wish to add to the list or overwrite it with new acquired
services).
• The installation modes are:
• Standard – using the list of transponders
• Manual – indicating the parameters of the transponders
• Exhaustive – complete scan of the satellite band
•Download – the current service list is sent to a computer connected to the serial port
• Upload – a list of services is sent from the computer towards the receiver using the serial
port.
• Satellite (i.e. the satellite associated with the list in question).
•Type of service: (i.e. whether you wish to acquire all the available services or only those
that are Free to Air).
Once you have set the service installation mode, confirm by pressing the
OK
key and your receiver
will start acquiring the new services.
Figure 26 - Service acquisition
Page 33

Menu and advanced functions
Digital DVB TSDR5000CI receiver - 33
Once the scan has been completed, the following message appears:
Figure 27 - service acquisition over
followed by the final confirmation message:
Figure 28 - Services saved on the receiver
Select an item using the keys and confirm your choice by pressing the
OK
key. To leave the
menu press the
EXIT
key.
TV configuration
Use this sub-menu to set the receiver-TV connection specifications
Page 34

34 - Digital DVB TSDR5000CI receiver
Menu and advanced functions
The available fields are:
• TV format (i.e. TV screen size ratio, 4/3 or 16/9).
• Colour mode standard at receiver output (PAL, SECAM, NTSC, RGB).
•Audio mode (STEREO or MONO)
• Screen type (i.e. how received image size is to be managed with the set TV screen size).
• Display time (i.e. show the time on the frontal display when receiver is placed in standby.
• UHF mode (i.e. definition of the modulation standard used by the TV modulator)
• UHF service (i.e. service used by the modulator).
Select an item using the and number keys and confirm your choice by pressing the OK key.
To leave the menu press the
EXIT
key.
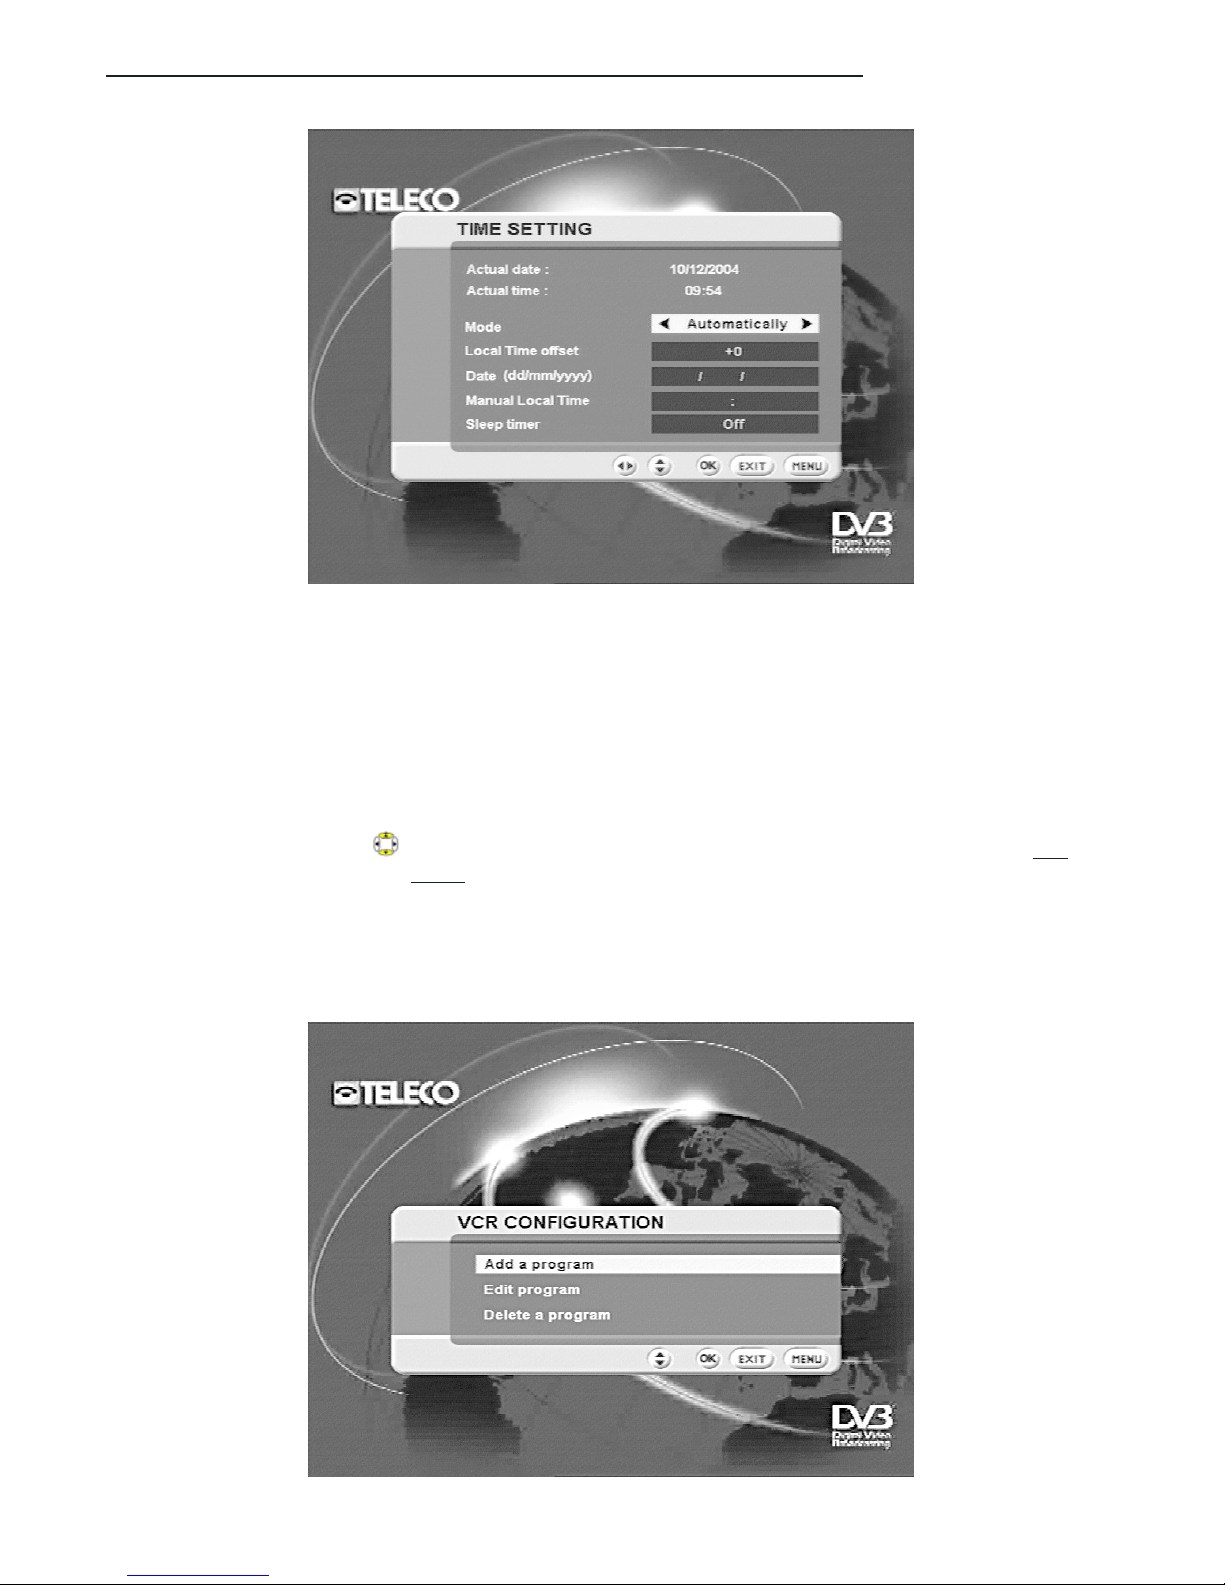
Set time
Use this sub-menu to set the clock on your receiver:
Figure 29 - TV configuration
Page 35
Menu and advanced functions
Digital DVB TSDR5000CI receiver - 35
VCR configuration
Use this sub-menu to add, modify or delete a receiver switch-on or switch-off program so that you
can set recording of the desired program:
Figure 30 - Setting the clock
The available fields are:
• Mode (i.e. whether the time is controlled via the received service or “locally” by the minicomputer on the receiver).
• Local time difference (i.e. time difference with respect to GMT).
• Date (the date is set when the clock is used in “local” mode).
• Local time (i.e. clock time when used in “local” mode).
•Delayed switch-off (i.e. causes the receiver to be switched off when it has not been used
for a set time as established by the user).
Select an item using the and number keys and confirm your choice by pressing the
OK
key.
To leave the menu press the
EXIT
key.
Figure 31 - VCR configuration
Page 36

36 - Digital DVB TSDR5000CI receiver
Menu and advanced functions
The available options are:
• Add a program (i.e. set receiver switch-on)
• Modify a program (.e. modify a previously added program)
• Delete a program (i.e. remove a previous setting).
Select an item using the keys and confirm your choice by pressing the OK key. To leave the
menu press the
EXIT
key.
Reinstallation
The reinstallation procedure consists of cancelling all the information on your receiver so that it
is ready for complete reconfiguration. Your receiver is supplied with a list of pre-programmed
services: bear in mind, should you decide to reinstall, that the receiver will not load the initial list
but an empty one. For further information on the reinstallation procedure see ‘Reinstalling your
receiver’.
System update
This sub-menu allows your receiver to download any software updates:
Figure 32 - System update
The available fields are:
•Frequency (i.e. the frequency of the transponder where the update is available).
•Polarisation of the transponder
• Symbol rate of the transponder.
• FEC of the transponder.
These parameters are generally preset to the correct values, yet can, at TELECO’s request, be
adapted to carry out any updates.
Select an item using the and number keys and confirm your choice by pressing the
OK
key.
To leave the menu press the
EXIT
key.
Page 37

User settings
Use this sub-menu to set up the receiver according to your personal requirements:
Menu and advanced functions
Digital DVB TSDR5000CI receiver- 37
Language configuration
Use this menu to set the language in which menus and messages are displayed by your
TSDR5000CI receiver and the default audio language. If the received service is available in the
default language this language will be selected automatically. If it is not your receiver will provide
the main audio service.
Figure 34 - Menu/audio language settings
Figure 33 - User settings menu
Select the menu items using the up-down arrow keys and confirm with the OK key.
Page 38

38 - Digital DVB TSDR5000CI receiver
Menu and advanced functions
Access control
From this menu you can create safety mechanisms to limit access to certain functions of the
receiver. In fact access can be inhibited to the following functions:
_ setting menu _ lock-protected services (see page 22) _ children access.
We recommend you to carry out these operations carefully and keep a copy of the access code
in a safe place: should you lose the code, the receiver could not be unlocked by the user, it should
be returned to the factory for technical servicing.
Figure 35 - Controlling access to receiver functions
Modifying the PIN code
Use this sub-menu to set and/or modify the PIN (Personal Identification Number) code, which
gives access to any “padlocked” functions. To modify the PIN you must key in the previously
assigned PIN. Note: the PIN code is factory-set to 1234
Figure 36 - PIN code
Note: the PIN code
is factory-set to
1234.
Page 39

Menu and advanced functions
Digital DVB TSDR5000CI receiver - 39
Information system
This menu gives technical data on the software installed on your receiver. This data is important
for proper operation and identification of your receiver and must be given to our technical staff
when requested.
Figure 37 - Information system
Conditioned access
This sub-menu provides information and instructions for reception of services requiring payment
(CA = Controlled Access). These are managed via the CAM (Control Access Module), which must
be inserted in the slot at the front of the receiver. If you access this sub-menu without inserting
the CAM the following message appears:
Figure 38 - Conditioned access
Inserting a CAM may generate a message similar to the following (the message may change
depending on the module inserted):
Page 40

40 - Digital DVB TSDR5000CI receiver
Menu and advanced functions
Figure 39 - Access to CAM information
Select an item to obtain more detailed information on the technical specifications of the
inserted CAM and on the subscription to the card in the module (this information changes
depending on the inserted module). There follow some examples of additional information
relative to the inserted CAM and card.
Figure 40 - Example of information on the CAM
Page 41

Menu and advanced functions
Digital DVB TSDR5000CI receiver - 41
Figure 41 - Example of information on the SmartCard
Page 42

42 - Digital DVB TSDR5000CI receiver
Reinstalling your receiver
Reinstalling your receiver
Introduction
Particularly difficult circumstances may make it necessary to proceed with complete re-installation
of your receiver. For example, this may be necessary when modifications have been made to
receiver configuration and the receiver is subsequently unable to acquire any services.
WE REMIND YOU that the re-installation procedure restores the factory settings and causes all
services and previous settings to be fully deleted.
Re-installation sequence
To re-initialise your receiver select the main menu via the MENU key on the remote control and
choose ‘Reinstallation’. The following message appears:
Figura 42 - Confirm reinstallation
To confirm the procedure you must key in the PIN code (as a precaution for any unintentional reinstallation). Note: the PIN code is factory-set to 1234. The memory of the receiver is fully cleared
and the receiver goes off and again on in a few seconds. A few moments later the following
message appears:
Page 43

Reinstalling your receiver
Digital DVB TSDR5000CI receiver - 43
At this point your receiver has organised its internal memory ready for resetting of the configuration
and new services. Confirm with the OK key and the following appears:
Figure 45 - Setting the language during re-initialisation
Set the desired language with the right and left arrow keys, then confirm with the OK key.
Then set the type of TV set connection:
Figure 44 - Welcome message
Page 44

44 - Digital DVB TSDR5000CI receiver
Reinstalling your receiver
Figure 46 - TV configuration
Once this task has been completed confirm with the OK key. The subsequent task consists of
setting the type of converter connected to your receiver:
Figure 47 - LNB configuration
Once this task has been completed confirm with the OK key. Next, set the service installation
mode:
Page 45
Reinstalling your receiver
Digital DVB TSDR5000CI receiver - 45
Figure 48 - Service installation
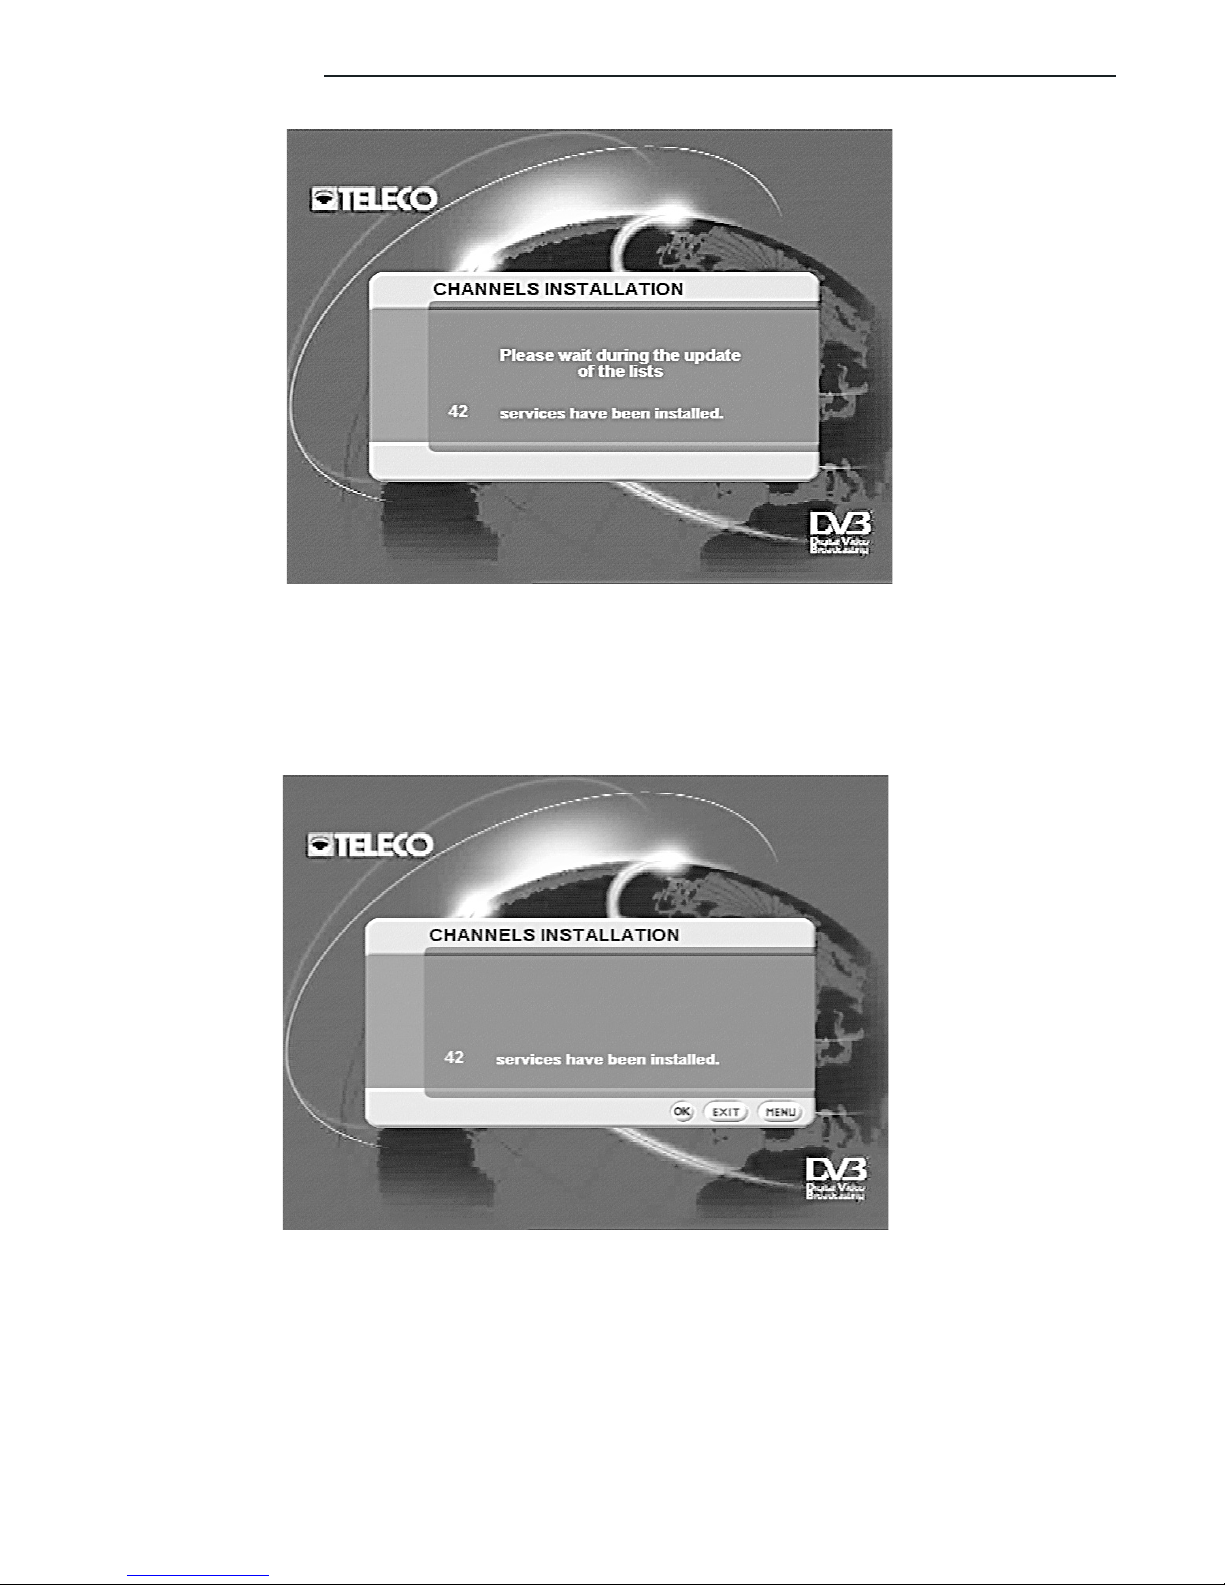
Figure 49 - Services being installed
Once this task has been completed confirm with the OK key. At this point your receiver will start
acquiring the service list for the requested satellite; this procedure may take a few minutes and
depends on the number of services. During this task the screen displays the following message:
Page 46
46 - Digital DVB TSDR5000CI receiver
Reinstalling your receiver
Figure 51 - Services saved
Figure 50 - Service reception complete
Page 47
Reinstalling your receiver
Digital DVB TSDR5000CI receiver - 47
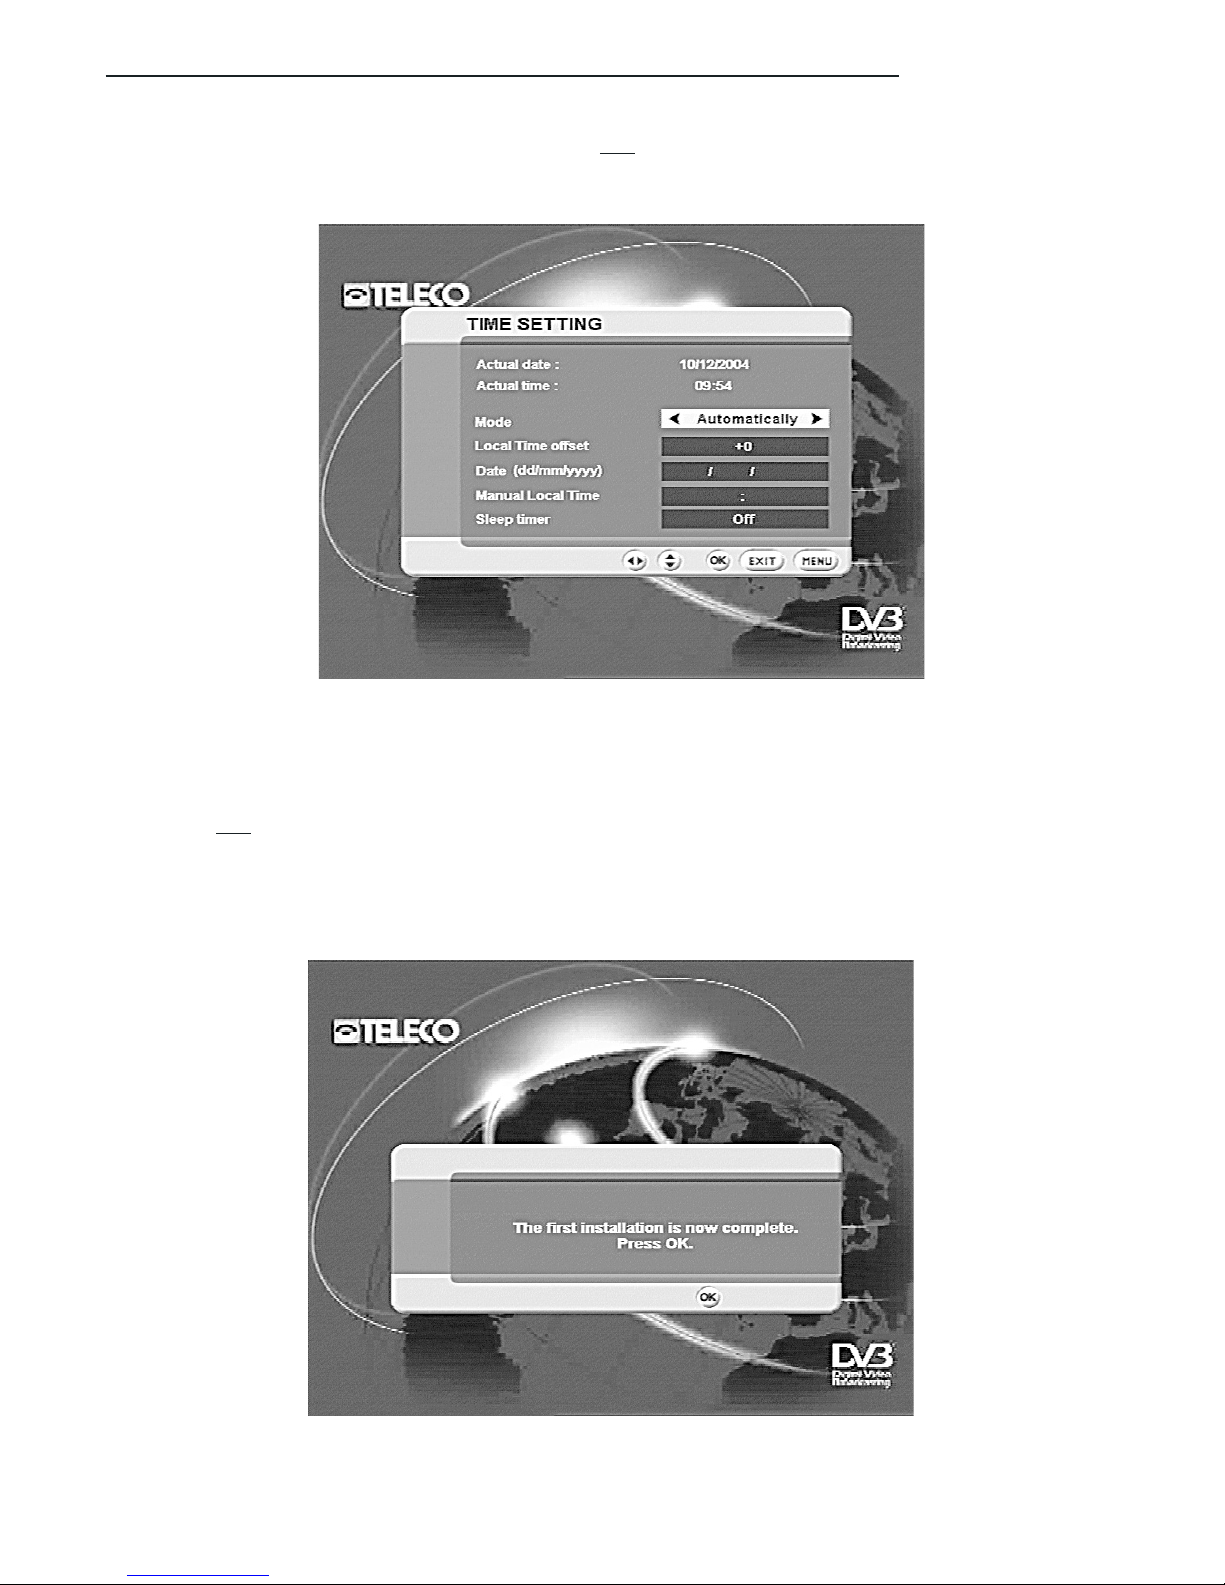
Figure 52 - Clock setting
Figure 53 - Reinstallation completed
Unless specifically stated otherwise, it is advisable to leave the settings in automatic. At the end
press the OK key again to confirm your choice. Re-installation of the receiver has now been
successfully completed.
Once the services have been acquired press
OK
. You will then be requested to set the clock on
your receiver:
Page 48

48 - Digital DVB TSDR5000CI receiver
Glossary
Glossary
Bouquet
The term Bouquet refers to a package of services (services) included in a single offer. A
Network or Broadcaster may manage one or more bouquet offers.
CA
Acronym for Control Access. Indicates that the service you wish to receive is encrypted. To
use such services you need an electronic device that decodes the received signal (e.g. CAM
module and SmartCard).
CAM
Acronym for Control Access Module. Indicates the electronic decoder module inserted in the
PCMCIA connector. The rear part of module has a slot for insertion of the SmartCard. There
are different CAM modules, each designed to operate with a specific CA system.
FEC and Symbol rate
Parameters characterising transmission of the digital signal in the transponder. They must
correspond with the transmitted signal.
Network or Broadcaster
The term Network or Broadcaster refers to the company supplying the service within one
or more bouquets.
Transponder
The term transponder refers to a satellite transmission service. On previous analogue systems
a transponder could carry only one program; with digital transmission, instead, several
programs (services) can be carried.
Service
The term service refers to the program you wish to receive. Unlike previous analogue systems
the term
service is now preferred (rather than program) because, in DVB digital applications,
the content of the transmitted information is wider-ranging. For example, it may be a TV
program and also a radio one, a set of computer data, access control info etc.
SmartCard
The SmartCard is a removable electronic device which authorises access to services. About
the same size as a credit card, it houses a programmable device that grants access to certain
services and contains information on the period of use. The SmartCard is designed for use
together with the Control Access device (see CAM), which must be must be able to read the
information it contains.
Page 49

Digital DVB TSDR5000CI receiver - 49
Glossary
Page 50

50 - Digital DVB TSDR5000CI receiver
Glossary
Page 51

Digital DVB TSDR5000CI receiver - 51
Page 52

ITALY
Via E.Majorana 49
48022 LUGO( RA )
Tel. + 39 0545 25037
Fax.+ 39 0545 32064
Tel. Servizio Assistenza
899 899 856
E-mail: info@telecogroup.com
www.telecogroup.com
ZIMMER
TECHNIK FŐR MOBILE FREIZEIT
Raiffeisenstr, 6
64347 Griesheim
Tel. 06155 797873 - Fax. 06155 797871
info@zimmer-mobiltechnik.de
I
N EUROPE:
GREAT BRITAIN - SCAN TERIEUR LTD
30, The Metro Centre, Tolpits Lane - Watford,
Herts - England - WD18 9XG
Tel. 01923 800353 - Fax 01923 220358
HOLLAND / BELGIUM - KARMAN TRADING
Lagewed 54 – 3849 PE Hierden – the Netherlands
Tel. 0341 722450 - Fax 0341 722451
e-mail: info@karmantrading.nl
web site: www.karmantrading.nl
FRANCE - BLEYS JEAN-PHILIPPE
19, Rue de la Parcheminerie
18700 Aubigny sur Nere - France
Tel.02 48580367 – Fax 02 48583585
e-mail: teleco.telair@bleysetd.com
Service Technique France : 06 83 31 44 05
ESPAÑA - NAUCCA CARAVANING, S.A.
Poligono Industrial CAN ROQUETA 2 – Calle Can Lletget,2
08202 Sabadell (Barcelona) - España
Tel. 00 34 937 457 054 - Fax. 00 34 937 254 484
e-mail: comercial@naucca.com
ÖSTERREICH – TELECO GmbH
82041 Deisenhofen - Deutshland
Tel. 0049 8031 98939 - Fax. 0049 8031 98949
e-mail: telecogmbh@telecogroup.com
www.telecogroup.com
IN DEUTSHLAND
TELECO GmbH
82041 Deisenhofen Tel. 0049 8031 98939 - Fax. 0049 8031 98949
e-mail: telecogmbh@telecogroup.com
www.telecogroup.com
Service für Teleco Anlagen in Deutschland:
09001000690
Service für Teleco Anlagen in Österreich:
0900949470
Foto e disegni non contrattuali - Les photos et les dessins ne sont donnés qu’à titre indicatif.
We reserve the right to make technical changes without prior notice - Fotos und Zeichnungen nicht vertraglich.
Foto’s en tekeningen niet contractueel - Fotos y planos no indicados en contrato
 Loading...