

Page 1

Page 2

WELCOME
Congratulations on your purchase of the FreshFun
mobile phone. Your phone provides many functions
which are practical for daily use, such as a
hands-free loudspeaker, camera, MP3 player, Ultra
clear video
You can read the manual to understand how to use
FreshFun mobile phone and experience the
well-established functions and simple operation
method. Please use the original accessory in order to
achieve the best use of effects. FreshFun shall not be
responsible for any damage in machinery due to use
of non-original components.
Page 3
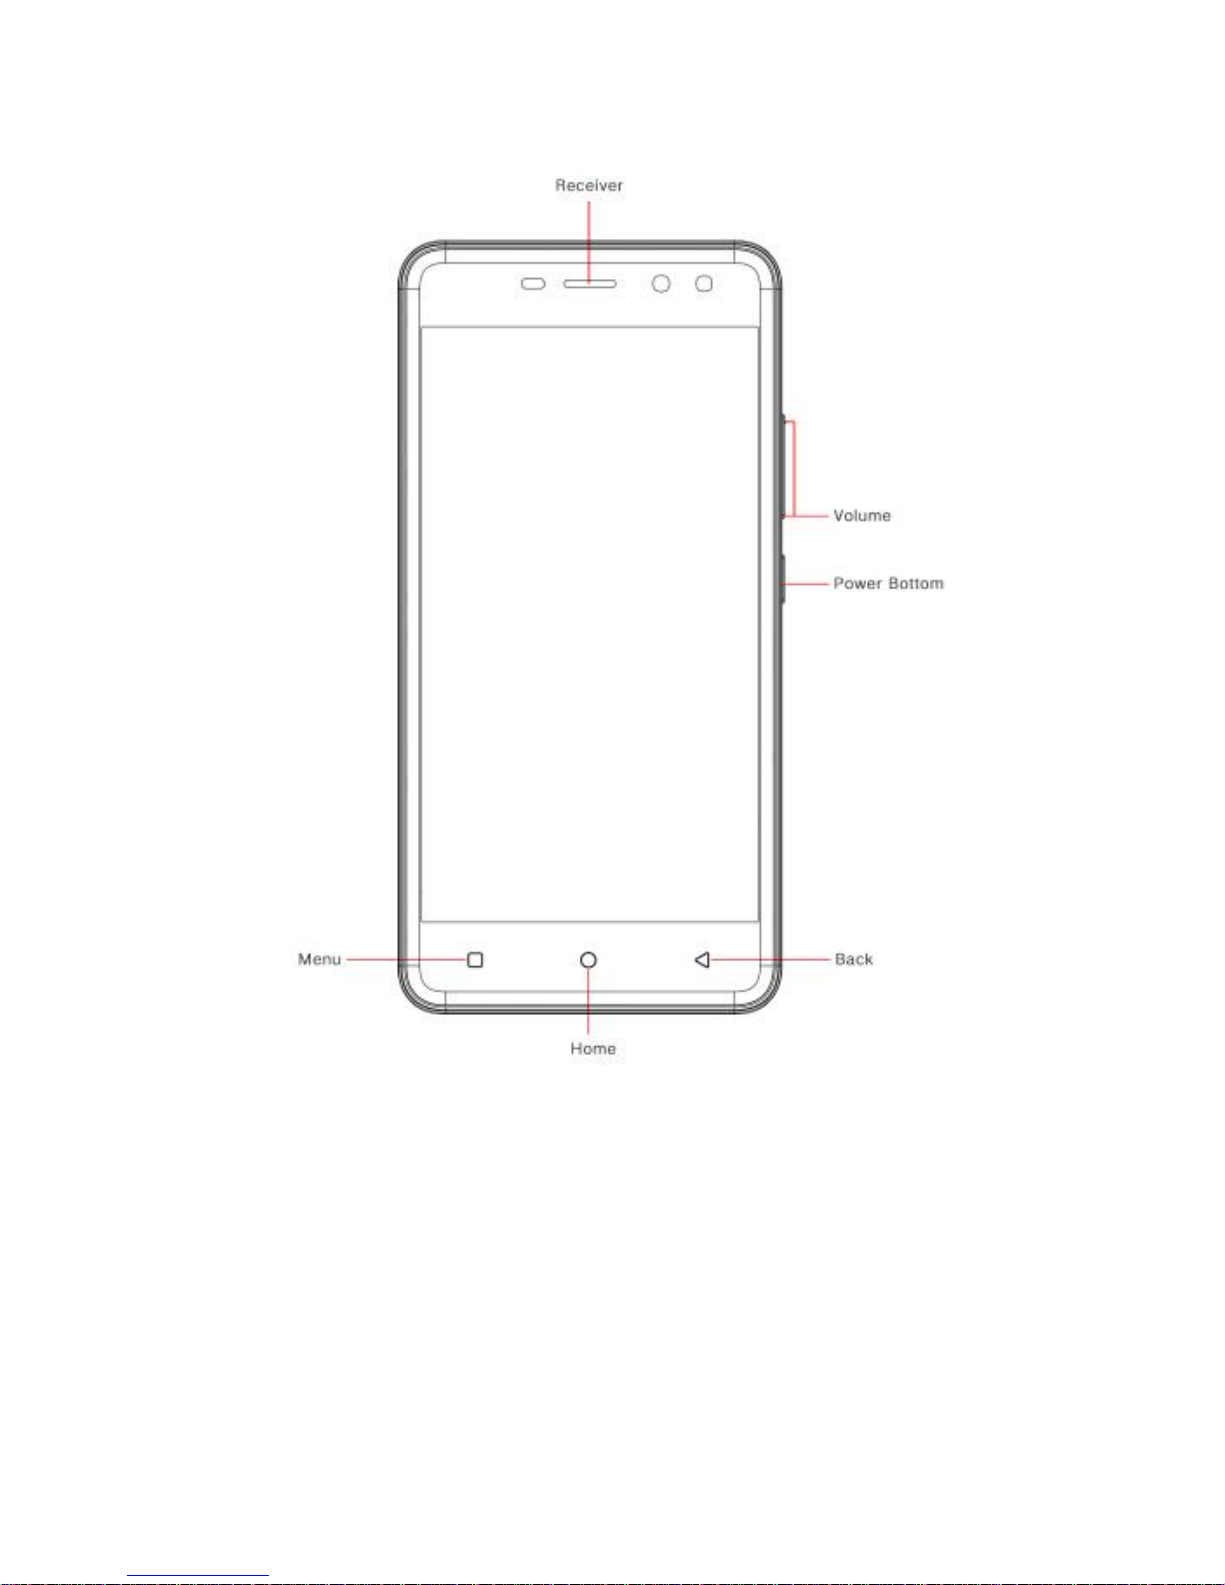
YOUR PHONE-FRONT VIEW
Page 4
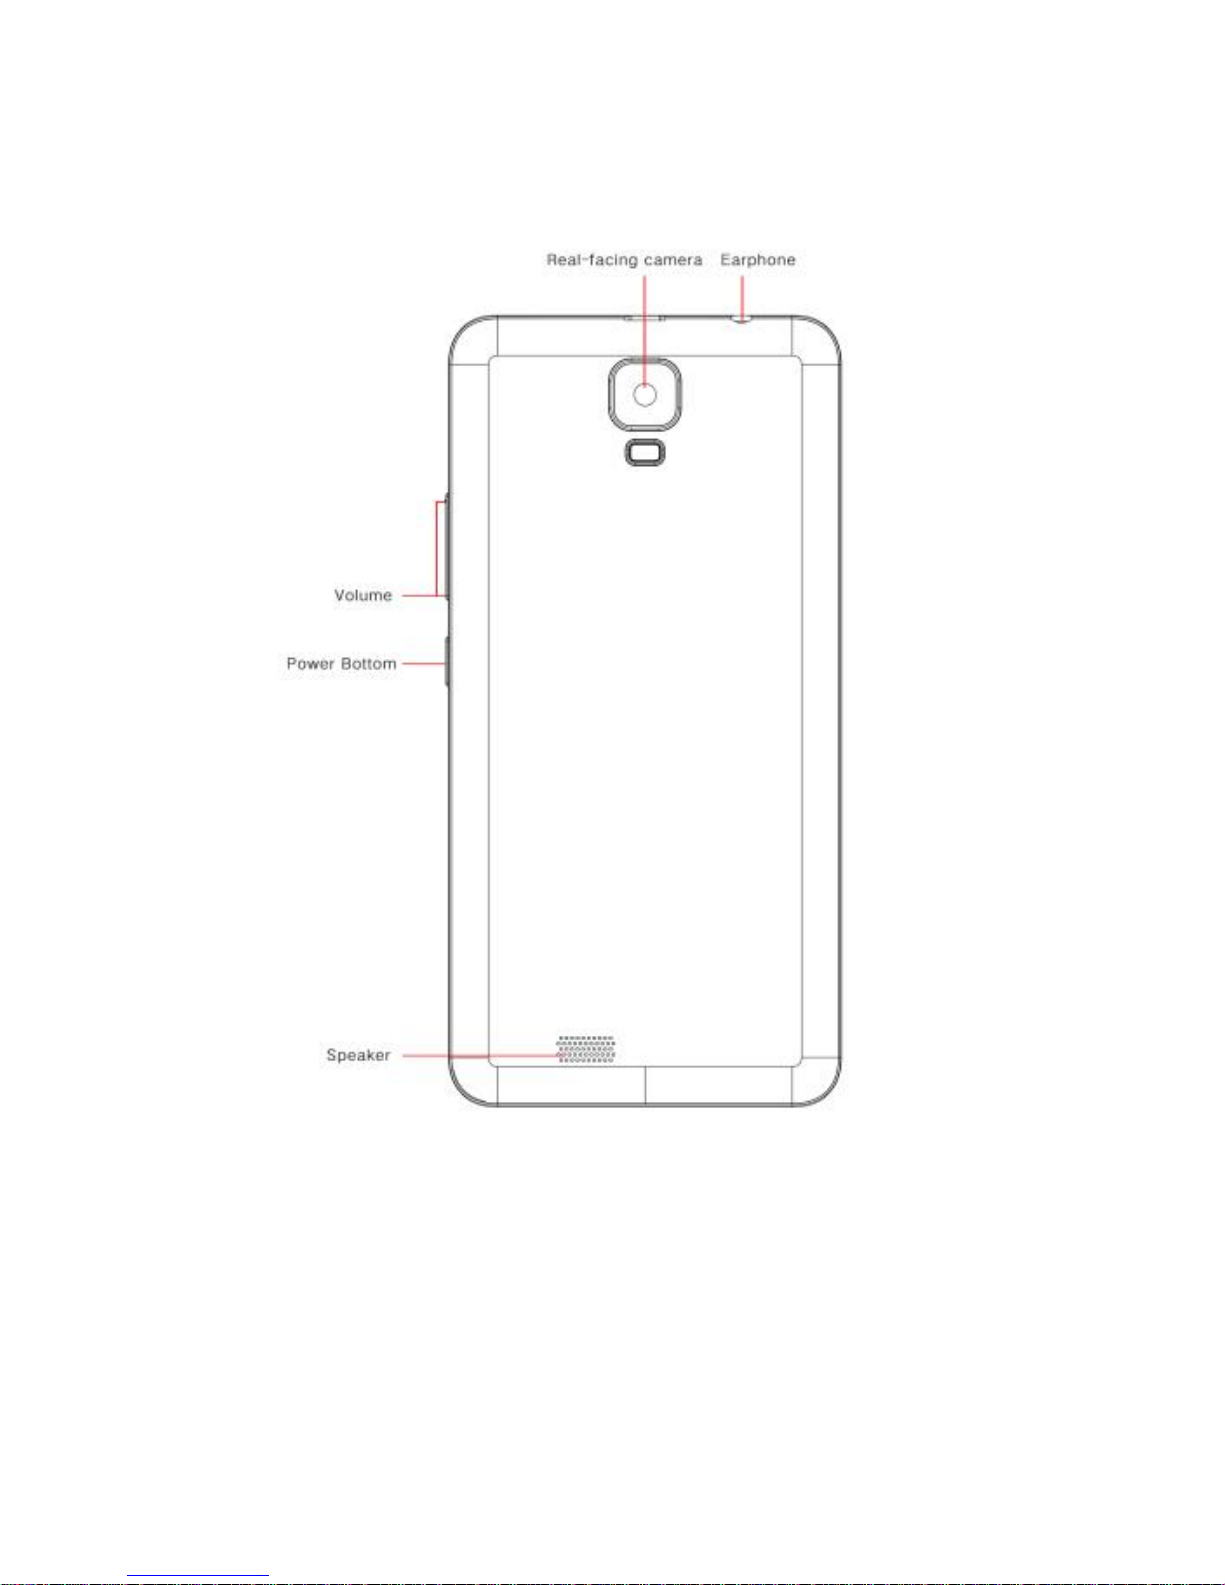
YOUR PHONE-BACK VIEW
Page 5
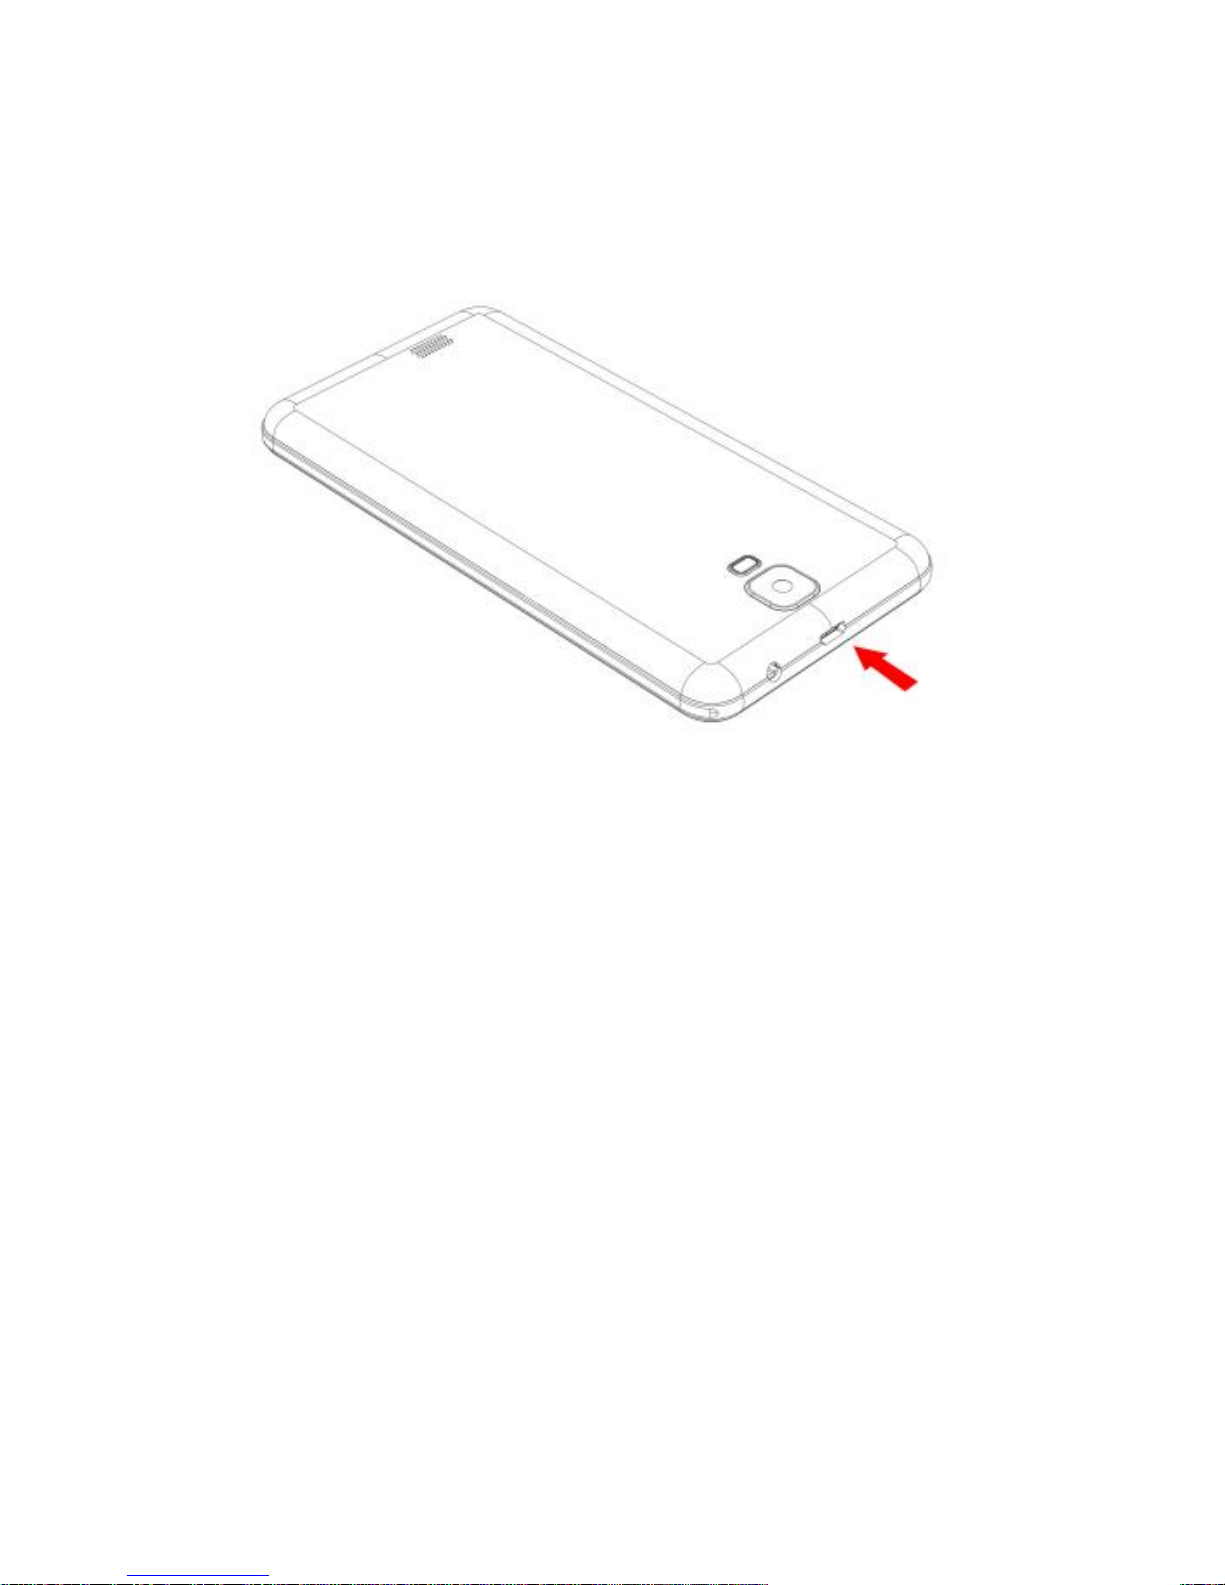
CHARGE THE BATTERY
Connect this end to phone’s USB port.
Tip: Be sure to charge your phone’s battery completely
after inserting it in the phone for the first time.
Page 6

INSERT SIM AND Micro SD CARD
Please insert the SIM card(s) according to the label on
the phone. Make sure that the clipped corner of the
SIM card and the metallic contacts are facing the
correct direction. Slide the SIM card into the slot until it
doesn't move up any further.
Micro SD card slot is above the SIM card slot. The
direction in which the micro SD card has to be inserted
into the designated slot is shown by a label on the
phone.
Tip: For additional media storage insert a micro SD card.
Page 7
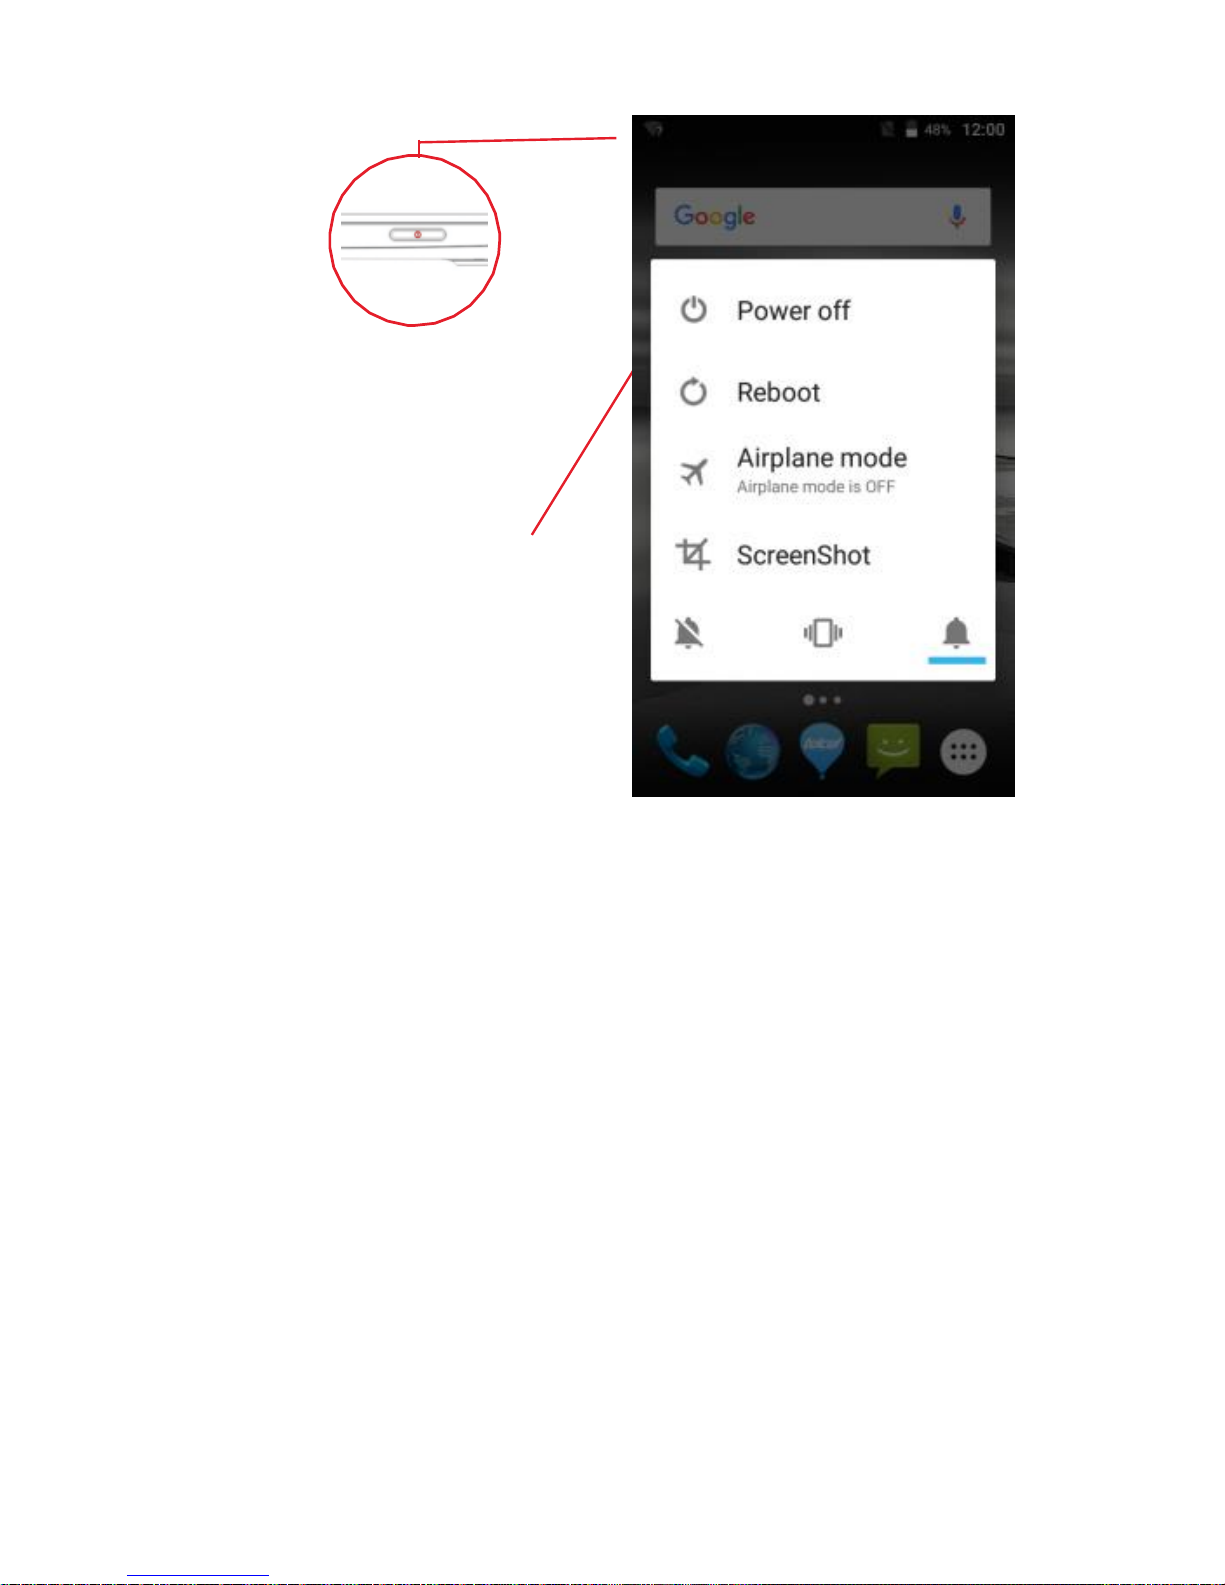
TURN THE PHONE ON& OFF
Hold down the power
button to turn the phone
on.
Hold down the power
button, then touch Power
off to turn the phone off
Page 8
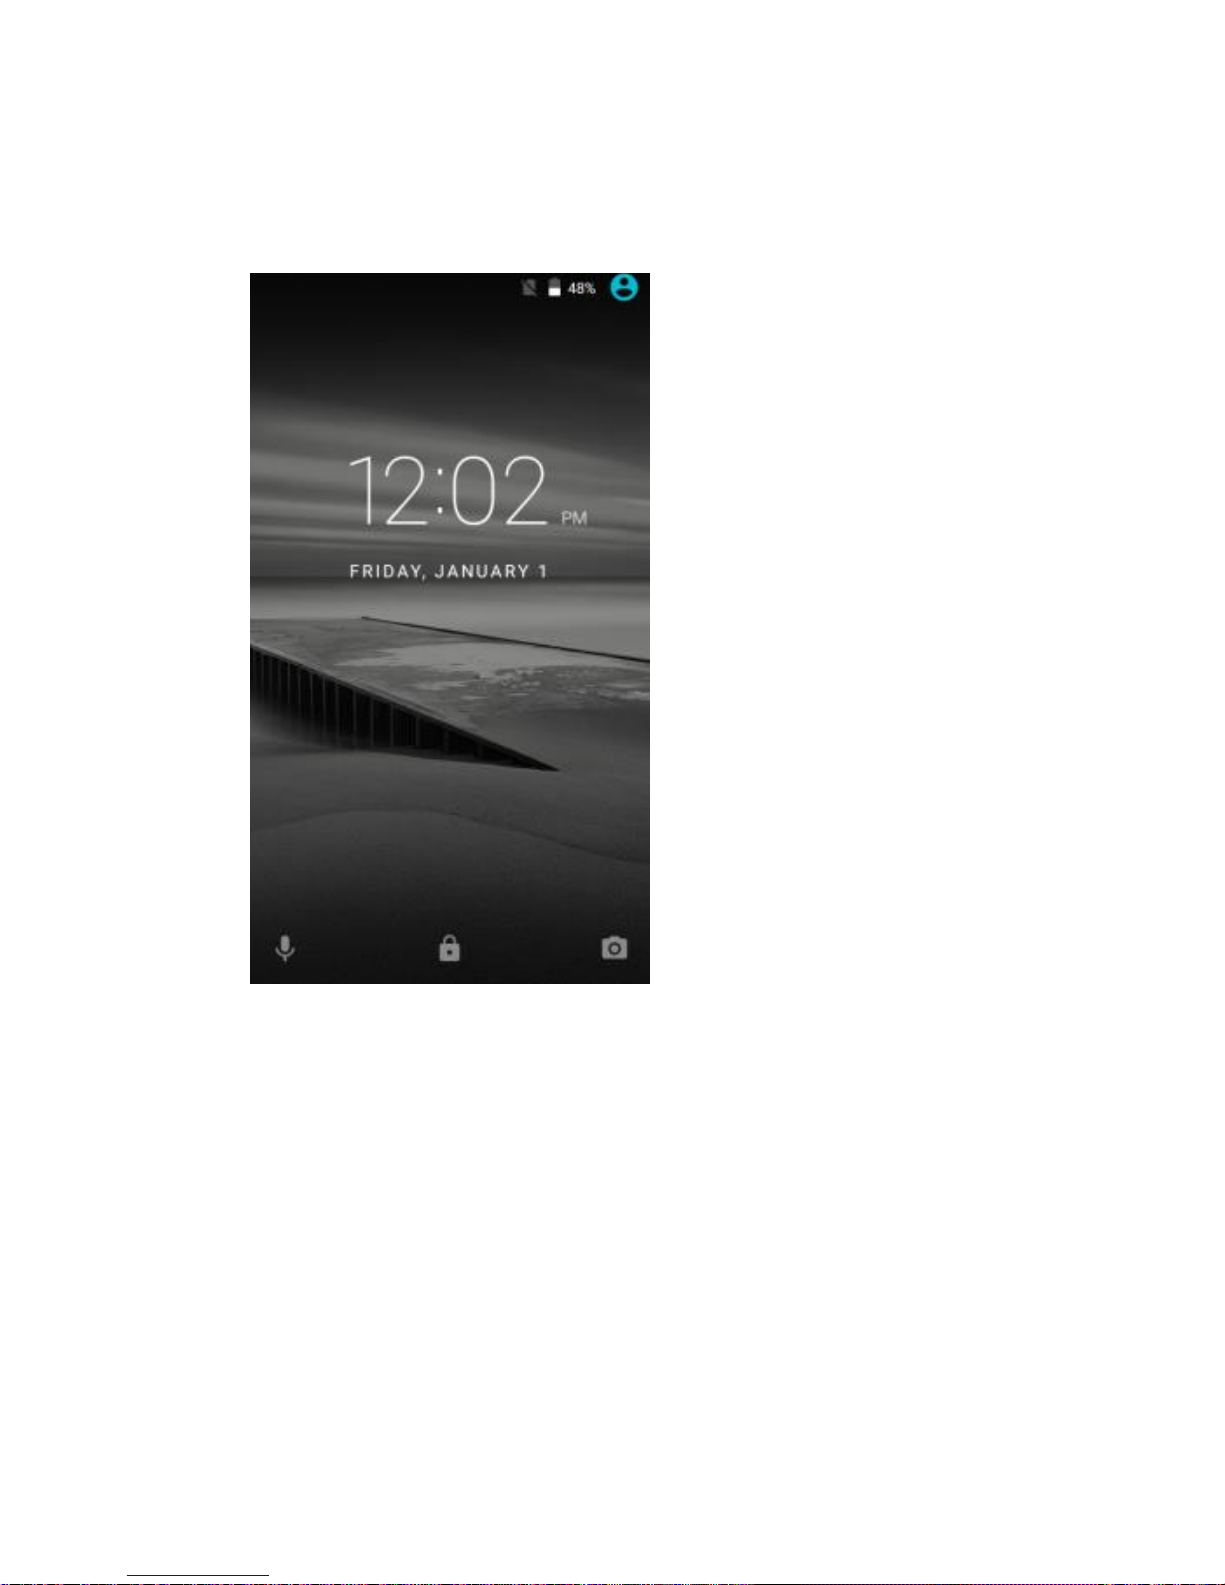
DIM LOCK & WAKE THE PHONE
When the power is on and you want to dim the screen,
press the power button.
When the screen is dimmed and you want to wake the
phone, press the power button and then drag the lock
to the right
Page 9
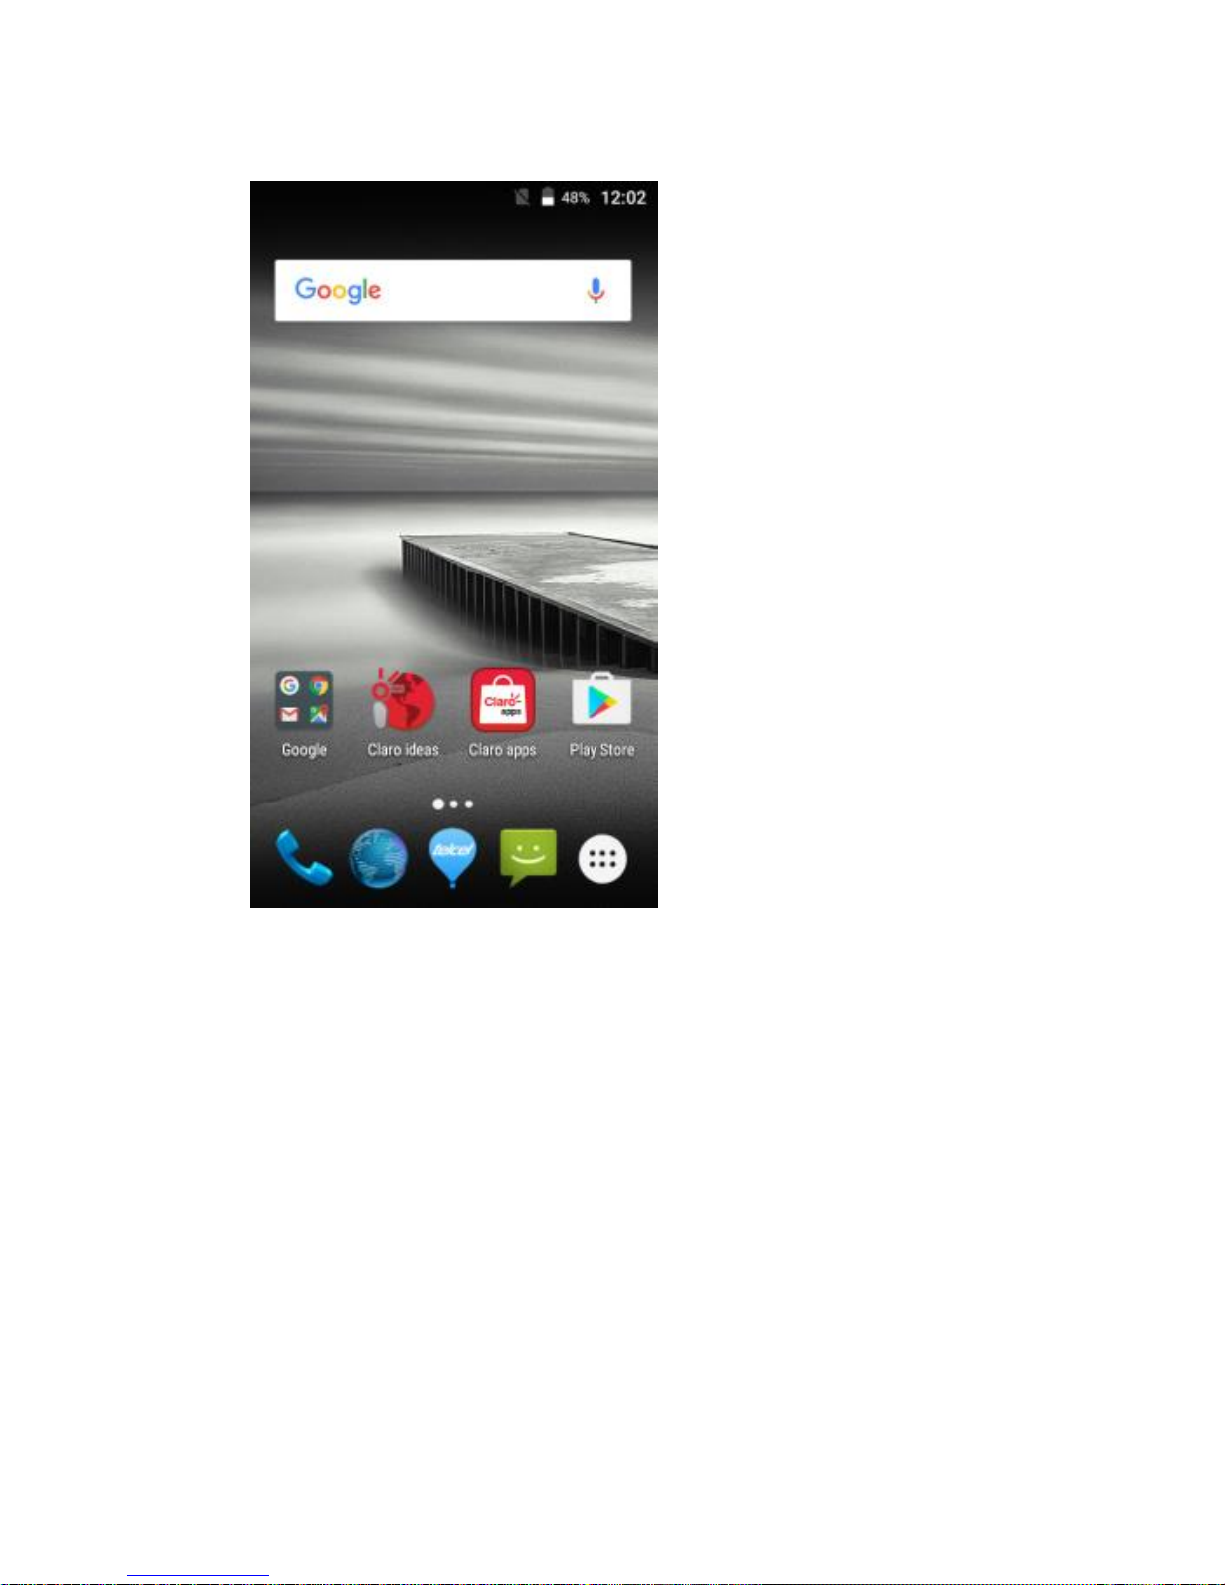
Page 10
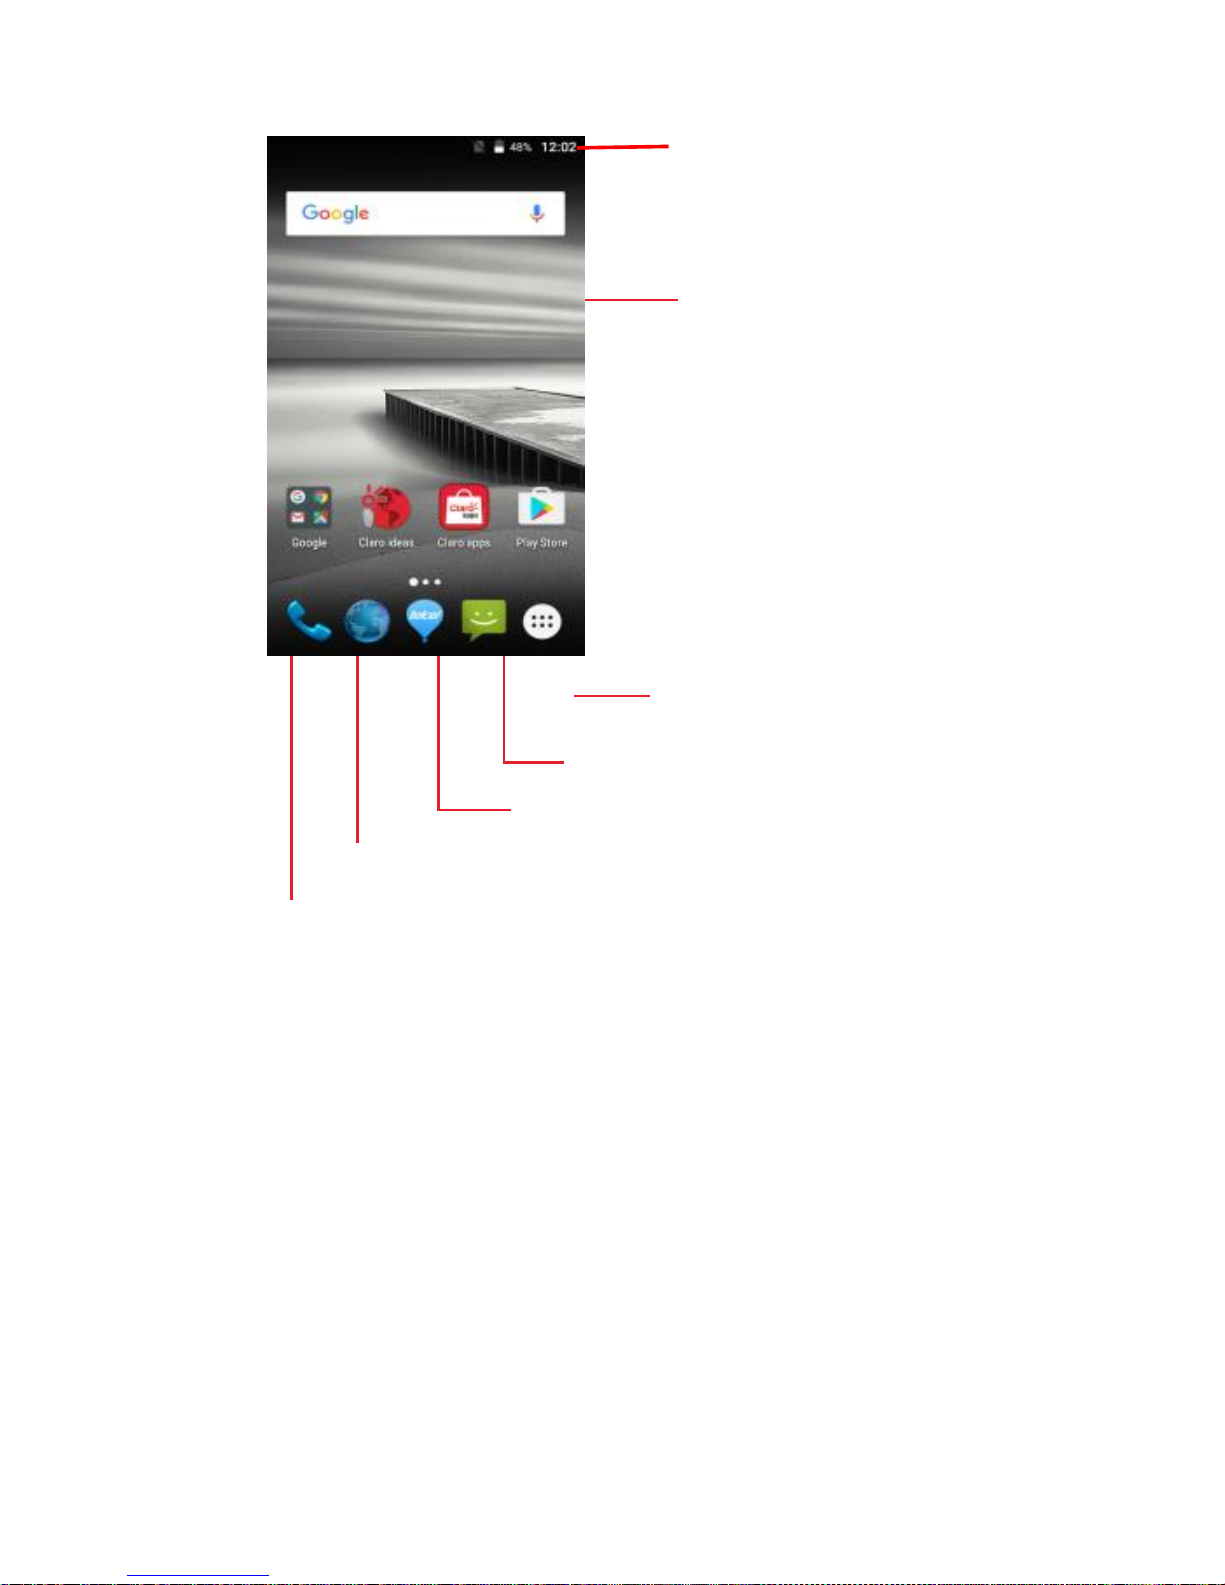
HOME SCREEN
Phone status bar and
notifications
Touch and hold an
empty spot to change
the wallpaper
Touch it to main menu
Touch it to enter message
Touch it to Telcel
TTouch it to enter web
Touch it to enter dial pad interface
Page 11
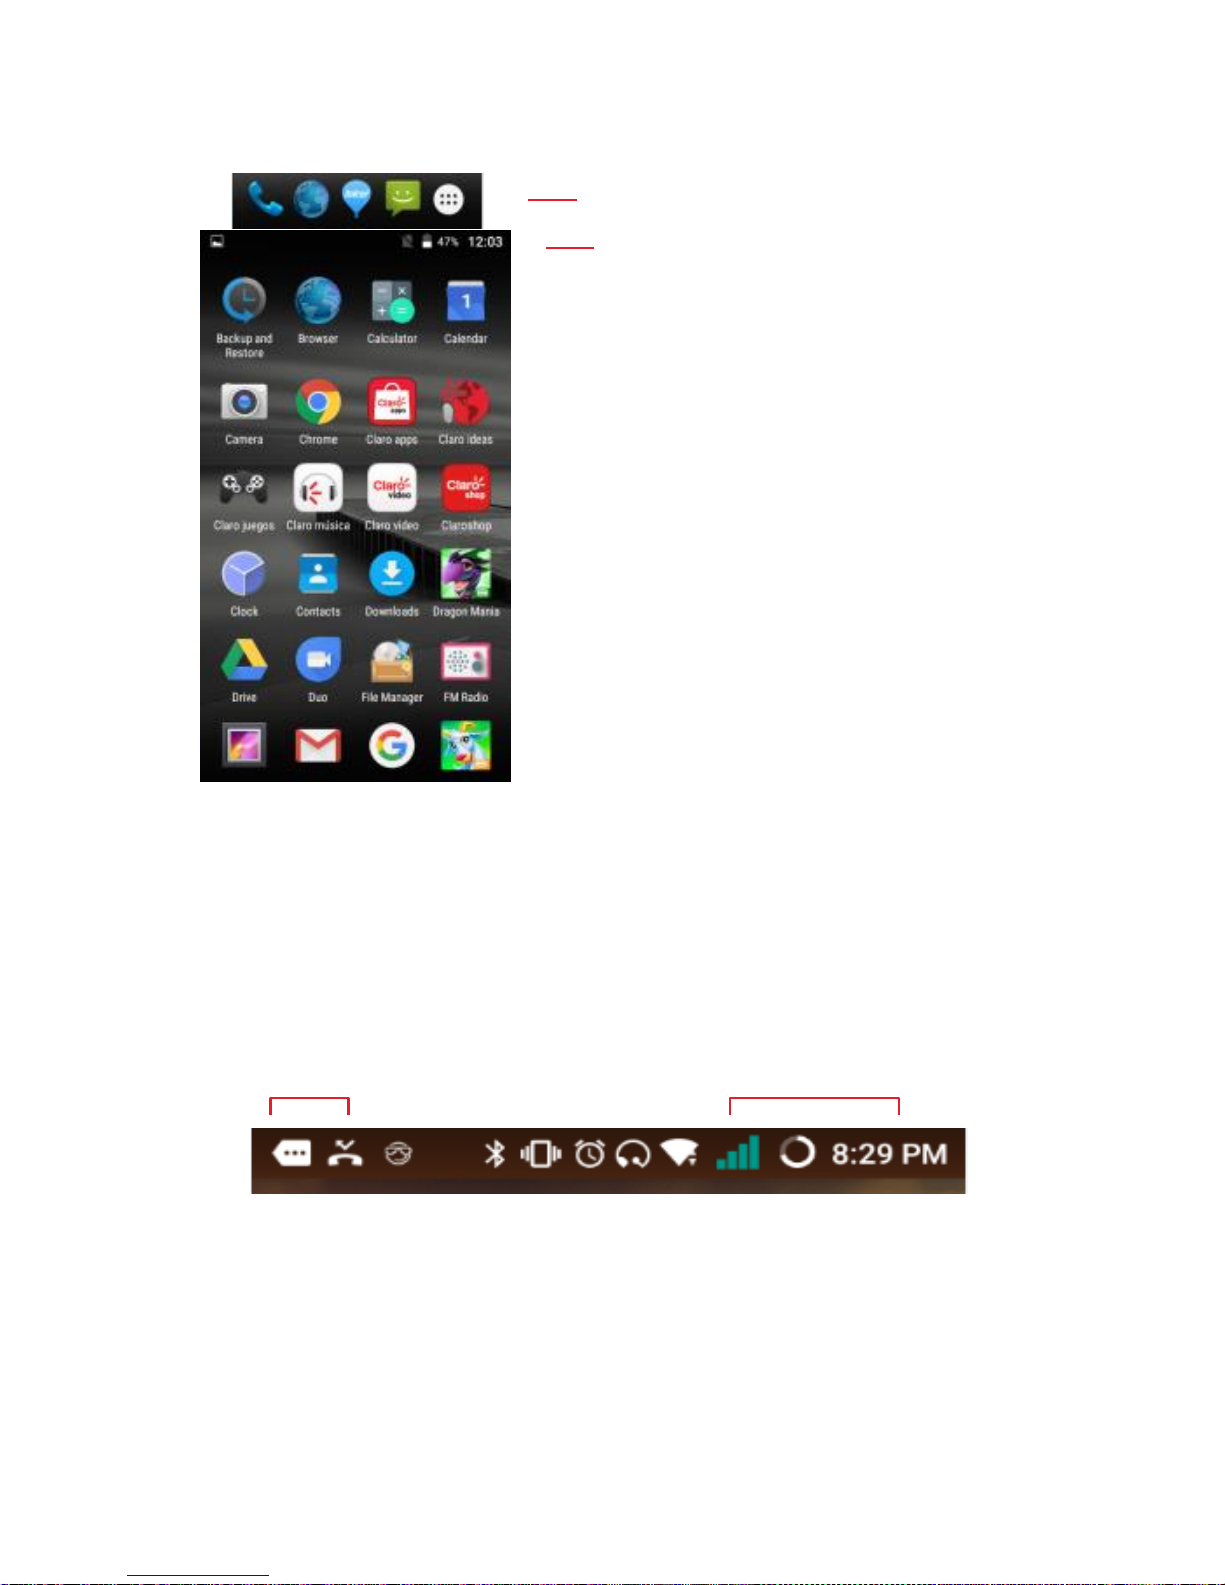
APPS
1. Touch it to enter app tray.
2. Touch an app to launch it
STATUS BAR
The status bar shows your phone’s status and
notifications. (Notifications are described on the next
page.)
Notification icons Status icons
Page 12
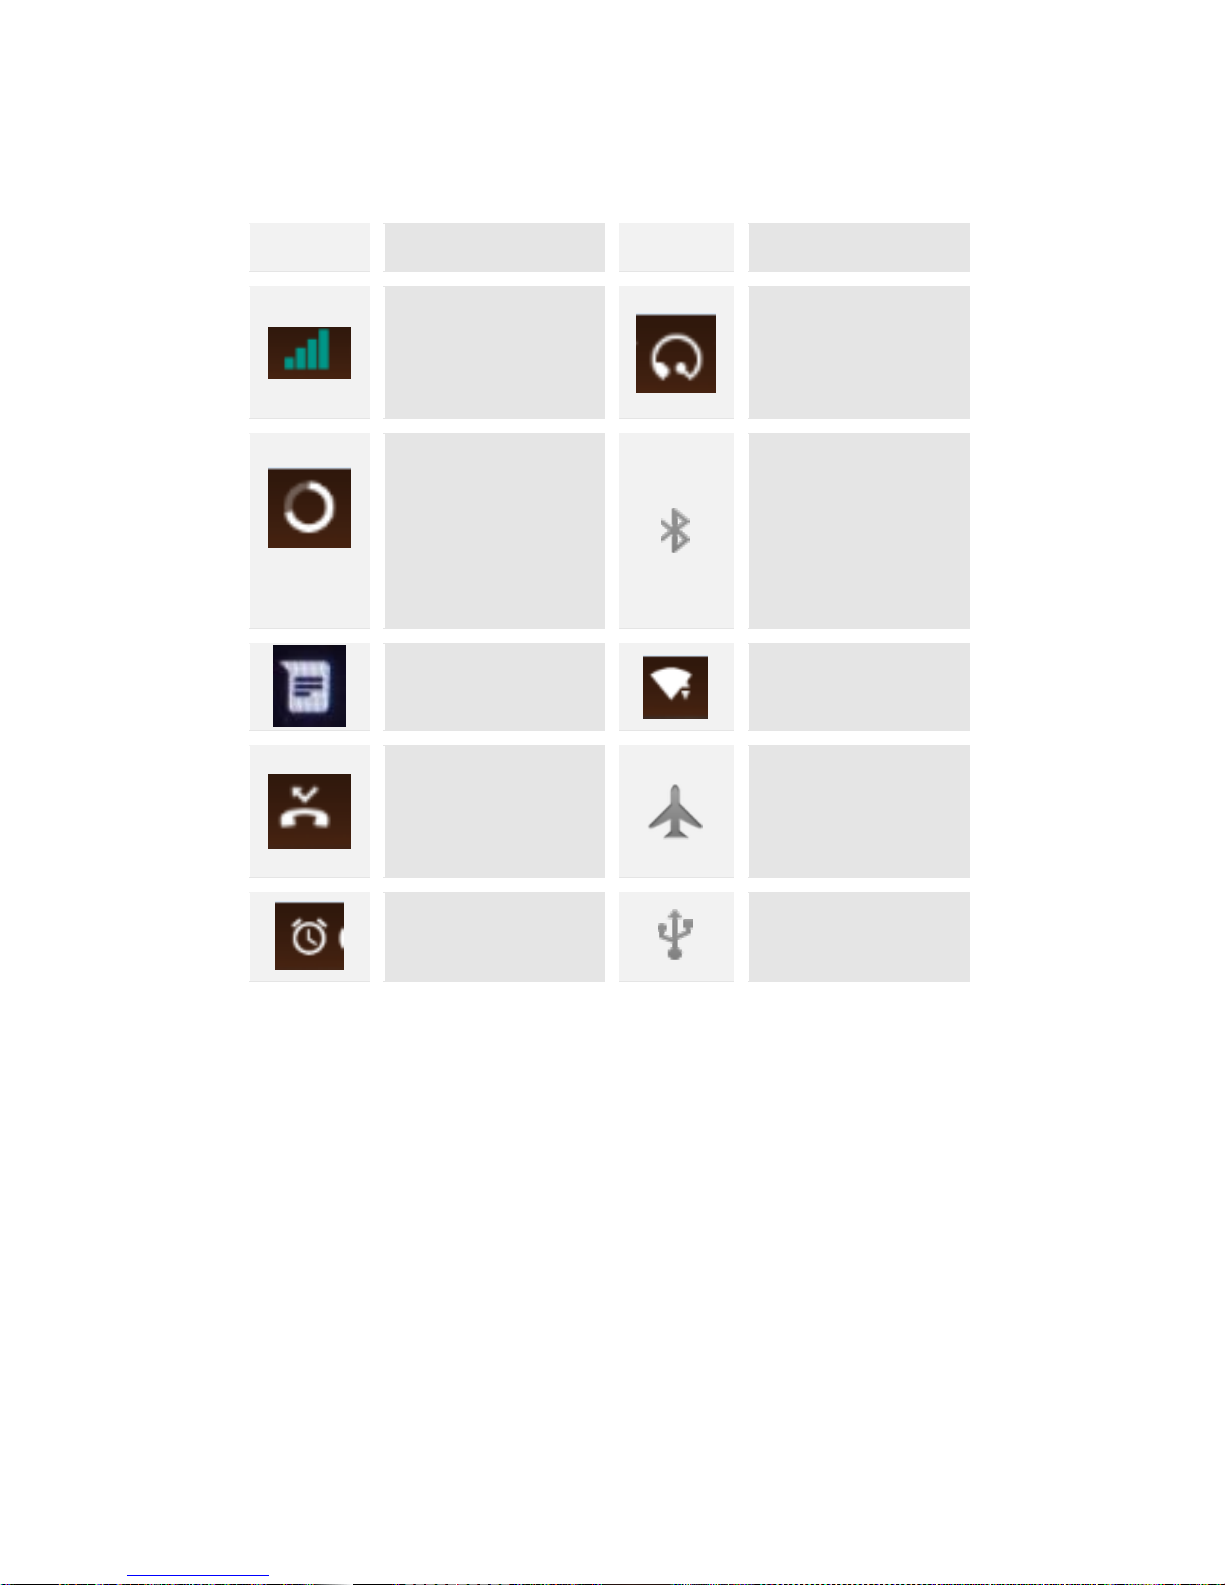
Status icons
The following status icons may appear on your
screen:
Icon
Statement
Icon
Statement
SIM
Network
signal level
Headset is
inserted
Indicates
battery
capacity
Bluetooth is
activated
Unread
messages
Wi-Fi is
connected
Missed calls
Airplane
mode is
activated
Alarm is
activated
USB is
connected
Page 13
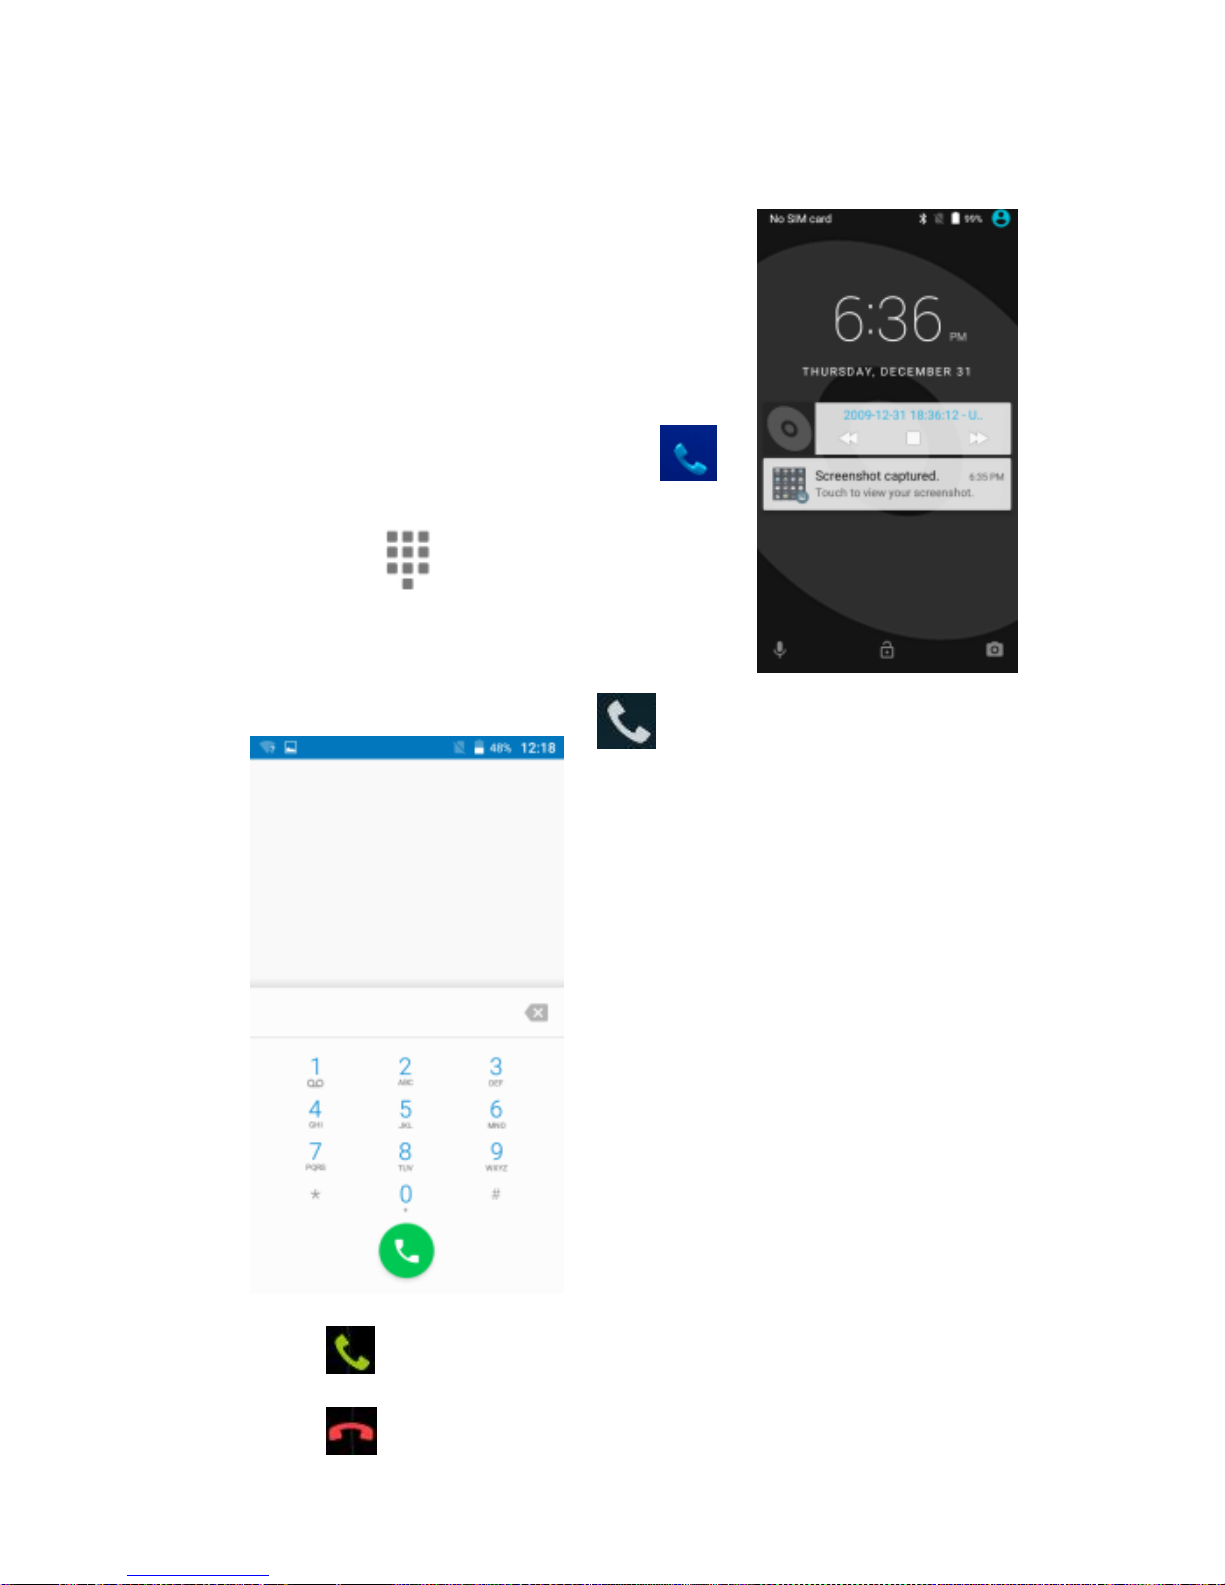
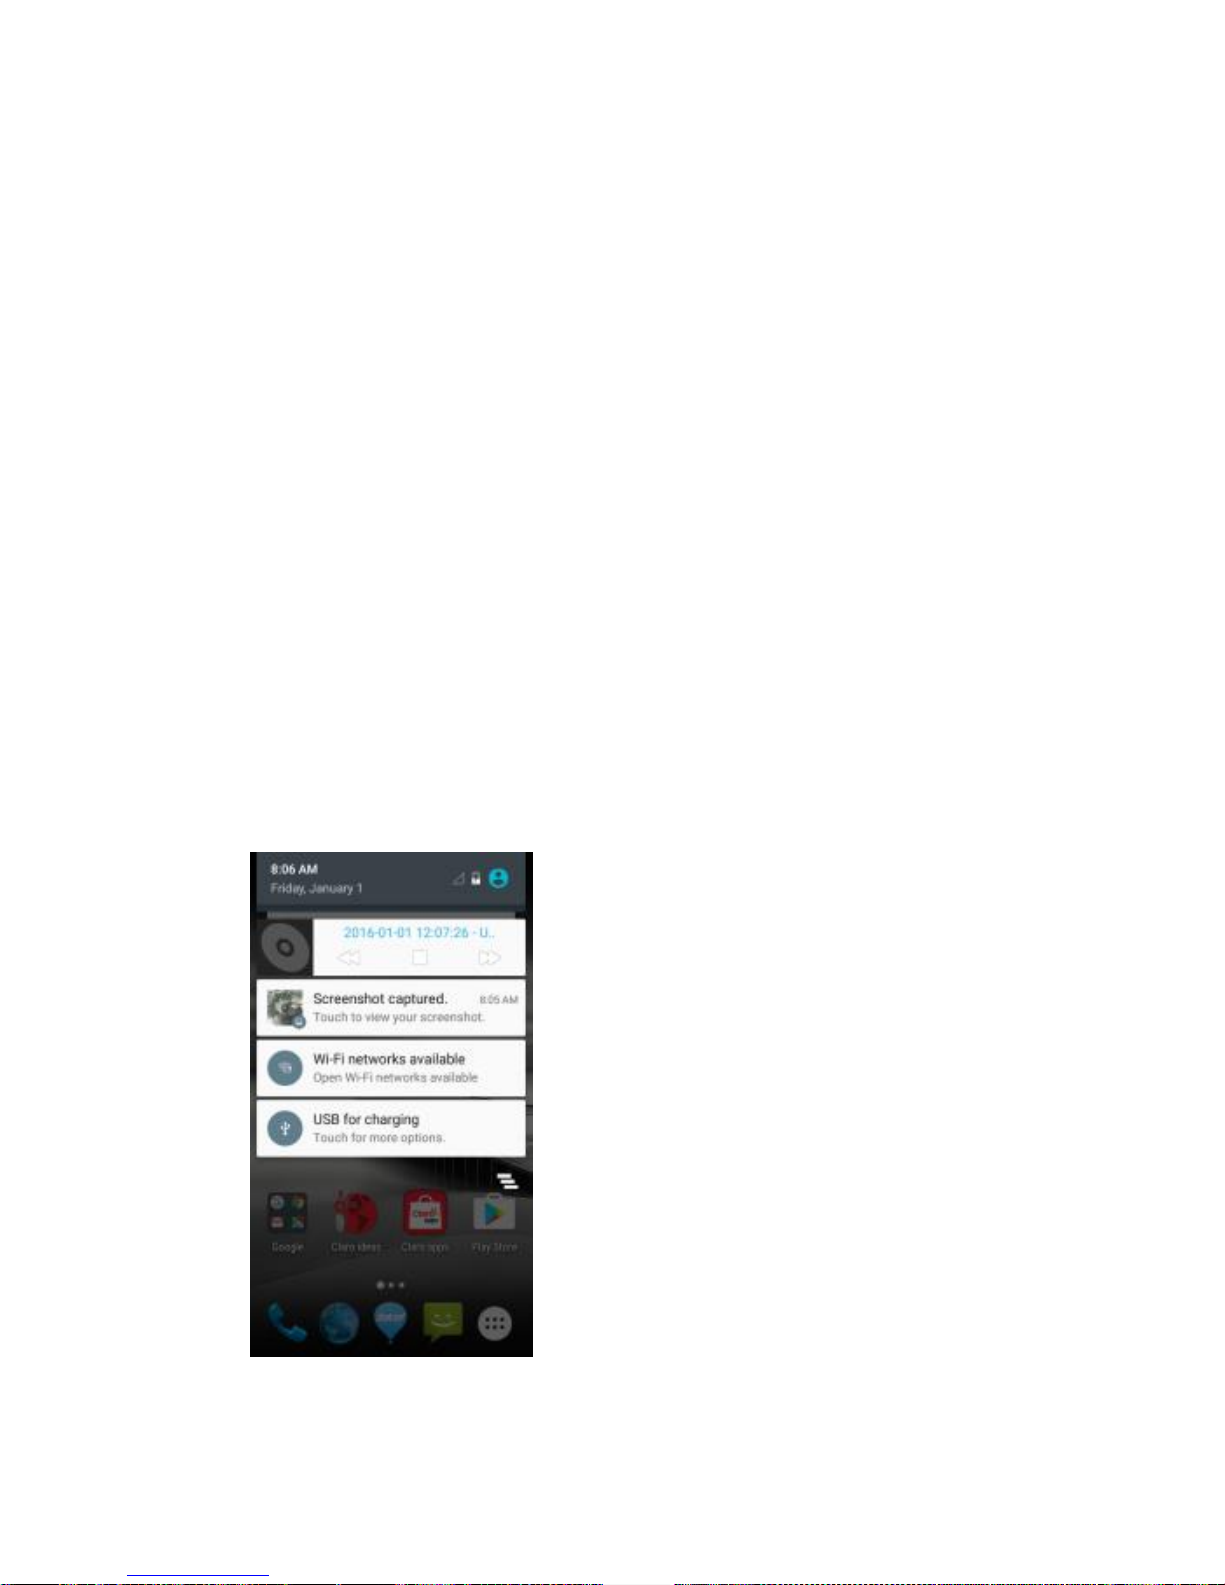
NOTIFICATION PANEL
The notification panel is your center for new events: like
new e-mail, voicemail, updates, and more.
Drag down to display notifications
Touch a notification to respond
MAKE & ANSWER A CALL
1. From the Home screen, touch
2. Touch ,
Dial a number using the dial pad.
3. Touch to initiate the call
Answer a call
Drag
Decline a call
Drag
Page 14
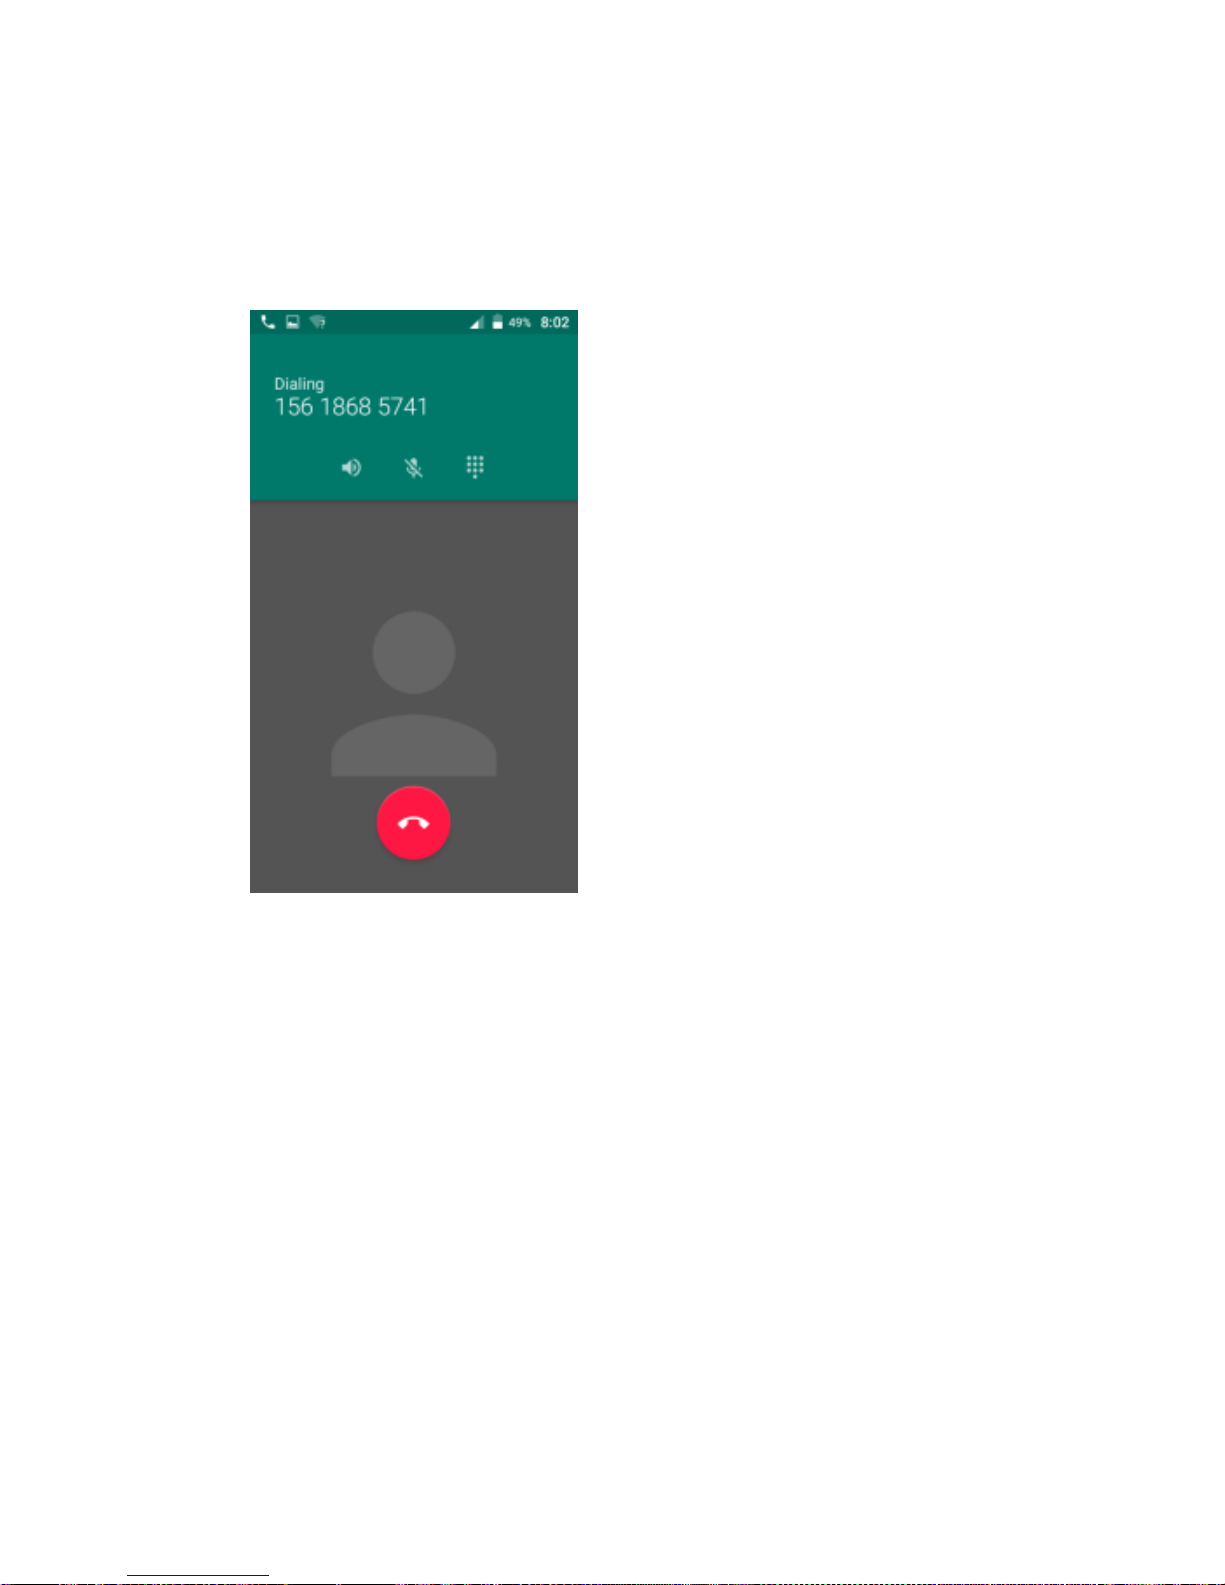
VOLUME CONTROL WHEN CALLING
Volume key is at the left side of the phone. During a
conversation, you can press the volume key to tune the
sound volume.
Page 15
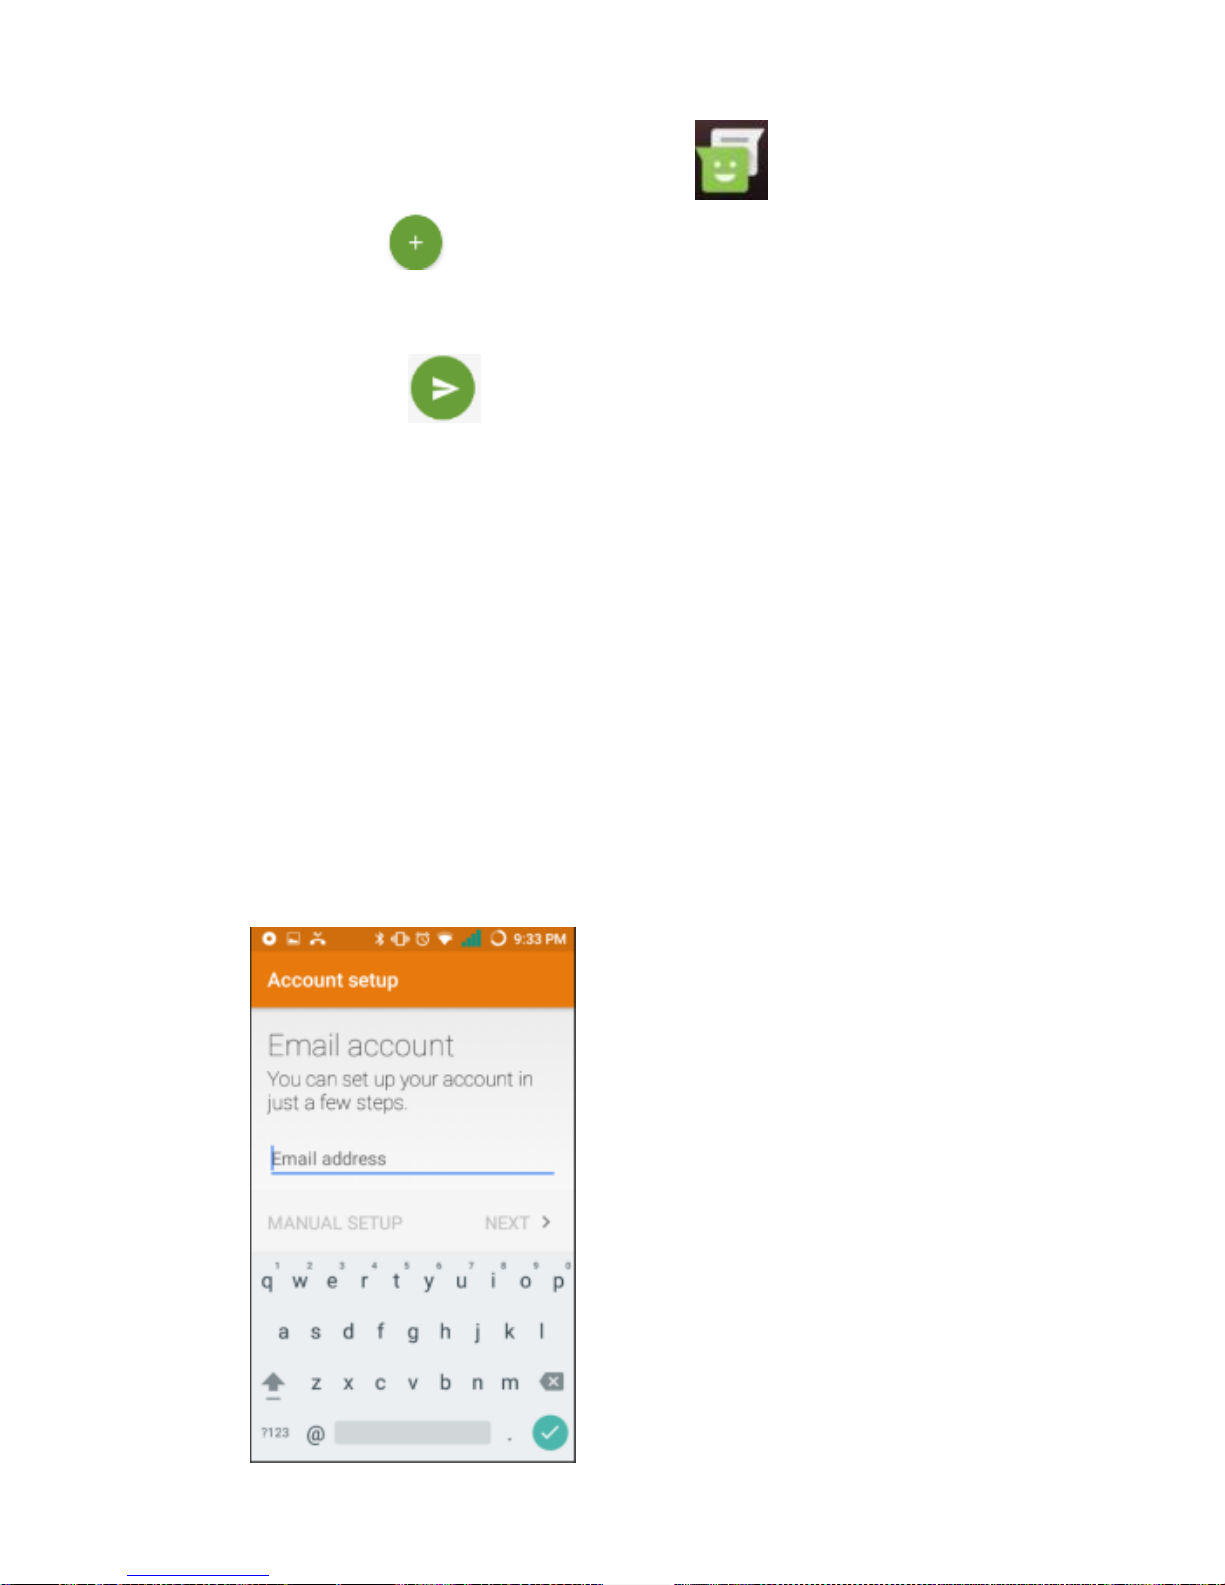
SEND A TEXT
1. From the Home screen, touch
2. Touch
3. Touch the To field, then enter a recipient.
4. Touch the Type message field, then enter a message
5. Touch Send the message
ADDING EMAIL ACCOUNTS
The first time you open Email, you are prompted to set
up an email account. After that, you can configure Email
to send and receive email from additional accounts.
To add an email account:
1) Tap the e-mail icon. In Your account interface, tap
Next. In e-mail address option, enter your e-mail
address. In password option, → enter your e-mail
password. Tap Next.
2) Filling the email address and password, tap next to
setup email
3) Tap next to enter your email.
Page 16
SETTINGS
the settings for various features of the phone
Get to know the settings in your phone so that you can
personalize them to your own requirements. Go to
Settings to configure how your phone looks, sounds,
communication, privacy, and operations in a variety of
ways:
Wi_Fi
You can use Wireless & Network
settings to manage your SIM card,
configure and manage
connections to networks and
devices by using Wi-Fi. You also
can set Bluetooth, data usage,
airplane mode, VPN, tethering &
portable hotspot and mobile
networks in this interface.
Audio
profiles
There are four profiles: General,
Silent, Meeting and Outdoor. You
can set the profiles according to
different conditions.
Display
You can set Wallpaper,
Auto-rotate screen, Brightness,
Daydream, wireless display, Sleep
and Font size in this interface.
Storage
Use the Storage settings to
monitor the used and available
space on your phone and on your
SD card and to manage your SD
card.
Battery
You can view your battery status,
battery level and battery use in
this interface.
Page 17

Apps
You can use the Applications
settings to view details about the
applications installed on your
phone, to manage their data and
force them to stop, to view and
control currently running services,
and to view the storage used by
applications, etc.
Location
You can turn on Wi-Fi & mobile
network location, GPS satellites,
etc through this function.
Security
You can set the parameters about
security through this function.
Language &
input
Use the Language & Keyboard
settings to select the language for
the text on your phone and for
configuring the input method.
Backup &
reset
You can backup your data and
reset your phone in this interface.
Add account
You should add account first
before using this function.
Data & time
You can use Date & Time settings
to set your preferences for how
dates are displayed. You can also
use these settings to set your own
time and time zone, rather than
obtaining the current time from
the network, etc.
Timer switch
machine
You should set a certain time,
when the time arrive, the phone
would power on/off
automatically.
Page 18
Accessibility
Enable your installed accessibility
applications and adjust related
settings.
About phone
This function enables you to view
some phone related information.
SET A RINGTONE
Press Perfiles audio, select the profiles
you want to set, you can customize the ringtone and
volume of incoming call, notification ringtone in this
interface.
MULTIMEDIA
listen it, watch it, capture it, enjoy it!
FM RADIO
1. Pull out the telescopic antenna or insert earphone,
then Tap the Power icon to stop or play FM.
2. Tap the forward by 0.1 MHz or scroll the knob icon to
change channel frequency. Press volume key to adjust
the volume.
3. Tap Auto search, Record and Favorites icon to adjust.
Page 19
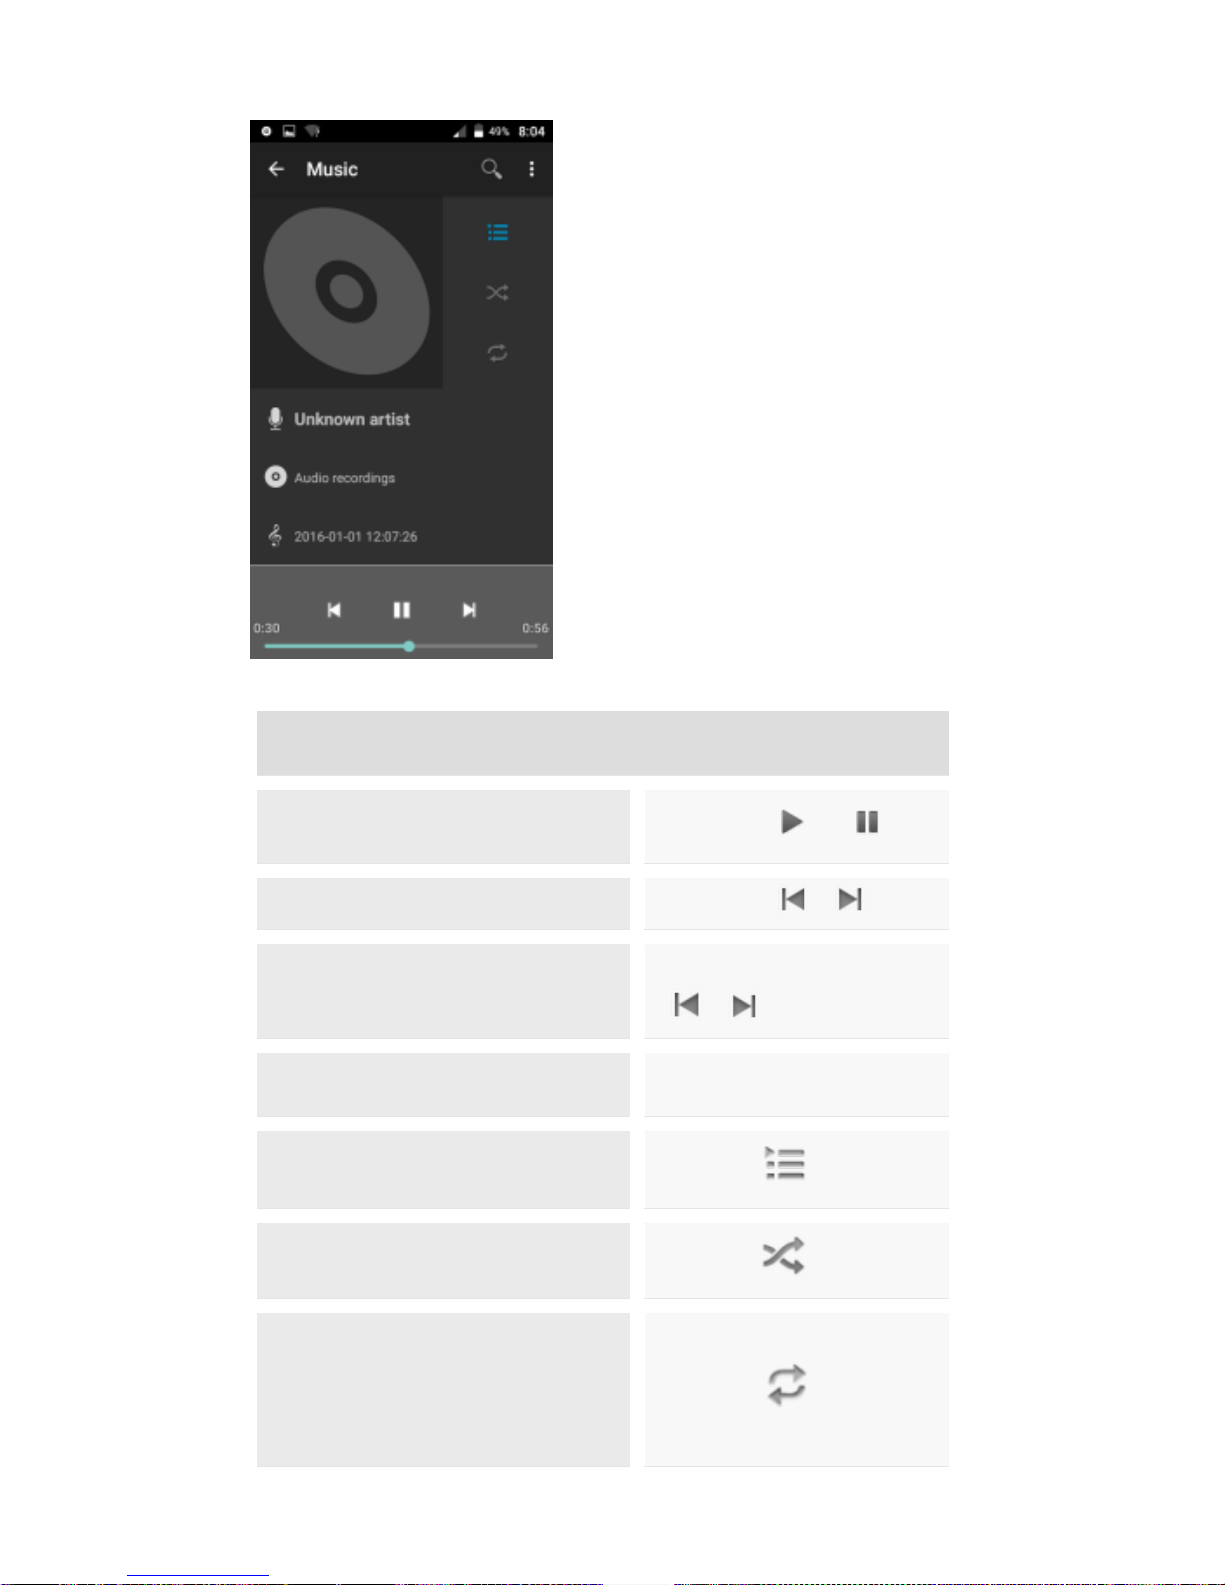
MUSIC
Controls
Play/Pause
Touch /
Previous/Next
Touch /
Rewind/Forward
Touch and hold
/
Volume adjust
Press side key
Now playing: Touch to
open the current playlist.
Touch
Shuffle: Touch to shuffle
the current playlist.
Touch
Repeat: Touch to repeat
the current playlist; touch
again to repeat the
current track.
Touch
Page 20

Camera
1. Launch the camera by pressing the camera icon on
the home screen
2. In the camera app, tap the screen to focus on a
specific area.
3. Press the camera button all the way down to take a
picture.
SHOOT A VIDEO
1. Press and hold the camera button until it vibrates
then release.
2. In the Camera app, select video
3. Press the camera button to begin filming and press
again to stop filming.
Calculator
1. Launch the calculator by pressing the calculator icon
on the home screen.
2. In the calculator app, enter numbers and arithmetic
operators on the basic screen.
Calendar
You can use the calendar to keep track of important
events. After entering the calendar function menu you
can select year, month and date. Slide the Calendar
screen up and down to switch month.
Sound Recorder
Use this function to record audio files. Two function
icons at the bottom of the Recorder screen are
corresponding to start recording and review record file.
Page 21
Clock
The clock allows you to view time and date. You can also
add an alarm, set the alarm and turn it on. Then, the
alarm can ring at a specific time you set.
Gallery
Both pictures and videos taken by camera or stored in
SD card can be scanned through this function.
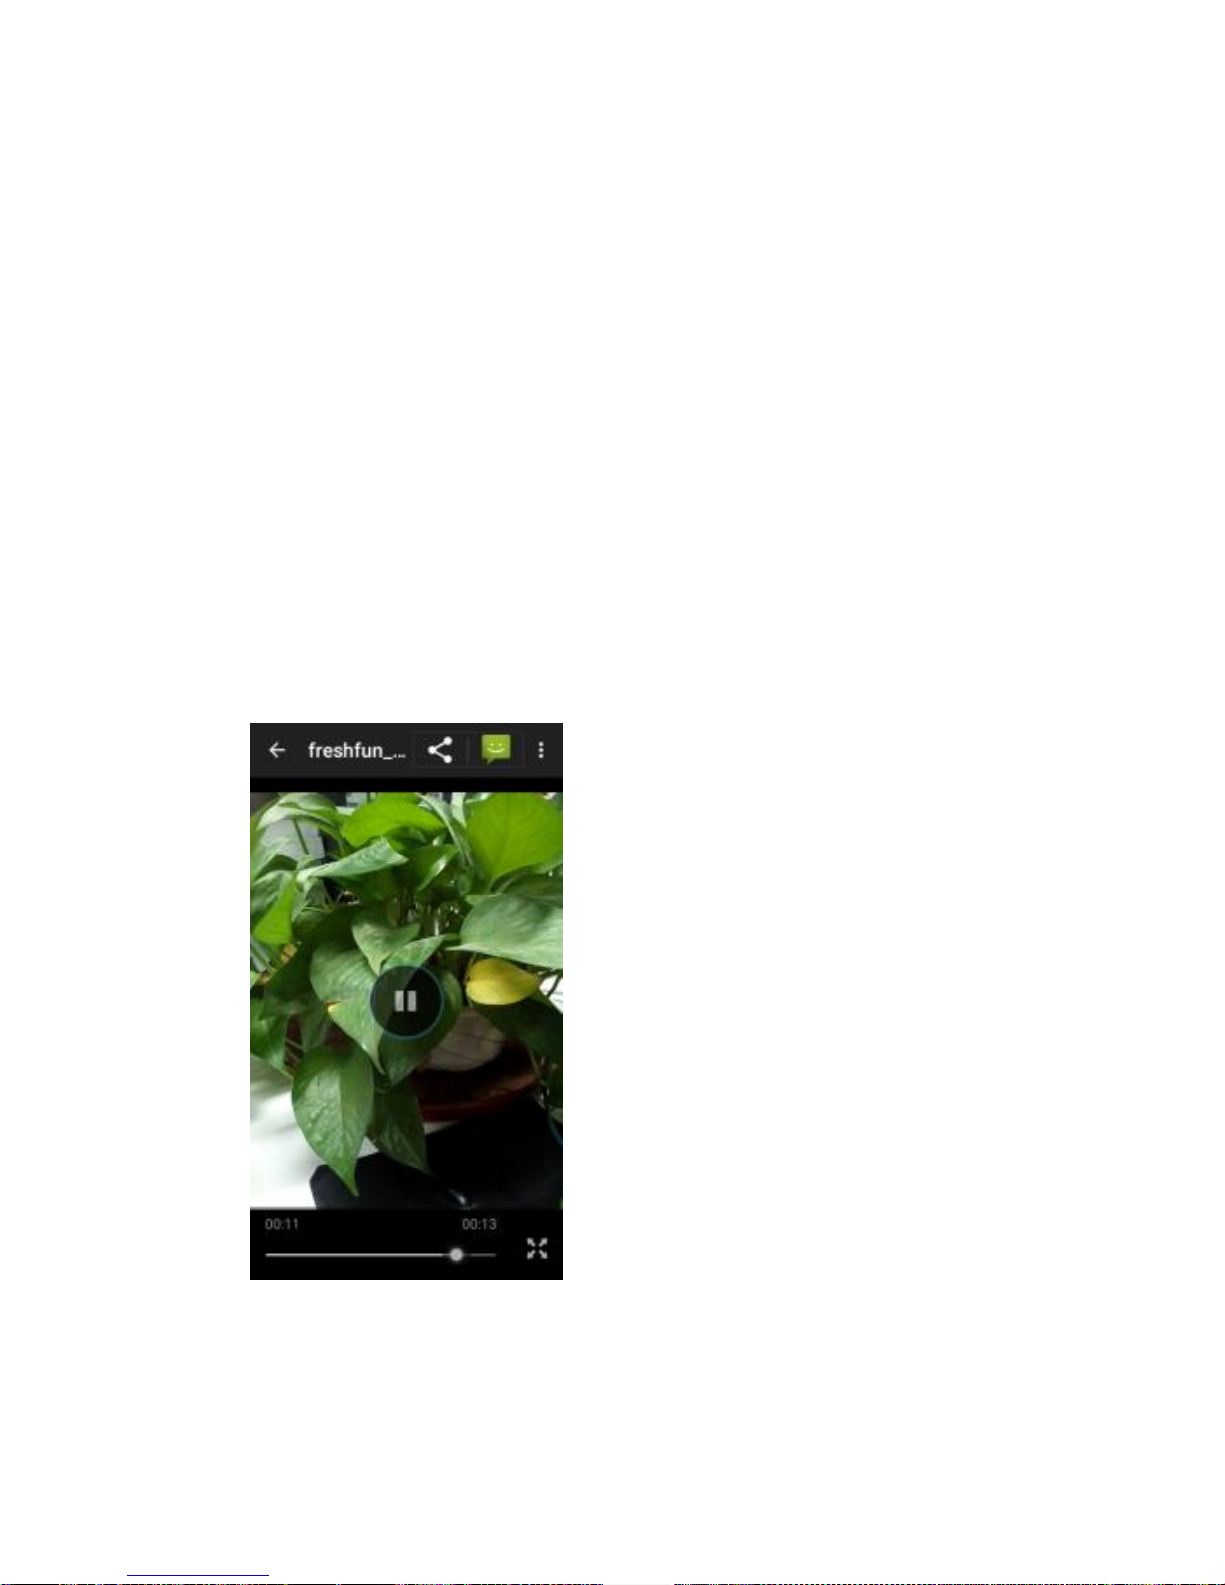
Video player
With Videos, you can play video clips in your device (for
example, the video you captured by the camera) or
video files stored in compatible SD card (if inserted)
Page 22
SIM1 Toolkit
STK features are provided by your service provider. If
your SIM card supports STK feature, you will see the STK
menu. Different STK has different STK main menu.
Please contact your service provider if the STK does not
work.
Browser
To let you browse the Internet.
File Manager
The phone supports the SD card. You can use the File
Explorer to conveniently manage various directories and
files on the SD card.
USE AS MODEM VIA USB
You can connect your phone to a computer with a USB
cable, to transfer music, pictures, and other files
between your phone’s SD card and the computer.
Page 23
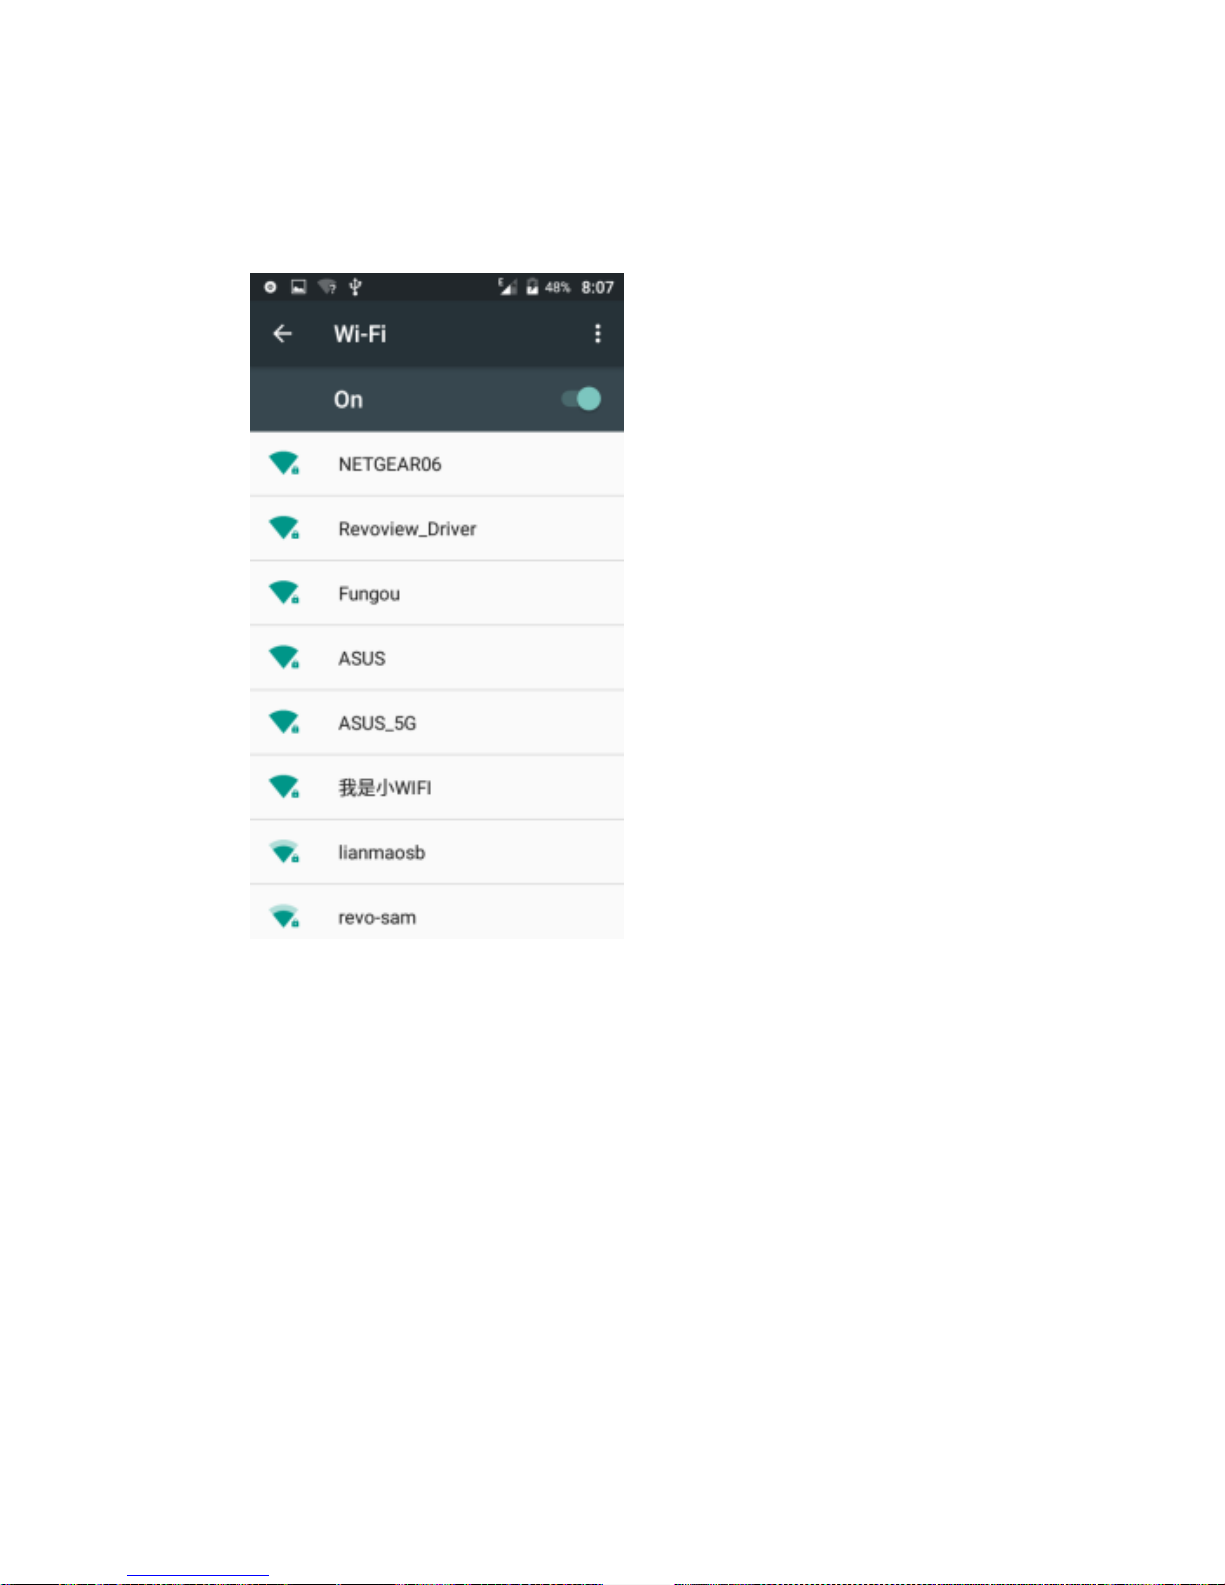
CONNECT TO Wi-Fi NETWORKS
Wi-Fi is a wireless networking technology that can
provide Internet access at distances of up to 100 meters,
depending on the Wi-Fi router and your surroundings.
Touch Settings> WI-FI . Check Wi-Fi to turn it on. The
phone scans for available Wi-Fi networks and displays
the names of those it finds. Secured networks are
indicated with a Lock icon.
Page 24

1.FCC Statement
This device complies with Part 15 of the FCC rules.
Operation is subject to the following two conditions: 1)
this device may not cause harmful interference, and 2)
this device must accept any interference received,
including interference that may cause undesired
operation.
Note: This equipment has been tested and found to
comply with the limits for a ClassB digital device,
pursuant to part 15 of the FCC Rules. These limits are
designed to provide reasonable protection against
harmful interference in a residential installation.
This equipment generates uses and can radiate radio
frequency energy and, if not installed and used in
accordance with the instructions, may cause harmful
interference to radio communications. However, there
is no guarantee that interference will not occur in
particular installation. If this equipment does cause
harmful interference to radio or television reception,
which can be determined by turning the equipment off
and on, the user is encouraged to try to correct the
interference by one or more of the following measures:
--Reorient or relocate the receiving antenna.
--Increase the separation between the equipment and
receiver.
--Connect the equipment into an outlet on a circuit
different from that to which the receiver is connected.
--Consult the dealer or an experienced radio/TV
technician for help.
Changes or modifications not expressly approved by the
party responsible for compliance could void the user’s
authority to operate the equipment.
Page 25

SAR Information Statement
This phone meets the government’s requirements for
exposure to radio waves. The guidelines are based on
standards that were developed by independent
scientific organizations through periodic and thorough
evaluation of scientific studies. The standards include a
substantial safety margin designed to assure the safety
of all persons regardless of age or health.
FCC RF Exposure information and Statement the SAR
limit of USA (FCC) is 1.6W/kg averaged over one gram of
tissue. Device type I50F (FCC ID: 2ALCI-FRESHFUNI50F)
has also been tested against this SAR limit.
SAR information on this and other device can be
viewed on-line at http://www.fcc.gov/oet/ea/fccid/.
This device was tested for typical body-worn
operations with the back of the handset kept 10mm
from the body.
To maintain compliance with FCC RF exposure
requirements, use accessories that maintain a 1.0cm
separation distance between the user’s bodies.
The use of belt clips, holsters and similar accessories
should not contain metallic components in its
assembly. The use of accessories that do not satisfy
these requirements may not comply with FCC RF
exposure requirements, and should be avoided.
 Loading...