


SignalVu-PC Quick Start
This document describes how to install the SignalVu-PC base software, connect to
an instrument with SignalVu-PC, activate SignalVu-PC optional applications, and
provides a br
SignalVu-PC, access the SignalVu-PC Help in the application software fromthe
Main menu from Help > User Manual.
SignalVu-PC can be used as a stand alone software application on a PC and also
with the Tektronix spectrum analyzers listed below.
ief introduction to the application. For full operating information on
PC requirements for
SignalVu-PC
The PC on w
requirements:
One of th
20 GB free space on the C: drive
4GBRAM
hich SignalVu-PC is installed must meet the following minimum
e following Windows operating systems:
Windows
Windows 8/8.1 (64-bit)
Windows 7 (64-bit) with Service Pack 1
10 (64-bit) (See page 3, Windows 10 activation.)
www.tek.com
Copyright © Tektronix
$
077-1024-16

SignalVu-PC Quick Start
PC requirements for
SignalVu-PC when
connecting to a Tektronix
Spectrum Analyzer
Supported anal
a PC with the listed minimum requirements to obtain full performance.
RSA306
RSA306B
RSA306B-SMA
RSA503A, RSA507A
RSA513A, RSA518A
RSA603A, RSA607A
NOTE. The RSA7100 comes with the CTRL7100 P C preconfigured and has
different requirements than those noted below.
Minimum requirements. The following minimum PC requirements must be met to
obtain full performance with SignalVu-PC with the above listed USB analyzers.
USB 3.0 port
Windows 7 or 8/8.1 operating system or Windows 10 (64-bit) operating system
yzers. The following Tektronix USB Spectrum Analyzers require
Connect feature
Core i7 4th generation processor or greater
Intel
Processors of lower performance can be used, with reduced real time
ormance. This means that the minimum signal duration for 100%
perf
probability of intercept will increase and the performance of AM/FM
demodulation and listening will be degraded.
8GBRAM
ive capable of sustained write rates of 300 MB/sec to support streaming data
Dr
If streaming data is not needed, drives with slower write rates will work.
20 GB free space on the C: drive
SignalVU-PC automatically connects to a Tektronix spectrum analyzer if one is
detected via the USB port (or the PCIe port for the RSA7100) and if no other
devices are currently connected to SignalVu-PC). No user action is required. The
Connect feature also allows connection to an MDO4000B/C series oscilloscope
when Option CON is installed.
Refer to the Connectivity section about connecting to an MDO4000B/C series
oscilloscope. The Connectivity section also provides instructions to manually
connect to a Tektronix spectrum analyzer.
The SignalVu-PC application Help file (Help > User Manual) also contains this
information.
2 SignalVu-PC Quick Start

SignalVu-PC Quick Start
TekVISA
Windows 10 activation
Tektronix Virt
VISA solution. It is a collection of software and documentation that allows
for remote control of instruments regardless of instrument brand and physical
connection. TekVISA includes a VISA driver, VISA libraries, documentation,
USB Device Driver, VXI-11 server, and connection management/debug software.
When you install the SignalVu-PC software, you will have the option to install
TekVISA. You should only use the version of TekVISA supplied with the
SignalVu-PC software.
If you have an older version of TekVISA already installed, you need to uninstall
that version before installing the most recent version.
NOTE. If y
programmatic interface, you must use TekVISA. TekVISA is also required for a
LAN connection to a supported instrument.
TekVISA is not required for a USB connection to a Tektronix USB spectrum
analyzer with SignalVu-PC.
The version of Microsoft Windows 10 that ships with the CTRL7100/RSA7100 is
shipped in Deferred Activation mode. Microsoft has a default activation method
that requires a connection to the Internet. If you do not have a connection, you
can activate Windows 10 by phone or you can continue to operate in Deferred
Activation mode.
ual Instrument Software Architecture (TekVISA) is a Tektronix
ou want to control SignalVu-PC from another PC by using a
First time activation. You can activate Windows 10 two ways.
1. Co
2.C
Activation with removable drives. If an SSD/HD is removed from one controller
and inserted into another controller, then the activation process will need to run
again. If controller 2 is not connected to the Internet, the activation willfailand
an Activate Windows watermark will display on the screen. To activate Windows
and remove the watermark, you must connect to the Internet or call Microsoft.
nnect to the Internet. Windows will automatically activate. You can also
go to System Properties to connect and activate.
all Microsoft and speak with a representative to activate Windows 10.
Contact information and a unique activation code (installation ID) will appear
in a pop up window.
SignalVu-PC Quick Start 3
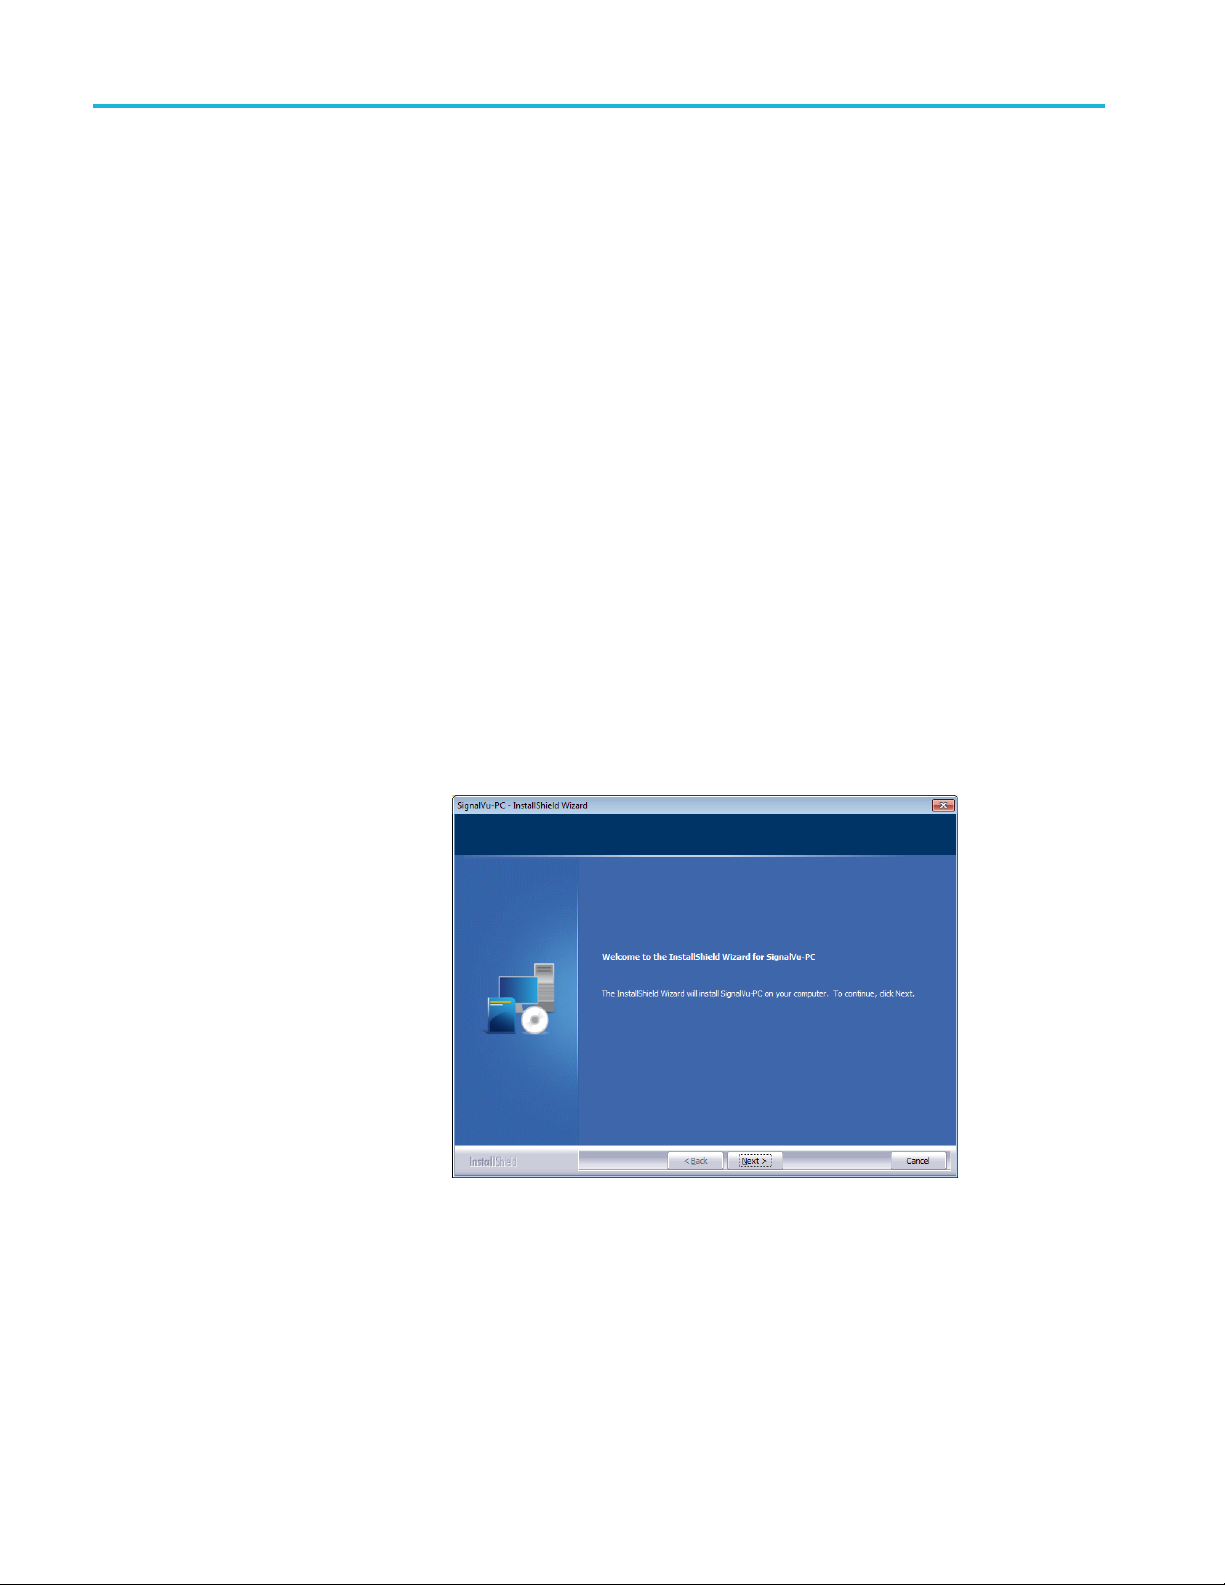
Installing SignalVu-PC
Installing Si
gnalVu-PC
SignalVu-PC
Tektronix USB spectrum analyzer (on a USB memory device that ships with each
instrument) and preinstalled on the CTRL7100 for the RSA7100.
1. If you downloaded SignalVu-PC from the web:
a. Unzip the a
b. Use Windows Explorer to navigate to the folder you extracted from the
archive.
c. Double-click Setup.exe to start the software installation.
2. If you are installing from the USB Flash drive provided with an instrument:
a. Insert the Flash drive on the PC where SignalVu-PC will be installed.
b. Use Windows Explorer to navigate to the SignalVu-PC folder and open
the Win64 folder on the flash drive.
c. Double-click Setup.exe to start the software installation.
3. Follow the software installation steps.
a. Inst
can be downloaded from the web. It is also provided with each
rchive on the PC where SignalVu-PC will be installed.
allation start up. Click Next to continue.
4 SignalVu-PC Quick Start
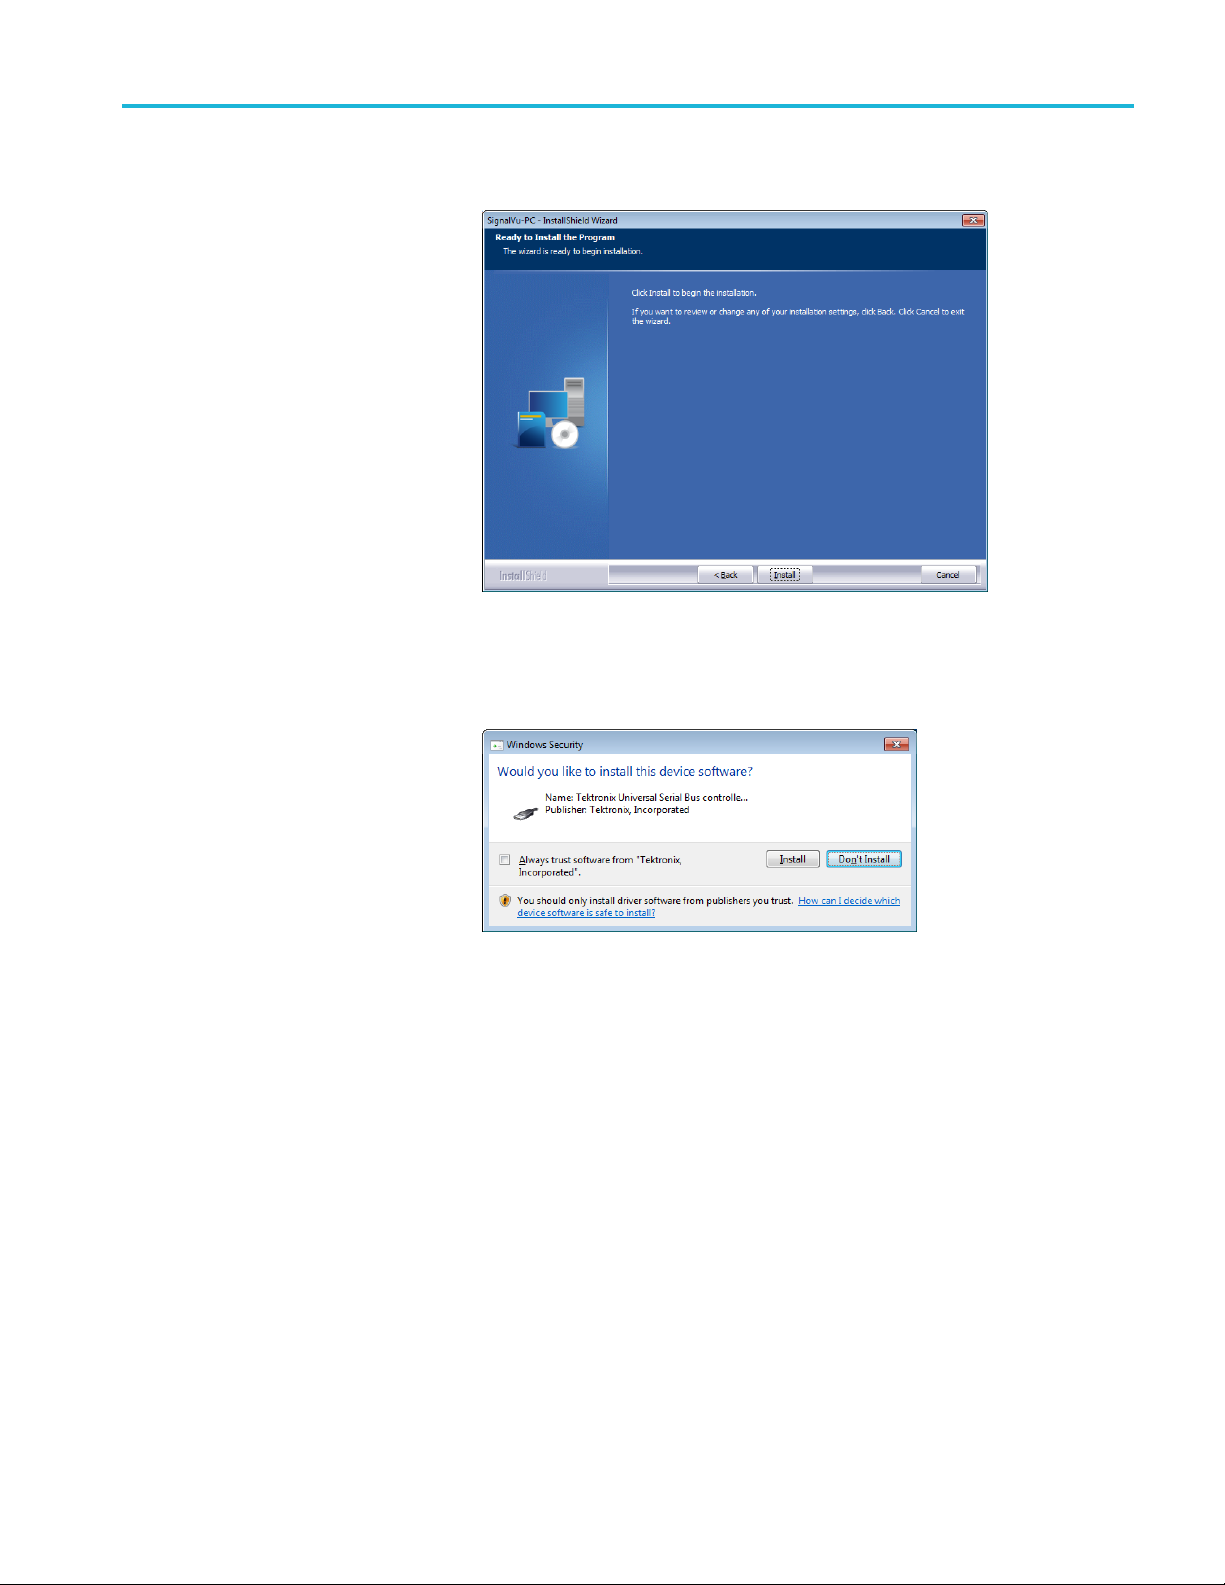
Installing SignalVu-PC
b. Software insta
c. Depending on your PC’s security settings, you may see this Windows
Security dialog box. Click Install to continue with the USB device
software installation. If you click Don’t Install, the entire SignalVu-PC
ation will abort and SignalVu-PC will be un-installed from the PC.
install
llation is ready to begin. Click Install to begin.
SignalVu-PC Quick Start 5

Installing SignalVu-PC
d. Install the Tek
to complete the installation.
NOTE. If you want to control SignalVu-PC from another PC b y using a
programmatic interface, you must use TekVISA. TekVISA is also required for a
LAN connection to a supported instrument.
TekVISA is optimized for SignalVu-PC, especially for instrument searching,
and is the recommended VISA application. If you want to use another
VISA application, such as NIVISA, uncheck the TekVISA box to bypass the
installat
TekVISA is not required for a USB connection to a Tektronix USB spectrum
analyzer
ion.
with SignalVu-PC.
VISA software. Ensure the box is checked and click Finish
6 SignalVu-PC Quick Start

SignalVu-PC optional application licenses
e. If TekVISA was i
the software.
4. If you’ve purchased optional applications for SignalVu-PC, you’ll need to
activate them by installing a purchased license. Read SignalVu-PC optional
application licenses for more information. (See page 7.).
nstalled, a restart of the PC is required before using
SignalVu-PC optional application licenses
The SignalVu-PC product software is made up of the base software and any
ionally purchased applications software (licensed optional software).
addit
The base software provides access to the standard SignalVu-PC applications.
It is available for download, free of charge, from the Tektronix Web site at
www.Tek.com\downloads. Once you have the base version, you can purchase
licenses for optional SignalVu-PC applications or choose to activate 30-day free
trials of those applications.
ense types
Lic
Tektronix is working to make it easier for you to manage the options you purchase
for SignalVu-PC by implementing a licensing scheme to host your purchased
licenses and allow you to manage your licenses yourself. As a result, there are
wo types of licenses: License Keys (legacy) and License Files (new).
t
License Keys: Prior to December 4, 2015, optional applications were
ctivated with license keys. This is referred to as the legacy licensing method.
a
Any license keys already purchased are still valid. To install a license key,
read SignalVu-PC license keys (legacy).(Seepage13.).
License Files: Beginning December 4, 2015, optional applications are
activated with license files. To install a license file, read SignalVu-PC license
files (See page 8.).
SignalVu-PC Quick Start 7

SignalVu-PC license files
SignalVu-PC l
icense files
SignalVu-PC
controlled via license files, rather than the previous method of installing license
keys.
SignalVu-PC licenses can be associated with and stored on either your PC or any
RSA300 series, RSA500 series, RSA600 series, and RSA7100 series spectrum
analyzers. Two types of licenses (Node-locked and Floating) are available, and
there are three methods to purchase them, (1) as an option to your hardware, or
separately as a (2) Node-locked or (3) Floating license. Licenses are managed
using the
licenses are purchased as an option to your instrument, use of the TektronixAMS
is not required for you to use them. Just connect the instrument to your PC with
SignalVu-PC, and the licenses will be recognized automatically.
A licensing scheme is used to host your license files. If they are
not already installed on your instrument or PC, you can access and
manage your licenses from the Tektronix Product License Web page:
http://www.tek.com/products/product-license. The Product License page provides
llowing:
the fo
Inventory of all the licenses in your company account
optional applications (purchased after December 4, 2015) are
Tektronix Asset Management System (AMS) on Tek.com. If your
How to purchase
application licenses
Ability to check out a license
Ability to check in a license
Ability to move a floating licenses
NOTE. If you purchased licenses as options to the RSA7100, these licenses are
pre-installed on the instrument. No activation or installation is required.
A variety of optional, licensed applications are available for purchase for
SignalVu-PC. These licenses can be associated with and stored on either your
PC or any RSA300 series, RSA500 series, RSA600 series, and RSA7100 series
spectrum analyzers. Licenses can be purchased as an option to your hardware,
or separately as a Node-locked or a Floating license.
Contact your local Tektronix Account Manager to purchase a license. If your
purchased license is not ordered as an option to your instrument, you will receive
an email with a list of the applications purchased and the URL to the Tektronix
Product License Web page, where you will create an account and can then
manage your licenses using the Tektronix Asset Management System (AMS):
http://www.tek.com/products/product-license.
AMS provides an inventory of the license(s) in your account. It enables you to
check out or check in a license and view the history of licenses.
8 SignalVu-PC Quick Start

SignalVu-PC license files
Optional appli
License type Description
Node locked li
purchased as an option to your
instrument
Node locked license (NL)
purchase
Floating license (FL) purchased
tely
separa
cations are enabled by one of the following license types.
cense (NL)
d separately
This license i
which can be either a PC or an instrument. It can be
reassociated to either a PC or another spectrum analyzer
two times usi
When associated with an instrument, this license is
factory-installed on that instrument at the time of
manufactur
with SignalVu-PC when the instrument is connected.
However, the licensed application is deactivated from the
PC if the lic
This is the most common form of licensing, as it simplifies
management of your applications.
This license is initially assigned to a specific host id,
which can
reassociated to either a PC or instrument two times using
Tek A MS .
This lice
either your PC or with an instrument when you install
the license.
This lic
license to stay on your PC, or if you have an existing USB
instrument on which you would like to install a license.
This license can be moved between different host ids,
which c
reassociated to different PCs or instruments an unlimited
number of times using Tek AMS.
This l
either your PC or with an instrument when you install
the license.
This i
in applications where the license needs to be moved
frequently.
nse is delivered via email and is associated with
ense should be purchased when you want your
an be either PCs or instruments. It can be
icense is delivered via email and is associated with
sthemostflexible license and is recommended
s initially assigned to a specific host id,
ng Tek AMS.
e. It will be recognized by any PC operating
ensed instrument is disconnected.
be either a PC or an instrument. It can be
To view a list of currently installed application licenses (options) in your
nalVu-PC product, select Tool s > Licenses > Manage from the SignalVu-PC
Sig
main toolbar.
er to the following sections for information about How to install a license (See
Ref
page 10.) and Howtoreturnalicense(See page 12.).
Available application options. A list of currently available application options is
in the SignalVu-PC ordering information section. (See page 25.)
SignalVu-PC Quick Start 9

SignalVu-PC license files
How to install a license
Before install
downloaded the license to your product or a portable memory device. The
following instructions include information about how to download and purchase
licenses.
NOTE. If you purchased licenses as options to the RSA7100, these licenses are
pre-installed on the instrument. No activation or installation is required.
1. Select Too l s > Licenses > Manage to open the Manage Licenses window.
ing an application license, you must first have purchased one and
2. Selec
3. If you already have a license file (*.lic) downloaded, click the Install new
t This computer or other license host from the list on the left side of
the window. Notice that the Host ID field will populate with the ID for the
selected host. Currently installed licenses associated with that host will also
appear in the bottom right panel of the window under Installed Licenses.
license button and navigate to the license you want to install, and then click
Open. The license will install and appear in the Installed Licenses list. This
task is now complete.
10 SignalVu-PC Quick Start

SignalVu-PC license files
4. If the license y
following:
a. Select the hos
license host list. For example, if you want to install the license on the
computer, select This computer. Notice that the Host ID field on the
right will populate with the ID for the selected host.
b. Click
c. Navigate to the TekAMS system, log in, and enter the host ID in the
appropriate field. The Tek AMS system can be accessed from a link on
this page http://www.Tek.com/products/product-license.
d. Follow the instructions online to download the desired license file (*.lic).
e. Once the license is downloaded, perform step 3 above.
5. If you do
a. Using an Ethernet connection, navigate to www.Tek.com/products and
find you
b. Click on the Additional Options tab. This tab lists all available software
licen
c. Find the option you want, then click on the related link to download
a fre
ou want to install is in your TekAMS system account, do the
t on which you want to install the license from the Select
to copy the host ID.
not have a license yet, do the following:
r product.
se options.
e trail version.
d. Click on the related link to request a quote.
e. After your purchase is complete, you will receive instructions for creating
a TekAMS account to access and manage your licenses. Once your
count is set up, perform step 4 above.
ac
SignalVu-PC Quick Start 11

SignalVu-PC license files
Howtoreturnalicense
You can return (
1. Select Too l s > Licenses > Manage to open the Manage Licenses window.
2. In the Manage Licenses window, select the license you want to return.
3. Click Uninstall selected license. The following window will appear.
uninstall) a license from a particular product as follows:
4. Click Ye s to uninstall the license. You will then be prompted to save an exit
license file. This is the file you will check into (return to) your TekAMS
account.
5. Save the exit license file to the desired location.
6. Click Close.
7. Navigate to your TekAMS account and check in the saved exit license file.
12 SignalVu-PC Quick Start

SignalVu-PC license keys (legacy)
Howtomovealicensetoa
different host
Signal
Vu-PC license keys (legacy)
You ca n ret urn a
indicated below. See the SignalVu-PC ordering information section for a list of
available application licenses.
Node locked license (NL): This license type can be reassigned no more than
two times. This allows you to reassign the license in the case of an upgrade to
a new Windows platform, for example.
Floating license (FL): This license type can be reassigned an unlimited
number of times.
When assigning a floating license, you need to specify the host id and the
duration the feature is to be enabled on the host. After the license expires,the
feature is automatically disabled on that host and the license in then available
to be assigned to a different host.
Free trial license (FT): This license type expires after 30 days.
ection only applies to SignalVu-PC installations that used license keys to
This s
activate optional applications.
purchased license and then reassign it to a different host, as
Activating SignalVu-PC
ons in evaluation mode
opti
If you don’t have a license for one (or any) SignalVu-PC options, you can activate
option in evaluation mode for a period of 30 days. No Internet access is
each
required for activation of evaluation licenses.
NOTE. Each option has its own evaluation period.
activate an option in evaluation mode:
To
1. Launch SignalVu-PC.
2. Go to Tools > Licenses > Legacy > Manage, displaying the Manage Legacy
License dialog.
SignalVu-PC Quick Start 13

SignalVu-PC license keys (legacy)
3. Select the opti
The Current Status box will change to display the number of days remaining
for evaluation. Repeat this procedure for each of the SignalVu-PC options
youwishtoevaluate.
on you want to evaluate, the select Start 30-day evaluation.
Activating SignalVu-PC
options
Activating SignalVu-PC options requires internet access. However, you can
activate SignalVu-PC on a PC that does not have internet access by using a
second PC that does have internet access to contact the license server and use
it to download a license file. The license file can then be transferred to the PC
on which SignalVu-PC is to be activated. In order to use any options you have
ased for SignalVu-PC, you must activate each option individually one of
purch
the following two ways:
Activate with Internet access. To activate an option:
1. Launch SignalVu-PC.
2. Go to Tools > Licenses > Legacy > Activate..., displaying the Activate Legacy
License dialog.
14 SignalVu-PC Quick Start

SignalVu-PC license keys (legacy)
3. In the dialog, s
4. In the Enter Activation Key text box, enter the option activation key
provide
5. Click OK in the License Activation window.
d when you purchased the option.
elect Auto.
SignalVu-PC will contact the license server and install a license file provided
by the license server.
6. Repeat the steps above to activate each option, using the activation key
specific to each option.
Activating without Internet access. To activate SignalVu-PC options on a PC
without internet access, you need use the Offline Activation Tool. The tool is
provided with SignalVu-PC as a separate installation file.
To activate SignalVu-PC options using a second PC to access the Internet:
1. Launch SignalVu-PC.
2. Go
to Tools > Licenses > Legacy > Activate..., displaying the Activate Legacy
License dialog.
SignalVu-PC Quick Start 15

SignalVu-PC license keys (legacy)
3. In the Activate
Legacy License window, select Manual.
4. Write down the Host ID shown. Click Cancel to close the Activate Legacy
License
window.
5. Install the Activation Assistant software on a PC that has internet access.
The Activation Assistant software is located at:
If you installed SignalVu-PC from a DVD or USB flash drive, navigate
to the device, open the Offline Activation Tool folder, and run the Setup
file located there.
If you downloaded SignalVu-PC from the Web, navigate to the location
you extracted the installation files. Open the Offline Activation Tool
er and run the Setup file located there.
fold
6. Launch the Activation Assistant application and follow the instructions
enerate a license file. Repeat this step for each option that you have
to g
purchased. You will also need the option activation key you received.
tivation keys are specific to each option, therefore you must acquire a
Ac
license file for each option purchased.
opy the license file (or files) to the following location the PC on which
7.C
SignalVu-PC is to be activated:
:\ProgramData\Tektronix\RSA\SignalVu-PC\License
C
8. Restart SignalVu-PC.
This completes the activation process for SignalVu-PC options.
16 SignalVu-PC Quick Start

SignalVu-PC license keys (legacy)
Moving SignalVu-PC to a
different PC
SignalVu-PC op
SignalVu-PC and its options from one PC to another PC by deactivating each
option on the current installation and reactivating them on another PC.
NOTE. Each activated SignalVu-PC option needs to be deactivated.
To deactivate SignalVu-PC options:
1. Launch SignalVu-PC and select Tool s > Licenses > Legacy > Manage...
from the menu bar.
2. Use the drop-down list under Option to select one of the SignalVu-PC
options that is activated on the PC. For example: OFDM Measurements
(SignalVu-PC SVO).
NOTE. If your SignalVu-PC installation has options installed, be sure to
deactivate all options.
3. Starting with each installed option, click Deactivate License. Continue
selecting options and clicking Deactivate License until all the SignalVu-PC
options have been deactivated.
tions are licensed for use on a single PC. However, you can move
SignalVu-PC options are now deactivated. You can now install SignalVu-PC
on another PC and activate the options in the new installation.
SignalVu-PC Quick Start 17

Getting Started with SignalVu-PC
Getting Start
SignalVu-PC displays
ed with SignalVu-PC
The SignalVu-PC Vector Signal Analysis software enables a desktop PC to
perform vector-signal analysis on waveforms acquired by Tektronix oscilloscopes
and Real-Ti
or real-time signal analyzer and make repeated measurements on the PC without
recapturing the waveform. SignalVu-PC utilizes the same analysis capabilities
found in the RSA6000 Series and RSA5000 Series Real-Time Analyzers.
NOTE. For complete operating instructions, refer to the SignalVu-PC instrument
Help accessed by s electing Help > User manual.
The following figure shows the spectrum display.
me Signal Analyzers. Capture the waveform once on an oscilloscope
18 SignalVu-PC Quick Start

Getting Started with SignalVu-PC
This figure show
s the spectrogram, time overview, and spectrum displays.
This fig
ure shows the various toolbar display controls.
SignalVu-PC Quick Start 19

Connectivity
Connectivity
Connecting a Tektronix
Spectrum Analyzer to a PC
You can conne
installed):
RSA503A, RS
USB 3.0
RSA603A an
RSA306B and RSA306B-SMA Spectrum Analyzers via USB 3.0
RSA306 Spectrum Analyzer via USB 3.0
RSA7100 Spectrum Analyzers via PCIe (SignalVu-PC comes installed on the
CTRL7100 that ships with the RSA7100)
MDO4000B/C Series instrument via USB, wireless, or LAN (Option CON
for SignalVu-PC required)
NOTE. Only one instrument at a time can be connected to SignalVu-PC.
Establishing a connection to a Tektronix Spectrum Analyzer instrument is as
simple as connecting the cable from the PC to the instrument.
USB connection. For a USB analyzer, you can connect the USB cable either
before or after starting the SignalVu-PC application. During the connection
process, SignalVu-PC indicates that it is finding and connecting to the instrument.
Please wait for the connection process to complete before using the software.
ct to the following instruments with your PC (with SignalVu-PC
A507A, RSA513A, and RSA518A Spectrum Analyzers via
d RSA607A Spectrum Analyzers via USB 3.0
NOTE. Your PC may notify you that it has found a new USB device and has
aded the device drivers. If you see these notifications, wait until the drivers
lo
are loaded before continuing.
PCIe connection. For a RSA7100 analyzer, connect the PCIe cable from the
CTRL7100 controller (PC) to the instrument before powering on the PC. Both
the analyzer and the SignalVu-PC application will start when the CTRL7100 is
powered on. Please wait for the application to launch and the convertor fansto
reduce speed before using the software.
The SignalVu-PC application always monitors the ports. Anytime a Tektronix
Spectrum Analyzer is discovered, a connection is immediately establishedcausing
the Connect status indicator to turn green (
from the PC also disconnects the SignalVu-PC application, causing the Connect
status indicator to turn red (
20 SignalVu-PC Quick Start
).
). Disconnecting the instrument

Connectivity
If the SignalVu
USB, PCIe, or network), an automated connection will not take place. In this
situation, you have to do the following:
1. Select Disconnect From Instrument to end the existing connection.
2. Select Conn
the instrument list.
3. Select the i
NOTE. The SignalVu-PC software version must be at or above the version
provided with the Tektronix Spectrum Analyzer. The latest version of software is
available from the Tektronix web site www.Tek.com/downloads.
4. A Connect Status dialog box will appear to confirm the instrument is
connected and SignalVu-PC can receive live data from the instrument.
NOTE. You c an quickly verify connection status by looking at the Connected
indicator square. It is green (
when it is not. You can also view the name of the instrument that is connected
by hovering the pointer over the
-PC application is already connected to another instrument (either
ect To Instrument. You should see the connected analyzer in
nstrument.
) when an instrument is connected. It is red ( )
.
nectingtoan
Con
MDO4000B/C Series
instrument
5. When you want to connect to a different instrument, select Disconnect From
Instrument to end the current connection.
E. You can watch a video tutorial about using Connect (with Option CON
NOT
enabled) to connect to an MDO4000B/C Series instrument and about WLAN
Presets at www.youtube.com/user/tektronix. For more information about
the Tektronix YouTube channel, click on the Help menu in the SignalVu-PC
application, select User Manual, and search for YouTube.
USB connection. To establish a connection using USB, perform the following
procedures in the order given.
1. Check that the MDO4000B/C is on.
2. Connect a USB cable to the MDO.
3. Connect the other end of that USB cable to the PC.
NOTE. Your PC may notify you that it has found a new USB device and has
loaded the device dri vers. If you see these notifications, wait until the drivers
are loaded before continuing.
SignalVu-PC Quick Start 21

Connectivity
4. Double click th
5. Click Connect on the menu bar to view the drop down menu.
6. Select Connect To Instrument. You should see the USB connected MDO in
the Connect To Instrument list.
NOTE. If the
that connection will also show in the Connect To Instrument list. You must select
Disconnect From Instrument to end that connection before connecting to the
newly found instrument.
7. If you do not see the USB MDO, click Search for Instrument.TekVISA
is now searching for instruments. A notification will briefly appear stating
that the instrument was found. Check that the newly found instrument now
appears in the Connect To Instrument list.
8. Select the instrument.
9. A Connect Status dialog box will appear to confirm the instrument is
connected and SignalVu-PC can receive live data from the instrument.
NOTE. You can quickly verify connection status by looking at the Connected
indicator square at the bottom of the screen. It is green (
is connected. It is red (
rument that is connected by hovering the pointer over the
inst
e SignalVu-PC icon on the Desktop to start the application.
PC is currently connected by LAN or USB to a nother MDO4000B/C,
)whenaninstrument
) when it is not. You can also view the name of the
.
10. Use SignalVu-PC to configure the MDO. Frequency, Amplitude, Span,
ndwidth, and Time Scaling parameters for the RF channels can only be
Ba
changed using SignalVu-PC.
NOTE. Press F1 on your keyboard to open the SignalVu-PC help for information
about configuring and using the application. You can also click on Help > User
Manual in the SignalVu-PC menu bar to open the help.
11. When you are ready to connect to a different instrument, select Disconnect
From Instrument to first end the current connection.
NOTE. For more search options using TekVISA, go to the Visa Resource Manager
(double click in the applications tray).
22 SignalVu-PC Quick Start

Connectivity
LAN or wireless
connection, perform the following procedures in the order given.
1. Check that the
2. Use an Ethernet cable to connect the MDO to the network.
3. Check that the MDO is on and wait for the IP Address to display on the
screen. Write down the IP address to help you identify the MDO in the
SignalVu-P
4. Double click the SignalVu-PC icon on the Desktop to start the application.
5. Click Connect on the menu bar to view the drop down menu.
6. Select Search For Instrument. TekVISA is now searching for instruments.
7. A notification will briefly appear stating that the instrument was found. Check
that the newly found instrument now appears in the Connect To Instrument
list and then click on the instrument name to connect.
NOTE. If the PC is currently connected by LAN/wireless or USB to another
MDO400
You must select Disconnect From Instrument to end that connection before
connecting to the newly found instrument.
0B/C, that connection will also show in the Connect To Instrument list.
connection. To establish a connection using a LAN or wireless
PC has a working LAN or wireless network connection.
C application.
8. If you do not see the LAN address of the MDO, click Manually Search for
LAN Instrument. You will then need to enter the IP address of the MDO
into the IP Address dialog box and click Connect.
9. A Connect Status dialog box will appear to confirm the instrument is
connected and SignalVu-PC can receive live data from the instrument.
NOTE. You c an quickly verify connection status by looking at the Connected
indicator square at the bottom of the screen. It is green (
is connected. It is red (
instrument that is connected by hovering the pointer over the
) when it is not. You can also v iew the name of the
) when an instrument
.
SignalVu-PC Quick Start 23

Connectivity
10. Use SignalVu-P
Bandwidth, and Time Scaling parameters for the RF channels can only be
changed using SignalVu-PC.
NOTE. Press F1 on your keyboard to open the SignalVu-PC help for information
about configuring and using the application. You can also click on Help > User
Manual in the SignalVu-PC menu bar to open the help.
11. When you are ready to connect to a different instrument, select Disconnect
From Instrument to first end the current connection.
NOTE. For
(double click in the Windows applications tray).
more search options using TekVISA, go to the Visa Resource Manager
C to configure the MDO. Frequency, Amplitude, Span,
24 SignalVu-PC Quick Start

SignalVu-PC ordering information
SignalVu-PC o
rdering information
The followin
g table shows available optional applications and the license type
associated with that application option. See the How to purchase application
licenses section for information about license types and how to activate one.
Applicatio
AM/FM/PM/
Settling
General
40 MHz and MDO
Genera
800 MH
(RSA7100 only)
Pul
Pu
Phase Noise measurements
RSA7100 only)
(
Advanced triggers (Frequency Mask, Density) for the RSA7100
(RSA7100 only)
EMI Pre-compliance and Troubleshooting
Flexible O FDM Analysis
WLAN 802.11a/b/g/j/p measurements
WLAN 802.11n measurements
(Requires SV23NL-SVPC or SV23FL-SVPC)
WLAN 802.11ac measurement to work with analyzer of acquisition bandwidth ≤ 40 MHz
and MDO
(Requires SV23NL-SVPC or SV23FL-SVPC and SV24NL-SVPC or SV24FL-SVPC)
WLAN 802.11ac measurement to work with analyzer of any acquisition bandwidth and
MDO
(Requires SV23NL-SVPC or SV23FL-SVPC and SV24NL-SVPC or SV24FL-SVPC)
n description
Direct Audio Analysis
Time (frequency and phase) measurements
Purpose Modulation Analysis to work with analyzer of acquisition bandwidth ≤
l Purpose Modulation Analysis to work with analyzer of any acquisition bandwidth
z acquisition bandwidth (for frequencies > 3.6 GHz
se Analysis to work with analyzer of acquisition bandwidth ≤ 40 MHz and MDO
lse Analysis to work with analyzer of any acquisition bandwidth
Application
(option) License typ
SVANL-SVP
SVAFL-SVP
SVTNL-SV
SVTFL-S
SVMNL-S
SVMFL-
SVMHNL
SVMHF
B800N
B800
SVP
SVP
PHNL-SVPC
SV
PHFL-SVPC
SV
HASNL-SVPC
P
HASFL-SVPC
P
TRIGHNL-SVPC
TRIGHFL-SVPC
EMCVUNL-SVPC
EMCVUFL-SVPC
SVONL-SVPC
SVOFL-SVPC
SV23NL-SVPC
SV23FL-SVPC
SV24NL-SVPC
SV24FL-SVPC
SV25NL-SVPC
SV25FL-SVPC
SV25HNL-SVPC
SV25HFL-SVPC
C
C
PC
VPC
VPC
SVPC
-SVPC
L-SVPC
L-SVPC
FL-SVPC
NL-SVPC
FL-SVPC
Node Locked
Floating
Node Locked
Floating
Node Locked
Floating
Node Locked
Floating
Node Locked
Floating
Node Locked
Floating
Node Locked
Floating
Node Locked
Floating
Node Locked
Floating
Node Locked
Floating
Node Locked
Floating
Node Locked
Floating
Node Locked
Floating
Node Locked
Floating
Node Locked
Floating
e
SignalVu-PC Quick Start 25

SignalVu-PC ordering information
Application description
APCO P25 measurements
Bluetooth® measurements
Bluetooth® 5 measurements
(Requires SV27NL-SVPC or SV27FL-SVPC)
Mapping
SignalVu-PC connection to the MDO4000B/C series oscilloscopes
WLAN 802.11a/b/g/j/p/n/ac and option to connect to MDO 4000B/C. Works with analyzer
of analyzer of acquisition bandwidth ≤ 40 MHz and MDO.
option bundles the following: SV23NL-SVPC or SV23FL-SVPC, SV24NL-SVPC or
(This
SV24FL-SVPC, SV25NL-SVPC or SV25FL-SVPC, and CONNL-SVPC or CONFL-SVPC)
WLAN 802.11a/b/g/j/p/n/ac and option to connect to MDO 4000B/C. Works with analyzer
of any acquisition bandwidth.
s option bundles the following: SV23NL-SVPC or SV23FL-SVPC, SV24NL-SVPC
(Thi
or SV24FL-SVPC, SV25HNL-SVPC or SV25HFL-SVPC, and CONNL-SVPC or
CONFL-SVPC)
LTE™ Downlink RF measurements
WiGig 802.11ad and 802.11ay measurements (only for offline analysis)
EMI CISPR detectors
Signal survey and classification
Playback of recorded files
(RSA500A series and RSA600A series only)
IQFlow™ continuous and simultaneous streaming of data to RAID (requires option
C7100-A or C 7100- B) and 40 GbE
(RSA7100 only)
IQFlow™ continuous streaming of IQ data to a custom API application
(RSA7100 only)
1
1
2
3
Application
(option) License type
SV26NL-SVPC
SV26FL-SVPC
SV27NL-SVPC
SV27FL-SVPC
SV31NL-SVPC
SV31FL-SVPC
MAPNL-SVPC
MAPFL-SVPC
CONNL-SVPC
CONFL-SVPC
SV2CNL-SVPC
SV2CFL-SVPC
SV2CHNL-SVPC
SV2CHFL-SVPC
SV28NL-SVPC
SV28FL-SVPC
SV30NL-SVPC
SV30FL-SVPC
SVQPNL-SVPC
SVQPFL-SVPC
SV54NL-SVPC
SV54FL-SVPC
SV56NL-SVPC
SV56FL-SVPC
STREAMNL-SVPC
STREAMFL-SVPC
CUSTOM-APINL
Node Locked
Floating
Node Locked
Floating
Node Locked
Floating
Node Lock
ed
Floating
Node Loc
Floatin
Node Lo
Float
Node L
Floa
ked
g
cked
ing
ocked
ting
Node Locked
Floating
Node Locked
Floating
Node Locked
Floating
Node Locked
Floating
Node Locked
Floating
Node Locked
Floating
Node Locked
-SVPC
CUSTOM-APIFL
Floating
-SVPC
26 SignalVu-PC Quick Start

SignalVu-PC ordering information
Application
Application description
Return loss, VSWR, cable loss, and distance to fault
(RSA500A series and RSA600A series only)
Education-only version of all m odules for SignalVu-PC EDUFL-SVPC
1
Bluetooth is a registered trademark of Bluetooth SIG, Inc.
2
LTE i s a trad
3
IQFlow is a trademark of Tektronix
emark of ETSI.
(option) License type
SV60NL-SVPC
SV60FL-SVPC
Node Locked
Floating
Floating
SignalVu-PC Quick Start 27

SignalVu-PC ordering information
Features by spectrum analyzer
The following table lists a subset of features that may or may not be available
for your analyzer when connected to SignalVu-PC. An “√” means the feature
is available with the specified product. Some of these features require specific
options be installed. You can view a list of options for SignalVu-PC above or
an www.tek.
Feature RSA300 Seri
Audio demo
DPX Spect
Fast Frame
Frequency Mask Trigger
Phase Noise measurements
DPX Density Trigger
Intern
Playb
Playb
Trac
cable loss, and distance to fault (Option 04 with
SV60-SVPC)
dulation (listening)
rogram (DPXogram)
al GPS
ack of recorded files (Option SV56-SVPC)
ack of recorded files ( DataVu-PC)
king generator and return loss, VSWR,
com.
√√√
√√√√
√√√
√√√√
es
RSA600
es
RSA500 Seri
√√√
√√
Series RSA7100
√
√
√
√
28 SignalVu-PC Quick Start
 Loading...