

Page 1

Instructions
MTXFSC Option Upgrade
MTX100 MPEG Recorder & Player
075-0872-00
Warning
The servicing instructions are for use by qualified
personnel only. To avoid personal injury, do not
perform any servicing unless you are qualified to
do so. Refer to all safety summaries prior to
performing service.
www.tektronix.com
*P075087200*
075087200
Page 2

Copyright © Tektronix, Inc. All rights reserved.
Tektronix products are covered by U.S. and foreign patents, issued and pending. Information in this publication
supercedes that in all previously published material. Specifications and price change privileges reserved.
Tektronix, Inc., P.O. Box 500, Beaverton, OR 97077
TEKTRONIX and TEK are registered trademarks of Tektronix, Inc.
Contacting Tektronix
Phone 1-800-833-9200*
Address Tektronix, Inc.
Department or name (if known)
14200 SW Karl Braun Drive
P. O. B o x 5 0 0
Beaverton, OR 97077
USA
Web site wwww.tektronix.com
Sales support 1-800-833-9200, select option 1*
Service support 1-800-833-9200, select option 2*
Technical support Email: techsupport@tektronix.com
1-800-833-9200, select option 3*
6:00 a.m. - 5:00 p.m. Pacific time
* This phone number is toll free in North America. After office hours, please leave a voice mail message.
Outside North America, contact a Tektronix sales office ordistributor; see the Tektronix web site for a list of offices.
Page 3

Kit Description
Kit Parts List
This kit provides parts and instructions to upgrade your MTX100 MPEG Recorder
& Player to Option SC (Scheduler software).
These instructions apply for the MTXFSC software field upgrade.
Table 1 lists the items that shipped with the MTXFSC software field upgrade.
Table 1: MTXFSC part list
Quantity Part number Description
1 ea 062-A279-57 SOFTWARE PKG: APPLICATION RECOVERY, CD-ROM
1 ea 119-7168-00* DONGLE: SOFTWARE PROTECTION DEVICE
1 ea 075-0872-XX MANUAL, TECH: INSTRUCTIONS, MTX100 UPGRADE KIT
*Internal use only
MTX100 MTXFSC Option Upgrade 1
Page 4

Kit Description
2 MTX100 MTXFSC Option Upgrade
Page 5

Installation Instructions
This section provides information on how to enable the Scheduler software on your
MTX100 MPEG Recorder & Player. This section also provides information on
how to install the Scheduler software on your PC.
For information on how to use the Scheduler software, refer to the MTX100 MPEG
Recorder & Player User Manual, which is included on the CD-ROM that is
supplied with this kit.
Checking the MTX100 Application Version
Before performing the installation of the MTXFSC software field upgrade, check
the version of your MTX100 application.
If the version of your MTX100 application is 5.11, the Scheduler software is
already installed on your MTX100. Proceed to Installing the Parallel Driver
below.
If the version of your MTX100 application is 5.0 and earlier, you must upgrade
the application to version 5.11. For instructions on how to upgrade the
MTX100 application, refer to the MTX100 MPEG Recorder & Player Release
Notes, which are included on the CD-ROM that is supplied with this kit.
NOTE. When upgrading the MTX100 application to 5.11, the Scheduler software is
automatically installed.
Installing the Parallel Driver
Perform the following steps to install the parallel driver on your MTX100:
1. Select File
application. The Windows 2000 desktop appears.
2. Insert the MTX100 & RTX100 Application Software Recovery CD supplied
with this kit into the CD-ROM drive.
3. Double-click the My Computer icon.
4. Double-click the CD-ROM drive icon.
5. Double-click the Driver folder in the MTX100 & RTX100 Application
Software Recovery CD.
6. Double-click the SSD5411-32bit.exe icon.
→ Exit in the Play or Record screen to exit the MTX100
MTX100 MTXFSC Option Upgrade 3
Page 6

Installation Instructions
7. Click Next in the resulting window. The License Agreement window appears.
8. Select I accept the terms in the license agreement, and then click Next. The
9. Click Next. The Setup Type window appears.
10. Select Complete and click Next. The Ready to Install Program window
11. Click Install to proceed with installation.
12. When the InstallShield Wizard Completed window appears, click Finish to
13. Remove the MTX100 & RTX100 Application Software Recovery CD from
Attaching the Software Key
Destination Folder window appears.
appears.
complete the installation.
the CD-ROM drive, and then store the CD in a safe location.
Perform the following steps to attach the software protection key to the rear-panel
PRINTER port of the MTX100:
1. If there is a cable attached to the PRINTER port of the MTX100, disconnect
the cable.
2. Attach the software protection key (see Figure 1) to the PRINTER port and
tighten the retention screws.
Figure 1: Software protection key
3. If you removed a cable in step 1, reconnect it directly to the software protection
key. The key should not interfere with parallel communication.
NOTE. To run the Scheduler software, the software protection key must be installed
on the PRINTER port. Do not remove or misplace the software key.
The installation of the software field upgrade is complete.
4 MTX100 MTXFSC Option Upgrade
Page 7

Installing the Scheduler Software on Your PC
You can install the Scheduler software on your PC. When installing the software
into a remote, networked PC, you can create a schedule list on the PC and play or
record streams.
NOTE. The Scheduler software requires the MTX100 application software version
5.11. If the software version of your MTX100 application is 5.0 and earlier, you
must upgrade the application to version 5.11.
Installation Instructions
PC System Requirement
Installing the Scheduler
Software
Before installing the software, verify that the target PC meets the following
minimum system requirement:
Windows 2000/XP operating system
CD-ROM drive (for software installation)
Perform the following steps to install the Scheduler software on your PC:
1. Log on to Windows (2000 or XP) as Administrator.
2. Insert the MTX100 & RTX 100 Application Software Recovery CD supplied
with this kit into the CD-ROM drive.
3. Double-click the My Computer icon on the Windows 2000 desktop.
4. Double-click the CD-ROM drive icon.
5. Double-click the PC_Scheduler folder.
CAUTION. To prevent data loss, it is strongly recommended that you exit any open
application on your PC before you run the Scheduler setup.exe file.
6. Double-click setup.exe icon in the list. The scheduler installation program
displays a series of setup windows as listed below. Click the Next> button to
accept the default parameters, or change the parameters in the setup windows
to suit your needs. Click the Back button in a setup window to return to the
previous setup window.
a. Welcome window. Read the displayed information, and then click the
Next button to proceed with the installation.
b. Choose Destination Location window. The default directory location for
the application is displayed. If you want to install Scheduler in a custom
location, click the Browse... button, and then select or create a custom
directory location.
MTX100 MTXFSC Option Upgrade 5
Page 8
Installation Instructions
c. Select Program Folder window. The default name for the program folder
is displayed. If you want to change the name, type in a new name, or select
a name from the Existing Folders list. Click the Next> button to proceed.
d. Start Copying Files window. Review the displayed information, and then
click the Next> button to start the installation.
e. Setup Complete window. If the installation is successful, you will see a
message that setup has finished installing the Scheduler application onto
your PC. If you want to run Scheduler immediately, select Yes, Launch
the program file, and then click the Finish button. To exit the installation
program without running Scheduler, click the Finish button.
7. Remove the MTX100 & RTX100 Application Software Recovery CD from
your PC, and then store the CD in a safe location.
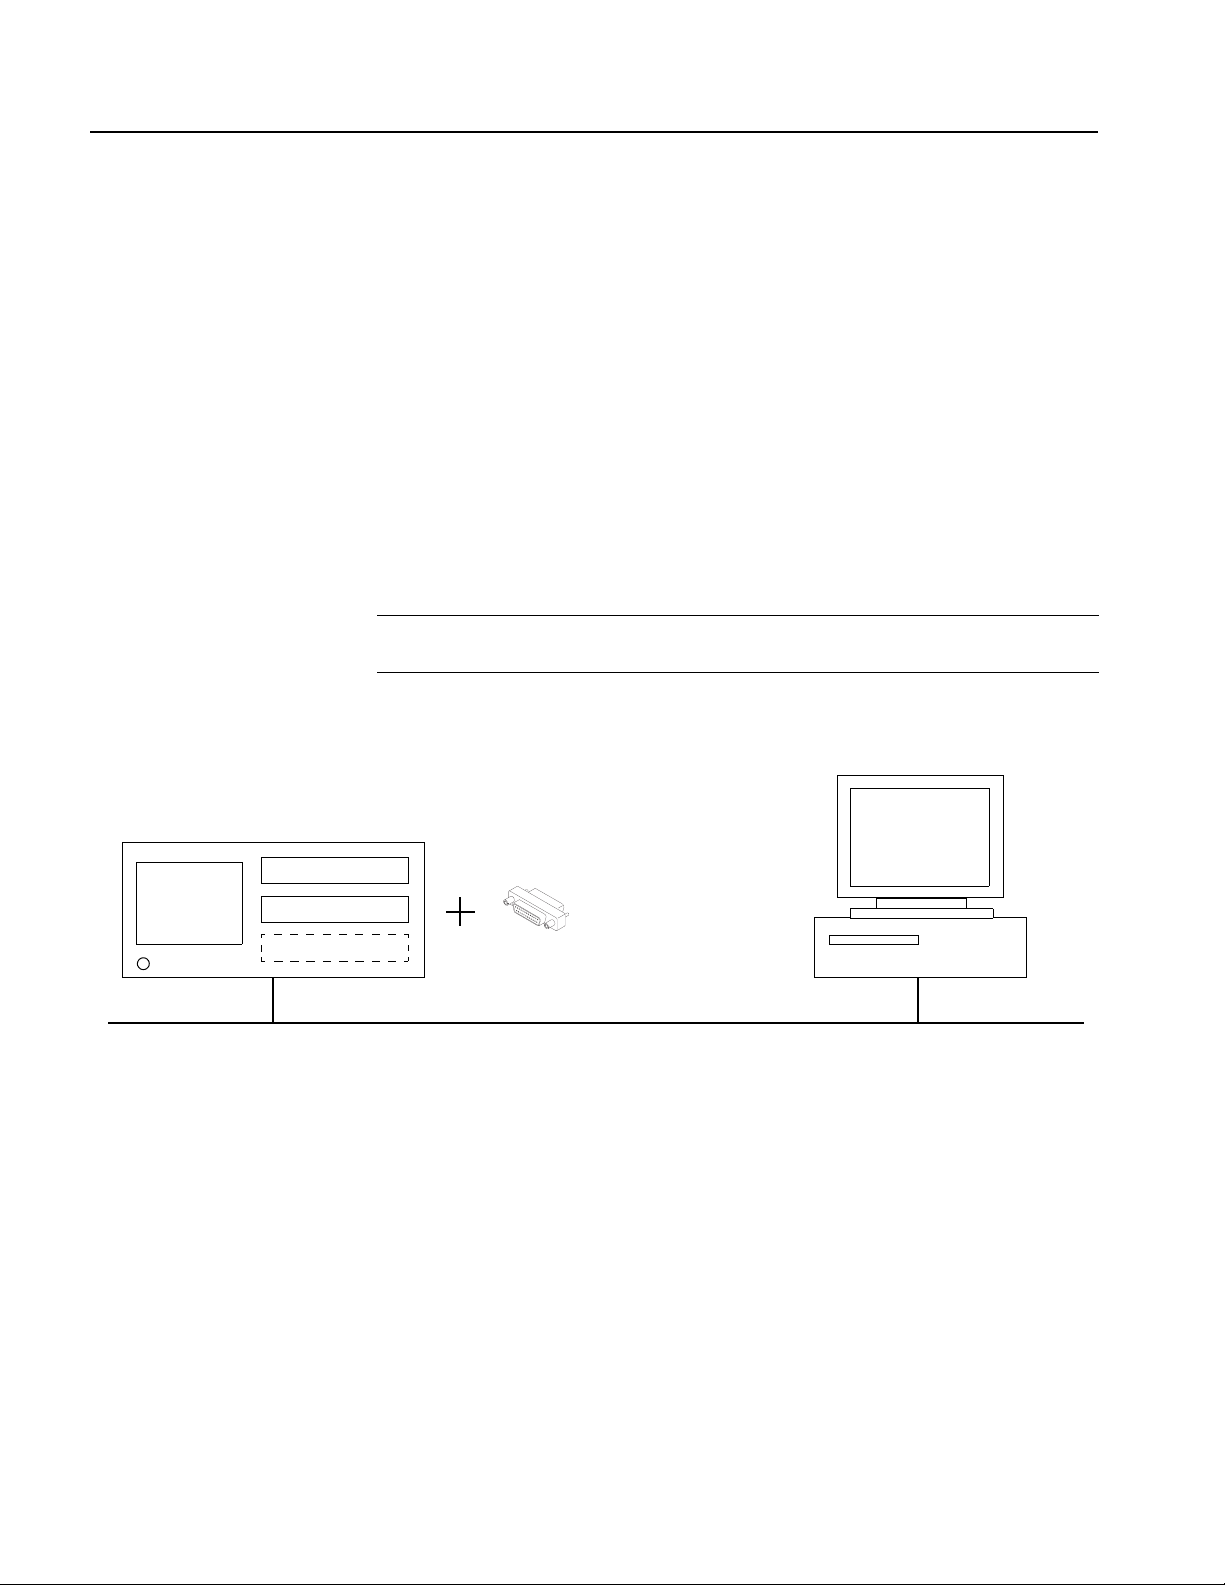
NOTE.
To run the Scheduler software on your PC, the software protection key
needs to be attached to the PRINTER port on the MTX100. See Figure 2.
MTX100
MTX100 application
Parallel driver
Scheduler software
Software protection key
Figure 2: Controlling the MTX100 from the remote PC
❙❙ End of document ❙❙
Remote PC
Scheduler software
Ethernet network
6 MTX100 MTXFSC Option Upgrade
 Loading...