

Page 1

User Manual
K1297-G20 Monitor
Protocol Tester
C73000-B6076-C91-14
This document supports software version 3.10 and above
and the device types 7KK1200-B (K1297) and
7KK1200-P (K1297 Compact)
Revised: June 2004
Page 2

Copyright © Tektronix, Inc. All rights reserved.
Tektronix products are covered by U.S. and foreign patents, issued and pending.
Information in this publication supercedes that in all previously published material.
Specifications and price change privileges reserved.
Valid controlled documentation is only distributed electronically by Tektronix.
Printed copies are considered for reference only.
Tektronix Berlin GmbH & Co. KG
Wernerwerkdamm 5
13629 Berlin
GERMANY
TEKTRONIX and TEK are registered trademarks of Tektronix, Inc.
Adober Acrobatr Reader Version 5.0: Copyright © Adobe Systems Incorporated
1987 - 2001
Microsoftr Windows XPr Embedded: Copyright © Microsoft Corporation
1985 - 2001
Microsoftr Internet Explorerr Version 5.5: Copyright © Microsoft Corporation
1995 – 2000
Berkeley Filter Software: Copyright © The Regents of the University of California
1990 - 1997
Network Time Protocol Software: Copyright © David L. Mills 1992–2003
Page 3

WARRANTY
Tektronix warrants that this product will be free from defects in materials and workmanship for a
period of one (1) year from the date of shipment. If any such product proves defective during this
warranty period, Tektronix, at its option, either will repair the defective product without charge
for parts and labor, or will provide a replacement in exchange for the defective product.
In order to obtain service under this warranty, Customer must notify Tektronix of the defect
before the expiration of the warranty period and make suitable arrangements for the performance
of service. Customer shall be responsible for packaging and shipping the defective product to the
service center designated by Tektronix, with shipping charges prepaid. Tektronix shall pay for the
return of the product to Customer if the shipment is to a location within the country in which the
Tektronix service center is located. Customer shall be responsible for paying all shipping charges,
duties, taxes, and any other charges for products returned to any other locations.
This warranty shall not apply to any defect, failure or damage caused by improper use or
improper or inadequate maintenance and care. Tektronix shall not be obligated to furnish service
under this warranty a) to repair damage resulting from attempts by personnel other than Tektronix
representatives to install, repair or service the product; b) to repair damage resulting from
improper use or connection to incompatible equipment; c) to repair any damage or malfunction
caused by the use of non–Tektronix supplies; or d) to service a product that has been modified or
integrated with other products when the effect of such modification or integration increases the
time or difficulty of servicing the product.
THIS WARRANTY IS GIVEN BY TEKTRONIX WITH RESPECT TO THE LISTED
PRODUCTS IN LIEU OF ANY OTHER WARRANTIES, EXPRESS OR IMPLIED.
TEKTRONIX AND ITS VENDORS DISCLAIM ANY IMPLIED WARRANTIES OF
MERCHANTABILITY OR FITNESS FOR A PARTICULAR PURPOSE. TEKTRONIX’
RESPONSIBILITY TO REPAIR OR REPLACE DEFECTIVE PRODUCTS IS THE
SOLE AND EXCLUSIVE REMEDY PROVIDED TO THE CUSTOMER FOR BREACH
OF THIS WARRANTY. TEKTRONIX AND ITS VENDORS WILL NOT BE LIABLE
FOR ANY INDIRECT, SPECIAL, INCIDENTAL, OR CONSEQUENTIAL DAMAGES
IRRESPECTIVE OF WHETHER TEKTRONIX OR THE VENDOR HAS ADVANCE
NOTICE OF THE POSSIBILITY OF SUCH DAMAGES.
Page 4

Page 5

Contents
General Safety Summary iii. . . . . . . . . . . . . . . . . . . . . . . . . . . .
Service Safety Summary vii. . . . . . . . . . . . . . . . . . . . . . . . . . . . .
Preface 1. . . . . . . . . . . . . . . . . . . . . . . . . . . . . . . . . . . . . . . . . . . .
Prerequisites 4. . . . . . . . . . . . . . . . . . . . . . . . . . . . . . . . . . . . . . . .
Assistance 5. . . . . . . . . . . . . . . . . . . . . . . . . . . . . . . . . . . . . . . . .
Contacting Tektronix 8. . . . . . . . . . . . . . . . . . . . . . . . . . . . . . . . .
Getting Started 9. . . . . . . . . . . . . . . . . . . . . . . . . . . . . . . . . . . . .
Device Description 10. . . . . . . . . . . . . . . . . . . . . . . . . . . . . . . . . .
Exchanging Measuring Modules 26. . . . . . . . . . . . . . . . . . . . . . . .
Connecting to the Data Line 35. . . . . . . . . . . . . . . . . . . . . . . . . . .
Switching on the Device 36. . . . . . . . . . . . . . . . . . . . . . . . . . . . . .
Software Installation 42. . . . . . . . . . . . . . . . . . . . . . . . . . . . . . . . .
Security Requirements 57. . . . . . . . . . . . . . . . . . . . . . . . . . . . . . . .
Ethernet Connection 58. . . . . . . . . . . . . . . . . . . . . . . . . . . . . . . . .
Remote Operation 60. . . . . . . . . . . . . . . . . . . . . . . . . . . . . . . . . . .
Connecting Peripherals 62. . . . . . . . . . . . . . . . . . . . . . . . . . . . . . .
Examples 63. . . . . . . . . . . . . . . . . . . . . . . . . . . . . . . . . . . . . . . . . .
Online Monitoring in a Network 64. . . . . . . . . . . . . . . . . . . . . . . .
Recording and Reviewing Monitoring Data 72. . . . . . . . . . . . . . .
Calltrace 79. . . . . . . . . . . . . . . . . . . . . . . . . . . . . . . . . . . . . . . . . . .
Appendix A: Interfaces A-1. . . . . . . . . . . . . . . . . . . . . . . . . . . . . .
System Unit A-2. . . . . . . . . . . . . . . . . . . . . . . . . . . . . . . . . . . . . . . .
AP-4 and AP-4/256 Board A-21. . . . . . . . . . . . . . . . . . . . . . . . . . . . .
BAI Board A-27. . . . . . . . . . . . . . . . . . . . . . . . . . . . . . . . . . . . . . . . .
V./X. Board A-38. . . . . . . . . . . . . . . . . . . . . . . . . . . . . . . . . . . . . . . .
E1/DS1 Monitoring Board A-47. . . . . . . . . . . . . . . . . . . . . . . . . . . . .
Ethernet Board A-51. . . . . . . . . . . . . . . . . . . . . . . . . . . . . . . . . . . . . .
Appendix B: Keyboard B-1. . . . . . . . . . . . . . . . . . . . . . . . . . . . . .
Appendix C: Specifications C-1. . . . . . . . . . . . . . . . . . . . . . . . . . .
K1297-G20 Monitor User Manual
i
Page 6

Contents
Appendix D: Windows XPe Troubleshooting E-1. . . . . . . . . . . .
Preventive Measures E-1. . . . . . . . . . . . . . . . . . . . . . . . . . . . . . . . .
Repair Measures E-7. . . . . . . . . . . . . . . . . . . . . . . . . . . . . . . . . . . .
Abbreviations F-1. . . . . . . . . . . . . . . . . . . . . . . . . . . . . . . . . . . . . .
Index Index-1. . . . . . . . . . . . . . . . . . . . . . . . . . . . . . . . . . . . . . . . . . . . .
ii
K1297-G20 Monitor User Manual
Page 7

General Safety Summary
Review the following safety precautions to avoid injury and prevent
damage to this product or any products connected to it. To avoid potential
hazards, use this product only as specified.
Only qualified service personnel should perform service procedures.
While using this product, you may need to access other parts of the
system. Read the General Safety Summary in other system manuals for
warnings and cautions related to operating the system.
To Avoid Fire or Personal Injury
Use Proper Power Cord. Use only the power cord specified for this product
and certified for the country of use.
Connect and Disconnect Test Leads Properly. Do not connect or disconnect
test leads while they are connected to a voltage source.
Ground the Product. This product is grounded through the grounding
conductor of the power cord. To avoid electric shock, the grounding
conductor must be connected to earth ground. Before making connections
to the input or output terminals of the product, ensure that the product is
properly grounded.
Observe All Terminal Ratings. To avoid fire or shock hazard, observe all
ratings and markings on the product. Consult the Appendix C of the User
Manual for further ratings information before making connections to the
product.
Do not apply a potential to any terminal, that exceeds the permitted rating
of that terminal.
With some interfaces only voltages corresponding to the default of the
relevant connector are applied at the measuring sockets. However, high
voltages from the line may occur at some of the measuring sockets. These
measuring sockets are protected against accidental contact and are
specially labelled.
K1297-G20 Monitor User Manual
iii
Page 8

General Safety Summary
Use Proper AC Adapter. Use only the AC adapter specified for this product.
Do Not Operate Without Covers. Do not operate this product with covers or
panels removed.
Do Not Look into the End of a Fibreglass Cable. Never look into the end of a
fibreglass cable or a single fibre which could be connected to a laser
source. Laser radiation can damage your eyes because it is invisible and
your pupils do not contract instinctively as with normal bright light. If you
think your eyes have been exposed to laser radiation, you should have your
eyes checked immediately by an eye doctor. The optical output’s radiation
power in our system corresponds to the laser class 1 in accordance with
EN60825–1, IEC 825-1, and U.S. CDRH regulations.
Use Proper Fuse. Use only the fuse type and rating specified for this
product.
Avoid Exposed Circuitry. Do not touch exposed connections and components
when power is present.
Do Not Operate With Suspected Failures. If you suspect there is damage to this
product, have it inspected by qualified service personnel.
Do Not Operate in Wet/Damp Conditions.
Do Not Operate in an Explosive Atmosphere.
Keep Product Surfaces Clean and Dry.
Provide Proper Ventilation.
Refer to the manual’s installation instructions for
details on installing the product so it has proper ventilation.
Certifications and Compliances
Consult the product specifications in the Appendix C for certifications and
compliances.
iv
K1297-G20 Monitor User Manual
Page 9
General Safety Summary
Safety Terms and Symbols
Terms in this Manual. These terms may appear in this manual:
WARNING. Warning statements identify conditions or practices that could
result in injury or loss of life.
CAUTION. Caution statements identify conditions or practices that could
result in damage to this product or other property.
K1297-G20 Monitor User Manual
v
Page 10
General Safety Summary
Terms on the Product. These terms may appear on the product:
DANGER indicates an injury hazard immediately accessible as you read
the marking.
WARNING indicates an injury hazard not immediately accessible as you
read the marking.
CAUTION indicates a hazard to property including the product.
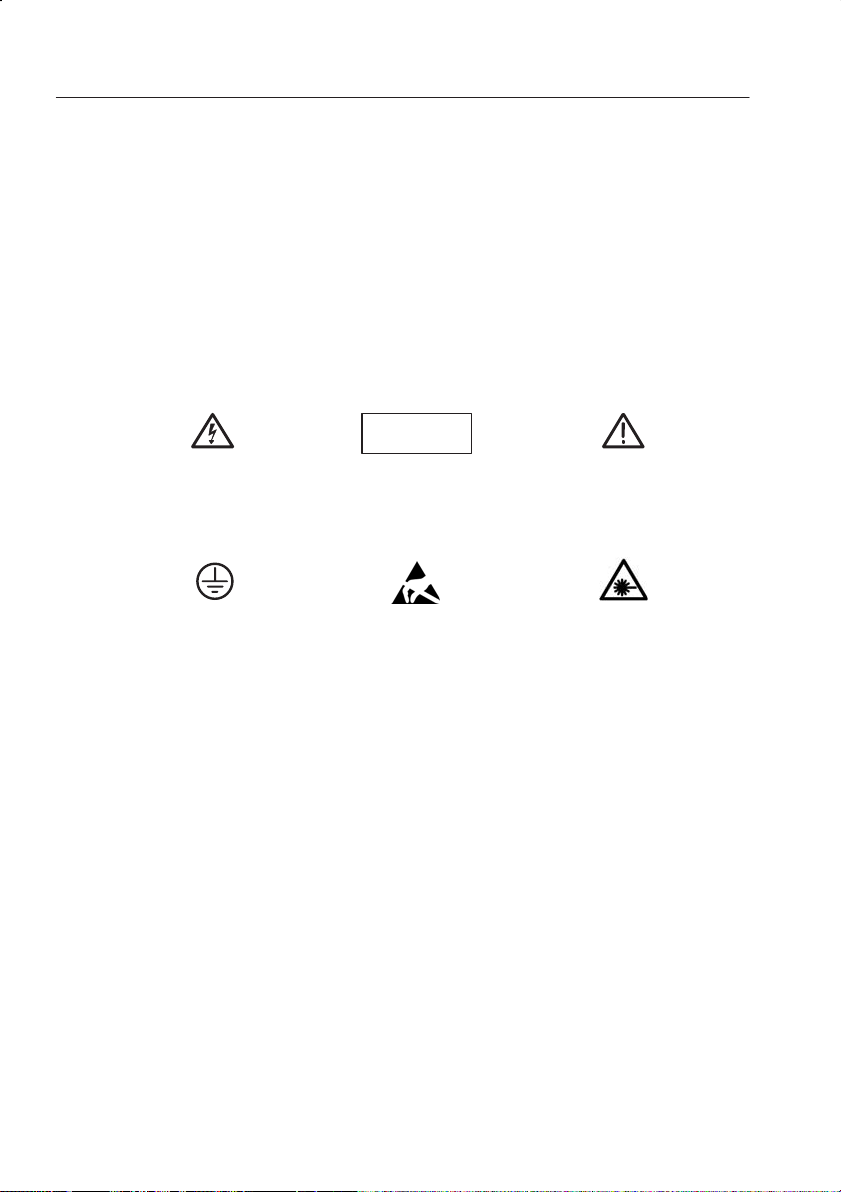
Symbols on the Product. These symbols may appear on the product:
Laser Klasse 1
WARNING
High Voltage
Protective Ground
(Earth) Terminal
WARNING
Laser Radiation
Laser Class 1
Observe precautions for handling
electrostatic discharge sensitive
devices
CAUTION
Refer to Manual
WARNING
End of a Fibre-
class Cable
vi
K1297-G20 Monitor User Manual
Page 11

Service Safety Summary
Only qualified service personnel should perform service procedures. Read
this Service Safety Summary and the General Safety Summary before
performing any service procedures.
Do Not Service Alone. Do not perform internal service or adjustments of this
product unless another person capable of rendering first aid and resuscitation is present.
Disconnect Power. To avoid electric shock, switch off the instrument power,
then disconnect the power cord from the mains power.
Use Care When Servicing With Power On. Dangerous voltages or currents may
exist in this product. Disconnect power, remove battery (if applicable), and
disconnect test leads before removing protective panels, soldering, or
replacing components.
K1297-G20 Monitor User Manual
vii
Page 12

Service Safety Summary
viii
K1297-G20 Monitor User Manual
Page 13

Preface
The Protocol Tester K1297 and K1297 Compact analyzes wide area
communication networks with SS#7 (CCS#7), ISDN D channel, V5.x,
GSM 900, DCS 1800, PCS 1900, CDMA, NMT 900, GPRS and internet
protocols.
You can simultaneously monitor up to 16 PCM interfaces and 32 signalling
links using this Protocol Tester. It can automatically capture the signalling
channels and the framing when monitoring PCM routes. E1/DS1, ISDN
BAI S0, and U
currently available.
Using the approximately 150 implemented WAN communication protocols
– including a number of national and manufacturer-specific variants – you
can decode and analyze almost all signalling data online as well as offline.
The required protocols can be combined according to your needs using the
graphical protocol stack editor. You can trigger and filter the data stream in
order to keep data simple for analysis. A series of measuring applications
is available for analyses.
The Protocol Tester is designed with the following in mind:
H Modular form. The modular design using the VME bus enables
, as well as V./X. and Ethernet interface boards are
2B1Q
optimum adaption to different tasks. The modular concept of the
Protocol Tester with four slots for the interface modules makes it
extendable for almost any future applications.
H Easy to operate. The Windows XP provides a familiar and easy-to-op-
erate interface.
H Easy to transport. The Protocol Tester is light weight and compact so
it’s easy to transport. A transport case is available to protect the
instrument.
K1297-G20 Monitor User Manual
1
Page 14

Preface
K1297 and K1297 Compact.
The Protocol Tester is available in two variants: The K1297 Compact is a
fairly small, portable device. The K1297 is a slightly bigger benchtop
device.
If both variants do not differ from each other the term Protocol Tester is
used throughout this manual. Differences between K1297 Protocol Tester
(device type 7KK1200-B) and K1297 Compact Protocol Tester (device type
7KK1200-P) are marked specially.
K1297-G20 Monitor software, applications and Online Help are similar in
both variants. Differntiation is not necessary.
2
K1297-G20 Monitor User Manual
Page 15

Preface
Fields of Application
The K1297 / K1297 Compact has been designed for various purposes:
H to detect interferences in individual network segments
H to support the integration of different network elements
H to develop integration tests and to test new software versions
The Protocol Tester is a passive monitoring device which will not interfere
with the network.
Due to the auto restart mechanism, error-free, long-term measurements
are possible after a power outage.
K1297-G20 Monitor User Manual
3
Page 16

Preface
Prerequisites
You should have the following qualifications to work with the Protocol
Tester:
H Knowledge of PC and Windows-XPe
H Experience with communications test applications
H Familiarity with the safety requirements for electrical equipment for
measurement, control and laboratory use
4
K1297-G20 Monitor User Manual
Page 17

Assistance
To help you use the Protocol Tester, the following documentation is
provided:
H The User Manual assists you when starting the Protocol Tester. The
H The online help system is the detailed reference documentation. To
H The Protocol Assistant is the detailed protocol reference documenta-
NOTE. The scope of the provided documentation does not necessarily
mirror your order but might go beyond to give you a overview of what is
available.
Preface
User Manual is also available as a PDF online manual.
open the Help window with the context-sensitive descriptions, press
<F1> from within an application window.
tion. To open it, press <F2> from within the monitor main window. The
Protocol Assistant reflects the tester’s software implementation of
protocols.
H The release notes are delivered separately and contain the latest
information on the current software version (readme.txt).
H Windows XP online help: To open the Windows XP online help, click
in the taskbar on Start: Help abd Support.
NOTE. The Windows XP installation is an OEM version. Therefore the
Microsoft Support cannot be used. The Protocol Tester is supported by
Tektronix only.
K1297-G20 Monitor User Manual
5
Page 18

Preface
About the User Manual
The User Manual gives you an overview on how to work with the Protocol
Tester:
H The most important part of the introductory chapter is the safety
instructions.
H Getting Started tells you how to make the device ready for start-up, for
example how to set up the device and how to establish the measuring
connection, how to exchange modules, how to configure and start
applications.
H Examples describes some applications step by step. If you follow these
steps, you will quickly reach the desired measuring result.
H In the appendices you will find an explanation of the interfaces and
boards, a keyboard description and the technical data.
The following text styles and markings have specific meaning in this
manual:
Text style Description
Courier The Courier font indicates menus and menu functions as
well as commands, parameters and examples.
<Key>
6
Keys or key sequences are in angle brackets.
K1297-G20 Monitor User Manual
Page 19

Preface
Training Information
Contact your local sales office or our service support staff for information
on training for the communications test technology with the K1297 /
K1297 Compact.
Third-Party Products
To offer you complete solutions, it is sometimes necessary to buy products
- such as modems and remote operation software - from third-party
suppliers, and sell them together with our products.
So, if our products are used in a standard configuration that has not been
tested by Tektronix, we kindly ask you for your understanding should we
need to refer you to the supplier for support.
K1297-G20 Monitor User Manual
7
Page 20

Preface
Contacting Tektronix
Address Tektronix Berlin GmbH & Co. KG
Web site www.tektronix.com
Wernerwerkdamm 5
13629 Berlin
GERMANY
Technical
support
For hotline service support, call:
+4930-386-22200
(8:00 a.m. – 00:30 p.m. GMT + 01:00 and
1:30 p.m. – 6:00 p.m. GMT + 01:00)
or
1-800-833-9200 (This phone number is toll free in North
America. After office hours, please leave a voice mail
message. Outside North America, contact a Tektronix
sales office or distributor; see the Tektronix web site for a
list of offices.)
Or fax:
+4930-386-22546
Or contact us by e-mail:
mpt.hotline@tek.com
8
K1297-G20 Monitor User Manual
Page 21

Getting Started
This chapter tells you how to prepare the Protocol Tester for start-up, this
means how to set up the device, how to exchange the measuring modules,
how to connect the data line, and how to switch on the device.
Information on switching off the device and how to prepare the Protocol
Tester for transport is included at the end of this chapter.
NOTE. The device has been delivered according to your requirements.
Please examine the merchandise for visible transport damage and for
completeness using the pick slip.
K1297-G20 Monitor User Manual
9
Page 22

Getting Started
Device Description
Each K1297 and K1297 Compact Protocol Tester consists of a basic
device and the individual measuring modules (interface boards) which are
for fitting the basic device according to your individual application
purposes.
The basic device is equipped with a powerful PC board, a hard disk of 2
GB and VME bus.
H With K1297 seven slots are available for the measuring modules.
H With K1297 Compact four slots are available for the measuring
modules.
Each basic device also features a TFT display (XGA), two PC card slots
(type II; also called PCMCIA cards), a 3.5’’ floppy disk drive and a
removable keyboard with integrated trackball.
External PE GND. On the right side of the device, next to power cord
connector, power switch, and fuses you will find an external PE GND
screw. You can use this screw terminal to connect a separate protective
earth to the K1297.
To do so, use at least an AWG18 cable. Connect the protective earth cable
between the screw head and flat washer of the PE GND. Make also a good
connection at the point where you connect the other end of the cable.
10
NOTE. The K1297 is intended to be electrically grounded. The delivered
power cord is equipped with a three-wire grounding plug that has a third
grounding pin. Connect this plug to a grounded AC socket.
If you are not sure that your AC socket has a protective ground, you can
connect a protective earth separately to the K1297 at the rear PE GND
screw terminal.
K1297-G20 Monitor User Manual
Page 23
Getting Started
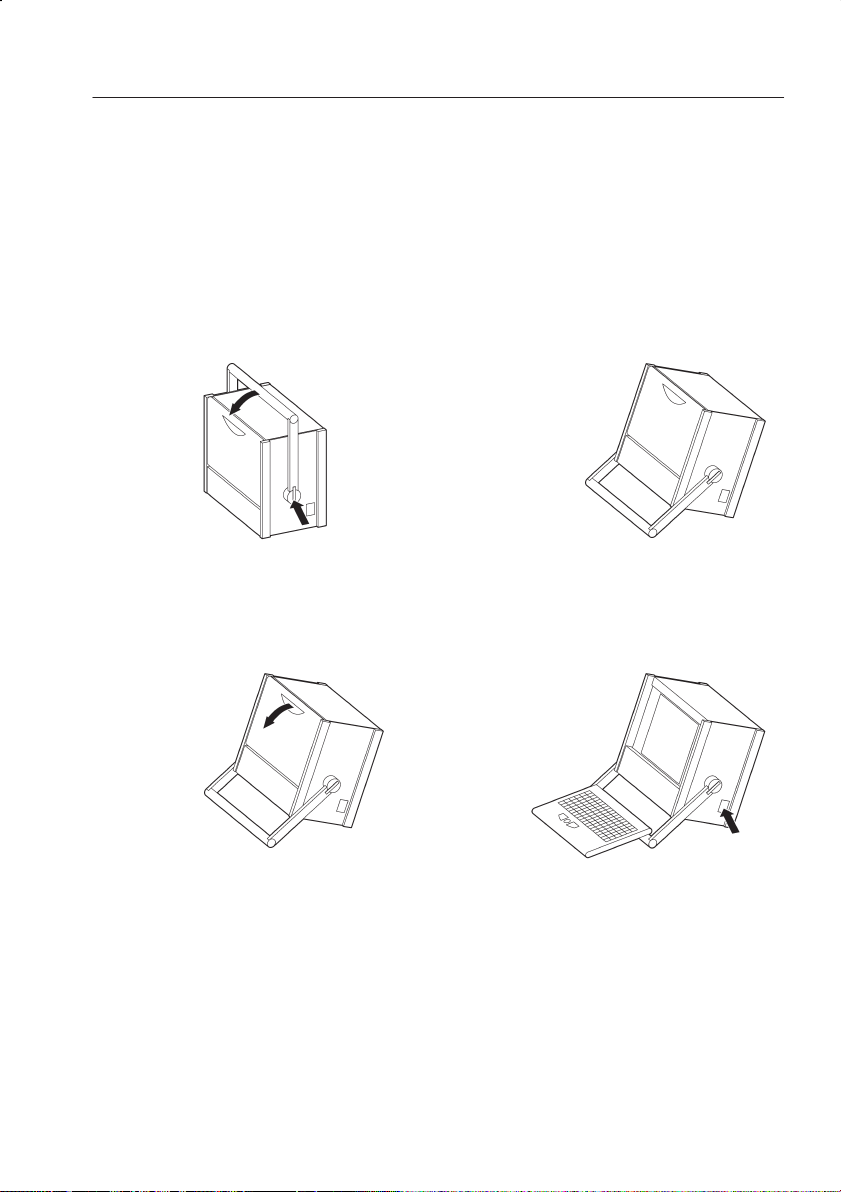
K1297: Setting-up the Device
Proceed as follows when setting up the device:
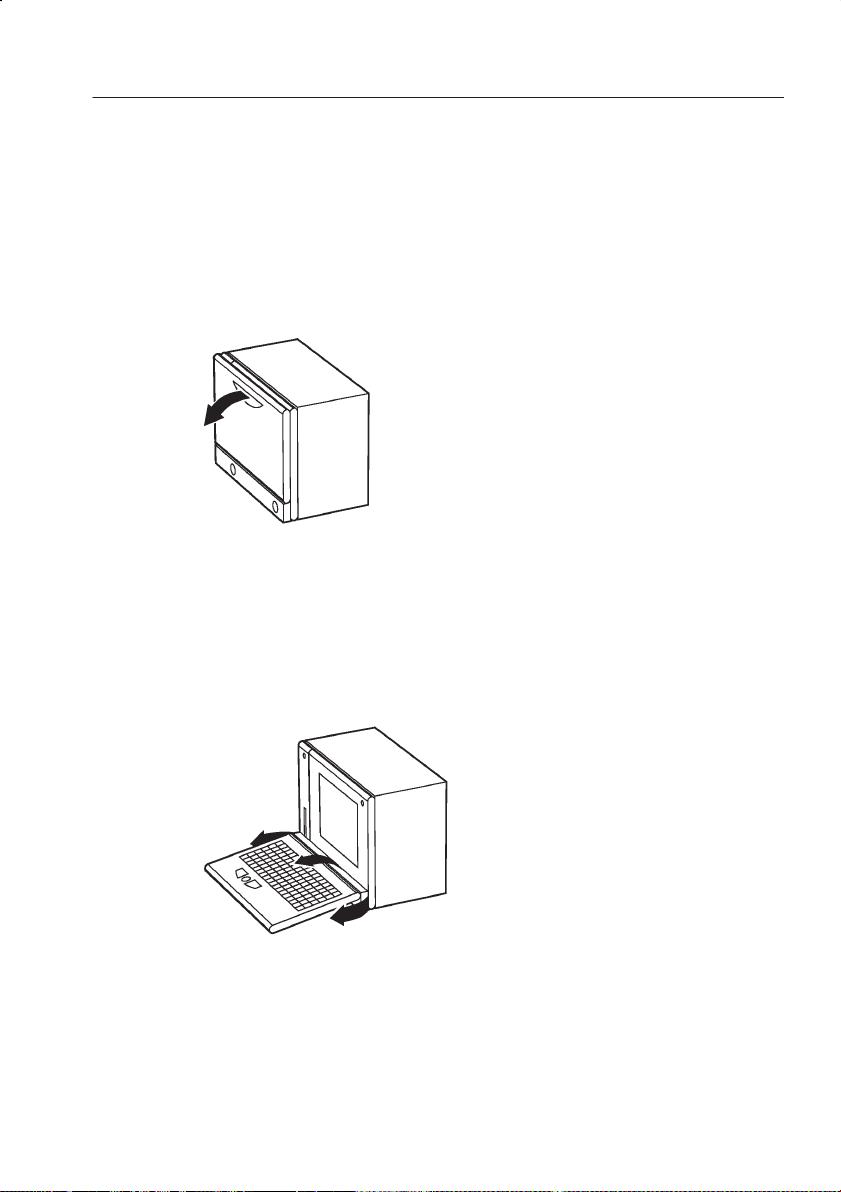
1. Pull the dark-gray release handle above the logo forward and fold the
keyboard down.
2. Remove the gray cable box from the monitor frame by pulling it away
from the device until you hear a loud click: Place both hands at the
sides of the cable box and pull the cable box away from the monitor
frame. Or place one hand between cable box and monitor frame and
press the cable box away from the monitor frame.
K1297-G20 Monitor User Manual
11
Page 24
Getting Started
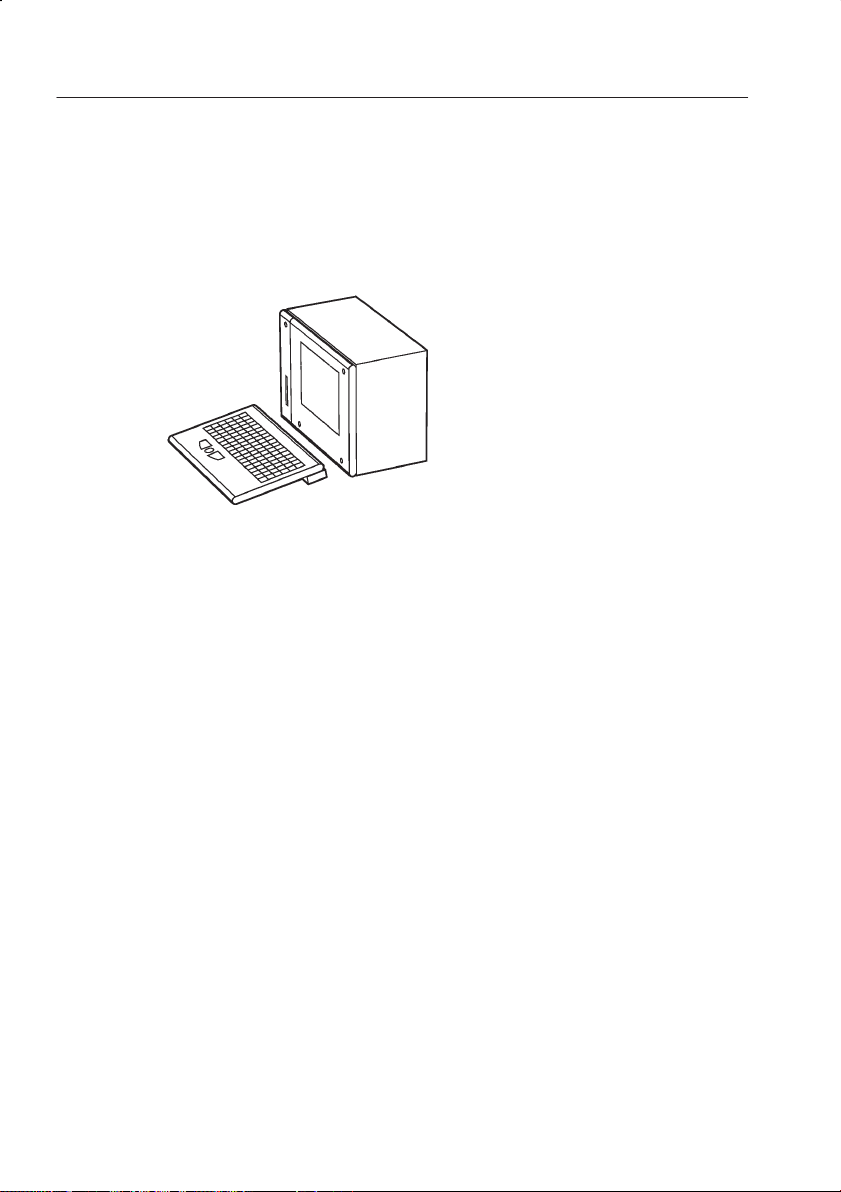
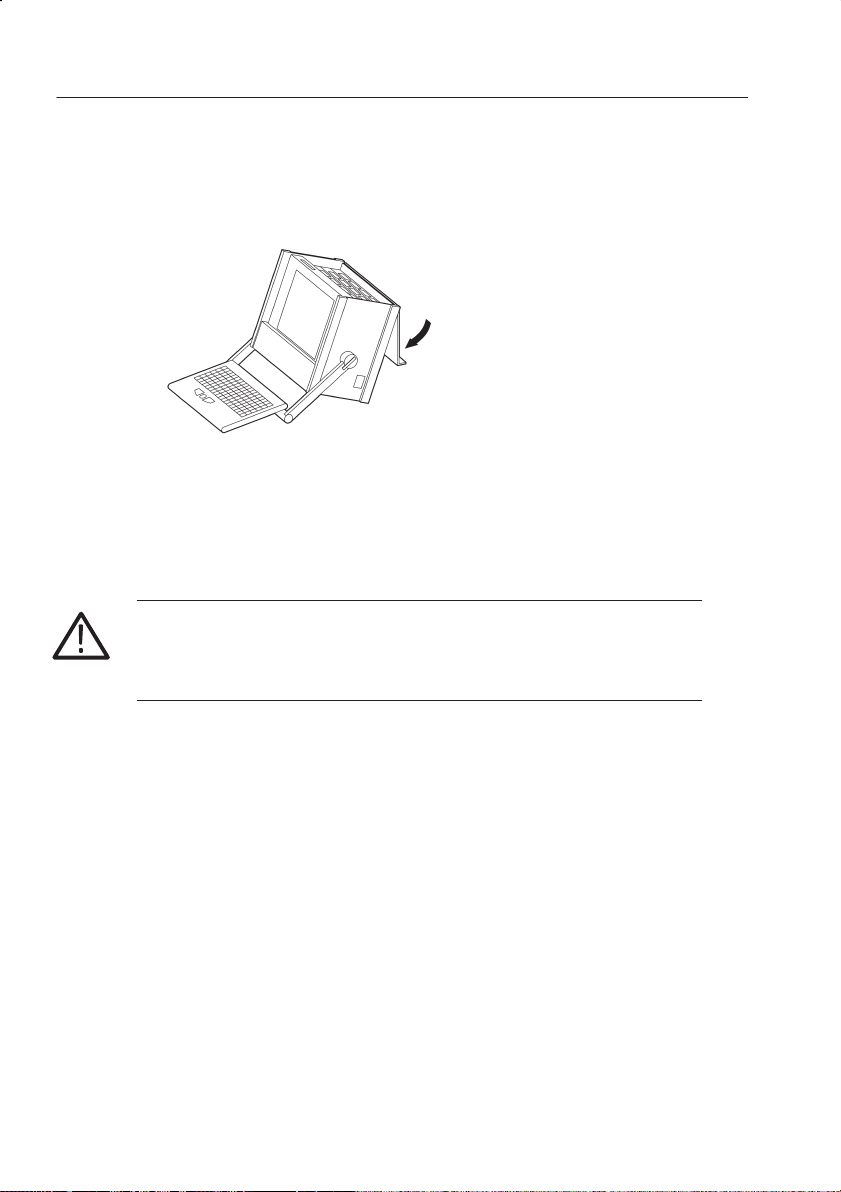
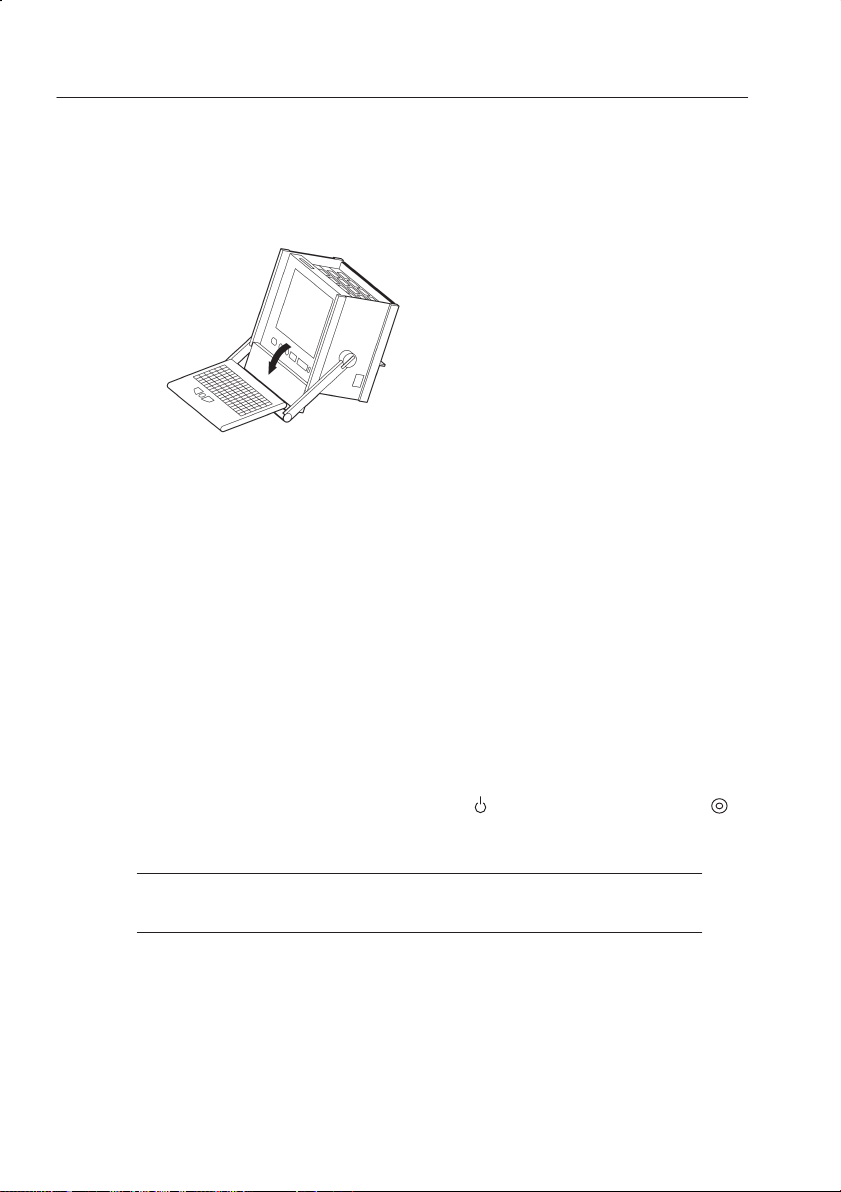
3. Take the cable out of the cable box and fold the cable box underneath
4. Pull on the lower monitor frame to position the monitor in a working
the keyboard. The keyboard is now positioned in a working angle in
front of you.
angle. The mains cable must be supplied to the non-heating appliance
socket on the rear of the K1297. The mains plug must be plugged into
a socket with protective ground.
12
Changing the Fuses for K1297. Spare fuses can you find in the delivered
accessories box. If the fuses need to be changed, proceed as follows:
1. Switch off the device.
2. Disconnect the power cord.
3. The black fuse tray is placed on the right hand side of the mains
switch, on the rear of the device.
Use an appropriate tool, such as a flat screw-driver, insert it into the
slot above the on/off switch. Open the tray, pull the red strip and
exchange the broken fuse.
Make sure to always use two fuses of the proper fuse type and rating.
4. Close the fuse tray.
K1297-G20 Monitor User Manual
Page 25
Getting Started
K1297 Compact: Setting-up the Device
Proceed as follows when setting up the device:
1. Press in both of the lateral handle hinges (handle variant: push up
hinges), fold down the handle and set the device in the desired
position.
2. Pull the dark grey handle above the logo and lift the keyboard from the
device.
The handle can now be used as keyboard rest.
The mains connector and the ON/OFF switch are both located on the right
side of the device. The fuses are located underneath the switch cover.
K1297-G20 Monitor User Manual
13
Page 26
Getting Started
3. Fold the device cover (top) towards the rear until it locks at the back.
The PC board is located in slot 1. The floppy disk drive and two PC card
slots are also located underneath the device cover on the left side. You can
connect modem or ISDN PC cards for remote control of the Protocol
Tester or portable data carriers to the PC card slots.
CAUTION. To avoid equipment damage, do not insert foreign objects into
the disk drive or the PC card slots.
14
Insert the 3.5’’ diskettes into the floppy drive with the label field forward.
K1297-G20 Monitor User Manual
Page 27

Getting Started
The following interfaces are located on the cover of the PC module in
slot 1:
H Socket for external PS/2 keyboard (KBD)
H Serial interface (COM1)
H Parallel interface (LPT1)
H 10Base-2 and 10Base-T sockets for LAN connection
H Socket for external monitor (VGA)
For further information on the individual interfaces, please refer to
Appendix A: Interfaces.
To reset the Protocol Tester in an emergency, use a pointed tool and insert
it into the RESET switch located on the cover of the PC module. There is
also an LED indicating the operating state of the hard disk (HD).
Slots 2 to 5 are available for the measuring modules. For further
information on the individual measuring boards, please refer to
Appendix A: Interfaces.
NOTE. You will find information on pin assignment of the individual
sockets also in Appendix A.
K1297-G20 Monitor User Manual
15
Page 28
Getting Started
4. Push the front cover upwards and fold the cover towards you.
The following interfaces are located behind the front cover and beneath
the display:
H Keyboard connection (KEYBOARD): If the keyboard interface on the
H Connections for alarm triggering and for a programmable relay. The
PC module’s cover (KBD) is used with an external keyboard, the
KEYBOARD connector must not be plugged in.
synchronizing sockets can be used for data or timestamp synchronization of several K1297s (option).
16
H Serial interface (COM2)
H SCSI connection (SCSI I/O BUS), for example for an external
CD-ROM or CD-RW drive
Furthermore, the LEDs for power supply (top) and hard disk access
are located beneath the display.
NOTE. You will find information on pin assignment of the individual
sockets also in Appendix A.
K1297-G20 Monitor User Manual
Page 29

Getting Started
Changing the Fuses for K1297 Compact. Spare fuses can you find in the
delivered accessories box. If the fuses need to be changed, proceed as
follows:
1. Switch off the device.
2. Disconnect the power cord.
3. The black fuse tray is placed on the right hand side of the mains switch
on the right sight of the device.
Use an appropriate tool, such as a flat screw-driver, insert it into the
slot above the on/off switch. Open the tray, pull the red strip and
exchange the broken fuse.
Make sure to always use two fuses of the proper fuse type and rating.
4. Close the fuse tray.
K1297-G20 Monitor User Manual
17
Page 30

Getting Started
Connecting an External Monitor
The PC card of the K1297 provides a Video Graphics Array (VGA) port
for connecting an external monitor. Using a PC-4 or PC-5 board, you can
operate an external monitor in the following use cases:
H Displaying the same information on both monitors
H Expanding the display across both monitors
H Operating only the external monitor
Displaying the Same Information on Both Monitors. To display the same
information on both monitors, proceed as follows:
1. Connect the external monitor to the VGA port of the PC card.
2. Switch on both devices: the K1297 and the external monitor.
3. On the K1297 Desktop, open the context menu by clicking the right
4. Open the CHIPS tab in the Display Properties dialog box.
5. Select Single Display Mode from the list in the upper part of this dialog
mouse button and click Properties. The Display Properties dialog box
opens.
box and BOTH in the Display Device check box.
18
6. Confirm your settings with OK.
7. To exit this operating mode, open the Display Properties dialog box /
CHIPS tab as described in step 3 and 4.
Select Single Display Mode from the list in the upper part of this dialog
box and LCD in Display Device check box.
Confirm your selection by OK.
K1297-G20 Monitor User Manual
Page 31

Getting Started
Expanding the Display Across Both Monitors – Dual Display Mode. In this mode,
the display is divided horizontally or vertically into two parts. One part is
displayed on the build-in display, the other one on the external monitor. To
set up your computer for dual–display mode, perform the following steps:
1. Connect the external monitor to the VGA port of the PC card.
2. Switch on both devices: the K1297 and the external monitor.
3. On the K1297 Desktop, open the context menu by clicking the right
mouse button and click Properties. The Display Properties dialog box
opens.
4. Open the CHIPS tab in the Display Properties dialog box.
5. Select Dual Display Mode from the list in the upper part of this dialog
box.
6. In the lower part of the dialog box you can now configure further
settings such as vertical or horizontal monitor position.
Here, you can also select whether the external monitor (CRT) or the
K1297 (LCD) should be in left / top or right / bottom position.
7. Start the dual display mode by pressing the Apply button.
Both monitors show full-sized images only when the display resolution
is set correctly.
8. To set the display resolution, open the Display Properties dialog once
again (see step 3) and open the Settings tab.
9. Change the resolution according to the monitor position: set the
Desktop area to 1024x1536 pixels for vertical aligned monitors and
2048x768 pixels for horizontal aligned monitors.
10. To exit the dual display mode, open the Display Properties dialog box
as described in step 3, open the CHIPS tab, and select Single Display
Mode from the list in the upper part of this dialog box. Confirm your
selection by OK.
K1297-G20 Monitor User Manual
19
Page 32

Getting Started
Operating only the External Monitor. Use this mode, if you want to work with
more screen area. Connect a larger monitor and increase the display
resolution. To operate only the external monitor, proceed as follows:
1. Connect the external monitor to the VGA port of the PC card.
2. Switch on both devices: the K1297 and the external monitor.
3. On the K1297 Desktop, open the context menu by clicking the right
4. Open the CHIPS tab in the Display Properties dialog box.
5. Select Single Display Mode from the list in the upper part of this dialog
6. Confirm your settings with OK.
7. To enlarge the screen area, increase the display resolution. Therefore,
mouse button and click Properties. The Display Properties dialog box
opens.
box and CRT in the Display Device check box.
The external monitor operates and the built-in LCD display turns gray.
open the Display Properties dialog once again (see step 3) and open the
Settings tab. Change the Desktop Area to 1600x1200 maximum.
20
8. To exit this operating mode, open the Display Properties dialog box /
CHIPS tab as described in step 3 and 4.
Select Single Display Mode from the list in the upper part of this dialog
box and LCD in Display Device check box.
Confirm your selection by OK.
NOTE. Before disconnecting the external monitor, always remember to
switch back to the LCD mode. Otherwise the K1297 display remains gray.
K1297-G20 Monitor User Manual
Page 33

Getting Started
CD-RW Drive (Option)
The external CD-RW drive (Plexwriter) from Plextor can be used to write
CDs and as a CD-ROM drive. The CD-RW drive is delivered with the
original Plextor manual. Read this manual carefully. Pay particular
attention to the safety instructions.
For using the CD-RW drive with K1297 Protocol Testers, you should
adhere to the following instructions as well:
H The SCSI-Bus-ID of the CD-RW drive should be set to a value
between 2 and 6. We recommend to set the SCSI-Bus-ID to 3 before
connecting the device. Then, connect one of the two SCSI interfaces of
the CD-RW drive to the SCSI interface of your Protocol Tester using
the supplied cable.
H Do not install the software of the Plextor Software Utilities (Plex
Tools) CD on your Protocol Tester.
H If you like to write CDs with the CD-RW drive you need to install the
delivered Nero burning software. To install this software insert the
NERO Burning ROM (Plextor Version) from AHEAD. The CD starts
automatically and opens the Ahead Installer dialog box. Start the
installation process by clicking the Nero button. We recommend not to
install the following Nero components:
– NeroMediaPlayer
– InCD Packet-Writing
– UDF reader
NOTE. The delivered Nero software is not usable for Windows 3.11
operating systems. Users of Protocol Testers with Windows 3.11 who like
to write CDs are asked to upgrade their devices. Please contact the
Tektronix hotline.
K1297-G20 Monitor User Manual
21
Page 34

Getting Started
H Before writing a CD, carefully study the Nero online manual. We
H Do not insert CDs with Autostart mechanism into the CD-RW drive
recommend to close all K1297-G20 Monitor applications before
writing. The running applications or the writing process might be
disturbed or interrupted when running simultaneously. Use only
high-quality CDs.
during the operation of K1297-G20 Monitor applications. Automatically started software may disturb or interrupt your running applications.
22
K1297-G20 Monitor User Manual
Page 35

Getting Started
Switching Off and Transporting the Device
Before you switch off the Protocol Tester, shut down the operating system,
and then switch off the Protocol Tester using the I/O switch.
K1297. When folding the keyboard up, keyboard and cable box must be
connected and the cable must be completely inside the cable box.
1. First put the keyboard into the holding pins which are located at the top
of the monitor frame (a); then press the two locking buttons on the
cable box until you hear them click (b).
a. b.
Use the optional transport case to transport the device over longer
distances.
K1297-G20 Monitor User Manual
23
Page 36

Getting Started
K1297 Compact. For transport purposes fold the cover over the slots.
1. The cover beneath the display is folded upwards and the keyboard is
2. Press the lateral handle hinges (variant handle: push up hinges) and put
folded back in front of the display to protect it against damage.
the handle into a vertical position.
24
K1297-G20 Monitor User Manual
Page 37

Getting Started
3. Use the transport case in which the device has been delivered to
transport the Protocol Tester over longer distances. Put the device into
the transport case as shown below:
Before closing the transport case make sure that the handle is pointed
toward the rear edge of the device.
K1297-G20 Monitor User Manual
25
Page 38

Getting Started
Exchanging Measuring Modules
E1/DS1, ISDN BAI S0, and U
boards are available as measuring modules. ATM modules will be
available in the future.
You can easily install and remove the measuring modules from slots 2 to 5
(behind the PC board). You can control the individual measuring modules
and the interface sockets via applications.
CAUTION. The device must be switched off completely. All modules contain
electrostatically sensitive components. Observe the necessary precautions
and ESD safety instructions.
Make sure the VME bus address on the new module is set correctly (see
page 30).
, as well as V./X. and Ethernet interface
2B1Q
26
K1297-G20 Monitor User Manual
Page 39

Getting Started
Which Board into which Slot?
The measuring boards and the slots are marked with different colors. So
exchanging the measuring modules is made easy for you. The colors of the
boards have the following meaning:
H GREEN stands for all measuring boards for WAN interfaces such as
E1/DS1, S0, U
, V.X, Ethernet. Put green boards into green slots.
2B1Q
H YELLOW stands for the AP-4 Board. You can put yellow boards in
either green or transparent slots.
H TRANSPARENT stands for the PC board. Put transparent boards into
transparent slots.
CAUTION. If you put a “wrong” board into a slot, you could damage the
board and the instrument.
Slot 0 and 1 are reserved for the PC boards only. Do not put the PC board
into other slots and do not put other boards into slots 0 and 1.
K1297-G20 Monitor User Manual
27
Page 40

Getting Started
The following color assignment matrix gives you an overview of which
measuring board you can put into which slot:
Table 1: Which board into which slot?
Board
GREEN yes no*
YELLOW yes yes
TRANSPARENT no** yes
* Restrictions could occur with some applications due to the P2 backplane
adapter.
** The “transparent” Ethernet board can be installed in a “green” slot.
Slot
GREEN TRANSPARENT
28
K1297-G20 Monitor User Manual
Page 41

Getting Started
The following figures give you an example which measuring board you
can put into which slot:
K1297. Possible Board Combination
876543210
Board
0
Board (Power Feeding)
0
PC Board
PC Board
E1/DS1 Board
E1/DS1 Board
E1/DS1 Board
BAI S
AP-4 Board
E1/DS1 Board
BAI S
K1297 Compact. Possible Board Combination
543210
Ethernet Board
E1/DS1 Board
PC Board
BAI Board
AP-4 Board
PC Board
NOTE. K1297 and K1297 Compact. For each interface board a cable is
delivered free of charge. Thus you are able to work right away with your
Protocol Tester. Furthermore, we offer a wide range of cables and
adapters, which you can order. For further information please take a look
at our data sheet or contact your local sales partner.
K1297-G20 Monitor User Manual
29
Page 42

Getting Started
Setting the VME Bus Address
You must adhere to the correct setting of the VME bus address using the
hex switch when installing measuring modules. To avoid conflicts during
initialization, the addresses must be clear. The same hex switch scale
number must not appear more than once.
30
The hex switch is yellow with the scale from 0 to F around it and it is
located in the center of the upper third of the modules. The display can be
set to the desired value using an appropriate tool.
K1297-G20 Monitor User Manual
Page 43

Getting Started
Before setting the hex switch, check which settings are already used for
other boards. Therefore, open the K1297-G20 Monitor Status Window via
the appropriate button in the tool bar.
The hex switch of one board must be set on value 1. The values 0 and F
are reserved for the AP-4 board. Do not use the values 0 and F for other
boards and do not change the AP-4 settings.
K1297-G20 Monitor User Manual
31
Page 44

Getting Started
K1297. Make sure that the hex switches are set as follows:
Table 2: Setting the VME bus address
Board Slot Hex switch number
PC board 1 9
AP-4 board 2 0
Interface board 1 8 1
Interface board 2 7 2
Interface board 3 6 3
Interface board 4 5 4
Interface board 5 4 5
Interface board 6 3 6
K1297 Compact. Make sure that the hex switches are set as follows:
32
Table 3: Setting the VME bus address
Board Slot Hex switch number
PC board 1 9
AP-4 board 2 –
Interface board 1 5 1
Interface board 2 4 2
Interface board 3 3 3
K1297-G20 Monitor User Manual
Page 45

Getting Started
Installing Modules
CAUTION. Make sure the VME bus address on the new module is set
correctly (see page 30).
If you install modules, proceed as follows:
1. Switch the device off and unplug the mains plug.
2. Remove the cover if necessary and put the module on the guide rails of
the relevant slot.
3. Push the module completely into the slot.
4. Tighten the module with the two cross-head screws.
NOTE. If you have to install a new E1/DS1 board and/or an AP-4 board,
the Protocol Tester reprograms the boot Flash-PROM of this new board.
Reprogramming is done automatically during the start-up sequence of the
application and takes much more time than the normal start-up sequence.
Therefore just be patient. You must not switch off or shut down the
Protocol Tester during this time.
The reprogramming is finished as soon as the LEDs of the new boards are
off and the Protocol Tester shows the Data Flow Window. Although the
tester is then ready to work, you have to close all K1297-G20 Monitor
applications and start them (only the applications, not Windows XPe)
again.
K1297-G20 Monitor User Manual
33
Page 46

Getting Started
Removing Modules
If you remove modules, proceed as follows:
1. Switch the device off and unplug the mains plug.
2. Unscrew the two cross-head screws of the module’s front cover. The
3. Use your thumbs to simultaneously press outwards the levers located
4. Then pull the module carefully out of the device. Make sure that the
5. If the two springs located behind the screws on the internal side of the
screws must be completely loosened.
beneath the screws.
spring strip on the long side of the module cover is not being damaged.
module’s front cover catch when removing the module, press the
springs carefully back using an appropriate tool. Then pull the module
completely out of the device.
34
K1297-G20 Monitor User Manual
Page 47

Connecting to the Data Line
The Protocol Tester can be connected to the data line in the on or off state
using the cables available as accessories.
1. Plug the right plug on the one end of the cable into a socket of the
measuring module. In the K1297 they are located on the rear of the
device. In the K1297 Compact the sockets of the measuring modules
are located underneath the cover of the Protocol Tester.
The individual cables available as accessories are listed in the data
sheet. Or ask your local sales partner about them.
We recommend that the cable length be less than 3 m.
You can control the individual measuring modules and the interfaces
(sockets) via the K1297-G20 Monitor application.
CAUTION. Please pay attention to possible impedance differences. The
Protocol Tester is set to high impedance as default. For low input
impedance you must set the tester accordingly. This is done via the
K1297-G20 Monitor application.
Getting Started
K1297-G20 Monitor User Manual
35
Page 48

Getting Started
Switching on the Device
Make sure that the keyboard cable is connected to the keyboard interface,
the mains cable is supplied to the non-heating appliance socket and the
mains plug is plugged into a socket with protective ground.
1. Switch the device on using the ON/OFF switch (see page 13).
2. The Protocol Tester is set ready-to-run upon delivery. The device
automatically boots after switching on. The operating system is loaded
and the application is then started automatically.
If you start Windows XPe for the first time, you are automatically
logged on as administrator with the following information:
User name: Administrator-K12
Password: xinortket12k
CAUTION. Do not change the pre-configured Administrator-K12 account,
since password changes also require modifications of the automatic logon.
For those changes, precise knowledge about the concept of user accounts
and user groups in Windows XP is required. The risk of changes which the
customer undertakes is carried by the customer.
36
Reprogramming of Flash-PROMs. During the first start after installation the
Flash-PROM of your interface boards may be reprogrammed. This may
take some time. Do not switch off the Protocol Tester during the
reprogramming process.
After reprogramming is completed you may have to close and restart the
K1297-G20 Monitor application. Depending on the type and number of
interface cards this procedure might have to be repeated once for each
interface card.
K1297-G20 Monitor User Manual
Page 49

Getting Started
Updating Expired Licenses. The K1297-G20 Monitor software will not start
if a product license has expired. To help you avoid this situation, product
license information is available from the Licenses option in the Help Menu
in the Data Flow window. Product expiration warnings will also be
displayed after the system start for products that have licenses, which will
expire in 21 days or less.
If a license does expire however, you can use the normal K1297-G20
Monitor setup program to either uninstall the expired product or update the
license key file.
K1297-G20 Monitor User Manual
37
Page 50

Getting Started
K1297-G20 Monitor Application
The K1297-G20 Monitor application is started with an initial screen which
shows the version number of your application on top of the screen and
information on the load state of the software at the bottom.
Data Flow Window. If you start the autoconfiguration, the autoconfiguration
feature automatically detects the signalling channels and the framing of
the connected data lines. After the autoconfiguration has been carried out,
the active signalling channels are available and you can start the
measurement: the Data Flow Window appears.
There are two different tabs for setting parameters of interface modules,
links and measurement scenarios: Cards Overview and Measure-
ment Scenarios.
38
K1297-G20 Monitor User Manual
Page 51

Getting Started
Cards Overview. The Cards Overview tab provides an overview of the
connected interface modules. Here you can define the setup settings of
modules and ports or change existing configuration settings. These are
assigning symbolic names to the ports and defining frame types and line
codes.
The left pane, Tester Overview , displays the interface modules, ports
and the line configurations currently set. The right pane, Cards
Overview, shows the individual sockets on the cards including module
designation.
K1297-G20 Monitor User Manual
39
Page 52

Getting Started
Measurement Scenarios. In the Measurement Scenarios tab of the
Data Flow Window, configure your measurement task by defining data
sources and parameters for the measurement. The Measurement
Scenarios tab keeps you informed about the currently active parameter
settings and system status at all times.
The grey boxes in the pipelines represent measurement modules
(processing elements) with the connecting lines indicating the data flow
between the modules.
40
The left pane, List of Scenarios, displays the available measurement tasks (scenarios) as well as the measurement tasks currently
configured and the outline sources. On the right, the Measurement
Scenarios pane displays the pipelines assigned to the measurement
tasks.
K1297-G20 Monitor User Manual
Page 53

Getting Started
NOTE. As soon as you are in the K1297-G20 Monitor application, the
K1297-G20 Monitor online help is available: simply click Help in an
application window using the trackball or mouse or press <F1>.
The online help gives you context-sensitive assistance.
K1297-G20 Monitor User Manual
41
Page 54

Getting Started
Software Installation
Important Hints
The Protocol Tester is ready for use upon delivery. Windows XPe and the
K1297-G20 Monitor application have already been installed.
Base software, application programs, updates, and upgrades are supplied
on CD-ROM, with a setup program and a readme.txt file located directly
under the root directory of the CD-ROM. You should read the readme file
before installing the software.
Device-specific software keys protect the CD-ROM software against
unauthorized access. To enable the software on your Protocol Tester, you
also receive an additional Software Keyfile / License Information Disk (key
disk).
Mixing Different Software Versions. Software products from different CD
versions are NOT designed to be mixed. The Setup program has a security
mechanism that will ensure that such version mixes cannot be installed:
After having selected your software products from this CD, you will be
warned about older software products in your existing configuration that
will be removed.
42
H If you confirm with Ye s, the Setup program removes the old products
automatically and proceeds with the installation of the new products.
H If you want to keep an old product, cancel the Setup program, backup
the software as described below, and then restart the Setup program
again.
If you want to install software products from different CD versions, first
perform a complete backup of the existing software. This will ensure you
the best control about the software configuration on your system and
possible dependencies with other software packages you might have
installed.
K1297-G20 Monitor User Manual
Page 55

Getting Started
Types of Installation. You have two options to install Protocol Tester
software:
H Installation of additional software packages: Install further software
packages in addition to the already installed software version such as
protocols, emulations, application programs.
H Installation of a new software version: Install a complete new version
of the base software and additional software packages.
NOTE. The K1297 Protocol Tester has been pre-configured with Microsoft
Windows XPe and therefore provides you with all possibilities offered by
this industry standard. This enables you to choose from a variety of
available software products for the analysis and evaluation of your
measurement results. Such programs can be installed and used directly on
your Protocol Tester.
Within this context, please observe the following: The installation of
additional software reduces the disk space required for saving measurement results. During the course of a measurement, only Protocol Tester
applications should be run in order to ensure the exclusive availability of
the disposable CPU performance for the measurement task.
User Data. It is important to always save user data to an appropriate back up
system before performing any installation. Detailed instructions for the
back up are given in the appropriate section.
User data are files and directories:
H not provided by Tektronix
H stored under the installation path of the Protocol Tester
NOTE. If you modify files and directories provided by Tektronix, it is
necessary to save them under a different name. Otherwise a subsequent
installation might fail or become incomplete, or your data might be
overwritten.
K1297-G20 Monitor User Manual
43
Page 56

Getting Started
Pre-Installation Checks
1. Ensure that the system date and time have been set to the actual date
2. Ensure that your boards meet the following memory requirements:
3. Remove the content of the directory C:K1297\bin
and time. Failure to do so may result in a situation where the software
cannot be started.
H E1/DS1 Monitoring boards: 16 MB RAM minimum
H BAI boards: 8 MB RAM minimum
At least 16 MB (recommended 32 MB) of memory are required for
interface boards that are installed with VME bus address 1. (See
chapter ”Setting the VME Bus Address”).
NOTE. Cards that do not meet these requirements are NOT booted and
CANNOT be operated. A message will appear in the K1297-G20
Monitor Status Window if memory is not sufficient. If a RAM upgrade is
required, please contact your technical support representative.
44
The installation of a new K1297-G20 Monitor software over an
existing K1297-G20 Monitor software can cause problems with
non-existing licenses. To avoid this problem remove the content of the
directory C:\K1297\bin of the exiting software version before you
install the new version. This can be done with the Windows Explorer
or on the command line with
del c:\K1297\bin\*.*
K1297-G20 Monitor User Manual
Page 57

Getting Started
Pre-Installation Checks for K1297-G20 Monitor PC Software. The K1297-G20
Monitor PC Monitoring Software is supported for Windows XP Professional. It requires a dongle (aka. Aladdin Software Hardlock). For
information on obtaining and configuring this special version contact your
Tektronix representative. When using this version with the dongle please
observe the following guidelines:
H Never attempt to attach the dongle to the appropriate port (LPT1 or
USB) without first shutting the PC or Laptop down. This may damage
the dongle or the hardware to which it was attached.
H Never attempt to detach the dongle from the appropriate port (LPT1 or
USB) without first shutting the PC or Laptop down. This may damage
the dongle or the hardware to which it was attached. If the dongle is
removed while the K1297-G20 Monitor software is running, the
software will terminate.
K1297-G20 Monitor User Manual
45
Page 58

Getting Started
Installation of Additional Software Packages
If you have purchased additional software packages you need to install
them on top of your existing software installation. Therefore, do not
remove the existing software or change its installation path (by default
C:\K1297).
NOTE. There are logical dependencies between single software packages
and the base software package. Such information are provided in the order
information and will be checked during the setup process. Only matching
combinations can be installed.
Missing Destination Drives. The Setup program warns you, if products cannot
be installed on your system because of missing destination drives. The
affected products are reported in a warning dialog box; they will NOT be
listed in the ”List of Available Products” of the Setup program.
1. If such a warning appears, create the necessary destinations drive
outside of the Setup program. Refer to the Microsoft Windows Online
Help on how to do this.
46
2. Restart the Setup program. The affected products will now become
accessible in the ”List of Available Products”.
K1297-G20 Monitor User Manual
Page 59

Getting Started
To install additional software packages, proceed as follows:
1. Close all applications.
2. Connect the optional external CD drive directly to your Protocol Tester
or create an access to a network CD drive.
If you install the software from a CD network drive, do not browse the
network neighborhood to access this location. Map the share
containing the CD to an unused drive letter instead, such as ”E:”
or ”F:”
3. Insert the key disk into the floppy disk drive of the Protocol Tester.
The key disk contains a serial number, which must be the same as the
nameplate fabrication code (Ser.-No.) on the back of the device.
4. Insert the installation CD into the CD drive. The Setup Guide starts
automatically. The Setup Guide helps you to successfully install your
Protocol Tester software. Follow the Setup Guide instructions.
If the installation does not start automatically, double-click
RunIntro.bat from the CD root directory.
Follow the setup program instructions. Read the enclosed license
agreement carefully and respond to the prompts.
Specify a valid keyfile within the keyfile selection dialog box, if you
do not want to use the keyfile.txt on the key disk in the floppy
disk drive.
In the subsequent dialog boxes, click Next.
K1297-G20 Monitor User Manual
47
Page 60

Getting Started
5. In the product selection dialog box, installed software packages are
6. Press Next to test your selection against the provided keys.
indicated by their version numbers in the column State.
DO NOT deselect any installed products.
Check that all additional software packages that shall be installed are
selected. Their selection might fail if:
a. an incorrect or incomplete keyfile was selected before or
b. not all necessary software packages were purchased or installed.
In case a. choose the correct keyfile using the button that indicates the
currently used keyfile.
In case b. install all software packages that you have purchased for this
system. Therefore, you might need to access all keyfiles you have
received in all deliveries for this software version for this system. If
you cannot proceed, contact the technical support.
NOTE. The Next button may be disabled. One possible reason is that
not enough space is available on the hard disk. In that case, try to save
space until the setup program displays at least 20 % free disk space.
48
7. Press Start when the key check finished successfully.
CAUTION. Do not interrupt the installation program once you have clicked
Start. If the program is inadvertently interrupted, rename the file
C:\WINDOWS\UNINSTALL.K12XX.INI.0x with the highest number
for x to C:\WINDOWS\UNINSTALL.K12XX.INI.
Start the installation program again.
8. After the installation is complete, remove the key disk from the floppy
disk drive and reboot your Protocol Tester.
K1297-G20 Monitor User Manual
Page 61

Getting Started
Installation of a New Software Version
Software products from different product CDs are NOT designed to be
mixed. The Setup program has a security mechanism that will ensure that
such version mixes cannot be installed.
If you install a new software version on top of an existing software
version, the existing version will be automatically removed.
If you want to install software products from different CD versions in
parallel on one Protocol Tester, first perform a complete backup of the
existing software.
K1297-G20 Monitor User Manual
49
Page 62

Getting Started
Back Up the Software. If you want to back up your existing K1297-G20
Monitor installation, proceed as follows:
1. Close all applications.
2. Use the Windows Task Manager to end the process dio.exe.
3. Rename the original K1297 directory C:\K1297 (for example,
4. Rename the file C:\WINDOWS\UNINSTALL.K12xx.INI (for
CAUTION. If you do not rename this file before installing the new software,
the software will not start.
CAUTION. If you create multiple installation sets on your hard disk by such
back up operations, keys for different software versions will remain in your
keyfile C:\WINDOWS\keyfile.txt. The KeyManager program will
not be able to identify each back up. A subsequent call of this tool might
announce keys of back up installations erroneously as ”obsolete”. Do not
delete “obsolete” keys, as a restored installation will not run without its
keys. To overcome such possible problems rename the keyfile accordingly
(for example C:\WINDOWS\keyfile.txt.vxxx).
C:\K1297.vxxx), or move the directory to a different partition.
example, C:\WINDOWS\UNINSTALL.K12xx.INI.vxx) before
you install the new K1297-G20 Monitor software.
50
K1297-G20 Monitor User Manual
Page 63

Getting Started
Installing the Software. To install a new software version, proceed as
follows:
1. Close all applications.
2. Connect the optional external CD drive directly to your Protocol Tester
or create an access to a network CD drive.
If you install the software from a CD network drive, do not browse the
network neighborhood to access this location. Map the share
containing the CD to an unused drive letter instead, such as ”E:”
or ”F:”
3. Insert the key disk into the floppy disk drive of the Protocol Tester. The
key disk contains a serial number, which must be the same as the
nameplate fabrication code (Ser.-No.) on the back of the device.
4. Insert the installation CD into the CD drive. The Setup Guide starts
automatically. The Setup Guide helps you to successfully install your
Protocol Tester software. Follow the Setup Guide instructions.
If the installation does not start automatically, double-click
RunIntro.bat from the root directory of the CD.
Follow the setup program instructions. Read carefully the enclosed
license agreement and respond to the prompts.
Specify a valid keyfile within the keyfile selection dialog box, if you
do not want to use the keyfile.txt of the key disk in the floppy
disk drive.
In the subsequent dialog boxes, click Next.
NOTE. The Setup program warns you, if products cannot be installed on
your system because of missing destination drives. The affected products
(such as Conformance Tests which require a D: disk drive) are reported in
a warning dialog box; they will NOT be listed in the ”List of Available
Products” of the Setup program.
If such a warning appears, proceed as described on page 46.
K1297-G20 Monitor User Manual
51
Page 64

Getting Started
5. In the product selection dialog, check that all software packages that
6. Press Next to test your selection against the provided keys.
7. Press Start when the key check finished successfully.
shall be installed are selected. Their selection might fail if:
a. an incorrect or incomplete keyfile was selected before or
b. not all necessary software packages were purchased or installed.
In case a. choose the correct keyfile using the button that indicates the
currently used keyfile.
In case b. install all software packages that you have purchased for this
system. Therefore, you might need to access all keyfiles you have
received in all deliveries for this software version for this system. If
you cannot proceed contact the technical support.
NOTE. The Next button may be disabled. One possible reason is that
not enough space is available on the hard disk. In that case, try to save
space until the setup program displays at least 20 % free disk space).
52
CAUTION. Do not interrupt the installation program once you have
clicked Start. If the program is inadvertently interrupted, rename the
file C:\WINDOWS\UNINSTALL.K12XX.INI.0x with the highest
number for x to C:\WINDOWS\UNINSTALL.K12XX.INI.
Start the installation program again.
8. After the installation is complete, remove the key disk from the floppy
disk drive and reboot your Protocol Tester.
K1297-G20 Monitor User Manual
Page 65

Getting Started
Removing the Software
To remove K1297-G20 Monitor software, proceed as follows:
1. Close all applications.
2. Start the Tektronix K1297 remove program by selecting:
Start / Settings / Control Panel / Add or Remove
Programs: Tektronix K1297-Mon Protocol Tester
and press Add/Remove.
Remove the K1297-G20 Monitor software by selecting dedicated or all
entries in the list of installed components.
User Data will be preserved.
3. Reboot the system after removing has been completed successfully.
K1297-G20 Monitor User Manual
53
Page 66

Getting Started
Operating System
The user interface application of the K1297-G20 Monitor runs under
Microsoft Windows XPe.
CAUTION. The K1297 Protocol Tester is delivered with a specially
configured version of Windows XP Embedded (XPe).
The Windows XPe installation is supported by Tektronix only. Microsoft
Support Services do not support this installation.
The risk of changes (software developments or expansions) which the
customer undertakes is carried by the customer. Regarding this Tektronix
assumes no responsibility.
Windows XPe is delivered in the English version. It starts immediately
after you set up and switch on your K1297. Activation is not necessary.
Windows XPe is described in detail in the Windows XP online help. To
open the online help, click Start: Help and Support on the taskbar. Help
and Support is your comprehensive resource for Windows XPe information and tools.
54
K1297-G20 Monitor User Manual
Page 67

Getting Started
Preconfigured Accounts, Automatic Logon
Upon delivery, the device is configured with the following user accounts:
Table 4: Account Data
User name Password State
Administrator-K12 xinortket12k on (default)
Administrator xinortkeT21K on (built-in)
Guest (none, left blank) off
CAUTION. Do not rename the accounts and do not change the Group
Memberships of the accounts, because this might make the device
unusable.
K1297-G20 Monitor User Manual
55
Page 68

Getting Started
Autologon Account. Administrator-K1297 is pre-configured as autologon
account. Use always this account when:
H Operating the K1297
H Operating the Remote Desktop Client
CAUTION. Do not change the pre-configured Administrator-K12 account,
since password changes also require modifications of the automatic logon.
For those changes, precise knowledge about the concept of user accounts
and user groups in Windows XPe is required. The risk of changes which
the customer undertakes is carried by the customer.
The password for the autologon account is visible in the registry for
everyone who has physical access to the device.
CAUTION. For safety reasons, do not use the password of the autologon
account for other accounts and on other system units (PCs, Unix networks,
etc.)
56
If you change the autologon account you must adapt the automatic logon
as well. To change the automatic logon, proceed as follows:
1. Select Start / All Programs / Powertoys for Windows XP / TweakUI for
Windows XP. The Tweak UI dialog box opens.
2. Select Logon / Autologon from the tree view and change the automatic
logon.
Do not forget the changed passwords, as you might be locked out from
using the device. For further hints on how to select good passwords, see
for example
http://archive.ncsa.uiuc.edu/SCD/Consulting/Security/passwords.html
K1297-G20 Monitor User Manual
Page 69

Security Requirements
Security Requirements for Stand Alone Systems. The pre-configuration of the
device has been chosen for a stand-alone system without enhanced security
requirements for ease of operation. Particular security measures are not
necessary.
Security Requirements for Network Operation. If you apply the Protocol Tester
within a network or by way of a modem, then implement further and
enhanced security measures.
We strongly recommend to observe for instance the following general
statements:
H Access via an individual LAN
If you operate your Protocol Testers within an individual LAN
network, then protect this network against access from other PCs.
H Access via a company-wide Intranet
If you operate your Protocol Testers within an Intranet, then implement
an extended user administration and employ up-to-date virus scanners
and firewalls.
Getting Started
H Access via Internet or modem
If you want to access your Protocol Tester via the Internet, implement
the same security measures as in Intranets (see above). You can also
implement additional security measures with the help of virtual private
networks (VPNs).
To implement additional security measures, contact your local system
administrator or the Tektronix service center.
CAUTION. The implementation of extended security measures is your sole
responsibility. It is realized at customer’s own risk and without liability to
Tektronix.
You should implement these measures especially while applying the
Remote Desktop software or when transferring files via a network.
K1297-G20 Monitor User Manual
57
Page 70

Getting Started
Ethernet Connection
If you want to operate the protocol tester in a local Ethernet network, you
can use the built-in network adapter of the protocol tester. To establish an
Ethernet connection, connect your Ethernet cable to the 10BaseT /
100BaseTX connector of the K1297 PC board.
The properties for the default connection can you see in the Local Area
Connection Properties dialog box. To open this dialog box, proceed as follows:
1. Select Start / Control Panel / Network Connections. The Network
Connections dialog box opens.
2. Double-click an active Local Area Connection. A Status dialog box for
this connection opens. By pressing the Properties button you open the
Local Area Connection Properties dialog box.
58
Figure 1: Local Area Connection Properties, Generals tab
K1297-G20 Monitor User Manual
Page 71

Getting Started
TCP/IP Protocol. The TCP/IP protocol is configured by default upon
delivery. The IP address is automatically assigned to the network card by a
DHCP server.
If your network does not have a DHCP server, ask your network
administrator for the necessary parameters, such as IP address and subnet
mask. Type in the parameters as follows:
1. Open the General tab of the Local Area Connection Properties dialog
box (see figure 1).
2. Press the Properties button in the General tab of the Local Area
Connection Properties dialog box.
The Internet Protocol (TCP/IP) Properties dialog box opens.
3. Select Use the following IP address and enter your IP address and
Subnet Mask.
4. Press the OK button to close the Internet Protocol (TCP/IP) Properties
dialog box and the Close button to close the Local Area Connection
Properties dialog box.
CAUTION. Only the software components configured upon delivery
guarantee faultless operation of the Protocol Tester.
K1297-G20 Monitor User Manual
59
Page 72

Getting Started
Remote Operation
Remote Desktop
The protocol tester can be remotely operated with the help of Remote
Desktop. Using Remote Desktop you can connect each Windows computer
to a K1297. This allows you to remotely control your K1297 without being
in field or test laboratory.
H Computers with operating system Windows XP Professional can be
connected immediately to your K1297.
H To connect computers running Windows 95 or a more recent version of
Windows to your K1297, you must install the Remote Desktop
Connections Client software.
The Remote Desktop Connections Client software is available under
C:\Setup.etc . To install it, start the msrdpcli.exe .
To activate Remote Desktop, proceed as follows:
1. Enable the Remote Desktop feature on your K1297: click Start –>
Control Panel –> System. The System Properties dialog box opens.
60
2. Open the Remote tab and enable Allow users to connect remotely to
this computer. Close the System Properties dialog box.
3. On the control computer side: Select Start –> All Programs –>
Accessories –> Communications –> Remote Desktop Connection. The
Remote Desktop Connection dialog box opens.
Figure 2: Remote Desktop dialog box
4. Enter the name of the K1297 and click Connect.
K1297-G20 Monitor User Manual
Page 73

Getting Started
Remote Assistance
Use Remote Assistance if you need remote support on your K1297. Using
this feature you can invite somebody to connect to your K1297. During
Remote Assistance both of you can operate the K1297.
To activate Remote Assistance, proceed as follows:
1. Click Start –> Control Panel –> System. The System dialog box opens.
2. Open the Remote tab and enable Allow Remote Assistance invitations
to be sent from this computer.
3. Click Start –> Help and Support. Click Invite a friend to connect to
your computer with Remote Assistance under Ask for assistance.
4. Follow the Remote Assistance wizard.
K1297-G20 Monitor User Manual
61
Page 74
Getting Started
Connecting Peripherals
External devices can be connected to your K1297 in several ways. Some
devices, such as keyboard, mouse, or USB devices, are connected to the
front panels of the installed boards of your K1297. Other devices, like
printers and external drives, are connected to ports on the rear panel of
your protocol tester.
For a device to work properly with Windows, a device driver must be
installed on the system. Each device is supported by one or more device
drivers, which are typically supplied by the device manufacturer.
However, some device drivers are included with the operating system. If
the device is Plug and Play, Windows XPe can automatically detect it and
install the appropriate device drivers.
If the device is not automatically installed by the operating system, the
Found New Hardware Wizard will appear and ask you to insert any media,
such as compact discs or floppy disks, that were provided with the device.
Non-Plug and Play devices are installed using the Add Hardware Wizard.
To start this wizard, click Start –> Control Panel –> Add Hardware.
Before manually installing device drivers, you should consult the device
documentation provided by the manufacturer.
62
You must be logged on as an Administrator or as a member of the
Administrators group in order to install or configure a peripheral device.
CAUTION. To avoid product damage, always power off the K1297 before
installing any accessories.
K1297-G20 Monitor User Manual
Page 75

Examples
The following chapter guides you step by step through the different
aspects of working with the Protocol Tester. These are common applications relevant to many users.
NOTE. The following chapter should help you get started by explaining the
basic principles of the Protocol Tester in a clear and simple fashion.
K1297-G20 Monitor User Manual
63
Page 76

Examples
Online Monitoring in a Network
You can use the Protocol Tester and E1/DS1 interface boards (PRIMO) to
test the signalling in the following type of situations:
H In mobile networks at A
(BSC) and base transceiver station (BTS) or at A interfaces between
mobile switching center (MSC) and base station controller (BSC)
H In fixed networks between switching systems or between subscriber
and switching system.
Preliminary Steps
1. Connect the Protocol Tester’s PRIMO interface boards to the
measuring sockets of the data line, using the appropriate cables.
The interfaces on the PRIMO boards are 9-pin Sub-D sockets (refer to
the previous chapter, section Connecting to the data line and to
Appendix A, Section E1/DS-1 Interface Board).
2. Switch the device on.
The operating system boots automatically (refer to the previous
chapter, section Switching on the K1297). The K1297-G20 Monitor
application is started automatically.
The Status Window shows status messages for the individual
modules. If the modules boot without errors, the message “boot OK”
will be displayed.
interfaces between base station controller
bis
64
K1297-G20 Monitor User Manual
Page 77

3. The following dialog appears for loading the configuration:
4. Click Autoconfiguration.
The autoconfiguration feature automatically detects the signalling
channels and the framing of the connected data lines.
Examples
After the autoconfiguration has been carried out, the active signalling
channels are available and you can start the measurement: the Data
Flow Window appears. Make sure you are in the Measurement
Scenarios pane.
K1297-G20 Monitor User Manual
65
Page 78

Examples
NOTE. The data line has not been connected properly, if the following
message appears: “The initialization of PCM Check has been terminated!
The previous configuration will be loaded.” In this case, check the
connection between the Protocol Tester and the data line measuring
sockets.
If you get the message “No signalling detected on any ports”, please
restart the autoconfiguration. Start it now via the menu Tools:
Autoconfiguration.
Furthermore, take into account, that the autoconfiguration for LAP-based
protocols depends on the received data amount during a measurement
interval.
66
K1297-G20 Monitor User Manual
Page 79

Examples
Starting Measurements
The autoconfiguration feature automatically defines an online data
source (Scenario) and generates an online measurement scenario as
a pipeline which contains several branches for individual measurement
tasks. An online data source is a group of logical links. A logical link
consists of a channel and a channel data interpretation rule (assigned
protocol).
The settings for each data source, as detected by the autoconfiguration
feature, are displayed in the expanded left part of the window under
List of Scenarios (to expand, click “+”):
The following information is provided:
[1]D(Rx):16:-:64 [Whibisup.stk] (example)
1: first board
A: port MON A
(Rx) direction, here: Receive
16:-:64 timeslot 16, no subchannel (-), with 64 kbit/s
Whibisup.stk detected protocol setting, here: the stack for SS#7
K1297-G20 Monitor User Manual
White Book according to ITU-T
67
Page 80

Examples
The right side of the window Measurement Scenarios contains
the online measurement scenario as a pipeline with the two branches
Monitor and Recording File.
5. To start online monitoring, click the ON/OFF switch of the Monitor
pipeline branch to ON.
68
The pipeline of the activated data flow is now green: the measurement
is running.
6. To view the signalling data of the activated data flow switch to the
monitor main window by clicking the processing element Monitor
at the right end of the pipeline.
K1297-G20 Monitor User Manual
Page 81

Examples
Online Monitoring
The monitor main window consists of three views (see each title bar). The
Short View is shown in the upper part the window, the Frame View in the
middle and the Packet View in the lower part. These three views display
the data flow at different levels of complexity.
K1297-G20 Monitor User Manual
69
Page 82

Examples
The data in each view is constantly updated. In Live Mode (indicated in
the main window title bar), you can read the data as it is measured. This
mode is set by default when you switch to the monitor main window.
If you click on a view and scroll the contents using the arrow keys (↓ and
↑), the system automatically switches into Freeze Mode (indicated in the
main window title bar). The continuous display of new data frames is then
suppressed. In the background, the measuring goes on, until the available
storage is full. Then you receive the following error message:
Click the Live Mode button to return to live mode.
70
K1297-G20 Monitor User Manual
Page 83

Examples
The Short View provides an overview and lists the detected data packets
row by row in summary form.
You can choose which infomation is important for your own overview.
Select Monitor:Column Setup:Short View.
The Frame View decodes the protocol parameters of a frame selected in
Short View bit by bit and displays the results in plain text. The protocol
parameters displayed depend on which protocol stacks are loaded.
You can choose how detailed the information should be displayed. Select
Monitor:Column Setup:Frame View.
The Packet View displays the protocol parameters of a frame selected in
Short View in hexadecimal, ASCII or EBCDIC.
K1297-G20 Monitor User Manual
71
Page 84

Examples
Recording and Reviewing Monitoring Data
The signalling data of the active data flow can be recorded in a special
recording file for subsequent evaluation and/or offline analysis. This
recording feature can be used in conjunction with or as an alternative to
online monitoring.
Preliminary Steps
The Protocol Tester has been properly connected to the data line and
turned on. The modules booted without errors and the application has
been started.
Once the autoconfiguration has terminated successfully, the Data
Flow Window appears (refer to “Preliminary Steps” in the previous
section). Make sure you are in the Measurement Scenarios pane.
Start Recording
The right side of the window Measurement Scenarios contains a
pipeline branch with the processing element Recording File at the
right end of the pipeline, which displays a file icon. NONE signifies that
no recording file has been created.
72
K1297-G20 Monitor User Manual
Page 85

Examples
1. Click the processing element Recording File to create a recording file.
The following window appears:
Choose one of the indicated files or create a new one by writing a
name in File name. The following dialog box appears:
Storing all your recording files in c:\k1297\rec\ facilitates the
search for individual files later on.
K1297-G20 Monitor User Manual
73
Page 86

Examples
Press Browse, if you want to locate an existing file.
You do not need to enter the file extension “.rf5” for the recording files
when entering the file name. The program appends it automatically.
The remaining settings are optional.
2. Confirm your entries with OK. The name of the recording file appears
in the processing element Recording File.
74
K1297-G20 Monitor User Manual
Page 87

Examples
3. To start recording, click the ON/OFF switch of the Recording
pipeline branch to ON.
The signalling data of the activated data flow are written to the
recording file until the file is full or until you terminate the process.
The data in the recording file can be read after the current measurement is complete.
You can stop recording by clicking the ON/OFF switch of the
Recording branch to OFF.
NOTE. In most cases, data are recorded and reviewed at different times. It
is however possible to check the contents of the recording file immediately
after recording data. A description on how to review recorded data you
find on the following pages.
K1297-G20 Monitor User Manual
75
Page 88

Examples
Reviewing Recorded Data
Proceed as follows to view the signalling data stored in a recording file
with the record viewer.
1. Start the record viewer by clicking the Rec View icon in the
pipeline selection toolbar and and drag it in the green measurement
scenario window . The pipeline of the Record Viewer appears in the
Measurement Scenarios:
2. Click the left processing element (pipeline element) Recording
File in the Record Viewer pipeline. The following dialog box
appears:
76
Select the recording file you want to work with by double-clicking it.
K1297-G20 and K1205 recording files end with ”.rf5”. K1103
recording files end with ”.rec”. K1297 and K1197 recording files end
with ”.dat”.
K1297-G20 Monitor User Manual
Page 89

Examples
3. With the following dialog box you can then change the protocol stacks
assigned to the logical links.
Confirm your selection with OK. The name of the recording file is
entered automatically into the Recording File processing
element. The pipeline of the activated data flow is now green.
K1297-G20 Monitor User Manual
77
Page 90

Examples
4. If you want to filter the signalling data according to certain criteria,
such as error events, proceed as follows: First click the pipeline
processing element Filter, then within the Filter Setup
window click Error Event. The following figure shows the
Filter Setup dialog for the Display Filter.
78
Proceed with your settings and confirm your selection with OK.
5. To view the signalling data switch to the monitor main window by
clicking the processing element Monitor at the right end of the
pipeline. The monitor main window with the three views appears. You
can scroll through the recorded data flow using the arrow keys (↓ and
↑) in the individual views.
K1297-G20 Monitor User Manual
Page 91

Calltrace
The Calltrace application can detect and trace one or several calls on the
basis of complete or partial phone numbers. Calltrace analyzes protocolspecific data and produces a text output for any found hit. The Calltrace
can be run in the following three modi:
Calltrace only Mode.In this mode the calltrace searches for a frame that
matches the user selected parameters. The analysis and the result can be
seen at once.
Sequenced Calltrace Mode. In this mode all messages of one call will be
collected (stored) until the CT can make a decision whether the current
call matches the parameters or not. This representation is more focussed,
because it is related to one call.
Sequence only Mode. This mode works just like the sequenced Calltrace
mode, apart from the fact, that no numbers can be entered. All messages
are simply sequenced, i.e. sorted by calls and then displayed if the call has
been released. A search criteria is not possible here.
Calltrace applications are offered for a variety of protocols. All applications are operating according to the same principles. In this section, the
ISUP Calltrace is given as an example.
Examples
K1297-G20 Monitor User Manual
79
Page 92

Examples
Preliminary Steps
The Protocol Tester has been properly connected to the data line and
turned on. The modules booted without error and the application has
been started.
Once the autoconfiguration has terminated successfully, the Data
Flow Window appears (refer to “Preliminary Steps” in the previous
section). Make sure you are in the Measurement Scenarios pane.
80
K1297-G20 Monitor User Manual
Page 93

Examples
Preparing and Starting a Calltrace
1. Click the processing element Application in the pipeline, which
you will find either in the monitor branch or in the recording branch.
The following dialog box appears:
2. Select CallTr/Seq from the list of available applications and
confirm your selection with OK.
Calltrace analyzes the data traffic of a variety of protocols. Therefore,
you have to select the protocol to be tested before starting Calltrace.
The Calltr/Seq_1 window appears.
K1297-G20 Monitor User Manual
81
Page 94

Examples
3. Select the protocol from the protocol list on the basis of which the
calltrace is to be performed.
4. Confirm your selection with Load. The CallTr/Seq_1: ISUP
ITU-T White book window then appears (example). Depending on
the Calltrace selected this window can slightly vary.
82
K1297-G20 Monitor User Manual
Page 95

Examples
5. Enter the phone number you are looking for under Search for. You
can enter up to four numbers divided by commas (,). The following
wildcards for digits are allowed: + for exactly one digit or no digit, *
for any number of digits, ? for exactly one digit.
You can enter more than one asterisk (*) within a calling number (for
example *123*678). One asterisk is always automatically entered at
the end of the number. Thus, numbers that are too long can be found. If
calling numbers are initiated by + or * the filter mode starts working
only after the number is confirmed by an ACM (Address complete) or
an ANM (Answer message). That means that all messages are
transmitted until then, because they belong to a call with a corresponding number.
If you are looking for numbers with prefixes (for example international
area code) at one and the same time, you will get more specific outputs
by entering the exact numbers (for example 4930386,30386) than
by entering numbers initiated by “+” or “*” (++30386,*30386).
6. Specify whether the phone number designates a Calling Party or
a Called Party in the Type of number field.
7. Specify whether it is a National, an International or a
Subscriber number without a national/international area code in
the Nature of Address field. Select don’t care to include
all numbers.
8. For protocols you can specify Cause Values as additional search
criteria. The Calltrace application then searches for calls that contain
the desired number and one of the selected cause values (reason for the
end of call).
9. Specify the number of calls to be traced in the Trace mode field:
one (Single) or any number of matching phone numbers (Multi-
ple).
If you activate the filter mode, only the calltrace messages will be
displayed. Other messages will be suppressed. The asterisk (*) at the
beginning leads to more detailed infomation.
K1297-G20 Monitor User Manual
83
Page 96

Examples
10. Click Start to start Calltrace.
The results are displayed in the monitor main window.
11. Switch to the monitor main window by clicking the processing element
Monitor at the right end of the pipeline under Measurement
Scenarios in the Data Flow Window.
84
K1297-G20 Monitor User Manual
Page 97

Examples
Viewing the Results
Click the Short View in the monitor window. Use the arrow keys (↓
and ↑) to scroll through the recorded data flow in the individual views.
Detailed information is displayed in plain text in the Frame View on
the right.
Calltrace outputs the word text in the 2. Protocol column
(Short View) and displays detailed information in the data frame
context.
K1297-G20 Monitor User Manual
85
Page 98

Examples
Examples. The number you were tracing was found:
You have been connected to the number you were tracing:
86
The connection has been cleared down (released):
K1297-G20 Monitor User Manual
Page 99

Ending Calltrace
You end the Calltrace application by clicking the processing element
Application in the pipeline in the monitor window. The window
CallTr/Seq-1: ISUP ITU-T White book appears. Click
Close.
Examples
K1297-G20 Monitor User Manual
87
Page 100

Examples
88
K1297-G20 Monitor User Manual
 Loading...