

Page 1

Instructions
DPO7UP
Upgrades for DPO7000, DPO70000 and
DSA70000 Series Instruments
075-0902-01
Warning
The servicing instructions are for use by qualified
personnel only. To avoid personal injury, do not
perform any servicing unless you are qualified to
do so. Refer to all safety summaries prior to
performing service.
www.tektronix.com
*P075090201*
075090201
Page 2

Copyright © Tektronix. All rights reserved. Licensed software products are owned by Tektronix or its subsidiaries or
suppliers, and are protected by national copyright laws and international treaty provisions.
Tektronix products are covered by U.S. and foreign patents, issued and pending. Information in this publication supercedes
that in all previously published material. Specifications and price change privileges reserved.
TEKTRONIX and TEK are registered tradem arks of Tektronix, Inc.
Contacting Tektronix
Tektronix, Inc.
14200 SW Karl Braun Drive
P.O. Box 500
Beaverton, OR 97077
USA
For product information, sales, service, and technical support:
H In North America, call 1-800-833-9200.
H Worldwide, visit www.tektronix.com to find contacts in your area.
Page 3

General Safety Summary
Review the following safety precautions to avoid injury and prevent damage to
this product or any products connected to it.
To avoid potential hazards, use this product only as specified.
Only qualified personnel should perform service procedures.
ToAvoidFireor
Personal Injury
Use Proper Power Cord. Use only the power cord specified for this product and
certified for the country of use.
Connect and Disconnect Properly. Do not connect or disconnect probes or test
leads while they are connected to a voltage source.
Ground the Product. This product is grounded through the grounding conductor
of the power cord. To avoid electric shock, the grounding conductor must be
connected to earth ground. Before making connections to the input or output
terminals of the product, ensure that the product is properly grounded.
Observe All Terminal Ratings. To avoid fire or shock hazard, observe all ratings
and markings on the product. Consult the product manual for further ratings
information before making connections to the product.
The inputs are not rated for connection to mains or Category II, III, or IV
circuits.
Do not apply a potential to any terminal, including the common terminal, that
exceeds the maximum rating of that terminal.
Power Disconnect. The power switch disconnects the product from the power
source. See instructions for the location. Do not block the power switch; it must
remain accessible to the user at all times.
Do Not Operate Without Covers. Do not operate this product with covers or panels
removed.
Do Not Operate With Suspected Failures. If you suspect there is damage to this
product, have it inspected by qualified service personnel.
Avoid Exposed Circuitry. Do not touch exposed connections and components
when power is present.
Do Not Operate in Wet/Damp Conditions.
Do Not Operate in an Explosive Atmosphere.
Keep Product Surfaces Clean and Dry.
Provide Proper Ventilation. Refer to the manual’s installation instructions for
details on installing the product so it has proper ventilation.
DPO7UP Upgrades for DPO7000, DPO70000 and DSA70000 Series Instruments
i
Page 4

General Safety Summary
Terms in this Manual
Symbols and Terms
on the Product
These terms may appear in this manual:
WARNING. Warning statements identify conditions or practices that could result
in injury or loss of life.
CAUTION. Caution statements identify conditions or practices that could result in
damage to this product or other property.
These terms may appear on the product:
H DANGER indicates an injury hazard immediately accessible as you read the
marking.
H WARNING indicates an injury hazard not immediately accessible as you
read the marking.
H CAUTION indicates a hazard to property including the product.
The following symbol(s) may appear on the product:
CAUTION
Refer to Manual
WARNING
High Voltage
Protective Ground
(Earth) Terminal
Earth Terminal
Chassis Ground
ii
DPO7UP Upgrades for DPO7000, DPO70000 and DSA70000 Series Instruments
Page 5

Kit Description
This kit provides instructions to upgrade DPO7000, DPO70000 and DSA70000
Series instruments. Once installed, the upgrades are equivalent to the factoryinstalled options.
For a list of available options, see the Tektronix Web site (www.tektronix.com),
the Optional Applications CD that is part of this kit, or your Tektronix representative.
Products
DPO7000 Series B010100 and above
DPO70000 Series B010100 and above
DSA70000 Series B010100 and above
Minimum Tool and Equipment List
Required tools and equipment Part number
USB or PS-2 Keyboard 119-6633-00 (USB)
119-6906-00 (PS-2)
or equivalent
Kit Parts List
Part
Option Quantity
All 1 each NS LABEL, OPTION INFORMATION
All 1 each 075-0902-01 MANUAL,KIT INSTRUCTIONS
All 1 each 020-2700-xx SOFTWARE KIT,OPTIONAL APPLICATIONS
All 1 each 020-2693-xx SOFTWARE,INSTRUMENT
NS - Not Saleable
DPO7UP Upgrades for DPO7000, DPO70000 and DSA70000 Series Instruments
number
Description
1
Page 6

Installation Instructions
To install your new option(s), you need the key number that is provided with this
kit. This unique key number is valid only for the specific model number and
serial number of your instrument; it will not work on any other instrument. This
single key number enables all valid options for your instrument, those that were
factory installed and any others that you may have previously purchased. In other
words, this new key number supercedes any previous key numbers that you may
already have.
CAUTION. To avoid losing your options, do not misplace the paper label that is
included with this kit. This label contains the option installation key number and
should be installed on the rear panel of the instrument for future reference.
As a backup, you may want to copy the key number and save it with the other
important papers for your instrument. If you ever need to r eenable the option,
you will need to r eenter this key number .
If you are upgrading to an option that includes software, follow the installation
instructions in the booklet that accompanies the application CD before you
proceed with the instructions in this section.
2
DPO7UP Upgrades for DPO7000, DPO70000 and DSA70000 Series Instruments
Page 7

Install Option
Installation Instructions
Follow these steps to enable your new option(s):
1. If this upgrade kit came with a product software CD for your instrument and
if the version number of your instrument software (pull down the Help
menu, and then select About TekScope) is less than the version number on
the product software CD, use the instructions that came with the CD to
install the new product software. Do the remaining steps of this procedure.
2. Connect a keyboard to the USB or PS-2 port of the instrument.
3. Power on the instrument and wait for it to boot.
4. If the instrument is in the button-bar mode, put the instrument into menu-bar
mode. In menu-bar mode, there is a PC-style menu bar across the top of the
display.
5. Pull down the Utilities menu, and then select Option Installation.
6. Follow the on-screen instructions to enter the alphanumeric key number
exactly as it is printed on the label.
7. Attach the label to the rear panel over the existing label.
NOTE. Verify that you have the latest version of the optional application and
firmware. The latest versions can be downloaded from www.tek.com.
DPO7UP Upgrades for DPO7000, DPO70000 and DSA70000 Series Instruments
3
Page 8
Installation Instructions
Verify Option or Application Package Upgrade
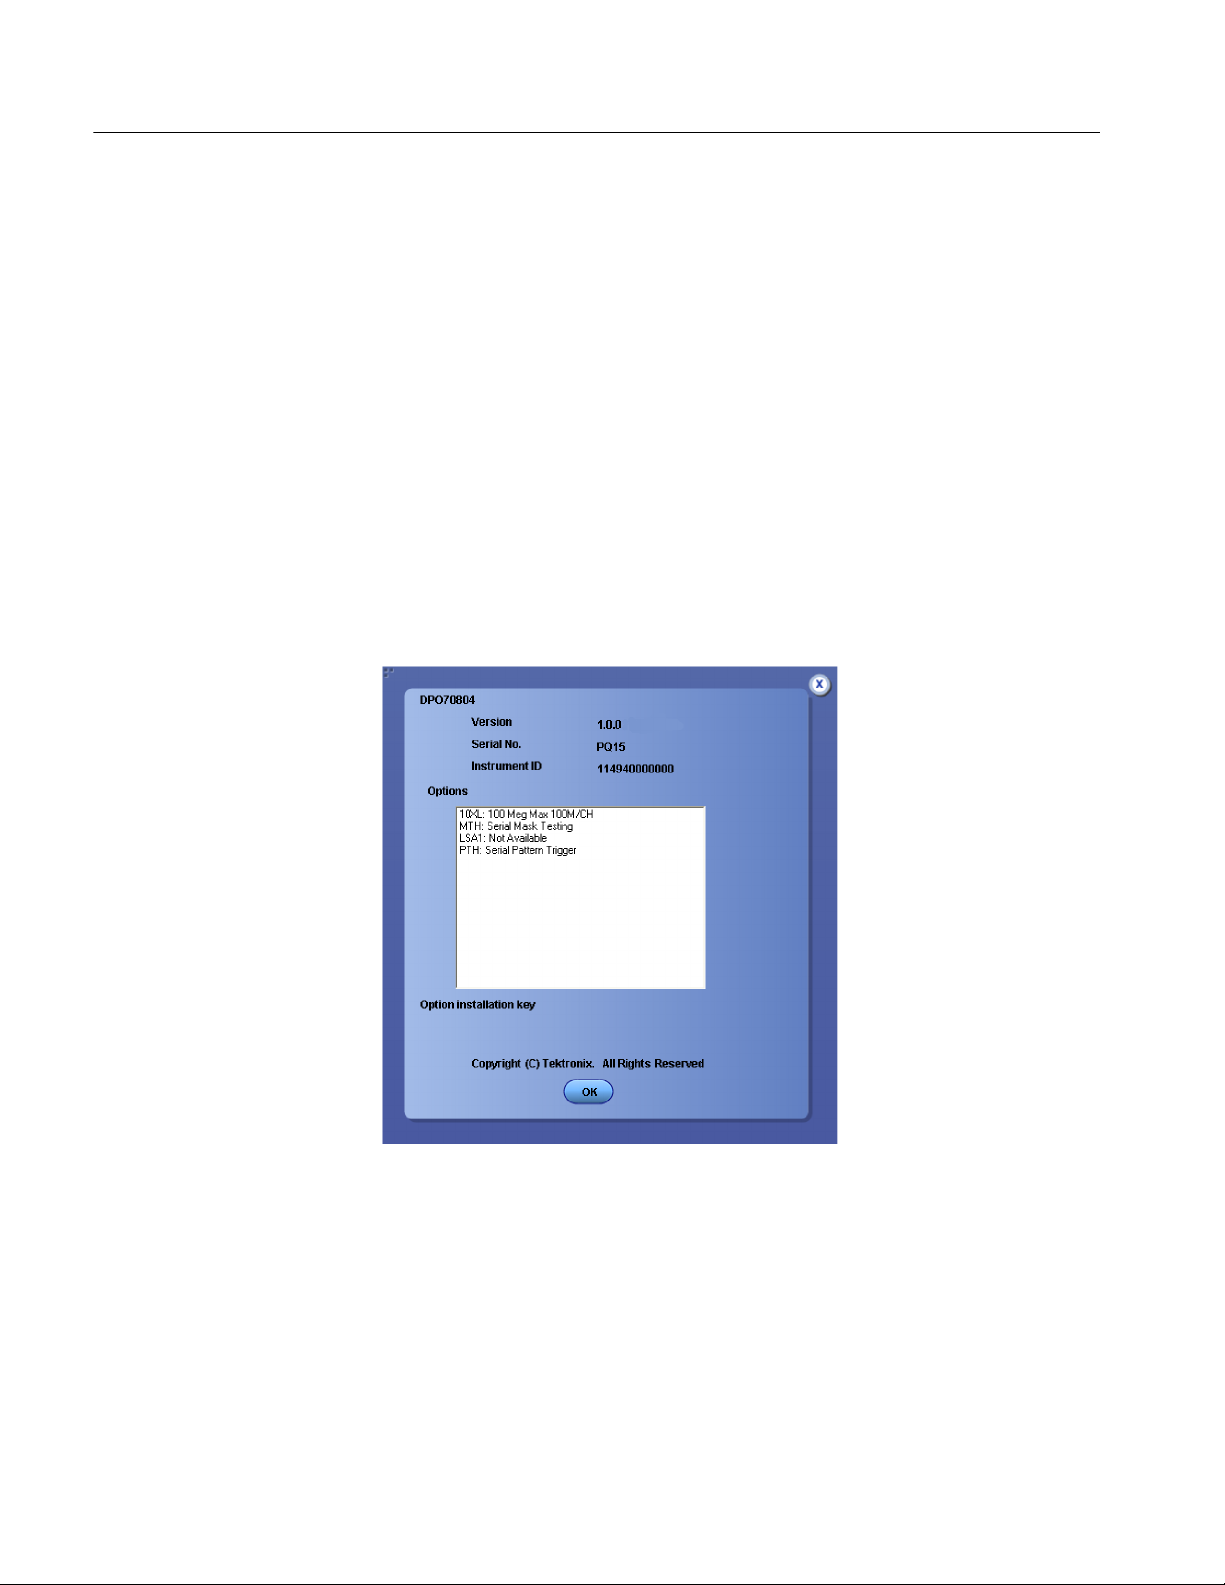
Follow these steps to verify that an option or application upgrade was successful:
1. Restart the oscilloscope product software.
2. Pull down the Help menu, and then select About TekScope.
3. Verify that the option or application that you installed is in the scrollable
Options list (see Figure 1).
The example in Figure 1 shows that the following options are installed:
H Option 10XL 100 Meg Max 100M/CH
H Option MTH Serial Mask Testing
H Option PTH Serial Pattern Trigger
Figure 1: About TekScope property sheet
g End of document g
4
DPO7UP Upgrades for DPO7000, DPO70000 and DSA70000 Series Instruments
 Loading...