


User Manual
BPA100 Series
Bluetooth Protocol Analyzer
Software Version 2.3
071-1128-00
This document applies to firmware version 2.3
and above.
Check for regular BPA Series software updates at
www.tektronix.com/bpa_software
www.tektronix.com

Copyright © Tektronix, Inc. All rights reserved. Licensed software products are owned by Tektronix or its suppliers and
are protected by United States copyright laws and international treaty provisions.
Use, duplication, or disclosure by the Government is subject to restrictions as set forth in subparagraph (c)(1)(ii) of the
Rights in Technical Data and Computer Software clause at DFARS 252.227-7013, or subparagra phs (c)(1) and (2) of the
Commercial Computer Software -- Restricted Rights clause a t FAR 52. 227-19, as applicable.
Tektronix products are covered by U.S. and foreign patents, issued and pending. Information in this publ ication supercedes
that in all previously published material. Spec ifications and price change privileges reserved.
Tektronix, Inc., P.O. Box 500, Beaverton, OR 97077
TEKTRONIX and TEK are registered trademarks of Tektronix, Inc.

HARDWARE WARRANTY
Tektronix warrants that the products that it manufactures and sells will be free from defects in materials and
workmanship for a period of three (3) years from the date of shipment. If a product proves defective during this
warranty period, Tektronix, at its option, either will repair the defective product without charge for parts and labor,
or will provide a replacement in exchange for the defective product.
In order to obtain service under this warranty, Customer must notify Tektronix of the defect before the expiration
of the warranty period and make suitable arrangements for the performance of service . Customer shall be
responsible for packaging and shippi ng the defective product to the service center designated by Tektronix, with
shipping charges prepaid. Tektronix shall pay for the return of the product to Customer if the shipment is to a
location within the country in which the Tektronix service center is located. Customer shall be responsible for
paying all shipping charges, dut ies, taxes, and any other charges for products returned to any other locations.
This warranty shall not apply to any defect, failure or damage caused by improper use or improper or inadequate
maintenance and care. Tektronix shall not be obligated to furnish service under this warranty a) to repair damage
resulting from attempts by personnel other than Tektronix representatives to install, repair or service the product;
b) to repair damage resulting from improper use or connection to incompa tible equipment; c) to repair any
damage or malfunction caused by the use of non-Tektronix supplies; or d) to service a product that has been
modified or integrated with other products when the effect of such modification or integra tion increases the time
or difficulty of servicing the product.
THIS W ARRANTY IS GIVEN BY TEKTRONIX IN LIEU OF ANY OTHER WARRANTIES, EXPRESS
OR IMPLIED. TEKTRONIX AND ITS VENDORS DISCLAIM ANY IMPLIED WARRANTIES OF
MERCHANTABILITY OR FITNESS FOR A PARTICULAR PURPOSE. TEKTRONIX’
RESPONSIBILITY TO REPAIR OR REPLACE DEFECTIVE PRODUCTS IS THE SOLE AND
EXCLUSIVE REMEDY PROVIDED TO THE CUSTOMER FOR BREACH OF THIS WARRANTY.
TEKTRONIX AND ITS VENDORS WILL NOT BE LIABLE FOR ANY INDIRECT , SPECIAL,
INCIDENTAL, OR CONSEQUENTIAL DAMAGES IRRESPECTIVE OF WHETHER TEKTRONIX OR
THE VENDOR HAS ADVANCE NOTICE OF THE POSSIBILITY OF SUCH DAMAGES.

SOFTWARE WARRANTY
Tektronix warrants that the media on which this software product is furnished and the encoding of the programs on
the media will be free from defects in materials and workmanship for a period of three (3) months from the date of
shipment. If a medium or encoding proves defe ctive during the warranty period, Tektronix will provide a
replacement in exchange for the defective medium. Except as to the media on which this software product is
furnished, this software product is provided “as is” without warranty of any kind, either express or implied.
Tektronix does not warrant that the functions contained in this software product will meet Customer’s
requirements or that the operation of the programs will be uninterrupted or error-free.
In order to obtain service under this warranty, Customer must notify Tektronix of the defect before the expiration
of the warranty period. If Tektronix is unable to provide a replacement that is free from defects in materials and
workmanship within a reasonable time thereafter, Customer may terminate the license for this software product
and return this software product and any associated materials for credit or refund.
THIS W ARRANTY IS GIVEN BY TEKTRONIX IN LIEU OF ANY OTHER WARRANTIES, EXPRESS
OR IMPLIED. TEKTRONIX AND ITS VENDORS DISCLAIM ANY IMPLIED WARRANTIES OF
MERCHANTABILITY OR FITNESS FOR A PARTICULAR PURPOSE. TEKTRONIX’
RESPONSIBILITY TO REPLACE DEFECTIVE MEDIA OR REFUND CUSTOMER’S PAYMENT IS
THE SOLE AND EXCLUSIVE REMEDY PROVIDED TO THE CUSTOMER FOR BREACH OF THIS
WARRANTY . TEKTRONIX AND ITS VENDORS WILL NOT BE LIABLE FOR ANY INDIRECT ,
SPECIAL, INCIDENTAL, OR CONSEQUENTIAL DAMAGES IRRESPECTIVE OF WHETHER
TEKTRONIX OR THE VENDOR HAS ADVANCE NOTICE OF THE POSSIBILITY OF SUCH
DAMAGES.

Table of Contents
Operating Basics
General Safety Summary v...................................
Preface vii...................................................
Reference Documents vii.............................................
Contacting Tektronix viii.............................................
What’s New in Version 2.3 1--1..................................
Acquiring Piconet Packet Data 1--3..............................
Overview 1--3.......................................................
Collecting Data 1--4..................................................
Understanding the Data Acquisition Window 1--6..........................
Setting Up an Acquisition 1--11.........................................
Setting Up the Data Filter 1--20..........................................
Setting Up Triggers 1-- 21..............................................
Using the Synchronization Wizard 1--32...................................
Starting a Logging Session 1--33.........................................
Ending a Logging Session 1--33.........................................
Saving the Current Logging Session 1--33.................................
Using the HCI Terminal Application 1--33................................
Analyzing Piconet Packet Data 1--35..............................
Opening a Data File 1--35..............................................
Understanding the Data Analysis Window 1--36............................
Reference
Appendices
Glossary
Index
Using Bookmarks 2--1................................................
Performing an Advanced Search 2--3....................................
Exporting Data 2--4..................................................
Generating Error Packet Data 2--6......................................
Understanding Decryption 2--18.........................................
Setting Up Encryption in the Bluetooth Neighborhood 2--20...................
Appendix A: Specifications A--1..................................
Appendix B: Accessories B--1...................................
Standard Accessories B--1.............................................
Optional Accessories B--1.............................................
Appendix C: Sample Scripts C--1.................................
HCI Terminal Scripts C--1.............................................
Appendix D: Trigger Loopback Test D--1..........................
BPA100 Series Bluetooth Protocol Analyzer User Manual
i

Table of Contents
List of Figures
Figure 1--1: The Bluetooth Protocol Analyzer data acquisition
window 1--6..................................................
Figure 1--2: Acquisition Setup dialog box 1--11......................
Figure 1--3: Acquisition window Sync Bar 1--13.....................
Figure 1--4: Select Master and Select Slave dialog boxes 1--14..........
Figure 1--5: Decryption dialog box 1--16............................
Figure 1--6: Drift compensation dialog box 1--18.....................
Figure 1--7: Data Filter set up dialog box 1--20......................
Figure 1--8: Low Level Trigger Setup dialog box 1--22................
Figure 1--9: Sequence Repeat dialog box 1--23.......................
Figure 1--10: Sequence Timeout dialog box 1--24....................
Figure 1--11: Packet Definition d ialog box 1--25.....................
Figure 1--12: Customize Pattern dialog box 1--25....................
Figure 1--13: Slot Information dialog box 1--28......................
Figure 1--14: Low-level trigger setup with completed trigger
sequence 1--29.................................................
Figure 1--15: High Level Trigger Setup dialog box 1--30..............
Figure 1--16: Pre-Post Trigger Buffer setup dialog box 1--31...........
Figure 1--17: Bluetooth Protocol Analyzer synchronization
wizard 1--32...................................................
Figure 1--18: The Bluetooth Protocol Analyzer data analysis
window 1--36..................................................
Figure 1--19: List view context-sensitive menu 1--45..................
Figure 2--1: Analysis window showing bookmarked packets 2--1......
Figure 2--2: Bookmarks dialog box 2--2...........................
Figure 2--3: Advanced Search dialog box 2--3......................
Figure 2--4: Export Data dialog box 2--5...........................
Figure 2--5: Error Packet Generator dialog box 2--7.................
Figure 2--6: Sequence Repeat dialog box 2--8.......................
Figure 2--7: Sequence Timeout dialog box 2--9.....................
Figure 2--8: Error Name dialog box 2--10...........................
Figure 2--9: Standard packet format 2--10..........................
Figure 2--10: Packet Definition dialog box 2--11.....................
Figure 2--11: Customize Pattern dialog b ox 2--12....................
ii
BPA100 Series Bluetooth Protocol Analyzer User Manual

Table of Contents
Figure 2--12: Slot Information dialog box 2--14......................
Figure 2--13: Error Packet Generator setup with completed
error generation sequence 2--15...................................
Figure 2--14: Analyzer display of generated error 2--17...............
Figure 2--15: Bluetooth Protocol Analyzer List view showing
paring process 2--18............................................
Figure 2--16: Acquisition Summary dialog box 2--19..................
BPA100 Series Bluetooth Protocol Analyzer User Manual
iii

Table of Contents
List of Tables
Table 1--1: Acquisition window menus and toolbar buttons 1--7......
Table 1--2: Analysis window menus and toolbar buttons 1--37.........
T able 1--3: Packet tabs 1--43.....................................
Table A--1: Air Probe characteristics A--1.........................
T able A--2: Environmental characteristics A--1.....................
Table A--3: Certifications and compliances A--2....................
Table A--4: Physical characteristics A--3...........................
iv
BPA100 Series Bluetooth Protocol Analyzer User Manual
General Safety Summary
Review the following safety precautions to avoid injury and prevent damage to
this product or any products connected to it. To avoid potential hazards, use this
product only as specified.
Only qualified personnel should perform service procedures.
ToAvoidFireor
Personal Injury
Symbols and Terms
Do Not Operate With Suspected Failures. If you suspect there is damage to this
product, have it inspected by qualified service personnel.
Do Not Operate in Wet/Damp Conditions.
Do Not Operate in an Explosive Atmosphere.
Keep Product Surfaces Clean and Dry.
Terms in this Manual. These terms may appear in this manual:
WARNING. Warning statements identify conditions or practices that could result
in injury or loss of life.
CAUTION. Caution statements identify conditions or practices that could result in
damage to this product or other property.
Symbols on the Product. The following symbols may appear on the product:
CAUTION
Refer to Manual
BPA100 Series Bluetooth Protocol Analyzer User Manual
v

General Safety Summary
vi
BPA100 Series Bluetooth Protocol Analyzer User Manual

Preface
This manual provides operating information for the Tektronix BPA100 Series Bluetooth Protocol Analyzer and is organized into the following sections:
H Operating Basics provides instructions for operating the current version of
the Tektronix Bluetooth Protocol Analyzer.
H Reference provides detailed information on acquiring and analyzing Piconet
packet data.
H Appendix A: Specifications provides hardware specifications and regulatory
statements.
H Appendix B: Accessories lists the standard accessories.
H Appendix C: Sample Scripts provides sample HCI scripts.
H Appendix D: Trigger Loopback Test provides test instructions on how to
verify the Trigger In and Trigger Out functions are are operating properly.
H Glossary explains the terms used in this manual.
Reference Documents
The following third-party reference documents provide additional information:
H HCI Terminal Guide (Digianswer #00-11-03) provides information about
using a HCI terminal as an interface with Bluetooth hardware.
H Bluetooth Revealed (Prentice Hall, Inc., ISBN 0-13-090294-2) provides
background on several areas including the basic technology, the Bluetooth
specification with information about the protocol stack, Bluetooth profiles,
and the future of the technology.
H Bluetooth 1.1: Connect without Cables (Prentice Hall, Inc.,
ISBN 0-13-066106-6) provides less background about the technology and
more in-depth information about the protocol stack and other areas. This
book provides many diagrams.
NOTE. Check for regular BPA Series software updates at www.tektronix.com/
bpa_software.
BPA100 Series Bluetooth Protocol Analyzer User Manual
vii

Preface
Contacting Tektronix
Phone 1-800-833-9200*
Address
Web site www.tektronix.com
Sales support 1-800-833-9200, select option 1*
Service support 1-800-833-9200, select option 2*
Technical support Email: techsupport@tektronix.com
* This phone number is toll free in North America. After office hours, please
leave a voice mail message.
Outside North America, contact a Tektronix sales office or distr ibutor; see the
Tektronix web site for a list of offices.
Tektronix, Inc.
Department or name (if known)
14200 SW Karl Braun Drive
P.O. Box 500
Beaverton, OR 97077
USA
1-800-833-9200, select option 3*
6:00 a.m. -- 5:00 p.m. Pacific time
viii
BPA100 Series Bluetooth Protocol Analyzer User Manual

Operating Basics


What’s New in Version 2.3
The Tektronix Bluetooth Protocol Analyzer Application Software V2.3 upgrade
adds several important capabilities to the BPA100 Series analyzers, including
support for three new protocol layers. The new features supported in V2.3 are
listed below:
H Support for New Protocol Layers. BNEP (Bluetooth Network Encapsulation
Protocol), AT (Hayes modem command set), and HID (Human Interface
Device) protocols are decoded with a separate tab for each in the application
windows. Along with the Hayes modem command set, V2.3 also supports
some Bluetooth-specific AT commands for headset profile.
H Hardware Trigger In. This connector senses a TTL-level high or low (menu
programmable) signal as a trigger from another Bluetooth Protocol Analyzer,
logic analyzer, oscilloscope, or other test equipment.
H Hardware Trigger Out. This connector outputs a pulse or TTL-level high or
low (menu programmable) signal to trigger a Bluetooth Protocol Analyzer,
logic analyzer, oscilloscope, or other test equipment. This function allows
you to count clocks after a trigger event for logic analysis synchronization.
You can set the Trigger Out to accommodate any specified pattern in a
sequence. When the pattern is matched, the signal is sent.
H Hardware Clock Out. This connector provides a LV-TTL square-wave signal
synchronized to the local Bluetooth clock. The output frequency is 1.6 kHz
(625 s) with a 50% duty cycle. This signal is always present when the Air
Probe is powered on. To verify the signal, connect an oscilloscope.
H Synchronization Wizard. This feature allows users with a minimal knowl-
edge of Bluetooth synchronization to easily synchronize to a Piconet. The
wizard consists of a series of screens that provide the appropriate graphics,
selections, operations (like device discovery), and other information to guide
you through the synchronization setup process.
H Presynchronization Drift Compensation. This feature improves your chances
of synchronizing to a device with a highly drifting clock. By receiving more
than one FHS packet for a particular device over several seconds, the
analyzer can calculate the relative drift of the device under test and use this
information to improve the success of synchronization.
H Application Programming Interface (API). Using this Tektronix client
software, you can control the Bluetooth Protocol Analyzer from a remote
PC.
H Sniff, Hold, and Test Mode. This feature allows the Bluetooth Protocol
Analyzer to follow the Bluetooth Sniff and Hold power modes. It also
BPA100 Series Bluetooth Protocol Analyzer User Manual
1- 1

What’s New in Version 2.3
provides the capability of supporting Test Mode as a slave Device Under
Test (DUT), so you can use the Bluetooth Protocol Analyzer in conjunction
with any Bluetooth tester.
H L2CAP Connection Properties. This feature lists the current L2CAP
connection properties for all L2CAP connections. It also allows you to
change the L2CAP connection type.
H RFCOMM Server Channel Assignments. This feature lists the current
RFCOMM channel assignments for all RFCOMM connections. It also
allows you to manually assign various protocols for “Unknown” RFCOMM
connections.
H Export to *.wav file. This feature supports a post-acquisition process that
scans captured Independent or Piconet mode audio data and creates a .wav
file. You can play back the file on a PC using standard Windows audio
players.
H Advanced Search. This feature provides new search capabilities based on
individual columns and Boolean parameters. Users can mark all packets that
match the search criteria.
H Trigger Loopback Test. You can use this diagnostic test to verify that the
Trigger In and Trigger Out functions are operating properly.
Graphical User Interface (GUI) Enhancements:
H Low Level Trigger (LLT) and Error Packet Generation (EPG) setup has
been redesigned to be more intuitive.
H Show/Hide Packets and Show/Hide Columns selections have moved to
the Packet View Window. User settings affecting these features are now
saved along with the data file and will be active when you reopen the
data file.
H Double--clicking on a column title adjusts the column width to the
maximum length of the text appearing within that column.
H If a log file contains audio data, an audio icon appears in the log toolbar.
Audio data can then be exported as a .wav file and played back using a
Windows Media player or similar tool.
H The Synchronization Statusbar has changed. It now contains one
indicator and the corresponding synchronization status message, only.
1- 2
BPA100 Series Bluetooth Protocol Analyzer User Manual

Acquiring Piconet Packet Data
This section introduces you to the basic operation of the Bluetooth Protocol
Analyzer. This section contains information on the following topics:
H Monitoring overview
H Operating modes
H Collecting data
H Understanding the application window
H Using the menu and toolbars
H Setting up an acquisition
H Setting up the data filter
H Setting up triggers
H Using the synchronization wizard
H Starting and ending a logging session
Overview
H Saving a log session
H Using the HCI Terminal application
Using the Bluetooth Protocol Analyzer you can connect to and monitor the
activity of a Bluetooth Piconet and log data containing all of the baseband
packets transmitted between the participating Bluetooth devices.
Following data collection, you can display the contents of the files you saved
during acquisition and use the analysis features of the Bluetooth Protocol
Analyzer to further interpret the data. Detailed information on data analysis is
provided in the Analyzing Piconet Packet Data section, beginning on page 1--35.
Additionally, the Bluetooth Protocol Analyzer has features that allow you to
generate baseband packets containing known errors for testing purposes.
Information on error packet generation can be found on page 2--6.
BPA100 Series Bluetooth Protocol Analyzer User Manual
1- 3

Acquiring Piconet Packet Data
Operating Mode
You can operate the Bluetooth Protocol Analyzer in either Independent or
Piconet mode.
Independent Mode. Configured as an independent unit, the B luetooth Protocol
Analyzer does not interact directly in the piconet. Instead, after synchronizing to
the net, it passively monitors and logs all baseband packets transmitted between
the master and the slaves comprising the Piconet. By using the advanced
triggering and filter features, you can identify the data you want to log, and then
analyze it following the session.
Piconet Mode. Configured as a participant in a piconet, the Bluetooth Protocol
Analyzer uses a full-protocol stack and participates as the master or a slave in the
Piconet.
As a master, the Bluetooth Protocol Analyzer logs all baseband packets between
itself and the piconet slave device(s). When set up as a slave, it logs all packets
between itself and the Piconet master as well as between the master and all other
slave devices.
For information on how to configure the analyzer for independent or Piconet
mode operation, see Logging Mode on page 1--12.
Collecting Data
With the Bluetooth Protocol Analyzer you can connect to and create a log
containing all the baseband packets transmitted between Bluetooth devices in a
Piconet. Using the analyzer features you can do the following:
H Operate as a member of a Piconet, as a stand-alone (independent) unit, or
independent with data decryption.
H Select the master or slave to which the Bluetooth Protocol Analyzer is
synchronized.
H Set the duration over which the Protocol Analyzer tries to synchronize to a
Piconet master.
H Capture all baseband packets transmitted within a Bluetooth Piconet,
including packets that are normally not visible to the host such as retransmitted packets. View the status of each packet and estimate the clock and
hop frequency.
H Select specified hopping patterns: Europe/USA, Japan, France, or Spain.
H Transmit and receive on a single user-defined frequency .
H Set a correlation value.
1- 4
BPA100 Series Bluetooth Protocol Analyzer User Manual

Acquiring Piconet Packet Data
H Turn data whitening on and off.
H Output data to a log file or view as a real-time display.
H Start or stop a logging session manually.
H Enable data decryption in Independent mode.
H Display the paging sequence in Independent mode.
H Filter packets during data acquisition (prior to logging), such as ID, NULL,
POLL, and Access Error packets.
H Generate known errors for testing and debugging.
NOTE. When you use the Bluetooth Protocol Analyzer with Bluetooth Neighborhood, you must use the Piconet mode (working as a participant in a Piconet).
When you use the Bluetooth Protocol Analyzer in the Independent mode
(working as a passive listener), you cannot use it with Bluetooth Neighborhood.
BPA100 Series Bluetooth Protocol Analyzer User Manual
1- 5

Acquiring Piconet Packet Data
Understanding the Data Acquisition Window
Figure 1--1 shows the data acquisition window of the Bluetooth Protocol
Analyzer. and identifies each of the functional areas. This is the window that
displays when you log a data file. Note that when the data acquisition window is
the active window, many of the toolbar buttons are disabled.
Menu Bar Toolbar
Statusbar Data Window
Figure 1- 1: The Bluetooth Protocol Analyzer data acquisition window
Menu Bar
Toolbars
1- 6
Session Info Bar
The Menu Bar hosts the data acquisition and analysis functional menus. The
menus and menu selections vary depending on the current analyzer function.
Table 1--1 lists the menus that are available during data acquisition.
The toolbar contains shortcut buttons for the major analyzer functions. Most
toolbar buttons have corresponding menu selections in the Menu Bar. The
BPA100 Series Bluetooth Protocol Analyzer User Manual
Acquiring Piconet Packet Data
number and function of the available buttons varies, depending on the type of
window you have open. Table 1--1 identifies the acquisition toolbar buttons and
their functions.
Statusbar
The Statusbar provides useful information on the status of the Bluetooth Protocol
Analyzer. View this area for information on the current log session.
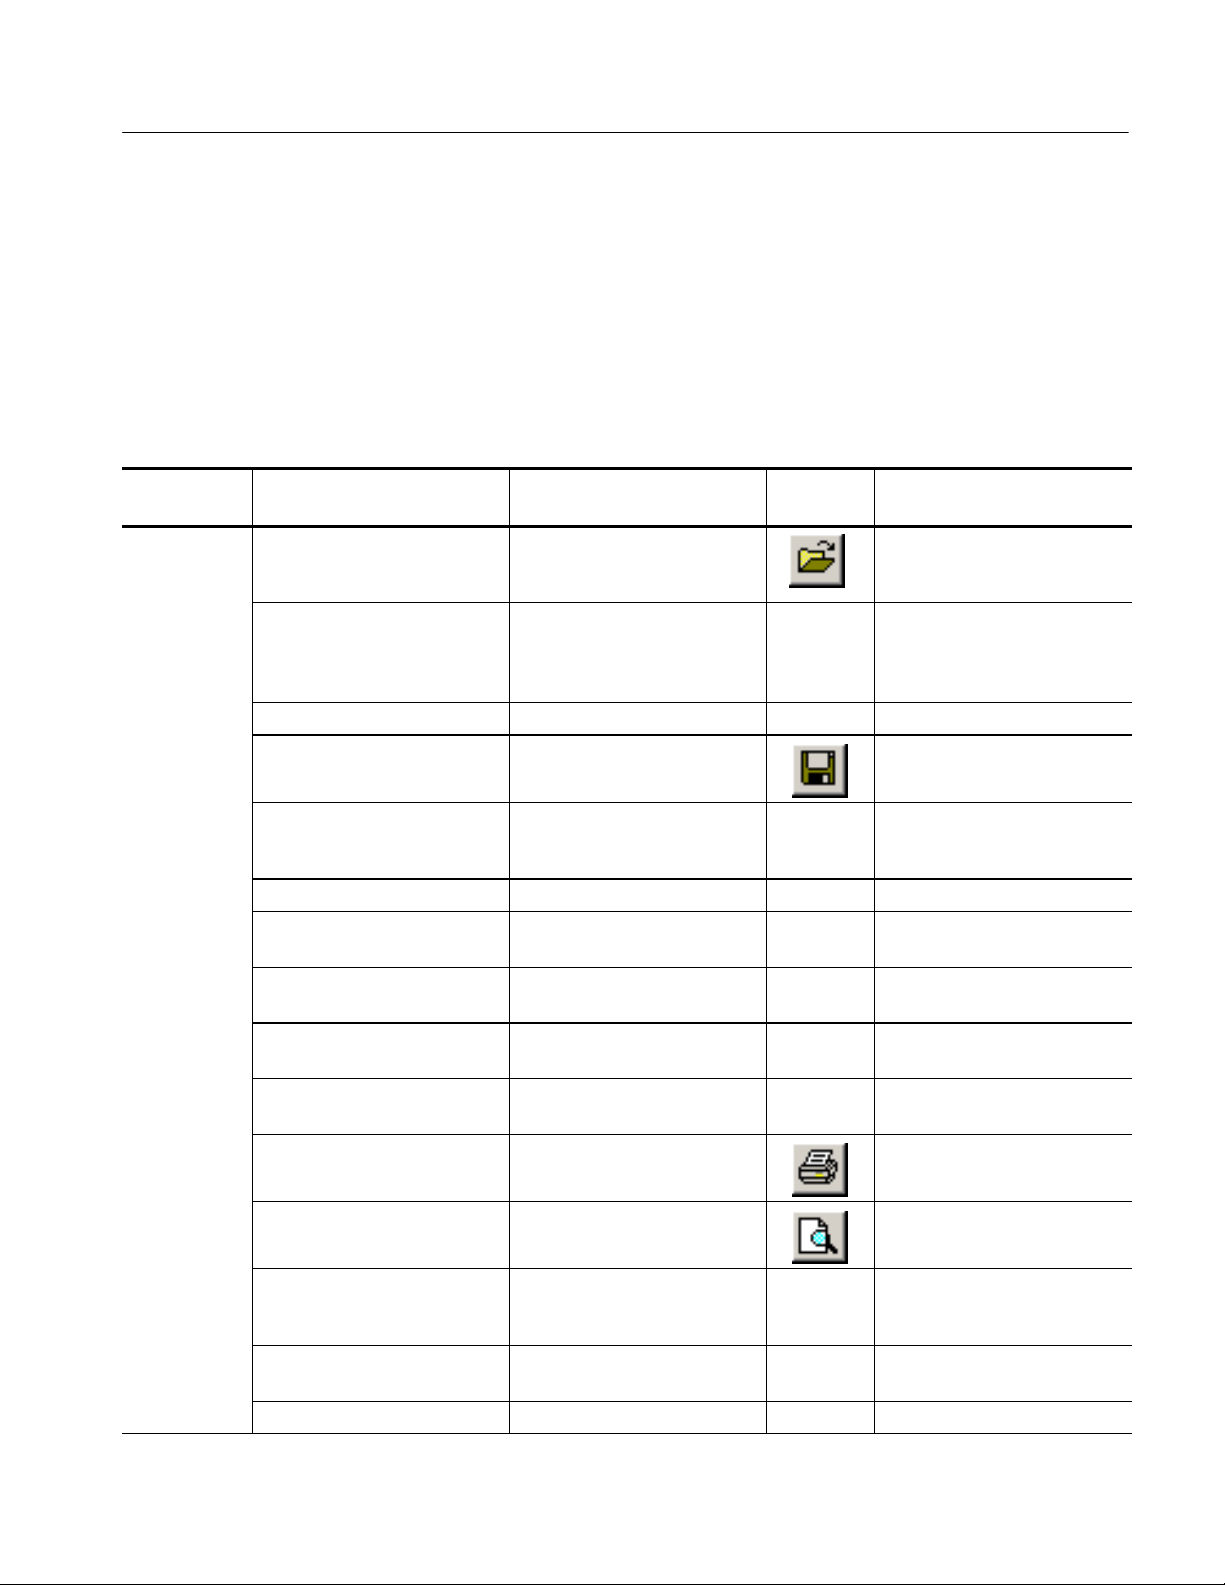
Table 1- 1: Acquisition window menus and toolbar buttons
Menu Selection Function
File > Open Use Windows Explorer to
browse and open a previously
saved log session.
Open Current Log Open a Tektronix Bluetooth
.tbpa log file located at the path
specified in the System > Options > Output tab.
Close Closeafile.
Save Save changes to the open data
file.
Save As Open the Save As dialog box to
saveafiletoaspecifiedlocation.
Search Files Search for a file. See the Online Help.
Export Export data to a comma sepa-
rated file (.csv)
Properties Display properties of the active
data file.
Acquisition Summary Display acquisition details of the
active data file.
Send To Send the active file as email to
the mail profile you specify.
Print Print the entire or partial con-
tents of the active data file.
Toolbar
button
Additional information
See page 1--35.
See page 1--33.
See page 1--33.
See the Online Help.
See the Online Help.
Print Preview Display a sample view of the the
data file selected for printing.
Print Setup Define the margins and other
printer properties for printing
data files.
Print Window Print the active window using
the Page Setup dialog box.
1, 2, 3... <List of recent files> Reopen a recently opened file.
BPA100 Series Bluetooth Protocol Analyzer User Manual
1- 7

Acquiring Piconet Packet Data
Table 1- 1: Acquisition window menus and toolbar buttons (Cont.)
Toolbar
Menu Additional information
Exit Quit the Bluetooth Protocol
System > Start Session Begin an acquisition (logging)
Stop Session End the current acquisition
Pause/Resume Click to suspend the current
Test Mode Enable/Disable Test Mode
Trigger Loopback Test Verify that the Trigger In and
System Properties Display BPA100 Series software
Tools > Access executable files set up
Options Define packet-type display
Default Return the factory default set-
Acquisition > Setup Define parameters for the next
FunctionSelection
Analyzer application
session using the criteria defined in the Acquisition > Setup
dialog box.
session.
acquisition session. Click again
to resume the session.
activation by a remote Bluetooth
device.
Trigger Out functions are operating properly.
and firmware versions and
copyright information.
with the Tools tab of the System
Options dialog box.
colors; define disk location for
storing acquisition log files;
identify executable files to be
run from the System > Tools
menu.
tings for the following: acquisition setup, data files, pre- post-trigger, error packet generation.
acquisition session.
button
Available with BPA105 Air Probe
only.
Available with BPA105 Air Probe
only.
Also displays the Bluetooth
device address of the connected
Air Probe.
See the Online Help.
See the Online Help.
See page 1--11.
1- 8
Data Filter Specify the packets you do not
want to acquire during the next
acquisition session in the Data
Filter dialog box. These settings
become the default settings.
Enable Data Filter Activate/deactivate the Data
Filter dialog box settings.
BPA100 Series Bluetooth Protocol Analyzer User Manual
See page 1--20.
Acquiring Piconet Packet Data
Table 1- 1: Acquisition window menus and toolbar buttons (Cont.)
Toolbar
Menu Additional information
FunctionSelection
button
Pre- Post Trigger Buffer Set the number of packets
collected before and after a
trigger event in the Pre- Post
Trigger Buffer dialog box.
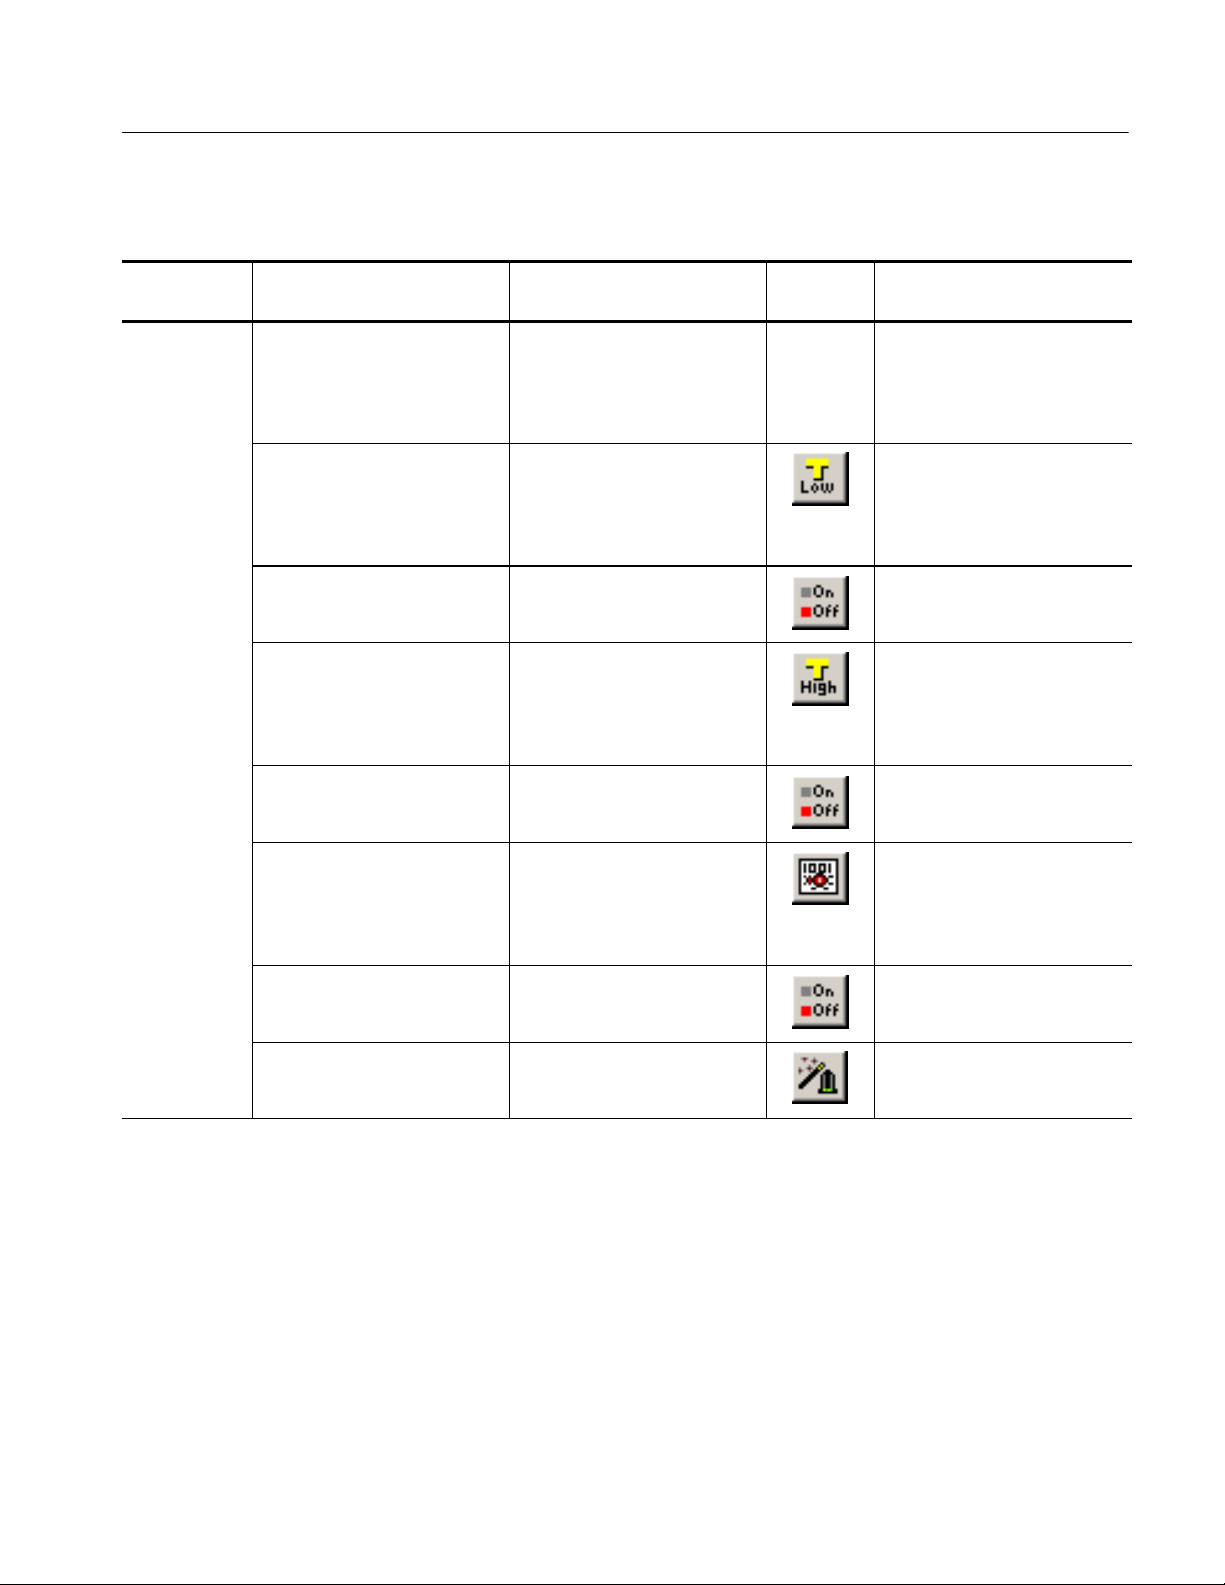
Low Level Trigger Define trigger events for the
next acquisition based on lowlevel trigger characteristics, such
as FLOW, ARQN, hop frequency, payload headers, etc.
Enable Low Level Trigger Enable/disable settings defined
in the Low Level Trigger Setup
dialog box.
High Level Trigger Define the trigger events for the
next acquisition base on highlevel trigger characteristics, such
as RFCOMM and SDP protocols.
Enable High Level Trigger Enable/disable settings defined
in the High Level Trigger Setup
dialog box.
Error Packet Generation Set error packet generation
sequences for testing and
debugging, such as FLOW,
ARQN, hopping frequency,
payload headers, etc.
Enable Error Packet Generation Enable/disable settings defined
in the Error Packet Generator
dialog box.
Sync Wizard Use the Sync Wizard to define
participants and synchronize to
a Piconet.
Unless enabled, the post-trigger
buffer size is limited only by the
disk space available on your PC.
See page 1--31 for additional
information.
See page 1--21.
See page 1--30.
See page 2--6.
BPA100 Series Bluetooth Protocol Analyzer User Manual
1- 9

Acquiring Piconet Packet Data
Table 1- 1: Acquisition window menus and toolbar buttons (Cont.)
Toolbar
Menu Additional information
View > Toolbar Enable/disable the toolbar. See Figure 1--1 on page 1--6.
Statusbar Enable/disable the statusbar.
Sync Bar Enable/disable the synchroniza-
Session Info Bar Enable/disable the session
Show/Hide Packets Define which packets you want
FunctionSelection
tion information bar.
information bar.
to display in the List views.
button
Contains synchronization status
indicator. See page 1--13.
Displays session time information and packet counts. See
page 1--11.
See the Online Help.
Show/Hide Columns Define which columns you want
to display in the List views.
Format Columns Define the data format of the
displayed columns: decimal,
hex, binary, ASCII.
Help > Help Topics Display the online help main
menu.
Help on Window Display the help topic for the
active window.
What’s This? Point to an element in the
display window and obtain a
help topic.
Technical Support Access the Tektronix Bluetooth
Protocol Analyzer technical
support Web site.
Customer Feedback Obtain a request for feedback
on the product support Web site.
About Tektronix Bluetooth
Protocol Analyzer
Display Bluetooth Protocol
Analyzer software version and
copyright.
See the Online Help.
See the Online Help.
Download drivers and software
updates. Obtain product-related
technical information.
Send ideas for product improvement.
1- 10
BPA100 Series Bluetooth Protocol Analyzer User Manual

Acquiring Piconet Packet Data
Data Window
The data window displays information on the traffic you are currently logging
(acquiring). Data windows are either acquisition windows (active during data
collection) or analysis windows (active when you display the contents of a saved
acquisition file). See Analyzing Piconet Packet Data beginning on page 1 --35 for
more information on analysis windows.
Session Info Bar. At the bottom of the acquisition data window, the Session Info
Bar displays the information listed below. See Figure 1--1 on page 1--6 for the
location of the session info bar.
H Start time of an in-process acquisition session
H End time of the most recently completed acquisition session
H Number of baseband packets logged
H Logsizeinbytes
H Number of bytes received
Setting Up an Acquisition
Select Acquisition > Setup or click the shortcut button to display the
Acquisition Setup dialog box. See Figure 1--2. Use this dialog box to configure
the settings for a new logging session.
Figure 1- 2: Acquisition Setup dialog box
BPA100 Series Bluetooth Protocol Analyzer User Manual
1- 11

Acquiring Piconet Packet Data
Logging Mode
Before you start a new logging session, decide whether you will operate the
Bluetooth Protocol Analyzer as an active member of a Piconet (either as a master
or as a slave) or as a stand-alone unit that nonintrusively monitors data flowing
across the Piconet.
Piconet Mode. Use this mode with the Bluetooth Neighborhood or HCI Terminal
to set up the Bluetooth Protocol Analyzer as an active participant in the Piconet.
When you start a logging session, the analyzer logs all baseband packets sent
from and received by your computer, whether the Bluetooth Protocol Analyzer is
acting as a slave or a master.
NOTE. You cannot operate the HCI Terminal application and Bluetooth
Neighborhood simultaneously.
Independent Mode. Use this mode to set up the Bluetooth Protocol Analyzer as a
stand-alone unit. When you select this mode, the analyzer displays the Sync Bar
near the bottom of the acquisition window. See page 1--13 for additional
information on the Sync Bar.
Select a synchronization mode:
H Sync to Piconet using master inquiry. In this mode, synchronization is
obtained by performing an inquiry and using the clock information returned
by the master to set the clock of the Bluetooth Protocol Analyzer. You must
identify a master in the Select Master dialog box. See Select Master or Slave
on page 1--14.
In some Bluetooth devices, the clock drifts away when the device is not in
connect mode; this synchronization mode can be troublesome if you want to
monitor negotiations during the connect phase. The problem occurs because
there are often several seconds of delay from the time the Bluetooth Protocol
Analyzer obtains the master clock information until the master actually
connects to the slave. Likewise, if the inquiry scan mode on the Bluetooth
device is not implemented or is disabled during the connection, this mode
cannot be used for synchronization. See Resync on page 1--19.
H Sync to Piconet using a fake connection response. This mode can be used
only during the connection phase, when the Piconet master connects to a
new slave. The analyzer operates as if it were the slave unit selected in the
Select Slave dialog box (see Figure 1--4 on page 1--14) and obtains the
master clock information by initiating a new connection as if it were that
slave. Immediately after the clock information is retrieved, the protocol
analyzer stops transmitting, and the piconet master continues the connection
attempt with the true slave. You must identify a slave in the Select Slave
dialog box. See Select Master or Slave on page 1--14.
1- 12
BPA100 Series Bluetooth Protocol Analyzer User Manual
Acquiring Piconet Packet Data
NOTE. The HCI Terminal application provides user control of the Bluetooth
Protocol Analyzer in piconet member mode. See the HCI Terminal topic on
page 1--33.
H Sync to Piconet using slave inquiry. This mode can only be used during the
connection phase. The Bluetooth Protocol Analyzer listens for the clock
information from the master (sent in the connection phase) to the new
Piconet slave, and does not interfere with the Piconet in any way. In order to
find the clock information on the right frequency, it is necessary to capture
the slave clock. This is done by performing an inquiry to the slave. You must
identify a slave in the Select Slave dialog box. See Select Master or Slave on
page 1--14.
Sync Indication Bar. To activate the Sync Bar, select View > Sync Bar. When you
use Independent mode as the logging mode, the Sync Bar appears at the bottom
of the acquisition window. See Figure 1--3.
Figure 1- 3: Acquisition window Sync Bar
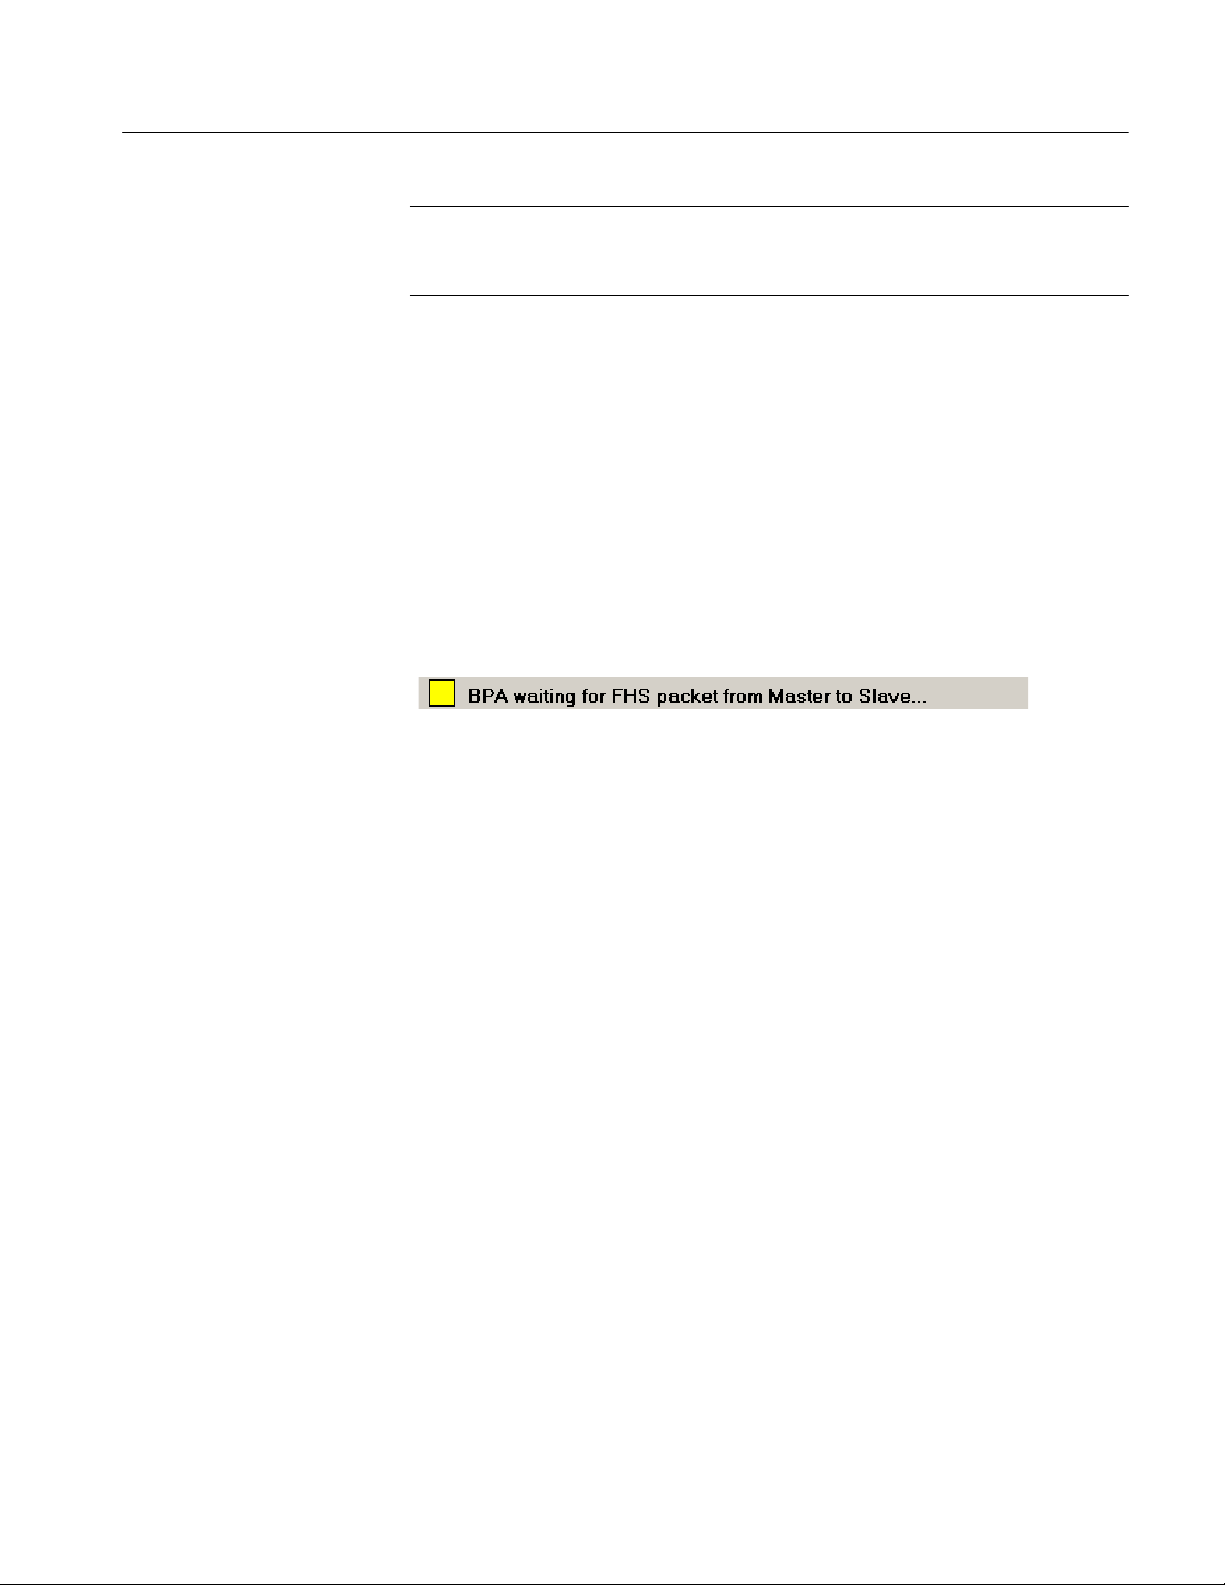
The Sync Bar contains the following indicators to verify the status of the
analyzer connection to the Piconet:
H Gray. Indicates that the analyzer is in an idle state.
H Yellow. Indicates that the analyzer is waiting for an FHS packet from the
master or slave that is needed for synchronization. This indicator is
accompanied by an explanatory message.
H Flashing Yellow. Indicates that the analyzer is synchronized to the master but
has not yet recorded any traffic. This indicator is accompanied by an
explanatory message.
H Green. Indicates the analyzer is synchronized and acquiring data.
H Red. Indicates that a time-out occurred while waiting for traffic. For more
information on time-outs, see Acquisition Timeout on page 1--15.
BPA100 Series Bluetooth Protocol Analyzer User Manual
1- 13
Acquiring Piconet Packet Data
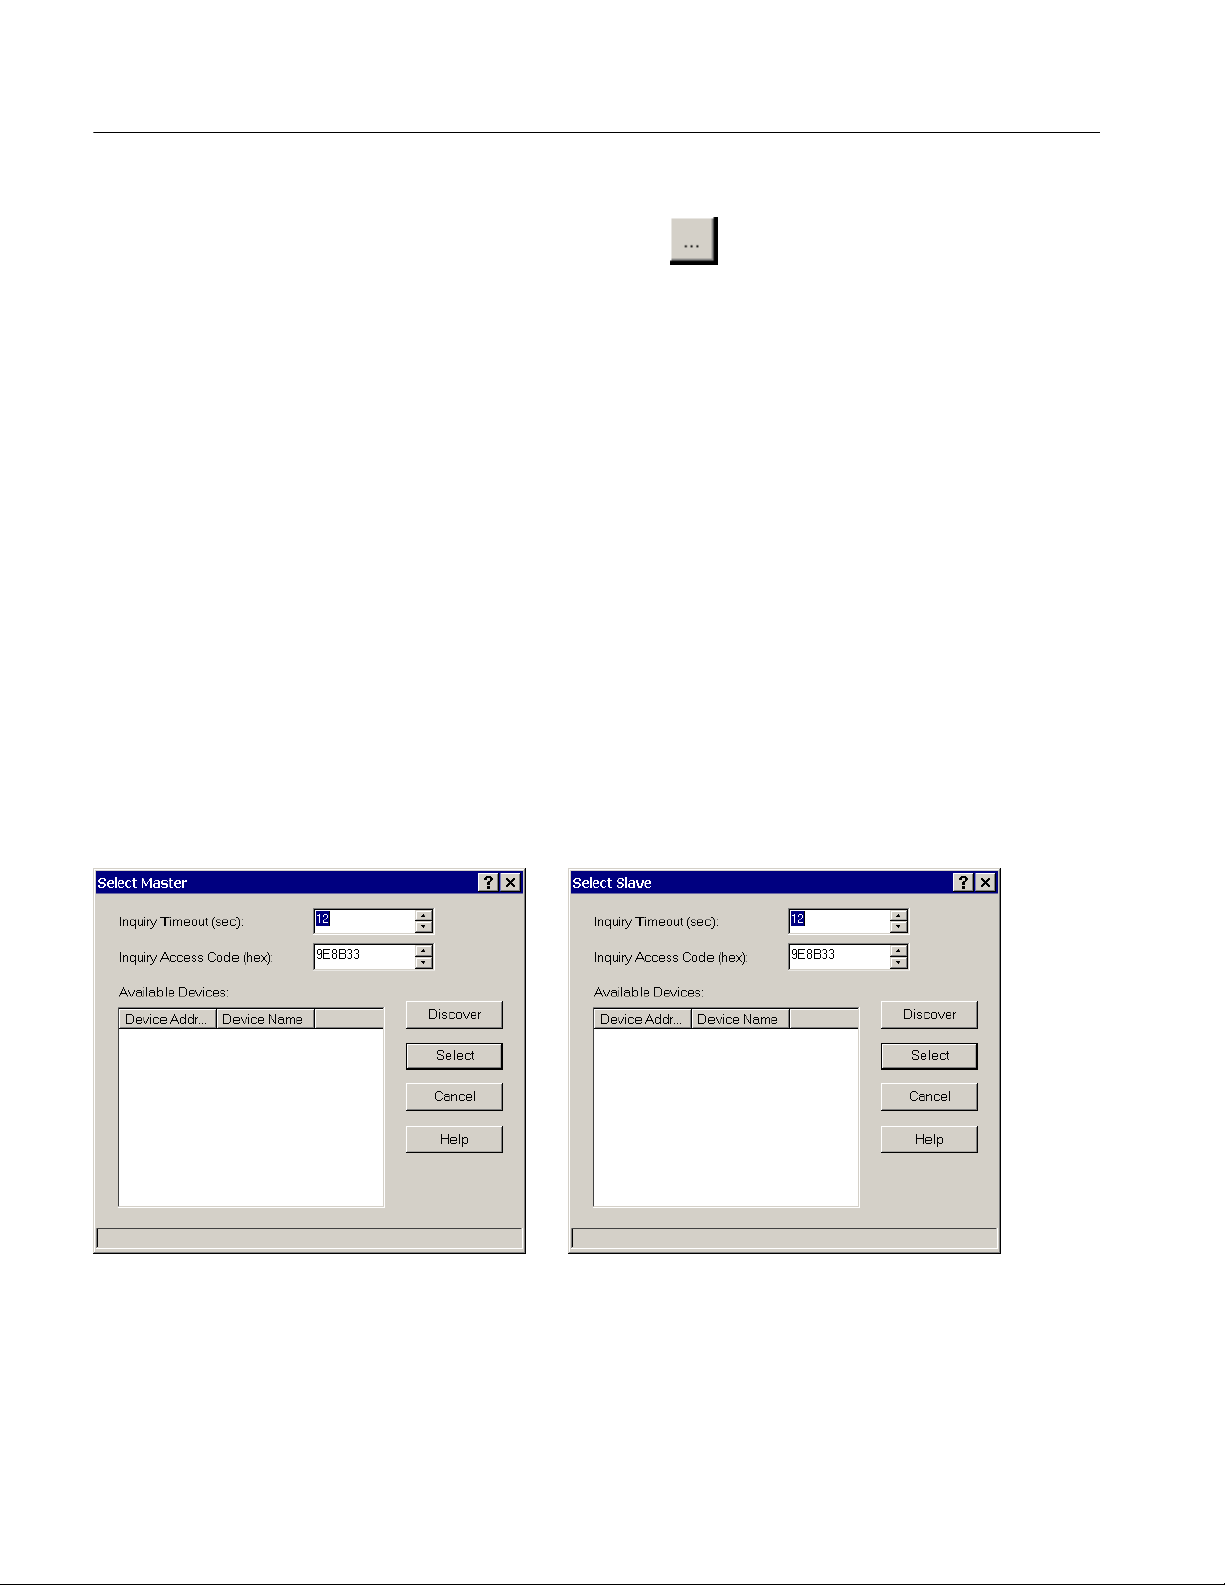
Select Master or Slave. Click the
box (see Figure 1--2 on page 1--11) to open a Master or Slave dialog box and set
up the options to discover and connect to a Bluetooth device within range. See
Figure 1--4.
H Inquiry Time-out. Select how long the Bluetooth Protocol Analyzer performs
the inquiry process. The default time is 12 seconds. However, you can set the
time from 2 to 60 seconds.
H Inquiry Access Code. Enter an inquiry access code (IAC); there are 64 IACs.
The default is the General IAC (GIAC), which is 0x9E8B33. The remaining
63 access codes are Dedicated IACs (DIACs). You can set any of the 64
IACs. Although the GIAC is normally used, you can use a DIAC in certain
instances.
For example, a group of users might agree to set their devices to a specific DIAC
to make their devices easier to discover in an environment with many Bluetooth
devices.
H Discover. Click this button to carry out device discovery and display a list of
all active Bluetooth devices within range.
H Select. Click the device name you want to synchronize to; then click Select
and close the Select Master or Select Slave dialog box.
shortcut button in the Acquisition dialog
Figure 1- 4: Select Master and Select Slave dialog boxes
1- 14
BPA100 Series Bluetooth Protocol Analyzer User Manual

Acquiring Piconet Packet Data
Acquisition Time-out. The Bluetooth Protocol Analyzer invokes a synchronization time-out under the following conditions.
H Acquisition Setup Dialog Box Timeout. Click Acquisition > Setup.Inthe
Timeout (sec) field specify a number in the drop-down list box to limit the
amount of time the analyzer will wait for traffic to start after synchronizing
to a Piconet. If the analyzer is synchronized to a Piconet, and no traffic exists
on the Piconet for too long a time period, clock drift between the analyzer
and the master device may cause loss of synchronization.
H Loss of Piconet Synchronization Time-out. The Bluetooth Protocol Analyzer
will also time out if the analyzer cannot synchronize within a 41 second
period. In this case, user intervention may be required. For example, you
may have to move the undiscovered device closer to the analyzer or reorient
the Bluetooth Protocol Analyzer Air Probe antenna, and then try again. In
some cases, you may have to remove another source of radio interference.
NOTE. When you operate the Bluetooth Protocol Analyzer and Bluetooth
Neighborhood together to participant in a Piconet, you must use Piconet mode.
When you operate the Bluetooth Protocol Analyzer in Independent Mode
working as a passive listener, you cannot use Bluetooth Neighborhood.
BPA100 Series Bluetooth Protocol Analyzer User Manual
1- 15
Acquiring Piconet Packet Data
Enabling Decryption
Use the following procedure to set up the Bluetooth Protocol Analyzer to decrypt
encrypted data transmitted between Piconet devices. See Understanding
Decryption, on page 2--18, for additional information on the decryption process.
NOTE. This feature operates in Independent mode only.
1. In the menu bar, select Acquisition > Setup.
2. In the Acquisition Setup dialog box, check the Enable Decryption option
box to enable the feature.
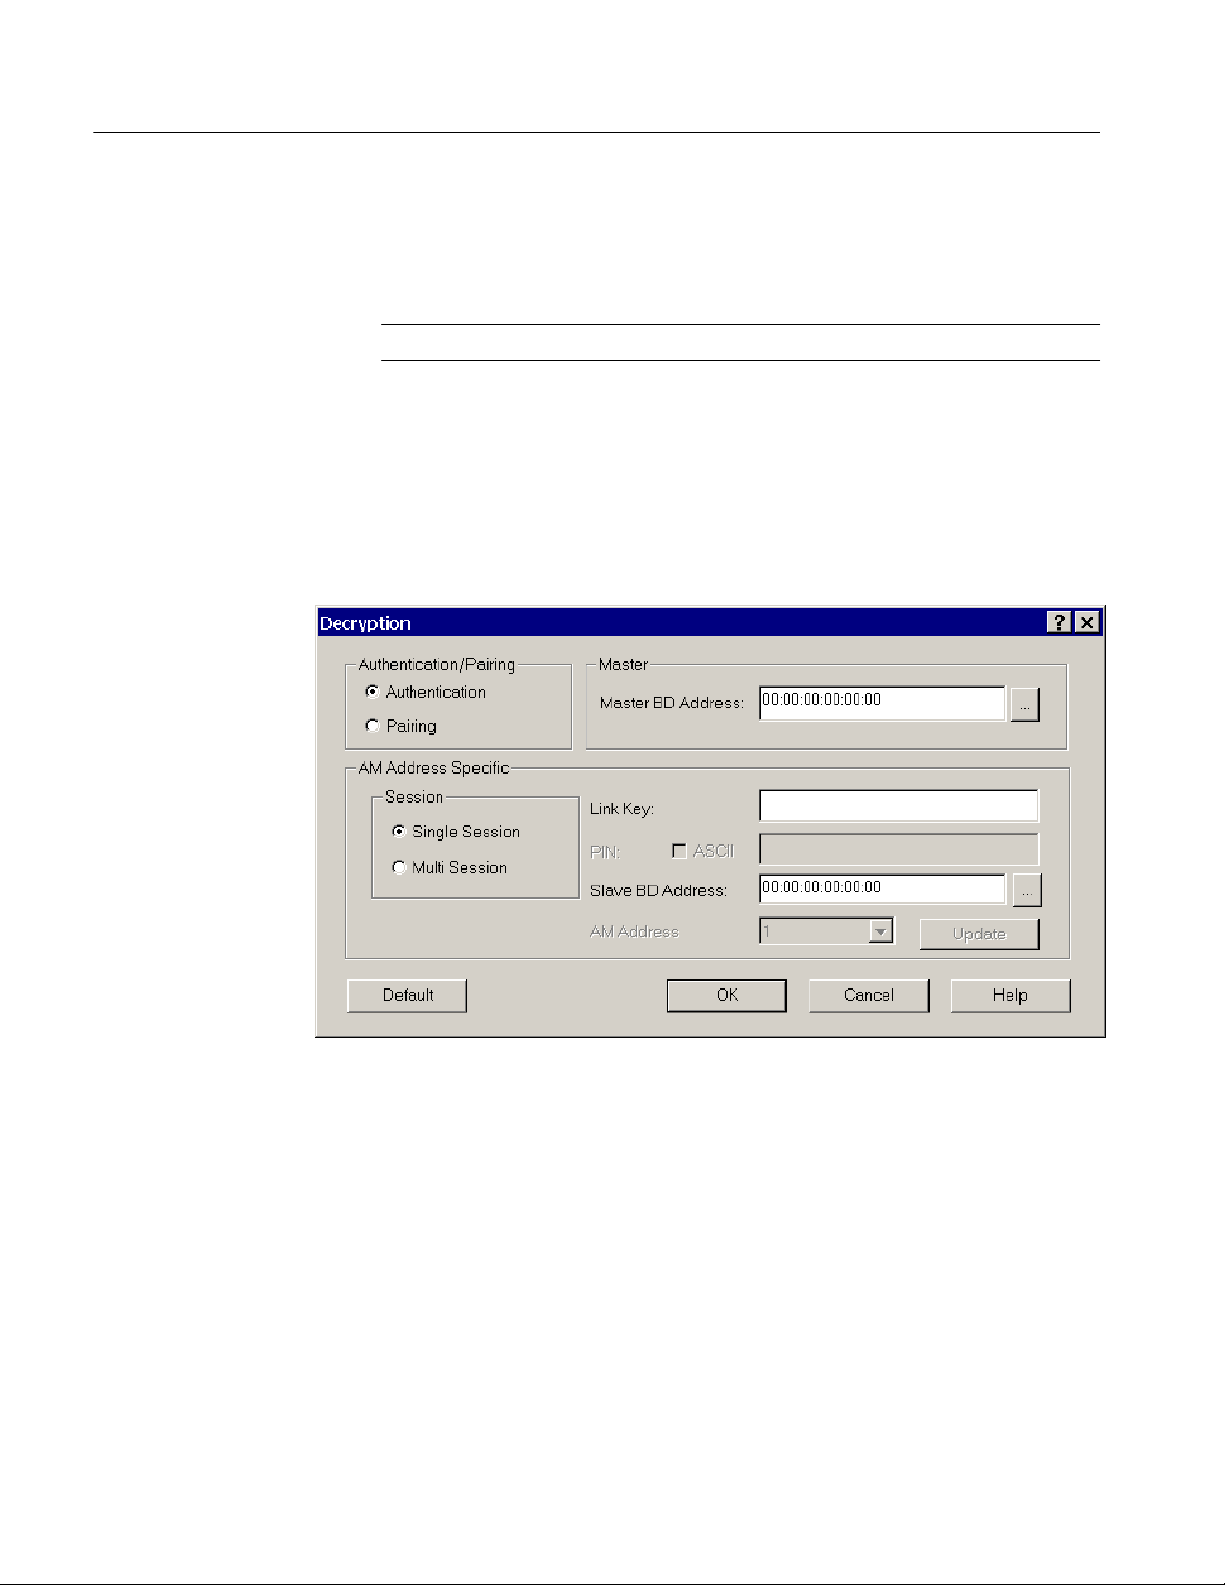
3. Click the Decryption button to display the Decryption dialog box. See
Figure 1--5.
1- 16
Figure 1- 5: Decryption dialog box
H Authentication. Use Authentication to decrypt encrypted data transactions
from bonded (paired) devices where a link key has been previously
calculated. You must enter the Link Key, a 128-bit hexadecimal number,
along with the master and slave Bluetooth device addresses of the devices
for which decryption is desired.
H Pairing. Use Pairing for unbonded devices when the acquisition will record
the pairing process using PIN codes. In this case, you must enter the PIN
code (optionally using an ASCII entry) used between the master and slave
for authentication.
BPA100 Series Bluetooth Protocol Analyzer User Manual

Acquiring Piconet Packet Data
The analyzer will monitor the authentication process, compute the link key,
and decrypt any following encrypted data transactions between master and
slave.
H AM Address Specific. Select Single or Multi Session. A Single Session
consists of only one slave device. A Multiple Session consists of more than
one slave device. If you select Multi Session, you need to enter the Slave BD
Address for each AM Address (Active Member Address).
NOTE. Authentication requires the use of a link key, which is not a “1234”
number like a PIN. For authentication, you must enter the 32-character 128-bit
hexadecimal number that is used to pair devices. As a general strategy, use
pairing to capture the first Piconet between two devices by entering a PIN, and
then let the analyzer sniff and capture the packets that control the pairing
process. To find the link key, select File > Acquisition Summary and scroll to
the bottom of the file. The link key is labeled Calculated Link Key.
H Master or Slave BD Address. Enter the Master and Slave Bluetooth Device
Enabling Drift
Compensation
addresses, or click the
which to discover and select a device.
H Link Key. Enter the link key when Authentication is selected.
H PIN. Enter the PIN code value (Hex or ACSII) when Pairing is selected.
4. Click OK to accept your decryption parameters as part of the acquisition
setup.
Drift compensation improves your chances of synchronizing to a device with a
highly drifting clock. By receiving more than one FHS packet for a particular
device over several seconds, the analyzer can calculate the relative drift of the
device and use this information to improve the success of synchronization.
NOTE. This feature operates in Independent mode only.
1. In the menu bar, select Acquisition > Setup.
2. In the Acquisition Setup dialog box, check the Enable DriftComp option
box to enable the feature.
3. Click the DrifComp button to display the Driftcomp dialog box. See
Figure 1--6.
button to display the Master dialog box from
BPA100 Series Bluetooth Protocol Analyzer User Manual
1- 17

Acquiring Piconet Packet Data
The DriftComp dialog box lets you calculate the drift between the Bluetooth
Protocol Analyzer clock and the device under test clock. The analyzer will use
this value to synchronize to the device.
Figure 1- 6: Drift compensation dialog box
4. In the DrifComp dialog box, click Select to display the Select Device
Address dialog box.
5. Click Discover to find the available devices within range.
After a few seconds (up to the value you set in the Inquiry Timeout list box)
the Select Device Address dialog box displays the addresses of the available
devices.
6. Select a target Bluetooth device from the Available Devices list; then click
Calculate.
The analyzer calculates the drift between itself and the selected target device
and then displays the information in the Drift Compensation Dialog box. The
graph characterizes the drift for the target device.
7. Click OK to accept the calculated value as part of the acquisition setup.
1- 18
BPA100 Series Bluetooth Protocol Analyzer User Manual

Acquiring Piconet Packet Data
Hopping Mode
Advanced Settings
Specify the Piconet search criteria:
H Normal Hopping. Specify the hopping pattern for the geographical area you
want (Europe/USA, France, Spain or Japan).
H Rx/Tx on single-frequency. Specify the desired frequency from 2402 MHz to
2480 MHz. This mode is useful for testing and debugging.
NOTE. To meet FCC regulations, the transmit power is reduced to 0 dBm when
operating in the single-frequency mode.
Specify the Piconet synchronization parameters:
H Correlation. This value sets the number of bits (in the synchronization word
of each received packet) that must be matched to validate the packet.
Normally, the radio uses 54 to 64 bits correlation. The default value is 54.
The value can range from 40 to 64.
H Resync. This value sets the expected drift in parts per million of the master
when in park, sniff, or hold modes and optimizes resynchronization to the
Piconet when you exit park, sniff, or hold. The Bluetooth specification
allows up to ±250 ppm in the park, sniff, or hold modes as a power saving
technique. The analyzer uses the resync value when it sets up the window
length in a continuous search for a packet, when the Piconet exits park, sniff,
or hold modes.
Resync is used in independent mode only. You can force the analyzer to not
use a “window search” by setting the resync value to zero. This is useful if
you know the device has negligible drift, and helps ensure that no packets
are lost because of the window search.
Data Whitening
BPA100 Series Bluetooth Protocol Analyzer User Manual
You can turn data whitening on or off. By default, this function is on, which is
normal operation for Bluetooth devices.
Data whitening encrypts all data packets transmitted between Bluetooth devices
on a Piconet to remove DC bias in the data.
For test purposes, you can turn data whitening off. In this test condition, all
devices must have whitening turned off or you will get scrambled data.
1- 19

Acquiring Piconet Packet Data
Output
Specify the destination of the data output from your logging session:
H Log file. Send the output to a log file on the PC hard disk. You can open the
H Free run display. To continuously monitor the latest session transactions with
In both cases, you must stop the acquisition and save the data to a file before you
can begin a data analysis.
Setting Up the Data Filter
Select Acquisition > Data Filter or click the shortcut button to display
the Data Filter set up dialog box. See Figure 1--7.
The data filter allows you to reduce the amount of data captured during a logging
session. This function can greatly reduce the size of the log file, making it easier
to work with the data.
You can set up the filter to ignore the following baseband packets: ID, NULL,
POLL, and Access Error packets.
file and analyze the data later. See Understanding the Data Analysis Window
on page 1--36 for additional information.
real-time screen updates, send the data directly to the List view display in the
Acquisition Window.
1- 20
Figure 1- 7: Data Filter set up dialog box
BPA100 Series Bluetooth Protocol Analyzer User Manual

Setting Up Triggers
Acquiring Piconet Packet Data
You can set up low and high-level triggers that instruct the Bluetooth Protocol
Analyzer to log specific types of data you are interested in.
Low Level Trigger
Low-level triggers allow you to define and capture specific conditions that you
may want to monitor on a Piconet.
Select Acquisition > Low Level T rigger or click the
open the Low Level Trigger Setup dialog box. See Figure 1--8 on page 1--22.
In the this dialog box, you can define the packet sequences that will trigger the
Bluetooth Protocol Analyzer.
Setting up low-level triggers consists of the following tasks:
H Defining the trigger sequences.
H Specifying the packets involved.
H Indicating the actions to be taken when the analyzer triggers.
You can specify trigger sequences using patterns at the following protocol layers:
Baseband, LMP, L2CAP, RFCOMM, SDP, and various header and payload
errors.
The low-level trigger function is limited to 4 simultaneously active trigger
sequences consisting of up to four packet definitions each.
High-level triggers are not limited in this fashion. See page 1--30 for additional
information on high-level triggers.
shortcut button to
BPA100 Series Bluetooth Protocol Analyzer User Manual
1- 21

Acquiring Piconet Packet Data
Figure 1- 8: Low Level Trigger Setup dialog box
Trigger On. Select the sequence(s) to be used as a trigger by checking the Trigger
On option boxes. If no check boxes are selected, all sequences are disabled and
the analyzer will not recognize a trigger. If more than one sequence is checked,
the first sequence satisfied will trigger the analyzer.
Trigger Sequence Tabs. Select a tab to configure a trigger sequence. You can
create a maximum of four sequences, each containing a maximum of four
patterns.
Each sequence is a potential trigger and the sequence detected first causes the
Bluetooth Protocol Analyzer to begin logging. Occurrences of the remaining
sequences are indicated in color and function as markers in the analyzer display.
All packets, except the last packet in a sequence, are marked in Yellow as a
single match in a sequence. The last packet in any sequence is Green.
The following list describes the control elements you can set up to define a
trigger sequence:
H Name. Type a name into the Name field to identify the trigger sequence, or
use the default name if you do not want to create a new one.
1- 22
BPA100 Series Bluetooth Protocol Analyzer User Manual

Acquiring Piconet Packet Data
H Trigger Out. Click this check box if you want the Bluetooth Protocol
Analyzer to output a trigger from the Air Probe Trig Output connector when
the trigger sequence is identified (BPA105 only).
H Repeat. Click the Change button to open the Sequence Repeat dialog box
and specify how many times you want the analyzer to repeat the selected
trigger sequence. See Figure 1--9. Whenever the patterns in the specified
sequence occur in order, they will be marked in the Bluetooth Protocol
Analyzer display.
H Click the Repeat the sequence indefinitely check box to repeat the
specified trigger sequence indefinitely, or clear the check box to specify
a value with the slider.
H Move the Repeat slider to specify the number of times to repeat the
trigger sequence, 1 through 200.
H Click OK or Cancel.
Figure 1- 9: Sequence Repeat dialog box
H Time-out. Click the Change button to open the Sequence Timeout dialog
box and specify a time-out value. See Figure 1--10.
This value controls how long the analyzer looks for the next pattern in a
sequence. Enter the value as a number of Bluetooth time slots. A Bluetooth
time slot is 625 s. The range for this field is 0 to 65535 time slots. If you
enter 0, you disable the time-out. If a time-out prevents a sequence from
completing, a red marker is indicated in the analyzer List view and the
sequence is reset.
BPA100 Series Bluetooth Protocol Analyzer User Manual
1- 23

Acquiring Piconet Packet Data
H Click the Specify no timeout value check box to specify no time-out
limit, or clear the check box to specify a value with the slider.
H Move the slider to specify a time-out value, 1 through 65, 535 Bluetooth
time slots.
H Click OK or Cancel.
1- 24
Figure 1- 10: Sequence Timeout dialog box
Add Packet. Click the Add Packet button to open the Packet Definition dialog
box and define a trigger. See figure 1--11.
H Specify the action of the selected sequence using the “If”, “is” and “of
type” drop-down list boxes. You can add up to four packets for each
sequence. The “Then” field indicates the trigger action that follows each
packet in the trigger sequence.
H Click OK or Cancel.
BPA100 Series Bluetooth Protocol Analyzer User Manual

Figure 1- 11: Packet Definition dialog box
Acquiring Piconet Packet Data
Customize Pattern. In the Packet Definition dialog box, click the Customize
button to open the Customize Pattern dialog box and specify the characteristics
of a packet for specialized triggering. See figure 1--12.
Figure 1- 12: Customize Pattern dialog box
BPA100 Series Bluetooth Protocol Analyzer User Manual
1- 25

Acquiring Piconet Packet Data
All fields in the Customize Pattern dialog box are used to set conditions for
triggers to occur.
H Name. This field identifies the “of type” pattern you selected in the Packet
Definition dialog box (see Figure 1--11 on page 1--25).
H Status. In the Status field you can specify a trigger condition if an error
occurs.
H Options available for Rx packets:
H Access error
H Packet header error (1/3 FEC)
H Packet header error (HEC)
H Payload recoverable error
H Payload non-recoverable error
H Payload error
H Payload length error
H Options available for Rx, Tx, or either packets:
H Packet transmit
By right-clicking you can enable and set conditions, or specify the condition
as “don’t care.” For example, if you select the the third option, then a trigger
on that pattern occurs only if there is an HEC error in that pattern. If you
select the eighth option, a trigger occurs only if that pattern is transmitted.
H Estimated Clock. This is the Bluetooth clock for the Master used in the
Piconet. X specifies that four bits are “don’t care.” For example,
XXXXXXXX causes the entire estimated clock to be ignored by triggering.
H Frequency. In this two-part field, you can enter a specific frequency. In
addition to the frequency, the channel is displayed (on the right). The
mapping from frequency to channel is (Freq = 2402 + Channel), and the
mapping goes both ways. For example, if you specified channel 10, the
frequency field automatically displays 2412. You can also select “don’t care”
for these bits.
H AM Address. This field sets the Active Member (AM) address. This address
is used to access different members in the Piconet. Three bits are used for
this address, that is, eight different AM addresses are available. AM_ADDR
= 0 is used for broadcast. You can also select “don’t care” for these bits.
1- 26
BPA100 Series Bluetooth Protocol Analyzer User Manual

Acquiring Piconet Packet Data
H Type. This field specifies the packet type. Four bits are used for the packet
type, that is, 16 different Packet types are available. You can specify only the
packets that are not reserved. You can also select “don’t care” for these bits.
H Flow. One bit is used for flow control in the header. Flow = 0 means STOP;
Flow = 1 means GO. You can also select “don’t care” for this bit.
H ARQN. One bit is used for acknowledgement of the last transmission. If a
packet is received correctly, the ARQN bit is set to 1 in the return packet.
You can also select “don’t care” for this bit.
H SEQN. SEQN is a sequential sequence of numbers used to detect retransmis-
sion. You can also select “don’t care” for this bit.
H L_CH. This field specifies the Logical Channel. This field contains two bits
and is used to indicate whether the packet is an LMP message or an L2CAP
fragment.
H Flow. This flow bit is used to control flow on the L2CAP level. One bit is
used for flow control in the payload. Flow = 0 means STOP; Flow = 1
means GO. You can also select “don’t care” for this bit.
H Length. This field allows you to select a specific length to trigger on. The
length can be from 0--339; you can also select “don’t care.”
H Data/Mask. This field specifies the payload data (first row) and the mask that
is used with the data (second row). A mask of FF will mask in the whole
byte and a mask of 00 will mask out the whole byte. The position of the
mask and data is linked together so that the value in data index 1 links to the
mask at mask index 1 and so on. Empty fields are interpreted as “don’t care.”
H Comments. You can use this field to enter additional information (notes)
about the specified pattern.
H Click OK or Cancel.
BPA100 Series Bluetooth Protocol Analyzer User Manual
1- 27

Acquiring Piconet Packet Data
Slot Information. This field shows information about the patterns you have loaded
into hardware. There are ten hardware slots you can load with patterns.
H Click the Slot Info button to open the Slot Information dialog box and
identify the storage location of the defined packets. See Figure 1--13.
You can use up to 10 hardware slots. The pattern name, and whether it is
customized or not, is listed next to the slot number. Slots are filled as
patterns are added. Customized packets use additional slots.
For example, an uncustomized DH1 packet unused in Sequence A, occupies
a different hardware slot than the customized DH1 packet used in sequence
D, etc.
H Click Close.
1- 28
Figure 1- 13: Slot Information dialog box
NOTE. You are allowed 10 hardware patterns (slots 1 through 10) for low-level
triggers.
BPA100 Series Bluetooth Protocol Analyzer User Manual

Acquiring Piconet Packet Data
Sequence Overview. The Overview field summarizes the flow of packets
comprising each trigger sequence.
Figure 1- 14: Low-level t rigger setup with completed trigger sequence
Load and Save. You can load trigger files (*.llt files) that you have previously
created, or save the current trigger setup using the Load and Save buttons.
H Load. Click this button to display the Open dialog box that allows you to
browse and open a trigger setup file (*.llt).
H Save. Click this button to display the Save As dialog box that allows you to
browse and save a trigger setup file (*.llt).
Enable Trigger. To enable the Low Level Trigger, click the Enable button; then
close the Low Level Trigger Setup dialog box.
BPA100 Series Bluetooth Protocol Analyzer User Manual
1- 29

Acquiring Piconet Packet Data
High Level Trigger
Select Acquisition > High Level Trigger or click the
open the High Level Trigger Setup dialog box. See Figure 1--15.
Use this dialog box to set up the Bluetooth Protocol Analyzer to trigger on
RFCOMM and service discovery protocols (SDP).
shortcut button to
Figure 1- 15: High Level Trigger Setup dialog box
To set up and trigger on RFCOMM or SDP protocols, you must check the
Trigger on RFCOMM data or Trigger on SDP data option box.
RFCOMM Tab. When you click the RFCOMM tab and select the Trigger on
RFCOMM Data option box, you can select from among the following control
fields: SABM, DM, UIH, UA, and DISC. If you check UIH, additional
information fields become active.
You can also select Trigger on Payload Data to set up a trigger on the first
8 bytes of payload data. (Values for each byte are 0 through FF.) Empty fields
mean “don’t care.” For RFCOMM, the Payload data starts at the second byte of
the RFCOMM information field.
SPD Tab. When you click the SDP tab in the High Level Trigger Setup dialog
box and select the Trigger on SDP Data option box, you can do the following:
H Select from among various SDP information fields.
1- 30
BPA100 Series Bluetooth Protocol Analyzer User Manual

Acquiring Piconet Packet Data
H Select Trig on Payload Data to set up a trigger on the first 8 bytes of
payload data. (V alues for each byte are 0 through FF.) Empty fields are
interpreted as “don’t care.” For SDP, the Payload data starts from the first
byte of the SDP parameter data part.
Enable Trigger. To enable the High Level Trigger, click the Enable button; then
close the High Level Trigger Setup dialog box.
Pre- Post-Trigger Buffer
Select Acquisition > Pre-Post Trigger Buffer to display the Pre-Post Trigger
Buffer dialog box for setting pre-trigger and post-trigger buffer sizes. See
Figure 1--16.
Use this dialog box to set how many packets are saved prior to the trigger event
(0 to 100,000) and how many packets are saved after the trigger event (up to
3,200,000).
NOTE. If you do not check the Enable Post Trigger box, post-trigger data is saved
until you manually stop logging or the hard disk becomes full.
Figure 1- 16: Pre-Post Trigger Buffer setup dialog box
BPA100 Series Bluetooth Protocol Analyzer User Manual
1- 31

Acquiring Piconet Packet Data
Using the Synchronization Wizard
This feature allows users with a minimal knowledge of Bluetooth synchronization to easily synchronize to a Piconet. The wizard consists of a series of screens
that provide the appropriate graphics, selections, operations (like device
discovery), and other information to guide you through the synchronization setup
process.
The Wizard is self-explanatory . Simply start the Wizard and follow the on-screen
instructions.
To start the Sync Wizard, click the
Sync Wizard in the menu bar.
If you need further assistance while using the Wizard, click the Help buttons on
the individual setup panels.
shortcut button or select Acquisition >
1- 32
Figure 1- 17: Bluetooth Protocol Analyzer synchronization wizard
BPA100 Series Bluetooth Protocol Analyzer User Manual

Starting a Logging Session
Select System > Start Session or click the button to begin logging. If
you configured the Acquisition Setup dialog box Output for Free run display
(Acquisition > Setup > Output option buttons), a secondary window will open
within the application window to display the session views. A description of the
List, Packet, and Hex session views begins on page 1--44.
You can use one of the following methods to pause the automatic screen updates
during a session:
H Select System > Pause in the menu bar.
Acquiring Piconet Packet Data
H Click the
Ending a Logging Session
Select System > Stop Session or click the button to discontinue the
current logging session. When the sessions ends, you will find the following
information displayed at the bottom of the application window:
H Start and end times of the logging session
H Number of baseband packets logged
H Log size
H Bytes received
Saving the Current Logging Session
Stop the current log session and select File > Save As to save the session (.tbpa
file) to a specified location using the displayed Save As dialog box. Click the
shortcut button to save the session to the specified location at any time.
shortcut button in the tool bar.
Using the HCI Terminal Application
The HCI Terminal application (included on the BPA100 Series Bluetooth
Protocol Analyzer product software disk) provides a hardware interface similar
to the interface provided by an AT terminal application when communicating
with a modem. The HCI Terminal application provides control of the
BPA100 Series Bluetooth Protocol Analyzer in Piconet member mode. This is
similar to using the Bluetooth Neighborhood from the Software Suite. For
further information on this product, refer to the documentation available on disk.
BPA100 Series Bluetooth Protocol Analyzer User Manual
1- 33

Acquiring Piconet Packet Data
How to Create HCI Scripts. The HCI Terminal Guide (also available on the
BPA100 Series Bluetooth Protocol Analyzer product software disk) describes the
functionality of the script language. The sample scripts provided in Appendix C:
Sample Scripts on page C--1 of this manual, will help you to understand HCI
scripting.
NOTE. You cannot operate the HCI Terminal application and Bluetooth
Neighborhood simultaneously. For controlled packet generation, you are advised
to use the HCI terminal instead of Bluetooth Neighborhood.
1- 34
BPA100 Series Bluetooth Protocol Analyzer User Manual

Analyzing Piconet Packet Data
This section includes information on the following topics:
H Opening a log file
H Understanding the analysis window
H Using the menus and toolbars
H Interpreting data in the List, Packet Information, and Hex views
You can perform the following operations on the data files you logged and saved
during acquisition:
H Search for files
H Find specific packets within data files using Advanced Search
H Export data to comma separated value (.csv) files that you can read with
other applications, such as Microsoft Excel
H Add or remove bookmarks
Opening a Data File
H Display a summary that includes session information and packet count
H Analyze and decode packet information at Baseband, LMP, L2CAP,
RFCOMM, SDP, OBEX, TCS, HDLC, PPP, BNEP, AT, and HID protocol
levels
H Display error packets and access errors
H Identify trigger packets and defined sequences
To open a data file for analysis, do the following:
H Select File > Open or click the
dialog box.
H Browse to the folder containing your saved acquisition files with the .data
extension.
H Select the file you want to open.
H Click Open.
shortcut button to display the Open
BPA100 Series Bluetooth Protocol Analyzer User Manual
1- 35

Analyzing Piconet Packet Data
Understanding the Data Analysis Window
The Bluetooth Protocol Analyzer opens each data file separately within the
application window. Figure 1--18 identifies the functional areas available for data
analysis.
List view
Packet infoview
Log toolbar
TabsToolbar ColumnsMenu Bar
Hex view
Statusbar Log Statusbar
Figure 1- 18: The Bluetooth Protocol Analyzer data analysis window
1- 36
BPA100 Series Bluetooth Protocol Analyzer User Manual

Analyzing Piconet Packet Data
Menu Bar
Toolbars
Table 1--2 lists the menus that are available when a file is open.
The toolbars contain shortcut buttons. Table 1--2 identifies the analysis toolbar
buttons and explains their functions. Most toolbar buttons have a corresponding
menu selection in the menu bar.
Table 1- 2: Analysis window menus and toolbar buttons
Menu Selection Function
File > Open Use Windows Explorer to
browse and open a previously
saved log session.
Open Current Log Open a Tektronix Bluetooth
.tbpa log file located at the path
specified in the System > Options > Output tab.
Close Closeafile.
Save Save changes to the open data
file.
Save As Open the Save As dialog box to
saveafiletoaspecifiedlocation.
Search Files Search for a file.
Export Export data to a comma sepa-
rated file (*.csv)
Properties Display properties of the active
data file.
Acquisition Summary Display acquisition details of the
active data file.
Send To Send the active file as email to
the mail profile you specify.
Print Print the entire or partial con-
tents of the active data file.
Toolbar
button
Additional information
See page 1--35.
See page 1--33.
See page 1--33.
Print Preview Display a sample view of the the
data file selected for printing.
Print Setup Define the margins and other
printer properties for printing
data files.
Print Window Print the active window using
the Page Setup dialog box.
1, 2, 3... <List of recent files> Reopen a recently opened file.
BPA100 Series Bluetooth Protocol Analyzer User Manual
1- 37

Analyzing Piconet Packet Data
Table 1- 2: Analysis window menus and toolbar buttons (Cont.)
Toolbar
Menu Additional information
Exit Quit the Bluetooth Protocol
Edit > Add/Remove Bookmark Toggle a bookmark on or off for
Add Comment Add a comment to the selected
Goto Prev Bookmark Select the previous packet in the
Goto Next Bookmark Select the next packet in the List
FunctionSelection
Analyzer application
the packet you have highlighted
in the List view.
packet in the List view. Comments are displayed in the
Navigate Bookmarks dialog box.
List view with a bookmark.
view with a bookmark.
button
Seepage2--1.
Clear All Bookmark Remove all bookmarks from the
List view.
Navigates Bookmarks Open the Bookmarks dialog box
so you can:
H Jump to a specified book-
mark in the List view.
H Display a bookmarked
comment.
H Display the time difference
between two bookmarked
packets.
Go One Level Back Move to the previous protocol
level List view that the selected
packet appears in. The currently
selected packet is also selected
in the new view.
Go To Next Level Move to the next higher protocol
level List view that the selected
packet appears in. The currently
selected packet is also selected
in the new view.
L2CAP Connection Properties Set the L2CAP packet type for
packets that cannot be decoded
from previous packets.
RFCOMM Server channel
assignments
Set the RFCOMM Server channel for assignments that cannot
be decoded from previous
packets.
You can also press the Backspace key.
You can also press the Enter
key.
1- 38
BPA100 Series Bluetooth Protocol Analyzer User Manual

Analyzing Piconet Packet Data
Table 1- 2: Analysis window menus and toolbar buttons (Cont.)
Toolbar
Menu Additional information
FunctionSelection
button
Highlight L2CAP Connection Highlight all packets with the
same L2CAP connection properties as the selected packet.
Highlight AM_ADDR Highlight all packets with the
same AM_ADDR value as the
selected packet.
Highlight Fragmentation Hghlight the packets associated
with the selected fragment.
Clear Highlights Clear all highlighting in all List
views.
Toggle Hex/ASCII in Payload Toggle payload display of the
selected packet between hexadecimal and ASCII format in the
List view.
Clear Toggled Fields Return all toggled fields to their
original format.
Search > Find Search for specific data in the
active List view using the various parameters.
Find Prev Select the previous packet in the
List view that contains data that
matches the search criteria last
entered in the Find dialog box.
Find Next Select the next packet in the List
view that contains data that
matches the search criteria last
entered in the Find dialog box.
Advanced Search Displays the Advanced Search
dialog box. You can search for
specific data packets based on
individual columns and Boolean
parameters.
System > Start Session Begin an acquisition (logging)
session using the criteria defined in the Acquisition > Setup
dialog box.
Stop Session End the current acquisition
session.
Pause Click to suspend logging in the
current acquisition session. Click
again to resume logging.
You can set the highlight color in
the Color tab of the System >
Options dialog box.
You can set the highlight color in
the Color tab of the System >
Options dialog box.
Fragmentation occurs when
payload data is too large and
must be segmented and transmitted in more than one packet.
Does not affect bookmarks.
BPA100 Series Bluetooth Protocol Analyzer User Manual
1- 39

Analyzing Piconet Packet Data
Table 1- 2: Analysis window menus and toolbar buttons (Cont.)
Toolbar
Menu Additional information
FunctionSelection
button
Test Mode Enable/disable Test Mode
activation by a remote Bluetooth
device.
Trigger Loopback Test Verify that the Trigger In and
Trigger Out functions are operating properly.
System Properties Display BPA100 Series software
and firmware versions and
copyright information.
Tools > Access executable files set up
with the Tools tab of the System
Options dialog box.
Options Define packet-type display
colors; define disk location for
storing acquisition log files;
identify executable files to be
run from the System > Tools
menu.
Default Return the factory default set-
tings for the following: acquisition setup, data files, pre- post-trigger, error packet generation.
Acquisition > Setup Define parameters for the next
acquisition session.
Available with BPA105 Air Probe
only.
Available with BPA105 Air Probe
only.
Also displays the Bluetooth
device address of the connected
Air Probe.
See page 1--11.
1- 40
Data Filter Specify the packets you do not
want to acquire during the next
acquisition session in the Data
Filter dialog box. These settings
become the default settings.
Enable Data Filter Activate/deactivate the Data
Filter dialog box settings.
Pre- Post Trigger Buffer Set the number of packets
collected before and after a
trigger event in the Pre- Post
Trigger Buffer dialog box.
Low Level Trigger Define trigger events for the
next acquisition based on lowlevel trigger characteristics, such
as FLOW, ARQN, hop frequency, payload headers, etc.
BPA100 Series Bluetooth Protocol Analyzer User Manual
See page 1--20.
Unless enabled, the post-trigger
buffer size is limited only by the
disk space available on your PC.
See page 1--31 for additional
information.
See page 1--21.

Analyzing Piconet Packet Data
Table 1- 2: Analysis window menus and toolbar buttons (Cont.)
Toolbar
Menu Additional information
Enable Low Level Trigger Enable/disable settings defined
High Level Trigger Define the trigger events for the
Enable High Level Trigger Enable/disable settings defined
Error Packet Generation Set up error packet generation
Enable Error Packet Generation Enable/disable settings defined
Sync Wizard Use the Sync Wizard to define
View > Toolbar Enable/disable the toolbar. See Figure 1--1 on page 1--6.
Statusbar Enable/disable the statusbar.
Log Toolbar Enable/disable the log toolbar. Contains navigation buttons.
Log Statusbar Enable/disable the log statusbar. Displays packet information.
Sync Bar Enable/disable the synchroniza-
Session Info Bar Enable/disable the session
Show/Hide Packets Define which packets you want
FunctionSelection
in the Low Level Trigger Setup
dialog box.
next acquisition base on highlevel trigger characteristics, such
as RFCOMM and SDP protocols.
in the High Level Trigger Setup
dialog box.
sequences for testing and
debugging, such as FLOW,
ARQN, hopping frequency,
payload headers, etc.
in the Error Packet Generator
dialog box.
participants and quickly synchronize to a Piconet.
tion information bar.
information bar.
to display in the List views.
button
See page 1--30.
See page 2--6.
Contains synchronization status
indicator. See page 1--13.
Displays session time information and packet counts. See
page 1--11.
Show/Hide Columns Define which columns you want
to display in the List views.
Format Columns Define the data format of the
displayed columns: decimal,
hex, binary, ASCII.
Smaller Font Decrease the font text size in
the active window.
BPA100 Series Bluetooth Protocol Analyzer User Manual
1- 41

Analyzing Piconet Packet Data
Table 1- 2: Analysis window menus and toolbar buttons (Cont.)
Toolbar
Menu Additional information
Larger Font Increase the font text size in the
Default Font Return the text in the active
Hex View Show/hide Hexadecimal view
Packet Info Show/hide Packet Information
Vertical Lines Toggles the vertical lines that
Horizontal Lines Toggle the horizontal lines that
Wrap Payload Data Wrap/unwrap the data within the
Window > New Window Open a duplicate window show-
Cascade Overlap all windows within the
Tile Horizontally Adjust all window sizes horizon-
Tile Vertically Adjust all window sizes vertically
Minimize All Minimize all windows to icons at
1, 2, 3... <List of open files> Displays a list of the open
Help > Help Topics Display the online help main
FunctionSelection
active window.
window to the default font size.
window
view window
define the columns of the List
view on or off.
define the rows of the List view
on or off.
selected payload cell.
ing the current view.
Application window from upperleft to lower-right.
tally within the Application
window and position them
side-by-side.
within the Application window
and position them side-by-side.
the bottom of the Application
window. Click on an icon to
return a window to its original
size.
windows.
menu.
button
The window you select from the
list becomes the active window.
1- 42
Help on Window Display the help topic for the
active window.
BPA100 Series Bluetooth Protocol Analyzer User Manual

Analyzing Piconet Packet Data
Table 1- 2: Analysis window menus and toolbar buttons (Cont.)
Toolbar
Menu Additional information
What’s This? Point to an element in the
Technical Support Access the Tektronix Bluetooth
Customer Feedback Obtain a request for feedback
About Tektronix Bluetooth
Protocol Analyzer
FunctionSelection
display window and obtain a
help topic.
Protocol Analyzer technical
support Web site.
on the product support Web site.
Display Bluetooth Protocol
Analyzer software version and
copyright.
button
Download drivers and software
updates. Obtain product-related
technical information.
Send ideas for product improvement.
Tabs
Table 1--3 lists the tabs available in the Analysis window. Click on the tabs to
select which packet types you want to display in the List view. For example, you
can click on the Triggers tab to view the triggers you have set up.
Table 1- 3: Packet tabs
Tab Ta b Ic on Function Additional information
Baseband View all baseband packets. Baseband packets include specificati ons for the
Bluetooth link controller, which implements
basic protocols and other low--level link
routines.
LMP View all LMP packets. Acronym for Link Manager Protocol. The LMP
is used for link setup and control. LMP PDU
signals are interpreted and filtered out by the
Link Manager on the receiving side and are not
propagated to higher layers.
L2CAP View all L2CAP packets. Acronym for Logical Link Controller and
Adaptation Protocol.
RFCOMM View all packets associated with the RFCOMM
protocol layer data.
SDP View all SDP packets. SDP is a Bluetooth--defined protocol provided
OBEX View all OBEX packets. Object Exchange Protocol. This protocol is
Serial cable emulation protocol based on ETSI
TS 07.10.
for or available through a Bluetooth device. This
protocol is a means for applications to discover
which services are available and to determine
the characteristics of those available services.
associated with file transfer and business card
data.
BPA100 Series Bluetooth Protocol Analyzer User Manual
1- 43

Analyzing Piconet Packet Data
Table 1- 3: Packet tabs (Cont.)
Tab Additional informationFunctionTab Icon
TCS View all TCS packets. Telephone Control Specification protocol. View
the protocol discriminator, message type, and
other data (message specific).
HDLC View all HDLC packets. High--Level Data Link Control protocol. HDLC is
a special type of PPP packet.
PPP View all PPP packets. Point--to--Point Protocol.
BNEP View all BNEP packets. Bluetooth Network Encapsulation Protocol. This
protocol is associated with the common
transport of networking protocols over a
Bluetooth network. BNEP is used in the
Bluetooth Personal Area Networking profile.
AT View all AT packets. Emulation of modem Attention (AT) commands
in the RFCOMM protocol layer. AT commands
are used by the Headset, FAX, and Dial--up
Networking Bluetooth profiles.
HID View all HID packets. Human Interface Device protocol.
Triggers View defined triggers and trigger arming events.
Log Statusbar
The Log Statusbar displays the number of packets logged of the type: Baseband,
LMP, L2CAP, RFCOMM, SDP, OBEX, TCS, HDLC, PPP, BNEP, AT, and HID.
It also displays the number of trigger packets and indicates whether a filter is
selected for the packet type being displayed (see Setting Up the Data Filter on
page 1--20).
Statusbar
The Statusbar displays general information on the analyzer menu selections,
logging modes, input and output configurations, and the hardware present.
List View
The List view displays the contents of the active file as a list of the packets that
the file contains. During an acquisition, if the system is configured for free run
mode, the List view will display packet data as it is received.
NOTE. If the Acquisition Setup is set to Free run display mode, clicking the tabs
will change the protocol levels but it will not maintain highlighting or necessarily display the same packet.
1- 44
BPA100 Series Bluetooth Protocol Analyzer User Manual

Analyzing Piconet Packet Data
Columns. These columns reflect the elements you configured in the View Setup,
where you can decide which elements you want the List view to show. For
additional information, see Setting Up an Acquisition on page 1--11.
Bookmarks. Bookmarks allow you to quickly display packets of special
interested that you have marked in the List view. You can also measure the time
between any two bookmarks. For additional information on bookmarks, see
page 2--1.
Context Menu. You can right-click in the List view area of the analysis window to
display the context-sensitive menu shown in Figure 1--19. See page 1--38 for
additional information on these edit selections.
Figure 1- 19: List view context-sensitive menu
Packet Info View
BPA100 Series Bluetooth Protocol Analyzer User Manual
This area displays detailed information on the packet currently highlighted in the
List view. The type of information displayed depends on the type and contents of
the packet. Various elements of packet data can be switched off or on in the View
> Format Columns dialog box. For additional information, see Setting Up an
Acquisition on page 1--11.
1- 45

Analyzing Piconet Packet Data
Hex View
The List view only displays the first several bytes of the entire payload (unless
Wrap Payload Data is selected from the View menu). If you want to view the
entire contents of a packet of any length, select View > Hex View.
1- 46
BPA100 Series Bluetooth Protocol Analyzer User Manual

Reference


Reference
Using Bookmarks
In this section you will find information on the following topics:
H Using bookmarks
H Performing an advanced search
H Exporting data
H Generating error packet data
H Understanding and setting up encryption and decryption
Select Edit > Add/Remove Bookmark or click the shortcut button to
toggle a bookmark on or off for the packet you have highlighted (clicked on) in
the List view. When a bookmark is assigned to a packet, a Blue arrow is placed
at the left side of the Index field for the highlighted packet. See Figure 2--1.
Figure 2- 1: Analysis window showing bookmarked packets
BPA100 Series Bluetooth Protocol Analyzer User Manual
2- 1

Reference
Bookmarks allow you to quickly display packets you are interested in. To move
between bookmarked packets, select Edit > Goto Prev Bookmark or Edit >
Goto Next Bookmark.
Measure the Time
Between Bookmarks
You can also click the
To measure the time between any two bookmarks, do the following:
1. Select Edit > Navigate Bookmarks to open the Bookmarks dialog box. See
Figure 2--2.
2. Click on one of the bookmarks to select it; then control-click another
bookmark to highlight it.
3. Read the time between the two bookmarks at the bottom of the Bookmarks
dialog box. The timespan is displayed in hours, minutes, seconds, and
microseconds. The time is shown in time ticks (312.5 s per time tick).
or shortcut buttons.
2- 2
Figure 2- 2: Bookmarks dialog box
To remove all bookmarks from the active List view if desired, click the
shortcut button.
BPA100 Series Bluetooth Protocol Analyzer User Manual

Performing an Advanced Search
This feature provides search capabilities based on individual columns in the List
view and Boolean parameters.
1. Select Search > Advanced Search to open the Advanced Search dialog box.
See Figure 2--3.
Reference
Figure 2- 3: Advanced Search dialog box
In the Advanced Search dialog box you can specify a criteria to search for
specific data packets based on individual columns and Boolean parameters. You
can also mark all packets that match the search criteria.
H Search Criteria. Specify the parameters used to search the data packets:
H You can Clear the search criteria.
H You can select the Current Packet as the search criteria.
H You can Add/Remove Columns to the search criteria.
H Search Area. Specify where and how to search for packets:
H You can specify a search in the current layer , all layers, or in a specific
layer.
H You can specify the search to start from the first packet, currently
selected packet, or specific packet.
H You can specify the search to end at the last packet or a specific packet.
BPA100 Series Bluetooth Protocol Analyzer User Manual
2- 3

Reference
Exporting Data
H You can search for hidden packets (those hidden using Show/Hide
Packets).
H Save/Restore. You can save or restore a set of search criteria.
H Mark All. You can mark the data packets that match the search criteria by
inserting a bookmark for criteria-matching packets.
NOTE. Selecting Mark All clears all current bookmarks.
2. Click Find Now to initiate the search and find data packets that match the
search criteria.
To export acquisition data from a log file, do the following:
1. Select File > Export.
2. In the Export Data dialog box, select the destination path and folder.
3. Name the file.
4. Select Spreadsheet Format (*.csv) or Text Format (*.txt) in the Save as
type drop-down list box.
5. Select the appropriate Export Range option button.
6. Click Save.
2- 4
BPA100 Series Bluetooth Protocol Analyzer User Manual

Reference
Exporting to an Audio File
This feature supports a post-acquisition process that scans captured Independent
or Piconet mode audio data and creates a *.wav file. You can play back the audio
file on a PC using standard Windows audio players.
A headphone
identifies the presence of audio data.
1. In the Bluetooth Protocol Analyzer menu bar, select File > Export to open
the Export Data dialog box. See Figure 2--4.
2. Use standard Windows techniques to name the file and file location.
3. Select Audio Format (*.wav) in the Save as type drop-down list box.
Separate channels will be saved in separate .wav files.
4. Click Save to write the file to the location and file name you specified.
You can play back the file on a PC using standard Windows audio players.
icon appearing in the Bluetooth Protocol Analyzer toolbar
Figure 2- 4: Export Data dialog box
BPA100 Series Bluetooth Protocol Analyzer User Manual
2- 5

Reference
Generating Error Packet Data
Error Packet Generation allows you to introduce 1, 2, or 3-bit errors into the
header or payload of selected packets that can be transmitted by the Bluetooth
Protocol Analyzer. You can use error packet generation to cross-check error-correcting algorithms, such as FEC, HEC, and CRC, or to force uncorrectable errors
intended to stress protocol robustness.
When you enable Error Packet Generation, the error specified in the Error Type
field of an error sequence is inserted into the last packet of the sequence. You can
transmit error packets when operating in Piconet mode only. Packets containing
errors are highlighted in Blue and marked with a bug icon in the List view, as
shown in Figure 2--14 on page 2--17.
Select Acquisition > Error Packet Generation or click the
button to open the Error Packet Generator dialog box. See Figure 2--5.
To generate errors, you must set up the analyzer to do the following:
H Define the error type.
H Define the error sequence.
H Specify the packets involved, (only transmitted packets can generate errors).
H Enable Error Packet Generation. (In the menu bar , select Acquisition >
Enable Error Packet Generation.)
H In addition, you must operate the analyzer in Piconet mode.
H Select Acquisition > Setup.
H In the Acquisition Setup dialog box, click the Piconet option button.
You can specify error sequences using patterns at the following protocol layers:
Baseband, LMP, L2CAP, RFCOMM, and SDP.
Error generation is limited to four simultaneously active error sequences
consisting of up to four packet definitions per sequence.
shortcut
2- 6
NOTE. If you want to generate an error using a setup you previously created and
saved, click Load. In the Open dialog box, browse to the location and open your
error packet generation file (*epg).
BPA100 Series Bluetooth Protocol Analyzer User Manual

Reference
Figure 2- 5: Error Packet Generator dialog box
Insert Error. Select the sequence(s) to be used as error sequences by checking the
Insert Error option boxes. If no check boxes are selected, all sequences are
disabled and the analyzer will not generate errors. If more than one sequence is
checked, the first sequence satisfied will trigger the analyzer.
Error Tabs. Select a tab to configure an error sequence. You can create a
maximum of four sequences, each containing a maximum of four packets.
Each sequence is a potential error packet generator. Sequences that remain
following an error are highlighted in color to indicate function. All packets,
except the last packet in a sequence, are marked in Yellow as a single match in a
sequence. The last packet in any error generation sequence is Blue.
NOTE. To generate an error, you must configure the analyzer for Piconet mode.
The final packet in a sequence must also be a transmitted packet.
BPA100 Series Bluetooth Protocol Analyzer User Manual
2- 7

Reference
The following list describes the control elements you can set up to define an
error generation sequence:
H Name. Type a name into the Name field to identify the error generation
sequence, or, use the default name if you do not wish to create a new one.
H Trigger Out. Click this check box if you want the Bluetooth Protocol
Analyzer to output a trigger from the Air Probe Trig Output connector when
the error generation sequence is identified (BPA105 only).
H Repeat. Click the Change button to open the Sequence Repeat dialog box
and specify how many times you want the analyzer to repeat the selected
error generation sequence. See Figure 2--6. Whenever the patterns in the
specified sequence occur in order, they will be marked in the Bluetooth
Protocol Analyzer display.
H Click the Repeat the sequence indefinitely check box to repeat the
specified error generation sequence indefinitely.
H Move the Repeat slider to specify the number of times to repeat the error
generation sequence, 1 through 200.
H Click OK or Cancel.
Figure 2- 6: Sequence Repeat dialog box
2- 8
H Time-out. Click the Change button to open the Sequence Timeout dialog
box and specify a time-out value. See Figure 2--7.
BPA100 Series Bluetooth Protocol Analyzer User Manual

Reference
This value controls how long the analyzer looks for the next pattern in a
sequence. Enter the value as a number of Bluetooth time slots. A Bluetooth
time slot is 625 s. The range for this field is 1 to 65535 time slots. If a
time-out precludes a sequence from completing, a Red marker is indicated in
the analyzer List View and the sequence is reset.
H Click the Specify no time out value check box to specify no time-out
limit.
H Move the slider to specify a time-out value, 1 through 65, 535 Bluetooth
time slots.
H Click OK or Cancel.
Figure 2- 7: Sequence Timeout dialog box
H Error Type. Click the Change button to open the Error Name dialog box.
See Figure 2--8.
BPA100 Series Bluetooth Protocol Analyzer User Manual
2- 9

Reference
Figure 2- 8: Error Name dialog box
H In the drop-down list box, select the header or payload bit errors to be
inserted.
A header with a 1-bit error should be recoverable by devices receiving
the error packet; a 2-bit error mayor may not be recoverable. A 3-bit
error forces an unrecoverable error in the receiving device.
H Click View bit details to review error bit position and operation details.
H Bit positions are counted from the beginning of the packet Access
Code, see Figure 2--9.
H For predefined header and payload error insertion, the last 3 bits of
the header (123, 124, 125), and the first 3 bits of the payload, if
present, are affected.
H Bit forcing occurs prior to data whitening, during packet transmis-
sion by the analyzer.
LSB MSB126 127
Access code Header Payload
72 54 0--2745
Figure 2- 9: Standard packet format
When generating a 2 or 3-bit error, it is recommended that you do not
use the Repeat the sequence infinitely option (in the S equence Repeat
dialog box, Figure 2--6 on page 2--8), this will result in a continuous,
unrecoverable error. Instead, set the count to a desired value (for
example, set the count to 5).
2- 10
BPA100 Series Bluetooth Protocol Analyzer User Manual

Reference
H You can select from the predefined errors in the Error Name drop-down
list box or create a custom error by selecting Custom, and then clicking
the Modify bit details button.
H In the Customize Error dialog box, enter the Bit Position. To enter the
Bit Operation, click in the Bit Operation field to activate a drop-down
list box, from which you can select Forced 1, Forced 0, or Toggle as the
bit operation. It is recommended that you use Toggle instead of Forced 1
or Forced 0. Since errors are forced before data whitening occurs, this
feature is recommended for advanced users only.
H Click OK or Cancel.
Add Packet. Click the Add Packet button to open the Packet Definition dialog
box and define a trigger. See figure 2--10.
H Specify the action of the selected sequence using the “If”, “ is” and “of
type” drop-down list boxes. You can add up to four packets for each
sequence. The “Then” field indicates the action that follows each packet
in the trigger sequence.
H Click OK or Cancel.
Figure 2- 10: Packet Definition dialog box
Customize Pattern. In the Packet Definition dialog box, click the Customize
button to open the Customize Pattern dialog box and specify packet characteristics for specialized patterns. See figure 2--11.
BPA100 Series Bluetooth Protocol Analyzer User Manual
2- 11

Reference
Figure 2- 11: Customize Pattern dialog box
The fields in the Customize Pattern dialog box are described below:
H Name. This field identifies the “of type” pattern you selected in the Packet
Definition dialog box (see Figure 2--10 on page 2--11).
H Status Option Boxes. This field contains information about the status of the
packet, which indicates whether the packet is an Rx or Tx packet. For a
receive packet, this field may also contain information about errors included
in the packet (for example, Header Errors and Payload Errors). There are no
restrictions on what can be specified, so it is possible to specify a Tx packet
with an access error, although this is not a combination that can occur.
All fields in the Customize Pattern dialog box can be used to set conditions.
The following options are available:
H Access error
H Packet header error (1/3 FEC)
H Packet header error (HEC)
H Payload recoverable error
2- 12
H Payload nonrecoverable error
BPA100 Series Bluetooth Protocol Analyzer User Manual

Reference
H Payload error
H Payload length error
H Packet transmit
By right-clicking you can enable and set the conditions, or make the
condition “don’t care.” For example, if you select the the third option, then a
match occurs on that pattern only if there is an HEC error in that pattern. If
you select the eighth option, a match occurs only if that pattern is transmitted.
H Estimated Clock. This is the Bluetooth clock for the Master used in the
Piconet. X specifies that four bits are “don’t care.” For example,
XXXXXXXX causes the entire estimated clock to be ignored.
H Frequency. In this two-part field you can enter a specific frequency. In
addition to the frequency, the channel is displayed (on the right). The
mapping from frequency to channel is (Freq = 2402 + Channel), and the
mapping goes both ways. For example, if you specified channel 10, the
frequency field automatically displays 2412. You can also select “don’t care”
for these bits.
H AM Address. This field sets the Active Member (AM) address. This address
is used to access different members in the Piconet. Three bits are used for
this address, that is, eight different AM addresses are available. AM_ADDR
= 0 is used for broadcast. You can also select “don’t care” for these bits.
H Type. This field specifies the packet type; four bits are used. That is, 16
different packet types are available. You can specify only the packets that are
not reserved. You can also select “don’t care” for these bits.
H Flow. One bit is used for flow control in the header. Flow = 0 means STOP.
Flow = 1 means GO. You can also select “don’t care” for this bit.
H ARQN. One bit is used for acknowledgement of the last transmission. If a
packet is received correctly, the ARQN bit is set to 1 in the return packet.
You can also select “don’t care” for this bit.
H SEQN. SEQN is a sequential sequence of numbers used to detect retransmis-
sion. You can also select “don’t care” for this bit.
H L_CH. This field specifies the Logical Channel. The field contains two bits
and is used to indicate whether the packet is an LMP message or an L2CAP
fragment.
H Flow. This bit controls flow on the L2CAP level. One bit is used for flow
control in the payload. Flow = 0 means STOP. Flow = 1 means GO. You can
also select “don’t care” for this bit.
BPA100 Series Bluetooth Protocol Analyzer User Manual
2- 13

Reference
H Length. This field allows you to select a specific length, from 0 to 339. You
can also select “don’t care.”
H Data/Mask. This field specifies the payload data (first row) and the mask that
is used with the data (second row). A mask of FF will mask in the whole
byte and a mask of 00 will mask out the whole byte. The position of the
mask and data is linked together so that the value in data index 1 links to the
mask at mask index 1, and so on.
H Comments. You can use this field to enter additional information (notes)
about the specified pattern.
H Click OK or Cancel.
Slot Information. This field shows information about the patterns you have loaded
into hardware. There are ten hardware slots you can load with patterns.
H Click the Slot Info button to open the Slot Information dialog box and
identify the storage location of the defined packets. See Figure 2--12.
2- 14
Figure 2- 12: Slot Information dialog box
BPA100 Series Bluetooth Protocol Analyzer User Manual

Reference
You can use up to 10 hardware slots. The pattern name, and whether it is
customized or not, is listed next to the slot number. Slots are filled as
patterns are added. Customized packets use additional slots. For example, an
uncustomized DH1 packet unused in Sequence A, occupies a different
hardware slot than the customized DH1 packet used in sequence D, etc.
H Click Close.
NOTE. You are allowed 10 hardware patterns (slots 1 through 9) for low-level
triggers.
Sequence Overview. The Overview field summarizes the flow of packets
comprising each error sequence.
Figure 2- 13: Error Packet Generator setup with completed error generation sequence
BPA100 Series Bluetooth Protocol Analyzer User Manual
2- 15

Reference
Load and Save. You can load error packet generation files (*.epg files) that you
have previously created or save the error setup using the Load and Save buttons.
H Load. Click this button to display the Open dialog box that allows you to
browse and open an error packet generation setup file (*.epg).
H Save. Click this button to display the Save As dialog box that allows you to
browse and save an error packet generation setup file (*.epg).
Enable Error Packet Generation. To enable Error Packet Generation, click the
associated
Generation.
toolbar button or select Acquisition > Enable Error Packet
2- 16
BPA100 Series Bluetooth Protocol Analyzer User Manual

Reference
Example of a Generated Error. The Error Packet Generator setup window (see
Figure 2--5 on page 2--7) was used to create a sequence named Error Seq1 that
contains an LMP_host_connection_req pattern. A Payload error with 3 bits
toggled was set to be transmitted with this pattern. The status was set to Single,
which resulted in the error being transmitted one time. Figure 2--14 shows the
Bluetooth Protocol Analyzer display following transmission of the error.
In the Index column, 3659 is highlighted (in Blue in the application). This
indicates an error was transmitted. Following this error, Index 3661 shows that
the LMP_host_connection_req pattern was transmitted again but without the
error.
Figure 2- 14: Analyzer display of generated error
BPA100 Series Bluetooth Protocol Analyzer User Manual
2- 17

Reference
Understanding Decryption
The Bluetooth Protocol Analyzer is capable of decrypting encrypted transmissions in Independent Mode if the pairing process is captured and the PIN key is
known, or, if a calculated link key from a previous pairing is available.
The analyzer knowing the master and slave addresses and the PIN key, can
monitor a pairing session. In Figure 2--15, the LMP packets beginning with
LMP_in_rand, show the pairing process in detail. While the link key is never
transmitted directly, it can be calculated if the PIN key, the master address, and
the slave address are known.
2- 18
Figure 2- 15: Bluetooth Protocol Analyzer List view showing paring process
BPA100 Series Bluetooth Protocol Analyzer User Manual

Reference
You can find the calculated link key (and other decryption keys) in the Acquisition Summary dialog box, similar to the one shown in Figure 2--16. To open this
dialog box, Select File > Acquisition Summary.
Figure 2- 16: Acquisition Summar y dialog box
These calculated link key value can be used to decrypt subsequent acquisitions
involving the same paired devices.
For additional information on setting up Decryption, see Enabling Decryption on
page 1--16.
BPA100 Series Bluetooth Protocol Analyzer User Manual
2- 19

Reference
Setting Up Encryption in the Bluetooth Neighborhood
To enable encryption, you must perform the following setup in the Bluetooth
Neighborhood application.
1. In the Bluetooth menu bar, select Bluetooth > Bluetooth Neighborhood
Properties.
2. Open the Security tab and select Link level security for the Security Mode.
3. Select Enable for the Encryption Mode.
4. Once bonding is established between master and slave, you need to expire
bonding to use decryption in Independent mode. Right-click the device
bonded in Bluetooth Neighborhood and select expire bonding.
2- 20
BPA100 Series Bluetooth Protocol Analyzer User Manual

Appendices


Appendix A: Specifications
This section lists the electrical, environmental, and physical characteristics of the
BPA100 Series Bluetooth Protocol Analyzer.
Specifications listed in this section are guaranteed unless labeled “typical.”
Typical specifications are provided for your convenience and are not guaranteed.
The electrical characteristics listed in Table A--1 are valid when the BPA100 Series Bluetooth Protocol Analyzer operates within the environmental conditions
listed in Table A--2.
Table A- 1: Air Probe characteristics
Characteristic Description
Device compatibility Communicates with USB Specification V1.1 devices.
Operating range, typical 0 to 250 m (820 ft)
Frequency range 2.402 to 2.480 GHz
Transmitter
Power output, typical Active mode: +20 dBm (100 mW)
Single frequency mode: 0 dBm (1 mW)
Receiver
Sensitivity > --80 dBm
Power
Requirements Powered through USB cable connection between the host PC and the
Bluetooth Air Probe interface.
Consumption Active mode: < 350 mA.
Inquiry scan mode: 81 mA
Hibernation/standby mode: 400 A
Table A- 2: Environmental characteristics
Characteristic Description
Temperature Range
Operating +5 _Cto+55_C(+41_F to +131 _F)
Nonoperating 0 _Cto+55_C(+32_F to +131 _F)
Humidity
Operating 20 to 90% RH, noncondensing
Nonoperating 20 to 95% RH, noncondensing
BPA100 Series Bluetooth Protocol Analyzer User Manual
A- 1

Appendix A: Specifications
Table A- 2: Environmental characteristics (Cont.)
Characteristic Description
Altitude
Operating 3,050 m (10,000 ft)
Nonoperating 10,058 m (33,000 ft)
Table A- 3: Certifications and compliances
Category Standards or description
EC Declaration of Conformity -EMC
United States and Canada Emissions comply with FCC Code of Federal Regulations 47, Part 15, Subpart C, Section 247,
Meets intent of Directive 999/S/EG for Radio and Telecommunications Terminal Equipment.
Compliance was demonstrated to the following specifications as listed in the Official Journal of the
European Union:
ETS 300-328 11/1996 and A1 07/1997, Spread Spectrum data transmission equipment
in the 2.4 GHz ISM band.
ETS 300-826 11/1997 EMC and Radio Spectrum Matters, 2.4 GHz wideband transmission
systems.
IEC 61000--4--2 Electrostatic Discharge Immunity (Performance Criterion C).
IEC 61000--4--3 RF Electromagnetic Field Immunity (Performance Criterion B)
Class A Limits.
Complies with RSS-210 of the Industry Canada.
A- 2
BPA100 Series Bluetooth Protocol Analyzer User Manual

Table A- 4: Physical characteristics
Characteristic Description
Weight 3lbs(1.36kg)
Dimensions
1
2
110 mm
(4.250 in)
2
Includes accessories and shipping container.
Dimensions of Bluetooth air probe:
Height: 110 mm (4.250 in)
Width: 70 mm (2.750 in)
Depth: 42 mm (1.625 in)
Appendix A: Specifications
1
70 mm
(2.750 in)
42 mm
(1.625 in )
BPA100 Series Bluetooth Protocol Analyzer User Manual
A- 3

Appendix A: Specifications
A- 4
BPA100 Series Bluetooth Protocol Analyzer User Manual

Appendix B: Accessories
This section lists the Bluetooth Protocol Analyzer standard and optional
accessories.
Standard Accessories
Tektronix includes the following standard accessories with the Bluetooth
Protocol Analyzer:
H BPA100 Series Product Software CD-ROM, Tektronix part number
063-3595-xx. Includes BPA100 Series Bluetooth Protocol Analyzer
documentation (*.pdf) files.
H BPA100 Series Bluetooth Protocol Analyzer Installation Manual, Tektronix
part number 071-1121-xx.
H (1) Custom USB cable, Tektronix part number 174-4580-xx.
H (2) SMB-to-BNC input/output cables for the BPA 105 Air Probe, Tektronix
part number 174-3578-xx.
Optional Accessories
H (1) BNC female-to-female connector, Tektronix part number 103-0028-xx.
You can order the following accessories for BPA100 Series V2.3 Bluetooth
Protocol Analyzers. Contact your Tektronix representative or distributor for
ordering information. See page viii for information on contacting Tektronix.
H BPA100 Series Bluetooth Protocol Analyzer Software Version V2.3
User Manual, Tektronix part number 071-1128-xx.
H BPA100 Series Bluetooth Protocol Analyzer Software Version V2.3
Application Programmer Interface Manual, Tektronix part number
071-1129-xx.
BPA100 Series Bluetooth Protocol Analyzer User Manual
B- 1

Appendix B: Accessories
B- 2
BPA100 Series Bluetooth Protocol Analyzer User Manual

Appendix C: Sample Scripts
This section contains technical information you may need to write your own
scripts.
HCI Terminal Scripts
Use the following HCI Terminal scripts as a guide when creating your own
scripts.
Sniffer Test Script for
Master Packet Types
Report(Sniffer test script for packet types [Master])
report( )
RESET(All)
SETDEBUGLEVEL(81)
SETMAXLOOPCOUNT(5000)
WAITCOMPLETE_ENABLED
//TIMESTAMPS_ENABLED
// Write Scan enable
// Set Event Filter
// Change connection packet type
TXCMD1A0C0100
WAITEVENT($0E,5000,[TestError])
TXCMD050C03020002
WAITEVENT($0E,5000,[TestError])
// Establish ACL connection
report( )
report(Establishing ACL connection)
label: Establish_one_connection
label: create_connection_retry#1
// NOTE:
// change the Bluetooth address in this command
// if your BD_Addr is 00 50 CD 00 93 38 then it should be reversed as 38 93 00
CD 50 00
//Itsstarts| | itisreversed
TXCMD05040C389300CD500018CC00000000
WAITEVENT($03,20000,[TestError])
BPA100 Series Bluetooth Protocol Analyzer User Manual
C- 1

Appendix C: Sample Scripts
if byte[2] = $04 jump(create_connection_retry#1)
if byte[2] = $10 jump(create_connection_retry#1)
report(ACL connection established!)
report( )
delay(1000)
//WAITEVENT($1B,5000,[TestError])
WAITEVENT($1C,5000,[TestError])
WAITEVENT($0B,5000,[TestError])
WAITEVENT($0C,5000,[TestError])
//TXCMD 0F 04 04 00 00 18 CC
//WAITEVENT($1D,5000,[TestError])
report(Connection packet type changed)
report( )
// switch from master to slave
TXCMD0B0807389300CD500000
WAITEVENT($12,1000,[TestError])
// Disconnect ACL connection
// This Device is Slave now so wait for Disconnect from master
label: Disconnect
//TXCMD 06 04 03 00 00 13
WAITEVENT($05,60000,[TestError])
report(ACL connection disconnected)
report( )
label: TestSuccess
report(Test passed!)
report( )
jump(end)
label: TestError
report()
report(***************Test failed!*******************)
report()
C- 2
label: end
REPORT(DONE!)
BPA100 Series Bluetooth Protocol Analyzer User Manual

Appendix C: Sample Scripts
Sniffer Test Script for
Slave Packet Types
Report(Sniffer test script for packet types [Slave])
report( )
RESET(All)
SETDEBUGLEVEL(81)
SETMAXLOOPCOUNT(5000)
WAITCOMPLETE_ENABLED
//TIMESTAMPS_ENABLED
// Write Scan enable
// Set Event Filter
// Wait for max slots changed event
TXCMD1A0C0103
//WAITEVENT($0E,5000,[TestError])
TXCMD050C03020002
WAITEVENT($0E,5000,[TestError])
// Establish ACL connection
report( )
report(Establishing ACL connection)
WAITEVENT($03,60000,[TestError])
report(ACL connection established from master!)
report( )
delay(1000)
WAITEVENT($1B,60000,[TestError])
WAITEVENT($1C,60000,[TestError])
WAITEVENT($0B,60000,[TestError])
WAITEVENT($0C,60000,[TestError])
//WAITEVENT($1B,5000,[TestError])
//report(Connection packet type changed from master)
report( )
// ROLE Switch this device becomes master
//WAITEVENT($12,10000,[TestError])
delay(6000)
// Wait for master to disconnect ACL connection
// This device is master now so disconnect the connection
BPA100 Series Bluetooth Protocol Analyzer User Manual
C- 3

Appendix C: Sample Scripts
label: Disconnect
TXCMD060403000013
WAITEVENT($05,10000,[TestError])
report(ACL connection disconnected from master)
report( )
label: TestSuccess
report(Test passed!)
jump(end)
label: TestError
report()
report(****************Test failed!***************)
report()
label: end
REPORT(DONE!)
Sniffer Test Script for
Slave Connection Packet
Types
Report(BP A100 connection test script for packet types [Slave])
report( )
RESET(All)
SETDEBUGLEVEL(81)
SETMAXLOOPCOUNT(5000)
WAITCOMPLETE_ENABLED
//TIMESTAMPS_ENABLED
// Write Scan enable
// Set Event Filter
// Wait for max slots changed event
TXCMD1A0C0103
WAITEVENT($0E,5000,[TestError])
TXCMD050C03020002
WAITEVENT($0E,5000,[TestError])
REPORT(The following tests are from the test specification)
// Wait for events from master
// When master is done add 1 SCO HV1 connection and disconnect it 5.5.18.1.4
& 5.5.18.1.10
C- 4
// Establish ACL connection
report( )
BPA100 Series Bluetooth Protocol Analyzer User Manual

Appendix C: Sample Scripts
report(Establishing ACL connection)
WAITEVENT($03,60000,[TestError])
report(ACL connection established from master!)
report( )
WAITEVENT($1B,5000,[TestError])
report(Connection packet type changed from master)
report( )
// Set some payload
SETPAYLOAD(49 66 20 79 6F 75 20 63 61 6E 20 72 65 61 64 20 74 68 69 73
20 74 68 65 6E 20 79 6F 75 20 68 61 76 65 20 73 65 74 20 74 68 65 20 66 6F
72 6D 61 74 20 6F 66 20 74 68 65 20 70 61 79 6C 6F 61 64 20 74 6F 20 62 65
20 64 69 73 70 6C 61 79 65 64 20 69 6E 20 41 53 43 49 49 2E 20 53 6F 6D 65
74 69 6D 65 73 20 74 68 65 20 50 43 20 67 75 79 73 20 66 6F 72 67 65 74 73
20 74 6F 20 77 72 61 70 20 74 68 65 20 70 61 79 6C 6F 61 64 20 73 6F 20 79
6F 75 20 63 61 6E 20 6E 6F 74 20 73 65 65 20 69 74 20 61 6C 6C 20 61 74 20
6F 6E 65 20 74 69 6D 65 20 74 68 65 6E 20 79 6F 75 20 77 69 6C 6C 20 68 61
76 65 20 74 6F 20 63 68 6F 73 65 20 48 45 58 20 76 69 65 77 20 74 6F 20 73
65 65 20 69 74 20 61 6C 6C 2E 20 49 20 74 68 69 6E 6B 20 74 68 69 73 20 73
68 6F 75 6C 64 20 62 65 20 63 68 61 6E 67 65 64 20 61 73 20 73 6F 6F 6E 20
61 73 20 70 6F 73 73 69 62 6C 65 2C 20 68 6F 77 65 76 65 72 20 69 66 20 79
6F 75 20 63 61 6E 20 72 65 61 64 20 74 68 69 73 20 6C 69 6E 65 20 74 68 65
20 70 72 6F 62 6C 65 6D 20 69 73 20 66 69 78 65 64 20 21)
// Test DM1, DH1, DM3, DH3, DM5, DH5 packets
label: NoSCO
REPORT(Testing for DM1, DH1, DM3, DH3, DM5, DH5 packets)
report( )
TXDATA(hCon:0,bc:0,pb:2,Len:1,cnt:500,Random:0)
TXDATA(hCon:0,bc:0,pb:2,Len:2,cnt:500,Random:0)
TXDATA(hCon:0,bc:0,pb:2,Len:3,cnt:500,Random:0)
TXDATA(hCon:0,bc:0,pb:2,Len:4,cnt:500,Random:0)
TXDATA(hCon:0,bc:0,pb:2,Len:5,cnt:500,Random:0)
TXDATA(hCon:0,bc:0,pb:2,Len:6,cnt:500,Random:0)
TXDATA(hCon:0,bc:0,pb:2,Len:7,cnt:500,Random:0)
TXDATA(hCon:0,bc:0,pb:2,Len:8,cnt:500,Random:0)
TXDATA(hCon:0,bc:0,pb:2,Len:9,cnt:500,Random:0)
TXDATA(hCon:0,bc:0,pb:2,Len:10,cnt:500,Random:0)
report()
report(Packets size = 1..10 ”passed”)
report()
BPA100 Series Bluetooth Protocol Analyzer User Manual
C- 5

Appendix C: Sample Scripts
// Wait for master to disconnect ACL connection
WAITEVENT($05,60000,[TestError])
report(ACL connection disconnected from master)
report( )
label: TestSuccess
report(Test passed!)
jump(end)
label: TestError
report(Test failed!)
label: end
REPORT(DONE!)
Sniffer Test Script for
Master Connection Packet
Types
Report(BPA100 Connection test script [Master])
report( )
RESET(All)
SETDEBUGLEVEL(81)
SETMAXLOOPCOUNT(5000)
WAITCOMPLETE_ENABLED
//TIMESTAMPS_ENABLED
// Write Scan enable
// Set Event Filter
// Change connection packet type
TXCMD1A0C0100
WAITEVENT($0E,5000,[TestError])
TXCMD050C03020002
WAITEVENT($0E,5000,[TestError])
// Establish ACL connection
report( )
report(Establishing ACL connection)
C- 6
label: Establish_one_connection
label: create_connection_retry#1
// NOTE:
// change the Bluetooth address in this command
// if you BD_Addr is 00 50 CD 00 93 11 then it should be reversed as 11 93 00
CD 50 00
//Itsstarts| | itisreversed
BPA100 Series Bluetooth Protocol Analyzer User Manual

Appendix C: Sample Scripts
TXCMD05040C119300CD500018CC00000000
WAITEVENT($03,20000,[TestError])
if byte[2] = $04 jump(create_connection_retry#1)
if byte[2] = $10 jump(create_connection_retry#1)
report(ACL connection established!)
report( )
//TXCMD 0F 04 04 00 00 18 CC
//WAITEVENT($1D,5000,[TestError])
report(Connection packet type changed)
report( )
// Set some payload
SETPAYLOAD(49 66 20 79 6F 75 20 63 61 6E 20 72 65 61 64 20 74 68 69 73
20 74 68 65 6E 20 79 6F 75 20 68 61 76 65 20 73 65 74 20 74 68 65 20 66 6F
72 6D 61 74 20 6F 66 20 74 68 65 20 70 61 79 6C 6F 61 64 20 74 6F 20 62 65
20 64 69 73 70 6C 61 79 65 64 20 69 6E 20 41 53 43 49 49 2E 20 53 6F 6D 65
74 69 6D 65 73 20 74 68 65 20 50 43 20 67 75 79 73 20 66 6F 72 67 65 74 73
20 74 6F 20 77 72 61 70 20 74 68 65 20 70 61 79 6C 6F 61 64 20 73 6F 20 79
6F 75 20 63 61 6E 20 6E 6F 74 20 73 65 65 20 69 74 20 61 6C 6C 20 61 74 20
6F 6E 65 20 74 69 6D 65 20 74 68 65 6E 20 79 6F 75 20 77 69 6C 6C 20 68 61
76 65 20 74 6F 20 63 68 6F 73 65 20 48 45 58 20 76 69 65 77 20 74 6F 20 73
65 65 20 69 74 20 61 6C 6C 2E 20 49 20 74 68 69 6E 6B 20 74 68 69 73 20 73
68 6F 75 6C 64 20 62 65 20 63 68 61 6E 67 65 64 20 61 73 20 73 6F 6F 6E 20
61 73 20 70 6F 73 73 69 62 6C 65 2C 20 68 6F 77 65 76 65 72 20 69 66 20 79
6F 75 20 63 61 6E 20 72 65 61 64 20 74 68 69 73 20 6C 69 6E 65 20 74 68 65
20 70 72 6F 62 6C 65 6D 20 69 73 20 66 69 78 65 64 20 21)
REPORT(Testing for DM1, DH1, DM3, DH3, DM5, DH5 packets)
report( )
TXDATA(hCon:0,bc:0,pb:2,Len:1,cnt:10,Random:0)
TXDATA(hCon:0,bc:0,pb:2,Len:2,cnt:10,Random:0)
TXDATA(hCon:0,bc:0,pb:2,Len:3,cnt:10,Random:0)
TXDATA(hCon:0,bc:0,pb:2,Len:4,cnt:10,Random:0)
TXDATA(hCon:0,bc:0,pb:2,Len:5,cnt:10,Random:0)
TXDATA(hCon:0,bc:0,pb:2,Len:6,cnt:10,Random:0)
TXDATA(hCon:0,bc:0,pb:2,Len:7,cnt:10,Random:0)
TXDATA(hCon:0,bc:0,pb:2,Len:8,cnt:10,Random:0)
TXDATA(hCon:0,bc:0,pb:2,Len:9,cnt:10,Random:0)
TXDATA(hCon:0,bc:0,pb:2,Len:10,cnt:10,Random:0)
report()
report(Packets size = 1..10 ”passed”)
report()
BPA100 Series Bluetooth Protocol Analyzer User Manual
C- 7

Appendix C: Sample Scripts
// Disconnect ACL connection
TXCMD060403000013
WAITEVENT($05,10000,[TestError])
report(ACL connection disconnected)
report( )
label: TestSuccess
report(Test passed!)
report( )
jump(end)
label: TestError
report(Test failed!)
label: end
REPORT(DONE!)
C- 8
BPA100 Series Bluetooth Protocol Analyzer User Manual

Appendix D: Trigger Loopback Test
NOTE. This test is valid for Bluetooth Protocol Analyzers using the BPA105
Airprobe only.
Use the Trigger Loopback Test to verify the that Trigger In and Trigger Out
hardware functions are operating properly.
To run the test do the following:
1. Connect the Trigger Out connector to the Trigger In connector on the rear of
the BPA105 Airprobe. Use the SMB-to-BNC cables and the BNC female-tofemale adapter supplied with the analyzer.
2. In the Bluetooth Protocol Analyzer menu bar, select System > Trigger
Loopback Test.
3. Follow the on-screen instructions.
The Trigger Loopback Test takes approximately 30 seconds to complete.
BPA100 Series Bluetooth Protocol Analyzer User Manual
D- 1

Appendix C: Trigger Loopback Test
D- 2
BPA100 Series Bluetooth Protocol Analyzer User Manual
 Loading...