

Page 1

Instructions
AWG50UP
Upgrades for AWG5000 Series Instruments
075-0928-00
www.tektronix.com
075092800
075092800
Page 2

Copyright © Tektronix. All rights reserved. Licensed software products are owned by Tektronix or its subsidiaries or
suppliers, and are protected by national copyright laws and international treaty provisions.
Tektronix products are covered by U.S. and foreign patents, issued and pending. Information in this publication
supercedes that in all previously published material. Specifications and price change privileges reserved.
TEKTRONIX and TEK are registered trademarks of Tektronix, Inc.
Contacting Tektronix
Tektronix, Inc.
14200 SW Karl Braun Drive or P.O. Box 500
Beaverton, OR 97077 USA
For product information, sales, service, and technical support:
In North America, call 1-800-833-9200
Worldwide, visit www.tektronix.com to find contacts in your area.
Page 3

General Safety Summary
Review the following safety precautions to avoid injury and prevent damage to this
product or any products connected to it. To avoid potential hazards, use this
product only as specified.
Only qualified personnel should perform service procedures.
To Avoid Fire or
Personal Injury
Use Proper Power Cord. Use only the power cord specified for this product and
certified for the country of use.
Ground the Product. This product is grounded through the grounding conductor of
the power cord. To avoid electric shock, the grounding conductor must be
connected to earth ground. Before making connections to the input or output
terminals of the product, ensure that the product is properly grounded.
Observe All Terminal Ratings. To avoid fire or shock hazard, observe all ratings and
markings on the product. Consult the product manual for further rating information
before making connections to the product. Do not apply a potential to any terminal,
including the common terminal, that exceeds the maximum rating of that terminal.
Power Disconnect. The power cord provides Mains disconnect.
Do Not Operate Without Covers. Do not operate this product with covers or panels
removed.
Do Not Operate With Suspected Failures. If you suspect there is damage to this
product, have it inspected by qualified service personnel.
Avoid Exposed Circuitry. Do not touch exposed connections and components when
power is present.
Do Not Operate in Wet/Damp Conditions.
Do Not Operate in an Explosive Atmosphere.
Keep Product Surfaces Clean and Dry.
Provide Proper Ventilation. Refer to the manual's installation instructions for details
on installing the product so it has proper ventilation.
AWG50UP Upgrades for AWG5000 Series Instruments i
Page 4
General Safety Summary
Symbols and Terms
Terms in this Manual. These terms may appear in this manual:
WAR N I NG. Warning statements identify conditions or practices that could result
in injury or loss of life.
CAUTION. Caution statements identify conditions or practices that could result in
damage to this product or other property.
Terms on the Product. These terms may appear on the product:
DANGER indicates an injury hazard immediately accessible as you read the
marking.
WARNING indicates an injury hazard not immediately accessible as you read
the marking.
CAUTION indicates a hazard to property including the product.
ii AWG50UP Upgrades for AWG5000 Series Instruments
Page 5
Kit Description
Product
Kit Parts List
This kit provides instructions to install an option on an AWG5000 series
instrument. Once installed, the upgrade is equivalent to a factory-installed option.
For a list of available options, see the Tektronix Web site (www.tektronix.com), or
your Tektronix representative.
AWG5000 series B010100 and above
Option Quantity Part number Description
All 1 each NS LABEL, OPTION INFORMATION
All 1 each 075-0928-00 MANUAL, KIT INSTRUCTIONS
NS – Not Saleable
AWG50UP Upgrades for AWG5000 Series Instruments 1
Page 6

Kit Description
2 AWG50UP Upgrades for AWG5000 Series Instruments
Page 7
Installation Instructions
To install your new option(s), you need the key number that is provided with this
kit. This unique key number is valid only for the specific model number and serial
number of your instrument; it will not work on any other instrument. This single
key number enables all valid options for your instrument, those that were factory
installed and any others that you may have already purchased. In other words, this
new key number supercedes any previous key numbers that you may already have.
CAUTION. To avoid losing your options, do not misplace the paper label that is
included with this kit. This label contains the option installation key number and
should be installed on the rear panel of the instrument for future reference.
As a backup, you may want to copy the key number and save it with the other
important papers for your instrument. If you ever need to reenable the option, you
will need to reenter this key number.
Install Option
Follow these steps to enable your new option(s):
1. Power on the instrument.
2. From the menu bar, select the System menu, and then select Option
Installation....
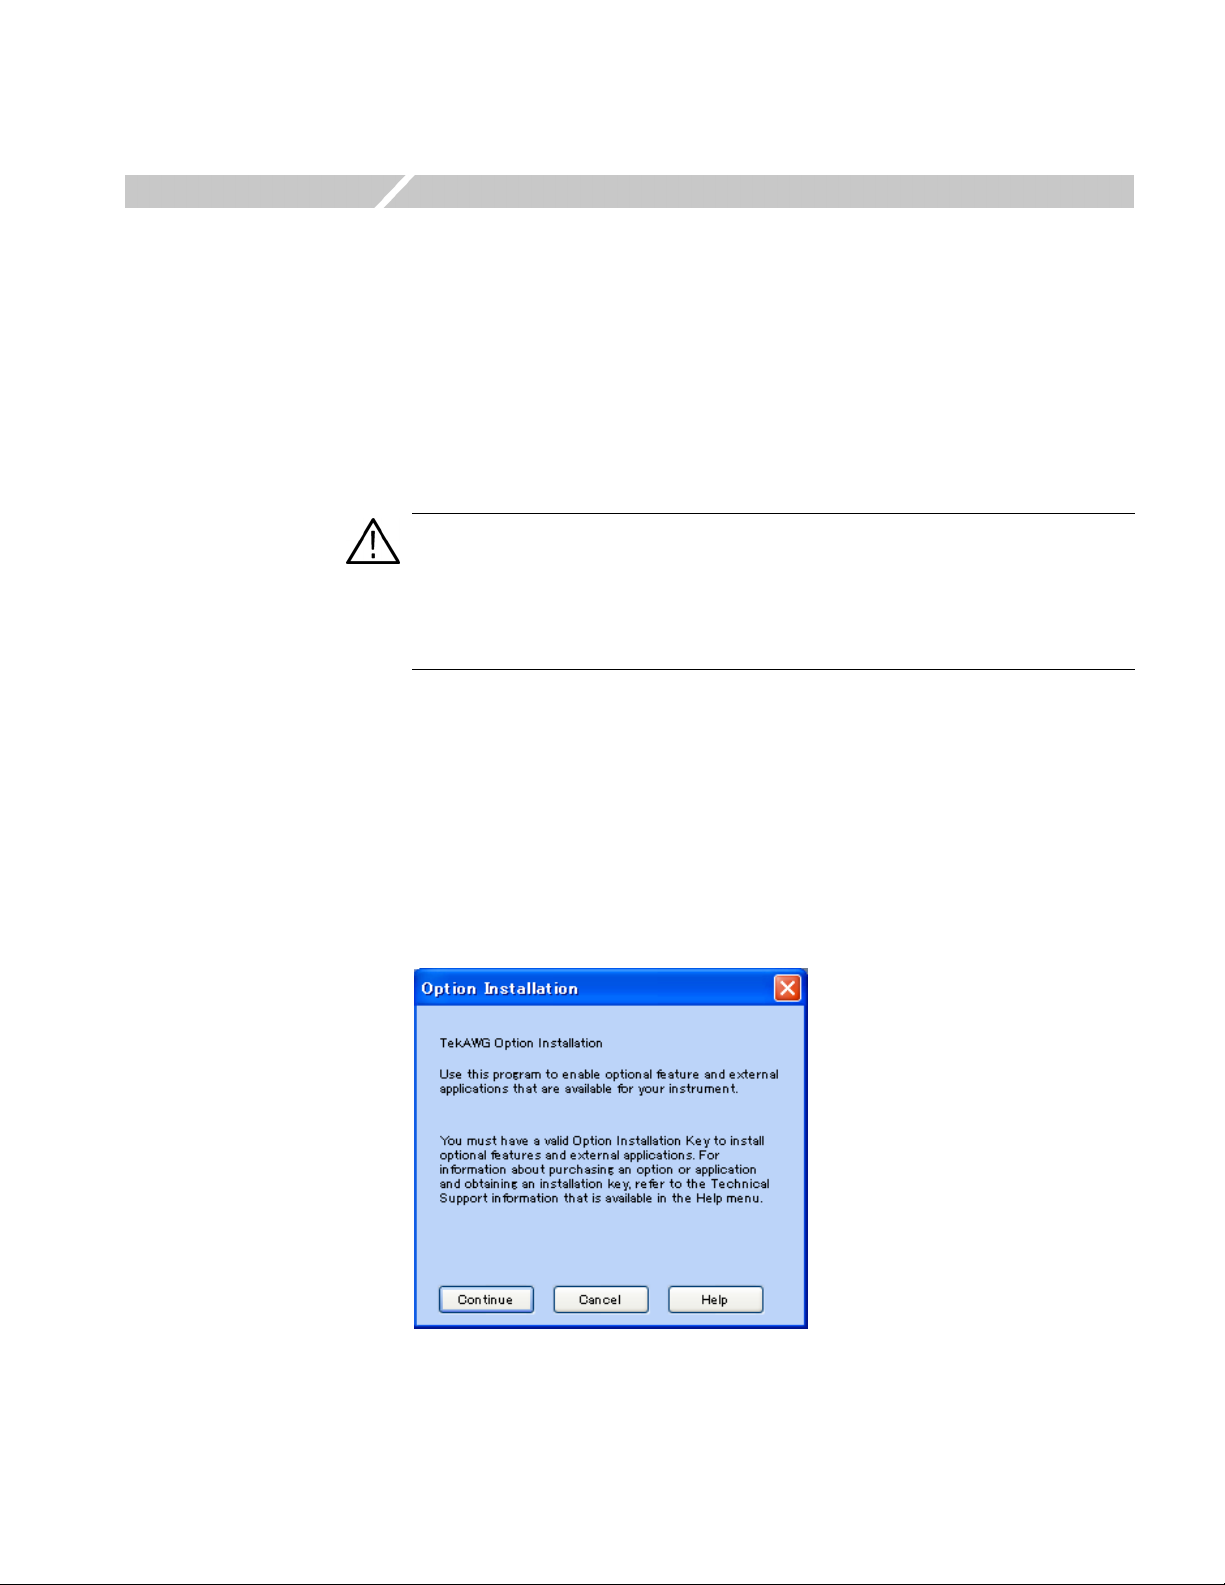
3. The Option Installation dialog box is displayed.
Figure 1: Option Installation dialog box (1)
AWG50UP Upgrades for AWG5000 Series Instruments 3
Page 8

Installation Instructions
4. Click Continue to display the second dialog box.
Figure 2: Option Installation dialog box (2)
5. Follow the on-screen instructions to enter the alphanumeric key number
exactly as it is printed on the label.
6. Attach the label to the rear panel over the existing label.
4 AWG50UP Upgrades for AWG5000 Series Instruments
Page 9

Verify Option Upgrade
Installation Instructions
Follow these steps to verify that an option upgrade was successful:
1. Restart the instrument application software.
2. Select the Help menu, and then select About Tektronix AWG....
3. Verify that the option that you installed is in the Options list (see Figure 3).
The example in Figure 3 shows that the option 01: Memory Expansion to 32 M is
installed:
Figure 3: About Tektronix AWG
❖ End of document ❖
AWG50UP Upgrades for AWG5000 Series Instruments 5
Page 10

 Loading...