

Page 1

AIM3A
Analog Input Module
Introduction
The AIM3A analog input module accepts input signals of
flOOmV full scale through klOV full scale, and outputs a
signal of flOV full scale to the A/D converter module in
slot1 ofthedataacquisitionsystem.TheAIM3Acanaccept
32 single-ended (common ground) inputs, or 16 differential (floating) inputs, or a mixture of both. All AEvl3A
functions,includinggainofxl,x10,andx100,areprogrammable, permitting single-ended and differential inputs to
be intermixed with a different gain setting for each channel. Full 16-bit precision results from the AIM3A’s lownoise instrumentation amplifier, linearity of 0.005%, and
attention to design, signal routing, and shielding. When
used with an AMMlA (AMMZ) A/D module, the AIM3A
will support 5OkHz (62.51d-12) measurements at any gain
and channel mix.
The AIM3A can be configured to accept current inputs by
installing appropriate current sensing resistors in the op.
tionalresistorlocationsprovidedon themodule.Theinput
signals are connected to removable screw terminal ships.
Alternately, a user-installed mass termination connector is
available for single-ended channels0-7 and 16-32, or differential channels O-7. The mass termination connector uses
the pin out format of the Analog Devices 3B mainframe
ribbon cable connector to permit direct connection of the
AlM3A to a 3B signal conditioning subsystem.
Hardware Compatibility
The AIM3A can be used in slots 2 through 10 of the 500A
and 5OOP. Up to 9 AJM3A modules can be used in these
systemsforamaximumof3@4analoginputchannels(32SE
channels per AIM3A plus 16 SE channels on the AMMx in
slot 1). For best performance, analog modules should be
mounted in the lowest-numbered available slots. The
Alh43A can also be used in the option slot of the Model 575
or576forupto48analoginputchannels(32SEchannelson
the AlM3A plus 16 SE channels on the AMMx).
Document Number: 501-918-01 Rev. C / 3-92
Copyright 0 1989 Keithley Instruments, Inc., Cleveland, OH 44139 (216)248-0400 AIM3A-1
Page 2

SH 0
0 0
I I
1
2
I 0 I
3
0 SH
0 o0
0
0 l-
o 2-
0 3-
qo 4-
0 5-
0 6-
0 7-
0 NC
LJ
Page 3

AlM3A
Analog Input Module
Software Compatibility
Full control of the AIM3A requires software specifically
designed for this module. Keithley’s KDAC500 software
fully supports the AlM3A. If you are using third-party
software, be certain that the software fully supports the
AIM3A.
AIM3A Specifications
(Specifications apply for 18” to 28”C, 1 year)
Input channels: 16 differential or 32 single-ended, software
selectable
Input characteristics:
Input Protection: lt3OV max (powered), i-15V max
(unpowered)
Input Resistance: IOOMR
Input Bias Current: 5OnA
Software selectable gains:
Input range (+V):
Gain accuracy (% rdg): 0.05 0.01
Gain Nonlinearity (%): 0.005 0.005 0.005
Gain Tempco (%/“C): 0.002 0.002 0.002
Input offset @IV): 250 25 25
Offset Tempco QV/“C): 50 6
Input noise
@V RMS, 1OOKHz BW):
Settling time to .Ol%:
CMRR (DC to 60Hz): 70db 90db 100db
Power up conditions: gain = Xl, input channels = differential, channel selected = channel 0.
xl
10 1
24 2.7 1.3
15ps 15ps 15la
X10
xl00
0.1
0.01
2
Standard Connections
terminal block, first strip 3/16 of insulation from the end of
the wire which you want to attach. Loosen the desired
terminal screw on the block and insert the bare end of the
wire into the corresponding hole. Tighten the screw securely to compress the tab against the wire.
After you have attached all the desired signal wires to a
terminal block, replace the terminal block by lining it up
with the mating pins on the AIM3A and pressing it back
into place.
Alternate connections are available through the optional
cable mass termination connector Jll. Note that Jll connects only to channels 0 through 7 and 16 through 23 in
single-ended mode, or 0 through 7 in differential mode.
This connector is available from Scotch/3M as Part Number 3429, and can be easily field-installed if it is needed.
Installation
All features and operating modes of the AlM3A module
are programmable with the exception of jumpers Wl and
W2 and resistor sockets J5 JlO. Jumpers Wl and W2
connect input low to module ground, and are normally left
in place. They may be removed for measurements where
remote ground sensing is needed. A jumper may be plain
wire, or may resemble a resistor.
Sockets J5 JlO are used for current sensing resistors, or for
ground reference resistors for some types of differential
measurements. These are special situations which are
covered under the “Applications” topic later in this manual.
The input connections to the AIM3A are made through
quick-disconnect terminal blocks Jl, J2, J3, and J4,or through
mass termination Jll.
A quick-disconnect terminal block can be removed from
the AlM3A to facilitate making connections. Pull the block
straight off the board with a firm, even pressure. Do not pry
the terminals with a screwdriver or sharp object, or you
may damage the circuit board.
Note that each individual terminal on a terminal block
consists of a small metal block with a hole and metal
compression tab within the hole. To make connections to a
CAUTION
Turn off power to the data acquisition system
before you insert or remove any module. To
minimize the possibility of EM1 radiation,
always operate the data acquisition system
with the cover in place and properly secured.
CAUTION
Make sure you have discharged any static
charges on your body before handling the
AIM3A. You can do this most easily by simply
touching the chassis of a computer or data
acquisition mainframe which is plugged into
AIM3A-3
Page 4

AIM3A
Analog Input Module
a grounded, 3-wire outlet. Avoid touching
components or the card edge connector of the
module.
NOTE
Analog input modules should be placed in the
lowest-numbered availableslots. Thispositioning will provide the shortest distance to the
Analog Master Measurement module in slot 1,
and will also minimize any possibility of noise
pick-up from the power supply or other mod-
l&S.
For a compatible multi-slot data acquisition system (e.g.
Model 5OOA or 5OOP), remove the top cover of the system
by loosening the cover retaining screws located in the
upper corners of the rear panel. Slide the cover back about
one inch and then lift it off. Insert the AIM3A module in the
desired slot with the component side facing the system
power supply. Replace the system cover.
In a single-slot system such as the Model 575 or 576, first
attach the supplied right-angle bracket to the AIM3A (see
Figure 2). Install the AIM3A in the option slot, with the
component side of the board facing upward. Secure the
bracket to the rear panel of the system. Close and secure the
cover.
The AIM3A has a single, differential instrumentation amplifier that amplifies all input signals, whether singleended or differential. A differential amplifier responds
only to the difference in voltage between two signals
connected to its non-inverting (+) and inverting (-) inputs.
The common mode voltage is the average of the two input
voltages. The actual voltage at each input is not important
as long as the common voltage is within the common mode
range of the amplifier. The common mode range of thi
AIM3Awillnotbeexceededaslongasallinputsarewithin
the range -lOV to +lOV referenced to module ground.
For example, if the input to the (+) input is 9 Volts and the
input to the (-) input is 8 Volts, the amplifier will amplify
the +1 Volt difference signal and reject (ignore) the 8.5 volt
common mode signal at both inputs. The ability to reject
the8.5Volt commonsignal isreferred toasCommonMode
Rejection.
When the AIM3A amplifies a differential input signal, the
(+) input of the amplifier is connected to the selected (+)
channel on terminal block Jl or J3, and the (-) input of the
amplifier is connected to the corresponding (-) channel
terminal on J2 or J4. For example, if channel 2 and differential mode are selected, the (+) input of the amplifier is
connected to pin 7 of Jl, and the (-1 input of the amplifier is
connected to pin 4 of JZ. As long as the voltage at either pin
is within +lO to -10 volts as measured to the module
ground (pin 10 of Jl and J3, or pin 1 of J2 and J4), the
amplifier will amplify the difference between the inputs.
End View Top View
I
-e
screws
Threaded Hole
screw
Bracket
‘@we 2. Model 575 Mounting Bracket
Applications
The following brief description of the AIM3A’s amplifier
circuitry will help you make the most effective use of the
module.
AIM3A-4
When the AIM3A amplifies a single-ended input signal,
the (+) input is connected to the selected channel on terminalblockJ1, J2, J3,or J4,and the (-1 inputisconnected toone
of common input low connections available on Jl, JZ, J3, or
14.
The jumpers Wl and W2 provide a user-removable connection between the input low connections and module
ground,andshouldnormallybeleftlnposition.TheAIM3A
amplifier will now amplify the voltage difference between
the selected (+) input terminal and module ground.
As an example, if channel 30 and single-ended mode are
selected, the (+) input of the amplifier is connected to pin
8 of J4, and the (-) input of the amplifier is connected to pin
10 of J4 (or pin 1 of J3, since these two pins are internally
connected). Pin 10 of J4 and pin 1 of J3 are jumpered to
module ground by WZ. The amplifier will amplify the
difference between pin 8 of J4 and pin 10 of J4.
Page 5

AlM3A
Analog Input Module
There are two groups of 16 single-ended input channels,
and each group has its own (-) input connection. Singleended channels 0 through 7 and 16 through 23 form one
group, with their (-) input connection brought to pin 1 of Jl
and pin 10 of J2. Jumper Wl connects this (-) input connection to the module ground as supplied from the factory.
Single-ended channels 8 through 15 and 24 through 31
form the second group, with their (-) input connection
brought to pin 1 of J3 and pin 10 of J4. Jumper WZ connects
this (-1 input connection to the module ground as supplied
from the factory.
CAUTION
To minimize the possibility of EMI radiation,
use shielded cable for input signals. Connect
the shield to module ground, but do not connect the shield at the opposite cable end to
anything.Themaximuminputvoltageallowed
with module power on is i30 Volts, or 225
Volts with module power off. If any input
exceeds f10 Volts, all inputs will be lnoperative.
There are several choices for the method of connecting
inputs to the AIM3A. You must decide which method will
yield the best results for a given application. To achieve 16bit performance, care must be taken to minimize error
sources caused by ground loops and shielding problems.
The guidelines for choosing connection methods are as
follows:
Single-ended Input, Local Ground Sensing. Using
Terminal Blocks
For input sources which can be grounded, but are not
connected to a ground of their own, the connections shown
in Figure 3 will give good results. The AIM3A provides the
ground connection for the input sources. Two possible
connectionsareshown.SourcesVOandVl haveindividual
cables going to each source. Up to 32 sources can be
connected to a single AIh43A in this way. Four input
common terminals are provided, one on each connector.
Connectall thewiresfromasingleinputsource to thesame
connector, asshownfor Jl inFigure3. SourcesV16andV17
show a cable with a single input common wire. This
connection method can be used for up to 16 sources in a
group where all the sources have one wire in common. The
sources in a single group must be connected to channels
which all use the same input common connection. There
are two input common connections, one for channels 0
through 7 and 16 through 23, and a second input common
connection for channels 8 through 15 and 24 through 31.
Single-ended Input, Remote Ground Sensing, Using
Terminal Blocks
Figure 4 shows four single-ended inputs connected to the
AIM3A using a remote ground sense line. All 16 singleended inputs on Jl and J2 use a single ground sense line.
This method is useful when up to 16 voltage sources to be
measured are all located at a single remote location, with
one side of each signal source connected to ground at the
remote location. There may be a voltage difference be-
tween the ground at the remote location and the ground on
theAlM3A. This will cause an error in the voltage readings
if the connection in Figure 3 is used.
In Figure 4, the ground connection on theAIM3A is disconnected by removing jumper Wl. The ground at the remote
location is carried to the AlM3A by the remote ground
sense wire. The AIM3A will measure the difference between the remote signal, and the remote ground, and
eliminate the error caused by the difference in ground
voltage between it and the remote location. Two groups of
16 single-ended inputs can be wired this way, with the first
group using Jl, J2, and Wl, and the second group using J3,
J4, and W2 Refer also to Figures 10 and 11 later in this
manual.
Differential Inputs, Using Terminal Blocks
When there are multiple inputs with different ground
points, or the actual ground points are not known, the
differential input wiring can be used to prevent ground
loop errors and reject common mode noise. Figure 5 shows
two inputs connected as differential input channels 2 and
3. Either the (+) or the (-) input on any differential input
maybeconnected toground,orbothmay bediiferent from
ground. A restriction does exist, however. No input terminal on the AIM3A can be connected to a voltage beyond
+lOVor-10Vwithrespecttothe.4IM3Agroundreference.
If this happens, reading errors may occur on the channel
which is greater than 10 volts. At about +15 or -15 volts,
other channels will begin to read in error, and above +3OV
or -3OV, the AIM3A will be damaged.
When the AtM3A is used to measure a floating source, the
readings may appear noisy, or may fluctuate or rise until
they reach the maximum input permitted by the programmed gains. This problem results where the floating
sourcehasnolow-impedancecurrentretumpathtoground.
Over a period of seconds to minutes, the input of the
AIM3A charges off the input signal until the common
mode voltage present at the input exceeds the allowable
level, and the module no longer functions properly. The
AIM3A-5
Page 6

AIM3A
Analon Inaut Module
solution is to install a resistor for the affected channel from
inputlow toground.Thevalueof theresistormaybein the
range of 5k-lOOk, depending on the signal characteristics,
and should be determined empirically. These resistors can
be mounted on headers which are plugged into the avail-
able resistor sockets on the AEvf3A.
Notes:
1. Jumpers Wl and W2 must be in position. Wl connects input common for signals connected to Jl
and J2 to module ground. W2 connects input common of J3 and J4 to module ground.
2. All shields for singleended signals connected to Jl are attached to pin 10 of Jl, The shield input
on any connector is the right-most pin (Le. closest to the strain relief block of the AIM3A).
3. All input common lines for single-ended signals connected to Jl are attached to pin 1 of Jl, The
input common on any connector is the left-most pin (i.e. furthest from the strain relief block of the
AIM3A).
‘igure 3. Single-ended, Local Ground Sense, Using Terminal Blocks
AIM3A-6
Page 7

AIM3A
Analog Input Module
Notes:
Wl Removed for remote
Ground sense with Jl & J2
I---
A+
Remote Ground
Sense
1. Jumpers Wi and or W2 must be removed for this mode of operation: Remove Wl if connections
Ji and J2 are used, or W2 if J3 or J4 are used.
2. The input common on any connector is the left-most pin (Le. furfhest from the strain relief block
of the AIM3A.
3. The shield input on any connector is the right-most pin (i.e. closest to the strain relief block of
the AIM3A.
‘igure 4. Single-ended, Remote Ground Sense, Using Terminals
AIM3A-7
Page 8

AIM3A
Analog Input Module
Notes:
1. Jumpers Wl and or W2 may be in or out for this setup.
2. Input Common terminals have no effect for differential measurements.
3. The input common on any connector is the left-most pin (i.e. furthest from the strain relief
block of the AIM3A.
4. The shield input on any connector is the right-most pin (i.e. closest to the strain relief block of
the AIM3A.
igure 5. Differential Inputs, Using Terminal Blocks
Single-ended Inputs, Using Mass-termination
A location is provided near the strain relief block of the
AIh43A module for an optional mass termination connec-
tor Jl 1. Connector Jl 1 has its pins wired in parallel with the
connections on Jl and JZ, and provides a method for
quickly connecting up to 16 single-ended or 8 differential
signals to the AIM3A. The pin out of Jll is identical to that
of the Analog Devices 38 subsystem connector. When Jll
is used, the remaining input terminals on J3 and J4 of the
AIh43A may still be used in the usual fashion.
The pin out of Jll when used for single-ended inputs is
shown in Figure 6. The pin out of Jll when used with
differential inputs is shown in Figure 7. AU the input signal
connections previously described in Figures 3,4, and 5 can
be implemented with Jll. When Jll is used with the
AnalogDevices3B subsystem, the single-ended input with
remote ground sensing configuration is used, and Wl
must be removed.
AIh43A-8
Page 9

AlM3A
Analog Input Module
Remove Wl if remote ground is used
To Input 6
To Input Common
Pinout of user-installed connector
( ~$$?$zd
Typical Input Wiring :
Remote ground,
if used
Notes:
1. Connector is user-installable. ScotchWM Part Number 3429.
2. Connectors J3 and J4 can be wired for other operating modes.
3. Jumper Wl connects input common to module ground. Remove Wl if remote ground sensing is
used
‘igure 6. Single-ended Hook-up, Using Mass Termination
AIM3A-9
Page 10

AIM3A
Analog Input Module
Wl and W2 have no effect on
differential measurements
Pinout of user-installed connector
/
Typical Input Wiring :
To Input 5+
To Input 5-
To Shield
Notes:
I, Connector is user-installable, Scotchl3M Part Number 3429.
2. Connectors J3 and J4 can be wired for other operating modes.
3. Jumpers Wl and W2 have no effect on differential measurements.
‘igure 7. Differential Hook-up, Using Mass Termination
Current Measurement Using Terminal Blocks
TheAIM3A can measure currents by using current sensing
resistors to convert the current to a voltage. The voltage
drop across the current sensing resistor may then be measured and converted to a current. DIP sockets and DIP
headers are provided on the AIM3A to mount the current
sensing resistors. If all the currents being measured have a
common rehzrn path, the connection method shown in
Figure 8 can be used. If the currents being measured have
different return paths, the connection method shown in
Figure 9 must be used. In both connection methods, the
common mode voltage limitation applies as described
before; that is, no input terminal can be more than 10 volts
positive or negative with respect to the module ground.
The example in Figure 8 shows two 4-20 ma current loop
sensors being connected to single-ended channels 0 and 1.
An external power supply is needed to power the sensors.
Up to 16 current loop sensors can be connected to Jl and J2
and use the common current return path as shown. 16
additional current loop sensors can be wired to J3 and J4,
and use the second common current return path. When the
AIM3A-10
Page 11

Remove Wl for single-ended
current loop senscrs
connected to Jl & J2
AIM3A
Analog Input Module
I, \
I+
4 20mA
current
senscrs
External
voltage source
to power senscm
Sensc<cu3nt
return path for
channels 0 - 7
and16-23
1. Up to 16 senscrs can be connected to Jl and J2
2. Precision 250 ohm 0.01% O.iW resistors are available from Keithley DAC as part number 500.
RES-250. These resistors can be soldered to the DIP header plugs which are supplied in J5-JlO.
3. Remove jumper Wl if connectors Ji and/or J2 are used. Remove W2 if J3 and/or J4 are used
4. The same configuration can be repeated for J3 and J4.
‘igure 8. Measuring Currents Using Single-ended Inputs
common current retcrn is used as shown for single-ended
current inputs, single-ended voltage inputs in that group
of 16cannot beused. Figure9showsasingle4-ZOmasensor
connected up for current sensing in the differential mode.
In this connection method, either input terminal on the
AIM3A may be connected to ground either at the external
power supply or at the sensor.
The resistor value used for current measurements should
be chosen such that the resulting voltage drop does not
exceed the voltage input range for the channel being used.
Thus, if a maximum cuTTent of 20 mA is expected, and if the
input range is HOV, the resistor cannot be any larger than
5OOn or the resulting input voltage will be greater than
1OV. Ohm’s Law can be used to calculate the value as
fellows:
Voltagedrop = maximumexpectedcurrentxresistorvalue
Generally, you may choose any resistor value which gives
a suitable voltage drop. To avoid heating which may affect
measurement accuracy, make sure the maximum power
dissipated in the resistor is well within the power rating of
the resistor. Calculate this dissipation with another Ohm’s
law equation,
I’d2 x R
AlM3A-11
Page 12

AIM3A
Analog Input Module
WI and W2 have no affect
on differential current
measurements
.Eb m
nnnlti
’ I--
Each sensor
has its own
return current
path
1
+ External
v
4
+7
4 - 20mA
sensor
voltage supply
to power sensor
1. Up to 8 sensors can be connected to Jl and J2
2. Precision 250 ohm 0.01% 0.1 W resistors are available from Kelthley DAC as part number 500.
RES-250. These resistors can be soldered to the DIP header plugs which are supplied in J5-JlO.
3. Jumpers Wl and W2 have no effect on differential current measurements.
4. The same configuration can be repeated for J3 and J4.
‘igure 9. Measuring Currents Using Differential Inputs
There is one case where you most install a specific value
resistor. Keithley’s software includes an engineering units
flag which facilitates measurement of 4-2OmA current
loops. This EUF rehnns a reading of current in inilliamps.
It equates 4mA as 1V measured across the resistor, and
2OmA as 5V. Ohm’s law requires a resistor value of 250
ohms for this relationship to hold. Single-ended or differentialmcdecanbeused. Resistorswith avalueof250ohms
@ 0.01% are available from DALE resistors; part number
RN55E25008, or from Kaithley in packs of eight resistors as
500~RES-250.
Grounding
Care must be taken in wiring test circuits to minimize
errors due to the resistance of connection wire, especially
where the wire must carry an appreciable current. Figure
10 shows a circuit which has an inherent problem resulting
in a measurement error of 26%. The 1.28 ohm and 50 ohm
resistors are not actually discrete resistors in the circuitry,
but instead represent the equivalent resistances of wire or
other components. Figure 11 shows how the jumper Wl
may be removed to overcome this measurement problem.
AIM3A-12
Page 13

Amplifies 0.626V
AIM3A
Analog Input Module
Voltage drop
E=IR=0.10~1.26=0.126~
Error in measured voltage =
0.126VIO.5V n 26%
in ground wire =
‘igure 10. Errors Due to Ground Loop
(0.626V - 0.126V) - 0.5V
50 ft. of
#24 awg
50R = 1 OOmA load
(Sensor amp circuit
power, for example)
Using remote ground sensing
subtracts the ermr due to
ground wire resistance
‘igure 11. Avoiding Ground Loop Errors with Remote Ground Sensing
50 ft. of #24 awg
50R - 1 OOmA load
(Sensor amp circuit
power. for example)
Page 14

AIM3A
Analog Input Module
Selecting gains
The AIM3A module must be used with a data acquisition
system containing an AMMlA, AMM2, or other A/D
module. AllKeithleymasteranalogandA/Dmodulesalso
include a programmable gain (“global”) amplifier which
can be used to amplify any analog signal before it is
digitizedbytheA/Dconverter.TheAIM3Aalsohasanonboard (“local”) instnxmentation amplifier which amplifies
only those signals connected to the AIM3A. Thus, total
gains of xl, x2, x5, x10, x20, x50, x100, x500, and xlOW can
be applied to signals connected to the AIM3A. The following guidelines should be used in selecting gains:
Where possible, the amplifier on the AlM3A should be
used. The AIM3A amplifier processes the signal before
it passes through the remaining multiplexer and amplifier circuits, so the amount of noise which is amplified
along with the signal will be minimized.
The maximum signal presented to the A/D converter
as a result of all the applied gains cannot exceed the
A/D converter range.
Input filtering
Some types of measurements may be susceptible to noise
from the environment. Examples include measurement of
high-impedancesignals,ormeasurementsperformednear
motors, SCR controllers, etc. You should routinely take
care to minimize noise in your measurement setups. Typical steps include:
1.
Use short cable runs and shielded connecting cables.
2.
Properly use shielding. Only one differential signal
should be carried in a shielded cable. The shield should
be terminated only on one end of the cable; generally to
a shield terminal on the AIM3A.
3.
Minimize external sources of noise, re-orient equipment, or use a power outlet for the data acquisition
system which is not shared by any other equipment.
4.
Take several readings and average them. If the noise is
random, it will be filtered out mathematically through
averaging.
5.
Use any filtration available in the data acquisition system. The AMM2 module includes a programmable
filter with pass bands of 1OOkHz or ZkHz. The reading
rate available with the 1 OOkHz filter is 50kHz, while the
reading rate available with the 2kHz filter is 1kHz.
6.
Consider external conditioning or filtration. In some
casesyoumaywant toimplementafilterdirectlyatone
or more inputs of the AIM3A. A single-pole input filter
may be easily constructed using one resistor and one
capacitor (see Figure 12). The relative RC values will
depend on a variety of factors, including the frequency
of the noise, the required attenuation, and the necessary response time. The RC values can be computed
from the formula:
f&m =&
Where f is in Hz, C is farads, and R is ohms. The resulting
system response time within 0.01% is then equal to 9.2xRC.
As an example, assume that 10 counts of 60Hz noise is
present in the signal. To reduce the noise to one count (i.e.
to reduce the noise voltage by a factor of lo), an attenuator
factor of 10 (20dB) will be necessary at 60Hz. A single-pole
filter will roll off at a rate of 20dB per decade. Thus, a 3dB
point of 6Hz would be chosen to attenuate to 6OHz noise by
20dB. Rearranging the above equation to solve for R we
have:
R=
Picking a nominal value of 0.5pF for C, the necessary resis-
tance is:
R=
2rr x (0.5 x 10-6) x 6
R = 53,OOOohms
The resulting response time (Tr) is:
Tr = 9.2xRC
Tr = 9.2 x 53000 x 0.5
Tr = 0.24~~
Note that there are a number of RC values that can be used
in a given application. To minimize the effects of the series
resistance, however, keep the value of R as low as possible.
1
2n x c x f(s*)
1
AIM3A-14
Page 15

AIM3A
Analog Input Module
Where signals of low to moderate impedance are mixed on
one AIM3A, sufficient settling time or other measures
must be taken to assure accurate measurements. When the
AIM3A multiplexer selects any channel, a small charge
flows into or out of the AIM3A. If the next channel selected
by the multiplexer is a low impedance source, the AIM3A
and source will rapidly settle for the next measurement. If
the multiplexer instead switches to a high impedance
signal source, more time will be required for the AlM3A
input to settle at the new voltage.
igure 12. Single-pole Input Filter
High-Impedance Measurements
In measuring an analog signal, the measurement instrument places a small load on the signal and absorbs a small
amount of current from the signal source. Ideally, this load
should be zero, but will actually be some finite value. The
input impedance of the AIM3A is 100 Megohms, which is
comparable to a high-quality digital multimeter. Under
most measurement situations, the AIM3A will present a
negligible load to the signal source. However, measurement of signals from very high-impedance transducers
such as pH meter electrodes requires input impedance
several orders of magnitude higher.
Table 1. User-configured Components on the AIM3A Module
Application
Where high and low impedance signals are mixed on one
AIM3A, it is thus important that sufficient settling time be
provided per channel. It may also be helpful to short one
AIM3A channel to ground, and to scan that channel between the actual signal channels. Alternately, an external
buffer amplifier may be inserted between a high impedance signal and the AIM3A input. Such an amplifier presents a low impedance to the AIM3A, and may also be
designed with some gain as well. A buffer amplifier can be
built using an SET-input op amp and a few components.
See an analog IC applications guide for more information.
User-Configured Components
The user-configurable components on the AIh43A are J5,
J6, J7, J8, J9, JlO, Jll, Wl and W2.
Used for current sense resistors for single-ended inputs 0 through 7, or for ground reference resistors for
differential (+) input channels 0 through 7.
Used for current sense resistors for single-ended inputs 8 through 15, or for ground reference resistors
for differential (+) input channels 8 through 15.
Used for current sense resistors for single-ended inputs 16 through 23, or for ground reference resistors
for differential (-) input channels 0 through 7.
Used for current sense resistors for single-ended inputs 24 through 31, or for ground reference resistors
for differential f-1 input channels 8 through 15.
Used for current sense resistors for differential inputs 0 through 7.
Used for current sense resistors for differential inputs 8 through 15.
Jumper which connects the input common of single-ended input channels 0 through 7 and 16 through
23 to module ground.
Jumper which connects the input common of single-ended input channels 8 through 15 and 24 through
31 to module ground.
AIM3A-15
Page 16

AlM3A
Amlo,q Input Module
Table 2. Pin Outs for Single-ended Input Current Sense Resistors
Single-ended
Connector Channel
;z 0 1
; 3 2
J5 4
;z 5 6
J5 7
J6 8
fi 10 9
:z 11 12
; 14 13
J6 15
;: 17 16
J7 18
:: 20 19
Differential
Channel
co +I 8 7 10 9
+3 +2 6 5 12 11
+4 4 13
c5 +6 3 2 14 15
+7 1 16
+8 8 9
+I0 +9 7 6 10 11
+12 +11 5 4 12 13
+13 +I4 3 2 14 15
+15 1 16
-0 -1 10 9 8 7
-2 11 6
-3 -4 12 13 4 5
Input Input
TWIlliII~l Common
:; 21 22
J7 23
:: 24 25
; 26 27
:: 29 28
30
31
-6 -5 14 15 3 2
-7 16 1
-8 -9 10 9 8 7
-11 -10 11 12 6 5
-12 -13 13 14 4 3
-14 15 2
-15 16 1
AIh43A-16
Page 17

Table 3. Pin Outs for Differential Current Sense Resistors
1 Differential
connector Channel
I
0
1
11
;i
;
:;
2 3
4 5
6 7
12 5
13 4
14
15
16 1
I
6
3
2
AIM3A
Analog Input Module
Jl’J
JlO
JlO
JlO
JlO
JlO
Jl’J
Jl’J
8
9
10
11
12
13
14
15
Theory of Operation
The AlM3A circuitry is divided into three sections. The
input multiplexer consists of Ul, U2, U3, U4, and U5. The
instrumentation amplifier consists of U6, U7, U8, and the
associated resistors. ThedigitalcontrollogicconsistsofU9,
UlO, Ull, U12, U13, and U14.
The programmable gain instrumentation amplifier is constructed using an AD625JN amplifier (U7). The inputs of
U7 are connected to the input multiplexer through protection resistors R25 and R26. The output of Ui’ at pin 10 is
connected to J12 pin 3. The ANA-COM signal at pins 2 and
43ofJ12isthesystemzerovoltagereferencepoint,grounded
at the A/D converter input on the Ah4MlA or Ah@E. U8
buffers this ground reference, and feeds the U7 ground
reference input at pin 7.
U6 and resistors Ii11 through R24 form the programmable
gain control for amplifier U7. Pins 5 and 12 of U7 drive the
ends of a balanced voltage divider, and U6 selects two taps
on the divider based on the gain setting programmed. The
selected voltage divider taps are connected to U7 pins 2
and 15.
9
10 7
11
12 5
13 4
14 3
15
16 1
The input multiplexer allows either single-ended or differential signals to be selected as inputs to the instnunentation amplifier. When a differential input is selected, the (+)
input of the selected channel is connected to the noninverting input of the instrumentation amplifier by Ul (for
channels 0 through 7) or U3 (for channels 8 through 15).
The (-1 input of the selected channel is routed through U2
(Ch O-7) or U4 (Ch 8-15) to pin 14 of U5B. U5B is enabled,
connecting the (-) input of the selected channel to the
inverting input of the instrumentation amplifier. The 1K
resistor networks Rl, R2, R3, R4 combine with clamping
diodes inside Ul, U2, U3, U4 to provide input over voltage
protection. The diodes are arranged to conduct whenever
the input voltages either go above the +15 volt supply, or
go below the -15 volt supply.
Whenasingle-endedinputisselected,oneofthefourinput
multiplexers,Ul,U2,U3,orU4,connects theselectedinput
to its output. U5A is enabled, so that the outputs of all four
input multiplexers are connected to the non-inverting
input of theinsmunentationamplifier. If the selected input
is on either Jl or J2, then U5C is enabled, connecting the
inverting input of the instrumentation amplifier to input
low reference connections on Jl and J2. If the selected input
is on J3 or J4, then U5D is enabled, connectig the inverting
I 8
6
2
AlM3A-17
Page 18

AIM3A
Analog Input Module
input of the instrumentation amplifier to input low refer-
ence connections on J3 and J4.
ThedigitalcontrollogicrespondsonlytoawritetoCMDA.
A write to CMDA occurs when CMDA and R/W are both
pulsed low, causing U9D to pulse high. U14E inverts the
output of U9D, and will cause U12 to latch the data on DO
through D4 at the trailing edge of the pulse. The input
channel selection is controlled by these latched data bits,
which are further decoded by U9A, U9B, U9C, UlOA,
UlOB, UlOC, U14A, and U14B. When a write pulse occurs,
data is not latched by Ull if data bits D6 and D7 are both
low at the time of the write pulse. This is accomplished by
AND gate UlOD, which combines the write pulse from
U9D with the output of U13A. U13A is high if either D6 or
D7 or both are high. When a write is allowed to Ull, it
latches data bits D5, D6, and D7. Latched data bit D5 selects
single-ended or differential input mode by altering the
decoding of the channel selection data bits D3 and D4 in
Table 4. AIM3A Command Locations and Functions
portionsofU9andUlO.LatcheddatabitsD6andD7switch
the gain of the instrumentation amplifier by controlling
U6.
AIM3A Commands and Command Loca-
tions
The AlM3A is controlled by writing to the Command A
(CMDA) address for the slot in which the module is
mounted. Programmable parameters include selection of
channel, single-ended or differential mode, and gain.
Command B is not implemented on the AlM3A, and there
are also no READ modes for the AIM3A.
Keithley’s KDAC500 software offers complete programmability of the AIM3A.
Read Functions:
COMMAND FUNCTION
CMDA
CMDB NOW2
Write Functions:
COMMAND
CMDA Select channel, gain, and single-ended or differential input.
CMDB
NOIW
FUNCTION
NOIVZ
AlM3A-18
Page 19

16 Diff
32%
Inputs
AIM3A
Analog Input Module
Table 4. AIM3A Command Locations and Functions (Cont.)
TO
AMMlA
At%2
Multiplexer
Multiplexer
Channel select
(CMDA write)
Programmable gain
(CMDA write)
D7 D6 D5 D4 D3 D2 Dl DO
T -II- s!g$y;:
lo-x10Gain
11 - x100 Gain
* A simultaneous write of 000 or 001 to bits D7. D6, and D5 will have no effect on the last write to
D5, D6, or D7.
AIh43A-19
Page 20

AlM3A
Analog Input Module
Calibration Procedure
There are four adjustments on the AIM3A: Xl0 gain, Xl00
gain,andfwooffsetvoltageadjustments.Theoffsetadjustments can be made with equipment of average accuracy,
whereas the gain adjustments require equipment meeting
or exceeding the performance of the equipment specified
for the procedures. The gain calibrations will degrade by a
maximum of 0.01% per year. If the gains require readjust-
ment,bestresultswillbeobtainedifthemoduleisrehuned
for factory calibration.
Offset Adjustment
Equipment Required:
Keithley Model 196 DMM or equivalent
Keithley Model 500,5OOA, or 575 Data Acquisition System
Procedure:
1.
Install the AIM3A module to be calibrated in slot 3 of
the Data Acquisition System. Install either an AMMIA
or an AMMZ into slot 1 of the Data Acquisition System,
then tom on the system power. Provide 15 minutes for
the equipment to warm up.
2.
Short single-ended channel 0 to ground by installing a
jumper wire between pin9 and pin 1 of input connector
Jl. If jumper Wl has been disconnected, it will also be
necessary to also install a jumper wire between pin 1
and pin 10 of input connector Jl for this test.
3.
Attach the (-) lead of the DMM to TPl (labeled ANA
COM) on the AIM3A. Attach the (+) lead of the DMM
to TP2 (labeled ANA OUT) on the AIM3A. Select the
most sensitive DC voltage range.
4.
If U7, R27, or R28 have been replaced, preset R27 and
R28 to near the center of their adjustment range by first
rotating the adjustment screws counterclockwise at
least 25 turns (or until a clicking sound is heard as the
screw is rotated), and then rotating the adjustment
screws clockwise 13 turns. R27 and R28 should not be
presetiftheboardwasfunctioningnormallybefore this
calibration was begun, since R27 and R28 are probably
close to the proper adjustment.
5.
Invoke BASICA on the computer controlling the data
acquisition system. Using the BASICA direct mode,
execute the following statement:
DEF SEG = &HCFF&?
If the IBIN card in your system is set to an address other
than CAFE, use that address instead of CFFB in the DEF
SEG statement.
Using the BASICA immediate mode, execute the fol-
6.
lowing statement:
POKE 4,96
This will select the Xl gain and single-ended channel 0.
7.
Adjust R28 for a DMM Indication of 0 volts, within 50
microvolts.
8.
Using the BASICA immediate mode, execute the following statement:
POKE 4,224
ThisstatementselectsXlOOgainandsingle-endedchannel0.
9.
Adjust R27 for a DMM indication of 0 volts, within 500
microvolts.
10. Repeat steps 6, 7, 8, and 9 in order until no further
improvement is obtained.
Gain Adjustment
Equipment Required:
Fluke Model 5101 Voltage Calibrator or equivalent
Keithley Model 196 DMM or equivalent
Keithley Model 500,5OOA, or 575 Data Acquisition system
Procedure:
Install the AIM3A module to be calibrated in slot 3 of
the Data Acquisition System. Install either an AMMlA
or an AMMZ into slot 1 of the Data Acquisition System,
then hum on the system power. Provide 15 minutes for
the equipment to warm up.
Connect the (-) lead of the voltage calibrator output to
Jl pin 1 and the (+) lead of the voltage calibrator output
to Jl pin 9. If jumper Wl has been disconnected, it is
necessary to also install a jumper wire between pin 1
and pin 10 of input connector Jl for this test.
Attach the (-) lead of the DMM to TPl (labeled ANA
COM) on the AIM3A, and the (+) lead of the DMM to
TI?? (labeled ANA OUT) on theAIM3A. Select the most
sensitive DC voltage range that can display a 10 volt
reading.
Invoke BASICA on the computer controlling the data
acqtisitionsystem.UslngtheBASICAimmediatemode,
AIM3A-20
Page 21

AIM3A
Analog Input Module
execute the following statement:
DEF SEG = &HCFJF8
If the IBIN card in your system is.& to an address other
than CFF8, use that address instead of CFFB in the DEF
SEG statement.
5. Using the BASICA direct mode, execute the following
statement:
POKE 4,160
This will select the X10 gain and single-ended channel
0.
6. With the voltage calibrator set to produce 0 volts output, note the offset voltage reading on the Dh4M.
7. Set the voltage calibrator to produce 1.0000 volts.
8. AdjustR21foraDMMreadingequaltolOvoltsplusthe
offset voltage reading noted in step 6. When adding the
offset reading, be sure to use the correct polarity.
9. Using the BASICA direct mode, execute the following
statement:
Faulty software or applications programs - If you have
completed a new program which does not work as anticipated, review the program design and be certain that it
actually functions as you assume. If a program which had
been running properly begins to behave erratically, either
the supporting software package or the application program may have been corrupted. This may occur through
disk media failures, power supply problems, hardware
failures, or operator error.
Compare your software package to a back-up copy or the
original diskettes. If the software is questionable, you
should reinstall the software t&m the original diskettes or
known-good copies. Likewise, your applications program
should be restored from backups if a problem develops.
Note that it is crucial to back up important software and
programs. Ideally, you should make at least two copies,
and store one in a location away from your work site.
Application programs should be backed up regularly as
they are being developed. Printouts of program listings
may also be desirable.
POKE 4,224
This will select the Xl00 gain and single-ended channel
0.
10. With the voltage calibrator set to produce 0 volts output, note the offset voltage reading on the DMM.
11. Set the voltage calibrator to produce 100.00 millivolts.
12. AdjustR17foraDMMreadingequaltolOvoltsplusthe
offset voltage reading noted in step 6. When adding the
offset reading, be sure to use the correct polarity.
Troubleshooting
Any observed or suspected problem with a system or
module may be the result of malfunctions in any part of the
system. A hierarchy of possible problem areas is listed
below. The list should help you apply an organized approach to troubleshooting, starting with software and
working toward a specific module. It assumes that your
system and software have both worked properly in the
past. If you have spares, you can most quickly verify a
system component through simple substitution. Check
your data acquisition system manual or computer documentation - they may contain additional instructions on
troubleshooting.
Faulty computer system -A malfunctioning computer or
peripheral can affect the data acquisition software and
hardware, ranging from minor problems to total failure.
These problems may be continuous or intermittent. If you
suspect your computer, remove the data acquisition interface and run any diagnostics which came with the system
to verify its performance. Also try running other software
with which you are familiar. Pay close attention for any
erratic behavior of the software which points to hardware
problems.
Defective interface - A malfunctioning data acquisition
interface can prevent the computer from booting up and
operatingproperly,oritcanaffect only thedataacquisition
system. Some graphics, mouse, and networking adapters
have been observed to conflict with data acquisition interfaces as a result of both using the same addresses or
interrupts. The system operates properly with only one of
the cards in place, but diagnostic error messages or other
problems result with both cards plugged into the system.
You can usually determine incompatibility by trying each
suspected card individually, and then together in the system. Such incompatibility can often be overcome through
switch settings, configuration changes, or minor modifications to the hardware.
AIh43A-21
Page 22

AIM3A
An&g Input Module
Defective data acquisition interface cable-The cable car-
ries essential power, control, or data signals. Open conduc-
tors in a cable will disrupt the process. Cable shorts,
especially in lines carrying system power supply voltages,
may cause a total shutdown of the computer or data
acquisition mainframe. If these problems exist, try discon-
necting the interface cable from the computer and data
acquisition system.
There is amaximum permissible length specified forinterface cables. Exceeding the length will also introduce problems. You may note erratic operation of the computer,
corrupt data, or a failure of the indicator lamps on the data
acquisition system to light.
Defective data acquisition mainframe-A mainframe de-
fect can affect any and all data acquisition functions. Main
areas of include the mother board logic and connectors, the
expansion slots, and the power supply. In the case of a
completely dead system, always check any fuses and cabling which camy power.
An individual slot may also be bad. A known good module
can be tried in various slots to determine the condition of
individual mainframe slots.
power control modules. The PIM modules use an external
board and solid state relays. These should also be considered in situations where PIM modules are suspected of
being faulty.
In troubleshooting modules, use a software package with
which you are familiar to write a few simple test programs
for the suspected module. Elaborate programs should
generally not be used. They may contain their own errors
which mask problems with hardware.
If a suspected module does not respond as expected, you
may assume that the module requires calibration or is
defective. If a module has no calibratable components, a
problem at this point will normally indicate a failure
within the module.
Defective AIMSAmodule -An AIM3A can be checked by
running a few simple programs which test individual
features of the module. If you suspect a noise problem, try
shorting both inputs for a given channel to ground. The
CMDA and CMDB registers can also be exercised to determine correct operation of the module. See information
elsewhere in this manual.
Defective module(s) in general - Failures in a module’s
address, data, or control circuitry can affect other modules
if they ultimately reach the data acquisition mother board
orpowersupply.Youmaybeable tolocateafaultymodule
byremotigmodulesindividuallyuntil theproblemclears.
The master A/D module in slot 1 is a special case because
it processes data from all analog input channels. Any
analog input involves its global multiplexer, programmable gain amplifier, and A/D converter. If only the
analog input functions are faulty, you should also consider
themasterA/Dmodule. Useaknown-good A/Dmodule,
or first verify your A/D module for proper operation
before troubleshooting another analog module.
Analog output normally relies only on circuitry within an
analogoutputmoduleunlessdocumentationforthemodule
staates otherwise.
Digital input and output are also performed wholly on a
single module, with the exception of the PIMI and PIM2
Askilled technicianwhohasaccesstoelectronictestequipment may be able to troubleshoot individual circuits on a
module to isolate the faulty parts. A full parts list and
diagram set are included with each module to aid the
technician.
If a defective component is found, replacement parts may
be obtained from Keithley. If factory service is desired, the
module may be returned for repair. All Keithley-manufachued systems and modules are warranted against defects
in material and workmanship for a period of one year. For
information on replacement parts or factory service, see
the Parts List section of the appropriate manual.
NOTE
If a calibratable module which had been working accurately suddenly becomes inaccurate by
more than a few percent, the problem is more
likely a malfunction and not a calibration problem. If you cannot calibrate the hardware after
two attempts, you should return it to Keithley
for repair or calibration at the factory.
AIM3A-22
Page 23

AIM.3A
Analog Input Module
Parts List
This section contains replacement parts information,
component location drawings and schematic diagrams for
the AIM3A module. Parts are listed alphanumerically in
order of their circuit designations. You may obtain spares
from Keithley Instruments, Inc., 28775 Aurora Road,
Cleveland, OH 44139.
To place a parts order, or obtain information concerning
replacement parts, first contact the Keithley customer
service department at (216) 248-0400 X7.725. When ordering parts, include the following information:
1, Model Number
2. Serial Number
3. Part Description
4. Circuit Designation (if applicable)
5. Keithley Part Number
If an additional instruction manual is required, order the
manual package, Keithley Part Number 501-918-00. The
manual package contains an instruction manual and any
applicable addenda.
To place orders for additional AIM3A’s or for any catalog
part #, contact Sales Order Entry at 508-880-3000.
AIM3A-23
Page 24

AlM3A
Analog Input Module
Table 5. Parts List - Model SOO-AIM3A Analog Input Module
Part No.
C-365-.1 4 Cap, .luF, 20%, 5OV, Ceramic c2, c3, c4, c5
C-64IOOP
CS-521-2
CS-553 2
IC-163
xc-179 1 IC, Quad 2 Input NOR, 74LSO2 u9
IC-156
IC-203
lC-215 1
IC-267
IC-320
IC-366 1
IC-473
IC-679 1
IC-680
J-3
R-176-1.09K
R-263-1.52K 2
R-263-15.2K 2
R-263-402
R-76-1K 2
R-76-4.7K
R-76-6.8M
R-55-l .5K 2
R-55-10
R-55-152
R-55-20K 2 RES, ZOK, l%, l/BW, Metal Film Rll, R24
R-55-61.9K 1 RES, 61.9K, l%, l/SW, Metal Film R19
R-5549.5K
&ant@
1 Cap, lOOpF, lo%, lOOOV, Ceramic Cl
4 corm, strip, 10 Pin
1 IC, Quad 2 Input NAND, 74LSO0 u13
1 IC, Hex Inverter, 74LSO4 u14
1 IC, 15V OP-AMP, 305AW US
4 IC, 5 Ch CMOS Analog Multiplexer, 6108
1 IC, SPST CMOS Analog Switch, DG211 u5
1 IC, 4 Chan Diff CMOS Analog Multi, 6208
1 IC, HEX/Quad D Type Flip Flop, 74LS175
2
1 RES, l.O9K, .l%, l/SW, Metal Film
1 RES, 402, .l%, l/lOW, Metal Film
4 RES, 4.7K, 5%, 1/4W, Composition or Film
1 RES, 6.5M, 5%, 1/4W, Composition or Film
1 RES, 10.5K, l%, l/SW, Metal Film
1 RES, 152,1%, 1/5W, Metal Film
1 RES, 69.5K, l%, 1 /SW, Metal Film
Title
Corm, Test Point TPI,Ti?.
IC, Quad 2 Input Pas AND, 74LSO5 UlO
IC, 4 Bit Bistable Latch, 74LS75
IC, Programmable Gain Inst Amp, AD625JN
Jumper, Circuit
RBS, 1.82K, .l%, l/lOW, MetalFilm
RBS, 15.2K, .l%, l/lOW, Metal Film
RES, lK, 5%, 1/4W, Composition or Fiirn
RES, 1.5K, l%, 1/5W, Metal Film
Designation
Jl, J2, J3,J4
Ul, u2, u3, u4
Ull
U6
u7
u12
WI, w2
R29
R13, R18
R12, R22
R14
=J,u
R7, RS, R9, RlO
R23
R25, R26
R16
R20
R15
RI-89-10K
RP-89-200
SO-65
TF-177-l
500-323
500-321
500-322
500-322
6-32X1 /ZPI’H
501-915-00
AIM3A-24
2 POT, lOK, lo%, .75W, Non-Wirewound R27, R28
2 POT, 200,10%, .75W, Non-Wirewound R17, R21
6 16-Pin Socket
RES Network, lK, 2%, 2.25W
Cable Clamp Assy
Cable Clamp
Strip Rubber
Strip Rubber
Screw
Manual Package
JS...JlO
Rl, R2, R3, R4
Page 25

Page 26

4.7K UlOA
R13
1.82K
R25
1.5K
TP1
TP2
J2
R12
18.2K
Rll
20K
R26
J12
R29
i
r~ - !
1090
u13c
,-?&A
U9D
U14D
,olD*
- - MO.
EC0 REV
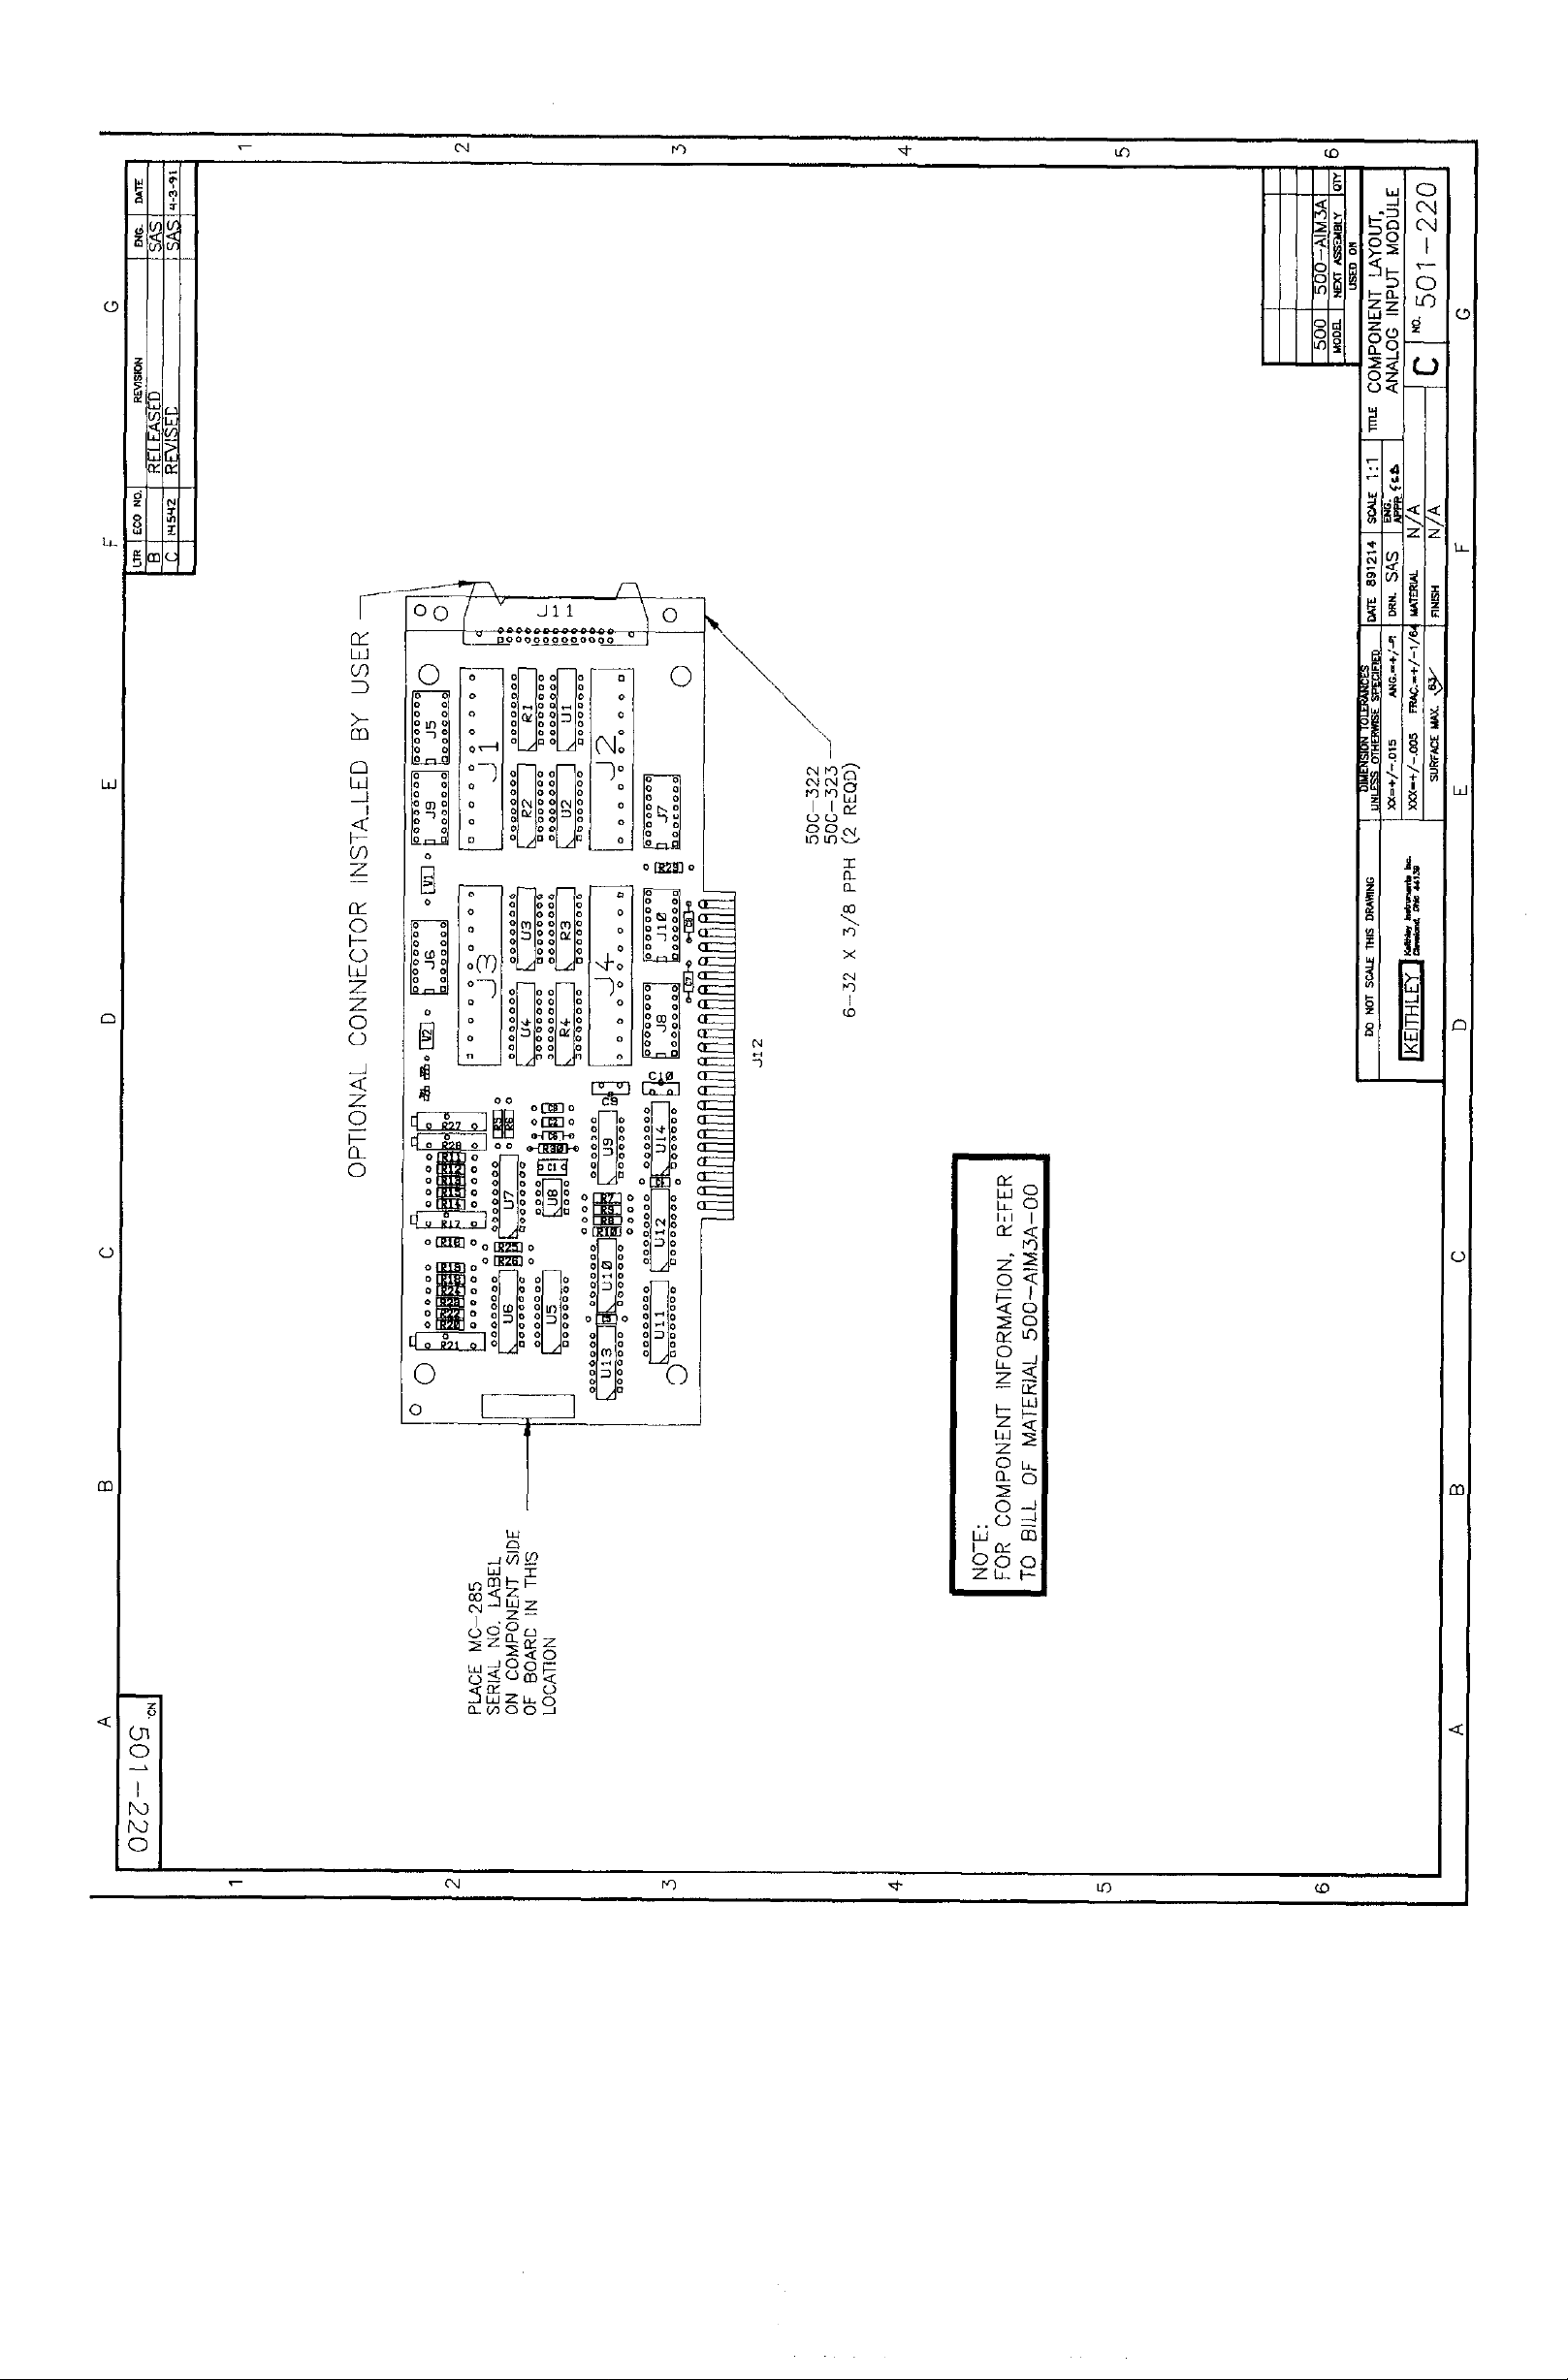
C AIM3A 501-226 lllSL(2 C
Page 27

Page 28
 Loading...