

Page 1
P H A S E R® 8 4 0
COLOR PRINTER
Advanced Features
and Troubleshooting Manual
www.tek.com/Color_Printers/
®
Page 2

Page 3

Phaser
®
840 Color Printer
Advanced Features and Troubleshooting Manual
V4 April 1999
070-9103-00
Page 4

Copyright © Tektronix, Inc. Unpublished rights reserved under the copyright laws of the United States. Contents of this
publication may not be reproduced in any form without permission of Tektronix, Inc.
Tektronix
®
, Phaser
of Tektronix, Inc. PhaserLink™, PhaserPort™, PhaserPrint™, PhaserSym™, PhaserTools™, TekSMART™, and the
TekColor™ name are trademarks of Tektronix, Inc. TekColor Care
®
, PhaserShare
®
,ColorStix
®
, the TekColor
®
icon, and Made For Each Other
SM
and RealSUPPORT
SM
®
are registered trademarks
are service marks of Tektronix,
Inc.
Adobe
Birch
®
, Acrobat
®
, Carta
®
, Acrobat
®
, Mythos
®
Reader, Illustrator
®
, Quake
®
, and Tekton
®
, PageMaker
®
are registered trademarks and Adobe Jenson™, Adobe Brilliant Screens™
®
, Photoshop
®
, and PostScript
®
, ATM
®
, Adobe Garamond
®
,
technology, and IntelliSelect™ are trademarks of Adobe Systems Incorporated or its subsidiaries which may be registered
in certain jurisdictions.
Apple
Geneva
®
, LaserWriter
®
, Monaco
®
, LocalTalk
®
, and New York
®
, Macintosh
®
are registered trademarks, and QuickDraw™ is a trademark of Apple Computer
®
, Mac
®
OS, AppleTalk
®
,
TrueType2
®
, Apple Chancery
®
, Chicago
®
,
Incorporated.
Marigold™ and Oxford™ are trademarks of AlphaOmega Typography.
Avery™ is a trademark of Avery Dennison Corporation.
®
FTP
Software is a registered trademark of FTP Software, Incorporated.
PCL
®
and HP-GL
®
are registered trademarks of Hewlett-Packard Corporation.
Hoefler Text was designed by the Hoefler Type Foundry.
ITC Avant Guard Gothic
ITC Zapf Dingbats
®
are registered trademarks of International Typeface Corporation.
®
, ITC Bookman
®
, ITC Lubalin Graph
®
, ITC Mona Lisa
®
, ITC Symbol
®
, ITC Zapf Chancery
®
, and
Bernhard Modern™, Clarendon™, Coronet™, Helvetica™, New Century Schoolbook™, Optima™, Palatino™, Stempel
Garamond™, Times™, and Univers™ are trademarks of Linotype-Hell AG and/or its subsidiaries.
MS-DOS
®
and Windows
Wingdings™ in TrueType
®
are registered trademarks of Microsoft Corporation.
®
format is a product of Microsoft Corporation. WingDings is a trademark of Microsoft
Corporation and TrueType is a registered trademark of Apple Computer, Inc.
Albertus™, Arial™, Gill Sans™, Joanna™, and Times New Roman™ are trademarks of Monotype Corporation.
Antique Olive
®
is a registered trademark of M. Olive.
Eurostile™ is a trademark of Nebiolo.
®
Novell
Sun
and NetWare
®
, Sun Microsystems
Incorporated.SPARC
®
are registered trademarks of Novell, Incorporated.
®
, and Sun Microsystems Computer Corporation
®
is a registered trademark of SPARC International, Incorporated. SPARCstation™ is a trademark of
®
are registered trademarks of Sun Microsystems,
SPARC International, Incorporated, licensed exclusively to Sun Microsystems, Incorporated.
Ethernet
UNIX
®
is a registered trademark of Xerox Corporation.
®
is a registered trademark in the US and other countries, licensed exclusively through X/Open Company Limited.
Other marks are trademarks or registered trademarks of the companies with which they are associated.
PANTONE
®
Colors generated by the Phaser 840 Color Printer are four- and/or three-color process simulations and may
not match PANTONE-identified solid color standards. Use current PANTONE Color Reference Manuals for accurate
colors.
PANTONE Color simulations are only obtainable on this product when driven by qualified Pantone-licensed software
packages. Contact Pantone, Inc. for a current list of qualified licensees.
All trademarks noted herein are either the property of Tektronix, Inc., Pantone, Inc., or their respective companies.
© Pantone, Inc., 1988.
Page 5

Phaser
®
840 Printer Warranty
Tektronix warrants that the Phaser 840 Printer will be free from defects in materials and workmanship for a period of one
(1) year from the date of shipment. If this product proves defective during the warranty period, Tektronix, at its option, will
either repair the defective product on site or by means of telephone support, without charge for parts and labor, or provide
a replacement in exchange for the defective product.
Under this product warranty, Customer must notify Tektronix or its authorized representative of the defect before the
expiration of the warranty period and if instructed by Tektronix make suitable arrangements for repair. Tektronix or its
authorized representative will provide warranty repair during the warranty period at Customer’s site, if required, without
charge within the United States or outside the United States if the product is located in a customary on site service area.
Outside the United States, a description of the customary on-site service area may be obtained from the local Tektronix
Subsidiary or Authorized Tektronix Distributor.
The
Maintenance Kit
in this product will be free from defects in materials and workmanship for a period of (a) ninety (90)
days from the date of installation, but not more than one (1) year from date of shipment; or (b) six (6) months where longer
periods are required by law. Under this warranty, Customer must notify Tektronix or its authorized representative of the
defect before the expiration of the warranty period. Tektronix or its representative will ship a replacement kit, at Tektronix
expense, to replace the defective kit. Customer shall be responsible for paying any associated taxes or duties. Tektronix
may require that the kit be returned to the designated Tektronix depot or the Tektronix authorized representative from
which the kit was originally purchased.
This warranty shall not apply to any defect, failure or damage caused by improper use or improper or inadequate
maintenance and care. Tektronix shall not be obligated to furnish service under this warranty:
a.
to repair damage resulting from attempts by personnel other than Tektronix representatives to install, repair or
service the product;
b.
to repair damage resulting from improper use or connection to incompatible equipment;
c.
to repair any damage or malfunction caused by the use of non-Tektronix Phaser 840 printer supplies or consumables;
d.
to repair a product that has been modified or integrated with other products when the effect of such modification or
integration increases the time or difficulty of servicing the product;
e.
to repair damage or malfunction resulting from failure to perform user maintenance and cleaning at the frequency
and as prescribed in the user manual; or
f.
to repair this product after the limit of its duty cycle of 65,000 pages per month have been reached. All service
thereafter shall be billed on a time and material basis.
g.
to repair or replace Maintenance Kits that have been used beyond their stated capacities.
ABOVE
OR
PROVIDED
INDIRECT
WARRANTIES
IMPLIED
PURPOSE
SPECIAL
,
THE
EXPRESS
PARTICULAR
REMEDY
ANY
ADVANCE NOTICE OF THE POSSIBILITY OF SUCH DAMAGES.
.
TEKTRONIX
.
TEKTRONIX
TO
THE
INCIDENTAL
,
ARE
GIVEN
CUSTOMER
BY
TEKTRONIX
AND
ITS
VENDORS
’
RESPONSIBILITY
FOR
BREACH
OR
CONSEQUENTIAL
WITH
RESPECT
DISCLAIM
TO
REPAIR
OF
THIS
DAMAGES
TO
ANY
IMPLIED
OR
REPLACE
WARRANTY
THIS
PRODUCT
WARRANTIES
DEFECTIVE
TEKTRONIX
.
IRRESPECTIVE OF WHETHER TEKTRONIX OR THE VENDOR HAS
IN
LIEU
OF
OF
MERCHANTABILITY
PRODUCTS
AND
ITS
VENDORS
ANY
* Maintenance Kit in this product is, specifically, maintenance roller and maintenance counter.
IS
OTHER
THE
WARRANTIES
SOLE
WILL
NOT
OR
AND
,
FITNESS
EXCLUSIVE
BE
LIABLE
FOR
FOR
A
Page 6
User safety summary
Terms in manual:
Power sour ce:
or ground. Use only the specified power cord and connector. Refer to a qualified service technician for changes to the cord
or connector.
Operation of product:
Do not operate without the covers and panels properly installed. Do not operate in an atmosphere of explosive gases.
Safety instructions:
Terms on product:
Care of product:
or plug is frayed or otherwise damaged, if you spill anything into the case, if product is exposed to any excess moisture, if
product is dropped or damaged, if you suspect that the product needs servicing or repair, and whenever you clean the
product.
Ground the product:
contact a licensed electrician to install a properly grounded outlet.
CAUTION Conditions that can result in damage to the product.
WARNING Conditions that can result in personal injury or loss of life.
Do not apply more than 250 volts RMS between the supply conductors or between either supply conductor
Avoid electric shock by contacting a qualified service technician to replace fuses inside the product.
Read all installation instructions carefully before you plug the product into a power source.
CAUTION A personal injury hazard exists that may not be apparent. For example, a
panel may cover the hazardous area. Also applies to a hazard to property
including the product itself.
DANGER A personal injury hazard exists in the area where you see the sign.
Disconnect the power plug by pulling the plug, not the cord. Disconnect the power plug if the power cord
Plug the three-wire power cord (with grounding prong) into grounded AC outlets only. If necessary,
Symbols as marked on product:
DANGER high voltage: Protective ground (earth) terminal:
Hot surface on or in the printer.
Use caution to avoid personal
injury:
WARNING:
WARNING:
If the product loses the ground connection, usage of knobs and controls (and other conductive
parts) can cause an electrical shock. Electrical product may be hazardous if misused.
For your protection, do not defeat any interlocks.
Use caution. Refer to the manual(s)
for information:
Page 7

Contents
1 Color Printer Resources
Printed and online books 2
Tektronix World Wide Web sites 4
2 Advanced Print Features
All about media 7
Margins and print area 13
Media hints 14
Loading media trays 14
Loading paper 14
Loading Phaser 840 printer transparencies 16
Loading labels 17
Using the Manual Feed Slot 19
Loading media in the Manual Feed Slot for single-sided printing 20
Automatic duplex printing 24
Setting duplex printing in the print driver 24
Loading pre-printed paper for duplex printing 26
Using fonts 27
Resident typefaces (PostScript) 27
Resident typefaces (PCL5C) 27
Downloading fonts 27
Printing a list of resident fonts 29
Using Quick Collate 30
Previewing with Check Print 31
Using Image Smoothing 33
Automatic tray switching 33
Using Slip Sheets 34
Front Panel Intensity 35
Intelligent Ready mode 35
PhaserPrint Plug-in for Photoshop 36
Installing the plug-in: Macintosh 36
Installing the plug-in: Windows 36
Using the plug-in 37
Selecting options in the PhaserPrint dialog box 38
3 Consumables
User-replaceable consumables 47
When to replace consumables 47
Consumable life information 48
Advanced Features and Troubleshooting Manual
i
Page 8

4 Troubleshooting
On-line support 49
Customer Support Centers 50
Getting information by fax 51
Diagnostic tools 52
Symptoms and solutions 53
Media jams and misfeeds 57
Preventing media jams 57
Clearing a media jam 58
Cleaning the printer 59
If the printer has frequent media jams 59
Ink smears 59
Light stripes on prints 60
The Cleaning Page 62
Cleaning supplies 63
Using isopropyl alcohol 63
Cleaning for oily streaks 64
Cleaning for ink smears and jams: internal paper path 65
Cleaning for ink smears and jams: paper-feed rollers 66
Cleaning for ink smears: paper-exit path 69
Cleaning for media tray jams 71
Cleaning for lower tray jams: paper-feed rollers 74
5 Printer Management
PhaserLink™ software 75
Usage Profile 76
Enabling and disabling the Startup Page 78
Changing the Energy Star timeout 79
Protected mode for the front panel menu 80
Job Accounting 80
6 Using Color
Print-quality modes 81
Color corrections 82
Printing the Color Sampler Charts 83
Overview 83
Printing a color sampler chart from the front panel 85
Printing samplers from a Macintosh 86
Printing samplers from a PC 88
Printing the desired color from an application 89
PANTONE Color Files 90
Methods of printing PANTONE Colors 90
Installing the PANTONE Color files 91
Printing the PANTONE Color Chart 91
ii
Phaser 840 Color Printer
Page 9

7 Using Printer Utilities
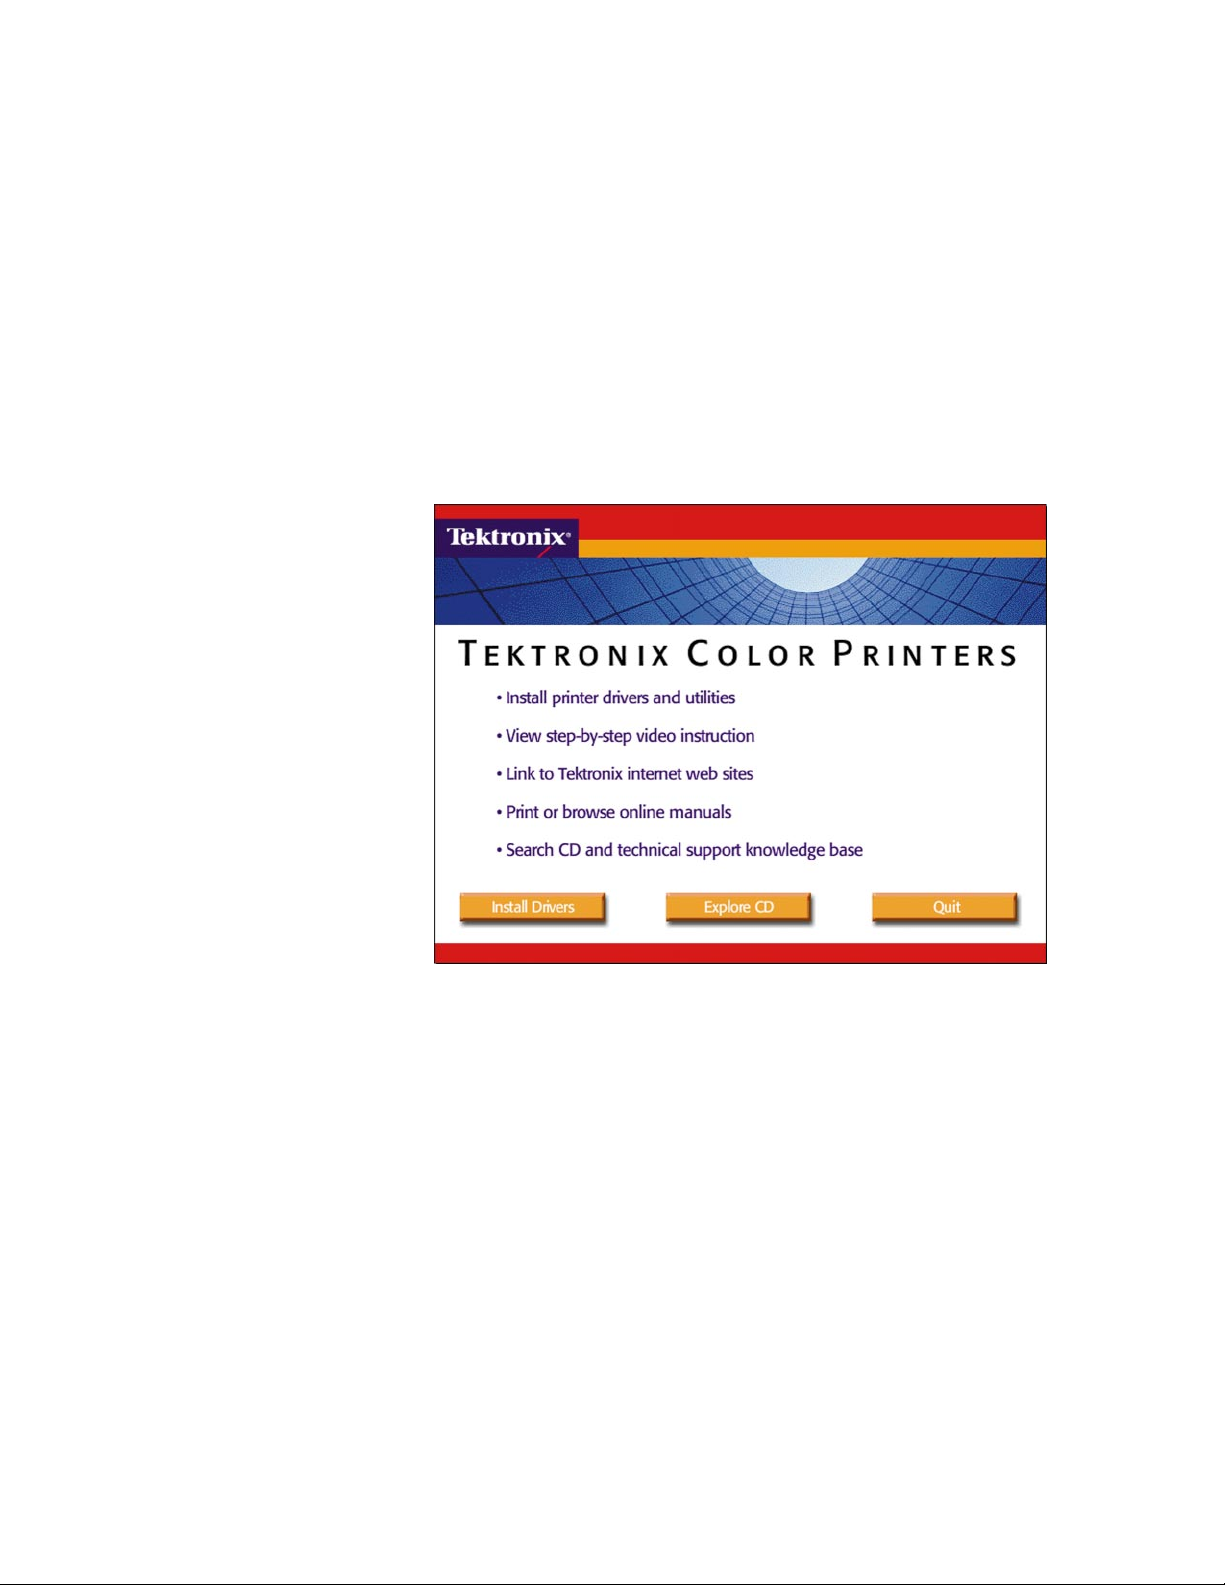
Using the files on the printer’s CD-ROM 95
Downloading files from a Macintosh 95
Using the Apple Printer Utility to perform other tasks 97
Downloading files from a PC 98
Downloading files from the Tektronix World Wide Web site 100
Downloading files from the Tektronix ftp server 101
8 Connecting Scanners and Hard Drives
SCSI device overview 103
Connecting SCSI devices 104
Required items 104
Connection overview 104
Connecting one SCSI device 105
Connecting multiple SCSI devices 106
Initializing a formatted SCSI device 107
Macintosh users 107
PC and workstation users 107
Enabling and disabling Sys/Start Job execution 108
Using the front panel 108
Using a Macintosh utility file 108
Using PC utility file 109
Connecting an IDE hard disk drive 109
Required Items 109
Static Electricity Precautions 109
Tools required 109
Installing the IDE hard disk drive 110
Configuring the printer driver 113
9 Using Your Printer with a Scanner
Overview 115
Making copies 116
Copying a single page 116
Copying multiple pages with an Auto-Document Feeder 117
Using the front panel Copier Menu 118
Copier Menu 119
Placing and scaling images 120
Copying at 100% scale 120
Copying to fit full-bleed images 121
Scaling images using Zoom 122
Scaling images using Scan Area 122
Advanced Features and Troubleshooting Manual
iii
Page 10

10 Regulatory Information and Specifications
Canadian EMC (Electromagnetic Compatibility) regulatory standards 123
Declaration of conformity 124
FCC Class B device 125
Material Safety Data Sheets 126
MSDS for Silicone Oil 127
MSDS for Ink Sticks 129
MSDS for CleanTex Alcopad 131
Specifications 134
Index
iv
Phaser 840 Color Printer
Page 11
Chapter
1
Color Printer Resources
Tektronix offers the following suite of books, web sites, and software tools to help
you get the fullest (and most colorful) use from your printer. The books and
software tools are all located on the printer’s CD-ROM.
Advanced Features and Troubleshooting Manual
1
Page 12

1
Color Printer Resources
Printed and online books
Setup Guide
■ Printed book is shipped with your printer.
■ Online book is included on the printer’s CD-ROM in PDF (Acrobat)
format.
■ Topics:
■ Unpacking
■ Setting up
■ Installing printer software
User Guide
■ Printed book is shipped with your printer.
■ Online book is included on the printer’s CD-ROM in PDF (Acrobat) and
HTML formats.
■ Topics:
■ Loading media
■ Duplex printing
■ Consumables information
■ Troubleshooting print quality
■ Front panel tutorial
PhaserShare Networking Setup Guide
■ Printed book is shipped with your printer.
■ Online book is included on the printer’s CD-ROM in PDF (Acrobat)
format.
■ Topics:
■ Connecting your printer to a network:
■ Novell NetWare
■ Ethernet
■ TCP/IP
■ Token Ring
■ AppleTalk
2
Phaser 840 Color Printer
Page 13

Color Printer Resources
Advanced Features and Troubleshooting Manual
■ Online book is included on the printer’s CD-ROM in PDF (Acrobat) and
HTML formats.
■ Order a printed copy: order number 070-9103-00.
■ Topics:
■ All about media
■ Using color
■ Advanced troubleshooting
■ Connecting hard disk drives and scanners
■ Using a scanner with your printer
PhaserShare Networking Manual
■ Online book is included on the printer’s CD-ROM in PDF (Acrobat) and
HTML formats.
1
■ Order a printed copy: order number 071-0180-01.
■ Topics:
■ System administration:
■ Setting printer parameters
■ Printer status
■ Printer management:
■ Usage Profile reports
■ PhaserLink Printer Management software
Advanced Features and Troubleshooting Manual
3
Page 14
1
Color Printer Resources
T ektronix W orld Wide Web sites
Tektronix home page
What it includes Where to find it
■ Product and supplies
information
■ Downloading printer drivers
■ Finding your local reseller
PhaserLink Printer Management software
What it includes Where to find it
Printer administration and
support tool using World Wide
Web technology
■ Status of print jobs
■ Tracking printer usage
■ Configure printer settings
■ Routine troubleshooting
■ Set security for
password-protected
features
www.tek.com/Color_Printers/
www.tek.com/Color_Printers/
products/phaserlink.html
or
Enter your printer’s TCP/IP
address in your web browser
4
Phaser 840 Color Printer
Page 15
TekSMART™ Knowledge Base
What it includes Where to find it
Color Printer Resources
1
Color Connection
■ Extensive technical
www2.tek.com/merlin/tko
troubleshooting library
■ Easy search function
What it includes Where to find it
Link to the world of
www.colorconnection.tektronix.com
Tektronix color:
■ Color education
■ Printing ideas
■ Personalized email
subscription
■ colorize.com
Advanced Features and Troubleshooting Manual
5
Page 16

Page 17
Chapter
2
Advanced Print Features
All about media
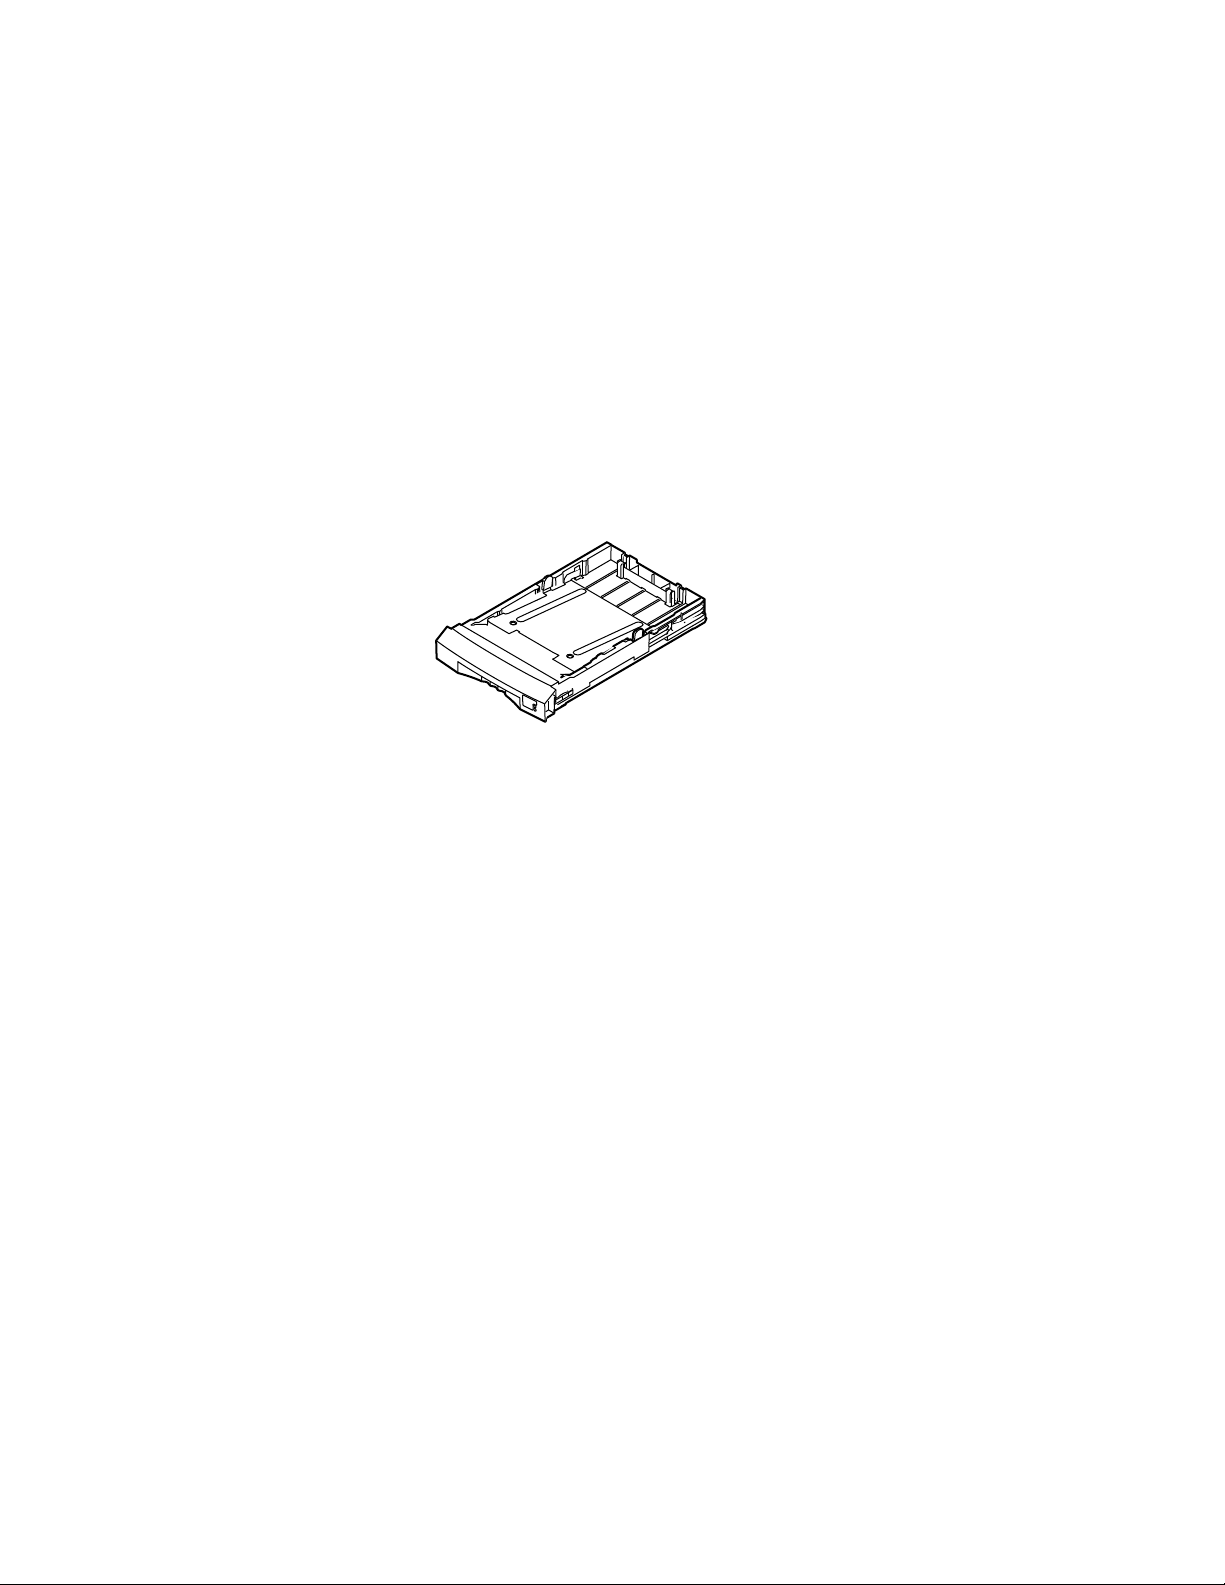
Standard Paper/Transparency Tray
Tray sizes:
436-0330-00 A/Letter
436-0332-00 A4
9103-26
Paper
200-sheet approximate capacity
■ Bond or equivalent, 60 - 120 g/m
■ Cover stock up to 176 g/m
■ Coated papers, single-sided printing only
■ Short-grained paper, 105 g/m
Ordering Information
Tektronix Premium Paper 90 g/m2, 24 lb. bond 500 sheets per package
016-1368-00 A/Letter
016-1369-00 A4
2
, 16 - 32 lb.
2
, 65 lb., single-sided printing only
2
, 28 lb. bond or higher
Advanced Features and Troubleshooting Manual
7
Page 18

2
Advanced Print Features
Tranparencies
50-sheet capacity
N O T
E
Use only Phaser 840 printer transparencies; they have been specially f ormulated for
this printer.
Ordering Information
Phaser 840 Printer Premium Transparencies 50 sheets per package
016-1724-00 A/Letter
016-1725-00 A4
Phaser 840 Printer Standard Transparencies 50 sheets per package
016-1720-00 A/Letter
016-1721-00 A4
Labels
50-sheet capacity
N O T
E
Use laser-quality labels.
Recommended labels
Avery™ White Laser Labels, for example:
US: 5160, 5960
Metric: L7162
8
Phaser 840 Color Printer
Page 19
Advanced Print Features
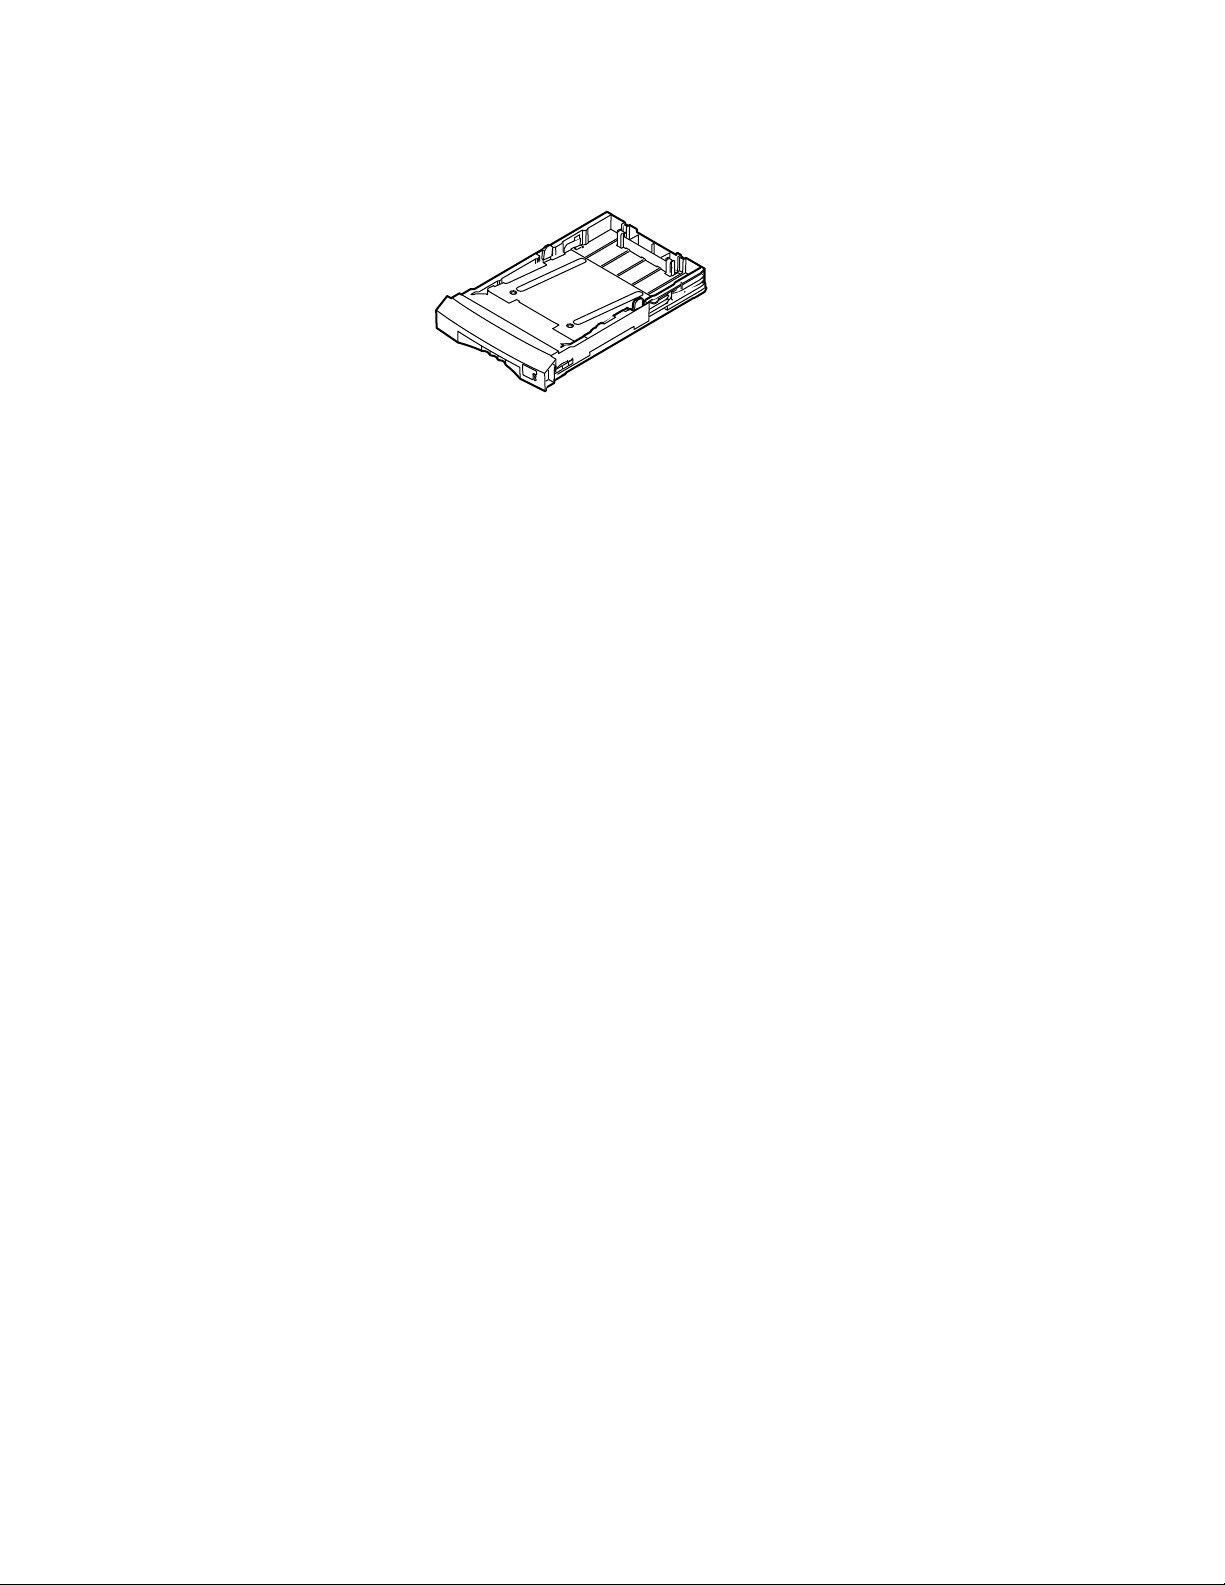
High-Capacity T ransparency/Label T ray
Tray sizes:
436-0336-00 A/Letter
436-0338-00 A4
9103-26
T ranparencies
175-sheet capacity
N O T
E
Use only Phaser 840 printer transparencies; they have been specially f ormulated for
this printer.
2
Ordering Information
Phaser 840 Printer Premium Transparencies 50 sheets per package
016-1724-00 A/Letter
016-1725-00 A4
Phaser 840 Printer Standard Transparencies 50 sheets per package
016-1720-00 A/Letter
016-1721-00 A4
Labels
100-sheet capacity
N O T
E
Use laser-quality labels.
Recommended labels
Avery™ White Laser Labels, for example:
US: 5160, 5960
Metric: L7162
Advanced Features and Troubleshooting Manual
9
Page 20
2
Advanced Print Features
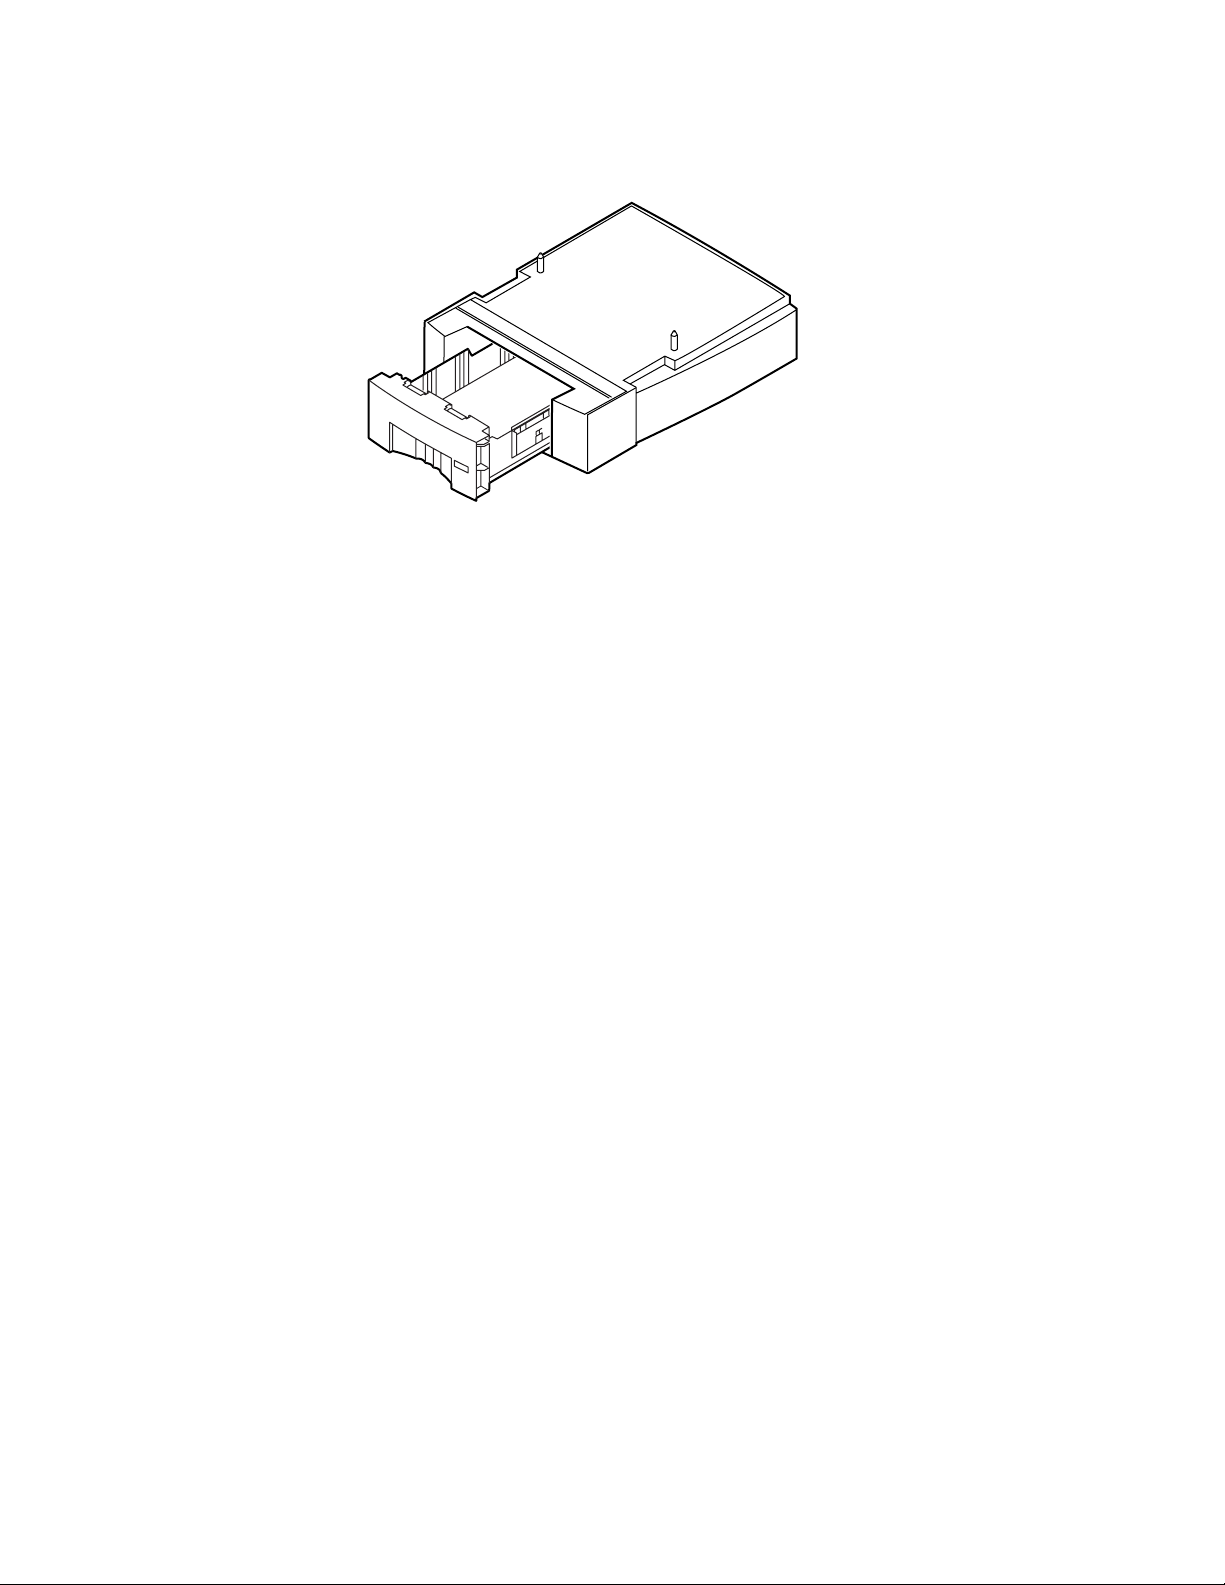
High-Capacity Paper Tray Assembly
Paper
500-sheet approximate capacity
■ Bond or equivalent, 60 - 120 g/m
2
, 16 - 32 lb.
Tray sizes:
Z840LTA-00 A/Letter
Z840LTA-01 A4
9103-27
Ordering Information
Tektronix Premium Paper 90 g/m2, 24 lb. bond 500 sheets per package
016-1368-00 A/Letter
016-1369-00 A4
10
Phaser 840 Color Printer
Page 21

Advanced Print Features
Manual Feed Slot
9102-03
Media Sizes
■ A/Letter
■ A4
■ Envelopes (refer to page 13 for supported envelope sizes)
Tray capacity
2
■ 1 sheet
Media Types
Paper
■ Bond or equivalent, 60 - 120 g/m
■ Cover stock up to 216 g/m
■ Index stock up to 216 g/m
■ Coated papers, single-sided printing only
■ Short-grained paper, 105 g/m
Ordering Information
Tektronix Premium Paper 90 g/m2, 24 lb. bond 500 sheets per package
016-1368-00 A/Letter
016-1369-00 A4
2
, 16 - 32 lb.
2
, 80 lb., single-sided printing only
2
, 110 lb., single-sided printing only
2
, 28 lb. or higher
Advanced Features and Troubleshooting Manual
11
Page 22

2
Advanced Print Features
Phaser 840 printer transparencies
N O T
E
Use only Phaser 840 printer transparencies; they have been specially formulated
for this printer.
Ordering Information
Phaser 840 Printer Premium Transparencies 50 sheets per package
016-1724-00 A/Letter
016-1725-00 A4
Phaser 840 Printer Standard Transparencies 50 sheets per package
016-1720-00 A/Letter
016-1721-00 A4
Labels
N O T
E
Always use full-sheet peel-off labels.
■ Recommended Avery™ White Laser Labels, for example:
US: 5160, 5960
Metric: L7162
Envelopes
■ #10 (US)
■ #6
■ C5
■ DL
■ Choukei 3 Gou
■ Choukei 4 Gou
3
⁄
4
(US)
12
Phaser 840 Color Printer
Page 23
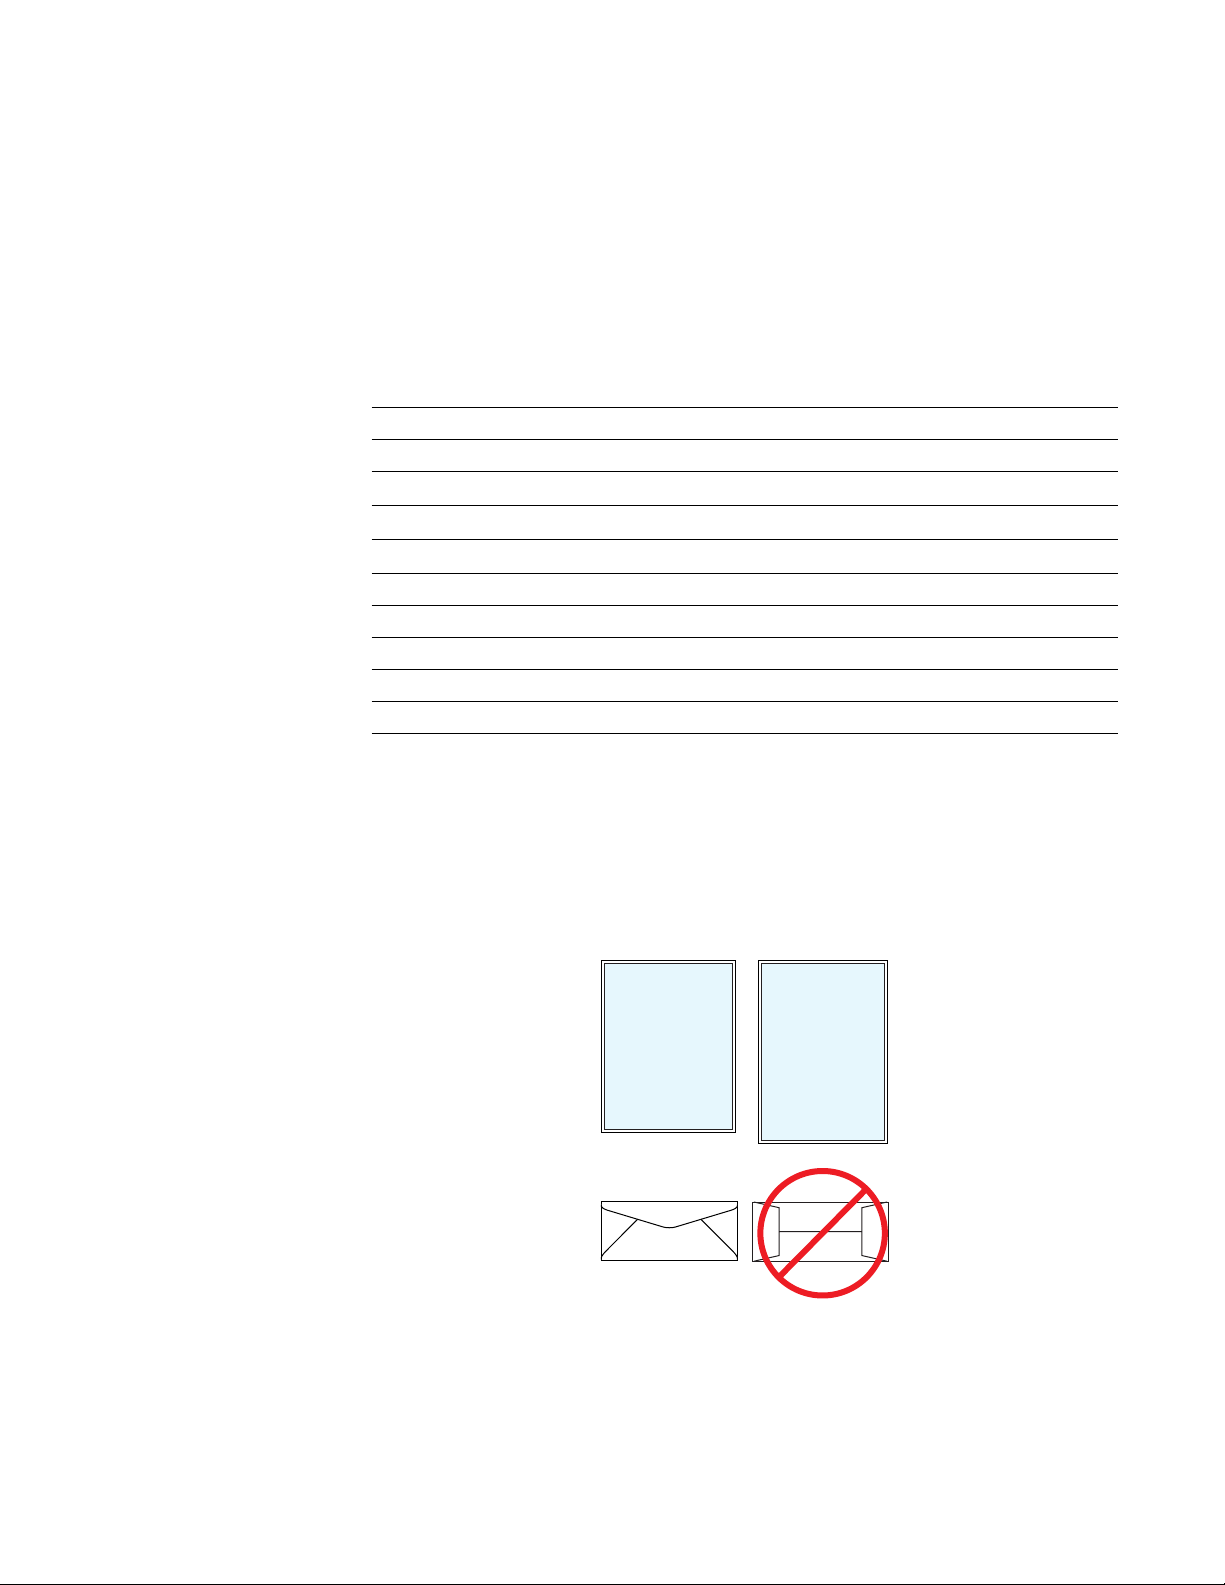
Margins and print area
The image area of a print is a bit smaller than the media size. You may need to adjust
the page margins in your application software to match the print area.
N O T
E
To assure the correct page margins, use the drivers supplied on the printer’s
CD-ROM.
Supported media sizes selected in drivers and front panel
Media Page size Print area Top Bottom Left Right
1
Letter
2
A4
3
Envelopes
■ US #10
■ US #6
■ C5
■ DL
■ Choukei 3 Gou
■ Choukei 4 Gou
3
Advanced Print Features
Margins
8.5 x 11 in. 8.112 x 10.612 in. .2 in. .2 in. .2 in. .2 in.
210 x 297 mm 200 x 283 mm 5 mm 5 mm 5 mm 5 mm
4.13 x 9.5 in. 3.2 x 9.24 in. .2 in. .8 in. .2 in. .2 in.
⁄
4
3.65 x 6.5 in. 3.2 x 6.2 in. .2 in. .28 in. .2 in. .2 in.
162 x 229 mm 80 x 219 mm 5 mm 77 mm 5 mm 5 mm
110 x 220 mm 80 x 210 mm 5 mm 25 mm 5 mm 5 mm
120 x 235 mm 80 x 225 mm 5 mm 35 mm 5 mm 5 mm
90 x 205 mm 80 x 195 mm 5 mm 5 mm 5 mm 5 mm
2
N O T E
Never use envelopes with an end flap, or with windows or metal clasps; they will
damage the printer. Only use the recommended envelope sizes. Envelopes must
always be printed with the
flap face-up
1
3
.
2
9102-04
Advanced Features and Troubleshooting Manual
13
Page 24
2
Advanced Print Features
Media hints
■ When printing a large number of paper sheets or transparencies, use the
media-specific trays for best reliability.
■ When you select a media tray by location (Upper, Middle, Lower), the
printer feeds from that tray.
■ Always keep media in a sealed package to avoid the effects of moisture
which can affect feed reliability.
■ Always use the Manual Feed Slot for heavy media and envelopes.
■ Always fan the media before inserting it in the media tray.
Loading media trays
Loading paper
1.
Remove the media tray from the printer.
2.
Fan the paper to help separate the sheets.
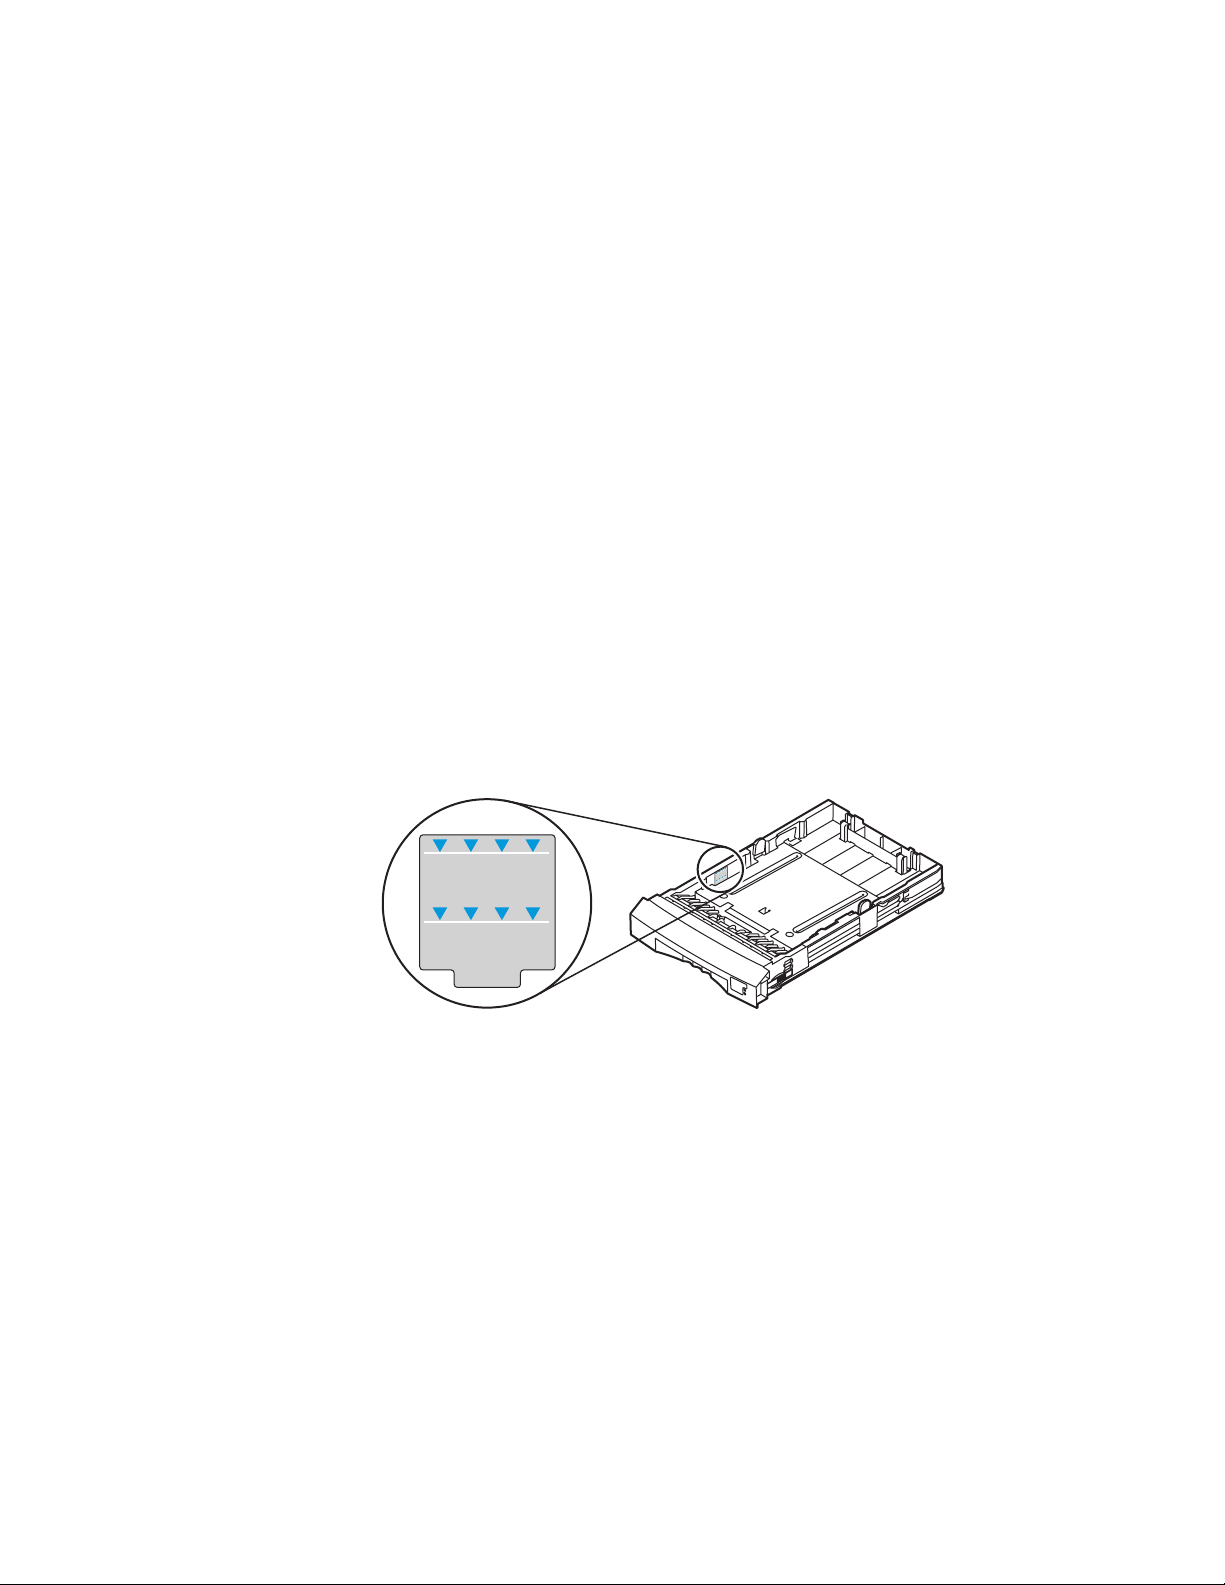
3.
Use the tray’s maximum-capacity label to determine how much paper to
load.
Paper
Transparency
4.
Load the paper with the side to be printed face-up for single-sided
Paper
Transparency
0389-39
printing.
N O T E
Refer to “Loading pre-printed paper for duplex printing” on page 25 for
information about loading paper when duplex printing.
14
Phaser 840 Color Printer
Page 25
Advanced Print Features
Transparency
Paper
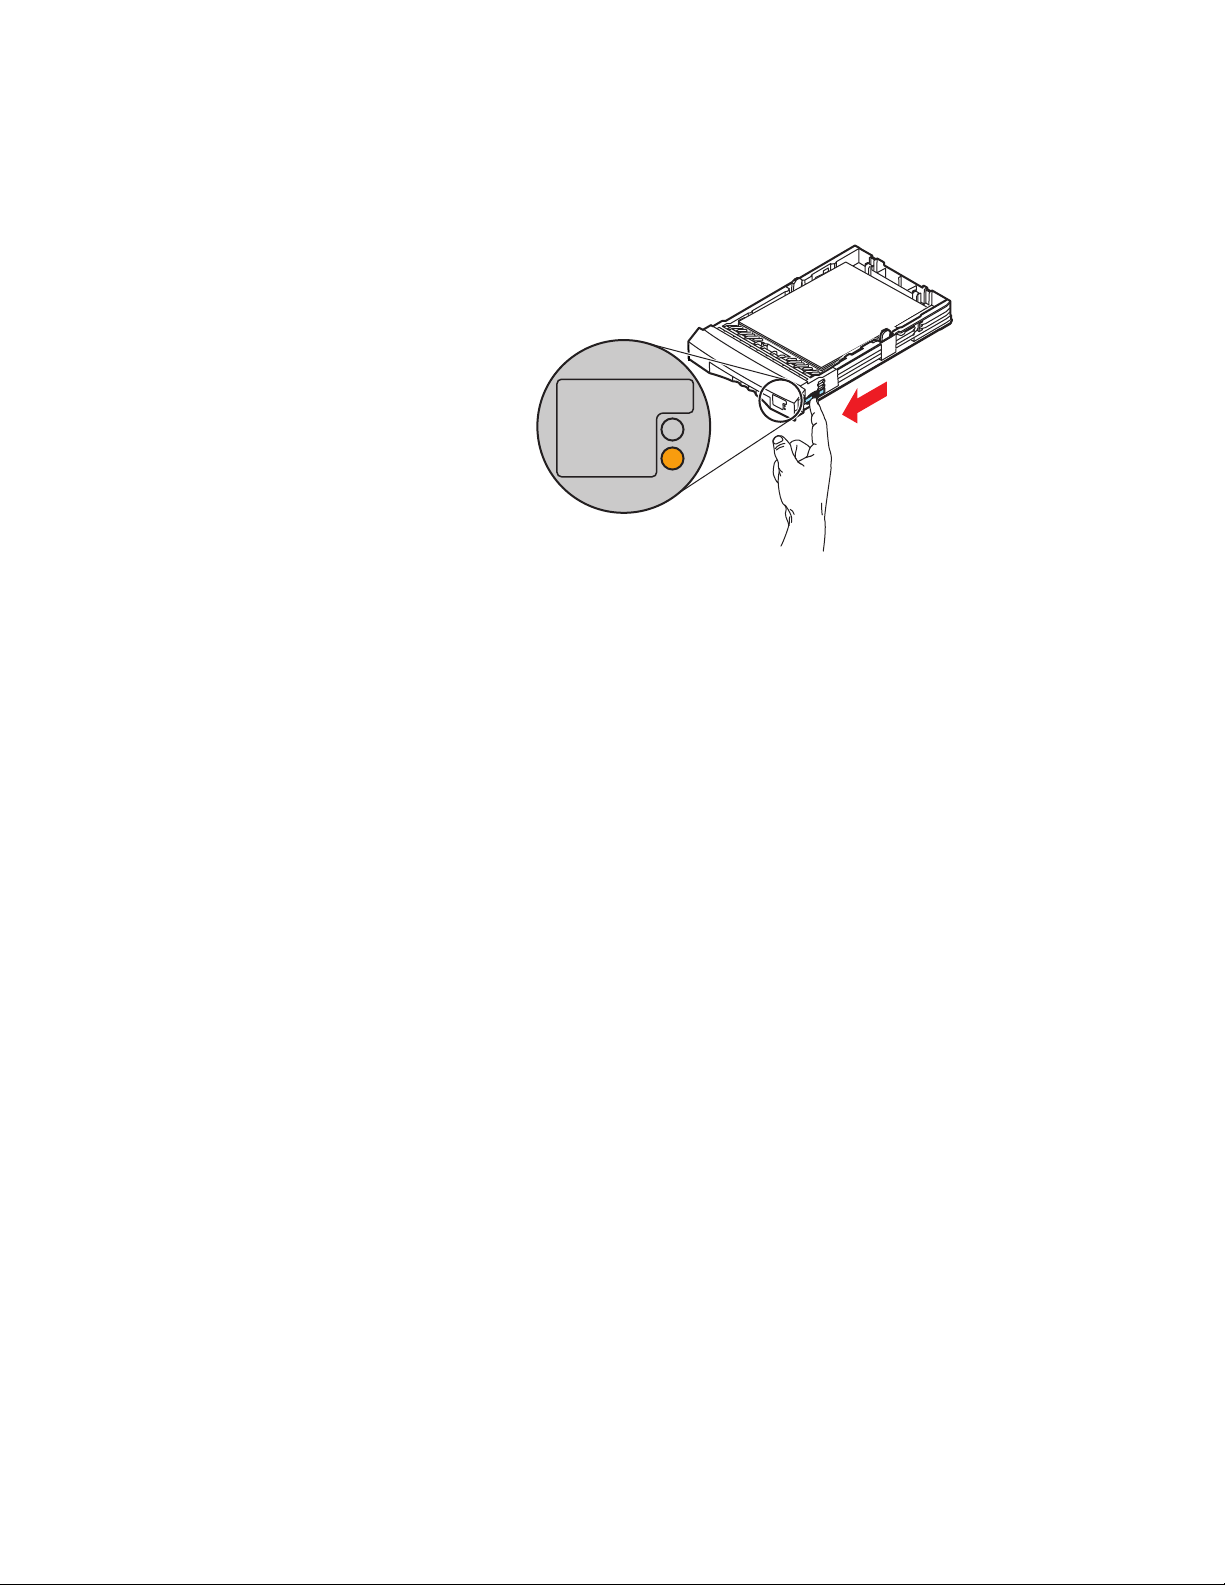
5.
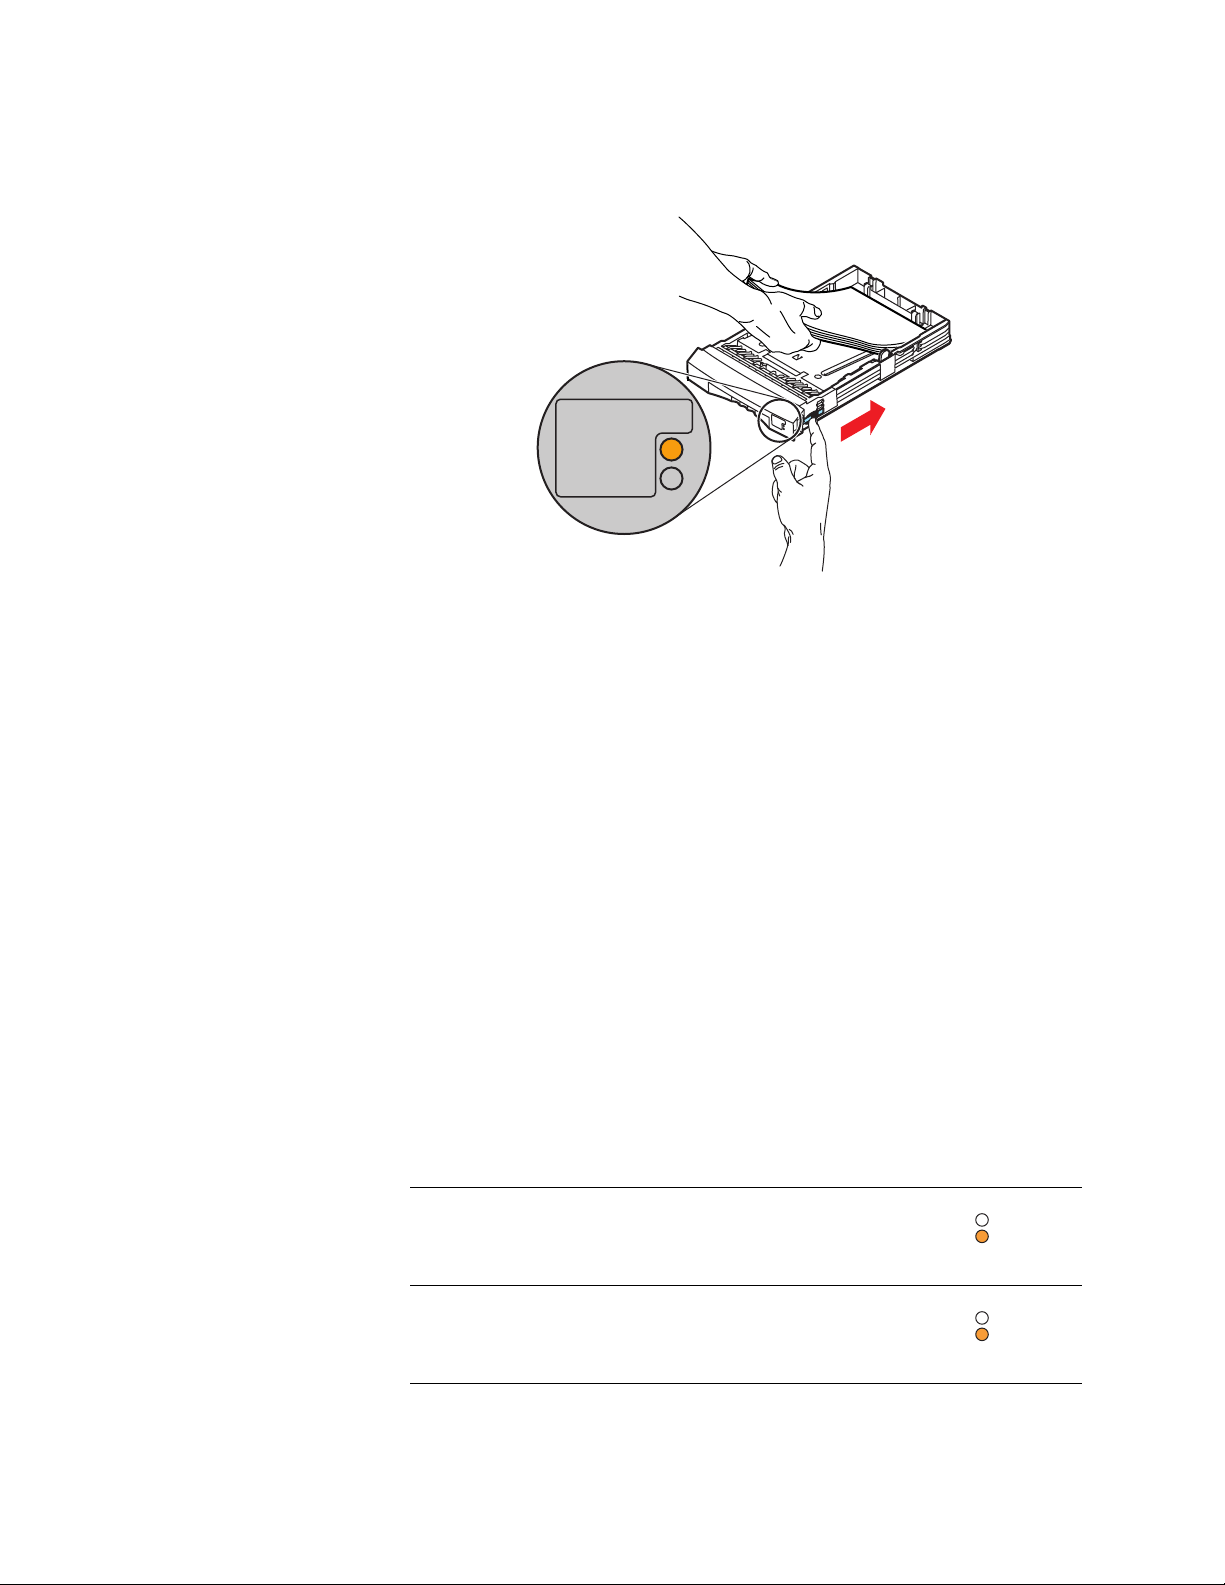
Place the media snugly against the front left wall of the tray.
6.
Set the indicator switch on the right side of the tray to Paper.
2
0389-15
7.
Insert the tray into the printer.
Advanced Features and Troubleshooting Manual
15
Page 26
2
Advanced Print Features
Loading Phaser 840 printer transparencies
C A U T I O N
Handle transparencies by the edges and with both hands to avoid fingerprints and
creases, which can result in poor print quality.
1.
Remove the media tray from the printer.
2.
Fan the transparencies.
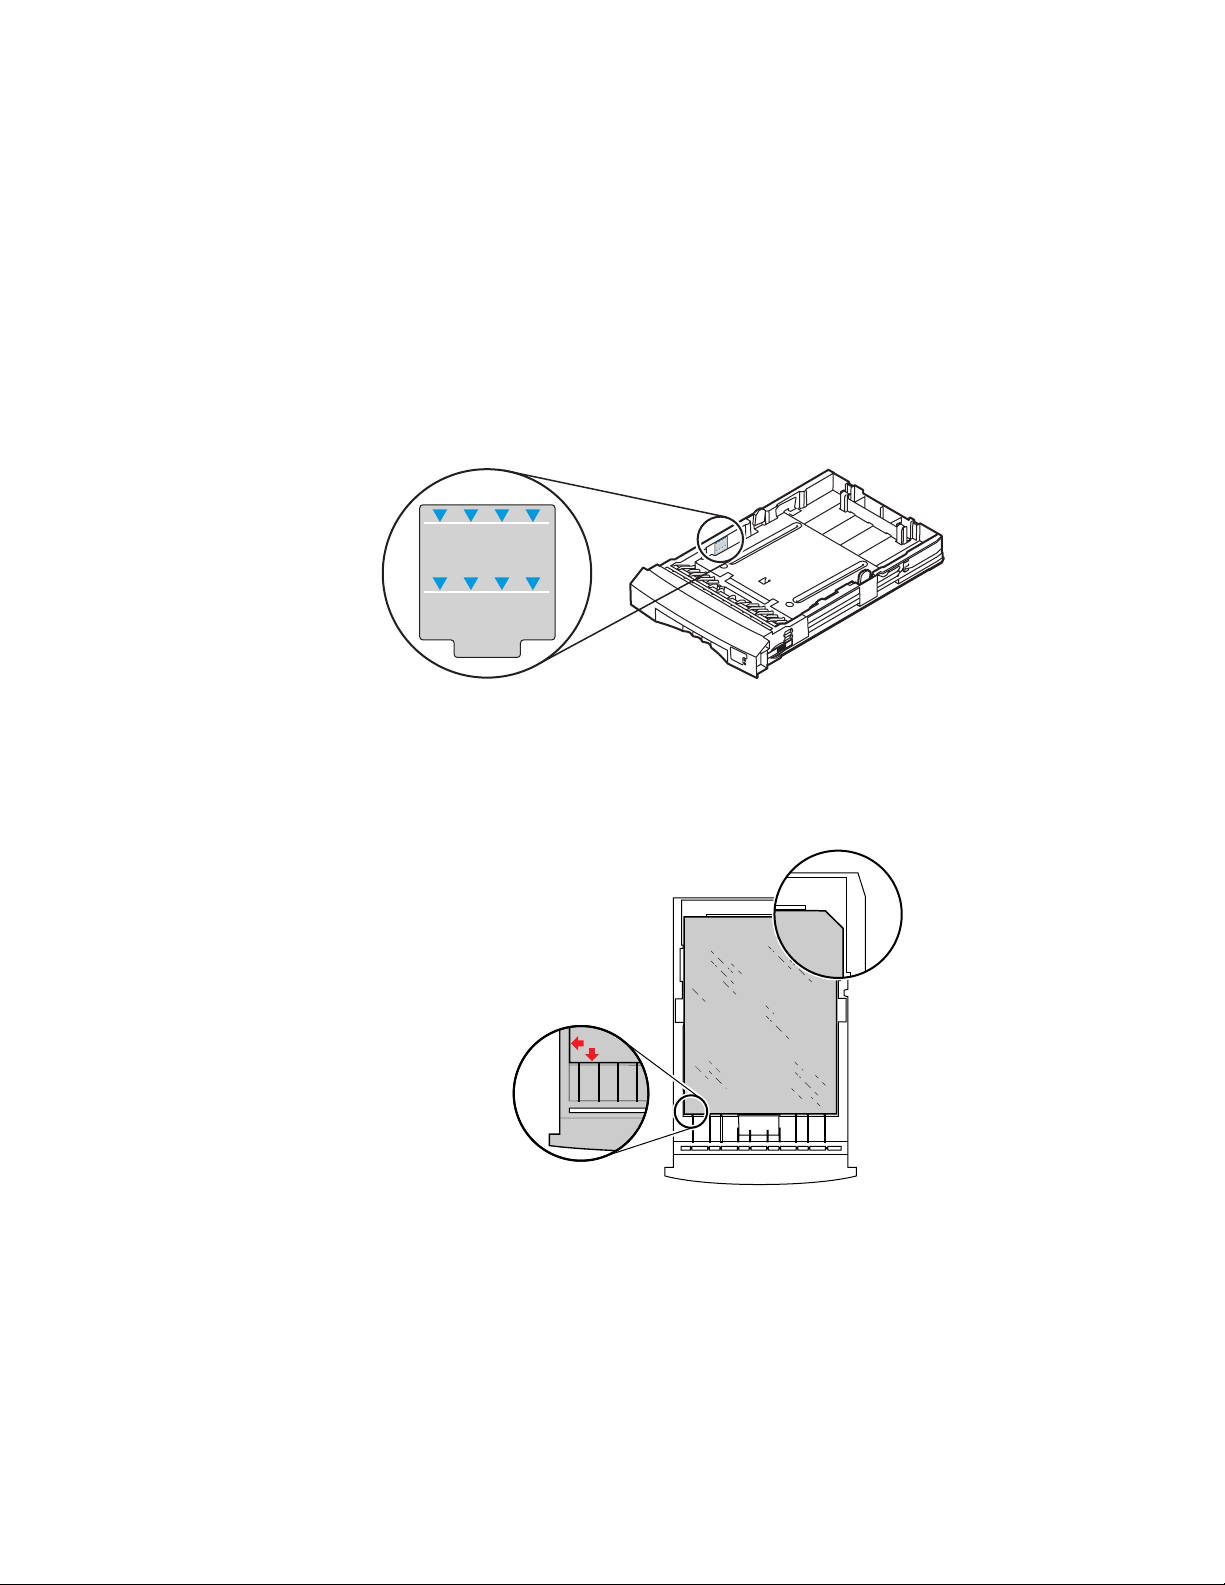
3.
Use the tray’s maximum-capacity label to determine how many
transparencies to load.
Paper
Transparency
4.
Place Phaser 840 printer transparencies in the tray so that the notched
Paper
Transparency
0389-39
corner is in the right rear corner of the tray. Make sure that the
transparencies fit snugly against the front left wall of the tray.
16
9103-31
Phaser 840 Color Printer
Page 27
Advanced Print Features
Transparency
Paper
Transparency
Paper
Transparency
Label
5.
Set the indicator switch on the right side of the tray to Transparency.
1
0389-17
2
Loading labels
6.
Insert the tray into the printer.
Using the media indicator switch
■ For the best printing reliability, always set the indicator switch to
Transparency
■ Always load transparencies in the tray with the notched corner in the right
rear corner of the tray.
N
O T E
Make sure that duplex printing is disabled in the printer driver.
1.
Remove the media tray from the printer.
2.
Fan the labels to help separate the sheets.
3.
Load the labels with the side to be printed face-up, and place the label
sheets snugly against the front left wall of the tray.
4.
Set the indicator switch on the right side of the tray.
T ray Capacity Indicator Setting
Paper/Transparency tray 50 sheets
when printing on transparencies.
High-Capacity Paper/Transparency tray 100 sheets
5.
Insert the tray into the printer.
Advanced Features and Troubleshooting Manual
17
Page 28

2
Advanced Print Features
Using the Manual Feed Slot
The Manual Feed Slot is the only location for loading envelopes, and serves as
another location for loading A - or A4 - size media.
■ Load a single sheet at a time.
■ Use the Manual Feed Slot to print on standard and heavy media.
Standard media
■ Paper
■ Phaser 840 printer transparencies
Specialty media
■ Cover / Index stock
■ Avery™ White Laser Labels
Envelopes
■ #10 (US)
3
■ #6
■ DL
■ C5
■ Choukei 3 Gou
■ Choukei 4 Gou
⁄
(US)
4
N O T E
Never use envelopes with an end flap, or with windows or metal clasps; they will
damage the printer. Only use the recommended envelope sizes. Envelopes must
always be placed with the
flap face-up
9102-54
.
18
Phaser 840 Color Printer
Page 29

Advanced Print Features
Loading media in the Manual Feed Slot for single-sided printing
N O T
E
For details on loading pre-printed paper for automatic duplex printing,
refer to page 25.
1.
In a supported printer driver, select Manual Feed Paper.
2.
To send the job to the printer, click Print.
3.
Open the printer’s manual feed cover and adjust the guide for your paper
size.
4.
When the printer’s front panel reads Waiting for paper, use both
hands to insert one sheet of media until it stops.
5.
Wait for the front panel’s prompt before inserting additional sheets.
Letterhead
1.
In a supported printer driver, select Manual Feed Paper.
2
2.
To send the job to the printer, click Print.
3.
Open the printer’s manual feed cover and adjust the guide for your paper
size.
4.
When the printer’s front panel reads Waiting for paper, insert one
sheet of letterhead until it stops:
Insert the letterhead paper with the side to be printed face-down, with the
top of the page entering the printer first.
1234
9103-34
5.
Wait for the front panel’s prompt before inserting additional sheets.
Advanced Features and Troubleshooting Manual
19
Page 30

2
Advanced Print Features
Transparencies
1.
In a supported printer driver, select Manual Feed Transparency.
2.
To send the job to the printer, click Print.
3.
Open the printer’s manual feed cover and adjust the guide for your
transparency size.
4.
When the printer’s front panel reads Waiting for transparency, use
both hands to insert one transparency until it stops:
Insert the transparency with the notched corner to the right and entering
the printer last.
9103-35
5.
Wait for the front panel’s prompt before inserting additional sheets.
Envelopes
This printer should be used for occasional envelope printing only. Do not print
envelopes in high volumes.
C A U T I O
■ Keep unused envelopes in their packaging to avoid the effects of moisture,
■ Use the recommended envelope sizes.
■ Single-sided printing only.
■ No end flaps.
■ No windows or metal clasps.
■ No exposed gummed surfaces.
N
To avoid media jams and damage to the printer components, make sure that you
follow the guidelines listed here.
which can affect feed reliability.
20
Phaser 840 Color Printer
Page 31

Advanced Print Features
1.
In your application, create a document matching the measurements of the
envelope. Refer to “Margins and print area” on page 13 for dimensions.
2.
From your application, make these selections:
■ Set the orientation to Landscape.
■ Select the envelope size.
■ Select Manual Feed Paper as the paper source.
■ If your application has a tool for creating envelopes, select the feed
method that matches the illustration in Step 4.
3.
Send the job to the printer.
4.
When the printer’s front panel reads Waiting for manual feed.
Insert one envelope, insert one envelope until it stops:
Insert one envelope with the short end of the envelope entering the printer
first, and with the flap side face-up and aligned with the left side of the
manual feed slot.
2
9102-54
9103-33
Envelope printing hints
■ For Macintosh users: If the envelope address prints upside-down, to
correct, select Page Setup; select Landscape and Envelope size. In Page
Setup’s PostScript Options select Flip Horizontal and Flip Vertical. From
the Print dialog window, select Manual Paper Feed.
■ Many applications include a tool for creating an envelope document. For
example, Microsoft Word includes an Envelopes and Labels feature under
the Tools menu. Make sure that you select Face Down; select the feed
method icon showing the flap entering to the left, and select Clockwise
Rotation.
If the envelope addressing prints upside-down in Microsoft WORD, from
the Tools menu select the Envelope and Labels item. After clicking the
Feed button, select Face Down, Clockwise Rotation, Left Flap (the right
icon), and Use Envelope Feeder. In the Envelope Page Setup dialog, select
Landscape, Flip Horizontal and Flip Vertical. From the Print dialog
window, select Manual Feed.
■ Check the Tektronix web site for any application- or platform-specific
information for printing envelopes on this printer.
Advanced Features and Troubleshooting Manual
21
Page 32

2
Advanced Print Features
Labels
C A U T I O
■ Tektronix recommends using Avery™ White Laser Labels, for example:
■ Each label is at least 25 x 67 mm or 1 x 2.625 in. in size. Smaller labels may
N
To avoid media jams and damage to the printer components, make sure that you
follow these guidelines.
■ A/Letter: 5160, 5960
■ A4: L7162
peel off and damage printer components.
■ If any of the labels on a sheet are missing, do not use that sheet; it may
damage the printer.
■ Use full-sheet peel-off labels.
■ Make sure that the duplex printing option is disabled in the printer driver.
■ Do not store labels in high-humidity environments. Labels stored under
such conditions will jam in the printer.
1.
Refer to your application’s manual for information on page orientation and
page margins.
If your application has a setting for Avery™ labels, use it as a template.
Otherwise, set margins and spacing according to the guidelines in the
instruction sheets that are included with the labels.
2.
In a supported printer driver, select Manual Feed Paper. Make sure that
the duplex printing option is disabled.
3.
To send the job to the printer, click Print.
4.
Open the printer’s manual feed cover and adjust the guide for your paper
size.
5.
When the printer’s front panel reads Waiting for paper, use both
hands to insert one sheet of media until it stops:
Insert the label sheet with the side to be printed face-down.
9103-36
22
6.
Wait for the front panel’s prompt before inserting additional sheets.
Phaser 840 Color Printer
Page 33

Automatic duplex printing
This printer can automatically print double-sided (duplex) copies. When a
double-sided print job is sent to the printer, the printer will print the second side
(back side) and then print the first side (front side). During this process, the paper
will partially exit the printer. To avoid media jams, wait until the paper has
completely exited the printer before removing your paper from the output tray.
N O T E
The Plus and Extended printer configurations include automatic duplex printing.
The Standard printer configuration does not support automatic duplex printing.
Setting duplex printing in the print driver
1.
Decide on a binding preference (how the page turns) for Step 2:
■ Long-Edge
The page turns on the long side, regardless of orientation.
Advanced Print Features
2
■ Short-Edge
The page turns on the short side, regardless of orientation.
Landscape Portrait
Long
edge
Short
edge
9102-50
Advanced Features and Troubleshooting Manual
23
Page 34

2
Advanced Print Features
2.
In the application’s Print screen, select the Duplex option and a binding
preference.
Macintosh: LaserWriter 8.5.1
From the pull-down menu, choose Layout.
a.
b.
Check Print on Both Sides.
c.
Select the icon for your binding preference:
Long-Edge Short-Edge
Macintosh: LaserWriter 8.3.4
a.
Click the Options button.
b.
Select 2-Sided Printing.
c.
Select Long-Edge Binding or Short-Edge Binding.
PC: Windows 3.1x
a.
Click the Setup button.
b.
Click the Features tab.
c.
Select 2-sided printing.
d.
Select Long-Edge Binding or Short-Edge Binding.
PC: Windows 95 / Windows 98
a.
Click the Properties button.
b.
Click the Paper tab.
c.
Click More Options button and select Printing on Both Sides.
d.
Select Flip on Long-Edge or Flip on Short-Edge.
PC: Windows NT4
a.
Click the Properties button.
b.
Click the Advanced tab.
c.
Under Paper/Output, select Print on Both Sides.
d.
Select Short Side or Long Side.
24
Phaser 840 Color Printer
Page 35

Loading pre-printed paper for duplex printing
Media T ray
N O T E
In the Print dialog box, select the tray by location: Upper, Middle, or Lower.
■ Letterhead (pre-printed) side is face-down.
■ Place the top of the page at the back of the tray.
1234
Advanced Print Features
2
Manual Feed Slot
N O T E
In the Print dialog box, select Manual Feed Paper.
1.
Open the printer’s manual feed cover and adjust the guide for your paper
size.
2.
When the printer’s front panel reads Waiting for paper, insert one
sheet of media until it stops:
For pre-printed papers, such as letterhead, insert the media with the
letterhead side face-up, with the top of the page entering the printer last.
1234567
9102-13
3.
Wait for the front panel’s prompt before inserting additional sheets.
Advanced Features and Troubleshooting Manual
25
Page 36

2
Advanced Print Features
Using fonts
Resident typefaces (PostScript)
The printer accepts Adobe Type 1 and Type 3 downloadable fonts, TrueType fonts,
PCL5, and a variety of user-defined fonts.
To extend font capability, the printer supports an optional internal IDE hard drive
and a SCSI-connected external hard disk for storage of additional fonts. Refer to
“Connecting Scanners and Hard Drives” on page 101 for more information.
ATM (Adobe Type Manager) software (provided on a separate CD-ROM shipped
with your printer) helps your computer to display these fonts on screen as they will
appear in your prints.
All printer configurations are shipped with 136 resident fonts. To print a sample of
the printer’s fonts, see page 28.
Resident typefaces (PCL5C)
For PCL5C (Printer Command Language) printing (HP LaserJet 5 emulation), the
printer supports Courier, Times, and Universe typefaces in medium, bold, italic
medium, and italic bold. Before the printer accepts PCL data, the printer port must
be set to AutoSelect.
Downloading fonts
Printer-resident fonts are always available for printing. Additional downloadable
fonts can be sent from your computer and stored in the printer’s memory or on a
hard disk. Adding more printer memory expands the number of fonts that can be
stored on your printer.
Downloading fonts saves print time when printing large, or several documents, that
use those fonts.
26
Phaser 840 Color Printer
Page 37

Advanced Print Features
The printer accepts these (and other) downloadable fonts:
■ Type 1
■ Type 3
■ Adobe
■ Agfa
■ Bitstream
■ Microsoft
■ Apple
■ TrueType (scalable to any point size; look the same on-screen and printed).
Before printing, make sure that the fonts specified in your document are installed in
the printer or are set up correctly. If you request a font in an application that is not
resident in the printer, or is not correctly installed, the text is printed in Courier
typeface.
Refer to “Connecting Scanners and Hard Drives” on page 101 for more information
on connecting hard drives for font storage.
2
Downloading fonts from a Macintosh
1.
From the printer’s CD-ROM, run the Installer application. Select Custom
Install. Select Printer Utilities.
2.
From the PhaserTools folder on your computer’s hard disk, double-click
Apple Printer Utility. Select your printer’s zone (AppleTalk Zones) and
your printer (Printers).
3.
Click Open Printer; a dialog box appears.
4.
Click the arrow next to Printer Preferences.
5.
Click the arrow next to Fonts for a list of installed fonts and locations.
6.
Click Add.
7.
Select your font folder, then select the font you want to download.
8.
Under Destination, select the download location: either the printer’s
memory or an attached hard disk.
9.
Click Add for one font or click Add All for all fonts in the folder.
10.
Click Send; the font(s) appear in the list.
N O T
E
To remove downloaded fonts, click Remove.
Advanced Features and Troubleshooting Manual
27
Page 38

2
Advanced Print Features
Downloading fonts with Windows 95 / Windows 98 (parallel connection only)
To download fonts to a SCSI hard drive, download the DOS-based utility
PCSEND.EXE (developed by Adobe Systems Inc. for downloading Adobe fonts)
from the Tektronix ftp server using the following address:
ftp://ftp.tek.com/Color_Printers/bbs/pcs/misc_utilities/PCSEND.EXE
See “Downloading files from the Tektronix ftp server” on page 99 for more
information.
N O T E
PCSEND.EXE
parallel port on the computer. The file does not support printers connected via
Ethernet.
will support downloading of fonts to a printer directly connected to a
Printing a list of resident fonts
From a Macintosh
1.
From the printer’s CD-ROM, run the Installer application. Select Easy
Install.
2.
From the PhaserTools folder on your computer’s hard disk, double-click
Apple Printer Utility. Select your printer’s zone (AppleTalk Zones) and
your printer (Printers).
3.
Click Open Printer; a dialog box appears.
4.
From the File menu, select Print Font Samples.
From a PC or workstation
1.
From the printer’s CD-ROM, run setup.exe. Select Easy Install.
2.
Open the PHSRTOOL directory. Open the SAMPLERS subdirectory.
3.
Use one of these methods to send to the printer the FONTS.PS file:
■ PC users: Use the DOS COPY command.
■ Workstation users: Send the file to the printer as you would any
PostScript file.
■ Windows NT users: Send the file to the printer by typing the following
at the DOS prompt:
lpr -S <IPaddress> -P PS FONTS.PS
28
Phaser 840 Color Printer
Page 39

Using Quick Collate
Requirements
■ Plus Feature Set
■ Hard drive (internal or external)
Quick Collate speeds the collation and printing of large print jobs and multiple sets
of documents. The collate function in some software applications repeatedly sends
each page in sequence to the printer until the requested number of copies is printed.
With the Quick Collate option, the job is sent only once and then multiple collated
sets are produced by the printer, allowing much faster processing time.
The number of pages that can be collated at one time depends on the size of the hard
disk attached to the printer.
Through a supported driver — generally through the Properties
(Windows 95/ Windows 98) or Printer Specific Options (Macintosh) menus,
select Quick Collate.
Advanced Print Features
2
Quick Collate hints
Increasing the collation capacity.
should be sufficient. If you need to increase the number of pages that the printer can
collate at once, you can add an external SCSI hard drive.
Quick Collate and Check Print.
with Check Print, only the first page of the first set is printed before pausing for your
review.
N O T
E
Make sure that you disable the collate function in your application, because the
printer’s Quick Collate option is faster than the collate function in software
applications.
For typical files, the internal IDE hard drive
When you use the printer’s Quick Collate option
Advanced Features and Troubleshooting Manual
29
Page 40

2
Advanced Print Features
Previewing with Check Print
Requirements
■ Plus Feature Set
■ Enable the feature in the printer’s front panel
When printing multiple pages through the driver (either multiple copies of a single
page or a multiple-page file), select Check Print to preview the first page of the job
before proceeding with the remainder of the job; this feature is useful when printing
a large job.
Access to Check Print from the driver is enabled and disabled in the printer’s front
panel. You can also set the timeout in the front panel (timeout is the amount of time
the printer waits after sending the first page of a file before it continues with the
remainder of the job).
The factory default for Check Print is “disabled”; the default timeout is 5 minutes.
Follow these instructions to enable Check Print in the front panel, reset the default
timeout, and select the option in the printer driver.
Enable Check Print
1.
In the front panel, scroll to Menu.; press Select.
2.
Scroll to Printer Configuration; press Select.
3.
Scroll to Default Printer Settings; press Select.
4.
Scroll to Check Print. Press Select to toggle the setting for Check
Print.
Reset the timeout
1.
In the front panel, scroll to Menu; press Select.
2.
Scroll to Printer Configuration; press Select.
3.
Scroll to Default Printer Settings; press Select.
4.
Scroll to Check Print Timeout; press Select.
5.
Use the up or down arrows to change the timeout (the amount of time
the printer pauses before completing the print job).
6.
Scroll to Exit and press Select to activate your selection.
N O T
E
You can also enable Check Print and control the default timeout through PhaserLink
Printer Management software. For details on PhaserLink Printer Management
software, refer to the
Tektronix web site.
PhaserShare Networking Manual
on the printer’s CD-ROM or
30
Phaser 840 Color Printer
Page 41

Advanced Print Features
Use Check Print
1.
In a supported driver, select Check Print:
■
LaserWriter 8.3.4 driver:
In the Print dialog box, click Options.
■
LaserWriter 8.5.1 driver:
In the Print dialog box, use the Printer-Specific Options pull-down
menu.
■
Windows 95 / Windows 98 PostScript driver:
In the Device Options tab, select Printer Features.
■
Windows NT driver:
Under the Properties tab, select the Advanced tab. In the Document
Options tab, select Printer features.
■
Adobe PS3 driver for Windows 3.1:
Select the Features tab options.
2.
Check your first print. At the printer’s front panel’s Check Print
message, choose one of these options and press Select:
2
Reprint Reprints the first page, pauses for the duration of
Cancel Cancels the print job.
Continue Prints the rest of the print job.
timeout or until you press a button.
Advanced Features and Troubleshooting Manual
31
Page 42

2
Advanced Print Features
Using Image Smoothing
Image Smoothing blends adjacent colors in low-resolution images for smoother
color transitions. For example, use Image Smoothing to improve the appearance of
a 72-dpi image downloaded from the World Wide Web. Image Smoothing is not
recommended for 300-dpi or higher images.
There are four ways of selecting Image Smoothing (driver selections override all
other settings):
■ In a supported printer driver; check the Image Smoothing box On.
■ Through the printer’s front panel in the Default Printer Settings
menu.
■ Through PhaserLink Printer Management software under Configure
Printer Defaults.
■ Through one of the following PostScript utility files (see “Using Printer
Utilities” on page 93):
Macintosh
■ Image Smoothing On
■ Image Smoothing Off
PC
■ SMOOTHON.PS
■ SMOOTHOFF.PS
Automatic tray switching
When your printer has a High-Capacity Paper Tray Assembly, you can easily run
large jobs without having to replace media often.
1.
For automatic tray switching to work properly, load the same type and size
media in all of the printer’s media trays.
2.
Install a tray in each of the printer’s tray slots.
3.
In the printer driver, select Paper as the source.
32
Phaser 840 Color Printer
Page 43

Using Slip Sheets
You can have the printer insert a slip sheet, or divider page, to separate print jobs,
multiple copies of a single print job, or individual pages of a print job.
There are two selections to make in your printer driver.
1.
In a supported driver, locate the Slip Sheet options:
■
LaserWriter 8.3.4 driver:
In the Print dialog box, click Options.
■
LaserWriter 8.5.1 driver:
In the Print dialog box, use the Printer-Specific Options pull-down
menu.
■
Windows 95 / Windows 98 PostScript driver:
In the Device Options tab, select Printer Features.
■
Windows NT driver:
From the Properties tab, select the Advanced tab. From the Document
Options tab, select Printer Features
Advanced Print Features
2
■
Adobe PS3 driver for Windows 3.1:
Select the Features tab options.
2.
Select one of the following for Slip Sheet:
Off Turns off the slip sheet feature.
End of Job Inserts a slip sheet between individual print jobs.
End of Set Inserts a slip sheet between copies, or sets, of a multi-cop y
End of Page Inserts a slip sheet between every page of a print job.
3.
Select one of the following for Slip Sheet Source:
Upper Tray Takes paper for the slip sheet from the upper media tray.
Middle Tray Takes paper for the slip sheet from the middle media tray, if
Lower Tray Takes paper for the slip sheet from the lower media tray, if
print job.
you have two High-Capacity Paper Tray Assemblies
installed.
you have one or two High-Capacity Paper Tray Assemblies
installed.
Advanced Features and Troubleshooting Manual
33
Page 44

2
Advanced Print Features
Front Panel Intensity
1.
In the printer’s front panel, scroll to Menu; press Select.
2.
Scroll to Printer Configuration; press Select.
3.
Scroll to Default Printer Settings; press Select.
4.
Scroll to Front Panel Intensity; press Select.
5.
Use the up or down arrows to change the front panel back light intensity
(0 is no back light, 10 is the brightest back light).
6.
Press Select to activate your selection.
7.
Scroll to Exit; press Select to return to the Ready to Print message.
Intelligent Ready mode
Intelligent Ready mode is an automated system that optimizes printer standby time
by monitoring your printer’s usage patterns. You can set Intelligent Ready mode
with PhaserLink or the printer’s front panel. The front panel only allows you to turn
Intelligent Ready mode On or Off.
1.
In the front panel, scroll to Menu; press Select.
2.
Scroll to Printer Configuration; press Select.
3.
Scroll to Default Printer Settings; press Select.
4.
Scroll to Advanced Printer Settings; press Select.
5.
Scroll to Intelligent Ready. Press Select to turn this option On or
Off.
6.
Scroll to Exit; press Select to return to the Ready to Print message.
N O T E
You can also enable Intelligent Ready mode and set your own printer warm-up
times through PhaserLink Printer Management software. F or details on PhaserLink
Printer Management software, refer to the
printer’s CD-ROM or Tektronix web site.
PhaserShare Networking Manual
on the
34
Phaser 840 Color Printer
Page 45

PhaserPrint Plug-in for Photoshop
The PhaserPrint™ plug-in, included on the printer’s CD-ROM, operates within the
Photoshop application. With PhaserPrint, you can improve image transfer time and
gain easy access to Tektronix printer features and other media features.
PhaserPrint software produces correct output only on supported Tektronix printers.
N O T
E
If you use this plug-in with a printer not listed in the PhaserPrint dialog box, the
image may be placed incorrectly on the page, or colors may look incorrect, or your
file may not print.
Installing the plug-in: Macintosh
N O T
E
The PhaserPrint Plug-in is automatically installed with the software installation
option Easy Install.
Advanced Print Features
2
Compatibility requirements
■ Photoshop 2.5.1 and higher
■ System 7.0 and higher
Installing the plug-in
1.
From the printer’s CD-ROM, run the Installer application. Select Custom
Install.
2.
Select PhaserPrint plug-in for Photoshop. Click Install; the file is installed
in the Photoshop application’s Plug-ins folder on your computer’s hard
disk.
Installing the plug-in: Windows
Compatibility requirements
■ Photoshop 3.0 and higher
■ Windows 95/Windows 98 or Windows NT
■ (optional) TCP/IP support requires proper installation of IP networking
software and cards
Installing the plug-in
1.
From the printer’s CD-ROM, run setup.exe. Select Custom Install.
2.
Select PhaserPrint plug-in for Photoshop; the file is installed in the
Photoshop application’s Plug-ins directory on your computer’s hard disk.
Advanced Features and Troubleshooting Manual
35
Page 46

2
Advanced Print Features
Using the plug-in
1.
2.
3.
4.
5.
If you don’t already have a default printer selected, do the following:
■
Macintosh
: Open the Chooser. Select a PostScript driver (such as the
Apple LaserWriter 8); select your printer. PhaserPrint software works
like a printer driver, and prints to the printer you selected in the
Chooser.
■
Windows
: Within the PhaserPrint software, select your printer and
port, as described in “Print using (Windows)” on page 38.
Open Photoshop. Open an image file.
From the File menu, select Export. Select PhaserPrint; the PhaserPrint
dialog box appears.
In the Printer Model field, select your printer.
PhaserPrint software supports the following image modes selected from
Photoshop’s Mode menu. If you select a mode not listed here, an error
message appears and your image is not printed.
■ Bitmap
■ Grayscale
■ Indexed Color
■ RGB Color
■ CMYK Color
■ Lab Color
36
Phaser 840 Color Printer
Page 47

Selecting options in the PhaserPrint dialog box
Settings you make in the PhaserPrint plug-in remain in effect until you change them.
The exception is Number of Copies, which defaults to 1 each time you start the
plug-in.
N O T
E
You can get information on any of the plug-in’s features or printer-specific options
with the online Help function.
Number of copies
Enter the number of copies to print, from 1 to 1000.
Print using (Macintosh)
The Print using pop-up menu lets you choose between printing an image or saving
the image to disk.
■
AppleTalk
the currently selected printer name is displayed in the Printer model field.
If the selected printer is not a PostScript printer, this option is unavailable
(grayed-out).
Prints the image to the printer currently selected in the Chooser;
Advanced Print Features
2
■
PostScript file
dialog box lets you choose a new or existing file for saving the PostScript
code.
When selected, the File format pop-up menu becomes available. This
pop-up menu has two options: ASCII base-85 and Binary.
■
ASCII base-85
during file output, making the resulting PostScript file portable, and
downloadable through interface ports that don’t support binary data.
■
Binary
Saves an image to disk as a PostScript file. Click Save; a
Image data is encoded using an ASCII base-85 filter
Image data is output in binary format.
Advanced Features and Troubleshooting Manual
37
Page 48

2
Advanced Print Features
Print using (Windows)
The Print using pop-up menu lets you choose between printing an image or saving
the image to disk. It has two to four options, depending on your system
configuration:
■
TCP/IP
model, choose a printer. Add and delete printers in the list, and edit the
printer configurations.
N O T
E
TCP/IP is the fastest printing method; it prints jobs in much less time than the
Parallel Port or Printer Driver methods, and is the recommended method if it is
available for the printer you are using.
■
Local Port
Port Name, choose the desired printer port.
■
Printer Driver
Driver Name, choose a printer.
Available if a TCP/IP stack is installed and running. From Printer
Available if you have local ports installed in your PC. From the
Prints the image through the selected printer driver. From
■
PostScript file
Saves an image to disk as a PostScript file. Click Save; a
dialog box lets you choose a new or existing file for saving the PostScript
code.
When selected, the File format pop-up menu becomes available. This
pop-up menu has two options: ASCII base-85 and Binary.
■
ASCII base-85
Image data is encoded using an ASCII base-85 filter
during file output, making the resulting PostScript file portable so that
it can be downloaded through interface ports that don’t support
binary data. Note that the file may be up to 25% larger.
■
Binary
Image data is output in binary format. Recommended for
network printing only (not for the parallel port).
Displays the currently selected printer.
Printer model
■ Lists all printers supported by PhaserPrint software.
■ When you select your printer model, PhaserPrint displays the correct
options for your printer.
38
Phaser 840 Color Printer
Page 49

Advanced Print Features
Media size (selection)
■ Paper sizes are printer-specific; refer to the online Help for your printer’s
options. Before selecting a paper size, select your printer in the Printer
model field.
Color Correction
■ The setting remains in effect until you change it.
■ Color Corrections are not available if the Photoshop Mode is Lab.
■ If RGB is the selected Mode in Photoshop, the Calibrated RGB option is
also available.
Media
■ The setting remains in effect until you change it.
Quality
■ The setting remains in effect until you change it.
Rendering Intent
■ Available in the following cases:
2
■ If the Mode in Photoshop is RGB, and you select Calibrated RGB as
the Color Correction in PhaserPrint.
■ If the Mode in Photoshop is Lab.
■ Calibrated RGB and Lab modes take longer to print than other modes
because the printer must convert CIE colors to RGB or CMYK colors before
printing.
Compress Image Data
■ Compresses image data so that less data is sent to the printer or stored in
a file.
■ Useful if your network connection is slow, for example, if you are
connected to a busy network or if you are using LocalTalk or a parallel port.
N O T E
For fast networks, printing may be faster without using this option.
■ The setting remains in effect until you change it.
■ Default is On.
Advanced Features and Troubleshooting Manual
39
Page 50

2
Advanced Print Features
Fast preview
■ Quick print of your image with slightly reduced image quality.
■ Reflects the printer color correction you selected.
■ For the fastest printing, use the None color correction option.
■ Default is Off.
Check Print
■ Available only with the printer’s Plus Feature Set option.
■ Check Print must be enabled in the printer’s front panel.
■ When sending a multiple-copy print job to the printer through the driver,
you can select Check Print to preview the first page of the job, and
determine if the job is printing as expected before proceeding with the
remainder of the job. This option is especially useful when printing
many copies.
1.
Click the Check Print check box.
2.
Check your first print. At the Check Print message on the printer’s
front panel, press one of the buttons:
■ Reprint Reprints the first page, the printer pauses again for the
duration of the selected timeout, or until you press one of the
buttons.
■ Cancel Cancels the print job.
■ Continue Continues printing the entire job.
■ At the printer’s front panel, set the Check Print timeout.
■ Default is Off.
40
Phaser 840 Color Printer
Page 51

Advanced Print Features
Image Smoothing
■ Blends adjacent colors so that color transitions are less noticeable.
■ Use this option when the image being printed was scanned at a lower
resolution than the printer’s output resolution. For example, printing an
image scanned at 72 dpi using the printer’s Standard print quality mode
(300 dpi).
■ Images printed using Image Smoothing appear with less sharp detail but
with smoother color transitions.
■ Default is Off.
Stylized representation of the page
■ The lower left area of the dialog box displays a stylized representation of
the page as it would look when printed using the current selections in the
Scale, Scale to fit, Printer model, Media size (selection), Landscape
orientation, Replicate images, Center images, and Image separation
options. When you change any of these selections, the representation of the
page is redrawn to reflect the new selection.
■ If Show color preview of image is On, an approximate color image is
displayed.
2
Scaling an image
■ Scale to fit
■ Scales an image to the largest size that fits the image area of the
currently selected page size or orientation.
■ Automatically updates the Scale field value.
■ Scale
■ Type the percentage the image should be scaled, from 10 percent to
2000 percent.
■ Use with the Replicate images option to produce multiple copies of an
image on a single page.
■ Alert message Image clipping will occur.
This message appears in the PhaserPrint dialog box whenever a scaled
image will not fit within the image area of the currently selected page size
or orientation option.
Advanced Features and Troubleshooting Manual
41
Page 52

2
Advanced Print Features
Landscape orientation
■ Prints the image horizontally (landscape) on the page. Leave this box
unchecked to print the image vertically (portrait) on the page.
■ Refer to the Stylized representation of the page, in the lower left corner of
the dialog box, to see how your selection will look when printed.
Center images
■ Centers the image in the page’s image area.
■ If this box is not checked, the lower left corner of the image is aligned with
the lower left corner of the printable area of the page.
■ If the Center images box is checked and the Replicate images box is
checked, the set of replicated images are centered in the image area of the
page.
Replicate images
■ Fills the page’s image area with as many copies of the image as will fit.
■ The size of each replicated image is determined by the setting in the Scale
text box.
■ If the size of each replicated image (shown as black rectangles in the
stylized representation of the page) is too small to display, the total image
area of the printed page is shown as a single gray rectangle.
Image size
■ Reflects the dimensions, in inches or millimeters, of the image.
■ If the value in the Scale box is out-of-range, the image dimensions are
displayed with question marks.
42
Phaser 840 Color Printer
Page 53

Advanced Print Features
Image separation
■ Only available if the Replicate images box is checked.
■ Type an amount, in inches or millimeters (depending on your
measurement standard), to specify the amount of separation between
each replicated image.
■ A larger amount reduces the number of images that can be printed at
one time.
■ Minimum allowed separation value is 0.
■ Maximum separation value is 100 mm (4 inches).
■ Default separation value is 3.175 mm (0.125/one-eighth inch).
■ Valid characters for this field are 0 to 9 and a period (or decimal point).
■ As you type a value, the stylized representation of the page, and
Number of images and Image layout values are dynamically updated.
If the value entered in the Image separation field is out-of-range, the
values in these other fields are replaced by question marks, and no
images are shown in the stylized representation of the page. If the
value is out-of-range, and you click Print or Save, the following alert is
displayed:
2
The value for Image separation is out of range. It will be
replaced with the closest allowed value.
Number of images
■ Displays the number of scaled images that will fit in the image area of the
currently selected Media size (selection) and Landscape orientation
options.
■ Number of images reflects the current Image separation value.
■ If the Replicate images box is not checked, this number is set to 1.
■ If either Scale or Image separation values are out-of-range, a question
mark is displayed.
Advanced Features and Troubleshooting Manual
43
Page 54

2
Advanced Print Features
Image layout
■ Shows how the scaled images will fit horizontally and vertically in the
image area of the currently selected Media and Landscape orientation
options.
■ Image layout reflects the current Image separation value.
■ If the Replicate images box is not checked, this number is set
to 1 x 1.
■ If either Scale or Image separation values are out-of-range, question marks
are displayed.
Media size (display)
Reflects the dimensions, in inches or millimeters, of the selected media size.
Show color preview of image
Displays an approximate color image, rather than a black box, in the Stylized
representation of the page field.
44
Phaser 840 Color Printer
Page 55

Chapter
3
Consumables
User-replaceable consumables
These are the replaceable components for the printer:
■ ColorStix ink sticks
■ Maintenance Kit (maintenance roller/maintenance counter)
When to replace consumables
When the front panel prompts you to replace a component, make sure that you have
replacements on hand. The printer continues to print until the component is depleted.
ColorStix ink sticks
C A U T I O N
Use only Phaser 840 printer ColorStix® ink; other Phaser ColorStix ink will not fit
this printer and will damage it if used. Keep ink in its packaging until you are ready
to use it.
Front panel messages
Ink low - Add ink
Out of ink - Open top cover. Add ink
Order numbers
016-1604-00 3 Black sticks
016-1605-00 5 Cyan sticks, 2 Black sticks
016-1606-00 5 Magenta sticks, 2 Black sticks
016-1607-00 5 Yellow sticks, 2 Black sticks
016-1582-00 2 Cyan sticks, 1 Black stick
016-1583-00 2 Magenta sticks, 1 Black stick
016-1584-00 2 Yellow sticks, 1 Black stick
■ Add ink soon.
■ Add ink to continue printing.
Maintenance Kit
N O T E
The Maintenance Kit which ships with a new printer has a life of 10,000 prints.
Replacement Maintenance Kits have a life of 30,000 prints.
Front panel messages
Maintenance Kit is Low.
Only
Maintenance Kit is empty.
Open front cover and replace.
Order number Maintenance Kit Life
016-1727-00 30,000 prints
xx
prints until empty.
Advanced Features and Troubleshooting Manual
■ Replace the Maintenance Kit soon.
■ Replace the Maintenance Kit to continue printing.
45
Page 56

3
Consumables
Consumable life information
This printer provides several convenient methods for accessing the information you
need on the life of the user-replaceable consumables.
Status of the Maintenance Kit
1.
In the front panel, scroll to Menu; press Select.
2.
Scroll to Consumable Usage; press Select.
3.
Scroll to Maintenance Kit Remaining Life; press Select. The
number of Prints Remaining will display.
4.
Scroll to Exit; press Select to return to the Ready to Print message.
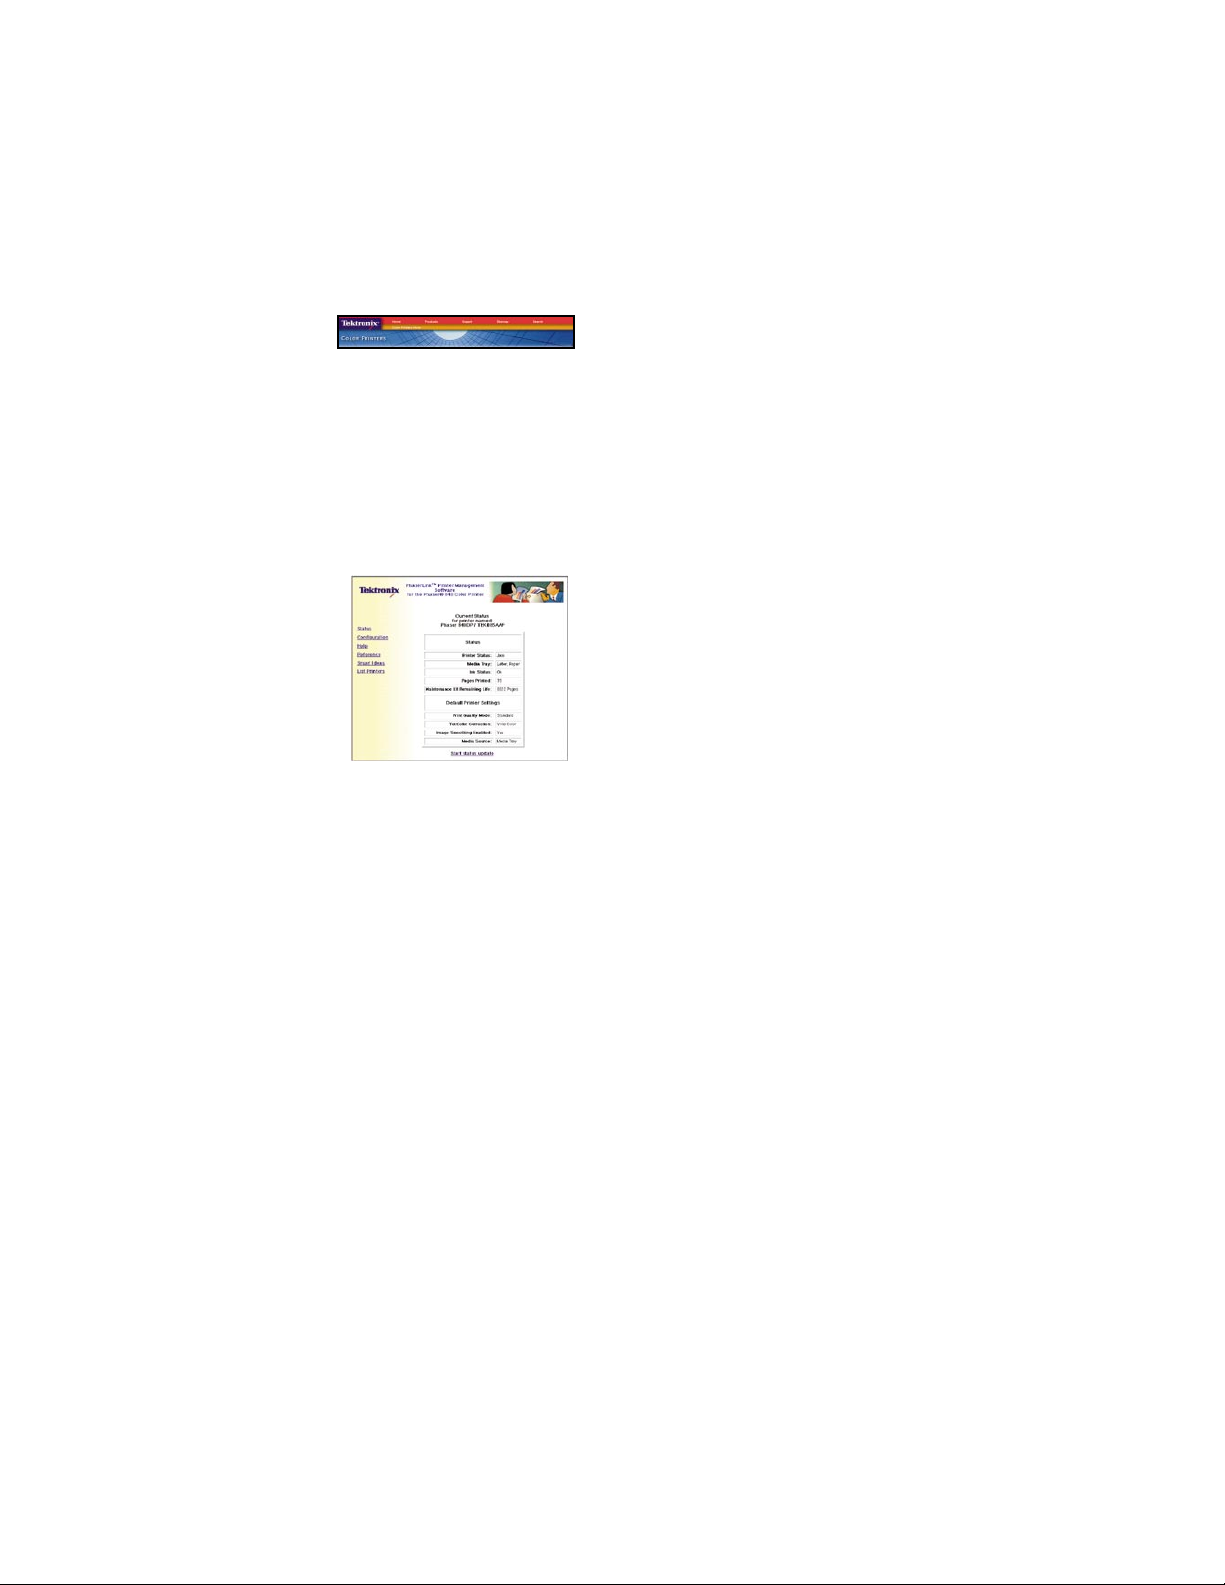
PhaserLink Printer Management software
PhaserLink Printer Management software is a printer management tool that uses
World Wide Web technology to provide printer information and functionality.
PhaserLink requires a TCP/IP connection. To access PhaserLink information, enter
your printer’s IP address in a web browser. The PhaserLink interface appears on
your computer’s screen. Refer to page 73 for more information about PhaserLink
Printer Management software.
9103-40
Usage Profile Report
The printer can generate a report detailing printer usage. The Usage Profile Report
includes information on many aspects of printer usage, including ink used, number
of pages printed, and media types used. You can print these reports from the
printer’s front panel or PhaserLink Printer Management software, or you can obtain
them automatically via email. Refer to page 74 for more information about the
Usage Profile report.
46
Phaser 840 Color Printer
Usage Profile
Phaser®840 Color Printer
9103-39
Page 57

Chapter
4
Troubleshooting
On-line support
Visit Tektronix’ color printer web site for the most up-to-date information about your
printer. View updated user documentation, download utility files, get answers to
frequently asked questions, find a list of Tektronix dealers in your area, or contact
customer support.
TekSMART™ Knowledge
Base
Tektronix Color Printer
web site
Documentation www.tektronix.com/Color_Printers/userdoc/introduction.html
www2.tek.com/merlin/tko
www.tektronix.com/Color_Printers/
Customer support www.tektronix.com/Color_Printers/support/colcare.html
Color use tips for novices
and experts
PhaserLink Printer
Management software
Anonymous FTP server ftp.tektronix.com/Color_Printers/
Email update notices www.tektronix.com/Color_Printers/support/subscribe.html
colorize.com
www.tektronix.com/Color_Printers/products/phaserlink.html
Advanced Features and Troubleshooting Manual
47
Page 58

4
Troubleshooting
Customer Support Centers
For more information or for getting help with troubleshooting or servicing your
printer, contact your local Tektronix dealer or sales representative or the following
resources worldwide:
Customer Support Centers
Australia
1-800-811-177
Austria
0660 5804
Belgium
02 720 9602
Brazil
0800 16 0220
Canada
1-800-835-6100
China
10-6235-1230
Denmark
(44) 533 444
Eastern Europe and
the Middle East
+44 1908 68187
Finland
0203 206 30
All other locations: Contact local Tektronix dealers or Tektronix offices.
For a list of dealers in your area, visit www.tektronix.com/Color_Printers/contacts.
France
01 69 86 8137
Germany
0180 525 3535
Hong Kong
2585-6655
India (South Asia)
(91) 80-227-5577
Italy
02 45 287 000
Japan
81 3 3448 4872
Korea
2-528-5299
Luxembourg
400 847
Netherlands
(040) 267 0440
New Zealand
+61 2 9888 0100
Norway
(22) 723 801
Singapore (ASEAN)
1-800-356-5565
Spain
902 239 272
Sweden
(08) 299 071
Switzerland
155 9493
Taiwan
(02) 2757-1571
Thailand
2-645-4407
U.K.
(01) 908 681 707
U.S.
1-800-835-6100
48
Phaser 840 Color Printer
Page 59

Getting information by fax
Another Tektronix resource for up-to-date information is HAL (Highly Automated
Library). If you have a fax machine and a touch-tone telephone, you can quickly
receive the latest technical hints and tips, solutions to common technical problems,
and application notes for software such as CorelDRAW! and QuarkXPress.
Call HAL from anywhere in the world; the fax library is available 24 hours a day,
seven days a week. For a catalog listing HAL documents, call one of the following
numbers.
Country Numbers
Austria
Belgium
Denmark
Troubleshooting
4
Finland
Holland
Italy
Norway
Switzerland
France 0800 90 81 86
Germany 0130 819 220
Spain 07 44 1908 681839
Sweden 009 44 1908 681839
UK 01908 681839
Other countries +44 1908 681839
(where + is your country’s International Access Code)
00 44 1908 681839
Advanced Features and Troubleshooting Manual
49
Page 60

4
Troubleshooting
Diagnostic tools
The printer provides several tools for diagnosing and solving various types of
problems; these tools include the following:
Front panel
Status messages
Automatically reflects a condition requiring user intervention.
Help button
Provides detailed information on currently displayed menus and status messages.
Help Topics
Describes common printer tasks.
Consumables Usage Menu
Includes status for the remaining life of the Maintenance Kit.
Configuration Page
Found in the Printer Configuration menu; provides useful information for
installation and troubleshooting:
■ Printer’s name and Internet address
■ Firmware version
■ Feature set (one of three printer configurations: Standard, Plus, Extended)
■ Printer serial number
■ Network information
■ Printer feature status (for example, Check Print enabled)
Usage Profile report
Found in the Consumables Usage menu; provides detailed information on
consumables used, tray and media selections, printer interventions, as well as an
analysis of usage rates. Useful for planning your consumables ordering and
tracking the average use of consumables on a per-job basis.
PhaserLink™ Printer Management Software
Use a standard web browser to view printer status, control printer configuration,
view consumable information, and link to online documentation via the World Wide
Web.
N O T
E
To use PhaserLink Printer Management software, the printer must be connected to
a network running TCP/IP. Refer to the
complete details.
PhaserShare Networking Manual
for
50
PS Error Handler
Enabled in the front panel’s Advanced Printer Settings menu. Used to
diagnose PostScript problems. When a PostScript error occurs, an error page prints
out if the error handler is enabled.
Phaser 840 Color Printer
Page 61

Symptoms and solutions
Front Panel Messages
Symptom Possible Causes Solution
Power indicator is blinking The printer is receiving, processing or
Pow er indicator is off The printer is turned off, is not ready , is
Error indicator is blinking The printer is stopped because it
The front panel menu returns
to
Ready to Print
without any intervention.
Front panel reports:
printing a job.
You have entered the menu in the front
panel.
disabled, or has detected an error.
detected an error or condition requiring
user intervention, such as an open
door or a media jam.
Front-panel timeout: If no activity
occurs in 2 minutes, the front panel
returns to
Media jam. ■ Make sure that paper or transparencies are
Ready to Print.
Media Jam - Open
front cover . . .
Media Jam - Open
exit cover . . .
Media Jam - Remove
<xxx> tray . . .
Media Jam - Retry
manual feed
Too much media is loaded in the
media tray.
Media is wrinkled or curled. Change the media.
Media is too thick or too thin. Use recommended media; refer to page 7.
Media has jammed at the manual feed
slot because it was not loaded
properly.
Front panel reports:
Output tray full
Front panel reports:
Envelope Jam -
Too much media is stacked in the
output tray.
An envelope has jammed because it
was not loaded properly.
Retry manual feed
Front panel reports:
Incorrect Media
Size
Front panel reports:
An incorrect paper size is loaded in the
tray, or paper narrower than A4-size is
in the manual feed slot.
The ink is almost empty. Add ink soon.
Ink low - Add ink
Wait for the job to be completed or cancel
the job.
Exit the menu.
Make sure that the printer is plugged in and
turned on.
■ Correct the condition reported by the front
panel (for example , close the door or clear the
media jam).
■ Press the Help button to access information
on the error condition.
■ If the problem is an error that is not
user-correctable, contact Customer Support.
Scroll to
the menu.
installed correctly and that the tray’s media
indicator switch has been set correctly
■ When using the manual feed slot, make sure
that the media is fed straight and aligned with
the left edge of the manual feed slot.
■ To clear the jam: Refer to “Clearing a media
jam” on page 56.
■ To prevent a jam: Clean the rollers. See
page 57 for details on cleaning the printer.
Reduce the amount of media to below the tray’s
maximum-capacity label.
Re-insert the media in the manual feed slot:
make sure that it is loaded flush against the left
side of the manual feed slot.
Remove all printed pages from the output tray.
Re-insert the envelope in the manual feed slot:
make sure it is loaded flush against the left side
of the manual feed slot with the flap side facing
up.
Use letter- or A4-size media only, or one of the
supported envelope sizes.
Troubleshooting
Menu and press Select to re-enter
4
Advanced Features and Troubleshooting Manual
51
Page 62

4
Troubleshooting
Front Panel Messages (cont'd.)
Symptom Possible Causes Solution
Front panel reports:
The ink is empty. Add ink to continue printing.
Out of ink
Front panel reports:
Ink sticks jammed
Front panel reports:
One or more Ink sticks are stuck in the
ink-loading bin.
The maintenance kit is almost empty Order a replacement Maintenance Kit.
■ Open and close the top cover.
■ Apply pressure to each row of ink sticks in the
loading bin to make sure they are not
jammed.
Maintenance Kit is
low . . .
Front panel reports:
Maintenance Kit
The maintenance kit is depleted. Replace the Maintenance Kit to continue
printing.
Empty . . .
Front panel reports:
Maintenance Drawer
(A) locked
Front panel reports:
Printer Error ##
Hot ink is present. Close the door and wait a few minutes before
An error occurred that may not be
user-correctable.
removing the maintenance drawer (A) from the
printer.
■ Write down the error number.
■ If you have access to the w orld wide web, look
up the error number on the TekSMART web
page (see “On-line support” on page 47) for
possible corrective action.
■ If the error persists, call Customer Support
with the error number. See page 48.
Problems with jams
Symptom Solution
Frequent media tray jams Fan the paper or transparencies before installing them in their respective trays; this is
Frequent media jams Make sure that you use a high-quality paper: 60 - 120 g/m
especially important for transparencies because they tend to stick together.
Clean the printer’s rollers. Refer to page 69 for more information.
2
the media trays. Refer to “All about media” on page 7 for more information.
Make sure that the printer is placed on a flat, level surface.
Use only Phaser 840 printer transparencies; they have been specially formulated for this
printer.
Do not overfill the media tray, as indicated by the tray’s maximum-capacity label.
Clean the printer’s rollers. Refer to page 64 for more information.
(16 - 32 lb. bond) paper in
52
Phaser 840 Color Printer
Page 63

Troubleshooting
Problems with automatic duplex printing
Symptom Solution
Output is single-sided Make sure that you have selected duplex printing in the printer driver.
Frequent jams when duplex
printing
Paper must be between 60 - 120 g/m
When using the manual feed slot, make sure that the media is always loaded straight.
2
(16 - 32 lb. bond) in weight.
Clean the printer’s rollers. Refer to page 64 for more information.
Second side of a duplex print
is upside-down
Select the correct method for binding preference in the printer driver.
■ Long-edge binding: Page turns on the long side, regardless of image orientation.
■ Short-edge binding: Page turns on the short side, regardless of image orientation.
Refer to “Automatic duplex printing” on page 23 for detailed instructions.
Labels are printed on the
wrong side
■ Make sure the labels are loaded face down.
■ Make sure that duplex printing is not selected in the printer driver when you are printing
labels.
Printed colors are not what you expected
Symptom Solution
Light-colored or missing
stripes on prints
Ink streaks or oil on front,
back, or edges of print
Prints have dull, faded colors If you are using the upper media tray , make sure that the indicator s witch has been set f or
Photographic images appear
grainy
Black-and-white prints
instead of color
Blue colors look too purple If printed blue colors look too purple, print your document with the Vivid Color color
Clean the printhead: in the front panel troubleshooting menu, select Eliminate Light
Stripes. Refer to page 58 for more information.
■ Clean the printer’s internal paper path with the front panel troubleshooting routine.
Refer to page 63.
■ Clean the printer’s paper-exit rollers. Refer to page 67.
■ Clean the wiper blade in the maintenance drawer (A). Refer to page 62.
the appropriate media.
Use only Phaser 840 printer transparencies; they have been specially formulated for this
printer.
For printing on transparencies, make sure that you have selected in the driver
Transparency (for the media tray) or Manual Feed Transparency (for the manual feed
slot).
Try a different color correction mode. Refer to page 80 for more information.
■ In the printer driver, select the highest print quality mode.
■ Use images that are 150 dpi or higher.
In the printer driver, check if the TekColor Correction is set to Monochrome; if it is,
choose a different color correction.
Macintosh users:
Make sure that you are using the correct PPD file with the latest Apple LaserWriter
printer driver (version 8.3.4 or higher), that supports color PostScript.
In the Print dialog box, make sure that Color/Grayscale is selected. Some applications
require special files to print in color. Mak e sure that these files are properly installed. For
information, refer to the topics on the printer’s CD-R OM or the Tektronix World Wide Web
site.
PC users:
Be sure to use a driver that supports color PostScript.
If you are using Windows: In the Options dialog box, make sure that the Color box is
checked. For information on the drivers, refer to the printer’s CD-ROM or World Wide
Web.
correction. Refer to page 80 for information on color corrections.
4
Advanced Features and Troubleshooting Manual
53
Page 64

4
Troubleshooting
Printed colors are not what you expected (cont'd.)
Symptom Solution
Transparency print quality
poor.
Print is wrinkled or rippled
■ Use only Phaser 840 printer transparency media.
■ Make sure that you hav e loaded transparencies correctly in the tray or man ual feed slot;
refer to page 16 for more information.
■ Make sure that you have selected Standard as the print-quality mode; try setting
Vivid Color as the color correction.
■ Make sure that the switch on the side of the High-Capacity Paper/Transparency tray is
set to Transparency.
■ Make sure that you hav e selected in a supported printer driver either Transparency for
the media tray or Manual Feed Transparency (for the manual feed slot). Refer to
“Loading Phaser 840 printer transparencies” on page 16.
■ If your media is smooth, use a different type of media.
■ Use single-sided printing instead of double-sided printing.
Print Quality Problems
Symptom Solution
The printer times out when
connected to a parallel port
The area of paper that the
printer prints on is smaller
than the media size
You have problems printing
from a specific application
Fonts print incorrectly in
Windows
Text prints in Courier font The font you have specified is not available. The printer has 136 resident fonts. Other
Windows users: Refer to the Microsoft Online Help for instructions to change the timeout
for transmission retry.
■ Refer to “Margins and image areas” for more information.T o maximiz e the image area,
you may have to adjust the margins in your application software.
■ In your application check the setting for Image Size.
Get information and tips on printing from specific applications (such as QuarkXPress and
PageMaker) from the Tektronix Color Printer web site and from HAL. Refer to page 47
and page 49 respectively.
■ Make sure that you hav e selected the correct printer feature set PPD , P ostScript Printer
Description) with your driver.
■ If you have do wnloaded fonts to y our printer , or stored additional f onts on an internal or
external hard drive, you may need to reinstall the fonts.
fonts must be downloaded or available on a hard disk. Refer to “Downloading fonts” on
page 26.
54
Phaser 840 Color Printer
Page 65

Media jams and misfeeds
After you clear a media jam, the printer automatically outputs a second, usually
partial print to remove any image that may remain on the print drum; then it prints
your original image.
The lower tray is the default tray for media that the printer uses in self-cleaning. If
you have one or two High-Capacity Paper Tray Assemblies, you can make the upper
or middle tray the default tray through the printer’s front panel menu. Refer to “The
Cleaning Page” on page 60 for instructions.
Preventing media jams
Use the following guidelines to prevent media jams inside the printer.
■ Make sure that the printer is on a flat, level surface.
■ Use the recommended media. Refer to “All about media” on page 7.
■ Do not use three-holed paper, perforated paper, or odd-sized paper.
■ When using the manual feed slot, always use two hands to load the media
straight and evenly.
Troubleshooting
4
■ Keep paper and other supplies clean and free from dust.
■ Paper that has been sitting out of its sealed wrapper can become distorted,
causing paper jams. Keep paper sealed until you are ready to use it for
printing.
■ Do not use paper that has been creased or wrinkled.
■ Fan media before loading it in the trays.
■ When using the manual feed slot, wait until a front panel message prompts
you before feeding a second sheet of paper or transparency.
■ Do not print on sheets of labels that are missing labels.
Advanced Features and Troubleshooting Manual
55
Page 66

4
Troubleshooting
Clearing a media jam
C A U T I O N
Some surfaces inside the printer may be hot. To avoid possible injury when clearing
a jam, do not touch any hot surfaces.
■ When media jams in the printer, the front panel directs you to the location
of the jam. Follow the instructions on the front panel.
■ Use both hands to gently pull the media through its normal path out the
top of the printer (exit cover), if possible. Use the thumbwheel to advance
the media. Do not use excessive force pulling the media; it may tear.
■ After removing the jammed media, inspect it for tears. Do not leave any
scraps of media in the printer.
■ If your prints have ink smears after clearing a jam, clean the printer’s feed
rollers. Refer to page 64.
■ If jamming persists, cleaning the printer’s internal paper path may solve
the problem. Refer to page 63.
W A R N I N G
Never use a sharp object to remove jammed paper; you may damage the print
drum, requiring repair to your printer.
56
Phaser 840 Color Printer
Page 67

Cleaning the printer
You need to clean the printer when the following occur:
■ Media jams are frequent.
■ Prints are striped or smeared.
How often you need to clean the printer will depend on how heavily the printer is
used and the environment in which it is used.
Using the front panel: Some cleaning procedures are executed through the printer’s
front panel, in the Troubleshooting menu. Front panel messages guide you
through the steps of the procedures.
If the printer has frequent media jams
Problem Cleaning procedure
Troubleshooting
4
Ink smears
Media jams or misfeeds at the
upper tray.
Media jams or misfeeds at the
middle or lower paper tray.
Media jams behind the front cover
or at the manual feed slot.
Media jams inside the exit cover. “Cleaning for ink smears and jams: paper-feed
If your prints have stray ink marks on the front or the back, clean the internal paper
path. If smears persist, clean the paper-feed rollers. If smears still appear, clean the
paper-exit path.
1
See “Cleaning for ink smears and jams: internal paper path” on page 63.
2
See “Cleaning for ink smears and jams: paper-feed rollers” on page 64.
3
See “Cleaning for ink smears: paper-exit path” on page 67.
123
“Cleaning for media tray jams” on page 69.
“Cleaning for lower tray jams: paper-feed rollers”
on page 72.
“Cleaning for ink smears and jams: paper-feed
rollers” on page 64.
rollers” on page 64.
Advanced Features and Troubleshooting Manual
9922-29
57
Page 68

4
Troubleshooting
Light stripes on prints
If prints have narrow, lengthwise stripes that are faded or the wrong color, or prints
have missing colors, run the automatic printhead-cleaning sequence from the
printer’s front panel.
1.
When the Ready to Print message appears, scroll to Menu; press
Select.
2.
Scroll to Troubleshooting; press Select.
9103-01
3.
Scroll to Eliminate Light Stripes; press Select.
4.
A series of front panel messages indicate the condition of the printer as it
progresses through a sequence of automatic cleaning routines. The printer
outputs a Cleaning Page (see page 60) at the end of the cleaning sequence
that you may discard as normal office waste.
5.
To confirm that the problem has been corrected, print a Test Page from the
Troubleshooting menu. Check for any missing color bars on the Test
Page. The following illustration shows a correct Test Page with black (1),
cyan (2), magenta (3), and yellow (4). Also shown is an example of a Test
Page with a missing color bar in the magenta.
58
Phaser 840 Color Printer
Page 69

Troubleshooting
678910111213
6 7 8 1011 1213
4
1
2
3
4
1234 678910111213141516171819202122232425262728293031323334353637383940414243444546474849505152535455565758596061626364656667686970717273747576777879808182838485868788
5
12345678910111213141516171819202122232425262728293031323334353637383940414243444546474849505152535455565758596061626364656667686970717273747576777879808182838485868788
12345678910111213141516171819202122232425262728293031323334353637383940414243444546474849505152535455565758596061626364656667686970717273747576777879808182838485868788
12345678910111213141516171819202122232425262728293031323334353637383940414243444546474849505152535455565758596061626364656667686970717273747576777879808182838485868788
1234 678910111213141516171819202122232425262728293031323334353637383940414243444546474849505152535455565758596061626364656667686970717273747576777879808182838485868788
5
12345678910111213141516171819202122232425262728293031323334353637383940414243444546474849505152535455565758596061626364656667686970717273747576777879808182838485868788
123456 7 8 10 11 1213 1415 1617 18 1920 2122 23 2425 2627 28 2930 3132 3334 35 3637 3839 40 4142 4344 4546 47 4849 5051 52 5354 5556 57 5859 6061 6263 64 6566 6768 69 7071 7273 74 7576 7778 7980 81 8283 8485 86 8788
12345678910111213141516171819202122232425262728293031323334353637383940414243444546474849505152535455565758596061626364656667686970717273747576777879808182838485868788
6.
If one or more of the color bars are still missing or are light, repeat the
cleaning sequence.
N O T E
The second cleaning sequence implements a more extensive cleaning of the
printer, which may take longer for the printer to execute than the previous cleaning.
7.
Return the printer to normal operation by scrolling to Exit and pressing
Select. The Ready to Print message appears when the printer is
returned to normal operation.
8.
If your prints still have color stripe problems after the second cleaning
sequence, turn the printer off for at least 4 hours to allow the ink to solidify.
When the printer is turned back on, it will perform a self-cleaning routine
that may resolve the problem.
9103-02
9.
If your prints still have color stripe problems, service may be required.
Advanced Features and Troubleshooting Manual
59
Page 70

4
Troubleshooting
The Cleaning Page
The Cleaning Page, a page with a series of narrow, colored stripes, is output each
time the printhead is cleaned. This occurs at the following times:
■ When you run the cleaning procedure to eliminate light stripes in your
prints. Refer to “Light stripes on prints” on page 58 for more information.
■ During the printer’s warming-up routine.
■ After emerging from Energy Star standby mode.
1
Red
2
Green
1234
3
Blue
Phaser® 840 Cleaning Page
This page prints to maintain optimal print quality.
4
Black
9103-03
Selecting the Cleaning Page source
The default source for the Cleaning Page or other paper that the printer uses in its
cleaning procedures is the lower tray. When one or two High-Capacity Paper Tray
Assemblies are installed, you can ensure that the printer always uses paper from the
lower or middle paper tray in its self-cleaning procedures by changing a setting in
the printer’s front panel as follows:
1.
When the Ready to Print message is displayed, scroll to Menu and press
Select.
2.
Scroll to Printer Configuration; press Select.
3.
Scroll to Default Printer Settings; press Select.
4.
Scroll to Advanced Printer Settings; press Select.
5.
Scroll to Cleaning Page Source; press Select and choose the desired tray.
6.
Scroll to Exit; press Select to return the printer to the Ready to Print
message.
You can also change the default through PhaserLink Printer Management software if
you are connected to a network via TCP/IP. Simply enter your printer’s IP address
in a standard web browser. Refer to the PhaserShare Networking Manual for details.
60
Phaser 840 Color Printer
Page 71

Cleaning supplies
Your printer is shipped with a cleaning kit that contains the following supplies:
1.
2.
Foam-tipped swabs
Presoaked alcohol wipes
Troubleshooting
4
Using isopropyl alcohol
If you purchase isopropyl alcohol, always use alcohol that is at least 90% pure;
alcohol that has additives can damage the printer.
W A R N I N
Alcohol is flammable; keep alcohol-soaked wipes and swabs away from hot
surfaces.
1
G
2
9103-04
Advanced Features and Troubleshooting Manual
61
Page 72

4
Troubleshooting
Cleaning for oily streaks
If your prints show oily streaks, you can clean the wiper blade that is located inside
the maintenance drawer (A).
1.
Open the front cover and remove the maintenance drawer (A).
2.
Use a lint-free wipe to gently wipe any excess debris from the clear plastic
wiper blade.
9103-09
3.
Reinsert the maintenance drawer into the printer.
0379-08
62
Phaser 840 Color Printer
Page 73

Cleaning for ink smears and jams: internal paper path
Clean the printer’s internal paper path surfaces if your prints have stray ink marks
on the front or the back.
9103-06
C A U T I O N
Always use clean sheets of paper to clean the paper path. Do not reuse cleaning
sheets. High-grade, heavier papers, such as 120 g/m
2
Troubleshooting
(32 lb.) bond, work best.
4
1.
Load high-grade paper into the printer and make sure that the tray’s media
selector switch is set to
upper media tray, load that tray and set the media selection switch to
If you have installed one or two High-Capacity Paper Tray Assemblies,
load either the upper tray or the lower tray. The lower tray is the default; if
you use the upper or middle paper tray, make sure that the printer’s
default has been set. Refer to “The Cleaning Page” on page 60 for details.
2.
When the printer is on and the Ready to Print message appears in the
front panel, scroll to Menu; press Select.
3.
Scroll to Troubleshooting; press Select.
4.
Scroll to Remove Ink Smears; press Select.
5.
After a short delay during the warm-up period, the printer begins an
automatic sequence of feeding several clean sheets of paper from the media
tray selected as the cleaning page source.
Paper
. If your printer is configured with just the
N O T E
For printers with Plus Features: The last few sheets are fed through the
duplex paper path.
6.
When the cleaning sequence is complete, inspect the last sheet of paper fed
through the printer. If it is not clean, repeat the cleaning sequence.
7.
Scroll to Exit; press Select. After a warm-up cycle, the printer returns to
normal operation.
Paper
.
If the ink smear problem persists: Refer to the following two procedures for directions
on cleaning paper-feed rollers and the paper-exit path.
Advanced Features and Troubleshooting Manual
63
Page 74

4
Troubleshooting
Cleaning for ink smears and jams: paper-feed rollers
The paper-feed rollers carry the print media from the media tray and manual feed
slot through the printer. Occasionally, stray ink particles become attached to the
paper-feed rollers, creating slick roller surfaces that cause media to feed improperly.
Clean the paper-feed rollers if either of the following conditions exist:
■ Media consistently jams behind the front cover or at the manual feed slot.
■ Ink smear problems persist after you have performed the “Cleaning for ink
smears and jams: internal paper path” procedure.
9103-07
C A U T I O N
Hot surfaces exist behind the middle paper-feed rollers. To avoid personal injury
during cleaning procedures, do not reach in behind these rollers.
1.
Open the front cover.
9103-08
2.
Remove the maintenance drawer (A) from the printer.
64
9103-09
Phaser 840 Color Printer
Page 75

Troubleshooting
3.
The upper paper-feed rollers are located above the slot for the maintenance
drawer (A). To clean these rollers:
a.
Use a prepackaged alcohol-soaked wipe.
b.
Place the cleaning wipe against each upper rubber roller, pressing to
create pressure against the roller.
c.
Use the thumbwheel to turn the upper rollers. The upper rubber
rollers should rotate four or five complete revolutions for each roller
segment to ensure proper cleaning. Scrub each roller thoroughly. If the
wipe becomes dirty, discard it and use another.
4
4.
To clean the middle rubber feed roller behind metal plate:
a.
Use a prepackaged alcohol-soaked wipe. Place the cleaning wipe
against the underside of each middle roller.
b.
Manually rotate the middle roller.
c.
Scrub each roller thoroughly. If the wipe becomes dirty, discard it
and use another.
c
9103-10
Advanced Features and Troubleshooting Manual
9103-11
65
Page 76

4
Troubleshooting
5.
The lower paper-feed rollers are located below the maintenance
drawer (A): one set of rollers is black rubber; the other set is white plastic.
To clean the lower rollers:
a.
Use a prepackaged alcohol-soaked wipe. Place and hold the cleaning
wipe on top of the white and black rollers.
b.
Use the thumbwheel to turn the rollers. Rotate the rollers four or five
complete revolutions for each roller segment to ensure proper cleaning.
c.
Scrub each roller thoroughly until clean. If the wipe becomes dirty,
discard it and use another.
6.
Put the maintenance drawer (A) back into the printer.
7.
Close the front cover.
9103-12
66
Phaser 840 Color Printer
Page 77

Cleaning for ink smears: paper-exit path
If you have already performed the other “Cleaning for ink smears” procedures
described earlier in this chapter but problems persist, you should manually clean the
paper-exit path. Refer also to “Cleaning for ink smears and jams: paper-feed rollers”
on page 64.
Occasionally, stray ink particles and oil become attached to the exit fingers, rollers,
and guides under the exit cover causing ink streaks or marks on the top edge, front,
or back of prints. When this occurs, you must clean these parts using both dry swabs
and alcohol-soaked wipes.
Sample ink smear: paper-exit path
Troubleshooting
4
9103-13
1.
Open the exit cover.
2.
Clean excess ink particles and oil from the blue exit fingers by gently
wiping the top surface of each finger using a dry swab.
90%
Isopropyl
alcohol
9103-14
C A U T I O N
To avoid damaging the print drum and exit fingers, never scrape excess ink with a
tool or fingernail; use a dry swab provided with the cleaning kit.
Advanced Features and Troubleshooting Manual
67
Page 78

4
4
Troubleshooting
3.
To clean the rubber exit rollers:
a.
Wrap an alcohol-soaked wipe around the index finger of one hand.
b.
Press your wipe-covered finger against each roller.
c.
Use the thumbwheel to turn the rollers. Rotate the rollers four or five
complete revolutions for each roller segment to ensure proper cleaning.
N O T E
You may notice some staining of the exit rollers while performing the cleaning
procedure; this is normal and does not indicate additional cleaning is necessary.
Simply clean rollers to remove any build-up of ink.
4.
To clean the two sets of ribbed exit guides under the exit cover, gently wipe
the raised ribs using an alcohol-soaked wipe.
9103-17
C A U T I O N
To avoid damaging the print drum and exit guide, never scrape excess ink with a
tool or fingernail; use only the materials provided with the cleaning kit.
9103-15
5.
Close the exit cover.
68
Phaser 840 Color Printer
Page 79

Cleaning for media tray jams
If the printer incorrectly feeds paper or transparencies, or feeds more than one sheet
at a time from the media tray, you can correct the problem by cleaning the
media-pick roller and separator pad.
Cleaning the media-pick roller
1.
Remove the media tray from the printer.
2.
Open the front cover.
Troubleshooting
4
C A U T I O N
Hot surfaces exist behind the upper paper-feed rollers. To avoid personal injury
during cleaning procedures, do not reach in behind the paper-feed rollers.
3.
Remove the maintenance drawer (A) from the printer.
9103-09
9103-18
Advanced Features and Troubleshooting Manual
69
Page 80

4
Troubleshooting
4.
To clean the top surface of the media-pick roller:
a.
Locate the top of the media-pick roller behind the black rubber
paper-path rollers.
b.
Use a prepackaged alcohol-soaked cloth.
c.
Scrub the top surface of the media-pick roller thoroughly. If the wipe
becomes dirty, discard it and use another.
5.
Replace the maintenance drawer (A) in the printer.
6.
Close the front cover.
9103-20
70
Phaser 840 Color Printer
Page 81

7.
To clean the bottom of the media-pick roller:
a.
Use a prepackaged alcohol-soaked cloth.
b.
Reach into the media tray slot to access the pick roller.
Scrub the bottom surface of the pick roller thoroughly.
Troubleshooting
9103-21
4
8.
Replace the upper media tray in the printer.
Cleaning the separator pad
1.
Remove the upper media tray from the printer.
2.
Gently wipe the separator pad using an alcohol-soaked cloth.
9103-63
3.
Inspect the separator pad for damage to the metal edge; it should be free of
dents and lie flat against the rubber surface. If any damage is seen, the
separator pad should be replaced.
4.
Replace the upper media tray in the printer.
Advanced Features and Troubleshooting Manual
71
Page 82

4
Troubleshooting
Cleaning for lower tray jams: paper-feed rollers
If the printer feeds paper incorrectly or feeds more than one sheet at a time from the
High-Capacity Paper Tray Assembly, you can generally correct the problem by
cleaning the paper-feed rollers.
1.
Remove the paper tray from the High-Capacity Paper Tray Assembly. If
your printer has two assemblies, remove the tray from each one. The two
paper-feed rollers for each assembly are visible when each tray is removed.
2.
Using an alcohol-soaked cloth, scrub the rollers thoroughly. Rotate the
roller several times to ensure proper cleaning.
9103-22
3.
Replace the paper tray in the High-Capacity Paper Tray Assembly.
72
Phaser 840 Color Printer
Page 83

Chapter
5
Printer Management
PhaserLink Printer Management software
PhaserLink Printer Management software is a printer management tool that uses
World Wide Web technology to provide printer information and functionality:
■ Job status
■ Job accounting
■ Printer usage
■ Routine troubleshooting
■ Configuration of printer settings
PhaserLink requires a TCP/IP connection. To access PhaserLink information, enter
your printer’s IP address in a web browser. The PhaserLink interface appears on
your computer’s screen.
9103-41
For detailed information on PhaserLink Printer Management software, refer to
“PhaserLink Printer Management software: The Printer’s Information Link” on the
printer’s CD-ROM or web site. Or enter this address in your web browser:
www.tektronix.com/Color_Printers/products/phaserlink.html
Advanced Features and Troubleshooting Manual
73
Page 84

5
Printer Management
Usage Profile
Usage Profile provides a proactive strategy for service, maintenance, and
administration of your printer. You can keep track of most printer parameters in
more detail than even PhaserLink provides.
Information in the Usage Profile Report includes:
■ Remaining life of consumables
■ Paper versus transparency usage
■ Percent coverage by job or printer history
■ Number and location of media jams
■ Media tray usage
■ Number of pages printed
Usage Profile
Phaser®840 Color Printer
9103-39
74
Phaser 840 Color Printer
Page 85

Printer Management
Print the Usage Profile report from your printer’s front panel:
1.
In the front panel, scroll to Menu; press Select.
2.
Scroll to Consumable Usage; press Select.
3.
Scroll to Print Usage Profile; press Select.
In addition, you can easily arrange electronic mail notification so that your system
administrator or supplies ordering agent receives timely information on error
conditions or supplies status. This feature allows you to predict consumables
ordering for remote locations. These types of error conditions are reported:
■
For the designated operator, system administrator or service provider
■ Ink low
■ Ink out
■ Maintenance Kit low
■ Maintenance Kit out
■ Empty media tray
5
■
For the system administrator
■ Printer configuration
■
For the service provider
■ Error conditions requiring hardware service repair
For detailed information about the Usage Profile report, refer to
Printer Management on the printer’s CD-ROM or web site.
Advanced Features and Troubleshooting Manual
75
Page 86

5
Printer Management
Enabling and disabling the Startup Page
By default, the printer produces a Startup Page each time the printer is turned on or
reset. If desired, you can disable the Startup Page. There are three methods for
enabling/disabling the Startup Page:
From PhaserLink Printer Management software
Refer to the PhaserShare Networking Manual for information on using your World
Wide Web browser to access the printer via a TCP/IP network connection.
From utility files
Download one of the following files from the printer’s CD-ROM:
■
Macintosh
■
PC
refer to page 96 for downloading instructions.
From the printer’s front panel
Scroll to Menu; press Select.
1.
2.
Scroll to Printer Configuration; press Select.
3.
Scroll to Default Printer Settings; press Select.
4.
Scroll to Startup Page; press Select to toggle the setting.
Use the Apple Printer Utility (refer to page 93 for instructions).
Use utility files STARTPG.PS (enables), NOSTRTPG.PS (disables);
5.
Scroll to Exit; press Select.
76
Phaser 840 Color Printer
Page 87

Changing the Energy Star timeout
■ When the printer is idle for the time set in the Energy Star front panel
menu, the printer begins a cool-down cycle that requires a 15 minute
warm-up period before being ready to use again.
■ The default for the Energy Star timeout is set to 999 hours.
■ For optimum printing performance and best ink economy, leave the printer
turned on overnight and during weekends, and leave the Energy Start
default set.
To change the timeout value:
1.
From the front panel, scroll to Menu; press Select.
2.
Scroll to Printer Configuration; press Select.
3.
Scroll to Default Printer Settings; press Select.
4.
Scroll to Advanced Printer Settings; press Select.
5.
Scroll to Energy Star Timeout; press Select.
Printer Management
5
6.
Use the up or down arrows to set the number of hours the printer must be
idle before it enters Energy Star mode.
7.
Press Select to save the Energy Star setting.
8.
Scroll to Exit, press Select to return to the Ready to Print message.
Advanced Features and Troubleshooting Manual
77
Page 88

5
Printer Management
Protected mode for the front panel menu
System administrators can control user access to the front panel menus with
PhaserLink or the following utility files (refer to page 93 for instructions on
dowloading utility files):
Macintosh utility files:
■ Menu Short (limits menu access)
■ Menu Long (expands menus)
PC utility files:
■ MENUSHRT.PS (limits menu access)
■ MENULONG.PS (expands menus)
The “short” utility files limit the menu items displayed on the front panel,
preventing users from changing front panel settings that may affect the prints of
other users. Users instead select printing features — such as color corrections —
through their applications only. In the protected mode, users can access all menus
except the Default Printer Settings, Advanced Printer Settings, and
Network Settings.
The “long” utility files reset the front panel to display full menus and allow full
access to the settings.
Job Accounting
If you used the Menu Short or MENUSHRT.PS file to limit the front panel menus, you
can temporarily restore the full menus:
1.
When the Ready to Print message appears, scroll to Menu; press
Select.
2.
Scroll to Printer Configuration; press Select.
3.
Hold down the Left arrow and press Select. The Default Printer
Settings and Network Settings selections are added to the menu and
are removed again when the Printer Configuration menu is closed.
The printer stores a log file containing information about jobs printed. The file is a
list of job accounting records. Each record contains fields such as user name, job
name, pages printed, job times, and ink used. Job accounting is available through
the PhaserShare Administrator and PhaserLink Printer Management software.
For more information on Job Accounting, see the PhaserShare Networking Manual on
the printer’s CD-ROM or web site.
78
Phaser 840 Color Printer
Page 89

Chapter
6
Using Color
Print-quality modes
Mode Maximum speed * Description
Fast Color 10 ppm Paper
Standard 6 ppm Paper
Enhanced
†
■ Fastest full-color output.
5 ppm Transparency
3 ppm Transparency
3 ppm Paper ■ Balance of high quality and fast
■ Useful for many images and
previewing work.
■ Rapidly produces good quality
transparencies and peer-level
documents.
■ Useful for rush jobs and situations
where having the most saturated
colors is not necessary.
■ General-purpose mode for full-color
printing.
■ Produces crisp, bright prints suitable
for most office use.
■ Recommended for high-quality
transparencies.
■ Produces vibrant, saturated prints
with smooth color transitions.
speed.
■ Smoothest and brightest large-area
fills.
■ Useful for printing paper copies of
overhead presentations.
High Resolution/ Photo†2 ppm Paper ■ Requires the Plus Feature set.
■ Highest-quality color prints,
1200 x 600 dpi resolution.
■ Near-photographic detail.
*
Approximate number of pages per minute.
†
Transparencies will be printed in Standard mode.
Advanced Features and Troubleshooting Manual
79
Page 90

6
Using Color
Color corrections
The printer provides TekColor Dynamic Correction, and consists of the following
color correction modes:
Front panel selection Driver selection
Color correction mode Description
Automatic Automatic Default setting. Automatically applies the
None None No correction made to colors.
Vivid Color Vivid Color Produces the brightest possible colors and
sRGB Display sRGB Display Closely approximates the colors on a
SWOP Press SWOP Press Specification for Web Offset Publications.
Euroscale Press Euroscale Press Used to match equivalent
Commercial Press Commercial Press Used to match commercial
SNAP Press SNAP Press Specifications for Non-Heat Advertising
DIC DIC Used to match Dai Nippon printing inks on
Toyo Toyo Used to match commercial Toyo printing inks
best color correction mode to each element
on the page.
¨
Used with the PANTONE
PANTONE
makes blue hues less purple.
standard display screen.
Used to match U.S. press standards.
Imation Matchprint¨ proofs.
Imation Matchprint¨ proofs.
Printing. Used to match standards f or printing
on uncoated and newsprint papers.
coated paper.
on coated paper.
¨
Color matching.
Color Chart for
80
FujiProof FujiProof Used to match the Fuji Color Art System for
Monochrome — Leaves gray as is; converts RGB and CMYK
— Use Printer Setting Uses the color correction mode specified in
Raw RGB
Raw CMYK
*
Available only with a downloadable utility file.
N O T
E
If your printer is on a network and you have changed the front panel settings, tell
other users on the network. The front panel printer settings affect all prints made
with non-Tektronix drivers.
Phaser 840 Color Printer
commercial North American proofs.
to pure gray.
the printer’s front panel setting rather than
any printer driver setting.
*
*
— Leaves RGB as is; converts CMYK and gray
to RGB.
— Leaves CMYK as is; converts RGB and gray
to CMYK.
Page 91

Printing the Color Sampler Charts
Overview
Color sampler charts are colored rectangles with each color’s component values;
they help you select colors in an application that can be reproduced on your printer.
Component values are percentages of each color — CMYK (Cyan, Magenta, Yellow,
Black), RGB (Red, Green, Blue), or HSB (Hue, Saturation, Brightness) — that
combine to make a particular color.
Tektronix
Process Color
Sampler
This Graphic Arts guide is
designed to help you choose
colors on the Tektronix color
printers. These reference
pages can be combined into
a wall reference chart, or
held in a reference book.
To assemble the
chart combine the
pages in this order:
Using Color
6
Copyright © 1992 Tektronix, Inc. Call 1-800-835-6100 for color printer information
R
Advanced Features and Troubleshooting Manual
9103-64
81
Page 92

6
Using Color
Color charts
■ Which color chart you print and use depends on how your application
selects color. For information on color selection, refer to the application’s
documentation, then print one or more of the color sampler charts.
■ Each color sampler chart is several pages long; print them in panels and
connect them to form a wall chart or place in a binder for easy reference.
Color sampler chart descriptions
Color sampler chart
CMYK Sampler Cyan, magenta, yellow, and
RGB Sampler Red, green, and blue color
HSB Sampler Hue, saturation, and
*
The number of pages will be half if Duplex mode is enabled on the front panel in the
black color model
model
brightness color model
Number of
pages *
18 X X
12 X X
12 X
Utility
file
Front
panel
selection
Default Printer Settings menu.
N O T
E
To print the PANTONE Color sampler chart, refer to “Printing the PANTONE Color
Chart” on page 89.
82
Phaser 840 Color Printer
Page 93

Printing a color sampler chart from the front panel
N O T
E
The HSB (Hue, Saturation, Brightness) color sampler chart and the PANTONE
Color sampler chart cannot be printed from the front panel.
Use the same color correction and print quality mode to print the chart and to print
from your application. Any other color correction selection in the driver causes
colors to print differently than expected.
Selecting a color correction file
1.
From the printer’s front panel, scroll to Menu; press Select.
2.
Scroll to Printer Configuration; press Select.
3.
Scroll to Default Printer Settings; press Select.
4.
Scroll to TekColor Correction. Use the up or down arrows to scroll to
the color correction you want.
Using Color
6
5.
Press Select to activate your selection.
6.
Scroll to Exit; press Select to return to the Ready to Print message.
Printing a color sampler chart
1.
From the printer’s front panel, scroll to Menu; press Select.
2.
Scroll to Demo Pages; press Select.
3.
Scroll to the desired color sampler, then press Select.
4.
Scroll to Exit; press Select to return to the Ready to Print message.
Advanced Features and Troubleshooting Manual
83
Page 94

6
Using Color
Printing samplers from a Macintosh
N O T
E
Use the same color correction and print quality mode to print the chart and to print
from your application. Any other color correction selection in the driver causes
colors to print differently than expected.
Installing color correction files
1.
From the printer’s CD-ROM, run the Installer application. Select Custom
Install.
2.
In the dialog box, select Printer Utilities and Samplers; click Install. Go to
the next topic, “Downloading a color correction file”.
Selecting a color correction file
Select a color correction file in one of three ways: the front panel, PhaserLink Printer
Management software, or download a PostScript utility file. Color correction files
include:
■ Automatic
■ None
■ Vivid Color
■ sRGB Display
■ SWOP Press
■ Euroscale Press
■ Commercial Press
■ SNAP Press
■ DIC
■ Toyo
■ FujiProof
■ Raw CMYK
■ Raw RGB
84
Phaser 840 Color Printer
Page 95

Downloading a color correction file
1.
From your computer’s hard disk, open the PhaserTools folder.
2.
Double-click Apple Printer Utility; a Printer Selector dialog box appears:
■ Under AppleTalk Zones, select your printer’s zone.
■ Under Printers, select your printer.
■ Click Open Printer.
3.
From the File menu, select Send PostScript File.
4.
Open the Printer Utilities folder and select a color correction file.
5.
Click Add.
6.
Click Send.
Printing a color sampler chart
1.
From your computer’s hard disk, open the PhaserTools folder.
Using Color
6
2.
Double-click Apple Printer Utility; a Printer Selector dialog box appears:
■ Under AppleTalk Zones, select your printer’s zone.
■ Under Printers, select your printer.
■ Click Open Printer.
3.
From the Utilities menu, select Send PostScript File.
4.
Open the PhaserTools folder. Open the Samplers folder; select a color
sampler chart; click Add.
5.
Click Send.
Advanced Features and Troubleshooting Manual
85
Page 96

6
Using Color
Printing samplers from a PC
N O T
E
Use the same color correction and print quality mode to print the chart and to print
from your application. Any other color correction selection in the driver causes
colors to print differently than expected.
Installing color correction files
1.
From the printer’s CD-ROM, run setup.exe. Select Custom Install.
2.
In the dialog box, select Printer Utilities, select a printer driver, select
Samplers; click Install. Go to the next topic, “Downloading a color
correction file”.
Downloading a color correction file
1.
From the computer’s hard disk, open the PHSRTOOL directory. Open the
PHSR840 subdirectory; select a color correction file:
■ AUTOMATC.PS
■ NOCORECT.PS
■ VIVDCOLR.PS
■ SRGBDSPL.PS
■ SWOPRESS.PS
■ EUROSCAL.PS
■ COMRCIAL.PS
■ SNAPRESS.PS
■ DIC.PS
■ TOYO.PS
■ FUJIPROF.PS
■ RAWCMYK.PS
■ RAWRGB.PS
2.
Send to the printer the desired color correction file:
■ PC users: Use the DOS COPY command.
■ Workstation users: Send a color correction file to the printer as you
would any PostScript file.
■ Windows NT users: Send the color correction file to the printer by
typing the following at the DOS prompt:
86
Phaser 840 Color Printer
lpr -S
<IPaddress>
-P PS
<filename>
Page 97

Printing a color sampler chart
1.
Open the PHSRTOOL directory. Open the SAMPLERS subdirectory.
2.
Send to the printer the desired color sampler chart:
■ PC users: Use the DOS COPY command.
■ Workstation users: Send the file to the printer as you would any
PostScript file.
N O T E
The name of the color correction mode used to print the color sampler will print on
the first page of the sampler.
Printing the desired color from an application
1.
Using the color sampler chart that you printed earlier, select the desired
colors.
2.
From your application, apply the desired colors in your document by
entering the specific CMYK or RGB values as indicated on the sampler
chart.
Using Color
6
3.
Print your document; select the same color correction that you used to print
the color sampler chart.
Advanced Features and Troubleshooting Manual
87
Page 98

6
Using Color
PANTONE Color Files
For the latest information on color libraries, visit the Tektronix web site at
www.tektronix.com/Color_Printers/ or contact your local Tektronix reseller.
PANTONE Color files for your printer include printer-specific color library files for
some specific applications and a file to print PANTONE Color sampler chart.
Methods of printing PANTONE Colors
PANTONE Colors from color selection books
In some applications, you can select colors from PANTONE Color selection books.
These colors can be proofed on your Phaser printer before final output on a printing
press. For this method, the printer-specific PANTONE files are not required.
1.
From an application, select and apply PANTONE Colors; use individual
color values from a PANTONE Colors selection book.
2.
Print your document; from a supported driver, select the Commercial Press
color correction. (Proof colors may not be completely accurate, but
PANTONE Colors will be printed correctly on a printing press.)
3.
When you are satisfied with the proof, the file can be separated for printing
press plates without adjustment to the file.
Printer-specific PANTONE Colors
Your printer can produce process color simulations of PANTONE Spot Colors.
1.
Print a copy of the PANTONE Color chart. Refer to “Printing the
PANTONE Color Chart” on page 89, or the “README.TXT” file included
with the printer-specific PANTONE files.
2.
Within an application, define the desired color in your document by using
the individual CMYK values which appear on the sampler chart.
N O T E
Tektronix provides custom PANTONE Color library files that can be installed
for some applications for the Phaser
3.
Print your document. For best results, use the same printer settings for
color correction and print quality, and the same type of paper that you used
to print the PANTONE Color chart.
For final output on a color printing press
For colors to be printed as a process color (no spot colors), follow these steps:
1.
Open the application.
840 printer.
88
2.
Before separating the file for printing press plates, replace the printer’s
PANTONE process Colors with standard PANTONE Colors.
Phaser 840 Color Printer
Page 99

Installing the PANTONE Color files
From the Web
1.
From the Tektronix web site, www.tektronix.com/Color_Printers/,
download the appropriate PANTONE Color file for the Phaser 840 printer.
2.
Choose a directory location, and extract the file.
3.
For installation instructions, refer to the README.TXT file located in the
directory chosen in Step 2.
From a CD-ROM
Macintosh
1.
From the printer’s CD-ROM, run the Installer application.
2.
From the Custom Install window, install the following:
■ PANTONE Color Files
■ Printer Utilities
Using Color
6
PC
1.
From the printer’s CD-ROM, run setup.exe. Select Custom Install.
2.
From the Custom Install window, install the following:
■ PANTONE Color Files
■ Printer Utilities
Printing the PANTONE Color Chart
Macintosh
Printing individual pages from Acrobat Reader
You will need to install Acrobat Reader if you want to print individual
1.
pages from the PANTONE Color chart. Insert the CD-ROM in your
computer’s drive, go to the Manuals folder, and install Acrobat Reader onto
your computer’s hard disk; follow on-screen instructions.
2.
After Acrobat Reader is installed, open the PhaserTools folder on
your computer’s hard disk. Open the Pantone Files folder. Double-click the
desired PDF file.
3.
View and print pages from the color sampler chart file. For best results,
print on paper. From a supported driver (such as LaserWriter 8), select the
appropriate print quality mode and color correction as stated in the
included README.TXT file.
N O T
E
Print only with the recommended settings; other settings cause PANTONE Colors to
print differently than expected.
Advanced Features and Troubleshooting Manual
89
Page 100

6
Using Color
Printing the entire chart
■ Use the Apple Printer Utility to download to the printer the desired
PANTONE PostScript file. This PostScript file contains necessary color
correction and print quality settings.
■ For best results and truest color:
■ Print the chart on paper that is similar to the paper that will be used on
the printing press.
■ Disable duplex printing when printing the color chart in order to
reduce the effects of color show-through.
PC
Printing individual pages from Acrobat Reader
You will need to install Acrobat Reader if you want to print individual
1.
pages from the PANTONE Color chart. Insert the CD-ROM in your
computer’s drive, go to the Manuals directory, and install Acrobat Reader
onto your computer’s hard disk; follow on-screen instructions.
2.
After Acrobat Reader is installed, open the PANTONE directory on your
computer’s hard disk. Double-click the desired PDF file.
3.
View and print pages from the color sampler chart file.
4.
From a supported driver (such as the Tektronix driver for Windows 3.1 or
the AdobePS 4 driver for Windows 95), select the appropriate print quality
mode and color correction as stated in the included README.TXT file.
N O T
E
Print only with the recommended settings; other settings cause PANTONE Colors to
print differently than expected.
90
Phaser 840 Color Printer
 Loading...