

Page 1

FS3PS90GGS/S
FS3MS90GGS/S
FS3FFS90GGS/S
FS3FFL90GGS/S
3100356
Page 2

CONTENTS
INSTALLER TECHNICAL MANUAL……………………………………………………………………………
APPLIANCE GAS CONNECTION………………………………………………………………………..
ADAPTATION TO DIFFERENT TYPES OF GAS…………………………………………………………....
BURNER ADJUSTMENT…………………………………………………………………………....
APPLIANCE ELECTRIC CONNECTION……………………………………………………….....
APPLIANCE MAINTENANCE………………………………………………………………………
REPLACING PARTS…………………………………………………………………………………………….
USE AND MAINTENANCE MANUAL………………………………………………………………
CONTROL PANEL DESCRIPTION………………………………………………………………
USING BURNERS…………………………………………………………………………………
USING HOT PLATES……………………………………………………………………………….
USING THE CERAMIC HOB……………………………………………………………………….
TYPE OF PAN…………………………………………………………………………………………………….
USING THE INDUCTION HOB…………………………………………………………………………………..
HOB CONTROL KNOB…………………………………………………………………………………………
HOB………………………………………………………………………………………………………………….
TYPES OF PANS……………………………………………………………………………………………………………
USING THE GAS OVEN (SINGLE CONTROL) …………………………………………………..
USING THE GAS OVEN FOR MODEL WITH DOUBLE CONTROLS………………………..
USING THE CHANGE-OVER SWITCH …………………………………………………….
USING THE ELECTRIC THERMOSTAT ( WITH A MULTIFUNCTION VEN)………………….
USING THE MULTIFUNCTION OVEN ……………………………………………………………..
USING THE NATURAL CONVENTIONAL ELECTRIC OVEN ………………………………..
USING THE VENTILATED ELECTRIC OVEN …………………………………………………………
USING THE GAS GRILL (SINGLE CONTROL) …………………………………………………..
USING THE GAS GRILL FOR MODEL WITH DOUBLE CONTROLS ………………………..
USING THE CONVENTIONAL ELECTRIC GRILL……………………………………………...
USING THE VENTILATED ELECTRIC GRILL ……………………………………………………
USING THE MINUTE-MINDER……………………………………………………………………..
USING THE END OF COOKING TIMER…………………………………………………………..
USING THE DIGITAL CLOCK …………………………………………………………………….
USING THE TOUCH CLOCK ………………………………………………………………………..
USING THE ANALOG CLOCK……………………………………………………………………..
USING THE 3 KEYS ELECTRONIC PROGRAMMER …………………………………………..
ELECTRONIC TIMER PROGRAMMER …………………………………………………………..
USING THE THERMOMETER …………………………………………………………………….
USING THE SELF-CLEANING OVEN………………………………………………………………
CLEANING THE APPLIANCE………………………………………………………………………
AFTER-SALES TECHNICAL SERVICE AND SPARE ARTS…………………………………….
pg
pg
pg
pg
pg
pg
pg
pg
pg
pg
pg
pg
pg
pg
pg
pg
pg
pg
pg
pg
pg
pg
pg
pg
pg
pg
pg
pg
pg
pg
pg
pg
pg
pg
pg
pg
pg
pg
3
3
4
4
5
5
6
6
6
7
7
8
8
8
9
9
10
10
11
11
11
13
13
13
13
14
14
14
14
14
15
15
15
17
17
18
18
18
2
Page 3
INSTALLATION, MAINTENANCE AND USE INSTRUCTIONS FOR
FREE-STANDING COOKERS 90x60 cm GIANT OVEN
READ THE INSTRUCTION BOOKLET BEFORE INSTALLING AND USING THE APPLIANCE.
The manufacturer will not be responsible for any damage to property or to persons caused by incorrect installation or
improper use of the appliance.
The manufacturer is not responsible for any inaccuracies, due to printing or transcription errors, contained in this booklet. In
addition, the appearance of the figures reported is also purely indicative.
The manufacturer reserves the right to make changes to its products when considered necessary and useful, without affecting
the essential safety and operating characteristics.
THIS APPLIANCE HAS BEEN DESIGNED FOR NON-PROFESSIONAL DOMESTIC USE.
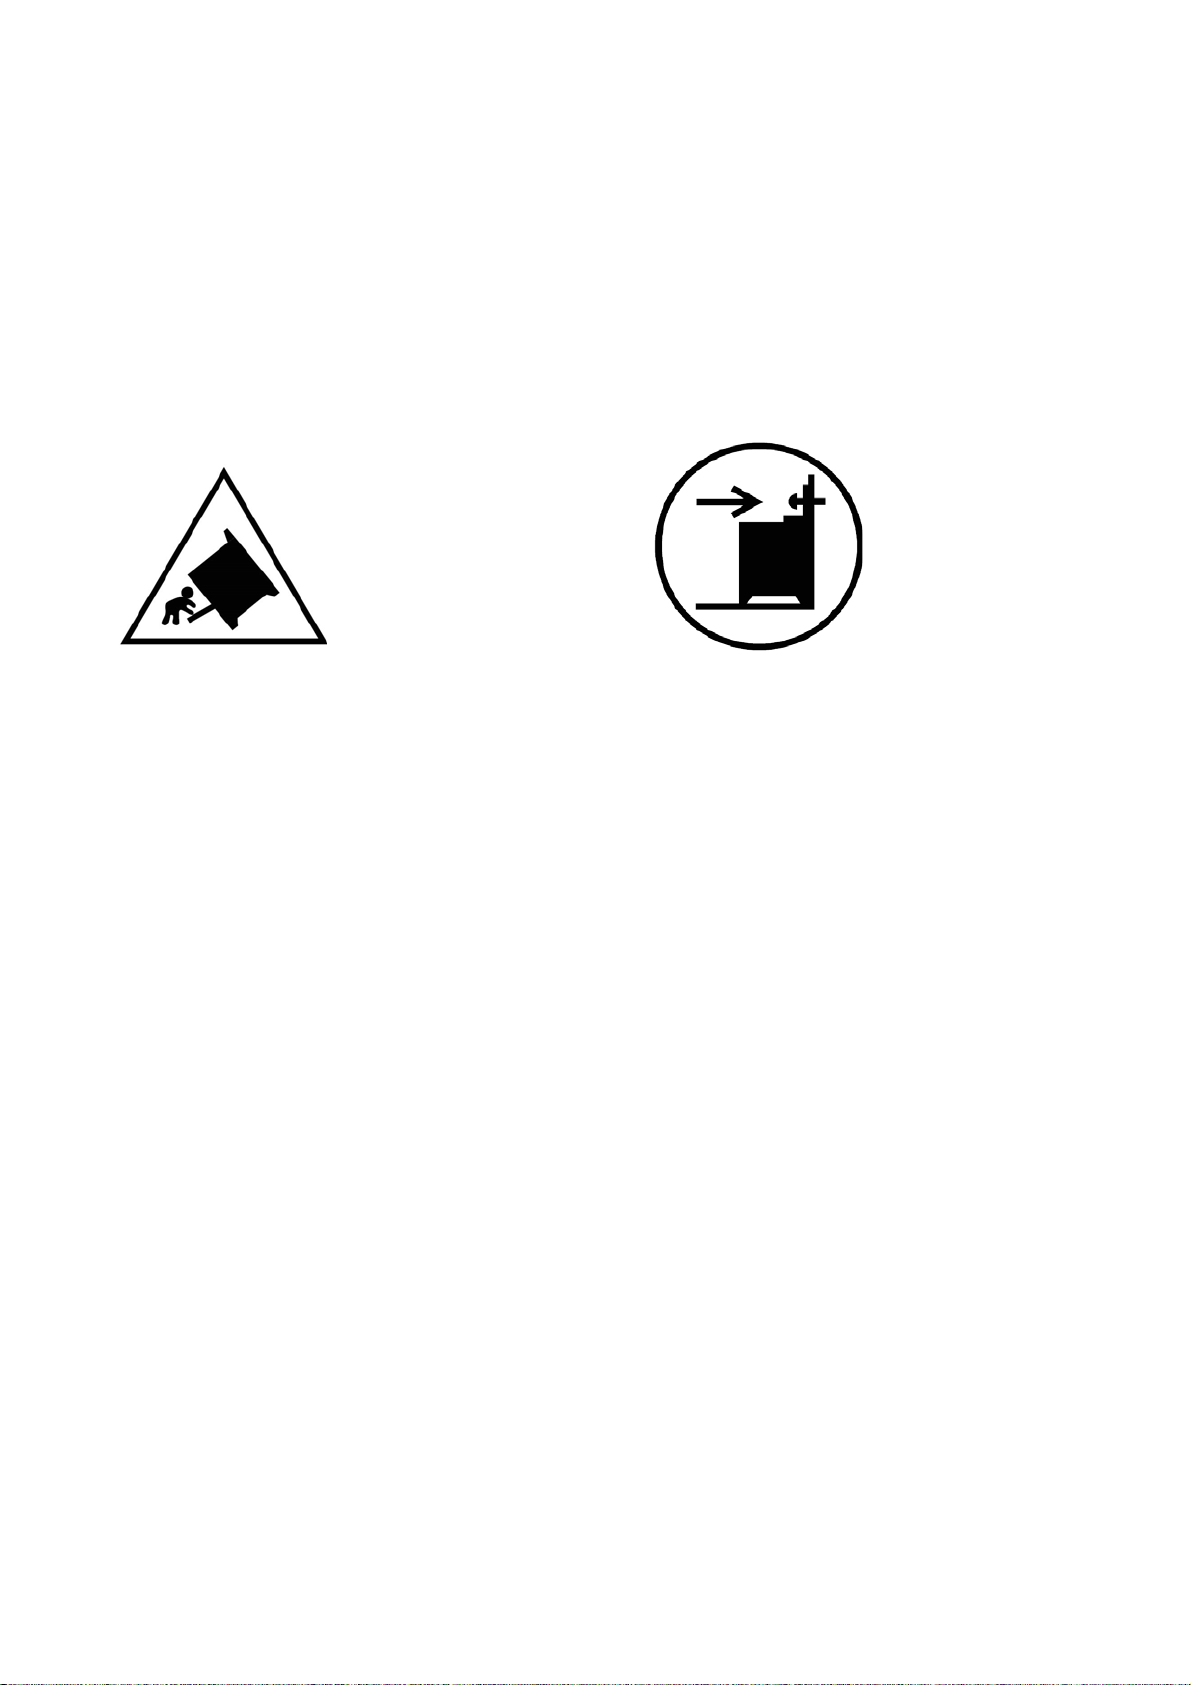
INSTALLING THE SYSTEM TO PREVENT TILTING OF THE APPLIANCE
Caution, possibility of tilting Anti-tip restraints
To prevent the appliance from accidentally tilting, the anti-tip restraints device provided with the appliance must be installed.
Installation instruction are included in the anti-tip restraints device kit supplied.
INSTALLER TECHNICAL MANUAL
APPLIANCE GAS CONNECTION
Before connecting the appliance to the gas network, make sure that the data on the label attached to the food warmer
drawer or on the back of the cooker are compatible with what is indicated for the gas distribution network.
A label attached to the last page of this handbook and in the food warmer drawer (or on the back) of the appliance
indicates the appliance adjustment conditions: type of gas and operating pressure.
IMPORTANT: This appliance must be installed in compliance with current national standards in force and used only in
a well-ventilated room.
WARNING: It should be recalled that the appliance utilises a threaded 1/2" gas cylindrical male fitting according to UNIISO 228-1.
To connect the appliance to the gas network with a flexible rubber hose, a supplemental hose nipple fitting is needed
(see Fig. 1) which is supplied with the appliance.
ADAPTATION TO DIFFERENT TYPES OF GAS
Before performing any maintenance operation, disconnect the appliance from the gas supply and electricity network.
REPLACING THE NOZZLES TO OPERATE WITH ANOTHER TYPE OF GAS:
Follow the instructions below to change the burner nozzles on the work surface:
1) Pull out the plug from the electric outlet to avoid any type of electric contact.
2) Remove the grids from the work surface (Fig. 2).
3) Remove the burners (Fig. 2).
4) Unscrew the nozzles using a 7 mm spanner, and replace them (Fig. 3) with those needed for the new type of gas according
to what is indicated in Table 1.
Follow the instructions below to change the oven burner nozzle:
1) Remove the oven level (Fig. 4-5).
2) Loosen the screw V and pull out the burner from the support being careful not to damage the ignition plug and the
thermocouple (Fig. 6).
3) Unscrew the nozzle R (Fig. 6) using a 7 mm spanner and replace it with the nozzle needed for the new type of gas according
to what is indicated in Table 2 or in Table 3.
Follow the instructions below to change the grill burner nozzle:
1) Loosen the screw at the end of the grill burner and pull out the burner from the support being careful not to damage the
ignition plug and the thermocouple (Fig. 7).
2) Unscrew the nozzle R (Fig. 7) using a 7 mm spanner and replace it with the nozzle needed for the new type of gas according
to what is indicated in Table 2 or in Table 3.
WARNING: After completing the above-mentioned replacements, the technician must adjust the burners, as described
in the paragraph below, seal any adjustment and pre-adjustment devices and apply the label on the
appliance, to replace the existing one, corresponding to the new gas adjustment. This label is contained in
the spare nozzle bag.
3
Page 4

Table 1
Burner Types of gas Pressure Nozzle diameter Rater capacity
mbar 1/100 mm. g/h l/h kW kcal/h
Auxiliary Natural G20 20 72 - 95 1 860
Butane G30 28-30 50 73 - 1 860
Propane G31 37 50 71 - 1 860
Semi-rapid Natural G20 20 97 - 167 1,75 1505
Butane G30 28-30 65 127 - 1,75 1505
Propane G31 37 65 125 - 1,75 1505
Rapid Natural G20 20 115 - 286 3 2580
Butane G30 28-30 85 218 - 3 2580
Propane G31 37 85 214 - 3 2580
Ultra rapid Natural G20 20 153 - 405 4,25 3655
4 kW Butane G30 28-30 102 309 - 4,25 3655
Propane G31 37 102 303 - 4,25 3655
Natural G20 20 ext. 155
Ultra rapid
Dual 5 kW
Propane G31
Table 2 (model with gas oven and gas grill with double controls)
Oven Natural G20 20 155 - 429 4,50 3870
Butane G30 28-30 105 327 - 4,50 3870
Propane G31 37 105 321 - 4,50 3870
Grill Natural G20 20 108 - 191 2 1720
Butane G30 28-30 72 145 - 2 1720
Propane G31 37 72 143 - 2 1720
Table 3 (model with gas oven and gas grill with single control, or gas oven and electric grill)
Oven Natural G20 20 155 - 429 4,50 3870
Butane G30 28-30 105 327 - 4,50 3870
Propane G31 37 105 321 - 4,50 3870
Grill Natural G20 20 108 - 191 2 1720
Butane G30 28-30 72 145 - 2 1720
Propane G31 37 72 143 - 2 1720
Butane G30
28-30 ext. 96
37 ext. 96
int. 70
int. 46
int. 46
-
-
334 -
328 -
476
-
-
5
-
4,60 3956
4,60 3956
4300
BURNER ADJUSTMENT
1) Burner "MINIMUM" adjustment:
Work surface burner adjustment: follow the instructions below to adjust the work surface burner minimum:
1) Light the burner and set the knob to the MINIMUM position (small flame).
2) Remove the knob of the valve that is press fit on the rod of that valve.
3) If the cooker is not equipped with safety valves on the surface burners, insert a small slotted screwdriver into the hole on the
valve rod (Fig. 8) and turn the choke screw to the right or left until the burner flame is adjusted to minimum. If the cooker is
equipped with safety valves, the choke valve is not located in the rod hole, but on the valve body (see fig. 9).
4)For the gas valve of dual burner the choke valve is located on the valve body (fig.10), the A screw adjust the outer ring,
the B screw adjust the inner ring.
5) Make sure that the flame does not go out when switching quickly from the MAXIMUM to the MINIMUM position.
Oven burner adjustment: follow the instructions below to adjust the minimum:
1) Light the burner setting the knob to the MAXIMUM position.
2) Close the oven door and operate the oven for at least 10 minutes.
3) Set the knob to the MINIMUM position (corresponding to 120°) and then remove it.
4) With a slotted screwdriver turn the choking screw (see figure 11) and, while observing the flame at the same time through the
cooker porthole, evaluate the consistency of the flame so it remains on when switching quickly from the MINIMUM to the
MAXIMUM position.
Grill burner adjustment: follow the instructions below to adjust the minimum:
1) Light the burner setting the knob to the MAXIMUM position.
2) Close the oven door and operate the oven for at least 10 minutes.
3) Set the knob to the MINIMUM position (small flame) and then remove it.
4) If the cooker is not equipped with safety valves on the surface burners, insert a small slotted screwdriver into the hole on the
valve rod (Fig. 8) and turn the choke screw to the right or left, while observing the flame at the same time through the cooker
porthole, evaluate the consistency of the flame so it remains on when switching quickly from the MINIMUM to the MAXIMUM
position. If the cooker is equipped with safety valves, the choke valve is not located in the rod hole, but on the valve body (see
figure 9).
WARNING: The above-mentioned adjustment should be made only with natural gas burners, while for those operating
with liquid gas the screw must be locked at the end in a clockwise direction.
WARNING: For the model with single control for grill and oven, the grill burner always
operates at maximum and therefore no minimum adjustment is required.
4
Page 5

APPLIANCE ELECTRIC CONNECTION:
The electric connection must comply with the current legal standards and regulations.
Before making the connection, check that:
- The system electrical rating and the current outlets are adequate for the maximum power output of the appliance (see the label
applied to the bottom of the casing).
- The outlet or the system is equipped with an efficient ground connection in accordance with the current legal standards and
regulations. The company will not be responsible for the non-compliance with these instructions.
When the connection to the power supply network is made using an outlet:
- If the power cord is supplied without a plug, apply a standard plug that is suitable for the load indicated on the label. Connect
the wires according to the diagram shown in Fig.12 and check that:
letter L (phase) = brown wire;
letter N (neutral) = blue wire;
ground symbol = green-yellow wire;
- The power cord must be positioned so that an overtemperature of 75 K will not be reached at any point.
- Do not use reductions, adapters or splitters since they might cause false contacts and lead to dangerous overheating.
When the connection is made directly to the electric network:
- Insert an omnipolar circuit-breaker between the appliance and the network which is sized for the appliance load with a
minimum opening between the contacts of 3 mm.
- Remember that the ground wire must not be interrupted by the circuit-breaker.
- As an alternative, the electric connection can also be protected by a high-sensitivity residual current circuit-breaker.
- It is highly recommended to attach the special green-yellow ground wire to an efficient ground system.
APPLIANCE MAINTENANCE
ATTENTION: IMPORTANT WARNINGS
For cookers resting on a base
ATTENTION: If the cooker rests on a base, take the measures necessary to prevent the cooker from sliding along the support
base.
For cookers with glass covers
ATTENTION: Before opening the appliance’s glass cover, carefully remove all liquid residues from the top of it.
ATTENTION: Before closing the appliance’s glass cover, make sure that the work surface has cooled.
For cookers with electric ovens
The unit becomes hot during use. Do not touch the heating elements inside the oven.
For cookers with electric ovens
ATTENTION: The accessible parts can become hot during use. Keep children away from the appliance.
For the food warmer compartment (or drop leaf in our case)
ATTENTION: The internal parts of the food warmer can become hot during use.
For glass doors
Do not use abrasive cleaning products or metal spatulas with sharp edges to clean the oven door’s glass since this could
scratch the surface and the glass could break.
Do not use steam cleaners to clean the appliance.
NOTE: various parts of the cooker heat up reaching temperatures which seem very high but which are actually fully within
safety limits. According to these limits:
1) With the oven on at 200°C for 1 hour, front accessible parts which cannot be grasped, can reach the following temperatures:
- Control panel: Tmax = Room Temperature +60°C
- Glass of the oven door: Tmax = Room temperature+60°C
- Metal part of the oven door: Tmax = Room temperature+45°C
2) With the oven on at 230°C for 1 hour, the parts which can be grasped, can reach the following temperatures:
- Plastic knobs: Tmax = Room temperature+60°C
- Metal oven door handle: Tmax = Room temperature+35°C
where the room temperature is the temperature in °C of the place where the appliance is installed.
Before performing any maintenance operation, disconnect the appliance from the gas supply and electricity network.
To replace parts such as knobs and burners, just remove them from the seats without disassembling any part of the cooker.
To replace parts such as nozzle supports, valves and electric components follow the procedure described in the burner
adjustment paragraph. To replace the valve or the gas thermostat, it is also necessary to disassemble the two rear gas train
brackets, loosening the 4 screws (2 per bracket) that attach it to the rest of the cooker and, unscrew the nuts that attach the
front burner valves to the control support, after removing all the knobs. To replace the gas or electric thermostat, also
disassemble the rear cooker guard, loosening the relative screws, to be able to pull out and reposition the thermostat bulb.
To replace the oven bulb, just unscrew the protection cap that projects out inside the oven.(fig.13)
WARNING: Before replacing the bulb, disconnect the appliance from the electric power supply.
REPLACING PARTS
5
Page 6
USE AND MAINTENANCE MANUAL
r
Oven and grill burners should not be used simultaneously
GAS BURNER DIMENSION
Dimension (mm)
Burne
Auxiliary Ø 50
Semi-rapid Ø 70
Rapid Ø 95
Ultra-rapid Ø 125
Ultra-rapid dual Ø 135
ELECTRIC HOT PLATE DIMENSION
TIPE OF PLATE DIMENSION
Electric hot plate Ø 145
Electric hot plate Ø 180
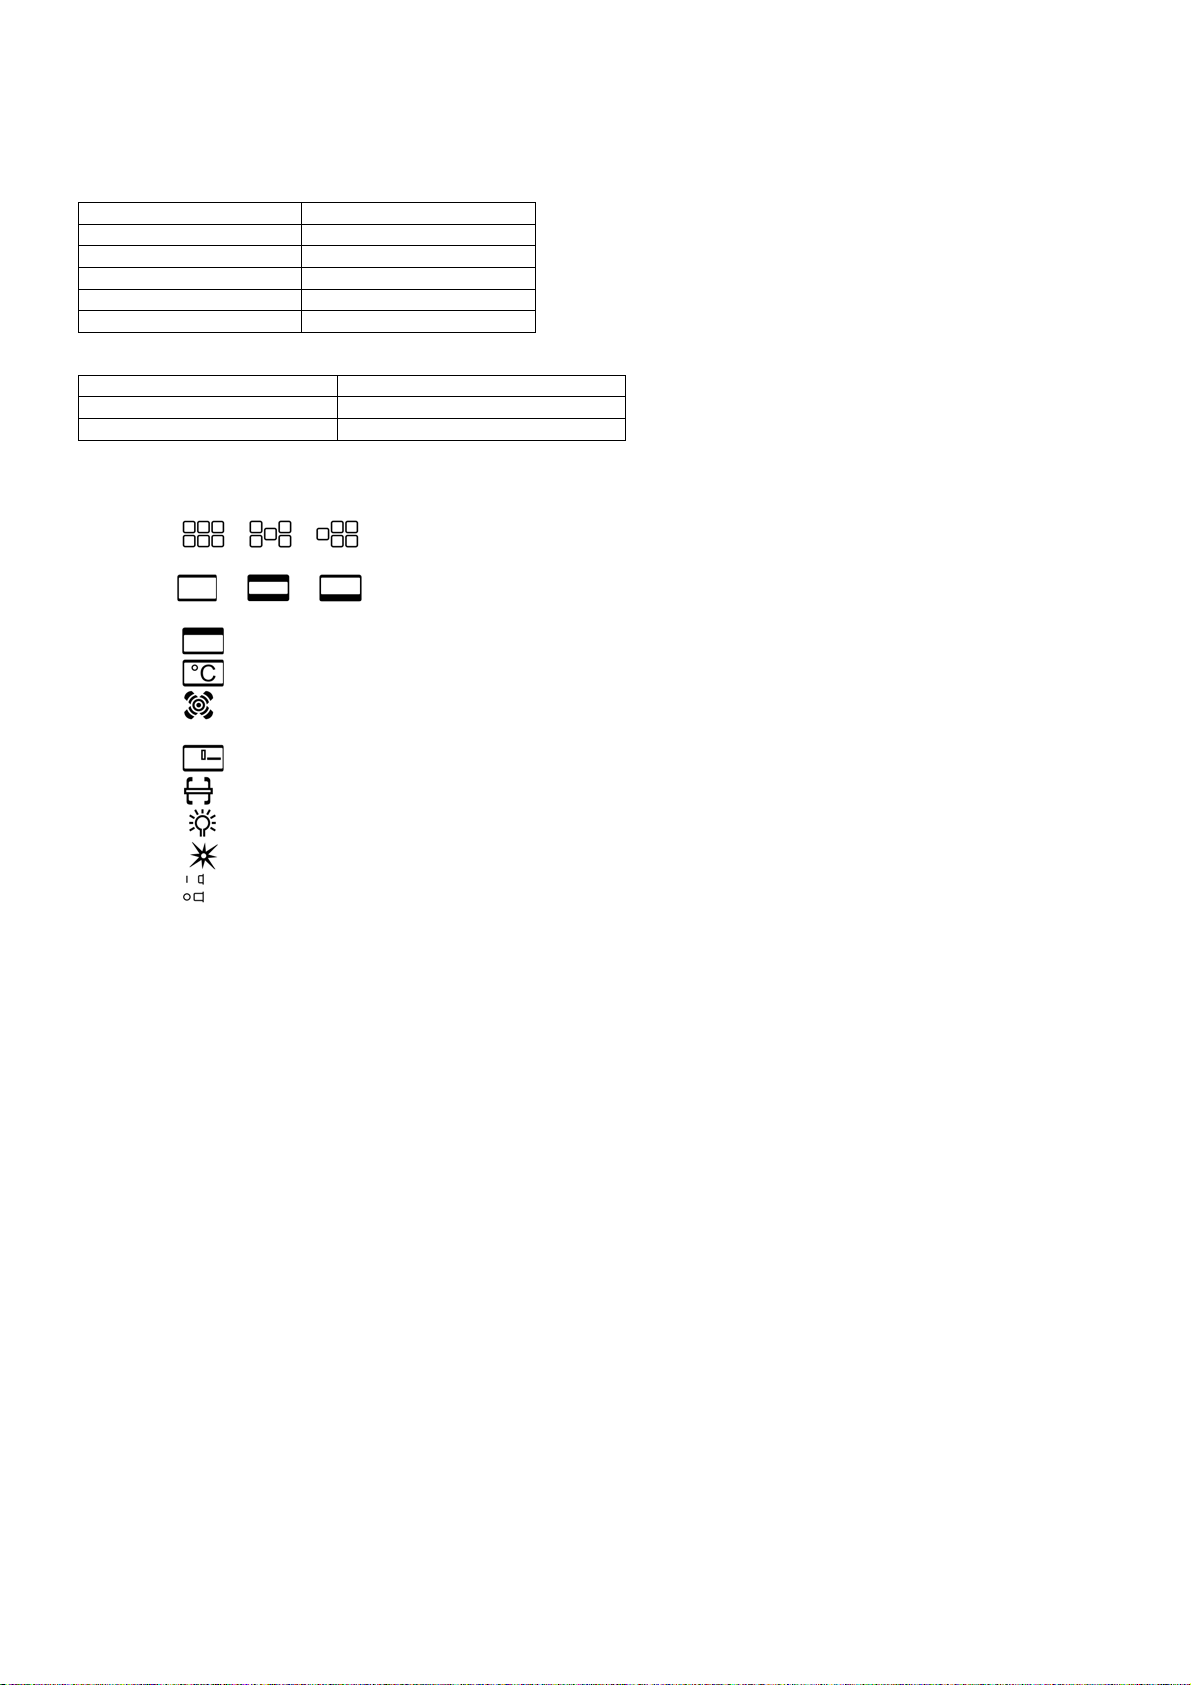
CONTROL PANEL DESCRIPTION
On the control panel, small symbols show the function of each knob or key. Here as follows are the several controls
that a cooker can have:
the symbol or or shows the disposition of burners on the worktop, the full dot identifies the burner in object (in
this case the rear burner on the right).
the symbol
electric grill and multifunction oven)
the symbol
the symbol shows the electric thermostat for electric fan oven.
the symbol shows the oven fan working button as to allow the oven to operates with fan assisted gas. The fan operation of
the oven prevents the operation of the grill, which therefore cannot be used with the fan in action.
the symbol
the symbol shows the operating key for the rotisserie (only gas oven)
the symbol shows the ignition key for the oven light (all except the electric fan oven)
the symbol shows the push-button for burner ignition
the symbol shows if keys are in position “on” or “off”
or or shows the running of any oven (2+0 switch, gas oven, gas oven with gas grill, gas oven with
shows the grill (gas grill, electric grill)
shows the minute minder
USING BURNERS
A diagram is etched on the control panel above each knob which indicates which burner corresponds to that knob. The burners
can be ignited in different ways depending on the type of appliance and its specific characteristics:
- Manual lighting (it is always possible even when the power is cut off): Turn the knob counterclockwise that corresponds
to the burner selected, setting it to the MAXIMUM position at the etched star (large flame Fig.15) and place a lit match up to the
burner.
- Electric ignition:
(large flame Fig. 15) and keep on pressing the knob in correspondence of the ignition symbol marked with a star (for cookers
equipped with ignition trough knob) or press the ignition button marked with a star and release it as soon as the burner has
ignited.
- Burner ignition equipped with safety device (thermocouple)(fig.14): Press and turn the knob counterclockwise that
corresponds to the burner selected, setting it to the MAXIMUM position at the etched star (large flame Fig. 15), press the knob
and activate one of the above-mentioned ignition devices. Once ignited, keep pressing the knob for about 10 seconds to allow
the flame to heat the thermocouple. If the burner goes out after releasing the knob, repeat the entire operation.
Note: It is recommended not to try to ignite a burner if the relative flame cap is not in the correct position.
-Use of the dual burner (fig.16)
This model controls both the central and external crown of the burner with just one valve.
To ignite the central crown press and turn the knob to the maximum delivery position 1 and hold it down until ignition: in
this position the internal flame are at maximum of the internal crown.
Turn the knob to position 2 to have the internal crown at the minimum.
Turn the knob to position 3 to have the internal crown ant the external crown at the maximum.
Turn the knob to position 4 to have the internal crown ant the external crown at the minimum.
Tips for using burners correctly:
- Use suitable pots for each burner (see tab. 5 and Fig.18).
- When the liquid is boiling, turn the knob to the MINIMUM position (small flame Fig. 15).
- Always use pots with a cover.
6
Turn the knob counterclockwise that corresponds to the burner selected, setting it to the MAXIMUM position
Page 7

TABLE N°5: Recommended pot diameters.
BURNER
Auxiliary
Semi-rapid
Rapid
Ultra-rapid
Ultra-rapid dual
Recommended POT DIAMETERS (cm.)
12 – 14
14 – 26
18 – 26
22 – 26
22 – 50
WARNING: Use flat-bottomed containers
WARNING: After cleaning, make sure head “B” and covers “A” are properly placed on their seat as figure 17A and not
off-center as in figure 17B
WARNING: If the power is cut off, the burners can be lit with matches. When cooking foods with oil and fat, which are
very flammable, the user should not leave the appliance unattended. If the appliance is equipped with a
glass cover, such a cover may break when heated. Turn off all burners before lowering the cover. Do not
use sprays near the appliance when it is being used.
When using the burners, make sure that the handles of the pots are correctly positioned. Keep children
away from the appliance. If equipped with a cover, before being closed, any food deposits should be
cleaned off the built-in surface.
NOTE: The use of a gas cooking appliance produces heat and humidity in the room where it is installed. Therefore,
proper aeration in the room is needed while ensuring that natural ventilation openings remain unobstructed.
Intensive and continuous use of the appliance may require additional aeration, for example by opening a
window, or more efficient aeration by increasing the power of the mechanical exhauster, if installed.
USING HOT PLATES
These plates are controlled by a switch with 6 settings (see Fig.19). The plates are turned on by turning the knob to the desired
position. The front panel of the appliance is etched with a mark indicating what plate corresponds to the knob. A light, which is
also installed on the control panel turns on, indicating that the plate is on.
How to use a hot plate:
When a hot plate is used for the first time or after a long period of inactivity, it is recommended to use it on position 1 for about
30 minutes to eliminate any humidity absorbed by the internal insulating material.
As example, we have included a table with the adjustments needed to ensure proper use of the hot plates.
WARNING: When a hot plate is used for the first time or after a long period of inactivity, it is necessary to use it on
position 1 for about 30 minutes to eliminate any humidity absorbed by the insulating material.
TABLE N°6
PLATE POSSIBLE COOKING METHODS
0 Plate off
1 To melt butter, chocolate, etc. - To heat small amounts of liquid
2 To heat larger quantities of liquid - To prepare creams and sauces that required extended cooking
3 To defrost foods, cook at boiling temperature
4 To cook roasts with delicate meat and fish
5 For meat roasts and steaks, for large pieces of boiled meat
6 To boil large quantities of water, for frying.
To ensure correct use, remember the following:
- Dry the bottom of the pot before placing it on the plate.
- Use pots with a flat and thick bottom (see Fig. 20).
- Never use pots that are smaller than the plate.
- Turn on the plate only after the pot has been placed on top.
- As soon as a crack appears on the surface of the hot plate, immediately turn off the appliance.
- If the appliance is equipped with a glass cover, it may break when heated.
- Turn off all the plates before closing the cover.
- After use, and to ensure good preservation, the plate should be treated with normal products for electric hot plates
that are available in the market so that the surface is always clean; this operation will prevent any corrosion (rust).
- After they are used, the plates remain hot for a long time; therefore, do not place the hands or other objects on the
plate to avoid burns.
- When using the burners, make sure that the handles of the pots are correctly positioned. Keep children away from the
appliance.
- When cooking foods with oil and fat, which are very flammable, the user should remain near the appliance.
WARNING: As soon as a crack appears on the surface of the hot plate, immediately turn off the appliance.
USING THE CERAMIC HOB
The working table has 5 cooking areas, which differ in power and diameter (Fig.21).
Positions are clearly indicated with screen-printed round areas (see description of the hobs).
The heating process comes inside these areas.
When a worktop hotplate is used for some time, the remaining surface remain hot; a red indicator in the worktop surface light
will indicate it.
To obtain best results, the bottom of the hob should be thick and flat.
The diameter of the bottom of the pot (or other container) should be as near as possible the diameter of the burner you are
using; using a smaller pot will cause waste of energy due to heat dispersion on the uncovered surface of the plate.
The hob surface and the bottom of the pot must be kept clean.
Following these recommendations will help you save energy.
7
Page 8

CERAN HOT PLATE
TIPE OF PLATE POWER
A) Ceramic electrical hot plate left front 700/1700W
B) Ceramic electrical hot plate left rear 1200W
D) Ceramic electrical hot plate right rear 1100/2200W
E) Ceramic electrical hot plate right front 1200W
C) Ceramic electrical hot plate central 1400/2200W
Residual heat
Each cooking zone is equipped with a device which warns of residual heat (H). After any cooking zone is switched off, a red
indication light may appear on the display. This warns that the cooking zone concerned is stili very hot. (Fig.22).
How to use the 5 electrical hot plate ceramic hob:
Each worktop cooking hotplate is controlled by an energy regulator switch (for 1 or 2 circuit type hotplate). These allow you
to select different power rates in continuous way from the lower position “0” (plate always “off”) to the higher position “3” (plate
always “on”; double circuit hotplates control switch (Fig. 23) allow to reach the full power rate of the related double circuit
hotplate by turning the related knob in 2
nd
circuit position for 1-2 sec. and the releasing it in pos.3 (Fig. 24).
Directions showing the hotplate and related control knob is indicated on the control panel of the appliance.
A red indication light on the worktop surface will indicate You that some worktop hotplate is turned on.
Once the boiling level has been reached, lower the temperature and let the food simmer.
Experience will guide you in understanding how long to simmer, but obviously this also depends on the food and the kind of pot
you are using. Proper use will permit you to save time and energy.
WARNING:
Under no circumstance use aluminium foil or plastic containers to hold the food while cooking on a glass-ceramic hob.
WARNING:
Do not touch the cooking area as long as the light indicating residual heat on the glass-ceramic hob, is “on”; this
indicates that the temperature in the relative area is still high.
WARNING:
Your glass-ceramic hob is thermal shock resistant and resistant to both heat and cold.
If you drop a heavy pot on your hob it will not break.
On the contrary, if a hard object, such as the salt shaker or the spice bottle strikes the edge or the corner of the hob,
the hob may break.
WARNING: never use the glass-ceramic hob as support surface.
TYPE OF PAN
The pans used for cooking must have certain minimum diameters to ensure satisfactory operation.
Pans larger than the cooking zones can also be used, but it is important to ensure that the bottom of the pan does not touch
other cooking zones, and that it is always centred over the perimeter of the cooking zone.(fig.27-28)
The pans used must not have crowned (concave or convex) bottom. (fig.29)
USING THE INDUCTION HOB
HOB CONTROL KNOB
These knobs provide control of the ceramic hob's cooking zones.
The zone it controls is shown above each knob. Turn the knob to the right to set the zone's operating power; the settings range
from a minimum of 1 to a maximum of 9. (fig. 25)
The working power is shown by a display on the hob.
Heating accelerator
Each cooking zone is equipped with a heating accelerator.
This system allows the zone to be operated at peak power for a time proportional to the heating power selected.
To start the heating accelerator, turn the knob to the left, select setting "A" and then release. The letter "A" will appear on the
display on the hob.
You now have 3 seconds to select the heating setting of your choice. Once a setting between 1 and 9 has been selected, "A"
and the chosen setting will flash in alternation on the display. '
While the heating accelerator is in operation, the heating level can be increased at any time. The "full power" time will be
modified accordingly. If the power is reduced by turning the knob anticlockwise, option "A" is automatically deactivated.
Power Function
The power function allows the user to operate each heating zone continuously at the maximum power for a time of no more than
10 minutes. This function can be used, for example, to bring a large amount of water to the boil in a hurry, or to turn up the heat
under meat.
Turn the knob clockwise and set heating level 9, then use the knob to set the "P" position and release il. "P" appears on the
corresponding zone display.
After 10 minutes, the power is reduced automatically, the knob returns to the 9 setting and the "P" disappears.
However, the power function can be turned off at any time by reducing the heating level. .
When the power function is selected for one heating zone (e.g. the left front zone), the power absorbed by the second zone (Ieft
rear zone) might be reduced to supply the maximum available energy to the first zone.
Consequently, the power function takes priority over the heating accelerator.
If a pan is removed from the cooking zone while the power function is on, the function is switched off.
Holding Function
The holding function keeps the temperature of the bottoms of pans at about 65°C. This allows foods to be kept hot with optimal
energy consumption and to be heated gently. The holding function can be kept in operation for up to 2 hours.
The holding function is and is indicated by the relevant symbols on the cooking zones.
8
Page 9

HOB
ATTENTION:
Metal items such as cutlery or lids must never be placed on the surface of the hob since they may become hot.
Cooking zones (fig.26)
The appliance is equipped with 5 cooking zones having different diameters and powers. Their positions are clearly marked by
rings, while the heating power is only released in the area shown on the ceramic hob. The 5 cooking zones are of HIGH-LlGHT
type and start to heat up a few seconds after they are switched on. The heat level of each zone can be regulated from the
minimum to the maximum setting using the knobs on the front panel.
Underneath each cooking zone there is a coil called an inductor, supplied with power by an electronic system, which generates
a variable magnetic field. When a pan is placed inside this magnetic field, the high frequency currents concentrate directly on
the bottom of the pan and produce the heat needed to cook the foods.
The 5 lights between the cooking zones come on when the temperature of one or more cooking zones exceeds 60° C.. The
lights go out when the temperature drops to below about 60° C.
Zone number: Power absorption
Normal operation: With power function:
1 1100W 1400W
2 1100W 1400W
3 1400W 2000W
4 2300W 3000W
5 2300W 3000W
Total power absorption 7400W
When the hob is used for the first time, it should be heated to its maximum temperature for long enough to bum off any oily
residues left by the manufacturing process, which might contaminate foods with unpleasant smells.
TYPES OF PANS
This type of appliance can only operate with pans of special kinds.
The bottom of the pan must be iron or steel/iron to generate the magnetic field necessary for the heating process.
Vessels made from the following materials are not suitable:
glass;
porcelain;
pottery;
steel, aluminium or copper without magnetic bottom;
To check that a pan is suitable, simply place a magnet close to its bottom:
if the magnet is attracted, the pan is suitable for induction cooking. If no magnet is to hand, put a little water in the pan, place it
on a cooking zone and switch it on. If the symbol
The pans used for cooking must have certain minimum diameters to ensure satisfactory operation.
Pans larger than the cooking zones can also be used, but it is important to ensure that the bottom of the pan does not touch
other cooking zones, and that it is always centred over the perimeter of the cooking zone.(fig.27-28).
Use only vessels specially designed for induction cooking, with thick, completely flat bottom; if these are not available, the pans
used must not have crowned (concave or convex) bottom. (fig.29)
Pan present device
Each cooking zone is equipped with a "pan present" device, which ensures that cooking cannot start unless a suitable pan is
present on the cooking zone and properly positioned.
If the user attempts to switch on the cooking zone with the pan not positioned properly or with a pan which is not of suitable
material, a few seconds after the zone is switched on the
Residual heat
Each cooking zone is equipped with a device which warns of residual heat. After any cooking zone is switched off, a flashing ‘H’
may appear on the display. This warns that the cooking zone concerned is still very hot. Cooking can be restarted while the ‘H’
is flashing; proceed as described in point "3".
Locking-out the hob
When not in use, the hob can be "Iocked out" to prevent children from accidentally switching it on.
With the cooking zones off, turn the knobs of zones 2 and 4 to the left simultaneously until 5 Ls appear on the power display and
then release the knobs.
To deactivate it, repeat the same procedure: the cooking zone displays will all show 0, indicating that the cooking zone lock-out
function has been deactivated.
Attention: Take care not to spill sugar or sweet mixtures onto the hob during cooking, or to place materials or substances which
might melt (plastic or aluminium foil) on it; if this should occur, to avoid damage to the surface, turn the heating off immediately
and clean with the scraper supplied while the cooking zone is still warm. If the ceramic hob is not cleaned immediately, residues
may form which cannot be removed once the hob has cooled.
Important!
Keep a close eye on children because they are unlikely to see the residual heat warning lights. The cooking zones are still very
hot for some time after use, even if they are switched off. Make sure that children never touch them.
WARNING: Under no circumstance use aluminium foil or plastic containers to hold the food while cooking on a glass-ceramic
hob.
WARNING: Do not touch the cooking area as long as the light indicating residual heat on the glass-ceramic hob, is “on”; this
indicates that the temperature in the relative area is still high.
appears on the display instead of the power, the pan is not suitable.
symbol will appear to warn the user that an error has been made.
9
Page 10

WARNING: Never place pan with bottoms which are not perfectly flat and smooth on the hob
WARNING: If you notice a crack in the ceramic hob, disconnect the appliance from the electricity supply and contact a service
centre.
WARNING: Your glass-ceramic hob is thermal shock resistant and resistant to both heat and cold.
If you drop a heavy pot on your hob it will not break.
On the contrary, if a hard object, such as the salt shaker or the spice bottle strikes the edge or the corner of the hob, the hob
may break.
WARNING: never use the glass-ceramic hob as support surface
USING THE GAS OVEN (SINGLE CONTROL)
GAS OVEN:
All the gas oven cookers are equipped with a thermostat and safety device to adjust the cooking temperature. The oven
temperature is set by turning the knob counterclockwise to match the indicator with the temperature selected. The gas oven can
be combined with a gas grill or an electric grill. See the specific pages for use information.
FAN GAS OVEN:
Operating the fan of the oven by means of the appropriate switch situated on the control panel, the circulation of warm air
guarantees a uniform heat distribution. The preheating of the oven can be avoided. However for delicate baking, it is preferable
to warm the oven before introducing the baking-pan. The baking system with the fan convection changes in part the various
traditional baking notions. When roasting meat it is not necessary to turn the meat any more and for a roast on the spit, it is not
indispensable to use the spit-roaster, but is sufficient to put the meat directly on the grate.
With the use of the fan gas oven, the baking temperatures are slightly lower of about 10-15°C compared to those in use with the
traditional gas oven. The fan operation of the oven prevents the operation of the grill, which therefore cannot be used with the
fan in action.
The oven can also be used in a traditional way, (by not activating the fan) for foods requiring heat from the bottom, e.g. pizza.
WARNING: If the burner flames are extinguished accidentally, turn off the control knob and do not try to relight the
oven until after at least 1 minute.
The oven burner can be ignited in different ways:
- Manual lighting (it is always possible even when the power is cut off):
To light the oven, open the oven door and turn the knob to the maximum temoerature setting (fig.30-31). At the same time put a
lit match next to the ignition tube that is visible on the oven level (fig.32). Then press the thermostat knob (this makes the gas
start to flow) and keep it pressed, after the burner has been completely lit, for 10 seconds. Release the knob and make sure that
the burner remains on, otherwise repeat the operation.
- Electric ignition (only for the models equipped with this device):
In this case, first open the oven door, then press and turn the knob to the maximum temperature setting (fig.30-31). Then press
the thermostat knob (models with ignition trough knob). Wait about 10 seconds after the burner has been completely lit and then
release the knob. Make sure that the burner remains on, otherwise repeat the operation. As for cookers without ignition trough
knob, press the thermostat knob and the key with the spark symbol, wait about 10 seconds after the burner has been
completely lit and then release the knob. Make sure that the burner remains on, otherwise repeat the operation.
The ignition device should not be used for more than 15 seconds. If after that period the burner still has not been lit, do
not use the device and open the door of the room or wait at least 60 seconds before trying to light the oven again.
WARNING: when trying to light the oven, the door must always be open. When using the oven, leave the cooker cover
open to prevent it from overheating.
NOTICE: when using the oven for the first time it should be operated for 15-30 minutes at a temperature of about 250°
without cooking anything inside in order to eliminate any moisture and odours from the internal insulation.
During normal oven use, after lighting the burner and setting the desired temperature, wait about 15 minutes before putting in
any food to preheat the oven.The oven is equipped with 5 guides (Fig.33) at different heights which can be used to insert
shelves or the tray. To keep the oven as clean as possible it is recommended to cook meat on the tray or on the shelf that has
been inserted inside the tray.
USING THE GAS OVEN FOR MODEL WITH DOUBLE CONTROLS
GAS OVEN:
All the gas oven cookers are equipped with a thermostat and safety device to adjust the cooking temperature. The oven
temperature is set by turning the knob counterclockwise to match the indicator with the temperature selected. The gas oven can
be combined with a gas grill or an electric grill. See the specific pages for use information.
When the cooker model allows the combinated use of gas oven and gas grill, the oven inner temperature is adjustable within the
limit indicated in TABLE 8.
FAN GAS OVEN:
Operating the fan of the oven by means of the appropriate switch situated on the control panel, the circulation of warm air
guarantees a uniform heat distribution. The preheating of the oven can be avoided. However for delicate baking, it is preferable
to warm the oven before introducing the baking-pan. The baking system with the fan convection changes in part the various
traditional baking notions. When roasting meat it is not necessary to turn the meat any more and for a roast on the spit, it is not
indispensable to use the spit-roaster, but is sufficient to put the meat directly on the grate.
With the use of the fan gas oven, the baking temperatures are slightly lower of about 10-15°C compared to those in use with the
traditional gas oven. The fan operation of the oven prevents the operation of the grill, which therefore cannot be used with the
fan in action.
The oven can also be used in a traditional way, (by not activating the fan) for foods requiring heat from the bottom, e.g. pizza.
WARNING: If the burner flames are extinguished accidentally, turn off the control knob and do not try to relight the
oven until after at least 1 minute.
10
Page 11
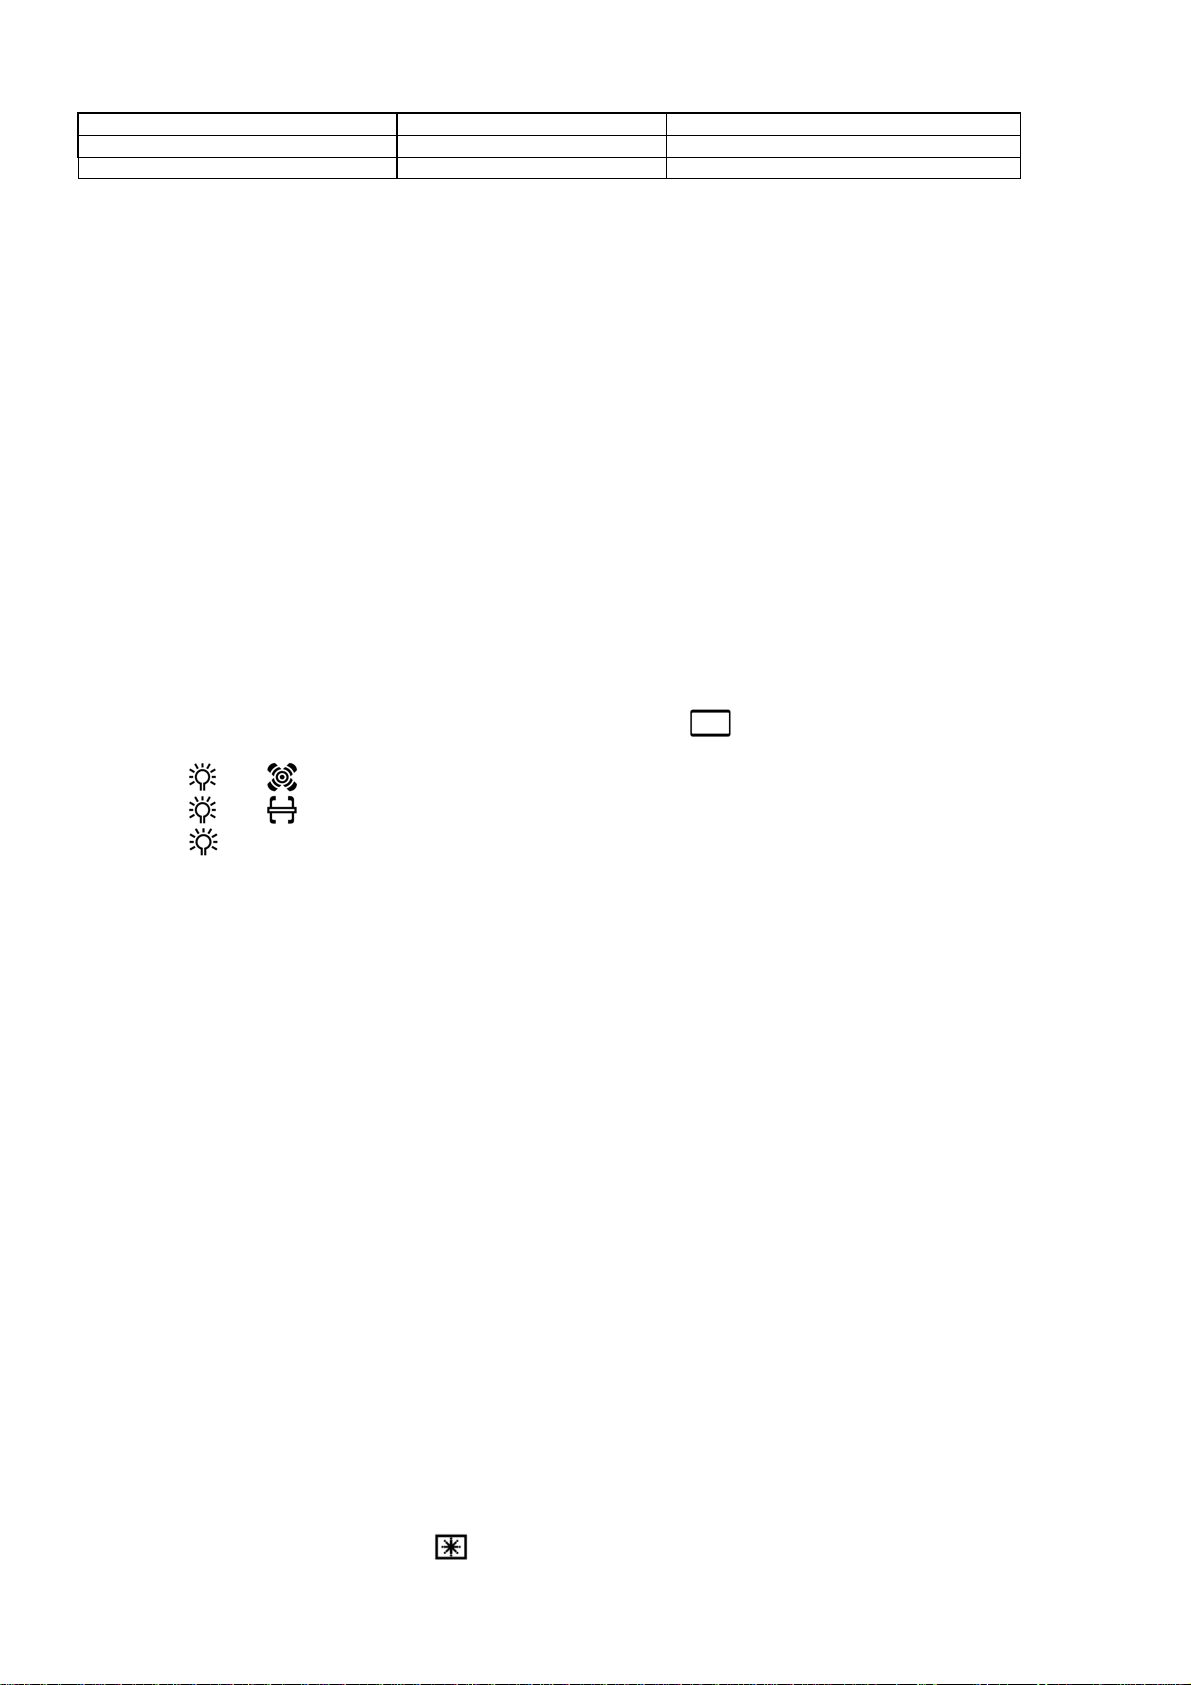
TABLE n° 8
POSITION OF OVEN KNOB ONLY OVEN BURNER OVEN BURNER+GRILL BURNER
1=MINIMUM 120°C 200°C
8=MAXIMUM 220°C 270°C
The oven burner can be ignited in different ways:
- Manual lighting (it is always possible even when the power is cut off):
To light the oven, open the oven door and turn the knob so the no. 8 on the scale matches the indicator (Fig.31). At the same
time put a lit match next to the ignition tube that is visible on the oven level (fig.32). Then press the thermostat knob (this makes
the gas start to flow) and keep it pressed, after the burner has been completely lit, for 10 seconds. Release the knob and make
sure that the burner remains on, otherwise repeat the operation.
- Electric ignition (only for the models equipped with this device):
In this case, first open the oven door, then press and turn the knob to the maximum temperature setting (number 8). Then press
the thermostat knob (models with ignition trough knob). Wait about 10 seconds after the burner has been completely lit and then
release the knob. Make sure that the burner remains on, otherwise repeat the operation. As for cookers without ignition trough
knob, press the thermostat knob and the key with the spark symbol, wait about 10 seconds after the burner has been
completely lit and then release the knob. Make sure that the burner remains on, otherwise repeat the operation.
The ignition device should not be used for more than 15 seconds. If after that period the burner still has not been lit, do
not use the device and open the door of the room or wait at least 60 seconds before trying to light the oven again.
WARNING: afther lighting the oven and grill burners, please wait for 2 or 3 minutes before closing the oven door, in
order to allow the burners flamesto became stable
WARNING: when trying to light the oven, the door must always be open. When using the oven, leave the cooker cover
open to prevent it from overheating.
NOTICE: when using the oven for the first time it should be operated for 15-30 minutes at a temperature of about 250°
without cooking anything inside in order to eliminate any moisture and odours from the internal insulation.
During normal oven use, after lighting the burner and setting the desired temperature, wait about 15 minutes before putting in
any food to preheat the oven. The oven is equipped with 5 guides at different heights (fig.33) which can be used to insert
shelves or the tray. To keep the oven as clean as possible it is recommended to cook meat on the tray or on the shelf that has
been inserted inside the tray.
USING THE CHANGE-OVER SWITCH (Fig. 34-35-36 )
The 2+0 change-over switch used for gas oven models.
the symbol and is for oven fan and light operation;
the symbol and is for oven turnspit and light operation;
the symbol is for turning on the oven light.
USING THE ELECTRIC THERMOSTAT (fig.36 )( WITH A MULTIFUNCTION OVEN)
The thermostat supplied with the relative models maintains a constant temperature inside the oven at a specific temperature
setting ranging from 50°C to 250°C.
Turn the knob clockwise and align the selected temperature indicated on the ring with the index etched on the control panel.
Thermostat operation is indicated by an orange light which will turn off when the temperature inside the oven is 10°C greater
than the temperature setting, and will turn on when the oven is 10°C less than the temperature setting. The thermostat can
control the oven elements only if the relative switch is in one of the possible oven element operating modes: if the switch is in
position 0, the thermostat has not effect on the oven elements, which remain off.
USING THE MULTIFUNCTION OVEN (fig.37)
Before using the ovens for the first time:
- Remove all packaging and accessories from inside the ovens.
- Heat the ovens to 200°C for ½ hour to burn off
- The automatic programmer must be set to Manual mode for ordinary cooking.
- The oven will not function when set in Automatic mode. See pag. 18-19.
To use the ovens:
1 Turn the function selector knob (Fig.37) clockwise to the desired function.
The orange light will illuminate, indicating that the element is on.
2 Turn the temperature selector knob (Fig.36B )clockwise to the desired temperature. The orange light will go out once the
oven has reached temperature and is ready for use. It is normal for this light to go on and off during cooking as the elements
maintain the temperature.
3
To turn the oven off, turn the function selector and temperature knobs anti- clockwise back to •.
Steam may be generated when cooking. As a precaution, always open the door in two stages. First, partially open the door by
100mm for a few seconds to allow the steam to escape, then open the door fully. Keep your face and head away from the door
when opening.
Never line the oven interior with foil as this can cause overheating and damage the enamel. Never cook on the oven base.
Always place dishes and trays onto an oven shelf. Do not leave the grill pan or other dishes on the oven base as damage to
the oven may occur.
Preheating the oven:
'Quickstart' provides the most efficient and fastest way to preheat the main oven (left hand oven). It will also ensure your oven
cooks evenly. Use 'Quickstart' as follows (
manufacturing residues.
):
11
Page 12
1 Select 'Quickstart' (using the oven function selector) and the required cooking temperature (using the temperature selector).
r
Allow the orange thermostat light to come on and off several times. This allows the temperature to stabilize before introducing
food .
2 Select the recurred cooking function and place the food in the oven.
3 When preparing heat sensitive foods such as cakes or meringues using the 'True Fan' function, allow the orange light to come
on and off
again several times to allow the top element to cool slightly.
'Quickstart' is unsuitable for use as a cooking function It is a quick pre-heat system.
OVEN FUNCTIONS
When using any of the functions in the multifunction oven (except grilling and defrosting) it is always recommended that you preheat the oven using the Quick start function, before switching over to your desired cooking function.
When using the Fan Assisted or True Fan oven function, it is advisable to reduce the oven temperature by 20°C if following a
recipe written for a conventional oven. Check the food often through the latter stages of cooking until you are used to the
cooking times and temperatures.
The ovens have a range of cooking functions providing different heat zones. The 'True Fan' function for instance, is most
suitable for cakes
,
desserts and batch baking. The ' Fan Assisted
'
function gives more browning so is more suitable for roasting
meats and vegetables or frozen potato products.
Example: To cook a turkey:
tin
When cooking a turkey, the grill pan can be used as a roasting
enough foil to wrap the turkey loosely. It
is
important to allow enough space around the sides and top of the oven for the hot air
Line the pan with a double layer of extra wide foil, allowing
to circulate. Make sure that the foil is not touching the sides or top of the oven. In a 60cm oven a turkey of 9 to 11 kg can be
cooked. In a 40cm oven a turkey of 6 – 9 kg can be cooked.
The oven light operates on selection of any oven function
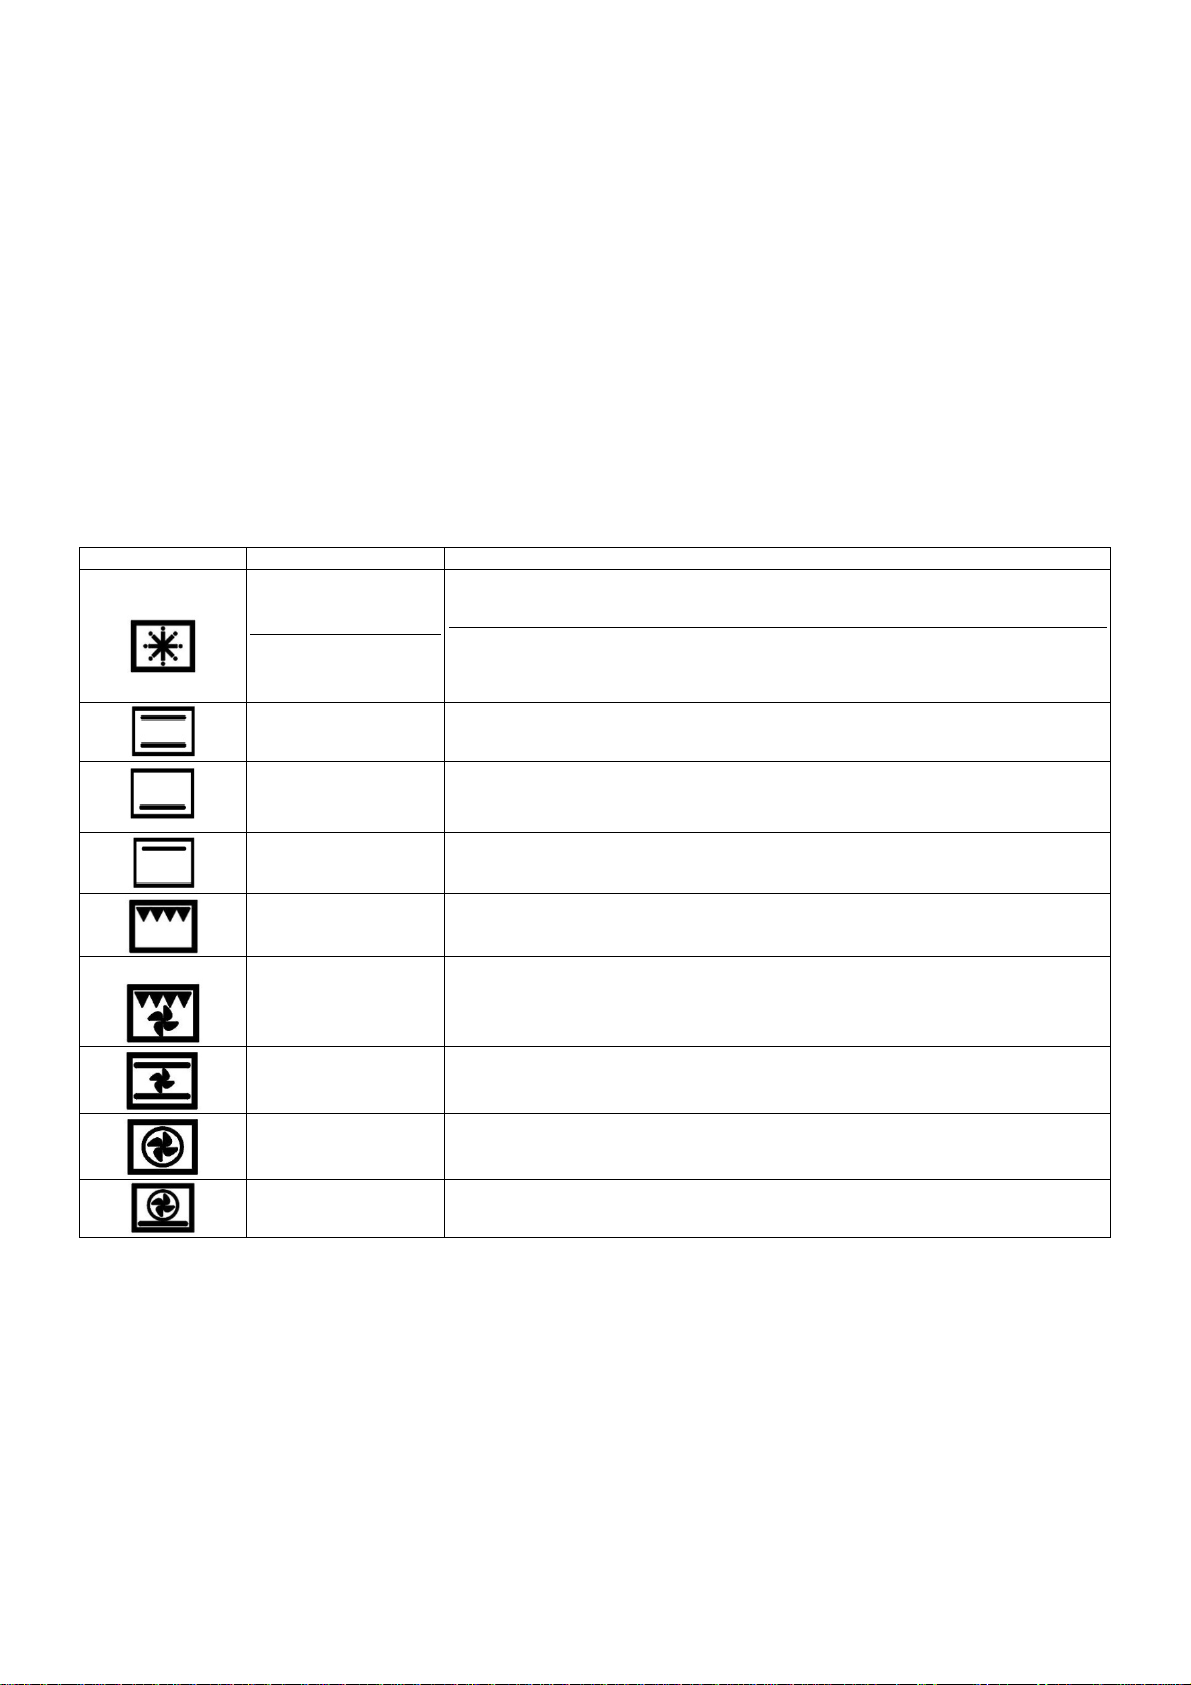
Symbol Function What to use it fo
Quickstar
Defrost
It is recommended that the oven is always pre-heated before use, whatever the cooking
temperature. Quick start is not suitable for cooking - once the oven has reached
temperature, switch to one of the oven functions below.
Place small frozen items on an oven tray at the lowest shelf position, and set the
temperature selector knob to O°C. Never use heat to defrost as this can pose a health risk.
Larger items such as joints, or a whole chicken or turkey, should be defrosted in the
refrigerator.
Conventional oven
Ideal for roasting and for baking items such as bread or rich fruit cakes on a single shelf.
Lower element
Use at low temperatures for slow-cooking casseroles, custard
or for warming plates. Use at high temperatures for cooking sweet and savoury pastry tarts.
Upper element
Use for browning and reheating dishes such as lasagne, moussaka and cauliflower cheese.
Conventional grill
Fan assisted grill
Fan assisted oven
True fan oven
Pizza
Ideal for crumpets, muffins and Welsh rarebit. Use when grilling for less than 15mins. For
foods needing a longer time use fan assisted grilling.
The fan circulates hot air around the food helping to cook it all the way through. Ideal for
cooking meat such as sausages and chicken portions. Cooking high water content foods
such as bacon and chops with this function helps to reduce condensation. (Recommended:
Door closed 200°C, 2nd from top shelf, turn the food over halfway through.
The fan circulates the hot air around the oven for uniform cooking of larger quantities of
food. Use for roasting vegetables, meat and poultry, or baked fish. This function is the best
one for cooking frozen potato products and breaded/battered chicken or fish.
This function is suitable for most recipes and is an efficient way to cook. The temperature is
kept uniform throughout the oven and is particularly suitable for baking on several shelves
or for batch cooking.
Use for cooking pizza, pastry or flat breads to get a
perfectly cooked base.
Using the grill
The grill pan consists of a wire trivet and enamel tray. Place food on the wire trivet. A lower shelf position can be used to slow
cooking down, or the temperature can be reduced. A detachable grill pan handle is supplied for removing the hot tray.
Both the Fan Assisted Grill and Conventional Grill functions are designed to be used with the oven door closed. This ensures
efficient preheating and even cooking.
When grilling, always pre-heat the grill element for 5 minutes before introducing food (200°C is recommended for preheating). It
is recommended that the grill pan is always removed from the oven when not in use, as air flow around the oven can be
impaired. The grill should be used with the oven door closed. Use the Fan Assisted Grill function for thicker pieces of meat and
when cooking high water content foods to reduce condensation.
Always use oven gloves when handling the grill pan and turning food. Do not line the grill pan with aluminium foil, this can cause
damage to the enamel coating and the grill elements.
At the end of cooking remove the grill pan for cleaning. If high fat content foods have been prepared, leave the grill turned on at
a maximum temperature for 5 minutes to clean the grill element.
12
Page 13

USING THE NATURAL CONVENTIONAL ELECTRIC OVEN
When using the oven for the first time it should be operated for a maximum of 30 minutes at a temperature of about 250° to
eliminate any odours generated by the internal insulation. During normal oven use, select the desired cooking temperature
using the thermostat knob and wait until the orange light turns off before putting in any food. The oven is equipped with 5 guides
at different heights (fig.33) which can be used to insert shelves or the tray. To keep the oven as clean as possible it is
recommended to cook meat on the tray or on the shelf that has been inserted inside the tray. Personal experience will help to
determine any variations in the values reported in the table. In any case, it is recommended to follow the instructions of the
specific recipe being used.
USING THE VENTILATED ELECTRIC OVEN
When using the oven for the first time it should be operated for a maximum of 30 minutes at a temperature of about 250° to
eliminate any odours generated by the internal insulation.
Before cooking, allow the oven to reach the desired temperature setting waiting for the orange light to turn off. This type of oven
is equipped with a circular element around which a fan has been installed that creates forced-air circulation in the horizontal
direction. Thanks to this type of operation, the ventilated oven can be used for different types of cooking at the same time,
without changing the taste of each food. Only some models are equipped with a removable metallic filter applied to the rear
screen which collects the fat while a roast is cooking. Therefore, it is recommended to remove this fat periodically, washing the
screen with soapy water and rinsing thoroughly. To remove the metallic filter just apply slight pressure toward the top on the tab
indicated by the arrow. Hot-air circulation guarantees a uniform distribution of heat. Pre-heating the oven is not necessary, but
for very delicate pastries, it is recommended to heat the oven before inserting the trays.
The ventilated conventional system partially changes the various notions about traditional cooking. Meat no longer needs to be
turned while it is cooking and the rotisserie is no longer needed to cook a roast on the spit. Just put the meat directly on the
shelf.
USING THE GAS GRILL (SINGLE CONTROL)
The gas grill can be combined only with the gas oven. It is controlled with the same gas oven knob (Fig.30), but turning it
clockwise instead of counterclockwise (see the gas oven use instructions), matching the symbol with the indicator. The grill
burner always operates at maximum and therefore there is no minimum position. In addition, it is equipped with a safety device
to prevent the flame from going out. The gas grill can also be ignited in different ways:
- Manual lighting: Just completely open the oven door, turn the knob so that the relative symbol matches the indicator, while
pressing the knob, and, at the same time, put a lit match next to the burner. Make sure that the burner is completely lit and after
about 10 seconds release the knob. Make sure that the burner remains on, otherwise repeat the operation.
- Electric ignition: In this case, completely open the oven door, press and turn the knob so that the relative symbol matches the
indicator, then press the thermostat knob (models with ignition trough knob). Wait about 10 seconds after the burner has been
completely lit and then release the knob. Make sure that the burner remains on, otherwise repeat the operation. As for cookers
without ignition trough knob, press the thermostat knob and the key with the spark symbol, wait about 10 seconds after the
burner has been completely lit and then release the knob. Make sure that the burner remains on, otherwise repeat the
operation.
WARNING: As with the oven, the grill must be lit with the door completely open.
The gas grill can be used to grill foods on the oven shelf or using the rotisserie.
Grilling on the shelf: In this case, the shelf supplied is placed on level 1 or 2 and the foods to be grilled are placed on top,
while the tray is inserted on the lower levels to collect the cooking juices.
Then light the grill burner according to the instructions described above.
IMPORTANT: grill foods on the shelf always with the door close.
WARNING: the accessible parts may become very hot while grilling. Keep children away from the appliance while
cooking.
Grilling with the rotisserie: This is used to grill with the rotating skewer. Therefore, insert the skewer holder on the side
shelves at level 3. Insert the food on the skewer and insert everything into the oven, inserting the point of the skewer into the
spindle that projects out from the left side of the oven and resting the front of the skewer into the skewer holder support (fig.38).
Afther, insert the tray into one of the lower guides, then light the grill burner according to the instructions described above and
press the button that starts the rotisserie
IMPORTANT: grill foods with the rotisserie always with the door close.
WARNING: the accessible parts may become very hot while grilling. Keep children away from the appliance while
cooking.
USING THE GAS GRILL FOR MODEL WITH DOUBLE CONTROLS
Oven and grill burners should not be used simultaneously
The gas grill can be combined only with the gas oven.
A diagram is etched on the control panel above each knob which indicates which burner corresponds to that knob. The gas grill
can be ignited in different ways depending on the type of appliance and its specific characteristics:
- Manual lighting (it is always possible even when the power is cut off): Just completely open the oven door, turn the knob
counterclockwise that corresponds to the gas grill, setting it to the MAXIMUM position at the etched star (large flame Fig.15)
while keeping the knob pressed and place a lit match up to the burner. Make sure that the burner is completely lit and after
about 10 seconds release the knob. Make sure that the burner remains on, otherwise repeat the operation.
- Electric ignition: In this case, completely open the oven door, press and turn the knob so that the relative symbol matches the
indicator, then press the thermostat knob (models with ignition trough knob). Wait about 10 seconds after the burner has been
completely lit and then release the knob. Make sure that the burner remains on, otherwise repeat the operation. As for cookers
without ignition trough knob, press the thermostat knob and the key with the spark symbol, wait about 10 seconds after the
burner has been completely lit and then release the knob. Make sure that the burner remains on, otherwise repeat the
operation.
WARNING: afther lighting the oven and grill burners, please wait for 2 or 3 minutes before closing the oven door, in
order to allow the burners flamesto became stable
13
Page 14

WARNING: As with the oven, the grill must be lit with the door completely open.
The gas grill can be used to grill foods on the oven shelf or using the rotisserie.
Grilling on the shelf: In this case, the shelf supplied is placed on level 1 or 2 and the foods to be grilled are placed on top,
while the tray is inserted on the lower levels to collect the cooking juices.
Then light the grill burner according to the instructions described above.
IMPORTANT: grill foods on the shelf always with the door close.
Grilling with the rotisserie: This is used to grill with the rotating skewer. Therefore, insert the skewer holder on the side
shelves at level 3. Insert the food on the skewer and insert everything into the oven, inserting the point of the skewer into the
spindle that projects out from the left side of the oven and resting the front of the skewer into the skewer holder support (fig.38).
Afther, insert the tray into one of the lower guides, then light the grill burner according to the instructions described above and
press the button that starts the rotisserie or set the oven switch to the relative position.
IMPORTANT: grill foods with the rotisserie always with the door close
WARNING: the accessible parts may become very hot while grilling. Keep children away from the appliance while
cooking.
USING THE CONVENTIONAL ELECTRIC GRILL
The electric grill can be linked to the gas oven (Fig.30) or to the electric oven (Fig.37).
Both cases, the grill is operated by the thermostat knob of the oven (see also the working of gas or electric oven). The gas grill
as well as the electric one can be used to grill on the oven grill or with the rotisserie.
The power of the electric grill is 2500W.
Grilling on the shelf: In this case, the shelf supplied is placed on level 1 or 2 and the foods to be grilled are placed on top,
while the tray is inserted on the lower levels to collect the cooking juices. Then turn on the grill element switching the thermostat
to the relative position (electric oven version).
IMPORTANT: grill foods on the shelf always with the door closed.
Grilling with the rotisserie: This is used to grill with the rotating skewer. Therefore, insert the skewer holder on the side
shelves at level 3. Insert the food on the skewer and insert everything into the oven, inserting the point of the skewer into the
spindle that projects out from the left side of the oven and resting the front of the skewer into the skewer holder support (Fig.38).
Then, insert the tray into one of the lower guides and switch the thermostat to the relative position and press the button with the
rotisserie symbol or set the oven switch to the relative position .
IMPORTANT: grill foods with the rotisserie always with the door closed.
WARNING: the accessible parts may become very hot while grilling. Keep children away from the appliance while
cooking.
USING THE VENTILATED ELECTRIC GRILL
The ventilated electric grill is a special function equipped only on the multifunction oven. Set the multifunction switch to the
relative position to activate the grill element (3000W) and the electric fan. Generally, to ensure excellent grilling, place the oven
shelf in the middle position while the oven tray should be inserted at the bottom.
IMPORTANT: When using the ventilated electric grill, set the thermostat knob no higher than 175 °C, which is between
the 150 °C and 200 °C setting, to avoid overheating the front of the appliance. In fact, ventilated grilling must be carried
out with the door closed.
Note:
The range cooker is fitted with a thermostatically controlled cooling fan designed to prevent the control panel and knobs from
overheating. The fan will operate when a certain temperature is reached. It will turn off when the temperature decreases.
USING THE MINUTE-MINDER
The minute-minder advises the user, with an acoustic signal, when food has been cooked, after a certain time period has
elapsed. To use the device, wind the minute-minder by turning the knob clockwise one complete turn. Then turn the knob
counterclockwise so that the indicator corresponds with the selected cooking time (fig.39).
WARNING: the acoustic signal does not stop the cooking cycle. The use must turn off the cooking cycle by hand using
the relative knobs.
USING THE END OF COOKING TIMER (Fig.40)
It allows to select the cooking time manually or timer with automatic shut off of the oven at the end of cooking.
If not cooking time is selected, it is necessary to position the timer knob on the symbol
To turn off the oven, select the timer knob on the desired cooking time and set the function and the temperature knobs; the end
of the countdown will be confirmed with a repeating tone.
NOTE: This function is available for the electric oven only.
.
USING THE DIGITAL CLOCK (Fig.41)
Power on
Display is flashing
Time of day function
3 button version: press time of day button
2 button version: press both button simultaneous
Set time of day with "+" and "-" buttons.
This function remains activated 7 seconds after the last "+" / "-" operation!
Change Summertime / Wintertime
Activate time of day function; press the button for 4 seconds until the hours display will flash.
Change the hours only by using the “+” or “-“ button. The minutes and hidden seconds will not be affected !
Set timer
14
Page 15

This function will be activated with "+" button. Press "+" button again to increase duration time.
During setting the units are 10 seconds steps or minutes.
During count down the timer has priority in the display. The bell- symbol illuminated. The units are seconds or minutes in the
long time section.
The maximum time is 10 h. The format change will happen after 99 minutes and 50 seconds to 1 hour and 40 minutes.
The pot- symbol illuminated.
To show time of day press “time of day” button for 6 seconds.
Reset timer
Count down to zero with permanent pressing “ – “ button. (automatic stop at zero )
Signal
The signal after “time out” will stay 7 minutes if it has not been reset with “time of day” button.
The following signal will be skipped if time of day is pressed during the last 15 seconds of the timer.
Signal frequency
If no function is activated, the signal frequency can be selected by pressing the "-" button.
Three different frequencies (1,5 ; 2,0 ; 3,0kHz) are selectable.
USING THE TOUCH CLOCK (Fig.42)
Mains frequency detection
At power on mains frequency is determined. When the timer is connected to 60Hz, the Celsius symbol is flashing during startup.
Power On
At power on, the relay contact is opened. The display and AUTO symbol flashes and time of day starts from 0:00. Power on
state with flashing daytime remains until time of day is set.
Setting Time of Day
Press PLUS and MINUS button simultaneously. At Power On, also MODE button is possible.
Time of day can be set with PLUS or MINUS, while the colon between hours and minutes is flashing.
Quick setting mode starts when PLUS or MINUS is held for more than 1 second. If daytime setting mode is selected while an
automatic program is active, the automatic program is cancelled.
The Buzzer
The buzzer interval alarm signal sounds if minute minder has reached the end time. The signal can be switched off by pressing
any key or by passing the signal duration limit.
Changing the Buzzer frequency
First press Plus and Minus simultaneously (menu far editing the time) and then Mode for selecting the menu far changing the
buzzer frequency. While the text is visible the buzzer signal frequency can be changed by touching Minus repetitively.
Note: If the touch pad is inactive, a visual alarm will only be reset when a valid key combination is pressed far more than 2
seconds.
Clearing Programs and Manual function
The duration of the minute minder can be cleared by
a) "clear Function": First select minute minder program, then press PLUS and MINUS button simultaneously.
after this clear the display returns from adjustment mode to time of day immediately.
b) Back counting of duration to zero. The timer remains in adjustment mode.
Minute Minder
While minute minder mode is selected, the Bell symbol flashes and the display reads the remaining time in hours and minutes,
only if the last minute is counting down the remaining seconds are displayed. An active minute minder program is indicated by
the statically illuminated Bell symbol. If alarm time has finished, an acoustic interval signal sounds and the Bell symbol flashes.
The minute minder program runs independently of other programs.
Key Lock
After power on reset or when no key is pressed for
combination for 2 seconds or more will deactivate the key lock.
USING THE ANALOG CLOCK (Fig.43)
For setting up the time displayed by watch pointers push briefly twice the knob till getting the CLOCK icon flashing.
For increasing or decreasing time displayed 1 minute by 1, turn the knob clockwise or counterclockwise, le minutes pointer will
increase or decrease 1 minute by minute clockwise or counterclockwise.10 seconds after last set up the electronic timer will exit
time set up mode.Minute minder set up will activate a simple alarm when set up time is over.
For setting up an alarm push briefly once the knob till getting ALARM icon flashing. The turn the knob, set up the alarm time and
briefly push once the knob to confirm; ALARM icon will stay on for all the set up time. When set up time is over an acoustic buzz
will be activated. Push again briefly once the knob for going back to time display.
For cancelling minute minder set up keep the knob pushed until ALARM icon goes off.
USING THE
The first start up
The numbers and the A letter on the display are blinking when the oven is switched on for the first time, or after a
power cut:
the appliance cannot be operated in this condition.
To set the hour and/or to enable the appliance to operate press the M key for at least 2 seconds: the A letter turns off
and the numbers now are steady on the display.
The dot (3) starts blinking: press the - or
The hour is accepted by the programmer just few second after having released the key.
N.B. the appliance can be correctly used for coking only when you will see on the display the symbol (2).
The symbols on the display:
3 KEYS ELECTRONIC PROGRAMMER
+
7
seconds, the key look function is activated. Pressing a valid key or key
key to set the hour.
(fig.44)
15
Page 16
1
2
3
4
5 -
6
7
Timer
The purpose of the timer is just of a sound signal, which can be set for a max time of 23h59min. once elapsed the set
time, the (4) symbol turns off and a sound signal is heard; this sound set off automatically in 7min, or you can stop it
by pressing any key of the programmer. To set the timer press the M key for 2 seconds, or anyway just to see the (4)
symbol blinking. Set the timer by using the
time. In a few seconds the current time appears on the display together with the ) symbol. The countdown starts
immediately from now on.
Semi-automatic cooking
Cooking time: Once having selected a coking function and set the desired temperature, press the M key for a 2
seconds time to access the programming mode. The (4) symbol appears. Release and press again the M key. On the
display, the A symbol starts blinking and the " dur " writing appears on the display, then it changes to O' 00. Set the
cooking time with the - or
programmer in a few seconds, or you can also touch the M key many times just to see again the current time.
The A and (2) symbols will be on the display. Once the set cooking time is finished, a sound will be heard and the
oven automatically switches off. Please see the following paragraphs about how to disable the sound alarm and
restarting the oven.
End of cooking
once having selected a cooking function and set the desired temperature, touch the M key to access the
programming mode for at least 2 sec. the ) symbol switches on. Release and touch again the M key.
On the display the A symbol starts blinking and the writing "dur" appears. Touch again the M key. On the display the
writing "End" appears. The last one changes few seconds after with the symbol 0ꞏ 00.
Set the end of cooking time with the keys - or
The selected time is automatically processed by the programmer in a few seconds, or you can also touch the M key
many times just to see again the current time.
The cooking immediately starts, while on the programmer display the current time is shown again in a few seconds.
The A and (2) symbols will be on the display.
Once the set end of cooking time is finished, a sound will be heard and the oven automatically switches off. Please
see the following paragraphs about how to disable the sound alarm and restarting the oven.
Automatic cooking
Set a cooking time following the instructions on the cooking time paragraph, then set the end of cooking time
following the instructions on the previous paragraph. (Max available end of cooking time 24h). The oven automatically
switches on at a determined time which is the difference between the end of cooking time and the cooking time.
During the waiting time before cooking, which goes from the oven start to the heating, on the display appears the A
symbol to show that an automatic program is on and the current time. The oven on is marked by the (2) symbol.
Once the set end of cooking time is
Please see the following paragraphs about how to disable the alarm and restarting the oven.
How to disable the sound alarm:
Operating again the
Once a semi-automatic or automatic cooking has expired, on the display appear the current time and the blinking A
symbol. In this condition, the heating elements and the light bulb of the oven are disabled. To enable again the oven,
just touch and keep the M key up to see the symbol (2) on the display and the A symbol disappears.
OTHER FUNCTIONS
How to delete a cooking time
To delete a semi-automatic or automatic cooking program, with the A symbol on, touch together the - and + keys for
at least 2 seconds or anyway up to see the (2) and the disabling of A symbol.
How to delete the countdown timer
To delete the counting of the timer, which symbol is ) t touch the M key for at least 2 seconds or anyway up to see the
) symbol blinking. Touch together the - and
Checking the function settings
The set or remaining time of every cooking function of the programmer can be recalled to the display by entering in
program mode with the M key. Touch and keep the M key for almost 2 seconds or anyway up to see the (4) symbol.
The remaining time appears on the display, or a series of zero numbers if the timer is disabled. Touch again the M
key. On the display appears the "dur" writing, then alternately the remaining time or a series of zero number (disable
timer).
By touching again the M key, the end of cooking time appears together with the "End" writing.
How to change the current time or the sound level
With the programmer in standard mode, the (2) symbol is on, touch together the - and + keys for at least 2 seconds
or anyway up to see the dot (3) blinking.
To update the hour on the display:
Automatic programme is working.
A
*
(* in some models there is the writinq 'Auto' instead of A).
The appliance is ready for manual use (not automatic).
When blinking, the programmer is in setting hour mode.
•
Timer set.
Decreasing numbers when setting the timer.
Also for choose your desired sound level ( 3 levels available).
"Mode" kev to access the programming options of the programme.
M
Increasing numbers when setting the timer.
+
+
or - keys. Release the + or - key when you have matched your desired
+
keys. (max available time: 10h). The selected time is automatically processed by the
+.
(maximum available time: 10hOOm).
finished, a sound will be heard and the oven automatically switches off.
To disable the sound just touch one of the keys.
oven
(semi-automatic or Automatic)
+
keys.
touch the + or - keys.
16
Page 17

To change the sound level:
with the - key your favourite sound level.
Note: number 1 is referred to the highest sound level. The available levels are 3.
Attention:
again.
Setting
Select a function by pressing the function button and set the required time with the +/- buttons.
+/- buttons
Pressing the “+” button increases the time set, pressing “-“ decreases it. The count-up and countdown speed increases the
longer the button is held in the appropriate position
Setting the time of day
Select the time of day function by pressing the duration and end time button together and set the time of day with the +/buttons.
Any programme which has been set is cancelled and the outputs switched on
Manual operation
Press duration and end time button together. The relay contacts will switch on. The “A” symbol will be erased, the pot symbol
illuminated. Any programme which has been set is cancelled.
Semi-automatic operation with cooking duration
Select the cooking duration function and set the required duration with +/- button. “A” and cookpot symbol appear. The relay
output becomes active. If time of day = cooking end time the relay output and the cookpot symbol are switched off.
The audible signal sounds. The symbol “A” blinks.
Semi-automatic operation with cooking end time
Select the cooking end time function and set the required duration with +/- button. “A” and cookpot symbol will appear. The relay
output becomes active. If time of day = cooking end time the relay output and the cookpot symbol are switched off.
The audible signal sounds and “A” blinks.
Fully automatic operation
Select the cooking duration function and set the required duration with +/- button. The “A” symbol appears. The relay is switched
on and the cookpot symbol appears. Select the cooking end time function and the earliest possible end time is displayed. Set
the required end time with the +/- buttons. The relay and the cookpot symbol are switched off.
The cookpot symbol appears again when time of day = the calculated start time.
After the automatic programme has ended, the symbol “A” blinks.
The audible signal is heard and the cook pot symbol and the relay are switched off.
Minute minder
Select the minute minder button and set required time with the +/- buttons. As the time set elapses the bell symbol is displayed.
After the time set has elapsed, the audible signal sounds.
Audible signal
The audible signal sounds at the end of a minute minder cycle or of a cooking programme for a period of 7 minutes. The signal
can be cancelled by pressing any function button. Pressing the “-“ button without having previously selected a function the
frequency of the signal changes. A selection from 3 possibilities can be made. The selected signal is audible as long as the time
the “-“button is pressed.
Programme start and verification
A programme which has been set is carried out after setting the time required. The “time to run” can be verified at any time by
selecting the appropriate function.
Setting error identification
The setting is correct if the time of day is in between the calculated cooking start and end times. If an error has been made, this
will be indicated by the audible signal and by the symbol “A” flashing. The faulty setting can be corrected by changing one or
both functions.
Cancelling programme
A programme can be cancelled by selecting the manual function. After a programme which has been set comes to an end, it is
automatically cancelled.
Power cut causes the loss of any program, even the clock; that means the programmer will have to be set
touch the M key. On the display appears the writing: Ton.. followed by a number. Select
ELECTRONIC TIMER
PROGRAMMER
(Fig. 45)
USING THE THERMOMETER (Fig. 46)
The cooker is fitted with a device to measure the temperature in the middle of the oven. This lets you check the temperature
inside the oven and adjust food cooking temperatures more accurately.
ELECTRIC OVEN
When you turn on the oven, the orange light comes on to indicate that the heating elements are working: The thermometer dial
will start to move towards the set temperature. The orange light will keeping coming on and off, indicating that the heating
elements are working to maintain the temperature inside the oven. The light may go off for a few minutes before the
thermometer has reached the temperature required. This is normal, because operation of the heating elements is regulated so
that heat is distributed properly inside the oven. Heat is optimally distributed inside the oven when the thermometer dial has
stopped. If the oven temperature drops or goes up, the thermometer dial will follow these variations in the same way. When the
oven is turned off, the temperature on the thermometer will slowly drop until it reaches room temperature.
NOTE: The temperatures on the knob are indicative. Follow the thermometer temperature for cooking.
GAS OVEN
When the oven is turned on, the burner will start working at the maximum and the thermometer dial will start to move towards
the set temperature. The flame may die down before the thermometer has reached the temperature required. This is because
burner power is reduced so that heat can be evenly distributed inside the oven. Heat is optimally distributed inside the oven
when the thermometer dial has stopped. When the oven is turned off, the temperature on the thermometer will slowly drop until
it reaches room temperature.
17
Page 18

NOTE: it is normal to record different temperatures from those indicated on the panel thermometer, when you measure the
temperature in the middle of the oven using a different thermometer. The temperature indicated by the thermometer is the
mean temperature inside the oven and does not indicate the temperature of any single point.
USING THE SELF-CLEANING OVEN
On models which have this device, the self-cleaning oven differs from normal ovens because the inner surfaces are coated with
a special micro-porous enamel that absorbs and eliminates grease residues during cooking. If liquid grease is released, selfcleaning is not sufficient, so wipe the grease stains with a damp sponge and then heat the oven to the maximum temperature,
wait for it to cool down and wipe again with a damp sponge.
CLEANING THE APPLIANCE
Before cleaning the appliance, it should be disconnected from the power supply and turn off the main gas feeder valve.
Cleaning the work surface:
Periodically clean the burner heads, the enamelled steel grids, the enamelled covers and the flame caps using warm soapy
water. Then those parts should be rinsed and thoroughly dried.
Any liquid that overflows from pots must always be removed using a rag.
If it becomes difficult to open or close a valve, do not force it, but immediately request the assistance of the technical
service personnel.
Cleaning the enamelled parts:
To maintain the original features of the enamelled parts they should be cleaned frequently with soapy water. Never use abrasive
powders. Do not leave acidic or alkaline substances on the enamelled parts (vinegar, lemon juice, salt, tomato sauce, etc.) and
do not wash the enamelled parts while they are still hot.
Cleaning the STAINLESS steel parts:
Clean the parts with soapy water and then dry them with a soft cloth. The shine is maintained by periodically using special
products that generally are found in the market. Never use abrasive powders.
Cleaning the burner flame caps:
Since the flame caps are resting on the burner, to clean them just remove them from their seat and wash them with soapy
water. After they have been thoroughly dried and having checked that the holes are not clogged, they can be replaced in their
proper position.
Cleaning the inside of the oven glass:
Cleaning the interior of the crystals of the oven:
Feature of the oven is the ability to remove the inner glass in order to make the internal cleanliness of crystals. This operation is
to be performed in a cold oven and with a damp cloth, taking care not to use abrasive detergents. For the removal of internal
glass lock the hinges by inserting the nail that came in the hinges (Fig 47-48) then remove the inner glass as (Fig.49-50-51-5253-54).
To reassemble the door to perform tasks in the opposite direction as (fig.55-56-57-58).
Cleaning the inside of the oven:
To facilitate intensive cleaning of the oven is practical to dismantle the door by following the instructions listed below. Insert the
nail that came in the hinges (Fig. 47-48). Bring the half-open door in place and working with your hands pull the door towards
you until the same has not been dropped from the attack. To replace the oven door proceed in reverse order. Also the grids side
are easily-removable by unscrewing the rings that secure it to the oven.
AFTER-SALES TECHNICAL SERVICE
AND SPARE PARTS
Before leaving the factory, this appliance was tested and calibrated by skilled and qualified personnel.
Any repairs or calibration that may become necessary after leaving the factory should be performed by skilled personnel.For this
reason we advise the customer to contact the Dealer that sold the appliance or the nearest Service Centre, providing them with
information about the type of appliance and the type of problem that has occurred.If defective parts must be replaced, it is
recommended to replace them with original spare parts that are available only in our technical Service Centres and authorised
dealers.
18
Page 19

INDEX
NOTICE TECHNIQUE DESTINEE A L’INSTALLATEUR………………………………………………………………..
RACCORDEMENT DE L’APPAREIL AU RESEAU DE DISTRIBUTION DU GAZ…………………………………….
ADAPTATION AUX DIFFERENTS TYPES DE GAZ………………………………………………………………………
REGLAGE DES BRULEURS ……………………………………………………………………………………………..
BRANCHEMENT ELECTRIQUE DE L’APPAREIL …………………………………………………………………….
ENTRETIEN DE L'APPAREIL………………………………………………………………………………………………
CHANGEMENT DES COMPOSANTS………………………………………………………………………………………
NOTICE DE MODE D’EMPLOI ET D’ENTRETIEN MODE D’EMPLOI ET D'ENTRETIEN……………………………
DESCRIPTION PANNEAU DE CONTROLE………………………………………………………………………………
UTILISATION DES BRULEURS…………………………………………………………………………………………..
UTILISATION DES PLAQUES ELECTRIQUES…………………………………………………………………………….
UTILISATION DU PLAN EN VITROCÉRAMIQUE………………………………………………………………………….
TYPE DE RÉCIPIENT………………………………………………………………………………………………………..
UTILISATION DU PLAN À INDUCTION …………………………………………………………………………………..
MANETTE DE COMMANDE DE LA TABLE DE CUISSON ……………………………………………………………..
TABLE DE CUISSON……………………………………………………………………………………………………….
TYPES DE CASSEROLES…………………………………………………………………………………………………
UTILISATION DU FOUR A GAZ (controle simple)………………………………………………………………………..
UTILISATION DU FOUR A GAZ (controle double)…………………………………………………………………………
UTILISATION DU COMMUTATEUR ………………………………………………………………………………….
UTILISATION DU THERMOSTAT ELECTRIQUE ……………………………………………………………………….
UTILISATION DU FOUR MULTIFONCTIONS (CUISINES AVEC FOUR ELECTRIQUE )……………………………
FONCTIONS DU FOUR……………………………………………………………………………………………………
UTILISATION DU FOUR ELECTRIQUE A CONVECTION NATURELLE …………………………………………..
UTILISATION DU FOUR ELECTRIQUE VENTILE ………………………………………………………………………
UTILISATION DU GRILL A GAZ (controle simple)……………………………………………………………………….
UTILISATION DU GRILL A GAZ (controle double)……………………………………………………………………..
UTILISATION DU GRILL ELECTRIQUE STATIQUE…………………………………………………………………….
UTILISATION DU GRILL ELECTRIQUE VENTILE ………………………………………………………………………
UTILISATION DE LA MINUTERIE……………………………………………………………………………………….
TIMER DE FIN CUISSON ………………………………………………………………………………………………….
UTILISATION DE L'HORLOGE ÉLECTRONIQUE ………………………………………………………………………
UTILISATION DE L’HORLOGE TACTILE …………………………………………………………………………………
UTILISATION DE L’HORLOGE ANALOGIQUE …………………………………………………………………………..
UTILISATION DE PROGRAMMATEUR ÉLECTRONIQUE À 3 TOUCHES …………………………………………..
UTILISATION DU PROGRAMMATEUR ELECTRONIQUE ……………………………………………………………..
UTILISATION DU THERMOMÈTRE ………………………………………………………………………………………..
UTILISATION DU FOUR AUTONETTOYANT …………………………………………………………………………..
pg
pg
pg
pg
pg
pg
pg
pg
pg
pg
pg
pg
pg
pg
pg
pg
pg
pg
pg
pg
pg
pg
pg
pg
pg
pg
pg
pg
pg
pg
pg
pg
pg
pg
pg
pg
pg
pg
20
20
20
21
21
22
22
22
22
23
23
24
24
25
25
25
25
26
27
28
28
28
28
29
30
30
30
31
31
31
31
31
32
32
33
34
35
35
19
Page 20

NOTICE D’INSTALLATION, D’ENTRETIEN ET MODE D’EMPLOI
DE LA CUISINIERE A GAZ 90x60cm
LIRE ATTENTIVEMENT LE CONTENU DE CETTE NOTICE AVANT D’INSTALLER OU D’UTILISER LA
CUISINIERE.
Le fabricant décline toute responsabilité en cas de dommages à des personnes ou à des biens provoqués par une
mauvaise installation ou un usage impropre de la cuisinière.
Le fabricant ne saurait être retenu responsable des inexactitudes éventuelles dues à des erreurs d’impression ou de
transcription, contenues dans cette notice. Les dessins sont purement indicatifs.
Le fabricant se réserve le droit d’apporter les modifications qu’il jugera utiles à tout moment et sans préavis, mais sans modifier
les caractéristiques essentielles de sécurité et de fonctionnement
CET APPAREIL A ETE CONCU POUR UN USAGE DOMESTIQUE
NOTICE TECHNIQUE DESTINEE A L’INSTALLATEUR
RACCORDEMENT DE L’APPAREIL AU RESEAU DE DISTRIBUTION DU GAZ
Avant de procéder au raccordement de l’appareil au réseau de distribution de gaz, vérifier que les données reportées
sur l’étiquette d’identification appliquée dans le tiroir de rangement ou au dos de la cuisinière sont compatibles avec
celles du réseau de distribution de gaz. L’étiquette appliquée sur la dernière page de cette notice ou dans le tiroir de
rangement ou au dos de l’appareil reporte les conditions de réglage : type de gaz et pression d’exercice.
ATTENTION : L'installation de la cuisinière doit se conformer à la législation en vigueur dans le pays d’utilisation.
ATTENTION : le raccord d’entrée du gaz à l’appareil a un taraud cylindrique de 1/2" gas, selon la norme UNI-ISO 228-1.
Pour raccorder l’appareil au gaz avec un tuyau de caoutchouc flexible, il faut un raccord porte-caoutchouc
supplémentaire (Fig. 1) fournit avec l’appareil, en conformité à les normes nationales en vigueur.
ADAPTATION AUX DIFFERENTS TYPES DE GAZ
Avant toute intervention, couper l’arrivée de gaz à l’appareil.
CHANGEMENT DES INJECTEURS POUR FONCTIONNER AVEC UN AUTRE TYPE DE GAZ :
Pour changer les injecteurs des brûleurs de la table de cuisson, opérer de la façon suivante :
1) Débrancher l’appareil pour éviter tout risque d’électrocution.
2) Enlever les grilles de la table de cuisson (Fig.2)
3) Enlever les brûleurs (Fig.2)
4) A l’aide d’une clé à 6 pans de 7 mm, dévisser les gicleurs (Fig.3) les remplacer par ceux prévus pour le nouveau type de gaz
en fonction des indications du tableau N° 1
Pour changer l’injecteur du brûleur du four, opérer de la façon suivante :
1) Retirer la sole du four (fig.4-5).
2) Dévisser la vis V et retirer le brûleur du support en veillant à ne pas endommager la bougie d’allumage et le thermocouple
(fig. 6).
3) A l’aide d’une clé à 6 pans de 7 mm remplacer le brûleur R (fig.6) par celui prévu pour le nouveau type de gaz en fonction
des indications du tableaux 2-3.
Pour remplacer l’injecteur du brûleur du grill, intervenir de la façon suivante :
1) Dévisser la vis a la fin du brûleur e ôter le brûleur de son support tout en faisant attention à ne pas abîmer la flamme
d’allumage et le thermocouple (fig.7).
2) Utiliser la clé à tubes hexagonale de 7 mm et remplacer l’injecteur R (fig.7) par un autre adapté au nouveau type de gaz
suivant les indications du tableaux 2-3
ATTENTION ! Après avoir exécuté les adaptations ci-dessus, procéder au réglage des brûleurs décrit dans le
paragraphe suivant, plomber éventuellement les organes de réglage et de préréglage et appliquer une nouvelle
étiquette sur l’appareil correspondant au nouveau type de gaz. Cette étiquette se trouve dans le sachet des injecteurs
de rechange.
TABLEAU n°1
Brûleur Type de Gaz Pression Ø Injecteur Classe nominale
mbar 1/100 mm. g/h l/h kW kcal/h
Naturel G20 20 72 - 95 1 860
Auxiliaire Buthane G30 28-30 50 73 - 1 860
Propane G31 37 50 71 - 1 860
Naturel G20 20 97 - 167 1,75 1505
Semi-rapide Buthane G30 28-30 65 127 - 1,75 1505
Propane G31 37 65 125 - 1,75 1505
Naturel G20 20 115 - 286 3 2580
Rapide Buthane G30 28-30 85 218 - 3 2580
Propane G31 37 85 214 - 3 2580
Ultra-rapide Naturel G20 20 153 - 405 4,25 3655
4 kW Buthane G30 28-30 102 309 - 4,25 3655
Propane G31 37 102 303 - 4,25 3655
Natural G20 20 ext. 155
Ultra-rapide
Dual 5 kW
Propane G31
Butane G30
28-30 ext. 96
37 ext. 96
int. 70
int. 46
int. 46
-
-
334 -
328 -
476
-
-
5
-
4,60 3956
4,60 3956
4300
20
Page 21

TABLEAU n°2 (pour four gaz et grill gaz avec controle double)
Brûleur Type de Gaz Pression Ø Injecteur Classe nominale
mbar 1/100 mm. g/h l/h kW kcal/h
Naturel G20 20 155 - 429 4,50 3870
Four Buthane G30 28-30 105 327 - 4,50 3870
Propane G31 37 105 321 - 4,50 3870
Naturel G20 20 108 - 191 2 1720
Grill Buthane G30 28-30 72 145 - 2 1720
Propane G31 37 72 143 - 2 1720
TABLEAU n°3 (pour four gaz et grill gaz avec controle simple ou four gaz et grill electrique )
Naturel G20 20 155 - 429 4,50 3870
Four Buthane G30 28-30 105 327 - 4,50 3870
Propane G31 37 105 321 - 4,50 3870
Naturel G20 20 108 - 191 2 1720
Grill Buthane G30 28-30 72 145 - 2 1720
Propane G31 37 72 143 - 2 1720
REGLAGE DES BRULEURS
1) Réglage de la flamme minimum des brûleurs :
Réglage des brûleurs de la table de cuisson : pour régler la flamme minimum des brûleurs de la table de cuisson, procéder
de la façon suivante :
1) Allumer le brûleur et tourner la manette sur la position de MINIMUM (petite flamme).
2) Enlever la manette du robinet fixée par simple pression.
3) A l’aide d’un petit tournevis, agir sur la vis d’étranglement située dans la traverse de la manette (fig. 8) or sur le corps du
robinet (fig. 9) jusqu’à ce que la flamme du brûleur soit bien réglée sur le MINIMUM.
4 Pour le robinet du brûleur Dual, la vis d’étranglement est située sur le corps du robinet (fig. 10), la vis A regle la couronne
exterieur, la vis B regle la couronne interieure
5) S’assurer qu’en passant rapidement du MAXIMUM au MINIMUM la flamme ne s’éteigne pas.
Réglage du brûleur du four : pour régler la flamme minimum du brûleur du four, procéder de la façon suivante:
1) Allumer le brûleur et tourner la manette sur la position de MAXIMUM.
2) Fermer la porte du four et faire fonctionner le four pendant 10 minutes au moins.
3) Tourner la manette sur la position de MINIMUM (en correspondance de 120°) et la retirer ensuite.
4) A l’aide d’un petit tournevis, agir sur la vis d’étranglement (figure 11) et tout en observant la flamme à travers le hublot du
four, régler la consistance de telle façon qu’elle reste allumée en exécutant de rapides passages du MAXIMUM au
MINIMUM avec la manette.
Réglage du brûleur du grill (for grill burner avec 2 commandes) : pour régler la flamme minimum du brûleur du grill,
procéder de la façon suivante:
1) Allumer le brûleur et tourner la manette sur la position de MAXIMUM.
2) Fermer la porte du four et faire fonctionner le four pendant 10 minutes au moins.
3) Tourner la manette sur la position de MINIMUM (petite flamme) et la retirer ensuite.
4) A l’aide d’un petit tournevis, agir sur la vis d’étranglement située dans la traverse de la manette (fig. 8) or sur le corps du
robinet (fig. 9) jusqu’à ce que la flamme du brûleur soit bien réglée sur le MINIMUM.
S’assurer qu’en passant rapidement du MAXIMUM au MINIMUM la flamme ne s’éteigne pas.
ATTENTION ! Le réglage ci-dessus s’exécute seulement avec des brûleurs fonctionnant au gaz méthane, avec des
brûleurs fonctionnant au gaz liquide la vis doit être vissée à fond dans le sens des aiguilles d’une montre.
ATTENTION ! Pour les modèles avec le bruleur grill à contrôle single, le bruleur grill fonctionne toujours au maximum
et il ne faut pas d'effectuer aucune regulation du minimum.
BRANCHEMENT ELECTRIQUE DE L’APPAREIL
Le branchement électrique doit être exécuté conformément aux normes et à la législation en vigeur. Avant de procéder
au branchement, vérifier que :
- Le voltage électrique de l’installation et des prises de courant sont compatibles avec la puissance maximale de l’appareil (cfr.
étiquette d’identification appliquée dans la partie inférieure de la contre-porte).
- La prise ou l’installation sont reliées à la terre conformément aux normes et à la législation en vigeur. Le fabricant décline toute
responsabilité en cas de non respect de ces dispositions.
Si le branchement au réseau de distribution se fait à travers une prise :
- Appliquer au câble d’alimentation, s’il en est dépourvu, une fiche normalisée adaptée au voltage indiqué sur l’étiquette
d’identification. Brancher les fils en vous basant sur le schéma de la Fig. 12 et en respectant les indications suivantes :
lettre L (phase) = fil marron.
lettre N (neutre) = fil bleu.
pictogramme terre = fil vert-jaune.
- Le câble d’alimentation doit être positionné de telle façon qu’il n’atteigne à aucun endroit une surtempérature de 75 K.
- Ne pas utiliser de réductions, adaptateurs ou commutateurs car il pourraient provoquer de faux contacts et donc des
surchauffes dangereuses.
Lorsque le branchement se fait directement au réseau électrique :
- Interposer entre l’appareil et le réseau un interrupteur omnipolaire, dimensionné au voltage de l’appareil avec une ouverture
minimum de 3 mm entre les contacts.
- Se rappeler que le câble de terre ne doit pas être interrompu par l’interrupteur.
- Le branchement électrique peut aussi être protégé par un interrupteur différentiel à haute sensibilité.
Il est vivement conseillé de relier le fil de terre vert-jaune à une installation efficace de terre.
ATTENTION : En cas de remplacement du câble d’alimentation, il est recommandé de garder le conducteur de terre
(jaune-vert), plus long de 2 cm environ par apport aux autres conducteurs et relié à la masse.
21
Page 22

A
ENTRETIEN DE L'APPAREIL
ATTENTION: AVERTISSEMENTS IMPORTANTS
Pour les cuisinières posées sur une base
ATTENTION: si l'appareil repose sur une base, prendre les mesures nécessaires de telle sorte que l'appareil ne puisse glisser
de la base d'appui.
Pour cuisinières avec couvercle en verre
ATTENTION: avant d'ouvrir le couvercle en verre de l'appareil, retirer soigneusement tout résidu de liquide présent sur celui-ci.
ATTENTION: avant de refermer le couvercle en verre de l'appareil, s'assurer que le plan de travail est froid.
Pour cuisinières à four électrique
Durant l'utilisation l'appareil devient chaud. Veiller à éviter de toucher les éléments chauffants à l'intérieur du four.
Pour cuisinières à four électrique
ATTENTION: les parties accessibles peuvent devenir chaudes pendant l'utilisation. Veiller à ce que les enfants ne s'approchent
pas.
Pour le logement chauffe-plats (ou plan basculant en l'occurrence)
ATTENTION: les parties internes du logement chauffe-plats peuvent devenir chaudes pendant l'utilisation.
Pour les portes en verre
Ne pas utiliser de produits de nettoyage abrasifs ni de spatules métalliques à bords coupants pour nettoyer la vitre de la porte
du four, pour ne pas risquer d'en rayer la surface voire de la briser.
Ne pas utiliser un nettoyeur à vapeur pour le nettoyage de l'appareil.
CHANGEMENT DES COMPOSANTS
Avant toute opération d’entretien et / ou de réparation, couper l’arrivée de courant et de gaz vers l’appareil.
Pour changer les composants comme les manettes ou les brûleurs, il suffit de les extraire de leur logement sans besoin de
démonter aucune pièce de la cuisinière.
Pour changer des composants comme les supports des injecteurs, les robinets et les composants électriques, suivre la
procédure décrite dans le paragraphe du réglage des brûleurs. En cas de changement du robinet ou du thermostat gaz,
démonter aussi les deux équerres de fixation derrière la rampe, en dévissant les 4 vis (2 par équerre) qui la fixe au reste de la
cuisinière. Retirer toutes les manettes et dévisser les écrous qui fixent les robinets des brûleurs avant au support du tableau de
bord.
En cas de changement du thermostat gaz ou électrique, démonter aussi la protection arrière de la cuisinière, en dévissant les
vis correspondantes, afin de pouvoir retirer et replacer le réservoir du thermostat.
Pour changer l’ampoule du four, il suffit de dévisser la calotte de protection qui dépasse à l’intérieur du four (fig. 13).
ATTENTION ! Avant de changer l’ampoule, débrancher l’appareil.
NOTICE DE MODE D’EMPLOI ET D’ENTRETIEN MODE D’EMPLOI ET D'ENTRETIEN
DIMENSION DES BRULEURS GAZ
BRULEUR DIMENSION (mm)
Auxiliaire Ø 50
Semi-rapide Ø 70
Rapide Ø 95
Ultra-rapide Ø 125
Ultra-rapide Dual Ø 135
DIMENSION PLAQUE ÉLECTRIQUE
TYPE PLAC
Placa électrique normale Ø 145
Placa électrique normale Ø 180
Sur le panneau de contrôle, en correspondance de chaque bouton ou touche, la function est visualisée par un petit symbol. Ci
dessous on mentionne les plusieurs commandes qu'on peut trouver sur une cuisinière:
le symbole
en examen (en ce cas le brûleur postérieur à droite)
le symbole
avec grill à gaz, four à gaz avec grill électrique , four multifonctions).
le symbole
le symbole indique le thermostat électrique pour fours électrique ventilés
le symbole indique la touche d'actionnement du ventilateur four pour permettre l'emploi du four à gaz ventilé. Le
fonctionnement du ventilateur empêche le fonctionnement du grill électrique, qui ne peut donc pas être utilisé avec le ventilateur
en marche.
le symbole
le symbole indique le touche de mise en action du tournebroche (seulement four à gaz)
le symbole indique le touche d'allumage de la lumière du four (tous sauf le four électrique ventilé)
DIMENSION (mm)
DESCRIPTION PANNEAU DE CONTROLE
ou ou indique la disposition des brûleurs sur le plan travail, le petit point plein identifie le brûleur
ou ou indique le functionnement de n’importe quel four (2+0 commutateur , four à gaz, four a gaz
indique le functionnement de n’importe quel grill (grill à gaz, grill électrique )
indique le compte-minutes
22
Page 23

le symbole indique le bouton d'allumage des brûleurs
le symbole indique si les touches sont en position d'allumé ou éteint
UTILISATION DES BRULEURS
Sur le tableau de bord, au-dessus de chaque manette, un schéma a été gravé qui indique à quel brûleur se réfère la manette.
L'allumage des brûleurs peut s’effectuer de différentes façons en fonction du type d’appareil et de ses caractéristiques
particulières :
- Allumage manuel (il est toujours possible même en cas de coupure de courant) : Tourner la manette correspondant au
brûleur sélectionné dans le sens contraire des aiguilles d’une montre et la placer sur la position de MAXIMUM (grande flamme
Fig. 15) et approcher une alumette allumée vers le brûleur.
- Allumage électrique : Tourner la manette correspondant au brûleur sélectionné dans le sens contraire des aiguilles d’une
montre et la placer sur la position de MAXIMUM (grande flamme Fig. 15) tenez le bouton appuyé en correspondance du
symbole d'allumage marqué d'une étoile (pour cuisinières douées d'allumage sous bouton) appuyer ensuite sur le bouton
d’allumage indiqué par une étoile et relâcher dès que le brûleur s’allume.
- Allumage brûleurs dotés d’un dispositif de sécurité (thermocouple)(Fig. 14): Presser et tourner la manette
correspondant au brûleur sélectionné dans le sens contraire des aiguilles d’une montre et la placer sur la position de MAXIMUM
(grande flamme Fig. 15), presser la manette et activer un des allumages décrits ci-dessus. Une fois l’allumage effectué,
continuer à presser la manette pendant 10 secondes environ de façon à laisser le temps à la flamme de chauffer le
thermocouple. Si le brûleur s’éteint après avoir relâché la manette, répéter entièrement l’opération.
N.B.: Il est recommandé de ne pas essayer d’allumer un brûleur si son chapeau n’est pas correctement mis en place.
Utilisation brûleur Dual (Fig. 16)
Ce modèle commande, avec un seul robinet, tant la couronne centrale du brûleur que la couronne externe.
Pour allumer la couronne centrale, il faut appuyer sur la manette, puis la tourner sur la position 1
de distribution maximum et la maintenir pressée jusqu’à l’allumage, dans cette position on a le réglage maximum de la flamme
interne.
Tourner la manette sur la position 2 pour avoir la couronne interne au minimum
En tournant la manette sur la position 3 on a la couronne interne et la couronne externe au maximum.
En tournant la manette sur la position 4 on a la couronne interne et la couronne externe au minimum.
Conseils pour la meilleure utilisation des brûleurs :
- Utiliser des récipients dont le format est adapté au brûleur (cfr. tableau n° 4 et Fig. 18).
- Lorsque l’ébulliton est atteinte, placer la manette sur le MINIMUM (petite flamme Fig. 15).
- Utiliser toujours des récipients avec couvercle.
TABLEAU N° 4
DIAMETRES DES RECIPIENTS CONSEILLES (cm)
BRULEUR
Auxilliaire 12 – 14
Semi-rapide 14 – 26
Rapide 18 - 26
Ultra-rapide 22 - 26
Ultra-rapide dual 22 - 50
ATTENTION ! Utiliser toujours des récipients à fond plat.
ATTENTION ! Après le nettoyage, assurez-vous que la tête "B" et couvre "A" sont correctement placés sur leur siège
comme figure 17A et non décentré comme dans la figure 17B
ATTENTION ! En cas de coupure de courant, les brûleurs peuvent être allumés avec une allumette. Durant la
cuisson des aliments avec de l’huile ou autres matières grasses, facilement inflammables, l’utilisateur ne doit pas
s’éloigner de l’appareil.
Si l’appareil est doté d’un couvercle en verre, celui-ci peut éclater sous l’action de la chaleur. Eteindre donc tous les
brûleurs avant d’abaisser le couvercle. Ne pas utiliser de spray près de l’appareil lorsque celui-ci est en fonction.
Pendant l’utilisation des brûleurs, veiller à ce que les manches des récipients soient orientés vers l’intérieur. Les
enfants doivent être tenus hors de portée. Après chaque utilisation, il est recommandé de nettoyer la plaque et
d’éliminer les résidus éventuels.
NOTE: L’utilisation d’un appareil de cuisson au gaz produit de la chaleur et de l’humidité dans la pièce où il est
installé. Par conséquent la pièce doit être bien aérée et les ouvertures de la ventilation naturelle ne doivent jamais être
obstruées . Activer aussi le dispositif mécanique d’aération / hotte d’aspiration ou électroventilateur.
Une utilisation intensive et prolongée de l’appareil, peut nécessiter une aération supplémentaire, par exemple
l’ouverture d’une fenêtre, ou une aération plus efficace en augmentant la puissance de l’aspiration mécanique si elle
est prévue.
UTILISATION DES PLAQUES ELECTRIQUES
Ces plaques sont commandées par un interrupteur à 6 positions (Fig. 19), qui se mettent en marche en tournant le bouton sur
la position désirée. Un dessin indique, sur le devant de l’appareil, à quelle plaque correspond le bouton. L’allumage est signalé
par un voyant rouge appliqué, lui aussi, sur le devant de l’appareil.
Comment utiliser une plaque électrique :
Avant la première utilisation ou après une longue période d’inactivité, nous conseillons de faire fonctionner la plaque sur la
position 1 pendant 30 minutes environ afin d’éliminer l’humidité éventuelle que le matériel isolant interne pourrait avoir absorber.
A titre purement indicatif, nous rapportons un tableau avec les indications nécessaires pour une utilisation optimale des plaques
électriques.
23
Page 24

ATTENTION: Avant la première utilisation ou après une longue période d'inactivité, il est conseillé de faire fonctionner
la plaque sur la position 1 du commutateur pendant 30 minutes environ afin d'éliminer l'humidité éventuellement
absorbée par l'isolant interne.
PLAQUE CUISSONS POSSIBLES
0 Plaque éteinte
1 Pour fondre le beurre, le chocolat, etc. - Pour chauffer de petites quantités de liquides
2 Pour chauffer de plus grandes quantités de liquides - Pour préparer des crèmes ou des sauces longue cuisson
3 Pour décongeler les aliments et cuire à la température d’ébullition
4 Pour cuire des rôtis de viande délicate et poissons
5 Pour rôtis de carrés et biftecks - Pour pots au feu
6 Pour porter à ébullition de grandes quantités d’eau - Pour frire
Voici quelques conseils pour une utilisation correcte :
- Séchez le fond du récipient avant de le poser sur la plaque.
- Utilisez des récipients à fond plat et épais ( cfr. Fig.20).
- N'utilisez jamais de récipients plus petit que la plaque.
- N'allumez la plaque qu'après avoir posé le récipient dessus.
- Après l'utilisation, nettoyez toujours la plaque avec des produits spéciaux que l'on trouve dans le commerce de
façon à ce que sa surface soit toujours propre ce qui permettra de prévenir la formation de l'oxydation.
- Une fois éteinte, la plaque reste encore chaude pendant quelques temps, par conséquent n'y poser pas les mains
ou d'autres objets.
- Pendant l'utilisation des plaques, veillez à ce que les manches des casseroles soient orientés vers l'intérieur. Ne
laissez pas approcher les enfants.
- Pendant la cuisson d'aliments avec de l'huile ou de la graisse, facilement inflammables, l'utilisateur ne doit pas
s'éloigner de la table de cuisson.
MISE EN GARDE : dès que vous constatez une fêlure sur la surface de la plaque, débranchez immédiatement la table
de cuisson.
UTILISATION DU PLAN EN VITROCÉRAMIQUE
La table de cuisson est divisée en 5 surfaces caractérisées par des puissances et des diamètres différents (Fig.21).
Les positions sont clairement indiquées par des surfaces circulaires sans représentation (voir la description des plans de
cuisson). L’opération de chauffage se passe à l’intérieur de ces surfaces. Lors de l’usage d’une ou de deux surfaces de
cuisson, le reste de la superficie se maintient froid. Pour un bon usage et une dépense d’énergie contenue, il est conseillé
d’utiliser des récipients adaptés pour la cuisson électrique. Le fond des récipients doit être plat et épais pour obtenir une bonne
cuisson. Le diamètre de la base des casseroles (ou des autres plats) devrait s’approcher le plus possible à celui de la plaque
utilisée ; en effet, s’il est inférieur, la chaleur se trouvera perdue à cause de la surface de plaque laissée découverte.La surface
du plan de travail et la base doivent être nettoyées fréquemment.
Suivre ces conseils vous servira à économiser de l’énergie et de la chaleur.
PLAQUE DE CUISSON CERAN
TYPE DE PLAQUE PUISSANCE
A) Plaque électrique céramique avant gauche 700/1700 W
B) Plaque électrique céramique arrière gauche 1200 W
D) Plaque électrique céramique arrière droit 1100/2200 W
E) Plaque électrique céramique avant droit 1200 W
C) Plaque électrique céramique centre 1400/2200 W
Chaleur résiduelle
Chaque zone de cuisson est équipée d'un indicateur de chaleur résiduelle (H). Après l'extinction d'une zone de cuisson, un
voyant rouge peut apparaître sur l'affichage. Ce voyant indique que le foyer en question est encore très chaud. (Fig. 22).
Comment utiliser la table de cuisson électrique céramique 5 foyers :
Chaque plaque de cuisson est commandée par un bouton régulateur de l'énergie (pour une zone de cuisson à 1 ou 2
circuits). Le bouton permet de sélectionner en continu différents niveaux de puissance de la position basse "0" (plaque
toujours "off") à la position élevée "3" (plaque toujours "on") ; le bouton de commande de la zone de cuisson à double circuit
(Fig. 23) permet d'atteindre la puissance maximale : tourner le bouton dans la position deuxième circuit pendant 1-2 secondes
puis le relâcher dans la position 3 (Fig. 24).
Sur le bandeau de commande de l'appareil figurent des indications concernant la plaque de cuisson et le bouton de commande
correspondant.
Un voyant rouge sur la surface de la table de cuisson indique qu'une plaque de cuisson est allumée.
Une fois la température d'ébullition atteinte, réduire la température et laisser les mets mijoter.
ATTENTION :
Ne jamais utiliser du papier aluminium ou des récipients en matière plastique pour cuisiner des mets sur une table
vitrocéramique.
ATTENTION :
Ne pas toucher la zone de cuisson tant que le voyant de chaleur résiduelle sur la table vitrocéramique est allumé ; ce
voyant indique que la température dans la zone de cuisson est encore élevée.
TYPE DE RÉCIPIENT
Les récipients utilisés pour la cuisson doivent présenter des diamètres minimum pour permettre un fonctionnement correct.
On peut utiliser des récipients d'un diamètre supérieur à la taille des zones de cuisson, mais il est important que la base du
récipient ne touche pas d'autres zones de cuisson, et qu'elle soit bien centrée sur le foyer utilisé (Fig. 27-28).
Utiliser des récipients à fond plat (non concave ou convexe). (Fig. 29)
24
Page 25

UTILISATION DU PLAN À INDUCTION
MANETTE DE COMMANDE DE LA TABLE DE CUISSON
Avec ces manettes il est possible de commander les zones de cuisson de la table vitrocéramique. Sur chaque manette est
indiquée la zone de cuisson commandée. Le dessin ci-contre se réfère à la manette de la zone de cuisson arrière gauche.
Tourner la manette vers la droite pour régler la puissance de fonctionnement de la zone de cuisson qui va d'un minimum de 1 à
un maximum de 9 (fig.25). La puissance de tra vai I est indiquée par un afficheur positionné sur la table de cuisson.
Accélérateur de chauffe
Chaque zone de cuisson est dotée d'un accélérateur de chauffe. Ce système permet de faire fonctionner à la puissance
maximum la zone de cuisson pendant un temps proportionnel à la puissance sélectionnée. Pour faire partir l'accélérateur de
chauffe, tourner la manette à gauche, sélectionner la position «A» puis lacher. La lettre «A» apparait sur l'afficheur présent sur
la table de cuisson. On a maintenant à disposition 3 secondes pour choisir la position de chauffe désirée. Lorsque la position
est réglée entre 1 et 9, «A» et la position sélectionnée se mettent à clignoter alternativement sur l'afficheur. Pendant le
fonctionnement de l'accélérateur de chauffe, il est possible d'augmenter l'intensité à tout moment. La période de « pleine
puissance » sera modifiée en conséquence. Si, au contraire, la puissance est réduite, en tournant la manette en sens antihoraire l'option « A » est automatiquement désactivée.
Fonction Power
En utilisant la fonction power, il est possible de fai re fonctionner de façon continue, à la puissance maximum, chaque zone de
cuisson pendant un maximum de 10 minutes. Cette fonction permet, par exemple, de porter rapidement à ébullition une grande
quantité d'eau ou de passer la viande à feu vif. Tourner la manette en sens horaire et programmer l'intensité de chauffe sur la
position 9, sélectionner avec la manette la position «P» puis lacher. Sur l'afficheur de la table de la zone correspondante
apparait « p ». Au bout de 10 minutes, la puissance diminue automatiquement, retourne à la position 9 et « P » disparait.
L'interruption de la fonction power est possible en diminuant à tout moment l'intensité de chauffe. Lorsque l'option power est
sélectionnée sur une zone de cuisson (ex celle avant gauche), la puissance absorbée par la seconde zone (arrière gauche)
pourrait etre réduite pour fournir l'énergie maximum disponible à la première Pour ce motif la fonction power est prioritaire par
rapport à l'accélérateur de chauffe.
Si un récipient est enlevé de la zone de cuisson pendant l'allumage de la fonction power, la fonction s'arrete.
Fonction de maintien
Le but de la fonction de maintien est de régler la température du fond de la casserole à 65°C environ. Cela permet de maintenir
au chaud les aliments avec un niveau énergétique opti mal et aussi de les réchauffer tout doucement. La durée maximale de la
fOl)ction de maintien est limitée à 2 heures.
La fonction de maintien est entre [O] et [1] et est indiquée par les symboles correspondants sur les zones de cuisson.
TABLE DE CUISSON
Les objets métalliques tels que les couverts ou les couvercles ne doivent pas etre posés sur la surface de la table de cuisson
car iIs peuvent chauffer.
Zones de cuisson (fig.26)
L'appareil est doté de 5 zones de cuisson de diamètre et de puissance différents. Leur position est indiquée clairement grace à
des signes circulaires tandis que la puissance de chauffe est marquée sur la surface vitrocéramique. Les 5 zones de cuisson
sont de type HIGH-LlGHT et s'allument quelques secondes après avoir été activées. L'intensité de chauffe de chaque zone peut
etre réglée, d'un minimum à un maximum, par l'intermédiaire des manettes se trouvant sur le panneau frontal.
Sous chaque zone de cuisson se trouve une bobine appelée inducteur qui est alimentée par un système électronique et qui
crée un champ magnétique variable. Quand une casserole est placée à l'intérieur de ce champ magnétique, les courants à
haute tréquence se concentrent directement sur le tond de la casserole et on a la chaleur nécessaire à la cuisson des aliments.
Les 5 voyants de signalisation se trouvant entre les zones de cuisson s'allument lorsque la température d'une zone ou de
plusieurs zones dépasse 60° C. Ces voyants s'éteignent lorsque la température est à peu près intérieure à 60° C.
Numéro de zone : Puissance consommée
Fonctionnement normal : Fonctionnement normal :
1 1100W 1400W
2 1100W 1400W
3 1400W 2000W
4 2300W 3000W
5 2300W 3000W
Puissance totale 7400W
A vant d'utiliser la table pour la première fois, il est opportun de la chauffer à la température maximum pour une durée
suffisante à bruler d'éventuels résidus huileux de fabrication qui pourraient donner des gouts désagréables aux aliments.
TYPES DE CASSEROLES
Pour pouvoir fonctionner, ces appareils demandent des casseroles spéciales.
Le fond de la casserole doit en effet etre en fer ou en acier/fer pour générer le champ magnétique nécessaire à l'échauffement.
Ne sont pas adaptés les récipients en :
verre ;
céramique ;
terre cuite ;
acier, aluminium ou cuivre privés de fond magnétique ;
Pour vérifier que la casserole est bien adaptée, approcher un aimant au fond: si celui-ci est attiré, la casserole est adaptée à la
25
Page 26

cuisson à induction. Si l'on n'a pas d'aimant, on peut mettre dans le récipient une petite quantité d'eau, le poser sur une zone de
cuisson et mettre la table en marche. Si, sur l'afficheur, à la piace de la puissance apparaH le
symbole
Les casseroles utilisées pour la cuisson doivent avoir des diamètres minimums pour garantir le fonctionnement correct.
Ci-après nous donnons un tableau avec les diamètres minimums des casseroles en fonction de la zone de cuisson.
Il est possible d'utiliser des casserolès plus grandes que les zones de cuisson enfaisant attention que le fond de la casserole ne
soit pas en contact avec d'autres zones de cuisson et qu'elle soit toujours au centre du périmètre de la zone.(Fig.27-28).
Utiliser exclusivement des récipients conçus pour la cuisson à induction, au fond épais et complètement plat, ou, à
défaut, des récipients au fond non bombé (concave ou convexe). (fig.29)
Signal de présence des casseroles
Chaque zone de cuisson est dotée d'un dispositif de «présence des casseroles» qui fait partir la cuisson uniquement lorsqu'un
récipient approprié est présent et bien positionné sur la zone. Si le récipient n'est pas bien positionné ou n'est pas du matériau
adapté et l'on essaie d'actionner la zone de cuisson, sur l'afficheur apparaitra au bout de quelques secondes de l'activation de
la zone, le symbole
Chaleur résiduelle
Chaque zone de cuisson est dotée d'un dispositif qui signale sa chaleur résiduelle. Sur l'afficheur, après l'extinction de n'importe
quelle zone de cuisson, un « H » clignotant peut s'afficher. Ce signal indique que cette zone de cuisson est encore très chaude.
Il est pqssible de reprendre la cuisson des aliments mème avec « H » clignotant: dans ce cas, procéder comme décrit au
paragraphe « 3 ».
Blocage de la table de cuisson
Dans des conditions de repos la table peut ètre « bloquée » contre des allumages accidentels de la part d'enfants.
Avec les zones de cuisson éteintes, tourner vers la gauche simultanément les manettes des zones 2 et 4 jusqu'à ce que 5 L
apparaissent sur l'afficheur de la puissance puis lacher les manettes. Pour débloquer, répéter la mème opération: les afficheurs
des zones montreront le chiffre O qui indiquera que le blocage des zones est désactivé.
ATTENTION
Faire attention de ne pas renverser de sucre ou des mélanges sucrées sur la table pendant la cuisson ou de ne pas poser de
matériaux ou de substances qui pourraient fondre (plastique ou feuilles d'aluminium) ; si cela arrive, pour éviter d'abimer la
surface, éteindre immédiatement et nettoyer avec le racloir fourni pendant que la zone de cuisson est encore tiède. Si la table
de cuisson vitrocéramique n'est pas nettoyée immédiatement, on risque des incrustfJtions impossibles à enlever après
refroidissement de la table.
IMPORTANT !
Faire très attention aux enfants car iIs peuvent difficilement voir les voyants de chaleur résiduelle allumés. Après utilisation, les
zones de cuisson restent très chaudes pendant un certa in temps, meme si elles sont éteintes. Éviter que les enfants y posent
leurs mains.
Voici quelques conseils pour une utilisation correcte :
- Séchez le fond du récipient avant de le poser sur la plaque.
- Utilisez des récipients à fond plat et épais.
- N'utilisez jamais de récipients plus petit que la plaque.
- N'allumez la plaque qu'après avoir posé le récipient dessus.
- Après l'utilisation, nettoyez toujours la plaque avec des produits spéciaux que l'on trouve dans le commerce de
façon à ce que sa surface soit toujours propre ce qui permettra de prévenir la formation de l'oxydation.
- Une fois éteinte, la plaque reste encore chaude pendant quelques temps, par conséquent n'y poser pas les mains
ou d'autres objets.
- Pendant l'utilisation des plaques, veillez à ce que les manches des casseroles soient orientés vers l'intérieur. Ne
laissez pas approcher les enfants.
- Pendant la cuisson d'aliments avec de l'huile ou de la graisse, facilement inflammables, l'utilisateur ne doit pas
s'éloigner de la table de cuisson.
MISE EN GARDE : dès que vous constatez une fêlure sur la surface de la plaque, débranchez immédiatement la table
de cuisson.
cela veut dire que la casserole n'est pas adaptée.
qui signale l'erreur.
UTILISATION DU FOUR A GAZ (controle simple)
FOUR A GAS :
Toutes les cuisinières avec un four à gaz sont équipées d’un thermostat avec sécurité pour le réglage de la température de
cuisson. En tournant la manette dans le sens contraire des aiguilles d’une montre de façon à ce que l’indice et la température
choisie correspondent, on programme la température du four. Le four à gaz peut être combiné à un grilloir à gaz ou à un grilloir
électrique, dont l’utilisation est expliquée dans les pages correspondantes.
FOUR A GAS A CHALEUR TOURNANTE:
En actionnant le ventilateur du four par l’interrupteur approprié situé sur le tableau de commande, la circulation de l’air chaud
assure une distribution uniforme de la chaleur. Le préchauffage du four peut être évité; toutefois, pour la pâtisserie très délicate,
il est préférable de chauffeur le four avant d’y insérer les plats. Le système de cuisson à convection ventilée change
partiellement les différentes notions de cuisson traditionnelle. La viande ne doit plus être retournée pendant la cuisson et pour
obtenir un rôti à la broche il n’est plus indispensable d’utiliser le tournebroche, mais il suffit de mettre la viande directement sur
la grille.
Par l’emploi du four à gaz à chaleur tournante, les températures de cuisson sont légèrement inférieures d’environ 10-15°C par
rapport à l’utilisation du four à gaz traditionnel. Le fonctionnement du ventilateur empêche le fonctionnement du grill, qui ne peut
donc pas être utilisé avec le ventilateur en marche.
Le four peut aussi être utilisé de façon traditionnelle, (n’activant pas la ventilation) pour les aliments qui exigent la chaleur du
bas, par ex. la pizza.
ATTENTION ! Si la flamme du brûleur s’éteint accidentellement, fermer la manette d’actionnement et attendre 1 minute
au moins avant de le rallumer.
26
Page 27

L'allumage du brûleur du four peut s’effectuer de différentes façons :
- Allumage manuel (toujours possible mais en cas de coupure de courant) :
Ouvrir la porte du four et tourner ensuite la manette jusqu’à la position maximale de température (Fig.30-31). Approcher en
même temps une allumette allumée vers le petit tube de l’allumage visible sous la sole du four (fig. 32). Presser ensuite la
manette du thermostat (de cette façon le gaz commence à passer) et continuer à le presser 10 secondes encore après
l'allumage complet du brûleur. Relâcher la manette et contrôler si le brûleur reste allumé, sinon répéter toute l’opération.
- Allumage électrique (seulement pour les modèles équipés de ce dispositif) :
Ouvrir la porte du four. Presser et tourner ensuite la manette jusqu’à la position maximale de température (Fig.30-31). Presser
ensuite la manette du thermostat (pour cuisinières douées d'allumage sous bouton) Attendre 10 secondes environ après
l'allumage complet du brûleur et relâcher la manette. Contrôler si le brûleur reste allumé, sinon répéter toute l’opération.
Presser ensuite la manette du thermostat et la touche reportant le pictogramme de l’étincelle. Attendre 10 secondes environ
après l'allumage complet du brûleur et relâcher la manette. Contrôler si le brûleur reste allumé, sinon répéter toute l’opération.
Le dispositif d’allumage ne doit pas être actionné plus de 15secondes. Si après ce délai, le brûleur ne s’est pas allumé,
cesser d’appuyer sur le bouton, ouvrir la porte du four et attendre au moins 60 secondes avant de tenter un nouvel
allumage.
ATTENTION ! l'allumage du four doit toujours s’effectuer avec la porte ouverte.
ATTENTION ! avant la première utilisation, chauffer le four à vide pendant 15-30 minutes à la température de 250°
environ, afin d’éliminer l’humidité et l’odeur des matériaux internes.
Préchauffer le four pendant 15 minutes, avant d’introduire les aliments à cuire.
Le four est équipé de 5 glissières à différentes hauteurs (fig.33), dans lesquelles on peut glisser les grilles ou le plat. Pour éviter
de trop salir le four, il est conseillé de cuire l’aliment dans le plat ou sur une grille elle-même posée sur le plat. Le tableau cidessous reporte les temps de cuisson et la position indicative du plat pour les différents types d’aliments. Ces informations ne
sont données qu’à titre indicatif, et ne sauraient remplacer l’expérience ou les goûts personnels. Il est de toutes façons conseillé
de suivre les indications reportées sur le livre de recettes.
UTILISATION DU FOUR A GAZ (controle double)
FOUR A GAS:
Toutes les cuisinières avec un four à gaz sont équipées d’un thermostat avec sécurité pour le réglage de la température de
cuisson. En tournant la manette dans le sens contraire des aiguilles d’une montre de façon à ce que l’indice et la température
choisie correspondent, on programme la température du four. Le four à gaz peut être combiné à un grilloir à gaz ou à un grilloir
électrique, dont l’utilisation est expliquée dans les pages correspondantes.
Quand on utilise le four a gaz combine avec le grill a gaz, a l'interieur du four les temperatures augmentent comme indique dans
le tableau 7.
FOUR A GAS A CHALEUR TOURNANTE:
En actionnant le ventilateur du four par l’interrupteur approprié situé sur le tableau de commande, la circulation de l’air chaud
assure une distribution uniforme de la chaleur. Le préchauffage du four peut être évité; toutefois, pour la pâtisserie très délicate,
il est préférable de chauffeur le four avant d’y insérer les plats. Le système de cuisson à convection ventilée change
partiellement les différentes notions de cuisson traditionnelle. La viande ne doit plus être retournée pendant la cuisson et pour
obtenir un rôti à la broche il n’est plus indispensable d’utiliser le tournebroche, mais il suffit de mettre la viande directement sur
la grille.
Par l’emploi du four à gaz à chaleur tournante, les températures de cuisson sont légèrement inférieures d’environ 10-15°C par
rapport à l’utilisation du four à gaz traditionnel. Le fonctionnement du ventilateur empêche le fonctionnement du grill, qui ne peut
donc pas être utilisé avec le ventilateur en marche.
Le four peut aussi être utilisé de façon traditionnelle, (n’activant pas la ventilation) pour les aliments qui exigent la chaleur du
bas, par ex. la pizza.
ATTENTION ! Si la flamme du brûleur s’éteint accidentellement, fermer la manette d’actionnement et attendre 1 minute
au moins avant de le rallumer.
POSITION THERMOSTAT BRULEUR FOUR BRULEUR FOUR+BRULEUR GRILL
1=MINIMUM 120°C 200°C
8=MAXIMUM 220°C 270°C
L'allumage du brûleur du four peut s’effectuer de différentes façons :
- Allumage manuel (toujours possible mais en cas de coupure de courant) :
Ouvrir la porte du four et tourner la manette jusqu’à faire correspondre le N°8 avec l'indice(Fig.31). Approcher en même temps
une allumette allumée vers le petit tube de l’allumage visible sous la sole du four
thermostat (de cette façon le gaz commence à passer) et continuer à le presser 10 secondes encore après l'allumage complet
du brûleur. Relâcher la manette et contrôler si le brûleur reste allumé, sinon répéter toute l’opération.
- Allumage électrique (seulement pour les modèles équipés de ce dispositif) :
Ouvrir la porte du four. Presser et tourner ensuite la manette jusqu’à la position maximale de température (numéro 8). Presser
ensuite la manette du thermostat (pour cuisinières douées d'allumage sous bouton) Attendre 10 secondes environ après
l'allumage complet du brûleur et relâcher la manette. Contrôler si le brûleur reste allumé, sinon répéter toute l’opération.
Presser ensuite la manette du thermostat et la touche reportant le pictogramme de l’étincelle. Attendre 10 secondes environ
après l'allumage complet du brûleur et relâcher la manette. Contrôler si le brûleur reste allumé, sinon répéter toute l’opération.
Le dispositif d’allumage ne doit pas être actionné plus de 15secondes. Si après ce délai, le brûleur ne s’est pas allumé,
cesser d’appuyer sur le bouton, ouvrir la porte du four et attendre au moins 60 secondes avant de tenter un nouvel
allumage.
ATTENTION ! l'allumage du four doit toujours s’effectuer avec la porte ouverte.
ATTENTION ! avant la première utilisation, chauffer le four à vide pendant 15-30 minutes à la température de 250°
environ, afin d’éliminer l’humidité et l’odeur des matériaux internes.
Préchauffer le four pendant 15 minutes, avant d’introduire les aliments à cuire.
(fig.32). Presser ensuite la manette du
27
Page 28

Le four est équipé de 5 glissières à différentes hauteurs (fig.33), dans lesquelles on peut glisser les grilles ou le plat. Pour éviter
de trop salir le four, il est conseillé de cuire l’aliment dans le plat ou sur une grille elle-même posée sur le plat. Le tableau cidessous reporte les temps de cuisson et la position indicative du plat pour les différents types d’aliments. Ces informations ne
sont données qu’à titre indicatif, et ne sauraient remplacer l’expérience ou les goûts personnels. Il est de toutes façons conseillé
de suivre les indications reportées sur le livre de recettes.
UTILISATION DU COMMUTATEUR (fig.34-35-36 )
Le commutateur 2 + 0 est utilisée pour les modèles avec four à gaz.
Le symbole
Le symbole
le symbole
et indique la fonction du ventilateur et la lumière four
et indique la fonction du tournebroche et la lumière four
indique la fonction de la lumière four.
UTILISATION DU THERMOSTAT ELECTRIQUE (Fig.36)
Sur ces modèles, le thermostat sert à maintenir constante la température intérieure du four d’une façon constante. La
température préfixée est comprise entre 50°C et 250°C.
Tourner le bouton dans le sens des aiguilles d’une montre, jusqu’à ce que la température choisie se trouve en face du repère
imprimée sur le devant de la cuisine. Le thermostat, représenté par le voyant orange s’éteint lorsque la température intérieure
du four sera de 10°C supérieure, et s’allumera lorsqu’elle sera de 10°C inférieure à la température désirée. Le thermostat peut
commander les résistances du four à condition que le commutateur se trouve sur une des modalités de fonctionnement des
résistances du four. Si l’interrupteur se trouve sur le 0, le thermostat n’a plus aucune influence sur les résistances du four qui
restent débranchées.
UTILISATION DU FOUR MULTIFONCTIONS (Fig.37)
(CUISINES AVEC FOUR ELECTRIQUE)
Avant d'utiliser les fours pour la première fois :
- Retirer tous les emballages et les accessoires à l'intérieur des fours.
- Chauffer les fours à 200 °C pendant ½ heure pour brûler les résidus de fabrication.
- Le programmateur automatique doit être réglé en mode Manuel pour la cuisson ordinaire.
- Le four ne fonctionne pas lorsqu'il est réglé en mode Automatique. Voir pages 35-36.
Comment utiliser les fours :
1
Tourner le sélecteur de mode de cuisson (Fig. 37) dans le sens des aiguilles d'une montre jusqu'au mode de
cuisson désiré.
Le voyant orange s'allume pour indiquer que l'élément est allumé.
2
Tourner le sélecteur de température (Fig. 36B) dans le sens des aiguilles d'une montre jusqu'à la température désirée.
Le voyant orange s'éteint lorsque le four a atteint la bonne température et est prêt à l'emploi. Il est normal que ce voyant
s'allume et s'éteigne durant la cuisson car les éléments maintiennent la température.
3
Pour éteindre le four, tourner les sélecteurs mode de cuisson et température dans le sens inverse des aiguilles d'une
montre sur •.
La cuisson peut générer de la vapeur. Par précaution, toujours ouvrir la porte en deux temps. D'abord, ouvrir partiellement la
porte de 100 mm pendant quelques secondes pour permettre à la vapeur de s'échapper, puis ouvrir complètement la porte.
Éloigner le visage et la tête de la porte à l'ouverture du four.
Ne jamais recouvrir l'intérieur du four avec du papier aluminium pour éviter toute surchauffe et tout dommage à l'émail. Ne
jamais cuire les aliments sur le plancher du four. Toujours disposer les plats et les plateaux sur une grille du four. Ne jamais
laisser la poêle grill ou d'autres plats sur le plancher du four pour éviter tout dommage au four.
Préchauffage du four :
"Quickstart" (Pré-chauffage rapide) est le moyen le plus efficace et rapide de préchauffer le four principal (four de gauche). Il
permet aussi une cuisson au four uniforme. Utiliser "Quickstart" comme suit (
1 Sélectionner "Quickstart" (en utilisant le sélecteur de mode de cuisson) et la température de cuisson souhaitée
(en utilisant le sélecteur de température). Laisser le voyant thermostat orange s'allumer et s'éteindre plusieurs fois
pour que la température se stabilise avant d'introduire les aliments.
2 Sélectionner le mode de cuisson habituel et disposer les aliments dans le four.
3 Si l'on utilise le mode "True Fan" (Chaleur tournante) pour préparer des aliments sensibles à la chaleur tels que les gâteaux
ou les meringues, laisser le voyant orange s'allumer et s'éteindre plusieurs fois pour que l'élément supérieur refroidisse un peu.
Ne pas utiliser 'Quickstart" pour cuire les mets. "Quickstart" est un système de préchauffage rapide.
) :
FONCTIONS DU FOUR
Quel que soit le mode de cuisson choisi (à l'exception de "gril" et "décongélation"), il est recommandé de toujours préchauffer le
four avec "Quickstart" avant de sélectionner le mode de cuisson.
Lors de l’utilisation du mode "Fan Assisted" (Convection) ou "True Fan" (Chaleur tournante), il est recommandé de réduire la
température du four de 20 °C si l'on suit une recette écrite pour un four conventionnel. Contrôler souvent les aliments vers la fin
de la cuisson jusqu'à se familiariser avec les temps et les températures de cuisson.
Les fours offrent une large sélection de modes de cuisson avec différentes zones de chaleur. Ainsi, le mode "Chaleur tournante"
est particulièrement indiqué pour les gâteaux, les desserts et les cuissons coup sur coup. Le mode "Convection" permet de
dorer les aliments ; il est donc plus recommandé pour rôtir les viandes et les légumes ou les produits de pomme de terre
surgelés.
Exemple : Pour cuire une dinde :
Lorsque l'on cuit une dinde, la poêle grill peut faire office de plat à four. Recouvrir le fond de la poêle grill d'une double couche
de papier aluminium extra large de manière à envelopper lâchement la dinde. Il est important de laisser suffisamment d'espace
28
Page 29

sur les côtés et sur le dessus du four pour permettre à l'air chaud de circuler. S'assurer que le papier aluminium ne touche pas
r
les côtés ou le dessus du four. Dans un four de 60 cm, il est possible de cuire une dinde de 9 à 11 kg et dans un four de 40 cm,
une dinde de 6 à 9 kg.
La lumière du four s'allume lorsque l'on sélectionne un mode de cuisson.
Symbole Fonction Quand l'utilise
Quickstart
(Préchauffage rapide)
Defrost
(Décongélation)
Four conventionnel
Élément inférieur Utiliser à des températures basses pour les ragoûts à cuisson lente, les crèmes
Élément supérieur Utiliser pour dorer et réchauffer des plats tels que les lasagnes, la moussaka et le
Il est recommandé de toujours préchauffer le four avant de l'utiliser, quelle que
soit la température de cuisson. Ne pas utiliser le mode "Quickstart" pour cuire les
aliments - une fois que le four est monté en température, sélectionner l'un des
modes de cuisson ci-après.
Placer de petits produits surgelés sur une plaque de cuisson sur le gradin le plus
bas, et tourner le sélecteur de température sur 0 °C. Ne jamais utiliser la chaleur
pour décongeler pour éviter tout problème de santé. Décongeler dans le
réfrigérateur les produits plus volumineux tels que les morceaux de viande ou un
poulet ou une dinde entiers.
Idéal pour rôtir et cuire des produits comme le pain ou les gâteaux riches en fruits
sur une grille du four.
ou pour réchauffer les assiettes. Utiliser à des températures élevées pour cuire
des tartes sucrées et salées.
chou-fleur gratiné.
Gril conventionnel
Cuisson au gril par
convection
Four à convection Le ventilateur fait circuler l'air chaud autour du four pour permettre une cuisson
Four à chaleur
tournante
Pizza Utiliser pour cuire des pizzas, des pâtes ou des pains plats avec une base
Utilisation du gril
La poêle grill est constituée d'un trépied en fil métallique et d'une plaque émaillée. Disposer les aliments sur le trépied en fil
métallique. On peut choisir un gradin inférieur pour ralentir la cuisson, ou bien réduire la température. Un manche amovible est
fourni pour retirer la plaque chaude.
Les modes "Cuisson au gril par convection" et "Gril conventionnel" sont conçus pour une utilisation avec la porte du four
fermée. Cela permet un préchauffage efficace et une cuisson homogène.
Pour griller, toujours préchauffer l'élément du gril pendant 5 minutes avant d'introduire les aliments (la température de
préchauffage recommandée est de 200 °C). Il est recommandé de retirer la poêle grill du four lorsqu'elle n'est pas utilisée pour
favoriser la circulation de l'air dans le four. Utiliser le gril avec la porte du four fermée. Sélectionner le mode "Cuisson au gril par
convection" pour des morceaux de viande plus épais et pour cuire des aliments à forte teneur en eau afin de réduire la
condensation.
Toujours utiliser des gants pour manipuler la poêle grill et pour retourner les aliments. Ne pas recouvrir la poêle grill avec du
papier aluminium car cela peut endommager le revêtement émaillé et les éléments du gril.
À la fin de la cuisson, retirer et nettoyer la poêle grill. Si des aliments riches en lipides ont été préparés, laisser le grill allumé à
la température maximale pendant 5 minutes puis nettoyer l'élément du gril.
Idéal pour les crumpets, muffins et toasts au fromage gallois. Utiliser pour griller
pendant moins de 15 minutes. Pour les aliments qui nécessitent un temps de
cuisson plus long, sélectionner la cuisson au gril par convection.
Le ventilateur fait circuler l'air chaud autour des aliments pour les cuire
complètement. Idéal pour cuire des viandes comme les saucisses et les
morceaux de poulet. Cuire des aliments avec une teneur en eau élevée, comme
le bacon et les côtelettes, en utilisant ce mode de cuisson contribue à réduire la
condensation. (Procédure recommandée : Porte fermée 200 °C, deuxième gradin
à partir du gradin le plus haut, retourner les aliments à mi-cuisson.
homogène de plus grandes quantités de nourriture. Utiliser pour rôtir les légumes,
les viandes et la volaille, ou les poissons. Ce mode de cuisson est idéal pour
cuire des produits de pomme de terre surgelés et du poulet ou du poisson
panés/enrobés de pâte à frire.
Le four à chaleur tournante est indiqué pour la plupart des recettes et c’est un
mode de cuisson efficace. La température reste uniforme dans tout le four et est
particulièrement indiquée pour une cuisson sur plusieurs grilles du four ou pour
des cuissons coup sur coup.
parfaitement cuite.
UTILISATION DU FOUR ELECTRIQUE A CONVECTION NATURELLE
Avant d’utiliser le four pour la première fois, le chauffer à une température de 250°C pendant 30 minutes au maximum, afin de
chasser les odeurs produites par l’isolement interne.
Pendant le fonctionnement normal, sélectionner la température désirée pour la cuisson avec le bouton du thermostat et
attendre que le voyant orange s’éteigne avant d’introduire les aliments.
Le four est pourvu de 5 guides placés à des différentes hauteurs (Fig. 33) qui permettent de positionner indifféremment les
grilles et les plateaux. Pour éviter de salir excessivement le four, nous conseillons de cuire la viande sur le plateau ou bien sur
la grille qui s’adapte sur le plateau.. L’expérience personnelle vous permettra ensuite de changer éventuellement les valeurs
rapportées dans le tableau. Nous conseillons cependant de suivre les indications de la recette.
29
Page 30

UTILISATION DU FOUR ELECTRIQUE VENTILE
Chauffer le four à une température de 250°C pendant 30 minutes au maximum, avant de l’utiliser pour la première fois, afin de
chasser les odeurs produites par l’isolement interne. Avant de commencer la cuisson, porter le four à la température désirée et
attendre que le voyant orange s’éteigne. Ce type de four possède une résistance circulaire à l’intérieur de laquelle est disposé
un ventilateur qui provoque une circulation d’air forcée en sens horizontal. Grâce à ce type de fonctionnement, le four ventilé
permet de cuire en même temps plusieurs plats, et de maintenir inaltéré le goût de chaque plat. Sur quelques modèles
seulement, un filtre métallique amovible est appliqué sur la paroi postérieure et sert à retenir le gras produit pendant la cuisson
du rôti ; il est donc conseillé d’effectuer périodiquement un lavage avec de l’eau savonneuse et de rincer abondamment afin
d’ôter le gras accumulé. Pour enlever le filtre métallique, il suffit d’exercer une légère pression vers le haut sur la languette
indiquée par la flèche. La circulation de l’air chaud assure une répartition uniforme de la chaleur. Le préchauffage du four peut
être évité ; malgré tout, pour une pâtisserie particulièrement délicate, il est préférable de réchauffer le four avant d’introduire les
plats. Le système a convection ventilée modifie quelque peu les notions de cuisine traditionnelle. La viande n’a plus besoin
d’être retournée pendant la cuisson et pour avoir un rôti à la broche, il suffit de le mettre directement sur la grille, sans devoir
utiliser un tournebroche.
UTILISATION DU GRILL A GAZ (controle simple)
Le grill à gaz fonctionne exclusivement avec le four à gaz. Grill a gaz controle directement par le thermostat. Le bouton (Fig.30)
est le même que celui du four, mais au lieu d’être tourné dans le sens inverse des aiguilles d’une montre (voir utilisation du four
à gaz), il faut le tourner dans le sens des aiguilles d’une montre, et faire correspondre le symbole avec le repère. Le brûleur du
grill fonctionne toujours au maximum, il n’existe donc pas de position minimum.
Le grill à gaz peut être allumé de façon suivante :
Allumage manuel : Il suffit d’ouvrir complètement la porte du four, de tourner le bouton en faisant correspondre le symbole
avec le repère, et, continuant à appuyer sur le bouton, approcher une allumette au brûleur. Une fois allumé, attendre 10
secondes et relâcher le bouton. Vérifier que le brûleur est allumé ; en cas contraire, répéter l’opération.
Allumage électrique : dans ce cas, ouvrir complètement la porte du four, presser et tourner le bouton en faisant correspondre
le symbole avec le repère, presser ensuite la manette du thermostat (pour cuisinières douées d'allumage sous bouton) et tout
en le tenant enfoncé, ou appuyer sur la touche avec le symbole de l’étincelle. Une fois allumé, attendre 10 secondes et relâcher
le bouton. Vérifier que le brûleur est allumé, en cas contraire, répéter l’opération.
ATTENTION: comme pour le four, il est essentiel d’effectuer l’allumage du grill avec la porte complètement ouverte.
Le grill à gaz peut être utilisé pour griller sur la grille du four ou utilisant le tournebroche.
Grillade sur la grille : dans ce cas, placer la grille fournie avec l’appareil au niveau 1 ou 2 et poser dessus les aliments à griller.
Pour recueillir les sauces de cuisson, le plateau doit être placé aux niveaux inférieurs. Allumer ensuite le brûleur en suivant les
indications reportées ci dessus.
IMPORTANT: pour tous les modèles, la grillade sur la grille doit être toujours faite avec la porte fermée.
Grillade avec tournebroche : sa fonction est de griller en utilisant la broche rotative. Placer dans le four la tige sur les grilles
latérales au niveau 3. Enfiler les aliments sur la broche et mettre le tout dans le four, en faisant entrer la pointe dans
l’encastrement qui se trouve dans la partie gauche du four, et poser la broche dans l’emplacement prévu à cet effet(Fig.38).
Enfiler ensuite le plateau dans une des guides inférieures, allumer le brûleur et appuyer sur la touche représentant le symbole
de la broche pour faire partir le moteur.
IMPORTANT: pour tous les modèles, la grillade sur la grille doit être toujours faite avec la porte fermée.
ATTENTION: les parties accessibles peuvent devenir très chaudes pendant les opérations de grillade. Eloigner les
enfants de la cuisine.
UTILISATION DU GRILL A GAZ (controle double)
Le grill à gaz fonctionne exclusivement avec le four à gaz.
Sur le panneau commandes au-dessus de chaque poignee il est serographie un schema dans lequel il est indiquee le bruleur a
lequel la poignee se refer.
Le grill à gaz peut être allumé de façon suivante :
Allumage manuel : Il suffit d’ouvrir complètement la porte du four, de tourner le bouton en faisant correspondre le symbole
avec le repère ( Fig.15 ), et, continuant à appuyer sur le bouton, approcher une allumette au brûleur. Une fois allumé, attendre
10 secondes et relâcher le bouton. Vérifier que le brûleur est allumé ; en cas contraire, répéter l’opération.
Allumage électrique : dans ce cas, ouvrir complètement la porte du four, presser et tourner le bouton en faisant correspondre
le symbole avec le repère, presser ensuite la manette du thermostat (pour cuisinières douées d'allumage sous bouton) et tout
en le tenant enfoncé, ou appuyer sur la touche avec le symbole de l’étincelle. Une fois allumé, attendre 10 secondes et relâcher
le bouton. Vérifier que le brûleur est allumé, en cas contraire, répéter l’opération.
ATTENTION : après avoir allumé les brûleurs, attendre 2 à 3 minutes avant de refermer la porte du four pour obtenir
une flamme stable
ATTENTION: comme pour le four, il est essentiel d’effectuer l’allumage du grill avec la porte complètement ouverte.
Le grill à gaz peut être utilisé pour griller sur la grille du four ou utilisant le tournebroche.
Grillade sur la grille : dans ce cas, placer la grille fournie avec l’appareil au niveau 1 ou 2 et poser dessus les aliments à griller.
Pour recueillir les sauces de cuisson, le plateau doit être placé aux niveaux inférieurs. Allumer ensuite le brûleur en suivant les
indications reportées ci dessus.
IMPORTANT: pour tous les modèles, la grillade sur la grille doit être toujours faite avec la porte fermée.
Grillade avec tournebroche : sa fonction est de griller en utilisant la broche rotative. Placer dans le four la tige sur les grilles
latérales au niveau 3. Enfiler les aliments sur la broche et mettre le tout dans le four, en faisant entrer la pointe dans
l’encastrement qui se trouve dans la partie gauche du four, et poser la broche dans l’emplacement prévu à cet effet(Fig. 38).
Enfiler ensuite le plateau dans une des guides inférieures, allumer le brûleur et appuyer sur la touche représentant le symbole
de la broche pour faire partir le moteur ou selectionaire la poigne sur le symbole de la broche.
30
Page 31

IMPORTANT : toujours fermer la porte du four lorsque l'on grille les aliments avec le tournebroche.
.ATTENTION: les parties accessibles peuvent devenir très chaudes pendant les opérations de grillade. Eloigner les
enfants de la cuisine.
UTILISATION DU GRILL ELECTRIQUE STATIQUE
Le grill électrique peur fonctionner avec le four à gaz (Fig.30) ou avec le four électrique (Fig.37).
Dans tous les cas, le grill est commandé par le bouton du thermostat du four. Comme pour le grill à gaz, le grill électrique peut
servir à griller sur la grille du four ou utilisant le tournebroche. La résistance du grill est de 2500 W
Grillade sur la grille : dans ce cas, il s’agit de placer la grille fournie avec l’appareil au niveau 1 ou 2 et de poser dessus les
aliments à griller. Pour recueillir les sauces de cuisson, le plateau doit être placé aux niveaux inférieurs. Mettre en marche la
résistance du grill commutant le thermostat sur la position correspondante.
Grillade avec tournebroche : sa fonction est de griller en utilisant la broche rotative. Placer dans le four la tige sur les grilles
latérales au niveau 3. Enfiler les aliments sur la broche et mettre le tout dans le four, en faisant entrer la pointe dans
l’encastrement qui se trouve dans la partie gauche du four, et poser la broche dans l’emplacement prévu à cet effet (Fig.38).
Placer ensuite le plateau dans les guides inférieurs et appuyer sur la touche qui enclenche le tournebroche et la résistance
(version avec four à gaz) ou bien placer le thermostat sur la position correspondante (version four électrique) et appuyer sur la
touche reportant le symbole de la broche ou selectionaire la poigne sur le symbole de la broche.
IMPORTANT : toujours fermer la porte du four lorsque l'on grille les aliments avec le tournebroche
ATTENTION: les parties accessibles peuvent devenir très chaudes pendant les opérations de grillade. Eloigner les
enfants de la cuisine.
UTILISATION DU GRILL ELECTRIQUE VENTILE
Le grill électrique-ventilé est une fonction particulière dont dispose uniquement le four multifonctions. Positionner le
commutateur 9+0 sur la position correspondante de façon à activer la résistance du grill de 3000W et la motoventilation.
Généralement, pour effectuer une grillade parfaite, il est conseillé de positionner la grille du four au milieu et le plateau audessous.
IMPORTANT: pendant l’utilisation du grill électrique-ventilé, ne pas positionner le thermostat sur plus de 175°C, qui se
trouve entre la position 150°C et 200°C afin d’éviter une surchauffe de la paroi avant de l’appareil ; en effet, la grillade
ventilée doit être effectuée avec la porte fermée.
N.B. :
L'appareil de cuisson est équipé d'un ventilateur de refroidissement commandé par un thermostat, conçu pour éviter la
surchauffe du bandeau de commande et des boutons. Le ventilateur fonctionne à une température déterminée. Le ventilateur
s'éteint lorsque la température diminue.
UTILISATION DE LA MINUTERIE
Le minuteur, écoulé un certain temps, averti avec un signal acoustique la fin du temps de cuisson des aliments. Il suffit de
tourner complètement le bouton dans le sens des aiguilles d’une montre (fig.39), puis de le tourner dans le sens opposé
choisissant le temps de cuisson.
ATTENTION: le signal acoustique n’arrête pas la cuisson. Pour interrompre la cuisson, il faut intervenir manuellement
en éteignant les boutons correspondants.
TIMER DE FIN CUISSON (Fig.40)
Il permet de sélectionner la cuisson manuellement ou bien la minuterie avec extinction automatique du four à fin cuisson.
Si on ne se sélectionne pas aucune durée de cuisson, alors il est nécessaire de positionner la poignée temporisateur sur le
symbole
.
Pour éteindre le four, tourner les sélecteurs de temps de cuisson, mode de cuisson et température de cuisson sur la position 0;
la fin du décompte est confirmée par une sonnerie.
N.B.: Cette fonction est uniquement disponible pour le four électrique.
UTILISATION DE L'HORLOGE ÉLECTRONIQUE (Fig. 41)
Sous tension
L'affichage clignote
Fonction "heure locale"
Version 3 touches : appuyez sur la touche "heure locale"
Version 2 touches : appuyez sur les deux touches en même temps
Régler l'heure locale au moyen des touches "+" et "-".
Cette fonction reste activée 7 secondes après la dernière opération "+" / "-" !
Changement Heure d'été / Heure d'hiver
Activer la fonction "heure locale" ; appuyez sur la touche pendant 4 secondes jusqu'à ce que l'affichage des heures clignote.
Changer les heures en utilisant la touche "+" ou "-". Cela n'aura pas d'effet sur les minutes et les secondes cachées !
Réglage de la minuterie
Cette fonction est activée au moyen de la touche "+". Appuyez sur la touche "+" une nouvelle fois pour augmenter la durée.
Le réglage se fait par pas de 10 secondes ou minutes.
Durant le décompte, la minuterie est prioritaire sur l'affichage. Le symbole représentant une cloche s'allume. Les unités sont les
secondes ou les minutes dans la section longue durée.
Le temps maximal est de 10 heures. Le format changera après 99 minutes et 50 secondes et passera à 1 heure et 40 minutes.
31
Page 32

Le symbole représentant une casserole s'allume.
Pour afficher l'heure de la journée, appuyez sur la touche "heure locale" pendant 6 secondes.
Remise à zéro de la minuterie
Décompte jusqu'au zéro avec pression permanente de la touche "-" (arrêt automatique au zéro).
Signal
Le signal après "temps écoulé" s'affichera pendant 7 minutes s'il n'a pas été remis à zéro avec la touche "heure locale".
Le signal suivant est omis si l'on appuie sur la touche "heure de la journée" durant les 15 dernières secondes de la minuterie.
Fréquence du signal
Si aucune fonction n'est activée, on peut sélectionner la fréquence du signal en appuyant sur la touche "-".
Trois fréquences (1,5 ; 2,0 ; 3,0 kHz) peuvent être sélectionnées.
UTILISATION DE L’HORLOGE TACTILE (fig.42)
Fonctionnement
Relevé de la fréquence de réseau
Au moment de l'allumage de l'appareil, on détermine la fréquence de réseau. Lorsque le compteur est branché à 60 Hz, le
symbole Celsius clignote à l'allumage.
Allumage
Au moment de l'allumage, le contact du relais est ouvert. L'écran et le symbole AUTO clignotent, l'heure débute à 0:00 et
clignote jusqu'à ce qu'on la règle.
Réglage de l'heure
Appuyer simultanément sur les touches PLUS et MOINS. À l'allumage de l'appareil, il est également possible d'accéder au
réglage de l'heure en appuyant sur la touche MODE.
Il est possible de régler l'heure avec les touches PLUS et MOINS pendant que le point entre l'heure et les minutes clignote. Le
mode de réglage rapide est activé lorsque la touche PLUS ou MOINS est touchée pendant plus d'une seconde. Si le réglage de
l'heure est sélectionné pendant qu'un programme de cuisson automatique est activé, le programme automatique est annulé.
Signal acoustique
Le signal acoustique se déclenche si le minuteur atteint la fin du temps programmé. Il est possible d'éteindre le signal en
touchant n'importe quelle touche, ou lorsque la durée du signal acoustique est atteinte.
Réglage du signal acoustique
Appuyer simultanément sur les touches PLUS et MOINS (menu pour modifier l'heure), puis sur la touche MODE pour
sélectionner le menu pour modifier le signal acoustique. Il est possible de régler la fréquence du signal acoustique en appuyant
sur la touche MOINS lorsque le texte « tonX » s'affiche sur l'écran.
Note : si la touche tactile est inactive, une alarme visuelle apparaît. Elle disparaît ensuite si l'on appuie sur une combinaison de
touches valide pendant plus de 2 secondes.
Effacer les programmes et la fonction manuelle
Il est possible d'effacer la durée programmée du minuteur de la façon suivante :
a) « clear Function » - Fonction de reconfiguration : sélectionner le programme de minuteur, puis appuyer simultanément
sur les touches PLUS et MOINS. Après cette opération, l'écran sort du mode de réglage et retourne immédiatement à
l'affichage de l'heure.
b) Diminuer la durée du minuteur jusqu'à zéro. Le minuteur reste en mode de réglage.
Minuteur
Lorsque le minuteur est sélectionné, le symbole de la cloche clignote et l'écran affiche le temps restant à la fin du compteur en
heures et minutes. C'est seulement lorsque le compteur arrive à la dernière minute que l'écran affiche les secondes restantes.
Si un programme de minuteur est activé, le symbole de la cloche reste allumé de façon permanente. Lorsqu'on atteint la fin du
temps programmé, le symbole de la cloche clignote et le signal acoustique se déclenche.
Le programme de minuteur fonctionne indépendamment des autres programmes.
Blocage des touches
Après avoir rallumé le minuteur ou lorsqu'aucune touche n'est touchée pendant 7 secondes, le blocage des touches s'active.
Lorsque l'on touche une touche ou une combinaison de touches pendant 2 secondes ou plus, le blocage des touches se
désactive.
UTILISATION DE L’HORLOGE ANALOGIQUE (fig.43)
Pour régler l'heure indiquée par les aiguilles de l'horloge appuyer brièvement 2 fois sur le bouton jusqu'à l'obtention du
clignotement de l'icone "CLOCK"
Pour augmenter ou diminuer l'horaire affiché à la cadence de 1 minute, tourner le bouton en sens horaire ou anti-horaire,
l'aiguille des minutes bougera à la cadence de 1 minute à la fois soit en sens horaire que anti-horaire.
Une fois terminés les ajustements, après 10 secondes l'horloge électronique sortira automatiquement de la fonction de réglage
horaire.
La programmation du minuterie permet d'avoir un simple allarme à la fin d'un laps de temps programmé.
Pour programmer une allarme appuyer brièvement le bouton une seule fois afin d'obtenir le clignotement de l'icone "ALARM",
faite tourner le bouton pour fixer l'horaire de l'alarme et appuyer brièvement une seule fois pour confirmer, l'icone "ALARM"
restera allumé jusqu'à l'entrée en fonction d'un simple signal acoustique.
Appuyer à nouveau brièvement le bouton une seule fois pour faire retour à la fonction horloge.
Pour annuler la programmation du Minute Minder tenir appuyer le bouton jusqu'à l'extinction de l'icone "ALARM"
32
Page 33

)
Signification des symboles sur l'écran :
1
(* :
2
3
4
5
UTILISATION DE PROGRAMMATEUR ÉLECTRONIQUE À 3 TOUCHES (fig.44)
Programme Automatique en marche
A
*
dans certaines versions, l'inscription Auto s'affiche en verticale
S'il est affiché, le four est activé pour fonctionner en mode manuel.
S'il est clignotant, il indique que le programmate ur est en modalité de programmation de
•
l'heure.
S'il est allumé, il indique qu'un minuteur d'avertissement est en marche .
Touche pour diminuer la valeur des chiffres durant les réglages du minuteur.
-
Elle sert également à sélectionner le niveau de sonnerie souhaité (3 niveaux).
.
6
7
Touche "Mode" pour accéder aux options de programmation prévues par le programmateur.
M
Touche pour augmenter la valeur des chiffres durant les réglages du minuteur.
+
La premièr mise en marche
Les chiffres et la lettre A s'affichent à l'écran en mode clignotant lorsque le four est branché au réseau électrique ou après une
éventuelle coupure de courant. Dans ces conditions on ne peut pas allumer le four.
Pour régler l'heure actuelle et/ou activer le four au fonctionnement, appuyer sur la touche M et la maintenir appuyée pendant 2
secondes. La lettre A s'éteint et l'éclairage des chiffres affichés sur l'écran devient fixe.
Quand le point (3) est en mode clignotant, appuyer sur la touche - ou sur la touché + pour corriger l'heure qui est affichée. Le
paramètre est accepté par le programmateur peu après avoir relâché la touche.
N.B. Le four pourra exercer ses fonctions de cuisson uniquement lorsque l'écran du programmateur affichera le symbole (2)
allumé.
Minuteur d'avertissement
La fonction du "minuteur" sert uniquement d'avertisseur sonore, que l'on peut régler pour une durée de 23 heures et 59 minutes
maximum. Lorsque le temps programmé est écoulé, le symbole (4) s'éteint et un signal sonore s'active puis s'éteint
automatiquement après 7 minutes ou en appuyant sur n'importe quelle touche. Pour régler le minuteur, appuyer sur la touche M
pendant au moins 2 secondes ou jusqu'à ce que le symbole (4) commence à clignoter. Programmer dans combien d'heures
etjou minutes le minuteur devra s'activer en utilisant la touche + ou -pour augmenter ou diminuer la valeur des chiffres sur
l'écran. Relacher la touche + ou -quand le temps désiré est atteint. L'heure actuelle ainsi que le symbole ) s'afficheront après
quelques secondes. Le compte à rebours commencera immédiatement.
Cuisson semi-automatique
- DURÉE de Cuisson :
Après avoir sélectionné une fonction de cuisson parmi celles qui sont disponibles et avoir réglé la température désirée, appuyer
sur la touche M pendant 2 secondes au moins pour accéder au mode de programmation. Le symbole (4) s'allume. Relacher et
appuyer de nouveau sur la touche M. Le symbole A commence à clignoter sur l'écran, et l'inscription " dur " s'affiche. Celle•ci
sera ensuite altérée avec par l'affichage des chiffres : 0• 00. Programmer le temps souhaité de durée de la cuisson en appuyant
sur les touches ¬ou + (temps maximal de programmation : 10 heures). Après quelques secondes, le temps programmé sera
automatiquement pris en compte par le programmateur, sinon appuyer plusieurs fois sur la touche M afin de revenir à
l'affichage de l'heure actuelle. Les symboles A et (2) seront allumés. Un signal sonore est émis à la fin du temps de cuisson
programmé et le four s'éteint automatiquement.
Voir les paragraphes suivants : désactivation de la sonnerie et réactivation du four.
-FIN de Cuisson :
Après avoir sélectionné une fonction de cuisson parmi celles qui sont disponibles et avoir réglé la température désirée, appuyer
sur la touche M pendant 2 secondes au moins pour accéder au mode de programmation. Le symbole ) s'allume. Relacher et
appuyer de nouveau sur la touche M. Le symbole A commence à clignoter sur l'écran, et l'inscription " dur " apparait. Appuyer
de nouveau sur la touche M. L'inscription " End " s'affichera sur l'écran. Celle•ci sera ensuite altérée par l'affichage des chiffres :
0• 00. Programmer l'heure prévue de la fin de la cuisson en appuyant sur les touches -ou + (temps maximal de programmation :
10 heures). Après quelques secondes, le temps programmé sera automatiquement pris en compte par le programmateur, sinon
appuyer plusieurs fois sur la touche M afin de revenir à l'affichage de l'heure actuelle. La cuisson commencera immédiatement,
tandis que l'heure actuelle reviendra, quelques secondes plus tard, s'afficher sur l'écran du programmateur. Les symboles A et
(2) seront allumés. Un signal sonore sera émis quand l'heure de la fin de cuisson prévue sera atteinte et le four s'éteindra
automatiquement. Voir les paragraphes suivants : désactivation de la sonnerie et réactivation du four.
Cuisson automatique
Programmer un temps de DURÉE de cuisson selon les indications examinées au chapitre DURÉE de la cuisson, puis saisir
l'heure de fin de cuisson selon les indications vues dans le chapitre précédent. (Temps maximal de programmation de fin de
cuisson : 24 heures). Le four s'allumera automatiquement à une heure déterminée qui correspondra à la différence entre l'heure
prévue pour la fin de cuisson et le temps de durée de cuisson. Durant la période d'attente, du démarrage du four au
réchauffement, le symbole A sera affiché sur l'écran pour indiquer qu'un programme automatique et l'heure actuelle sont
activés. Alors que l'allumage du four sera signalé par l'éclairage du symbole (2). Un signal sonore sera émis quand l'heure de
fin de cuisson programmée sera atteinte et le four s'éteindra automatiquement. Voir les paragraphes suivants : désactivation de
la sonnerie et réactivation du four.
Désactivation de la sonnerie
Appuyer sur n'importe quelle touche pour désactiver le signal sonore manuellement.
Réactivation du four
Le symbole A s'affiche en mode clignotant sur l'écran, en plus de l'heure actuelle, à la fin d'une cuisson semi•automatique ou
automatique. Dans ces conditions, l'alimentation électrique des éléments chauffants du four, y compris l'éclairage, sera
33
Page 34

débranchée. Pour remettre le four en marche, appuyer sur la touche M et la maintenir appuyée jusqu'à ce que le symbole (2)
s'allume et jusqu'à ce que la lettre A s'éteigne.
AUTRES FONCTIONS DU PROGRAMMATEUR
Annulation d'un programme de cuisson
Semi•automatique ou Automatique Pour annuler un programme de cuisson semi•automatique ou automatique, symbole A
allumé, appuyer en meme temps sur les touches -et + pendant au moins 2 secondes ou jusqu'à ce que le symbole (2) s'allume
et la lettre A s'éteigne.
Annulation du minuteur d'avertissement
Pour annuler le décompte du minuteur d'avertissement, symbole ) allumé, appuyer sur la touche M pendant au moins 2
secondes ou jusqu'à l'affichage en mode clignotant du symbole ) . Appuyer en meme temps sur les touches -et + .
Contròle de l'état des fonctions
Avec la touche M, on peut rappeler sur l'écran le temps programmé ou restant de toutes les fonctions offertes par le
programmateur. Appuyer sur la touche M et la maintenir appuyée pendant au moins 2 secondes ou jusqu'à ce que le symbole
(4) s'allume. L'écran affichera le temps restant ou bien une série de zéros si le minuteur est désactivé. Appuyer de nouveau sur
la touche M. L'inscription " dur " s'affichera sur l'écran, puis en modalité alternée le temps restant ou une série de zéros
(minuteur désactivé) En appuyant de nouveau sur la touche M, le temps de fin de cuisson programmé s'affichera avec
l'inscription "End".
UTILISATION DU PROGRAMMATEUR ELECTRONIQUE (Fig.45)
La programmation se passe en appuyant sur le bouton de la fonction désirée et après l’avoir relâché , il suffit que dans les 5
secondes on commence à établir le temps par les touches + e -
TOUCHES + E -
En actionnant les touches + e - , le temps augmente ou diminue à une vitesse variable selon la durée de pression exercée sur
la touche.
REGLAGE DE L’HEURE
En appuyant en même temps sur 2 touches au choix (durée de la cuisson, fin de cuisson , minuterie) et la touche + o - , on va
régler l’heure désirée. Par cette opération les programmes qui ont été précédemment réglés sont annulés , les contacts se
débranchent et le symbole AUTO clignote.
FONCTIONNEMENT MANUEL
En actionnant la touche “manuel” , les contacts du relais se débranchent , le symbole AUTO s’éteint et le symbole
"CASSEROLE" s’éclaire. Le fonctionnement manuel ne peut se passer qu’à la fin de la programmation automatique ou après
l’avoir annulée.
FONCTIONNEMENT AUTOMATIQUE
En actionnant la touche de durée ou fin de cuisson, le programmateur passe automatiquement de la fonction manuelle à celle
automatique.
FONCTIONNEMENT SEMI-AUTOMATIQUE AVEC DUREE CUISSON
Appuyer sur la touche de durée de cuisson ou de fin de cuisson et régler le temps désiré par les touches + e - . Le symbole
AUTO s’éteint à lumière fixe et ainsi que le symbole de durée de cuisson. Le relais s’insère immédiatement Quand le temps de
cuisson coïncide avec l’heure, le relais et le symbole de durée de cuisson se débranchent , le symbole AUTO s’éteint et le
signal acoustique entre en fonction.
FONCTIONNEMENT SEMI-AUTOMATIQUE AVEC FIN CUISSON
Appuyer sur la touche de fin de cuisson. L’heure du moment sera visualisée sur le display. Sélectionner le temps de fin de
cuisson désirée avec la touche + . Les symboles AUTO et la durée de la cuisson s’éclairent à lumière fixe. Les contacts du
relais se débranchent. Quand le temps de fin de cuisson coïncide avec l’heure, le relais et le symbole de durée de cuisson se
débranchent. Le temps de cuisson écoulé, le symbole AUTO s’éteint, le symbole de durée de cuisson et le relais se
débranchent et le signal acoustique entre en fonction.
FONCTIONNEMENT AUTOMATIQUE AVEC DUREE ET FIN DE CUISSON
Appuyer sur la touche de durée et sélectionner la durée de cuisson désirée par les touches + e - . Les symboles AUTO et
durée de cuisson s’éclairent à lumière fixe et le relais se débranche. Appuyer sur la touche de fin de cuisson; sur le diplay
apparaîtra le temps de fin cuisson le plus proche. Sélectionner le temps de fin cuisson désiré en appuyant sur la touche + . Le
relais et le symbole de durée se débranchent. Le symbole s’éclaire à nouveau au moment où l’heure coïncide avec le temps de
début de cuisson. Le temps de cuisson écoulé, le symbole AUTO s’éclaire, le signal acoustique se met en fonction et le
symbole de durée de cuisson et le relais se débranchent.
SIGNAL ACOUSTIQUE
Le signal acoustique se met en fonction à la fin d’une programmation ou de la fonction minuterie et a la durée de 15 minutes.
Pour l’arrêter avant , on devra appuyer sur n’importe quelle touche fonction.
DEBUT PROGRAMME ET CONTROLE
Le programme commence après environ 4 secondes du réglage. Il est toujours possible de contrôler le programme réglé, en
appuyant sur les touches correspondantes.
ERREURS DE PROGRAMMATION
On a une erreur de programmation si l’heure indiquée par l’horloge est comprise entre l’heure du début et de fin de cuisson.
L’erreur sera immédiatement signalée acoustiquement et par le clignotement du symbole AUTO. L'erreur de réglage peut être
corrigée en changeant la durée ou le temps de fin de cuisson. En présence d’une erreur de réglage, les relais sont débranchés.
ANNULATION D’UN PROGRAMME
Il est possible d’annuler un programme en appuyant sur la touche de durée de cuisson et ensuite la touche - jusqu’à ce que sur
le display ne paraisse l’indication 000. A la fin d’un programme réglé, celui- ci s’efface automatiquement.
34
Page 35

UTILISATION DU THERMOMÈTRE (fig.46)
La cuisinière est équipée avec un dispositif pour le mesurage de la température atteinte au centre du four.
Cela permet de vérifier la température atteinte à l’ intérieur du four ainsi que de régler plus précisément la température de
cuisson des aliments.
FOUR ELECTRIQUE
Lors de l’ allumage du four le voyant orangé s’allume en indiquant que les éléments chauffants du four sont activés : la
aiguille du thermostat commence à tourner envers de la température établie.
Le voyant orangé continuera à s’ allumer et s’éteindre en indiquant que les éléments chauffants sont activés afin de
maintenir la température à l’ intérieur du four.
Il est possible que le voyant s’ éteinte pour quelques minutes avant que le thermomètre ait atteinte la température désirée :
ce conduite est normale , car le fonctionnement des éléments chauffants est réglé d’une façon telle que la chaleur est
correctement distribuée à l’intérieure du four.
La distribution optimal de la chaleur à l’intérieur de la cavité est atteinte lors que l’ aiguille du thermomètre est arreté.
Si la température du four est baissée ou augmentée l’ aiguille du thermomètre suivra ces changements avec les mêmes
modalités.
Lors de l’ éteinte du four, l’ indication de la température sur le thermomètre se baissera lentement jusqu’au l’atteinte de la
température ambiance.
ATTENTION : Les températures sur la manette sont indicatives, pour vos cuissons ils faut suivre les indications du
thermomètre.
FOUR A GAZ :
Lors de l’ allumage du four le brûleur commencera à fonctionner au maximum et l’ aiguille du thermomètre tournera envers la
température établie.
Il est possible que la flamme se baisse avant que le thermomètre ait atteinte la température désirée. Cela se vérifie afin que
la puissance du brûleur soit réduite d’une façon telle que la chaleur soit uniformément distribuée a l’intérieure du four.
La distribution optimale de la chaleur est atteinte seulement lors que l’ aiguille du thermomètre s’est arretée.
Lors de l’éteinte du four , l’indication de la température sur le thermomètre se baissera lentement jusqu’au l’atteinte de la
température ambiance.
ATTENTION : il est normale que si l’ on mesure la température au centre du four en utilisant un différent thermomètre l’on
puisse relever des valeurs différents par rapport aux valeurs indiqués par le thermomètre du bandeaux des commandes.
La température donnée par le thermomètre est la température moyenne à l’intérieur de la cavité four et elle ne représente pas
la valeur de la température d’ un point en particulier.
UTILISATION DU FOUR AUTONETTOYANT
Sur les cuisines prévues à cet effet, le four autonettoyant diffère du four normal par ses parois internes recouvertes d’un émail
microporeux spécial qui absorbe et élimine les résidus de gras pendant la cuisson. En cas d’écoulement de liquides gras,
l’action auto nettoyante du four est insuffisante, il faut donc passer une éponge humide sur les tâches de gras et, par la suite,
réchauffer le four à la température maximum, attendre que le four se refroidisse et puis passer à nouveau l’éponge humide.
NETTOYAGE DE L’APPAREIL
Débrancher l’appareil du réseau d’alimentation et fermer le robinet général d’adduction de gaz à l’appareil avant de
procéder à toute opération de nettoyage.
Nettoyage du plan de cuisson :
Les brûleurs, les grilles en acier émaillé, les couvercles émaillés, et les répartiteurs de flamme doivent être lavés
périodiquement avec de l’eau savonneuse tiède, rincés et essuyés avec soin.
L’éventuel liquide débordé des casseroles doit toujours être enlevé avec un chiffon.
Si la manœuvre d’ouverture et de fermeture d’un des robinets est difficile, ne pas insister, mais demander
l’intervention urgente de l’assistance technique.
Nettoyage des éléments émaillés :
Les parties émaillées doivent être lavées fréquemment avec de l’eau savonneuse pour en garder longtemps les
caractéristiques. Ne jamais utiliser des poudres abrasives. Eviter de laisser dessus des substances acides ou alcalines
(vinaigre, jus de citron, sel, jus de tomates, etc.) et laver les parties émaillées quand elles sont encore chaudes.
Nettoyage des parties en acier inoxydable :
Les éléments en acier inoxydable doivent être nettoyés avec de l’eau savonneuse, puis rincés avec un chiffon doux. Utiliser des
produits spécifiques que l’on trouve facilement dans le commerce pour maintenir le brillant. Ne jamais utiliser des produits
abrasifs.
Nettoyage des répartiteurs de flamme :
Etant seulement posés, il suffit de les ôter de leurs logements et de les laver avec de l’eau savonneuse. Apres les avoir bien
essuyés et vérifié que les trous de sortie ne sont pas bouchés, les replacer correctement dans leurs positions.
Nettoyage du verre à l’intérieur du four :
Le verre à l’intérieur peut être démonté suivant les instructions reportées pour le nettoyage du four. Cette opération se fait à four
froid et avec un chiffon humide, en ayant soin de ne pas utiliser des produits abrasifs. Positionner l’insert dans le trou de de la
charniére (Fig. 47-48), demonter le verre à l’intérieur comme de Fig. 49 à Fig. 54.
Pour remonter le verre suivre les instructions de Fig. 55 à Fig. 58.
Nettoyage intérieur du four :
Pour faciliter le nettoyage du four, démonter la porte en suivant les instructions reportées ci-dessous :
Positionner l’insert dans le trou de la charniére (Fig. 47-48). Tenir la porte à semi-ouverte et tirer vers soi avec les mains la
petite porte jusqu’ à ce qu’elle se décroche. Pour la remonter, exécuter les opérations en sens inverse. Les grilles latérales
peuvent être, elles aussi, enlevées facilement, en dévissant les embouts qui les fixent au four.
35
Page 36

36
Page 37

Fig.1 Fig.2 Fig.3 fig.4 fig 5 fig 6
fig.7 fig 8 fig 9 fig 10 fig 11
Fig.12 Fig.13 fig.14 fig.15 fig 16
Fig. 17 (fig.17A –17B) fig.18 fig 19 fig 20
Fig.21 Fig.22 fig.23
Fig.27 Fig.28 Fig.29 fig 30 fig 31
Fig.24 fig 25 fig 26
Fig.32 Fig. 33 fig 34 fig 35 fig 36
Fig 36B Fig. 37 Fig.38 Fig.39 Fig.40
Fig.41 Fig.42 Fig.43 Fig.44 Fig.45 fig 46
37
Page 38

Fig.47 Fig.48 Fig.49
Fig.50 Fig.51 Fig.52
Fig.53 Fig.54 Fig.55
Fig.56 Fig.57 Fig.58
38
Page 39

ﺯﺎﻬﺟﻟﺍ ﻑﻳﻅﻧﺗ
.ﺯﺎﻐﻟﺎﺑ ﺔﻳﺫﻐﺗﻟﺍ ﻡﺎﻣﺻ ﺱﺑﺣﻣ ﻕﻼﻏﺍﻭ ﻲﺋﺎﺑﺭﻬﻛﻟﺍ ﺭﺎﻳﺗﻟﺍ ﻥﻋ ﻪﻠﺻﻓ ﺏﺟﻳ ﺯﺎﻬﺟﻟﺍ ﻑﻳﻅﻧﺗ ﻲﻓ ﻉﻭﺭﺷﻟﺍ ﻝﺑﻗ
:ﻝﻣﻌﻟﺍ ﺢﻁﺳ ﻑﻳﻅﻧﺗ
ﺎﻬﻧﻣ ﺙﻌﺑﻳ ﻲﺗﻟﺍ ﺔﻠﻌﺷﻟﺍ ﺵﻳﺑﺍﺭﻁﻭ ﺎﻧﻳﻣﻟﺎﺑ ﺔﻳﻠﻁﻣﻟﺍ ﺔﻳﻁﻏﻻﺍﻭ ﺎﻧﻳﻣﻟﺎﺑ ﺔﻳﻠﻁﻣﻟﺍ ﺔﻳﻧﺩﻌﻣﻟﺍ ﻲﻧﺍﻭﻷﺍ ﻝﻣﺍﻭﺣﻭ ﺩﻗﺍﻭﻣﻟﺍ ﺱﻭﺅﺭ ﻑﻳﻅﻧﺗ ﻲﻐﺑﻧﻳﺍﺎﺑ ﺏﻬﻠﻟﻣ ﻡﺍﺩﺧﺗﺳﺎﺳ ءﺎ ﻁﻭﻠﺧﻣ ﻥﺧ
.ﺔﻣﺎﺗ ﺓﺭﻭﺻﺑ ﺎﻬﻔﻳﻔﺟﺗ ﻡﺛ ﻲﻓﺎﺻ ءﺎﻣﺑ ﺎﻬﻔﻁﺷ ﻙﻟﺫ ﻭﻠﺗﻳﻭ ،ﻥﻭﺑﺎﺻﻟﺎﺑ
.ﺵﺎﻣﻘﻟﺍ ﻥﻣ ﺔﻌﻁﻗ ﻡﺍﺩﺧﺗﺳﺎﺑ ﻲﻬﻁﻟﺍ ﻲﻧﺍﻭﺃ ﻥﻣ ﺽﻳﻔﺗ ﻝﺋﺍﻭﺳ ﺔﻳﺃ ﺔﻟﺍﺯﺇ ﺏﺟﻳﻭ
ﺑ ﺎﻳﻧﻘﺗ ﻝﻫﺅﻣ ﺹﺧﺷ ﻑﻳﻠﻛﺗﺑ ﻝﺟﺎﻋ ﻪﺟﻭ ﻰﻠﻋ ﻡﻗ ﻝﺑ ﻙﻟﺫ ﻲﻓ ﺓﻭﻘﻟﺍ ﻡﺍﺩﺧﺗﺳﺍ ﻝﻭﺎﺣﺗ ﻼﻓ ﺔﺑﻭﻌﺻﺑ ﻡﺗﻳ ﺯﺎﻐﻟﺍ ﺱﺑﺣﻣ ﻕﻼﻏﺇ ﻭﺃ ﺢﺗﻓ ﻥﺎﻛ ﺍﺫﺇءﺍﺭﺟﺈ ﻟ ﺹﺣﻓ.ﺭﻣﻸ
:ﺎﻧﻳﻣﻟﺎﺑ ﺔﻳﻠﻁﻣﻟﺍ ءﺍﺯﺟﻷﺍ ﻑﻳﻅﻧﺗ
ﻳﺣﺎﺳﻣ ﺔﻳﺃ ﻡﺩﺧﺗﺳﺗ ﻻ .ﺎﻫﺭﻬﻅﻣ ﻰﻠﻋ ﻅﺎﻔﺣﻟﺍ ﻝﺟﺍ ﻥﻣ ﻙﻟﺫﻭ ﻥﻭﺑﺎﺻﻟﺎﺑ ﻁﻭﻠﺧﻣ ءﺎﻣﺑ ﻡﺎﻅﺗﻧﺎﺑ ﺎﻧﻳﻣﻟﺎﺑ ﺔﻳﻠﻁﻣﻟﺍ ﺔﻳﻠﺻﻻﺍ ءﺍﺯﺟﻻﺍ ﻑﻳﻅﻧﺗ ﺏﺟﻳﺔﻁﺷﺎﻛ ﻖ ﻕﻼﻁﻻﺍ ﻰﻠﻋ .
ﻬﻧﻣﻭ) ﺎﻧﻳﻣﻟﺎﺑ ﺔﻳﻠﻁﻣﻟﺍ ءﺍﺯﺟﻷﺍ ﻰﻠﻋ ﺔﻳﻭﻠﻗ ﺩﺍﻭﻣ ﻭﺃ ﺽﺎﻣﺣﺃ ﺔﻳﺃ ﻙﺭﺗ ﺏﻧﺟﺗﻁﻟﺍ ﺭﻳﺻﻋ ،ﺢﻠﻣﻟﺍ ،ﻥﻭﻣﻳﻠﻟﺍ ﺭﻳﺻﻋ ،ﻝﺧﻟﺍ :ﻝﺎﺛﻣﻟﺍ ﻝﻳﺑﺳ ﻰﻠﻋ ﺎﻣﻭ ﻡﻁﺎﻣﻭ (ﻙﻟﺫ ﻲﻟﺍ ﺎ ﻝﺳﻐﺗ ﻻ
.ﺎﻬﺗﺭﺍﺭﺣ ﺔﺟﺭﺩ ﺽﻔﺧﻧﺗ ﻡﻟ ﺍﺫﺇ ﺎﻧﻳﻣﻟﺎﺑ ﺔﻳﻠﻁﻣﻟﺍ ءﺍﺯﺟﻷﺍ
:ﺃﺩﺻﻠﻟ ﻡﻭﺎﻘﻣﻟﺍ ﺫﻻﻭﻔﻟﺍ ﻥﻣ ﺔﻋﻭﻧﺻﻣﻟﺍ ءﺍﺯﺟﻷﺍ ﻑﻳﻅﻧﺗ
ﺍ ﻥﻛﻣﻳ .ﻡﻋﺎﻧ ﺵﺎﻣﻗ ﺔﻌﻁﻗ ﻡﺍﺩﺧﺗﺳﺎﺑ ﺎﻬﻔﻔﺟﻭ ﻥﻭﺑﺎﺻﻟﺎﺑ ﻁﻭﻠﺧﻣ ءﺎﻣﺑ ءﺍﺯﺟﻷﺍ ﻩﺫﻫ ﻑﻅﻧﺧﺗﺳﺎﺑ ﻱﺭﻭﺩﻟﺍ ﻑﻳﻅﻧﺗﻟﺍ ﻖﻳﺭﻁ ﻥﻋ ﻥﺎﻌﻣﻠﻟﺍ ﻰﻠﻋ ﻅﺎﻔﺣﻟﻣﻟﺍ ﻡﺍﺩﺻﺻﺧﻣﻟﺍ ﺕﺎﺟﺗﻧ ﺔ
.ﻕﻼﻁﻻﺍ ﻰﻠﻋ ﺔﻁﺷﺎﻛ ﻖﻳﺣﺎﺳﻣ ﺔﻳﺃ ﻡﺩﺧﺗﺳﺗ ﻻ .ﻕﺍﻭﺳﻷﺍ ﻲﻓ ﺓﺩﺎﻋ ﺓﺭﻓﻭﺗﻣﻟﺍﻭ ﻙﻟﺫﻟ
:ﺩﻗﻭﻣﻟﺍ ﺏﻬﻟ ﺵﻳﺑﺍﺭﻁ ﻑﻳﻅﻧﺗ
ﻙﻟﺫ ﻲﻓ ﻡﺩﺧﺗﺳﺍﻭ ،ﺎﻬﻔﻳﻅﻧﺗﻟ ﻪﻳﻓ ﺔﺗﺑﺛﻣﻟﺍ ﻥﺎﻛﻣﻟﺍ ﻥﻣ ﺏﻬﻠﻟﺍ ﺎﻬﻧﻣ ﺙﻌﺑﻧﻳ ﻲﺗﻟﺍ ﺩﻗﻭﻣﻟﺍ ﺵﻳﺑﺍﺭﻁ ﻉﺯﻧ ﺏﺟﻳﺑ ﻡﻗ ﻡﺛ .ﻥﻭﺑﺎﺻﻟﺎﺑ ﺎﻁﻭﻠﺧﻣ ﺍءﺎﻣ ﺎﻬﺑﻳﻛﺭﺗﻣﻣ ﻲﻓ ﻱﺭﺧﺃ ﺓﺭ ﺎﻬﻌﺿﻭ
.ﺎﻬﺗﺎﺣﺗﻓ ﺩﺍﺩﺳﻧﺍ ﻡﺩﻋ ﻥﻣ ﺩﻛﺄﺗﻟﺍﻭ ﺓﺩﻳﺟ ﺓﺭﻭﺻﺑ ﺎﻬﻔﻳﻔﺟﺗ ﻥﻣ ءﺎﻬﺗﻧﻻﺍ ﺩﻌﺑ ﺢﻳﺣﺻﻟﺍ
:ﻲﻠﺧﺍﺩﻟﺍ ﻥﺭﻔﻟﺍ ﺝﺎﺟﺯ ﻑﻳﻅﻧﺗ
:ﻝﺧﺍﺩﻟﺍ ﻥﻣ ﻥﺭﻔﻟﺍ ﺝﺎﺟﺯ ﻑﻳﻅﻧﺗ
ﻣ ﺝﺎﺟﺯﻟﺍ ﻑﻳﻅﻧﺗﻟ ﺏﺎﺑﻟﺍ ﻰﻠﻋ ﺕﺑﺛﻣﻟﺍ ﻲﺟﺎﺟﺯﻟﺍ ﺡﻭﻠﻟﺍ ﻙﻓ ﺔﻳﻧﺎﻛﻣﺇ ﻥﺭﻔﻟﺍ ﺕﺍﺯﻳﻣ ﻥﻣ ﻥﺎﻛ ﺍﺫﺇ ﻁﻘﻓ ﺔﻳﻠﻣﻌﻟﺍ ﻩﺫﻬﺑ ﻡﺎﻳﻘﻟﺍ ﻥﻛﻣﻳﻭ .ﻝﺧﺍﺩﻟﺍ ﻥﺍﺎﺑ ﻥﺭﻔﻟ ءﺍﺭﺟﺇﻭ ،ﺍﺩﺭﻋ ﺔﻠﻳﻣ
ﻝﺎﺧﺩﺍ ﻖﻳﺭﻁ ﻥﻋ ﻝﺻﺎﻔﻣﻟﺍ ﻝﻔﻘﺑ ﻡﻗ ﻲﻠﺧﺍﺩﻟﺍ ﺝﺎﺟﺯﻟﺍ ﺔﻟﺍﺯﻹ .ﺔﻁﺷﺎﻛ ﻖﻳﺣﺎﺳ
ﻣ ﺔﻳﺃ ﺽﺭﻐﻟﺍ ﺍﺫﻬﻟ ﻡﺩﺧﺗﺳﺗ ﻻﻭ .ﺔﻠﻠﺑﻣ ﺔﻁﻭﻓ ﻡﺍﺩﺧﺗﺳﺎﺑ ﻑﻳﻅﻧﺗﻟﺍ ﺎﻣﺳﻣﻟﺍﺧﺍﺩ ﻖﻓﺭﻣﻟﺍ ﺭ ﻝ
ﻝﻛﺷﻟﺍ) ﻝﺻﺎﻔﻣﻟﺍ47-48ﺟﺯﻟﺍ ﻙﻓ ﻥﻛﻣﻳ ﺎﻫﺩﻧﻋ ،( ﻝﻛﺷﻟﺍ ﻲﻓ ﺢﺿﻭﻣ ﻭﻫ ﺎﻣﻛ ﻲﻠﺧﺍﺩﻟﺍ ﺝﺎ49 -50-51-52-53-54
ﻝﻛﺷﻟﺍ) ﺱﻛﺎﻌﻣﻟﺍ ﻩﺎﺟﺗﻻﺍ ﻲﻓ ﺔﻘﺑﺎﺳﻟﺍ ﺕﺍﻭﻁﺧﻟﺍ ﻉﺎﺑﺗﺍ ﻰﺟﺭﻳ ﺏﺎﺑﻟﺍ ﺏﻳﻛﺭﺗ ﺓﺩﺎﻋﻹ55 -56 -57 -58 (
:ﻝﺧﺍﺩﻟﺍ ﻥﻣ ﻥﺭﻔﻟﺍ ﻑﻳﻅﻧﺗ
ﺍ ﺭﺎﻣﺳﻣﻟﺍ ﻝﺧﺩﺍ .ﻩﺎﻧﺩﺃ ﺓﺭﻭﻛﺫﻣﻟﺍ ﺕﺍﺩﺎﺷﺭﻹﺍ ﻉﺎﺑﺗﺎﺑ ﺏﺎﺑﻟﺍ ﻙﻳﻛﻔﺗ ﻲﻠﻣﻌﻟﺍ ﻥﻣﻓ ﻥﺭﻔﻟﺍ ﻑﻳﻅﻧﺗ ﺕﺎﻳﻠﻣﻋ ﺭﻳﺳﻳﺗﻟﻛﺷﻟﺍ) ﻝﺻﺎﻔﻣﻟﺍ ﻝﺧﺍﺩ ﻖﻓﺭﻣﻟ ﻝ47-48 ﺙﻳﺣﺑ ﺏﺎﺑﻟﺍ ﺢﺗﻓﺍ .(
.ﺕﻳﺑﺛﺗﻟﺍ ﻁﺎﻘﻧ ﻥﻣ ﻙﻔﻧﻳ ﻰﺗﺣ ﻙﻳﺩﻳ ﺎﺗﻠﻛ ﻙﻟﺫ ﻲﻓ ﺎﻣﺩﺧﺗﺳﻣ ﻙﻫﺎﺟﺗﺍ ﻲﻓ ﻪﺑﺣﺳﺍﻭ ﺎﻳﺑﺳﻧ ﺏﺭﺍﻭﻣ ﻊﺿﻭ ﻲﻓ ﻥﻭﻛﻳ
ﻟﻭﻬﺳﺑ ﺎﻬﻛﻓ ﻥﻛﻣﻳ ﺔﻳﺑﻧﺎﺟﻟﺍ ﻙﻳﺑﺎﺑﺷﻟﺍ ﻥﺎﻓ ﻙﻟﺫ ﻰﻟﺇ ﺔﻓﺎﺿﻹﺎﺑ .ﺱﻛﺎﻌﻣﻟﺍ ﻩﺎﺟﺗﻻﺍ ﻲﻓ ﺕﺍﻭﻁﺧ ﺱﻔﻧ ﻉﺎﺑﺗﺍ ﺏﺟﻳ ﺏﺎﺑﻟﺍ ﺏﻳﻛﺭﺗ ﺓﺩﺎﻋﻹﻭ ﺔﻣﺎﺗ ﺔﺣﺑ ﻙﻟﺫﻲﺗﻟﺍ ﺕﺎﻘﻠﺣ ﻝ ﻲﻓ ﺎﻬﺗﺑﺛﺗ
.ﻥﺭﻔﻟﺍ
ﻊﻳﺑﻟﺍ ﺩﻌﺑ ﺎﻣ ﺔﻣﺩﺧ
ﺭﺎﻳﻐﻟﺍ ﻊﻁﻗﻭ
.ﻥﻳﺻﺻﺧﺗﻣﻭ ﻥﻳﻠﻫﺅﻣ ﻥﻳﻠﻣﺎﻋ ﺩﻳ ﻰﻠﻋ ﻪﺗﺭﻳﺎﻌﻣﻭ ﻪﻁﺑﺿ ﻡﺗﻭ ﺕﺍﺭﺎﺑﺗﺧﺍ ﺓﺩﻌﺑ ﻊﻧﺻﻣﻟﺍ ﺓﺭﺩﺎﻐﻣ ﻝﺑﻗ ﺯﺎﻬﺟﻟﺍ ﺍﺫﻫ ﺭﻣ ﺩﻘﻟ
ﻠﻣﺎﻋ ﻰﻟﺇ ﻊﻧﺻﻣﻠﻟ ﻪﺗﺭﺩﺎﻐﻣ ﺩﻌﺑ ﺯﺎﻬﺟﻠﻟ ﺔﻳﺭﻭﺭﺿ ﺓﺭﻳﺎﻌﻣﻟﺍ ﻭﺃ ﺕﺎﺣﻼﺻﻹﺍ ﺔﻣﻬﻣ ﻝﻛﻭﺗ ﻥﺃ ﺏﺟﻳﻭﻧﻟﺎﺑ ﻪﺟﻭﺗﻧ ﺎﻧﻧﺈﻓ ﺏﺑﺳﻟﺍ ﺍﺫﻬﻟﻭ .ﻥﻳﻠﻫﺅﻣ ﻥﻳﺑﺯﻠﻟ ﺢﺻ ﺔﻟﺎﺣ ﻲﻓ ﻥﺋﺎﻭ ﺩﻭﺟ
ﺎﻬﺟﻟﺍ ﻥﻣ ﺯﺍﺭﻁﻟﺍ ﺍﺫﻬﺑ ﺔﻘﻠﻌﺗﻣﻟﺍ ﺕﺎﻣﻭﻠﻌﻣﻟﺎﺑ ﻡﻫﺩﻭﺯﻳ ﻥﺃ ﻥﻛﻣﻳ ﺔﻣﺩﺧ ﺯﻛﺭﻣ ﺏﺭﻗﺄﺑ ﻭﺃ ﺯﺎﻬﺟﻟﺍ ﻪﻧﻣ ﺍﻭﺭﺗﺷﺍ ﻱﺫﻟﺍ ﺭﺟﺎﺗﻟﺎﺑ ﻝﺎﺻﺗﻻﺎﺑ ﺏﻋﺎﺻﻣﻳﻋﻭﻧﻭ ﺯﻟﺍ ﺔﻠﻛﺷﻣﻟﺍ ﺔ ﻲﺗ
ﻌﻟﺎﺑ ﺔﺑﺎﺻﻣ ءﺍﺯﺟﺃ ﻝﺍﺩﺑﺗﺳﺍ ﻡﺯﻼﻟﺍ ﻥﻣ ﻥﺎﻛ ﺍﺫﺇﻭ.ﻡﻬﻬﺟﺍﻭﺗﺍ ﺯﻛﺍﺭﻣ ﻯﺩﻟ ﻁﻘﻓ ﺭﻓﺍﻭﺗﺗ ﻲﺗﻟﺍﻭ ﺔﻳﻠﺻﺃ ﺭﺎﻳﻏ ﻊﻁﻘﺑ ﺎﻬﻟﺍﺩﺑﺗﺳﺎﺑ ﺢﺻﻧﻧ ﺎﻧﻧﺈﻓ ﺏﻁﺍ ﺔﻣﺩﺧﻟﻭ ﺎﻧﻟ ﺔﻌﺑﺎﺗﻟ ﺭﺎﺟﺗﻟﺍ
.ﻙﻟﺫﺑ ﻡﻬﻟ ﺹﺧﺭﻣﻟﺍ
39
Page 40

ﻲﻟﺯﺎﻧﺗﻟﺍ ﺩﻌﻟﺍ ﺕﻗﺅﻣ ﻑﺫﺣ ﺔﻳﻔﻳﻛ
ـﺑ ﻪﻟ ﺯﻣﺭﻳ ﻱﺫﻟﺍﻭ ،ﻲﻟﺯﺎﻧﺗﻟﺍ ﺩﻌﻟﺍ ﺕﻗﺅﻣ ﻑﺫﺣﻟt ﺭﺯﻟﺍ ﻰﻠﻋ ﻁﻐﺿﺍ ،M ﻥﻳﺗﻳﻧﺎﺛ ﺓﺩﻣﻟ2 ﺃﺩﺑﻳ ﻰﺗﺣ ﻝﺎﺣ ﻱﺃ ﻰﻠﻋ ﻭﺃ ﻝﻗﻷﺍ ﻰﻠﻋ( ﺯﻣﺭﻟﺍ ﻲﻓﺍ ﻰﻠﻋ ﻁﻐﺿﺍ .ﺽﻳﻣﻭﻟ
ﻥﻳﺭﺯﻟﺍ- .ﺩﺣﺍﻭ ٍﻥﺁ ﻲﻓ + ﻭ
ﻑﺋﺎﻅﻭﻟﺍ ﺕﺍﺩﺍﺩﻋﺇ ﻥﻣ ﻖﻘﺣﺗﻟﺍ
ﺔﺟﻣﺭﺑﻟﺍ ﺭﺯ ﺔﻁﺳﺍﻭﺑ ﺔﺷﺎﺷﻟﺍ ﻝﻼﺧ ﻥﻣ ﺞﻣﺭﺑﻣﻟﺎﺑ ﻲﻬﻁﻟﺍ ﻑﺋﺎﻅﻭ ﻝﻛﻟ ﺔﻳﻘﺑﺗﻣﻟﺍ ﻲﻬﻁﻟﺍ ﺓﺩﻣ ﻰﻠﻋ ﻉﻼﻁﻹﺍ ﻥﻛﻣﻳM ﺭﺯﻟﺍ ﻰﻠﻋ ﻁﻐﺿﺍ .M ﺎﺛ ﺓﺩﻣﻟ ﻥﻳﺗﻳﻧ2 ﻭﺃ ﻝﻗﻷﺍ ﻰﻠﻋ
) ﺯﻣﺭﻟﺍ ﺭﻬﻅﻳ ﻰﺗﺣ ﻝﺎﺣ ﻱﺃ ﻰﻠﻋ4ﺗ . ( ﺡﺎﺗﻔﻣ ﺱﻣﻠﺑ ﻡﻗ .ﺕﻗﺅﻣﻟﺍ ﻝﻳﻁﻌﺗ ﻡﺗ ﺍﺫﺇ ﺭﺎﻔﺻﻷﺍ ﻥﻣ ﺔﻠﺳﻠﺳ ﻭﺃ ،ﺔﺷﺎﺷﻟﺍ ﻰﻠﻋ ﺔﻳﻘﺑﺗﻣﻟﺍ ﺓﺩﻣﻟﺍ ﺭﻬﻅM ﻣ ﺔﺷﺎﺷﻟﺍ ﺽﺭﻌﺗ .ﻯﺭﺧﺃ ﺓﺭ
ﺓﺭﺎﺑﻌﻟﺍ“dur ”.(ﻝﺎﻐﺷ ﺭﻳﻏ ﺕﻗﺅﻣﻟﺍ) ﺭﺎﻔﺻﻷﺍ ﻥﻣ ﺔﻠﺳﻠﺳ ﻭﺃ ﺔﻳﻘﺑﺗﻣﻟﺍ ﺓﺩﻣﻟﺍ ﺏﻭﺎﻧﺗﻟﺎﺑ ﻡﺛ
ﺭﺯﻟﺍ ﺱﻣﻟ ﺩﻧﻋﻭM ﺓﺭﺎﺑﻌﻟﺎﺑ ﺎﻘﻓﺭﻣ ﻲﻬﻁﻟﺍ ﺔﻳﺎﻬﻧ ﺕﻳﻗﻭﺗ ﺽﺭﻋ ﻡﺗﻳ ،ﻯﺭﺧﺃ ﺓﺭﻣ “End.”
ﺕﻭﺻﻟﺍ ﻯﻭﺗﺳﻣ ﻭﺃ ﻲﻟﺎﺣﻟﺍ ﺕﻳﻗﻭﺗﻟﺍ ﺭﻳﻳﻐﺗ ﺔﻳﻔﻳﻛ
) ﺯﻣﺭﻟﺍ ﺽﺭﻋ ءﺎﻧﺛﺃ ،ﻲﺋﺎﻘﻠﺗ ﻭﺃ ﻲﺋﺎﻘﻠﺗﻟﺍ ﻪﺑﺷ ﺞﻣﺎﻧﺭﺑﻟﺍ ﻊﺿﻭ ﻲﻓ2 ﻥﻳﺭﺯﻟﺍ ﻰﻠﻋ ﻁﻐﺿﺍ ،(- ﻥﻳﺗﻳﻧﺎﺛ ﺓﺩﻣﻟ ﺩﺣﺍﻭ ٍﻥﺁ ﻲﻓ + ﻭ2 ﻝﻗﻷﺍ ﻰﻠﻋﺃ ﺽﻣﻭﺗ ﻰﺗﺣ ﻝﺎﺣ ﻱﺃ ﻰﻠﻋ ﻭ
) ﻁﻘﻧﻟﺍ3.(
ﻭﺃ + ﻥﻳﺭﺯﻟﺍ ﺱﻣﻠﺑ ﻡﻗ- .
:ﺔﺷﺎﺷﻟﺍ ﻰﻠﻋ ﺔﻋﺎﺳﻟﺍ ﺙﻳﺩﺣﺗﻟ
ﺭﺯﻟﺍ ﺱﻣﻠﺑ ﻡﻗM :ﺔﻳﻟﺎﺗﻟﺍ ﺓﺭﺎﺑﻌﻟﺍ ﺔﺷﺎﺷﻟﺍ ﻰﻠﻋ ﺭﻬﻅﺗ .Ton ﺔﻁﺳﺍﻭﺑ ﻝﺿﻔﻣﻟﺍ ﺕﻭﺻﻟﺍ ﻯﻭﺗﺳﻣ ﺭﺗﺧﺍ . ﻡﻗﺭﺑ ﺔﻋﻭﺑﺗﻣ .ﺍ ﺭﺯﻟ -
ﻟ :ﺕﻭﺻﻟﺍ ﻯﻭﺗﺳﻣ ﺭﻳﻳﻐﺗ
ﻡﻗﺭﻟﺍ ﺭﻳﺷﻳ :ﺔﻅﺣﻼﻣ1 ﺔﺛﻼﺛ ﺔﺣﺎﺗﻣﻟﺍ ﺕﺎﻳﻭﺗﺳﻣﻟﺍ .ﻰﻠﻋﻷﺍ ﺕﻭﺻﻟﺍ ﻯﻭﺗﺳﻣ ﻰﻟﺇ3 .
،ﺞﻣﺎﻧﺭﺑ ﻱﺃ ﻥﺍﺩﻘﻓ ﻲﻓ ﺏﺑﺳﺗﻳ ﻲﺋﺎﺑﺭﻬﻛﻟﺍ ﺭﺎﻳﺗﻟﺍ ﻉﺎﻁﻘﻧﺍ :ﻪﻳﺑﻧﺗ .ﺩﻳﺩﺟ ﻥﻣ ﺔﺟﻣﺭﺑﻟﺍ ﻥﻳﻳﻌﺗ ﺓﺩﺎﻋﺇ ﻲﻧﻌﻳ ﺎﻣﻣ .ﺔﻋﺎﺳﻟﺍ ﻙﻟﺫ ﻲﻓ ﺎﻣﺑ
ﻝﻛﺷﻟﺍ) ﺭﺗﻣﻭﻣﺭﺗﻟﺍ ﻡﺍﺩﺧﺗﺳﺍ46(
ﺷﺑ ﻡﺎﻌﻁﻟﺍ ﻲﻬﻁﻟ ﺎﻬﻠﻳﺩﻌﺗﻭ ﻥﺭﻔﻟﺍ ﻝﺧﺍﺩ ﺓﺭﺍﺭﺣﻟﺍ ﺔﺟﺭﺩ ﺹﺣﻓ ﺔﻳﻧﺎﻛﻣﺇ ﺢﻳﺗﻳ ﺎﻣ .ﻥﺭﻔﻟﺍ ﻑﺻﺗﻧﻣ ﻲﻓ ﺓﺭﺍﺭﺣﻟﺍ ﺔﺟﺭﺩ ﺱﺎﻳﻘﻟ ﺯﺎﻬﺟﺑ ﺩﻭﺯﻣ ﺩﻗﻭﻣﻟﺍﺭﺛﻛﺃ ﻝﻛ .ﺔﻗﺩ
ﻲﺋﺎﺑﺭﻬﻛﻟﺍ ﻥﺭﻔﻟﺍ
ﺎﻘﺗﺭﺑﻟﺍ ءﻭﺿﻟﺍ ﺭﻳﻧﻳﻣﻭﻳ .ﺓﺩﺩﺣﻣﻟﺍ ﺓﺭﺍﺭﺣﻟﺍ ﺔﺟﺭﺩ ﻭﺣﻧ ﺭﺗﻣﻭﻣﺭﺗﻟﺍ ﺭﺷﺅﻣ ﻝﻘﺗﻧﻳ :ﻥﻳﺧﺳﺗﻟﺍ ﺭﺻﺎﻧﻋ ﻝﻳﻐﺷﺗ ﻰﻟﺇ ﺓﺭﺎﺷﻺﻟ ﻥﺭﻔﻟﺍ ﻝﻳﻐﺷﺗ ﺩﻧﻋ ﻲﻟءﻭﺿﻟﺍ ﺽ ﻟ ﻲﻟﺎﻘﺗﺭﺑﻟﺍ ﺓﺭﺎﺷﻺ
ﻁﻣﻟﺍ ﺓﺭﺍﺭﺣﻟﺍ ﺔﺟﺭﺩ ﻰﻟﺇ ﺭﺗﻣﻭﻣﺭﺗﻟﺍ ﻍﻭﻠﺑ ﻝﺑﻗ ﻖﺋﺎﻗﺩ ﻊﺿﺑ ءﻭﺿﻟﺍ ﺊﻔﻁﻧﻳ ﺩﻗ .ﻥﺭﻔﻟﺍ ﻝﺧﺍﺩ ﺓﺭﺍﺭﺣﻟﺍ ﻰﻠﻋ ﻅﺎﻔﺣﻠﻟ ﻥﻳﺧﺳﺗﻟﺍ ﺭﺻﺎﻧﻋ ﻝﻳﻐﺷﺗ ﻰﻟﺇﻭ .ﺔﺑﻭﻠﻫ،ﻱﺩﺎﻋ ﺭﻣﺃ ﺍﺫ ﻥﻷ
ﻟﺍ ﺭﺷﺅﻣ ﻑﻗﻭﺗﻳ ﺎﻣﺩﻧﻋ ﻥﺭﻔﻟﺍ ﻝﺧﺍﺩ ﺓﺭﺍﺭﺣﻠﻟ ﻲﻟﺎﺛﻣﻟﺍ ﻊﻳﺯﻭﺗﻟﺍ ﻰﺗﺄﺗﻳ .ﻥﺭﻔﻟﺍ ﻝﺧﺍﺩ ﺢﻳﺣﺻ ﻝﻛﺷﺑ ﺓﺭﺍﺭﺣﻟﺍ ﻊﻳﺯﻭﺗﻟ ﻁﺑُﺿ ﻥﻳﺧﺳﺗﻟﺍ ﺭﺻﺎﻧﻋ ﻝﻣﻋﺭﺗﻣﻭﻣﺭﺗ ﺔﻟﺎﺣ ﻲﻓ .
،ﻥﺭﻔﻟﺍ ءﺎﻔﻁﺇ ﺩﻧﻋ .ﺔﻘﻳﺭﻁﻟﺍ ﺱﻔﻧﺑ ﺕﺍﺭﻳﻐﺗﻟﺍ ﻩﺫﻫ ﺩﺻﺭﺑ ﺭﺗﻣﻭﻣﺭﺗﻟﺍ ﺭﺷﺅﻣ ﻡﻭﻘﻳ ﻥﺭﻔﻟﺍ ﺓﺭﺍﺭﺣ ﺔﺟﺭﺩ ﻉﺎﻔﺗﺭﺍ ﻭﺃ ﺽﺎﻔﺧﻧﺍ ﺍ ﺔﺟﺭﺩ ﺭﺷﺅﻣ ﺽﻔﺧﻧﻳ ﺓﺭﺍﺭﺣﻟﻋﺭﺗﻣﻭﻣﺭﺗﻟﺍ ﻰﻠ
.ﺔﻁﻳﺣﻣﻟﺍ ﺔﺋﻳﺑﻟﺍ ﺓﺭﺍﺭﺣ ﺔﺟﺭﺩ ﻰﻟﺇ ﻝﺻﻳ ﻰﺗﺣ ءﻁﺑﺑ
.ﻲﻬﻁﻟﺍ ءﺎﻧﺛﺃ ﺭﺗﻣﻭﻣﺭﺗﻟﺍ ﺭﺷﺅﻣ ﻉﺎﺑﺗﺇ ﺏﺟﻳ ﻭ .ﺔﻳﺩﺎﺷﺭﺇ ﺽﺑﻘﻣﻟﺍ ﻰﻠﻋ ﺓﺭﺍﺭﺣﻟﺍ ﺕﺎﺟﺭﺩ ﺩﻌﺗ :ﺔﻅﺣﻼﻣ
ﺯﺎﻐﻟﺍ ﻥﺭﻓ
ﻧ ﺭﺗﻣﻭﻣﺭﺗﻟﺍ ﺭﺷﺅﻣ ﻝﻘﺗﻧﻳﻭ ﻩﺩﺣ ﻰﺻﻗﺃ ﻰﻠﻋ ﻝﻣﻌﻟﺍ ﻲﻓ ﺩﻗﻭﻣﻟﺍ ﺃﺩﺑﻳ ،ﻥﺭﻔﻟﺍ ﻝﻳﻐﺷﺗ ﺩﻧﻋ ﺔﻧﺳﻟﺃ ﺽﻔﺧﻧﺗﻭ ﺩﻣﺧﻳ ﺩﻗ .ﺓﺩﺩﺣﻣﻟﺍ ﺓﺭﺍﺭﺣﻟﺍ ﺔﺟﺭﺩ ﻭﺣﺍﺑﻗ ﺏﻬﻠﻟﻣﺭﺗﻟﺍ ﻍﻭﻠﺑ ﻝ ﺭﺗﻣﻭ
ﻠﻟ ﻲﻟﺎﺛﻣﻟﺍ ﻊﻳﺯﻭﺗﻟﺍ ﻰﺗﺄﺗﻳ .ﻥﺭﻔﻟﺍ ﻝﺧﺍﺩ ﺓﺭﺍﺭﺣﻟﺍ ﺔﺟﺭﺩﻟ ٍﻭﺎﺳﺗﻣ ﻊﻳﺯﻭﺗﺑ ﺡﺎﻣﺳﻠﻟ ﺩﻗﻭﻣﻟﺍ ﺓﺭﺩﻗ ﺽﻔﺧﻧﺗ ﺙﻳﺣ .ﺔﺑﻭﻠﻁﻣﻟﺍ ﺓﺭﺍﺭﺣﻟﺍ ﺔﺟﺭﺩ ﻰﻟﺇﺩ ﺓﺭﺍﺭﺣﻧﻋ ﻥﺭﻔﻟﺍ ﻝﺧﺍ ﻑﻗﻭﺗﻳ ﺎﻣﺩ
ﺣﻟﺍ ﺔﺟﺭﺩ ﺭﺷﺅﻣ ﺽﻔ
ﺧﻧﻳ ،ﻥﺭﻔﻟﺍ ءﺎﻔﻁﺇ ﺩﻧﻋ .ﺭﺗﻣﻭﻣﺭﺗﻟﺍ ﺭﺷﺅﻣ .ﺔﻁﻳﺣﻣﻟﺍ ﺔﺋﻳﺑﻟﺍ ﺓﺭﺍﺭﺣ ﺔﺟﺭﺩ ﻰﻟﺇ ﻝﺻﻳ ﻰﺗﺣ ءﻁﺑﺑ ﺭﺗﻣﻭﻣﺭﺗﻟﺍ ﻰﻠﻋ ﺓﺭﺍﺭ
ﻡﻗﺭ ﻝﻭﺩﺟﻟﺍ ﻲﻓ ﺔﺣﺿﻭﻣﻟﺍ ﻥﺭﻔﻟﺍ ﺓﺭﺍﺭﺣ ﺔﺟﺭﺩ ﻭ ﺭﺗﻣﻭﻣﺭﺗﻟﺍ ﻊﺿﻭ ﻥﻳﺑ ﻖﺑﺎﻁﺗﻟﺍ ﺩﻌﻳ :ﺔﻅﺣﻼﻣ5 ﺍ ﻉﻭﻧ ﺎﻬﻧﻣ ﻝﻣﺍﻭﻋ ﺓﺩﻋ ﻰﻠﻋ ﺩﻣﺗﻌﻳﻭ ﺎﻳﺩﺎﺷﺭﺇ .ﺯﺎﻐﻟﺍ ﺔﻛﺑﺷ ﻁﻐﺿﻭ ﺯﺎﻐﻟ
ﺍ ءﺎﻧﺛﺃ ﺭﺗﻣﻭﻣﺭﺗﻟﺍ ﺭﺷﺅﻣ ﻉﺎﺑﺗﺇ ﺏﺟﻳ ﻭ .ﻲﻬﻁﻟ
ﻥﺭﻔﻟﺍ ﻑﺻﺗﻧﻣ ﻲﻓ ﺓﺭﺍﺭﺣﻟﺍ ﺱﺎﻳﻗ ﺩﻧﻋ ،ﺔﺣﻭﻠﻟﺎﺑ ﺭﺗﻣﻭﻣﺭﺗﻟﺍ ﻰﻠﻋ ﺎﻬﻳﻟﺇ ﺭﺎﺷﻣﻟﺍ ﻙﻠﺗ ﻥﻋ ﺔﻔﻠﺗﺧﻣ ﺓﺭﺍﺭﺣ ﺕﺎﺟﺭﺩ ﻝﺟﺳﺗ ﻥﺃ ﻲﻌﻳﺑﻁﻟﺍ ﻥﻣ :ﺔﻅﺣﻼﻣ ﺩﺧﺗﺳﺎﺑﺍﺭﺣ ﻥﺍﺯﻳﻣ ﻡﺍ ﺓﺭ
.ﺓﺩﺭﻔﻧﻣ ﺔﻁﻘﻧ ﺩﻧﻋ ﺓﺭﺍﺭﺣﻟﺍ ﺔﺟﺭﺩ ﻰﻟﺇ ﺱﻳﻟﻭ ،ﻥﺭﻔﻟﺍ ﻑﻳﻭﺟﺗ ﻝﺧﺍﺩ ﺓﺭﺍﺭﺣﻟﺍ ﺔﺟﺭﺩ ﻁﺳﻭﺗﻣ ﻰﻟﺇ ﺭﻳﺷﻳ ﺭﺗﻣﻭﻣﺭﺗﻟﺍ ﻥﻷ .ﻑﻠﺗﺧﻣ
ﺍﻥﺭﻔﻠﻟ ﻲﺗﺍﺫﻟﺍ ﻑﻳﻅﻧﺗﻟﺍ ﻡﺍﺩﺧﺗﺳ
ﻣ ﺹﺎﺧ ءﻼﻁﺑ ﺓﺎﻁﻐﻣ ﺔﻳﻠﺧﺍﺩﻟﺍ ﻪﺣﻁﺳﺃ ﻥﻭﻛﻟ ﻲﻌﻳﺑﻁﻟﺍ ﻥﺭﻔﻟﺍ ﻥﻋ ﻑﻳﻅﻧﺗﻟﺍ ﻲﺗﺍﺫ ﻥﺭﻔﻟﺍ ﻑﻠﺗﺧﻳ ،ﺔﻳﺻﺎﺧﻟﺍ ﻩﺫﻫ ﻰﻠﻋ ﻝﻣﺗﺷﺗ ﻲﺗﻟﺍ ﺕﻼﻳﺩﻭﻣﻟﺍ ﻲﻓﻟﺍ ﺩﺩﻌﺗﻠﻋ ﻝﻣﻌﻳ ﻡﺎﺳﻣ ﻰ
ﻥﺃ ﻲﻧﻌﻳ ﺍﺫﻬﻓ ،ﺔﻳﻧﻫﺩ ﻝﺋﺍﻭﺳ ﺏﺭﺳﺗ ﺔﻟﺎﺣ ﻲﻓ .ﻲﻬﻁﻟﺍ ءﺎﻧﺛﺃ ﺔﻣﻛﺍﺭﺗﻣﻟﺍ ﻥﻭﻫﺩﻟﺍ ﻥﻣ ﺹﻠﺧﺗﻟﺍﻭ ﺹﺎﺻﺗﻣﺍﻠﻟ ﺔﻳﻓﺎﻛ ﺭﻳﻏ ﻲﺗﺍﺫﻟﺍ ﻑﻳﻅﻧﺗﻟﺍ ﺔﻔﻳﻅﻭﻟﺎﺑ ﻡﺎﻳﻘﻐﺑﻧﻳ ﺫﺇ ،ﺽﺭﻐ ﻲ
ﺑ ﺔﻠﻠﺑﻣﻟﺍ ﺞﻧﻔﺳﻹﺍ ﺔﻌﻁﻗ ﺭﻳﺭﻣﺗ ﺓﺩﻭﺎﻌﻣﻭ ﺓﺭﺍﺭﺣﻟﺍ ﺕﺎﺟﺭﺩ ﻰﺻﻗﺃ ﻰﻟﺇ ﻥﺭﻔﻟﺍ ءﺎﻣﺣﺇ ﻡﺛ ﻥﻭﻫﺩﻟﺍ ﻡﻛﺍﺭﺗ ﻥﻛﺎﻣﺃ ﻰﻠﻋ ﺔﻠﻠﺑﻣ ﺞﻧﻔﺳﺇ ﺔﻌﻁﻗ ﺭﻳﺭﻣﺗﻳ ﻥﺃ ﺩﻌ.ﻥﺭﻔﻟﺍ ﺩﺭﺑ
40
Page 41

:ﺔﺷﺎﺷﻟﺍ ﻰﻠﻋ ﺯﻭﻣﺭﻟﺍ
ﻝﻳﻐﺷﺗﻟﺍ ﺩﻳﻗ ﻲﻟﻵﺍ ﺞﻣﺎﻧﺭﺑﻟﺍ
A*
1
ﻲﻓ) ﺓﺭﺎﺑﻌﻟﺍ ﺭﻬﻅﺗ ﺕﻼﻳﺩﻭﻣﻟﺍ ﺽﻌﺑ‘Auto ’ ﻑﺭﺣﻟﺍ ﻝﺩﺑA(
.(ﻲﺋﺎﻘﻠﺗ ﺱﻳﻟ) ﻱﻭﺩﻳﻟﺍ ﻡﺍﺩﺧﺗﺳﻼﻟ ﺯﻫﺎﺟ ﺯﺎﻬﺟﻟﺍ
.ﺔﻋﺎﺳﻟﺍ ﻁﺑﺿ ﻊﺿﻭ ﻲﻓ ﺞﻣﺭﺑﻣﻟﺍ ﻥﺃ ﻲﻧﻌﻳ ﺍﺫﻬﻓ ،ﺽﻣﻭﻳ ﺎﻣﺩﻧﻋ
ﺕﻗﺅﻣﻟﺍ ﺩﺍﺩﻋﺇ
.ﺕﻗﺅﻣﻟﺍ ﻁﺑﺿ ءﺎﻧﺛﺃ ﺩﺍﺩﻋﻷﺍ ﺹﺎﻘْﻧﺇ
) ﺏﻭﻠﻁﻣﻟﺍ ﺕﻭﺻﻟﺍ ﻯﻭﺗﺳﻣ ﺭﺎﻳﺗﺧﻻ ﺎﺿﻳﺃ ﻡﺩﺧﺗﺳﻳ3 (ﺓﺭﻓﻭﺗﻣ ﺕﺎﻳﻭﺗﺳﻣ
.ﺕﻗﺅﻣﻟﺍ ﻊﺿﻭ ﻲﻓ ﺩﺍﺩﻋﻷﺍ ﺓﺩﺎﻳﺯ
•
-
2
3
4
5
ﺭﺯ“Mode ”.ﺞﻣﺭﺑﻣﻟﺎﺑ ﺔﺣﺎﺗﻣﻟﺍ ﺔﺟﻣﺭﺑﻟﺍ ﺕﺍﺭﺎﻳﺧ ﺝﻭﻟﻭﻟ
M
+
6
7
ﺕﻗﺅﻣﻟﺍ
ﺎﻫﺎﺻﻗﺃ ﺓﺩﻣﻟ ﻪﻁﺑﺿ ﻥﻛﻣﻳ ،ﻲﺗﻭﺻﻟﺍ ﺭﺍﺫﻧﺇ ﺭﺍﺩﺻﺇ ﻲﻓ ﺕﻗﺅﻣﻟﺍ ﺔﻔﻳﻅﻭ ﺭﺻﺣﻧﺗ23 ﻭ ﺔﻋﺎﺳ59 ﺭﻟﺍ ﻲﻔﺗﺧﻳ ،ﺓﺩﺩﺣﻣﻟﺍ ﺓﺩﻣﻟﺍ ءﺎﺿﻘﻧﺍ ﺩﻌﺑﻭ .ﺔﻘﻳﻗﺩ) ﺯﻣ4 ﺓﺭﺎﻔﺻ ﻖﻠﻁﻧﺗﻭ (
ﺩﻌﺑ ﺎﻳﺋﺎﻘﻠﺗ ﺭﺍﺫﻧﻹﺍ ﺓﺭﺎﻔﺻ ﻑﻗﻭﺗﺗ.ﺭﺍﺫﻧﻹﺍ7 ﻁﻐﺿﻟﺎﺑ ﻭﺃ ،ﻖﺋﺎﻗﺩ‘ ﺭﺯﻟﺍ ﻰﻠﻋ ﻁﻐﺿﺍ ،ﺕﻗﺅﻣﻟﺍ ﻁﺑﺿﻟ .ﺞﻣﺭﺑﻣﻟﺍ ﺭﺍﺭﺯﺃ ﻥﻣ ﺭﺯ ﻱﺃ ﻰﻟM ﺓﺩﻣﻟﺛ ﻥﻳﺗﻳﻧﺎ2 ﻭﺃ ﻝﻗﻷﺍ ﻰﻠﻋ
) ﺯﻣﺭﻟﺍ ﺭﻬﻅﻳ ﻰﺗﺣ ﻝﺎﺣ ﻱﺃ ﻰﻠﻋ4 ﻥﻳﺭﺯﻟﺍ ﻝﺎﻣﻌﺗﺳﺎﺑ ﺕﻗﺅﻣﻟﺍ ﻁﺑﺿﺑ ﻡﻗ ﺎﻫﺩﻧﻋ .ﺎﺿﻣﻭﻣ ( ”+“ ﻭﺃ“- “ ﺭﺯﻟﺍ ﺭﺭﺣ ﻡﺛ .ﻁﻘﻓ- ﺯﻟﺍ + ﻭﺃﻭﻠﺑ ﺩﻌﺑ ﺭﺏﻭﻠﻁﻣﻟﺍ ﺕﻳﻗﻭﺗﻟﺍ ﻍ .
) ﺯﻣﺭﻟﺍ ﺏﻧﺟ ﻰﻟﺇ ﺔﺷﺎﺷﻟﺍ ﻰﻠﻋ ﻲﻟﺎﺣﻟﺍ ﺕﻳﻗﻭﺗﻟﺍ ﺽﺭﻋ ﻡﺗﻳﺳ ،ﻲﻧﺍﻭﺛ ﻊﺿﺑ ﺩﻌﺑ4 .ﺔﻅﺣﻠﻟﺍ ﻩﺫﻫ ﻥﻣ ﺍءﺩﺑ ﺭﻭﻔﻟﺍ ﻰﻠﻋ ﻲﻟﺯﺎﻧﺗﻟﺍ ﺩﻌﻟﺍ ﻖﻠﻁﻧﻳﻭ .(
ﻲﻟﺁ ﻪﺑﺷ ﻲﻬﻁ
ﺭﺯﻟﺍ ﻰﻠﻋ ﻁﻐﺿﺍ ،ﺔﺑﻭﻠﻁﻣﻟﺍ ﺓﺭﺍﺭﺣﻟﺍ ﻁﺑﺿﻭ ﻲﻬﻁﻟﺍ ﺔﻔﻳﻅﻭ ﺭﺎﻳﺗﺧﺍ ﺩﻌﺑ : ﻲﻬﻁﻟﺍ ﺓﺩﻣM ﻥﻳﺗﻳﻧﺎﺛ ﺓﺩﻣﻟ2 ﺝﻭﻟﻭﻟ ﺭﻬﻅﻳﺳ ﺎﻫﺩﻧﻋ .ﺔﺟﻣﺭﺑﻟﺍ ﻊﺿﻭﺍ) ﺯﻣﺭﻟ4 ﻡﺛ ﺭﺭﺣ .(
ﺡﺎﺗﻔﻣﻟﺍ ﻰﻠﻋ ﻯﺭﺧﺃ ﺓﺭﻣ ﻁﻐﺿﺍM ﺯﻣﺭﻟﺍ ﺃﺩﺑﻳ .A ﺓﺭﺎﺑﻌﻟﺍ ﺭﻬﻅﺗﻭ ،ﺽﻳﻣﻭﻟﺍ ﻲﻓ “dur “ ﻰﻟﺇ ﻝﻭﺣﺗﺗ ﻥﺃ ﻝﺑﻗ ﺔﺷﺎﺷﻟﺍ ﻰﻠﻋO ’00ﺑﺿﺑ ﻥﺫﺇ ﻡﻗ . ﺔﺑﻭﻠﻁﻣﻟﺍ ﻲﻬﻁﻟﺍ ﺓﺩﻣ ﻁ
ﺭﺯﻟﺍ ﺔﻁﺳﺍﻭﺑ- :ﺔﺣﺎﺗﻣﻟﺍ ﻯﻭﺻﻘﻟﺍ ﺓﺩﻣﻟﺍ) + ﺭﺯﻟﺍ ﻭﺃ10 ﻓ ﺞﻣﺭﺑﻣﻟﺍ ﺃﺩﺑﻳ (ﺕﺎﻋﺎﺳﻣﻳ ﻭﺃ ،ﻥﺍﻭﺛ ﻊﺿﺑ ﻲﻓ ﺎﻳﺋﺎﻘﻠﺗ ﺓﺩﺩﺣﻣﻟﺍ ﺓﺩﻣﻟﺍ ﺔﺟﻟﺎﻌﻣ ﻲﻰﻟﺇ ﺩﻳﺩﺟ ﻥﻣ ﺓﺩﻭﻌﻟﺍ ﻥﻛ ﺕﻳﻗﻭﺗﻟﺍ
ﺡﺎﺗﻔﻣﻟﺍ ﻰﻠﻋ ﻙﻐﺿﻟﺎﺑ ﻲﻟﺎﺣﻟﺍM .ﺕﺍﺭﻣ ﺓﺩﻋ
ﺯﻣﺭﻟﺍ ﻥﻣ ﻝﻛ ﺭﻬﻅﻳﺳA ) ﺯﻣﺭﻟﺍ ﻭ2ﺓﺩﺩﺣﻣﻟﺍ ﻲﻬﻁﻟﺍ ﺓﺩﻣ ءﺎﺿﻘﻧﺍ ﺩﻧﻋ ﺎﻳﺗﻭﺻ ﺎﻬﻳﺑﻧﺗ ﺭﺩﺻﻳﻭ ﻲﻬﻁﻟﺍ ﻥﻋ ﺎﻳﺋﺎﻘﻠﺗ ﻥﺭﻔﻟﺍ ﻑﻗﻭﺗﻳ .ﺔﺷﺎﺷﻟﺍ ﻰﻠﻋ (ﺟﺍﺭﻣ ءﺎﺟﺭﻟﺍ .ﻔﻟﺍ ﺔﻌ ﺕﺍﺭﻘ
.ﻥﺭﻔﻟﺍ ﻝﻳﻐﺷﺗ ﺓﺩﺎﻋﺇﻭ ﻲﺗﻭﺻﻟﺍ ﺭﺍﺫﻧﻹﺍ ﻝﻳﻁﻌﺗ ﺔﻳﻔﻳﻛ ﻰﻠﻋ ﻉﻼﻁﻼﻟ ﺔﻳﻟﺎﺗﻟﺍ
ﻲﻬﻁﻟﺍ ﺔﻳﺎﻬﻧ
ﺭﺯﻟﺍ ﻰﻠﻋ ﻁﻐﺿﺍ ،ﺔﺑﻭﻠﻁﻣﻟﺍ ﺓﺭﺍﺭﺣﻟﺍ ﻁﺑﺿﻭ ﻲﻬﻁﻟﺍ ﺔﻔﻳﻅﻭ ﺭﺎﻳﺗﺧﺍ ﺩﻌﺑM ﻥﻳﺗﻳﻧﺎﺛ ﺓﺩﻣﻟ2 ﺯﻣﺭﻟﺍ ﺽﺭﻋ ﻡﺗﻳﺳ ،ﺔﺟﻣﺭﺑﻟﺍ ﻊﺿﻭ ﺝﻭﻟﻭﻟ ﻝﻗﻷﺍ ﻰﻠﻋ ﺱﻣﻠﺑ ﻡﻗ ﻡﺛ ﺭﺭﺣ .(
ﺡﺎﺗﻔﻣM .ﻯﺭﺧﺃ ﺓﺭﻣ
ﺯﻣﺭﻟﺍ ﺃﺩﺑﻳA ﺓﺭﺎﺑﻌﻟﺍ ﺭﻬﻅﺗﻭ ،ﺽﻳﻣﻭﻟﺍ ﻲﻓ “dur “ ﺡﺎﺗﻔﻣ ﺱﻣﻠﺑ ﻡﻗ .ﺔﺷﺎﺷﻟﺍ ﻰﻠﻋM ﺓﺭﺎﺑﻌﻟﺍ ﺔﺷﺎﺷﻟﺍ ﻰﻠﻋ ﺭﻬﻅﺗﺳ .ﻯﺭﺧﺃ ﺓﺭﻣ“End .”ﺭﻳﻐﺗﺗﻟ ﻲﻧﺍﻭﺛ ﻊﺿﺑ ﺩﻌﺑ ﺎﻘﺣﻻ
ﺭﺎﻔﺻﺃ ﻰﻟﺇ0 ꞏ00 .
ﺭﺯﻟﺍ ﺔﻁﺳﺍﻭﺑ ﻲﻬﻁﻟﺍ ﺔﻳﺎﻬﻧ ﺕﻳﻗﻭﺗ ﻁﺑﺿﺑ ﻥﺫﺇ ﻡﻗ- :ﺔﺣﺎﺗﻣﻟﺍ ﻯﻭﺻﻘﻟﺍ ﺓﺩﻣﻟﺍ) + ﺭﺯﻟﺍ ﻭﺃ10 (ﺕﺎﻋﺎﺳ
ﺔﺟﻟﺎﻌﻣ ﻲﻓ ﺞﻣﺭﺑﻣﻟﺍ ﺃﺩﺑﻳ ﺡﺎﺗﻔﻣﻟﺍ ﻰﻠﻋ ﻙﻐﺿﻟﺎﺑ ﻲﻟﺎﺣﻟﺍ ﺕﻳﻗﻭﺗﻟﺍ ﻰﻟﺇ ﺩﻳﺩﺟ ﻥﻣ ﺓﺩﻭﻌﻟﺍ ﻥﻛﻣﻳ ﻭﺃ ،ﻥﺍﻭﺛ ﻊﺿﺑ ﻲﻓ ﺎﻳﺋﺎﻘﻠﺗ ﺓﺩﺩﺣﻣﻟﺍ ﺓﺩﻣﻟﺍM ﻋ.ﺕﺍﺭﻣ ﺓﺩ
ﺯﻣﺭﻟﺍ ﻥﻣ ﻝﻛ ﺭﻬﻅﻳﺳ .ﻥﺍﻭﺛ ﻊﺿﺑ ﺩﻌﺑ ﺞﻣﺭﺑﻣﻟﺍ ﺔﺷﺎﺷ ﻰﻠﻋ ﻲﻟﺎﺣﻟﺍ ﺕﻳﻗﻭﺗﻟﺍ ﺽﺭﻋ ﻰﻟﺇ ﺓﺩﻭﻌﻟﺍ ﻡﺗﺗ ﺎﻣﻧﻳﺑ ،ﺭﻭﻔﻟﺍ ﻰﻠﻋ ﻲﻬﻁﻟﺍ ﺃﺩﺑﻳA ﺯﻣﺭﻟﺍ ﻭ)2.ﺔﺷﺎﺷﻟﺍ ﻰﻠﻋ (
ﺭﻔﻟﺍ ﻑﻗﻭﺗﻳ ﻰﻠﻋ ﻉﻼﻁﻼﻟ ﺔﻳﻟﺎﺗﻟﺍ ﺕﺍﺭﻘﻔﻟﺍ ﺔﻌﺟﺍﺭﻣ ءﺎﺟﺭﻟﺍ .ﺓﺩﺩﺣﻣﻟﺍ ﻲﻬﻁﻟﺍ ﺓﺩﻣ ءﺎﺿﻘﻧﺍ ﺩﻧﻋ ﺎﻳﺗﻭﺻ ﺎﻬﻳﺑﻧﺗ ﺭﺩﺻﻳﻭ ﻲﻬﻁﻟﺍ ﻥﻋ ﺎﻳﺋﺎﻘﻠﺗ ﻥﻛﻌﺗ ﺔﻳﻔﻳ ﺭﺍﺫﻧﻹﺍ ﻝﻳﻁﺍ ﻲﺗﻭﺻﻟ
.ﻥﺭﻔﻟﺍ ﻝﻳﻐﺷﺗ ﺓﺩﺎﻋﺇﻭ
ﻲﺋﺎﻘﻠﺗ ﻲﻬﻁ
ﺎﻘﻓﻭ ﻲﻬﻁﻟﺍ ﺔﻳﺎﻬﻧ ﺕﻳﻗﻭﺗ ﻁﺑﺿ ﻡﺛ ،ﻲﻬﻁﻟﺍ ﺓﺩﻣ ﺓﺭﻘﻔﺑ ﺓﺩﺭﺍﻭﻟﺍ ﺕﺎﻣﻳﻠﻌﺗﻠﻟ ﺎﻘﻓﻭ ﻲﻬﻁﻟﺍ ﺓﺩﻣ ﻁﺑﺿﺑ ﻡﻗ.ﺔﻘﺑﺎﺳﻟﺍ ﺓﺭﻘﻔﻟﺎﺑ ﺓﺩﺭﺍﻭﻟﺍ ﺕﺎﻣﻳﻠﻌﺗﻠﻟ ﺻﻗﻻﺍ ﺩﺣﻟﺍ)ﻰ ﺍ ﺔﻳﺎﻬﻧﻟ ﻲﻫ ﺔﺣﺎﺗﻣﻟﺍ ﻲﻬﻁﻟ
24 .ﻲﻬﻁﻟﺍ ﺓﺩﻣﻭ ﻲﻬﻁﻟﺍ ﺔﻳﺎﻬﻧ ﺕﻳﻗﻭﺗ ﻥﻳﺑ ﻕﺭﺎﻔﻟﺎﺑ ﺩﺩﺣﻣﻟﺍ ﺕﻳﻗﻭﺗﻟﺍ ﻝﻭﻠﺣ ﺩﻧﻋ ﺎﻳﺋﺎﻘﻠﺗ ﻥﺭﻔﻟﺍ ﻝﻌﺗﺷﻳ .(ﺔﻋﺎﺳ
ﺯﻣﺭﻟﺍ ﺔﺷﺎﺷﻟﺍ ﻰﻠﻋ ﺭﻬﻅﻳ ،ﻥﺭﻔﻟﺍ ءﺎﻣﺣﻹ ﺔﻣﺯﻼﻟﺍ ﺓﺩﻣﻟﺍ ﻝﻼﺧ ﻱﺃ ،ﻲﻬﻁﻟﺍ ﺔﻳﻠﻣﻋ ءﺩﺑ ﻝﺑﻗA ﺭﺎﺷﻺﻟﺇ ﻲﺋﺎﻘﻠﺗﻟﺍ ﻲﻬﻁﻟﺍ ﺞﻣﺎﻧﺭﺑ ﻝﻳﻐﺷﺗ ﻰﻟﺇ ﺓ ﻡﺗﺗ .ﻲﻟﺎﺣﻟﺍ ﺕﻳﻗﻭﺗﻟﺍ ﻰﻟﺇ ﺔﻓﺎﺿ
) ﺯﻣﺭﻟﺎﺑ ﻥﺭﻔﻟﺍ ﻝﻳﻐﺷﺗ ﻰﻟﺇ ﺓﺭﺎﺷﻹﺍ2.ﺓﺩﺩﺣﻣﻟﺍ ﻲﻬﻁﻟﺍ ﺓﺩﻣ ءﺎﺿﻘﻧﺍ ﺩﻧﻋ ﺎﻳﺗﻭﺻ ﺎﻬﻳﺑﻧﺗ ﺭﺩﺻﻳﻭ ﻲﻬﻁﻟﺍ ﻥﻋ ﺎﻳﺋﺎﻘﻠﺗ ﻥﺭﻔﻟﺍ ﻑﻗﻭﺗﻳ (
ﻐﺷﺗ ﺓﺩﺎﻋﺇﻭ ﻲﺗﻭﺻﻟﺍ ﺭﺍﺫﻧﻹﺍ ﻝﻳﻁﻌﺗ ﺔﻳﻔﻳﻛ ﻰﻠﻋ ﻉﻼﻁﻼﻟ ﺔﻳﻟﺎﺗﻟﺍ ﺕﺍﺭﻘﻔﻟﺍ ﺔﻌﺟﺍﺭﻣ ءﺎﺟﺭﻟﺍ.ﻥﺭﻔﻟﺍ ﻝﻳ
.ﺢﻳﺗﺎﻔﻣﻟﺍ ﺩﺣﺃ ﺱﻣﻟ ﻲﻔﻛﻳ ،ﻲﺗﻭﺻﻟﺍ ﺭﺍﺫﻧﻹﺍ ﻝﻳﻁﻌﺗﻟ
:ﻲﺗﻭﺻﻟﺍ ﺭﺍﺫﻧﻹﺍ ﻝﻳﻁﻌﺗ ﺔﻳﻔﻳﻛ
ﻥﺭﻔﻟﺍ ﻝﻳﻐﺷﺗ ﺓﺩﺎﻋﺇ
ﺯﻣﺭﻟﺍ ﺽﺭﻋ ﻡﺗﻳ ،ﻲﺋﺎﻘﻠﺗﻟﺍ ﻪﺑﺷﻟﺍ ﻭﺃ ﻲﺋﺎﻘﻠﺗﻟﺍ ﻲﻬﻁﻟﺍ ﺔﻳﺎﻬﻧ ﻲﻓA ﺭﺻﺎﻧﻋ ﻑﻳﻗﻭﺗ ﺎﺿﻳﺃ ﻲﻧﻌﻳ ﺎﻣ ﻭﻣﻭ .ﻲﻟﺎﺣﻟﺍ ﺕﻳﻗﻭﺗﻟﺍ ﻰﻟﺇ ﺔﻓﺎﺿﺇ ﺎﺿﻣﻭﻣﺍ .ﺔﻳﻠﺧﺍﺩﻟﺍ ﺓﺭﺎﻧﻹﺍﻭ ﻥﻳﺧﺳﺗﻟ
ﺓﺩﺎﻋﻹ ﺡﺎﺗﻔﻣﻟﺍ ﻰﻠﻋ ﺭﺍﺭﻣﺗﺳﺎﺑ ﻁﻐﺿﻟﺍ ﻲﻔﻛﻳ ،ﺩﻳﺩﺟ ﻥﻣ ﻥﺭﻔﻟﺍ ﻝﻳﻐﺷﺗM ) ﺯﻣﺭﻟﺍ ﺽﺭﻋ ﺔﻳﺎﻏ ﻰﻟﺇ2 ﺯﻣﺭﻟﺍ ءﺎﻔﺗﺧﺍﻭ (A.
ﻯﺭﺧﺃ ﻑﺋﺎﻅﻭ
ﻲﻬﻁﻟﺍ ﺓﺩﻣ ﻑﺫﺣ ﺔﻳﻔﻳﻛ (ﻲﺋﺎﻘﻠﺗ ﻭﺃ ﻲﺋﺎﻘﻠﺗﻟﺍ ﻪﺑﺷ)
ﺯﻣﺭﻟﺍ ﺽﺭﻋ ءﺎﻧﺛﺃ ،ﻲﺋﺎﻘﻠﺗ ﻭﺃ ﻲﺋﺎﻘﻠﺗﻟﺍ ﻪﺑﺷ ﺞﻣﺎﻧﺭﺑﻟﺍ ﻑﺫﺣﻟA ﻥﻳﺭﺯﻟﺍ ﻰﻠﻋ ﻁﻐﺿﺍ ،- ﺗﻳﻧﺎﺛ ﺓﺩﻣﻟ ﺩﺣﺍﻭ ٍﻥﺁ ﻲﻓ + ﻭ ﻥﻳ2 ﻭﺃ ﻝﻗﻷﺍ ﻰﻠﻋﻋ) ﺭﻬﻅﺗ ﻰﺗﺣ ﻝﺎﺣ ﻱﺃ ﻰﻠ2 (
ﺯﻣﺭ ﻝﻳﻁﻌﺗﻭA.
41
Page 42

ﻡﻭﻳﻟﺍ ﺔﻋﺎﺳ ﻁﺑﺿ
/+ ﻥﻳﺭﺯﻟﺍ ﺔﻁﺳﺍﻭﺑ ﻡﻭﻳﻟﺍ ﺔﻋﺎﺳ ﻁﺑﺿﺍ ﻡﺛ ،ﺩﺣﺍﻭ ٍﻥﺁ ﻲﻓ ءﺎﻬﺗﻧﻻﺍ ﺕﻳﻗﻭﺗﻭ ﺓﺩﻣﻟﺍ ّﻱﺭِﺯ ﻰﻠﻋ ﻁﻐﺿﻟﺎﺑ ﻡﻭﻳﻟﺍ ﺔﻋﺎﺳ ﺔﻔﻳﻅﻭ ﺭﺗﺧﺍ-.
.ًﺎﻘﺑﺳﻣ ﺩﻌُﻣ ﺞﻣﺎﻧﺭﺑ ﻱﺃ ءﺎﻐﻟﺇ ﻡﺗﻳ
ﻱﻭﺩﻳ ﻝﻳﻐﺷﺗ
ﺕﻳﻗﻭﺗﻭ ﺓﺩﻣﻟﺍ ﺭﺯ ﻰﻠﻋ ﻁﻐﺿﺍ ﺯﻣﺭﻟﺍ ﻲﻔﺗﺧﻳ ﻲﺋﺎﺑﺭﻬﻛﻟﺍ ﻝّﺣﺭُﻣﻟﺍ ﻝﻳﻐﺷﺗ ﻡﺗﻳ .ﺩﺣﺍﻭ ٍﻥﺁ ﻲﻓ ﻲﻬﻁﻟﺍ ﻥﻣ ءﺎﻬﺗﻧﻻﺍ“A ”ﻬﻁﻟﺍ ءﺎﻧﺇ ﺯﻣﺭ ءﻲﺿﻳﻭ ﺩﻌُﻣ ﺞﻣﺎﻧﺭﺑ ﻱﺃ ءﺎﻐﻟﺇ ﻡﺗﻳ .ﻲ
.ًﺎﻘﺑﺳﻣ
ﻲﻬﻁﻟﺍ ﺓﺩﻣ ﻊﻣ ﺔﻳﻟﺁ ﻪﺑﺷﻟﺍ ﺕﺎﻳﻠﻣﻌﻟﺍ
/+ ﻥﻳﺭﺯﻟﺍ ﺔﻁﺳﺍﻭﺑ ﺔﺑﻭﻠﻁﻣﻟﺍ ﺓﺩﻣﻟﺍ ﻁﺑﺿﺑ ﻡﻗﻭ ﻲﻬﻁﻟﺍ ﺓﺩﻣ ﺔﻔﻳﻅﻭ ﺭﺗﺧﺍ- ﺯﻣﺭﻟﺍ ﺭﻬﻅﻳ ﺎﻫﺩﻧﻋ .“A ”ﻧﺇ ﺯﻣﺭﻭ ّﺣﺭُﻣﻟﺍ ﺝﺭﺎﺧﻣ ﻁﺷﻧﺗﻭ .ﻲﻬﻁﻟﺍ ءﺎ ﺕﻧﺎﻛ ﺍﺫﺇ .ﻲﺋﺎﺑﺭﻬﻛﻟﺍ ﻝ
.ﻥﺎﻳﻔﺗﺧﻳ ﻲﻬﻁﻟﺍ ءﺎﻧﺇﻭ ﻝّﺣﺭُﻣﻟﺍ ﺯﻣﺭ ﻥﺈﻓ ،ﻲﻬﻁﻟﺍ ﺕﻳﻗﻭﺗ ﺔﻳﺎﻬﻧ = ﻡﻭﻳﻟﺍ ﺔﻋﺎﺳ
ﺯﻣﺭﻟﺍ ﺽﻣﻭﻳﻭ ﺔﻳﺗﻭﺻﻟﺍ ﺓﺭﺎﺷﻹﺍ ﻖﻠﻁﻧﺗ“A.”
ﻲﻬﻁﻟﺍ ﺔﻳﺎﻬﻧ ﺕﻳﻗﻭﺗ ﻊﻣ ﺔﻳﻟﺁ ﻪﺑﺷﻟﺍ ﺕﺎﻳﻠﻣﻌﻟﺍ
ﻭﺑ ﺔﺑﻭﻠﻁﻣﻟﺍ ﺓﺩﻣﻟﺍ ﻁﺑﺿﺑ ﻡﻗﻭ ﻲﻬﻁﻟﺍ ﺔﻳﺎﻬﻧ ﺕﻳﻗﻭﺗ ﺔﻔﻳﻅﻭ ﺭﺗﺧﺍ/+ ﻥﻳﺭﺯﻟﺍ ﺔﻁﺳﺍ- ﺯﻣﺭﻟﺍ ﺭﻬﻅﻳ ﺎﻫﺩﻧﻋ .“A ”ﺭﺎﺧﻣ ﻁﺷﻧﺗﻭ .ﻲﻬﻁﻟﺍ ءﺎﻧﺇ ﺯﻣﺭﻭ ﺍﺫﺇ .ﻲﺋﺎﺑﺭﻬﻛﻟﺍ ﻝّﺣﺭُﻣﻟﺍ ﺝ
.ﻥﺎﻳﻔﺗﺧﻳ ﻲﻬﻁﻟﺍ ءﺎﻧﺇﻭ ﻝّﺣﺭُﻣﻟﺍ ﺯﻣﺭ ﻥﺈﻓ ،ﻲﻬﻁﻟﺍ ﺕﻳﻗﻭﺗ ﺔﻳﺎﻬﻧ = ﻡﻭﻳﻟﺍ ﺔﻋﺎﺳ ﺕﻧﺎﻛ
ﺯﻣﺭﻟﺍ ﺽﻣﻭﻳﻭ ﺔﻳﺗﻭﺻﻟﺍ ﺓﺭﺎﺷﻹﺍ ﻖﻠﻁﻧﺗ“A.”
ﻝﻣﺎﻛﻟﺎﺑ ﺔﻳﻟﻵﺍ ﺕﺎﻳﻠﻣﻌﻟﺍ
ﺿﺑ ﻡﻗﻭ ﻲﻬﻁﻟﺍ ﺓﺩﻣ ﺔﻔﻳﻅﻭ ﺭﺗﺧﺍ/+ ﻥﻳﺭﺯﻟﺍ ﺔﻁﺳﺍﻭﺑ ﺔﺑﻭﻠﻁﻣﻟﺍ ﺓﺩﻣﻟﺍ ﻁﺑ- ﺯﻣﺭﻟﺍ ﺭﻬﻅﻳ ﺎﻫﺩﻧﻋ .“A .”ﺭﻬﻅﻳﻭ ﻲﺋﺎﺑﺭﻬﻛﻟﺍ ﻝّﺣﺭُﻣﻟﺍ ﻝﻳﻐﺷﺗ ﻡﺗﻳ ﺭﺗﺧﺍ .ﻲﻬﻁﻟﺍ ءﺎﻧﺇ ﺯﻣﺭ
/+ ﻥﻳﺭﺯﻟﺍ ﺔﻁﺳﺍﻭﺑ ﺏﻭﻠﻁﻣﻟﺍ ﺕﻳﻗﻭﺗﻟﺍ ﺭﺗﺧﺍ .ﻲﻬﻁﻟﺍ ﻥﻣ ءﺎﻬﺗﻧﻼﻟ ﻥﻛﻣﻣ ﺕﻳﻗﻭﺗ ﺏﺭﻗﺃ ﺽﺭﻋ ﻡﺗﻳﺳ ﺎﻫﺩﻧﻋ ،ﻲﻬﻁﻟﺍ ﺔﻳﺎﻬﻧ ﺕﻳﻗﻭﺗ ﺔﻔﻳﻅﻭ-ﻲﻔﺗﺧﻳﺳ . ﻥﻣ ﻝﻛ ّﺣﺭُﻣﻟﺍ ﺯﻣﺭ ﻝ
.ﻲﻬﻁﻟﺍ ءﺎﻧﺇﻭ
.ﺏﻭﺳﺣﻣﻟﺍ ءﺩﺑﻟﺍ ﺕﻳﻗﻭﺗ = ﻡﻭﻳﻟﺍ ﺕﻳﻗﻭﺗ ﻱﻭﺎﺳﻳ ﺎﻣﺩﻧﻋ ﻯﺭﺧﺃ ﺓﺭﻣ ﻲﻬﻁﻟﺍ ءﺎﻧﺇ ﺯﻣﺭ ﺭﻬﻅﻳ
ﺯﻣﺭﻟﺍ ﺽﻣﻭﻳ“A ”.ﻲﻟﻵﺍ ﺞﻣﺎﻧﺭﺑﻟﺍ ءﺎﻬﺗﻧﺍ ﺩﻌﺑ
.ﻲﺋﺎﺑﺭﻬﻛﻟﺍ ﻝّﺣﺭُﻣﻟﺍﻭ ﻲﻬﻁﻟﺍ ءﺎﻧﺇ ﺯﻣﺭ ﻑﺎﻘﻳﺇﻭ ﺔﻋﻭﻣﺳﻣ ﺔﻳﺗﻭﺻ ﺓﺭﺎﺷﺇ ﺭﺍﺩﺻﺇ ﻡﺗﻳﻭ
ﻪﻳﺑﻧﺗﻟﺍ ﺔﻋﺎﺳ
ﻁﻣﻟﺍ ﺕﻳﻗﻭﺗﻟﺍ ﺭﺗﺧﺍﻭ ﻪﻳﺑﻧﺗﻟﺍ ﺔﻋﺎﺳ ﺭﺯ ﺭﺗﺧﺍ/+ ﻥﻳﺭﺯﻟﺍ ﺔﻁﺳﺍﻭﺑ ﺏﻭﻠ-ﻧﻋ ﺔﻳﺗﻭﺻﻟﺍ ﺓﺭﺎﺷﻹﺍ ﻖﻠﻁﻧﺗﻭ .ﺓﺩﻣﻟﺍ ءﺎﺿﻘﻧﺍ ﺩﻧﻋ ﺱﺭﺟﻟﺍ ﺯﻣﺭ ﺭﻬﻅﻳ .ﺎﺿﻘﻧﺍ ﺩ .ﺓﺩﻣﻟﺍ ء
ﺔﻋﻭﻣﺳﻣ ﺓﺭﺎﺷﺇ
ﺓﺩﻣﻟ ﺦﺑﻁﻟﺍ ﺞﻣﺎﻧﺭﺑ ﻭﺃ ﻪﻳﺑﻧﺗﻟﺍ ﺔﻋﺎﺳ ﺔﻳﺎﻬﻧ ﻲﻓ ﺕﺍﻭﺻﻷﺍ ﺔﻋﻭﻣﺳﻣ ﺓﺭﺎﺷﺇ ﻖﻠﻁﻧﺗ7 ﻱﺃ ﻰﻠﻋ ﻁﻐﺿﻟﺎﺑ ﺔﻳﺗﻭﺻﻟﺍ ﺓﺭﺎﺷﻹﺍ ﻑﻳﻗﻭﺗ ﻥﻛﻣﻳ .ﻖﺋﺎﻗﺩﺯ ﺭﺯﻟﺍ ﻰﻠﻋ ﻁﻐﺿﻟﺎﺑ .ﺭ“ - “
ﺩ ﻥﻳﺑ ﻥﻣ ﺭﺎﻳﺗﺧﻻﺍ ﻥﻛﻣﻳﻭ .ﺔﺗﻳﻭﺻﻟﺍ ﺓﺭﺎﺷﻹﺍ ﺩﺩﺭﺗ ﺭﻳﻳﻐﺗ ﻡﺗﻳ ،ﺎﻘﺑﺳﻣ ﻑﺋﺎﻅﻭﻟﺍ ﻯﺩﺣﺇ ﺭﺎﻳﺗﺧﺍ ﻥﻭ3 ﻹﺍ ﻥﻳﻧﻁ ﻉﺎﻣﺳ ﻥﻛﻣﻳﻭ .ﺔﺣﺎﺗﻣ ﺕﺍﺭﺎﻳﺧ ﺔﻠﻳﻁ ﺓﺭﺎﺗﺧﻣﻟﺍ ﺔﻳﺗﻭﺻﻟﺍ ﺓﺭﺎﺷ
ﺭﺯﻟﺍ ﻰﻠﻋ ﻁﻐﺿﻟﺍ ﺓﺩﻣ“-.“
ﻖﻘﺣﺗﻟﺍﻭ ﺞﻣﺎﻧﺭﺑﻟﺍ ﺔﻳﺍﺩﺑ
ﻘﺣﺗﻟﺍ ﻥﻛﻣﻳ .ﺏﻭﻠﻁﻣﻟﺍ ﺕﻳﻗﻭﺗﻟﺍ ﺩﻳﺩﺣﺗ ﺩﻌﺑ ﺩﺩﺣﻣﻟﺍ ﺞﻣﺎﻧﺭﺑﻟﺍ ﺫﻳﻔﻧﺗ ﻡﺗﻳ ﻥﻣ ﻖ“ﻝﻳﻐﺷﺗﻟﺍ ﺓﺩﻣ ”ﺎﻧﻣﻟﺍ ﺔﻔﻳﻅﻭﻟﺍ ﺭﺎﻳﺗﺧﺍ ﻖﻳﺭﻁ ﻥﻋ ﺕﻗﻭ ﻱﺃ ﻲﻓ.ﺔﺑﺳ
ﺄﻁﺧﻟﺍ ﺩﻳﺩﺣﺗ ﻁﺑﺿ
ﺷﻹﺍ ﻡﺗﺗﺳﻓ ،ﺄﻁﺧ ﺙﻭﺩﺣ ﺩﻧﻋﻭ .ﻲﻬﻁﻟﺍ ﻥﻣ ءﺎﻬﺗﻧﻻﺍ ﺕﺎﻗﻭﺃﻭ ﺏﻭﺳﺣﻣﻟﺍ ﻲﻬﻁﻟﺍ
ﺔﻳﺍﺩﺑ ﺕﻳﻗﻭﺗ ﻥﻳﺑ ﻡﻭﻳﻟﺍ ﺔﻋﺎﺳ ﺕﻧﺎﻛ ﺍﺫﺇ ﺎﻣﻳﻠﺳ ﺩﺍﺩﻋﻹﺍ ﻥﻭﻛﻳﻳﻟﺇ ﺓﺭﺎﺗﻭﺻ ﺭﺍﺫﻧﺈﺑ ﻪ ﻲ
ﺯﻣﺭﻟﺍ ﺽﻳﻣﻭﻭ“A . ”ﺩﺍﺩﻋﻹﺍ ﺢﻳﺣﺻﺗ ﻥﻛﻣﻳﻭ.ﻥﻳﺗﻔﻳﻅﻭﻟﺍ ﻼﻛ ﻭﺃ ﻯﺩﺣﺇ ﺭﻳﻳﻐﺗ ﻖﻳﺭﻁ ﻥﻋ ﺔﺋﻁﺎﺧﻟﺍ ﺕﺍ
ﺞﻣﺎﻧﺭﺑﻟﺍ ءﺎﻐﻟﺇ
.ﺎﻳﺋﺎﻘﻠﺗ ﻩءﺎﻐﻟﺇ ﻡﺗﻳ ،ﺎﻫﺭﺧﺁ ﻥﻋ ﻪﺗﻔﻳﻅﻭ ءﺍﺩﺃ ﻥﻣ ﺞﻣﺎﻧﺭﺑﻟﺍ ءﺎﻬﺗﻧﺍ ﺩﻌﺑ .ﺔﻳﻭﺩﻳﻟﺍ ﺔﻔﻳﻅﻭﻟﺍ ﺭﺎﻳﺗﺧﺎﺑ ﺞﻣﺎﻧﺭﺑﻟﺍ ءﺎﻐﻟﺇ ﻥﻛﻣﻳ
ﺎﻔﻣ ﻡﺍﺩﺧﺗﺳﺍ ﻝﻛﺷﻟﺍ) ﺔﻳﻧﻭﺭﺗﻛﻟﻹﺍ ﺔﺟﻣﺭﺑﻟﺍ ﺢﻳﺗ44(
ﺎﻣﺎﻗﺭﺃ ﺔﺷﺎﺷﻟﺍ ﺽﺭﻌﺗ ﻝﻭﻷﺍ ﻝﻳﻐﺷﺗﻟﺍ ءﺩﺑ ﻑﺭﺣﻭA :ﻲﺋﺎﺑﺭﻬﻛﻟﺍ ﺭﺎﻳﺗﻟﺍ ﻉﺎﻁﻘﻧﺍ ﺩﻌﺑ ﻭﺃ ،ﻰﻟﻭﻷﺍ ﺓﺭﻣﻠﻟ ﻥﺭﻔﻟﺍ ﻝﻳﻐﺷﺗ ﺩﻧﻋ ﺽﻣﺍﻭﻟﺍ
ﺔﻟﺎﺣﻟﺍ ﻩﺫﻫ ﻲﻓ ﺯﺎﻬﺟﻟﺍ ﻝﻳﻐﺷﺗ ﻥﻛﻣﻳ ﻻ
ﺡﺎﺗﻔﻣﻟﺍ ﻰﻠﻋ ﻁﻐﺿﺍ ﻝﻳﻐﺷﺗﻟﺍ ﻥﻣ ﺯﺎﻬﺟﻟﺍ ﻥﻳﻛﻣﺗﻟ ﻭﺃ / ﻭ ﺔﻋﺎﺳﻟﺍ ﻁﺑﺿﻟM ﻥﻳﺗﻳﻧﺎﺛ ﺓﺩﻣﻟ2 ﻑﺭﺣﻟﺍ ﻲﻔﺗﺧﻳﺳ ﺎﻫﺩﻧﻋ.ﻝﻗﻷﺍ ﻰﻠﻋA ﻗﺭﻷﺍ ﻰﻘﺑﺗﻭ .ﺔﺷﺎﺷﻟﺍ ﻰﻠﻋ ﻁﻘﻓ ﻡﺎ
.ﺭﺯﻟﺍ ﻰﻠﻋ ﻁﻐﺿﻟﺍ ﻑﻗﻭﺗ ﻥﻣ ﺓﺩﻭﺩﻌﻣ ﻲﻧﺍﻭﺛ ﺩﻌﺑ ﺞﻣﺭﺑﻣﻟﺍ ﻝﺑﻗ ﻥﻣ ﺔﻋﺎﺳﻟﺍ ﻝﺎﺧﺩﺇ ﻡﺗﻳ
)ﺯﻣﺭﻟﺍ ﺭﻭﻬﻅ ﺩﻌﺑ ﻻﺇ ﻲﻬﻁﻠﻟ ﻡﻳﻠﺳ ﻭﺣﻧ ﻰﻠﻋ ﺯﺎﻬﺟﻟﺍ ﻡﺍﺩﺧﺗﺳﺍ ﻥﻛﻣﻳ ﻻ :ﺔﻣﺎﻫ ﺔﻅﻭﺣﻠﻣ2.ﺔﺷﺎﺷﻟﺍ ﻰﻠﻋ (
42
ﺑﺗﻭ) ﻁﺎﻘﻧﻟﺍ ﺃﺩ3 ﺭﺯﻟﺍ ﻰﻠﻋ ﻁﻐﺿﺍ:ﺽﻳﻣﻭﻟﺍ ﻲﻓ (- .ﺔﻋﺎﺳﻟﺍ ﻁﺑﺿﻟ + ﺭﺯﻟﺍ ﻭﺃ
Page 43

ﺔﻳﺗﻭﺻ ﺓﺭﺎﺷﺇ
ﺓﺭﺎﺷﻹﺍ ﻝﺻﺍﻭﺗ ﺓﺩﻣﻟ ﺎﻬﻧﻳﻧﻁ ﺔﻳﺗﻭﺻﻟﺍ7 ﺩﻌﺑ ﻲﻧﺍﻭﺛ“ ﺓﺩﻣﻟﺍ ءﺎﺿﻘﻧﺍ “ ﺭﺯ ﺔﻁﺳﺍﻭﺑ ﺎﻬﻔﻳﻗﻭﺗ ﻡﺗﻳ ﻡﻟ ﺎﻣ“ﻡﻭﻳﻟﺍ ﺔﻋﺎﺳ .”
ـﻟﺍ ﻝﻼﺧ ﻡﻭﻳﻟﺍ ﺔﻋﺎﺳ ﺭﺯ ﻰﻠﻋ ﻁﻐﺿﻟﺍ ﻡﺗ ﺍﺫﺇ ﺔﻳﺗﻭﺻ ﺓﺭﺎﺷﺇ ﻥﺭﻔﻟﺍ ﺭﺩﺻُﻳ ﻥﻟ15 .ﺕﻗﺅﻣﻟﺍ ﻥﻣ ﺓﺭﻳﺧﻷﺍ ﺔﻳﻧﺎﺛ
ﺔﻳﺗﻭﺻﻟﺍ ﺓﺭﺎﺷﻹﺍ ﺩﺩﺭﺗ
ﺗﺧﺍ ﺎﻫﺩﻧﻋ ﻥﻛﻣﻳ ،ﺓﺭﺎﺗﺧُﻣ ﺔﻔﻳﻅﻭ ﻱﺃ ﻙﺎﻧﻫ ﻥﻛﺗ ﻡﻟ ﺍﺫﺇ ﺭﺯﻟﺍ ﻰﻠﻋ ﻁﻐﺿﻟﺎﺑ ﺔﻳﺗﻭﺻﻟﺍ ﺓﺭﺎﺷﻹﺍ ﺩﺩﺭﺗ ﺭﺎﻳ“- .”
) ﺕﺍﺩﺩﺭﺗ ﺙﻼﺛ ﻥﻳﺑ ﻥﻣ ﺭﺎﻳﺗﺧﻻﺍ ﻥﻛﻣﻳ1.5 ؛2.0 ؛3.0 .(ﺯﺗﺭﻫ ﻭﻠﻳﻛ
ﻝﻛﺷﻟﺍ) ﺱﻣﻠﻟﺎﺑ ﺔﻋﺎﺳﻟﺍ ﻡﺍﺩﺧﺗﺳﺍ42(
ﻲﺋﺎﺑﺭﻬﻛﻟﺍ ﺭﺎﻳﺗﻟﺍ ﺩﺩﺭﺗ ﻥﻋ ﻑﺷﻛﻟﺍ
ﺩﺩﺭﺗ ﻭﺫ ﻲﺋﺎﺑﺭﻬﻛ ﺭﺎﻳﺗ ﻰﻟﺇ ﺕﻗﺅﻣﻟﺍ ﻝﻳﺻﻭﺗ ﺩﻧﻋ .ﻝﻳﻐﺷﺗﻟﺍ ﺩﻧﻋ ﺭﺎﻳﺗﻟﺍ ﺩﺩﺭﺗ ﺩﻳﺩﺣﺗ ﻡﺗﻳ60 ﺯﺗﺭﻫﻟﺍ ءﺩﺑ ءﺎﻧﺛﺃ ﺓﺭﺍﺭﺣﻟﺍ ﺔﺟﺭﺩ ﺯﻣﺭ ﺽﻣﻭﻳ ، .ﻝﻳﻐﺷﺗ
ﺯﻣﺭﻟﺍﻭ ﺔﺷﺎﺷﻟﺍ ﺃﺩﺑﺗ .ﻲﺋﺎﺑﺭﻬﻛ ﻝّﺣﺭُﻣﻟﺍ ﻝﺻﻭﻣ ﺢﺗﻓ ﻡﺗﻳ ﻝﻳﻐﺷﺗﻟﺍ ﺩﻧﻋ ﻝﻳﻐﺷﺗAUTO ﻥﻣ ﻡﻭﻳﻟﺍ ﺔﻋﺎﺳ ﺃﺩﺑﺗﻭ ﺽﻳﻣﻭﻟﺍ ﻲﻓ0:00 ﺽﻳﻣﻭ ﺭﻣﺗﺳﻳ .ﺍ ﻰﻟﺇ ﻡﻭﻳﻟﺍ ﺔﻋﺎﺳﻭ ﺔﻗﺎﻁﻟ
ﺔﻋﺎﺳﻟﺍ ﻁﺑﺿ ﺔﻳﺎﻏ
ﻡﻭﻳﻟﺍ ﺔﻋﺎﺳ ﻁﺑﺿ
.ﺩﺣﺍﻭ ٍﻥﺁ ﻲﻓ ﺹﻗﺎﻧﻭ ﺩﺋﺍﺯ ﺭﺯ ﻰﻠﻋ ﻁﻐﺿﺍ ﺭﺯ ﻝﺎﻣﻌﺗﺳﺍ ﻥﻛﻣﻳ ،ﻝﻳﻐﺷﺗﻟﺍ ﻊﺿﻭ ﺩﻧﻋMODE .ًﺎﺿﻳﺃ
.ﺽﻳﻣﻭﻟﺍ ﺩﻳﻗ ﺔﻘﻳﻗﺩﻟﺍﻭ ﺔﻋﺎﺳﻟﺍ ﻥﻳﺑ ﻥﺎﺗﻁﻘﻧﻟﺍ ﺕﻣﺍﺩﺎﻣ ،ﺹﻗﺎﻧﻭﺃ ﺩﺋﺍﺯ ﺔﻁﺳﺍﻭﺑ ﻡﻭﻳﻟﺍ ﺔﻋﺎﺳ ﻁﺑﺿ ﻥﻛﻣﻳ
ﺓﺩﺣﺍﻭ ﺔﻳﻧﺎﺛ ﻥﻣ ﺭﺛﻛﻷ ﺹﻗﺎﻧ ﻭﺃ ﺩﺋﺍﺯ ﻰﻠﻋ ﻁﻐﺿﻟﺎﺑ ﻊﻳﺭﺳﻟﺍ ﺩﺍﺩﻋﻹﺎﺑ ﻡﺎﻳﻘﻟﺍ ﻥﻛﻣﻳ1ﺑﺿ ﺭﺎﻳﺗﺧﺍ ﻡﺗ ﺍﺫﺇ ﻲﺋﺎﻘﻠﺗﻟﺍ ﺞﻣﺎﻧﺭﺑﻟﺍ ءﺎﻐﻟﺇ ﻡﺗﻳ .ﻁ ﺍ ﺩﺣﺃ ﻝﻳﻐﺷﺗ ءﺎﻧﺛﺃ ﻡﻭﻳﻟﺍ ﺔﻋﺎﺳ ﺞﻣﺍﺭﺑﻟ
.ﺔﻳﺋﺎﻘﻠﺗﻟﺍ
ﻱﺃ ﻰﻠﻋ ﻁﻐﺿﻟﺎﺑ ﻪﺑﻧﻣﻟﺍ ﺓﺭﺎﻔﺻ ﻑﻳﻗﻭﺗ ﻥﻛﻣﻳ .ﻪﻳﺑﻧﺗﻟﺍ ﺔﻋﺎﺳ ﻲﻓ ﺓﺩﺩﺣﻣﻟﺍ ﺓﺩﻣﻟﺍ ءﺎﺿﻘﻧﺍ ﺩﻧﻋ ﻲﺗﻭﺻﻟﺍ ﻪﺑﻧﻣﻟﺍ ﺓﺭﺎﻔﺻ ﻖﻠﻁﻧﺗ ﻲﺗﻭﺻﻟﺍ ﻪﺑﻧﻣﻟﺍﻣﻭﺃ ﺡﺎﺗﻔ ﺓﺩﻣ ﻝﻳﻭﺣﺗﺑﺍ ﻥﻣ ﺩﺣﻟ
ﻥﻳﻧﻁﻟﺍ
ﻲﺗﻭﺻﻟﺍ ﻪﺑﻧﻣﻟﺍ ﺓﺭﺎﻔﺻ ﺩﺩﺭﺗ ﺭﻳﻳﻐﺗ
ﻳ ﺓﺭﺎﻔﺻ ﺩﺩﺭﺗ ﺭﻳﻳﻐﺗ ﻥﻛﻣ
ﻭﺃ ﺩﺋﺍﺯ ﻰﻠﻋ ﻻﻭﺃ ﻁﻐﺿﺍ ﻰﻠﻋ ﻡﺛ (ﺕﻳﻗﻭﺗﻟﺍ ﺭﻳﻳﻐﺗ ﺔﻣﺋﺎﻗ) ﺩﺣﺍﻭ ٍﻥﺁ ﻲﻓ ﺹﻗﺎﻧMode .ﻲﺗﻭﺻﻟﺍ ﻪﺑﻧﻣﻟﺍ ﺓﺭﺎﻔﺻ ﺩﺩﺭﺗ ﺭﻳﻳﻐﺗ ﺔﻣﺋﺎﻗ ﺭﺎﻳﺗﺧﻻ
ﺹﻧ ﻡﺍﺩﺎﻣ ﻲﺗﻭﺻﻟﺍ ﻪﺑﻧﻣﻟﺍtonX .ﺭﺭﻛﺗﻣ ﻝﻛﺷﺑ ﺹﻗﺎﻧ ﺱﻣﻠﺑ ﺎﻳﺩﺎﺑ
ﻻﺇ ﻱﺭﺻﺑﻟﺍ ﺭﺍﺫﻧﻹﺍ ﻥﻳﻳﻌﺗ ﺓﺩﺎﻋﺇ ﻥﻛﻣﻳ ﻼﻓ ،ﺔﻁﺷﻧ ﺭﻳﻏ ﺱﻣﻠﻟﺍ ﺔﺣﻭﻟ ﺕﻧﺎﻛ ﺍﺫﺇ :ﺔﻅﺣﻼﻣ ﺩﻳﺯﺗ ﺓﺩﻣﻟ ﺔﻟﻭﺑﻘﻣ ﺢﻳﺗﺎﻔﻣ ﺔﺑﻳﻛﺭﺗ ﻰﻠﻋ ﻁﻐﺿﻟﺎﺑﻋﻳﺗﻳﻧﺎﺛ ﻥ ﻥ2 .
ﺔﻳﻭﺩﻳﻟﺍ ﺔﻔﻳﻅﻭﻟﺍ ﻭ ﺞﻣﺍﺭﺑﻟﺍ ءﺎﻐﻟﺇ
ﻝﻼﺧ ﻥﻣ ﻪﻳﺑﻧﺗﻟﺍ ﺔﻋﺎﺳ ﺓﺩﻣ ءﺎﻐﻟﺇ ﻥﻛﻣﻳ
”ﺿ ﻥﻣ ﺔﺷﺎﺷﻟﺍ ﺽﺭﻋ ﺭﻳﻐﺗﻳ ﺎﻫﺩﻧﻋ ،ﺩﺣﺍﻭ ٍﻥﺁ ﻲﻓ ﺹﻗﺎﻧﻭ ﺩﺋﺍﺯ ﺭﺯ ﻰﻠﻋ ﻁﻐﺿﺍ ﻡﺛ ،ﻪﻳﺑﻧﺗﻟﺍ ﺔﻋﺎﺳ ﺞﻣﺎﻧﺭﺑ ﻻﻭﺃ ﺭﺗﺧﺍﻟﺇ ﺕﻗﻭﻟﺍ ﻁﺑﻰ ﻡﻭﻳﻟﺍ ﺔﻋﺎﺳ
ءﺎﻐﻟﻹﺍ ﺔﻔﻳﻅﻭ
(ﺃ“
.ﺍﺭﻭﻓ
.ﻝﻳﺩﻌﺗﻟﺍ ﻊﺿﻭ ﻲﻓ ﺕﻗﺅﻣﻟﺍ ﻰﻘﺑﻳ .ﻲﻟﺯﺎﻧﺗﻟﺍ ﺩﻌﻟﺍ ﺭﻳﻔﺻﺗ (ﺏ
ﻪﻳﺑﻧﺗﻟﺍ ﺔﻋﺎﺳ
ﻟﺍ ﺽﺭﻋ ﻰﻟﺇ ﻝﻭﺣﺗﺗ ﻻﻭ ،ﻖﺋﺎﻗﺩﻟﺍﻭ ﺔﻋﺎﺳﻟﺎﺑ ﺔﻳﻘﺑﺗﻣﻟﺍ ﺓﺩﻣﺍ ﺽﺭﻋ ﻲﻓ ﺔﺷﺎﺷﻟﺍ ﺭﻣﺗﺳﺗﻭ ،ﺱﺭﺟﻟﺍ ﺯﻣﺭ ﺽﻣﻭﻳ ،ﻪﻳﺑﻧﺗﻟﺍ ﺔﻋﺎﺳ ﻊﺿﻭ ﺭﺎﻳﺗﺧﺍ ءﺎﻧﺛﺃﺇ ﻲﻧﺍﻭﺛ ﻍﻭﻠﺑ ﺩﻧﻋ ﻻﺍ ﺔﻘﻳﻗﺩﻟ
ﻟﺍ ﻥﻣ ﺔﻳﻘﺑﺗﻣﻟﺍ ﺓﺭﻳﺧﻷﺍ .ﻲﻟﺯﺎﻧﺗﻟﺍ ﺩﻌ
.ﺱﺭﺟﻟﺍ ﺯﻣﺭ ﺽﻳﻣﻭﻭ ﻲﺗﻭﺻﻟﺍ ﻪﺑﻧﻣﻟﺍ ﺓﺭﺎﻔﺻﺑ ،ﺓﺩﻣﻟﺍ ءﺎﺿﻘﻧﺍ ﻰﻟﺇ ﺭﺎﺷﻳ .ﺏﺎﺛﻟﺍ ﺱﺭﺟﻟﺍ ﺯﻣﺭﺑ ﻁﺷﻧﻟﺍ ﻪﻳﺑﻧﺗﻟﺍ ﺔﻋﺎﺳ ﺞﻣﺎﻧﺭﺑ ﻰﻟﺇ ﺭﺎﺷﻳ
.ﻯﺭﺧﻷﺍ ﺞﻣﺍﺭﺑﻟﺍ ﻥﻋ ﻝﻘﺗﺳﻣ ﻝﻛﺷﺑ ﻪﻳﺑﻧﺗﻟﺍ ﺔﻋﺎﺳ ﺞﻣﺎﻧﺭﺑﻟﺍ ﻝﻣﻌﻳ
ﺭﺍﺭﺯﻷﺍ ﻝﻔﻗ
ﺩﻣﻟ ﺡﺎﺗﻔﻣ ﻱﺃ ﻰﻠﻋ ﻁﻐﺿﻟﺍ ﻡﺩﻋ ﺩﻧﻋ ﻭﺃ ﻝﻳﻐﺷﺗﻟﺍ ﻥﻳﻳﻌﺗ ﺓﺩﺎﻋﺇ ﺩﻌﺑ ﺓ7 ﻳ ،ﺭﺍﺭﺯﻷﺍ ﻁﻳﺷﻧﺗ ﺓﺩﺎﻋﻹ .ﺭﺍﺭﺯﻷﺍ ﻝﻔﻗ ﺔﻔﻳﻅﻭ ﻁﻳﺷﻧﺗ ﻡﺗﻳ ،ﻲﻧﺍﻭﺛﻭﺑﻘﻣ ﺭﺯ ﻱﺃ ﻰﻠﻋ ﻁﻐﺿﻟﺍ ﻲﻐﺑﻧ ﻝ
ﻥﻳﺗﻳﻧﺎﺛ ﺓﺩﻣﻟ ﺭﺍﺭﺯﺃ ﺔﺑﻳﻛﺭﺗ ﻱﺃ ﻭﺃ2 .
ﻋﺎﺳﻟﺍ ﻡﺍﺩﺧﺗﺳﺍ ﻝﻛﺷﻟﺍ) ﺔﻳﺭﻅﺎﻧﺗﻟﺍ ﺔ43(
ﺯﻣﺭ ﺭﻭﻬﻅ ﺔﻳﺎﻏ ﻰﻟﺇ ﺽﺑﻘﻣﻟﺍ ﻰﻠﻋ ﺓﺯﻳﺟﻭ ﺓﺭﺗﻔﻟ ﻲﻟﺍﻭﺗﻟﺍ ﻰﻠﻋ ﻥﻳﺗﺭﻣ ﻁﻐﺿﺍ ﻲﻐﺑﻧﻳ ،ﺔﻋﺎﺳﻟﺍ ﻁﺑﺿﻟCLOCK ﻣﺍﻭﻟﺍ.ﺽ
ﻋ ،ﺔﻋﺎﺳﻟﺍ ﺏﺭﺎﻘﻋ ﻩﺎﺟﺗﺍ ﺱﻛﻋ ﻭﺃ ﺔﻋﺎﺳﻟﺍ ﺏﺭﺎﻘﻋ ﻩﺎﺟﺗﺍ ﻲﻓ ﺽﺑﻘﻣﻟﺍ ﺭﻳﻭﺩﺗﺑ ﻡﻗ ،ﺔﻘﻳﻗﺩﺑ ﺔﻘﻳﻗﺩ ،ﺔﺿﻭﺭﻌﻣﻟﺍ ﺔﻋﺎﺳﻟﺍ ﻲﻓ ﻥﺎﺻﻘﻧﻟﺍ ﻭﺃ ﺓﺩﺎﻳﺯﻠﻟﺗﺳ ﺎﻫﺩﻧ ﻭﺃ ﺓﺩﺎﻳﺯ ﻡﺗﻧ ﻥﺎﺻﻘ
.ﺔﻋﺎﺳﻟﺍ ﺏﺭﺎﻘﻋ ﻩﺎﺟﺗﺍ ﺱﻛﻋ ﻭﺃ ﺔﻋﺎﺳﻟﺍ ﺏﺭﺎﻘﻋ ﻩﺎﺟﺗﺍ ﻲﻓ ﺔﻘﻳﻗﺩﺑ ﺔﻘﻳﻗﺩ
ﺭﺷﻋ ﺩﻌﺑ ﺔﻳﻠﻣﻋ ﻱﺃ ِﺭﺟﺗ ﻡﻟ ﺍﺫﺇ10 ﺍ ﺝﺭﺧﻳ ،ﻲﻧﺍﻭﺛ.ﺩﺍﺩﻋﻹﺍ ﻊﺿﻭ ﻥﻣ ﻲﻧﻭﺭﺗﻛﻟﻹﺍ ﺕﻗﺅﻣﻟ
.ﺓﺩﻣﻟﺍ ءﺎﺿﻘﻧﺍ ﺩﻌﺑ ﺎﻁﻳﺳﺑ ﺍﺭﺍﺫﻧﺇ ﻪﻳﺑﻧﺗﻟﺍ ﺔﻋﺎﺳ ﻖﻠﻁُﺗ
ﺯﻣﺭ ﺭﻭﻬﻅ ﺔﻳﺎﻏ ﻰﻟﺇ ﺽﺑﻘﻣﻟﺍ ﻰﻠﻋ ﺓﺯﻳﺟﻭ ﺓﺭﺗﻔﻟ ﻁﻐﺿﻟﺍ ﻲﻐﺑﻧﻳ ،ﺭﺍﺫﻧﻹﺍ ﻁﺑﺿﻟALARM ﺑﻟ ﻁﻐﺿﺍﻭ ﺭﺍﺫﻧﻹﺍ ﺕﻳﻗﻭﺗ ﻁﺑﺿﻟ ﺽﺑﻘﻣﻟﺍﺭﻳﻭﺩﺗ .ﺽﻣﺍﻭﻟﺍ ﻰﻠﻋ ﺓﺯﻳﺟﻭ ﺔﻫﺭ
ﺭﺍﺫﻧﻹﺍ ﺔﻧﻭﻘﻳﺃ ﺽﺭﻋ ﻡﺗﻳ .ﺩﻳﻛﺄﺗﻠﻟ ﺽﺑﻘﻣﻟﺍALARM ﺓﺭﻣ ﻁﻐﺿﺍ .ﺓﺩﺩﺣﻣﻟﺍ ﺓﺩﻣﻟﺍ ءﺎﺿﻘﻧﺍ ﺩﻧﻋ ﺭﺍﺫﻧﻹﺍ ﻥﻳﻧﻁ ﻖﻠﻁﻧﻳﻭ .ﺓﺩﺩﺣﻣﻟﺍ ﺓﺩﻣﻟﺍ ﺔﻠﻳﻁﺃﺑﻟ ﺽﺑﻘﻣﻟﺍ ﻰﻠﻋ ﻯﺭﺧ ﺔﻫﺭ
.ﺔﻋﺎﺳﻟﺍ ﺔﺷﺎﺷ ﻰﻟﺇ ﺓﺩﻭﻌﻠﻟ ﺓﺯﻳﺟﻭ
ﺯﻣﺭﻟﺍ ءﺎﻔﺗﺧﺍ ﺔﻳﺎﻏ ﻰﻟﺇ ﻩﺭﺭﺣﺗ ﻻﻭ ﺽﺑﻘﻣﻟﺍ ﻰﻠﻋ ﻰﻠﻋ ﻁﻐﺿﺍ ،ﻪﻳﺑﻧﺗﻟﺍ ﺔﻋﺎﺳ ﺕﺍﺩﺍﺩﻋﺇ ﻑﺫﺣﻟALARM.
ﻝﻛﺷﻟﺍ) ﻲﻧﻭﺭﺗﻛﻟﻹﺍ ﺕﻗﺅﻣﻟﺍ ﺞﻣﺭﺑﻣ45(
ﻋﺇﺕﺍﺩﺍﺩ
/+ ﻥﻳﺭﺯﻟﺍ ﺔﻁﺳﺍﻭﺑ ﺏﻭﻠﻁﻣﻟﺍ ﺕﻳﻗﻭﺗﻟﺍ ﺭﺗﺧﺍﻭ ﺔﻔﻳﻅﻭﻟﺍ ﺭﺯ ﻰﻠﻋ ﻁﻐﺿﻟﺎﺑ ﺔﻔﻳﻅﻭﻟﺍ ﺭﺗﺧﺍ-.
/+ ﺭﺍﺭﺯﺃ-
ﺭﺯﻟﺍ ﻰﻠﻋ ﻁﻐﺿﺍ ”+“ ﺭﺯﻟﺍ ﻰﻠﻋ ﻭ ﺓﺩﺎﻳﺯﻠﻟ“ - “.ﻑﺩﺍﺭﻣﻟﺍ ﺭﺯﻟﺍ ﻰﻠﻋ ﻁﻐﺿﻟﺍ ﺓﺩﻣ ﻊﻣ ﺓﺩﺎﻳﺯﻟﺍ ﻭﺃ ﻥﺎﺻﻘﻧﻟﺍ ﺔﻋﺭﺳ ﺏﺳﺎﻧﺗﺗ .ﻥﺎﺻﻘﻧﻠﻟ
43
Page 44

ﻟﺍ ءﺍﻭﻬﻟﺍ ﻊﻓﺩﺑ ﺓﺩﻭﺯﻣﻟﺍ ﺔﻳﺋﺎﺑﺭﻬﻛﻟﺍ ﺔﻳﺍﻭﺷﻟﺍ ﻡﺍﺩﺧﺗﺳﺍ ﻥﺧﺎﺳ
ﺭﺍﻭﺩﻟﺍ ﺡﺎﺗﻔﻣﻟﺍ ﻁﺑﺿﺍ .ﻑﺋﺎﻅﻭﻟﺍ ﺩﺩﻌﺗﻣﻟﺍ ﻥﺭﻔﻟﺍ ﻱﻭﺳ ﺎﻬﺑ ﺯﻬﺟﻳ ﻡﻟ ﺔﺻﺎﺧ ﺓﺯﻳﻣ ﻥﺧﺎﺳﻟﺍ ءﺍﻭﻬﻟﺍ ﻊﻓﺩﺑ ﺓﺩﻭﺯﻣﻟﺍ ﺔﻳﺋﺎﺑﺭﻬﻛﻟﺍ ﺔﻳﺍﻭﺷﻟﺍ ﺩﻌﺗ9 +0 ﻠﻋ ﻝﻳﻐﺷﺗﻟ ﻲﻧﻌﻣﻟﺍ ﻊﺿﻭﻟﺍ ﻰ
) ﺔﻳﺍﻭﺷﻠﻟ ﻱﺭﺍﺭﺣﻟﺍ ﻥﺎﺧﺳﻟﺍ300 ﻭﻟﺍ ﻲﻓ ﻑﺭﻟﺍ ﻰﻠﻋ ﻊﺿﻭ ﺏﺟﻳ ،ﺯﺎﺗﻣﻣ ءﺍﻭﺷ ﻥﺎﻣﺿﻟ ،ﺎﻣﻭﻣﻋ .ﺔﻳﺋﺎﺑﺭﻬﻛﻟﺍ ﺔﺣﻭﺭﻣﻟﺍﻭ (ﻁﺍﻭﺿﻭ ﻲﻐﺑﻧﻳ ﻥﻳﺣ ﻲﻓ ﻁﺳ ﻲﻓ ﺔﻳﻧﻳﺻﻟﺍ ﻊ
.ﻝﻔﺳﻷﺍ
ﺓﺭﺍﺭﺣ ﺔﺟﺭﺩ ﻰﻠﻋ (ﺕﺎﺗﺳﻭﻣﺭﺛﻟﺍ) ﻱﺭﺍﺭﺣﻟﺍ ﻡّﻅﻧﻣﻟﺍ ﺽﺑﻘﻣ ﻁﺑﺿ ﺏﺟﻳ ،ﻥﺧﺎﺳﻟﺍ ءﺍﻭﻬﻟﺍ ﻊﻓﺩﺑ ﺓﺩﻭﺯﻣﻟﺍ ﺔﻳﺋﺎﺑﺭﻬﻛﻟﺍ ﺔﻳﺍﻭﺷﻟﺍ ﻡﺍﺩﺧﺗﺳﺍ ﺩﻧﻋ :ﻡﺎﻫ ﻣ ﻰﻠﻋﺃ ﻥ175ﻲﺗﻟﺍﻭ ،
ﻥﻳﺑ ﺎﻣ ﺎﻬﻁﺑﺿ ﺡﻭﺍﺭﺗﺗ155 ﻭ200.ﺔﻳﻣﺎﻣﻻﺍ ﺔﻬﺟﺍﻭﻟﺍ ﺓﺭﺍﺭﺣﻟ ﻁﺭﻔﻣﻟﺍ ﻉﺎﻔﺗﺭﻻﺍ ﺏﻧﺟﺗﻟ ، ءﺍﻭﻬﻟﺍ ﻊﻓﺩ ﺕﺣﺗ ءﺍﻭﺷﻟﺍ ﺔﻳﻠﻣﻋ ﻥﺈﻓ ﻊﻗﺍﻭﻟﺍ ﻲﻓﻭ ﻡﺗﺗ ﻥﺧﺎﺳﻟﺍﻭ ﻥﺭﻔﻟﺍ ﺏﺎﺑ
.ﻖﻠﻐﻣ
:ﺔﻅﺣﻼﻣ
ﻥﻋ ﻑﻠﺗﺧﻳ ﻊﺿﻭﻣ ﻰﻠﻋ ﺽﺑﻘﻣﻟﺍ ﻊﺿﻭ ﺩﻧﻋ ﺓﺭﻣ ﻝﻛ ﻲﻓ ﻖﻠﻁﻧﺗ ﺩﻳﺭﺑﺗ ﺔﺣﻭﺭﻣﺑ ﺯﻬﺟﻣ ﻥﺭﻔﻟﺍ0 ﺣﻭﻟ ﻥﻳﺑ ءﺍﻭﻬﻟﺍ ﻊﻳﺯﻭﻧ ﻰﻠﻋ ﺔﺣﻭﺭﻣﻟﺍ ﻝﻣﻌﺗ (ﺭﻔﺻﻟﺍ) ﺏﺎﺑﻭ ﻡﻛﺣﺗﻟﺍ ﺔ
ﻥﺭﻔﻟﺍ ﺏﺎﺑﻟﻭ ﻡﻛﺣﺗﻟﺍ ﺔﺣﻭﻠﻟ ﺎﺿﻳﺃ ﺢﻣﺳﺗﻭ ﻥﺭﻔﻟﺍ.ﺯﺎﻬﺟﻟﺍ ﻝﻳﻐﺷﺗ ءﺎﻧﺛﺃ ﺕﻻﺎﺣﻟﺍ ﻊﻳﻣﺟ ﻲﻓ ﺔﺋﻓﺍﺩ ﺓﺭﺍﺭﺣ ﺔﺟﺭﺩ ﻲﻓ ءﺎﻘﺑﻟﺍ
ﻪﻳﺑﻧﺗﻟﺍ ﺔﻋﺎﺳ ﻡﺍﺩﺧﺗﺳﺍ
ﺑﻧﺗﻟﺍ ﺔﻋﺎﺳ ﻡﺍﺩﺧﺗﺳﻻ .ﺔﻧﻳﻌﻣ ﺔﻳﻧﻣﺯ ﺓﺭﺗﻓ ﺭﻭﺭﻣ ﺩﻌﺑ ﻲﻬﻁﻟﺍ ﺓﺩﻣ ءﺎﺿﻘﻧﺍ ﺩﻧﻋ ﺔﻳﺗﻭﺻ ﺓﺭﺎﺷﺇ ﺔﻁﺳﺍﻭﺑ ﻝﻣﻌﺗﺳﻣﻟﺍ ﻡﻼﻋﺈﺑ ﻪﻳﺑﻧﺗﻟﺍ ﺔﻋﺎﺳ ﻡﻭﻘﺗﻐﺑﻧﻳ ﻪﻳﺽﺑﻘﻣ ﺭﻳﻭﺩﺗ ﻲ ﺔﻋﺎﺳﻟﺍ
ﻩﺎﺟﺗﺍ ﻲﻓ ﺔﻠﻣﺎﻛ ﺓﺩﺣﺍﻭ ﺓﺭﻭﺩ ﺷﺅﻣﻟﺍ ﻖﻓﺍﻭﺗﻳ ﺙﻳﺣﺑ ﺔﻋﺎﺳﻟﺍ ﺏﺭﺎﻘﻋ ﻩﺎﺟﺗﺍ ﺱﻛﻋ ﺽﺑﻘﻣﻟﺍ ﺭﺩﺃ ﻡﺛ .ﺔﻋﺎﺳﻟﺍ ﺏﺭﺎﻘﻋ ﻥﺍﺭﻭﺩﺗﺧﻣﻟﺍ ﻲﻬﻁﻟﺍ ﺓﺩﻣ ﻊﻣ ﺭﻟﺍ) ﺓﺭﺎ ﻝﻛﺷ39.(
ﻲﻬﻁﻟﺍ. ﺏﺟﻳﻭ ﻰﻠﻋ ﻡﺩﺧﺗﺳﻣ ﺯﺎﻬﺟﻟﺍ ءﺎﻬﻧﺇ ﺔﻠﻳﻣﻋ ﻲﻬﻁﻟﺍ ﺎﻳﻭﻳﺩﻳ ﻡﺍﺩﺧﺗﺳﺎﺑ ﺡﺎﺗﻔﻣﻟﺍ ﺍﻲﻧﻌﻣﻟ.
ﺭﻳﺫﺣﺗ: ﺓﺭﺎﺷﻹﺍ ﺔﻳﺗﻭﺻﻟﺍ ﻻ ﻑﻗﻭﺗ ﺔﻳﻠﻣﻋ
ﺍ) ﻲﻬﻁﻟﺍ ﺔﻳﺎﻬﻧ ﺔﻋﺎﺳ. ﻡﺍﺩﺧﺗﺳﺍ ﻝﻛﺷﻟ40(
.ﻲﻬﻁﻟﺍ ﺔﻳﺎﻬﻧ ﺩﻧﻋ ﻲﺋﺎﻘﻠﺗﻟﺍ ﻥﺭﻔﻟﺍ ءﺎﻔﻁﻹ ﺕﻗﻭﻟﺍ ﺯﺎﻬﺟ ﻁﺑﺿ ﻭﺃ ﺎﻳﻭﺩﻳ ﻲﻬﻁﻟﺍ ﺓﺩﻣ ﺩﻳﺩﺣﺗ ﺔﻳﺻﺎﺧﻟﺍ ﻩﺫﻫ ﺢﻳﺗﺗ
ﺯﻣﺭﻟﺍ ﻰﻠﻋ ﺕﻗﻭﻟﺍ ﺩﺩﺣُﻣ ﺽﺑﻘﻣ ﻊﺿﻭ ﻱﺭﻭﺭﺿﻟﺍ ﻥﻣﻓ ،ﻲﻬﻁﻟﺍ ﺓﺩﻣ ﺭﺎﻳﺗﺧﺍ ﻡﺗﻳ ﻡﻟ ﺍﺫﺇ
ﺽﺑﻘﻣ ﻁﺑﺿﺑ ﻡﻗﻭ ،ﺕﻗﻭﻟﺍ ﺩﺩﺣُﻣ ﺽﺑﻘﻣ ﺔﻁﺳﺍﻭﺑ ﺔﺑﻭﻠﻁﻣﻟﺍ ﻲﻬﻁﻟﺍ ﺓﺩﻣ ﺭﺗﺧﺍ ،ﻥﺭﻔﻟﺍ ﻑﺎﻘﻳﻹ ﺯﺎﻧﺗﻟﺍ ﺩﻌﻟﺍ ﺔﻳﺎﻬﻧ ﺩﻳﻛﺄﺗﻟﻭ ؛ﺓﺭﺍﺭﺣﻟﺍﻭ ﺔﻔﻳﻅﻭﻟﺍﺻُﻳ ،ﻲﻟﺎﺷﺇ ﻥﺭﻔﻟﺍ ﺭﺩ ﺔﻳﺗﻭﺻ ﺓﺭ
.ﺭﺭﻛﺗﻣ ﻥﻳﻧﻁ ﻥﻋ ﺓﺭﺎﺑﻋ
.ﻁﻘﻓ ﻲﺋﺎﺑﺭﻬﻛﻟﺍ ﻥﺭﻔﻟﺍ ﻲﻓ ﺔﺣﺎﺗﻣ ﺔﻳﺻﺎﺧﻟﺍ ﻩﺫﻫ :ﺔﻅﺣﻼﻣ
ﻝﻛﺷﻟﺍ) ﺔﻳﻣﻗﺭﻟﺍ ﺔﻋﺎﺳﻟﺍ ﻡﺍﺩﺧﺗﺳﺍ41(
ﻝﻳﻐﺷﺗ
ﺔﺷﺎﺷﻟﺍ ﺽﻳﻣﻭ
ﺔﻋﺎﺳﻟﺍ ﺔﻔﻳﻅﻭ
ـﺑ ﺩﻭﺯﻣﻟﺍ ﺝﺫﻭﻣﻧﻟﺍ3 ﺳ ﻰﻠﻋ ﺭﺯ ﻰﻠﻋ ﻁﻐﺿﺍ :ﺭﺍﺭﺯﺃ ﻡﻭﻳﻟﺍ ﺔﻋﺎ
ﻥﻳﺭﺯـﺑ ﺩﻭﺯﻣﻟﺍ ﺝﺫﻭﻣﻧﻟﺍ2 ﺩﺣﺍﻭ ﺕﻗﻭ ﻲﻓ ﺎﻌﻣ ﻥﻳﺭﺯﻟﺍ ﻰﻠﻋ ﻁﻐﺿﺍ :
ﻥﻳﺭﺯﻟﺍ ﺔﻁﺳﺍﻭﺑ ﻡﻭﻳﻟﺍ ﺔﻋﺎﺳ ﻁﺑﺿﺑ ﻡﻗ ”+“ ﻭ“- .”
ﺓﺩﻣﻟ ﺔﻁﺷﻧ ﺔﻔﻳﻅﻭﻟﺍ ﻩﺫﻫ ﺭﻣﺗﺳﺗ7 ﺭﺍﺭﺯﻷﺍ ﺩﺣﻷ ﻁﻐﺿ ﺭﺧﺁ ﺩﻌﺑ ﻲﻧﺍﻭﺛ“ / ”+“ - !”
ﻱﻭﺗﺷﻟﺍﻭ ﻲﻔﻳﺻﻟﺍ ﻥﻳﺑ ﺕﻳﻗﻭﺗﻟﺍ ﺭﻳﻳﻐﺗ
ﻁﻐﺿﺍ ؛ﻡﻭﻳﻟﺍ ﺔﻋﺎﺳ ﺔﻔﻳﻅﻭ ﻁﻳﺷﻧﺗﺑ ﻡﻗ ﺓﺩﻣﻟ ﺭﺯﻟﺍ ﻰﻠﻋ4 .ﺽﻳﻣﻭﻟﺍ ﻲﻓ ﺔﻋﺎﺳﻟﺍ ءﺩﺑ ﺔﻳﺎﻏ ﻰﻟﺇ ﻲﻧﺍﻭﺛ
ﻥﻳﺭﺯﻟﺍ ﻝﺎﻣﻌﺗﺳﺎﺑ ﺔﻋﺎﺳﻟﺍ ﺭﻳﻳﻐﺗﺑ ﻡﻗ ﺎﻫﺩﻧﻋ ”+“ ﻭﺃ“- “ !ﻲﻧﺍﻭﺛﻟﺍﻭ ﻖﺋﺎﻗﺩﻟﺍ ﻰﻠﻋ ﺭﻳﻳﻐﺗ ﺃﺭﻁﻳ ﻥﻟ .ﻁﻘﻓ
ﺕﻗﻭﻟﺍ ﺩﺩﺣﻣ) ﺕﻗﺅﻣﻟﺍ ﺩﺍﺩﻋﺇ(
ﺭﺯﻟﺍ ﺔﻁﺳﺍﻭﺑ ﺔﻔﻳﻅﻭﻟﺍ ﻩﺫﻫ ﻁﻳﺷﻧﺗ ﻡﺗﻳ .”+“ ﺭﺯﻟﺍ ﻰﻠﻋ ﻁﻐﺿﺍ ”+“.ﺓﺩﻣﻟﺍ ﺓﺩﺎﻳﺯﻟ ﻯﺭﺧﺃ ﺓﺭﻣ
ﺯﻟﺍ ﺎﻫﺭﺩﻗ ﺕﺍﺩﺣﻭﺑ ﻡﺗﺗ ﻥﺎﺿﻘﻧﻟﺍ ﻭﺃ ﺓﺩﺎﻳ10 .ﻖﺋﺎﻗﺩ ﻭﺃ ﻥﺍﻭﺛ
.ﺔﻠﻳﻭﻁﻟﺍ ﺩﺩﻣﻟﺍ ﻲﻓ ﻖﺋﺎﻗﺩﻟﺍ ﻭﺃ ﻲﻧﺍﻭﺛﻟﺍ ﻰﻟﺇ ﺕﺍﺩﺣﻭﻟﺍ ﺭﻳﺷﺗ .ﺱﺭﺟﻟﺍ ﺯﻣﺭ ءﻲﺿﻳﻭ .ﻲﻟﺯﺎﻧﺗﻟﺍ ﺩﻌﻟﺍ ﻝﻼﺧ ﺕﻗﺅﻣﻠﻟ ﺽﺭﻌﻟﺍ ﻲﻓ ﺔﻳﻟﻭﻷﺍ ﻰﻁﻌﺗ
ﻲﻫ ﺎﻫﺭﺎﻳﺗﺧﺍ ﻥﻛﻣﻳ ﻲﺗﻟﺍ ﻯﻭﺻﻘﻟﺍ ﺓﺩﻣﻟﺍ10 ﺩﻌﺑ ﺽﺭﻌﻟﺍ ﻝﻛﺷ ﺭﻳﻐﺗﻳ .ﺕﺎﻋﺎﺳ99 ﻭ ﺔﻘﻳﻗﺩ50 ﺔﻳﻧﺎﺛ ﺓﺩﺣﺍﻭ ﺔﻋﺎﺳ ﻰﻟﺇ1 ﻭ40 .ﺔﻘﻳﻗﺩ
.ﻲﻬﻁﻟﺍ ءﺎﻧﺇ ﺯﻣﺭ ءﻲﺿﻳﻭ
ﺭﺯ ﻰﻠﻋ ﻁﻐﺿﺍ ﻡﻭﻳﻟﺍ ﺔﻋﺎﺳ ﺭﺎﻬﻅﻹ“ﻡﻭﻳﻟﺍ ﺔﻋﺎﺳ ” ﺓﺩﻣﻟ6 .ﻥﺍﻭﺛ
ﺕﻗﺅﻣﻟﺍ ﻥﻳﻳﻌﺗ ﺓﺩﺎﻋﺇ
ﺭﺯﻟﺍ ﻰﻠﻋ ﺭﻣﺗﺳﻣﻟﺍ ﻁﻐﺿﻟﺎﺑ ﻡﻗ ﺭﻔﺻﻟﺍ ﻰﻟﺇ ﻲﻟﺯﺎﻧﺗﻟﺍ ﺩﻌﻟﺍ ﺓﺩﺎﻋﻹ“ - .”(ﺭﻔﺻﻟﺍ ﻯﻭﺗﺳﻣ ﺩﻧﻋ ﺎﻳﺋﺎﻘﻠﺗ ﻑﻗﻭﺗﻳ)
44
Page 45

ﺣﻟﺍ ﻩﺫﻫ ﻲﻓ) ﺦﻳﺳﻟﺍ) ﺦﻳﺳﻟﺍ ﻝﻣﺎﺣ ﻝﺎﺧﺩﺇ ﻲﻐﺑﻧﻳ ،ﻙﻟﺫﻟﻭ .ﺭﺍﻭﺩﻟﺍ (ﺩﻭﻔﺳﻟﺍ) ﺦﻳﺳﻟﺍ ﻝﺎﻣﻌﺗﺳﺍ ﺔﻁﺳﺍﻭﺑ ءﺍﻭﺷﻟﺍ ﻡﺗﻳ ﺔﻟﺎ(ﺩﻭﻔﺳﻟﺍ ﻑﻭﻓﺭﻟﺍ ﻰﻠﻋﺍ ﻲﻓ ﺔﻳﺑﻧﺎﺟﻟ
:ﺓﺍﻭﺷﻣﻟﺎﺑ ءﺍﻭﺷﻟﺍ
ﻯﻭﺗﺳﻣﻟﺍ3ﺯﺭﺎﺑﻟﺍ ﻝﺯﻐﻣﻟﺍ ﻲﻓ (ﺩﻭﻔﺳﻟﺍ) ﺦﻳﺳﻟﺍ ﻑﺭﻁ ﺝﺍﺭﺩﺇ ﻖﻳﺭﻁ ﻥﻋ ،ﻥﺭﻔﻟﺍ ﻲﻓ ﻝﻛﻟﺍ ﻝﺎﺧﺩﺇ ﻡﺛ (ﺩﻭﻔﺳﻟﺍ) ﺦﻳﺳﻟﺍ ﻲﻓ ﺔﻣﻌﻁﻷﺍ ﻝﺎﺧﺩﺈﺑ ﻡﻗ . ﺎﺟﻟﺍ ﻰﻠﻋﻷﺍ ﺏﻧ ﻥﻣ ﺭﺳﻳ
ﻝﻛﺷﻟﺍ) ﺦﻳﺳﻟﺍ ﻝﻣﺎﺣ ﺔﻣﺎﻋﺩ ﻰﻠﻋ ﺦﻳﺳﻟﺍ ﺔﻣﺩﻘﻣ ﺕﺑﺛﻭ ﻥﺭﻔﻟﺍ28ﻟﺍ ﺩﻗﻭﻣ ﻝﺎﻌﺷﺇ ﻡﺛ ،ﺔﺿﻔﺧﻧﻣﻟﺍ ﻥﺭﻔﻟﺍ ﻱﺭﺎﺟﻣ ﺩﺣﺃ ﻲﻓ ﺝﺎﺻﻟﺍ ﻙﻟﺫ ﺩﻌﺑ ﻝﺧﺩﺍ .( ﻲﻓ ﺢﺿﻭﻣ ﻭﻫ ﺎﻣﻛ ﺔﻳﺍﻭﺷ
.ءﺍﻭﺷﻟﺍ ﺔﻳﻠﻣﻋ ءﺩﺑﻟ ﻝﻳﻐﺷﺗﻟﺍ ﺭﺯ ﻰﻠﻋ ﻁﻐﺿﺍﻭ ﻩﻼﻋﺃ ﺓﺭﻭﻛﺫﻣﻟﺍ ﺕﺎﻣﻳﻠﻌﺗﻟﺍ
ﻣﻌﻁﻷﺍ ءﺍﻭﺷ ﺩﻧﻋ ﺏﺎﺑﻟﺍ ﻖﻠﻏ ﺎﻣﺋﺍﺩ ﻲﻐﺑﻧﻳ :ﻡﺎﻫ.ﺔﻳﺍﻭﺷﻟﺍ ﺔﻁﺳﺍﻭﺑ ﺔ
ﺭﻳﺫﺣﺗ: ﻊﻔﺗﺭﺗ ﺓﺭﺍﺭﺣ ﺡﻭﻁﺳﻟﺍ ﺔﻳﺟﺭﺎﺧﻟﺍ ﻥﺭﻔﻠﻟ ءﺎﻧﺛﺍ ﺔﻠﻳﻣﻋ ءﺍﻭﺷﻟﺍ. ﺩﺎﻌﺑﺇ ﻝﺎﻔﻁﻷﺍ ﻥﻋ ﺓﺯﻬﺟﻷﺍ ءﺎﻧﺛﺃ ﻲﻬﻁﻟﺍ.
ﻲﺋﺎﻧﺛ ﻡﻛﺣﺗﺑ ﺯﻬﺟﻣﻟﺍ ﺯﺍﺭﻁﻟﺍ ﻥﻣ ﺯﺎﻐﻟﺍ ﺓﺍﻭﺷﻣ ﻡﺍﺩﺧﺗﺳﺍ
.ﺯﺎﻐﻟﺍ ﻥﺭﻓ ﻊﻣ ﻁﻘﻓ ﺎﻳﻭﺳ ﺯﺎﻐﻟﺍ ﺔﻳﺍﻭﺷ ﻡﺍﺩﺧﺗﺳﺍ ﻥﻛﻣﻳ
ﻝﻛ ﻕﻭﻓ ﻡﻛﺣﺗﻟﺍ ﺔﺣﻭﻟ ﻰﻠﻋ ﺔﻋﻭﺑﻁﻣﻟﺍ ﺯﻭﻣﺭﻟﺍﺗ ﺔﻔﻠﺗﺧﻣ ﻕﺭﻁﺑ ﺯﺎﻐﻟﺍ ﺔﻳﺍﻭﺷ ﻝﺎﻌﺷﺍ ﻥﻛﻣﻳﻭ .ﻲﻧﻌﻣﻟﺍ ﺽﺑﻘﻣﻠﻟ ﻑﺩﺍﺭﻣﻟﺍ ﺩﻗﻭﻣﻟﺍ ﻰﻟﺇ ﺭﻳﺷﺗ ﺽﺑﻘﻣﻭﻧﻟ ًﺎﻌﺑ ﻭ ﺯﺎﻬﺟﻟﺍ ﻉ
:ﻪﺻﺋﺎﺻﺧ
ﺭﻳﻭﺩﺗﺑ ﻡﻗ ﻡﺛ ،ﺎﻣﺎﻣﺗ ﻥﺭﻔﻟﺍ ﺏﺎﺑ ﺢﺗﻓﺍ ﺽﺑﻘﻣﻟﺍﺍﺍﻭﺷﻣﻟ ﻑﺩﺍﺭﻣﻟ ﺏﻭﻠﻁﻣﻟﺍ ﺯﺎﻐﻟﺍ ﺓ ﻲﻓ
ﻝﻛﺷﻟﺍ ،ﺭﻳﺑﻛ ﺏﻬﻟ) ﺔﻣﺟﻧﻟﺍ ﺯﻣﺭ ﺩﻧﻋ15 ﻁﻐﺿﻟﺍ ﻲﻓ ﺭﻣﺗﺳﺍ (ﻋ ﻡﺛ ﺽﺑﻘﻣﻟﺍ ﻰﻠ
ﻰﺻﻗﻷﺍ ﺩﺣﻟﺍ ﻰﻠﻋ ﻪﻁﺑﺿﺍﻭ ﺔﻋﺎﺳﻟﺍ ﺏﺭﺎﻘﻋ ﻥﺍﺭﻭﺩﻟ ﺱﻛﺎﻌﻣﻟﺍ ﻩﺎﺟﺗﻻﺍ“MAXIMUM ”
- :(ﻲﺋﺎﺑﺭﻬﻛﻟﺍ ﺭﺎﻳﺗﻟﺍ ﻉﺎﻁﻘﻧﺍ ﺔﻟﺎﺣ ﻲﻓ ﻰﺗﺣﻭ ﺎﻣﺋﺍﺩ ﻪﻣﺍﺩﺧﺗﺳﺍ ﻥﻛﻣﻳ) ﻱﻭﺩﻳﻟﺍ ﻝﺎﻌﺷﻹﺍ
ﺓﺩﻣﻟ ﺭﻅﺗﻧﺍﻭ ،ﻝﻣﺎﻛﻟﺎﺑ ﺩﻗﻭﻣﻟﺍ ﻝﺎﻌﺗﺷﺍ ﻥﻣ ﻖﻘﺣﺗ .ﺏﺎﻘﺛﻟﺍ ﺩﻭﻋ ﻡﺍﺩﺧﺗﺳﺎﺑ ﺩﻗﻭﻣﻟﺍ ﻝﻌﺷﺃ10 ﺩﻛﺄﺗﻟﺍ ﻲﻐﺑﻧﻳ ﻥﻛﻟﻭ .ﺽﺑﻘﻣﻟﺍ ﺭﻳﺭﺣﺗ ﻝﺑﻗ ﻥﺍﻭﺛ ﻣ ،ﻼﻌﺗﺷﻣ ﻝﺍﺯﺎﻣ ﺩﻗﻭﻣﻟﺍ ﻥﻭﻛ ﻥ
.ﻯﺭﺧﺃ ﺓﺭﻣ ﻝﺎﻌﺷﻻﺍ ﺔﻳﻠﻣﻋ ﺓﺩﻭﺎﻌﻣ ﻲﻐﺑﻧﻳﻓ ﻙﻟﺫﻛ ﺭﻣﻷﺍ ﻥﻛﻳ ﻡﻟ ﺍﺫﺇﻭ
ﻁﻐﺿﺍ ﻡﺛ .ﺓﺭﺎﺷﻹﺍ ﺯﻣﺭﻟﺍ ﻖﺑﺎﻁﻳ ﻰﺗﺣ ﺭﺍﻭﺩﻟﺍ ﺽﺑﻘﻣﻟﺍ ﺭﺩﺃ ﻡﺛ ﻁﻐﺿﺍ ،ﻩﺭﺧﺁ ﻥﻋ ﻥﺭﻔﻟﺍ ﺏﺎﺑ ﺢﺗﻓﺍ ﺔﻟﺎﺣﻟﺍ ﻩﺫﻫ ﻲﻓﻋﺽﺑﻘﻣ ﻰﻠ ﺣﻟﺍ ﻡّﻅﻧﻣﻟﺍ ﻱﺭﺍﺭ
- :ﻲﺋﺎﺑﺭﻬﻛﻟﺍ ﻝﺎﻌﺷﻹﺍ
ﺍﺭﻁﻠﻟ ﻁﻘﻓ) (ﺕﺎﺗﺳﻭﻣﺭﺛﻟﺍ) ﺓﺩﻣﻟ ﺭﻅﺗﻧﺍﻭ .(ﻝﺎﻌﺷﻹﺍ ﺽﺑﻘﻣﺑ ﺓﺩﻭﺯﻣﻟﺍ ﺕﺍﺯ10 ﻛﻣﻳ ﺍﺫﻫ ﺩﻧﻋﻭ ﻝﻣﺎﻛ ﻝﻛﺷﺑ ﻝﺎﻌﺗﺷﻻﺍ ﺔﻳﻠﻣﻋ ﻡﺗﺗ ﻥﺍ ﻥﻳﺣﻟ ﻥﺍﻭﺛ ﻰﻠﻋ ﻁﻐﺿﻟﺍ ﻥﻋ ﻑﻗﻭﺗﻟﺍ ﻙﻧ
ﺑ ﺎﻣﺃ .ﻯﺭﺧﺃ ﺓﺭﻣ ﻝﺎﻌﺷﻻﺍ ﺔﻳﻠﻣﻋ ﺓﺩﻭﺎﻌﻣ ﻲﻐﺑﻧﻳﻓ ﻙﻟﺫﻛ ﺭﻣﻷﺍ ﻥﻛﻳ ﻡﻟ ﺍﺫﺇﻭ ،ﻼﻌﺗﺷﻣ ﻝﺍﺯﺎﻣ ﺩﻗﻭﻣﻟﺍ ﻥﻭﻛ ﻥﻣ ﺩﻛﺄﺗﻟﺍ ﻲﻐﺑﻧﻳ ﻥﻛﻟﻭ .ﺽﺑﻘﻣﻟﺍ ﺔﺑﺳﻧﻟﺎﻟﺍ ﺩﻗﺍﻭﻣﻠ ﺭﻳﻐﻟﻣ ﺓﺩﻭﺯ
ﺓﺩﻣﻟ ﺭﻅﺗﻧﺍﻭ ،ﺓﺭﺍﺭﺷﻟﺍ ﺯﻣﺭ ﻪﻳﻠﻋ ﻥﻳﺑﻣﻟﺍ ﺡﺎﺗﻔﻣﻟﺍﻭ (ﺕﺎﺗﺳﻭﻣﺭﺛﻟﺍ) ﻱﺭﺍﺭﺣﻟﺍ ﻡّﻅﻧﻣﻟﺍ ﺽﺑﻘﻣ ﻰﻠﻋ ﻁﻐﺿﻟﺍ ﻲﻐﺑﻧﻳﻓ ﻝﺎﻌﺷﻹﺍ ﺽﺑﻘﻣﺑ10 ﻟ ﻥﺍﻭﺛ ﻝﺎﻌﺗﺷﻻﺍ ﺔﻳﻠﻣﻋ ﻡﺗﺗ ﻥﺍ ﻥﻳﺣ
،ﻼﻌﺗﺷﻣ ﻝﺍﺯﺎﻣ ﺩﻗﻭﻣﻟﺍ ﻥﻭﻛ ﻥﻣ ﺩﻛﺄﺗﻟﺍ ﻲﻐﺑﻧﻳ ﻥﻛﻟﻭ .ﺽﺑﻘﻣﻟﺍ ﻰﻠﻋ ﻁﻐﺿﻟﺍ ﻥﻋ ﻑﻗﻭﺗﻟﺍ ﻙﻧﻛﻣﻳ ﺍﺫﻫ ﺩﻧﻋﻭ ﻝﻣﺎﻛ ﻝﻛﺷﺑﻟﺫﻛ ﺭﻣﻷﺍ ﻥﻛﻳ ﻡﻟ ﺍﺫﺇﻭﻲﻐﺑﻧﻳﻓ ﻙ ﻳﻠﻣﻋ ﺓﺩﻭﺎﻌﻣ ﺔ
.ﻯﺭﺧﺃ ﺓﺭﻣ ﻝﺎﻌﺷﻻﺍ
ﻝﺑﻗ ﻥﺃ ﻖﻠﻏ ﺏﺎﺑ ،ﻥﺭﻔﻟﺍ ﺡﺎﻣﺳﻠﻟ ﺭﺍﺭﻘﺗﺳﺎﺑ ﻳﻬﻟﺏ ﺩﻗﺍﻭﻣﻟﺍ.
ﺭﻳﺫﺣﺗ: ﺩﻌﺑ ﻝﺎﻌﺷﺇ ﺩﻗﺍﻭﻣ ﻥﺭﻔﻟﺍ ،ﺔﻳﺍﻭﺷﻟﺍﻭ ﻰﺟﺭﻳ ﺭﺎﻅﺗﻧﻻﺍ ﺓﺩﻣﻟ 2 ﻭﺃ 3 ﻖﺋﺎﻗﺩ
ﺭﻳﺫﺣﺗ: ﻟﺎﺑ ﻝﺎﺣﻟﺍ ﻭﻫ ﺎﻣﻠﺛﻣ ﺔﻳﺍﻭﺷﻟﺍ ﺩﻗﻭﻣ ﻝﺎﻌﺷﺍ ﺩﻧﻋ ﺎﻣﺎﻣﺗ ﻥﺭﻔﻟﺍ ﺏﺎﺑ ﺢﺗﻓ ﺏﺟﻳ.ﻥﺭﻔﻠﻟ ﺔﺑﺳﻧ
.ﺓﺍﻭﺷﻣﻟﺍ ﻡﺍﺩﺧﺗﺳﺎﺑ ﻭﺃ ﻥﺭﻔﻟﺍ ﻑﺭ ﻰﻠﻋ ﺔﻣﻌﻁﻷﺍ ءﺍﻭﺷﻟ ﺯﺎﻐﻟﺍ ﺔﻳﺍﻭﺷ ﻝﺎﻣﻌﺗﺳﺍ ﻥﻛﻣﻳ
ﻑﺭﻟﺍ ﻰﻠﻋ ﺔﻣﻌﻁﻷﺍ ﻊﺿﻭ ﺏﺟﻳ ﺔﻟﺎﺣﻟﺍ ﻩﺫﻫ ﻲﻓ1 ﻭﺃ2ﺍ ﺔﻁﻗﺎﺳﺗﻣﻟﺍ ﻝﺋﺍﻭﺳﻟﺍ ﻊﻳﻣﺟﺗﻟ ﻲﻠﻔﺳﻟﺍ ﻑﺭﻟﺍ ﻲﻓ ﺔﻳﻧﻳﺻﻟﺍ ﻊﺿﻭﻭ ، ﻡﺛ .ءﺍﻭﺷﻟﺍ ﻥﻋ ﺔﺟﺗﺎﻧﻟ
:ﻑﺭﻟﺍ ﻰﻠﻋ ءﺍﻭﺷﻟﺍ
ﻓ ﺢﺿﻭﻣ ﻭﻫ ﺎﻣﻛ ﺔﻳﺍﻭﺷﻟﺍ ﺩﻗﻭﻣ ﻝﺎﻌﺷﺇ.ﻩﻼﻋﺃ ﺓﺭﻭﻛﺫﻣﻟﺍ ﺕﺎﻣﻳﻠﻌﺗﻟﺍ ﻲ
.ﺔﻣﻌﻁﻷﺍ ءﺍﻭﺷ ﺩﻧﻋ ﺏﺎﺑﻟﺍ ﻖﻠﻏ ﺎﻣﺋﺍﺩ ﻲﻐﺑﻧﻳ :ﻡﺎﻫ
) ﺦﻳﺳﻟﺍ) ﺦﻳﺳﻟﺍ ﻝﻣﺎﺣ ﻝﺎﺧﺩﺇ ﻲﻐﺑﻧﻳ ،ﻙﻟﺫﻟﻭ .ﺭﺍﻭﺩﻟﺍ (ﺩﻭﻔﺳﻟﺍ) ﺦﻳﺳﻟﺍ ﻝﺎﻣﻌﺗﺳﺍ ﺔﻁﺳﺍﻭﺑ ءﺍﻭﺷﻟﺍ ﻡﺗﻳ ﺔﻟﺎﺣﻟﺍ ﻩﺫﻫ ﻲﻓ (ﺩﻭﻔﺳﻟﺍﻋﻟﺍ ﻑﻭﻓﺭﻟﺍ ﻰﻠ ﻲﻓ ﺔﻳﺑﻧﺎﺟ
:ﺓﺍﻭﺷﻣﻟﺎﺑ ءﺍﻭﺷﻟﺍ
ﻯﻭﺗﺳﻣﻟﺍ3ﻟﺍ ﻲﻓ ﺔﻣﻌﻁﻷﺍ ﻝﺎﺧﺩﺈﺑ ﻡﻗ .ﺯﺭﺎﺑﻟﺍ ﻝﺯﻐﻣﻟﺍ ﻲﻓ (ﺩﻭﻔﺳﻟﺍ) ﺦﻳﺳﻟﺍ ﻑﺭﻁ ﺝﺍﺭﺩﺇ ﻖﻳﺭﻁ ﻥﻋ ،ﻥﺭﻔﻟﺍ ﻲﻓ ﻝﻛﻟﺍ ﻝﺎﺧﺩﺇ ﻡﺛ (ﺩﻭﻔﺳﻟﺍ) ﺦﻳﺳ ﺎﺟﻟﺍ ﻰﻠﻋﻥﻣ ﺭﺳﻳﻷﺍ ﺏﻧ
ﺎﻋﺩ ﻰﻠﻋ ﺦﻳﺳﻟﺍ ﺔﻣﺩﻘﻣ ﺕﺑﺛﻭ ﻥﺭﻔﻟﺍ ﻝﻛﺷﻟﺍ) ﺦﻳﺳﻟﺍ ﻝﻣﺎﺣ ﺔﻣ38ﺷﻟﺍ ﺩﻗﻭﻣ ﻝﺎﻌﺷﺇ ﻡﺛ ،ﺔﺿﻔﺧﻧﻣﻟﺍ ﻥﺭﻔﻟﺍ ﻱﺭﺎﺟﻣ ﺩﺣﺃ ﻲﻓ ﺝﺎﺻﻟﺍ ﻙﻟﺫ ﺩﻌﺑ ﻝﺧﺩﺍ ( ﻲﻓ ﺢﺿﻭﻣ ﻭﻫ ﺎﻣﻛ ﺔﻳﺍﻭ
ﺎﻣﻳﻠﻌﺗﻟﺍ.ءﺍﻭﺷﻟﺍ ﺔﻳﻠﻣﻋ ءﺩﺑﻟ ﻝﻳﻐﺷﺗﻟﺍ ﺭﺯ ﻰﻠﻋ ﻁﻐﺿﺍﻭ ﻩﻼﻋﺃ ﺓﺭﻭﻛﺫﻣﻟﺍ ﺕ
.ﺔﻳﺍﻭﺷﻟﺍ ﺔﻁﺳﺍﻭﺑ ﺔﻣﻌﻁﻷﺍ ءﺍﻭﺷ ﺩﻧﻋ ﺏﺎﺑﻟﺍ ﻖﻠﻏ ﺎﻣﺋﺍﺩ ﻲﻐﺑﻧﻳ :ﻡﺎﻫ
ﻥﻋ ﺓﺯﻬﺟﻷﺍ ءﺎﻧﺛﺃ ﻲﻬﻁﻟﺍ.
ﺭﻳﺫﺣﺗ: ﻊﻔﺗﺭﺗ ﺓﺭﺍﺭﺣ ﺡﻭﻁﺳﻟﺍ ﺔﻳﺟﺭﺎﺧﻟﺍ ﻥﺭﻔﻠﻟ ءﺎﻧﺛﺍ ﺔﻠﻳﻣﻋ ءﺍﻭﺷﻟﺍ. ﺩﺎﻌﺑﺇ ﻝﺎﻔﻁﻷﺍ
ﺔﻳﺩﻳﻠﻘﺗﻟﺍ ﺔﻳﺋﺎﺑﺭﻬﻛﻟﺍ ﺔﻳﺍﻭﺷﻟﺍ ﻡﺍﺩﺧﺗﺳﺍ ﺔﻳﻌﻳﺑﻁﻟﺍ
.ﻲﺋﺎﺑﺭﻬﻛﻟﺍ ﻥﺭﻔﻟﺍ ﻭﺍ ﻱﺯﺎﻐﻟﺍ ﻥﺭﻔﻟﺍ ﻊﻣ ﺝﻭﺩﺯﻣ ﻝﻛﺷﺑ ﺔﻳﺋﺎﺑﺭﻬﻛﻟﺍ ﺔﻳﺍﻭﺷﻟﺍ ﻡﺍﺩﺧﺗﺳﺍ ﻥﻛﻣﻳ
ﺷﺗﺑ ﺹﺎﺧﻟﺍ ءﺯﺟﻟﺍ ﻰﻠﻋ ﺓﺭﻅﻧ ﻰﻘﻟﺃ) ﻥﺭﻔﻟﺎﺑ ﺹﺎﺧﻟﺍ (ﺕﺎﺗﺳﻭﻣﺭﺛﻟﺍ) ﻱﺭﺍﺭﺣﻟﺍ ﻡّﻅﻧﻣﻟﺍ ﺽﺑﻘﻣ ﺔﻁﺳﺍﻭﺑ ﺔﻳﺍﻭﺷﻟﺍ ﻝﻳﻐﺷﺗ ﻡﺗﻳ ،ﻥﻳﺗﻟﺎﺣﻟﺍ ﺎﺗﻠﻛ ﻲﻓﻔﻟﺍ ﻝﻳﻐﻭﺍ ﻱﺯﺎﻐﻟﺍ ﻥﺭ ﻥﺭﻔﻟﺍ
ﻥﻛﻣﻳ .(ﻲﺋﺎﺑﺭﻬﻛﻟﺍ.ﺓﺍﻭﺷﻣﻟﺍ ﻡﺍﺩﺧﺗﺳﺎﺑ ﻭﺃ ﻥﺭﻔﻟﺍ ﻲﻓ ﺔﻣﻌﻁﻷﺍ ءﺍﻭﺷﻟ ﺔﻳﺋﺎﺑﺭﻬﻛﻟﺍ ﺔﻳﺍﻭﺷﻠﻟ ﺔﺑﺳﻧﻟﺎﺑ ﻝﺎﺣﻟﺍ ﻭﻫ ﺎﻣﻛ ﺯﺎﻐﻟﺍ ﺔﻳﺍﻭﺷ ﻝﺎﻣﻌﺗﺳﺍ
ﺔﻳﺋﺎﺑﺭﻬﻛﻟﺍ ﺔﻳﺍﻭﺷﻟﺍ ﺓﺭﺩﻗ ﻎﻠﺑﺗ2500 .ﻁﺍﻭ
ﻑﺭﻟﺍ ﻰﻠﻋ ﺔﻣﻌﻁﻷﺍ ﻊﺿﻭ ﺏﺟﻳ ﺔﻟﺎﺣﻟﺍ ﻩﺫﻫ ﻲﻓ1 ﻭﺃ2ﺳﺗﻣﻟﺍ ﻝﺋﺍﻭﺳﻟﺍ ﻊﻳﻣﺟﺗﻟ ﻲﻠﻔﺳﻟﺍ ﻑﺭﻟﺍ ﻲﻓ ﺔﻳﻧﻳﺻﻟﺍ ﻊﺿﻭﻭ ،ﻟﺍ ﺔﻁﻗﺎ ﻡﺛ .ءﺍﻭﺷﻟﺍ ﻥﻋ ﺔﺟﺗﺎﻧ
:ﻑﺭﻟﺍ ﻰﻠﻋ ءﺍﻭﺷﻟﺍ
.(ﻲﺋﺎﺑﺭﻬﻛﻟﺍ ﻥﺭﻔﻟﺍ ﺯﺍﺭﻁ) ﻲﻧﻌﻣﻟﺍ ﻊﺿﻭﻟﺍ ﻭﺣﻧ (ﺕﺎﺗﺳﻭﻣﺭﺛﻟﺍ) ﻱﺭﺍﺭﺣﻟﺍ ﻡّﻅﻧﻣﻟﺍ ﺡﺎﺗﻔﻣ ﺭﻳﻭﺩﺗ ﻖﻳﺭﻁ ﻥﻋ ءﺍﻭﺷﻟﺍ ﻥﺎﺧﺳ ﻝﻳﻐﺷﺗ
ﻙﻟﺫﻟ ﺩﻌﻣﻟﺍ ﻱﺭﺟﻣﻟﺍ ﻲﻓ ﻱﺭﺍﺭﺣﻟﺍ ﻝﺯﻌﻟﺍ ﺡﻭﻟ ﺏﻳﻛﺭﺗﺑ ﻡﻗﻭ ، ﺔﻳﻧﺎﺑﺿﻘﻟﺍ ﺔﻛﺑﺷﻟﺍ ﻡﺍﺩﺧﺗﺳﺎﺑ ﺔﻣﻌﻁﻻﺍ ءﺍﻭﺷ ﺩﻧﻋ ﺎﻣﺋﺍﺩ ﻥﺭﻔﻟﺍ ﺏﺎﺑ ﺢﺗﻓﺍ :ﻡﺎﻫ ﺟﺍ ﻥﻣﻉﺎﻔﺗﺭﺍ ﺏﻧﺟﺗ ﻝ ﺔﺟﺭﺩ
.ﻁﺭﻔﻣ ﻝﻛﺷﺑ ﺓﺭﺍﺭﺣ
) ﺦﻳﺳﻟﺍ) ﺦﻳﺳﻟﺍ ﻝﻣﺎﺣ ﻝﺎﺧﺩﺇ ﻲﻐﺑﻧﻳ ،ﻙﻟﺫﻟﻭ .ﺭﺍﻭﺩﻟﺍ (ﺩﻭﻔﺳﻟﺍ) ﺦﻳﺳﻟﺍ ﻝﺎﻣﻌﺗﺳﺍ ﺔﻁﺳﺍﻭﺑ ءﺍﻭﺷﻟﺍ ﻡﺗﻳ ﺔﻟﺎﺣﻟﺍ ﻩﺫﻫ ﻲﻓ(ﺩﻭﻔﺳﻟﺍ ﻑﻭﻓﺭﻟﺍ ﻰﻠﻋﺍ ﻲﻓ ﺔﻳﺑﻧﺎﺟﻟ
:ﺓﺍﻭﺷﻣﻟﺎﺑ ءﺍﻭﺷﻟﺍ
ﻯﻭﺗﺳﻣﻟﺍ3ﺍ ﻲﻓ ﻝﻛﻟﺍ ﻝﺎﺧﺩﺇ ﻡﺛ (ﺩﻭﻔﺳﻟﺍ) ﺦﻳﺳﻟﺍ ﻲﻓ ﺔﻣﻌﻁﻷﺍ ﻝﺎﺧﺩﺈﺑ ﻡﻗ .ﺯﺭﺎﺑﻟﺍ ﻝﺯﻐﻣﻟﺍ ﻲﻓ (ﺩﻭﻔﺳﻟﺍ) ﺦﻳﺳﻟﺍ ﻑﺭﻁ ﺝﺍﺭﺩﺇ ﻖﻳﺭﻁ ﻥﻋ ،ﻥﺭﻔﻟ ﺎﺟﻟﺍ ﻰﻠﻋﻥﻣ ﺭﺳﻳﻷﺍ ﺏﻧ
ﻡّﻅﻧﻣﻟﺍ ﺡﺎﺗﻔﻣ ﺭﻳﻭﺩﺗﺑ ﻡﻗﻭ ،ﺔﺿﻔﺧﻧﻣﻟﺍ ﻥﺭﻔﻟﺍ ﻱﺭﺎﺟﻣ ﺩﺣﺃ ﻲﻓ ﺝﺎﺻﻟﺍ ﻝﺎﺧﺩﺈﺑ ﻡﻗ ﺎﻫﺩﻧﻋ .ﺦﻳﺳﻟﺍ ﻝﻣﺎﺣ ﺔﻣﺎﻋﺩ ﻰﻠﻋ ﺦﻳﺳﻟﺍ ﺔﻣﺩﻘﻣ ﺕﺑﺛﻭ ﻥﺭﻔﻟﺍ ﺭﺍﺭﺣﻟﺍﺎﺗﺳﻭﻣﺭﺛﻟﺍ) ﻱ ﻭﺣﻧ (ﺕ
ﺿﻭﻣﻟﺍ ﺭﺯﻟﺍ ﻰﻠﻋ ﻁﻐﺿﺍﻭ ﻲﻧﻌﻣﻟﺍ ﻊﺿﻭﻟﺍ.(ﻲﺋﺎﺑﺭﻬﻛﻟﺍ ﻥﺭﻔﻟﺍ ﺯﺍﺭﻁ) ﺓﺍﻭﺷﻣﻟﺍ ﺯﻣﺭ ﻪﻳﻠﻋ ﺢ
ﺷ) ﻙﻟﺫﻟ ﺩﻌﻣﻟﺍ ﻱﺭﺟﻣﻟﺍ ﻲﻓ ﻱﺭﺍﺭﺣﻟﺍ ﻝﺯﻌﻟﺍ ﺡﻭﻟ ﺏﻳﻛﺭﺗﺑ ﻡﻗﻭ ، ﺓﺍﻭﺷﻣﻟﺍ ﻡﺍﺩﺧﺗﺳﺎﺑ ﺔﻣﻌﻁﻻﺍ ءﺍﻭﺷ ﺩﻧﻋ ﺎﻣﺋﺍﺩ ﺡﻭﺗﻔﻣ ﻪﺑﺷ ﺏﺎﺑﻟﺍ ﻙﺭﺗﺍ :ﻡﺎﻫ (.. ﻝﻛﻣﺍ ﺏﻧﺟﺗ ﻝﺟﺍ ﻥ ﻉﺎﻔﺗﺭ
.ﻁﺭﻔﻣ ﻝﻛﺷﺑ ﺓﺭﺍﺭﺣ ﺔﺟﺭﺩ
ﺓﺭﺍﺭﺣ ﺡﻭﻁﺳﻟﺍ ﺔﻳﺟﺭﺎﺧﻟﺍ ﻥﺭﻔﻠﻟ ﺎﻧﺛﺍء ﺔﻠﻳﻣﻋ ءﺍﻭﺷﻟﺍ. ﺩﺎﻌﺑﺇ ﻝﺎﻔﻁﻷﺍ ﻥﻋ ﺓﺯﻬﺟﻷﺍ ءﺎﻧﺛﺃ ﻲﻬﻁﻟﺍ.
ﺭﻳﺫﺣﺗ: ﻊﻔﺗﺭﺗ
45
Page 46

Fan Assistedﺔﻳﺩﺎﻌﻟﺍ ﺔﺣﻭﺭﻣﻟﺍ :
True Fanﻱﺭﺋﺍﺩﻟﺍ ﻥﻳﺧﺳﺗﻟﺍ ﺭﺻﻧﻋ + ﺔﺣﻭﺭﻣﻟﺍ :
ﺔﻳﺍﻭﺷﻟﺍ ﻝﺎﻣﻌﺗﺳﺍ
ﻠﻟ ﻲﻠﻔﺳﻟﺍ ﻊﺿﻭﻣﻟﺍ ﻝﺎﻣﻌﺗﺳﺍ ﻥﻛﻣﻳ .ﺏﺻْﻧِﻣﻟﺍ ﻙﻠﺳ ﻲﻓ ﺔﻣﻌﻁﻷﺍ ﻊﺿ .ﻊﻣﻼﻟﺍ ﺎﻧﻳﻣﻟﺍ ﻥﻣ ﺝﺎﺻﻭ ﺏﺻْﻧِﻣ ﻥﻣ ءﺍﻭﺷﻟﺍ ﺔﻳﻧﻳﺻ ﻥﻭﻛﺗﺗ ،ءﻲﻁﺑﻟﺍ ﻲﻬﻁﺃﻥﻛﻣﻳ ﻭ ﺔﺟﺭﺩ ﺽﻳﻔﺧﺗ
.ﺔﻧﺧﺎﺳﻟﺍ ﻲﻧﺍﻭﺻﻟﺍ ﺔﻟﺍﺯﻹ ﺽﺑﻘﻣﺑ ﺩﻭﺯﻣ ﻥﺭﻔﻟﺍ .ﺓﺭﺍﺭﺣﻟﺍ
.ﻲﻬﻁﻟﺍﻭ ءﺎﻣﺣﻹﺍ ﻲﺗﻳﻠﻣﻋ ﺓءﺎﻔﻛ ﻥﺎﻣﺿﻟ .ﻖﻠﻐﻣ ﺏﺎﺑﻟﺍﻭ ﻝﻣﻌﻠﻟ ﺔﻳﺩﻳﻠﻘﺗﻟﺍ ﺔﻳﺍﻭﺷﻟﺍ ﻭ ﺔﺣﻭﺭﻣﻟﺍ ﺓﺩﻋﺎﺳﻣﺑ ءﺍﻭﺷﻟﺍ ﻲﺗﻔﻳﻅﻭ ﻥﻣ ﻝﻛ ﻡﻳﻣﺻﺗ ﻡﺗ
ﺓﺩﻣﻟ ﻥﺭﻔﻟﺍ ءﺎﻣﺣﺇ ﺎﻣﺋﺍﺩ ﻲﻐﺑﻧﻳ ،ءﺍﻭﺷﻟﺍ ﺩﻧﻋ5 ﺩﺇ ﻝﺑﻗ ﻖﺋﺎﻗﺩ ـﺑ ﺢﺻﻧﻳ) ﺔﻣﻌﻁﻷﺍ ﻝﺎﺧ200 ءﺍﻭﺷﻟﺍ ﻲﻧﺍﻭﺃ ﺔﻟﺍﺯﺈﺑ ﻰﺻﻭﻳ .(ءﺎﻣﺣﻺﻟ ﺔﺟﺭﺩﻣ ،ﺎﻬﻟﺎﻣﻌﺗﺳﺍ ﻡﺩﻋ ﺩﻧﻋ ﻥﺭﻔﻟﺍ ﻥ
ﻣﻟﺍ ﺓﺩﻋﺎﺳﻣﺑ ءﺍﻭﺷﻟﺍ ﺔﻔﻳﻅﻭ ﻡﺩﺧﺗﺳﺍ .ﺔﻳﺍﻭﺷﻟﺍ ﺔﻔﻳﻅﻭ ﻝﺎﻣﻌﺗﺳﺍ ﺩﻧﻋ ﺏﺎﺑﻟﺍ ﻝﺎﻔﻗﺇ ﻲﻐﺑﻧﻳ .ﻥﺧﺎﺳﻟﺍ ءﺍﻭﻬﻟﺍ ﻖﻓﺩﺗ ﺽﺎﻔﺧﻧﺍ ﻲﻓ ﺏﺑﺳﺗ ﺩﻗ ﺎﻬﻧﻷﻧﻋ ﺔﺣﻭﺭﻟﺍ ﻊﻁﻗ ﻲﻬﻁ ﺩ ﻡﺣﻠ
ﻷﺍ ﻲﻬﻁ ﺩﻧﻋﻭ ﺔﻛﻳﻣﺳﻟﺍ .ﺭﺎﺧﺑﻟﺍ ﻑﺛﺎﻛﺗ ﻥﻣ ﺩﺣﻠﻟ ،ﻩﺎﻳﻣﻟﺎﺑ ﺔﻳﻧﻐﻟﺍ ﺔﻣﻌﻁ
ﻧﻣﻭﻟﻷﺍ ﻖﺋﺎﻗﺭﺑ ءﺍﻭﺷﻟﺍ ﻲﻧﺍﻭﺃ ﻥﻳﻁﺑﺗ ﻭﺃ ﻑﻟ ﻲﻐﺑﻧﻳ ﻻ .ﺔﻣﻌﻁﻷﺍ ﺏﻳﻠﻘﺗ ﺩﻧﻋ ﻭﺃ ءﺍﻭﺷﻟﺍ ﻲﻧﺍﻭﺃ ﺔﻟﻭﺎﻧﻣ ﺩﻧﻋ ﻥﺭﻔﻟﺍ ﺕﺍﺯﺎﻔﻗ ﺎﻣﺋﺍﺩ ﻡﺩﺧﺗﺳﺍﻷ ،ﻡﻭﻳ ﻖﺣﻠﺗ ﺩﻗ ﺎﻬﻧﺃ ءﻼﻁﺑ ًﺍﺭﺍﺭﺿ
.ءﺍﻭﺷﻟﺍ ﺕﺎﻧﺎﺧﺳﻭ ﺎﻧﻳﻣﻟﺍ
ﻟﺍ ﺔﻳﺎﻬﻧ ﺩﻧﻋ ءﺍﻭﺷﻟﺍ ﻲﻧﺍﻭﺃ ﺔﻟﺍﺯﺇ ﺏﺟﻳﺩ ﻰﺻﻗﺃ ﻰﻠﻋ ﺔﻟﺎﻐﺷ ءﺍﻭﺷﻟﺍ ﺔﻔﻳﻅﻭ ﻙﺭﺗ ﻲﻐﺑﻧﻳ ،ﻥﻭﻫﺩﻟﺍ ﺔﻳﻟﺎﻋ ﺔﻣﻌﻁﺃ ﺩﺍﺩﻋﺇ ﻡﺗ ﺍﺫﺇ .ﻑﻳﻅﻧﺗﻠﻟ ﻲﻬﻁﺍﺭﺣ ﺔﺟﺭ ﺓﺩﻣﻟ ﺓﺭ5 ﻗﺩ ﻖﺋﺎ
.ﺔﻳﺍﻭﺷﻟﺍ ﻥﺎﺧﺳ ﻑﻳﻅﻧﺗﻟ
ﻲﻌﻳﺑﻁﻟﺍ ﻱﺩﻳﻠﻘﺗﻟﺍ ﻲﺋﺎﺑﺭﻬﻛﻟﺍ ﻥﺭﻔﻟﺍ ﻡﺍﺩﺧﺗﺳﺍ
ﺎﻫﺎﺻﻗﺃ ﺓﺩﻣﻟ ﻪﻠﻳﻐﺷﺗ ﺏﺟﻳ ﻰﻟﻭﻷﺍ ﺓﺭﻣﻠﻟ ﻥﺭﻔﻟﺍ ﻡﺍﺩﺧﺗﺳﺍ ﺩﻧﻋ30 ﻎﻠﺑﺗ ﺓﺭﺍﺭﺣ ﺔﺟﺭﺩ ﺩﻧﻋ ﺔﻘﻳﻗﺩ ءﺎﻫﺯ250 ﻧﻟﺍ ﺢﺋﺍﻭﺭﻟﺍ ﻰﻠﻋ ءﺎﺿﻘﻠﻟ ،ﺔﺟﺭﺩ ﺔﻳﻠﺧﺍﺩﻟﺍ ﺓﺩﺎﻣﻟﺍ ﻥﻋ ﺔﺟﺗﺎ
ﻭ (ﺕﺎﺗﺳﻭﻣﺭﺛﻟﺍ) ﻱﺭﺍﺭﺣﻟﺍ ﻡّﻅﻧﻣﻟﺍ ﺽﺑﻘﻣ ﻡﺍﺩﺧﺗﺳﺎﺑ ﺔﺑﻭﻠﻁﻣﻟﺍ ﻲﻬﻁﻟﺍ ﺓﺭﺍﺭﺣ ﺔﺟﺭﺩ ﺭﺎﻳﺗﺧﺎﺑ ﻡﻗ ،ﻥﺭﻔﻠﻟ ﻱﺩﺎﻌﻟﺍ ﻡﺍﺩﺧﺗﺳﻻﺍ ءﺎﻧﺛﺃ .ﺔﻟﺯﺎﻌﻟﺍﺣ ﺭﻅﺗﻧﺍﺿﻟﺍ ﺊﻔﻁﻧﻳ ﻰﺗ ءﻭ
ﺭﺎﺟﻣ ﺔﺳﻣﺧ ﻰﻠﻋ ﻥﺭﻔﻟﺍ ﺭﻓﻭﺗﻳ .ﻡﺎﻌﻁ ﻱﺃ ﻊﺿﻭ ﻝﺑﻗ ﻲﻟﺎﻘﺗﺭﺑﻟﺍ ﻝﻛﺷﻟﺍ) ﺔﻔﻠﺗﺧﻣ ﺕﺎﻋﺎﻔﺗﺭﺍ ﻰﻠﻋ ﻱ33ﻠﻟ .ﻲﻧﺍﻭﺻﻟﺍ ﻭﺃ ﺕﺎﺟﺎﺻﻟﺍ ﺝﺍﺭﺩﻹ ﺔﺻﺻﺧﻣ ( ﻥﺭﻔﻟﺍ ﻰﻠﻋ ﻅﺎﻔﺣ
ﻰﻠﻋ ﺩﺎﻣﺗﻋﻼﻟ ﺎﺿﻳﺃ ﻡﻛﻭﻋﺩﻧ .ﻲﻧﺍﻭﺻﻟﺍ ﻕﻭﻓ ﺔﻋﻭﺿﻭﻣ ﺔﻳﻛﺑﺷ ﻥﺎﺑﺿﻗ ﻰﻠﻋ ﻭﺃ ﻲﻧﺍﻭﺻﻟﺍ ﻝﺧﺍﺩ ﻡﻭﺣﻠﻟﺍ ﻲﻬﻁ ﻥﺳﺣﺗﺳﻣﻟﺍ ﻥﻣﻓ ،ﻥﺎﻛﻣﻹﺍ ﺭﺩﻗ ﺎﻔﻳﻅﻧﺗ ﻡﻛﺗﺑﺭﺟﺍ ﺔﻳﺻﺧﺷﻟ
ﺩﺭﺍﻭﻟﺍ ﻡﻳﻘﻠﻟ ﺔﺑﺳﺎﻧﻣﻟﺍ ﺕﺎﻓﺎﺿﻹﺍ ﺩﻳﺩﺣﺗﻟ ﻥﺳﺣﺗﺳﻣﻟﺍ ﻥﻣﻓ ،ﻝﺣ ﻱﺃ ﻰﻠﻋﻭ .ﻝﻭﺩﺟﻟﺍ ﻲﻓ ﺓﻉﺎﺑﺗﺇ ﻟﺍ ﺔﻔﺻﻭﻟﺍ ﻲﻓ ﺓﺩﺭﺍﻭﻟﺍ ﺕﺎﻣﻳﻠﻌﺗﻟﺍﻭ ﺕﺍﻭﻁﺧﻟﺍ.ﺔﻳﻧﻌﻣ
ﻥﺧﺎﺳﻟﺍ ءﺍﻭﻬﻟﺍ ﻊﻓﺩﺑ ﺩﻭﺯﻣﻟﺍ ﻲﺋﺎﺑﺭﻬﻛﻟﺍ ﻥﺭﻔﻟﺍ ﻡﺍﺩﺧﺗﺳﺍ
ﺎﻫﺎﺻﻗﺃ ﺓﺩﻣﻟ ﻪﻠﻳﻐﺷﺗ ﺏﺟﻳ ﻰﻟﻭﻷﺍ ﺓﺭﻣﻠﻟ ﻥﺭﻔﻟﺍ ﻡﺍﺩﺧﺗﺳﺍ ﺩﻧﻋ30 ءﺎﻫﺯ ﻎﻠﺑﺗ ﺓﺭﺍﺭﺣ ﺔﺟﺭﺩ ﺩﻧﻋ ﺔﻘﻳﻗﺩ250 ﺭﻟﺍ ﻰﻠﻋ ءﺎﺿﻘﻠﻟ ،ﺔﺟﺭﺩﺎﻧﻟﺍ ﺢﺋﺍﻭ ﺔﻳﻠﺧﺍﺩﻟﺍ ﺓﺩﺎﻣﻟﺍ ﻥﻋ ﺔﺟﺗ
ﻫ ﺯﻳﻬﺟﺗ ﻡﺗ .ﻲﻟﺎﻘﺗﺭﺑﻟﺍ ءﻭﺿﻟﺍ ءﺎﻔﻁﻧﺍﻭ ﺓﺩﺩﺣﻣﻟﺍ ﺓﺭﺍﺭﺣﻟﺍ ﺔﺟﺭﺩ ﻥﺭﻔﻟﺍ ﻍﻭﻠﺑ ﻥﻳﺣ ﻰﻟﺇ ﺭﺎﻅﺗﻧﻻﺍ ﻲﻐﺑﻧﻳ ،ﻲﻬﻁﻟﺍ ﺔﻳﻠﻣﻋ ءﺩﺑ ﻝﺑﻗﻣ ﻉﻭﻧﻟﺍ ﺍﺫﺎﺧﺳﺑ ﻥﺭﻔﻟﺍ ﻥ ﻱﺭﺋﺍﺩ ﻥ
.ﺔﻟﺯﺎﻌﻟﺍ
ﺗﻳ ،ﺔﻳﻠﻣﻌﻟﺍ ﻩﺫﻫ ﻝﺿﻔﺑﻭ .ﻲﻘﻓﺃ ﻩﺎﺟﺗﺍ ﻲﻓ ءﺍﻭﻬﻠﻟ ﻱﺭﺳﻗ ﻖﻓﺩﺗ ﻰﻠﻋ ﻝﻣﻌﻳ ﺔﺣﻭﺭﻣﻟﺍ ﻝﻭﺣ ﺔﻳﻧﺎﻛﻣﺇ ﻥﺧﺎﺳﻟﺍ ءﺍﻭﻬﻟﺍ ﻊﻓﺩﺑ ﺩﻭﺯﻣﻟﺍ ﻥﺭﻔﻟﺍ ﺢﻳﻲﻬﻁ ﺃﺧﻣ ﻕﺎﺑﻁ ﺕﻗﻭ ﻲﻓ ﺔﻔﻠﺗﻭ ﺩﺣﺍ
ﻭﺃ ءﺍﻭﺷﻟﺍ ءﺎﻧﺛﺃ ﻥﻭﻫﺩﻟﺍ ﻊﻳﻣﺟﺗﻟ ﺔﻳﻔﻠﺧﻟﺍ ﺔﺣﻳﻔﺻﻟﺍ ﻰﻠﻋ ﻲﻧﺩﻌﻣ ﺭﺗﻠﻔﺑ ﺓﺯﻬﺟﻣ ﺕﻼﻳﺩﻭﻣﻟﺍ ﺽﻌﺑ ﻁﻘﻓ .ﺔﻣﻌﻁﻷﺍ ﻭﺃ ﺕﺎﻬﻛﻧﻟﺍ ﻲﻓ ﻁﻼﺗﺧﺍ ﻥﻭﺩﺍﻟ .ﻲﻬﻁﻟﻣﻟﺍ ﻥﻣﻓ ،ﻙﻟﺫ ﻥﺳﺣﺗﺳ
ﻳﻔﺻﻟﺍ ﻝﺳﻏﻭ ،ﻱﺭﻭﺩ ﻝﻛﺷﺑ ﻥﻭﻫﺩﻟﺍ ﻩﺫﻫ ﺔﻟﺍﺯﺇﻧ ﻑﻳﻔﻁ ﻁﻐﺿ ﻖﻳﺑﻁﺗ ﻲﻔﻛﻳ ﻲﻧﺩﻌﻣﻟﺍ ﺭﺗﻠﻔﻟﺍ ﺔﻟﺍﺯﻹ .ءﺎﻣﻟﺎﺑ ﺍﺩﻳﺟ ﺎﻬﻔﻁﺷﻭ ﻥﻭﺑﺎﺻﻟﺍﻭ ءﺎﻣﻟﺎﺑ ﺔﺣﻋﻷﺍ ﻭﺣﺳُﻠﻟﺍ ﻰﻠﻋ ﻰﻠ ﻥﻳ
ﻕﺎﺑﻁﺃ ﺩﺍﺩﻋﻹ ﻥﻛﻟ ،ﺎﻳﺭﻭﺭﺿ ﺱﻳﻟ ﻥﺭﻔﻟﺍ ءﺎﻣﺣﺇ .ﻥﺭﻔﻟﺍ ﻝﺧﺍﺩ ﺓﺭﺍﺭﺣﻠﻟ ﺎﻳﻭﺎﺳﺗﻣ ﺎﻌﻳﺯﻭﺗ ﻥﺧﺎﺳﻟﺍ ءﺍﻭﻬﻟﺍ ﻖﻓﺩﺗ ﻥﻣﺿﻳ .ﻡﻬﺳﻟﺎﺑ ﻪﻳﻟﺇ ﺭﺎﺷﻣﻟﺍﻫ ﻥﻣﻓ ﺔﺷﺍﺎﻣﺣﺇ ﻥﺳﺣﺗﺳﻣﻟ ء
ﻝﺑﻗ ﻥﺭﻔﻟﺍ .ﻲﻧﺍﻭﺻﻟﺍ ﻝﺎﺧﺩﺇ
ﺷ ﻕﺎﺑﻁﺃ ﻕﻭﺫﺗﻟ ﺔﻳﺍﻭﺷﻠﻟ ﺔﺟﺎﺣ ﻻﻭ ﻡﻭﺣﻠﻟﺍ ﺏﻳﻠﻘﺗﻟ ﺔﺟﺎﺣ ﻼﻓ .ﻱﺩﻳﻠﻘﺗﻟﺍ ﻲﻬﻁﻟﺍ ﻝﻭﺣ ﻡﻳﻫﺎﻔﻣﻟﺍ ﻥﻣ ﺩﻳﺩﻌﻟﺍ ﺭﻳﻐﻳ ﻥﺧﺎﺳﻟﺍ ءﺍﻭﻬﻟﺍ ﻊﻓﺩ ﻡﺎﻅﻧﻳﺫﻟ ءﺍﻭ ﻲﻔﻛﻳ ﺫﺇ .ﺓﺫﻭ ﻕﺎﺑﻁﻷﺍ ﻊﺿ
.ﻑﻭﻓﺭﻟﺍ ﻰﻠﻋ
(ﻱﺩﺎﺣﺃ ﻡﻛﺣﺗ) ﺯﺎﻐﻟﺍ ﺔﻳﺍﻭﺷ ﻡﺍﺩﺧﺗﺳﺍ
ﻟﺍ ﻥﺭﻓ ﻊﻣ ﻁﻘﻓ ﺎﻳﻭﺳ ﺯﺎﻐﻟﺍ ﺔﻳﺍﻭﺷ ﻡﺍﺩﺧﺗﺳﺍ ﻥﻛﻣﻳﺎﺳﻟﺍ ﺏﺭﺎﻘﻋ ﻩﺎﺟﺗﺍ ﻲﻓ ﻲﻓ ﻩﺭﻳﻭﺩﺗ ﻊﻣ ﻥﻛﻟ ،ﺯﺎﻐﻟﺍ ﺽﺑﻘﻣ ﺱﻔﻧ ﻥﻣ ﺎﻬﻳﻓ ﻡﻛﺣﺗﻟﺍ ﻡﺗﻳﻭ .ﺯﺎﻐﻻﺩﺑ ﺔﻋ ﺎﺟﺗﺍ ﺱﻛﻋ ﻥﻣ ﺏﺭﺎﻘﻋ ﻩ
ﺩﻭﺟﻭ ﻼﻓ ﺍﺫﻬﻟﻭ ،ﻰﺻﻗﻷﺍ ﺩﺣﻟﺍ ﻰﻠﻋ ﺎﻣﺋﺍﺩ ءﺍﻭﺷﻟﺍ ﺩﻗﻭﻣ ﻝﻣﻌﻳ .ﺭﺷﺅﻣﻟﺍ ﻊﻣ ﺯﻣﺭﻟﺍ ﺔﻘﺑﺎﻁﻣﻭ ،(ﺯﺎﻐﻟﺍ ﻥﺭﻓ ﻡﺍﺩﺧﺗﺳﺍ ﺕﺎﻣﻳﻠﻌﺗ ﺭﻅﻧﺍ) ﺔﻋﺎﺳﻟﺍ ﺩﺃ ﺩﺣﻟ .ﻰﺻﻗﺃ ﻭﺃ ﻰﻧﻭ ﺔﻓﺎﺿﻹﺎﺑ
ﻰﻟﺇ ﻥﻛﻣﻳﻭ .ﺝﻭﺭﺧﻟﺍ ﻥﻣ ﺏﻬﻠﻟﺍ ﻊﻧﻣﻟ ﻥﺎﻣﺃ ﺯﺎﻬﺟﺑ ﻩﺩﻳﻭﺯﺗ ﻡﺗ ،ﻙﻟﺫﻝﺎﻌﺷﺇ :ﺔﻔﻠﺗﺧﻣ ﻕﺭﻁﺑ ﺔﻳﺍﻭﺷﻟﺍ ﺩﻗﺍﻭﻣ
ﻝﺎﺧﺩﺈﺑ ﻡﻗ ﺕﻗﻭﻟﺍ ﺱﻔﻧ ﻲﻓﻭ ﻪﻳﻠﻋ ﻁﻐﺿﺍ ،ﺓﺭﺎﺷﻹﺍ ﺯﻣﺭﻟﺍ ﻖﺑﺎﻁﻳ ﻰﺗﺣ ﺽﺑﻘﻣﻟﺍ ﺭﻳﻭﺩﺗﻭ ،ﻩﺭﺧﺁ ﻥﻋ ﻥﺭﻔﻟﺍ ﺏﺎﺑ ﺢﺗﻓ ﻲﻔﻛﻳ ﻘﺛ ﺩﻭﻋﻟﺎﺑ ﻝﻌﺗﺷﻣ ﺏﺎ ﺏﺭﻘ
ﺍ ﻝﺎﻌﺗﺷﺍ ﻥﻣ ﻖﻘﺣﺗ .ﺩﻗﻭﻣﻟﺍ ﻥﻣ ﺓﺩﻣﻟ ﺭﻅﺗﻧﺍﻭ ،ﻝﻣﺎﻛﻟﺎﺑ ﺩﻗﻭﻣﻟ10 ﺷﻣ ﻝﺍﺯﺎﻣ ﺩﻗﻭﻣﻟﺍ ﻥﻭﻛ ﻥﻣ ﺩﻛﺄﺗﻟﺍ ﻲﻐﺑﻧﻳ ﻥﻛﻟﻭ .ﺽﺑﻘﻣﻟﺍ ﺭﻳﺭﺣﺗ ﻝﺑﻗ ﻥﺍﻭﺛ ﺭﻣﻷﺍ ﻥﻛﻳ ﻡﻟ ﺍﺫﺇﻭ ،ﻼﻌﺗﻛ ﻙﻟﺫ
ﺔﻳﻠﻣﻋ ﺓﺩﻭﺎﻌﻣ ﻲﻐﺑﻧﻳﻓﻝﺎﻌﺷﻹﺍ .ﻯﺭﺧﺃ ﺓﺭﻣ
ﺍ ﻖﺑﺎﻁﻳ ﻰﺗﺣ ﺭﺍﻭﺩﻟﺍ ﺽﺑﻘﻣﻟﺍ ﺭﺩﺃ ﻡﺛ ﻁﻐﺿﺍ ،ﻩﺭﺧﺁ ﻥﻋ ﻥﺭﻔﻟﺍ ﺏﺎﺑ ﺢﺗﻓﺍ ﺔﻟﺎﺣﻟﺍ ﻩﺫﻫ ﻲﻓ ﻁﻐﺿﺍ ﻡﺛ .ﺓﺭﺎﺷﻹﺍ ﺯﻣﺭﻟﻋﺽﺑﻘﻣ ﻰﻠ ﺣﻟﺍ ﻡّﻅﻧﻣﻟﺍ ﻱﺭﺍﺭ
ﺓﺩﻣﻟ ﺭﻅﺗﻧﺍﻭ .(ﻝﺎﻌﺷﻹﺍ ﺽﺑﻘﻣﺑ ﺓﺩﻭﺯﻣﻟﺍ ﺕﺍﺯﺍﺭﻁﻠﻟ ﻁﻘﻓ) (ﺕﺎﺗﺳﻭﻣﺭﺛﻟﺍ)10 ﻛﻣﻳ ﺍﺫﻫ ﺩﻧﻋﻭ ﻝﻣﺎﻛ ﻝﻛﺷﺑ ﻝﺎﻌﺗﺷﻻﺍ ﺔﻳﻠﻣﻋ ﻡﺗﺗ ﻥﺍ ﻥﻳﺣﻟ ﻥﺍﻭﺛ ﻰﻠﻋ ﻁﻐﺿﻟﺍ ﻥﻋ ﻑﻗﻭﺗﻟﺍ ﻙﻧ
ﻥﻛﻳ ﻡﻟ ﺍﺫﺇﻭ ،ﻼﻌﺗﺷﻣ ﻝﺍﺯﺎﻣ ﺩﻗﻭﻣﻟﺍ ﻥﻭﻛ ﻥﻣ ﺩﻛﺄﺗﻟﺍ ﻲﻐﺑﻧﻳ ﻥﻛﻟﻭ .ﺽﺑﻘﻣﻟﺍﺑ ﺎﻣﺃ .ﻯﺭﺧﺃ ﺓﺭﻣ ﻝﺎﻌﺷﻻﺍ ﺔﻳﻠﻣﻋ ﺓﺩﻭﺎﻌﻣ ﻲﻐﺑﻧﻳﻓ ﻙﻟﺫﻛ ﺭﻣﻷﺍﻟ ﺔﺑﺳﻧﻟﺎﺭﻳﻐﻟﺍ ﺩﻗﺍﻭﻣﻠ ﺓﺩﻭﺯﻣ
ﺓﺩﻣﻟ ﺭﻅﺗﻧﺍﻭ ،ﺓﺭﺍﺭﺷﻟﺍ ﺯﻣﺭ ﻪﻳﻠﻋ ﻥﻳﺑﻣﻟﺍ ﺡﺎﺗﻔﻣﻟﺍﻭ (ﺕﺎﺗﺳﻭﻣﺭﺛﻟﺍ) ﻱﺭﺍﺭﺣﻟﺍ ﻡّﻅﻧﻣﻟﺍ ﺽﺑﻘﻣ ﻰﻠﻋ ﻁﻐﺿﻟﺍ ﻲﻐﺑﻧﻳﻓ ﻝﺎﻌﺷﻹﺍ ﺽﺑﻘﻣﺑ10 ﻟ ﻥﺍﻭﺛ ﻝﺎﻌﺗﺷﻻﺍ ﺔﻳﻠﻣﻋ ﻡﺗﺗ ﻥﺍ ﻥﻳﺣ
ﻭﺗﻟﺍ ﻙﻧﻛﻣﻳ ﺍﺫﻫ ﺩﻧﻋﻭ ﻝﻣﺎﻛ ﻝﻛﺷﺑﻟﺫﻛ ﺭﻣﻷﺍ ﻥﻛﻳ ﻡﻟ ﺍﺫﺇﻭ ،ﻼﻌﺗﺷﻣ ﻝﺍﺯﺎﻣ ﺩﻗﻭﻣﻟﺍ ﻥﻭﻛ ﻥﻣ ﺩﻛﺄﺗﻟﺍ ﻲﻐﺑﻧﻳ ﻥﻛﻟﻭ .ﺽﺑﻘﻣﻟﺍ ﻰﻠﻋ ﻁﻐﺿﻟﺍ ﻥﻋ ﻑﻗﻐﺑﻧﻳﻓ ﻙﻠﻣﻋ ﺓﺩﻭﺎﻌﻣ ﻲ ﺔﻳ
.ﻯﺭﺧﺃ ﺓﺭﻣ ﻝﺎﻌﺷﻻﺍ
.ﻥﺭﻔﻠﻟ ﺔﺑﺳﻧﻟﺎﺑ ﻝﺎﺣﻟﺍ ﻭﻫ ﺎﻣﻠﺛﻣ ﺔﻳﺍﻭﺷﻟﺍ ﺩﻗﻭﻣ ﻝﺎﻌﺷﺍ ﺩﻧﻋ ﺎﻣﺎﻣﺗ ﻥﺭﻔﻟﺍ ﺏﺎﺑ ﺢﺗﻓ ﺏﺟﻳ :ﺭﻳﺫﺣﺗ
ﻠﻋ ﺔﻣﻌﻁﻷﺍ ءﺍﻭﺷﻟ ﺯﺎﻐﻟﺍ ﺔﻳﺍﻭﺷ ﻝﺎﻣﻌﺗﺳﺍ ﻥﻛﻣﻳ.ﺓﺍﻭﺷﻣﻟﺍ ﻡﺍﺩﺧﺗﺳﺎﺑ ﻭﺃ ﻥﺭﻔﻟﺍ ﻑﺭ ﻰ
ﻑﺭﻟﺍ ﻰﻠﻋ ﺔﻣﻌﻁﻷﺍ ﻊﺿﻭ ﺏﺟﻳ ﺔﻟﺎﺣﻟﺍ ﻩﺫﻫ ﻲﻓ1 ﻭﺃ2ﺍ ﺔﻁﻗﺎﺳﺗﻣﻟﺍ ﻝﺋﺍﻭﺳﻟﺍ ﻊﻳﻣﺟﺗﻟ ﻲﻠﻔﺳﻟﺍ ﻑﺭﻟﺍ ﻲﻓ ﺔﻳﻧﻳﺻﻟﺍ ﻊﺿﻭﻭ ، ﻡﺛ .ءﺍﻭﺷﻟﺍ ﻥﻋ ﺔﺟﺗﺎﻧﻟ
:ﻑﺭﻟﺍ ﻰﻠﻋ ءﺍﻭﺷﻟﺍ
.ﻩﻼﻋﺃ ﺓﺭﻭﻛﺫﻣﻟﺍ ﺕﺎﻣﻳﻠﻌﺗﻟﺍ ﻲﻓ ﺢﺿﻭﻣ ﻭﻫ ﺎﻣﻛ ﺔﻳﺍﻭﺷﻟﺍ ﺩﻗﻭﻣ ﻝﺎﻌﺷﺇ
ﺎﺑﻟﺍ ﻖﻠﻏ ﺎﻣﺋﺍﺩ ﻲﻐﺑﻧﻳ :ﻡﺎﻫ .ﺔﻣﻌﻁﻷﺍ ءﺍﻭﺷ ﺩﻧﻋ ﺏ
ءﺎﻧﺛﺍ ﺔﻠﻳﻣﻋ ءﺍﻭﺷﻟﺍ. ﺩﺎﻌﺑﺇ ﻝﺎﻔﻁﻷﺍ ﻥﻋ ﺓﺯﻬﺟﻷﺍ ءﺎﻧﺛﺃ ﻲﻬﻁﻟﺍ.
- :ﻱﻭﺩﻳﻟﺍ ﻝﺎﻌﺷﻹﺍ
- :ﻲﺋﺎﺑﺭﻬﻛﻟﺍ ﻝﺎﻌﺷﻹﺍ
ﺭﻳﺫﺣﺗ: ﻊﻔﺗﺭﺗ ﺓﺭﺍﺭﺣ ﺡﻭﻁﺳﻟﺍ ﺔﻳﺟﺭﺎﺧﻟﺍ ﻥﺭﻔﻠﻟ
46
Page 47

ﺭﺍﺪﻘﻤﺑ ﻻﻭﺃ ﺏﺎﺒﻟﺍ ﺢﺘﻓﺍ .ﻦﻴﺘﻠﺣﺮﻣ ﻰﻠﻋ ﺎﻤﺋﺍﺩ ﺏﺎﺒﻟﺍ ﺢﺘﻓ ﻲﻐﺒﻨﻳ ،ﻁﺎﻴﺘﺣﻻﺍ ﺏﺎﺑ ﻦﻣﻭ ﺍﺬﻬﻟﻭ .ﻲﻬﻄﻟﺍ ﺔﻴﻠﻤﻋ ﻦﻋ ﺭﺎﺨﺑ ﺪﻟﻮﺘﻳ ﺪﻗ100 ﺴﻠﻟ ﻥﺍﻮﺛ ﻊﻀﺒﻟ ﻢﻠﻣ ،ﺭﺎﺨﺒﻟﺍ ﺝﻭﺮﺨﺑ ﺡﺎﻤ
.ﺏﺎﺒﻟﺍ ﺢﺘﻓ ﺪﻨﻋ ﻚﻳﺪﻳﻭ ﻚﻬﺟﻭ ﺪﻌﺑﺃ .ﻞﻣﺎﻜﻟﺎﺑ ﺏﺎﺒﻟﺍ ﻚﻟﺫ ﺪﻌﺑ ﻪﺤﺘﻓﺍ ﻢﺛ
.ﺎﻧﻳﻣﻟﺍ ءﻼﻁ ﻑﻼﺗﺇﻭ ﺓﺭﺍﺭﺣﻟﺍ ﺔﺟﺭﺩ ﻲﻓ ﺎﻁﺭﻔﻣ ﺎﻋﺎﻔﺗﺭﺍ ﺏﺑﺳﺗ ﺩﻗ ﺎﻬﻧﻷ ،ﺎﻫﺭﻳﻏ ﻭﺃ ﺔﻳﻗﺭﻭ ﻖﺋﺎﻗﺭﺑ ﻝﺧﺍﺩﻟﺍ ﻥﻣ ﻥﺭﻔﻟﺍ ﻥﻳﻁﺑﺗ ﺍﺩﺑﺃ ﺏﺟﻳ ﻻ ﺍﺩﺑﺃ ﺏﺟﻳ ﻻ ﻁﻁﻷﺍ ﻲﻬ ﻰﻠﻋ ﺔﻣﻌ
ﻅﻭ ﻡﺍﺩﺧﺗﺳﺎﺑ ﻥﺭﻔﻟﺍ ءﺎﻣﺣﺇ ﺎﻣﺋﺍﺩ ﻥﺳﺣﺗﺳﻣﻟﺍ ﻥﻣﻓ (ﺩﻳﻠﺟﻟﺍ ﺔﺑﺍﺫﺇﻭ ءﺍﻭﺷﻟﺍ ءﺎﻧﺛﺗﺳﺎﺑ) ﻑﺋﺎﻅﻭﻟﺍ ﺩﺩﻌﺗﻣﻟﺍ ﻥﺭﻔﻟﺍ ﻑﺋﺎﻅﻭ ﻥﻣ ﻱﺃ ﻡﺍﺩﺧﺗﺳﺍ ﺩﻧﻋﻔﻳﺗﻟﺍ ﺔ،ﻊﻳﺭﺳﻟﺍ ﻝﻳﻐﺷ ﻝﻳﻭﺣﺗﻟﺍ ﻝﺑﻗ
ـﺑ ﺓﺭﺍﺭﺣﻟﺍ ﺽﻳﻔﺧﺗ ﻥﺳﺣﺗﻣﻟﺍ ﻥﻣ ﻪﻧﺈﻓ ،ﻱﺭﺋﺍﺩﻟﺍ ﻥﻳﺧﺳﺗﻟﺍ ﺭﺻﻧﻋ ﻊﻣ ﺔﺣﻭﺭﻣﻟﺎﺑ ﻭﺃ ﺔﺣﻭﺭﻣﻟﺎﺑ ﻲﻬﻁﻟﺍ ﻑﺋﺎﻅﻭ ﻡﺍﺩﺧﺗﺳﺍ ﺩﻧﻋ20 ﺭﺍﺭﺣﻟﺍ ﻥﻋ ﺔﺟﺭﺩ ﺔﻔﺻﻭﻟﺎﺑ ﺓﺩﺭﺍﻭﻟﺍ ﺓ
ﻲﻣﻭﺭﻟﺍ ﻙﻳﺩﻟﺍ ﻑﻠﻟ ﺔﻌﺳﺍﻭ ﻡﻭﻳﻧﻭﻣﻟﻷﺍ ﻖﺋﺎﻗﺭ ﻥﻣ ﺔﺟﻭﺩﺯﻣ ﺔﻘﺑﻁ ﻡﺍﺩﺧﺗﺳﺎﺑ.ﻲﻣﻭﺭﻟﺍ ﻙﻳﺩﻟﺍ ﻲﻬﻁ ءﺎﻧﺛﺃ ﺭﻳﻣﺣﺗﻠﻟ ءﺍﻭﺷﻟﺍ ءﺎﻧﺇ ﻝﺎﻣﻌﺗﺳﺍ ﻥﻛﻣﻳﺑ ﻪﻳﻓ ﺎﻣﺍﺍ ﻥﻣ .ﺔﻳﺎﻔﻛﻟ ﻙﺭﺗ ﻡﻬﻣﻟ
ﺏﺟﻳ .ﻥﺭﻔﻠﻟ ﻲﻠﺧﺍﺩﻟﺍ ﻉﺎﻘﻟﺍﻧﻷ ﻥﺭﻔﻟﺍ ﻉﺎﻗ ﻰﻠﻋ ﻥﻭﺣﺻﻟﺍ ﻭﺃ ءﺍﻭﺷﻟﺍ ﻲﻧﺍﻭﺃ ﻙﺭﺗ ﻲﻐﺑﻧﻳ ﻻ .ﻥﺭﻔﻟﺍ ﻑﻭﻓﺭ ﻰﻠﻋ ﻲﻧﺍﻭﺻﻟﺍﻭ ﻥﻭﺣﺻﻟﺍ ﻊﺿﻭ ﺎﻣﺋﺍﺩﻠﺗ ﺩﻗ ﺎﻬ ﺍﺭﺍﺭﺿﺃ ﻖﺣ
.ﻥﺭﻔﻟﺎﺑ
:ﻥﺭﻔﻟﺍ ءﺎﻣﺣﺇ
ﺔﻔﻳﻅﻭ ﺭﻓﻭﺗ“ﻊﻳﺭﺳﻟﺍ ﻝﻳﻐﺷﺗﻟﺍ ”ﻭﺎﺳﺗﻣ ﻝﻛﺷﺑ ﺔﻣﻌﻁﻷﺍ ﻲﻬﻁ ﻥﻣﺿﻳﻭ .(ﺭﺎﺳﻳﻟﺍ ﻰﻠﻋ ﻥﺭﻔﻟﺍ) ﻲﺳﻳﺋﺭﻟﺍ ﻥﺭﻔﻟﺍ ءﺎﻣﺣﻹ ﻉﺭﺳﺃﻭ ﺓءﺎﻔﻛ ﺭﺛﻛﺃ ﺔﻠﻳﺳﻭﻱﻡﺩﺧﺗﺳﺍ . “ ﻝﻳﻐﺷﺗﻟﺍ
:(
ﻊﻳﺭﺳﻟﺍ ” ) ﻲﻟﺎﺗﻟﺍ ﻭﺣﻧﻟﺍ ﻰﻠﻋ
1 ﺭﺎﻳﺗﺧﺎﺑ ﻡﻗ‘ ﻊﻳﺭﺳﻟﺍ ﻝﻳﻐﺷﺗﻟﺍ “ﻧﻳ ﺎﻫﺩﻧﻋ .(ﺓﺭﺍﺭﺣﻟﺍ ﺩﺩﺣﻣ ﻡﺍﺩﺧﺗﺳﺎﺑ) ﺔﺑﻭﻠﻁﻣﻟﺍ ﻲﻬﻁﻟﺍ ﺓﺭﺍﺭﺣ ﺔﺟﺭﺩﻭ (ﻥﺭﻔﻟﺍ ﺔﻔﻳﻅﻭ ﺩﺩﺣﻣ ﻡﺍﺩﺧﺗﺳﺎﺑ)ﻟﺍ ءﻭﺿ ﻖﻠﻁﺭﺍﺭﺣﻟﺍ ﻡّﻅﻧﻣ ﻱ
ﺢﻣﺳﻳ ﺎﻣﻣ .ﺕﺍﺭﻣ ﺓﺩﻋ ءﺎﻔﻁﻧﻻﺍﻭ ﻝﺎﻌﺗﺷﻻﺎﺑ ﻲﻟﺎﻘﺗﺭﺑﻟﺍ (ﺕﺎﺗﺳﻭﻣﺭﺛﻟﺍ) .ﺔﻣﻌﻁﻷﺍ ﻝﺎﺧﺩﺇ ﻝﺑﻗ ﺭﺍﺭﻘﺗﺳﻻﺍ ﻖﻳﻘﺣﺗ ﻥﻣ ﺓﺭﺍﺭﺣﻠﻟ
2 .ﻥﺭﻔﻟﺍ ﻲﻓ ﺔﻣﻌﻁﻷﺍ ﻝﺎﺧﺩﺇ ﻡﺛ ﺔﺑﻭﻠﻁﻣﻟﺍ ﻲﻬﻁﻟﺍ ﺔﻔﻳﻅﻭ ﺭﺎﻳﺗﺧﺎﺑ ﻡﻗ
3 ﺔﻔﻳﻅﻭ ﻝﺎﻣﻌﺗﺳﺎﺑ ﻙﻌﻛﻟﺍﻭ ﺕﺎﻳﻭﻠﺣﻟﺎﻛ ،ﺔﺷﻬﻟﺍ ﺔﻣﻌﻁﻷﺍ ﻲﻬﻁﻟ ﻥﺭﻔﻟﺍ ءﺎﻣﺣﺇ ﺩﻧﻋ“ﻱﺭﺋﺍﺩﻟﺍ ﻥﻳﺧﺳﺗﻟﺍ ﺭﺻﻧﻋ ﻊﻣ ﺔﺣﻭﺭﻣﻟﺍ“ﺭﺑﻟﺍ ءﻭﺿﻟﺍ ﻥﺈﻓ ،ﺷﻳ ﻲﻟﺎﻘﺗﻟ ﺊﻔﻁﻧﻳﻭ ﻝﻌﺗ ﺓﺩﻌ
ﺍﺭﻣ.ﻼﻳﻠﻗ ﻱﻭﻠﻌﻟﺍ ﻥﻳﺧﺳﺗﻟﺍ ﺭﺻﻧﻋ ﺩﻳﺭﺑﺗﻟ ﺕ
ﺔﻔﻳﻅﻭ“ﻊﻳﺭﺳﻟﺍ ﻝﻳﻐﺷﺗﻟﺍ ” .ﺔﻋﺭﺳﺑ ﻥﺭﻔﻟﺍ ﻥﻳﺧﺳﺗ ﻱﺃ ﻁﻘﻓ ءﺎﻣﺣﺇ ﺔﻔﻳﻅﻭ ﺎﻬﻧﻭﻛﻟ ﻲﻬﻁﻠﻟ ﺔﺑﺳﺎﻧﻣ ﺭﻳﻏ
ﻥﺭﻔﻟﺍ ﻑﺋﺎﻅﻭ
.ﺔﺑﻭﻠﻁﻣﻟﺍ ﻲﻬﻁﻟﺍ ﺔﻔﻳﻅﻭ ﻰﻟﺇ
ﻝﺣﺍﺭﻣ ﻝﻼﺧ ًﺍﺭﺍﺭﻣ ﺔﻣﻌﻁﻷﺍ ﺞﺿﻧ ﻥﻣ ﻖﻘﺣﺗ .ﻱﺩﻳﻠﻘﺗﻟﺍ ﻥﺭﻔﻟﺎﺑ ﺔﺻﺎﺧﻟﺍ .ﺓﺭﺍﺭﺣﻟﺍﻭ ﻲﻬﻁﻟﺍ ﺓﺩﻣﺑ ﺱﺎﻧﺋﺗﺳﻻﺍ ﺔﻳﺎﻏ ﻰﻟﺇ ﻲﻬﻁﻟﺍ
ﺔﻔﻳﻅﻭ ﺭﺑﺗﻌﺗ ﻼﺛﻣﻓ .ﺓﺭﺍﺭﺣﻟﺍ ﺔﻔﻠﺗﺧﻣ ﻖﻁﺎﻧﻣ ﺕﺍﺫ ﻲﻬﻁﻟﺍ ﻑﺋﺎﻅﻭ ﻥﻣ ﺔﻋﻭﻣﺟﻣ ﻰﻠﻋ ﻥﺍﺭﻓﻷﺍ ﺭﻓﻭﺗﺗ‘ﻱﺭﺋﺍﺩﻟﺍ ﻥﻳﺧﺳﺗﻟﺍ ﺭﺻﻧﻋ ﻊﻣ ﺔﺣﻭﺭﻣﻟﺍ’ﺍ ،ﻼﻣ ﺭﺛﻛﻷﻟﺍ ﻲﻬﻁﻟ ﺔﻣﺋ ﻙﻌﻛ
ﺔﻔﻳﻅﻭ ﺭﺑﺗﻌﺗ ﻥﻳﺣ ﻲﻓ .ﺕﺎﻌﻓﺩ ﻰﻠﻋ ﺯﺑﺧﻟﺍﻭ ﺕﺎﻳﻭﻠﺣﻟﺍﻭ ‘ﺔﺣﻭﺭﻣﻟﺎﺑ ’ﺭﺛﻛﻷﺍ ﺓﺩﻣﺟﻣﻟﺍ ﺱﻁﺎﻁﺑﻟﺍ ﺕﺎﺟﺗﻧﻣ ﻭﺃ ﺭﺎﺿﺧﻟﺍﻭ ﻡﻭﺣﻠﻟﺍ ﺭﻳﻣﺣﺗﻟ ﺔﻣﺋﻼﻣ .
ﻱﻭﺷﻣﻟﺍ ﻲﻣﻭﺭﻟﺍ ﻙﻳﺩﻟﺍ ﻲﻬﻁﻟ :ﻝﺎﺛﻣ
ﻧﺍﻭﺟﺑ ﺔﻳﻓﺎﻛ ﺔﺣﺎﺳﻣﻳ .ﻱﻭﻠﻌﻟﺍ ﻥﺭﻔﻟﺍ ﻑﻘﺳ ﻭﺃ ﺏﻧﺍﻭﺟﻟ ﻡﻭﻳﻧﻭﻣﻟﻷﺍ ﻕﺭﻭ ﺱﻣﻟ ﻡﺩﻋ ﻥﻣ ﻖﻘﺣﺗ .ﻥﺧﺎﺳﻟﺍ ءﺍﻭﻬﻟﺍ ﻥﺍﺭﻭﺩﺑ ﺡﺎﻣﺳﻠﻟ ﻥﺭﻔﻟﺍ ﻰﻠﻋﺃﻭ ﺏﻥﺭﻓ ﻊﺳﺗ 60 ﻙﻳﺩﻟ ﻡﺳ
ﻥﻳﺑ ﻪﻧﺯﻭ ﺡﻭﺍﺭﺗﻳ ﻲﻣﻭﺭ9 ﻭ11 ﻥﺭﻓ ﻊﺳﺗﻳ .ﻡﺟﻛ40 ﻥﻳﺑ ﻪﻧﺯﻭ ﺡﻭﺍﺭﺗﻳ ﻲﻣﻭﺭ ﻙﻳﺩﻟ ﻡﺳ6 ﻭ9 .ﻡﺟﻛ
ﺭﻔﻟﺍ ﻑﺋﺎﻅﻭ ﻥﻣ ﺔﻔﻳﻅﻭ ﻱﺃ ﺭﺎﻳﺗﺧﺍ ﺩﻧﻋ ﻥﺭﻔﻟﺍ ءﻭﺿ ﺭﻳﻧﻳ.ﻥ
ﻪﺗﻻﺎﻣﻌﺗﺳﺍ
ﺔﻔﻳﻅﻭ .ﻲﻬﻁﻟﺍ ﺓﺭﺍﺭﺣ ﺕﻧﺎﻛ ﺎﻣﻬﻣ ،ﻡﺍﺩﺧﺗﺳﻻﺍ ﻝﺑﻗ ﺎﻣﺋﺍﺩ ﻥﺭﻔﻟﺍ ءﺎﻣﺣﺇ ﻥﺳﺣﺗﺳﻳ“ﻊﻳﺭﺳﻟﺍ ﻝﻳﻐﺷﺗﻟﺍ ”ﻁﻠﻟ ﺔﺑﺳﺎﻧﻣ ﺭﻳﻏ ﻲﻬ- ﺩﻌﺑ ﻥﺭﻔﻟﺍ ءﺎﻣﺣﺇ
.ﻩﺎﻧﺩﺃ ﺓﺩﺭﺍﻭﻟﺍ ﻥﺭﻔﻟﺍ ﻑﺋﺎﻅﻭ ﻯﺩﺣﺇ ﻰﻟﺇ ﺭﻭﺭﻣﻟﺍ ﻲﻐﺑﻧﻳ
ﺟﻣﻟﺍ ﺔﻣﻌﻁﻷﺍ ﻊﺿ ﺭﻔﺻﻟﺍ ﻰﻠﻋ ﺓﺭﺍﺭﺣﻟﺍ ﻁﺑﺿﺑ ﻡﻗﻭ ،ﻥﺭﻔﻠﻟ ﻲﻠﻔﺳﻟﺍ ﻑﺭﻟﺍ ﻰﻠﻋ ﺔﻳﻧﻳﺻ ﻕﻭﻓ ﺓﺩﻣ0 ﺎﻳﺗﺧﻻﺍ ﺽﺑﻘﻣ ﺔﻁﺳﺍﻭﺑ ﺍًﺩﺑﺃ ﻲﻐﺑﻧﻳ ﻻ .ﺭ
ﻳﺑﻛﻟﺍ ﺓﺩﻣﺟﻣﻟﺍ ﺔﻣﻌﻁﻷﺍ ﺏﻳﻭﺫﺗ ﻲﻐﺑﻧﻳ .ﺔﺣﺻﻟﺍ ﻰﻠﻋ ﺭﻁﺧ ﻥﻣ ﻪﻠﻛﺷﺗ ﺎﻣﻟ ﺓﺩﻣﺟﻣﻟﺍ ﺔﻣﻌﻁﻷﺍ ﺏﻳﻭﺫﺗﻟ ﺓﺭﺍﺭﺣﻟﺍ ﻡﺍﺩﺧﺗﺳﺍﺣﻟﺍ ﺓﺭﺝﺎﺟﺩﻟﺎﻛ ،ﻡﺟ ﻭﺃ
.ﺔﺟﻼﺛﻟﺍ ﻲﻓ ،ﻲﻣﻭﺭﻟﺍ ﻙﻳﺩﻟﺍ
.ﺩﺣﺍﻭ ﻑﺭ ﻰﻠﻋ ﺔﻬﻛﺎﻔﻟﺎﺑ ﻲﻧﻐﻟﺍ ﻙﻌﻛﻟﺍ ﻭﺃ ﺯﺑﺧﻟﺎﻛ ،ﺕﺎﻧﺟﻌﻣﻟﺍ ﺹﻳﻣﺣﺗﻟ ﺏﺳﺎﻧﻣ
ﻡﻳﺭﻛﻟﺍ ﺭﻳﺿﺣﺗ ﻭﺃ ،ءﻲﻁﺑﻟﺍ ﻲﻬﻁﻟﺍ ﺭﻭﺩﻗ ﻲﻓ ﺔﻣﻌﻁﺃ ﺩﺍﺩﻋﺇ ﺩﻧﻋ ﺔﺿﻔﺧﻧﻣﻟﺍ ﺓﺭﺍﺭﺣﻟﺍ ﺕﺎﺟﺭﺩ ﺩﻧﻋ ﻡﺩﺧﺗﺳﻳ
ﺟﻌﻣﻟﺍﻭ ﺭﺋﺎﻁﻔﻟﺍ ﻲﻬﻁﻟ ﺔﻳﻟﺎﻌﻟﺍ ﺓﺭﺍﺭﺣﻟﺍ ﺕﺎﺟﺭﺩ ﺩﻧﻋ ﻡﺩﺧﺗﺳﻳ ﺔﻣﻌﻁﻷﺍ ﺔﺋﻓﺩﺗﻟ ﻭﺃ .ﺔﺣﻟﺎﻣﻟﺍﻭ ﺓﻭﻠﺣﻟﺍ ﺕﺎﻧ
ﻡﺣﻠﻟﺍ ﻭ ﻥﺎﺟﻧﺫﺎﺑﻟﺍ ﻥﻣ ﺕﺎﻘﺑﻁ ﻥﻣ ﻥﻭﻛﻣ ﻖﺑﻁ ) ﺔﻌﻘﺳﻣﻟﺍﻭ ،ﺎﻳﻧﺍﺯﻼﻟﺍ ﻝﺛﻣ ﻕﺎﺑﻁﻷﺍ ﻥﻳﺧﺳﺗ ﺓﺩﺎﻋﺇﻭ ﺝﺎﺿﻧﻹ ﻡﺩﺧﺗﺳﻳﺍﻡﻭﺭﻔﻣﻟ ﻳﺑﻧﺭﻘﻟﺍﻭ ( ﻁ
.ﻥﺑﺟﻟﺎﺑ
ﺑ ﺔﻳﺯﻟﻭﻟﺍﻭ ﺔَﻧ
ﺭﺩﺑ ﻡﺎﻌﻁﻟﺍ ﻰﻬﻁ ﻥﻣﺿﻳ ﺎﻣﻣ ،ﻱﻭﺎﺳﺗﻟﺎﺑ ﻥﺭﻔﻟﺍ ﻝﺧﺍﺩ ﺓﺭﺍﺭﺣﻟﺍ ﻊﻳﺯﻭﺗ ﻰﻠﻋ ﺔﺣﻭﺭﻣﻟﺍ ﻝﻣﻌﺗﺍﻭﺟﻟﺍ ﻊﻳﻣﺟ ﻰﻠﻋ ﺔﻳﻭﺎﺳﺗﻣ ﺔﺟﻧﻣ .ﺏﻧ ﺏﺳﺎ
ﻑﺛﺎﻛﺗ ﻥﻣ ﺩﺣﻟﺍ ﻰﻠﻋ ﺔﻔﻳﻅﻭﻟﺍ ﻩﺫﻫ ﺩﻋﺎﺳﺗ ﺫﺇ ،ﻩﺎﻳﻣﻟﺎﺑ ﺔﻳﻧﻐﻟﺍ ﺔﻣﻌﻁﻷﺍ ﻲﻬﻁ .ﺝﺎﺟﺩﻟﺍ ﻊﻁﻗﻭ ﻖﻧﺎﻘﻧﻟﺎﻛ ﻡﻭﺣﻠﻟﺍ ﻲﻬﻁﻟ ﺎﺧﺑﻟﺍ .ﺭ
ﻳَﻠﻟﺍ ﺕﺎﻛﻌﻛﻟﺍﻭ ﺔﻘﻳﻗﺭﻟﺍﻭ ﺓﺭﻳﻐﺻﻟﺍ ﺓﺭﺋﺎﻁﻔﻟﺍ ﻲﻬﻁﻟ ﺏﺳﺎﻧﻣﺳﻳ .ﺹﻣﺣﻣﻟﺍ ﺯﺑﺧﻟﺍ ﻰﻠﻋ ﺏﺍﺫﻣﻟﺍ ﻥﺑﺟﻟﺎﻋ ﻡﺩﺧﺗﺩﻣ ﻝﻘﺗ ﺎﻣﺩﻧ ءﺍﻭﺷﻟﺍ ﺓ
ّ
ِ
ﻥﻋ15 .ﺔﺣﻭﺭﻣﻟﺍ ﺓﺩﻋﺎﺳﻣﺑ ءﺍﻭﺷﻟﺍ ﻡﺍﺩﺧﺗﺳﺍ ﻥﺳﺣﺗﺳﻳ ﻝﻭﻁﺃ ءﺍﻭﺷ ﺓﺩﻣ ﻰﻟﺇ ﺝﺎﺗﺣﺗ ﻲﺗﻟﺍ ﺔﻣﻌﻁﻷﺍ ﻲﻬﻁﻟ .ﺔﻘﻳﻗﺩ
ﺔﺣﻭﺭﻣﻟﺍ ﺓﺩﻋﺎﺳﻣﺑ ءﺍﻭﺷﻟﺍ
ﻰﻠﻋ ﺓﺭﺍﺭﺣﻟﺍ ﻁﺑﺿﻭ ،ﺏﺎﺑﻟﺍ ﻖﻠﻏ ﻲﻐﺑﻧﻳ :ﺔﺣﻳﺻﻧ)200 ﻰﻠﻋﻷﺍ ﻥﻣ ﺍءﺩﺑ ﻥﺭﻔﻠﻟ ﻲﻧﺎﺛﻟﺍ ﻑﺭﻟﺍ ﻲﻓ ﺔﻣﻌﻁﻷﺍ ﻊﺿﻭﻭ ،ﺔﺟﺭﺩ ﺏﻳﻠﻘﺗﻭ ،
ﻷﺍ(ﻲﻬﻁﻟﺍ ﻑﺻﺗﻧﻣ ﺩﻧﻋ ﺔﻣﻌﻁ
ﺔﻔﻳﻅﻭﻟﺍ
ﻊﻳﺭﺳﻟﺍ ﻝﻳﻐﺷﺗﻟﺍ
ﺩﻣﺟﻣﻟﺍ ﻡﺎﻌﻁﻟﺍ ﺔﺑﺍﺫﺇ
ﻓﻱﺩﻳﻠﻘﺗ ﻥﺭ
ﻲﻠﻔﺳﻟﺍ ﻥﺎﺧﺳﻟﺍ
ﻱﻭﻠﻌﻟﺍ ﻥﺎﺧﺳﻟﺍ
ﺔﻳﺩﻳﻠﻘﺗ ﺔﻳﺍﻭﺷ
ﺯﻣﺭﻟﺍ
.ﺔﻳﻭﺎﺳﺗﻣ ﺔﺟﺭﺩﺑ ﻡﺎﻌﻁﻟﺍ ﻥﻣ ﺓﺭﻳﺑﻛ ﺔﻳﻣﻛ ﻰﻬﻁ ﻥﻣﺿﻳ ﺎﻣﻣ ،ﻱﻭﺎﺳﺗﻟﺎﺑ ﻥﺭﻔﻟﺍ ﻝﺧﺍﺩ ﺓﺭﺍﺭﺣﻟﺍ ﻊﻳﺯﻭﺗ ﻰﻠﻋ ﺔﺣﻭﺭﻣﻟﺍ ﻝﻣﻌﺗ ْﺣَﺗﻟ ﻡﺩﺧﺗﺳﻳﺹﻳِﻣ
ﻟﺍ ﺕﺎﺟﺗﻧﻣﻟﺍ ﻲﻬﻁﻟ ﻝﺿﻓﻷﺍ ﺔﻔﻳﻅﻭﻟﺍ ﻩﺫﻫ ﺩﻌﺗ .ﻱﻭﺷﻣﻟﺍ ﻙﻣﺳﻟﺍ ﻭﺃ ،ﻥﺟﺍﻭﺩﻟﺍﻭ ﻡﻭﺣﻠﻟﺍﻭ ﺕﺍﻭﺍﺭﺿﺧﻟﺍ ّﻲَﺷﻭﻣﺟﻣﻟﺍ ﺎﻁﺎﻁﺑﺍﻭ ﺓﺩ ﺝﺎﺟﺩﻟ
.ﻙﻣﺳﻟﺍ ﻭﺃ ﻁﺎﻣﺳﻘﺑﻟﺎﺑ
ﺩﺣﻭﻣ ﺓﺭﺍﺭﺣﻟﺍ ﻰﻠﻋ ءﺎﻘﺑﻹﺍ ﻰﻠﻋ ﻝﻣﻌﺗ ﺫﺇ .ﺔﻣﻌﻁﻷﺍ ﻲﻬﻁﻟ ﺔﻟﺎﻌﻓ ﺔﻠﻳﺳﻭﻭ ﺕﺎﻔﺻﻭﻟﺍ ﻡﻅﻌﻣﻟ ﺔﺑﺳﺎﻧﻣ ﺔﻔﻳﻅﻭﻟﺍ ﻩﺫﻫ ﺩﻌﺗﺟ ﻲﻓ ﺓ ءﺎﺣﻧﺃ ﻊﻳﻣ
ﻑﻭﻓﺭﻟﺍ ﻥﻣ ﺩﻳﺩﻌﻟﺍ ﻲﻓ ﺯﺑﺧﻠﻟ ﺹﺎﺧ ﻝﻛﺷﺑ ﺔﺑﺳﺎﻧﻣﻭ ﻥﺭﻔﻟﺍ .ﻲﻬﻁﻟﺍ ﻥﻣ ﺓﺩﺩﻌﺗﻣ ﺕﺎﻌﻓﺩﻟ ﻭﺃ
.ﻝﻔﺳﻷﺍ ﻥﻣ ﺔﻳﻟﺎﺛﻣ ﺔﺟﻳﺗﻧ ﻰﻠﻋ ﻝﻭﺻﺣﻠﻟ ﺕﺍﺯﻭﺑﺧﻣﻟﺍﻭ ﺍﺯﺗﻳﺑﻟﺍ ﻲﻬﻁﻟ ﻡﺩﺧﺗﺳﺗ
ﺔﺣﻭﺭﻣﻟﺍ ﺓﺩﻋﺎﺳﻣﺑ ﻥﺭﻓ
ﻊﻣ ﺔﺣﻭﺭﻣﻟﺍ ﺓﺩﻋﺎﺳﻣﺑ ﻥﺭﻓ
ﻱﺭﺋﺍﺩﻟﺍ ﻥﻳﺧﺳﺗﻟﺍ ﺭﺻﻧﻋ
ﺍﺯﺗﻳﺑ
47
Page 48

ﻢﻗﺭ ﺖﺤﺗ ﺎﻬﻴﻟﺇ ﺭﺎﺸﻤﻟﺍ ﺔﻤﻴﻘﻠﻟ ﻖﺑﺎﻄﻤﻟﺍ ﻊﺿﻮﻟﺍ ﻰﻠﻋ ﻩﺮﺷﺆﻣ ﻂﺒﻀﺑ ﻢﻗﻭ ﺭﺍﻭﺪﻟﺍ ﺾﺒﻘﻤﻟﺍ ﺭﺩﺃ ﻢﺛ ﻪﺑﺎﺑ ﻻﻭﺃ ﺢﺘﻓﺍ ﻥﺮﻔﻟﺍ ﻝﺎﻌﺷﻹ8 ﻞﻜﺷ) ﻝﻭﺪﺠﻟﺍ ﻲﻓ31ﺖﻗﻮﻟﺍ ﺲﻔﻧ ﻲﻓ ﻢﻗﻭ .(
ﻞﻜﺷ) ﻥﺮﻔﻟﺍ ﺔﻴﺿﺭﺃ ﻲﻓ ﺓﺩﻮﺟﻮﻤﻟﺍ ﻝﺎﻌﺷﻹﺍ ﺔﺤﺘﻓ ﺔﻫﻮﻓ ﻲﻓ ﻞﻌﺘﺸﻣ ﺏﺎﻘﺛ ﺩﻮﻋ ﻝﺎﺧﺩﺈﺑ32 ﻰﻟﺇ ﺍﺬﻫ ﻱﺩﺆﻳ) (ﺕﺎﺘﺳﻮﻣﺮﺜﻟﺍ) ﻱﺭﺍﺮﺤﻟﺍ ﻢّﻈﻨﻤﻟﺍ ﺾﺒﻘﻣ ﻰﻠﻋ ﻚﻟﺫ ﺪﻌﺑ ﻂﻐﺿﺍﻭ .(
.ﻯﺮﺧﺃ ﺓﺮﻣ ﻝﺎﻌﺷﻹﺍ ﺔﻴﻠﻤﻋ ﺓﺩﻭﺎﻌﻣ ﻲﻐﺒﻨﻴﻓ ﻚﻟﺬﻛ ﺮﻣﻷﺍ ﻦﻜﻳ ﻢﻟ ﺍﺫﺇﻭ ،ﻼﻌﺘﺸﻣ ﻝﺍﺯﺎﻣ ﺪﻗﻮﻤﻟﺍ ﻥﻮﻛ ﻦﻣ ﺪﻛﺄﺘﻟﺍ
ﺓﺩﻣﻟ ﺭﻅﺗﻧﺍﻭ .(ﻝﺎﻌﺷﻹﺍ ﺽﺑﻘﻣﺑ ﺓﺩﻭﺯﻣﻟﺍ ﺕﺍﺯﺍﺭﻁﻠﻟ ﻁﻘﻓ) (ﺕﺎﺗﺳﻭﻣﺭﺛﻟﺍ)10 ﻛﻣﻳ ﺍﺫﻫ ﺩﻧﻋﻭ ﻝﻣﺎﻛ ﻝﻛﺷﺑ ﻝﺎﻌﺗﺷﻻﺍ ﺔﻳﻠﻣﻋ ﻡﺗﺗ ﻥﺃ ﻥﻳﺣﻟ ﻥﺍﻭﺛ ﻰﻠﻋ ﻁﻐﺿﻟﺍ ﻥﻋ ﻑﻗﻭﺗﻟﺍ ﻙﻧ
ﺓﺩﻣﻟ ﺭﻅﺗﻧﺍﻭ ،ﺓﺭﺍﺭﺷﻟﺍ ﺯﻣﺭ ﻪﻳﻠﻋ ﻥﻳﺑﻣﻟﺍ ﺡﺎﺗﻔﻣﻟﺍﻭ (ﺕﺎﺗﺳﻭﻣﺭﺛﻟﺍ) ﻱﺭﺍﺭﺣﻟﺍ ﻡّﻅﻧﻣﻟﺍ ﺽﺑﻘﻣ ﻰﻠﻋ ﻁﻐﺿﻟﺍ ﻲﻐﺑﻧﻳﻓ ﻝﺎﻌﺷﻹﺍ ﺽﺑﻘﻣﺑ10 ﻟ ﻥﺍﻭﺛﺗﺷﻻﺍ ﺔﻳﻠﻣﻋ ﻡﺗﺗ ﻥﺃ ﻥﻳﺣ ﻝﺎﻌ
ﻟﺫﻛ ﺭﻣﻷﺍ ﻥﻛﻳ ﻡﻟ ﺍﺫﺇﻭ ،ﻼﻌﺗﺷﻣ ﻝﺍﺯﺎﻣ ﺩﻗﻭﻣﻟﺍ ﻥﻭﻛ ﻥﻣ ﺩﻛﺄﺗﻟﺍ ﻲﻐﺑﻧﻳ ﻥﻛﻟﻭ .ﺽﺑﻘﻣﻟﺍ ﻰﻠﻋ ﻁﻐﺿﻟﺍ ﻥﻋ ﻑﻗﻭﺗﻟﺍ ﻙﻧﻛﻣﻳ ﺍﺫﻫ ﺩﻧﻋﻭ ﻝﻣﺎﻛ ﻝﻛﺷﺑﻐﺑﻧﻳﻓ ﻙﻠﻣﻋ ﺓﺩﻭﺎﻌﻣ ﻲ ﺔﻳ
ﻝﻌﺗﺷﻳ ﺩﻗﻭﻣﻟﺍ ﺩﻌﺑ ﺭﻣﺭﻭ ﻩﺫﻫ ﺓﺭﺗﻔﻟﺍ ﻼﻓ ﺗﻡﺩﺧﺗﺳ ﺓﺯﻳﻬﺟﺗﻟﺍ ﻲﻐﺑﻧﻳﻭ ﺢﺗﻓ ﺏﺎﺑ ﺔﻓﺭﻐﻟﺍ
ﺡﻭﺍﺭﺗﺗ
ﺔﻟﺯﺎﻌﻟﺍ
.
15 - 30
ﻥﻳﺑ
ﺔﻳﻠﺧﺍﺩﻟﺍ
،ﻪﻠﺧﺍﺩﺑ
ﺔﻣﻌﻁﺃ
ﻪﻳﺃ
،ﺔﺟﺭﺩ
ﺩﻭﻥﻭ
ﻊﺿﻭ
ءﺎﻫﺯ
250
ﺔﻘﻳﻗﺩ
ﺩﻧﻋ
ﺔﺟﺭﺩ
ﺓﺭﺍﺭﺣ
ﻎﻠﺑﺗ
ﺓﺩﻣﻟ ﺭﺎﻅﺗﻧﻻﺍ ﻲﻐﺑﻧﻳ ﺍﺫﻬﻟﻭ ،ﻥﺭﻔﻟﺍ ءﺎﻣﺣﺇ ﺏﺟﻳ ،ﻱﺩﺎﻌﻟﺍ ﻡﺍﺩﺧﺗﺳﻻﺍ ءﺎﻧﺛﺃ15 ﻝﺑﻗ ،ﺔﺑﻭﻠﻁﻣﻟﺍ ﺓﺭﺍﺭﺣﻟﺍ ﻁﺑﺿﻭ ﺩﻗﻭﻣﻟﺍ ﻝﺎﻌﺷﺇ ﺩﻌﺑ ﺔﻘﻳﻗﺩﻭﻥﺭﻔﻟﺍ ﺭﻓﻭﺗﻳ .ﻪﻠﺧﺍﺩﺑ ﺔﻣﻌﻁﻷﺍ ﻊﺿ
.ﻲﻧﺍﻭﺻﻟﺍ ﻕﻭﻓ ﺔﻋﻭﺿﻭﻣ ﺔﻳﻛﺑﺷ ﻥﺎﺑﺿﻗ ﻰﻠﻋ ﻭﺃ ﻲﻧﺍﻭﺻﻟﺍ ﻝﺧﺍﺩ ﻡﻭﺣﻠﻟﺍ
ﺓﺩﻣﻟ
ﺓﺩﺎﻣﻟﺍ
ﻭ ﺭﺍﻭﺩﻟﺍ ﺽﺑﻘﻣﻟﺍ ﺭﺩﺃ ﻡﺛ ﻥﺭﻔﻟﺍ ﺏﺎﺑ ﻻﻭﺃ ﺢﺗﻓﺍ ﺔﻟﺎﺣﻟﺍ ﻩﺫﻫ ﻲﻓ ﻡﻗﺭ) ﺓﺭﺍﺭﺣﻠﻟ ﻰﺻﻗﻷﺍ ﺩﺣﻟﺍ ﻊﺿﻭ ﻰﻠﻋ ﻪﻁﺑﺿﺑ ﻡﻗ8 ﺽﺑﻘﻣ ﻰﻠﻋ ﻁﻐﺿﺍ ﻡﺛ . (ﺍ ﻱﺭﺍﺭﺣﻟﺍ ﻡّﻅﻧﻣﻟ
ﻪﻠﻳﻐﺷﺗ
ﺔﺟﺗﺎﻧ
ﻥﻋ
ﺏﺟﻳ
ﺓﺪﻤﻟ ،ﻪﻴﻠﻋ ﻂﻐﻀﻟﺍ ﻲﻓ ﺮﻤﺘﺳﺍﻭ (ﺯﺎﻐﻟﺍ ﻖﻓﺪﺗ10 ﻗﻮﺘﻟﺍ ﻚﻨﻜﻤﻳ ﺍﺬﻫ ﺪﻨﻋﻭ .ﻞﻣﺎﻜﻟﺎﺑ ﻝﺎﻌﺘﺷﻻﺍ ﺔﻴﻠﻤﻋ ﻦﻣ ءﺎﻬﺘﻧﻻﺍ ﺔﻳﺎﻏ ﻰﻟﺇ ﻥﺍﻮﺛ ﻲﻐﺒﻨﻳ ﻦﻜﻟﻭ ﺾﺒﻘﻤﻟﺍ ﻰﻠﻋ ﻂﻐﻀﻟﺍ ﻦﻋ ﻒ
ﻰﻟﻭﻷﺍ
ﺢﺋﺍﻭﺭﻟﺍ
ﺔﻔﻠﺗﺧﻣ ﺕﺎﻋﺎﻔﺗﺭﺍ ﻰﻠﻋ ﻱﺭﺎﺟﻣ ﺔﺳﻣﺧ ﻰﻠﻋ ﻝﻛﺷﻟﺍ)33ﺍ ﻥﻣﻓ ،ﻥﺎﻛﻣﻹﺍ ﺭﺩﻗ ﺎﻔﻳﻅﻧ ﻥﺭﻔﻟﺍ ﻰﻠﻋ ﻅﺎﻔﺣﻠﻟ .ﻲﻧﺍﻭﺻﻟﺍ ﻭﺃ ﺕﺎﺟﺎﺻﻟﺍ ﺝﺍﺭﺩﻹ ﺔﺻﺻﺧﻣ ( ﻲﻬﻁ ﻥﺳﺣﺗﺳﻣﻟ
ﻥﻭﻛ ﻥﻣ ﺩﻛﺄﺗﻟﺍ ﻲﻐﺑﻧﻳ ﻥﻛﻟﻭ .ﺽﺑﻘﻣﻟﺍﺑ ﺎﻣﺃ .ﻯﺭﺧﺃ ﺓﺭﻣ ﻝﺎﻌﺷﻹﺍ ﺔﻳﻠﻣﻋ ﺓﺩﻭﺎﻌﻣ ﻲﻐﺑﻧﻳﻓ ﻙﻟﺫﻛ ﺭﻣﻷﺍ ﻥﻛﻳ ﻡﻟ ﺍﺫﺇﻭ ،ﻼﻌﺗﺷﻣ ﻝﺍﺯﺎﻣ ﺩﻗﻭﻣﻟﺍﻟ ﺔﺑﺳﻧﻟﺎﺭﻳﻐﻟﺍ ﺩﻗﺍﻭﻣﻠ ﺓﺩﻭﺯﻣ
ﺓﺭﻣﻠﻟ
ﻰﻠﻋ
ﻥﺭﻔﻟﺍ
ءﺎﺿﻘﻟﺍﻭ
:(ﺓﺯﻳﻬﺟﺗﻟﺍ ﻩﺫﻫ ﻝﺛﻣﺑ ﺓﺩﻭﺯﻣﻟﺍ ﺕﺍﺯﺍﺭﻁﻠﻟ ﺔﺑﺳﻧﻟﺎﺑ ﻁﻘﻓ)
.ﻯﺭﺧﺃ ﺓﺭﻣ ﻝﺎﻌﺷﻹﺍ
ﻡﺍﺩﺧﺗﺳﺍ
ﺔﺑﻭﻁﺭﻟﺍ
- :ﻲﺋﺎﺑﺭﻬﻛﻟﺍ ﻝﺎﻌﺷﻹﺍ
ﺏﺟﻳﻭ ﻩﺎﺑﺗﻧﻻﺍ ﻰﻟﺇ ﻡﺩﻋ ﻡﺍﺩﺧﺗﺳﺍ ﺓﺯﻳﻬﺟﺗ ﻝﺎﻌﺷﻹﺍ ﺓﺩﻣﻟ ﻕﻭﻔﺗ 15 ﺔﻳﻧﺎﺛ. ﺍﺫﺇﻭ ﻡﻟ
ﻭﺃ ﺭﺎﻅﺗﻧﻻﺍ ﺓﺩﻣﻟ 60 ﺔﻳﻧﺎﺛ ﻝﺑﻗ ﺔﻟﻭﺎﺣﻣ ﻝﺎﻌﺷﺇ ﻥﺭﻔﻟﺍ ﻥﻣ ﺩﻳﺩﺟ.
ﺭﻳﺫﺣﺗ: ﺩﻌﺑ ﻝﺎﻌﺷﺇ ﺩﻗﺍﻭﻣ ﻥﺭﻔﻟﺍ ،ﺔﻳﺍﻭﺷﻟﺍﻭ ﻰﺟﺭﻳ ﺭﺎﻅﺗﻧﻻﺍ ﺓﺩﻣﻟ 2 ﻭﺃ 3 ﻖﺋﺎﻗﺩ ﻝﺑﻗ ﻥﺃ ﻖﻠﻏ ﺏﺎﺑ ،ﻥﺭﻔﻟﺍ ﺡﺎﻣﺳﻠﻟ ﺭﺍﺭﻘﺗﺳﺎﺑ ﻳﻬﻟﺏ ﺩﻗﺍﻭﻣﻟﺍ.
ﺭﻳﺫﺣﺗ: ﺩﻧﻋ
ﺔﻟﻭﺎﺣﻣ ﻝﺎﻌﺷﺇ ﻥﺭﻔﻟﺍ ﺏﺟﻳ ﻥﺃ ﻝﻅﻳ ﺏﺎﺑﻟﺍ ﺎﻣﺋﺍﺩ ﺎﺣﻭﺗﻔﻣ. ﺩﻧﻋ ﻡﺍﺩﺧﺗﺳﺍ ،ﻥﺭﻔﻟﺍ ﻲﻐﺑﻧﻳ ﻙﺭﺗ ءﺎﻁﻐﻟﺍ ﺎﺣﻭﺗﻔﻣ ﺩﺎﻔﺗﻟﻱ ﺓﺭﺍﺭﺣﻟﺍ ﺔﻁﺭﻔﻣﻟﺍ.
ﺔﻅﺣﻼﻣ
ﺩﻧﻋ
:
ﻥﻣ
ﺗﻠﻟﺹﻠﺧ
ﻝﻛﺷﻟﺍ)34-35 -36(
ﻝﻭﺣﻣﻟﺍ ﻡﺍﺩﺧﺗﺳﺍ
ﻝﻭﺣﻣﻟﺍ2+0 .ﺔﻳﺋﺎﺑﺭﻬﻛﻟﺍ ﺔﻳﺍﻭﺷﻟﺍﻭ ﺯﺎﻐﻟﺍ ﻥﺭﻓ ﺕﻼﻳﺩﻭﻣ ﻲﻓ ﻡﺩﺧﺗﺳﻣﻟﺍ
ﺯﻣﺭﻟﺍ
ﻭ ؛ﻥﺭﻔﻟﺍ ﺓﺭﺎﻧﺇﻭ ﺔﺣﻭﺭﻣ ﻝﻳﻐﺷﺗﻟ
ﻭ ؛ﻥﺭﻔﻟﺍ ﺓﺭﺎﻧﺇﻭ ﺭﺍﻭﺩﻟﺍ ﺩﻭﱡﻔَﺳﻟﺍ ﻝﻳﻐﺷﺗﻟ
ﺯﻣﺭﻟﺍ
.ﻥﺭﻔﻟﺍ ﺓﺭﺎﻧﺇ ﻝﻳﻐﺷﺗﻟ
ﺯﻣﺭﻟﺍ
ﻝﻛﺷﻟﺍ) (ﺕﺎﺗﺳﻭﻣﺭﺛﻟﺍ) ﻲﺋﺎﺑﺭﻬﻛﻟﺍ ﻱﺭﺍﺭﺣﻟﺍ ﻡّﻅﻧﻣﻟﺍ ﻡﺍﺩﺧﺗﺳﺍ36(ﻑﺋﺎﻅﻭﻟﺍ ﺩﺩﻌﺗﻣﻟﺍ ﻥﺭﻔﻟﺍ ﻊﻣ) (
ﻟﺍ ﺕﺍﺯﺍﺭﻁﻟﺎﺑ (ﺕﺎﺗﺳﻭﻣﺭﺛﻟﺍ) ﻱﺭﺍﺭﺣﻟﺍ ﻡّﻅﻧﻣﻟﺍ ﻅﻓﺎﺣﻳ ﻥﻳﺑ ﺡﻭﺍﺭﺗﺗ ﺓﺩﺩﺣﻣ ﺓﺭﺍﺭﺣ ﺔﺟﺭﺩ ﻖﻓﻭ ﻥﺭﻔﻟﺍ ﻝﺧﺍﺩ ﺔﺗﺑﺎﺛ ﺓﺭﺍﺭﺣ ﺔﺟﺭﺩ ﻰﻠﻋ ﻪﺑ ﺓﺯﻬﺟﻣ50 ﻭ250 .ﺔﻳﻭﺋﻣ ﺔﺟﺭﺩ
ﺑﻁﻣﻟﺍ ﺽﺑﻘﻣﻟﺍ ﻝﻭﺣ ﻕﻭﻁﻟﺍ ﻰﻠﻋ ﺔﺣﺿﻭﻣﻟﺍ ﻡﻳﻘﻟﺍ ﻯﺩﺣﺇ ﺭﺎﻳﺗﺧﺎﺑ ﺔﺑﻭﻠﻁﻣﻟﺍ ﺓﺭﺍﺭﺣﻟﺍ ﺔﺟﺭﺩ ﻰﻠﻋ ﻪﻁﺑﺿﻭ ﺔﻋﺎﺳﻟﺍ ﺏﺭﺎﻘﻋ ﻩﺎﺟﺗﺍ ﻲﻓ ﺽﺑﻘﻣﻟﺍ ﺭﻳﻭﺩﺗ ﻰﻠﻋ ﻉﻭﻟ .ﻡﻛﺣﺗﻟﺍ ﺔﺣﻭ
ﻝﺎﻐﺗﺷﺍ ﻰﻟﺇ ﺓﺭﺎﺷﻹﺍ ﻡﺗﺗ ﻥﻣ ﻰﻠﻋﺃ ﻥﺭﻔﻟﺍ ﻝﺧﺍﺩ ﺓﺭﺍﺭﺣﻟﺍ ﺔﺟﺭﺩ ﻥﻭﻛﺗ ﺎﻣﺩﻧﻋ ﺊﻔﻁﻧﻳ ،ﻲﻟﺎﻘﺗﺭﺑ ءﻭﺿﺑ (ﺕﺎﺗﺳﻭﻣﺭﺛﻟﺍ) ﻱﺭﺍﺭﺣﻟﺍ ﻡّﻅﻧﻣﻟﺍ ﺔﻔﻳﻅﻭ ﺭﺍﺭﺣﻟﺍـﺑ ﺓﺩﺩﺣﻣﻟﺍ ﺓ 10
ﻥﻣ ﻝﻗﻷ ﺎﻬﺿﺎﻔﺧﻧﺍ ﺩﻧﻋ ﻝﻣﻌﻟﺍ ﺩﻭﺎﻌﻳﻭ ،ﺕﺎﺟﺭﺩ10 ﺭﺻﺎﻧﻋ ﻲﻓ ﻡﻛﺣﺗﻟﺍ (ﺕﺎﺗﺳﻭﻣﺭﺛﻟﺍ) ﻱﺭﺍﺭﺣﻟﺍ ﻡّﻅﻧﻣﻠﻟ ﻥﻛﻣﻳ .ﺓﺩﺩﺣﻣﻟﺍ ﺓﺭﺍﺭﺣﻟﺍ ﻥﻋ ﺕﺎﺟﺭﺩﺍﺍﺫﺇ ﻁﻘﻓ ﻥﻳﺧﺳﺗﻟ ﻥﺎﻛ
ﺭﻔﺻﻟﺍ ﻰﻠﻋ ﺡﺎﺗﻔﻣﻟﺍ ﻊﺿﻭ ﻥﺎﻛ ﺍﺫﺈﻓ :ﻥﻳﺧﺳﺗﻟﺍ ﺭﺻﺎﻧﻋ ﻝﻳﻐﺷﺗ ﻉﺎﺿﻭﺃ ﻯﺩﺣﺇ ﻲﻓ ﻲﻧﻌﻣﻟﺍ ﺡﺎﺗﻔﻣﻟﺍ0 ﻻ (ﺕﺎﺗﺳﻭﻣﺭﺛﻟﺍ) ﻱﺭﺍﺭﺣﻟﺍ ﻡّﻅﻧﻣﻟﺍ ﻥﺈﻓ ،ﺗ ﺭﺻﺎﻧﻋ ﻰﻠﻋ ﻪﻟ ﺭﻳﺛﺄ
.ﺓﺄﻔﻁُﻣ ﻰﻘﺑﺗ ﻲﺗﻟﺍ ،ﻥﻳﺧﺳﺗﻟﺍ
ﻝﻛﺷﻟﺍ) ﻑﺋﺎﻅﻭﻟﺍ ﺩﺩﻌﺗﻣﻟﺍ ﻥﺭﻔﻟﺍ ﻡﺍﺩﺧﺗﺳﺍ37(
:ﻰﻟﻭﻷﺍ ﺓﺭﻣﻠﻟ ﻥﺭﻔﻟﺍ ﻝﺎﻣﻌﺗﺳﺍ ﻝﺑﻗ
- ﺍﺯﺈﺑ ﻡﻗ .ﻥﺍﺭﻓﻷﺍ ﻝﺧﺍﺩ ﻥﻣ ﺕﺍﺭﺍﻭﺳﺳﻛﻹﺍﻭ ﻑﻳﻠﻐﺗﻟﺍﻭ ﺔﺋﺑﻌﺗﻟﺍ ﺩﺍﻭﻣ ﻊﻳﻣﺟ ﺔﻟ
- ﺓﺩﻣﻟ ﻥﺍﺭﻓﻷﺍ ﻥﻳﺧﺳﺗﺑ ﻡﻗ ½ ﺎﻫﺭﺩﻗ ﺓﺭﺍﺭﺣ ﻰﻠﻋ ﺔﻋﺎﺳ200 ﻕﺭﺣﻟ ﺔﺟﺭﺩd .ﻊﻳﻧﺻﺗﻟﺍ ﺎﻳﺎﻘﺑ
- .ﻱﺩﺎﻌﻟﺍ ﻲﻬﻁﻠﻟ ﻱﻭﺩﻳﻟﺍ ﻊﺿﻭﻟﺍ ﻰﻠﻋ ﻲﺋﺎﻘﻠﺗﻟﺍ ﺞﻣﺭﺑﻣﻟﺍ ﻁﺑﺿ ﺏﺟﻳ
- ﺍ ﺭﻅﻧﺃ .ﻲﺋﺎﻘﻠﺗﻟﺍ ﻊﺿﻭﻟﺍ ﻰﻠﻋ ﻪﻁﺑﺿ ﻡﺗ ﺍﺫﺇ ﻥﺭﻔﻟﺍ ﻝﻣﻌﻳ ﻥﻟ ... ﺔﺣﻔﺻﻟ
:ﻥﺍﺭﻓﻷﺍ ﻡﺍﺩﺧﺗﺳﻻ
1 .ﺔﺑﻭﻠﻁﻣﻟﺍ ﺔﻔﻳﻅﻭﻟﺍ ﻭﺣﻧ ﺔﻋﺎﺳﻟﺍ ﺏﺭﺎﻘﻋ ﻩﺎﺟﺗﺍ ﻲﻓ (ﻝﻛﺷﻟﺍ) ﺭﺎﻳﺗﺧﻻﺍ ﺽﺑﻘﻣ ﺭﻳﻭﺩﺗﺑ ﻡﻗ
.ﻲﻧﻌﻣﻟﺍ ﺭﺻﻧﻌﻟﺍ ﻝﻳﻐﺷﺗ ﻰﻟﺇ ﺓﺭﺎﺷﻺﻟ ﻲﻟﺎﻘﺗﺭﺑ ءﻭﺿ ءﻲﺿُﻳ
2 ﻝﻛﺷﻟﺍ) ﺓﺭﺍﺭﺣﻟﺍ ﺭﺎﻳﺗﺧﺍ ﺽﺑﻘﻣ ﺭﻳﻭﺩﺗﺑ ﻡﻗ36B ﺊﻔﻁﻧﻳ .ﺔﺑﻭﻠﻁﻣﻟﺍ ﺓﺭﺍﺭﺣﻟﺍ ﻭﺣﻧ ﺔﻋﺎﺳﻟﺍ ﺏﺭﺎﻘﻋ ﻩﺎﺟﺗﺍ ﻲﻓ ( ﻍﻭﻠﺑ ﺩﻌﺑ ﻲﻟﺎﻘﺗﺭﺑﻟﺍ ءﻭﺿﻟﺍﺍﻭﻠﻁﻣﻟﺍ ﺓﺭﺍﺭﺣﻟﺍ ﻥﺭﻔﻟ ﺔﺑ
.ﻥﻳﺧﺳﺗﻟﺍ ﺭﺻﺎﻧﻋ ﺓﺭﺍﺭﺣ ﺔﺟﺭﺩ ﻰﻠﻋ ﻅﺎﻔﺣﻠﻟ ﻲﻬﻁﻟﺍ ءﺎﻧﺛﺃ ﻲﻟﺎﻘﺗﺭﺑﻟﺍ ءﻭﺿﻟﺍ ﺊﻔﻁﻧﻳﻭ ﻝﻌﺗﺷﻳ ﻥﺃ ﻱﺩﺎﻋ ﺭﻣﺃ .ﻡﺍﺩﺧﺗﺳﻼﻟ ﺍﺯﻫﺎﺟﻭ
3 ﻰﻟﺇ ﻑﻠﺧﻟﺍ ﻭﺣﻧ ﺔﻋﺎﺳﻟﺍ ﺏﺭﺎﻘﻋ ﻩﺎﺟﺗﺍ ﺱﻛﻋ ﺓﺭﺍﺭﺣﻟﺍﻭ ﺔﻔﻳﻅﻭﻟﺍ ﺭﺎﻳﺗﺧﺍ ﺽﺑﺎﻘﻣ ﺭﻳﻭﺩﺗﺑ ﻡﻗ ،ﻥﺭﻔﻟﺍ ﻑﺎﻘﻳﻹ .•
48
Page 49

:ﺔﻔﻠﺗﺧﻣ ﻕﺭﻁﺑ ﻥﺭﻔﻟﺍ ﺩﻗﺍﻭﻣ ﻝﺎﻌﺷﺍ ﻥﻛﻣﻳﻭ
:(ﻲﺋﺎﺑﺭﻬﻛﻟﺍ ﺭﺎﻳﺗﻟﺍ ﻉﺎﻁﻘﻧﺍ ﺔﻟﺎﺣ ﻲﻓ ﻰﺗﺣﻭ ﺎﻣﺋﺍﺩ ﻪﻣﺍﺩﺧﺗﺳﺍ ﻥﻛﻣﻳ)
- ﻱﻭﺩﻳﻟﺍ ﻝﺎﻌﺷﻹﺍ
ﻡﻗﺭ ﺕﺣﺗ ﺎﻬﻳﻟﺍ ﺭﺎﺷﻣﻟﺍ ﺔﻣﻳﻘﻠﻟ ﻖﺑﺎﻁﻣﻟﺍ ﻊﺿﻭﻟﺍ ﻰﻠﻋ ﻩﺭﺷﺅﻣ ﻁﺑﺿﺑ ﻡﻗﻭ ﺭﺍﻭﺩﻟﺍ ﺽﺑﻘﻣﻟﺍ ﺭﺩﺃ ﻡﺛ ﻪﺑﺎﺑ ﻻﻭﺍ ﺢﺗﻓﺍ ﻥﺭﻔﻟﺍ ﻝﺎﻌﺷﻹ8 ﻭﺩﺟﻟﺍ ﻲﻓ ﻝﻛﺷ) ﻝ30-31 ﻡﻗﻭ .( ﻲﻓ
ﻝﻛﺷ) ﻥﺭﻔﻟﺍ ﺔﻳﺿﺭﺃ ﻲﻓ ﺓﺩﻭﺟﻭﻣﻟﺍ ﻝﺎﻌﺷﻻﺍ ﺔﺣﺗﻓ ﺔﻫﻭﻓ ﻲﻓ ﻝﻌﺗﺷﻣ ﺏﺎﻘﺛ ﺩﻭﻋ ﻝﺎﺧﺩﺈﺑ ﺕﻗﻭﻟﺍ ﺱﻔﻧ32ﻟﺍ ﻡّﻅﻧﻣﻟﺍ ﺽﺑﻘﻣ ﻰﻠﻋ ﻙﻟﺫ ﺩﻌﺑ ﻁﻐﺿﺍﻭ .( (ﺕﺎﺗﺳﻭﻣﺭﺛﻟﺍ) ﻱﺭﺍﺭﺣ
ﺓﺩﻣﻟ ،ﻪﻳﻠﻋ ﻁﻐﺿﻟﺍ ﻲﻓ ﺭﻣﺗﺳﺍﻭ (ﺯﺎﻐﻟﺍ ﻖﻓﺩﺗ ﻰﻟﺇ ﺍﺫﻫ ﻱﺩﺅﻳ)10 ﺍﺫﻫ ﺩﻧﻋﻭ .ﻝﻣﺎﻛﻟﺎﺑ ﻝﺎﻌﺗﺷﻻﺍ ﺔﻳﻠﻣﻋ ﻥﻣ ءﺎﻬﺗﻧﻻﺍ ﺔﻳﺎﻏ ﻰﻟﺇ ﻥﺍﻭﺛ ﻙﻧﻛﻣﻳﺍ ﻰﻠﻋ ﻁﻐﺿﻟﺍ ﻥﻋ ﻑﻗﻭﺗﻟ
.ﻯﺭﺧﺃ ﺓﺭﻣ ﻝﺎﻌﺷﻹﺍ ﺔﻳﻠﻣﻋ ﺓﺩﻭﺎﻌﻣ ﻲﻐﺑﻧﻳﻓ ﻙﻟﺫﻛ ﺭﻣﻷﺍ ﻥﻛﻳ ﻡﻟ ﺍﺫﺇﻭ ،ﻼﻌﺗﺷﻣ ﻝﺍﺯﺎﻣ ﺩﻗﻭﻣﻟﺍ ﻥﻭﻛ ﻥﻣ ﺩﻛﺄﺗﻟﺍ ﻲﻐﺑﻧﻳ ﻥﻛﻟﻭ ﺽﺑﻘﻣﻟﺍ
:(ﺓﺯﻳﻬﺟﺗﻟﺍ ﻩﺫﻫ ﻝﺛﻣﺑ ﺓﺩﻭﺯﻣﻟﺍ ﺕﺍﺯﺍﺭﻁﻠﻟ ﺔﺑﺳﻧﻟﺎﺑ ﻁﻘﻓ)
- :ﻲﺋﺎﺑﺭﻬﻛﻟﺍ ﻝﺎﻌﺷﻹﺍ
ﻣﻟﺍ ﺭﺩﺃ ﻡﺛ ﻥﺭﻔﻟﺍ ﺏﺎﺑ ﻻﻭﺃ ﺢﺗﻓﺍ ﺔﻟﺎﺣﻟﺍ ﻩﺫﻫ ﻲﻓ ﻡﻗﺭ) ﺓﺭﺍﺭﺣﻠﻟ ﻰﺻﻗﻷﺍ ﺩﺣﻟﺍ ﻊﺿﻭ ﻰﻠﻋ ﻪﻁﺑﺿﺑ ﻡﻗﻭ ﺭﺍﻭﺩﻟﺍ ﺽﺑﻘ8 ﺽﺑﻘﻣ ﻰﻠﻋ ﻁﻐﺿﺍ ﻡﺛ . (ﺍ ﻱﺭﺍﺭﺣﻟﺍ ﻡّﻅﻧﻣﻟ
ﺓﺩﻣﻟ ﺭﻅﺗﻧﺍﻭ .(ﻝﺎﻌﺷﻹﺍ ﺽﺑﻘﻣﺑ ﺓﺩﻭﺯﻣﻟﺍ ﺕﺍﺯﺍﺭﻁﻠﻟ ﻁﻘﻓ) (ﺕﺎﺗﺳﻭﻣﺭﺛﻟﺍ)10 ﻛﻣﻳ ﺍﺫﻫ ﺩﻧﻋﻭ ﻝﻣﺎﻛ ﻝﻛﺷﺑ ﻝﺎﻌﺗﺷﻻﺍ ﺔﻳﻠﻣﻋ ﻡﺗﺗ ﻥﺍ ﻥﻳﺣﻟ ﻥﺍﻭﺛ ﻰﻠﻋ ﻁﻐﺿﻟﺍ ﻥﻋ ﻑﻗﻭﺗﻟﺍ ﻙﻧ
ﻟﺍ ﻲﻐﺑﻧﻳ ﻥﻛﻟﻭ .ﺽﺑﻘﻣﻟﺍﺑ ﺎﻣﺃ .ﻯﺭﺧﺃ ﺓﺭﻣ ﻝﺎﻌﺷﻹﺍ ﺔﻳﻠﻣﻋ ﺓﺩﻭﺎﻌﻣ ﻲﻐﺑﻧﻳﻓ ﻙﻟﺫﻛ ﺭﻣﻷﺍ ﻥﻛﻳ ﻡﻟ ﺍﺫﺇﻭ ،ﻼﻌﺗﺷﻣ ﻝﺍﺯﺎﻣ ﺩﻗﻭﻣﻟﺍ ﻥﻭﻛ ﻥﻣ ﺩﻛﺄﺗ ﺔﺑﺳﻧﻟﺎﻟﺭﻳﻐﻟﺍ ﺩﻗﺍﻭﻣﻠ ﺓﺩﻭﺯﻣ
ﺓﺩﻣﻟ ﺭﻅﺗﻧﺍﻭ ،ﺓﺭﺍﺭﺷﻟﺍ ﺯﻣﺭ ﻪﻳﻠﻋ ﻥﻳﺑﻣﻟﺍ ﺡﺎﺗﻔﻣﻟﺍﻭ (ﺕﺎﺗﺳﻭﻣﺭﺛﻟﺍ) ﻱﺭﺍﺭﺣﻟﺍ ﻡّﻅﻧﻣﻟﺍ ﺽﺑﻘﻣ ﻰﻠﻋ ﻁﻐﺿﻟﺍ ﻲﻐﺑﻧﻳﻓ ﻝﺎﻌﺷﻹﺍ ﺽﺑﻘﻣﺑ10 ﻟ ﻥﺍﻭﺛﻡﺗﺗ ﻥﺃ ﻥﻳﺣ ﻝﺎﻌﺗﺷﻻﺍ ﺔﻳﻠﻣﻋ
ﺔﻳ
ﻟﺫﻛ ﺭﻣﻷﺍ ﻥﻛﻳ ﻡﻟ ﺍﺫﺇﻭ ،ﻼﻌﺗﺷﻣ ﻝﺍﺯﺎﻣ ﺩﻗﻭﻣﻟﺍ ﻥﻭﻛ ﻥﻣ ﺩﻛﺄﺗﻟﺍ ﻲﻐﺑﻧﻳ ﻥﻛﻟﻭ .ﺽﺑﻘﻣﻟﺍ ﻰﻠﻋ ﻁﻐﺿﻟﺍ ﻥﻋ ﻑﻗﻭﺗﻟﺍ ﻙﻧﻛﻣﻳ ﺍﺫﻫ ﺩﻧﻋﻭ ﻝﻣﺎﻛ ﻝﻛﺷﺑﻐﺑﻧﻳﻓ ﻙﻠﻣﻋ ﺓﺩﻭﺎﻌﻣ ﻲ
.ﻯﺭﺧﺃ ﺓﺭﻣ ﻝﺎﻌﺷﻹﺍ
ﻕﻭﻔﺗ ﺓﺩﻣﻟ ﻝﺎﻌﺷﻹﺍ ﺓﺯﻳﻬﺟﺗ ﻡﺍﺩﺧﺗﺳﺍ ﻡﺩﻋ ﻰﻟﺇ ﻩﺎﺑﺗﻧﻻﺍ ﺏﺟﻳﻭ15 ﺍ ﻝﻌﺗﺷﻳ ﻡﻟ ﺍﺫﺇﻭ .ﺔﻳﻧﺎﺛﻼﻓ ﺓﺭﺗﻔﻟﺍ ﻩﺫﻫ ﺭﻭﺭﻣ ﺩﻌﺑ ﺩﻗﻭﻣﻟ ﺢﺗﻓ ﻲﻐﺑﻧﻳﻭ ﺓﺯﻳﻬﺟﺗﻟﺍ ﻡﺩﺧﺗﺳﺗ ﺔﻓﺭﻐﻟﺍ ﺏﺎﺑ
ﺓﺩﻣﻟ ﺭﺎﻅﺗﻧﻻﺍ ﻭﺃ60 .ﺩﻳﺩﺟ ﻥﻣ ﻥﺭﻔﻟﺍ ﻝﺎﻌﺷﺇ ﺔﻟﻭﺎﺣﻣ ﻝﺑﻗ ﺔﻳﻧﺎﺛ
ﺭﻳﺫﺣﺗ: ﺩﻧﻋ ﺔﻟﻭﺎﺣﻣ ﻝﺎﻌﺷﺇ ﻥﺭﻔﻟﺍ ﺏﺟﻳ ﻥﺃ ﻝﻅﻳ ﺏﺎﺑﻟﺍ ﺎﻣﺋﺍﺩ ﺎﺣﻭﺗﻔﻣ. ﺩﻧﻋ ﻡﺍﺩﺧﺗﺳﺍ ،ﻥﺭﻔﻟﺍ ﻲﻐﺑﻧﻳ ﻙﺭﺗ ءﺎﻁﻐﻟﺍ ﺎﺣﻭﺗﻔﻣ ﺩﺎﻔﺗﻟﻱ ﺓﺭﺍﺭﺣﻟﺍ ﺔﻁﺭﻔﻣﻟﺍ.
ﻣ ﻥﻳﺑ ﺡﻭﺍﺭﺗﺗ ﺓﺩﻣﻟ ﻪﻠﻳﻐﺷﺗ ﺏﺟﻳ ﻰﻟﻭﻷﺍ ﺓﺭﻣﻠﻟ ﻥﺭﻔﻟﺍ ﻡﺍﺩﺧﺗﺳﺍ ﺩﻧﻋ :ﺔﻅﺣﻼ15 - 30 ءﺎﻫﺯ ﻎﻠﺑﺗ ﺓﺭﺍﺭﺣ ﺔﺟﺭﺩ ﺩﻧﻋ ﺔﻘﻳﻗﺩ250 ﻥﻭﺩﻭ ،ﺔﺟﺭﺩﻭ ،ﻪﻠﺧﺍﺩﺑ ﺔﻣﻌﻁﺃ ﻪﻳﺃ ﻊﺿ
.ﺔﻟﺯﺎﻌﻟﺍ ﺔﻳﻠﺧﺍﺩﻟﺍ ﺓﺩﺎﻣﻟﺍ ﻥﻋ ﺔﺟﺗﺎﻧ ﺢﺋﺍﻭﺭﻟﺍ ﻰﻠﻋ ءﺎﺿﻘﻟﺍﻭ ﺔﺑﻭﻁﺭﻟﺍ ﻥﻣ ﺹﻠﺧﺗﻠﻟ
ﻟﻭ ،ﻥﺭﻔﻟﺍ ءﺎﻣﺣﺇ ﺏﺟﻳ ،ﻱﺩﺎﻌﻟﺍ ﻡﺍﺩﺧﺗﺳﻻﺍ ءﺎﻧﺛﺃ ﺓﺩﻣﻟ ﺭﺎﻅﺗﻧﻻﺍ ﻲﻐﺑﻧﻳ ﺍﺫﻬ15 ﻝﺑﻗ ،ﺔﺑﻭﻠﻁﻣﻟﺍ ﺓﺭﺍﺭﺣﻟﺍ ﻁﺑﺿﻭ ﺩﻗﻭﻣﻟﺍ ﻝﺎﻌﺷﺇ ﺩﻌﺑ ﺔﻘﻳﻗﺩﻭ ﻥﺭﻔﻟﺍ ﺭﻓﻭﺗﻳ.ﻪﻠﺧﺍﺩﺑ ﺔﻣﻌﻁﻷﺍ ﻊﺿ
ﺍ ﻥﻣﻓ ،ﻥﺎﻛﻣﻹﺍ ﺭﺩﻗ ﺎﻔﻳﻅﻧ ﻥﺭﻔﻟﺍ ﻰﻠﻋ ﻅﺎﻔﺣﻠﻟ .ﻲﻧﺍﻭﺻﻟﺍ ﻭﺃ ﺕﺎﺟﺎﺻﻟﺍ ﺝﺍﺭﺩﻹ ﺔﺻﺻﺧﻣ ﺔﻔﻠﺗﺧﻣ ﺕﺎﻋﺎﻔﺗﺭﺍ ﻰﻠﻋ (.. ﻝﻛﺷﻟﺍ) ﻱﺭﺎﺟﻣ ﺔﺳﻣﺧ ﻰﻠﻋﻥﺳﺣﺗﺳﻣﻟ ﻡﻭﺣﻠﻟﺍ ﻲﻬﻁ
ﻭﺻﻟﺍ ﻝﺧﺍﺩ.ﻲﻧﺍﻭﺻﻟﺍ ﻕﻭﻓ ﺔﻋﻭﺿﻭﻣ ﺔﻳﻛﺑﺷ ﻥﺎﺑﺿﻗ ﻰﻠﻋ ﻭﺃ ﻲﻧﺍ
ﻳﺭﻁ ﻥﻋ ﻥﺭﻔﻟﺍ ﺓﺭﺍﺭﺣ ﺔﺟﺭﺩ ﻁﺑﺿ ﻱﺭﺟﻳﻭ .ﻲﻬﻁﻟﺍ ﺓﺭﺍﺭﺣ ﺔﺟﺭﺩ ﻁﺑﺿﻟ ﻥﺎﻣﺃ ﻩﺯﻳﻬﺟﺗﻭ (ﺕﺎﺗﺳﻭﻣﺭﺛ) ﻱﺭﺍﺭﺣ ﻡّﻅﻧﻣﺑ ﺓﺯﻬﺟﻣ ﺔﻳﺯﺎﻐﻟﺍ ﻥﺍﺭﻓﻷﺍ ﺔﻓﺎﻛﺭﻳﻭﺩﺗ ﻖ ﺽﺑﻘﻣﻟﺍ
ﺳﻟﺍ ءﺍﻭﻬﻟﺍ ﻥﺍﺭﻭﺩﻭ ﻊﻳﺯﻭﺗ ﻝﺿﻔﺑ ﻱﻭﺎﺳﺗﻣ ﻲﻬﻁ ﻥﻣﺿﻳ ،ﻡﻛﺣﺗﻟﺍ ﺔﺣﻭﻟ ﻰﻠﻋ ﺩﻭﺟﻭﻣﻟﺍ ﻝﻳﻐﺷﺗﻟﺍ ﺭﺯ ﻰﻠﻋ ﻁﻐﺿﻟﺍ ﻝﻼﺧ ﻥﻣ ﻥﺭﻔﻟﺍ ﺔﺣﻭﺭﻣ ﻝﻳﻐﺷﺗ ﺭﺑﻋﻛﺷﺑ ﻥﺧﺎ .ﻡﻅﺗﻧﻣ ﻝ
ﺭﻣﺣﻣ ﻡﺣﻟ ﻰﻠﻋ ﻝﻭﺻﺣﻠﻟ ﺥﺎﻳﺳﻷﺍ ﻝﺎﻣﻌﺗﺳﺍ ﻰﻟﺍ ﺍﻭﺟﺎﺗﺣﺗ ﻥﻟﻭ ﻲﻬﻁﻟﺍ ﺔﻳﻠﻣﻋ ءﺎﻧﺛﺍ ﻡﺣﻠﻟﺍ ﺏﻠﻗ ﻰﻟﺍ ﺍﻭﺟﺎﺗﺣﺗ ﻥﻠﻓ .ﻱﺩﻳﻠﻘﺗﻟﺍ ﺦﺑﻁﻟﺍ ﺹﺋﺎﺻﺧﻭﺑ ،ﻣ ﻝﻛ ﻝﻭﺟﺎﺗﺣﺗ ﻑﻭﺳ ﺎ ﻥ
ﻣ ﺍﺯﺗﻳﺑﻟﺎﻛ ،ﻝﻔﺳﻷﺍ ﻥﻣ ﺓﺭﺍﺭﺣ ﺏﻠﻁﺗﺗ ﻲﺗﻟﺍ ﺔﻣﻌﻁﻷﺍ ﻲﻬﻁﻟ (ﺔﺣﻭﺭﻣﻟﺍ ﻝﺎﻣﻌﺗﺳﺍ ﻥﻭﺩ ﻥﻣ ﻱﺃ) ،ﺔﻳﺩﻳﻠﻘﺗ ﺔﻘﻳﺭﻁﺑ ﻥﺭﻔﻟﺍ ﻡﺍﺩﺧﺗﺳﺍ ﺎﺿﻳﺃ ﻥﻛﻣﻳﻭ.ﻼﺛ
ﺔﻳﺍﻭﺷﻟﺍ ﺩﻗﻭﻣ + ﻥﺭﻔﻟﺍ ﺩﻗﻭﻣ
ﻲﺋﺎﻧﺛ ﻡﻛﺣﺗﺑ ﺯﻬﺟﻣﻟﺍ ﺯﺍﺭﻁﻟﺍ ﻥﻣ ﺯﺎﻐﻟﺍ ﻥﺭﻓ ﻡﺍﺩﺧﺗﺳﺍ
.ﻡﺍﺩﺧﺗﺳﻻﺎﺑ ﺔﻘﻠﻌﺗﻣﻟﺍ ﺕﺎﻣﻭﻠﻌﻣﻠﻟ ﺔﺻﺻﺧﻣﻟﺍ ﺕﺎﺣﻔﺻﻟﺍ ﻰﻠﻋ ﺓﺭﻅﻧ ﻲﻘﻟﺃ
ﺍﻭﺷﻭ ﻱﺯﺎﻐﻟﺍ ﻥﺭﻔﻟﺍ ﻥﻣ ﻝﻛﻟ ﺝﻭﺩﺯﻣﻟﺍ ﻡﺍﺩﺧﺗﺳﻻﺍ ﺢﻳﺗﻳ ﺩﻗﻭﻣﻟﺍ ﺯﺍﺭﻁ ﻥﺎﻛ ﺍﺫﺇﺎﻧﻛﻣﻣ ﻥﻭﻛﻳ ﺔﻳﻠﺧﺍﺩﻟﺍ ﻥﺭﻔﻟﺍ ﺓﺭﺍﺭﺣ ﺔﺟﺭﺩ ﻁﺑﺿ ﻥﺎﻓ ﺯﺎﻐﻟﺍ ﺔﻳ ﻟﺍ ﻖﻓﻭﺡﻭﻣﺳﻣﻟﺍ ﻕﺎﻁﻧ ﻲﻓ ﻪﺑ
ـﺑ ﻝﻘﺗ ﺓﺭﺍﺭﺣﻟﺍ ﺔﺟﺭﺩ ﻥﺈﻓ ﺔﺣﻭﺭﻣﻟﺎﺑ ﺩﻭﺯﻣﻟﺍ ﻱﺯﺎﻐﻟﺍ ﻥﺭﻔﻟﺍ ﻡﺍﺩﺧﺗﺳﺍ ﺩﻧﻋ10 ﻰﻟﺇ15 ﺷﺗ .ﻱﺩﻳﻠﻘﺗﻟﺍ ﻱﺯﺎﻐﻟﺍ ﻥﺭﻔﻟﺍ ﺓﺭﺍﺭﺣ ﺔﺟﺭﺩ ﻥﻋ ﺕﺎﺟﺭﺩ ﻥﻭﺩ ﻝﻭﺣﻳ ﺔﺣﻭﺭﻣﻟﺍ ﻝﻳﻐ
ﻁﻘﻓ ﻥﺭﻔﻟﺍ ﺩﻗﻭﻣ
:ﺯﺎﻐﻟﺍ ﻥﺭﻓ
ﺱﻛﺎﻌﻣﻟﺍ ﻩﺎﺟﺗﻻﺍ ﻲﻓﻟﺍ ﺔﻳﺍﻭﺷ ﻊﻣ ﺎﻳﻭﺳ ﻱﺯﺎﻐﻟﺍ ﻥﺭﻔﻟﺍ ﻡﺍﺩﺧﺗﺳﺍ ﻥﻛﻣﻳﻭ .ﺔﺑﻭﻠﻁﻣﻟﺍ ﺓﺭﺍﺭﺣﻟﺍ ﺔﺟﺭﺩ ﻰﻠﻋ ﻩﺭﺷﺅﻣ ﻁﺑﺿﻭ ﺔﻋﺎﺳﻟﺍ ﺏﺭﺎﻘﻋ ﻥﺍﺭﻭﺩﻟﺍ ﻭﺃ ﺯﺎﻐﺭﻬﻛﻟﺍ ﺔﻳﺍﻭﺷﻟ .ﺔﻳﺋﺎﺑ
ﻡﻗﺭ ﻝﻭﺩﺟﻟﺍ8.
:ﺔﺣﻭﺭﻣﺑ ﺩﻭﺯﻣ ﻱﺯﺎﻏ ﻥﺭﻓ
ﻥﻛﻣﻳﻭ ﺩﻭﺯﻣﻟﺍ ﻲﻬﻁﻟﺍ ﻡﺎﻅﻧ .ﻪﻠﺧﺍﺩﺑ ﺔﻳﻧﻳﺻﻟﺍ ﻊﺿﻭﺑ ﻡﺎﻳﻘﻟﺍ ﻝﺑﻗ ﺔﻧﺟﻌﻣﻟﺍ ﺕﺎﻳﻭﻠﺣﻟﺍ ﻲﻬﻁﻟ ﻥﺭﻔﻟﺍ ءﺎﻣﺣﺇ ﻥﺳﺣﺗﺳﻳ ﺎﻣﻧﻳﺑ .ﻥﺭﻔﻟﺍ ءﺎﻣﺣﺇ ﺏﻧﺟﺗ ﺔﺣﻭﺭﻣﺑ ﺎﻳﺋﺯﺟ ﺭﻳﻐﻳﻁ ﻕﺭ
.ﺭﻳﻏ ﻻ ﺔﻳﺍﻭﺷﻟﺍ ﻕﻭﻓ ﻡﺣﻠﻟﺍ ﻊﺿﻭ ﻭﻫ ﻪﻳﻟﺍ
ﻭﺭﻣﻟﺍ ﺕﻣﺍﺩ ﺎﻣ ﺎﻬﻣﺍﺩﺧﺗﺳﺍ ﻥﻛﻣﻳ ﻻ ﻲﺗﻟﺍﻭ ،ﺔﻳﺍﻭﺷﻟﺍ ﻡﺍﺩﺧﺗﺳﺍ.ﻝﻣﻌﻟﺍ ﺩﻳﻗ ﺔﺣ
ﺄﻁﺧﻟﺍ ﻲﻐﺑﻧﻳﻓ ﺭﻳﻭﺩﺗ ﺽﺑﻘﻣ ﻡﻛﺣﺗﻟﺍ ﻰﻠﻋ ﻊﺿﻭ ﻕﻼﻏﻹﺍ ﻻﻭ ﻝﻭﺎﺣﺗ ﺓﺩﺎﻋﺇ ﻌﺷﺇﻝﺎ ﺭﻔﻟﺍﻥ ﺓﺭﻣ ﻱﺭﺧﺃ ﻝﺑﻗ ﺭﻣﺭﻭ ﺔﻘﻳﻗﺩ
ﺭﻳﺫﺣﺗ: ﺍﺫﺇ ﺙﺩﺣ ﺕﺄﻔﻁﻧﺍﻭ ﺔﻠﻌﺷ ﺯﺎﻐﻟﺍ ﻰﻠﻋ ﻝﻳﺑﺳ
ﺓﺩﺣﺍﻭ ﻰﻠﻋ ﻝﻗﻷﺍ.
ﻡﻗﺭ ﻝﻭﺩﺟﻟ8
ﻥﺭﻔﻟﺍ ﺽﺑﻘﻣ ﻊﺿﻭ
:ﺔﻔﻠﺗﺧﻣ ﻕﺭﻁﺑ ﻥﺭﻔﻟﺍ ﺩﻗﺍﻭﻣ ﻝﺎﻌﺷﺇ ﻥﻛﻣﻳﻭ
ﺎﺣ ﻲﻓ ﻰﺗﺣﻭ ﺎﻣﺋﺍﺩ ﻪﻣﺍﺩﺧﺗﺳﺍ ﻥﻛﻣﻳ) :(ﻲﺋﺎﺑﺭﻬﻛﻟﺍ ﺭﺎﻳﺗﻟﺍ ﻉﺎﻁﻘﻧﺍ ﺔﻟ
49
8ﻰﺻﻗﻷﺍ ﺩﺣﻟﺍ= 120 °ﺱ 200 °ﺱ
1ﻰﻧﺩﻷﺍ ﺩﺣﻟﺍ= 200 °ﺱ 270 °ﺱ
- ﻱﻭﺩﻳﻟﺍ ﻝﺎﻌﺷﻹﺍ
Page 50

ﻲﻧﺍﻭﻷﺍ ﻥﻣ ﻖﻘﺣﺗﻟﺍ ﺯﺎﻬﺟ
ﻳﻋ ﻰﻠﻋ ﺎﻋﻭﺿﻭﻣﻭ ﺎﺑﺳﺎﻧﻣ ﻲﻬﻁﻟﺍ ءﺎﻧﺇ ﻥﻛﻳ ﻡﻟ ﺍﺫﺇ ﻲﻬﻁﻟﺍ ﺔﻳﻠﻣﻋ ﻕﻼﻁﻧﺍ ﻥﻭﺩ ﻝﻭﺣﻳﻭ ،ﻲﻬﻁﻟﺍ ءﺎﻧﺇ ﻥﻣ ﻖﻘﺣﺗﻠﻟ ﺯﺎﻬﺟ ﻰﻠﻋ ﻲﻬﻁ ﻥﻳﻋ ﻝﻛ ﺭﻓﻭﺗﺗﻲﻬﻁﻟﺍ ﻥ .ﺢﻳﺣﺻ ﻝﻛﺷﺑ
ﻡﺩﺧﺗﺳﻣﻟﺍ ﺭﻳﺫﺣﺗﻟ ﺓﺭﺎﺷﺇ ﺭﺩﺻﻳ ﻥﺭﻔﻟﺍ ﻥﺈﻓ
ﻟﺍ ﻭﺣﻧﻟﺍ ﻰﻠﻋ ءﺎﻧﻹﺍ ﻊﺿﻭ ﻥﻭﺩ ﻲﻬﻁﻟﺍ ﻥﻳﻋ ﻝﻳﻐﺷﺗ ﻝﻣﻌﺗﺳﻣﻟﺍ ﻝﻭﺎﺣ ﺍﺫﺇ ،ﺔﺑﺳﺎﻧﻣ ﺭﻳﻏ ﺩﺍﻭﻣ ﻥﻣ ﻉﻭﻧﺻﻣ ﻭﺃ ﺢﻳﺣﺻ
.ﺄﻁﺧﻟﺎﺑ
ﺔﻧﻣﺎﻛﻟﺍ ﺓﺭﺍﺭﺣﻟﺍ
ﺔﺿﻣﻭﻣ ﺔﻳﺋﻭﺿ ﺓﺭﺎﺷﺇ ﺭﻬﻅﺗ ﺩﻗ .ﺔﻧﻣﺎﻛﻟﺍ ﺓﺭﺍﺭﺣﻟﺍ ﻥﻣ ﺭﻳﺫﺣﺗﻠﻟ ﺯﺎﻬﺟ ﻰﻠﻋ ﻲﻬﻁ ﻥﻳﻋ ﻝﻛ ﺭﻓﻭﺗﺗ‘H ’ﺍ ﻥﻳﻋ ءﺎﻔﻁﺇ ﺩﻌﺑ ﺓﺭﻣ ﻝﻛ ﻲﻓ ﺔﺷﺎﺷﻟﺍ ﻰﻠﻋ ﻥﺃ ﻥﻣ ﺭﻳﺫﺣﺗﻠﻟ .ﻲﻬﻁﻟ
ﺔﻳﻧﻌﻣﻟﺍ ﻲﻬﻁﻟﺍ ﻥﻳﻋ ﺯﻣﺭﻟﺍ ﺽﻣﻭﻳ ﺎﻣﻧﻳﺑ ﻲﻬﻁﻟﺍ ﻑﺎﻧﺋﺗﺳﺍ ﻥﻛﻣﻳ .ﺔﻧﺧﺎﺳ ﺩﺟ ﺕﻟﺍﺯﻻ‘H’ ﺔﻁﻘﻧ ﻲﻓ ﺢﺿﻭﻣ ﻭﻫ ﺎﻣﻛ ﻑﻧﺄﺗﺳﺍ ؛“3.”
ﻥﺭﻔﻟﺍ ﻝﻔﻗ
.ﺄﻁﺧﻟﺍ ﻖﻳﺭﻁ ﻥﻋ ﻝﺎﻔﻁﻷﺍ ﻝﺑﻗ ﻥﻣ ﻪﻠﻳﻐﺷﺗ ﻱﺩﺎﻔﺗﻟ ﻝﺎﻣﻌﺗﺳﻻﺍ ﻡﺩﻋ ﺩﻧﻋ ﻥﺭﻔﻟﺍ ﻝﻔﻗ ﻥﻛﻣﻳ
ﻥﻳﻧﻳﻌﻟﺍ ﺽﺑﺎﻘﻣ ﺭﻳﻭﺩﺗﺑ ﻡﻗ ،ﻲﻬﻁﻟﺍ ﻥﻭﻳﻋ ﻝﻳﻐﺷﺗ ﻑﻗﻭﺗ ءﺎﻧﺛﺃ2 ﻭ4 ﻭ ﺕﻗﻭ ﻲﻓ ﺭﺎﺳﻳﻟﺍ ﻰﻟﺇ ﻑﺭﺣﻟﺍ ﺭﻭﻬﻅ ﻥﻳﺣ ﻰﻟﺇ ﺩﺣﺍLs ﺣ ﻡﺛ ،ﺔﺷﺎﺷﻟﺍ ﻰﻠﻋ.ﺽﺑﺎﻘﻣﻟﺍ ﺭﺭ
ﺯﻣﺭﻟﺍ ﻲﻬﻁﻟﺍ ﻥﻭﻳﻋ ﻊﻳﻣﺟ ﺽﺭﻌﺗﺳ :ﺔﻳﻠﻣﻌﻟﺍ ﺱﻔﻧ ﺭﺍﺭﻛﺗ ﺩﻋﺃ ،ﺔﻔﻳﻅﻭﻟﺍ ﻝﻳﻁﻌﺗﻟ0.ﺯﺎﻬﺟﻟﺍ ﻝﻔﻗ ﺔﻔﻳﻅﻭ ﻝﻳﻁﻌﺗ ﻰﻟﺇ ﺓﺭﺎﺷﻺﻟ ،
ﻼﺑﻟﺍ) ﻥﺎﺑﻭﺫﻠﻟ ﺔﻠﺑﺎﻗ ﺩﺍﻭﻣ ﻊﺿﻭ ﻯﺩﺎﻔﺗﻭ ،ﻲﻬﻁﻟﺍ ءﺎﻧﺛﺃ ﻥﺭﻔﻟﺍ ﻰﻠﻋ ﻭﻠﺣ ﺞﻳﺯﻣ ﻱﺃ ﻭﺃ ﺭﻛﺳﻟﺍ ﻁﻭﻘﺳ ﺏﻧﺟﺗ :ﻪﻳﺑﻧﺗﻭﻳﻧﻭﻣﻟﻷﺍ ﻖﺋﺎﻗﺭ ﻭﺃ ﻙﻳﺗﺳﻪﻗﻭﻓ (ﻡﻭ ﺔﻟﺎﺣ ﻲﻓﻭ . ،ﻙﻟﺫ ﻉﻭﻗ
ﻑﻳﻅﻧﺗ ﻡﺗﻳ ﻡﻟ ﺍﺫﺇ .ﺯﺎﻬﺟﻟﺍ ﻊﻣ ﺔﻘﻓﺭﻣﻟﺍ ﺔﻁﺷﻛﻣﻟﺎﺑ ﻥﺧﺎﺳ ﻭﻫﻭ ﺢﻁﺳﻟﺍ ﻑﻳﻅﻧﺗﻭ ،ﺭﻭﻔﻟﺍ ﻰﻠﻋ ﻥﺭﻔﻟﺍ ﻑﺎﻘﻳﺇ ﺏﺟﻳ ،ﻥﺭﻔﻟﺍ ﺢﻁﺳﺑ ﺭﺍﺭﺿﻹﺍ ﺏﻧﺟﺗﻟﻭ ﻟﺍ ﻥﺭﻓ ﻰﻠﻋ ﻙﻳﻣﺍﺭﻳﺳ
ﺩﺭﺑﻳ ﻥﺃ ﺩﻌﺑ ﺢﻁﺳﻟﺍ ﻰﻠﻋ ﺔﻣﻛﺍﺭﺗﻣﻟﺍ ﺎﻳﺎﻘﺑﻟﺍ ﺔﻟﺍﺯﺇ ﻥﻛﻣﻳ ﻻ ﻪﻧﺈﻓ ،ﺭﻭﻔﻟﺍ .ﻥﺭﻔﻟﺍ
!ﻡﺎﻫ
ﺍ ﺩﻌﺑ ﺕﻗﻭﻟﺍ ﺽﻌﺑﻟ ﺔﻧﺧﺎﺳ ﻲﻬﻁﻟﺍ ﻥﻭﻳﻋ ﻰﻘﺑﺗ .ﺔﻧﻣﺎﻛﻟﺍ ﺓﺭﺍﺭﺣﻟﺍ ﺭﻳﺫﺣﺗ ءﺍﻭﺿﺃ ﺔﻳﺅﺭ ﻰﻠﻋ ﻥﻳﺭﺩﺎﻗ ﺭﻳﻏ ﻡﻬﻧﻷ ،ﺏﺛﻛ ﻥﻋ ﻝﺎﻔﻁﻷﺍ ﺔﺑﻗﺍﺭﻣ ﺏﺟﻳﻬﻣﺍﺩﺧﺗﺳﻡﻗﺭﻟﺍ ﻰﻠﻋ ،ﺎ ﻥﻣ
.ﺎﻬﺳﻣﻟ ﻭﺃ ﻥﻭﻳﻌﻠﻟ ﻝﺎﻔﻁﻷﺍ ﺏﺍﺭﺗﻗﺍ ﻡﺩﻋ ﻥﻣ ﻖﻘﺣﺗ .ﺎﻬﻠﻳﻐﺷﺗ ﻑﻗﻭﺗ
ﻭﺃ ﻡﻭﻳﻧﻭﻣﻟﻷﺍ ﻖﺋﺎﻗﺭ ﺍﺩﺑﺃ ﻡﺩﺧﺗﺳﺗ ﻻ :ﺭﻳﺫﺣﺗ.ﻲﻛﻳﻣﺍﺭﻳﺳﻟﺍ ﻲﻬﻁﻟﺍ ﺢﻁﺳ ﻰﻠﻋ ﺔﻣﻌﻁﻷﺍ ﻲﻬﻁﻟ ﻙﻳﺗﺳﻼﺑﻟﺍ ﻥﻣ ﺕﺎﻳﻭﺎﺣ ﻭﺃ ﻲﻧﺍﻭﺃ
ﺳﻟﺍ ﻲﻬﻁﻟﺍ ﺢﻁﺳ ﻰﻠﻋ ﺔﻧﻣﺎﻛﻟﺍ ﺓﺭﺍﺭﺣﻟﺍ ﻥﻣ ﺭﻳﺫﺣﺗﻠﻟ ﺔﻟﺎﻐﺷ ﺔﻳﺋﻭﺿﻟﺍ ﺓﺭﺎﺷﻹﺍ ﺓﺭﺎﻧﺇ ﺎﻣﻟﺎﻁ ﻲﻬﻁﻟﺍ ﺔﻘﻁﻧﻣ ﺱﻣﻟ ﺏﺟﻳ ﻻ :ﺭﻳﺫﺣﺗﻲﻛﻳﻣﺍﺭﻳﺧﻷﺍ ﻩﺫﻬﻓ . ﻥﺃ ﻰﻟﺇ ﺭﻳﺷﺗ ﺓﺭﻳ
ﻣ ﺩﺟ ﻝﺍﺯﺗ ﻻ ﺔﻳﻧﻌﻣﻟﺍ ﺔﻘﻁﻧﻣﻟﺍ ﻲﻓ ﺓﺭﺍﺭﺣﻟﺍ ﺔﺟﺭﺩ .ﺔﻌﻔﺗﺭ
.ﻥﺭﻔﻟﺍ ﻰﻠﻋ ءﺎﺳﻠﻣ ﺭﻳﻏ ﻭﺃ ﺎﻣﺎﻣﺗ ﺔﺣﻁﺳﻣ ﺭﻳﻏ ﻲﻬﻁ ﻲﻧﺍﻭﺃ ﺍﺩﺑ ﻝﻣﻌﺗﺳﺗ ﻻ :ﺭﻳﺫﺣﺗ
.ﺔﻣﺩﺧﻟﺍ ﺯﻛﺭﻣﺑ ﻝﺻﺗﺍﻭ ﻲﺋﺎﺑﺭﻬﻛﻟﺍ ﺭﺎﻳﺗﻟﺍ ﻥﻋ ﺭﻭﻔﻟﺍ ﻰﻠﻋ ﻪﻠﺻﻓﺍ ،ﻥﺭﻔﻟﺍ ﻲﻓ ﺥﺭﺷ ﺩﻭﺟﻭ ﺕﻅﺣﻻ ﺍﺫﺇ :ﺭﻳﺫﺣﺗ
.ﺓﺩﻭﺭﺑﻟﺍﻭ ﺓﺭﺍﺭﺣﻟﺍ ﻥﻣ ﻝﻛﻟﻭ ﺔﻳﺭﺍﺭﺣﻟﺍ ﺕﺎﻣﺩﺻﻠﻟ ﻡﻭﺎﻘﻣ ﻥﺭﻔﻠﻟ ﻲﻛﻳﻣﺍﺭﻳﺳﻟﺍ ﺝﺎﺟﺯﻟﺍ :ﺭﻳﺫﺣﺗ
ﺎﻣﻛ.ﻲﻬﻁﻟﺍ ﺢﻁﺳ ﻰﻠﻋ ﻝﻳﻘﺛ ءﺎﻧﺇ ﻁﻭﻘﺳ ﺩﻧﻋ ﺭﺳﻛﻧﻳ ﻥﻟ ﻪﻧﺃ
ﺑﺳﺗﺗ ﺩﻗ ،ﻩﺎﻳﺍﻭﺯ ﻯﺩﺣﺇ ﻭﺃ ﻥﺭﻔﻟﺍ ﻑﺍﻭﺣ ﻯﺩﺣﺈﺑ ﻝﺑﺍﻭﺗﻟﺍ ﺔﺟﺎﺟﺯ ﻭﺃ ﺢﻠﻣﻟﺍ ﺔﺷﺎﺷﺭﻛ ﻝﻳﻘﺛ ﻡﺳﺟ ﻡﺎﻁﺗﺭﺍ ﻥﺈﻓ ،ﻙﻟﺫ ﻥﻣ ﺱﻛﻌﻟﺍ ﻰﻠﻋﻭﻧﺍ ﻲﻓ ﺏ .ﻩﺭﺎﺳﻛ
.ﺔﻣﺎﻋﺩﻛ ﻲﻛﻳﻣﺍﺭﻳﺳﻟﺍ ﻥﺭﻔﻟﺍ ﺢﻁﺳ ﻝﺎﻣﻌﺗﺳﺍ ﻲﻐﺑﻧﻳ ﻻ :ﺭﻳﺫﺣﺗ
(ﻱﺩﺎﺣﺃ ﻡﻛﺣﺗ) ﺯﺎﻐﻟﺍ ﻥﺭﻓ ﻡﺍﺩﺧﺗﺳﺍ
ﻥﺭﻓ ﺯﺎﻐﻟﺍ:
ﻳﺭﻁ ﻥﻋ ﻥﺭﻔﻟﺍ ﺓﺭﺍﺭﺣ ﺔﺟﺭﺩ ﻁﺑﺿ ﻱﺭﺟﻳﻭ .ﻲﻬﻁﻟﺍ ﺓﺭﺍﺭﺣ ﺔﺟﺭﺩ ﻁﺑﺿﻟ ﻥﺎﻣﺃ ﻩﺯﻳﻬﺟﺗﻭ (ﺕﺎﺗﺳﻭﻣﺭﺛ) ﻱﺭﺍﺭﺣ ﻡّﻅﻧﻣﺑ ﺓﺯﻬﺟﻣ ﺔﻳﺯﺎﻐﻟﺍ ﻥﺍﺭﻓﻷﺍ ﺔﻓﺎﻛﺭﻳﻭﺩﺗ ﻖ ﺽﺑﻘﻣﻟﺍ
ﻣ ﺎﻳﻭﺳ ﻱﺯﺎﻐﻟﺍ ﻥﺭﻔﻟﺍ ﻡﺍﺩﺧﺗﺳﺍ ﻥﻛﻣﻳﻭ .ﺔﺑﻭﻠﻁﻣﻟﺍ ﺓﺭﺍﺭﺣﻟﺍ ﺔﺟﺭﺩ ﻰﻠﻋ ﻩﺭﺷﺅﻣ ﻁﺑﺿﻭ ﺔﻋﺎﺳﻟﺍ ﺏﺭﺎﻘﻋ ﻥﺍﺭﻭﺩﻟ ﺱﻛﺎﻌﻣﻟﺍ ﻩﺎﺟﺗﻻﺍ ﻲﻓﻐﻟﺍ ﺔﻳﺍﻭﺷ ﻊ ﻭﺃ ﺯﺎﺍﺭﻬﻛﻟﺍ ﺔﻳﺍﻭﺷﻟ .ﺔﻳﺋﺎﺑ
.ﻡﺍﺩﺧﺗﺳﻻﺎﺑ ﺔﻘﻠﻌﺗﻣﻟﺍ ﺕﺎﻣﻭﻠﻌﻣﻠﻟ ﺔﺻﺻﺧﻣﻟﺍ ﺕﺎﺣﻔﺻﻟﺍ ﻰﻠﻋ ﺓﺭﻅﻧ ﻲﻘﻟﺃ
ﻥﺭﻓ ﻱﺯﺎﻏ ﺩﻭﺯﻣ ﺔﺣﻭﺭﻣﺑ:
ﺳﻟﺍ ءﺍﻭﻬﻟﺍ ﻥﺍﺭﻭﺩﻭ ﻊﻳﺯﻭﺗ ﻝﺿﻔﺑ ﻱﻭﺎﺳﺗﻣ ﻲﻬﻁ ﻥﻣﺿﻳ ،ﻡﻛﺣﺗﻟﺍ ﺔﺣﻭﻟ ﻰﻠﻋ ﺩﻭﺟﻭﻣﻟﺍ ﻝﻳﻐﺷﺗﻟﺍ ﺭﺯ ﻰﻠﻋ ﻁﻐﺿﻟﺍ ﻝﻼﺧ ﻥﻣ ﻥﺭﻔﻟﺍ ﺔﺣﻭﺭﻣ ﻝﻳﻐﺷﺗ ﺭﺑﻋﻛﺷﺑ ﻥﺧﺎ .ﻡﻅﺗﻧﻣ ﻝ
ﺩﻭﺯﻣﻟﺍ ﻲﻬﻁﻟﺍ ﻡﺎﻅﻧ .ﻪﻠﺧﺍﺩﺑ ﺔﻳﻧﻳﺻﻟﺍ ﻊﺿﻭﺑ ﻡﺎﻳﻘﻟﺍ ﻝﺑﻗ ﺔﻧﺟﻌﻣﻟﺍ ﺕﺎﻳﻭﻠﺣﻟﺍ ﻲﻬﻁﻟ ﻥﺭﻔﻟﺍ ءﺎﻣﺣﺇ ﻥﺳﺣﺗﺳﻳ ﺎﻣﻧﻳﺑ .ﻥﺭﻔﻟﺍ ءﺎﻣﺣﺇ ﺏﻧﺟﺗ ﻥﻛﻣﻳﻭ ﺔﺣﻭﺭﻣﺑ ﺎﻳﺋﺯﺟ ﺭﻳﻐﻳﻁ ﻕﺭ
ﻡﺣﻟ ﻰﻠﻋ ﻝﻭﺻﺣﻠﻟ ﺥﺎﻳﺳﻷﺍ ﻝﺎﻣﻌﺗﺳﺍ ﻰﻟﺍ ﺍﻭﺟﺎﺗﺣﺗ ﻥﻟﻭ ﻲﻬﻁﻟﺍ ﺔﻳﻠﻣﻋ ءﺎﻧﺛﺃ ﻡﺣﻠﻟﺍ ﺏﻠﻗ ﻰﻟﺍ ﺍﻭﺟﺎﺗﺣﺗ ﻥﻠﻓ .ﻱﺩﻳﻠﻘﺗﻟﺍ ﺦﺑﻁﻟﺍ ﺹﺋﺎﺻﺧﻭ ﺑ ،ﺭﻣﺣﻣﻣ ﻝﻛ ﻝﻭﺟﺎﺗﺣﺗ ﻑﻭﺳ ﺎ ﻥ
.ﺭﻳﻏ ﻻ ﺔﻳﺍﻭﺷﻟﺍ ﻕﻭﻓ ﻡﺣﻠﻟﺍ ﻊﺿﻭ ﻭﻫ ﻪﻳﻟﺇ
ـﺑ ﻝﻘﺗ ﺓﺭﺍﺭﺣﻟﺍ ﺔﺟﺭﺩ ﻥﺈﻓ ﺔﺣﻭﺭﻣﻟﺎﺑ ﺩﻭﺯﻣﻟﺍ ﻱﺯﺎﻐﻟﺍ ﻥﺭﻔﻟﺍ ﻡﺍﺩﺧﺗﺳﺍ ﺩﻧﻋ10 ﻰﻟﺍ15 ﺷﺗ .ﻱﺩﻳﻠﻘﺗﻟﺍ ﻱﺯﺎﻐﻟﺍ ﻥﺭﻔﻟﺍ ﺓﺭﺍﺭﺣ ﺔﺟﺭﺩ ﻥﻋ ﺕﺎﺟﺭﺩ ﻥﻭﺩ ﻝﻭﺣﻳ ﺔﺣﻭﺭﻣﻟﺍ ﻝﻳﻐ
ﺕﻣﺍﺩ ﺎﻣ ﺎﻬﻣﺍﺩﺧﺗﺳﺍ ﻥﻛﻣﻳ ﻻ ﻲﺗﻟﺍﻭ ،ﺔﻳﺍﻭﺷﻟﺍ ﻡﺍﺩﺧﺗﺳﺍ.ﻝﻣﻌﻟﺍ ﺩﻳﻗ ﺔﺣﻭﺭﻣﻟﺍ
ﻣ ﺍﺯﺗﻳﺑﻟﺎﻛ ،ﻝﻔﺳﻷﺍ ﻥﻣ ﺓﺭﺍﺭﺣ ﺏﻠﻁﺗﺗ ﻲﺗﻟﺍ ﺔﻣﻌﻁﻷﺍ ﻲﻬﻁﻟ (ﺔﺣﻭﺭﻣﻟﺍ ﻝﺎﻣﻌﺗﺳﺍ ﻥﻭﺩ ﻥﻣ ﻱﺍ) ،ﺔﻳﺩﻳﻠﻘﺗ ﺔﻘﻳﺭﻁﺑ ﻥﺭﻔﻟﺍ ﻡﺍﺩﺧﺗﺳﺍ ﺎﺿﻳﺃ ﻥﻛﻣﻳﻭ.ﻼﺛ
ﺭﻳﺫﺣﺗ:
ﺍﺫﺇ ﺙﺩﺣ ﺕﺄﻔﻁﻧﺍﻭ ﺔﻠﻌﺷ ﺯﺎﻐﻟﺍ ﻰﻠﻋ ﻝﻳﺑﺳ ﺄﻁﺧﻟﺍ ﻲﻐﺑﻧﻳﻓ ﺭﻳﻭﺩﺗ ﺽﺑﻘﻣ ﻡﻛﺣﺗﻟﺍ ﻰﻠﻋ ﻊﺿﻭ ﻕﻼﻏﻻﺍ ﻻﻭ ﻝﻭﺎﺣﺗ ﺓﺩﺎﻋﺍ ﻌﺷﺍﻝﺎ ﻥﺭﻔﻟﺍ ﺓﺭﻣ ﻱﺭﺧﺃ ﻝﺑﻗ ﺭﻣﺭﻭ ﺔﻘﻳﻗﺩ
ﺓﺩﺣﺍﻭ ﻰﻠﻋ ﻝﻗﻷﺍ.
50
Page 51

ﺓﺩﻣ ﻝﻳﺩﻌﺗ ﻪﻧﻋ ﺞﺗﻧﻳﺳﻭ .ﻥﻳﺧﺳﺗﻟﺍ ﻝ
ﺟَﻌُﻣ ﻝﻳﻐﺷﺗ ءﺎﻧﺛﺃ ﺔﻅﺣﻟ ﺔﻳﺃ ﻲﻓ ﻥﻳﺧﺳﺗﻟﺍ ﻯﻭﺗﺳﻣ ﺓﺩﺎﻳﺯ ﻥﻛﻣﻳ“ﺔﻠﻣﺎﻛﻟﺍ ﺓﺭﺩﻘﻟﺍ ” ﺍﺫﺇ .ﻙﻟﺫﻟ ﺎﻘﻓﻭﺗﺍ ﺽﻳﻔﺧﺗ ﻡﻼﺧ ﻥﻣ ﺓﺭﺩﻘﻟ ﺭﻳﻭﺩﺗ ﻝ
ّ
ِ
ﺭﺎﻳﺧﻟﺍ ﻑﺎﻘﻳﺇ ﻡﺗﻳﺳﻓ ،ﺔﻋﺎﺳﻟﺍ ﺏﺭﺎﻘﻋ ﻩﺎﺟﺗﺍ ﺱﻛﻋ ﺽﺑﻘﻣﻟﺍ“A ”ﺗ.ﺎﻳﺋﺎﻘﻠ
ﺔﻗﺎﻁﻟﺍ ﺔﻔﻳﻅﻭ
ﻰﻠﻋ ﺩﻳﺯﺗ ﻻ ﺓﺭﺗﻔﻟ ﺔﻗﺎﻁﻟﺍ ﻥﻣ ﻰﺻﻗﻷﺍ ﺩﺣﻟﺍ ﻰﻠﻋ ﺭﻣﺗﺳﻣ ﻝﻛﺷﺑ ﺔﻧﺧﺎﺳ ﺔﻘﻁﻧﻣ ﻝﻛ ﻝﻳﻐﺷﺗ ﻡﺩﺧﺗﺳﻣﻠﻟ ﺔﻗﺎﻁﻟﺍ ﺔﻔﻳﻅﻭ ﺢﻳﺗﺗ10 ﺳﺍ ﻥﻛﻣﻳ .ﺔﻘﻳﻗﺩ ﻰﻠﻋ ،ﺔﻔﻳﻅﻭﻟﺍ ﻩﺫﻫ ﻡﺍﺩﺧﺗ
.ﻡﻭﺣﻠﻟﺍ ﺓﺭﺍﺭﺣ ﻊﻓﺭﻟ ﻭﺃ ،ﺔﻋﺭﺳﺑ ءﺎﻣﻟﺍ ﻥﻣ ﺓﺭﻳﺑﻛ ﺔﻳﻣﻛ ﻥﺎﻳﻠﻐﻟ ،ﻝﺎﺛﻣﻟﺍ ﻝﻳﺑﺳ
ﺟﺗﺍ ﻲﻓ ﺽﺑﻘﻣﻟﺍ ﺭﻳﻭﺩﺗﺑ ﻡﻗ ﻥﻳﺧﺳﺗﻟﺍ ﻯﻭﺗﺳﻣ ﺭﺎﻳﺗﺧﺍﻭ ﺔﻋﺎﺳﻟﺍ ﺏﺭﺎﻘﻋ ﻩﺎ9 ﻊﺿﻭﻣ ﻥﻳﻳﻌﺗﻟ ﺽﺑﻘﻣﻟﺍ ﻡﺩﺧﺗﺳﺍ ﻡﺛ ،“B ” ﺽﺭﻌﺗﺳ ﺎﻫﺩﻧﻋ .ﻩﺭﻳﺭﺣﺗ ﻡﺛﺍ ﻑﺭﺣﻟﺍ ﺔﺷﺎﺷﻟ“P ”
.ﺔﻓﺩﺍﺭﻣﻟﺍ ﺔﻘﻁﻧﻣﻠﻟ
ﺭﻭﺭﻣ ﺩﻌﺑ10 ﻊﺿﻭﻟﺍ ﻰﻟﺇ ﺽﺑﻘﻣﻟﺍ ﺩﻭﻌﻳﻭ ﺎﻳﺋﺎﻘﻠﺗ ﺔﻗﺎﻁﻟﺍ ﺽﻔﺧﻧﺗ ،ﻖﺋﺎﻗﺩ9 ﻑﺭﺣﻟﺍ ﻲﻔﺗﺧﻳﻭ“P.”
ﺭﻁ ﻥﻋ ﺔﻅﺣﻟ ﻱﺃ ﻲﻓ ﺔﻗﺎﻁﻟﺍ ﺔﻔﻳﻅﻭ ﻑﻳﻗﻭﺗ ﻥﻛﻣﻳﻭ.ﻥﻳﺧﺳﺗﻟﺍ ﻯﻭﺗﺳﻣ ﺽﻔﺧ ﻖﻳ
ﻟﺍ ﺔﻗﺎﻁﻟﺍ ﺽﻳﻔﺧﺗ ﻡﺗﻳ ﻪﻧﺈﻓ ،(ﻝﺎﺛﻣﻟﺍ ﻝﻳﺑﺳ ﻰﻠﻋ ﺭﺎﺳﻳﻟﺍ ﻰﻠﻋ ﺔﻳﻣﺎﻣﻷﺍ ﺔﻘﻁﻧﻣﻟﺍ) ﻥﻳﺧﺳﺗﻟﺍ ﻖﻁﺎﻧﻣ ﻯﺩﺣﻹ ﺔﻗﺎﻁﻟﺍ ﺔﻔﻳﻅﻭ ﻥﻳﻳﻌﺗ ﻡﺗﻳ ﺎﻣﺩﻧﻋﻣ ﺔﺻﺗﻣﻣﻷﺍ ﻖﻁﺎﻧﻣﻟﺍ ﻥ ﻯﺭﺧ
.ﻰﻟﻭﻷﺍ ﺔﻘﻁﻧﻣﻠﻟ ﺔﺣﺎﺗﻣﻟﺍ ﻯﻭﺻﻘﻟﺍ ﺔﻗﺎﻁﻟﺍ ﺭﻳﻓﻭﺗﻟ (ﺭﺎﺳﻳﻟﺍ ﻰﻠﻋ ﺔﻳﻔﻠﺧﻟﺍ ﺔﻘﻁﻧﻣﻟﺍ)
ﺟَﻌُﻣ ﻰﻠﻋ ﺔﻳﻭﻟﻭﻷﺍ ﺎﻬﻟ ﺔﻗﺎﻁﻟﺍ ﺔﻔﻳ
ّ
ِ
ﻅﻭ ﻥﺈﻓ ﻲﻟﺎﺗﻟﺎﺑﻭ.ﻥﻳﺧﺳﺗﻟﺍ ﻝ
.ﺓﺭﻳﺧﻷﺍ ﻩﺫﻫ ﻑﺎﻘﻳﺇ ﻡﺗﻳ ﻪﻧﺈﻓ ،ﺔﻗﺎﻁﻟﺍ ﺔﻔﻳﻅﻭ ﻝﻳﻐﺷﺗ ءﺎﻧﺛﺃ ﻲﻬﻁﻟﺍ ﺔﻘﻁﻧﻣ ﻥﻣ ءﺎﻧﻹﺍ ﺔﻟﺍﺯﺇ ﺩﻧﻋ
ﺩﻗﻭﻣﻟﺍ ﺢﻁﺳ
.ﺔﻧﺧﺎﺳ ﺢﺑﺻﺗ ﺩﻗ ﺎﻬﻧﻷ ﻥﺭﻔﻟﺍ ﺢﻁﺳ ﻰﻠﻋ ﻲﻧﺍﻭﻷﺍ ﺔﻳﻁﻏﺃ ﻭﺃ ﻥﻳﻛﺎﻛﺳﻟﺍ ﻝﺛﻣ
ﺔﻳﻧﺩﻌﻣ ﺩﺍﻭﻣ ﻊﺿﻭ ﺍﺩﺑﺃ ﺏﺟﻳ ﻻ :ﻪﻳﺑﻧﺗ
ﺍ) ﻲﻬﻁﻟﺍ ﻥﻭﻳﻋ ﻝﻛﺷﻟ26(
ﺱﻣﺧ ﻰﻠﻋ ﺯﺎﻬﺟﻟﺍ ﺭﻓﻭﺗﻳ5 ﻲﻓ ﻁﻘﻓ ﺓﺭﻭﺻﺣﻣ ﻲﻬﻓ ﺓﺭﺍﺭﺣﻟﺍ ﺎﻣﺃ ،ﺭﺋﺍﻭﺩ ﺔﻁﺳﺍﻭﺑ ﺡﻭﺿﻭﺑ ﻪﻳﻟﺇ ﺭﺎﺷﻣ ﺎﻬﻌﺿﻭﻭ .ﺓﺭﺩﻘﻟﺍﻭ ﺭﻁﻘﻟﺍ ﺔﻔﻠﺗﺧﻣ ﻲﻬﻁ ﻥﻭﻳﻋ ﻣﻟﺍ ﺔﻘﻁﻧﻣﻟﺍ ﺔﺣﺿﻭ
ﺔﺳﻣﺧﻟﺍ ﻥﻭﻳﻌﻟﺍ .ﻙﻳﻣﺍﺭﻳﺳﻟﺍ ﻥﺭﻓ ﻰﻠﻋ5 ﺗﺳﻣ ﻝﻳﺩﻌﺗ ﻥﻛﻣﻳ .ﺎﻬﻠﻳﻐﺷﺗ ﺩﻌﺑ ﻲﻧﺍﻭﺛ ﻊﺿﺑ ﻥﻳﺧﺳﺗﻟﺍ ﺔﻳﻠﻣﻋ ﻖﻠﻁﻧﺗﻭ ءﺎﺿُﻣﻟﺍ ﻉﻭﻧﻟﺍ ﻥﻣ ﺓﺭﺍﺭﺣﻟﺍ ﻯﻭﻟ ﺩﺣﻟﺍ ﻥﻣ ﻥﻳﻋ ﻝﻛﺍ ﻰﻧﺩﻷ
.ﺔﻳﻣﺎﻣﻷﺍ ﺔﺣﻭﻠﻟﺍ ﻰﻠﻋ ﺽﺑﺎﻘﻣﻟﺍ ﺔﻁﺳﺍﻭﺑ ﻰﺻﻗﻷﺍ ﺩﺣﻟﺍ ﻰﻟﺇ
ءﺎﻧﺇ ﻊﺿﻭ ﻡﺗﻳ ﺎﻣﺩﻧﻋﻭ .ًﺍﺭﻳﻐﺗﻣ ﺎﻳﺳﻳﻁﺎﻧﻐﻣ ﻻﺎﺟﻣ ﺩﻟﻭﻳ ،ﻲﻧﻭﺭﺗﻛﻟﺇ ﻡﺎﻅﻧ ﺔﻗﺎﻁﻟﺎﺑ ﺎﻫﺩﻣﻳ ،ﻲﺋﺎﺑﺭﻬﻛ ﺽﻳﺭﺣﺗ ﻑﺋﺎﻔﻟ ﺩﺟﻭﺗ ﻲﻬﻁ ﻥﻳﻋ ﻝﻛ ﺕﺣﺗﺩﺍﺫﻫ ﻝﺧﺍ ﻝﺎﺟﻣﻟﺍ
ﺭﺗﻟﺍ ﻲﻟﺎﻌﻟﺍ ﺭﺎﻳﺗﻟﺍ ﻥﺈﻓ ،ﻲﺳﻳﻁﺎﻧﻐﻣﻟﺍ.ﺔﻣﻌﻁﻷﺍ ﻲﻬﻁﻟ ﺔﻣﺯﻼﻟﺍ ﺓﺭﺍﺭﺣﻟﺍ ﺩﻳﻟﻭﺗ ﻰﻠﻋ ﻝﻣﻌﻳﻭ ءﺎﻧﻹﺍ ﻉﺎﻗ ﻰﻠﻋ ﺓﺭﺷﺎﺑﻣ ﺯﻛﺭﺗﻳ ﺩﺩ
ﺔﺳﻣﺧﻟﺍ ﻥﻭﻳﻌﻟﺎﺑ ﺔﻁﻳﺣﻣﻟﺍ ﺭﺋﺍﻭﺩﻟﺍ ءﻲﺿﺗ5 ﺭﺛﻛﺃ ﻭﺃ ﺎﻫﺍﺩﺣﺇ ﺓﺭﺍﺭﺣ ﺯﻭﺎﺟﺗ ﺩﻧﻋ60 ﻟﺇ ﺓﺭﺍﺭﺣﻟﺍ ﺽﺎﻔﺧﻧﺍ ﺩﻧﻋ ﺓءﺎﺿﻹﺍ ﻲﻔﺗﺧﺗﻭ .ﺔﻳﻭﺋﻣ ﺔﺟﺭﺩ ﻥﻭﺩ ﺎﻣ ﻰ60 ﺔﺟﺭﺩ
.ﺔﻳﻭﺋﻣ
:ﺔﻗﺎﻁﻟﺍ ﺔﻔﻳﻅﻭ ﻊﻣ
ﺔﻗﺎﻁﻟﺍ ﺹﺎﺻﺗﻣﺍ
ﺎﻋ ﻝﻳﻐﺷﺗ:ﻱﺩ
:ﻥﻳﻌﻟﺍ ﻡﻗﺭ
1 1100ﻁﺍﻭ 1400ﻁﺍﻭ
2 1100ﻁﺍﻭ 1400ﻁﺍﻭ
3 1400ﻁﺍﻭ 2000ﻁﺍﻭ
4 2300ﻁﺍﻭ 3000ﻁﺍﻭ
5 2300ﻁﺍﻭ 3000ﻁﺍﻭ
ﻲﻟﺎﻣﺟﻹﺍ ﺔﻗﺎﻁﻟﺍ ﺹﺎﺻﺗﻣﺍ7400ﻁﺍﻭ
ﺔﻳﺎﻔﻛﻟﺍ ﻪﻳﻓ ﺎﻣﺑ ﺔﻠﻳﻭﻁ ﺓﺭﺗﻔﻟ ﺓﺭﺍﺭﺣ ﺔﺟﺭﺩ ﻰﺻﻗﺃ ﻰﻟﺇ ﻪﻧﻳﺧﺳﺗ ﺏﺟﻳ ،ﻰﻟﻭﻷﺍ ﺓﺭﻣﻠﻟ ﺩﻗﻭﻣﻟﺍ ﻡﺍﺩﺧﺗﺳﺍ ﺩﻧﻋﺑ ﻥﻣ ﺔﻳﺗﻳﺯ ﺕﺎﻔﻠﺧﻣ ﺔﻳﺃ ﺔﻟﺍﺯﻹﻠﻣﻋ ﺎﻳﺎﻘ ،ﻊﻳﻧﺻﺗﻟﺍ ﺔﻳﻭ ﺙﻭﻠﺗ ﺩﻗ ﻲﺗﻟﺍ
.ﺔﻬﻳﺭﻛﻟﺍ ﺢﺋﺍﻭﺭﻟﺎﺑ ﺔﻣﻌﻁﻷﺍ
ﻲﻬﻁﻟﺍ ﻲﻧﺍﻭﺃ ﻉﺍﻭﻧﺃ
.ﺔﺻﺎﺧﻟﺍ ﻲﻧﺍﻭﻷﺍ ﻉﺍﻭﻧﺃ ﺽﻌﺑ ﻊﻣ ﻁﻘﻓ ﻝﺎﻣﻌﺗﺳﻼﻟ ﺏﺳﺎﻧﻣ ﺓﺯﻬﺟﻷﺍ ﻥﻣ ﻉﻭﻧﻟﺍ ﺍﺫﻫ
ﺍ ﻲﺳﻳﻁﺎﻧﻐﻣﻟﺍ ﻝﺎﺟﻣﻟﺍ ﺩﻳﻟﻭﺗﻟ ﺩﻳﺩﺣ / ﺏﻠﺻﻟﺍ ﻭﺃ ﺩﻳﺩﺣﻟﺍ ﻥﻣ ﻲﻧﺍﻭﻷﺍ ﻉﺎﻗ ﻥﻭﻛﻳ ﻥﺃ ﻲﻐﺑﻧﻳﻭ.ﻥﻳﺧﺳﺗﻟﺍ ﺔﻳﻠﻣﻌﻟ ﻡﺯﻼﻟ
:ﺔﺑﺳﺎﻧﻣ ﺭﻳﻏ ﺔﻳﻟﺎﺗﻟﺍ ﺩﺍﻭﻣﻟﺍ ﻥﻣ ﺔﻋﻭﻧﺻﻣﻟﺍ ﻲﻧﺍﻭﻷﺍ
• ؛ﺝﺎﺟﺯﻟﺍ
• ؛ﻑﺯﺧﻟﺍ
• ؛ﺭﺎﺧﻔﻟﺍ
• .ﻲﺳﻳﻁﺎﻧﻐﻣ ﻉﺎﻗ ﻥﻭﺩﺑ ﺱﺎﺣﻧﻟﺍ ﻭﺃ ﻡﻭﻳﻧﻭﻣﻟﻷﺍﻭ ﺏﻠﺻﻟﺍ
:ﻉﺎﻘﻟﺍ ﻰﻠﻋ ﺱﻳﻁﺎﻧﻐﻣﻟﺍ ﻥﻣ ﺔﻌﻁﻗ ﻊﺿﻭ ﻲﻔﻛﻳ ،ﻲﻧﺍﻭﻷﺍ ﺔﺑﺳﺎﻧﻣ ﻥﻣ ﺩﻛﺄﺗﻠﻟ
ﺍ ﺔﺑﺳﺎﻧﻣ ﺎﻬﻧﺃ ﻲﻧﻌﻳ ﺍﺫﻬﻓ ،ﺱﻳﻁﺎﻧﻐﻣﻟﺍ ﺏﺫﺟ ﻡﺗ ﺍﺫﺇﺎﻣﻟﺍ ﻥﻣ ﺔﻠﻳﻠﻗ ﺔﻳﻣﻛ ﺏﺻ ﺏﺟﻳﻓ ،ﺱﻳﻁﺎﻧﻐﻣﻟﺍ ﺏﺫﺟﻧﻳ ﻡﻟ ﺍﺫﺇ ﺎﻣﺃ .ﻱﺭﺍﺭﺣﻟﺍ ّﺙﺣﻟﺎﺑ ﻲﻬﻁﻟ ِﻹﺍ ﻲﻓ ءﻪﻌﺿﻭﻭ ءﺎَﻧ ﺔﻘﻁﻧﻣ ﻰﻠﻋ
.ﺏﺳﺎﻧﻣ ﺭﻳﻏ ﻝﻣﻌﺗﺳﻣﻟﺍ ءﺎﻧﻹﺍ ﻥﺃ ﻲﻧﻌﻳ ﺍﺫﻬﻓ ،ﺔﻗﺎﻁﻟﺍ ﻥﻣ ﻻﺩﺑ ﺔﺷﺎﺷﻟﺍ ﻰﻠﻋ ﺯﻣﺭﻟﺍ ﺭﻬﻅ ﺍﺫﺇ .ﺎﻬﻠﻳﻐﺷﺗﻭ ﻲﻬﻁﻟﺍ
ﺩ ﺭﺎﻁﻗﺃ ﻰﻠﻋ ﻲﻬﻁﻠﻟ ﺔﻣﺩﺧﺗﺳﻣﻟﺍ ﻲﻧﺍﻭﻷﺍ ﻥﺎﻌﻳﻗ ﺭﻓﻭﺗﺗ ﻥﺃ ﺏﺟﻳ.ﻲﺿﺭُﻣ ﻝﺎﻣﻌﺗﺳﺍ ﻥﺎﻣﺿﻟ ﺎﻳﻧ
ﺎﻬﻧﺃﻭ ،ﺓﺭﻭﺎﺟﻣﻟﺍ ﻲﻬﻁﻟﺍ ﻖﻁﺎﻧﻣﻟ ﺎﻬﻧﺎﻌﻳﻗ ﺔﺳﻣﻼﻣ ﻡﺩﻋ ﻡﻬﻣﻟﺍ ﻥﻣ ﻥﻛﻟ ،ﻲﻬﻁﻟﺍ ﻖﻁﺎﻧﻣ ﻥﻣ ﺭﺑﻛﺃ ﻥﺎﻌﻳﻗ ﺕﺍﺫ ﻲﻬﻁ ﻲﻧﺍﻭﺃ ﻡﺍﺩﺧﺗﺳﺍ ﺎﺿﻳﺃ ﻥﻛﻣﻳﻭ ﺔﻋﻭﺿﻭﻣ ﻣ ﻰﻠﻋ ﺎﻣﺋﺍﺩ ﺯﻛﺭ
ﻝﻛﺷﻟﺍ) .ﻲﻬﻁﻟﺍ ﺔﻘﻁﻧﻣ ﻁﻳﺣﻣ27 -28(
ﺍﺫ ،ﻱﺭﺍﺭﺣﻟﺍ ّﺙﺣﻟﺎﺑ ﻲﻬﻁﻠﻟ ﺎﺻﻳﺻﺧ ﺔﻣﻣﺻﻣ ﻲﻧﺍﻭﺃ ﻡﺍﺩﺧﺗﺳﺍ ﻲﻐﺑﻧﻳﻣ ﻲﻧﺍﻭﺃ ﻡﺍﺩﺧﺗﺳﺍ ﻲﻐﺑﻧﻳ ﻼﻓ ،ﺎﻫﺭﻓﻭﺗ ﻡﺩﻋ ﺔﻟﺎﺣ ﻲﻓﻭ ؛ﺢﻁﺳﻣﻭ ﻙﻳﻣﺳ ﻉﺎﻗ ﺕﻣ) ﺔﺑﺑﻘﺑﺩﺣﻣ ﻭﺃ ﺓﺭﻌﻘ (ﺔ
ﻝﻛﺷﻟﺍ) .ﻉﺎﻘﻟﺍ29(
51
Page 52

(... ﻝﻛﺷﻟﺍ) ﻙﻳﻣﺍﺭﻳﺳﻟﺍ ﻥﻣ ﻱﺭﺍﺭﺣ ﺡﻭﻟ
ﺔﻗﺎﻁﻟﺍ
ﺡﻭﻠﻟﺍ ﻉﻭﻧ
ﻲﺋﺎﺑﺭﻬﻛ ﻱﺭﺍﺭﺣ ﻙﻳﻣﺍﺭﻳﺳ ﺡﻭﻟ (ﺃ ﺭﺎﺳﻳﻟﺍ ﻰﻠﻋ ﻲﻣﺎﻣﻷﺍ700/1700ﻁﺍﻭ
ﻲﺋﺎﺑﺭﻬﻛ ﻱﺭﺍﺭﺣ ﻙﻳﻣﺍﺭﻳﺳ ﺡﻭﻟ (ﺏ ﻔﻠﺧﻟﺍ ﺭﺎﺳﻳﻟﺍ ﻰﻠﻋ ﻲ1200ﻁﺍﻭ
ﻲﺋﺎﺑﺭﻬﻛ ﻱﺭﺍﺭﺣ ﻙﻳﻣﺍﺭﻳﺳ ﺡﻭﻟ (ﺝ ﻥﻳﻣﻳﻟﺍ ﻰﻠﻋ ﻲﻔﻠﺧﻟﺍ1100/2200ﻁﺍﻭ
ﻲﺋﺎﺑﺭﻬﻛ ﻱﺭﺍﺭﺣ ﻙﻳﻣﺍﺭﻳﺳ ﺡﻭﻟ (ﺩ ﻥﻳﻣﻳﻟﺍ ﻰﻠﻋ ﻲﻣﺎﻣﻷﺍ1200ﻁﺍﻭ
ﻲﺋﺎﺑﺭﻬﻛ ﻱﺭﺍﺭﺣ ﻙﻳﻣﺍﺭﻳﺳ ﺡﻭﻟ (ﻩ ﻱﺯﻛﺭﻣﻟﺍ1400/2200ﻁﺍﻭ
ﺔﻧﻣﺎﻛﻟﺍ ﺓﺭﺍﺭﺣﻟﺍ
ﻟﺍ ﺓﺭﺍﺭﺣﻟﺍ ﻥﻣ ﺭﻳﺫﺣﺗﻠﻟ ﺯﺎﻬﺟ ﻰﻠﻋ ﻲﻬﻁ ﺔﻘﻁﻧﻣ ﻝﻛ ﺭﻓﻭﺗﺗ) ﺔﻧﻣﺎﻛHﻟ .ﻲﻬﻁﻟﺍ ﺔﻘﻁﻧﻣ ءﺎﻔﻁﺇ ﺩﻌﺑ ﺓﺭﻣ ﻝﻛ ﻲﻓ ءﺍﺭﻣﺣ ﺔﻳﺋﻭﺿ ﺓﺭﺎﺷﺇ ﺭﻬﻅﺗ ﺩﻗ .( ﺔﻘﻁﻧﻣ ﻥﺃ ﻥﻣ ﺭﻳﺫﺣﺗﻠ
ﻝﻛﺷﻟﺍ) .ﺔﻧﺧﺎﺳ ﺩﺟ ﺕﻟﺍﺯﻻ ﺔﻳﻧﻌﻣﻟﺍ ﻲﻬﻁﻟﺍ22(
ﺔﺳﻣﺧﻟﺍ ﺔﻳﺋﺎﺑﺭﻬﻛﻟﺍ ﻥﻭﻳﻌﻟﺍ ﻡﺍﺩﺧﺗﺳﺍ ﺔﻳﻔﻳﻛ5 :ﻙﻳﻣﺍﺭﻳﺳﻟﺍ ﺢﻁﺳﻟ
ﻻﺩﻌﻣ ﺭﺎﻳﺗﺧﺎﺑ ﺢﻣﺳﻳ ﺎﻣﻣ .(ﻼﻬﺗﺳﺍ ﺕﻟﺍ ﺔﻗﺎﻁﻟﺍ ﻙ ﺔﻔﻠﺗﺧﻣ
) ﺔﻗﺎﻁﻠﻟ ﻡﻅﻧﻣ ﺡﺎﺗﻔﻣ ﺔﻁﺳﺍﻭﺑ ﺩﻗﻭﻣﻟﺍ ﺢﻁﺳ ﻰﻠﻋ ﻥﻳﻋ ﻝﻛ ﻲﻓ ﻡﻛﺣﺗﻟﺍ ﻡﺗﻳ
ﻥﻳﻋﻥﻳﺗﺭﺍﺩ ﻥﻣ ﻭﺃ ﺓﺩﺣﺍﻭ ﺓﺭﺍﺩ ﻥﻣ
ﻰﻧﺩﻷﺍ ﻊﺿﻭﻣﻟﺍ ﻥﻣ ﺓﺭﻣﺗﺳﻣ ﺔﻘﻳﺭﻁﺑ“0“) ”ﻑﺎﻘﻳﺇ ” ﻰﺻﻗﻷﺍ ﻊﺿﻭﻣﻟﺍ ﻰﻟﺇ (ﺡﻭﻠﻟ ﻡﺋﺍﺩ“3“) ”ﻝﻳﻐﺷﺗ ”ﻟﺍ ﺩﻗﻭﻣ ﻥﻳﻋ ﺡﺎﺗﻔﻣ ﺢﻳﺗﻳ .(ﺡﻭﻠﻟ ﻡﺋﺍﺩ ﻝﻛﺷﻟﺍ) ﺔﺟﻭﺩﺯﻣﻟﺍ ﺓﺭﺍﺩ23 (
ﺍﺩﻟﺍ ﺩﻗﻭﻣ ﺔﻗﺎﻁﻟ ﻯﻭﺻﻘﻟﺍ ﺓﺭﺩﻘﻟﺍ ﻍﻭﻠﺑ ﻲﻧﺎﺛﻟﺍ ﻊﺿﻭﻟﺍ ﻭﺣﻧ ﺽﺑﻘﻣﻟﺍ ﺭﻳﻭﺩﺗ ﺭﺑﻋ ﺔﺟﻭﺩﺯﻣﻟﺍ ﺓﺭ2 ﺓﺩﻣﻟ ﺔﺟﻭﺩﺯﻣﻟﺍ ﺓﺭﺍﺩﻠﻟ1-2 ﻩﺭﻳﺭﺣﺗﻭ ﺔﻳﻧﺎﺛ ﻊﺿﻭﻟﺍ ﻲﻓ3 ﻝﻛﺷﻟﺍ)24 (
.ﺯﺎﻬﺟﻟﺍ ﻡﻛﺣﺗ ﺔﺣﻭﻟ ﻲﻓ ﺎﻬﻳﻟﺇ ﺭﺎﺷُﻣ ﻡﻛﺣﺗﻟﺍ ﺽﺑﻘﻣﻭ ﻲﻬﻁﻟﺍ ﻥﻭﻳﻋ ﺕﺎﻣﻼﻋ
.ﺔﻟﺎﻐﺷ ﻲﻬﻁﻟﺍ ﺡﺍﻭﻟﺃ ﺽﻌﺑ ﻥﺃ ﻰﻟﺇ ﺭﻳﺷﺗ ﻝﻣﻌﻟﺍ ﺢﻁﺳ ﻰﻠﻋ ءﺍﺭﻣﺣ ﺔﻳﺋﻭﺿ ﺓﺭﺎﺷﺇ
ﺍ ﺔﺟﺭﺩ ﻍﻭﻠﺑ ﺩﻌﺑ .ﻖﻓﺭﺑ ﺞﺿﻧﻳﻟ ﻡﺎﻌﻁﻟﺍ ﻙﺭﺗﻳﻭ ﺓﺭﺍﺭﺣﻟﺍ ﺔﺟﺭﺩ ﺽﻳﻔﺧﺗ ﻲﻐﺑﻧﻳ ،ﻥﺎﻳﻠﻐﻟ
ﺧﺗﺳﻣﻟﺍ ﻲﻧﺍﻭﻷﺍﻭ ﺔﻣﻌﻁﻷﺍ ﺔﻳﻋﻭﻧﺑ ﺎﻬﻁﺎﺑﺗﺭﺍ ﻰﻟﺇ ﺓﺭﺎﺷﻺﻟ ﻲﻋﺍﺩ ﻻﻭ ،ﺔﺑﺭﺟﺗﻟﺍﻭ ﺕﻗﻭﻟﺍ ﻊﻣ ﺎﻬﺑﺎﺳﺗﻛﺍ ﻥﻛﻣﻳ ﺔﻣﻌﻁﻷﺍ ﺞﺿﻧﻟ ﺔﻣﺯﻼﻟﺍ ﺓﺩﻣﻟﺍﻻﺍ .ﺔﻣﺩﻠﺳﻟﺍ ﻡﺍﺩﺧﺗﺳ ﻲﻓ ﻡﻫﺎﺳﻳ ﻡﻳ
.ﺔﻗﺎﻁﻟﺍﻭ ﺕﻗﻭﻟﺍ ﺭﻳﻓﻭﺗ
ﻗﺭ ﺍﺩﺑﺃ ﻡﺩﺧﺗﺳﺗ ﻻ :ﺭﻳﺫﺣﺗ.ﻲﻛﻳﻣﺍﺭﻳﺳﻟﺍ ﻲﻬﻁﻟﺍ ﺢﻁﺳ ﻰﻠﻋ ﺔﻣﻌﻁﻷﺍ ﻲﻬﻁﻟ ﻙﻳﺗﺳﻼﺑﻟﺍ ﻥﻣ ﺕﺎﻳﻭﺎﺣ ﻭﺃ ﻲﻧﺍﻭﺃ ﻭﺃ ﻡﻭﻳﻧﻣﻭﻟﻷﺍ ﻖﺋﺎ
ﺳﻟﺍ ﻲﻬﻁﻟﺍ ﺢﻁﺳ ﻰﻠﻋ ﺔﻧﻣﺎﻛﻟﺍ ﺓﺭﺍﺭﺣﻟﺍ ﻥﻣ ﺭﻳﺫﺣﺗﻠﻟ ﺔﻟﺎﻐﺷ ﺔﻳﺋﻭﺿﻟﺍ ﺓﺭﺎﺷﻹﺍ ﺓﺭﺎﻧﺇ ﺎﻣﻟﺎﻁ ﻲﻬﻁﻟﺍ ﺔﻘﻁﻧﻣ ﺱﻣﻟ ﺏﺟﻳ ﻻ :ﺭﻳﺫﺣﺗﻲﻛﻳﻣﺍﺭﻳﺧﻷﺍ ﻩﺫﻬﻓ . ﻥﺃ ﻰﻟﺇ ﺭﻳﺷﺗ ﺓﺭﻳ
ﻟﺍ ﺔﻘﻁﻧﻣﻟﺍ ﻲﻓ ﺓﺭﺍﺭﺣﻟﺍ ﺔﺟﺭﺩ .ﺔﻌﻔﺗﺭﻣ ﺩﺟ ﻝﺍﺯﺗ ﻻ ﺔﻳﻧﻌﻣ
ﻧﺇ ﻁﻭﻘﺳ ﺩﻧﻋ ﺭﺳﻛﻧﻳ ﻥﻟ ﻪﻧﺃ ﺎﻣﻛ .ﺓﺩﻭﺭﺑﻟﺍﻭ ﺓﺭﺍﺭﺣﻟﺍ ﻥﻣ ﻝﻛﻟﻭ ﺔﻳﺭﺍﺭﺣﻟﺍ ﺕﺎﻣﺩﺻﻠﻟ ﻡﻭﺎﻘﻣ ﻥﺭﻔﻠﻟ ﻲﻛﻳﻣﺍﺭﻳﺳﻟﺍ ﺝﺎﺟﺯﻟﺍ :ﺭﻳﺫﺣﺗﻝﻳﻘﺛ ءﺎ ﻟﺍ ﺢﻁﺳ ﻰﻠﻋ ﻰﻠﻋﻭ .ﻲﻬﻁ
ﻳﺍﻭﺯ ﻯﺩﺣﺇ ﻭﺃ ﻥﺭﻔﻟﺍ ﻑﺍﻭﺣ ﻯﺩﺣﺈﺑ ﻝﺑﺍﻭﺗﻟﺍ ﺔﺟﺎﺟﺯ ﻭﺃ ﺢﻠﻣﻟﺍ ﺔﺷﺎﺷﺭﻛ ﻝﻳﻘﺛ ﻡﺳﺟ ﻡﺎﻁﺗﺭﺍ ﻥﺈﻓ ،ﻙﻟﺫ ﻥﻣ ﺱﻛﻌﻟﺍ ﻲﻓ ﺏﺑﺳﺗﺗ ﺩﻗ ،ﻩﺎﺍ.ﻩﺭﺎﺳﻛﻧ
.ﺔﻣﺎﻋﺩﻛ ﻲﻛﻳﻣﺍﺭﻳﺳﻟﺍ ﻥﺭﻔﻟﺍ ﺢﻁﺳ ﻝﺎﻣﻌﺗﺳﺍ ﻲﻐﺑﻧﻳ ﻻ :ﺭﻳﺫﺣﺗ
ﻲﻬﻁﻟﺍ ﻲﻧﺍﻭﺃ ﻉﺍﻭﻧﺃ
.ﻲﺿﺭُﻣ ﻝﺎﻣﻌﺗﺳﺍ ﻥﺎﻣﺿﻟ ﺎﻳﻧﺩ ﺭﺎﻁﻗﺃ ﻰﻠﻋ ﻲﻬﻁﻠﻟ ﺔﻣﺩﺧﺗﺳﻣﻟﺍ ﻲﻧﺍﻭﻷﺍ ﻥﺎﻌﻳﻗ ﺭﻓﻭﺗﺗ ﻥﺃ ﺏﺟﻳ
ﻼﻣ ﻡﺩﻋ ﻡﻬﻣﻟﺍ ﻥﻣ ﻥﻛﻟ ،ﻲﻬﻁﻟﺍ ﻖﻁﺎﻧﻣ ﻥﻣ ﺭﺑﻛﺃ ﻥﺎﻌﻳﻗ ﺕﺍﺫ ﻲﻬﻁ ﻲﻧﺍﻭﺃ ﻡﺍﺩﺧﺗﺳﺍ ﺎﺿﻳﺃ ﻥﻛﻣﻳﻭﺎﻬﻧﺃﻭ ،ﺓﺭﻭﺎﺟﻣﻟﺍ ﻲﻬﻁﻟﺍ ﻖﻁﺎﻧﻣﻟ ﺎﻬﻧﺎﻌﻳﻗ ﺔﺳﻣ ﺔﻋﻭﺿﻭﻣ ﻣ ﻰﻠﻋ ﺎﻣﺋﺍﺩ ﺯﻛﺭ
ﻝﻛﺷﻟﺍ) .ﻲﻬﻁﻟﺍ ﺔﻘﻁﻧﻣ ﻁﻳﺣﻣ27 -28(
ﻝﻛﺷﻟﺍ) .ﻉﺎﻘﻟﺍ (ﺔﺑﺩﺣﻣ ﻭﺃ ﺓﺭﻌﻘﻣ) ﺔﺑﺑﻘﻣ ﻲﻧﺍﻭﺃ ﻡﺍﺩﺧﺗﺳﺍ ﻲﻐﺑﻧﻳ ﻻ29(
ﺙﺣﻟﺍ ﺩﻗﺍﻭﻣ ﻡﺍﺩﺧﺗﺳﺍ
ﺽﺑﻘﻣ ﻡﻛﺣﺗﻟﺍ ﻲﻓ ﺩﻗﻭﻣﻟﺍ
.ﻲﻛﻳﻣﺍﺭﻳﺳﻟﺍ ﺩﻗﻭﻣﻟﺍ ﻲﻬﻁ ﻖﻁﺎﻧﻣ ﻲﻓ ﻡﻛﺣﺗﻟﺍ ﺽﺑﺎﻘﻣﻟﺍ ﻩﺫﻫ ﺢﻳﺗﺗ
ﻥﻣ ﻰﻧﺩﺃ ﺩﺣ ﻥﻣ ﺕﺍﺩﺍﺩﻋﻹﺍ ﺩﺗﻣﺗﻭ .ﺔﻘﻁﻧﻣﻟﺍ ﻝﻳﻐﺷﺗﻟ ﻥﻳﻣﻳﻟﺍ ﻭﺣﻧ ﺽﺑﻘﻣﻟﺍ ﺭﺩﺃ .ﺽﺑﻘﻣ ﻝﻛ ﻕﻭﻓ ﺔﻓﺩﺍﺭﻣﻟﺍ ﺔﻘﻁﻧﻣﻟﺍ ﺭﻬﻅﺗ1 ﺭﺩﻗ ﻰﺻﻗﺃ ﺩﺣ ﻰﻟﺇ ﻩ9 ﻝﻛﺷﻟﺍ) .25 ﻡﺗﻳﻭ (
.ﻥﺭﻔﻟﺍ ﺔﺷﺎﺷ ﻰﻠﻋ ﻝﻳﻐﺷﺗﻟﺍ ﺓﻭﻗ ﺽﺭﻋ
.ﻥﻳﺧﺳﺗ ﻝ
ﻥﻳﺧﺳﺗﻟﺍ ﻝ
ﺟَﻌُﻣ ﻰﻠﻋ ﻲﻬﻁ ﺔﻘﻁﻧﻣ ﻝﻛ ﺭﻓﻭﺗﺗ
ّ
ِ
ﺟَﻌُﻣ
ّ
ِ
ﻠﺑ ﺔﻘﻁﻧﻣﻠﻟ ﻡﺎﻅﻧﻟﺍ ﺍﺫﻫ ﺢﻳﺗﻳ.ﺓﺭﺎﺗﺧﻣﻟﺍ ﻥﻳﺧﺳﺗﻟﺍ ﺓﻭﻘﻟ ﺔَﺑِﺳﺎَﻧَﺗُﻣ ﺓﺭﺗﻔﻟ ﻝﻳﻐﺷﺗﻟﺍ ءﺎﻧﺛﺃ ﺓﺭﺩﻘﻟﺍ ﺓﻭﺭﺫ ﻍﻭ
ﺕﺍﺩﺍﺩﻋﺇﺭﺗﺧﺍ ﺭﺎﺳﻳﻟﺍ ﻰﻟﺇ ﺽﺑﻘﻣﻟﺍ ﺭﻳﻭﺩﺗﺑ ﻡﻗ ،ﻥﻳﺧﺳﺗﻟﺍ ﻝ
ﺟَﻌُﻣ ﻝﻳﻐﺷﺗﻟ“A ” ﻑﺭﺣﻟﺍ ﺽﺭﻋ ﻡﺳﺗﻳ .ﻩﺭﺭﺣ ﻡﺛ“A ”.ﻥﺭﻔﻟﺍ ﻰﻠﻋ ﺔﺷﺎﺷ ﻰﻠﻋ
ّ
ِ
ﻰﻠﻋ ﻥﻭﺭﻓﻭﺗﺗ3 ﻹﺍ ﺭﺎﻳﺗﺧﺍ ﺩﻌﺑ .ﺔﺑﻭﻠﻁﻣﻟﺍ ﻥﻳﺧﺳﺗﻟﺍ ﺕﺍﺩﺍﺩﻋﺇ ﺭﺎﻳﺗﺧﻻ ﻲﻧﺍﻭﺛ ﻥﻳﺑ ﺔﺑﻭﻠﻁﻣﻟﺍ ﺕﺍﺩﺍﺩﻋ1 ﻭ9ﺭﺣﻠﻟ ﺏﻭﺎﻧﺗﻣ ﺽﻳﻣﻭ ﺽﺭﻋ ﻡﺗﻳﺳ ، ﻑ“A ” ﺕﺍﺩﺍﺩﻋﻹﺍﻭ
.ﺔﺷﺎﺷﻟﺍ ﻰﻠﻋ ﺓﺭﺎﺗﺧُﻣﻟﺍ
52
Page 53

:ﺔﻳﺭﺍﺭﺣﻟﺍ ﺡﺍﻭﻟﻷﺍ ﻡﺍﺩﺧﺗﺳﺍ ﺔﻳﻔﻳﻛ
ﻊﺿﻭﻟﺍ ﻰﻠﻋ ﻪﻁﺑﺿﺑ ﺔﻟﺎﺣﻟﺍ ﻩﺫﻫ ﻲﻓ ﺢﺻﻧﻳ ﻪﻧﺎﻓ ،ﻡﺍﺩﺧﺗﺳﻻﺍ ﻡﺩﻋ ﻥﻣ ﺔﻠﻳﻭﻁ ﺓﺭﺗﻓ ﺭﻭﺭﻣ ﺩﻌﺑ ﻭﺃ ﺓﺭﻣ ﻝﻭﻷ ﺔﻳﺭﺍﺭﺣﻟﺍ ﺡﺍﻭﻟﻷﺍ ﻡﺍﺩﺧﺗﺳﺍ ﺩﻧﻋ1 ﻧﺗ ﺓﺩﻣﻟ ﺯﻫﺎ30 ﺔﻘﻳﻗﺩ
.ﺔﻳﻠﺧﺍﺩﻟﺍ ﺔﻟﺯﺎﻌﻟﺍ ﺩﺍﻭﻣﻟﺎﺑ ﺎﻬﺻﺎﺻﺗﻣﺍ ﻖﺑﺳ ﺔﺑﻭﻁﺭ ﺔﻳﺃ ﻥﻣ ﺹﻠﺧﺗﻠﻟ
ﺔﻳﺭﺍﺭﺣﻟﺍ ﺡﺍﻭﻟﻸﻟ ﻡﻳﻠﺳﻟﺍ ﻡﺍﺩﺧﺗﺳﻻﺍ ﻥﺎﻣﺿﻟ ﺔﻔﻠﺗﺧﻣﻟﺍ ﻁﺑﺿﻟﺍ ﺕﺎﻳﻭﺗﺳﻣ ﻥﻣﺿﺗﻳ ﺔﻠﺛﻣﻷﺎﺑ ﻡﻋﺩﻣ ﻲﻧﺎﻳﺑ ﻝﻭﺩﺟ ﻲﻠﻳ ﺎﻣﻳﻓ ﺎﻧﻔﺿﺃ ﺩﻘﻓ ،ﻝﺎﺛﻣﻛﻭ.
ﺓﺭﺗﻓ ﺭﻭﺭﻣ ﺩﻌﺑ ﻭﺃ ﺓﺭﻣ ﻝﻭﻷ ﺔﻳﺭﺍﺭﺣﻟﺍ ﺡﺍﻭﻟﻷﺍ ﻡﺍﺩﺧﺗﺳﺍ ﺩﻧﻋ :ﺭﻳﺫﺣﺗ ،ﻡﺍﺩﺧﺗﺳﻻﺍ ﻡﺩﻋ ﻥﻣ ﺔﻠﻳﻭﻁ
ﻊﺿﻭﻟﺍ ﻰﻠﻋ ﻪﻁﺑﺿﺑ ﺔﻟﺎﺣﻟﺍ ﻩﺫﻫ ﻲﻓ ﺢﺻﻧﻳ ﻪﻧﺎﻓ1 ﺯﻫﺎﻧﺗ ﺓﺩﻣﻟ30 .ﺔﻳﻠﺧﺍﺩﻟﺍ ﺔﻟﺯﺎﻌﻟﺍ ﺩﺍﻭﻣﻟﺎﺑ ﺎﻬﺻﺎﺻﺗﻣﺍ ﻖﺑﺳ ﺔﺑﻭﻁﺭ ﺔﻳﺃ ﻥﻣ ﺹﻠﺧﺗﻠﻟ ﺔﻘﻳﻗﺩ
ﻡﻗﺭ ﻝﻭﺩﺟﻟﺍ6:
ﺔﺑﺎﺻﻹﺍ
ﺔﻳﺩﺎﻳﺗﻋﻻﺍ
ﺍﺓﺭﻓﻭﺗﻣﻟ
ﻱﺩﺎﻔﺗﻟ
ﺔﻔﻅﻧﻣﻟﺍ
ﺎﻬﻳﻠﻋ
ﺩﺍﻭﻣﻟﺍ
ﻯﺭﺧﺃ
ﻝﺎﻣﻌﺗﺳﺎﺑ
ﺎﻳﺷﺍء
ﻊﺿﻭ
ﻙﻟﺫﻭ
ﺃﺩﺻﻟﺍ
.(
ﻱﺩﻳﻷﺎﺑ
ﻭﺃ
ﺔﻧﻛﻣﻣﻟﺍ ﻲﻬﻁﻟﺍ ﻕﺭﻁ
ﺎﻔﻳﻅﻧ
ﻰﻠﻋ
ﻡﺍﻭﺩﻟﺍ
)
.
ﻝﻛﺂﺗ
ﺎﻬﺳﻣﻟ
ﺓﺯﻬﺟﻷﺍ
.ﺔﺑﻗﺍﺭﻣ ﻥﻭﺩ ﺯﺎﻬﺟﻟﺍ ﻙﺭﺗ ﻡﺩﻋ ﻡﺩﺧﺗﺳﻣﻟﺍ ﻰﻠﻋ ﺏﺟﻳ ،ﻝﺎﻌﺗﺷﻼﻟ ﺔﻠﺑﺎﻗ ،ﻥﻭﻫﺩﻭ ﺕﻭﻳﺯ ﻲﻓ ﺔﻣﻌﻁﺃ ﻲﻬﻁ ﺩﻧﻋ
ﺙﻭﺩﺣ
ﻡﺩﻌﻟ
ﻱﻭﻠﻌﻟﺍ
ﻥﻭﺩ
ﻩﺎﺑﺗﻧﻻﺍ
ﻥﻋ
ﺎﻬﺣﻁﺳ
ﻝﺎﻔﻁﻷﺍ
ﺏﺟﻳ
ﻱﺭﺍﺭﺣﻟﺍ
.
ﻙﻟﺫﻟ
ﻝﻅﻳﻟ
ﺍﺫﻫ ﻹﺍءﺍﺭﺟ
ﺔﻳﺭﺍﺭﺣﻟﺍ
ﺑﺇﺩﺎﻌ
.
ﺡﻭﻠﻟﺍ
ﻱﺭﺍﺭﺣﻟﺍ
.
ﻪﻧﻳﺧﺳﺗ
.
ﻡﺍﺩﺧﺗﺳﻻﺍ
ﻝﻭﺣﻳﻭ
؛ﺎﻬﻟﺎﻣﻌﺗﺳﺍ
ﻱﺭﺍﺭﺣﻟﺍ
.
ﻝﻛﺷﻟﺍ
20.(
ﺭﻁﻗ
ﺎﻬﻗﻭﻓ
.
ﺭﺳﻛﻧﻳ
ﺩﻧﻋ
ﺩﻌﺑ
؛ﺔﻳﺋﺎﺑﺭﻬﻛﻟﺍ
ﺡﺍﻭﻟﻷﺍ
ﻥﻣ
ﺡﻭﻠﻟﺍ
ﺎﻬﺗﺟﻟﺎﻌﻣ
ﺔﻳﺭﺍﺭﺣﻟﺍ
ءﺎﻬﺗﻧﻻﺍ
ﻥﻣ
ﻡﺍﺩﺧﺗﺳﺍ
ﺭﻅﻧﺍ
ﺭﻐﺻﺃ
ﻲﻬﻁﻟﺍ
ﺢﻁﺳ
ﺡﻭﻠﻟﺍ
ﺔﻛﻳﻣﺳﻭ
)
ﺎﻬﻧﺎﻳﻗ
ﺭﻳﺧﻷﺍ
ﺩﻗ
ءﺎﻁﻐﻟﺍ
.
ﻲﻐﺑﻧﻳ
ﻥﻣ
ءﺎﻧﺛﺃ
ﻰﻠﻋ
ﺔﻳﻧﺁ
ﻉﺩﺻﺗ
ﺡﺍﻭﻟﻷﺍ
ﺔﻠﻳﻭﻁ
ﺢﻳﺣﺻﻟﺍ
ﺭﻁﻗ
ﻊﺿﻭ
ﺍﺫﻫ
ﻕﻼﻏﺇ
،ﺓﺩﻳﺟ
:ﻲﻠﻳ ﺎﻣ ﺭﻛﺫﺗ ،ﺢﻳﺣﺻﻟﺍ ﻡﺍﺩﺧﺗﺳﻻﺍ ﻥﺎﻣﺿﻟ
ﺎﻬﻌﺿﻭ
ﺔﺣﻁﺳﻣ
ﺩﻌﺑ
ﺭﻭﻬﻅ
،ﻲﺟﺎﺟﺯ
ﻥﺈﻓ
ﺔﻟﺎﺣ
ﻑﻳﻅﻧﺗﻟ
ﺩﻌﺑ
ﺓﺩﻣ
ﻊﺿﻭﻟﺍ
ﻬﻁﻲ
ﺔﻟﺎﺣ
ﺓﺭﺍﺭﺣﻟﺍ
ﻝﺑﻗ
ﻥﺎﻌﻳﻗ
ﻲﻧﺍﻭﺃ
ﻱﺭﺍﺭﺣﻟﺍ
ﻻﺍ
ﺭﺍﺭﺣﻟﺍﺔﻳ ﻝﺑﻗ
ﺔﻳﺭﺍﺭﺣﻟﺍ
ﻲﻓ
ﺎﺻﻳﺻﺧ
ﻲﻬﻁﻟﺍ
ﺕﺍﺫ
ﻕﻼﻁﻹﺍ
ﺭﻭﻔﻟﺍ
ﻲﻓ
ءﺎﻁﻐﺑ
ﻥﺍﺯﺗﺧﺍ
ﺭﻭﺩﻘﻟﺍ
ﻲﻓ
ﻱﺭﺍﺭﺣﻟﺍ ﺡﻭﻠﻟﺍ
ﻲﻧﺍﻭﺃ
ﻲﻧﺍﻭﺃ
ﻲﻬﻁ
ﻰﻠﻋ
ﺡﻭﻠﻟﺍ
ﻰﻠﻋ
ﺯﻬﺟﻣ
ﺡﺍﻭﻟﻷﺍ
ﺡﺍﻭﻟﻷﺍ
ﺔﺟﺗﻧﻣﻟﺍﻭ
ﺡﺍﻭﻟﻷﺍ
ﺽﺑﺎﻘﻣ
0 ﺄﻔﻁُﻣ ﻱﺭﺍﺭﺣﻟﺍ ﺡﻭﻠﻟﺍ
1 ﺎﻬﺑﺎﺷﻳ ﺎﻣﻭ ﺔﺗﻻﻭﻛﺷﻟﺍﻭ ﺓﺩﺑﺯﻟﺍ ﺔﺑﺍﺫﻹ– ﻝﺋﺍﻭﺳﻟﺍ ﻥﻣ ﺔﻠﻳﻠﻗ ﺕﺎﻳﻣﻛ ﻥﻳﺧﺳﺗﻟ
2 ﻝﺋﺍﻭﺳﻟﺍ ﻥﻣ ﺓﺭﻳﺑﻛ ﺕﺎﻳﻣﻛ ﻥﻳﺧﺳﺗﻟ– ﻲﻬﻁﻟﺍ ﻥﻣ ﺔﻠﻳﻭﻁ ﺓﺩﻣ ﺏﻠﻁﺗﺗ ﻲﺗﻟﺍ ﺔﺻﻠﺻﻟﺍﻭ ﺕﺎﻣﻳﺭﻛﻟﺍ ﺩﺍﺩﻋﻹ
3 ﻥﺎﻳﻠﻐﻟﺍ ﺔﺟﺭﺩﻟ ﻲﻬﻁﻟﺍﻭ ﺓﺩﻣﺟﻣﻟﺍ ﺔﻣﻌﻁﻷﺍ ﻥﻋ ﺩﻳﻠﺟﻟﺍ ﺔﺑﺍﺫﻹ
4 ﻙﻣﺳﻟﺍﻭ ﺔﺷﻬﻟﺍ ﻡﻭﺣﻠﻟﺍ ﻥﻣ ﺕﺎﻳﻭﺷﻣﻟﺍ ﻲﻬﻁﻟ
5 ﻲﻬﻁﻟ ﻙﻟﺫﻛﻭ ،ﻡﺣﻠﻟﺍ ﺢﺋﺍﺭﺷﻭ ﻡﻭﺣﻠﻟﺍ ءﺍﻭﺷﻟ ﻲﻠﻐﻣﻟﺍ ﻡﺣﻠﻟﺍ ﻥﻣ ﺓﺭﻳﺑﻛﻟﺍ ﻊﻁﻘﻟﺍ
6 .ﻲﻠﻘﻠﻟ ،ﻩﺎﻳﻣﻟﺍ ﻥﻣ ﺓﺭﻳﺑﻛ ﺕﺎﻳﻣﻛ ﻲﻠﻐﻟ
ﻥﺎﻌﻳِﻗ
ﻡﺩﺧﺗﺳﺗ
ﻝﻳﻐﺷﺗﺑ
ﺯﺎﻬﺟﻟﺍ
ﻥﺭﻔﻟﺍ
ﻊﻳﻣﺟ
ﻰﻠﻋ
ﻕﺍﻭﺳﻷﺎﺑ
ﻑﻳﻔﺟﺗ
ﻡﺍﺩﺧﺗﺳﺍ
ﻡﻘﺗ
ﻑﻗﻭﺃ
ﻥﺎﻛ
ﻑﺎﻘﻳﺇ
ﻅﺎﻔﺣﻠﻟ
ﻝﺻﺍﻭﺗ
ﻕﻭﺭﺣﺑ
.
ﺭﻳﺫﺣﺗ: ﻑﻗﻭﺃ ﺯﺎﻬﺟﻟﺍ ﻰﻠﻋ ﺭﻭﻔﻟﺍ ﻲﻓ ﺔﻟﺎﺣ ﺭﻭﻬﻅ ﻉﺩﺻﺗ ﻰﻠﻋ ﺢﻁﺳ ﺡﻭﻠﻟﺍ ﻱﺭﺍﺭﺣﻟﺍ.
ﺓﺩﺎﻋ
ﻥﻣ ﻥﺃ
ﺩﻛﺄﺗ
-
-
- ﻻ
- ﻻ
-
ﺍﺫﺇ
-
-
-
ﻙﻳﻣﺍﺭﻳﺳﻟﺍ ﻥﻣ ﻲﻬﻁﻟﺍ ﺢﻁﺳ ﻝﺎﻣﻌﺗﺳﺍ
ﻰﻠﻋ ﻝﻣﻌﻟﺍ ﺢﻁﺳ ﺭﻓﻭﺗﻳ5 ﺍ ﺔﻔﻠﺗﺧﻣ ،ﻲﻬﻁﻠﻟ ﻥﻳﻋﺃ ﻝﻛﺷﻟﺍ) ﺭﻁﻘﻟﺍﻭ ﺓﺭﺩﻘﻟ21.(
.(ﻲﻬﻁﻟﺍ ﺢﻁﺳ ﻑﺻﻭ ﺭﻅﻧﺍ) ﺢﻁﺳﻟﺍ ﻰﻠﻋ ﺔﻋﻭﺑﻁﻣ ﺓﺭﺋﺍﺩﺑ ﺡﻭﺿﻭﺑ ﻲﻬﻁﻟﺍ ﻥﻭﻳﻋ ﻊﺿﺍﻭﻣ ﻰﻟﺇ ﺭﺎﺷﻳ
.ﻖﻁﺎﻧﻣﻟﺍ ﻩﺫﻫ ﻝﺧﺍﺩ ﻥﻳﺧﺳﺗﻟﺍ ﺔﻳﻠﻣﻋ ﻡﺗﺗ
53
ﻰﻠﻋ ﺭﻣﺣﺃ ءﻭﺿ ﺔﻁﺳﺍﻭﺑ ﻪﻳﻟﺇ ﺓﺭﺎﺷﻹﺍ ﻡﺗﺗﻭ ؛ﺎﻧﺧﺎﺳ ﻰﻘﺑﻳ ﺢﻁﺳﻟﺍ ﻥﺈﻓ ،ﺕﻗﻭﻟﺍ ﺽﻌﺑﻟ ﺎﻬﻣﺍﺩﺧﺗﺳﺍ ﺩﻌﺑ ﺩﻗﻭﻣﻟﺍ ﺢﻁﺳ ﻥﻭﻳﻋ ﻯﺩﺣﺇ ءﺎﻔﻁﺇ ﺩﻧﻋ ﺢﻁﺳﺍ.ﻝﻣﻌﻟ
.ﺎﺣﻁﺳﻣﻭ ﺎﻛﻳﻣﺳ ﻲﻧﺍﻭﻷﺍ ﻉﺎﻗ ﻥﻭﻛﻳ ﻥﺃ ﺏﺟﻳ ،ﺞﺋﺎﺗﻧﻟﺍ ﻝﺿﻓﺃ ﻰﻠﻋ ﻝﻭﺻﺣﻠﻟ
ﺭﻁﻘﻟﺍ ﺓﺭﻳﻐﺻﻟﺍ ﻲﻧﺍﻭﻷﺍ ﻥﻷ .ﻡﺩﺧﺗﺳﻣﻟﺍ ﺩﻗﻭﻣﻟﺍ ﺭﻁﻗ ﻰﻟﺇ ﻥﻛﻣﻳ ﺎﻣ ﺏﺭﻗﺃ (ﻯﺭﺧﺃ ﺔﻳﻭﺎﺣ ﻭﺃ ﻲﻬﻁﻟﺍ ﻲﻧﺍﻭﺃ) ﺭﺩﻘﻟﺍ ﻉﺎﻗ ﺭﻁﻗ ﻥﻭﻛﻳ ﻥﺃ ﻲﻐﺑﻧﻳﻭ ﻙﻠﻬﺗﺳﺗ ﻭ ﺭﺑﻛﺃ ﺔﻗﺎﻁ ﺭﺩﻬﺗ
ﻳﻌﻟﺍ ﺢﻁﺳ ﻥﻣ ﻑﻭﺷﻛﻣﻟﺍ ءﺯﺟﻟﺍ ﻥﻣ ﺓﺭﺍﺭﺣﻟﺍ .ﻥ
.ﻲﻧﺍﻭﻷﺍ ﻉﺎﻗﻭ ﻲﻬﻁﻟﺍ ﺢﻁﺳ ﺔﻓﺎﻅﻧ ﻰﻠﻋ ﻅﺎﻔﺣﻟﺍ ﺏﺟﻳ
.ﺔﻗﺎﻁﻟﺍ ﺭﻳﻓﻭﺗ ﻰﻠﻋ ﺩﻋﺎﺳﻳ ﺢﺋﺎﺻﻧﻟﺍ ﻩﺫﻫ ﻉﺎﺑﺗﺍ
Page 54

ﻲﻓ ﺏﻭﻠﻁﻣﻟﺍ ﺩﻗﻭﻣﻠﻟ ﻑﺩﺍﺭﻣﻟﺍ ﺽﺑﻘﻣﻟﺍ ﺭﻳﻭﺩﺗﺑ ﻡﻗ ﻡﺛ ﻁﻐﺿﺃ ﺏﺭﺎﻘﻋ ﻥﺍﺭﻭﺩﻟ ﺱﻛﺎﻌﻣﻟﺍ ﻩﺎﺟﺗﻻﺍ
ﻝﻛﺷﻟﺍ) (ﻱﺭﺍﺭﺣﻟﺍ ﺝﻭﺯﻟﺍ) ﻥﺎﻣﻷﺍ ﺯﺎﻬﺟﺑ ﺓﺩﻭﺯﻣﻟﺍ ﺩﻗﺍﻭﻣﻟﺍ ﻝﺎﻌﺷﺍ14:(
ﻠﻋ ﻪﻁﺑﺿﺍﻭ ﺔﻋﺎﺳﻟﺍ ﻰﺻﻗﻷﺍ ﺩﺣﻟﺍ ﻰ“MAXIMUM ” ﻝﻛﺷﻟﺍ ،ﺭﻳﺑﻛ ﺏﻬﻟ) ﺔﻣﺟﻧﻟﺍ ﺯﻣﺭ ﺩﻧﻋ15ﺷﻻﺍ ﺕﺍﺯﻳﻬﺟﺗ ﻯﺩﺣﺍ ﻕﻼﻁﺈﺑ ﻡﻗﻭ ﺽﺑﻘﻣﻟﺍ ﻰﻠﻋ ﻁﻐﺿﺍ ( ﺓﺭﻭﻛﺫﻣﻟﺍ ﻝﺎﻌ
ﺓﺩﻣﻟ ﺽﺑﻘﻣﻟﺍ ﻰﻠﻋ ﻁﻐﺿﻟﺍ ﻲﻓ ﺭﺍﺭﻣﺗﺳﻻﺍ ﻲﻐﺑﻧﻳ ،ﺩﻗﻭﻣﻟﺍ ﻝﺎﻌﺗﺷﺍ ﺩﻧﻋ .ﻩﻼﻋﺃ10 ﻱﺭﺍﺭﺣﻟﺍ ﺝﻭﺯﻟﺍ ﻥﻳﺧﺳﺗ ﻥﻣ ﺏﻬﻠﻟﺍ ﻥﻛﻣﺗﻳ ﻰﺗﺣ ﺎﺑﻳﺭﻘﺗ ﻥﺍﻭﺛ ﺕﺄﻔﻁﻧﺍﻭ ﺙﺩﺣ ﺍﺫﺇﻭ . ﺔﻠﻌﺷ
.ﺎﻬﺗﻣﺭﺑ ﺔﻳﻠﻣﻌﻟﺍ ﺭﺍﺭﻛﺗ ﺏﺟﻳﻓ ،ﺽﺑﻘﻣﻟﺍ ﺭﻳﺭﺣﺗ ﺩﻧﻋ ﺩﻗﻭﻣﻟﺍ
.ﺢﻳﺣﺻﻟﺍ ﻪﻌﺿﻭﻣ ﻲﻓ ﺏﻬﻠﻟﺍ ﻊﻳﺯﻭﺗ ﺵﻭﺑﺭﻁ ﻥﻛﺗ ﻡﻟ ﺍﺫﺇ ﺩﻗﻭﻣﻟﺍ ﻝﺎﻌﺷﺍ ﺔﻟﻭﺎﺣﻣ ﻡﺩﻌﺑ ﺢﺻﻧﻧ :ﺔﻅﺣﻼﻣ
ﻝﻛﺷﻟﺍ) ﻲﺋﺎﻧﺛﻟﺍ ﺩﻗﻭﻣﻟﺍ ﻡﺍﺩﺧﺗﺳﺍ16(
.ﻁﻘﻓ ﺩﺣﺍﻭ ﻡﺎﻣﺻ ﺔﻁﺳﺍﻭﺑ ﺩﻗﻭﻣﻠﻟ ﻲﺟﺭﺎﺧﻟﺍﻭ ﻱﺯﻛﺭﻣﻟﺍ ﺝﺎﺗﻟﺍ ﻥﻣ ﻝﻛ ﻲﻓ ﻡﻛﺣﺗﻳ ﻝﻳﺩﻭﻣﻟﺍ ﺍﺫﻫ
ﻹ ﻱﻭﺻﻘﻟﺍ ﻖﻓﺩﺗﻟﺍ ﻊﺿﻭ ﻰﺗﺣ ﺽﺑﻘﻣﻟﺍ ﻑﻟﻭ ﻁﻐﺿﺍ ،ﻱﺯﻛﺭﻣﻟﺍ ﺩﻗﻭﻣﻟﺍ ﺝﺎﺗ ﻝﺎﻌﺷ1 ﻠﺑﻳ ﻊﺿﻭﻟﺍ ﺍﺫﻫ ﻲﻓ :ﻝﺎﻌﺷﻹﺍ ﺔﻳﻠﻣﻋ ﻡﺗﺗ ﻰﺗﺣ ﻁﻐﺿﻟﺎﺑ ﺭﻣﺗﺳﺍﻭ ﻩﺩﺣ ﻲﻠﺧﺍﺩﻟﺍ ﺏﻬﻠﻟﺍ ﻎ
.ﻰﺻﻗﻷﺍ
ﻊﺿﻭﻟﺍ ﻭﺣﻧ ﺽﺑﻘﻣﻟﺍ ﻑﻠﺑ ﻡﻗ ،ﻰﻧﺩﻷﺍ ﺩﺣﻟﺍ ﻰﻠﻋ ﻲﻠﺧﺍﺩﻟﺍ ﺝﺎﺗﻟﺍ ﻁﺑﺿﻟ2.
ﻗﻷﺍ ﺩﺣﻟﺍ ﻰﻠﻋ ﻲﺟﺭﺎﺧﻟﺍ ﺝﺎﺗﻟﺍﻭ ﻲﻠﺧﺍﺩﻟﺍ ﺝﺎﺗﻟﺍ ﻁﺑﺿﻟ ﻊﺿﻭﻟﺍ ﻭﺣﻧ ﺽﺑﻘﻣﻟﺍ ﻑﻠﺑ ﻡﻗ ،ﻰﺻ3.
ﻊﺿﻭﻟﺍ ﻭﺣﻧ ﺽﺑﻘﻣﻟﺍ ﻑﻠﺑ ﻡﻗ ،ﻰﻧﺩﻷﺍ ﺩﺣﻟﺍ ﻰﻠﻋ ﻲﺟﺭﺎﺧﻟﺍ ﺝﺎﺗﻟﺍﻭ ﻲﻠﺧﺍﺩﻟﺍ ﺝﺎﺗﻟﺍ ﻁﺑﺿﻟ4.
:ﺢﻳﺣﺻﻟﺍ ﻪﺟﻭﻟﺍ ﻰﻠﻋ ﺩﻗﺍﻭﻣﻟﺍ ﻡﺍﺩﺧﺗﺳﻻ ﺓﺩﻳﻔﻣ ﺢﺋﺎﺻﻧ
- ﻝﻭﺩﺟﻟﺍ ﺭﻅﻧﺍ) ﺩﻗﻭﻣ ﻝﻛﻟ ﺔﺑﺳﺎﻧﻣ ﻲﻬﻁ ﻲﻧﺍﻭﺃ ﻡﺩﺧﺗﺳﺍ5 ﻝﻛﺷﻟﺍﻭ18.(
- ﻳ ﻥﺎﻳﻠﻐﻟﺍ ﺔﺟﺭﺩ ﻰﻟﺇ ﻝﺋﺍﻭﺳﻟﺍ ﻝﺻﺗ ﺎﻣﺩﻧﻋ ﻰﻧﺩﻷﺍ ﺩﺣﻟﺍ ﻰﻠﻋ ﺽﺑﻘﻣﻟﺍ ﻁﺑﺿ ﻲﻐﺑﻧ“MINIMUM ” ﻝﻛﺷﻟﺍ ،ﺭﻳﻐﺻ ﺏﻬﻟ)15.(
ﻡﻗﺭ ﻝﻭﺩﺟﻟﺍ5 .ﺎﻬﻟﺎﻣﻌﺗﺳﺎﺑ ﻰﺻﻭﻣﻟﺍ ﻲﻬﻁﻟﺍ ﺔﻳﻧﺁ ﺭﻁﻗ ﺕﺎﺳﺎﻘﻣ :
- .ءﺎﻁﻏ ﺕﺍﺫ ﻲﻬﻁ ﻲﻧﺍﻭﺃ ﺎﻣﺋﺍﺩ ﻡﺩﺧﺗﺳﺍ
(ﻡﺳ) ﺎﻬﻟﺎﻣﻌﺗﺳﺎﺑ ﻰﺻﻭﻣﻟﺍ ﻲﻬﻁﻟﺍ ﺔﻳﻧﺁ ﺭﻁﻗ ﺕﺎﺳﺎﻘﻣ
ﺢﻁﺳﻣ ﻉﺎﻗ ﺕﺍﺫ (ﺭﻭﺩﻗ) ﺕﺎﻳﻭﺎﺣ ﻡﺩﺧﺗﺳﺍ :ﺭﻳﺫﺣﺗ
ﻥﺃ ﻥﻣ ﻑﻳﻅﻧﺗﻟﺍ ﻥﻣ ءﺎﻬﺗﻧﻻﺍ ﺩﻌﺑ ﺩﻛﺄﺗ :ﺭﻳﺫﺣﺗ“B ” ءﺎﻁﻐﻟﺍﻭ“A ” ﻝﻛﺷﻟﺍ ﻲﻓ ﺢﺿﻭﻣ ﻭﻫ ﺎﻣﻛ ﺢﻳﺣﺻﻟﺍ ﺎﻣﻬﻌﺿﻭﻣ ﻲﻓ ﻥﺍﺩﺟﺍﻭﺗﻳ17A ﺭﻳﻏ ﻊﺿﻭ ﻲﻓ ﺎﺗﺳﻳﻟﻭ
ﺑﺎﻗ ،ﻥﻭﻫﺩﻭ ﺕﻭﻳﺯ ﻲﻓ ﺔﻣﻌﻁﺃ ﻲﻬﻁ ﺩﻧﻋ .ﻲﺋﺎﺑﺭﻬﻛﻟﺍ ﺭﺎﻳﺗﻟﺍ ﻉﺎﻁﻘﻧﺍ ﺩﻧﻋ ﺏﺎﻘﺛﻟﺍ ﻥﺍﺩﻳﻋ ﻡﺍﺩﺧﺗﺳﺎﺑ ﺩﻗﻭﻣﻟﺍ ﻝﺎﻌﺷﺍ ﻥﻛﻣﻳ :ﺭﻳﺫﺣﺗﺷﻼﻟ ﺔﻠﻋ ﺏﺟﻳ ،ﻝﺎﻌﺗ ﻡﺩﻋ ﻡﺩﺧﺗﺳﻣﻟﺍ ﻰﻠ
ﻊﻳﻣﺟ ءﺎﻔﻁﺇ ﺏﺟﻳ .ﻪﻧﻳﺧﺳﺗ ﺩﻧﻋ ﺭﺳﻛﻧﻳ ﺩﻗ ﺭﻳﺧﻷﺍ ﺍﺫﻫ ﻥﺈﻓ ،ﻲﺟﺎﺟﺯ ءﺎﻁﻐﺑ ﺯﻬﺟﻣ ﻥﺭﻔﻟﺍ ﻥﺎﻛ ﺍﺫﺇ .ﺔﺑﻗﺍﺭﻣ ﻥﻭﺩ ﺯﺎﻬﺟﻟﺍ ﻙﺭﺗ ﻭﻣﻟﺍﺑﻗ ﺩﻗﺍﺎﻁﻐﻟﺍ ﺽﻔﺧ ﻝ ﻡﺩﺧﺗﺳﺗ ﻻ .ء
.ﻪﻠﻳﻐﺷﺗ ءﺎﻧﺛﺃ ﺯﺎﻬﺟﻟﺍ ﻥﻣ ﺏﺭﻘﻟﺎﺑ (ﻱﺍﺭﺑﺳ) ﺕﺎﺷﺎﺷﺭ
ﺍﺩﻭﺯﻣ ﻥﺭﻔﻟﺍ ﻥﺎﻛ ﺍﺫﺇ .ﺓﺯﻬﺟﻷﺍ ﻥﻋ ﻝﺎﻔﻁﻷﺍ ﺩﺎﻌﺑﺇ .ﺩﻗﺍﻭﻣﻟﺍ ﻡﺍﺩﺧﺗﺳﺍ ءﺎﻧﺛﺃ ﺢﻳﺣﺻﻟﺍ ﻊﺿﻭﻟﺍ ﻲﻓ ﺭﻭﺩﻘﻟﺍ ﺽﺑﺎﻘﻣ ﻥﺃ ﻥﻣ ﺩﻛﺄﺗﺑﻓ ،ءﺎﻁﻐﻑﻳﻅﻧﺗ ﻲﻐﺑﻧﻳ ﻝﺑﻗ ﺩﻛﺄﺗﻟﺍﻭ ﺢﻁﺳﻟﺍ
ﻥﺎﻛﻣﻟﺍ ﺔﻳﻭﻬﺗ ﻥﺃ ﻥﻣ ﺩﻛﺄﺗﻟﺍ ﺏﺟﻳ ﻙﻟﺫﻟ .ﺎﻬﻳﻓ ﺎﻬﺑﻳﻛﺭﺗ ﻡﺗ ﻲﺗﻟﺍ ﺔﻓﺭﻐﻟﺍ ﻲﻓ ﺔﺑﻭﻁﺭﻭ ﺓﺭﺍﺭﺣ ﺔﻳﺯﺎﻐﻟﺍ ﺩﻗﺍﻭﻣﻟﺍ ﻡﺍﺩﺧﺗﺳﺍ ﻥﻋ ﺞﺗﻧﻳ :ﺔﻅﺣﻼﻣ ﺣﻧ ﻰﻠﻋﺭﺣﻟﺍﻭ ،ﺩﻳﺟ ﻭ ﻰﻠﻋ ﺹ
.ﻖﺋﺍﻭﻋ ﺔﻳﺃ ﻥﻣ ﺎﻫﻭﻠﺧﻭ ﺔﻳﻌﻳﺑﻁﻟﺍ ﺔﻳﻭﻬﺗﻟﺍ ﺕﺎﺣﺗﻓ ﺩﺍﺩﺳﻧﺍ ﻡﺩﻋ
ﺔﻳﻭﻬﺗ ﺯﺎﻬﺟﻠﻟ ﺭﻣﺗﺳﻣﻟﺍ ﻭﺃ ﻑﺛﻛﻣﻟﺍ ﻡﺍﺩﺧﺗﺳﻻﺍ ﺏﻠﻁﺗﻳ ﺩﻗﻭ ﺭﺳﻘﻟﺍ ﺔﻳﻭﻬﺗ ﺔﻳﻟﺎﻌﻓ ﺓﺩﺎﻳﺯ ﻭﺃ ﺓﺫﻓﺎﻧﻟﺍ ﺢﺗﻓ ﻝﺎﺛﻣﻟﺍ ﻝﻳﺑﺳ ﻰﻠﻋ ﺎﻬﻧﻣﻭ ،ﺔﻳﻓﺎﺿﺍﺎﻬﺟﻟ ﺔﻳﻟﺍ ﺔﻳﻭﻬﺗﻠﻟ ﺯ (ﻁﺎﻔﺷ) ﺔﻳﻛﻳﻧﺎﻛﻳﻣ
ﺩﻗﻭﻣﻟﺍ
ﻱﻭﻧﺎﺛﻟﺍ 12 – 14
ﻊﻳﺭﺳﻟﺍ ﻪﺑﺷﻟﺍ 14 – 26
ﻊﻳﺭﺳﻟﺍ 18 – 26
ﺔﻋﺭﺳﻟﺍ ﻖﺋﺎﻓ 22 – 26
ﻲﺋﺎﻧﺛ ﺔﻋﺭﺳﻟﺍ ﻖﺋﺎﻓ 22 – 50
ﻟﺍ ﻲﻓ ﻝﺎﺣﻟﺍ ﻭﻫ ﺎﻣﻠﺛﻣ ﺯﻛﺭﻣﺗﻣ ﻝﻛﺷ17B
ﻷﺍ ﺎﻳﺎﻘﺑ ﻥﻣ ﻩﻭﻠﺧ ﻥﻣ ﻪﻗﻼﻏﺍ.ﺔﻣﻌﻁ
.ﺎﺑﻛﺭُﻣ ﻙﻟﺫ ﻥﺎﻛ ﺍﺫﺇ
ﺔﻳﺭﺍﺭﺣﻟﺍ ﺡﺍﻭﻟﻷﺍ ﻡﺍﺩﺧﺗﺳﺍ
ﻰﻠﻋ ﻪﻁﺑﺿ ﻥﻛﻣﻳ ﺡﺎﺗﻔﻣ ﺔﻁﺳﺍﻭﺑ ﺡﺍﻭﻟﻷﺍ ﻩﺫﻫ ﻲﻓ ﻡﻛﺣﺗﻟﺍ ﻡﺗﻳ6 ﻝﻛﺷﻟﺍ ﺭﻅﻧﺍ) ﻉﺎﺿﻭﺃ19ﻳﺭﺍﺭﺣﻟﺍ ﺡﺍﻭﻟﻷﺍ ﻝﻳﻐﺷﺗ ﻥﻛﻣﻳ .(ﺍﺭﻳﻭﺩﺗ ﻖﻳﺭﻁ ﻥﻋ ﺔ ﻰﻠﻋ ﻪﻁﺑﺿﻭ ﺽﺑﻘﻣﻟ
ﺩﻭﺟﻭﻣ ﺔﺋﻳﺿﻣ ﺕﺍﺭﺎﺷﺍ ﻙﺎﻧﻫﻭ .ﺽﺑﻘﻣﻠﻟ ﻑﺩﺍﺭﻣﻟﺍ ﻱﺭﺍﺭﺣﻟﺍ ﺡﻭﻠﻟﺍ ﻥﻳﺑﺗ ﺔﻳﺣﻳﺿﻭﺗ ﻡﻭﺳﺭ ﺯﺎﻬﺟﻠﻟ ﺔﻳﻣﺎﻣﻷﺍ ﺔﻬﺟﺍﻭﻟﺍ ﻰﻠﻋ ﺩﺟﻭﻳ .ﺏﻭﻠﻁﻣﻟﺍ ﻊﺿﻭﻟﺍ ﻙﻟﺫﻛ ﺓﻋ ﺔﻬﺟﺍﻭﻟﺍ ﻰﻠ
.ﺎﻬﻣﺍﺩﺧﺗﺳﺍ ﻱﺭﺎﺟﻟﺍ ﺔﻳﺋﺎﺑﺭﻬﻛﻟﺍ ﺔﻳﺭﺍﺭﺣﻟﺍ ﺡﺍﻭﻟﻷﺍ ﻰﻟﺍ ﺭﻳﺷﺗ ﺯﺎﻬﺟﻠﻟ ﺔﻳﻣﺎﻣﻷﺍ
54
Page 55

(ﻡﻠﻣ) ﺩﺎﻌﺑﻷﺍ
ﺍﺩﺧﺗﺳﻻﺍ ﻝﻳﻟﺩﺔﻧﺎﻳﺻﻟﺍﻭ ﻡ
ﺭﻳﺫﺣﺗ: ﻻ ﻲﻐﺑﻧﻳ ﻡﺍﺩﺧﺗﺳﺍ ﻥﺭﻔﻟﺍ ﺩﻗﺍﻭﻣﻭ ﺔﻳﺍﻭﺷﻟﺍ ﻲﻓ ﺕﻗﻭ ﺩﺣﺍﻭ.
ﺯﺎﻐﻟﺍ ﺩﻗﻭﻣ ﺩﺎﻌﺑﺃ
ﺩﻗﻭﻣﻟﺍ
ﻱﻭﻧﺎﺛﻟﺍ Ø 50
ﻊﻳﺭﺳﻟﺍ ﻪﺑﺷﻟﺍ Ø 70
ﻊﻳﺭﺳﻟﺍ Ø 95
ﺔﻋﺭﺳﻟﺍ ﻖﺋﺎﻓ Ø 125
ﻲﺋﺎﻧﺛ ﺔﻋﺭﺳﻟﺍ ﻖﺋﺎﻓ Ø 135
ﺩﺎﻌﺑﺃ ﺡﻭﻠﻟﺍ ﻱﺭﺍﺭﺣﻟﺍ ﻲﺋﺎﺑﺭﻬﻛﻟﺍ
ﺩﺎﻌﺑﻷﺍ
ﺡﻭﻠﻟﺍ ﻉﻭﻧ
ﺭﺍﺭﺣ ﺡﻭﻟﻲﺋﺎﺑﺭﻬﻛ ﻱ Ø 145
ﻲﺋﺎﺑﺭﻬﻛ ﻱﺭﺍﺭﺣ ﺡﻭﻟ Ø 180
ﻡﻛﺣﺗﻟﺍ ﺔﺣﻭﻟ ﻑﺻﻭ
ﻬﺑ ﺯﻬﺟﻣﻟﺍ ﻡﻛﺣﺗﻟﺍ ﻑﺋﺎﻅﻭ ﺯﻭﻣﺭﻟ ﺩﺭﺳ ﻲﻠﻳ ﺎﻣﻳﻓ ﺩﺭﻭﻧﻭ .ﺡﺎﺗﻔﻣ ﻭﺃ ﺽﺑﻘﻣ ﻝﻛ ﺔﻔﻳﻅﻭ ﺢﺿﻭﺗ ﺓﺭﻳﻐﺻ ﺯﻭﻣﺭ ﻰﻠﻋ ﻡﻛﺣﺗﻟﺍ ﺔﺣﻭﻟ ﻱﻭﺗﺣﺗﻗﻭﻣﻟﺍ ﺎ:ﺩ
ﻭﺃ ﻭﺃ ﺔﻘﻣﺎﻐﻟﺍ ﺓﺭﺋﺍﺩﻟﺍ ،ﻱﻭﻠﻌﻟﺍ ﺢﻁﺳﻟﺍ ﻰﻠﻋ ﺩﻗﺍﻭﻣﻟﺍ ﻥﺎﻛﻣ ﻰﻟﺍ ﺭﻳﺷﻳ ﻲﻔﻠﺧﻟﺍ ﺩﻗﻭﻣﻟﺍ ﻝﺎﺛﻣﻟﺍ ﺍﺫﻫ ﻲﻓ) ﻲﻧﻌﻣﻟﺍ ﺩﻗﻭﻣﻟﺍ ﻰﻟﺍ ﺭﻳﺷﺗ
ﺯﻣﺭﻟﺍ
.(ﻥﻳﻣﻳﻟﺍ ﻰﻠﻋ ﺩﻭﺟﻭﻣﻟﺍ
ﻭﺃ ﻭﺃ ﻊﻣ ﻱﺯﺎﻐﻟﺍ ﻥﺭﻔﻟﺍ ،ﺔﻳﺯﺎﻐﻟﺍ ﺔﻳﺍﻭﺷﻟﺍ ﻊﻣ ﻱﺯﺎﻐﻟﺍ ﻥﺭﻔﻟﺍ ،ﻱﺯﺎﻐﻟﺍ ﻥﺭﻔﻟﺍ) ﻪﻠﻳﻐﺷﺗ ﻱﺭﺎﺟﻟﺍ ﻥﺭﻔﻟﺍ ﺔﻳﻋﻭﻧ ﻰﻟﺇ ﺭﻳﺷﻳ
ﺯﻣﺭﻟﺍ
(ﻑﺋﺎﻅﻭﻟﺍ ﺩﺩﻌﺗﻣﻟﺍ ﻥﺭﻔﻟﺍﻭ ﺔﻳﺋﺎﺑﺭﻬﻛﻟﺍ ﺔﻳﺍﻭﺷﻟﺍ
ﺭﻳﺷﻳﺇﻰﻟ (ﺔﻳﺋﺎﺑﺭﻬﻛﻟﺍ ﺔﻳﺍﻭﺷﻟﺍ ،ﺯﺎﻐﻟﺍ ﺔﻳﺍﻭﺷ) ﺔﻳﺍﻭﺷﻟﺍ
.ﺔﺣﻭﺭﻣﺑ ﺯﻬﺟﻣﻟﺍ ﻲﺋﺎﺑﺭﻬﻛﻟﺍ ﻥﺭﻔﻟﺎﺑ ﺹﺎﺧﻟﺍ ﻲﺋﺎﺑﺭﻬﻛﻟﺍ (ﺕﺎﺗﺳﻭﻣﺭﺛﻟﺍ) ﻱﺭﺍﺭﺣﻟﺍ ﻡّﻅﻧﻣﻟﺍ ﻰﻟﺇ ﺭﻳﺷﻳ
ﺧﺗﺳﺍ ﻥﻭﺩ ﻝﻭﺣﻳ ﺔﺣﻭﺭﻣﻟﺍ ﻝﻳﻐﺷﺗ .ﺔﺣﻭﺭﻣﺑ ﺩﻭﺯﻣﻟﺍ ﻱﺯﺎﻐﻟﺍ ﻥﺭﻔﻟﺍ ﻡﺍﺩﺧﺗﺳﺎﺑ ﺢﻣﺳﻳ ﺎﻣﻣ ،ﻥﺭﻔﻟﺍ ﺔﺣﻭﺭﻣ ﻝﻳﻐﺷﺗ ﺭﺯ ﻰﻟﺇ ﺭﻳﺷﻳ ﻻ ﻲﺗﻟﺍﻭ ،ﺔﻳﺍﻭﺷﻟﺍ ﻡﺍﺩ
ﺯﻣﺭﻟﺍ
ﺯﻣﺭﻟﺍ
ﺯﻣﺭﻟﺍ
.ﻝﻣﻌﻟﺍ ﺩﻳﻗ ﺔﺣﻭﺭﻣﻟﺍ ﺕﻣﺍﺩ ﺎﻣ ﺎﻬﻣﺍﺩﺧﺗﺳﺍ ﻥﻛﻣﻳ
ﻖﺋﺎﻗﺩﻟﺍ ﻪﺑﻧﻣ ﻰﻟﺇ ﺭﻳﺷﻳ
ﺯﻣﺭﻟﺍ
(ﻱﺯﺎﻐﻟﺍ ﻥﺭﻔﻠﻟ ﺔﺑﺳﻧﻟﺎﺑ ﻁﻘﻓ) ﺓﺍﻭﺷﻣﻟﺍ ﻝﻳﻐﺷﺗ ﺡﺎﺗﻔﻣ ﻰﻟﺇ ﺭﻳﺷﻳ
ﺭﻳﺷﻳﻰﻟﺇ (ﺔﺣﻭﺭﻣﺑ ﺯﻬﺟﻣﻟﺍ ﻲﺋﺎﺑﺭﻬﻛﻟﺍ ﻥﺭﻔﻟﺍ ﺍﺩﻋ ﺎﻣ ﺎﻬﻌﻳﻣﺟ) ﻥﺭﻔﻟﺍ ﺓﺭﺎﻧﺇ ﺡﺎﺗﻔﻣ
ﻳ ﺭﻳﺷﻰﻟﺇ ﺩﻗﻭﻣﻟﺍ ﻝﺎﻌﺷﻹ ﺱْﺑَﻛﻟﺍ ﱡﺭِﺯ
ﺯﻣﺭﻟﺍ
ﺯﻣﺭﻟﺍ
ﺯﻣﺭﻟﺍ
ﻊﺿﻭ ﻲﻓ ﺢﻳﺗﺎﻔﻣﻟﺍ ﺕﻧﺎﻛ ﺎﻣ ﺍﺫﺇ ﺭﻳﺷﻳ“ﻝﻳﻐﺷﺗ ” ﻭﺃ“ﻑﺎﻘﻳﺇ”
ﺯﻣﺭﻟﺍ
ﺩﻗﺍﻭﻣﻟﺍ ﻡﺍﺩﺧﺗﺳﺍ
ًﺎﻌﺑﺗ ﺔﻔﻠﺗﺧﻣ ﻕﺭﻁﺑ ﺩﻗﺍﻭﻣﻟﺍ ﻝﺎﻌﺷﺍ ﻥﻛﻣﻳﻭ .ﻲﻧﻌﻣﻟﺍ ﺽﺑﻘﻣﻠﻟ ﻑﺩﺍﺭﻣﻟﺍ ﺩﻗﻭﻣﻟﺍ ﻰﻟﺇ ﺭﻳﺷﺗ ﺽﺑﻘﻣ ﻝﻛ ﻕﻭﻓ ﻡﻛﺣﺗﻟﺍ ﺔﺣﻭﻟ ﻰﻠﻋ ﺔﻋﻭﺑﻁﻣﻟﺍ ﺯﻭﻣﺭﻟﺍ ﺍ ﻉﻭﻧﻟﺋﺎﺻﺧ ﻭ ﺯﺎﻬﺟﻟ:ﻪﺻ
ﻟﺍ ﺩﻗﻭﻣﻠﻟ ﻑﺩﺍﺭﻣﻟﺍ ﺽﺑﻘﻣﻟﺍ ﺭﻳﻭﺩﺗﺑ ﻡﻗ ﻲﻓ ﺏﻭﻠﻁﻣﺍﺎﻌﻣﻟﺍ ﻩﺎﺟﺗﻻ ﻥﺍﺭﻭﺩﻟ ﺱﻛ
ﻰﺻﻗﻷﺍ ﺩﺣﻟﺍ ﻰﻠﻋ ﻪﻁﺑﺿﺍﻭ ﺔﻋﺎﺳﻟﺍ ﺏﺭﺎﻘﻋ“MAXIMUM ” ﻝﻛﺷﻟﺍ ،ﺭﻳﺑﻛ ﺏﻬﻟ) ﺔﻣﺟﻧﻟﺍ ﺯﻣﺭ ﺩﻧﻋ15ﺛﻟﺍ ﺩﻭﻋ ﻡﺍﺩﺧﺗﺳﺎﺑ ﺩﻗﻭﻣﻟﺍ ﻝﻌﺷﺃ ﻡﺛ (.ﺏﺎﻘ
ﻷﺍ ﺩﺣﻟﺍ ﻰﻠﻋ ﻪﻁﺑﺿﺍﻭ ﺔﻋﺎﺳﻟﺍ ﺏﺭﺎﻘﻋ ﻥﺍﺭﻭﺩﻟ ﺱﻛﺎﻌﻣﻟﺍ ﻩﺎﺟﺗﻻﺍ ﻲﻓ ﺏﻭﻠﻁﻣﻟﺍ ﺩﻗﻭﻣﻠﻟ ﻑﺩﺍﺭﻣﻟﺍ ﺽﺑﻘﻣﻟﺍ ﺭﻳﻭﺩﺗﺑ ﻡﻗ ﻰﺻﻗ“MAXIMUM ” ﺏﻬﻟ)
ﻝﻛﺷﻟﺍ ،ﺭﻳﺑﻛ15 ﺔﺑﺳﻧﻟﺎﺑ ﺍﺫﻫ) ﺔﻣﺟﻧﻟﺎﺑ ﻪﻳﻟﺍ ﺭﺎﺷﻣﻟﺍ ﻝﺎﻌﺷﻻﺍ ﺯﻣﺭﻟ ﻖﺑﺎﻁﻣﻟﺍ ﻊﺿﻭﻣﻟﺍ ﻲﻓ ﺽﺑﻘﻣﻟﺍ ﻰﻠﻋ ﻁﻐﺿﻟﺍ ﻲﻓ ﺭﺍﺭﻣﺗﺳﻻﺍ ﻊﻣ ( ﺩﻗﺍﻭﻣﻠﻟﺍﺑﻘﻣﺑ ﺓﺯﻬﺟﻣﻟ ﺩﻭﺯﻣ ﺽ
.ﺩﻗﻭﻣﻟﺍ ﻝﺎﻌﺗﺷﺍ ﺩﺭﺟﻣﺑ ﻩﺭﺭﺣ ﻡﺛ ﺔﻣﺟﻧﻟﺎﺑ ﻪﻳﻟﺍ ﺯﻭﻣﺭﻣﻟﺍ ﻝﺎﻌﺷﻻﺍ ﺭﺯ ﻰﻠﻋ ﻁﻐﺿﺍ ﻭﺃ (ﻝﺎﻌﺷﺍ ﺔﻌﻣﺷﺑ
55
- :(ﻲﺋﺎﺑﺭﻬﻛﻟﺍ ﺭﺎﻳﺗﻟﺍ ﻉﺎﻁﻘﻧﺍ ﺔﻟﺎﺣ ﻲﻓ ﻰﺗﺣﻭ ﺎﻣﺋﺍﺩ ﻪﻣﺍﺩﺧﺗﺳﺍ ﻥﻛﻣﻳ) ﻱﻭﺩﻳﻟﺍ ﻝﺎﻌﺷﻹﺍ
- :ﻲﺋﺎﺑﺭﻬﻛﻟﺍ ﻝﺎﻌﺷﻹﺍ
Page 56

ﺭﺷﺎﺑﻣ
:
ﻝﻛﺷﺑ
ﻲﺋﺎﺑﺭﻬﻛﻟﺍ
ﺭﺎﻳﺗﻟﺎﺑ
ﺍﺫﺇ
ﻥﺎﻛ
ﻝﻳﺻﻭﺗﻟﺍ
ﺔﻛﺑﺷﺑ
ﺩﺍﺩﻣﻹﺍ
- ﻧﺗﻳ ﻲﺋﺎﺑﺭﻬﻛﻟﺍ ﺭﺎﻳﺗﻟﺍ ﻊﺑﻧﻣﻭ ﺯﺎﻬﺟﻟﺍ ﻥﻳﺑ ﺏﻁﻘﻟﺍ ﻱﺩﺎﺣﺃ ﺓﺭﺋﺍﺩﻠﻟ ﻊﻁﺎﻗ ﺡﺎﺗﻔﻣ ﺏﻳﻛﺭﺗ ﺏﺟﻳﻥﻳﺑ ﺓﻭﺟﻓ ﻪﺑﻭ ﺯﺎﻬﺟﻠﻟ ﻲﺑﺭﻬﻛﻟﺍ ﻝﻣﺣﻟﺍ ﻊﻣ ﺏﺳﺎ ﻼﺻﻭﻟﺍ ﺎﻫﺭﺩﻗ ﺕ3 ﻡﻣ ﺩﺣﻛ
.ﻲﻧﺩﺃ
- .ﺏﻁﻘﻟﺍ ﻱﺩﺎﺣﻷﺍ ﺡﺎﺗﻔﻣﻟﺍ ﺔﻁﺳﺍﻭﺑ ﺽﻳﺭﺄﺗﻟﺍ ﻙﻠﺳ ﻝﺻﻓ ﺏﺟﻳ ﻻ ﻪﻧﺃ ﺭﻛﺫﺗ
- .ﺔﻳﻟﺎﻋ ﺔﻳﺳﺎﺳﺣ ﻱﺫ ﻲﻘﺑﺗﻣﻟﺍ ﺭﺎﻳﺗﻟﺎﺑ ﻝﻣﻌﻳ ﺓﺭﺍﺩ ﻊﻁﺎﻗ ﺡﺎﺗﻔﻣ ﻖﻳﺭﻁ ﻥﻋ ﻲﺋﺎﺑﺭﻬﻛﻟﺍ ﻝﻳﺻﻭﺗﻟﺍ ﺔﻳﺎﻣﺣ ﺎﺿﻳﺃ ﻥﻛﻣﻣﻟﺍ ﻥﻣﻓ ﻙﻟﺫﻟ ﻝﻳﺩﺑﻛﻭ
- ﺩﻛﺅﻧ .ﻝﺎﻌﻓ ﺽﻳﺭﺄﺗ ﻡﺎﻅﻧﺑ ﺭﺿﺧﻷﺍﻭ ﺭﻔﺻﻷﺍ ﻥﻳﻧﻭﻠﻟﺍ ﻭﺫ ﺹﺎﺧﻟﺍ ﺽﻳﺭﺄﺗﻟﺍ ﻙﻠﺳ ﺕﻳﺑﺛﺗ ﺓﺭﻭﺭﺿ ﻰﻠﻋ
ﺯﺎﻬﺟﻟﺍ ﺔﻧﺎﻳﺻ
ﺔﻣﺎﻫ ﺕﺍﺭﻳﺫﺣﺗ :ﻪﻳﺑﻧﺗ
ﺓﺩﻋﺎﻗ ﻰﻠﻋ ﺓﺯﻛﺗﺭﻣﻟﺍ ﺩﻗﺍﻭﻣﻠﻟ
.ﺯﺎﻛﺗﺭﻻﺍ ﺓﺩﻋﺎﻗ ﻥﻋ ًﺍﺩﻳﻌﺑ ﺯﺎﻬﺟﻟﺍ ﻕﻻﺯﻧﺍ ﻱﺩﺎﻔﺗﻟ ﺔﻣﺯﻼﻟﺍ ﺕﺍءﺍﺭﺟﻹﺎﺑ ﻡﻗ ،ﺓﺩﻋﺎﻗ ﻰﻠﻋ ﺍﺯﻛﺗﺭﻣ ﺯﺎﻬﺟﻟﺍ ﻥﺎﻛ ﺍﺫﺇ :ﻪﻳﺑﻧﺗ
ﻗﺍﻭﻣﻠﻟﻲﺟﺎﺟﺯ ءﺎﻁﻐﺑ ﺓﺩﻭﺯﻣﻟﺍ ﺩ
.ﻲﺟﺎﺟﺯﻟﺍ ءﺎﻁﻐﻟﺍ ﺢﺗﻓ ﻝﺑﻗ ،ﺔﻳﺎﻧﻌﺑ ﺯﺎﻬﺟﻟﺍ ﻕﻭﻓ ﻥﻣ ﺔﻠﺋﺎﺳﻟﺍ ﺕﺎﻔﻠﺧﻣﻟﺍ ﻊﻳﻣﺟ ﺔﻟﺍﺯﺇ ﻲﻐﺑﻧﻳ :ﻪﻳﺑﻧﺗ
.ﺯﺎﻬﺟﻠﻟ ﻲﺟﺎﺟﺯﻟﺍ ءﺎﻁﻐﻟﺍ ﻖﻠﻏ ﻝﺑﻗ ،ﻝﻣﻌﻟﺍ ﺢﻁﺳ ﺓﺭﺍﺭﺣ ﺔﺟﺭﺩ ﺽﺎﻔﺧﻧﺍ ﻥﻣ ﻖﻘﺣﺗ :ﻪﻳﺑﻧﺗ
ﻲﺋﺎﺑﺭﻬﻛ ﻥﺭﻔﺑ ﺓﺩﻭﺯﻣﻟﺍ ﺩﻗﺍﻭﻣﻠﻟ
ﻣ ﺏﻧﺟﺗ .ًﺎﻧﺧﺎﺳ ﺯﺎﻬﺟﻟﺍ ﺢﺑﺻﻳ ﻡﺍﺩﺧﺗﺳﻻﺍ ءﺎﻧﺛﺃ.ﻥﺭﻔﻟﺍ ﻝﺧﺍﺩ ﺔﻧﺧﺎﺳﻟﺍ ءﺍﺯﺟﻷﺍ ﺔﺳﻣﻼ
ﻲﺋﺎﺑﺭﻬﻛ ﻥﺭﻔﺑ ﺓﺩﻭﺯﻣﻟﺍ ﺩﻗﺍﻭﻣﻠﻟ
.ﺓﺯﻬﺟﻷﺍ ﻥﻋ ﻝﺎﻔﻁﻷﺍ ﺩﺎﻌﺑﺇ .ﻡﺍﺩﺧﺗﺳﻻﺍ ءﺎﻧﺛﺃ ﺔﻧﺧﺎﺳ ﺎﻬﻳﻟﺇ ﻝﻭﺻﻭﻟﺍ ﻥﻛﻣﻳ ﻲﺗﻟﺍ ءﺍﺯﺟﻷﺍ ﺢﺑﺻﺗ ﻥﺃ ﻥﻛﻣﻳ :ﻪﻳﺑﻧﺗ
ﺍ ﻥِﺧﺳُﻣ ﺝﺭﺩﻷ
ﻁ ﺔﻣﻌ(ﺎﻧﺗﻟﺎﺣ ﻲﻓ ﺭﻳﻁﻘﺗﻟﺍ ﺝﺭﺩ ﻭﺃ)
ﻷﺍ ﻥِﺧﺳُﻣﻟ ﺔﻳﻠﺧﺍﺩﻟﺍ ءﺍﺯﺟﻷﺍ ﺢﺑﺻﺗ ﻥﺃ ﻥﻛﻣﻳ :ﻪﻳﺑﻧﺗ.ﻡﺍﺩﺧﺗﺳﻻﺍ ءﺎﻧﺛﺃ ﺔﻧﺧﺎﺳ ﺔﻣﻌﻁ
ﺔﻳﺟﺎﺟﺯﻟﺍ ﺏﺍﻭﺑﻸﻟ ﺔﺑﺳﻧﻟﺎﺑ
ﺝﺎﺟﺯﻟﺍ
ﺭﺳﻛ
ﻭﺃ
ﺢﻁﺳﻟﺍ
ﺏﺑﺳﺗ
ﺩﻗ
ﺎﻬﻧﻷ
ﻥﺭﻔﻟﺍ
ﺏﺎﺑ
ﺝﺎﺟﺯ
ﻑﻳﻅﻧﺗﻟ
ﻑﺍﻭﺣﻟﺍ
ﺓﺩﺎﺣ
ﺔﺑﺑﺩﻣ
ﺔﻳﻧﺩﻌﻣ
ﺵﻭﺩﺧ
ﻠﻋﻰ
ﻲﻓ
ﻭﺃ
ﺕﺍﻭﺩﺃ
.
ﺯﺎﻬﺟﻟﺍ
ﻭﺃ
ﺔﻁﺷﺎﻛ
ﻑﻳﻅﻧﺗﻟ
ﻑﻳﻅﻧﺗ
ﺭﺎﺧﺑﻟﺎﺑ
ﺕﺎﺟﺗﻧﻣ
ﺕﺎﻔﻅﻧﻣ
ﻡﺩﺧﺗﺳﺗ
ﻡﺩﺧﺗﺳﺗ
ﺗﺧﻣ ءﺍﺯﺟﺃ ﺓﺭﺍﺭﺣ ﻊﻔﺗﺭﺗﻣ ﺩﻭﺩﺣ ﻲﻓ ﻝﺧﺩﺗ ﻊﻗﺍﻭﻟﺍ ﻲﻓ ﺎﻬﻧﻛﻟ ﻭ ﺔﻳﺎﻐﻠﻟ ﺔﻌﻔﺗﺭﻣ ًﺎﻳﺭﻫﺎﻅ ﻭﺩﺑﺗ ﺓﺭﺍﺭﺣ ﺕﺎﺟﺭﺩ ﻝﺻﺗﻟ ﺩﻗﻭﻣﻟﺍ ﻥﻣ ﺔﻔﻠﻟﺍ ﺭﻳﻳﺎﻌ ﻲﺗﻟﺍ ،ﺔﻣﻼﺳﺗ ﺹﻧ
:ﺔﻅﺣﻼﻣ
ﻻ
ﻻ
:ﻰﻠﻋ
ﺕ
1 ﺓﺭﺍﺭﺣ ﻰﻠﻋ ﻥﺭﻔﻟﺍ ﻝﻳﻐﺷﺗ ﺩﻧﻋ (200 ﻟﺍ ﻥﻭﺩﺑ ﺎﻬﻳﻟﺇ ﻝﻭﺻﻭﻟﺍ ﻥﻛﻣﻳ ﻲﺗﻟﺍ ﺔﻳﻣﺎﻣﻷﺍ ءﺍﺯﺟﻷﺍ ﻝﺻﺗ ﻥﺃ ﻥﻛﻣﻳ ،ﺓﺩﺣﺍﻭ ﺔﻋﺎﺳ ﺓﺩﻣﻟ ﺔﻳﻭﺋﻣ ﺔﺟﺭﺩﺎﺟﺭﺩ ﻰﻟﺇ ﺽﺑﺎﻘﻣ
ﺍ:ﺔﻳﻟﺎﺗﻟﺍ ﺓﺭﺍﺭﺣﻟ
- :ﻡﻛﺣﺗﻟﺍ ﺔﺣﻭﻟTmax + ﺔﻓﺭﻐﻟﺍ ﺓﺭﺍﺭﺣ ﺔﺟﺭﺩ = ﻯﻭﺻﻘﻟﺍ ﺓﺭﺍﺭﺣﻟﺍ60°ﺱ
- :ﻥﺭﻔﻟﺍ ﺏﺎﺑ ﺝﺎﺟﺯTmax + ﺔﻓﺭﻐﻟﺍ ﺓﺭﺍﺭﺣ ﺔﺟﺭﺩ = ﻯﻭﺻﻘﻟﺍ ﺓﺭﺍﺭﺣﻟﺍ60°ﺱ
- :ﻥﺭﻔﻟﺍ ﺏﺎﺑﻟ ﺔﻳﻧﺩﻌﻣﻟﺍ ءﺍﺯﺟﻷﺍTmax +ﺔﻓﺭﻐﻟﺍ ﺓﺭﺍﺭﺣ ﺔﺟﺭﺩ = ﻯﻭﺻﻘﻟﺍ ﺓﺭﺍﺭﺣﻟﺍ45° ﺱ
2 ﺓﺭﺍﺭﺣ ﻰﻠﻋ ﻥﺭﻔﻟﺍ ﻝﻳﻐﺷﺗ ﺩﻧﻋ (230 ﺔﺟﺭﺩﺎﺟﺭﺩ ﻰﻟﺇ ﺽﺑﻘﻣﻟﺍ ﺕﺍﺫ ءﺍﺯﺟﻷﺍ ﻝﺻﺗ ﻥﺃ ﻥﻛﻣﻳ ءﺍﺯﺟﻷﺍ ﻝﺻﺗ ﻥﺃ ﻥﻛﻣﻳ ،ﺓﺩﺣﺍﻭ ﺔﻋﺎﺳ ﺓﺩﻣﻟ ﺔﻳﻭﺋﻣﻟﺎﺗﻟﺍ ﺓﺭﺍﺭﺣﻟﺍ ﺕ:ﺔﻳ
- :ﻲﻛﻳﺗﺳﻼﺑﻟﺍ ﺽﺑﻘﻣﻟﺍTmax +ﺔﻓﺭﻐﻟﺍ ﺓﺭﺍﺭﺣ ﺔﺟﺭﺩ = ﻯﻭﺻﻘﻟﺍ ﺓﺭﺍﺭﺣﻟﺍ60° ﺱ
- :ﻥﺭﻔﻟﺍ ﺏﺎﺑﻟ ﻲﻧﺩﻌﻣﻟﺍ ﺽﺑﻘﻣﻟﺍTmax + ﺔﺋﻳﺑﻟﺍ ﺓﺭﺍﺭﺣ ﺔﺟﺭﺩ = ﻯﻭﺻﻘﻟﺍ ﺓﺭﺍﺭﺣﻟﺍ35° ﺱ
ﺟﺭﺩﺑ ﺩﻭﺻﻘﻣﻟﺍ ﺱﻭﻳﺳﻠﻳﺳ ﺓﺩﺣﻭﺑ ﺔﻳﺳﺎﻳﻗ ﺓﺭﺍﺭﺣ ﺔﺟﺭﺩ ﻲﻫ ﺔﻓﺭﻐﻟﺍ ﺓﺭﺍﺭﺣ ﺔ°).ﺯﺎﻬﺟﻟﺎﺑ ﺏﻳﻛﺭﺗ ﻥﺎﻛﻣ ﺓﺭﺍﺭﺣ ﺔﺟﺭﺩ ﻰﻟﺇ ﺭﻳﺷﺗﻭ ،ﻱﻭﺋﻣ ﺱﺎﻳﻘﻣ (ﺱ
ﺕﺎﻧﻭﻛﻣﻟﺍ ﻝﺍﺩﺑﺗﺳﺍ
.ﺔﻧﺎﻳﺻﻠﻟ ﻝﺎﻣﻋﺃ ﺔﻳﺄﺑ ﻡﺎﻳﻘﻟﺍ ﻝﺑﻗ ءﺎﺑﺭﻬﻛﻟﺍﻭ ﺯﺎﻐﻟﺍ ﻲﺗﻛﺑﺷ ﻥﻋ ﺯﺎﻬﺟﻟﺍ ﻝﺻﻓ ﺏﺟﻳ
ﻣ ﻥﻣ ﺎﻬﺗﻳﺣﻧﺗ ﻲﻔﻛﻳ ﺩﻗﺍﻭﻣﻟﺍﻭ ﺽﺑﺎﻘﻣﻟﺍ ﻝﺛﻣ ﺕﺎﻧﻭﻛﻣﻟﺍ ﺽﻌﺑ ﻝﺍﺩﺑﺗﺳﻻ.ﻥﺭﻔﻟﺍ ﻥﻣ ﺔﻌﻁﻗ ﻱﺃ ﻙﻳﻛﻔﺗ ﻥﻭﺩ ﺎﻬﻌﺿﻭ
ﻭﻣﻟﺍ ﻁﺑﺿ ﺓﺭﻘﻓ ﻲﻓ ﺓﺩﺭﺍﻭﻟﺍ ﺕﺍءﺍﺭﺟﻹﺍ ﻊﺑﺗﺍ ﺔﻳﺋﺎﺑﺭﻬﻛﻟﺍ ﺕﺎﻧﻭﻛﻣﻟﺍﻭ ﻖﻓﺩﺗﻟﺍ ﻁﺑﺿ ﺕﺎﻣﺎﻣﺻﻭ ،ﺕﺎﻫﻭﻔﻟﺍ ﻡﺋﺎﻋﺩ ﻝﺛﻣ ﺕﺎﻧﻭﻛﻣﻟﺍ ﺽﻌﺑ ﻝﺍﺩﺑﺗﺳﻻﻻﻭ .ﺩﻗﺎﻣﺻﻟﺍ ﻝﺍﺩﺑﺗﺳ ﻭﺃ ﺕﺎﻣ
ﺕﻳﺑﺛﺗﻟﺍ ﻲﻠﻣﺎﺣ ﻙﻳﻛﻔﺗ ﺎﺿﻳﺃ ﻱﺭﻭﺭﺿﻟﺍ ﻥﻣﻟ ﻪﻧﺎﻓ ﺯﺎﻐﻠﻟ (ﺕﺎﺗﺳﻭﻣﺭﺛﻟﺍ) ﻱﺭﺍﺭﺣﻟﺍ ﻡّﻅﻧﻣﻟﺍ ﻷﺍ ﻲﻏﺍﺭﺑﻟﺍ ﻙﻔﺑ ﻙﻟﺫﻭ ﺯﺎﻐﻟﺍ ﺓﺭﻭﺳﺎﻣﻟ ﻥﻳﻳﻔﻠﺧﻟﺍ) ﺔﻌﺑﺭ2 ﺎﻣﻬﺑﺛﺗ ﻲﺗﻟﺍﻭ (ﻝﻣﺎﺣ ﻝﻛﻟ
ﺍ ﻝﺍﺩﺑﺗﺳﻻﻭ .ﺽﺑﺎﻘﻣﻟﺍ ﻝﻛ ﺔﻟﺍﺯﺇ ﺩﻌﺑ ،ﻡﻛﺣﺗﻟﺍ ﺭﻣﺍﻭﺃ ﺔﺣﻭﻟ ﺔﻣﺎﻋﺩ ﻰﻟﺇ ﺔﻳﻣﺎﻣﻷﺍ ﺩﻗﺍﻭﻣﻟﺍ ﺕﺎﻣﺎﻣﺻ ﺕﺑﺛﺗ ﻲﺗﻟﺍ ﻝﻳﻣﺍﻭﺻﻟﺍ ﻙﻔﺑﻭ ﺯﺎﻬﺟﻟﺍ ﻲﻓ ﻡّﻅﻧﻣﻟﺍﺭﺛﻟﺍ) ﻱﺭﺍﺭﺣﻟ (ﺕﺎﺗﺳﻭﻣ
ﻛﻔﺗ ﺎﺿﻳﺃ ﺏﺟﻳ ،ﻲﺋﺎﺑﺭﻬﻛﻟﺍ ﻭﺃ ﻱﺯﺎﻐﻟﺍ ّﻅﻧﻣﻟﺍ ﺓﺩﺎﻋﺇﻭ ﻝﺣ ﻥﻣ ﻥﻛﻣﺗﻠﻟ ﻪﺑ ﺔﺻﺎﺧﻟﺍ ﻲﻏﺍﺭﺑﻟﺍ ءﺎﺧْﺭﺈﺑ ﻙﻟﺫﻭ ،ﺩﻗﻭﻣﻠﻟ ﻲﻗﺍﻭﻟﺍ ﻲﻔﻠﺧﻟﺍ ﺡﻭﻠﻟﺍ ﻙﻳﺭﺣﻟﺍ ﻡﺳﻭﻣﺭﺛﻟﺍ) ﻱﺭﺍ (ﺕﺎﺗ
.ﻪﻌﺿﻭﻣ
ﻝﻛﺷﻟﺍ) .ﻥﺭﻔﻟﺍ ﻝﺧﺍﺩ ﺯﺭﺎﺑﻟﺍﻭ ﻲﻗﺍﻭﻟﺍ ﺎﻫءﺎﻁﻏ ﻙﻓ ﻲﻔﻛﻳ ﻥﺭﻔﻟﺍ ﺔﺑﻣﻟ ﻝﺍﺩﺑﺗﺳﻻ13(
ﺭﻳﺫﺣﺗ: ﺏﺟﻳ ﻝﺻﻓ ﺯﺎﻬﺟﻟﺍ ﻥﻋ ﺭﺎﻳﺗﻟﺍ ﻲﺋﺎﺑﺭﻬﻛﻟﺍ ﻝﺑﻗ ﻡﺎﻳﻘﻟﺍ ﻝﺍﺩﺑﺗﺳﺎﺑ ﻠﻟﺍﺔﺑﻣ.
56
Page 57

ﺩﻗﻭﻣﻟﺍ ﻁﺑﺿ
1 ﻰﻧﺩﻷﺍ ﺩﺣﻟﺍ ﻰﻠﻋ ﺩﻗﻭﻣﻟﺍ ﻁﺑﺿ (“MINIMUM : ”
ﻰﻧﺩﻷﺍ ﺩﺣﻟﺍ ﻰﻠﻋ ﺢﻁﺳﻟﺍ ﺩﻗﻭﻣ ﻁﺑﺿﻟ ﺔﻳﻟﺎﺗﻟﺍ ﺕﺎﻣﻳﻠﻌﺗﻟﺍ ﻊﺑﺗﺍ“MINIMUM:”
:ﺢﻁﺳﻟﺍ ﺩﻗﻭﻣ ﻁﺑﺿ
1 ﻰﻧﺩﻷﺍ ﺩﺣﻟﺍ ﻊﺿﻭ ﻰﻠﻋ ﺭﺍﻭﺩﻟﺍ ﺽﺑﻘﻣﻟﺍ ﻁﺑﺿﺍ ﻡﺛ ﺩﻗﻭﻣﻟﺍ ﺩﻗﻭﺃ (“MINIMUM ”.(ﺭﻳﻐﺻ ﺏﻬﻟ)
2ﺎﻛﺣﺈﺑ ﺕﺑﺛﻣﻟﺍ ﻡﺎﻣﺻﻟﺍ ﺽﺑﻘﻣ ﻉﺯﻧﺍ (.ﻡﺎﻣﺻﻟﺍ ﺏﻳﺿﻗ ﻰﻠﻋ ﻡ
3 ﻝﻛﺷﻟﺍ) ﻡﺎﻣﺻﻟﺍ ﺏﻳﺿﻗ ﻲﻓ ﺩﺟﺍﻭﺗﻣﻟﺍ ﺏﻘﺛﻟﺍ ﻲﻓ ﺭﻳﻐﺻ ﻲﻏﺍﺭﺑ ﻙﻔﻣ ﻝﺎﺧﺩﺇ ﻲﻐﺑﻧﻳﻓ ،ﺢﻁﺳﻟﺍ ﺩﻗﻭﻣﻟ ﻥﺎﻣﺃ ﻡﺎﻣﺻﺑ ﺍﺯﻬﺟﻣ ﺩﻗﻭﻣﻟﺍ ﻥﻛﻳ ﻡﻟ ﺍﺫﺇ (8( ﻖﻧﺎﺧﻟﺍ ﻲﻏﺭﺑﻟﺍ ﺭﻳﻭﺩﺗ ﻡﺛ
ﻥﺎﻛ ﺍﺫﺇﻭ .ﻰﻧﺩﻷﺍ ﺩﺣﻟﺍ ﻰﻠﻋ ﺩﻗﻭﻣﻟﺍ ﺏﻬﻟ ﻁﺑﺿ ﻥﻳﺣﻟ ﺍﺭﺎﺳﻳ ﻭﺃ ﺎﻧﻳﻣﻳ (ﻖﻓﺩﺗﻣﻟﺍ ﺯﺎﻐﻟﺍ ﺔﻳﻣﻛ ﻲﻓ ﻡﻛﺣﺗﻣﻟﺍ) ﺎﻓ ،ﻥﺎﻣﺃ ﻡﺎﻣﺻﺑ ﺍﺯﻬﺟﻣ ﺩﻗﻭﻣﻟﺍﺎﻣﺻﻟﺍ ﻥ ﻥﻟ ﻖﻧﺎﺧﻟﺍ ﻡﻳ ﺍﺩﺟﺍﻭﺗﻣ ﻥﻭﻛ
ﻝﻛﺷﻟﺍ ﺭﻅﻧﺍ) ﻡﺎﻣﺻﻟﺍ ﻝﻛﻳﻫ ﻲﻓ ﺎﻣﻧﺇﻭ ﺏﻳﺿﻘﻟﺍ ﺏﻘﺛ ﻲﻓ9.(
4 ﻝﻛﺷﻟﺍ) ﻡﺎﻣﺻﻟﺍ ﻝﻛﻳﻫ ﻲﻓ ﺩﺟﻭﻳ ﻖﻧﺎﺧﻟﺍ ﻡﺎﻣﺻﻟﺍ ﻥﺈﻓ ،ﻲﺋﺎﻧﺛﻟﺍ ﺩﻗﻭﻣﻟﺍ ﺯﺎﻏ ﻡﺎﻣﺻﻟ ﺔﺑﺳﻧﻟﺎﺑ (10 ﺭﺎﻣﺳﻣﻟﺍ ﻡﻭﻘﻳﻭ ،(A ﺟﺭﺎﺧﻟﺍ ﻕﻭﻁﻟﺍ ﻁﺑﺿﺑ ﺭﺎﻣﺳﻣﻟﺍ ﻡﻭﻘﻳ ﻥﻳﺣ ﻲﻓ ،ﻲ
B .ﻲﻠﺧﺍﺩﻟﺍ ﻕﻭﻁﻟﺍ ﻁﺑﺿﺑ
5 ﻰﺻﻗﻷﺍ ﺩﺣﻟﺍ ﻥﻣ ﺔﻋﺭﺳﺑ ﻝﻳﺩﺑﺗﻟﺍ ﺩﻧﻋ ﺏﻬﻠﻟﺍ ءﺎﻔﻁﻧﺍ ﻡﺩﻋ ﻥﺃ ﻥﻣ ﺩﻛﺄﺗ (MAXIMUM ﻰﻧﺩﻷﺍ ﺩﺣﻟﺍ ﻰﻟﺇMINIMUM .
:ﻰﻧﺩﻷﺍ ﺩﺣﻟﺍ ﻰﻠﻋ ﺩﻗﻭﻣﻟﺍ ﻁﺑﺿﻟ ﺔﻳﻟﺎﺗﻟﺍ ﺕﺎﻣﻳﻠﻌﺗﻟﺍ ﻊﺑﺗﺍ
:ﻥﺭﻔﻟﺍ ﺩﻗﻭﻣ ﻁﺑﺿ
1 ﻰﺻﻗﻷﺍ ﺩﺣﻟﺍ ﻊﺿﻭ ﻰﻠﻋ ﺭﺍﻭﺩﻟﺍ ﺽﺑﻘﻣﻟﺍ ﻁﺑﺿﺍ ﻡﺛ ﺩﻗﻭﻣﻟﺍ ﺩﻗﻭﺃ (MAXIMUM:
2ﺃ ( ﺓﺩﻣﻟ ﻥﺭﻔﻟﺍ ﻝﻳﻐﺷﺗﺑ ﻡﻗ ﻡﺛ ﻥﺭﻔﻟﺍ ﺏﺎﺑ ﻖﻠﻏ10 .ﻝﻗﻷﺍ ﻰﻠﻋ ﻖﺋﺎﻗﺩ
ﻖﺑﺎﻁﻳ ﺎﻣﺑ)120 .ﻪﻋﺯﻧﺑ ﻙﻟﺫ ﺩﻌﺑ ﻡﻗ ﻡﺛ (ﺔﻳﻭﺋﻣ ﺔﺟﺭﺩ
3 ﻰﻧﺩﻷﺍ ﺩﺣﻟﺍ ﻰﻠﻋ ﻊﺿﻭ ﻰﻠﻋ ﺭﺍﻭﺩﻟﺍ ﺽﺑﻘﻣﻟﺍ ﻁﺑﺿﺍ (“MINIMUM ”
4 ﺭﻳﻐﺻﻟﺍ ﺱﺎﻘﻣﻟﺍ ﻥﻣ ﻲﻏﺍﺭﺑ ﻙﻔﻣ ﻡﺍﺩﺧﺗﺳﺎﺑ (ﻖﻓﺩﺗﻣﻟﺍ ﺯﺎﻐﻟﺍ ﺔﻳﻣﻛ ﻲﻓ ﻡﻛﺣﺗﻣﻟﺍ) ﻖﻧﺎﺧﻟﺍ ﻲﻏﺭﺑﻟﺍ ﺭﻳﻭﺩﺗﺑ ﻡﻗ ( ﻝﻛﺷﻟﺍ ﺭﻅﻧﺍ)11ﻧﺛﺃ ﻲﻓ ﻡﻗﻭ ( ﻥﻣ ﺏﻬﻠﻟﺍ ﺔﺑﻗﺍﺭﻣﺑ ﻙﻟﺫ ءﺎ
ﻰﻧﺩﻷﺍ ﺩﺣﻟﺍ ﻥﻣ ﻊﻳﺭﺳﻟﺍ ﻝﻳﺩﺑﺗﻟﺍ ءﺍﺭﺟﺇ ﺩﻧﻋ ﺔﻠﻌﺷﻟﺍ ﺊﻔﻁﻧﺗ ﻻ ﺙﻳﺣﺑ ﺏﻬﻠﻟﺍ ﺔﻓﺎﺛﻛ ﺔﺟﺭﺩ ﻡﻳﻳﻘﺗ ﻝﺟﺃ ﻥﻣ ﺩﻗﻭﻣﻟﺍ ﺔﺣﺗﻓ ﻝﻼﺧ“MINIMUM ”ﻰﻟﺇ ﻰﺻﻗﻷﺍ ﺩﺣﻟﺍ
“MAXIMUM.”
ﺩﺣﻟﺍ ﻰﻠﻋ ﺩﻗﻭﻣﻟﺍ ﻁﺑﺿﻟ ﺔﻳﻟﺎﺗﻟﺍ ﺕﺎﻣﻳﻠﻌﺗﻟﺍ ﻊﺑﺗﺍ :ﻰﻧﺩﻷﺍ
:ﺔﻳﺍﻭﺷﻟﺍ ﺩﻗﻭﻣ ﻁﺑﺿ
1 ﻰﺻﻗﻷﺍ ﺩﺣﻟﺍ ﻊﺿﻭ ﻰﻠﻋ ﺭﺍﻭﺩﻟﺍ ﺽﺑﻘﻣﻟﺍ ﻁﺑﺿﺍ ﻡﺛ ﺩﻗﻭﻣﻟﺍ ﺩﻗﻭﺃ (MAXIMUM:
2 ﺓﺩﻣﻟ ﻥﺭﻔﻟﺍ ﻝﻳﻐﺷﺗﺑ ﻡﻗ ﻡﺛ ﻥﺭﻔﻟﺍ ﺏﺎﺑ ﻖﻠﻏﺃ (10 .ﻝﻗﻷﺍ ﻰﻠﻋ ﻖﺋﺎﻗﺩ
3 ﻰﻧﺩﻷﺍ ﺩﺣﻟﺍ ﻰﻠﻋ ﻊﺿﻭ ﻰﻠﻋ ﺭﺍﻭﺩﻟﺍ ﺽﺑﻘﻣﻟﺍ ﻁﺑﺿﺍ (“MINIMUM ”.ﻪﻋﺯﻧﺑ ﻙﻟﺫ ﺩﻌﺑ ﻡﻗ ﻡﺛ ،(ﺭﻳﻐﺻ ﺏﻬﻟ)
4ﻣﺻﺑ ﺍﺯﻬﺟﻣ ﺩﻗﻭﻣﻟﺍ ﻥﻛﻳ ﻡﻟ ﺍﺫﺇ ( ﻝﻛﺷﻟﺍ) ﻡﺎﻣﺻﻟﺍ ﺏﻳﺿﻗ ﻲﻓ ﺩﺟﺍﻭﺗﻣﻟﺍ ﺏﻘﺛﻟﺍ ﻲﻓ ﺭﻳﻐﺻ ﻲﻏﺍﺭﺑ ﻙﻔﻣ ﻝﺎﺧﺩﺇ ﻲﻐﺑﻧﻳﻓ ،ﺢﻁﺳﻟﺍ ﺩﻗﻭﻣﻟ ﻥﺎﻣﺃ ﻡﺎ8( ﻖﻧﺎﺧﻟﺍ ﻲﻏﺭﺑﻟﺍ ﺭﻳﻭﺩﺗ ﻡﺛ
ﺎﺛﻛ ﺔﺟﺭﺩ ﻡﻳﻳﻘﺗ ﻝﺟﺃ ﻥﻣ ﺩﻗﻭﻣﻟﺍ ﺔﺣﺗﻓ ﻝﻼﺧ ﻥﻣ ﺏﻬﻠﻟﺍ ﺔﺑﻗﺍﺭﻣﺑ ﻙﻟﺫ ءﺎﻧﺛﺃ ﻲﻓ ﻡﻗﻭ ،ﺍﺭﺎﺳﻳ ﻭﺃ ﺎﻧﻳﻣﻳ (ﻖﻓﺩﺗﻣﻟﺍ ﺯﺎﻐﻟﺍ ﺔﻳﻣﻛ ﻲﻓ ﻡﻛﺣﺗﻣﻟﺍ)ﻬﻠﻟﺍ ﺔﻓﻧﺗ ﻻ ﺙﻳﺣﺑ ﺏﻔﻁ ﺩﻧﻋ ﺔﻠﻌﺷﻟﺍ ﺊ
ﻰﻧﺩﻷﺍ ﺩﺣﻟﺍ ﻥﻣ ﻊﻳﺭﺳﻟﺍ ﻝﻳﺩﺑﺗﻟﺍ ءﺍﺭﺟﺇ“MINIMUM ” ﻰﺻﻗﻷﺍ ﺩﺣﻟﺍ ﻰﻟﺇ“MAXIMUM .”ﻟﺍ ﻡﺎﻣﺻﻟﺍ ﻥﺎﻓ ،ﻥﺎﻣﺃ ﻡﺎﻣﺻﺑ ﺍﺯﻬﺟﻣ ﺩﻗﻭﻣﻟﺍ ﻥﺎﻛ ﺍﺫﺇﻭ ﻥﻭﻛﻳ ﻥﻟ ﻖﻧﺎﺧ
ﻝﻛﺷﻟﺍ ﺭﻅﻧﺍ) ﻡﺎﻣﺻﻟﺍ ﻝﻛﻳﻫ ﻲﻓ ﺎﻣﻧﺇﻭ ﺏﻳﺿﻘﻟﺍ ﺏﻘﺛ ﻲﻓ ﺍﺩﺟﺍﻭﺗﻣ9.(
ﻩﻼﻋﺃ ﻡﺋﻼﻣ ﻓﻁﻘ ﺩﻗﺍﻭﻣﻠﻟ ﺔﻣﻣﺻﻣﻟﺍ ﻡﺍﺩﺧﺗﺳﻼﻟ ﻊﻣ ﺯﺎﻐﻟﺍ ،ﻲﻌﻳﺑﻁﻟﺍ ﺎﻣﻧﻳﺑ ﺏﻠﻁﺗﻳ ﺗﻝﻳﻐﺷ ﺩﻗﺍﻭﻣﻟﺍ ﺔﻠﻣﺎﻌﻟﺍ ﺑﺯﺎﻐﻟﺎ ﻝﺋﺎﺳﻟﺍ
ﺭﻳﺫﺣﺗ: ﻁﺑﺿ ﺯﺎﻬﺟﻟﺍ ﻰﻠﻋ ﺔﻟﺎﺣﻟﺍ ﺓﺭﻭﻛﺫﻣﻟﺍ
ﺎﻬﺗﺭﺍﺩﺇ ﻲﻓ ﻩﺎﺟﺗﺍ ﺏﺭﺎﻘﻋ ﺔﻋﺎﺳﻟﺍ ﻰﻟﺇ ﺔﻳﺎﻬﻧﻟﺍ ﻡﺎﻛﺣﺈﺑﻭ.
ﺭﻳﺫﺣﺗ: ﻲﻐﺑﻧﻳ ﺎﻣﺋﺍﺩ ﻝﻳﻐﺷﺗ ﺩﻗﻭﻣ ﺔﻳﺍﻭﺷ ﺯﺍﺭﻁﻟﺍ ﺯﻬﺟﻣﻟﺍ ﺩﻗﻭﻣﺑ ﺩﺣﺍﻭ ﻰﻠﻋ ﻰﺻﻗﺃ ،ﺩﺣ ﺍﺫﻬﻟﻭ ﻼﻓ ﻲﻋﺍﺩ ﻪﻁﺑﺿﻟ ﻰﻠﻋ ﺩﺣﻟﺍ ﻧﺩﻷﺍﻰ.
:ﻲﺋﺎﺑﺭﻬﻛﻟﺍ ﺭﺎﻳﺗﻟﺎﺑ ﺯﺎﻬﺟﻟﺍ ﻁﺑﺭ
.ﻲﺋﺎﺑﺭﻬﻛﻟﺍ ﺭﺎﻳﺗﻟﺎﺑ ﻁﺑﺭﻟﺍ ءﺍﺭﺟﺇ ﺩﻧﻋ ﺎﻬﺑ ﻝﻭﻣﻌﻣﻟﺍ ﻥﻳﻧﺍﻭﻘﻟﺍﻭ ﺭﻳﻳﺎﻌﻣﻟﺍ ﺓﺎﻋﺍﺭﻣ ﺏﺟﻳ
:ﻲﺗﻵﺍ ﺔﻌﺟﺍﺭﻣ ﻲﻐﺑﻧﻳ ،ﻲﺋﺎﺑﺭﻬﻛﻟﺍ ﺭﺎﻳﺗﻟﺎﺑ ﻁﺑﺭﻟﺍ ﺔﻳﻠﻣﻋ ﻲﻓ ﻉﻭﺭﺷﻟﺍ ﻝﺑﻗ
.(ﺯﺎﻬﺟﻟﺍ
ﺍ ﻥﻋ ﺔﻳﻟﻭﺋﺳﻣﻟﺍ ﺔﺟﺗﻧﻣﻟﺍ ﺔﻛﺭﺷﻟﺍ.ﻡﺍﺩﺧﺗﺳﻻﺍ ﻝﻳﻟﺩ ﻲﻓ ﺓﺭﻭﻛﺫﻣﻟﺍ ﺕﺎﻣﻳﻠﻌﺗﻟﺍ ﻉﺎﺑﺗﺇ ﻡﺩﻋ ﻥﻋ ﻡﺟﻧﺗ ﺩﻗ ﻲﺗﻟﺍ ﺞﺋﺎﺗﻧﻟ
:(ﺱﺑﻘﻣ) ﺭﺎﻳﺗﻠﻟ ﺫﺧﺄﻣ ﺭﺑﻋ ﻡﺗﻳ ﻲﺋﺎﺑﺭﻬﻛﻟﺍ ﺭﺎﻳﺗﻟﺎﺑ ﺩﺍﺩﻣﻹﺍ ﺔﻛﺑﺷﺑ ﻝﻳﺻﻭﺗﻟﺍ ﻥﺎﻛ ﺍﺫﺇ
ﻡﻗﺭ ﻝﻛﺷﻟﺍ ﻲﻓ ﺢﺿﻭﻣﻟﺍ ﻲﻧﺎﻳﺑﻟﺍ ﻡﺳﺭﻠﻟ ﺎﻘﺑﻁ ﻙﻼﺳﻷﺍ12 :ﻲﺗﻵﺍ ﻥﻣ ﻖﻘﺣﺗ ﻡﺛ
ﻑﺭﺣﻟﺍL (ﺯﺎﻓ)– ؛ﻲﻧﺑﻟﺍ ﻙﻠﺳﻟﺍ
ﻑﺭﺣﻟﺍN (ﺩﻳﺎﺣﻣ)– ؛ﻕﺭﺯﻷﺍ ﻙﻠﺳﻟﺍ
؛ﺭﻔﺻﻷﺍﻭ ﺭﺿﺧﻷﺍ ﻥﻳﻧﻭﻠﻟﺍ ﻭﺫ ﻙﻠﺳﻟﺍ = ﺽﻳﺭﺄﺗﻟﺍ ﺯﻣﺭ
ﺩ ﻝﻭﺣﻳ ﻊﺿﻭ ﻲﻓ ﺎﺗﺑﺛﻣ ﻲﺋﺎﺑﺭﻬﻛﻟﺍ ﻙﻠﺳﻟﺍ ﻥﻭﻛﻳ ﻥﺃ ﺏﺟﻳ ﻯﺩﻌﺗﻳ ﺎﻣ ﻰﻟﺇ ﻪﻧﻣ ءﺯﺟ ﻱﺃ ﺓﺭﺍﺭﺣ ﺔﺟﺭﺩ ﻝﻭﺻﻭ ﻥﻭ75 K.
ﺍ ﻰﻟﺇ ﻯﺩﺅﻳ ﺊﻁﺎﺧ ﺱﻣﻼﺗ ﺙﻭﺩﺣ ﻲﻓ ﺏﺑﺳﺗ ﺩﻗ ﺎﻬﻧﻷ ،ﺭﺎﻳﺗﻟﺍ ﺔﺋﺯﺟﺗﻟ ﺕﻼﺻﻭ ﻭﺃ ﺔﺋﻳﺎﻬﻣ ﺕﻼﺻﻭ ﻭﺃ ﺽﻳﻔﺧﺗ ﺕﻼﺻﻭ ﺔﻳﺃ ﻝﻳﺻﻭﺗﻟﺍ ﻲﻓ ﻡﺩﺧﺗﺳﺗ ﻻﻣ ﻉﺎﻔﺗﺭ ﺭﻳﻁﺧﻭ ﻁﺭﻔ
.ﺓﺭﺍﺭﺣﻟﺍ ﺔﺟﺭﺩ ﻲﻓ
57
- ﻟ ﻯﻭﺻﻘﻟﺍ ﺔﻗﺎﻁﻟﺍ ﺕﺎﺑﻠﻁﺗﻣﻟ ﻲﺋﺎﺑﺭﻬﻛﻟﺍ ﺭﺎﻳﺗﻟﺍ (ﺱﺑﺎﻘﻣ) ﺫﺧﺂﻣﻭ ﺔﻳﺋﺎﺑﺭﻬﻛﻟﺍ ﺓﺭﺩﻘﻟﺍ ﺔﻳﺎﻔﻛﺛﻣﻟﺍ ﺔﻳﻧﻔﻟﺍ ﺕﺎﻔﺻﺍﻭﻣﻟﺍ ﺔﺣﻭﻟ ﺭﻅﻧﺃ) .ﺯﺎﻬﺟﻠ ﻲﻓ ﺔﺗﺑﺍ ﻲﻠﻔﺳﻟﺍ ءﺯﺟﻟﻣ ﻝﻛﻳﻫ ﻥ
- ﺍ ﺩﻋﺍﻭﻘﻟﺍﻭ ﺭﻳﻳﺎﻌﻣﻠﻟ ﺔﻘﺑﺎﻁﻣ ﺔﻳﻟﺎﻋ ﺔﻳﻟﺎﻌﻓ ﺔﺟﺭﺩ ﻱﺫ ﻲﺿﺭﺃ ﻝﻳﺻﻭﺗﺑ ﻥﺍﺯﻬﺟﻣ ﻡﺎﻅﻧﻟﺍ ﻭﺃ ﻲﺋﺎﺑﺭﻬﻛﻟﺍ ﺭﺎﻳﺗﻟﺍ (ﺱﺑﺎﻘﻣ) ﺫﺧﺂﻣ ﺕﻧﺎﻛ ﺎﻣ ﺍﺫﺇﻳﻧﻭﻧﺎﻘﻟﻬﺑ ﻝﻭﻣﻌﻣﻟﺍ ﺔ ﻝﻣﺣﺗﺗ ﻻ .ﺎ
- ﺑ ﻲﻓ ﺎﻬﻳﻟﺇ ﺭﺎﺷﻣﻟﺍ ﻝﻳﻣﺣﺗﻟﺍ ﺔﺟﺭﺩﻟ ﻡﺋﻼﻣ ﻲﺳﺎﻳﻗ ﺱﺑﺎﻗ ﺏﻳﻛﺭﺗ ﻲﻐﺑﻧﻳﻓ ﺱﺑﺎﻘﺑ ﺩﻭﺯﻣ ﺭﻳﻏ ﻲﺑﺭﻬﻛﻟﺍ ﻝﻳﺻﻭﺗﻟﺍ ﻙﻠﺳ ﻥﻛﻳ ﻡﻟ ﺍﺫﺇﻔﺻﺍﻭﻣﻟﺍ ﺔﻗﺎﻁﻔﻟﺍ ﺕﺎﺻﻭﺗﺑ ﻡﻗ .ﺔﻳﻧ ﻝﻳ
Page 58

ﻝﻭﺩﺟﻟﺍ1
ﺩﻗﻭﻣﻟﺍ ﺯﺎﻐﻟﺍ ﻉﺍﻭﻧﺃ ﻁﻐﺿﻟﺍ ﺔﻫﻭﻔﻟﺍ ﺭﻁﻗ ﺳﻟﺍ ﺓﺭﺩﻘﻣﻟﺍ ﺔﻌ
ﺭﺎﺑ ﻲﻠﻠﻣ 1/100 .ﻡﻠﻣ ﺱ/ﻍ ﺱ/ﻝ ﺕﺍﻭﻠﻳﻛ ﺱ/ﻝﺎﻛﻭﻠﻳﻛ
ﻱﻭﻧﺎﺛﻟﺍ ﻲﻌﻳﺑﻁG20 20 72 - 95 1 860
ﻥﺎﺗﻭﺑG30 30-28 50 73 - 1 860
ﻥﺎﺑﻭﺭﺑG31 37 50 71 - 1 860
ﻪﺑﺷﻟﺍﻊﻳﺭﺳﻟﺍ ﻲﻌﻳﺑﻁG20 20 97 - 167 1.75 1505
ﻥﺎﺗﻭﺑG30 30-28 65 127 - 1.75 1505
ﻥﺎﺑﻭﺭﺑG31 37 65 125 - 1.75 1505
ﻊﻳﺭﺳﻟﺍ ﻲﻌﻳﺑﻁG20 20 115 - 286 3 2580
ﻥﺎﺗﻭﺑG30 30-28 85 218 - 3 2580
ﻥﺎﺑﻭﺭﺑG31 37 85 214 - 3 2580
ﺔﻋﺭﺳﻟﺍ ﻖﺋﺎﻓ ﻲﻌﻳﺑﻁG20 20 153 - 405 4.25 3655
4 ﺕﺍﻭﻠﻳﻛ ﻥﺎﺗﻭﺑG30 30-28 102 309 - 4.25 3655
ﻥﺎﺑﻭﺭﺑG31 37 102 303 - 4.25 3655
4300
5
-
4.60 3956
4.60 3956
476
-
-
-
-
-
-
334
328
ﻲﺟﺭﺎﺧﻟﺍ155
ﻲﻠﺧﺍﺩﻟﺍ70
ﻲﺟﺭﺎﺧﻟﺍ96
ﻲﻠﺧﺍﺩﻟﺍ46
ﻲﺟﺭﺎﺧﻟﺍ96
ﻲﻠﺧﺍﺩﻟﺍ46
30-28
37
ﻲﻌﻳﺑﻁG20 20
ﻥﺎﺗﻭﺑG30
ﺔﻋﺭﺳﻟﺍ ﻖﺋﺎﻓ
ﻲﺋﺎﻧﺛ5 ﺕﺍﻭﻠﻳﻛ
ﻥﺎﺑﻭﺭﺑG31
ﻝﻭﺩﺟﻟﺍ2 (ﺝﻭﺩﺯﻣ ﻡﻛﺣﺗﺑ ﺔﻳﺯﺎﻏ ﺔﻳﺍﻭﺷﻭ ﻱﺯﺎﻏ ﻥﺭﻔﺑ ﺯﻬﺟﻣﻟﺍ ﺯﺍﺭﻁﻟﺍ)
ﻥﺭﻔﻟﺍ ﻲﻌﻳﺑﻁG20 20 155 - 429 4.50 3870
ﻥﺎﺗﻭﺑG30 30-28 105 327 - 4.50 3870
ﻥﺎﺑﻭﺭﺑG31 37 105 321 - 4.50 3870
ﺔﻳﺍﻭﺷﻟﺍ ﻲﻌﻳﺑﻁG20 20 108 - 191 2 1720
ﻥﺎﺗﻭﺑG30 30-28 72 145 - 2 1720
ﻥﺎﺑﻭﺭﺑG31 37 72 143 - 2 1720
ﻝﻭﺩﺟﻟﺍ3 ﻳﺯﺎﻏ ﺔﻳﺍﻭﺷﻭ ﻱﺯﺎﻏ ﻥﺭﻔﺑ ﺯﻬﺟﻣﻟﺍ ﺯﺍﺭﻁﻟﺍ)(ﺔﻳﺋﺎﺑﺭﻬﻛ ﺔﻳﺍﻭﺷﻭ ﻱﺯﺎﻏ ﻥﺭﻔﺑ ﻭﺃ ،ﺩﺭﻔﻧﻣ ﻡﻛﺣﺗﺑ ﺔ
ﻥﺭﻔﻟﺍ ﻲﻌﻳﺑﻁG20 20 155 - 429 4.50 3870
ﻥﺎﺗﻭﺑG30 30-28 105 327 - 4.50 3870
ﻥﺎﺑﻭﺭﺑG31 37 105 321 - 4.50 3870
ﺔﻳﺍﻭﺷﻟﺍ ﻲﻌﻳﺑﻁG20 20 108 - 191 2 1720
ﻥﺎﺗﻭﺑG30 30-28 72 145 - 2 1720
ﻥﺎﺑﻭﺭﺑG31 37 72 143 - 2 1720
58
Page 59

.ﻲﻓﺭﺣﻟﺍ ﺱﻳﻟﻭ ﻲﻟﺯﻧﻣﻟﺍ ﻡﺍﺩﺧﺗﺳﻼﻟ ﻡﻣﺻﻣ ﺯﺎﻬﺟﻟﺍ
ﺏﻳﻛﺭﺗﻟﺎﺑ ﻡﺋﺎﻘﻠﻟ ﺔﻳﻧﻘﺗ ﺕﺎﻣﻳﻠﻌﺗ
ﺯﺎﻐﻟﺍ ﺭﺩﺻﻣﺑ ﺯﺎﻬﺟﻟﺍ ﻝﻳﺻﻭﺗ
ﺍ ﻥِﺧﺳُﻣ ﺝﺭﺩ ﻰﻠﻋ ﺔﺗﺑﺛﻣﻟﺍ ﺔﻳﻧﻔﻟﺍ ﺕﺎﻔﺻﺍﻭﻣﻟﺍ ﺔﺣﻭﻟ ﻰﻠﻋ ﺓﺩﺭﺍﻭﻟﺍ ﺕﺎﻧﺎﻳﺑﻟﺍ ﺔﻘﺑﺎﻁﻣ ﻥﻣ ﺩﻛﺄﺗ ،ﺯﺎﻐﻟﺍ ﺔﻛﺑﺷﺑ ﺯﺎﻬﺟﻟﺍ ﻝﻳﺻﻭﺗ ﻝﺑﻗﻷﻁ ﺔﻣﻌﻭﺃ ﺟﻟﺍ ﻰﻠﻋﻟ ﻲﻔﻠﺧﻟﺍ ﺏﻧﺎ ﺩﻗﻭﻣﻠ
ﺑﻟ.ﺯﺎﻐﻟﺍ ﻊﻳﺯﻭﺗ ﺔﻛﺑﺷ ﺕﺎﻧﺎﻳ
ﺍ ﻥِﺧﺳُﻣ ﺝﺭﺩ ﻰﻠﻋ ﺔﺗﺑﺛﻣﻟﺍ ﺔﻳﻧﻔﻟﺍ ﺕﺎﻔﺻﺍﻭﻣﻟﺍ ﺔﺣﻭﻟﻭ ﻡﺍﺩﺧﺗﺳﻻﺍ ﻝﻳﻟﺩ ﻥﻣ ﺓﺭﻳﺧﻷﺍ ﺔﺣﻔﺻﻟﺍ ﻰﻠﻋ ﺔﻘﺻﻠﻣﻟﺍ ﺔﻗﺎﻁﺑﻟﺍ ﻥﻣ ﻝﻛ ﻥﻣﺿﺗﺗﻷﻁ ﺔﻣﻌﻭﺃ ﻟﺍ ﻰﻠﻋ) ﻲﻔﻠﺧﻟﺍ ﺏﻧﺎﺟﻟ (ﺩﻗﻭﻣﻠ
.ﻝﻳﻐﺷﺗﻠﻟ ﻡﺯﻼﻟﺍ ﻁﻐﺿﻟﺍﻭ ﺯﺎﻐﻟﺍ ﻉﻭﻧ :ﺯﺎﻬﺟﻟﺍ ﻁﺑﺿﻟ ﺔﻔﻠﺗﺧﻣﻟﺍ ﻉﺎﺿﻭﻷﺎﺑ ﺔﻘﻠﻌﺗﻣﻟﺍ ﺕﺎﺣﺎﺿﻳﻹﺍ
ﻫﺍ ﺓﺩﻳﺟ ﺔﻓﺭﻏ ﻲﻓ ﻪﻣﺍﺩﺧﺗﺳﺍ ﻱﺭﺟﻳ ﻥﺃﻭ ﺎﻳﻧﻭﻧﺎﻗ ﺔﻳﺭﺎﺳﻟﺍﻭ ﺎﻬﺑ ﻝﻭﻣﻌﻣﻟﺍ ﺔﻳﻧﻁﻭﻟﺍ ﺭﻳﻳﺎﻌﻣﻠﻟ ﺎﻘﻓﻭ ﺯﺎﻬﺟﻟﺍ ﺍﺫﻫ ﺏﻳﻛﺭﺗ ﺏﺟﻳ :ﻡﺎ.ﺔﻳﻭﻬﺗﻟ
ﺭﻳﺫﺣﺗ: ﺭﻛﺫﺗ ﻥﺃ ﻝﺧﺩﻣ ﻝﻳﺻﻭﺗ ﺯﺎﻐﻟﺍ ﺹﺎﺧﻟﺍ ﺯﺎﻬﺟﻟﺎﺑ ﺓﺭﺎﺑﻋ ﻥﻋ ﺔﻠﺻﻭ ﺯﺎﻏ ﺔﻳﻧﺍﻭﻁﺳﺃ ﺭﻛﺫ ﺔﺑﻟﻭﻠﻣ ﺔﺟﺭﺩﺑ 2/1 ﺎﻘﺑﻁ ﺭﻳﻳﺎﻌﻣﻠﻟ ﺔﻳﺳﺎﻳﻘﻟﺍ ﺔﻳﻣﻟﺎﻌﻟﺍ UNI-ISO 228-
1
ﺏﻠﻁﺗﻳ
ﻝﻳﺻﻭﺗ
ﺯﺎﻬﺟﻟﺍ
ﺔﻛﺑﺷﺑ
ﺯﺎﻐﻟﺍ
ﺔﻁﺳﺍﻭﺑ
ﺓﻭﺑﻌﻟﺍ
.
ﺕﺎﻳﻭﺗﺣﻣ
ﻥﻣﺿ
ﺎﻬﻧﻭﺩﺟﺗ
ﻝﻛﺷﻟﺍ
1 (
ﺭﻅﻧ
ﺔﻳﻠﻳﻣﻛﺗ
)
ﻡﻭﻁﺭﺧ
ﺔﻠﺻﻭ
،ﺵﺗﻭﺎﻛﻟﺍ
ﻡﻭﻁﺭﺧ
ﻥﻣ
ﺔﺋﻳﻬﺗ ﺯﺎﻬﺟﻟﺍ ﻉﺍﻭﻧﻷ ﻯﺭﺧﺃ ﻥﻣ ﺯﺎﻐﻟﺍ
ﺏﺟﻳ
ﻝﺻﻓ
ﻡﺍﺩﺧﺗﺳﻻ
ﺯﺎﻬﺟﻟﺍ
ﻥﻋ
ﺕﺎﻫﻭﻔﻟﺍ
ﻝﺍﺩﺑﺗﺳﺍ
ﺔﻧﺎﻳﺻﻠﻟ
.
ﻝﺎﻣﻋﺃ
ﻲﺗﻛﺑﺷ
ﺯﺎﻐﻟﺍ
ﺯﺎﻐﻟﺍ
ﻉﻭﻧ
ﺭﺧﺁ ﻣﻥ
ﺔﻳﺄﺑ
:
ءﺎﺑﺭﻬﻛﻟﺍﻭ
ﻝﺑﻗ
ﻡﺎﻳﻘﻟﺍ
:ﺯﺎﻬﺟﻟﺍ ﺢﻁﺳ ﻰﻠﻋ ﺩﻗﻭﻣﻟﺍ ﺕﺎﻫﻭﻓ ﻝﺍﺩﺑﺗﺳﻻ ﺔﻳﻟﺎﺗﻟﺍ ﺕﺎﻣﻳﻠﻌﺗﻟﺍ ﻊﺑﺗﺍ
1.ﻲﺋﺎﺑﺭﻬﻛﻟﺍ ﺭﺎﻳﺗﻟﺎﺑ ﻝﺎﺻﺗﺍ ﻱﺃ ﺏﻧﺟﺗﻟ ﻲﺋﺎﺑﺭﻬﻛﻟﺍ ﺭﺎﻳﺗﻟﺍ ﺫﺧﺄﻣ ﻥﻣ ﺱﺑﺎﻘﻟﺍ ﻝﺻﻓﺍ (
2 ﻝﻛﺷﻟﺍ) ﺯﺎﻬﺟﻟﺍ ﺢﻁﺳ ﻥﻣ ﻲﻬﻁﻟﺍ ﻲﻧﺍﻭﺃ ﻝﻣﺍﻭﺣ ﺔﻟﺍﺯﺇ (2.(
3 ﻝﻛﺷﻟﺍ) ﺩﻗﺍﻭﻣﻟﺍ ﺔﻟﺍﺯﺈﺑ ﻡﻗ (2.(
4ﺡﺎﺗﻔﻣ ﻡﺍﺩﺧﺗﺳﺎﺑ ﺕﺎﻫﻭﻔﻟﺍ ﻙﻓ ( ﺱﺎﻘﻣ ﻲﻏﺍﺭﺑ7 ﻝﻛﺷﻟﺍ) ﺎﻬﻟﺩﺑﺗﺳﺍ ﻡﺛ ،ﻡﻣ3ﻠﻌﻣﻠﻟ ﺎﻘﺑﻁ ﻝﺻﻭﻣﻟﺍ ﺯﺎﻐﻟﺍ ﻥﻣ ﺩﻳﺩﺟﻟﺍ ﻉﻭﻧﻠﻟ ﺔﻣﻣﺻﻣﻟﺍ ﻙﻠﺗﺑ (ﻡﻗﺭ ﻝﻭﺩﺟﻟﺍ ﻲﻓ ﺓﺩﺭﺍﻭﻟﺍ ﺕﺎﻣﻭ
1 .
ﺕﺎﻣﻳﻠﻌﺗﻟﺍ
:
ﻝﺍﺩﺑﺗﺳﻻ
ﺔﻫﻭﻓ
ﺩﻗﻭﻣ
ﻥﺭﻔﻟﺍ
ﺔﻳﻟﺎﺗﻟﺍ
ﻊﺑﺗﺍ
1 ﻝﻛﺷﻟﺍ) ﻥﺭﻔﻟﺍ ﺭﺎﻁﺇ ﺔﻟﺍﺯﺈﺑ ﻡﻗ (4-5.(
2 ـﺑ ﻪﻳﻟﺇ ﺭﺎﺷﻣﻟﺍ ﻲﺑﻟﻭﻠﻟﺍ ﺭﺎﻣﺳﻣﻟﺍ ﻙﻓ (V ﻔﺑ ﻡﻗ ﻡﺛﺣﻟﺍ ﺝﻭﺯﻟﺍﻭ ﻝﺎﻌﺷﻹﺍ ﺔﻌﻣﺷﺑ ﺭﺍﺭﺿﺃ ﻖﺣﻠﺗ ﻻ ﻰﺗﺣ ﺭﺫﺣﻟﺍ ﻲﺧﻭﺗﻭ ﻪﺗﻣﺎﻋﺩ ﻥﻣ ﺩﻗﻭﻣﻟﺍ ﻙ ﻝﻛﺷﻟﺍ) ﻱﺭﺍﺭ6(
3 ﺔﻫﻭﻔﻟﺍ ﻙﻓ (R ﺱﺎﻘﻣ ﻲﻏﺍﺭﺑ ﺡﺎﺗﻔﻣ ﻡﺍﺩﺧﺗﺳﺎﺑ10ﻟﺍ ﺕﺎﻣﻭﻠﻌﻣﻠﻟ ﺎﻘﺑﻁ ﻝﺻﻭﻣﻟﺍ ﺯﺎﻐﻟﺍ ﻥﻣ ﺩﻳﺩﺟﻟﺍ ﻉﻭﻧﻠﻟ ﻡﻣﺻﻣﻟﺍ ﺩﻗﻭﻣﻟﺎﺑ ﺎﻬﻟﺩﺑﺗﺳﺍ ﻡﺛ ،ﻡﻣﻗﺭ ﻝﻭﺩﺟﻟﺍ ﻲﻓ ﺓﺩﺭﺍﻭ ﻡ2 ﻭﺃ
ﻡﻗﺭ ﻝﻭﺩﺟﻟﺍ3 .
ﻊﺑﺗﺍ
:
ﺔﻳﺍﻭﺷﻟﺍ
ﺩﻗﻭﻣ
ﺔﻫﻭﻓ
ﻝﺍﺩﺑﺗﺳﻻ
ﺔﻳﻟﺎﺗﻟﺍ
ﺍﻭ ﻝﺎﻌﺷﻱﺭﺍﺭﺣﻟﺍ ﺝﻭﺯﻟ ﻝﻛﺷﻟﺍ)
ﺗﻟﺍﺕﺎﻣﻳﻠﻌ
1ﻹﺍ ﺔﻌﻣﺷﺑ ﺭﺍﺭﺿﺃ ﻖﺣﻠﺗ ﻻ ﻰﺗﺣ ﺭﺫﺣﻟﺍ ﻲﺧﻭﺗﻭ ﺔﻣﺎﻋﺩﻟﺍ ﻥﻣ ﺩﻗﻭﻣﻟﺍ ﻙﻔﺑ ﻡﻗ ﻡﺛ ﺔﻳﺍﻭﺷﻟﺍ ﺩﻗﻭﻣ ﺔﻳﺎﻬﻧ ﻲﻓ ﺩﺟﺍﻭﺗﻣﻟﺍ ﻲﺑﻟﻭﻠﻟﺍ ﺭﺎﻣﺳﻣﻟﺍ ﻙﻓ (
7.(
2 ﺔﻫﻭﻔﻟﺍ ﻙﻓ (R ﺱﺎﻘﻣ ﻲﻏﺍﺭﺑ ﺡﺎﺗﻔﻣ ﻡﺍﺩﺧﺗﺳﺎﺑ7 ﻟﺎﺑ ﺎﻬﻟﺩﺑﺗﺳﺍ ﻡﺛ ،ﻡﻣﻟﺍ ﺕﺎﻣﻭﻠﻌﻣﻠﻟ ﺎﻘﺑﻁ ﻝﺻﻭﻣﻟﺍ ﺯﺎﻐﻟﺍ ﻥﻣ ﺩﻳﺩﺟﻟﺍ ﻉﻭﻧﻠﻟ ﻡﻣﺻﻣﻟﺍ ﺩﻗﻭﻣﻗﺭ ﻝﻭﺩﺟﻟﺍ ﻲﻓ ﺓﺩﺭﺍﻭ ﻡ2 ﻭﺃ
ﻡﻗﺭ ﻝﻭﺩﺟﻟﺍ3 .
ﻭﻫ ﺎﻣﻠﺛﻣ ﺩﻗﺍﻭﻣﻟﺍ ﻁﺑﺿﺑ ﻡﺎﻳﻘﻟﺍ ﺎﻬﻟ ﺫﻔﻧﻣﻟﺍ ﻲﻧﻔﻟﺍ ﻰﻠﻋ ﺏﺟﻳ ﻩﻼﻋﺃ ﺓﺭﻭﻛﺫﻣﻟﺍ ﻝﺍﺩﺑﺗﺳﻻﺍ ﺕﺎﻳﻠﻣﻋ ﻥﻣ ءﺎﻬﺗﻧﻻﺍ ﺩﻌﺑ :ﺭﻳﺫﺣﺗﻣ ﻲﻓ ﺢﺿﻭﺍﺎﺷﻣﻟﺍ ﺓﺭﻘﻔﻟ ﻊﻳﻣﺷﺗﻭ ﻩﺎﻧﺩﺃ ﺎﻬﻳﻟﺇ ﺭ
ﻳﻐﺗﻟﺍ ﻝﻛﺎﻁﺑﻟﺍ ﻝﺣﻣ ﻝﺣﺗﻟ ﺯﺎﻬﺟﻟﺍ ﻰﻠﻋ ﺩﻳﺩﺟﻟﺍ ﺯﺎﻐﻟﺍ ﻉﻭﻧﻟ ﺎﻘﺑﻁ ﻯﺭﺧﺃ ﺔﻗﺎﻁﺑ ﻖﺻﻠﺑ ﻡﺎﻳﻘﻟﺍﻭ ﺯﺎﻬﺟﻟﺍ ﻁﺑﺿ ﻰﻠﻋ ﺕﺭﺟ ﻲﺗﻟﺍ ﺕﺍﺭﻳﺩﻘﻟﺍ ﺔﻗﻟﺍ ﻩﺫﻫ .ﺔﻣﻳ ﻥﻣﺿ ﺔﻘﻓﺭﻣ ﺔﻗﺎﻁﺑ
.ﺕﺎﻫﻭﻔﻟﺍ ﺭﺎﻳﻏ ﻊﻁﻗ ﺱﻳﻛ
ﻝﻭﺩﺟﻟﺍ1
59
Page 60

.ﺯﺎﻬﺟﻟﺍ ﻝﺎﻣﻌﺗﺳﺍﻭ ﺏﻳﻛﺭﺗ ﻲﻓ ﻉﻭﺭﺷﻟﺍ ﻝﺑﻗ ﻡﺍﺩﺧﺗﺳﻻﺍ ﻝﻳﻟﺩ ﻩءﺍﺭﻗ ﻲﻐﺑﻧﻳ
ﺟﺗﻧﻣﻟﺍ ﺔﻛﺭﺷﻟﺍ ﻝﻣﺣﺗﺗ ﻻﻳﻛﺭﺗﻟﺍ ﻲﻓ ءﺎﻁﺧﺃ ﻥﻋ ﺔﻣﺟﺎﻧ ﺹﺎﺧﺷﻸﻟ ﺕﺎﺑﺎﺻﺇ ﺔﻳﺃ ﻭﺃ ﺕﺎﻛﻠﺗﻣﻣﻟﺎﺑ ﻖﺣﻠﺗ ﺭﺋﺎﺳﺧ ﺔﻳﺃ ﻥﻋ ﺔﻳﻟﻭﺅﺳﻣﻟﺍ ﺔﺳﺑ ﻭﺃ ﺏ ﻡﺍﺩﺧﺗﺳﺍ ﺏﺑﺍ ﺔﻘﻳﺭﻁﺑ ﺯﺎﻬﺟﻟ
.ﺔﺣﻳﺣﺻ ﺭﻳﻏ
ﻣﺇ ﻭﺃ ﺔﻳﻌﺑﻁﻣ ءﺎﻁﺧﺃ ﻰﻟﺇ ﺎﻬﺑﺎﺑﺳﺃ ﻊﺟﺭﺗ ﻡﺍﺩﺧﺗﺳﻻﺍ ﻝﻳﻟﺩ ﺎﻬﻳﻠﻋ ﻱﻭﺗﺣﻳ ﺔﺣﻳﺣﺻ ﺭﻳﻏ ﺕﺎﻧﺎﻳﺑ ﺔﻳﺃ ﻥﻋ ﺔﻳﻟﻭﺅﺳﻣﻟﺍ ﺔﺟﺗﻧﻣﻟﺍ ﺔﻛﺭﺷﻟﺍ ﻝﻣﺣﺗﺗ ﻻ.ﺔﻳﺋﻼ ﺑ ﻰﻟﺇ ﺔﻓﺎﺿﻹﺎﺫ ﻥﺄﻓ ﻙﻟ
.ﺏﺳﺣﻓ ﺔﻳﺑﻳﺭﻘﺗ ﺭﻅﺎﻧﻣ ﻯﻭﺳ ﺕﺳﻳﻟ ﺔﻳﺣﻳﺿﻭﺗﻟﺍ ﻝﺎﻛﺷﻷﺎﺑ ﺓﺩﺭﺍﻭﻟﺍ ﺕﺎﻣﻭﺳﺭﻟﺍ
ﺗﻣﻟﺍ ﺔﻣﺎﻬﻟﺍ ﺹﺋﺎﺻﺧﻟﺍ ﻰﻠﻋ ﺭﻳﺛﺄﺗ ﻪﻟ ﺱﻳﻟﻭ ﺎﻳﺭﻭﺭﺿ ﻙﻟﺫ ﻥﺎﻛ ﺍﺫﺇ ﺎﻬﺗﺎﺟﺗﻧﻣ ﻰﻠﻋ ﺕﻼﻳﺩﻌﺗ ءﺍﺭﺟﺃ ﻲﻓ ﻖﺣﻟﺎﺑ ﺎﻬﺳﻔﻧﻟ ﺔﺟﺗﻧﻣﻟﺍ ﺔﻛﺭﺷﻟﺍ ﻅﻔﺗﺣﺗﺎﺑ ﺔﻘﻠﻌ ءﺍﺩﺃﻭ ﻥﺎﻣﻷﺍ.ﺔﻔﻳﻅﻭﻟ
ﻧﻣﻟ ﻡﺎﻅﻧ ﺏﻳﻛﺭﺗﺯﺎﻬﺟﻟﺍ ﻝﻳﻣ ﻊ
ﺎﻣﻹﺍ ﺔﻳﻟﺎﻣﺗﺣﺍ ،ﺭﻳﺫﺣﺗﺔﻟ
ﺔﻟﺎﻣﻺﻟ ﺓﺩﺎﺿﻣ ﺩﻧﺎﺳﻣ
ﻣﻟﺍ ﺯﺎﻬﺟﻟﺍ ﺏﻳﻛﺭﺗ ﺏﺟﻳ ،ﺯﺎﻬﺟﻠﻟ ﺔﻳﺿﺭﻌﻟﺍ ﺔﻟﺎﻣﻹﺍ ﺏﻧﺟﺗﻟﻣﻺﻟ ﺩﺎﺿﻣﻟﺍ ﺯﺎﻬﺟﻟﺍ ﺔﻋﻭﻣﺟﻣ ﻥﻣﺿ ﺏﻳﻛﺭﺗﻟﺍ ﺕﺎﻣﻳﻠﻌﺗ ﺭﻓﻭﺗﺗ .ﺩﻗﻭﻣﻟﺍ ﻊﻣ ﺭﻓﻭﺗﻣﻟﺍ ﺔﻟﺎﻣﻺﻟ ﺩﺎﺿﺓﺩﻭﺯﻣﻟﺍ ﺔﻟﺎ .
60
Page 61

ﺏﻳﻛﺭﺗ ﺕﺎﻣﻳﻠﻌﺗ
ﻡﺍﺩﺧﺗﺳﺍﻭ ﺔﻧﺎﻳﺻﻭ
ﺭﺣﻟﺍ ﺏﻳﺻﻧﺗﻟﺍ ﺩﻗﻭﻣ
60x90 ﻕﻼﻣﻌﻟﺍ ﻥﺭﻔﻟﺍ ﻡﺳ
ﻡﺍﺩﺧﺗﺳﺍﻭ ﺔﻧﺎﻳﺻﻭ ﺏﻳﻛﺭﺗ ﺕﺎﻣﻳﻠﻌﺗ
ﺭﺣﻟﺍ ﺏﻳﺻﻧﺗﻟﺍ ﺩﻗﻭﻣ60x90 ﻼﻣﻌﻟﺍ ﻥﺭﻔﻟﺍ ﻡﺳﻕ
3100356
61
 Loading...