

Page 1
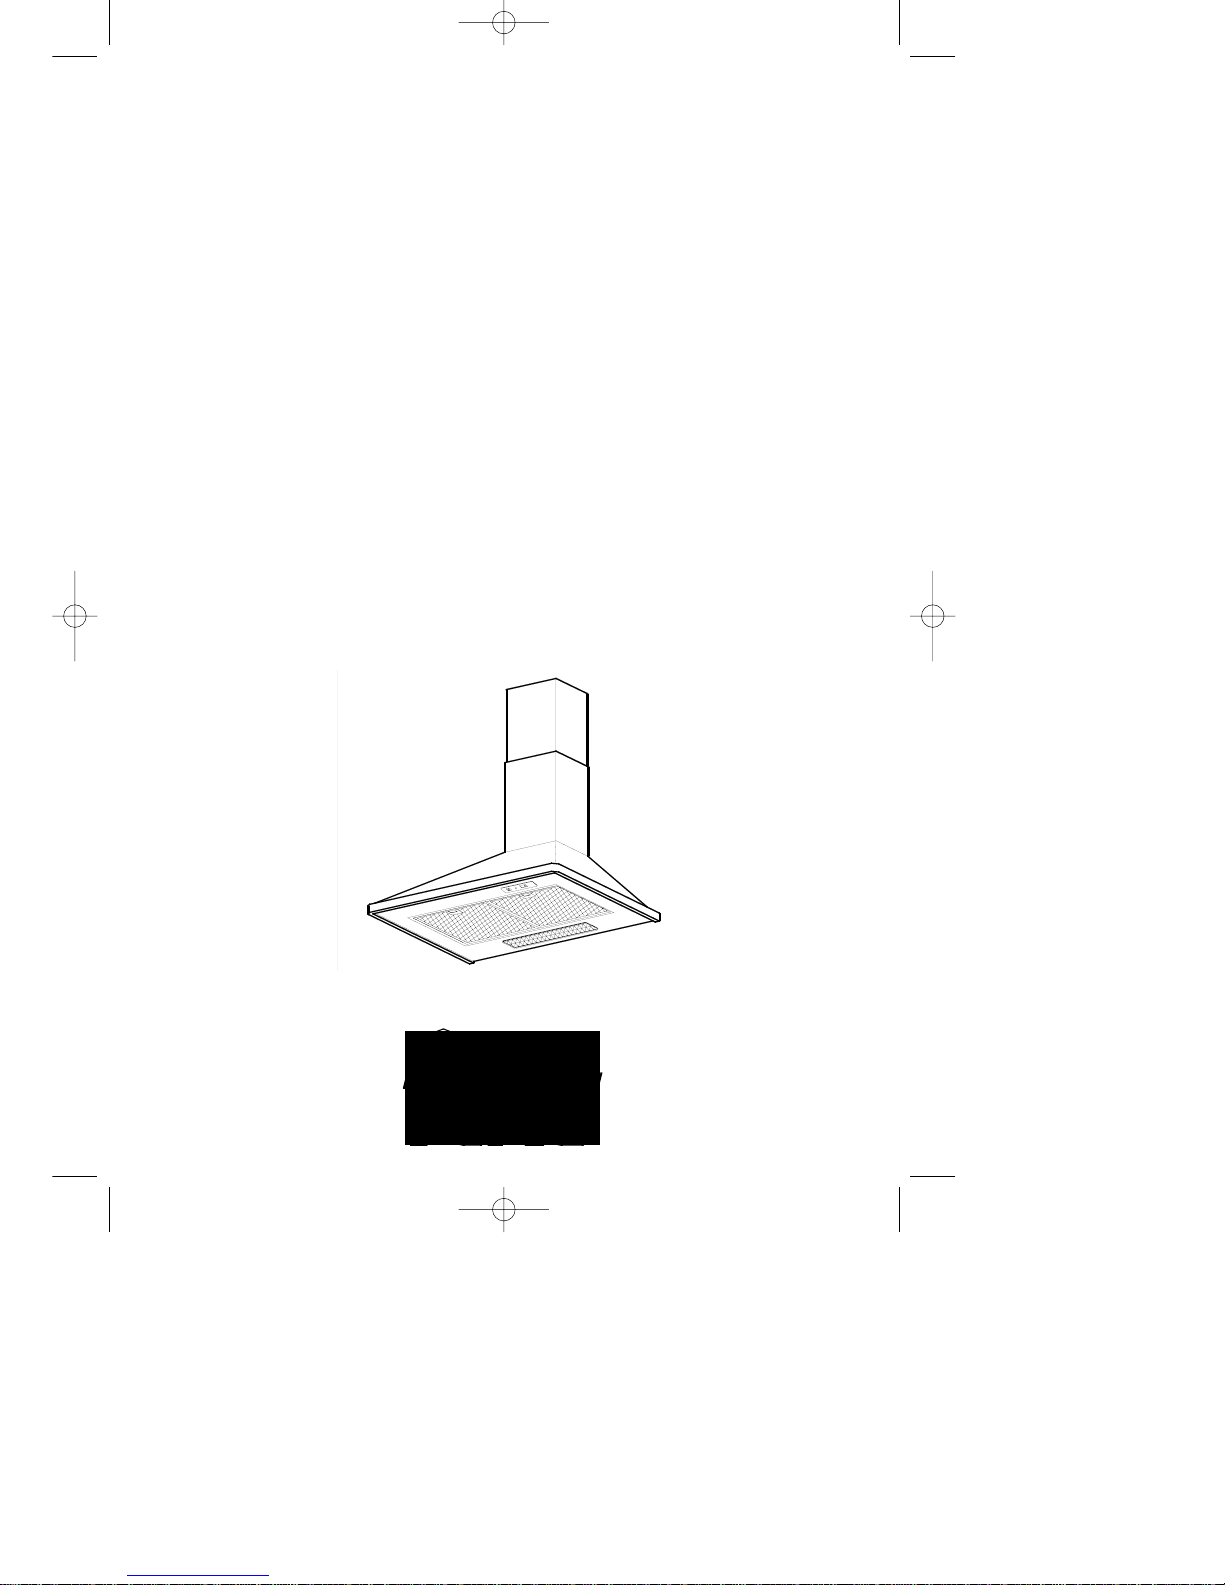
Manual de Instrucciones
Campanas Extractoras DE-60.2/DE-70.2/DE-90.2
Bedienungsanleitung
Dunstabzugshauben DE-60.2/DE-70.2/DE-90.2
Instructions Manual
Kitchen Hoods DE-60.2/DE-70.2/DE-90.2
Manuel d’instructions
Hottes aspirantes DE-60.2/DE-70.2/DE-90.2
Manual de Instruções
Exaustores DE-60.2/DE-70.2/DE-90.2
Manual DE TEKA2.qxd 15/02/2005 9:07 Page 1
Page 2
14
ENG
Dear client:
Congratulations on your choice. We are sure
that this modern, functional and practical
apparatus, made with top quality materials,
will fully satisfy your needs.
Please read every section of this
INSTRUCTIONS MANUAL before using your
kitchen hood for the first time, to be able to get
maximum performance from the apparatus
and to avoid breakdowns which may be
caused by incorrect use, as well as to allow
any minor problems to be solved.
Store this manual, as it will provide useful
information about your kitchen hood at all
times and will also help other people to use it.
• Please be aware of current local
regulations with reference to domestic
electrical fittings and gas eduction.
• Verify that the tension and frequency of the
network match those indicated on the label
located inside the kitchen hood.
• The apparatus must be connected to the
network using a break switch with a
universal cut off and minimum contact
separation of 3 mm.
• Once the kitchen hood has been installed,
ensure that the feed cable to the network is
not in contact with any live metal edges.
• Avoid connecting the apparatus to
conductors used exits for fumes produced
by a non-electric energy source. E.g.:
boilers, chimneys, etc.
• If the extractor fan is going to be used
simultaneously with equipment powered by
a non-electric energy source. E.g.: gas
cookers, the room must have sufficient
ventilation.
• Excessive fat accumulation in the kitchen
hood and metal filters is a fire risk and may
also cause dripping, so the inside of the
kitchen hood and the metal filters must be
cleaned at least once a month.
• The lower part of the kitchen hood must be
fitted at least 50 cm. over electric hobs and
65 cm. over gas or mixed hobs.
• Never leave gas hobs lit if not covered by a
container. The fat accumulated in the filters
may drip or catch fire when the
temperature increases.
• Avoid cooking under the kitchen hood if the
metal filters are not fitted, e.g.: while they
are being cleaned in the dishwasher.
• You must not produce flames under the
kitchen hood.
• Disconnect the apparatus before any
interior manipulation. E.g. during cleaning
or maintenance.
• We recommend the use of gloves and to
be extremely careful when cleaning the
kitchen hood's interior.
• Your kitchen hood is designed for domestic
use and only for extraction and purification
of gases produced during food preparation.
It will be your responsibility if it is used for
other purposes, which may be dangerous.
The manufacturer cannot accept responsibility for damage caused by improper use
of the apparatus.
• For repairs please contact the nearest
TEKA Technical Assistance Service, and
always use genuine spare parts. Repairs
or modifications effected by unqualified
personnel can cause malfunctions or may
damage the apparatus, putting your safety
in danger.
Safety Instructions
Manual DE TEKA2.qxd 15/02/2005 9:07 Page 14
Page 3

15
ENG
Index
Page
Description of the apparatus 15
Instructions for use 15
Cleaning and maintenance 16
Problem solving 16
Sizes and specifications 17
Accessories supplied 18
Installation 18
Active charcoal filters 18
A Sliding control with on/off, speed
selector, light and working pilot control.
B Metal filters.
C Lamp with two lights - 40 W (E-14).
D, E Vertically adjustable tubecovers.
To improve draught we recommend to turn
the extractor fan on a few minutes before
cooking so that the flow of air is continuous
and stable when fumes are extracted.
Similarly, keep the extractor fan on for a few
minutes after cooking to completely extract
fumes and odours.
Instructions for use
Description of the apparatus
You may control the kitchen hood's workings
by operating the controls as shown in the
diagram.
Speed Light
0.- Stop
1.- Minimum speed
2.- Medium speed
3.- Maximum speed
0. Off
1. On
Manual DE TEKA2.qxd 15/02/2005 9:07 Page 15
Page 4
16
ENG
When cleaning and doing maintenance,
make sure the safety instructions set out
on page 14 are complied with.
• If your kitchen hood is made from stainless
steel, use this material's specially designed
cleaners following the instructions
mentioned in the product supplier´s
instructions.
• If your kitchen hood is painted, use
lukewarm water and a neutral soap.
• Never use metallic scourers, nor abrasive
or corrosive products.
• Dry the kitchen hood using a cloth that
does not produce fluff.
To remove the filters from their fittings, press
lightly on the locks and then pull them off.
The metal filters can be cleaned by soaking
them in hot water with neutral detergent until
the fat dissolves and then rinsing them under
the tap or using products specially designed
for fats. They can also be washed in a
dishwasher. In this case, it is advisable to
stack them vertically to avoid food residue
sticking to them.
Cleaning in a dishwasher with aggressive
detergents or polish may damage the metallic
surface (blackening it), although this will not
affect its fat retention capacity.
Once clean, leave them to dry off and then fit
them onto the kitchen hood.
Proceed as follows:
• Remove the metal filters.
• Change the broken/burnt out lamp.
Maximum lamp power is 40 W (E-14).
• Fit the metal filters.
Cleaning the metal filters
Cleaning the body of the kitchen hood
Cleaning and maintenance
_________________________________________________________
Problem solving
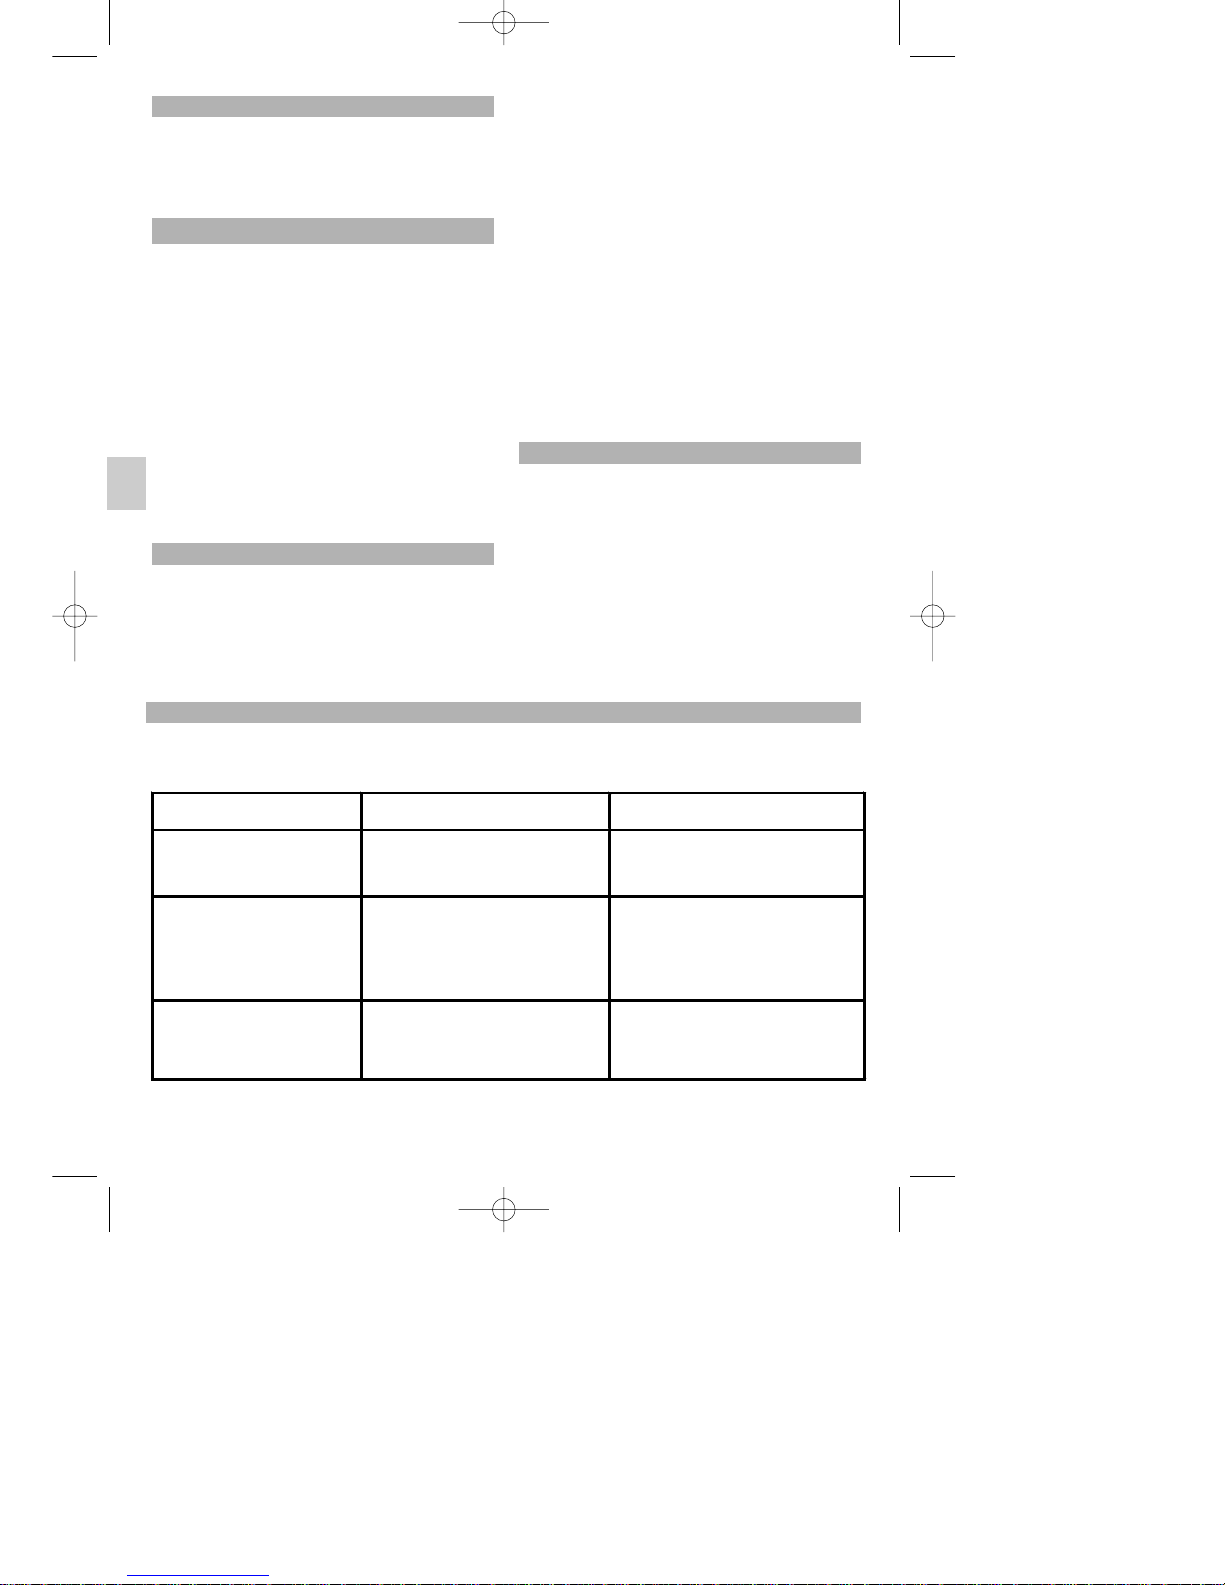
Proceed with the following checks before calling the Technical Service:
Problem Possible cause Solution
The extractor fan ceases to function The kitchen hood feed cable is not connected to
the network.
There is no electrical current in the network
Connect feed cable to the network.
Check that the network has electrical current
The extractor ceases to educt strongly
or vibrates
Filters are saturated with fat.
Obstruction in the air exit conduct
Change or clean the active charcoal and/or metal
filters, as the case may be.
Eliminate the obstruction
The lamps do not light up The lamps are burnt out
The lamps are loose
Change the lamps
Tighten the lamps
Changing lights
Manual DE TEKA2.qxd 15/02/2005 9:07 Page 16
Page 5
17
ENG
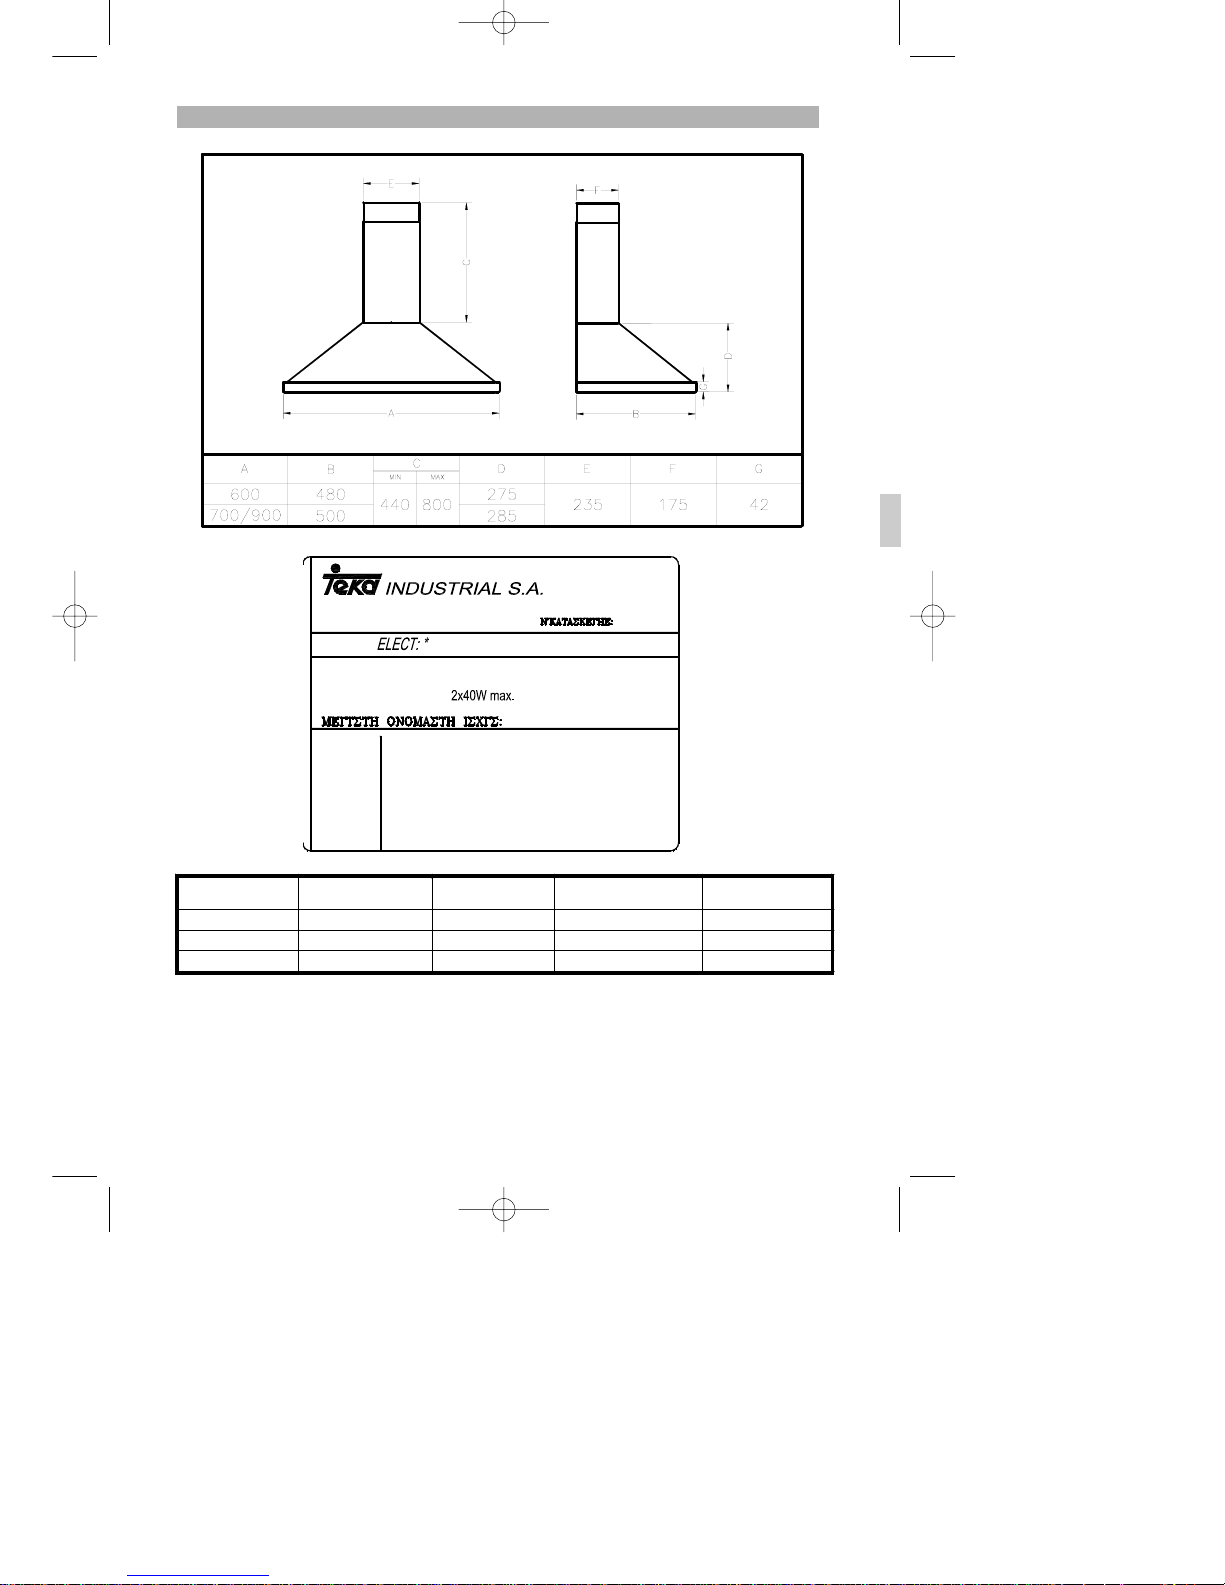
Sizes and specifications
SANTANDER (E)
Campana decorativa
Código Técnico *
Serial n°: A-00000
Potencia nom. lámpara:
Poténcia nom. lámpada:
Puissance lampes.:
Lamps rate:
Technical Code
Network Tension
(V)
Network
Frequency (Hz)
Lights / Motor Power
(W)
Motor Volume
145411DE 220 - 230 50 2 x 40/ 140 500 m3/h
115411DE 240 50 2 x 40/ 140 470 m3/h
135411DE 110 - 127 60 2 x 40/ 140 450 m3/h
TEKA INDUSTRIAL S.A. reserves the right to make changes and corrections to its
products as it deems necessary, without altering their basic characteristics.
Manual DE TEKA2.qxd 15/02/2005 9:07 Page 17
Page 6
18
ENG
1 150/125 mm reduction.
1 Anti-recoil valve.
1 Support for tubecover.
1 Hood support.
2 Wall support.
6 Wall plugs (Ø8 x 40).
6 Long bolts (Ø5 x 45).
2 Wall plugs (Ø6 x 30).
2 Long bolts (Ø4 x 30).
2 M6 washers.
2 M4 washers.
2 Screws (Ø3.9 x 13).
8 Screws (Ø4 x 12).
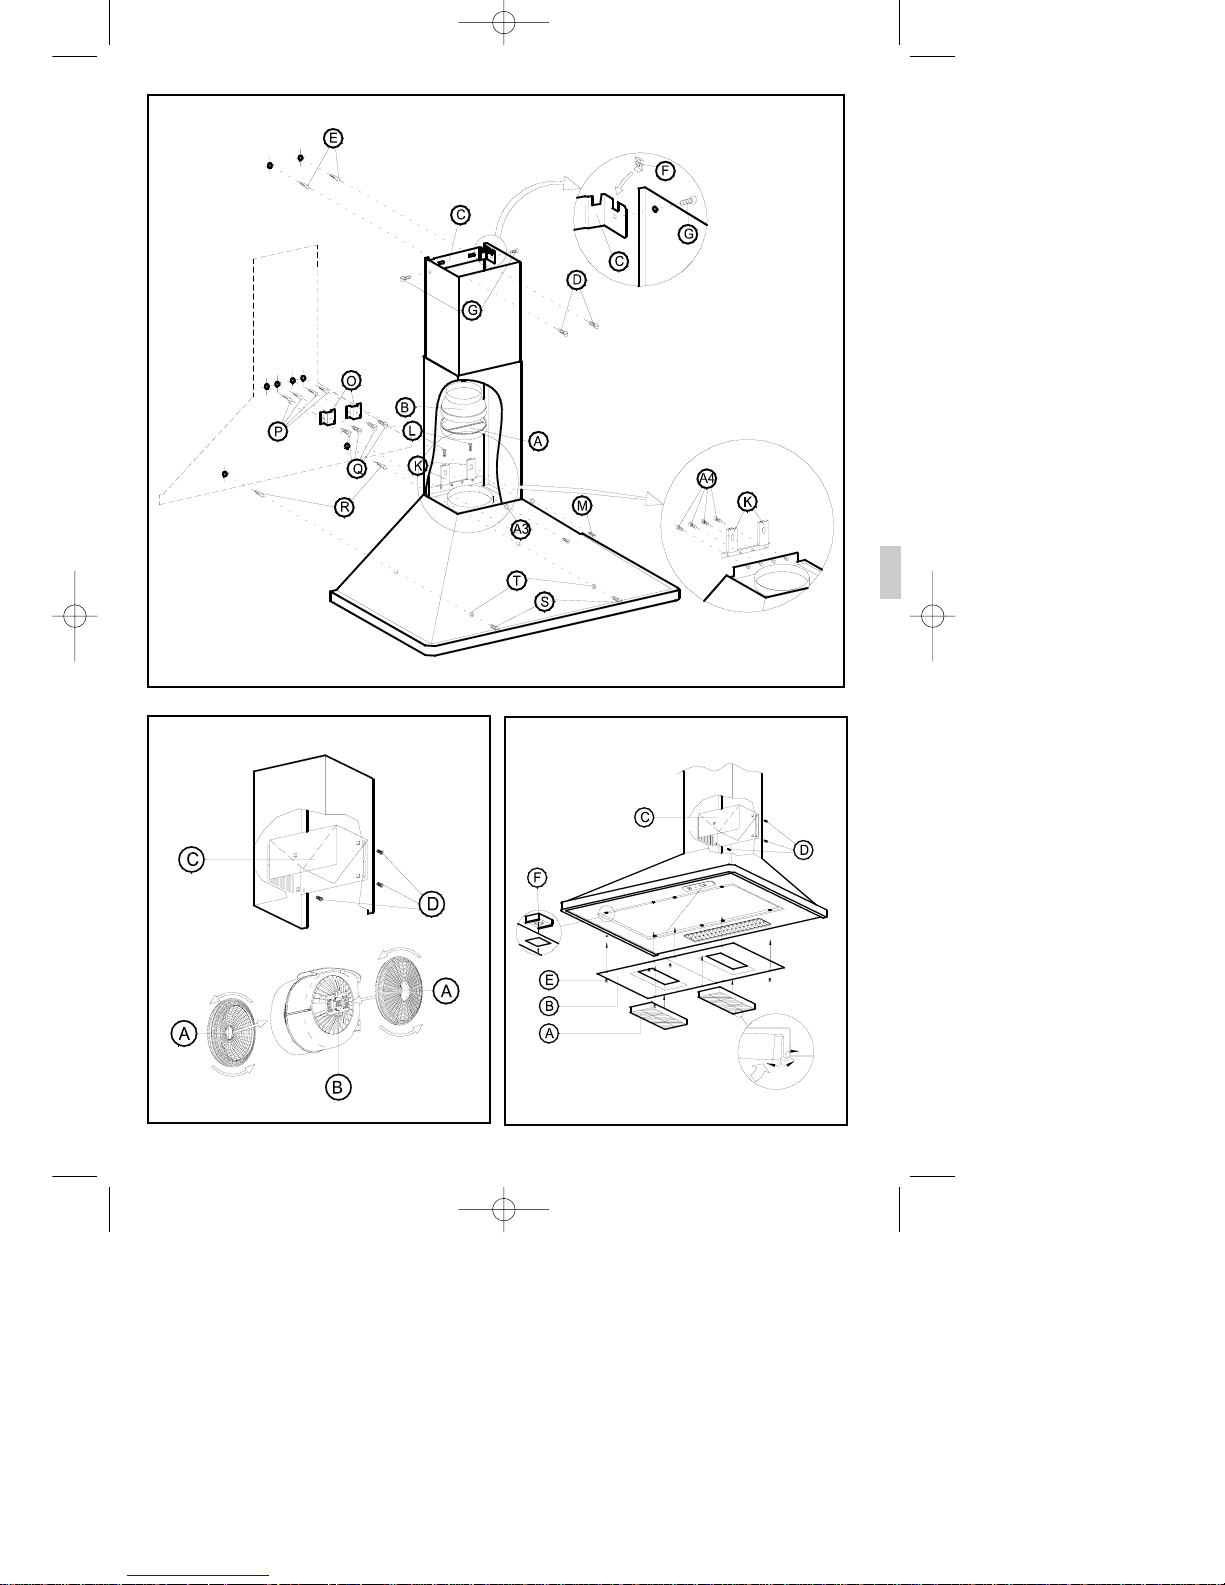
Fig. 1 (Page. 19)
On installing the kitchen hood make sure
that the Safety Instructions set out on page
14 are complied with.
To obtain optimum performance, the external
conduct must be no more than FOUR
METRES LONG, have more than two 90°
angles and its diameter must be at least Ø120.
1) Using the attached template, trace and drill
the points for fitting the wall plugs onto the wall
(A1) (Ø8 x 40).
2) Attach the Supports (O) to the wall using the
long bolts (Q) (Ø5 x 45) as in figure 1.
3) Fit the support (K) to the body of the hood
using the long bolts (A4) (M4 x 12), as
indicated in figure 1.
4) Hang the kitchen hood onto the mounted
supports (O). Straighten the appliance by
tightening the long bolts (L) (M4 x 12).
5) Trace the location of the long bolts (S) (Ø 5
x 45).
6) Take the kitchen hood off.
7) Drill into the wall and fit the wall plugs (R).
8) Hang the kitchen hood; tighten the screws
(M) (M4x12) with the washers (A3) (M4) and
the long bolts (S) (Ø 5x45) with the washers
(T).
9) Mount the tubecovers. Lift the upper
tubecover up to the desired height and mark its
shape on the wall. Remove the tubecovers.
10) Fit the clips (F) to the support (C).
11) Centre the support (C) around the shape
marked; trace and drill the fixing points for the
wall plugs (E) (Ø6 x 30). Attach the support (C)
with the long bolts (D) (Ø4x30).
12) Fit the part (A) if the inner tube (not
supplied) is Ø150 or (A)+(B) if it is Ø120.
13) Attach the inner tube with a clamp (not
supplied) to (A) or (B) as the case may be.
14) Once the inner tube is fitted, fit the lower
tubecover around the extractor fan outlet and
attach the upper tubecover with the screws
(G).
When exterior gas extraction is not possible,
then the kitchen hood may be set to purify the
air by recycling it through active charcoal
filters.
The active charcoal filters have an active life of
between three to six months, depending on
the individual conditions of use. These filters
cannot be washed nor regenerated. They must
be replaced once their useful life comes to an
end.
SET type 1 - Fig. 2 (Page.19)
1) Put the filters into the lateral draught section
of the motor making the holes in the filters
match up (A) with the pivots (B) of the motor
carcass. Turn as indicated in the diagram.
2) Remove the tubecovers. Fit the diffuser (C)
into the inside of the lower tubecover with the
screws (D). Mount the tubecovers.
SET type 2 - Fig. 3 (Page. 19)
1) Fit the nut-supports (F) onto the body of the
kitchen hood.
2) Attach the supports (B) with the screws (E)
onto the nuts (F).
3) Mount the carbon filters (A) introducing the
anchorages into the grooves of the supports.
4) Remove the tubecovers. Fit the diffuser (C)
into the inside of the lower tubecover with the
screws (D). Mount the tubecovers.
Active charcoal filters (Optional)
Installation
Accesories supplied
Manual DE TEKA2.qxd 15/02/2005 9:07 Page 18
Page 7
19
ENG
FIG.1
FIG.2
FIG.3
Manual DE TEKA2.qxd 15/02/2005 9:07 Page 19
 Loading...