

Teilch TCH PRO 203 Quick Start Manual
teilch
BOX CONTENT
•
Power Supply
•
Isokinetic Probe
•
Barbed Probe
•
Inlet Filter
•
Hand Strap
•
External Sensor
•
SD Memory Card (2GB) - Installed
•
USB Cable
•
USB Flash Drive (Software, documentation, and
operation manual)
•
Inlet Caps (x2)
•
Case Protector
•
Carrying Case
•
Inlet O-ring Seal Replacements (x4)
•
Calibration Certificate
•
QuickStart Guide
CONNECTIONS
•
USB: Use for data (mass storage), firmware
upgrade and slow charge (500mA)
•
Power: Use for fast charge (2.5A)
The device comes with a charged battery and is ready to use out of the box.
TCH PRO 203 - QUICK START GUIDE
Questions? info@teilch.com - 1290 Hammerwood Avenue - Sunnyvale, CA 94089 - (+1) 650 319 3018 - www.teilch.com
This is a short introductory guide for TCH PRO 203.
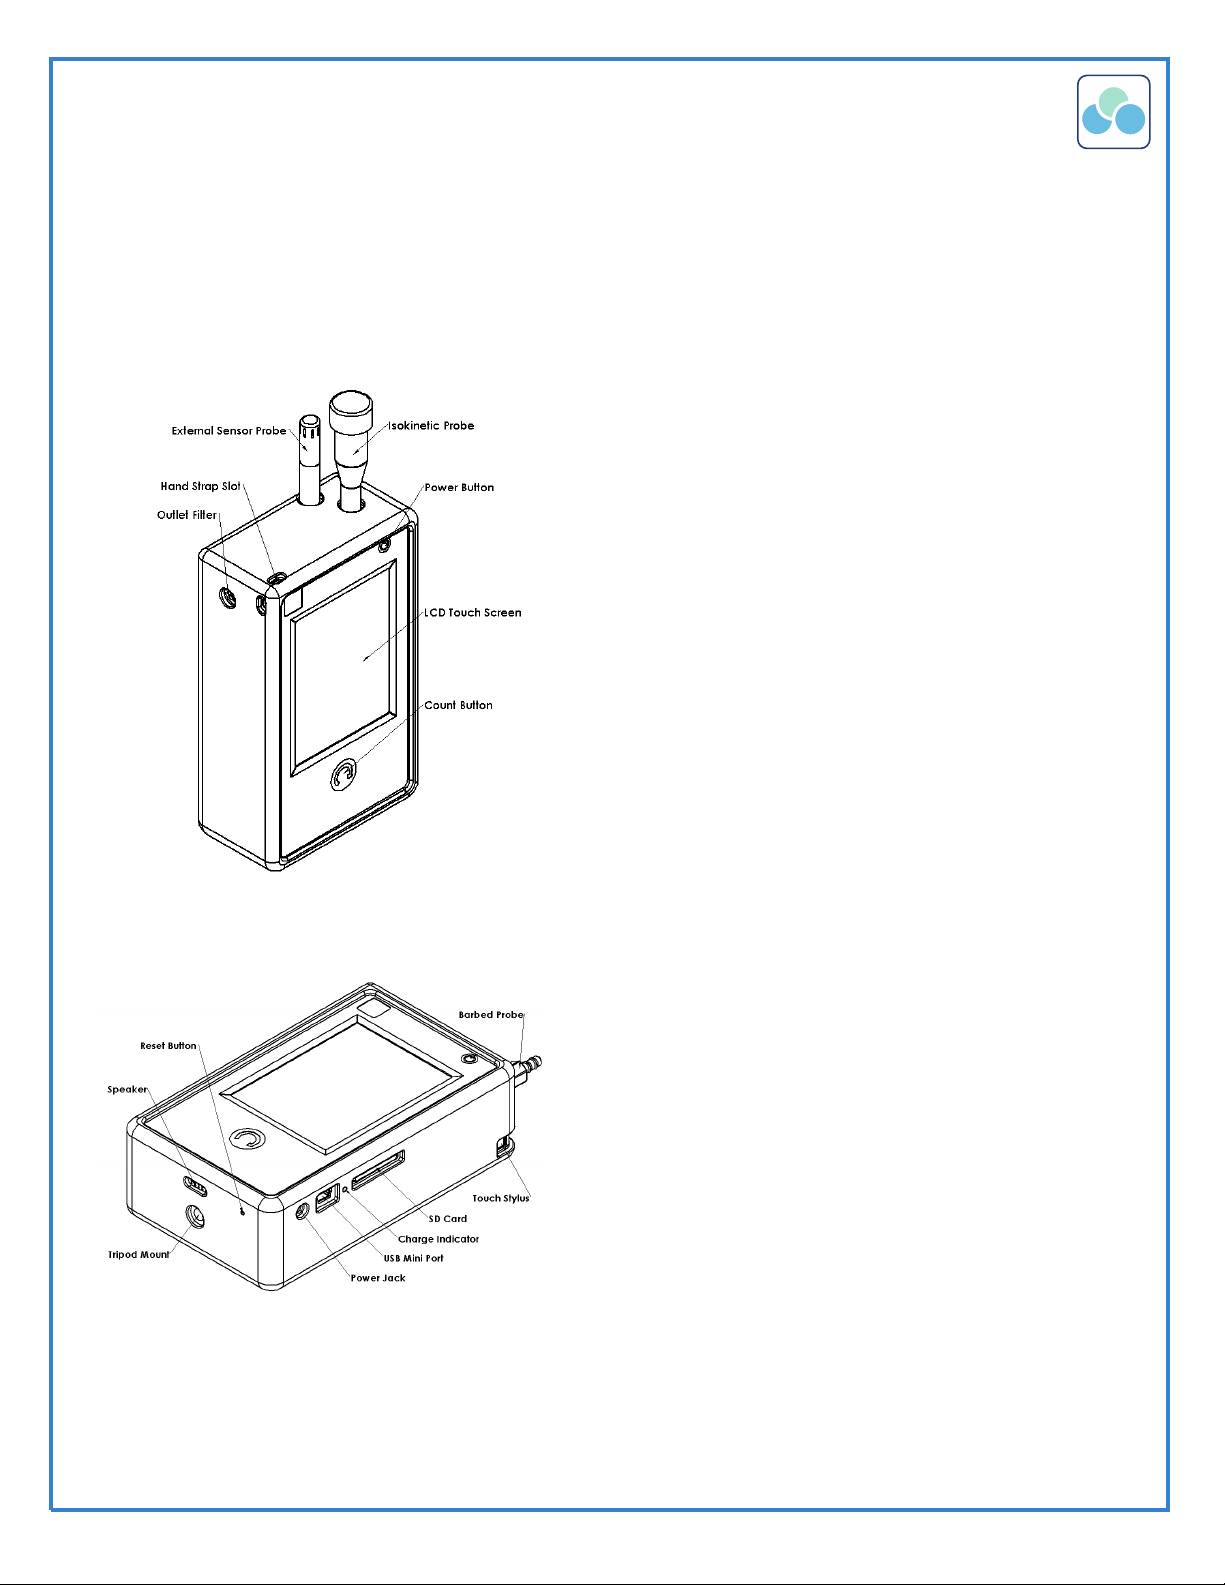
TCH Pro 203 Handheld Particle Analyzer
•
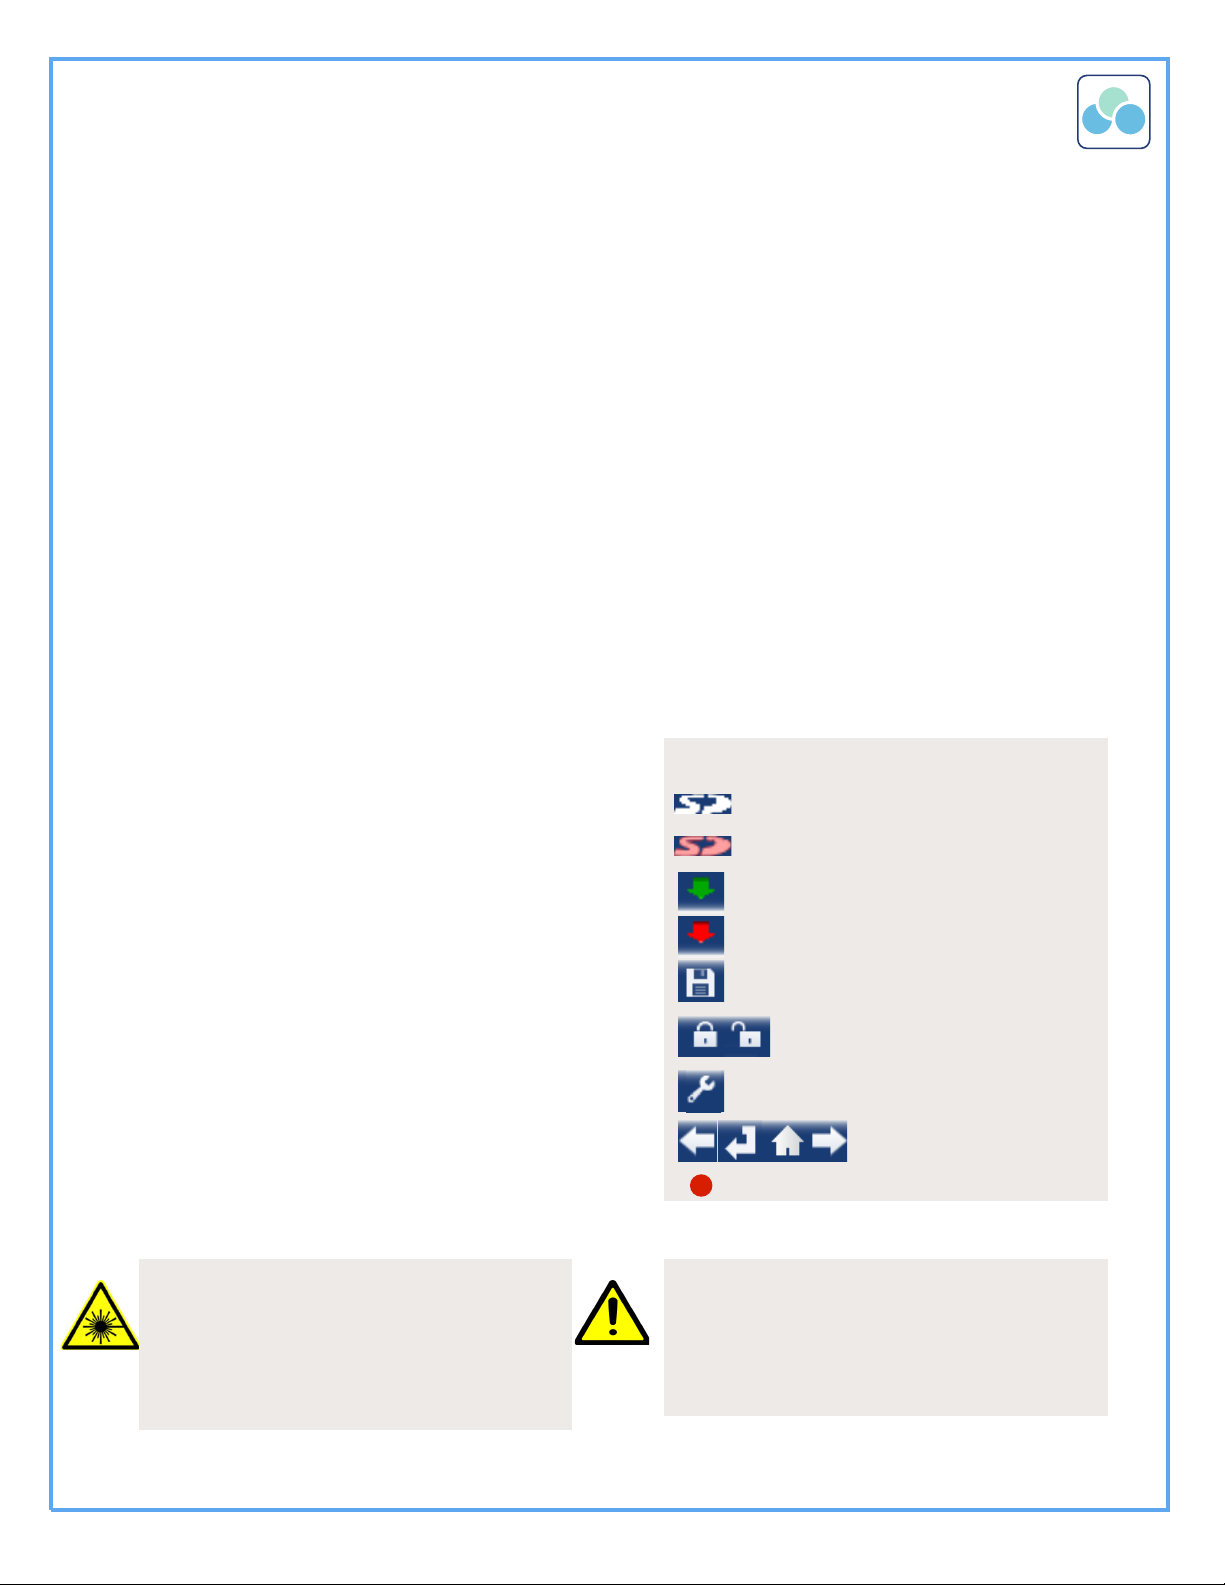
Screen Symbols
SD Inserted
SD Busy - Do Not Remove
Data Saved to SD
Data Not Saved (SD not present or full)
Save
Lock. Default password is 1234. To
reset password, press reset button.
Settings
Navigation
Red Dot: Coincidence Loss Error
teilch
TCH PRO 203 - QUICK START GUIDE
OPERATIONS
To start using the instrument, proceed as follows:
1.
Position the instrument in the environment
to be measured.
2.
Remove the red protective cap from the
inlet tube.
3.
Turn the device ON by pressing the Power
button and holding it for 3 seconds.
4.
After pressing the power key, a SPLASH
screen will appear for three seconds,
displaying the company logo, model
number, serial number, and firmware
version number. The Start screen displays
on the LCD.
5.
When the MENU screen appears, the
instrument is ready for use. Select mode
and follow on-screen instructions.
‣
Cleanroom Particle Analysis:
Cleanroom certification and
monitoring
‣
Continuous Particle Log: Save full
particle log data into SD Card
‣
Air Quality Analysis: Particulate Matter
‣
Pressure: Differential Pressure
Sampling
•
To purge sensor, install Inlet Filter and run any
Count cycle (pump ON) for 1 minute
ADVANCED OPERATIONS
Data Management and Analysis: Data may be
viewed and analyzed on instrument screen or
may be saved into SD Card. All data is
formatted as text and may be viewed and
analyzed with any text or spreadsheet software
(not provided by Teilch).
Firmware Upgrade: Press Reset while holding
Power button. Follow on screen instructions.
Touch Screen Calibration: If screen touch panel
does not work accurately, turn unit off, press
and hold Count and press Power while touching
screen. Follow on screen instructions.
Laser Safety: Class I laser-based device.
No exposure to laser radiation occurs
during normal operation. DO NOT
remove any housings or covers.
Important: There are no user-serviceable
parts inside this instrument. All repair and
maintenance needs should be done by a
qualified technician.
Questions? info@teilch.com - 1290 Hammerwood Avenue - Sunnyvale, CA 94089 - (+1) 650 319 3018 - www.teilch.com
 Loading...