

Page 1

SNACK'N CLEAN
www.tefal.com
FR
NL
DE
IT
ES
PT
EL
EN
TR
DA
NO
SV
FI
RU
UK
AR
FA
Tef-SNAKnCLEAN-2100072598 18/09/12 09:22 Page1
Page 2
CONSIGNES DE SECURITE
PRECAUTIONS IMPORTANTES :
•Cet appareil est uniquement destiné à un usage
domestique. Il n’a pas été conçu pour être utilisé
dans les cas suivants qui ne sont pas couverts par la
garantie :
- dans les coins de cuisines réservés au personnel
dans des magasins, bureaux et autres
environnements professionnels,
- dans les fermes,
- par les clients des hôtels, motels et autres
environnements à caractère résidentiel,
- dans les environnements de type chambres
d’hôtes.
•Ne jamais utiliser l'appareil sans surveillance.
•Cet appareil n’est pas prévu pour être utilisé par
des personnes (y compris les enfants) dont les
capacités physiques, sensorielles ou mentales sont
réduites, ou des personnes dénuées d’expérience
ou de connaissance, sauf si elles ont pu bénéficier,
par l’intermédiaire d’une personne responsable de
leur sécurité, d’une surveillance ou d’instructions
préalables concernant l’utilisation de l’appareil.
Il convient de surveiller les enfants pour s’assurer
qu’ils ne jouent pas avec l’appareil.
•Cet appareil peut être utilisé par des enfants âgés
FR
2
Tef-SNAKnCLEAN-2100072598 18/09/12 09:22 Page2
Page 3
de 8 ans et plus et les personnes manquant
d’expérience et de connaissances ou dont les
capacités physiques, sensorielles ou mentales sont
réduites, si elles ont été formées et encadrées
quant à l'utilisation de l'appareil d'une manière
sûre et connaissent les risques encourus. Les
enfants ne doivent pas jouer avec l'appareil. Le
nettoyage et l’entretien par l'utilisateur ne doit pas
être fait par des enfants à moins qu'ils ne soient
âgés de 8 et plus et supervisés.
Tenir l'appareil et son cordon hors de la portée des
enfants de moins de 8 ans.
• La température des surfaces accessibles peut être
élevée lorsque l'appareil est en fonctionnement.
•Vérifier que l'installation électrique est compatible
avec la puissance et la tension indiquées sous
l'appareil.
•Cet appareil n'est pas destiné à être mis en
fonctionnement au moyen d'une minuterie
extérieure ou par un système de commande à
distance séparé.
•Si le câble d'alimentation est endommagé, il doit
être remplacé par le fabricant, son service après
vente ou des personnes de qualification similaire
afin d'éviter un danger.
•Ne jamais plonger dans l’eau la charnière
FR
3
Tef-SNAKnCLEAN-2100072598 18/09/12 09:22 Page3
Page 4

électrique avec les résistances et son cordon. Ne
jamais les passer au lave-vaisselle.
•Enlever tous les emballages, autocollants ou
accessoires divers à l'intérieur comme à l'extérieur
de l'appareil.
•Dérouler entièrement le cordon avant de brancher
l'appareil.
•Si une rallonge électrique est utilisée, elle doit être
de section au moins équivalente et avec prise de
terre incorporée.
•Ne brancher l'appareil que sur une prise avec terre
incorporée.
•Bien sécher tous les éléments après le nettoyage
avant de redémarrer l'appareil.
A faire
• Lire attentivement et garder à portée de main les instructions de cette notice, communes aux différentes
versions suivant les accessoires livrés avec votre appareil.
• Si un accident se produit, passer de l’eau froide immédiatement sur la brûlure et appeler un médecin si
nécessaire.
• Lors de la première utilisation, laver les plaques (voir paragraphe Nettoyage), verser un peu d’huile sur la
plaque et l’essuyer avec un chiffon doux.
• Veiller à l’emplacement du cordon avec ou sans rallonge, prendre toutes les précautions nécessaires afin de ne
pas gêner la circulation des convives autour de la table de telle sorte que personne ne s’entrave dedans.
• Pour éviter de détériorer les plaques, utiliser celles-ci uniquement sur l’appareil pour lequel elles ont été
conçues (ne pas les mettre dans un four, sur le gaz,…)
• Pour préserver le revêtement de la plaque de cuisson, toujours utiliser une spatule plastique ou en bois.
• Vérifier que l’appareil est débranché avant nettoyage.
• Les plaques de cuisson et le corps de l’appareil se nettoient avec une éponge, de l’eau chaude et du liquide
vaisselle.
• Les fumées de cuisson peuvent être dangereuses pour les animaux ayant un système de respiration
particulièrement sensible, comme les oiseaux. Nous conseillons aux propriétaires d’oiseaux de les éloigner du
lieu de cuisson.
• N’utiliser que les plaques fournies avec l’appareil ou acquises auprès du centre de service agréé.
• Si l’appareil est utilisé au centre de la table, le mettre hors de portée des enfants.
FR
4
Tef-SNAKnCLEAN-2100072598 18/09/12 09:22 Page4
Page 5

entes
.
A ne pas faire
• Ne jamais brancher l’appareil lorsqu’il n’est pas utilisé.
• Pour éviter la surchauffe de l’appareil, ne pas le placer dans un coin ou contre un mur.
• Ne jamais placer votre appareil directement sur un support fragile (table en verre, nappe, meuble verni…) ou
sur un support de type nappe plastique.
• Ne pas placer l’appareil sur ou près de surfaces glissantes ou chaudes, ni laisser le cordon pendre au-dessus
d’une source de chaleur (plaques de cuisson, cuisinière à gaz…).
• Ne pas poser d’ustensiles de cuisson sur les surfaces de cuisson de l’appareil.
• Ne pas couper directement sur les plaques.
• Ne jamais utiliser d’éponge métallique, ni de poudre à récurer afin de ne pas endommager la surface de
cuisson (ex : revêtement antiadhésif,…)
• Ne jamais faire chauffer l'appareil en position verticale.
• Ne pas brancher l’appareil sans les plaques et les capots correctement positionnés.
Conseils/Informations
• Pour votre sécurité, cet appareil est conforme aux normes et réglementations applicables (Directives Basse Ten-
sion, Compatibilité Electromagnétique, Matériaux en contact des aliments, Environnement,…).
• Lors de la première utilisation, un léger dégagement d’odeur ou de fumée peut se produire.
• Merci d’avoir choisi cet appareil, destiné uniquement à un usage domestique.
Mode d'emploi
Les dessins explicatifs sont en dernières pages.
• Poser l’appareil sur un plan ferme.
Avant la première utilisation
• Dérouler entièrement le cordon.
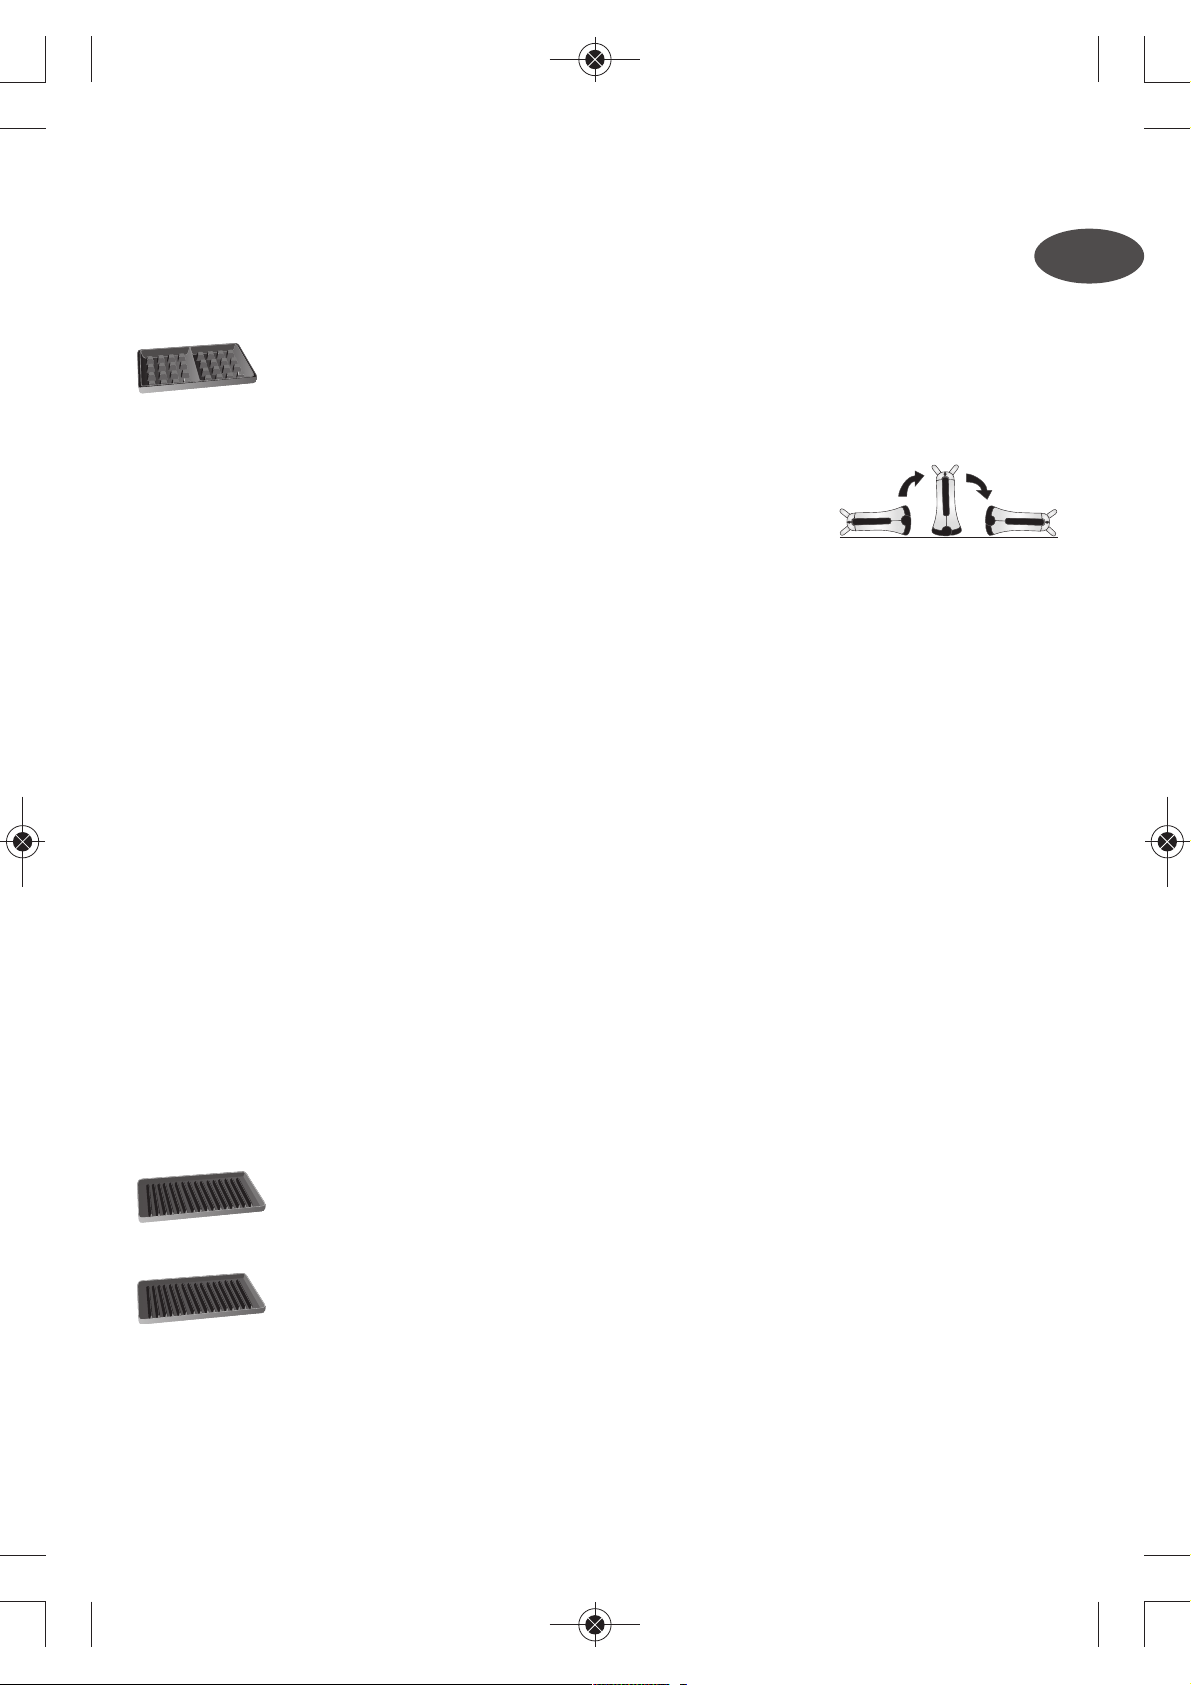
• Ouvrir l’appareil en levant le loquet - A.
• Pour enlever les plaques, appuyer sur les touches "EJECT" - 4 - situées sur le devant des capots supérieur et in-
férieur - C - D - E.
• Pour remettre les plaques, poser la plaque de biais et appuyez sur la plaque pour la verrouiller - F - G - H.
• Les plaques gril et gaufres ne sont pas interchangeables. Faire correspondre le repère 1 de la plaque avec le re-
père 1 du capot à l’intérieur du produit, et le repère 2 de l’autre plaque avec le repère 2 de l’autre capot - G.
• Lors de la première utilisation, laver les plaques (suivre paragraphe nettoyage), verser un peu d’huile sur les
plaques et les essuyer avec un chiffon doux.
• Vérifier que l’appareil est froid et débranché avant de procéder à un changement de plaques.
Utilisation de l’appareil
• Veiller à ce que les plaques et les capots soient stables, bien positionnés et bien clipsés sur l’appareil.
• Fermer l’appareil.
• Vérifier que l’interrupteur est sur 0.
• Brancher le cordon sur le secteur. Mettre l’interrupteur I en marche (position 1). Le voyant rouge s’allume - I.
• Laisser préchauffer l’appareil : le voyant vert s’allume quand la température de cuisson est atteinte - J.
• Ouvrir l’appareil et placer les préparations sur les plaques - L.
• Fermer l’appareil.
• Laissez la préparation cuire le temps désiré.
• Pendant la cuisson, il est normal que le voyant vert s’allume et s’éteigne tour à tour.
• A la fin des cuissons, éteindre l’appareil en mettant l’interrupteur en position 0. Puis débrancher la prise - N -
O.
• Laisser refroidir environ 2 heures.
FR
5
Tef-SNAKnCLEAN-2100072598 18/09/12 09:22 Page5
Page 6
Utilisation du minuteur pour controler le temps de cuisson
• Le bouton situé à droite de l’afficheur permet :
- de régler le temps par appui prolongé ou par plusieurs appuis brefs ; un petit "5" s’affiche en haut à droite
pour signaler les demi-minutes ;
- d’arrêter la sonnerie manuellement en appuyant quelques secondes.
• Lorsque le temps de cuisson est écoulé, la sonnerie retentit et s’arrête automatiquement après deux séries.
• Le minuteur signale la fin du temps de cuisson, mais il n’arrête pas l’appareil.
Nettoyage
• Après refroidissement, vous pouvez éjecter les plaques - C - D - E.
• Laisser refroidir l’appareil environ 1 heure en position ouverte avant éjection des plaques.
• Pour éjecter les capots pour passage au lave-vaisselle, appuyer sur le bouton "CLEAN" - 5. Les deux capots - 1 - 2 avec leurs plaques se nettoient au lave-vaisselle ou avec une éponge, de l’eau chaude et du liquide vaisselle - 5.
• Placer les capots - 1 - 2 - verticalement dans le lave-vaisselle, en positionnant la poignée vers le haut - P.
• Pour nettoyer les plaques, utiliser une éponge humide avec du produit à vaisselle ; les rincer et les essuyer soigneusement.
• Les plaques peuvent passer au lave-vaisselle.
• La charnière électrique - 3 - ne passe pas au lave-vaisselle. Elle peut être nettoyée avec un linge humide, puis
séchée - R.
• Pour remonter l’appareil : s’assurer que tous les éléments sont complètement secs avant de les assembler.
• Les capots inférieur et supérieur doivent être séchés avec précaution avant toute nouvelle utilisation.
Rangement
• L’appareil peut être rangé verticalement - T.
• Il est possible d'enrouler le cordon autour des poignées avant le rangement de l'appareil.
Remplacement de la pile du minuteur
• S’il y a perte partielle ou totale de l’affichage, la pile doit être remplacée.
• Nous vous recommandons d’utiliser un tournevis plat.
• Insérer un tournevis dans la fente arrière du minuteur afin de déclipser et extraire le minuteur - U.
• Dévisser la partie ronde située sous le minuteur.
• Extraire la pile.
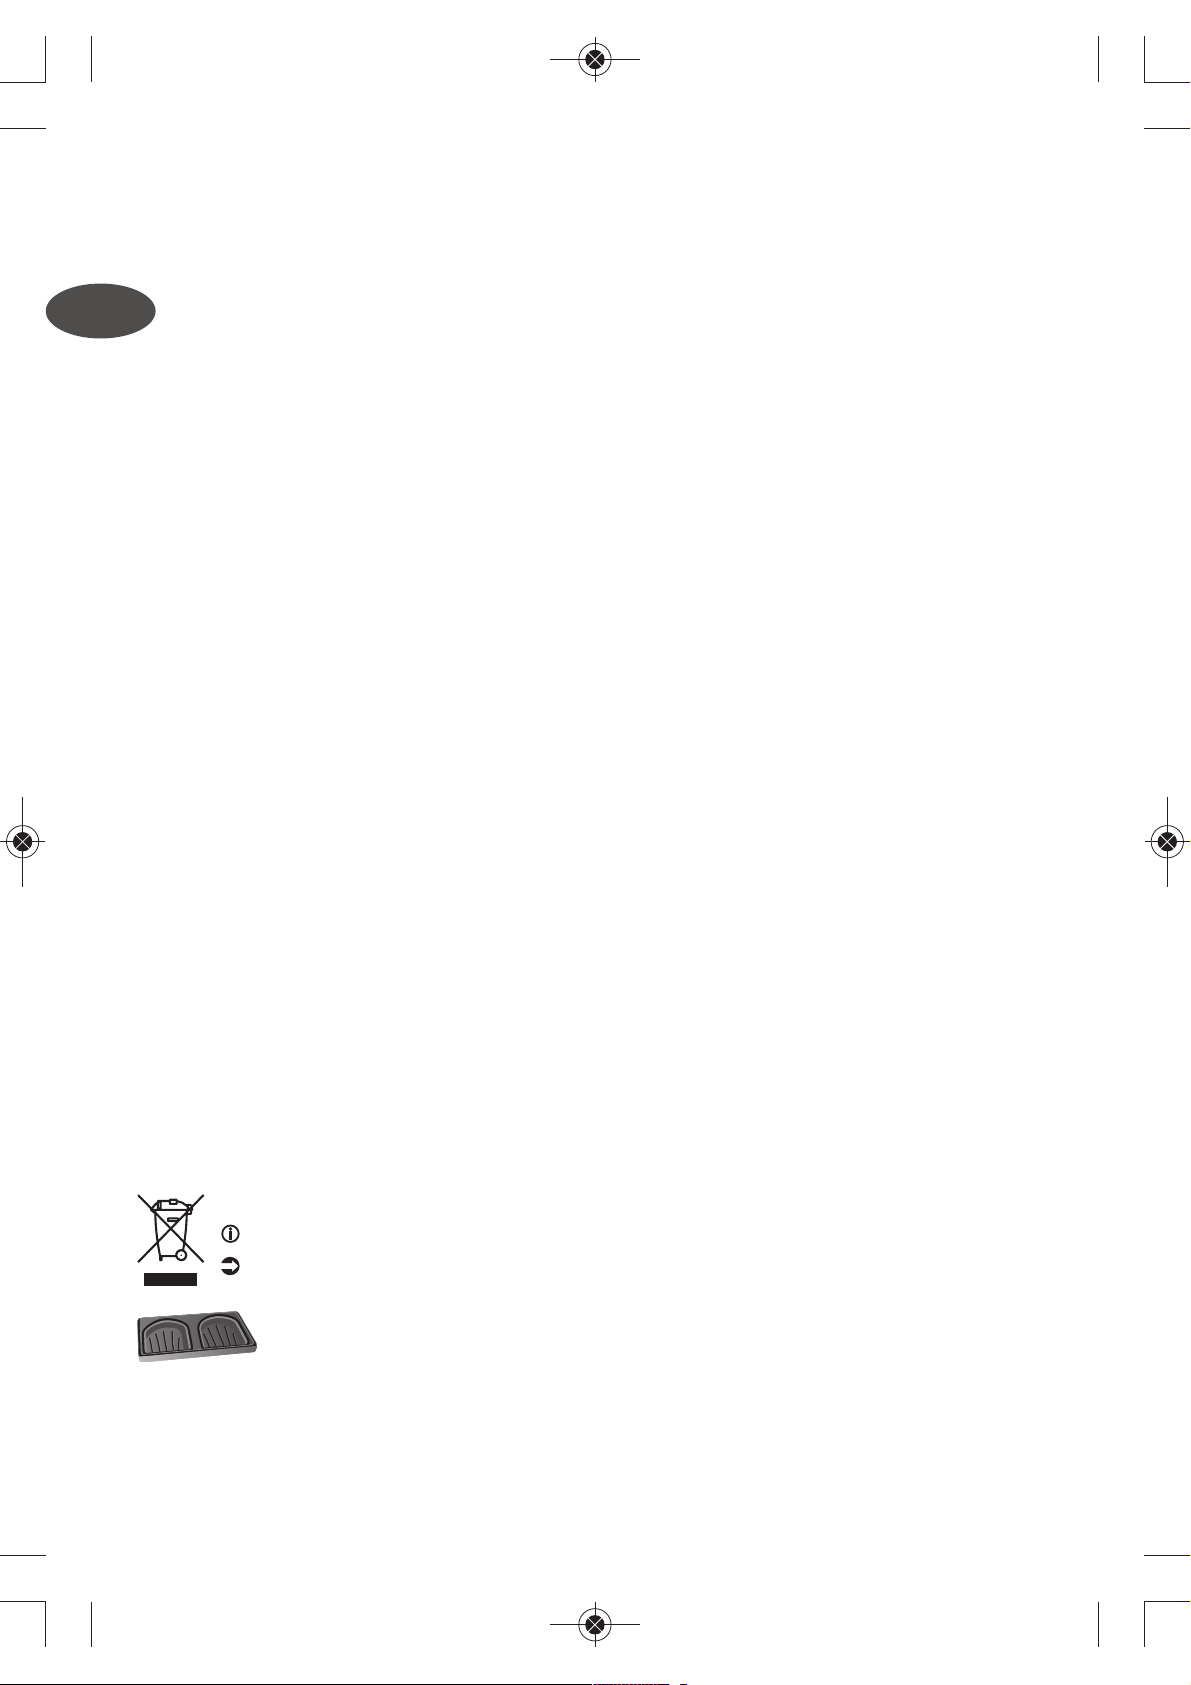
• Par respect de l’environnement, ne pas jeter la pile, mais l'apporter à l’un des points de collecte prévu à cet effet.
Environnement
FR
Recettes Croque-monsieur
Mettre les plaques croque-monsieur (*). Placer les croque-monsieur dans les alvéoles des
plaques. Refermer l’appareil et serrer pro gres si ve ment les poignées pour bien sceller les tranches de
pain. Laisser cuire 3 à 4 minutes selon le degré de cuisson souhaité.
Croque-monsieur
• 4 tranches de pain • tranche de jambon cuit • 70 g de gruyère • poivre • 20 g de beurre
Beurrer la face extérieure des 4 tranches de pain. Découper le gruyère en fines lamelles et disposer la moitié du
fromage sur les deux tranches de pain. Poser pardessus 1/2 tranche de jambon. Poivrer. Recouvrir de gruyère et
réunir les tranches deux à deux.
6
Participons à la protection de l’environnement !
Votre appareil contient de nombreux matériaux valorisables ou recyclables.
Confiez celui-ci dans un point de collecte pour que son traitement soit effectué.
Tef-SNAKnCLEAN-2100072598 18/09/12 09:22 Page6
Page 7
Croque-Roquefort
• 4 tranches de pain • 30 g de beurre • 8 noix • 50 g de Roquefort
Beurrer les tranches de pain sur les faces extérieures. Retirer les noix de leurs coques et les hacher grossièrement.
Mélanger avec 10 g de beurre et le Roquefort. Garnir deux tranches de pain avec la préparation, puis recouvrir
avec les deux autres.
Recettes Gaufres et gaufrettes
Mettre les plaques gaufres (*). Verser la pâte en pre nant soin de recouvrir chaque petit
pavé et de ne pas la faire déborder. Refermer l’appareil, at ten dre 10 secondes, puis retourner l’ap pa reil
pour bien répartir la pâte et assurer une cuis son uniforme. Laisser dans cette
posi tion pen dant 2 minutes. Remettre l’appareil à l’endroit et laisser cuire encore environ 1 mi nu te 30. Eviter d’ouvrir en cours de cuisson. Placer les gaufres
sur une grille et attendre 1 minute avant de déguster : elles deviennent alors
plus croquantes.
Gaufres traditionnelles
• 300 g de farine • 10 g de levure • sel • 75 g de sucre en poudre • 100 g de beurre • 2 œufs
• 1/2 l de lait
Mélanger la farine et la levure dans un saladier. Faire un puits et ajouter le sel, le sucre, le beurre fondu et les
œufs entiers. Délayer peu à peu avec le lait. Laisser reposer la pâte 1 heure.
Gaufres croustillantes
• 300 g de farine • 1 sachet de levure • 1 pincée de sel • 1 c. à soupe de sucre • 2 œufs • 40 cl de lait
Battre les œufs en omelette jusqu’à consistance mousseuse. Incorporer les autres ingrédients et battre jusqu’à
consistance lisse.
Gaufrettes petit-déjeuner
• 3 jaunes d’œuf • 370 ml de lait • 250 g de farine • 2 c. à café de levure • 3 c. à café de sucre
• 1/2 c. à café de sel • 8 c. à café d’huile • 3 blancs d’œuf
Mélangez les jaunes d’œuf et le lait. Ajoutez la farine, la levure, le sucre, le sel et mélangez bien le tout. Ajoutez
l’huile. Battez les blancs en neige et incorporez-les à la pâte.
Gaufrettes à la vanille
• 200 g de beurre • 50 g de sucre • des morceaux de gousse de vanille • 1 pincée de sel • 6 œufs
• 300 g de farine • 2 c. à café de levure • 1/4 de litre de lait • 1 c. à soupe de rhum
Battez le beurre, le sucre, la vanille et le sel. Mélangez la farine et la levure et ajoutez à l’ensemble progressivement
le lait et les œufs, puis incorporez le rhum.
Grillades
Mettre les plaques grils (*). Poser la viande sur les plaques. Refermer l’appareil et laisser
cuire selon la recette et le degré de cuisson souhaité.
Panini
Mettre les plaques grils (*). Placer le pain sur les plaques. Refermer l’appareil et laisser
cuire selon la recette et le degré de cuisson souhaité.
FR
7
Tef-SNAKnCLEAN-2100072598 18/09/12 09:22 Page7
Page 8

VEILIGHEIDSVOORSCHRIFTEN
BELANGRIJKE VOORZORGSMAATREGELEN
•Uw apparaat is uitsluitend bedoeld voor
huishoudelijk gebruik. Deze is niet ontworpen voor
gebruik in de volgende gevallen, waarvoor de
garantie niet geldig is:
- in kleinschalige personeelskeukens in winkels,
kantoren en andere arbeidsomgevingen,
- door gasten van hotels, motels of andere
verblijfsvormen.
•Het apparaat nooit zonder toezicht gebruiken.
•Dit apparaat is niet bedoeld om zonder hulp en/of
toezicht gebruikt te worden door kinderen of
andere personen indien hun fysieke, zintuiglijke of
mentale vermogen hen niet in staat stellen dit
apparaat op een veilige wijze te gebruiken. Er moet
toezicht zijn op kinderen zodat zij niet met het
apparaat kunnen spelen.
Er moet toezicht zijn op kinderen zodat zij niet met
het apparaat kunnen spelen.
•Dit apparaat mag gebruikt worden door kinderen
vanaf 8 jaar en door personen met beperkte
fysieke, zintuiglijke of mentale capaciteiten of
personen zonder ervaring of kennis, indien ze via
een persoon die verantwoordelijk is voor hun
veiligheid onder toezicht staan of voorafgaand
NL
8
Tef-SNAKnCLEAN-2100072598 18/09/12 09:22 Page8
Page 9

instructies kregen over het gebruik van het toestel
en op de hoogte zijn van de mogelijke risico’s.
Kinderen mogen niet met het apparaat spelen.
Schoonmaak en onderhoudswerkzaamheden
mogen alleen worden verricht door kinderen boven
de 8 jaar die onder toezicht staan.
Houd het apparaat en diens snoer buiten bereik
van kinderen onder de 8 jaar.
• Wanneer het apparaat aanstaat, kan de
temperatuur hoog oplopen.
•Controleer of de elektrische installatie geschikt is
voor de op het apparaat aangegeven
stroomsterkte en spanning.
•Dit apparaat is niet geschikt om gebruikt te worden
in combinatie met een tijdschakelaar of
afstandsbediening.
•Wanneer het netsnoer is beschadigd dient deze te
worden vervangen door de fabrikant, zijn
servicedienst of een gelijkwaardig gekwalificeerd
persoon om een gevaarlijke situatie te voorkomen.
•Dompel het uitneembare elektriciteitsblok met de
verwarmingselementen en het snoer nooit onder in
water. Reinig ze nooit in de vaatwasser.
•Verwijder de volledige verpakking, de stickers en
diverse accessoires, zowel aan de binnenkant als
aan de buitenkant van het apparaat.
NL
9
Tef-SNAKnCLEAN-2100072598 18/09/12 09:22 Page9
Page 10
•Rol het snoer volledig uit en steek de stekker van het
apparaat in het stopcontact.
•Als er een elektrisch verlengsnoer gebruikt wordt,
moet deze minimaal van een gelijke doorsnede zijn
en met een geïntegreerde geaarde stekker hebben.
•Sluit het apparaat uitsluitend aan op een geaard
stopcontact.
•Droog alle onderdelen na reiniging grondig voor u
het apparaat weer gebruikt.
Doen
• Lees de instructies van deze handleiding aandachtig door en houd ze binnen handbereik; deze handleiding
betreft de verschillende modellen, aan de hand van de met het apparaat meegeleverde accessoires.
• Als iemand zich brandt, koel de brandplek dan gelijk met koud water en roep, indien nodig, de hulp in van een
huisarts.
• Bij het eerste gebruik de bakplaten schoonmaken (Paragraaf "reiniging"); doe een klein beetje olie op de
bakplaten en neem de bakplaten af met een zacht doekje.
• Zorg ervoor dat u het snoer, met of zonder verlengsnoer, zo neerlegt dat iedereen vrij rond de tafel kan lopen
en er niemand over kan struikelen.
• Om beschadigingen van de bakplaten te voorkomen dient u deze alleen te gebruiken bij het apparaat waar ze
voor bedoeld zijn. (bijv.: niet in een oven plaatsen, op het gas of een elektrische kookplaat…).
• Om beschadigingen aan de bakplaat te voorkomen, adviseren wij u altijd een houten of kunststof spatel te
gebruiken.
• Controleer of de stekker van het apparaat uit het stopcontact is verwijderd voordat u het reinigt.
• De bakplaat en het apparaat moeten met een spons, warm water en afwasmiddel afgewassen worden.
• De dampen die tijdens het bereiden van voedsel vrijkomen kunnen gevaarlijk zijn voor (huis)dieren met
bijzonder gevoelige luchtwegen, zoals vogels. Wij raden u daarom aan eventuele vogels op een veilige afstand
van de plek waar u het apparaat gebruikt te plaatsen.
• Gebruik alleen de bij het apparaat geleverde bakplaten of aangeschaft via een erkend service center.
• Indien het apparaat midden op de tafel wordt gebruikt, dient u ervoor te zorgen dat het buiten bereik van
kinderen blijft.
Niet doen
• Sluit het apparaat nooit aan als u het niet gebruikt.
• Om oververhitting van het apparaat te voorkomen, dient u deze niet in een hoek of tegen een muur te
plaatsen.
• Plaats het apparaat nooit rechtstreeks op een kwetsbare ondergrond (glazen tafel, tafelkleed, gelakt
meubel...) of op een onstabiele ondergrond, zoals tafelkleden met een verende vulling.
NL
10
Tef-SNAKnCLEAN-2100072598 18/09/12 09:22 Page10
Page 11

• Plaats het apparaat niet op of in de buurt van gladde of warme oppervlakken en laat het snoer nooit boven
een warmtebron hangen (kookplaat, gasfornuis, enzovoorts).
• Plaats geen kookgerei op de kookoppervlakken van het apparaat.
• Snijd het voedsel niet op de platen.
• Gebruik om beschadiging van het bakoppervlak te voorkomen nooit een metalen spons of schuurpoeder.
• Verwarm het apparaat niet in verticale stand.
• Steek de stekker niet in het stopcontact als de platen en de kappen niet juist zijn aangebracht.
Adviezen / Informatie
• Voor uw veiligheid voldoet dit apparaat aan de toepasselijke normen en regelgevingen (Richtlijnen Laagspan-
ning, Elektromagnetische Compatibiliteit, Materialen in contact met voedingswaren, Milieu…).
• Tijdens het eerste gebruik kan er tijdens de eerste paar minuten geur en rook vrijkomen.
• Wij danken u voor de aankoop van dit apparaat, dat uitsluitend bestemd is voor huishoudelijk gebruik.
Gebruiksaanwijzing
Achterin dit boekje vindt u illustraties ter verduidelijking.
• Plaats uw apparaat op een stevige ondergrond.
Voor het eerste gebruik
• Rol het snoer volledig uit.
• Til hendel op om het toestel te openen - A.
• Het verwijderen van de platen, druk op de toetsen “EJECT" - 4 - op de voorzijde van de bovenste en onderste
kap- C - D - E.
• Het terugplaatsen van de platen, zet de plaat schuin neer en druk hierop om hem te vergrendelen - F - G - H.
• De grill- en wafelplaten zijn niet onderling verwisselbaar. Zet merkteken 1 van de plaat tegenover merkteken 1
van de kap aan de binnenzijde van het apparaat en merkteken 2 van de andere plaat tegenover merkteken 2
van de andere kap - G.
• Wanneer u het apparaat voor het eerst gebruikt dient u de platen af te wassen (zie de paragraaf Reiniging),
daarna giet u een beetje olie op de plaat of platen en veegt deze vervolgens met een zachte doek schoon.
• Controleer voordat u de platen gaat veranderen of het apparaat is afgekoeld en de stekker uit het stopcontact
is gehaald.
Gebruik van het apparaat
• Zorg ervoor dat de platen en de kappen stabiel zijn, goed geplaatst en vastgeklikt op het apparaat.
• Sluit het apparaat.
• Controleer of de knop op "0" staat.
• Steek de stekker van het snoer in het stopcontact. Zet de knop I aan (positie 1). Het rode controlelampje licht
op - I.
• Laat het apparaat opwarmen: zodra de baktemperatuur is bereikt, gaat het groene controlelampje branden -
J.
• Open het apparaat en leg de bereiding op de platen - L.
• Sluit het apparaat.
• Verwarm de bereiding gedurende de gewenste tijd.
• Het is normaal dat tijdens de bereiding het groene lampje uit en aan gaat.
• Wanneer de bereidingstijd is verstreken, schakelt u het apparaat uit door op "0" te drukken. Haal de stekker van
het apparaat uit het stopcontact - N - O.
• Laat het apparaat afkoelen (ca. 2 uur).
Gebruik de timer voor het bijhouden van de baktijd
• De toets rechts op het display kan gebruikt worden om:
- de baktijd in te stellen door deze continu ingedrukt te houden of door impulsen te geven. De kleine “5” in de
rechter bovenhoek geeft de halve minuten aan;
NL
11
n een
stand
k van
Tef-SNAKnCLEAN-2100072598 18/09/12 09:22 Page11
Page 12
- het waarschuwingssignaal handmatig te stoppen.
• Zodra de ingestelde tijd verstreken is hoort u een waar schuwings signaal. Na 2 series van piepjes houdt dit
signaal automatisch op.
• Het signaal waarschuwt dat de ingestelde tijd verstreken is, maar schakelt het apparaat niet uit.
Reiniging
• U kunt de platen uitwerpen zodra ze zijn afgekoeld - C - D - E.
• Laat het apparaat (ongeveer 1 uur) afkoelen in geopende positie avant éjection des plaques.
• Om de kappen los te maken om ze in de vaatwasser te steken, drukt u op de knop “CLEAN” - 5. De twee kappen -
1 - 2 - en hun platen kunnen in de vaatwas machine schoongemaakt worden of met een spons, warm water en
afwasmiddel - 5.
• Plaats de kappen - 1 - 2 - verticaal in de vaatwasmachine, met de handgreep naar boven - P.
• Gebruik een vochtige spons met afwasmiddel om de platen schoon te maken. Spoel en droog grondig.
• De platen zijn vaatwasmachinebestendig.
• Nooit het elektrische scharnier - 3 - in de vaatwasmachine doen. U kunt het schoonmaken met een vochtige
doek, daarna afdrogen - R.
• Het monteren van het apparaat: controleer voor de montage of alle elementen goed droog zijn.
• De onderste en bovenste kap moeten voor ieder nieuw gebruik zorgvuldig afgedroogd worden.
Opbergen
• Het apparaat kan verticaal opgeborgen worden - T.
• U kunt het snoer rond de handgrepen oprollen voordat u het apparaat opbergt.
De batterij van de timer vervangen
• Als de cijfers in het display gedeeltelijk of helemaal niet meer zichtbaar zijn moet de batterij vervangen wor-
den.
• Wij raden u aan een platte schroevendraaier te gebruiken.
• Steek een schroevendraaier in de achterste gleuf van de timer om deze los te klikken en te verwijderen - U.
• Schroef het ronde gedeelte los onder de timer.
• Verwijder de batterij.
• Om het milieu te beschermen raden wij u aan de batterij niet weg te gooien, maar deze terug te brengen naar uw
leverancier.
Milieu
NL
Recepten Tosti’s
De tostiplaten plaatsen (*). Plaats de te roosteren sandwiches op de tostiplaten. Sluit het
apparaat en klem geleidelijk de handgrepen dicht om de sneden in het brood te maken. Laat het brood
3 tot 4 minuten bakken, al naar gelang uw smaak.
Tosti met ham en kaas
• 4 sneden brood • 20 g boter • 70 g Goudse kaas • 1 plakje ham • peper
De sneden brood aan de binnenzijde licht insmeren met wat boter. Snijd de kaas in dunne plakjes en verdeel het
over twee sneetjes brood. Leg een half plakje ham erbovenop en strooi er een snufje peper overheen. Bedek het
met de andere twee sneden.
12
Wees vriendelijk voor het milieu !
Uw apparaat bevat materialen die geschikt zijn voor hergebruik.
Lever het in bij het milieustation in uw gemeente of bij onze technische dienst.
Tef-SNAKnCLEAN-2100072598 18/09/12 09:22 Page12
Page 13
Tosti met Roquefort en walnoten
• 4 sneden brood • 30 g boter • 8 walnoten • 50 g Roquefort kaas (of andere blauwschimmelkaas)
De sneden brood aan de binnenzijde licht insmeren met wat boter. Hak de walnoten in niet al te kleine stukjes.
Roer deze door de 10 g boter en de Roquefort kaas. Verdeel de bereiding over twee sneden en doe daar de andere 2 sneden bovenop.
Recepten Wafels/Wafeltjes
De wafelplaten plaatsen (*). Verdeel het beslag over ieder vakje en let erop dat het beslag
niet over de plaat heen loopt. Sluit het apparaat, wacht 10 seconden en draai het apparaat om (onderste
plaat boven) zodat het beslag zich goed kan verspreiden en een mooi gelijkmatig bakresultaat verkregen wordt. Laat het apparaat 2 minuten staan.
Draai het weer om en laat de wafels nog eens 1 minuut 30 bakken. Open het
apparaat tijdens het bakken niet. Neem de wafels uit het apparaat en laat ze
op een rooster 1 minuut uitwasemen. Ze zijn dan krokanter.
Klassieke wafels
• 300 g bloem • 10 g bakpoeder • zout • 75 g witte basterdsuiker • 100 g boter • 2 eieren • 1/2 l melk
Meng de bloem en het bakpoeder in een kom. In het midden een kuiltje maken en een snufje zout, de suiker, de
gesmolten boter en de eieren toevoegen. De melk beetje bij beetje toevoegen. Roeren tot een egaal beslag ontstaat. Laat het beslag 1 uur rusten, voordat u gaat bakken.
Krokante wafels
• 300 g bloem • 10 g bakpoeder • 1 snufje zout • 1 theelepel suiker • 2 eieren • 40 cl melk
Klop de eieren totdat een schuimige substantie ontstaat. Voeg de andere ingrediënten toe en klop dit op tot een
egaal beslag.
Ontbijtwafels
• 3 eidooiers • 370 ml melk • 250 gr bloem • 2 theelepels gist • 3 theelepels suiker • 1/2 theelepel zout
• 8 theelepels olie • 3 eiwitten
Meng de eidooiers en de melk. Voeg bloem, gist, suiker en zout toe en meng alles goed. Voeg de olie toe. Klop
de eiwitten stijf en voeg ze toe aan het beslag.
Vanillewafels
• 200 gr boter • 50 gr suiker • 1 in stukjes gesneden vanillestokje • 1 mespuntje zout • 6 eieren
• 300 gr bloem • 2 theelepels gist • 1/4 liter melk • 1 eetlepel rum
Mix boter, suiker, vanille en zout. Meng bloem en gist en voeg geleidelijk de melk en de eieren toe aan het geheel;
voeg tenslotte de rum toe.
Recepten Grillgerechten
De grillplaten plaatsen (*). Leg het vlees op de platen. Sluit het apparaat en laat het zolang bakken als geadviseerd in het recept of al naar gelang uw smaak.
Recepten Paninis
De grillplaten plaatsen (*). Leg het brood op de platen. Sluit het apparaat en bak het brood
volgens het recept en de gewenste bakgraad.
NL
13
Tef-SNAKnCLEAN-2100072598 18/09/12 09:22 Page13
Page 14

SICHERHEITSHINWEISE
WICHTIGE VORKEHRUNGEN
•Dieses Gerät ist ausschließlich für die Verwendung
in privaten Haushalten bestimmt.
Die Garantie erstreckt sich nicht auf die
Verwendung in Umgebungen wie beispielsweise:
- Kochecken für das Personal in Geschäften, Büros
oder sonstigen Arbeitsumfeldern,
- landwirtschaftlichen Anwesen,
- den Gebrauch durch Gäste in Hotels, Motels und
sonstigen Umfeldern mit Beherbergungscharakter,
- Frühstückspensionen.
•Lassen Sie das Gerät nie unbeaufsichtigt in Betrieb.
•Überlassen Sie niemals unbeaufsichtigt Kindern
oder Personen das Gerät, wenn deren physische
oder sensorische Fähigkeiten oder Mangel an
Erfahrung und Wissen sie am sicheren Gebrauch
hindern. Sie müssen stets überwacht werden und
zuvor unterwiesen sein.
Kinder müssen beaufsichtigt werden, um sicher zu
gehen, dass sie nicht mit dem Gerät spielen.
•Dieses Gerät darf von Kindern ab einem Alter von 8
Jahren und von Personen, deren körperliche oder
geistige Fähigkeiten bzw. Wahrnehmungsfähigkeiten
eingeschränkt sind oder die über mangelnde
Erfahrungen oder Kenntnisse verfügen, nur unter
DE
14
Tef-SNAKnCLEAN-2100072598 18/09/12 09:22 Page14
Page 15
der Voraussetzung verwendet werden, dass sie
beaufsichtigt werden oder Anweisungen zur
sicheren Nutzung des Geräts erhalten haben und
die damit verbundenen Risiken verstehen. Kinder
dürfen nicht mit dem Gerät spielen. Das Gerät darf
nicht von Kindern gereinigt oder gewartet werden,
es sei denn, sie sind älter als 8 Jahre und werden
beaufsichtigt.
Achten Sie darauf, dass das Gerät und sein
Netzkabel sich stets außer Reichweite von Kindern
im Alter von unter 8 Jahren befinden.
• Die zugänglichen Flächen können während des
Betriebs hohe Temperaturen erreichen.
•Stellen Sie sicher, dass die Stromversorgung mit der
auf der Unterseite des Geräts angegebenen
Stromstärke und Spannung übereinstimmt.
•Dieses Gerät darf nicht über eine externe Schaltuhr
oder eine separate Fernsteuerung betrieben werden.
•Wenn die Anschlussleitung dieses Geräts
beschädigt wird, muss sie durch den Hersteller oder
seinen Kundendienst ausgetauscht werden.
•Der elektrische Basisgeräteteil mit den
Heizelementen und das Kabel dürfen weder ins
Wasser getaucht noch in der Geschirrspülmaschine
gereinigt werden.
•Verpackungen, Aufkleber und gesamtes Zubehör
DE
15
Tef-SNAKnCLEAN-2100072598 18/09/12 09:22 Page15
Page 16
innerhalb und außerhalb des Geräts entfernen.
•Rollen Sie das Stromkabel ganz ab und schließen
Sie das Gerät an.
•Wenn ein Verlängerungskabel verwendet wird,
muss dies mindestens den gleichen Querschnitt
haben und eine Erdung besitzen.
•Schließen Sie das Gerät nur an eine geerdete
Steckdose an.
•Nach der Reinigung müssen alle Elemente gut
getrocknet werden, bevor das Gerät wieder
eingeschaltet wird.
Immer
• Lesen Sie bitte die Gebrauchsanleitung sorgfältig durch und bewahren Sie diese griffbereit auf. Die
Gebrauchsanleitung ist für alle Modelle gültig.
• Im Falle eines Unfalls, lassen Sie bitte sofort kaltes Wasser über die Verbrennung laufen und rufen Sie
gegebenenfalls einen Arzt.
• Reinigen Sie die Platten bei der ersten Inbetriebnahme, und geben Sie ein wenig Öl auf die Platten und reiben
Sie sie mit einem weichen Tuch ab.
• Bitte treffen Sie alle geeigneten Maßnahmen, damit das Stromkabel und gegebenenfalls das
Verlängerungskabel die Bewegungsfreiheit der Gäste bei Tisch nicht beeinträchtigen und niemand darüber
stolpern kann.
• Um eine Beschädigung der Platten zu vermeiden, verwenden Sie diese nur auf dem Gerät, für das sie konzipiert
wurden (z.B.: nicht in einem Ofen, auf einem Gasherd oder einer Elektrokochplatte...).
• Benutzen Sie stets einen Spatel aus Plastik oder Holz, um die Beschichtung der Kochplatte nicht zu
beschädigen.
• Überprüfen Sie, ob das Gerät vom Stromnetz getrennt und abgekühlt ist, bevor Sie es reinigen.
• Reinigen Sie die Platten und das Gehäuse des Geräts mit einem Schwamm und heißem Seifenwasser.
• Die Kochdämpfe können für Tiere mit einem besonders empfindlichen Atemsystem wie Vögel eine Gefahr
darstellen. Vogelhaltern wird empfohlen, die Tiere vom Kochplatz entfernt zu halten.
• Verwenden Sie ausschließlich die mitgelieferten oder bei einem autorisierten Kundendienstzentrum erworbene
Platten.
• Wenn das Gerät in der Mitte des Tisches benutzt wird, darf er sich nicht in Reichweite von Kindern befinden.
Niemals
• Schließen Sie das Gerät nie an, wenn es nicht benutzt wird.
• Zur Vermeidung von Überhitzung des Gerätes darf dieses nicht in Ecken oder an einer Wand aufgestellt werden.
• Das Gerät darf nicht direkt auf empfindliche Unterlagen (Glastisch, Tischtuch, lackierte Möbel, etc.) oder auf
weiche Unterlagen gestellt werden.
DE
16
Tef-SNAKnCLEAN-2100072598 18/09/12 09:22 Page16
Page 17
• Platzieren Sie das Gerät nicht auf oder in der Nähe von rutschigen oder heißen Oberflächen. Führen Sie das
Netzkabel niemals über scharfe Kanten oder eine Wärmequelle wie Kochplatten oder einen Gasherd.
• Legen Sie keine Kochutensilien auf die Kochflächen des Geräts.
• schneiden Sie nicht direkt im Grillplatten.
• Verwenden Sie keine Metallschwämme und kein Scheuerpulver, um die Kochflächen(Anti-Haft-
Beschichtung) nicht zu beschädigen (zum Beispiel: die Anti-Haft-Beschichtung, ...).
• Erhitzen Sie das Gerät nicht in vertikaler Position.
• Schließen Sie das Gerät nicht an das Stromnetz an, solange die Platten und die beiden Abdeckungen nicht
richtig eingesetzt sind.
Ratschläge / Informationen
• Für Ihre Sicherheit entspricht dieses Produkt allen gängigen Standards (Niederspannungsrichtlinie, elektromag-
netische Verträglichkeit, Lebensmittelverordnung, Umweltschutz,...).
• Bei der ersten Inbetriebnahme kann es in den ersten Minuten zu leichter Geruchs- oder Rauchentwicklung kom-
men. Öffnen Sie in diesem Fall das Fenster, bis keine Geruchs- oder Rauchentwicklung mehr feststellbar ist.
• Wir freuen uns, dass Sie sich für dieses Gerät entschieden haben. Dieses Gerät ist ausschließlich für den Haus-
gebrauch in geschlossenen Räumen bestimmt.
Bedienungsanleitung
Auseinandergezogene Ansicht des Gerätes am Ende dieser Beilage.
• Stellen Sie das Gerät auf eine stabile Unterlage.
Vor der ersten Inbetriebnahme
• Rollen Sie das Netzkabel ganz aus.
• Öffnen Sie das Gerät durch Anheben der Verriegelung - A.
• Um die Platten zu entfernen, drücken Sie die Eject Taste - 4 - an der Vorderseite, oben und unten - C - D - E.
• Einlegen der Platten, die Platte schräg einlegen, darauf drücken, um sie zu verriegeln - F - G - H.
• Die Waffel- und Grillplatten können nicht beliebig eingesetzt werden. Die Markierung 1 der Platte mit der Mar-
kierung 1 der Abdeckung im Produkt, und die Markierung 2 der anderen Platte mit der Markierung 2 der anderen
Abdeckung in Übereinstimmung bringen - G.
• Reinigen Sie die Platten vor der ersten Inbetriebnahme (beachten Sie den Abschnitt “Reinigung”), geben Sie
ein wenig Öl auf die Platten und reiben Sie sie mit einem weichen Tuch ab.
• Vergewissern Sie sich, dass das Gerät kalt und von Stromnetz getrennt ist, bevor Sie die Platten wechseln.
Gebrauch des Gerätes
• Achten Sie darauf, dass die Platten und die Abdeckungen stabil, richtig positioniert und fest auf das Gerät ge-
clipst sind.
• Schließen Sie das Gerät.
• Stellen Sie sicher, dass der Schalter auf 0 gestellt ist.
• Schließen Sie das Stromkabel an. Schalten Sie den Ein-/Aus-Schalter I ein (Position 1). Das rote Lämpchen der
Betriebskontrollleuchte geht an - I.
• Heizen Sie das Gerät vor : der grünen Betriebskontrollleuchte leuchtet auf, sobald die richtige Temperatur erreicht ist - J.
• Öffnen Sie das Gerät und geben Sie die Zubereitungen auf die Platten - L.
• Schließen Sie das Gerät.
• Garen Sie die Zubereitungen je nach gewünschter Dauer.
• Während des Betriebes schaltet der grünen Betriebskontrollleuchte ein und aus. Dieses ist eine normale Funktion.
• Am Ende des Garvorgangs schalten Sie das Gerät durch Drücken des Ein-/Aus-Schalters auf 0 aus. Ziehen Sie
den Netzstecker - N - O.
• Lassen Sie das Gerät in offener Position abkühlen (ca. 2 Stunde).
Nutzen Sie den Timer, um die Garzeit zu kontrollieren
DE
17
ht zu
Tef-SNAKnCLEAN-2100072598 18/09/12 09:22 Page17
Page 18
• Der Schalter auf der rechten Seite ermöglicht :
- die Zeiteinstellung: durch gedrückt halten oder mehrmaliges kurzes Drücken. Ein kleines “5”-auf der rechten
Seite des Displays zeigt die verbliebenen Sekunden an;
- das manuelle Unterbrechen des Warnsignals.
• Wenn die Garzeit beendet ist, ertönt ein Warnsignal, welches nach zweimaligem Klingeln stoppt.
• Der Timer zeigt das Ende der Garzeit an, schaltet das Gerät aber nicht aus.
Reinigung
• Nach dem Abkühlen können Sie die Platten - C - D - E ausklinken.
• Lassen Sie das Gerät (ca. 1 Stunde) vor Auswurf der Platten in geöffneter Position abkühlen.
• Um die Abdeckungen zum Reinigen in der Geschirrspülmaschine abzunehmen, drücken Sie die “CLEAN”- Taste
- 5. Die beiden Abdeckungen - 1 - 2 - und die Platten können in der Geschirrspül maschine oder mit einem
Schwamm, heißem Wasser und Geschirrspülmittel gereinigt werden - 5.
• Stellen Sie die Abdeckungen - 1 - 2 - senkrecht in die Spül maschine, mit dem Griff nach oben - P.
• Zum Reinigen der Platten verwenden Sie einen feuchten Schwamm mit etwas Spülmittel, dann abspülen und
sorgfältig trocknen.
• Die Platten sind spülmaschinengeeignet.
• Das elektrische Basiselement - 3 - darf nie in der Geschirrspülmaschine gereinigt werden. Das elektrische Basiselement kann mit einem feuchten Tuch gesäubert und anschließend getrocknet werden - R.
• Um das Gerät zusammenzubauen: vor dem Zusammenfügen vergewissern sie sich, dass alle Elemente vollkommen trocken sind.
• Die oberen und unteren Abdeckungen müssen vor jeder neuen Benutzung sorgsam getrocknet werden.
Aufbewahrung
• Das Gerät kann in vertikaler Stellung aufbewahrt werden - T.
• Vor dem Aufbewahren des Gerätes können Sie das Kabel um die Griffe wickeln.
Auswechseln der Batterie des Timers
• Wenn die Anzeige teilweise oder total ausfällt, muss die Batterie ausgewechselt werden.
• Wir empfehlen Ihnen, einen flachen Schraubenzieher zu verwenden.
• Führen Sie einen Schraubenzieher in den Schlitz hinten am Timer ein und lösen Sie den Timer ab - U.
• Schrauben Sie das runde Teil unter dem Timer ab.
• Nehmen Sie die Batterie heraus und ersetzen Sie diese durch eine gleichwertige.
• Um die Umwelt zu schützen, werfen Sie die Batterie des Timers nicht in den Hausmüll, sondern bringen Sie
diese zu einer Annahmestelle für Altbatterien.
Umwelt
Rezepte getoastete Sandwichs
Die Croque- Monsieur- Platten einlegen (*). Setzen Sie die Sandwich-Platten ein. Legen
Sie die Toastscheiben auf die Platte. Schließen Sie das Gerät, indem Sie allmählich den Druck auf die
Griffe erhöhen, um die Toastscheiben gut miteinander zu verbinden. Lassen Sie die Toastscheiben je
nach Geschmack 3 bis 4 Minuten im Gerät.
18
Denken Sie an den Schutz der Umwelt!
Ihr Gerät enthält wertvolle Rohstoffe, die wieder verwertet werden können.
Geben Sie Ihr Gerät deshalb bitte bei einer Sammelstelle Ihrer Stadt oder Gemeinde ab.
DE
Tef-SNAKnCLEAN-2100072598 18/09/12 09:22 Page18
Page 19

Getoastete Sandwiches
• 4 Scheiben Toastbrot • 20 g Butter • 70 g Schweizer Käse • 1 Scheibe gekochten Schinken • Pfeffer
Bestreichen Sie die Außenseiten der Brotscheiben mit Butter. Schneiden Sie den Schweizer Käse in dünne Scheiben
und legen Sie die Hälfte davon zwischen die beiden Brotscheiben. Legen Sie eine halbe Scheibe Schinken oben
auf das Brot und bestreuen Sie es mit Pfeffer. Dann decken Sie alles mit dem Schweizer Käse ab und klappen
Sie die Scheiben zusammen.
Croque-Roquefort
• 4 Scheiben Toastbrot • 30 g Butter • 8 Walnüsse • 50 g Roquefort-Käse
Bestreichen Sie die Außenseiten des Brotes mit Butter. Hacken Sie die Walnüsse grob und rühren diese mit 10 g
Butter unter den Roquefort-Käse. Geben Sie die fertige Masse auf 2 Scheiben Toastbrot und decken Sie mit den
übrigen Scheiben ab.
Rezepte: Waffeln und Knusperwaffeln
Die Waffelplatten einlegen (*). Verteilen Sie die Masse so, dass die gesamte Fläche bedeckt ist, aber nicht über die Seiten der Heizplatten herausläuft. Schließen Sie das Gerät, warten 10 Sekunden und drehen Sie dann das Gerät um, damit sich der Teig gut verteilt und gleichmäßig gebacken
wird. Halten Sie diese Position 2 Minuten. Drehen Sie das Gerät nach rechts und backen Sie die Waffeln
weitere 1 Minute 30. Vermeiden Sie es, das Gerät während des Backens zu öffnen. Legen Sie die Waffeln auf ein Gitter und warten Sie 1 Minute bevor Sie
diese essen: Dadurch wird die Waffel knuspriger.
Traditionelle Waffeln
• 300 g Mehl • 10 g Backpulver • Salz • 75 g Zucker • 100 g Butter • 2 Eier • 1/2 l Milch
Mischen Sie das Mehl und das Backpulver in einer Schüssel. In eine Vertiefung geben Sie eine Prise Salz, Zucker,
zerlassen Butter und die Eier. Vermischen Sie alles allmählich mit der Milch. Lassen Sie den Teig 1 Stunde stehen.
Knusprige Waffeln
• 300 g Mehl • 10 g Backpulver • 1 Prise Salz • 1 Teelöffel Zucker • 2 Eier • 400 ml Milch
Schlagen Sie die Eier schaumig und geben Sie dann nach und nach die anderen Zutaten hinzu. Rühren Sie den
Teig solange weiter, bis eine geschmeidige Masse entsteht.
Frühstückswaffeln
• 3 Eigelb • 370 ml Milch • 250 g Mehl • 2 Teelöffel Trockenhefe • 3 Teelöffel Zucker • 1/2 Teelöffel Salz
• 8 Teelöffel Öl • 3 Eiweiß
Verrühren Sie die Eigelb und die Milch. Geben Sie das Mehl, die Hefe, den Zucker, das Salz hinzu und verrühren Sie
alles. Dann fügen sie das Öl hinzu. Schlagen Sie das Eiweiß zu Schnee und heben Sie den Eischnee unter den Teig.
Vanillewaffeln
• 200 g Butter • 50 g Zucker • Vanilleschote in Stücken • eine Prise Salz • 6 Eier • 300 g Mehl • 2 Teelöffel
Trockenhefe • 1/4 l Milch • 1 Esslöffel Rum
Butter, Zucker, Vanille und Salz verrühren. Mehl und Hefe mischen und langsam nach und nach die Milch und die
Eier hinzufügen, dann den Rum einarbeiten.
Rezepte Grillen
Setzen Sie die Grillplatten ein (*). Legen Sie das Fleisch auf die Heizplatten. Schließen Sie
das Gerät und lassen Sie es, je nach Rezept und Ihrem Geschmack, braten.
Rezepte Paninis
Setzen Sie die Panini-Platten ein (*). Legen Sie das Brot auf die Platten. Schließen Sie das
Gerät und lassen Sie das Brot je nach Rezept und gewünschter Bräune toasten.
DE
19
Tef-SNAKnCLEAN-2100072598 18/09/12 09:22 Page19
Page 20

CONSIGLI DI SICUREZZA
PRECAUZIONI IMPORTANTI
• Questo apparecchio è stato concepito per uso
unicamente domestico.
Non è stato ideato per essere utilizzato nei seguenti
casi, che restano esclusi dalla garanzia:
- in angoli cottura riservati al personale nei negozi,
negli uffici e in altri ambienti professionali,
- nelle fabbriche,
- dai clienti di alberghi, motel e altre strutture
ricettive residenziali,
- in ambienti tipo camere per vacanze.
•Non utilizzare mai l’apparecchio senza sorvegliarlo.
•Questo apparecchio non dovrebbe essere utilizzato
da persone (compresi i bambini) le cui capacità
fisiche, sensoriali o mentali sono ridotte, o da
persone prive di esperienza o di conoscenza, tranne
se hanno potuto beneficiare, tramite una persona
responsabile della loro sicurezza, di una
supervisione o di istruzioni preliminari relative
all’utilizzo dell’apparecchio. È opportuno
sorvegliare i bambini per assicurarsi che non
giochino con l’apparecchio.
•Questo apparecchio può essere utilizzato da
bambini dagli 8 anni in su e da persone le cui
capacità fisiche, sensoriali o mentali sono ridotte o
IT
20
Tef-SNAKnCLEAN-2100072598 18/09/12 09:22 Page20
Page 21

da persone prive di esperienza o di conoscenza,
purché possano beneficiare di sorveglianza o di
istruzioni preliminari relative all'uso
dell'apparecchio e comprendano i pericoli
implicati. Evitare che i bambini giochino con
l'apparecchio. Le operazioni di pulizia e
manutenzione devono essere svolte unicamente da
bambini dagli 8 anni in su.
Tenere l'apparecchio e il relativo cavo di
alimentazione fuori della portata dei bambini di età
inferiore agli 8 anni.
• La temperatura delle superfici accessibili può
essere elevata quando l’apparecchio è in funzione.
•Verificare che l’impianto elettrico sia compatibile
con la potenza e la tensione indicate sotto
l’apparecchio.
•Questo apparecchio non è destinato a essere
messo in funzione per mezzo di un timer esterno o
di un sistema di comando a distanza separato.
•Se il cavo di alimentazione e’ danneggiato, esso
deve essere sostituito dal costruttore o dal suo
servizio assistenza tecnica o comunque da una
persona con qualifica similare, in modo da
prevenire ogni rischio.
•Non immergere in acqua la cerniera elettrica con le
resistenze e il cavo. Non lavare in lavastoviglie.
IT
21
Tef-SNAKnCLEAN-2100072598 18/09/12 09:22 Page21
Page 22

•Togliere tutti gli imballi, adesivi o vari accessori sia
all’interno che all’esterno dell’apparecchio.
• Srotolare completamente il cavo e collegare
l’apparecchio.
•Se viene utilizzata una prolunga, quest’ultima deve
presentare almeno una sezione equivalente ed
essere dotata di messa a terra integrata.
•Collegare l’apparecchio solamente ad una presa
con messa a terra incorporata.
•Prima di riavviare l'apparecchio, asciugare con cura
tutti gli elementi dopo averli lavati.
Cosa fare
• Leggere attentamente e tenere a portata di mano le istruzioni del presente foglietto illustrativo; esse fanno
parte delle diverse versioni di accessori forniti insieme al vostro apparecchio.
• Nel caso di incidente, sciacquare immediatamente la scottatura con acqua fredda e chiamare un medico se
necessario.
• Al momento del primo utilizzo, lavare la piastra o le piastre (seguire il paragrafo pulizia), versare un po’ d’olio
sulla piastra o sulle piastre e asciugare con uno straccio morbido.
• Al momento del posizionamento del cavo con o senza prolunga, prendere tutte le precauzioni necessarie per
non ostacolare la circolazione degli invitati attorno al tavolo in modo che nessuno possa inciamparvi.
• Per evitare di deteriorare le piastre, utilizzarle solo sull’apparecchio per il quale sono previste (es.: non metterle
nel forno, sul fornello o su una piastra elettrica).
• Per non danneggiare il rivestimento delle piastre di cottura e delle padelline, utilizzare sempre una spatola di
plastica o di legno.
• Verificare che l’apparecchio sia scollegato prima di pulirlo.
• La piastra di cottura e il corpo dell’apparecchio si puliscono con una spugnetta, acqua calda e liquido per i
piatti.
• I fumi di cottura possono essere pericolosi per gli animali con un sistema di respirazione particolarmente
sensibile, come gli uccelli. Consigliamo di allontanare gli uccelli dal luogo di cottura.
• Utilizzare solo le piastre fornite con l’apparecchio o acquistate presso il Servizio Assistenza Autorizzato.
• Se l’apparecchio è usato al centro del tavolo, metterlo fuori dalla portata dei bambini.
IT
22
Tef-SNAKnCLEAN-2100072598 18/09/12 09:22 Page22
Page 23

Cosa non fare
• Non collegare mai l’apparecchio quando non è utilizzato.
• Per evitare il surriscaldamento dell’apparecchio, non metterlo in un angolo o contro il muro.
• Non mettere mai direttamente l’apparecchio su un supporto fragile (tavolo di vetro, mobile verniciato…) o su
un supporto morbido, come per esempio una tovaglia di gomma.
• Non appoggiare l’apparecchio su di una superficie scivolosa o calda, o vicino ad essa. Non lasciare mai il
cavo pendente sopra una fonte di calore (piastre di cottura, fornelli a gas ecc.).
• Non posare utensili di cottura sulle superfici di cottura dell’apparecchio.
• Non tagliare gli alimenti direttamente sulle piastre.
• Non usare mai spugnette metalliche, né polveri abrasive per non danneggiare la superficie di cottura (es.:
rivestimento antiaderente, ...).
• Non riscaldare mai l'apparecchio in posizione verticale.
• Non collegare l'apparecchio se le piastre non sono posizionate correttamente.
Consigli / informazioni
• Per la vostra sicurezza, questo prodotto è conforme alle norme in vigore (Direttiva Basso Voltaggio, Compatibilità
elettromagnetica, Materiali compatibili con il cibo, Ambiente,...).
• Al primo utilizzo, si può produrre un leggero odore o fumo per i primi minuti.
• Grazie per aver acquistato questo apparecchio, destinato al solo uso domestico.
Istruzioni d'uso
Disegno esploso nelle ultime pagine.
• Mettere il vostro apparecchio sopra un piano d’appoggio fermo.
Prima del primo utilizzo
• Srotolare completamente il cavo.
• Aprire l’apparecchio alzando il fermo - A.
• Premere i tasti “EJECT” - 4 - situati sulla parte anteriore dei supporti anteriore e inferiore - C - D - E.
• Per rimettere le piastre, appoggiare la piastra di traverso e premere sulla piastra per bloccarla - F - G - H.
• Le piastre grill e cialde non sono intercambiabili. Fare corrispondere il segno 1 della piastra con il segno 1 del
supporto all’interno del prodotto, e il segno 2 dell’altra piastra con il segno 2 dell’altro supporto - G.
• Al momento del primo utilizzo, lavarele piastre (seguire il paragrafo Pulizia), versare un po’ d’olio sulle piastre
e asciugare con uno straccio morbido.
• Verificare che l’apparecchio sia freddo e staccato dalla corrente prima di procedere alla sostituzione delle piastre.
Utilizzo
• Verificare che i supporti le piastre siano stabili, ben posizionate e ben fissate sull’apparecchio.
• Chiudere l’apparecchio.
• Verificare che l'interruttore sia in posizione 0.
• Collegare il cavo alla rete di alimentazione. Avviare l'apparecchio posizionando l'interruttore I su 1. La spia rossa
si accende - I.
• Preriscaldare l'apparecchio : una volta raggiunta la temperatura di cottura, si accende la spia verde - J.
• Aprire l'apparecchio e posizionare i preparati sulle piastre - L.
• Chiudere l’apparecchio.
• Lasciare cuocere il preparato il tempo necessario.
• Durante la cottura, è normale che la spia verde si accenda e si spenga.
• A fine cottura, spegnere l'apparecchio premendo su 0. Scollegare il cavo dalla corrente di rete - N - O.
• Lasciare raffreddare l'apparecchio (2 ora circa).
IT
23
ie per
ola di
Tef-SNAKnCLEAN-2100072598 18/09/12 09:22 Page23
Page 24

Usare il timer per controllare il tempo di cottura
• Il tasto situato sul lato destro dello schermo consente:
- di impostare il tempo tenendo il tasto continuamente premuto o premendolo più volte. Un piccolo “5” in alto
a destra indica il mezzo minuto;
- di arrestare manualmente il segnale di avviso.
• Allo scadere del tempo di cottura, il timer emette un segnale di avviso e si ferma automaticamente dopo due
serie di segnali sonori.
• Il timer indica la fine del tempo di cottura ma non spegne l’apparecchio.
Pulizia
• Dopo aver fatto raffreddare l'apparecchio è possibile estrarre le piastre - C - D - E.
• Lasciare raffreddare l'apparecchio (1 ora circa) in posizione aperta prima di estrarre le piastre.
• Per sganciare i supporti da lavare in lavastoviglie, premere il pulsante “CLEAN” - 5. I supporti - 1 - 2 - e le piastre
possono essere lavati in lavastoviglie o in acqua calda con una spugna e un detersivo per piatti - 5.
• Mettere i supporti - 1 - 2 - in posizione verticale nella lavastoviglie, con la maniglia rivolta verso l'alto - P.
• Per pulire le piastre, utilizzare una spugna umida e del detersivo per piatti. Sciacquarle e asciugarle con cura.
• Le piastre di cottura possono essere lavate in lavastoviglie.
• Non lavare mai la cerniera elettrica (3) in lavastoviglie. Pulire la cerniera elettrica con un panno umido, quindi
asciugare - R.
• Per rimontare l’apparecchio: assicurarsi che tutti gli elementi siano completamente asciutti prima di assemblarli.
• I supporti inferiore e superiore devono essere asciugati con attenzione prima di qualsiasi ulteriore utilizzo.
Sistemazione
• L’apparecchio può essere sistemato verticalmente - T.
• È possibile arrotolare il cavo intorno alle maniglie prima di riporre l'apparecchio.
Cambiare la batteria del timer
• Nel caso il display sia parzialmente o completamente illeggibile, la batteria deve essere sostituita.
• Raccomandiamo l’uso di un cacciavite a punta piatta.
• Inserire la punta di un cacciavite nella fessura posteriore del timer per sganciarlo ed estrarlo dal corpo dell'ap-
parecchio - U.
• Svitare il componente rotondo situato sotto il timer.
• Rimuovere la batteria.
• Nel rispetto dell’ambiente, non buttare la batteria ma consegnarla al distributore, grossista o rivenditore.
Ambiente
IT
Ricette Toasts
Posizionare le piastre per toasts. Posizionare i toasts sulle piastre. Chiudere l’apparecchio
e serrare progressivamente le impugnature per sigillare bene le fette di pane. Lasciar cuocere dai 3 ai 4
minuti a seconda del proprio gusto.
Toasts
• 4 fette di pane • 20 g burro • 70 g formaggio groviera • 1 fetta di prosciutto cotto • pepe
Imburrare la parte esterna delle fette di pane. Tagliare a fettine il formaggio groviera e porre metà del formaggio
su due fette di pane. Mettere 1/2 fetta di prosciutto e aggiungere pepe. Coprire con formaggio groviera quindi
unire le altre fette di pane.
24
Partecipiamo alla protezione dell’ambiente !
Il vostro apparecchio è composto da diversi materiali che possono essere riciclati.
Lasciatelo in un punto di raccolta o presso un Centro Assistenza Autorizzato.
Tef-SNAKnCLEAN-2100072598 18/09/12 09:22 Page24
Page 25

Croque-Roquefort
• 4 fette di pane • 30 g di burro • 8 noci • 50 g di formaggio Roquefort (o gorgonzola)
Imburrare la parte esterna delle fette di pane. Spezzettare le noci ed aggiungere, mescolando al burro ed al formaggio Roquefort. Spalmare il preparato su due fette di pane quindi coprire con le restanti fette.
Ricette Cialde (waffles) e wafer
Mettere le piastre per cialde. Stendere la pastella facendo attenzione a coprire l’intera
area della piastra senza debordare. Chiudere l’apparecchio, attendere 10 secondi quindi capovolgere
l’apparec chio per permettere al burro di distribuirsi bene e di cuocere uniformemente. Se l’apparecchio
è dotato di una base, procedere come segue. Tenere nella posizione per 2 minuti. Capovolgere nuovamente l’apparecchio e lasciar cuocere ancora per 1
minuto 30. Evitare di aprire durante la cottura. Mettere le cialde sopra una
griglia e aspettare 1 minuto prima di mangiarle: diventano più croccanti.
Cialde tradizionali
• 300 g di farina • 10 g di lievito in polvere • sale • 75 g di zucchero • 100 g di burro • 2 uova
• 1/2 l di latte
Amalgamare in una terrina la farina con il lievito. Fare un buco e aggiungere il sale, lo zucchero, il burro sciolto e
le uova. Aggiungere lentamente il latte. Lasciar riposare per 1 ora.
Cialde croccanti
• 300 g di farina • 10 g lievito in polvere • 1 pizzico di sale • 1 cucchiaio di zucchero • 2 uova
• 40 cl latte
Sbattere le uova finchè raggiungano una consistenza schiumosa. Aggiungere gli altri ingredienti e sbattere fino
ad ottenere un impasto liscio ed omogeneo.
Cialde “Prima Colazione”
• 3 tuorli d’uovo • 370 ml di latte • 250 g di farina • 2 cucchiaini di lievito • 3 cucchiaini di zucchero
• 1/2 cucchiaino di sale • 8 cucchiaini di olio • 3 albumi d’uovo
Mescolate i tuorli con il latte. Aggiungete la farina, il lievito, lo zucchero, il sale e mescolate bene il tutto. Aggiungete
l’olio. Montate i bianchi a neve e incorporateli alla pasta.
Cialde alla Vaniglia
• 200 g. di burro • 50 g di zucchero • qualche pezzo di vaniglia • un pizzico di sale • 6 uova
• 300 g di farina • 2 cucchiaini di lievito • 1/4 di litro di latte • 1 cucchiaio di rhum
Battete il burro con lo zucchero, la vaniglia e il sale. Mescolate la farina con il lievito e aggiungete al composto
progressivamente il latte e le uova, poi incorporate il rhum.
Ricette grigliate
Grillades
Mettere le piastre grill. Posizionare le piastre per grigliare (a seconda del modello). Posizionare la carne sulle piastre. Chiudere l’apparecchio e far cuocere secondo la ricetta e il proprio gusto.
Ricette panini
Mettere le piastre grill. Posizionare le piastre per panini (a seconda del modello). Posizionare il pane sulle piastre. Chiudere l'apparecchio e far cuocere secondo la ricetta e il proprio gusto.
IT
25
Tef-SNAKnCLEAN-2100072598 18/09/12 09:22 Page25
Page 26

CONSEJOS DE SEGURIDAD
PRECAUCIONES IMPORTANTES
•Este aparato se ha diseñado únicamente para un
uso doméstico. El aparato no se ha diseñado para
ser utilizado en los siguientes casos, que no están
cubiertos por la garantía:
- En zonas de cocina reservadas al personal en
tiendas, oficinas y demás entornos profesionales,
- En granjas,
- Por los clientes de hoteles, moteles y demás
entornos de tipo residencial,
- En entornos de tipo casas de turismo rural.
•No utilice nunca el aparato sin vigilancia.
•Este aparato no está previsto para ser utilizado por
personas (incluso niños) cuyas capacidades físicas,
sensoriales o mentales estén reducidas, o personas
provistas de experiencia o de conocimiento,
excepto si no han podido beneficiarse si a través de
una persona responsable de su seguridad, de una
vigilancia o instrucciones previas referentes al uso
del aparato. Hay que vigilar a los niños para
asegurarse de que no juegan con el aparato.
•Este electrodoméstico pueden utilizarlo niños a
partir de 8 años de edad y personas con
capacidades físicas, sensoriales o mentales
reducidas o desprovistas de experiencia o de
ES
26
Tef-SNAKnCLEAN-2100072598 18/09/12 09:22 Page26
Page 27

conocimiento, siempre que dispongan de
supervisión o hayan recibido instrucciones sobre el
uso seguro del electrodoméstico y entiendan los
riesgos que implica. Los niños no deben jugar con el
electrodoméstico. Los niños no deben ocuparse
de la limpieza y el mantenimiento de usuario del
electrodoméstico, salvo que sean mayores de 8
años y estén supervisados por un adulto.
Mantenga el electrodoméstico y su cable de
alimentación fuera del alcance de los niños
menores de 8 años.
• La temperatura de las superficies accesibles
puede aumentar cuando el aparato esté en funcionamiento.
•Compruebe que la instalación eléctrica es
compatible con la potencia y la tensión indicadas
debajo del aparato.
•Este aparato no está destinado para ser puesto en
marcha mediante un reloj exterior o un sistema de
mando a distancia separado.
•Si el cable de alimentación está dañado, éste tiene
que ser sustituido por el fabricante, o en un Servicio
Técnico autorizado, o una persona cualificada,
para evitar cualquier peligro.
•No sumerja nunca en agua la bisagra eléctrica con
las resistencias y el cable. No lave nunca estos
ES
27
Tef-SNAKnCLEAN-2100072598 18/09/12 09:22 Page27
Page 28

elementos en el lavavajillas.
•Retire todos los embalajes, pegatinas o accesorios
tanto de dentro como de fuera del aparato.
•Desenrosque completamente el cable antes de
conecte el aparato.
• Si se utiliza un prolongador eléctrico, el mismo
debe ser de sección al menos equivalente y con
toma de tierra incorporada.
•Sólo conecte el aparato a un enchufe con toma de tierra.
•Seque bien todos los elementos después de limpiarlos
y antes de volver a poner en marcha el aparato.
Lo que se debe hacer
• Leer atentamente y guardar al alcance de la mano las instrucciones de este folleto, comunes a las diferentes
versiones según los accesorios suministrados con el aparato.
• Si se produce un accidente, deje correr agua fría inmediatamente sobre la quemadura y acuda a un médico
si fuera necesario.
• En la primera la primera utilización, lavar las placas (seguir el párrafo después de la limpieza), verter un poco
de aceite sobre las placas y secarlo con un paño suave.
• Velar por la ubicación del cable con o sin alargador, tomar todas las precauciones necesarias para no molestar
la circulación de los comensales alrededor de la mesa de modo que nadie tropiece.
• Para evitar deteriorar las placas, utilizarlas únicamente en el aparato para las que han sido diseñadas (ej: no
poner en un horno, sobre el gas o sobre una placa eléctrica…).
• Para preservar el revestimiento de las placas de cocción y de las minisartenes, utilice siempre una espátula de
plástico o madera.
• Asegúrese de que el aparato esté desconectado antes de limpiarlo.
• Las placas de cocción y el cuerpo del aparato se limpian con una esponja, agua caliente y detergente para vajillas.
• Los humos causados por la cocción pueden ser peligrosos para los animales que tengan un sistema
respiratorio particularmente sensible, como los pájaros. Aconsejamos a los propietarios de pájaros que los
alejen del lugar donde se realiza la cocción.
• Utilice solamente las placas y las minisartenes suministradas con el aparato o adquiridas en un centro de
servicio oficial.
• Si se utiliza el aparato en el centro de la mesa, ponerlo fuera del alcance de los niños.
Lo que debe cuidar para evitar riesgos
• No conecte nunca el aparato cuando no lo esté utilizando.
• Para evitar el sobrecalentamiento del aparato, no lo coloque en una esquina o contra la pared.
ES
28
Tef-SNAKnCLEAN-2100072598 18/09/12 09:22 Page28
Page 29

• No coloque nunca el aparato directamente sobre un soporte frágil (mesa de cristal, mantel, mueble
barnizado...) o sobre un soporte blando, tipo mantel de plástico.
• No coloque el aparato encima o cerca de superficies resbaladizas o calientes. No deje nunca el cable encima
de una fuente de calor (placas de cocción, cocina de gas…).
• No colocar utensilios de cocción sobre las superficies de cocción del aparato.
• No corte directamente los alimentos sobre las placas.
• No utilizar nunca una esponja metálica o polvos abrasivos para no estropear la superficie de cocción (Ej.:
Revestimiento antiadherente).
• No caliente nunca el aparato en posición vertical.
• No conecte el aparato sin que las placas estén correctamente colocadas.
Consejos / información
● Para su seguridad, este aparato es conforme a las normas y reglamentaciones aplicables (Directivas Baja Ten-
sión, Compatibilidad Electromagnética, Materiales en contacto con alimentos, Medio Ambiente...).
● En la primera utilización, podrá producirse un ligero desprendimiento de olor y de humo durante los primeros
minutos.
• Le agradecemos que haya comprado este aparato, exclusivamente destinado a uso doméstico.
Instrucciones de uso
Vista explotada del aparato disponible en las últimas páginas.
• Coloque el aparato sobre una superficie firme.
Antes de la primera utilización
• Desenrosque completamente el cable.
• Abra el aparato levantando el cierre - A.
• Para retirar las placas: presione los botones "EJECT" - 4 - situados sobre la parte delantera de las tapas superior
e inferior - C - D - E.
• Para volver a colocar las placas: coloque la placa oblicua y presione sobre la placa para bloquearla - F - G - H.
• Las placas de parrillada y gofres no se pueden intercambiar. Haga coincidir la marca 1 de la placa con la marca
1 de la tapa en el interior del aparato, y la marca 2 de la otra placa con la marca 2 de la otra tapa - G.
• Antes de la primera utilización, lavar las placas (seguir párrafo Limpieza), verter un poco de aceite sobre las
placas y secar con un trapo suave.
• Compruebe que el aparato está frío y desconectado antes de cambiar las placas.
Uso del aparato
• Cuide que las placas y las tapas sean estables, estén bien posicionadas y bien fijadas con clips en el aparato.
• Cerrar el aparato.
• Compruebe que el interruptor esté en 0.
• Conecte el cable a la red. Ponga el interruptor I en marcha (posición 1). El indicador luminoso rojo se encenderá
- I.
• Deje precalentar el aparato, el indicador luminoso verde se enciende cuando se alcanza la temperatura de coc-
ción - J.
• Abra el aparato y coloque la preparación en las placas - L.
• Cerrar el aparato.
• Cocine la preparación durante el tiempo deseado.
• Durante el tiempo de cocción, es normal que el indicador luminoso verde se encienda y apague sucesivamente.
• Cuando haya terminado la cocción, apague el aparato pulsando 0. Desconecte el enchufe de la pared - N - O.
• Deje enfriar el aparato (aproximadamente 2 hora).
Utilización del reloj para controlar el tiempo de cocción
• El botón situado a la derecha de la pantalla permite:
ES
29
entes
édico
poco
lestar
illas.
Tef-SNAKnCLEAN-2100072598 18/09/12 09:22 Page29
Page 30

- ajustar el tiempo mediante una presión prolongada o mediante varias presiones breves. Para indicar los medios
minutos aparecerá un pequeño "5" en la parte superior derecha ;
- parar la señal sonora manualmente presionando unos segundos.
• Cuando el tiempo de cocción ha transcurrido, la señal sonora suena y se para automáticamente después de
dos series.
• El reloj señala el fin del tiempo de cocción pero no detiene el funcionamiento del aparato.
Limpieza
• Una vez que se hayan enfriado, podrá expulsar las placas - C - D - E.
• Deje enfriar el aparato (aproximadamente 1 hora) abierto antes de retirar las tapas.
• Para extraer las tapas para introducirlas en el lavavajillas, pulsar el botón “CLEAN” - 5. Las dos tapas - 1 - 2 con sus placas se pueden lavar en el lavavajillas o con una esponja con agua caliente y líquido lavavajillas - 5.
• Coloque las tapas - 1 - 2 - verticalmente en el lavavajillas con el asa hacia arriba - P.
• Para limpiar las placas, utilice una esponja húmeda con producto lavavajillas. Aclárelas y séquelas con cuidado.
• Las placas pueden lavarse en el lavavajillas.
• Nunca coloque el eje eléctrico - 3 - en el lavavajillas. El eje eléctrico puede limpiarse con un paño húmedo y secarlo a continuación - R.
• Para volver a montar el aparato: asegúrese de que todos los elementos estén completamente secos antes de
volverlos a montar.
• La tapa inferior y superior deben secarse con precaución antes de cada uso.
Colocación
• El aparato puede guardarse verticalmente - T.
• Puede enroscar el cable alrededor de las asas antes de guardar al aparato.
Cambio de la pila del reloj
• Si se pierde total o parcialmente la pantalla, debe cambiarse la pila.
• Recomendamos que utilice un destornillador plano.
• Encaje un destornillador plano en la parte posterior del reloj para desencajar y extraer el reloj - U.
• Destornille la parte redonda situada bajo el reloj.
• Extraiga la pila.
• Este aparato contiene una o varias pilas. Por respeto al medio ambiente, no las tire a la basura, llévelas a un
punto de colecta para su reciclado.
Medio ambiente
ES
Recetas Sándwich
Coloque las placas para sándwich (*). Coloque los sándwich en los huecos de las placas.
Cierre el aparato y apriete progresivamente las asas para sellar adecuadamente las rebanadas de pan.
Deje cocinar de 3 a 4 minutos según el grado de cocción deseado.
Sándwich de jamón y queso
• 4 rebanadas de pan • 1 loncha de jamón cocido • 70 g de queso gruyere • pimienta
• 20 g de mantequilla
Untar con mantequilla la cara exterior de las 4 rebanadas de pan. Cortar el queso gruyere en láminas finas y colocar la mitad del queso sobre las dos rebanadas de pan. Colocar por encima 1/2 loncha de jamón. Añadir un
30
¡¡ Participe en la conservación del medio ambiente !!
Su electrodoméstico contiene materiales recuperables y/o reciclables.
Entréguelo al final de su vida útil, en un Centro de Recogida Específico o en uno de nuestros
Servicios Oficiales Post Venta donde será tratado de forma adecuada.
Tef-SNAKnCLEAN-2100072598 18/09/12 09:22 Page30
Page 31

poco de pimienta. Cubrir con queso gruyere y pegar las rebanadas de dos en dos.
Sándwich Roquefort
• 4 rebanadas de pan • 30 g de mantequilla • 8 nueces • 50 g de Roquefort
Untar con mantequilla la cara exterior de las rebanadas de pan. Retirar la cáscara de las nueces y picarlas en
trozos grandes. Mezclar con 10 g de mantequilla y el Roquefort. Untar dos rebanadas de pan con la mezcla y
cubrir con las otras dos.
Recetas Gofres y gaufrettes
Coloque las placas para gofres (*). Vierta la masa teniendo cuidado de cubrir cada pequeño hueco y que no se desborde. Cierra el aparato, espere 10 segundos y de la vuelta al aparato
para repartir bien la masa y asegurar una cocción uniforme. Deje en esta posición durante 2 minutos.
Vuelva a poner el aparato del derecho y deje cocer todavía 1 minuto 30 segundos más aproximadamente. Evite abrirlo durante la cocción. Coloque las
gofras sobre una rejilla y espere 1 minuto antes de probarlas: así estarán más
crujientes.
Gofres tradicionales
• 300 g de harina • 10 g de levadura • sal • 75 g de azúcar en polvo • 100 g de mantequilla • 2 huevos
• 1/2 l de leche
Mezclar la harina y la levadura en una ensaladera. Hacer un pozo y añadir la sal, el azúcar, la mantequilla derretida
y los huevos enteros. Diluir poco a poco con la leche. Dejar reposar la masa durante 1 hora.
Gofres crujientes
• 300 g de harina • 1 sobrecito de levadura • 1 pizca de sal • 1 c. sopera de azúcar • 2 huevos
• 40 cl de leche
Batir los huevos en tortilla hasta conseguir una consistencia espumosa. Incorporar el resto de los ingredientes y
batir hasta conseguir una consistencia uniforme.
Gofrettes para el desayuno
• 3 yemas de huevo • 370 ml de leche • 250 g de harina • 2 cucharadas pequeñas de levadura
• 3 cucharadas pequeñas de harina • 1/2 cucharada pequeña de sal • 8 cucharadas pequeñas de aceite
• 3 claras de huevo
Mezcle las yemas de huevo y la leche. Añada la harina, la levadura, el azúcar y la sal. Mézclelo todo bien. Añada
el aceite. Bata las claras de huevo a punto de nieve e incorpórelas a la masa.
Gaufrettes a la vainilla
• 200 g de mantequilla • 50 g de azúcar • trozos de vaina de vainilla • 1 pizca de sal • 6 huevos
• 300 g de harina • 2 cucharadas pequeñas de levadura • 1/4 de litro de leche
• 1 cucharada pequeña de ron
Bata la mantequilla, el azúcar, la vainilla y la sal. Mezcle la harina y la levadura y añádales progresivamente la
leche y los huevos. Incorpore el ron.
Parrilladas
Coloque las placas parrilla (*). Coloque la carne sobre las placas. Cierre el aparato y deje
cocer según la receta y el grado de cocción deseado.
Panini
Coloque las placas parrilla (*). Coloque el pan sobre las placas. Cierre el aparato y deje
cocer según el grado de cocción deseado.
ES
31
Tef-SNAKnCLEAN-2100072598 18/09/12 09:22 Page31
Page 32

CONSELHOS DE SEGURANÇA
CONSELHOS IMPORTANTES
•Este aparelho foi concebido apenas para uma
utilização doméstica. Não foi concebido para ser
utilizado nos casos seguintes, que não estão
cobertos pela garantia :
- Em cantos de cozinha reservados aos funcionários
nas lojas, escritórios e outros ambientes
profissionais,
- Em quintas,
- Pelos clientes de hotéis, motéis e outros ambientes
de carácter residencial,
- Em ambientes do tipo quartos de hóspedes.
•Nunca utilize o aparelho sem vigilância.
•Este aparelho não foi concebido para ser utilizado
por pessoas (incluindo crianças) cujas capacidades
físicas, sensoriais ou mentais se encontram
reduzidas, ou por pessoas com falta de experiência
ou conhecimento, a não ser que tenham sido
devidamente acompanhadas e instruídas sobre a
correcta utilização do aparelho, pela pessoa
responsável pela sua segurança.
É importante vigiar as crianças por forma a garantir
que as mesmas não brinquem com o aparelho.
•O aparelho pode ser usado por crianças com mais de
8 anos de idade e por pessoas com capacidades
físicas, sensoriais e mentais reduzidas ou falta de
PT
32
Tef-SNAKnCLEAN-2100072598 18/09/12 09:22 Page32
Page 33

experiência e conhecimentos, se tiverem recebido
supervisão ou instruções relativamente ao uso do
aparelho com segurança e compreendam os perigos
envolvidos. As crianças não podem brincar com o
aparelho. A limpeza e manutenção a realizar pelo
utilizador não pode ser efectuada por crianças, a
menos que estas tenham mais de 8 anos e sejam
supervisionadas.
Mantenha o aparelho e o respectivo cabo de
alimentação fora do alcançe de crianças com menos
de 8 anos de idade.
• A temperatura das superfícies acessíveis pode subir
quando o aparelho estiver a funcionar.
•Certifique-se que a instalação eléctrica é compatível
com a potência e a tensão indicadas por baixo do
aparelho.
•Este aparelho não se destina a ser colocado em
funcionamento por meio de um temporizador
exterior ou de um sistema de controlo à distância
separado.
•Se o cabo de alimentação se encontrar de alguma
forma danificado o mesmo deverá ser substituido
pelo fabricante, Serviço de Assistência Técnica
autorizado ou por uma pessoa qualificada por forma
a evitar qualquer tipo de perigo para o utilizador.
•Nunca mergulhe em água a parte eléctrica com as
resistências e o cabo. Nunca lave estas partes na
PT
33
Tef-SNAKnCLEAN-2100072598 18/09/12 09:22 Page33
Page 34

máquina de lavar loiça.
•Retire todas as embalagens, autocolantes ou
acessórios tanto no interior como no exterior do
aparelho.
•Desenrole o cabo por completo antes de ligue o
aparelho.
•Se utilizar uma extensão eléctrica, a secção da
mesma deve ser pelo menos equivalente e com
tomada de terra incorporada.
•O aparelho apenas deve ser ligado a uma tomada
com terra incorporada.
•Seque bem todos os elementos após a limpeza
antes de voltar a utilizar o aparelho.
A fazer
• Leia com atenção o manual de instruções e guarde-o para futuras utilizações. Este manual é comum às diferentes
versões, consoante os acessórios entregues com o seu aparelho.
• Em caso de acidente, passe imediatamente a queimadura por água fria e consulte um médico caso seja
necessário.
• Aquando da primeira utilização, lavar as placas (seguir parágrafo limpeza) deitar um pouco de óleo na placas e
limpá-las com um pano macio.
• Certifique-se que coloca o cabo de alimentação, com ou sem extensão, de maneira a não impedir a circulação
dos convidados à volta da mesa, por forma a que ninguém tropece.
• Para evitar deteriorar as placas, utilizá-las apenas sobre o aparelho para as quais elas foram concebidas (ex.: não
as colocar dentro do forno, sobre um bico de gás ou sobre uma placa eléctrica …).
• Para preservar o revestimento das placas de cozedura e dos acessórios, utilize sempre uma espátula de plástico
ou madeira.
• Antes da limpeza, verificar se o aparelho está desligado da corrente antes de proceder à sua limpeza.
• As placas de cozedura e o corpo do aparelho devem ser limpos com uma esponja, água quente e detergente para
a loiça.
• Os fumos de cozedura podem ser perigosos para os animais com um sistema respiratório particularmente
sensível, como os pássaros. Aconselhamos os proprietários de pássaros a afastá-los do local de cozedura.
• Utilizar apenas as placas incluídas com o aparelho ou adquiridas junto de um Serviço de Assistência Técnica
autorizado.
• Caso o aparelho seja utilizado no centro da mesa, mantenha-o fora do alcance das crianças.
A não fazer
• Nunca ligue o aparelho quando este não for utilizado.
PT
34
Tef-SNAKnCLEAN-2100072598 18/09/12 09:22 Page34
Page 35

• Para evitar o sobreaquecimento do aparelho, não o instale num canto ou contra uma parede.
• Nunca coloque o aparelho directamente sobre um suporte delicado (mesa de vidro, toalha, móvel
envernizado…) ou sobre um suporte mole, do tipo toalha plástica.
• Não colocar o aparelho em cima ou perto de superfícies escorregadias ou quentes; não deixar o cabo de
alimentação pendurado por cima de uma fonte de calor, placas eléctricas ou fogão a gás…).
• Não coloque utensílios de cozedura sobre as superfícies de cozedura do aparelho.
• Não corte os alimentos directamente nas placas.
• Nunca utilize esponjas metálicas nem pó de arear por forma a não danificar a superfície de cozedura (por ex.:
revestimento antiaderente...).
• Nunca aquecer o aparelho na posição vertical.
• Não ligar o aparelho sem que as placas e as coberturas estejam correctamente posicionadas.
Conselho / informação
• Para sua segurança, este aparelho está em conformidade com as normas e regulamentações aplicáveis (Directivas
de Baixa Tensão, Compatibilidade Electromagnética, Materiais em contacto com os alimentos, Ambiente...).
• Aquando da primeira utilização, pode ocorrer uma ligeira libertação de cheiro e fumo.
• Parabéns por ter adquirido este aparelho, destinado exclusivamente a um uso doméstico.
Instruções de utilização
Vista extensa do aparelho nas últimas páginas.
• Coloque o aparelho sobre uma superfície estável.
Antes da primeira utilização
• Desenrole o cabo por completo.
• Abra o aparelho levantando o cadeado - A.
• Para retirar as placas: prima os botões "EJECT" - 4 - situados na parte da frente do corpo superior e inferior - C - D - E.
• Para colocar de novo as placas: coloque a placa na diagonal e pressione-a de modo a que esta fique perfeitamente
encaixada e presa - F - G - H.
• As placas grill e waffles não podem ser utilizadas em simultâneo. Faça corresponder a marca 1 da placa com a
marca 1 da cobertura no interior do produto e a marca 2 da outra placa com a marca 2 da outra cobertura - G.
• Aquando da primeira utilização, lave as placas (seguir as indicações do parágrafo Limpeza), deite um pouco de
óleo nas placas e limpe com um pano macio.
• Certifique-se que o aparelho está frio e desligado antes de proceder a uma mudança de placas.
Utilização do aparelho
• Há que ter em atenção a estabilidade das placas e das coberturas, colocá-las correctamente e fixá-las bem no
aparelho.
• Feche o aparelho.
• Verifique se o interruptor está na posição 0.
• Ligue o cabo à corrente. Ligue o interruptor I en marche (posição 1). A luz vermelha acende-se - I.
• Aguarde até o aparelho concluir o pré-aquecimento: quando a temperatura de cozedura é atingida, o indicador
luminoso verde acende-se - J.
• Abra o aparelho e coloque as preparações nas placas - L.
• Feche o aparelho.
• Deixe a preparação cozer durante o tempo pretendido.
• Durante a cozedura, é normal que a luz verde acenda e apague alternadamente.
• No final da cozedura, desligue o aparelho pressionando o botão 0. Retire a ficha da tomada - N - O.
• Deixe o aparelho arrefecer (cerca de 2 hora).
Utilização do temporizador para controlar o tempo de cozedura
• O botão situado à direita do visor permite:
- ajustar o tempo de cozedura através de uma pressão prolongada ou através de várias pressões breves. É apre-
PT
35
lação
Tef-SNAKnCLEAN-2100072598 18/09/12 09:22 Page35
Page 36

sentado um pequeno "5" no canto superior do visor para assinalar os meios-minutos;
- parar o temporizador manualmente através da pressão do botão durante alguns segundos.
• Depois de decorrido o tempo de cozedura, o temporizador emite um aviso sonoro e desliga-se automaticamente
ao fim de duas séries.
• O temporizador avisa sobre o tempo de cozedura mas não pára o aparelho.
Limpeza
• Depois de arrefecer, pode ejectar as placas - C - D - E.
• Deixe o aparelho arrefecer (cerca de 1 hora) na posição aberta antes de retirar as placas.
• Para retirar as coberturas para lavar à máquina, prima o botão "CLEAN" - 5. O corpo superior e inferior - 1 - 2 - com
as respectivas placas, podem ser lavados na máquina de lavar loiça ou simplesmente com uma esponja, água
quente e detergente líquido para a loiça - 5.
• Coloque o corpo superior e inferior - 1- 2- na vertical na máquina de lavar loiça, posicionando a pega para cima - P.
• Para limpar as placas, utilize uma esponja húmida com detergente para a loiça; enxagúe-as e seque-as bem.
• As placas são compatíveis com a máquina de lavar loiça.
• Nunca coloque a parte eléctrica do aparelho na máquina de lavar loiça - 3 - A parte eléctrica pode ser limpa com
um pano húmido e, posteriormente, seca - R.
• Para voltar a montar o aparelho : certifique-se que todos os elementos estão completamente secos antes de os
montar.
• As coberturas inferior e superior devem ser limpas com cuidado antes de qualquer nova utilização.
Arrumação
• O aparelho pode ser guardado na vertical - T.
• Pode enrolar o cabo à volta das pegas antes de arrumar o produto.
Substituição da pilha do temporizador
• Caso ocorra uma perda parcial ou total dos carácteres no visor do temporizador, é necessário substituir a pilha.
• Recomendamos-lhe a utilização de uma chave-de-fendas plana para facilitar a remoção do temporizador.
• Insira uma chave-de-fendas na ranhura do temporizador de modo soltá-lo e retirá-lo - U.
• Desaparafuse a superfície redonda situada por baixo do temporizador.
• Retire a pilha.
• Por forma a respeitar o ambiente, não as deite no lixo, mas sim num dos pontos de recolha previstos para este
efeito.
Ambiente
Receitas Tosta Mista
Coloque as placas para tostas mistas (*). Coloque os tostas mistas nos alvéolos das placas.
Feche o aparelho e pressione progressivamente as pegas de modo a fechar bem as fatias de pão no seu
interior. Deixe cozer entre 3 a 4 minutos consoante o grau de cozedura desejado.
Tosta Mista
• 4 fatias de pão • 1 fatia de fiambre • 70 g de queijo gruyère • pimenta • 20 g de manteiga
36
Protecção do ambiente em primeiro lugar!
O seu produto contém materiais que podem ser recuperados ou reciclados.
Entregue-o num ponto de recolha para possibilitar o seu tratamento.
PT
Tef-SNAKnCLEAN-2100072598 18/09/12 09:22 Page36
Page 37

Barrar com manteiga a face exterior das 4 fatias de pão. Cortar o queijo gruyère em fatias finas e dispor metade do
queijo sobre duas das fatias de pão. Colocar em cima 1/2 fatia de fiambre. Temperar com pimenta. Cobrir com o
queijo gruyère e reunir as fatias juntar as duas a duas.
Tosta Mista com Roquefort
• 4 fatias de pão • 30 g de manteiga • 8 nozes • 50 g de queijo Roquefort
Barre com manteiga as faces exteriores das fatias de pão. Descasque as nozes e pique-as grosseiramente. Misture
com 10 g de manteiga e com o queijo Roquefort. Guarneça duas fatias de pão com o preparado e, em seguida,
cubra com as outras duas fatias.
Receitas Waffles
Coloque as placas para waffles (*). Deite a massa, certificando-se que cobre todos os alvéolos, não deixando verter a massa para fora. Feche o aparelho, aguarde cerca de 10 segundos e, então,
vire o aparelho ao contrário de modo a espalhar a massa e, assim, garantir uma cozedura uniforme. Deixeo nesta posição durante cerca de 2 minutos. Volte a colocar o aparelho na sua posição inicial e deixe cozer
ainda durante cerca de 1 minuto e 30 segundos. Evite abrir o aparelho no decorrer da cozedura. Coloque
as waffles sobre uma grelha e aguarde 1 minuto antes de provar: elas tornamse, assim, mais estaladiças.
Waffles tradicionais
• 300 g de farinha • 10 g de fermento de padeiro • sal • 75 g de açúcar em pó
• 100 g de manteiga
• 2 ovos • 1/2 l de leite
Misture a farinha e o fermento numa taça. Faça uma cova no meio e junte o sal, o açúcar, a manteiga derretida e
os ovos inteiros. Dilua a massa pouco a pouco com o leite. Deixe a massa repousar durante 1 hora.
Waffles estaladiças
• 300 g de farinha • 1 embalagem de fermento • 1 pitada de sal • 1 colher de sopa de açúcar • 2 ovos •
40 cl de leite
Bata os ovos até obter uma consistência cremosa. Incorpore os outros ingredientes e bata até obter uma consistência lisa.
Waffles para o pequeno-almoço
• 3 gemas • 370 ml de leite • 250 g de farinha • 2 c. de café de fermento • 3 c. de café de açúcar
• 1/2 c. de café de sal • 8 c. de café de óleo • 3 claras
Misture as gemas e o leite. Junte a farinha, o fermento, o açúcar, o sal e misture tudo muito bem. Junte o óleo. Bata
as claras em castelo e envolva-as na massa.
Waffles de baunilha
• 200 g de manteiga • 50 g de açúcar • pedaços de vagem de baunilha • 1 pitada de sal • 6 ovos
• 300 g de farinha • 2 c. de café de fermento • 1/4 de litro de leite • 1 c. de sopa de rum
Bata a manteiga, o açúcar, a baunilha e o sal. Misture a farinha e o fermento e adicione gradualmente à mistura o
leite e os ovos. Seguidamente junte o rum.
Grelhados
Coloque as placas grill (*). Disponha a carne nas placas.
Feche o aparelho e deixe cozinhar de acordo com a receita e o grau de cozedura pretendido.
Paninis
Coloque as placas grill (*). Disponha o pão nas placas. Feche o aparelho e deixe cozinhar de
acordo com a receita e o grau de cozedura pretendido.
37
PT
Tef-SNAKnCLEAN-2100072598 18/09/12 09:22 Page37
Page 38

√¢H°I∂™ ∞™º∞§∂I∞™
™∏ª∞¡Tπ∫∂™ ¶P√ºÀ§∞•∂π™
•
∏ ·ЪФ‡Ы· Ы˘ЫОВ˘‹ ЪФФЪ›˙ВЩ·И ·ЫОПВИЫЩИО¿ БИ·
ФИОИ·О‹ ¯Ъ‹ЫЛ. ¢ВУ ¤¯ВИ Ы¯В‰И·ЫЩВ› БИ· ¯Ъ‹ЫЛ ЫЩИ˜
·ОfiПФ˘ıВ˜, ВЪИЩТЫВИ˜, ФИ ЫФ›В˜ ‰ВУ О·П‡ЩФУЩ·И
·fi ÙËÓ ÂÁÁ‡ËÛË:
- ™В ¯ТЪФ˘˜ ОФ˘˙›У·˜ Ф˘ ¯ЪЛЫИМФФИФ‡УЩ·И ·fi ЩФ
ЪФЫˆИОfi ЫВ О·Щ·ЫЩ‹М·Щ·, БЪ·КВ›· О·И ¿ПП·
В·ББВПМ·ЩИО¿,
- ™В ·БЪФОЩ‹М·Щ·,
- °И· ¯Ъ‹ЫЛ ·fi ВП¿ЩВ˜ НВУФ‰Ф¯В›ˆУ, ·У‰Ф¯В›ˆУ
О·И ¿ПП· ФИОИЫЩО¿ ВЪИ‚¿ППФУЩ·,
- ™Â ВЪИ‚¿ППФУЩ· Ù‡Ô˘ ВУФИОИ·˙fiМВУˆУ
‰И·МВЪИЫМ¿ЩˆУ.
• ªЛУ МВЩ·ОИУВ›ЩВ ЩЛ Ы˘ЫОВ˘‹ ВУТ М·БВИЪВ‡ВЩВ.
•
∏ Ы˘ЫОВ˘‹ ·˘Щ‹ ‰ВУ Ъ¤ВИ У· ¯ЪЛЫИМФФИВ›Щ·И ·fi
¿ЩФМ· (Ы˘МВЪИП·М‚·УФМ¤УˆУ ЩˆУ ·И‰ИТУ) МВ
МВИˆМ¤УВ˜ ЫˆМ·ЩИО¤˜ ·ИЫıЛЩЛЪИ·О¤˜ ‹ ‰И·УФЛЩИО¤˜
ИО·УfiЩЛЩВ˜ ‹ ¿ЩФМ· ¯ˆЪ›˜ В›Ъ· ‹ БУТЫЛ ЩЛ˜
Ы˘ЫОВ˘‹˜, ВОЩfi˜ ·У ¤¯Ф˘У П¿‚ВИ Ы¯ВЩИО¤˜ Ф‰ЛБ›В˜
БИ· ЩЛ ¯Ъ‹ЫЛ ЩЛ˜ Ы˘ЫОВ˘‹˜ ‹ ВИЩЛЪФ‡УЩ·И ·fi
¿ЩФМФ ˘В‡ı˘УФ БИ· ЩЛУ ·ЫК¿ПВИ¿ ЩФ˘˜.
∆· ·И‰И¿ Ъ¤ВИ У· ВИЩЛЪФ‡УЩ·И О·И У· МЛУ ЩФ˘˜
ВИЩЪ¤ВЩ·И У· ·›˙Ф˘У МВ ЩЛ Ы˘ЫОВ˘‹
.
•
∏ Ы˘ЫОВ˘‹ ·˘Щ‹ МФЪВ› У· ¯ЪЛЫИМФФИЛıВ› ·fi
·И‰И¿ ЛПИО›·˜ ЩФ˘П¿¯ИЫЩФУ 8 ВЩТУ О·И ·fi ¿ЩФМ·
МВ ÌÂȈ̤Ó˜ ۈ̷ÙÈΤ˜, ·УЩИПЛЩИО¤˜ ‹
EL
38
Tef-SNAKnCLEAN-2100072598 18/09/12 09:22 Page38
Page 39

УВ˘М·ЩИО¤˜ ИО·УfiЩЛЩВ˜ ‹ Ф˘ ‰ВУ ¤¯Ф˘У ВМВИЪ›·
О·И БУТЫЛ, ‰В‰ФМ¤УФ˘ fiЩИ ЩВПФ‡У ˘fi В›‚ПВ„Л ‹
О·ıФ‰‹БЛЫЛ fiЫФУ ·КФЪ¿ ЩЛ ¯Ъ‹ЫЛ ЩЛ˜ Ы˘ЫОВ˘‹˜ МВ
·ÛÊ¿ÏÂÈ· Î·È fiÙÈ Î·Ù·ÓÔÔ‡Ó ÙÔ˘˜ ÂÌÏÂÎfiÌÂÓÔ˘˜
ÎÈÓ‰‡ÓÔ˘˜. Τα ·È‰È¿ ‰ÂÓ Ú¤ÂÈ Ó· ·›˙Ô˘Ó Ì ÙË
Û˘Û΢‹. √ ηı·ÚÈÛÌfi˜ Î·È Ë Û˘ÓÙ‹ÚËÛË ‰ÂÓ Ú¤ÂÈ
Ó· Ú·ÁÌ·ÙÔÔÈÔ‡ÓÙ·È ·fi ·È‰È¿, ·Ú¿ ÌfiÓÔ ·Ó
Â›Ó·È ·fi 8 ÂÙÒÓ Î·È ¿Óˆ Î·È ·Ó ÙÂÏÔ‡Ó ˘fi
›‚Ï„Ë.
¢È·ÙËÚ›Ù ÙË Û˘Û΢‹ Î·È ÙÔ Î·ÏÒ‰Èfi Ù˘ ÛÂ
ÛËÌÂ›Ô Ô˘ Ó· ÌËÓ ÙË ÊÙ¿ÓÔ˘Ó ·È‰È¿ ÌÈÎÚfiÙÂÚ· ·fi
8 ÂÙÒÓ
.
•
∏ ıВЪМФОЪ·Ы›· ЩˆУ ЪФЫ‚¿ЫИМˆУ ВИК·УВИТУ
МФЪВ› В›У·И ·˘НЛМ¤УЛ О·Щ¿ ЩЛУ ТЪ· ПВИЩФ˘ЪБ›·˜
ЩЛ˜ Ы˘ЫОВ˘‹˜
.
•
µВ‚·ИˆıВ›ЩВ fiЩИ Л ИЫ¯‡˜ ЩЛ˜ ЛПВОЩЪИО‹˜ Ы·˜
ВБО·Щ¿ЫЩ·ЫЛ˜ ·УЩИЫЩФИ¯В› Ì ÙËÓ ÈÛ¯‡ Ô˘
·Ó·ÁÚ¿ÊÂÙ·È ÛÙÔ Î¿Ùˆ ̤ÚÔ˜ Ù˘ Û˘Û΢‹˜
.
•
∏ Ы˘ЫОВ˘‹ ·˘Щ‹ ‰ВУ ЪФФЪ›˙ВЩ·И У· Щ›ıВЩ·И ЫВ
ПВИЩФ˘ЪБ›· Ì ВНˆЩВЪИОfi ¯ÚÔÓԉȷÎfiÙË ‹
¯ˆЪИЫЩfi ЩЛПВ¯ВИЪЛЫЩ‹ЪИФ.
•
Εάν ηٷÛÙÚ·Ê› ÙÔ Î·ÏÒ‰ÈÔ, Ú¤ÂÈ Ó·
·ÓÙÈηٷÛÙ·ı› ·fi ÙÔÓ Î·Ù·Û΢·ÛÙ‹ ‹ ·fi
οÔÈÔ ÂÍÔ˘ÛÈÔ‰ÔÙË̤ÓÔ Î¤ÓÙÚÔ Û¤Ú‚È˜, ÒÛÙ ӷ
·ÔʇÁÂÙÂ Ù˘¯fiÓ ÎÈÓ‰‡ÓÔ˘˜
.
•
.
EL
39
Tef-SNAKnCLEAN-2100072598 18/09/12 09:22 Page39
Page 40

.
•
BÁ¿ÏÙ fiÏ· Ù· ˘ÏÈο Ù˘ Û˘Û΢·Û›·˜,Ù·
·˘ЩФОfiППЛЩ· О·И Щ· ·НВЫФ˘¿Ъ, ·fi ЩФ ВЫˆЩВЪИОfi
О·И ВНˆЩВЪИОfi М¤ЪФ˜ ЩЛ˜ Ы˘ЫОВ˘‹˜.
•
•ВЩ˘П›НЩВ ЩВПВ›ˆ˜ ЩФ ЛПВОЩЪИОfi О·ПТ‰ИФ.
•
∂¿У ¯ЪЛЫИМФФИВ›ЩВ О·ПТ‰ИФ ЪФ¤ОЩ·ЫЛ˜, Ъ¤ВИ У·
¤¯ВИ ЩФ ПИБfiЩВЪФ ›‰И· ‰И·ЩФМ‹ О·И БВИˆМ¤УЛ Ъ›˙·
.
•
¡· Û˘Ó‰¤ÂÙ ÙËÓ Û˘Û΢‹ Û·˜ ¿ÓÙ· ÛÂ
Ú›˙· Ì Á›ˆÛË.
•
.
TÈ ÚÂÂÈ Ó· ηÓÂÙÂ
с ¢И·‚¿ЫЩВ ЪФЫВОЩИО¿ ЩИ˜ Ф‰ЛБ›В˜ ¯Ъ‹ЫВˆ˜ О·И ОЪ·ЩВ›ЫЩВ ЩИ˜. √И Ф‰ЛБ›В˜ В›У·И ОФИУ¤˜ БИ· ‰И¿КФЪФ˘˜
Ù‡Ô˘˜ ·Ó¿ÏÔÁ· Ì ÔÈ· ÂÍ·ÚÙ‹Ì·Ù· Â›Ó·È ÂÍÔÏÈṲ̂ÓË Ë Û˘Û΢‹
.
ñ ™Â ÂÚ›ÙˆÛË ·Ù˘¯‹Ì·ÙÔ˜, Ú›ÍÙ ·Ì¤Ûˆ˜ ÎÚ‡Ô ÓÂÚfi ÛÙÔ ¤Áη˘Ì· Î·È Â¿Ó Â›Ó·È ··Ú·›ÙËÙÔ Î·Ï¤ÛÙÂ
ÁÈ·ÙÚfi.
.
ñ ¶ÚÈÓ ÙËÓ ÚÒÙË ¯Ú‹ÛË Ï‡ÓÂÙ ÙȘ ϿΘ (‚Ϥ ÙË ‰Â‡ÙÂÚË ·Ú¿ÁÚ·ÊÔ K·ı·ÚÈÛÌfi˜), ·Ï›„Ù ÙȘ
ϿΘ Ì ϛÁÔ Ï¿‰È Î·È ÛÎÔ˘›ÛÙ ÙȘ Ì ··Ïfi ·Ó›.
ñ ºÚÔÓÙ›ÛÙ ηٿ ÙËÓ ÙÔÔı¤ÙËÛË ÙÔ˘ ηψ‰›Ô˘ Ì ‹ ¯ˆÚ›˜ Ì·Ï·ÓÙ¤˙· Ó· Ï·Ì‚¿ÓÂÙ fiϘ ÙȘ ··Ú·›ÙËÙ˜
ЪФК˘П¿НВИ˜ ЪФОВИМ¤УФ˘ У· МЛУ ·ЪВМФ‰›˙ВЩ·И Л О˘ОПФКФЪ›· ЩˆУ О·ПВЫМ¤УˆУ Б‡Ъˆ ·fi ЩФ ЩЪ·¤˙И.
ñ °È· ·ÔÊ˘Á‹ ÊıÔÚ¿˜ των λακών : να τις ¯ЪЛЫИМФФИВ›ЩВ ·ФОПВИЫЩИО¿ ¿Уˆ ЫЩЛ ‚¿ЫЛ Ф˘ ЪФФЪ›˙ВЩ·И
БИ· ·˘ЩfiУ ЩФУ ЫОФfi (.¯. : МЛУ ЩЛУ ЩФФıВЩВ›ЩВ М¤Ы· ЫЩФУ КФ‡ЪУФ, ¿Уˆ ЫВ ВЫЩ›· ОФ˘˙›У·˜ МВ ·¤ЪИФ ‹
ЛПВОЩЪИО‹ П¿О·…).
с °И· ЩЛ ‰И·Щ‹ЪЛЫЛ ЩЛ˜ ВИО¿П˘„Л˜ ЩЛ˜ П¿О·˜ „ЛЫ›М·ЩФ˜, У· ¯ЪЛЫИМФФИВ›ЩВ ¿УЩ· МИ· П·ЫЩИО‹ ‹ Н‡ПИУЛ
Ы¿ЩФ˘П·.
с ¶ЪИУ ·¿ ЩФ О·ı¿ЪИЫМ·, ‚В‚·ИˆВ›ЩВ fiЩИ Л Ы˘ЫОВ˘‹ ‰ВУ В›У·И ЫЩЛУ Ъ›˙·.
с ªФЪВ›ЩВ В›ЫЛ˜ У· О·ı·Ъ›ЫВЩВ ЩИ˜ П¿ОВ˜ О·И ЩФ ЫТМ· ЩЛ˜ Ы˘ЫОВ˘‹˜ ¯ЪЛЫИМФФИТУЩ·˜ ¤У· ЫКФ˘ББ·Ъ¿ОИ
Î·È ˘ÁÚfi ·ÔÚÚ˘·ÓÙÈÎfi È¿ÙˆÓ.
ñ ∏ ‰ËÌÈÔ˘ÚÁ›· ηÓÔ‡ ÌÔÚ› Ó· Â›Ó·È ÂÈΛӉ˘ÓË ÁÈ· ˙Ò· Ì Ôχ ¢·›ÛıËÙÔ ·Ó·Ó¢ÛÙÈÎfi Û‡ÛÙËÌ·, fiˆ˜
Щ· ЩЛУ¿. ™·˜ ЪФЩВ›УФ˘МВ У· МЛУ ОЪ·Щ¿ЩВ ЩЛУ¿ ЫЩЛУ ОФ˘˙›У·.
с ГЪЛЫИМФФИВ›ЩВ МfiУФУ П¿ОВ˜ ЪФМЛıВ˘М¤УВ˜ МВ ЩЛ Ы˘ЫОВ˘‹ ‹ ·БФЪ·ЫМ¤УВ˜ ЫЩФ ВИ‰ИОВ˘М¤УФ Ы¤Ъ‚И˜.
с ∂¿У Л Ы˘ЫОВ˘‹ ¯ЪЛЫИМФФИВ›Щ·И ЫЩФ О¤УЩЪФ ЩФ˘ ЩЪ·В˙ИФ‡, КЪФУЩ›ЫЩВ У· ЩЛУ ЩФФıВЩ‹ЫВЩВ М·ОЪИ¿ ·fi
Ù· ·È‰È¿.
TÈ ÚÂÂÈ Ó· ·ÔÊ¢ÁÂÙÂ
с ¶ФЩ¤ МЛУ ·К‹УВЩВ ЩЛУ Ы˘ЫОВ˘‹ Ы˘У‰В‰ВМ¤УЛ ЫЩЛУ Ъ›˙· fiЩ·У ‰ВУ ЩЛУ ¯ЪЛЫИМФФИВ›ЩВ, ВОЩФ˜ В¿У ЩЛУ
ЪФıВЪМ·›УВЩВ.
с °И· У· ·ФК‡БВЩВ ЩЛУ ˘ВЪı¤ЪМ·УЫЛ ЩЛ˜ Ы˘ЫОВ˘‹˜, Ы·˜ Ы˘УИЫЩФ‡МВ У· МЛУ ЩЛУ ЩФФıВЩВ›ЩВ ЫВ БˆУ›В˜
Î·È Ó· ÌËÓ ·ÎÔ˘Ì¿ÂÈ ÛÙÔÓ ÙÔ›¯Ô.
ñ ¶ÔÙ¤ ÌËÓ ÙÔÔıÂÙ›Ù ÙËÓ Û˘Û΢‹ ·Â˘ı›·˜ Û ¢·›ÛıËÙ˜ ÂÈÊ¿ÓÂȘ (Á˘¿ÏÈÓÔ ÙÚ·¤˙È, ÚÔ‡¯·, ¤ÈÏ·
40
EL
Tef-SNAKnCLEAN-2100072598 18/09/12 09:22 Page40
Page 41

МВ ‚ВЪУ›ОИ). AФК‡БВЩВ У· ЩЛУ ¯ЪЛЫИМФФИВ›ЩВ ¿Уˆ ЫВ М·П·О‹ ВИК¿УВИ· Ы·У ЩФУ МФ˘Ы·М¿.
с ªЛУ ЩФФıВЩВ›ЩВ ЩЛ Ы˘ЫОВ˘‹ ¿Уˆ ЫВ ФПИЫıЛЪ¤˜ ‹ ЫВ О·˘Щ¤˜ ВИК¿УВИВ˜, МЛУ ·К‹УВЩВ ФЩ¤ ЩФ О·ПТ‰ИФ
У· ОЪ¤МВЩ·И ¿Уˆ ·fi ЛБ‹ ıВЪМfiЩЛЩ·˜ (М¿ЩИ· ОФ˘˙›У·˜, БО¿˙И…).
с ªЛУ ЩФФıВЩВ›ЩВ ЫОВ‡Л ‹ ВЪБ·ПВ›· М·БВИЪ¤М·ЩФ˜ ¿Уˆ ЫЩИ˜ ВИК¿УВИВ˜ „ЛЫ›М·ЩФ˜ ЩЛ˜ Ы˘ЫОВ˘‹˜.
с ФЩ¤ МЛУ Оfi‚ВЩВ ЩФ К·БЛЩfi fiЩ·У ·˘Щfi В›У·И ·ОfiМ· ЫЩИ˜ П¿ОВ˜.
с ¶ФЩ¤ МЛ ¯ЪЛЫИМФФИВ›ЩВ МВЩ·ППИОfi ЫКФ˘ББ¿ЪИ, Ф‡ЩВ О·И ЫОfiУЛ БИ· ЩЪ›„ИМФ ЪФОВИМ¤УФ˘ У· МЛУ
ЪФО·П¤ЫВЩВ КıФЪ¿ ЫЩЛУ ВИК¿УВИ· „ЛЫ›М·ЩФ˜ (.¯. : ·УЩИОФППЛЩИО‹ ВИО¿П˘„Л, ...).
с .
ñ .
/¶ПЛЪФКФЪИoТУ
ñ ∏ ‰ËÌÈÔ˘ÚÁ›· ηÓÔ‡ ÌÔÚ› Ó· Â›Ó·È ÂÈΛӉ˘ÓË ÁÈ· ˙Ò· Ì Ôχ ¢·›ÛıËÙÔ ·Ó·Ó¢ÛÙÈÎfi Û‡ÛÙËÌ·, fiˆ˜
Щ· ЩЛУ¿. ™·˜ ЪФЩВ›УФ˘МВ У· МЛУ ОЪ·Щ¿ЩВ ЩЛУ¿ ЫЩЛУ ОФ˘˙›У·.
с ‘OЩ·У ¯ЪЛЫИМФФИ‹ЫВЩВ ЩЛУ Ы˘ЫОВ˘‹ Ы·˜ БИ· ЪТЩЛ КФЪ¿, МФЪВ› У· ˘¿ЪНВИ МИ· МИОЪ‹ М˘Ъˆ‰И¿ О·И
П›БФ˜ О·Уfi˜ О·Щ¿ Щ· ЪТЩ· ПВЩ¿.
с ∂˘¯·ЪИЫЩФ‡МВ Ф˘ ·БФЪ¿Ы·ЩВ ·˘Щ‹У ЩЛУ Ы˘ЫОВ˘‹, Л ФФ›· ¯ВИ О·Щ·ЫОВ˘·ЫЩВ› БИ· ФИОИ·О‹ ¯Ъ‹ЫЛ МfiУФ.
Οι επεξηγηµατικές εικόνες βρίσκονται στις τελευταίες σελίδες.
ñ ∆ФФıВЩ‹ЫЩВ ЩЛУ Ы˘ЫОВ˘‹ Ы·˜ ¿Уˆ ЫВ М›· ›‰Л, ЫЩ·ıВЪ‹ О·И ·УıВОЩИО‹ ЫЩИ˜ ˘„ЛП¤˜
ıВЪМФОЪ·Ы›В˜ ВИК¿УВИ·.
¶ЪИУ ¯ЪЛЫИМФФИ‹ЫВЩВ ЩЛУ Ы˘ЫОВ˘‹ Ы·˜ БИ· ЪТЩЛ КФЪ¿ :
ñ •ВЩ˘П›НЩВ ЩВПВ›ˆ˜ ЩФ ЛПВОЩЪИОfi О·ПТ‰ИФ.
ñ - A.
• °È· Ó· ·Ê·ÈÚ¤ÛÂÙ ÙȘ ϿΘ : ¶È¤ÛÙ ٷ Ï‹ÎÙÚ· "EJECT" - 4 - Ф˘ ‚Ъ›ЫОФУЩ·И ЫЩФ МЪФЫЩИУfi М¤ЪФ˜
ÙˆÓ Î·Ï˘ÌÌ¿ÙˆÓ Ù˘ Û˘Û΢‹˜ - C - D - E.
• °È· Ó· ÙÔÔıÂÙ‹ÛÂÙ ͷӿ ÙȘ ϿΘ : ∆ÔÔıÂÙ›ÛÙ ÙË Ï¿Î· Û ÁˆÓ›· Î·È È¤ÛÙ ÙËÓ ˆÛfiÙÔ˘ Ó·
ÎÏÂȉÒÛÂÈ ÛÙË ı¤ÛË Ù˘ - F - G - H.
• √И П¿ОВ˜ БОЪИП О·И БОФКЪВЩТУ ‰ВУ В›У·И ВУ·ПП¿НИМВ˜. º¤ЪЩВ ЫВ В˘ıВ›· ЩЛУ ¤У‰ВИНЛ 1 ¿Уˆ ЫЩЛУ
П¿О· ЩЛ˜ Ы˘ЫОВ˘‹˜ МВ ЩЛУ ¤У‰ВИНЛ 1 ЫЩФ ВНˆЩВЪИОfi М¤ЪФ˜ ЩЛ˜ Ы˘ЫОВ˘‹˜., О·И ЩЛУ ¤У‰ВИНЛ 2 ЫЩЛУ
¿ППЛ П¿О· МВ ЩЛУ ¤У‰ВИНЛ 2 ЫЩФ ¿ППФ ВНˆЩВЪИОfi М¤ЪФ˜ ЩЛ˜ Ы˘ЫОВ˘‹˜ - G.
• ¶ЪИУ ЩЛ ЪТЩЛ ¯Ъ‹ЫЛ ¯‡ЫЩВ П›БФ П¿‰И ¿Уˆ ЫЩИ˜ П¿ОВ˜. ∫·ı·Ъ›ЫЩВ МВ М›· ·ФЪЪФКЛЩИО‹ ВЩЫ¤Щ·
ÎÔ˘˙›Ó·˜.
ñ ∂ϤÁÍÙ ·Ó Ë Û˘Û΢‹ Â›Ó·È ÎÚ‡· Î·È ÂÎÙfi˜ Ú›˙·˜ ÚÈÓ ·ÏÏ¿ÍÂÙ ÙȘ ϿΘ.
ГЪЛЫИМФФ›ЛЫЛ
ñ ∂ϤÁÍÙÂ, ·Ó ÔÈ Ï¿Î˜ Â›Ó·È ÛÙ·ıÂÚ¤˜, ÛˆÛÙ¿ ÙÔÔıÂÙË̤Ó˜ Î·È ·Ó ÂÊ·ÚÌfi˙Ô˘Ó ÛˆÛÙ¿ ÛÙË Û˘Û΢‹.
ñ KÏ›ÛÙ ÙËÓ.
ñ Βεβαιωθείτε ότι ο διακόπτης είναι στη θέση 0.
ñ ∞ÔÛ˘Ó‰¤ÛÙ ÙÔ Î·ÏÒ‰ÈÔ ·fi ÙÔ Ú‡̷ Î·È ÛÙË Û˘Ó¤¯ÂÈ·. Γυρίστε τον διακόπτη I στη θέση ενεργοποί-
ησης (θέση 1). H ОfiООИУЛ ¤У‰ВИНЛ ·У¿‚ВИ О·И Л Ы˘ЫОВ˘‹ ·Ъ¯›˙ВИ У· ıВЪМ·›УВЩ·И- I.
ñ AÊ‹ÛÙ ÙË Û˘Û΢‹ Ó· ÚÔıÂÚÌ·Óı›, Ë ÊˆÙÂÈÓ‹ ¤Ó‰ÂÈÍË Á›ÓÂÙ·È Ú¿ÛÈÓË, ÌfiÏȘ ÊÙ¿ÛÂÈ Û ۈÛÙ‹
ıВЪМФОЪ·Ы›· „ЛЫ›М·ЩФ˜ - J.
ñ Ανοίξτε τη συσκευή και τοποθετήστε τις τροφές πάνω στις πλάκες - L.
ñ KÏ›ÛÙ ÙËÓ Û˘Û΢‹.
ñ Αφήστε την τροφή να ψηθεί όσο επιθυµείτε.
ñ H Ъ¿ЫИУЛ КˆЩВИУ‹ ¤У‰ВИНЛ ı· Ы‚‹УВИ О·И ı· ·У¿‚ВИ ФВ Щ·ОЩИО¿ ¯ЪФУИО¿ ‰И·ФЩ‹М·Щ· О·Щ¿ ЩЛ ¯Ъ‹ФЛ
˘Ф‰ВИОУ‡ФУЩ·˜ fiЩИ ‰И·ЩЛЪВ›Щ·И Л ıВЪМФОЪ·Ы›·.
ñ Στο τέλος του ψησίµατος, απενεργοποιήστε τη συσκευή γυρίζοντας τον διακόπτη στο 0. AÔÛ˘Ó‰¤ÛÙÂ
ÙËÓ Û˘Û΢‹ - N - O.
ñ ∞Ê‹ÛÙ ÙË Û˘Û΢‹ Ó· ÎÚ˘ÒÛÂÈ.
¯ЪЛЫИМФФИВ›ЩВ ЩФ ¯ЪФУfiМВЩЪФ БИ· У· ВП¤Б¯ВЩВ ЩФ ¯ЪfiУФ „ЛЫ›М·ЩФ˜
ñ √ ‰È·ÎfiÙ˘ ÛÙË ‰ÂÍÈ¿ ÏÂ˘Ú¿ Û·˜ ÂÈÙÚ¤ÂÈ:
EL
41
¤˙È.
Ó ÙËÓ
Tef-SNAKnCLEAN-2100072598 18/09/12 09:22 Page41
Page 42

- ¡· Ú˘ıÌ›ÛÂÙ ÙËÓ ÒÚ· Ȥ˙ÔÓÙ·˜ Î·È ÎÚ·ÙÒÓÙ·˜ ·ÙË̤ÓÔ ÙÔ ÎÔ˘Ì› ‹ Ȥ˙ÔÓÙ·˜ ÙÔ ÎÔ˘Ì› ÁÚ‹ÁÔÚ·
ÁÈ· ·ÚÎÂÙ¤˜ ÊÔÚ¤˜. ª›· ÌÈÎÚ‹ ¤Ó‰ÂÈÍË «5» ÛÙÔ ‰ÂÍ› ¿Óˆ ̤ÚÔ˜ ˘Ô‰ÂÈÎÓ‡ÂÈ Ù· ÌÈÛ¿ ÏÂÙ¿.
- ¡· ÛÙ·Ì·Ù‹ÛÂÙ ÙËÓ ¤Ó‰ÂÈÍË ÚÔÂȉÔÔ›ËÛ˘.
с ŸЩ·У Ф ¯ЪfiУФ˜ М·БВИЪ¤М·ЩФ˜ ЩВПВИТЫВИ ЩФ ¯ЪФУfiМВЩЪФ Ы·˜ ВИ‰ФФИВ› О·И ЫЩ·М·Щ¿ВИ ·˘ЩfiМ·Щ· МВЩ¿ ·fi
‰‡Ô ‰È·‰Ô¯ÈÎÔ‡˜ ‹¯Ô˘˜.
с ∆Ф ¯ЪФУfiМВЩЪФ ˘Ф‰ВИОУ‡ВИ ЩФ Щ¤ПФ˜ ЩФ˘ „ЛЫ›М·ЩФ˜ ·ПП¿ ‰ВУ ı¤ЩВИ ЩЛ Ы˘ЫОВ˘‹ ВОЩfi˜ ПВИЩФ˘ЪБ›·˜.
K·ı·ÚÈÛÌfi˜
ñ
- C - D - E .
ñ ¶ÚÈÓ ·Ê·ÈÚ¤ÛÂÙ ÙȘ ϿΘ ÁÈ· Ó· ÙȘ χÓÂÙ ÛÙÔ Ï˘ÓÙ‹ÚÈÔ È¿ÙˆÓ, ·Ê‹ÛÙ ÙË Û˘Û΢‹ Ó· ÎÚ˘ÒÛÂÈ
(ÂÚ›Ô˘ ÁÈ· 1 ÒÚ·) ¤¯ÔÓÙ·˜ ÙËÓ ·ÓÔȯً.
ñÈ· ÙËÓ ·Ê·›ÚÂÛË ÙˆÓ Î·Ï˘ÌÌ¿ÙˆÓ ÒÛÙ ӷ Ï˘ıÔ‡Ó ÛÙÔ Ï˘ÓÙ‹ÚÈÔ È¿ÙˆÓ, ·Ù‹ÛÙ ÙÔ ÎÔ˘Ì› “CLEAN”
- 5. ∆·
‰‡Ô ηχÌÌ·Ù· Ù˘ Û˘Û΢‹˜
- 1 - 2 - О·И ФИ П¿ОВ˜ П¤УФУЩ·И ЫЩФ П˘УЩ‹ЪИФ И¿ЩˆУ ‹ ¯ЪЛЫИМФФИТУЩ·˜
˙ÂÛÙfi ÓÂÚfi Î·È ·ÔÚÚ˘·ÓÙÈÎfi È¿ÙˆÓ
- 5.
ñ ∆ÔÔıÂÙ›ÛÙ ٷ ‰‡Ô ̤ÚË - 1 - 2 - О¿ıВЩ· ЫЩФ П˘УЩ‹ЪИФ И¿ЩˆУ МВ ЩЛ ¯ВИЪФП·‚‹ ЪФ˜ Щ· ¿Уˆ - P.
ñ Για να καθαρίσετε τις πλάκες, χρησιµοποιήστε ένα βρεγµένο σφουγγάρι και υγρό πιάτων. Ξεπλύνετε και
σκουπίστε τις προσεκτικά.
ñ Οι πλάκες µπορούν να πλυθούν στο πλυντήριο πιάτων.
с ¶ФЩ¤ МЛУ ‚¿˙ВЩВ ЩЛУ ЛПВОЩЪИО‹ ‚¿ЫЛ ЫЩФ П˘УЩ‹ЪИФ И¿ЩˆУ
- 3. ∏ ЛПВОЩЪИО‹ ‚¿ЫЛ МФЪВ› У· О·ı·ЪИЫЩВ›
МВ ¤У· ˘БЪfi ·У› О·И МВЩ¿ У· ЩЛУ ЫЩВБУТЫВЩВ
- R.
с °И· ЩЛУ ВО У¤Ф˘ Ы˘У·ЪМФПfiБЛЫЛ ЩЛ˜ Ы˘ЫОВ˘‹˜: BВ‚·ИˆıВ›ЩВ fiЩИ fiП· Щ· М¤ЪЛ ЩЛ˜ В›У·И ВУЩВПТ˜ ЫЩВБУ¿
ЪФЩФ‡ Щ· Ы˘У·ЪМФПФБ‹ЫВЩВ.
с ∆Ф В¿Уˆ О·И ЩФ О¿Щˆ О¿П˘ММ· Ъ¤ВИ У· В›У·И ФˆЫ‰‹ФЩВ ЫЩВБУ¿ ЪИУ ·fi ФФИ·‰‹ФЩВ У¤· ¯Ъ‹ЫЛ.
∞Ôı‹Î¢ÛË
ñ
∏ Û˘Û΢‹ ÌÔÚ› Ó· ·ÔıË΢ٛ ÙÔÔıÂÙË̤ÓË Û οıÂÙË ı¤ÛË - T.
ñ ªФЪВ›ЩВ У· Щ˘П›НВЩВ ЩФ О·ПТ‰ИФ Б‡Ъˆ ·fi ЩИ˜ ¯ВИЪФП·‚¤˜ ЪИУ ·ФıЛОВ‡ЫВЩВ ЩЛ Ы˘ЫОВ˘‹.
∞УЩИО·Щ¿ЫЩ·ЫЛ ЩЛ˜ М·Щ·Ъ›·˜ ЩФ˘ ¯ЪФУФМ¤ЩЪФ˘
с ∞У ¯·ıВ› Л ¤У‰ВИНЛ МВЪИОТ˜ ‹ ВУЩВПТ˜ , Л М·Щ·Ъ›· Ъ¤ВИ У· ·ПП·¯ıВ›.
с ¶ЪФЩВ›УФ˘МВ У· ¯ЪЛЫИМФФИ‹ЫВЩВ ¤У· П·Щ‡ О·ЩЫ·‚›‰И.
с µ¿ПЩВ ЩФ О·ЩЫ·‚›‰И ЫЩЛУ ·У·ЫЛОˆМ¤УЛ Ы¯ИЫМ‹ ¿Уˆ ЫЩФ ¯ЪФУfiМВЩЪФ БИ· У· ·ФЫ˘У‰¤ЫВЩВ ЩФ
¯ЪФУfiМВЩЪФ
- U.
с •В‚И‰ТЫЩВ ЩФ ЫЩЪФББ˘Пfi ВН¿ЪЩЛМ· Ф˘ ‚Ъ›ЫОВЩ·И ЩФФıВЩЛМ¤УФ О¿Щˆ ·fi ЩФ ¯ЪФУfiМВЩЪФ.
с ∞К·ИЪ¤ЫЩВ ЩЛ М·Щ·Ъ›·.
с ∏ ·ЪФ‡Ы· Ы˘ЫОВ˘‹ ВЪИ¤¯ВИ М›· ‹ ВЪИЫЫfiЩВЪВ˜ М·Щ·Ъ›В˜. °И· ПfiБФ˘˜ ЫВ‚·ЫМФ‡ ЪФ˜ ЩФ ВЪИ‚¿ППФУ,
МЛУ ВЩ¿ЩВ ЩИ˜ ¯ЪЛЫИМФФИЛМ¤УВ˜ М·Щ·Ъ›В˜, ·ПП¿ МВЩ·К¤ЪВЩ¤ ЩИ˜ ЫЩ· ЫЛМВ›· ‰И·ПФБ‹˜ Ф˘ ЪФФЪ›˙ФУЩ·И
БИ· ·˘ЩfiУ ЩФУ ЫОФfi.
¶ÂÚÈ‚¿ÏÏÔÓ
™˘ÓÙ·Á¤˜ ÙÔÛÙ
∆ФФıВЩВ›ЫЩВ ЩИ˜ ВИ‰ИО¤˜ БИ· tost, ·УЩИОФППЛЩИО¤˜ П¿ОВ˜ (*). ∆ФФıВЩВ›ЫЩВ Щ·
Ы¿УЩФ˘ИЩ˜ В¿Уˆ ЫЩИ˜ ·УЩИОФППЛЩИО¤˜ П¿ОВ˜. ∫ПВ›ЫЩВ ЩЛУ ЩФЫЩИ¤Ъ· О·И ЫК›БНЩВ ЫЩ·‰И·О¿ ЩИ˜
¯ВИЪФП·‚¤˜ ЪФОВИМ¤УФ˘ У· ЫКЪ·БИЫЩФ‡У О·П¿ ЫЩЛУ ЩФЫЩИ¤Ъ· ФИ К¤ЩВ˜ ЩФ˘ „ˆМИФ‡. ∞К‹УВЩВ Щ·
Ы·УЩФ˘ИЩ˜ У· „ЛıФ‡У 3 ‹ 4 ПВЩ¿ ·У¿ПФБ· МВ ЩЛУ ЪФЩИМЛЫ‹ Ы·˜.
ÙÔÛÙ
ñ 4 ʤÙ˜ „ˆÌÈ ñ 20 ÁÚ. µÔ‡Ù˘ÚÔ ñ 70 ÁÚ. Ù˘Ú› ÁÚ·‚Ȥڷ ñ 1 ʤٷ ‚Ú·ÛÙfi ˙·ÌfiÓ ñ ȤÚÈ
42
∞˜ Ы˘М‚¿ППФ˘МВ ОИ ВМВ›˜ ЫЩЛУ ЪФЫЩ·Ы›· ЩФ˘ ВЪИ‚¿ППФУЩФ˜!
∏ Ы˘ЫОВ˘‹ Ы·˜ ВЪИ¤¯ВИ ФПП¿ ·НИФФИ‹ЫИМ· ‹ ·У·О˘ОПТЫИМ· ˘ПИО¿.
¶·Ъ·‰ТЫЩВ ЩЛУ ·ПИ¿ Ы·˜ Ы˘ЫОВ˘‹ ЫВ ¤У· О¤УЩЪФ ‰И·ПФБ‹˜, ЩФ ФФ›Ф ı· ·У·П¿‚ВИ ЩЛУ
ВВНВЪБ·Ы›· ЩЛ˜.
EL
Tef-SNAKnCLEAN-2100072598 18/09/12 09:22 Page42
Page 43

µФ˘Щ˘ЪТУВЩВ ЩИ˜ К¤ЩВ˜ ЩФ˘ „ˆМИФ‡ ·fi ЩЛУ ¤Нˆ ПВ˘Ъ¿. ∫fi‚ВЩВ ЩФ Щ˘Ъ› ЫВ ПВЩ¤˜ К¤ЩВ˜ О·И ‚¿˙ВЩВ ЩФ
МИЫfi ¿Уˆ ЫВ 2 К¤ЩВ˜ „ˆМ›. ∫·ЩfiИУ ‚¿˙ВЩВ МИЫ‹ К¤Щ· ˙·МfiУ О·И И¤ЪИ ВУТ О·П‡ЩВЩВ МВ ЩФ ˘fiПФИФ
Щ˘Ъ› ЩИ˜ ¿ППВ˜ 2 К¤ЩВ˜ „ˆМИФ‡.
Croque-Roquefort
с 4 К¤ЩВ˜ „ˆМ› с 30 БЪ. ‚Ф‡Щ˘ЪФ с 8 О·Ъ‡‰И· с 50 БЪ. Щ˘Ъ› Щ‡Ф˘ ЪФОКФЪ
µФ˘Щ˘ЪТУВЩВ ЩИ˜ К¤ЩВ˜ ЩФ˘ „ˆМИФ‡ ·fi ЩЛУ ¤Нˆ ПВ˘Ъ¿. ∆ВМ·¯›˙ВЩВ Щ· О·Ъ‡‰И· О·И Щ· ·У·МВИБУ‡ВЩВ МВ
ЩФ Щ˘Ъ› ЩЛ˜ ВИПФБ‹˜ Ы·˜ О·И 10 БЪ. ‚Ф‡Щ˘ЪФ. °ВМ›˙ВЩВ 2 К¤ЩВ˜ „ˆМ› МВ ЩФ ·Ъ·¿Уˆ МВ›БМ· О·И ЩИ˜
О·П‡ЩВЩВ МВ ЩИ˜ ˘fiПФИВ˜ 2.
™˘УЩ·Б‹ БИ· ‚¿КПВ˜ О·И БОФКЪ¤ЩВ˜
∆ФФıВЩВ›ЫЩВ ЩИ˜ ‚¿КПВ˜ ЫЩИ˜ ЫЩИ˜ ·УЩИОФППЛЩИО¤˜ П¿ОВ˜ (*). ∞ПВ›КВЩВ МВ ЩФ МВ›БМ·
fiПЛ ЩЛУ ВИК¿УВИ· ЩˆУ ‚¿КПˆУ, ЪФЫ¤¯ФУЩ·˜ У· МЛУ ‰И·К‡БВИ ЩФ МВ›БМ· ·fi ЩИ˜ ПВ‡ЪВ˜. ∫ПВ›ЫЩВ
ЩЛУ ЩФЫЩИ¤Ъ·, ВЪИМ¤УВЩВ 10 ‰В˘ЩВЪfiПВЩ· О·И ·ОФПФ‡ıˆ˜ Б˘Ъ›ЫЩВ ЩЛ Ы˘ЫОВ˘‹ ·У¿Ф‰· ВЩЫИ ТЫЩВ
ЩФ ‚Ф‡Щ˘ЪФ У· ·ПˆıВ› ФМФИfiМФЪК· ЫВ fiПЛ ЩЛУ ВИК¿УВИ· ЩˆУ ‚¿КПˆУ. ∫Ъ·Щ‹ЫЩВ ЩЛ Ы˘ЫОВ˘‹ ЫВ
·˘Ù‹ ÙË ı¤ÛË ÁÈ· ÂÚ›Ô˘ 2 ÏÂÙ¿. °˘Ú›ÛÙ ÙË Û˘Û΢‹ ÛÙËÓ ÔÚı‹ Ù˘ ı¤ÛË
Î·È ·Ê‹ÛÙ ÙȘ ‚¿ÊϘ Ó· „ËıÔ‡Ó ÁÈ· ·ÎfiÌË 1 1/2 ÏÂÙfi. ∞ÔʇÁÂÙ ӷ ÙËÓ
·ÓÔ›ÍÂÙ ηٿ ÙË ‰È¿ÚÎÂÈ· ÙÔ˘ „Ë̷ۛÙÔ˜. ToÔıÂÙ›ÛÙ ÙȘ ‚¿ÊϘ ¿Óˆ
Û ÌÈ· Û¯¿Ú· Î·È ÂÚÈ̤ÓÂÙ ÁÈ· 1 ÏÂÙfi, ¤ÙÛÈ ÒÛÙ ÔÈ ‚¿ÊϘ Ó· Á›ÓÔ˘Ó Èfi
ÙÚ·Á·Ó¤˜.
ªÂ›ÁÌ· ÁÈ· ¶·Ú·‰ÔÛȷΤ˜ µ¿ÊϘ
ñ 300 ÁÚ. ·Ï‡ÚÈ ñ 10 ÁÚ. Ì·ÈÎÈÓ-·Ô˘ÓÙÂÚ ñ ·Ï¿ÙÈ ñ 75 ÁÚ. ˙¿¯·ÚË ñ 100 ÁÚ. ‚Ô‡Ù˘ÚÔ ñ 2 ·˘Á¿ ñ ó Ï›ÙÚÔ
Á¿Ï·
∞У·МВИБУ‡ВЩВ ЩФ ·ПВ‡ЪИ О·И ЩФ М·ИОИУ-¿Ф˘УЩВЪ ЫВ ¤У· МТП. ∫·ЩfiИУ ЪФЫı¤ЫЩВ ЩФ ·П¿ЩИ, ЩЛ ˙¿¯·ЪЛ,
Щ· ·˘Б¿ О·И ЩФ ‚Ф‡Щ˘ЪФ ПИˆМ¤УФ. ∞У·О·Щ¤„ЩВ О·П¿ ВУТ Ъ›¯УВЩВ ЫЩ·‰И·О¿ О·И ЩФ Б¿П·. ∞К‹ЫЩВ ЩФ ‚Ф‡Щ˘ЪФ
ВОЩfi˜ „˘БВ›Ф˘ БИ· ВЪ›Ф˘ 1 ТЪ·, ТЫЩВ У· ПИТЫВИ.
ªÂ›ÁÌ· ÁÈ· ÙÚ·Á·Ó¤˜ ‚¿ÊϘ
ñ 300 ÁÚ. ·Ï‡ÚÈ ñ 10 ÁÚ. Ì·ÈÎÈÓ-·Ô˘ÓÙÂÚ ñ ·Ï¿ÙÈ ñ 1 ÎÔ˘Ù·ÏÈ¿ Ù˘ ÛÔ‡·˜ ˙¿¯·ÚË ñ 2 ·˘Á¿ ñ 40 cl
Á¿Ï·
∞У·МВИБУ‡ВЩВ ·Ъ¯ИО¿ Щ· ·˘Б¿ ТЫФ˘ У· Б›УФ˘У "ФМВП¤Щ·" О·И О·ЩfiИУ ЪФЫı¤ЩВЩВ ЫЩ·‰И·О¿ Щ· ˘fiПФИ·
˘ПИО¿. ∞У·МВИБУ‡ВЩВ Ы˘УВ¯Т˜ ТЫФ˘ У· БИУФ‡У ¤У· ФМФИfiМФЪКФ МВ›БМ·.
°ÎÔÊÚ¤Ù˜ ÁÈ· ÚˆÈÓfi
ñ 3 ÎÚfiÎÔÈ ·‚ÁÒÓ ñ 370 ml Á¿Ï· ñ 250 ÁÚ. ·Ï‡ÚÈ ñ 2 Î. ÙÔ˘ ÁÏ˘ÎÔ‡ Ì·ÁÈ¿ ñ 3 Î. ÙÔ˘ ÁÏ˘ÎÔ‡ ˙¿¯·ÚË ñ
1/2 Î. ÙÔ˘ ÁÏ˘ÎÔ‡ ·Ï¿ÙÈ ñ 8 Î. ÙÔ˘ ÁÏ˘ÎÔ‡ Ï¿‰È ñ 3 ·ÛÚ¿‰È· ·‚ÁÒÓ
∞Ó·Ì›ÍÙ ÙÔ˘˜ ÎÚfiÎÔ˘˜ ·‚ÁÒÓ Î·È ÙÔ Á¿Ï·. ¶ÚÔÛı¤ÛÙ ÙÔ ·Ï‡ÚÈ, ÙË Ì·ÁÈ¿, ÙË ˙¿¯·ÚË Î·È ÙÔ ·Ï¿ÙÈ Î·È
·Ó·Î·Ù¤„Ù ٷ fiÏ· Ì·˙› ηϿ. ¶ÚÔÛı¤ÛÙ ÙÔ Ï¿‰È. ÃÙ˘‹ÛÙ ٷ ·ÛÚ¿‰È· ·‚ÁÒÓ ÒÛÙ ӷ Á›ÓÔ˘Ó Ì·Ú¤Áη
Î·È Î·ÙfiÈÓ ÚÔÛı¤ÛÙ ÙË Ì·Ú¤Áη ÛÙË ˙‡ÌË.
°ÎÔÊÚ¤Ù˜ Ì ‚·Ó›ÏÈ·
ñ 200 ÁÚ. ‚Ô‡Ù˘ÚÔ ñ 50 ÁÚ. ˙¿¯·ÚË ñ 1 Ú·‚‰¿ÎÈ ‚·Ó›ÏÈ·˜ Û ÎÔÌÌ¿ÙÈ· ñ 1 Ú¤˙· ·Ï¿ÙÈ ñ 6 ·‚Á¿ ñ 300 ÁÚ.
·Ï‡ÚÈ ñ 2 Î. ÙÔ˘ ÁÏ˘ÎÔ‡ Ì·ÁÈ¿ ñ 1/4 Ï›ÙÚÔ Á¿Ï· ñ 1 Î. Ù˘ ÛÔ‡·˜ ÚÔ‡ÌÈ
ÃÙ˘‹ÛÙ ÙÔ ‚Ô‡Ù˘ÚÔ, ÙË ˙¿¯·ÚË, ÙË ‚·Ó›ÏÈ· Î·È ÙÔ ·Ï¿ÙÈ. ∞ӷη٤„Ù ÙÔ ·Ï‡ÚÈ Î·È ÙË Ì·ÁÈ¿ ηÈ
ÚÔÛı¤ÛÙ ‰È·‰Ô¯Èο ÛÙÔ Ì›ÁÌ· ÙÔ Á¿Ï· Î·È Ù· ·‚Á¿ Î·È Î·ÙfiÈÓ ÙÔ ÚÔ‡ÌÈ.
æËÙ¿ ÛÙÔ grill
∆ФФıВЩВ›ЫЩВ ЩИ˜ ВИ‰ИО¤˜ ·УЩИОФППЛЩИО¤˜ П¿ОВ˜ БИ· grill (*). ∆ФФıВЩВ›ЫЩВ ЩФ ОЪ¤·˜
¿Уˆ ЫЩИ˜ П¿ОВ˜. ∫ПВ›ЫЩВ ЩЛ Ы˘ЫОВ˘‹ О·И ·К‹ЫЩВ У· „ЛıВ› ЩФ ОЪ¤·˜ ·У¿ПФБ· МВ ЩЛУ ЪФЩИМЛЫ‹ Ы·˜.
Panini „ˆÌ¿ÎÈ·
∆ÔÔıÂÙ›ÛÙ ÙȘ ϿΘ ÁÈ· Ù· „ˆÌ¿ÎÈ· (*). µ¿ÏÙ ٷ „ˆÌ¿ÎÈ· ¿Óˆ ÛÙȘ ϿΘ.
∫Ï›ÛÙ ÙË Û˘Û΢‹ Î·È „‹ÛÙ ٷ ·Ó¿ÏÔÁ· Ì ÙËÓ Û˘ÓÙ·Á‹ Î·È ÙËÓ ÚÔÙ›ÌËÛ‹ Û·˜.
43
EL
Tef-SNAKnCLEAN-2100072598 18/09/12 09:22 Page43
Page 44

SAFETY INSTRUCTIONS
IMPORTANT SAFEGUARDS
•This appliance is intended for domestic household
use only. It is not intended to be used in the
following applications, and the guarantee will not
apply for:
- staff kitchen areas in shops, offices and other
working environments;
- farm houses;
- by clients in hotels, motels and other residential
type environments;
- bed and breakfast type environments.
•Never leave the appliance unattended when in use.
•This appliance is not intended for use by persons
(including children) with reduced physical, sensory
or mental capabilities, or lack of experience and
knowledge, unless they have been given
supervision or instruction concerning use of the
appliance by a person responsible for their safety.
Children should be supervised to ensure that they
do not play with the appliance.
•This appliance can be used by children aged from 8
years and above and persons with reduced
physical, sensory or mental capabilities or lack of
experience and knowledge if they have been given
supervision or instruction concerning use of the
EN
44
Tef-SNAKnCLEAN-2100072598 18/09/12 09:22 Page44
Page 45

appliance in a safe way and understand the
hazards involved. Children shall not play with the
appliance. Children under the age of 8 years should
not use this appliance unless continuous
supervision by a responsible adult is given. Cleaning
and user maintenance shall not be made by
children unless they are older than 8 years and
supervised.
Keep the appliance and its cord out of reach of
children less than 8 years.
• Accessible surface temperatures can be high
when the appliance is operating.
•Make sure that the electric power supply is
compatible with the power rating and voltage
indicated on the bottom of the appliance.
•This appliance is not intended to be operated by
means of an external timer or separate remote
control system.
•If the power supply cord is damaged, it must be
replaced by the manufacturer or its service agent or
a similarly qualified person in order to avoid a
hazard.
•Never immerse the removable power unit with the
heating elements and cord in water. Never put
them in the dishwasher.
•Remove all packaging materials, stickers and
EN
45
Tef-SNAKnCLEAN-2100072598 18/09/12 09:22 Page45
Page 46

accessories from the inside and the outside of the
appliance.
•Fully unwind the power cord before plugging in the
appliance.
•If it is necessary to use an extension lead ensure
that it is of suitable construction and power rating,
with an earth connection.
•Always plug the appliance into an earthed socket.
•Before restarting the appliance, dry all the parts
thoroughly after cleaning.
Do
• Read the instructions carefully, common to different versions depending on the accessories supplied with your
appliance, and keep them within reach.
• Any commercial use, inappropriate use or failure to comply with the instructions, the manufacturer accepts no
responsibility and the guarantee will not apply.
• If an accident occurs, rinse the burn immediately with cold water and call a doctor if necessary.
• Before first use, wash the plates (follow paragraph Cleaning) pour a little cooking oil onto the plates and wipe
with a soft cloth or paper kitchen towel.
• Position the power cord carefully, whether an extension is used or not, so that guests can move freely around
the table without tripping over it.
• To prevent damage to the plates, only use them on the appliance for which they were designed (e.g., do not
place in an oven, on the gas ring or electric hot-plate, etc.).
• Always use a wooden or plastic spatula to avoid damaging the cooking plate.
• Check that the appliance is unplugged before cleaning.
• Clean the cooking plates and the body of the appliance with a sponge, hot water and washing-up liquid.
• Cooking fumes may be dangerous for animals which have a particularly sensitive respiratory system, such as
birds. We advise bird owners to keep them away from the cooking area.
• Only use the plates provided with the appliance or bought from an Approved Service Center.
• If the appliance is used in the centre of the table, keep it out of the reach of children.
Do not
• Never leave the appliance plugged in when not in use.
• To prevent the appliance from overheating, do not place it in a corner or against a wall.
• Never place the appliance directly on a fragile surface (glass table, tablecloth, varnished furniture, etc.) or on a
soft surface such as a tea-towel.
• Never place the appliance on or near hot or slippery surfaces; never leave the cord hanging over a heat source
(hotplates, gas stove, etc.).
EN
46
Tef-SNAKnCLEAN-2100072598 18/09/12 09:22 Page46
Page 47

• Do not place cooking utensils on the cooking surfaces of the appliance.
• Never cut food directly on the plates.
• Do not use metal scourers or scouring powders to avoid damaging the cooking surface (e.g.: non-stick
coating, ...).
• Never leave the appliance to heat in a vertical position.
• Never plug the appliance without the plates and covers are correctly positioned.
Advice / information
• For your safety, this appliance conforms to all applicable standards and regulations (Low Voltage Directive, Elec-
tromagnetic Compatibility, Food Compliant Materials, Environment, …).
• first use, there may be a slight odour and a little smoke. This is normal and will quickly disappear.
• Thank you for buying this appliance, which is intended for domestic use only.
Instructions for use
Exploded view of the appliance at the end of this leaflet.
• Place your appliance on a flat, stable and heat-resistant surface.
Before you use your appliance for the first time
• Fully unwind the power cord.
• Lift the latch - A - to open the appliance .
• To remove the plates, press the "EJECT" buttons - 4 - located on the front of the upper and lower covers. - C - D - E.
• To refit the plates, place the plate at an angle and press down to lock it in place - F - G - H.
• The plates used for making waffles and for grilling are not interchangeable. Line up the mark 1 on the plate
with the mark 1 on the cover, inside the appliance and the mark 2 on the other plate with the mark 2 on the
other cover - G.
• On first use, wash the plates (follow paragraph Cleaning), pour a little cooking oil onto the plates and wipe with
a soft cloth.
• Always make sure that the appliance is cold and unplugged from the power outlet before changing the plates.
Using the appliance
• Ensure that the plates and covers are stable, well positioned and correctly clipped to the appliance.
• Close the appliance.
• Check that the switch is in "0" position.
• Connect the cord into the mains. Turn on the switch I (position 1). The red light will light up - I.
• Leave the appliance to pre-heat: the green light goes out when the correct cooking temperature is reached - J.
• Open the appliance and place the prepared food to be cooked on the plates - L.
• Close the appliance.
• Leave the food to cook for the desired time.
• The green light goes out and lights up again regularly during the cooking process, this is normal.
• When cooking is complete, switch off the appliance by pressing "0". Unplug the electrical cord from the wall
socket - N - O.
• Let the appliance cool down (approximately 2 hours).
Using the timer to control the cooking time
•The button situated on the right side of the screen enables you:
- to set the time by pressing and holding down the button or by pressing the button quickly several times. A
small "5" displays at the top and on the right side to indicate the half minutes;
- to manually stop the warning signal by pressing a few seconds.
• When the cooking time is finished, the timer gives a warning signal and stops automatically after two series of
ringing.
• The timer indicates the end of cooking time but does not turn the appliance off.
EN
47
Tef-SNAKnCLEAN-2100072598 18/09/12 09:22 Page47
Page 48

Cleaning
• You can eject the plates - C - D - E after they have cooled down.
• Leave the appliance to cool (for about 1 hour) in an open position before removing the plates.
• Press the "CLEAN" button - 5 - to remove the covers before washing in the dishwasher. The two covers - 1 - 2 - and
their plates can be washed in a dishwasher or with a sponge using hot water and washing-up liquid - 5.
• Place the covers - 1 - 2 - vertically in the dishwasher with the handle pointing upward - P.
• To clean the plates, use a damp sponge with washing-up liquid; rinse and wipe carefully.
• The plates are dishwasher safe.
• Never put the removable power unit - 3 - in the dishwasher. The removable power unit can be cleaned with a
moist cloth, then dried - R.
• Reassembling the appliance: make sure that all of the component parts are completely dry before assembling
them.
• The lower and upper covers must be dried carefully before they are used again.
Storage
• The appliance can be stored vertically - T.
• You can wind the cord around the handles before storing the appliance.
Timer battery replacement
• If there is a partial or total loss of the display, the battery must be changed.
• We recommend you use a flat head screwdriver.
• Insert the tip of a screwdriver into the rear slot on the timer to detach and remove the timer - U.
• Unscrew the round component situated under the timer.
• Remove the battery.
• To respect the environment, dispose of it at your local waste disposal centre.
Environment
EN
HELPLINE: If you have any product problems or queries, please contact our Customer Relations Team first for expert
help and advice: 0845 602 1454 – UK
(01) 677 4003 – ROI or consult our website – www.tefal.co.u
Recipes for toasties
Fit the toasted sandwich inserts (*). Place the prepared sandwiches on the toasted sandwich insert with the butter on the outside surface of the bread. Close the appliance and tighten the
handles progressively to firmly seal the slices of bread. Leave to cook for 3 to 4 minutes depending on
your taste.
Ham and cheese toasted sandwich
• 4 slices of white bread • 20 g butter • 70 g gruyere cheese • 1 slice cooked ham • pepper
Butter the outer surfaces of the slices of bread. Cut the gruyere cheese into thin slices and place half of the cheese
on the unbuttered side of bread. Place half slice of ham on top and add pepper. Cover with the remaining gruyere
cheese then cover with the other slices of bread, with the butter on the outside.
48
Environment protection first!
Your appliance contains valuable materials which can be recovered or recycled.
Leave it at a local civic waste collection point.
Tef-SNAKnCLEAN-2100072598 18/09/12 09:22 Page48
Page 49

Roquefort and walnut toasted sandwich
• 4 slices of white bread • 30 g butter • 8 walnuts • 50 g Roquefort cheese (or stilton)
Butter the outer surfaces of the slices of bread. Roughly chop the walnuts. Mix them with 10 g butter and the Roquefort cheese. Spread the mixture onto the unbuttered slide of two slices of bread, then cover them with the
two remaining slices, so the butter is on the outside.
Recipes Waffles and mini waffle
Fit the waffle inserts (*). Spread the mixture making sure the entire area is covered but
without spilling over the side of the plate. Close the appliance, wait for 10 seconds then turn the appliance upside down to allow the batter to spread well and to cook evenly.
Keep in this position for 2 minutes.Turn the appliance right side up and leave
to cook for a further 1 minute 30. Avoid opening during cooking. Place the
waffles on a cooling tray and wait for 1 minute before eating: they become
more crispy.
Traditional waffles
• 300 g plain flour • 1 tbsp baking powder • salt • 75 g caster sugar • 100 g melted butter • 2 eggs
• 500 ml milk
Mix the flour and the baking powder in a bowl. Make a hole and add the salt, the sugar, the melted butter and
the eggs. Gradually beat in the milk. Leave the batter to stand for 1 hour. Then cook as above.
Crispy waffles
• 300 g plain flour • 1 tbsp baking powder • 1 pinch of salt • 1 tbsp sugar • 2 eggs • 400 ml milk
Beat the eggs to a frothy consistency. Mix all the other dry ingredients in a large bowl. Gradually mix in the egg
and milk. Beat until a smooth consistency.
Breakfast Waffles
• 3 egg yolks • 370 ml milk • 250 g plain flour • 2 tsps baking powder • 3 tsps sugar • 1/2 tsp salt
• 8 tsps oil • 3 egg whites
Mix the egg yolks and the milk. Add the flour, baking powder, sugar and salt and mix well. Add the oil. Beat the
egg whites until stiff and incorporate into the batter.
Vanilla Waffles
• 200 g butter • 50 g sugar • some pieces of vanilla pod • a pinch of salt • 6 eggs • 300 g plain flour
• 2 tsps baking powder • 1/4 litre milk • 1 tbsp rum.
Beat the butter, sugar, vanilla and salt. Mix the flour and baking powder and gradually add all the milk and the
eggs, then incorporate the rum.
Grill recipes
Position the grill inserts (*). Place the meat on the inserts.
Close the appliance and leave to cook according to the recipe and depending on your taste.
Recipes Panini
Position the grill inserts (*). Place the bread on the inserts.
Close the appliance and leave to cook according to the recipe and depending on your taste
EN
49
Tef-SNAKnCLEAN-2100072598 18/09/12 09:22 Page49
Page 50

1
104
A B*
2
C D E
3
I* J* K*
F G H
OK
Tef-SNAKnCLEAN-2100072598 18/09/12 09:22 Page104
Page 51

105
4
L* M
5
NO
P Q R
S T U*
* selon modèle
afhankelijk van het model
je nach Modell
in base al modello
según el modelo
consoante o modelo
·Ó¿ÏÔÁ· Ì ÙÔ ÌÔÓÙ¤ÏÔ
depending on the model
modele göre
afhængig af modellen
avhengig av modell
beroende på modell
mallista riippuen
в зависимости от модели
залежно вiд моделi
°d•ºV ±b‰
•ºV «∞Luœ¥q
Tef-SNAKnCLEAN-2100072598 18/09/12 09:22 Page105
Page 52

106
INTERNATIONAL GUARANTEE : COUNTRY LIST
ALGERIA
CIJA
9 rue Puvis de Chavannes - Saint Euquene
Oran
(041 28 18 53
1 an
1 year
ARGENTINA
GROUPE SEB ARGENTINA S.A.
Billinghurst 1833 3° - C1425DTK
Capital Federal - Buenos Aires
0800-122-2732
2 años
2 years
!"!#$!%
ARMENIA
&'()*+,-../ #0'-1,
125171 2,345/, 67898:+/;</8
=>,-?9@)ABC@)D98EF
(010) 55-76-07
2 G/+9/
2 years
AUSTRALIA
GROUPE SEB AUSTRALIA
PO Box 7535,
Silverwater NSW 2128
02 97487944 1 year
ÖSTERREICH
AUSTRIA
SEB ÖSTERREICH HmbH
Campus 21 - Businesspark Wien Süd
Liebermannstr. A02 702 - 2345 Brunn am Gebirge
01 866 70 299 00
2 Jahre
2 years
BELGIQUE BELGIE
BELGIUM
GROUPE SEB BELGIUM SA NV
25 avenue de l'Espérance - ZI
6220 Fleurus
070 23 31 59
2 ans
2 years
БЕЛАРУСЬ
BELARUS
ЗАО «Группа СЕБ-Восток»,
125171, Москва, Ленинградское - шоссе, д. 16А, стр. 3
017 2239290
2 года
2 years
BOSNA I
HERCEGOVINA
SEB Développement
Predstavništvo u BiH - Vrazova 8/II
71000 Sarajevo
Info-linija za potrošače
033 551 220
2 godine
2 years
BRASIL
BRAZIL
SEB COMERCIAL DE PRODUTOS DOMÉSTICOS LTDA
Rua Venâncio Aires, 433/437/447,
Pompéia, São Paulo/SP
0800-119933
1 ano
1 year
БЪЛГАРИЯ
BULGARIA
ГРУП СЕБ БЪЛГАРИЯ ЕООД
Ул. Борово 52 Г, ет. 1, офис 1,
1680 София
0700 10 330
2 години
2 years
CANADA
GROUPE SEB CANADA
345 Passmore Avenue
Toronto, ON M1V 3N8
800-418-3325
1 an
1 year
CHILE
GROUPE SEB CHILE
Comercial Ltda Av. Providencia, 2331, piso 5,
oficina 501 Santiago
12300 209207
2 años
2 years
COLOMBIA
GROUPE SEB COLOMBIA
Apartado Aereo 172, Kilometro 1
Via Zipaquira - Cajica Cundinamarca
18000919288
2 años
2 years
HRVATSKA
CROATIA
SEB Développement S.A.S.
Vodnjanska 26
10000 Zagreb
01 30 15 294
2 godine
2 years
ČESKÁ REPUBLIK
CZECH REPUBLIC
GROUPE SEB ČR spol. s r .o.
Jankovcova 1569/2c
170 00 Praha 7
731 010 111
2 roky
2 years
DANMARK
GROUPE SEB NORDIC AS
Tempovej 27
2750 Ballerup
44 663 155
2 år
2 years
DEUTSCHLAND
GERMANY
GROUPE SEB DEUTSCHLAND GmbH / KRUPS GmbH
Herrnrainweg 5
63067 Offenbach
0212 387 400
2 Jahre
2 years
EESTI
ESTONIA
GROUPE SEB POLSKA SP Z O.O.
ul. Bukowińska 22b
02-703 Warszawa
5 800 3777
2 aastat
2 years
SUOMI
FINLAND
Groupe SEB Finland
Kutojantie 7
02630 Espoo
09 622 94 20
2 Vuotta
2 years
«∞§“ «z¸
Tef-SNAKnCLEAN-2100072598 18/09/12 09:22 Page106
Page 53

107
FRANCE
Incluant uniquement
Guadeloupe, Martinique,
Réunion, Saint-Martin
GROUPE SEB FRANCE
Service Consommateur Tefal
BP 15 - 69131 ECULLY CEDEX
09 74 50 47 74
1 an
1 year
ΕΛΛΑ∆Λ
GREECE
SEB GROUPE ΕΛΛΑ∆ΟΣ Α.Ε.
Οδός Καβαλιεράτου 7 Τ.Κ. 145 64 Ν. Κηφισιά
2106371251
2 χρόνια
2 years
!
HONG KONG
SEB ASIA Ltd.
Room 903, 9/F, North Block, Skyway House
3 Sham Mong Road, Tai Kok Tsui, Kowloon - Hong-Kong
852 8130 8998 1 year
MAGYARORSZÁG
HUNGARY
GROUPE SEB CENTRAL-EUROPE Kft.
Távíró köz - 4 2040 Budaörs
06 1 801 8434
2 év
2 years
INDONESIA
Groupe SEB Indonesia (Representative office)
Sudirman Plaza, Plaza Marein 8th Floor
JL Jendral Sudirman Kav 76-78,
Jakarta 12910, Indonesia
+62 21 5793 6881 1 year
ITALIA
ITALY
GROUPE SEB ITALIA S.p.A.
Via Montefeltro, 4 - 20156 Milano
199207354
2 anni
2 years
JAPAN
GROUPE SEB JAPAN Co. Ltd.
1F Takanawa Muse Building, 3-14-13, Higashi Gotanda,
Shinagawa-Ku, Tokyo 141-0022
0570-077772 1 year
ҚАЗАҚСТАН
KAZAKHSTAN
ЖАҚ «Группа СЕБ- Восток»
125171, Мəскеу, Ленинградское
шоссесі,16А, 3 үйі
727 378 39 39
2 жыл
2 years
KOREA
( )!" #$ %&'
()* +,- (./ 88 (.01 323435564786
1588-1588 1 year
LATVJA
LATVIA
GROUPE SEB POLSKA Sp. z o.o.
ul. Bukowińska 22b
02-703 Warszawa
6 716 2007
2 gadi
2 years
LIETUVA
LITHUANIA
GROUPE SEB POLSKA Sp. z o.o.
ul. Bukowińska 22b
02-703 Warszawa
6 470 8888
2 metai
2 years
LUXEMBOURG
GROUPE SEB BELGIUM SA NV
25 avenue de l'Espérance - ZI
6220 Fleurus
0032 70 23 31 59
2 ans
2 years
MACEDONIA
Groupe SEB Bulgaria EOOD
Office 1, floor 1, 52G Borovo St., 1680 Sofia - Bulgaria
ГРУП СЕБ БЪЛГАРИЯ ДООЕЛ
Ул. Борово 52 Г, сп. 1, офис 1, 1680 София - България
(0)2 20 50 022
2 годин
2years
MALAYSIA
GROUPE SEB MALAYSIA SDN. BHD
Unit No. 402-403, Level 4, Uptown 2, No. 2, Jalan SS21/37,
Damansara Uptown, 47400, Petaling Jaya, Selangor D.E Malaysia
65 6550 8900 1 year
MEXICO
G.S.E.B. MEXICANA, S.A. DE C.V. Goldsmith 38 Desp. 401,
Col. Polanco - Delegacion Miguel Hildalgo
11 560 Mexico D.F.
(01800) 112 8325
1 años
1 year
MOLDOVA
ТОВ «Груп СЕБ Україна»
02121, Харківське шосе, 201-203, 3 поверх,
Київ, Україна
(22) 929249
2 ani
2 years
NEDERLAND
The Netherlands
GROUPE SEB NEDERLAND BV
Generatorstraat 6 - 3903 LJ Veenendaal
0318 58 24 24
2 jaar
2 years
NEW ZEALAND
GROUPE SEB NEW ZEALAND
Unit E, Building 3, 195 Main Highway,
Ellerslie, Auckland
0800 700 711 1 year
NORGE
NORWAY
GROUPE SEB NORDIC AS
Tempovej 27
2750 Ballerup DANMARK
815 09 567
2 år
2 years
PERU
Groupe SEB Perú
Av. Camino Real N° 111 of. 805 B
San Isidro - Lima - Perú
441 4455
1 años
1 year
Tef-SNAKnCLEAN-2100072598 18/09/12 09:22 Page107
Page 54

108
POLSKA
POLAND
GROUPE SEB POLSKA Sp. z o.o
ul. Bukowińska 22b
02-703 Warszawa
0 801 300 421
koszt jak za
połączenie lokalne
2 lata
2 years
PORTUGAL
GROUPE SEB IBÉRICA SA
Urb. da Matinha - Rua Projectada à Rua 3
Bloco1 - 3° B/D 1950 - 327 Lisboa
808 284 735
2 anos
2 years
REPUBLIC
OF IRELAND
GROUPE SEB IRELAND
Unit B3 Aerodrome Business Park, College Road,
Rathcoole, Co. Dublin
01 677 4003 1 year
ROMÂNIA
ROMANIA
GROUPE SEB ROMÂNIA
Str. Daniel Constantin nr. 8 - 010632 Bucureti
0 21 316 87 84
2 ani
2 years
РОССИЯ
RUSSIA
ЗАО «Группа СЕБ-Восток», 119180 Москва,
125171, Москва, Ленинградское
шоссе, д. 16А, стр. 3
495 213 32 30
2 года
2 years
SRBIJA
SERBIA
SEB Developpement
Đorđa Stanojevića 11b
11070 Novi Beograd
060 0 732 000
2 godine
2 years
SINGAPORE
GROUPE SEB SINGAPORE Pty Ltd.
59 Jalan Pemipin, #04-01/02 L&Y Building
Singapore 577218
65 6550 8900 1 year
SLOVENSKO
SLOVAKIA
GROUPE SEB SLOVENSKO s.r.o.
Rybničná 40 - 831 07 Bratislava
233 595 224
2 roky
2 years
SLOVENIJA
SLOVENIA
SEB d.o.o
Gregorčičeva ulica 6 - 2000 MARIBOR
02 234 94 90
2 leti
2 years
ESPAÑA
SPAIN
GROUPE SEB IBÉRICA S.A.
C/ Almogàvers, 119-123, Complejo Ecourban
08018 Barcelona
902 31 24 00
2 años
2 years
SVERIGE
SWEDEN
TEFAL SVERIGE SUBSIDIARY OF GROUP SEB NORDIC
Truckvägen 14 A,
194 52 Upplands Väsby
08 594 213 30
2 år
2 years
SUISSE / SCHWEIZ
SWITZERLAND
GROUPE SEB SCHWEIZ GmbH
Thurgauerstrasse 105
8152 Glattbrugg
044 837 18 40
2 ans
2 Jarhre
2 years
TAIWAN
SEB ASIA Ltd. Taiwan Branch
4F., No. 37 Dexing W. Rd., Shilin Dist., Taipei City 11158,
Taiwan (R.O.C.)
886-2-2833 3716 1 year
THAILAND
GROUPE SEB THAILAND
2034/66 Italthai Tower, 14th Floor, n° 14-02,
New Phetchburi Road,
Bangkapi, Huaykwang, Bangkok, 10320
662 351 8911 2 years
TÜRKIYE
TURKEY
GROUPE SEB ISTANBUL AS
Beybi Giz Plaza Dereboyu Cad. - Meydan Sok.
No: 28 K.12 Maslak
216 444 40 50
2 YIL
2 years
U.S.A.
GROUPE SEB USA
2121 Eden Road - Millville, NJ 08332
800-395-8325 1 year
УKPAÏHA
UKRAINE
ТОВ «Груп СЕБ Україна»
02121, Харківське шосе, 201-203, 3 поверх, Київ, Україна
044 492 06 59
2 роки
2 years
UNITED KINGDOM
GROUPE SEB UK LTD
Riverside House, Riverside Walk
Windsor, Berkshire, SL4 1NA
0845 602 1454 1 year
VENEZUELA
GROUPE SEB VENEZUELA
Av Eugenio Mendoza, Centro Letonia, Torre ING Bank,
Piso 15, Ofc 155 - Urb. La Castellana, Caracas
0800-7268724 2 años
VIETNAM
Vietnam Fan Joint Stock Company
25 Nguyen Thi Nho Str, Ward 9,
Tan Binh Dist, HCM city
+84-8 38644037
+84-8 38645830
1 year
www.tefal.com
Tef-SNAKnCLEAN-2100072598 18/09/12 09:22 Page108
Page 55

109
TEFAL / T-FAL INTERNATIONAL GUARA NTEE
Date of purchase: . . . . . . . . . . . . . . . . . . . . . . . . . . . . . / Date d'achat / Fecha de compra /
Data da compra / Data d'acquisto / Kaufdatum / Aankoopdatum / Købsdato / Inköpsdatum /
Kjøpsdato / Ostopäivä / Data zakupu / Data vânzării / Įsigijimo data/ Ostukuupäev / Datum
nakupa / Sorozatszám / Dátum nákupu / Pirkuma datums / Datum Kupovine / Datum kupnje /
Data cumpărării / Datum nákupu / Tarikh pembelian / Tanggal pembelian / Ngày mua hàng/
Satın alma tarihi / Дата прпдажи / Дата на закупуване / Датум на купуваое / Сатылған мерзімі /
Ηµεροµηνία αγοράς/ !"!#$%&'() / วั นที่ ซื้ อ / 購買日期/購入日/ -9:;3/
ªd Ob ¢U¸¥a / ¢U¸¥a «∞Ad«¡
Product reference: . . . . . . . . . . . . . . . . . . . . . . . . . . / Référence du produit / Referencia del
producto / Referência do produto / tipo de prodotto / Typnummer des Gerätes / Artikelnummer
van het apparaat / Referencenummer / Produktreferens / Artikkelnummer / Tuotenumero /
referencja produktu / Model / Gaminio numeris / Toote viitenumber / Tip aparata / Vásárlás
kelte / Typ vyÑrobku / Produkta atsauces numurs / Model proizvoda / Oznaka proizvoda / Cod
produs / Produk rujukan / Referensi produk / Mã sản phẩm/ Ürün kodu / Мпдель / Мпдель /
Мпдел на уреда / Мпделi / Κωδικός προιόνηος / *+,-. / รุ่ นผลิ ตภั ณฑ์ / 產品模型/ 製品レファレ
ンス番/ <=>3/
±d§l JULq L∫Bu‰ / ±d§l «∞LÔM∑ÓZ «∞JULq
Distributor stamp . . . . . . . . . . . . . . . . . . . . . . . Cachet distributeur /Sello del distribuidor /
Carimbo do revendedor / Timbro del negozzio / Händlerstempel / Stempel van de dealer /
Forhandler stempel / Återförsäljarens stämpel / Forhandler stempel / Jälleenmyyjän leima /
pieczęć sprzedawcy / Ştampila vânzătorului / Antspaudas / Tempel / Žig trgovine / Eladó neve,
címe/ Razítko predajcu / Zīmogs / Pečat maloprodaje/ Pečat prodavca / Pečat prodajnog
mjesta / Ştampila vânzătorului/ Razítko prodejce/ Cap peruncit / Cap dari Toko Penjual / Cửa
hàng bán đóng dấu/ Satıcı Firmanın Kaşesi / Печать прпдавца / Печатка прпдавця / Печат на
търгпвския пбект / Печат на прпдавницата / Сатушының мөрі / Σθραγίδα καηαζηήµαηος /
!"!#$%&'()&*+ / ตราประทั บของห้ าง/ร้ านที่ ซื้ อ / 零售商的蓋印/ 販売店印/ !" #$%/
≠¸ug LN¸ ª¸bˆ / ª∑ °Uzl «∞∑§ezW
Retailer name & address: . . . . . . . . . . . . . . . . . . . . . . . . . . . . . . . . . . . . . . . . . . . . . . . . . . /
Nom et adresse du vendeur / Nombre y dirección del minorista / Nome e endereço do revendedor /
Nome e indirizzo delnegozzio / Name und Anschrift des Händlers / Naam en adres van de dealer /
Forhandler navn & adresse / Återförsäljarens namn och adress / Forhandler navn og adresse /
Jälleenmyyjän nimi ja osoite / nazwa i adres sprzedawcy / Numele şi adresa vânzătorului /
Parduotuvės pavadinimas ir adresas / Müüja kauplus ja aadress / Naziv in naslov trgovine /
Tipusszám / Názov a adresa predajcu / Veikala nosaukums un adrese / Naziv i adresa maloprodaje /
Naziv i adresa prodavca / Naziv i adresa prodajnog mjesta / Nume şi adresă vânzător / Název a
adresa prodejce / Nama dan alamat peruncit / Nama Toko Penjual dan alamat / Tên và địa chỉ
cửa hàng bán/ Satıcı firmanın adı ve adresi / Название и адрес прпдавца / Назва і адреса
прпдавця / Търгпвки пбект / Назив и адреса на прпдавницата / Сатушының аты жəне
мекен-жайы / Επωνυµία και διεύθσνζη καηαζηήµαηος / !"!#$%& !),!)$-.+ / 0!123) /
ชื่ อและที่ อยู่ ของห้ าง/ร้ านที่ ซื้ อ / 零售商的店名和地址/販売店の名前、住所/ !" &'( ) /
≤UÂ Ë ¬œ¸” îdœÁ ≠dË‘ / «ßr Ë´Mu«Ê °Uzl «∞∑πezW
Tef-SNAKnCLEAN-2100072598 18/09/12 09:22 Page109
Page 56

110
Tef-SNAKnCLEAN-2100072598 18/09/12 09:22 Page110
Page 57

111
Tef-SNAKnCLEAN-2100072598 18/09/12 09:22 Page111
Page 58

2 - 7
8 -13
14-19
20-25
26-31
32-37
38-43
44-49
50-55
56-61
62-67
68-73
74-79
80-85
86-91
92-97
98-103
Ref. 2100072598 - 09/12
FR
NL
DE
IT
ES
PT
EL
EN
TR
DA
NO
SV
FI
RU
UK
AR
FA
Tef-SNAKnCLEAN-2100072598 18/09/12 09:22 Page112
 Loading...