

TEFAL Clipso, Clipso Modulo, Clipso Control, P41006, P41007 User Manual
...
Clipso
Clipso Modulo
Clipso Control
Clipso Control +
www.tefal.com
User's Guide - Kullanma Kılavuzu - Manuel d’instruction
Manual de Instrucciones - Οδηγίες χρήσης
- Manual de instruções
EN
TR
FR
ES
EL
AR
PT
b∞¥‰ «ùߢFLU‰
O
T
U
K*
C
F*
H
N
M*
V
R
S
W
S
D
A*
Q*
L*
J
I
D
B
G
P*
E
*depending on model - *modele görel - *Selon modèle - *según modelo - *ανάλογα µε το µοντέλο
- *consoante modelo
R
A*
*•ºV «∞Luœ¥q

fig. 1 fig. 2 fig. 3 fig. 4
fig. 5 fig. 6 fig. 8
fig. 9
fig. 14
fig. 15 fig. 16
fig. 17 fig. 18 fig. 19 fig. 20
fig. 7
fig. 11fig. 10 fig. 12
fig. 13
a
b
mini
a
b

*depending on model
1
IMPORTANT SAFEGUARDS
• For your safety, this appliance is compliant with applicable standards and regulations:
- Directive concerning Pressure operated appliances
- Equipment coming into contact with food
- Environment
• This appliance is intended for domestic use.
• Any commercial use, inappropriate use or failure to comply with the instructions, the
manufacturer accepts no responsibility and the guarantee will not apply.
• Take the time to read all the instructions and refer to the "Instructions for use".
• As with any cooking appliance, supervise cooking closely if using the Pressure Cooker
with children nearby or certain handicapped persons.
• This product is not intended for use by persons (including children) with reduced
physical, sensory or mental capabilities, or lack of experience and knowledge, unless
they have been given supervision or instruction concerning use of the product by a
person responsible for their safety.
• Do not put your Pressure Cooker into a hot oven.
• When your pressure cooker is under pressure please take the utmost care when
moving it. Do not touch the hot surfaces (in particular the metal parts). Use the
handles and buttons. Use oven gloves if necessary.
• Do not use your Pressure Cooker for any use other than that for which it is designed.
• Your Pressure Cooker cooks under pressure. Burns could result from boiling over if not
used properly. Make sure that the Pressure Cooker is properly closed before bringing
it up to pressure. (see paragraph Opening - Closing).
• Never force the Pressure Cooker open. Make sure that the inside pressure has returned
to normal. See paragraph Safety.
• Never use your Pressure Cooker without liquid: this could cause serious damage.
Always make sure that there is enough liquid in it during cooking.
• Use compatible heat sources.
• Do not fill your Pressure Cooker more than 2/3 full.(maximum filling mark).
• Never cook a milk based menu in your pressure cooker.
• For food that expands considerably during cooking, such as rice, dehydrated
vegetables or compotes, … do not fill the Pressure Cooker more than half full.
• After cooking meats which have a surface skin ( e.g.. ox tongue…), which may expand
under the effect of pressure, do not pierce the meat while the skin still has a swollen
appearance; you run the risk of scalding yourself. We recommend you pierce the meat
before cooking.
• When cooking food with a thick texture (chick peas, rhubarb, compotes, etc.) the
Pressure Cooker should be shaken slightly before opening to ensure that the food
does not spurt out.
• Always check that valves are clear before use. See paragraph “Before cooking”.
• Do not use the Pressure Cooker to fry under pressure using oil.
• Leave the safety systems alone, except for cleaning and maintenance in accordance
with instructions.
• Use only the appropriate TEFAL spare parts for your model. Particularly, only the
TEFAL pan and lid.
• Do not use your pressure cooker to store acidic or salty food before and after cooking.
• Make sure the pressure regulator valve is in the steam release position before opening
the lid.
• Never place your pressure cooker with its handles folded back* on a source of heat.
Keep these instructions

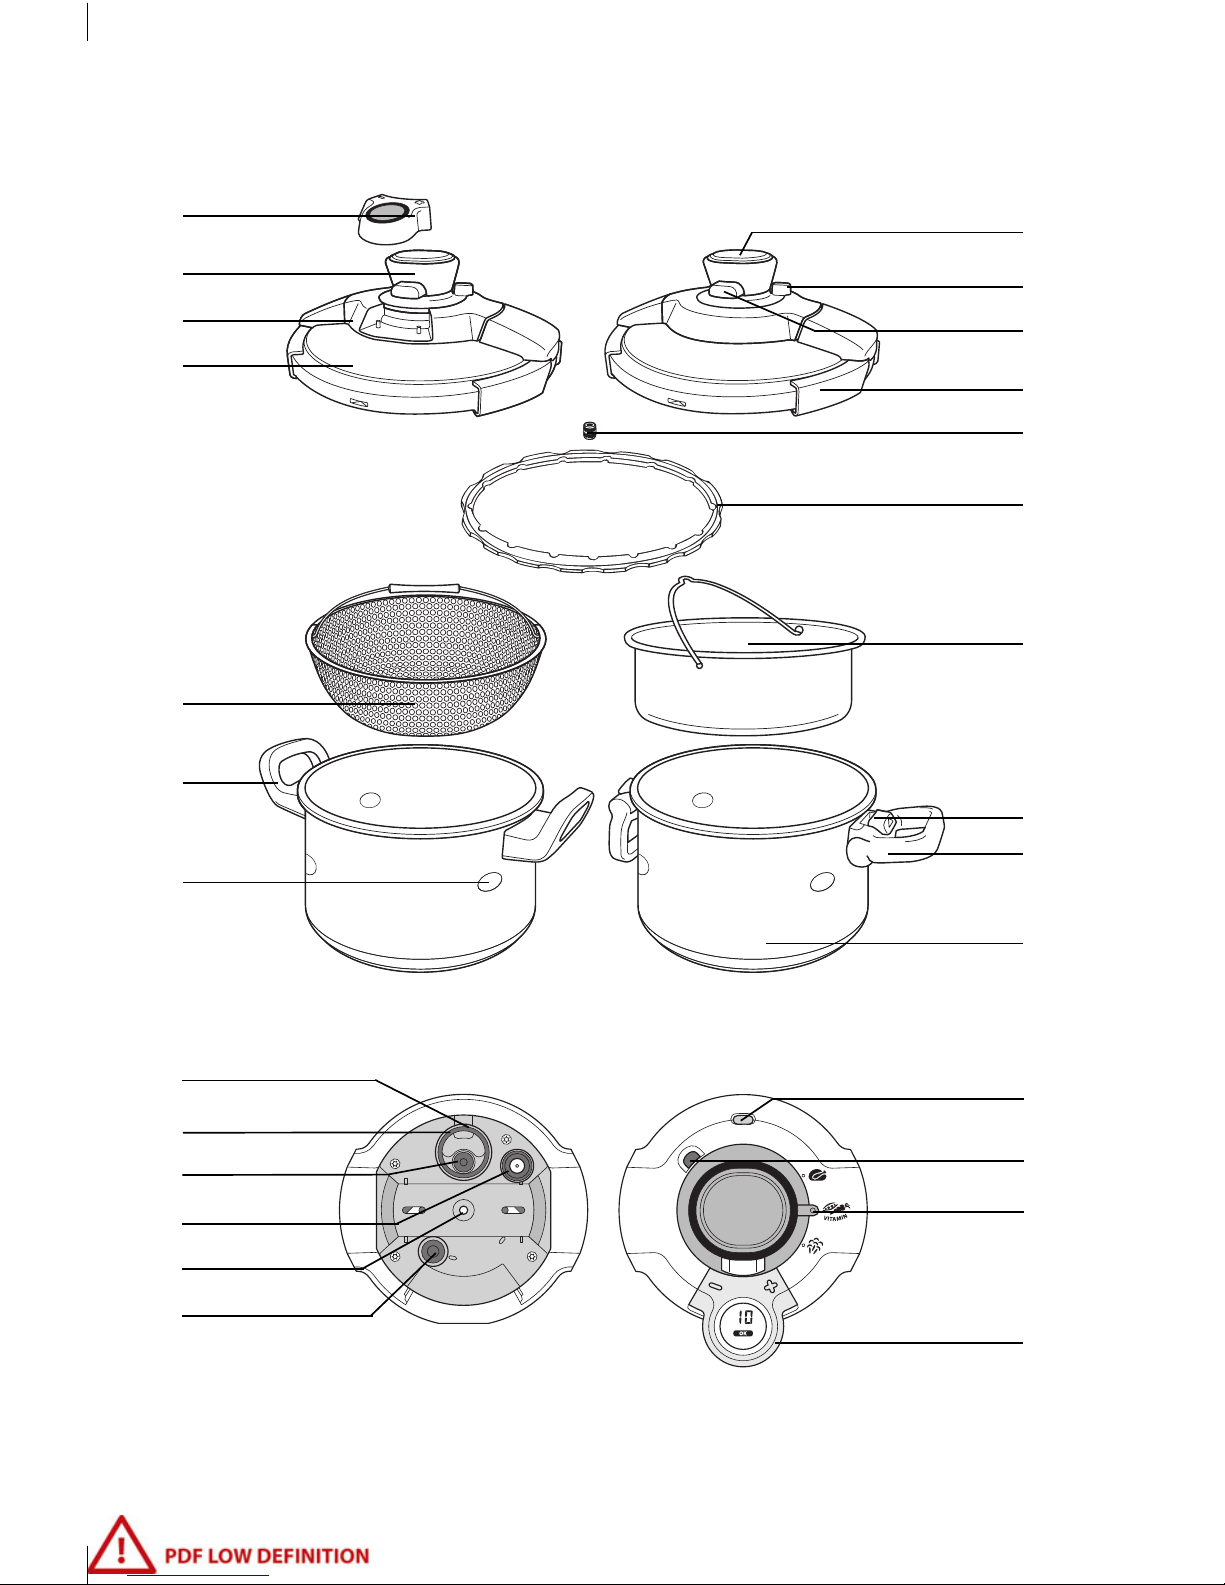
Descriptive diagram
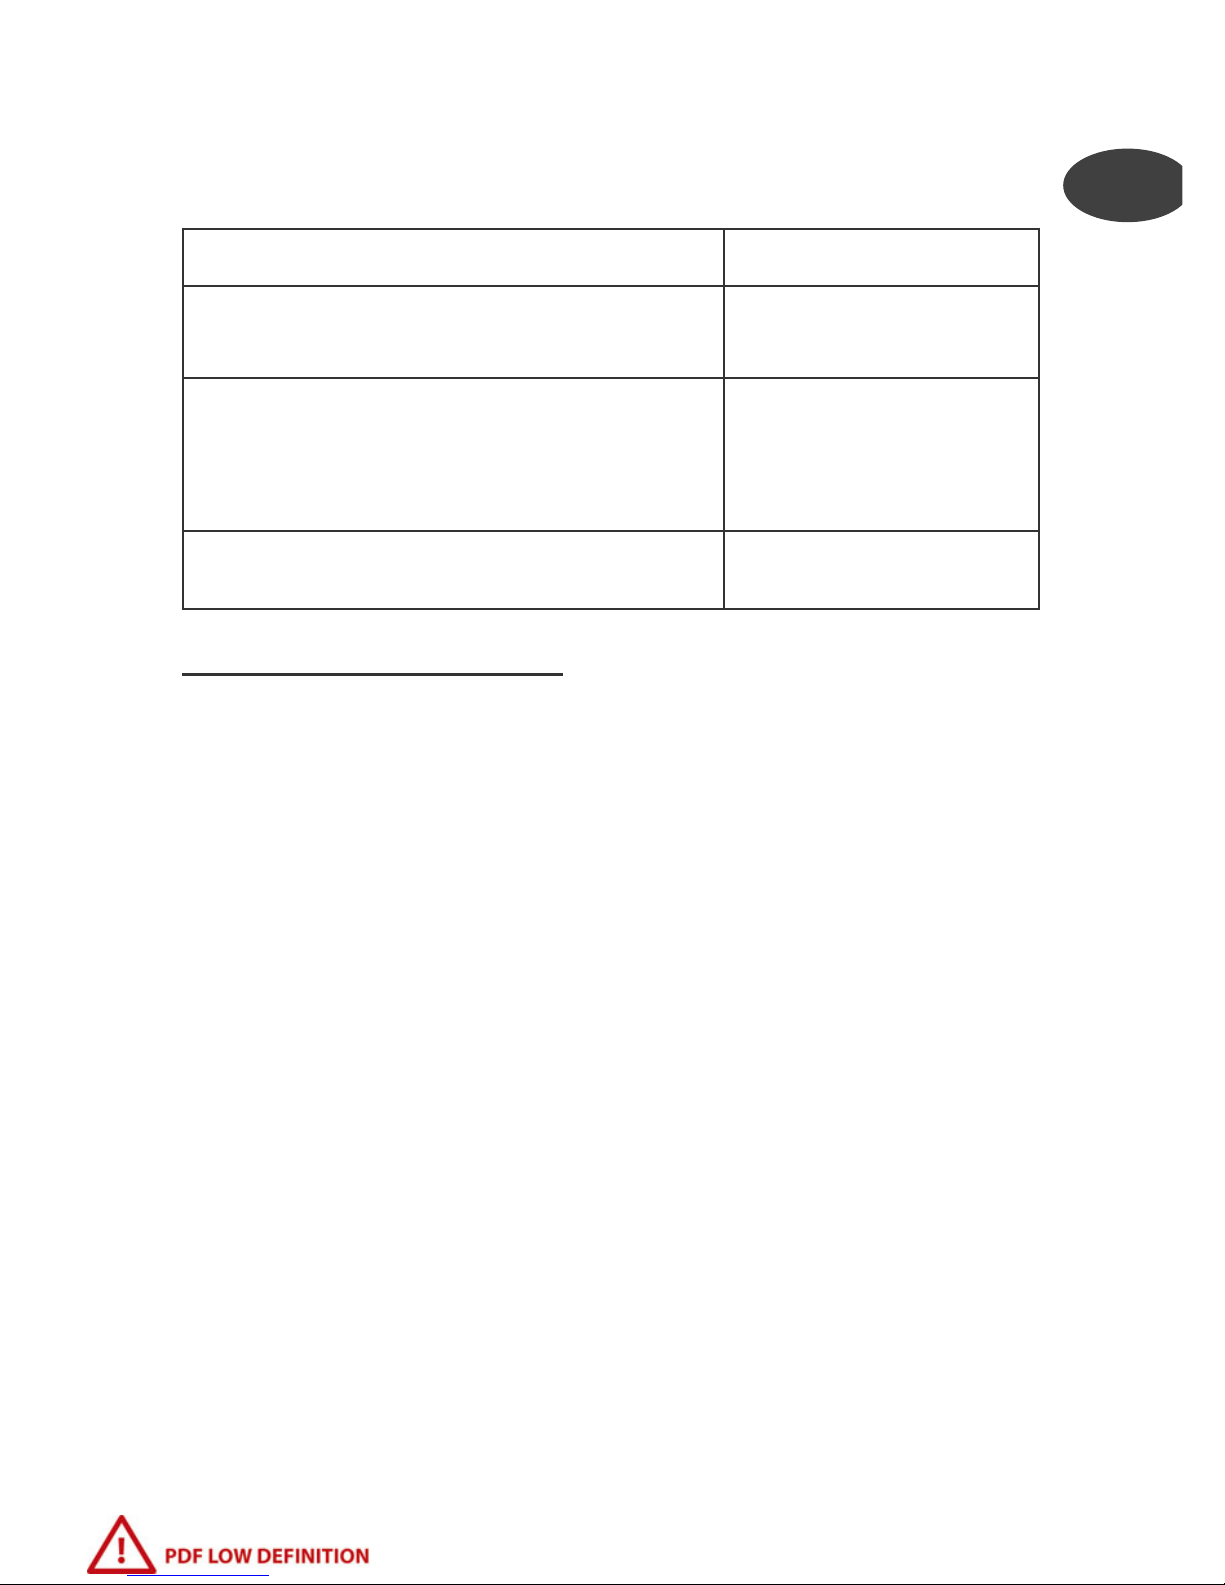
Characteristics
Pressure cooker base diameter
Normative information:
Maximum operating pressure: 80kPa.
Maximum safety pressure: 140kPa.
2
*depending on model
EN
A- Timer*
B- Locking button
C- Lid knob
D- Programme selector
E- Unlocking button
F- Control panel
G- Jaws
H- Stainless steel lid
I-Module retaining nut
J- Lid seal
K- Vitamin basket*
L- Steam basket*
M- Fixed pan handle*
N- Integrated basket supports
O- Stainless steel pot
P- Handle release button*
Q- Folding pan handles*
R- Steam release outlet
S- Pressure indicator
T- Operating valve seal
U- Operating valve
V- Control module fixing screw
W- Safety valve
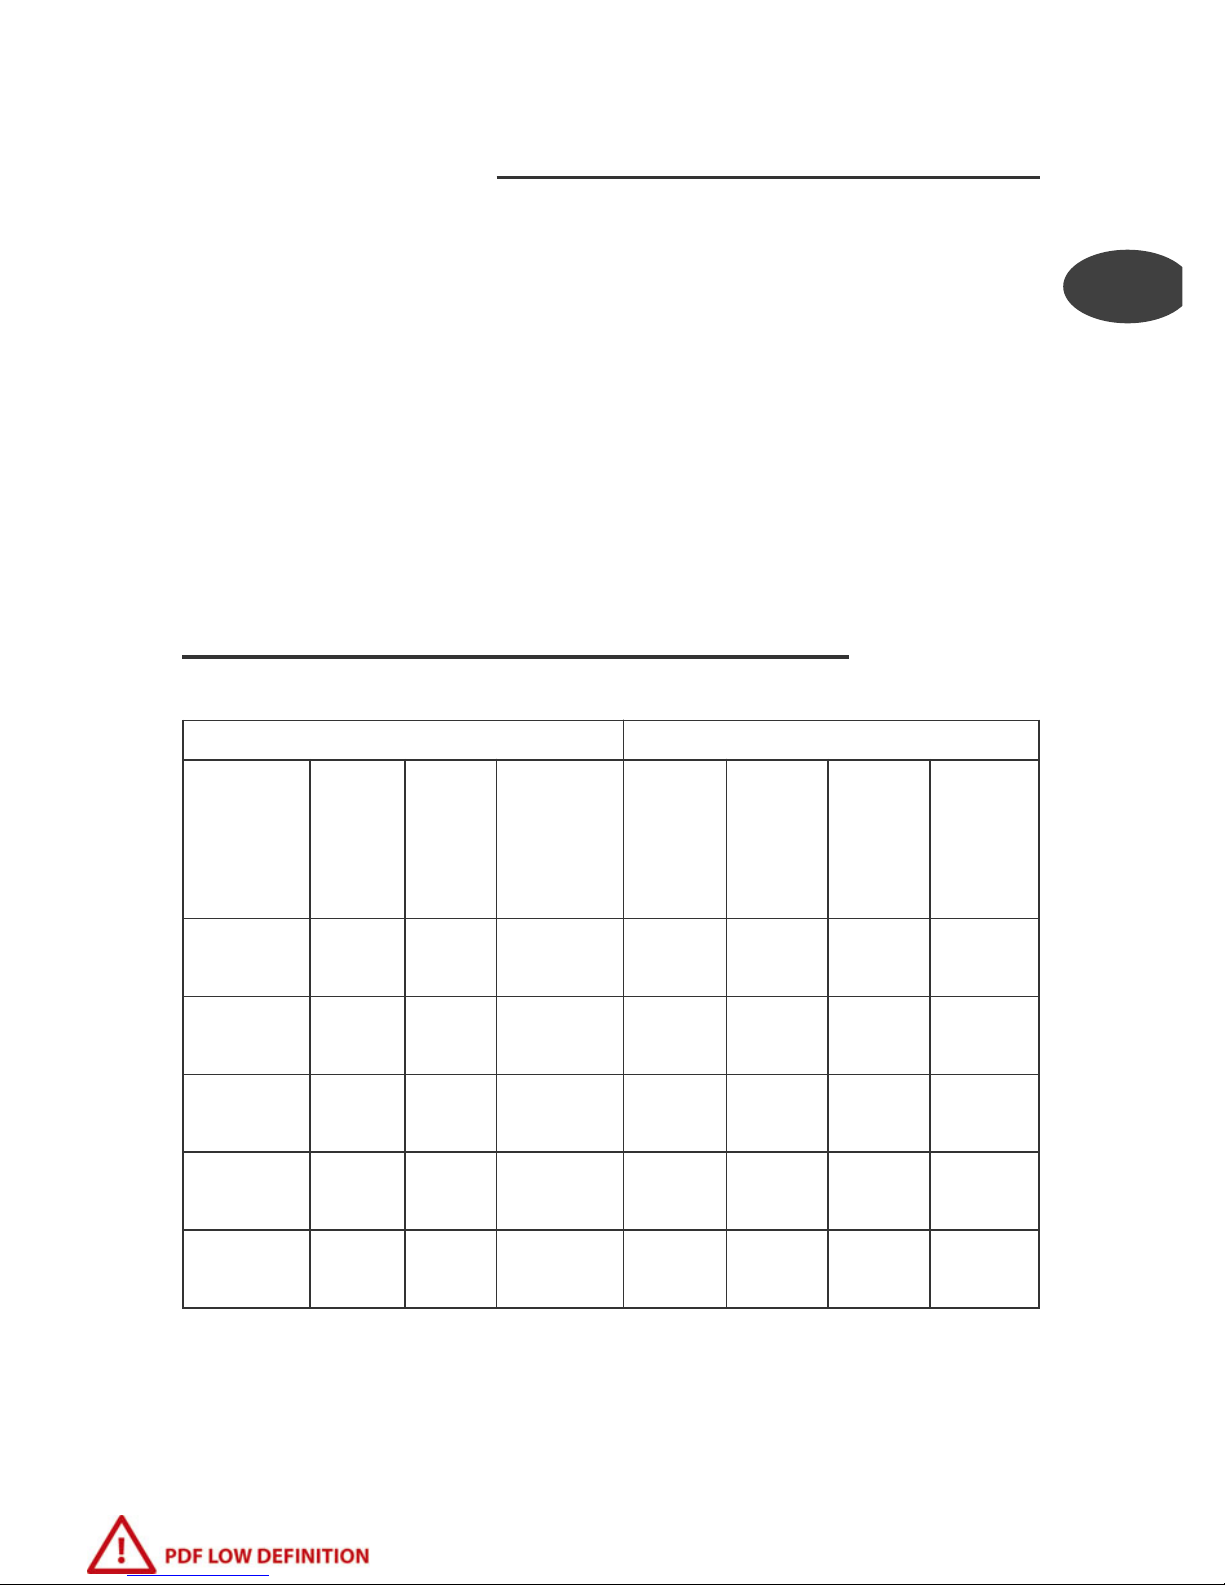
Model
Total
Capacité
InteriorØBase
Ø
Material
body
and lid
Clipso
Clipso
Control
Clipso
Control
+
Clipso
Modulo
4,5 L 5,3 L* 22 cm 18 cm
Stainless
steel
P41306 P41006 - -
6 L 6,8 L* 22 cm 18 cm
Stainless
steel
- P41007 P41107 P40807
4,5 L - 25 cm 20 cm
Stainless
steel
- P41012 - -
8 L 9,4 L* 25 cm 20 cm
Stainless
steel
- P41014 P41114 P40814
10 L 11,4 L* 25 cm 20 cm
Stainless
steel
- P41015 P41115 P40815
* Product capacity with the lid in position.

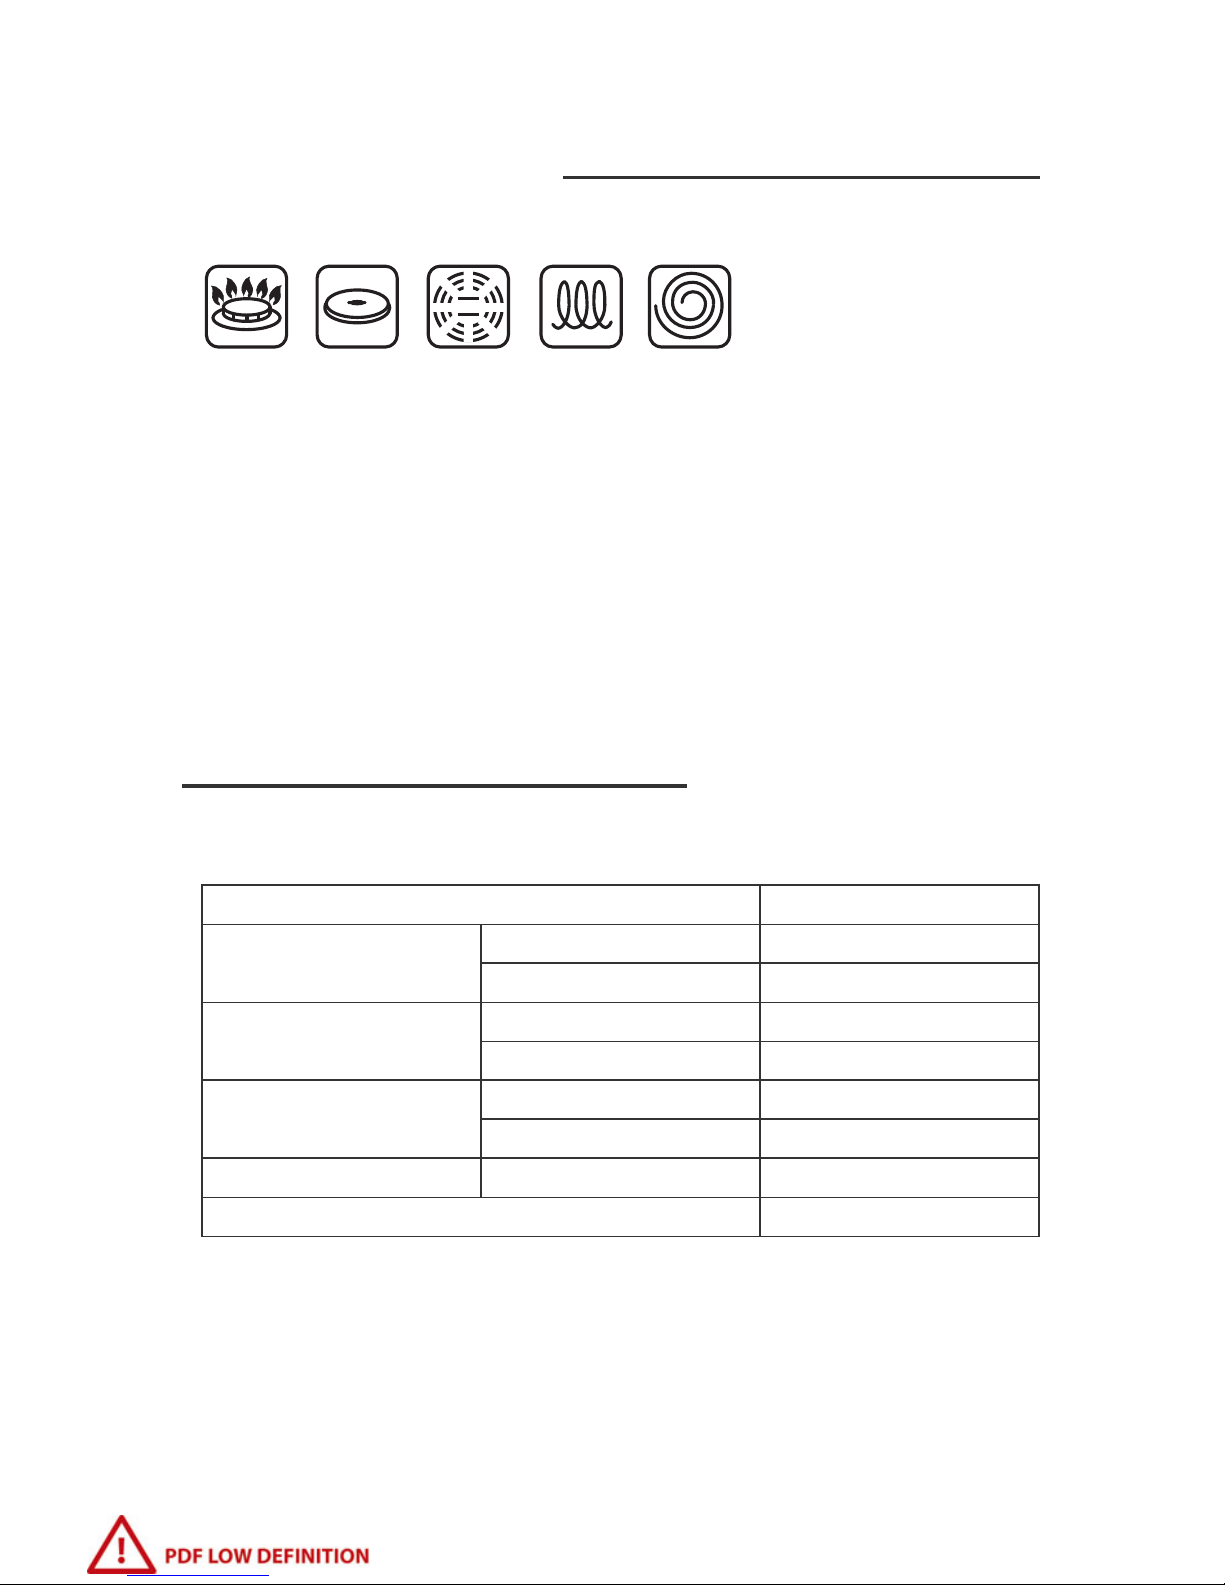
Compatible heat sources
•
Stainless steel models are suitable for all hob
types, including induction.
•
On electrical and induction stoves, use a hot plate
or hob or ring size of diameter of equal or lower
than the base of the pressure cooker.
•
On a ceramic hob, make sure that the base of the
pot is clean and dry.
•
On a gas hob, the flame should not lick out from
around the base of the pressure cooker.
•
On all sources of heat, make sure that your pressure
cooker is correctly centred.
• Not suitable for use on an Aga
TEFAL spare parts
• Commercially available accessories are:
•
To replace other parts or for repairs, contact an
TEFAL Approved Service Centre
• Use only TEFAL original parts suitable for your
model.
GAS SOLID
HOTPLATE
CERAMIC
or
HALOGEN
INDUCTION
ELECTRIC
HOTPLATE
Accessories Reference
Seal
4/6L X1010001
4,5/8/10L X1010002
Vitamin basket*
4,5/6L X1030001
8/10L X1030002
Steam basket*
4,5/6L 792185
8/10L 980513
Folding handles* 6/8/10L X1050005
Timer X1060001
3
*depending on model
Do not heat your
pot when it is
empty, as you risk
damaging your
product.
Opening
• Press the unlocking button on the side of the lid
knob; the jaws will release
- Fig 1.
• Lift the lid off.
Closing
• Place the lid over the pressure cooker, ensuring
that it is sitting correctly on the pot.
• Press down on the locking button
- Fig 2
• It is normal for the lid to be able to twist round
whilst it is locked.
• The clamps must be in contact with the edge
of the lid.
If you are unable to close the lid:
• Make sure the jaws are fully open before fitting
the lid onto the pot.
• Check good condition and correct position of
the seal.
Control module*
The control module has been designed to make cleaning your pressure
cooker easier.
• Once the lid seal and the timer* have been
removed, the pot and lid can also be put in the
dishwasher.
• The control module contains all the parts which
enable your pressure cooker to function. As
soon as it is fixed on the lid, your pressure
cooker can be used normally.
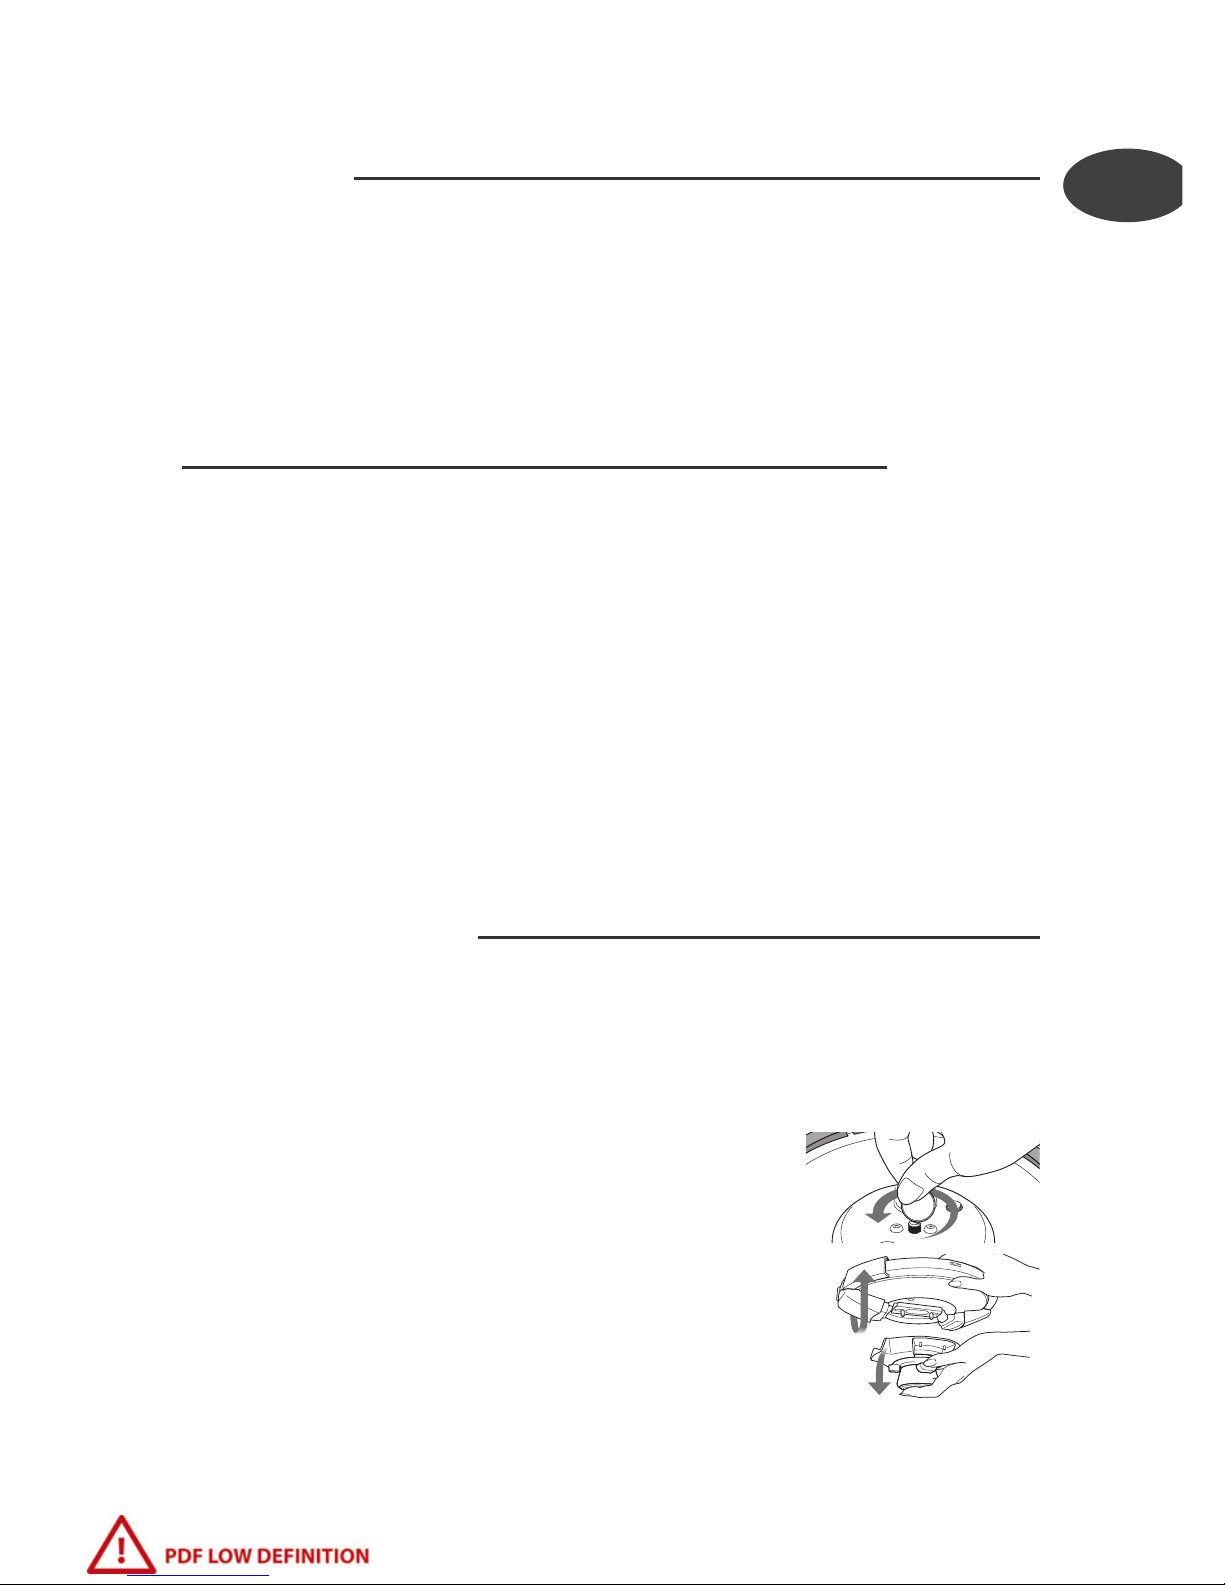
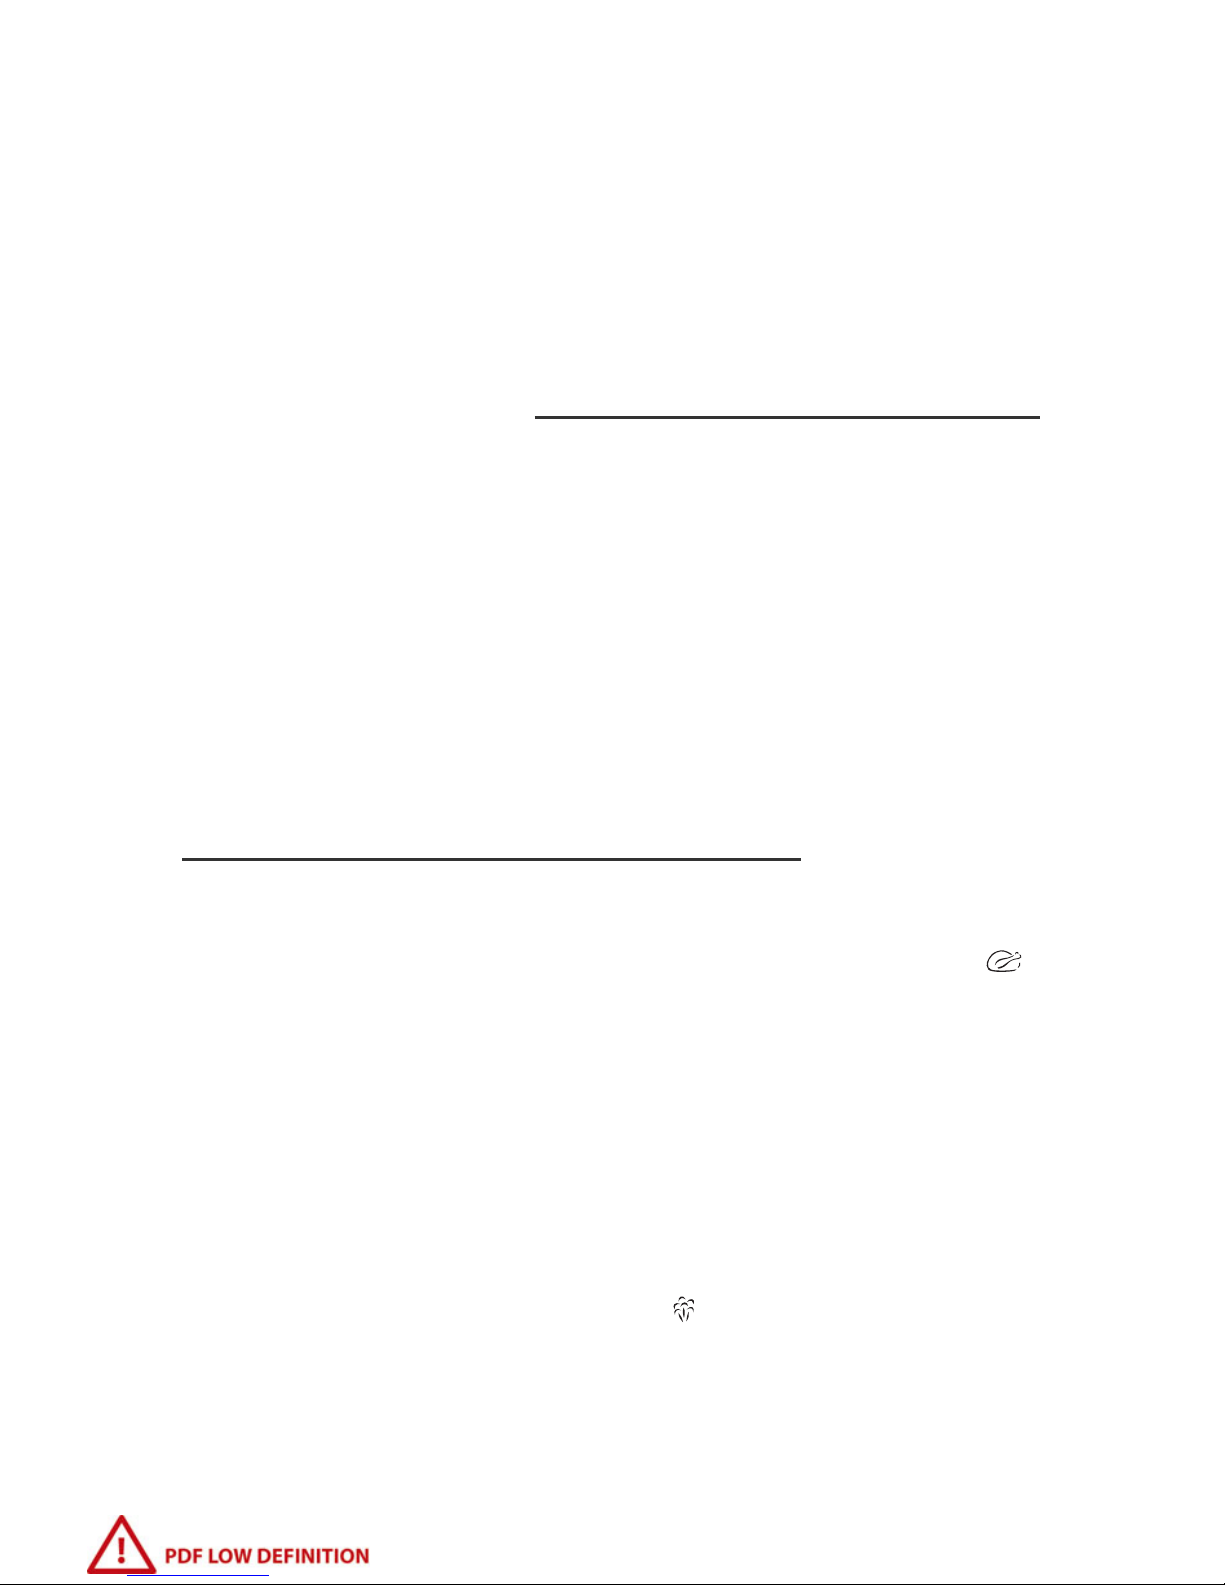
To remove the control module from the lid
• Remove the timer*
• Turn over the lid.
• Loosen the screw holding the module using a
coin, while holding the module with your other
hand.
4
*depending on model
EN
Whenever opening
and closing the lid,
the control module
must always be
fixed onto the lid.
The jaws must be
flat on the edge of
the lid.
- Fig 3.
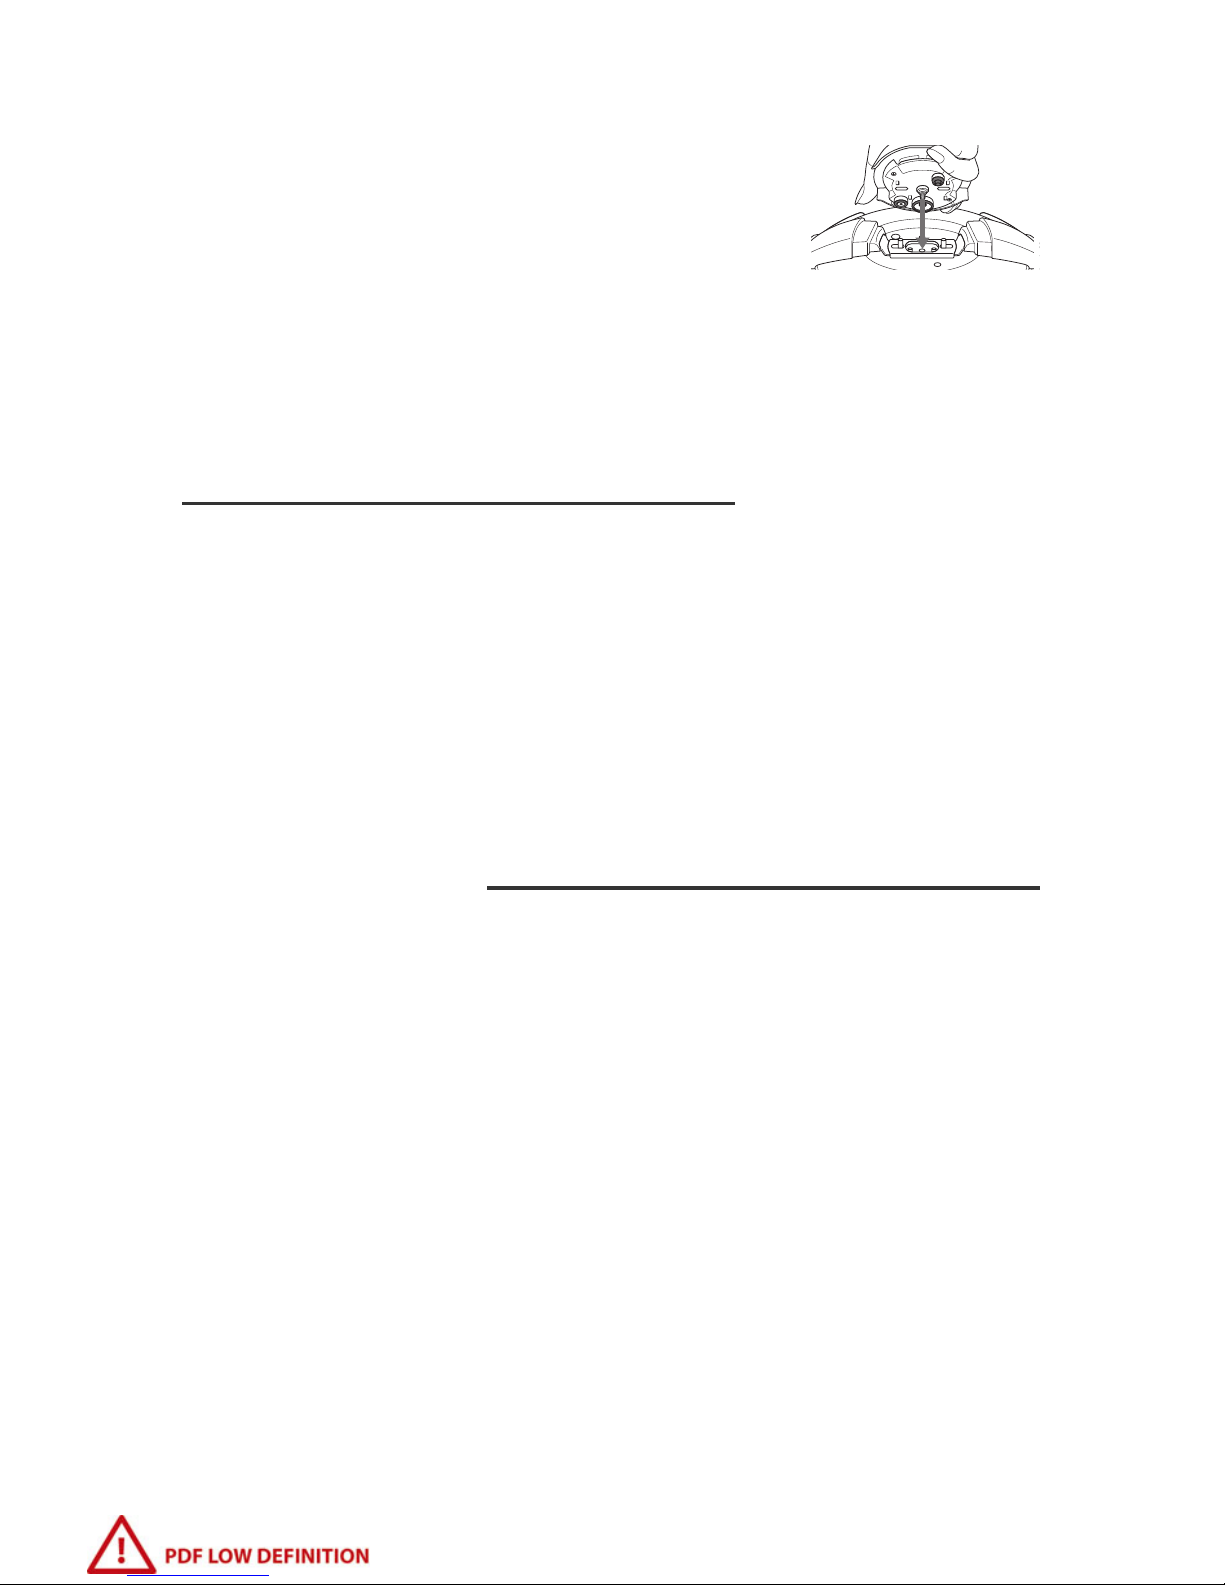
To attach the control module to the lid
• Position the module on the lid, taking care not
to press the release button and aligning the
module with the holes in the lid
• Turn them over while holding the module onto
the lid and tighten the attachment screw using
a coin.
The control module can only be fitted one way.
Minimum filling
For cooking directly in the pot
• Minimum: Always ensure you have a minimum
quantity of 250 ml (2 glasses) of liquid in the
pot
- Fig 4.
For steam cooking
• Pour 750 ml of water in to the bottom of the
pot.
• Place your vitamin / steam basket on the built-
in supports provided.
Maximum filling
• Never fill your pressure cooker beyond 2/3 of
the height of the pot
- Fig 5.
For certain foods
• For food that expands considerably during
cooking, such as rice, dehydrated vegetables or
stewed fruits, ... do not fill the pressure cooker
with contents more than half the height of the
pot.
If your pressure cooker has been heated without
any liquid in it:
• Get your pressure cooker checked by an
Approved Tefal service centre.
5
*depending on model
The foodstuffs
placed in the
Vitamin/steam
basket must not
touch the lid.

Using the Vitamin/Steam basket*
For steam cooking
You will have 1 or 2 steam baskets according to
your model.
• Place the steam basket onto the integrated
basket supports
- Fig 6.
• Pour 750 ml of water into the pressure cooker.
For models equipped with 2 rows of basket
supports
• You can simultaneously cook food at the
bottom of the cooker with at least 250 ml of
liquid, and in the steam basket placed on the
basket supports.
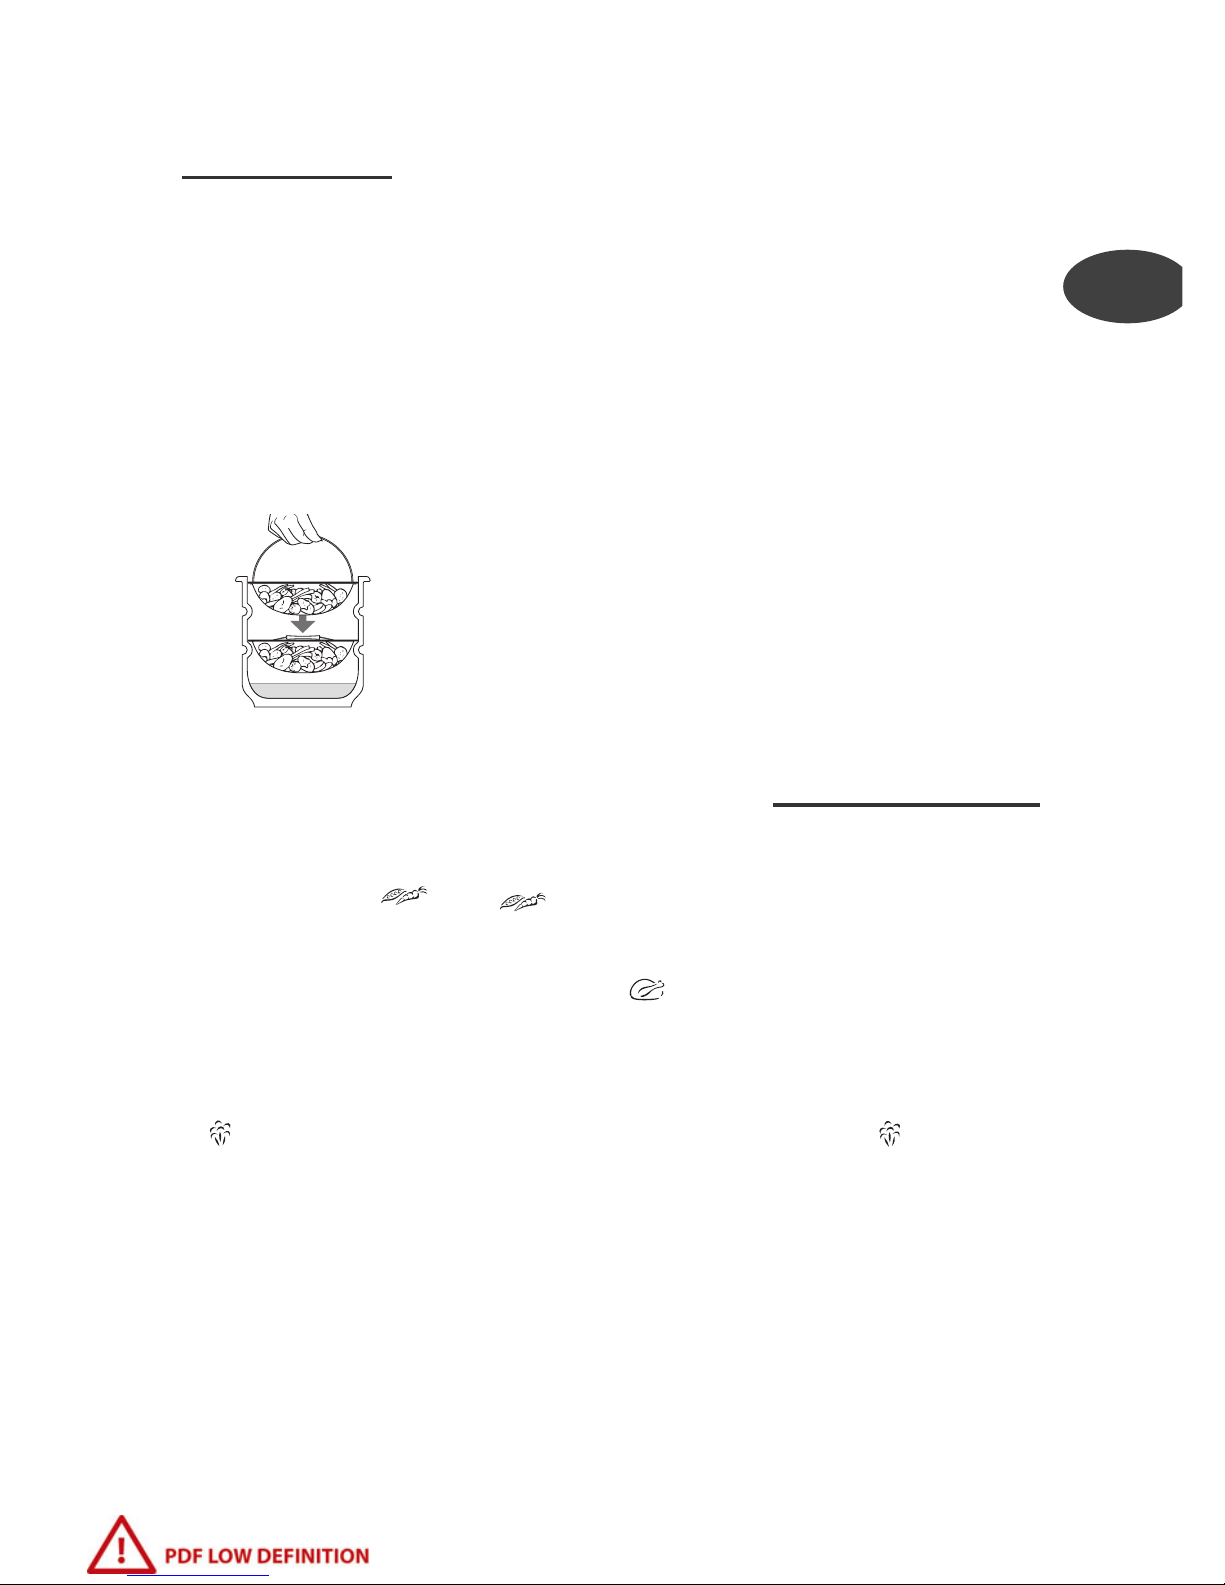
• If you have 2 vitamin/steam baskets you can
also steam two layers of food using the 2
baskets simultaneously.
• Place the first basket on the lower level by tilting
the basket slightly on its side.
• Then place the second basket onto the higher
level.
Using the pressure selector
In order to keep as many of the vitamins in
when cooking the food
• Position the selector on or *.
For cooking meat and fish
• Position the pressure selector on .
To release the steam
• Remove the timer*.
• Gradually move the pressure selector to
- Fig 7.
• You can also release the pressure by placing the
pressure cooker under cold running tap water.
Aim the running water on to the metal part of
the lid.
v
i
t
a
m
i
n
6
*depending on model
EN
Turn the pressure
cooker so that the
unlocking button is
facing you.
The steam is very
hot when it comes
out of the
operating valve.
The heating source
must be turned off
when the selector is
in the position.
Remove the timer*
before placing
under running
water.
The foodstuffs
placed in the
Vitamin/steam
basket must not
touch the lid.

Electronic timer*
Depending on model, your Clipso Control is fitted with a timer which
automatically records the cooking time once the temperature level
corresponding to the position of the pressure selector has been reached.
Using the timer*
• Fit the timer - Fig 8
• To turn the timer on, press either (+) or (–) button.
• To set the cooking time (maximum of 59
minutes) press the (+) or (–) button
- Fig 9.
• Hold down the button to move along more
quickly.
• When the cooking time is set, the OK indicator is
displayed on the screen after a few seconds
.
• The timer starts as soon as the right pressure
level and temperature is reached. A short series
of beeps inform you when it starts
- Fig 10.
• Once countdown has started, you can remove the
timer from the pressure cooker.
• The starting of the timer is not triggered by the
release of steam via the steam release outlet:
depending on the amount of food in the cooker
and the heat source used, the timer may start
before or after the steam release.
• You are able to increase or reduce the cooking
time on the timer at any time, even during
countdown, by simply pressing the + (to increase)
or – (to reduce) button.
• At the end of cooking: when the time has finished
counting down, the timer will go off making a
sound. To stop the bell ringing, press either the
(+ ) or (–) button once.
• The timer switches off automatically.
• Removal: press the front of the timer to release
it and then remove it.
7
*depending on model
Cooking times are
programmed in
minutes.
Don’t forget to
turn down the heat
once there is a
continual release of
steam from the
steam release
outlet.
Your Clipso Control
can also operate
without its timer.
You may encounter the following situations:
• If you start hearing regular beeps and the time
starts flashing, this means that the timer must
be attached onto the module. The symbol OK
should then appear.
• Your timer is programmed but you don’t want
to use it any more: the pressure cooker stops
automatically after an hour or you can stop it
manually by pushing the + and – buttons
simultaneously.
• The timer is fragile and may become damaged
if it falls or if pressure is applied to the screen.
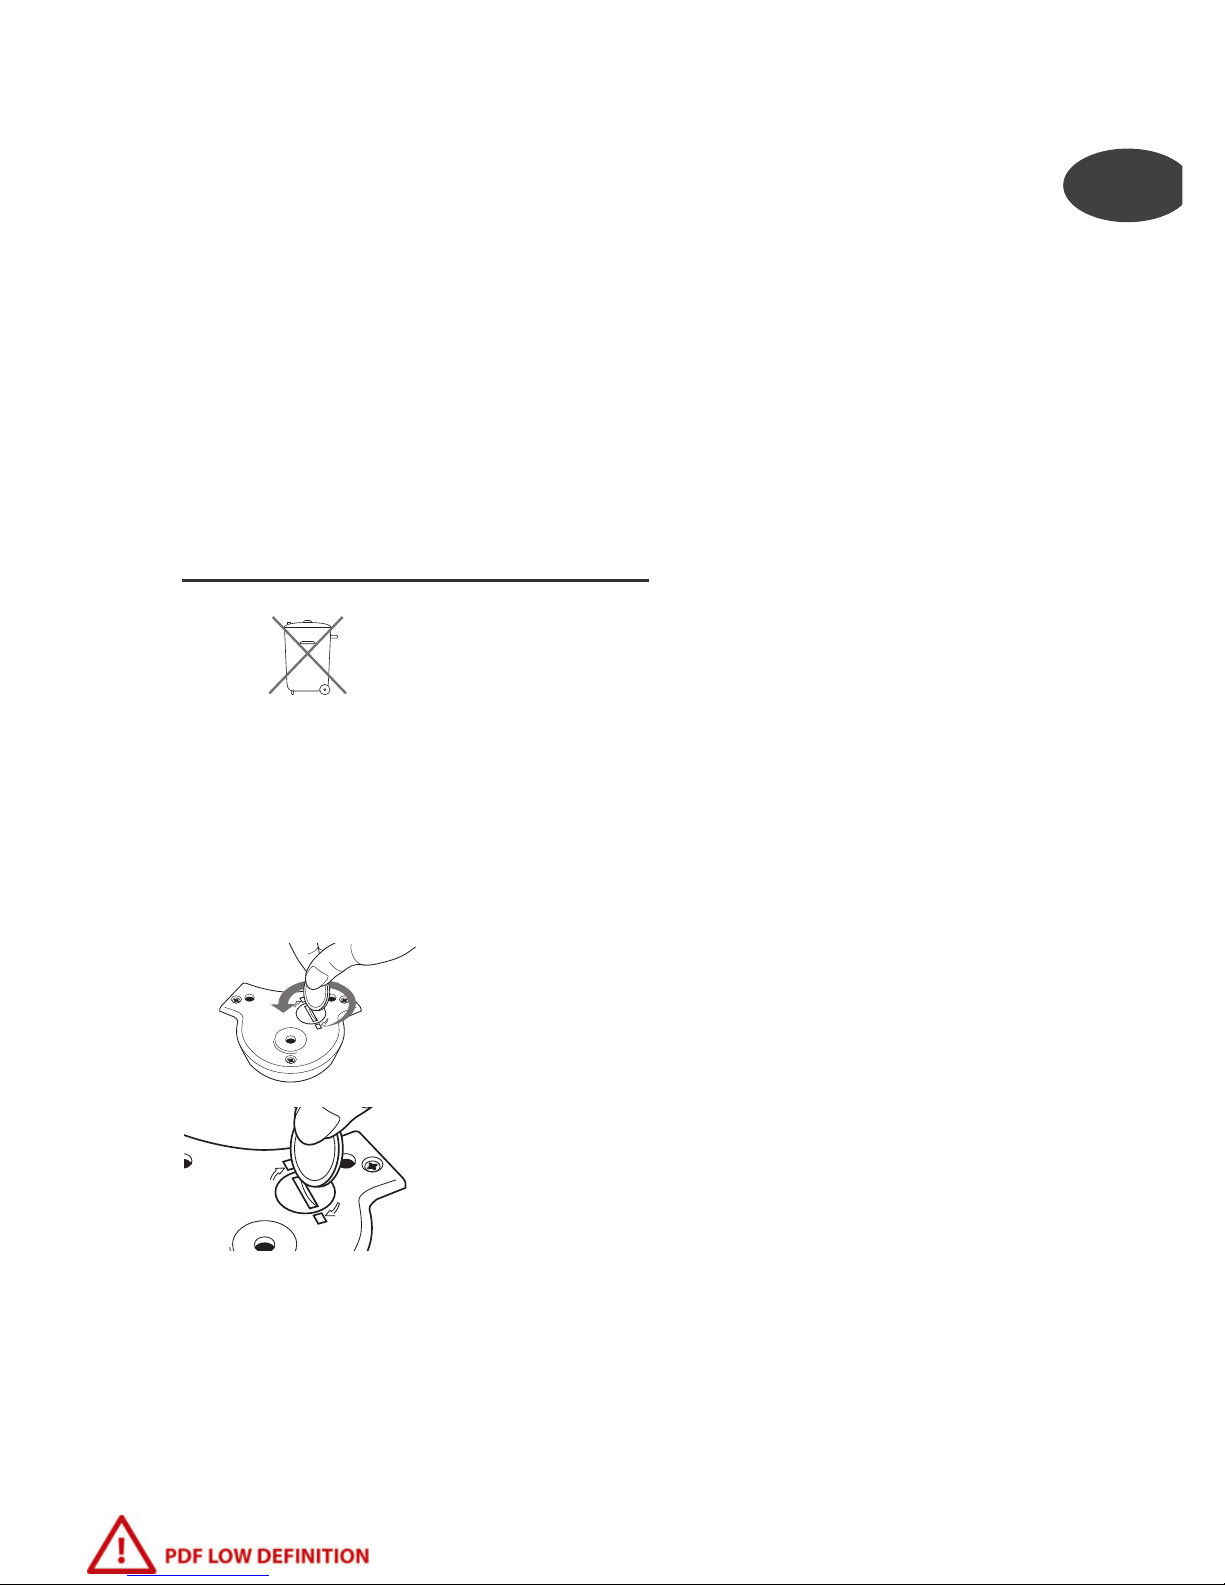
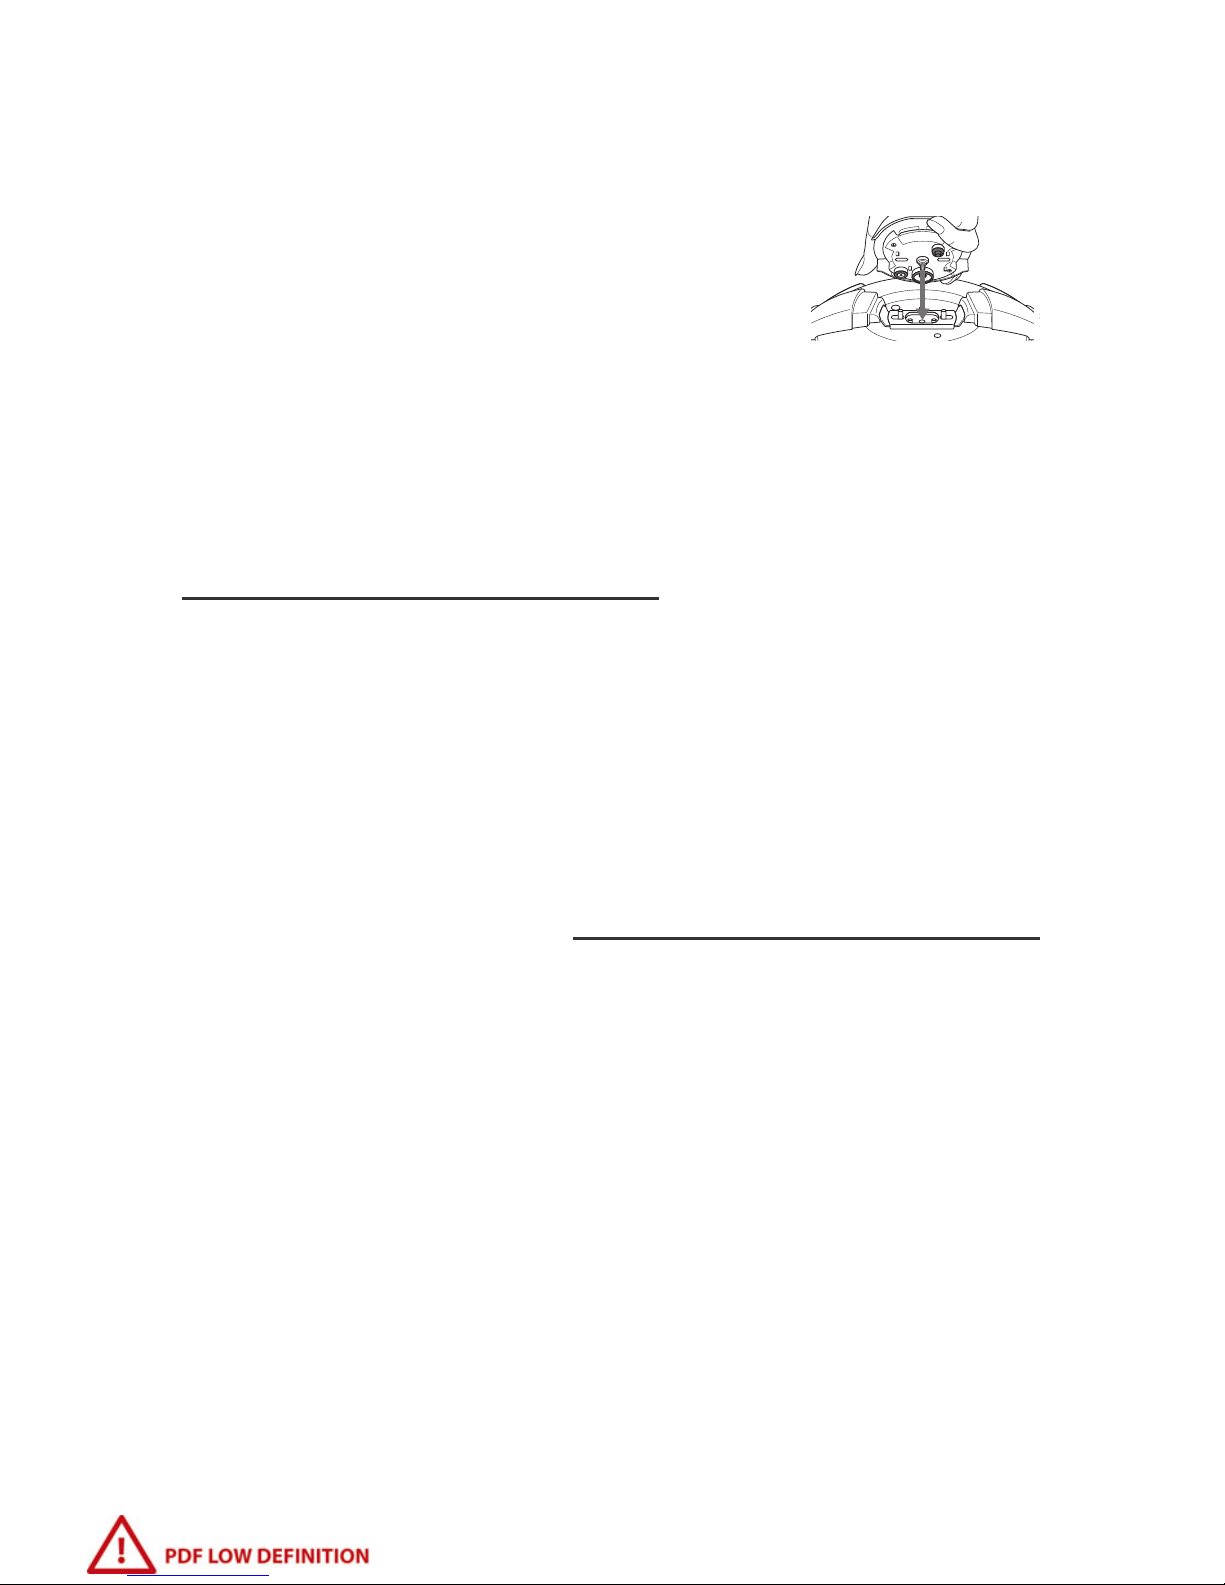
Battery Replacement
The lifetime of the battery depends on timer
usage frequency. However, you should replace
the battery when you notice total or partial loss
of display.
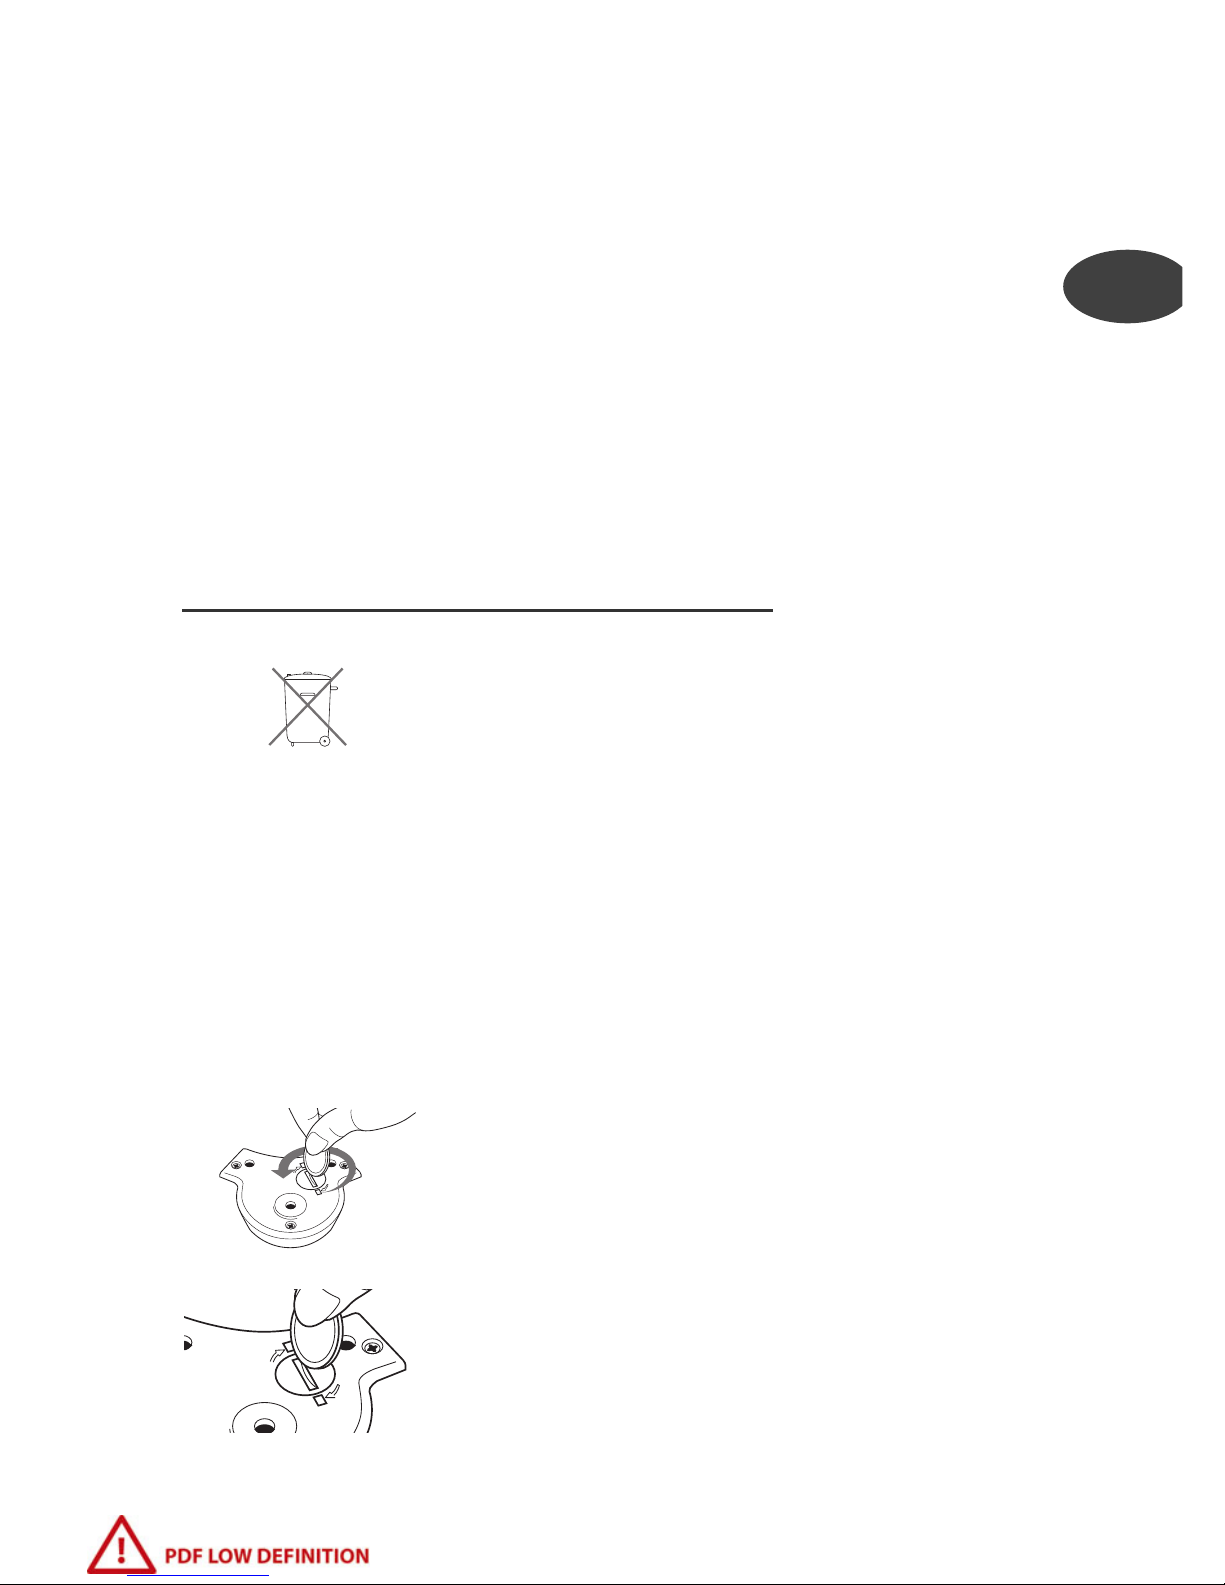
• In order to help to protect the environment,
remove the used battery. Do not throw it away
with the household waste, but dispose of it at
a local civic collection centre. The battery of the
timer is a button-type manganese alkaline
battery. It contains mercury. It complies with
European regulations.
• You can have the timer battery ref LR 54
(1131) replaced by an authorised service
dealer.
• To remove the battery from your timer , open
the battery cap as shown in the diagram
opposite.
• Gently close the battery cap, but don’t force it
beyond the stop blocks as shown in the diagram
opposite.
Recommendations for use
• Do not force the battery cap when you close it.
• Should you lose the timer, you can obtain
another one from any of our TEFAL Approved
Service Centres.
8
*depending on model
EN
Hg
Never place the
timer in water,
or in the
dishwasher.
Folding handles*
Before use, remove the stickers from each of
the handles.
To fold back the handles
• Press the handle release buttons
- Fig 11
• The “handles folded” position is only used to
store the pressure cooker.
To place the handles in their working position
• Raise the handles until you hear them “click”
into position.
Using your pressure cooker
for the first time
• Fill the pressure cooker up to 2/3 full with water.
• Close the lid on the pressure cooker.
• Turn the selector so that it is on .
• Put the pressure cooker on the heat source at
the highest temperature.
• Set the timer for 15 minutes (see chapter on
Electronic timer)*.
• When steam starts to release from the outlet,
lower the heat source.
• For models not fitted with a timer, allow
15 minutes.
• After 15 minutes, turn off the heat.
• Remove the timer*.
• Gradually position the programme selector
to .
• When no more steam escapes from the steam
outlet and the pressure indicator is down, open
the pressure cooker.
• Remove the timer from its holder.*
• Rinse out the pressure cooker under running
water and dry it.
• Clean the basket with warm water and washing
up liquid.
9
*depending on model
Turn the pressure
cooker so that the
unlocking button is
facing you.
Do not attempt to
fold the handles
without pressing
the release buttons.
Do not place your
pressure cooker on
a source of heat
with its handles
folded
- Fig 12

• Note: the appearance of marks/stains on the
interior base of the pressure cooker does not
alter the quality of the metal. It is merely due
to calcium deposits. To remove these, use a
scouring pad and some diluted white vinegar.
Use
Before cooking
• Before each use, check that the control module
is correctly fastened (retaining nut is tightened);
you can use a coin if necessary.
• Before each use, check that the operating valve
(selector at position or * or ) ) and
the safety valve inside the lid can move freely
- Fig 13
• Close the lid.
• Set the programme selector to the position
indicated in your recipe.
• Set the timer for the required cooking time.*
• Put the pressure cooker on the heat source at
the highest temperature.
• It is perfectly normal to see steam being
released through the pressure indicator outlet
before the pressure starts to increase. Water
droplets may appear in the area around the
pressure indicator.
• As soon as the pressure indicator comes up ,
you will no longer be able to open your pressure
cooker.
v
i
t
a
m
i
n
10
*depending on model
EN
Turn the pressure
cooker so that the
unlocking button is
facing you.
Never use the lid
with the pressure
selector on
If the heating
source is on.

During cooking
• Cooking starts when steam escapes in a steady
flow from the outlet with a regular hissing
sound. Lower the heat.
• For models fitted with a timer, the cooking time
countdown is triggered automatically, by
emitting a beep. You can then take the timer
with you.
• As soon as the cooking time has come to an
end, turn off the heat source.
• For models fitted with a timer, your timer alerts
you with a sound signal that the cooking time
has finished. Turn off the source of heat and
press the (+) or (–) button to stop the timer bell
ringing.
End of cooking
• Remove the timer*.
• To release the steam
• After the heat has been turned off you have
two alternatives:
• Slow pressure release: gradually turn the
programme selector to the steam position .
• Fast pressure release:
• Place the pressure cooker under a cold running
tap, directing the flow onto the metal part of
the lid.
- Fig 14.
11
*depending on model
As with all cooking
appliances, make
sure you properly
supervise the
cooking area if
children or certain
disabled persons
are close by.
Be careful, as the
steam, which is released, is very hot.
If you notice unusual release of pressure during decompression: turn the
selector to position
or * then
repeat the decompression procedure
slowly, making sure
that the pressure
has released normally.
v
i
t
a
m
i
n

• When the pressure indicator is down in the
normal position, all pressure has been released
from the pressure cooker.
• You can then open the pressure cooker.
To move/lift the pressure cooker use the side
handles on the pot. Never use the lid knob to
move or lift it.
Cleaning and Maintenance
• Wash your cooker after each use.
• For the models fitted with folding pan handles,
we recommend cleaning the pressure cooker
with the handles folded.
• Never use bleach or chlorine based products to
clean your pressure cooker as these damage the
quality of stainless steel.
Dishwasher cleaning
• You can wash the pot and the basket in the
dishwasher.
• You can also put the lid into the dishwasher, on
the condition that you have removed the timer*
and the seal for the lid.
Cleaning by hand
• Wash your pot and basket in warm water with
a little washing-up liquid. You can use a
scouring pad on the inside.
• Remove the seal from the lid and clean it in
warm water with a little washing-up liquid.
• Clean your lid under water with a sponge and
washing-up liquid.
• Let the lid drip dry after cleaning.
If the appearance of your pot has changed:
• It is blackened: you can clean it with a special
stainless steel cleaning substance on sale at
your Approved TEFAL Service Centre.
12
*depending on model
EN
Remove the timer
before cleaning the
pressure cooker*.
Do not leave food
standing in your
pressure cooker.
Never put the
timer* or the seal
into the
dishwasher.
Don’t leave the lid
to soak in water if
the control module
is still attached.
For a few seconds,
steam escapes
through this outlet:
do not run your
hand over it.

• There are rainbow-coloured glints on it: clean it
with commercially available white vinegar,
available from hardware stores, or with a
special stainless steel cleaning substance.
Putting the control module in place
(see chapter on control module)
Re-fitting the seal
• For better visibility, this operation must be
carried out with the lid in the open position, i.e.:
with the jaws open
- Fig 15.
• To ensure a perfect seal, make sure the seal slips
fully under each tab
- Fig 16 by pressing and
pushing it with your finger towards the edge of
the lid.
When storing your pressure cooker
• Turn the lid over on the pan, so that it is in a
stable position
- Fig 17a or - Fig 17b.
Cleaning the control module
• Remove the control module from the lid.
• Check visually and in plain daylight that the
steam outlet is not blocked. If it is blocked,
clean it using a cotton-bud, then rinse it under
water
- Fig 18.
• Wash the control module under running water
- Fig 19.
• Check that the operation device can move
freely.
• Check the mobility of the operating valve
(selector to position or * or )
- Fig
13.
• You can also put the control module in the
dishwasher.
• Check that the module seals are correctly
fitted.
• If these seals are missing or damaged, leaks
can occur underneath the module during the
pressure cooking operation. The shape of the
seals has been specially designed for easy
removal and re-fitting. Seals can be purchased
from TEFAL Approved Service Centres.
v
i
t
a
m
i
n
13
*depending on model
Change the lid seal
once a year.
ave your pressure
cooker checked at a
TEFAL Approved
Service Centre after
10 years of use.
Never open the
control module.
Don’t forget to remove the timer.*
Do not use any
sharp or pointed
objects to carry out
operating and
safety checks.

Cleaning the timer
• Clean it with a soft, dry cloth.
• Do not use solvent for cleaning the timer.
Safety
Your Clipso pressure cooker has several systems to guarantee that your
appliance will work in complete safety.
Safety when closing
• The jaws must be in contact with the edge of
the lid
- Fig 3. If this is not the case, it means
that there is a leak around the pressure
indicator and the pressure cooker cannot gain
pressure .
Safety when opening
• If the pressure cooker is under pressure, the
open button cannot be activated because the
mechanism is locked by the pressure indicator.
• In this case, do not try to force it open, but
move the selector to and wait for the
pressure to disappear completely.
• Check the position of the pressure indicator . It
must be in the low position to be opened.
Safety when there is excess pressure
• When the appliance is operating, if the steam
release outlet gets blocked , the excess pressure
safety systems swing into action :
• First device: The safety valve releases the
pressure and the steam escapes from under the
control module
- Fig 20a
• Second device: steam flows from between the
lid and the pot
- Fig 20b
If one of these security devices is set off:
• Turn off the heat source.
• Let the pressure cooker cool down.
• Open the cooker.
• Check and clean the operation valve, steam
release outlet, safety valve and seal.
14
*depending on model
EN

Guarantee
• Your new TEFAL pressure cooker comes with a
ten-year guarantee for use under the
conditions set out in these instructions. This
guarantee covers:
- Any defects relating to the metal structure
of the pressure cookebody,
- Any premature deterioration of the metal
base.
• For other parts, a one year parts and labour
guarantee is provided (except where applicable law in your own country states otherwise).
This guarantee covers any defects or manufacturing faults.
• The contractual guarantee cover is provided
only on presentation of a valid proof of purchase which shows the date of purchase.
• The guarantee cover excludes:
• The normal life of the seal, pressure control
valve or locking indicator seal is limited. These
parts are excluded from the guarantee and
will require periodic renewal.
• Any damage consecutive to a failure to follow
the major recommendations made or due to
negligent use, especially:
- Dropping, falls, bangs or knocks, placing in
an oven…
• Only TEFAL Approved Service Centres are authorised to provide service under guarantee.
• Please call the Helpline number below for the
address of your nearest TEFAL Approved Service Center.
If you have any problems or queries please call
our Customer Relations team first for expert
help and advice:
0845 602 1454 - UK
(01) 67 4003 - ROI
or consult our web site: www.tefal.co.uk
15
*depending on model
16
*depending on model
EN
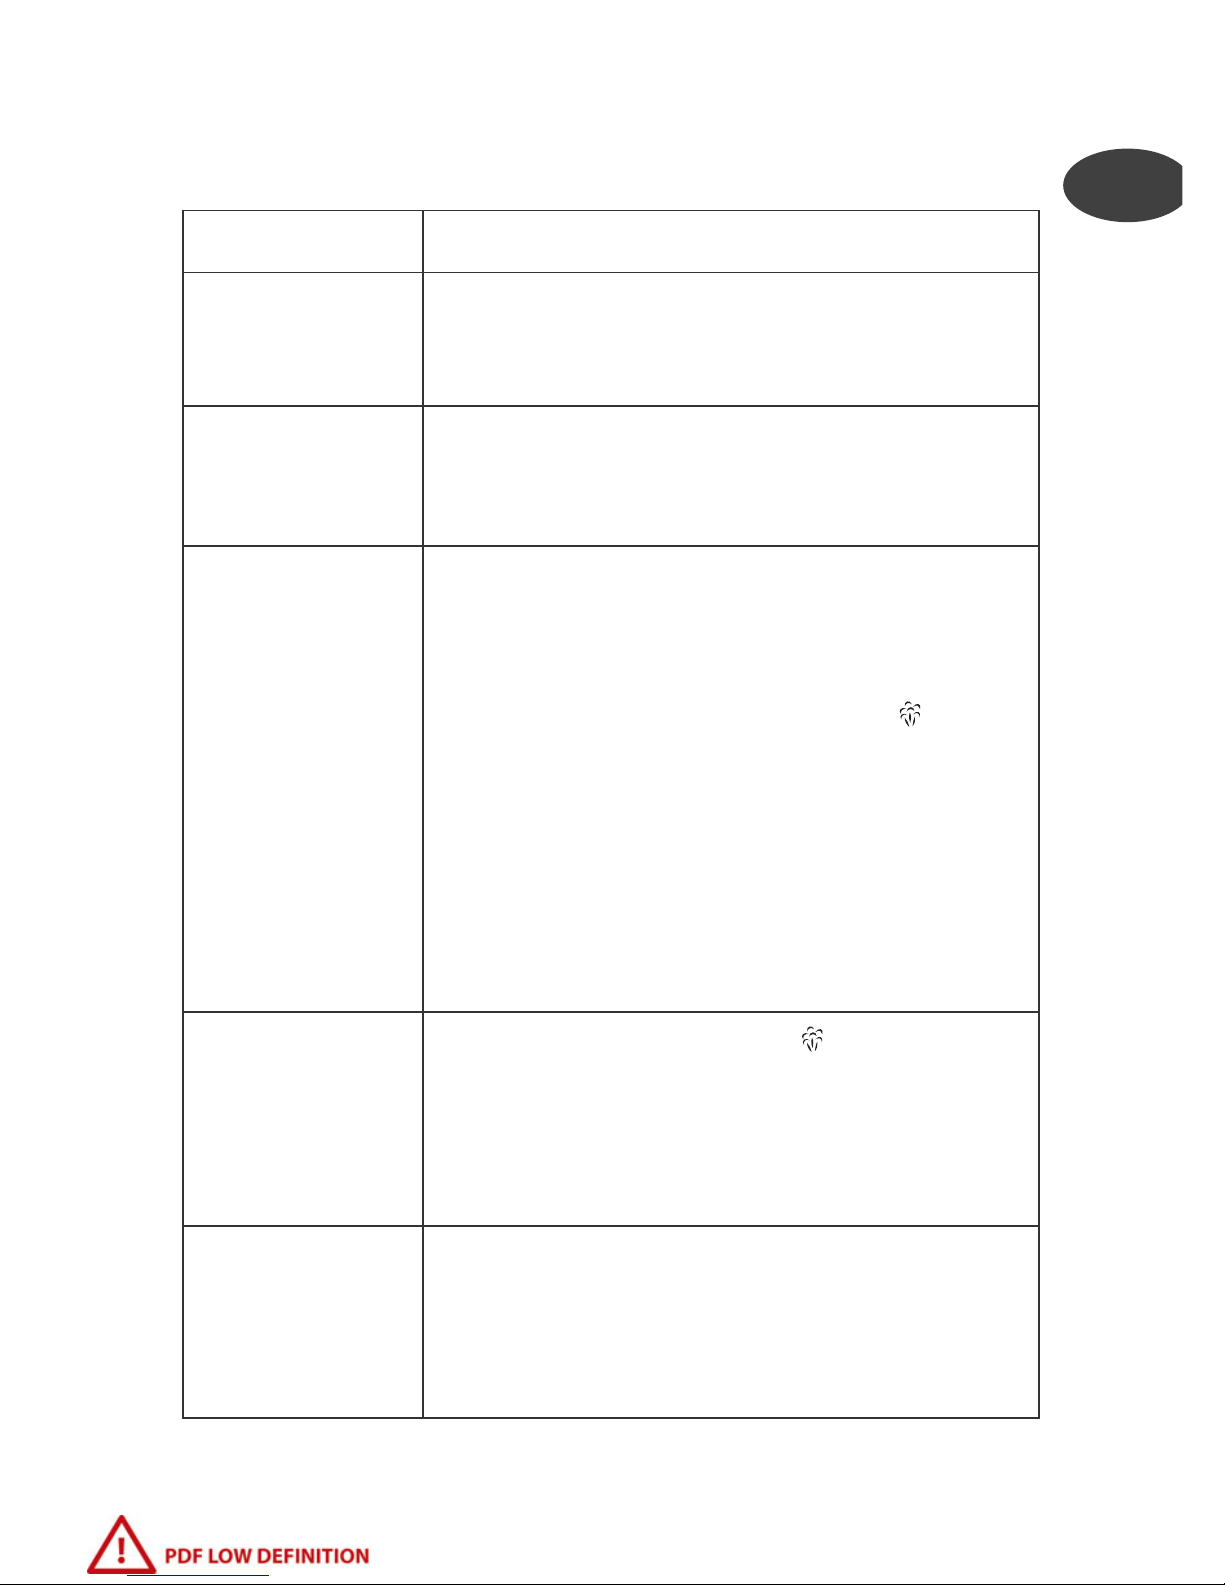
TEFAL answers your questions
Problems Recommandations
I cannot close the
lid:
• Make sure the jaws are fully open before fitting the
lid onto the pot.
• Check good condition and correct position of the
seal.
If your pressure
cooker has been
heated without
any liquid in it:
•Have it checked at a TEFAL Approved Service Centre.
If the pressure indicator does not
rise:
• This is normal for the first few minutes
• If the problem continues, check that:
- There is enough liquid inside the pan.
- The source of heat is high enough; if not, increase
the heat.
- The pressure selector is not turned to .
- The pressure cooker is closed properly.
- The control module is screwed in properly.
- The clamps must be in contact with the edge of
the lid.
- The seal for the lid is positioned correctly.
- The seal is clean and in good condition; change it
if required.
- Check the cleanness and the mobility of the pressure indicator.
The pressure indicator has lifted up
and no steam escapes from the release outlet during
cooking:
• Set the programme selector to :
- If no steam escapes, put your pressure cooker under
cold water to release the steam, then clean the operating valve and release outlet.
- If steam escapes, the pressure level has not been reached yet: set the selector back to the initial position.
If steam escapes
from around the
control module:
check:
• The control module is sufficiently screwed on.
• Good condition and correct installation of the seals
on the operating and safety valves.
17
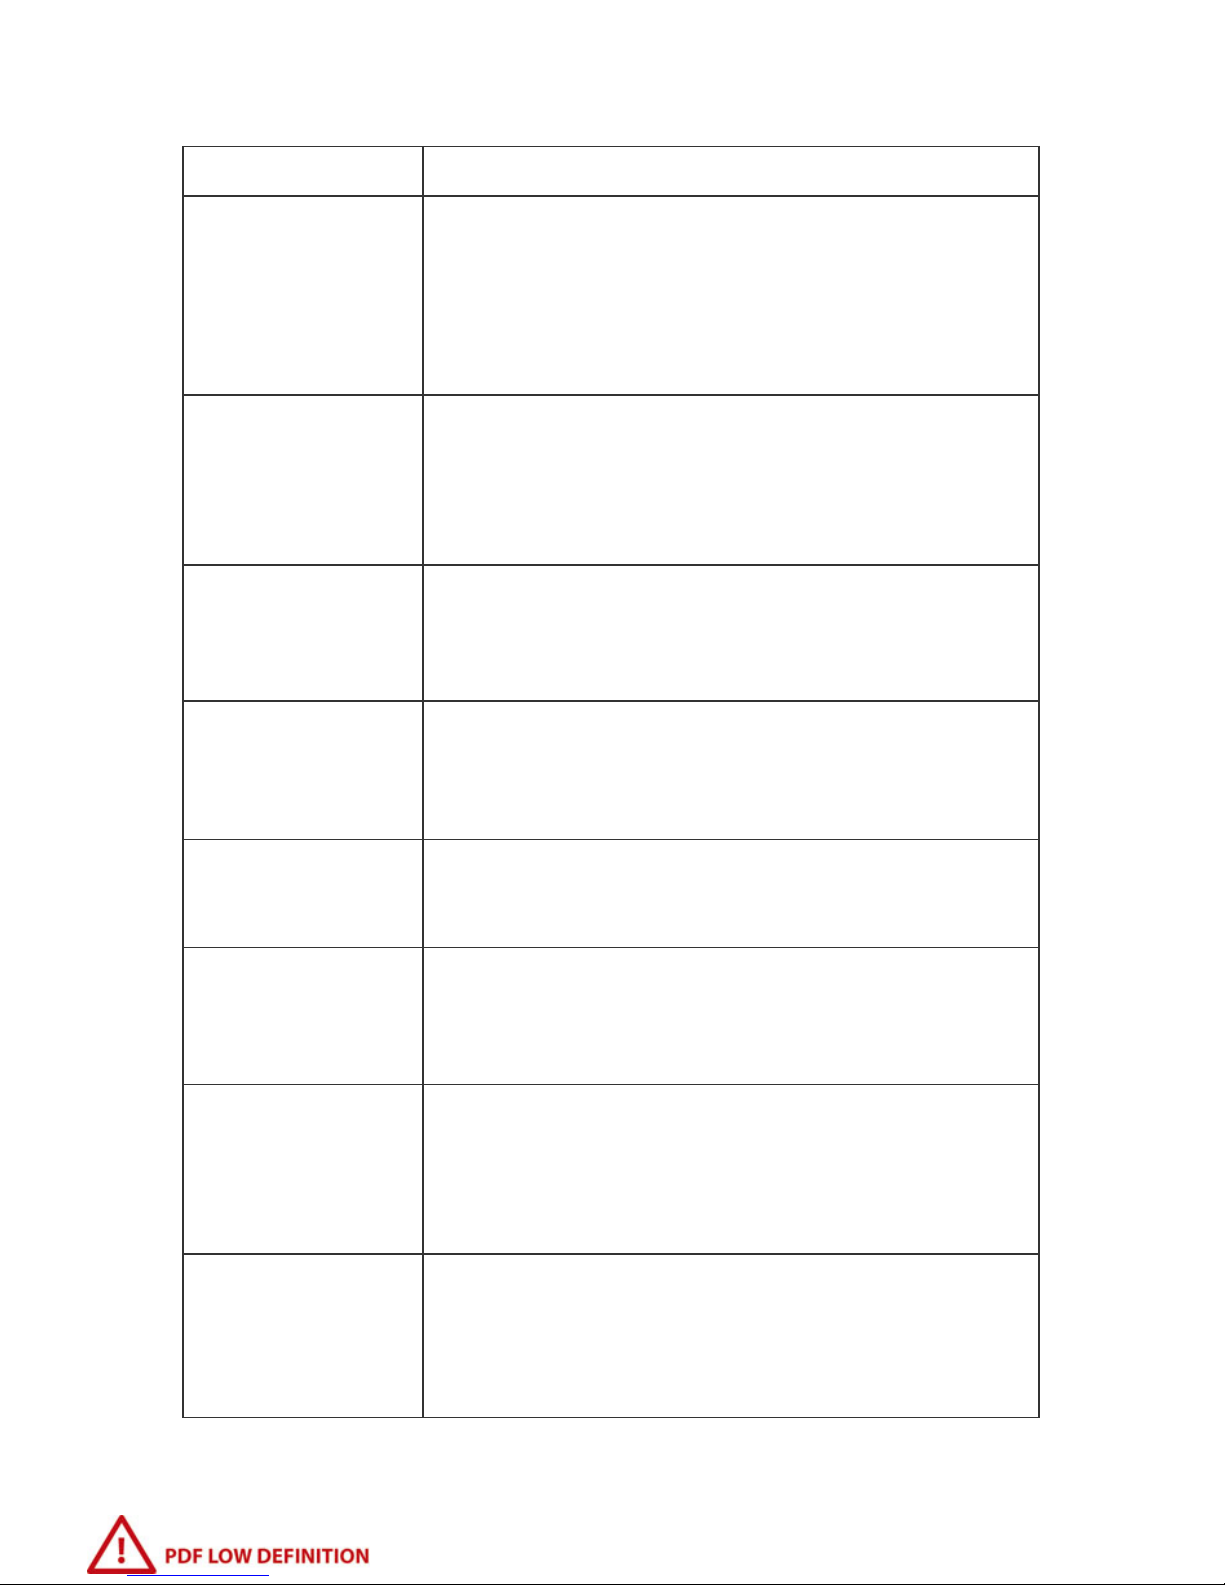
Problems Recommandations
Steam is leaking
around the lid:
check:
• The lid closes correctly.
• The seal is correctly fitted onto the lid.
• The seal is clean and not damaged. Replace it if necessary.
• Lid, safety valve and operating valve are clean.
• The edge of the pot is not damaged.
If one of the security devices is activated (safety valve
or seal):
• Turn off the heat source immediately.
• Let the pressure cooker cool down.
• Open the cooker.
• Check and clean the operating valve, steam release
outlet, safety valve and seal.
I cannot open the
lid:
• Check that the pressure indicator is in the low position.
• If not: release the steam from the pressure cooker
by cooling it under cold running water, if necessary.
If the food is burnt
or undercooked,
check:
• The cooking time.
• The heat source.
• That the programme selector is on the correct setting.
• The quantity of liquid.
If food has burnt
in the pot:
• Leave the pot to soak before cleaning it.
• Never use bleach or chlorine based products to clean
it.
If regular beeps are
being emitted and
the cooking time is
flashing:
• Check that the timer has been properly put in place
on the control module.
If you cannot put
the handles into
the working
position: check
that:
• The release button is not jammed.
• If the problem persists, have your pressure cooker
checked by an approved TEFAL Service Centre.
If you cannot fold
back the handles:
do not force them.
Check
• That you have pressed the handle release buttons
in completely.
• If the problem persists, have your pressure cooker
checked by an approved TEFAL Service Centre.
*depending on model
Regulatory markings
Recommendations for use
1 - The steam is very hot when it comes out of
the operating valve.
2 - Do not try to force open your appliance, but
make sure that the pressure indicator (S) is
in the low position.
3 - As for any cooking appliance, keep a close
eye on it if there are children nearby.
4 - Danger ! Beware of steam jets.
5 - Use the two pot handles when moving the
pressure cooker.
6 - Do not leave food in your pressure cooker
longer than is necessary.
7 - Never use bleach or any chlorinated subs-
tance, as these may cause damage to the
stainless steel.
8 - Do not leave the lid in water.
9 - Change the seal every year.
10 - Your pressure cooker must only be cleaned
when the appliance has completely cooled
down and is empty.
11 - You must have your pressure checked by an
Approved TEFAL Service Centre after 10
years of use.
18
*depending on model
EN
Marking Location
Identification of the manufacturer
or brand
Close button.
Manufacture year and batch
Model reference
Maximum safety pressure (PS)
Upper operating pressure (PF)
On the top edge of the
lid, visible when the lid is
in the “open” position.
Capacity
On the outside bottom of
the pot.

19
*modele göre
Tanımlayıcı şema
• Güvenliğiniz açısından, bu cihaz aşağıda belirtilen hususlara yönelik normlar ve resmi
düzenlemelere uygun olarak üretilmiştir.
- Basınç altındaki Donanımlara ilişkin Direktif
- Besinlerle temas halinde olan maddelere ilişkin direktif
- Çevre korumasına ilişkin direktif
• Bu cihaz ev içi kulanım için tasarlanmıştır.
• Bütün talimatları okumaya zaman ayırın ve "Kullanım Talimatlarını" inceleyin.
• Her türlü pişirme cihazı için olduğu gibi, düdüklü tencereyi çocukların veya engelli
kişilerin yakınında kullanıyorsanız gözetimsiz bırakmayın.
• Düdüklü tencerenizi sıcak bir fırına sokmayın.
• Düdüklü tencerenizi taşırken son derece dikkat edin. Sıcak yüzeylere dokunmayın
(Özellikle de metal parçalara). Tutacakları kullanın. Gerekirse, eldiven kullanın.
• Düdüklü tencerenizi kullanım amacı dışında hiçbir şekilde kullanmayın.
• Düdüklü tencereniz basınç altında pişirir. Uygunsuz kullanım, haşlanarak
yaralanmalara neden olabilir. Kullanmaya başlamadan önce, düdüklü tencerenizin
doğru bir şekilde kapatılmış olduğundan emin olun. “Kapama” paragrafına bkz.
• Düdüklü tencerenizi asla zorlayarak açmayın. İçindeki basıncın düştüğünden emin
olun. “Güvenlik” paragrafına bkz.
• Düdüklü tencerenizi, içinde sıvı olmadan asla kullanmayın; ciddi şekilde hasar
görmesine neden olabilirsiniz. Pişirme işlemi sırasında, düdüklü tencereniz içinde
yeterli miktarda su olduğundan daima emin olun.
• Uygun ısı kaynaklarını kullanın.
• Düdüklü tencerenizi, 2/3 oranından fazla doldurmayın (maksimum doluluk çizgisi).
• Düdüklü tencereniz içinde, asla süt ve sütten yapılmış besinler pişirmeyin.
• Pirinç, kurutulmuş sebzeler veya kompostolar gibi pişirme esnasinda genleşen
gıdalar için, düdüklü tencerenizin yarıdan fazlasını doldurmayın.
• Basıncın etkisiyle şişme riski bulunan, dış deriye sahip etleri pişirdikten sonra (örneğin
dana dili…), deri şişkinliğini koruduğu müddetçe sivri herhangi bir şey batırmayın,
aksi halde haşlanabilirsiniz. Eti, pişirmeden önce delmenizi tavsiye ederiz.
• Kalın dokulu gıdaları pişirirken (kırık bezelye, ravent, kompostolar...) dışarı
sıçramamaları için kapağını açmadan önce düdüklü tencere hafifçe sallanmalıdır.
• Her kullanım öncesinde, supapların tıkalı olmadıklarını kontrol edin. “Kullanım öncesi”
paragrafına bkz.
• Düdüklü tencerenizi sıvı yağ ile basınç altında kızartma yapmak için kullanmayın.
• Talimatlara uygun temizlik ve bakim yapmak dışında, güvenlik sistemlerine
müdahale etmeyin.
• Yalnızca modelinizle uyumlu orijinal TEFAL yedek parçaları kullanın. Özellikle, TEFAL
marka bir tava ve kapak kullanın.
• Pişirme öncesinde ve sonrasında düdüklü tencerenizde asitli veya tuzlu besinleri
Muhafaza etmeyin.
• Düdüklü tencerenizi açmadan önce, supabın buhar çıkış (basınçsız) konumunda
olduğundan emin olun.
• Hiçbir zaman düdüklü tencerenizi katlanmış saplarla* bir ısı kaynağı üzerine
yerleştirmeyin.
Bu talimatları saklayın
20
TR
Tanımlayıcı şema
Özellikler
Düdüklü tencere taban çapı
Standart bilgileri :
İşleyiş basıncı : 80 kPa.
Maksimum işleyiş basıncı : 140 kPa.
*modele göre
A-
Akıllı kontrol saati*
B-
Açma kapama düğmesi
C-
Kapak kulbu
D-
Pişirme programı seçici
E-
Açma düğmesi
F-
Kontrol modülü
G-
Kilit mekanizması
H-
Paslanmaz çelik kapak
I-
Modül tespit somunu
J-
Kapak lastiği (conta)
K-
Vitamin Sepeti*
L-
Buhar sepeti*
M-
Sabit saplar*
N-
Entegre sepet destekleri
O-
Paslanmaz çelik tencere
P-
Sap katlama düğmesi*
Q-
Katlanabilir saplar*
R-
Buhar çıkış noktası
S-
Basınç seviyesi göstergesi
T-
Buhar çıkış valf kilidi
U-
Buhar çıkış valfi
V-
Kontrol modülü bağlantı vidası
W-
Güvenlik valfi
Modeller
Kapasite
Kap iç
çapı
Dip
çapı
Gövde ve
kapak
malzeme
si
Clipso Clipso
Control
Clipso
Control
+
Clipso
Modulo
4,5 L 22 cm 18 cm
Paslanmaz
çelik
P41306 P41006 - -
6 L 22 cm 18 cm
Paslanmaz
çelik
- P41007 P41107 P40807
4,5 L 25 cm 20 cm
Paslanmaz
çelik
- P41012 - -
8 L 25 cm 20 cm
Paslanmaz
çelik
- P41014 P41114 P40814
10 L 25 cm 20 cm
Paslanmaz
çelik
- P41015 P41115 P40815
21
Uygun ısı kaynakları
•
Paslanmaz çelik modeller, indüksiyon da dahil
olmak üzere tüm ocaklarla kullanıma uygundur.
• Elektrikli ve indüksiyon ocaklarda, düdüklü
tencere tabanına eşit veya daha küçük çapta bir
ısı plakası kullanın.
• Vitro-seramik masa üzerinde kullanırken, tencere
tabanının temiz ve kuru olduğundan emin olun.
• Gaz üzerinde, alevler, düdüklü tencere tabanının
kenarlarından taşmamalıdır.
• Bütün ocaklar üzerinde, düdüklü tencerenizin iyi
ortalanmış olduğundan emin olun.
TEFAL Aksesuarları
• Piyasada mevcut düdüklü tencere aksesuarları
şunlardır:
• Diğer parçaların değişimi veya onarım işlemleri
için, Yetkili bir TEFAL Servisine başvurun.
• Yalnızca ürününüzün modeline uygun olan,
orijinal TEFAL aksesuarlarını kullanın.
GAZ PLAKA
ELEKTRİKLİ
SERAMİKCAM
HALOJEN
INDÜKSIYON
SPİRAL
ELEKTRİK
Aksesuarlar Referans
Conta
4/6L
X1010001
4,5/8/10L
X1010002
Vitamin Sepeti*
4,5/6L
X1030001
8/10L
X1030002
Buhar Sepeti*
4,5/6L
792185
8/10L
980513
Katlanır tutacaklar*
6/8/10L
X1050005
Sayaç X1060001
*modele göre
Tencereniz boşken
ısıtmayın,aksi
taktirde ürününüze
zarar verebilirsiniz.

22
TR
Açma
•
Kapağın yanındaki açma düğmesine basın,
kilitler açılır
- Şekil 1
•
Kapağı kaldırın.
Kapatma
• Kapağı, düdüklü tencerenin gövdesine doğru
şekilde yerleştirerek tencerenin üzerine kapatın.
• Kapak kapatma düğmesine basın - Şekil 2
• Kapalı konumda, Kapağın tencere üzerinde
serbestçe dönebilmesi normaldir.
• Kilitler, Kapağın kenarı ile temasta olmalıdır.
Kapağı kapatamazsaniz :
• Kapağı tencere üzerine koymadan önce kilitlerin
tamamen açık olduğundan emin olun.
• Lastiğin iyi yerleştirilmiş olduğundan emin olun.
Kontrol modülü*
Kumanda modülü, düdüklü tencerenizin temizlenmesini kolaylaştırmak için
düşünülmüştür.
•
Contası ve sayaç* çıkarıldıktan sonra, kapak
bulaşık makinesinde yıkanabilir.
•
Kumanda modülü, düdüklü tencerenizin
çalışmasını sağlayan unsurları bir araya getirir.
Kapak üzerine sabitlenir sabitlenmez, düdüklü
tencereniz normal bir şekilde kullanılabilir.
Kapağın kontrol modülünü çıkarmak için
•
Akıllı Kontrol saatini* çıkarın.
•
Kapağı ters çevirin.
•
Diğer elle modülü tutarak, bir madeni para
yardımıyla modülün vidasını gevşetin.
*modele göre
Kapağın açılıp
kapandığı sırada,
kontrol modülü
mutlaka kapak
üzerinde yerinde
olmalıdır.
Kilitler, kapağın
kenarı ile temasta
olmalıdır
- Şekil 3
23
Kontrol modülünü kapak üzerine bağlamak
için
• Açma düğmesi üzerine basmamaya özen
göstererek ve modülü Kapağın deliklerine
karşılık getirerek modülü kapak üzerine
konumlandırın.
• Modülü kapak üzerinde tutarak bütünü ters
çeviriniz ve bir madeni para yardımıyla vidayı
sıkıştırın.
Kontrol modülü yalnızca tek yönde
yerleştirilebilir.
Minimum doldurma
Direkt olarak hazne içinde pişirme için
• Tencerede daima, en az 25 cl (2 bardak) sıvı
bulunduğundan emin olun
- Şekil 4.
Buharlı pişirme için
• Hazne içine 75 cl su doldurun.
• Vitamin/buhar sepetini bu amaç için tasarlanmış
olan destekler üzerine yerleştirin.
Maksimum doldurma
• Düdüklü tencerenizi hiçbir zaman 2/3'den fazla
doldurmayın
- Şekil
5.
Bazı besinler için
• Pirinç, kurutulmuş sebzeler veya kompostolar
gibi pişirme esnasında genleşen gıdalar için,
düdüklü tencerenizin, ... tencere yüksekliğinin
yarıdan fazlasını doldurmayın.
Düdüklü tencere içinde sıvı olmadan ısınmışsa :
• Düdüklü tencerenizi bir TEFAL Yetkili Satış
Sonrası Servis Merkezine kontrol ettirin.
*modele göre
Vitamin/buhar
sepetine
yerleştirilmiş
besinler kapakla
temas etmemelidir.
24
TR
Vitamin/buhar sepetinin kullanımı*
Buharlı pişirme için
1 veya 2 Vitamin sepeti (modele göre).
• Buhar sepetini, entegre sepet destekleri üzerine
yerleştirin
- Şekil
6.
•
Düdüklü tencereye 75 cl su boşaltın.
2 sıra entegre destek ile donatılmış modeller
için
• En az 25 cl sıvı ile tencerenin alt kısmında ve
entegre desteklerin üzerine koyduğunuz buhar
sepetinde eşzamanlı pişirme gerçekleştirebilirsiniz.
• 2 Vitamin/buhar sepetiniz varsa, iki katlı buhar
pişirmesini eşzamanlı olarak gerçekleştirebilirsiniz.
• Sepeti hafifçe kenara doğru eğerek ilk sepeti alt
sıra üzerine yerleştirin.
• Daha sonra ikinci sepeti üst sıra üzerine
yerleştirin
Pişirme programı seçici kullanımı
Besinleri vitaminlerini olabildiğince koruyarak
pişirmek için
• Seçici anahtarı veya * üzerine getirin.
Et ve balık pişirimi için
• Pişirme programı seçici’yi bu konuma getirin.
Buharı serbest bırakmak için
• Sayacı çıkarın*
• Pişirme programı seçici’yi yavaşça bu konuma
getirin
- Şekil
7.
•
Düdüklü tencerenizi soğuk su altına tutarak da,
basıncını alabilirsiniz. Suyun, kapağın metal
kısımlarına gelmesini sağlayın.
v
i
t
a
m
i
n
*modele göre
Vitamin/buhar
sepetine
yerleştirilmiş
besinler kapakla
temas etmemelidir.
Düdüklü
tencerenizi, açma
düğmesi size karşı
gelecek şekilde
yönlendirin.
İşleyiş supabından
çıkan su, son derece
sıcaktır.
Pişirme programı
seçici
pozisyonundayken,
ısı kaynağının
mutlaka kesilmiş
olması
gerekmektedir.
Su tutmadan önce,
Akıllı kontrol
saatini* yerinden
çıkarın.

25
Elektronik Akıllı kontrol saati*
Clipso Control cihazınız, pşirme programı seçici’nin konumuna uygun olan
sıcaklığa erişilmesini takiben, pişirme süresini otomatik olarak sayan bir
kontrol saati donatılmıştır.
Kullanım
Elektronik Akıllı kontrol saati*
•
Akıllı
Kontrol saatini yerine takın - Şekil 8.
•
Akıllı
Kontrol saatini çalıştırmak için, (+) veya (-)
düğmesine basın.
• Pişirme zamanının seçimi için (en fazla 59
dakika), (+) veya (-) düğmesine basın
- Şekil 9.
• Daha hızlı bir geçiş için sürekli basın.
• Pişirme zamanı tanımlandıktan sonra, birkaç
saniye sonra OK sembolü görüntülenir.
• Doğru ısı seviyesine erişildiği andan itibaren,
dakika saati pişirme zamanını geri saymaya
başlar. Kisa bir seri bip sesi, geri sayımın
başladığını size bildirir
- Şekil 10.
• Bu andan itibaren, dakika saatini düdüklü
tencereden geri çekebilirsiniz.
•
Akıllı
Kontrol saatinin başlaması, buhar çıkış
kanalından buhar çıkmasıyla bağlantılı değildir :
gıdanın hacmine ve kullanılan ısı kaynağına
göre, buhar çikişinin öncesinde veya sonrasinda
saat başlayabilir.
• (+) veya (-) düğmesine basarak, geri sayım
esnasında bile, herhangi bir zamanda pişirme
süresini artirabilir veya azaltabilirsiniz.
• Pişirme sonunda : zaman geri sayımı sona
erdiğinde, kontrol saati bir sesli sinyal ile sizi
uyarir. Zil sesini durdurmak için (+) veya (-)
düğmelerinden biri üzerine bir kez basın.
• Akıllı kontrol saati otomatik olarak kapanır.
• Çıkarma : serbest bırakmak için Akıllı kontrol
saatinin önüne bastırın ve daha sonra çekin.
*modele göre
Pişirme süreleri,
dakika cinsinden
ayarlanır.
Buhar çıkış
kanalından sürekli
buhar Çıkmaya
başladığında
ocağin altını
kısmayı
unutmayın.
Clipso Control
cihazınız aynı
zamanda Akıllı
kontol saati
olmadan
daçalışabilir.
26
TR
Aşağıdaki durumlarla karşılaşabilirsiniz:
• Düzenli bip sesi duyuyorsanız ve zaman yanıp
sönüyorsa, sayaç modül üzerine yerleştirilmelidir.
Bu durumda OK sembolü görüntülenecektir.
• Akıllı Kontrol saatiniz programlandı, ancak artık
kullanmak istemiyorsunuz: Bir saat içinde
otomatik olarak kapanır veya + ve – tuşlarına
aynı anda basarak, manuel olarak
kapatabilirsiniz.
• Akıllı Kontrol saati hassas bir unsurdur, düşme
veya ekran üzerine basınç uygulanması halinde
hasar görebilir.
Pil değiştirme
Pilin yaşam süresi dakika saatinin kullanım
sıklığına bağlıdır. Ancak, görüntülemede tam veya
kismi bir kayıp gözlemlediğinizde pili
değiştirmeniz gerekir.
• Çevrenin korunmasına katkıda bulunmak için,
kullanılmış pili çıkarın. Ev çöpleriyle birlikte
atmayın, yerel bir toplama merkezine bırakın.
Kontrol saatinin pili, düğme tipinde manganezli
bir alkalin pildir. Civa içermektedir. Avrupa
mevzuatına uygundur.
• Kontrol saati içine yerleştirilmiş LR 54 (1131)
referanslı pili yetkili bir servis noktasında
değiştirtebilir veya kendiniz değiştirebilirsiniz.
• Akıllı Kontrol saatinizin pilini çıkarmak için,
yandaki şemada gösterildiği şekilde pil kapağını
açın.
• Yandaki şemada gösterildiği şekilde, pil kapağını
yavaşça kapatın, dayanma noktalarını
zorlamayın.
*modele göre
Hg
27
Kullanım önerileri
• Kapatırken pil kapağını zorlamayın. Çerçevenin
dışına çıkmayın.
• Kaybolması halinde, bütün TEFAL Yetkili Servis
Merkezlerimizden başka bir kontrol saati
edinebilirsiniz.
Katlanabilir saplar*
Kullanım öncesi, sapların her birinin üzerinde
bulunan etiketleri çıkarmaya özen gösterin.
Sapları katlamak için
• Sapların katlama düğmelerine basınız
- Şekil
11.
•
"Katlanmış sap" konumu yalnızca ürünün
muhafazası sırasında kullanılır.
Sapları kullanım konumuna getirmek için
• Kilitlendiğine dair bir tık sesi duyana kadar
sapları kaldırın.
İlk kullanım
• Tencereyi 2/3'üne kadar su doldurun.
• Düdüklü tencerenin Kapağını kapatın.
• Pişirme programı seçici’yi açık konuma getirin .
• Düdüklü tencereyi maksimum güce ayarlanmış
bir ocak üzerine yerleştirin.
• Akıllı kontrol saatini 15 dakikaya ayarlayın (bkz.
Elektronik dakika saati başlığı).*
• Buhar çıkmaya başladığında ocağın altını kısın.
Akıllı kontrol saati ile donatilmamiş modeller için,
15 dakika geri sayiniz.
• 15 dakika geçtikten sonra ocağı kapatın.
• Akıllı Kontrol saatini desteğinden çıkarın.*
• Kademeli olarak basınç selektörünü 'a
konumlandırın .
• Buhar çıkış kanalından artık hiçbir şey çıkmıyorsa
ve basınç göstergesi düşmüşse, düdüklü
tencereyi açın.
*modele göre
Kilit açma düğmelerine basmadan sapları katlamaya
çalışmayın.
Hiçbir zaman
düdüklü tencerenizi
katlanmış saplarla
bir ocak üzerine
yerleştirmeyin
- Şekil 12.
Akıllı kontrol
saatini bulaşık
makinesine
koymayın.
Sayacı asla su
altına tutmayın.
Düdüklü
tencerenizi, açma
düğmesi size karşı
gelecek şekilde
yönlendirin.
 Loading...