

Page 1
3
4
m
a
b
d
e
j
i
l
HR MIN
AUTO
PRO
k
o
n
f
c
5
g
6
h
7 8
1 2
05
24
06
Page 2
Français
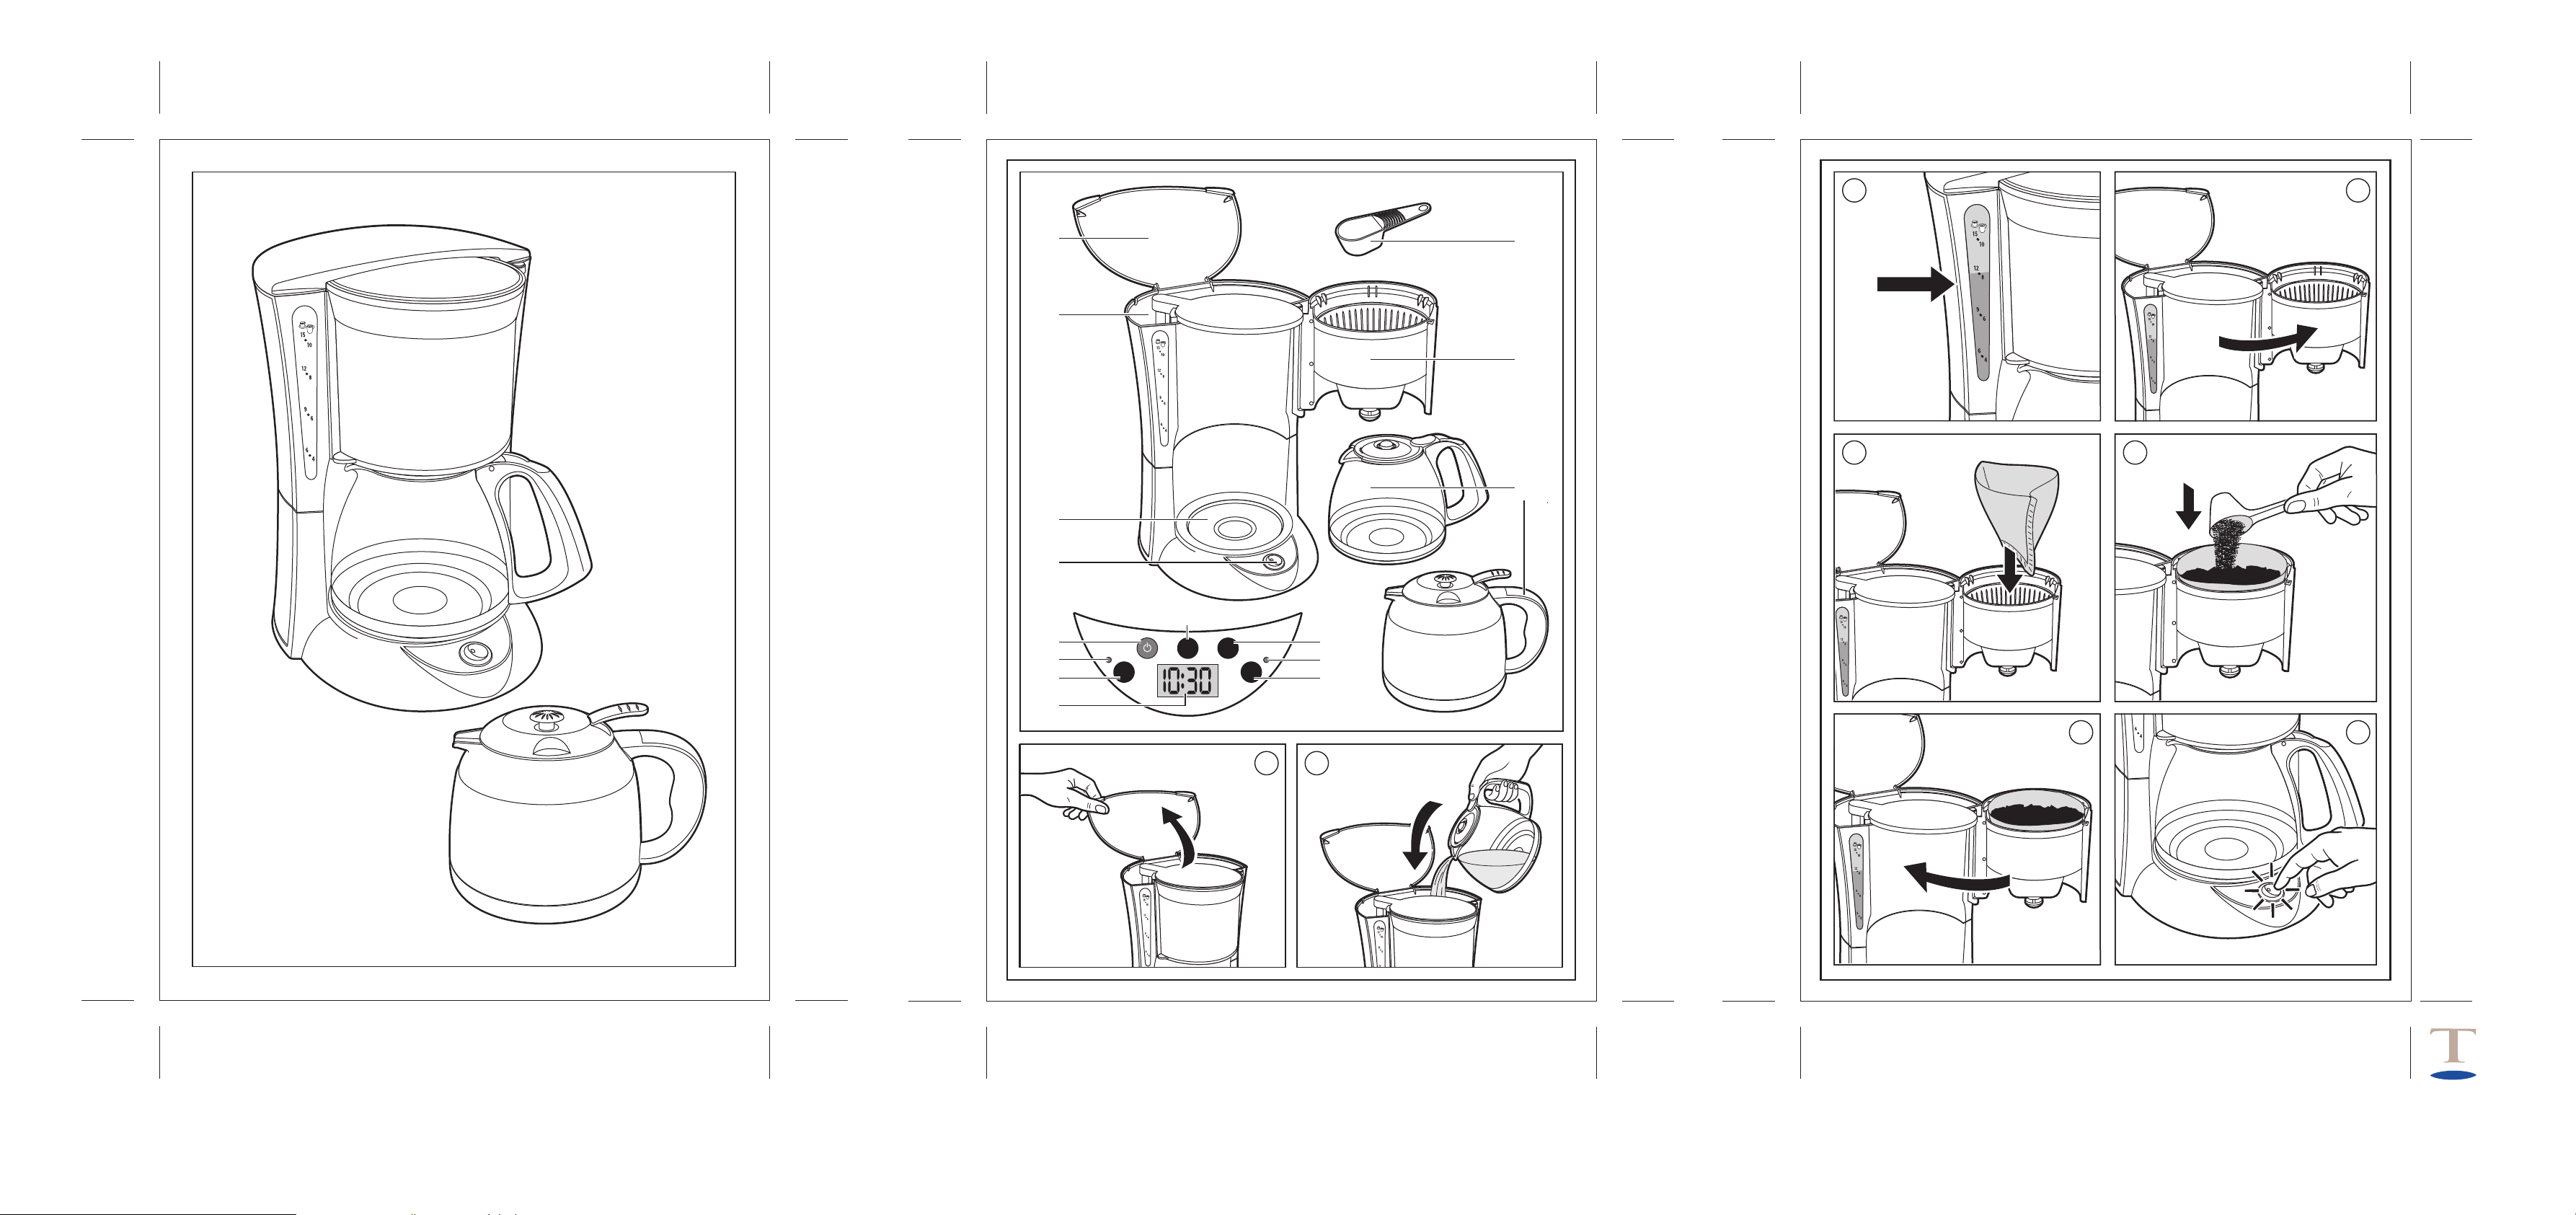
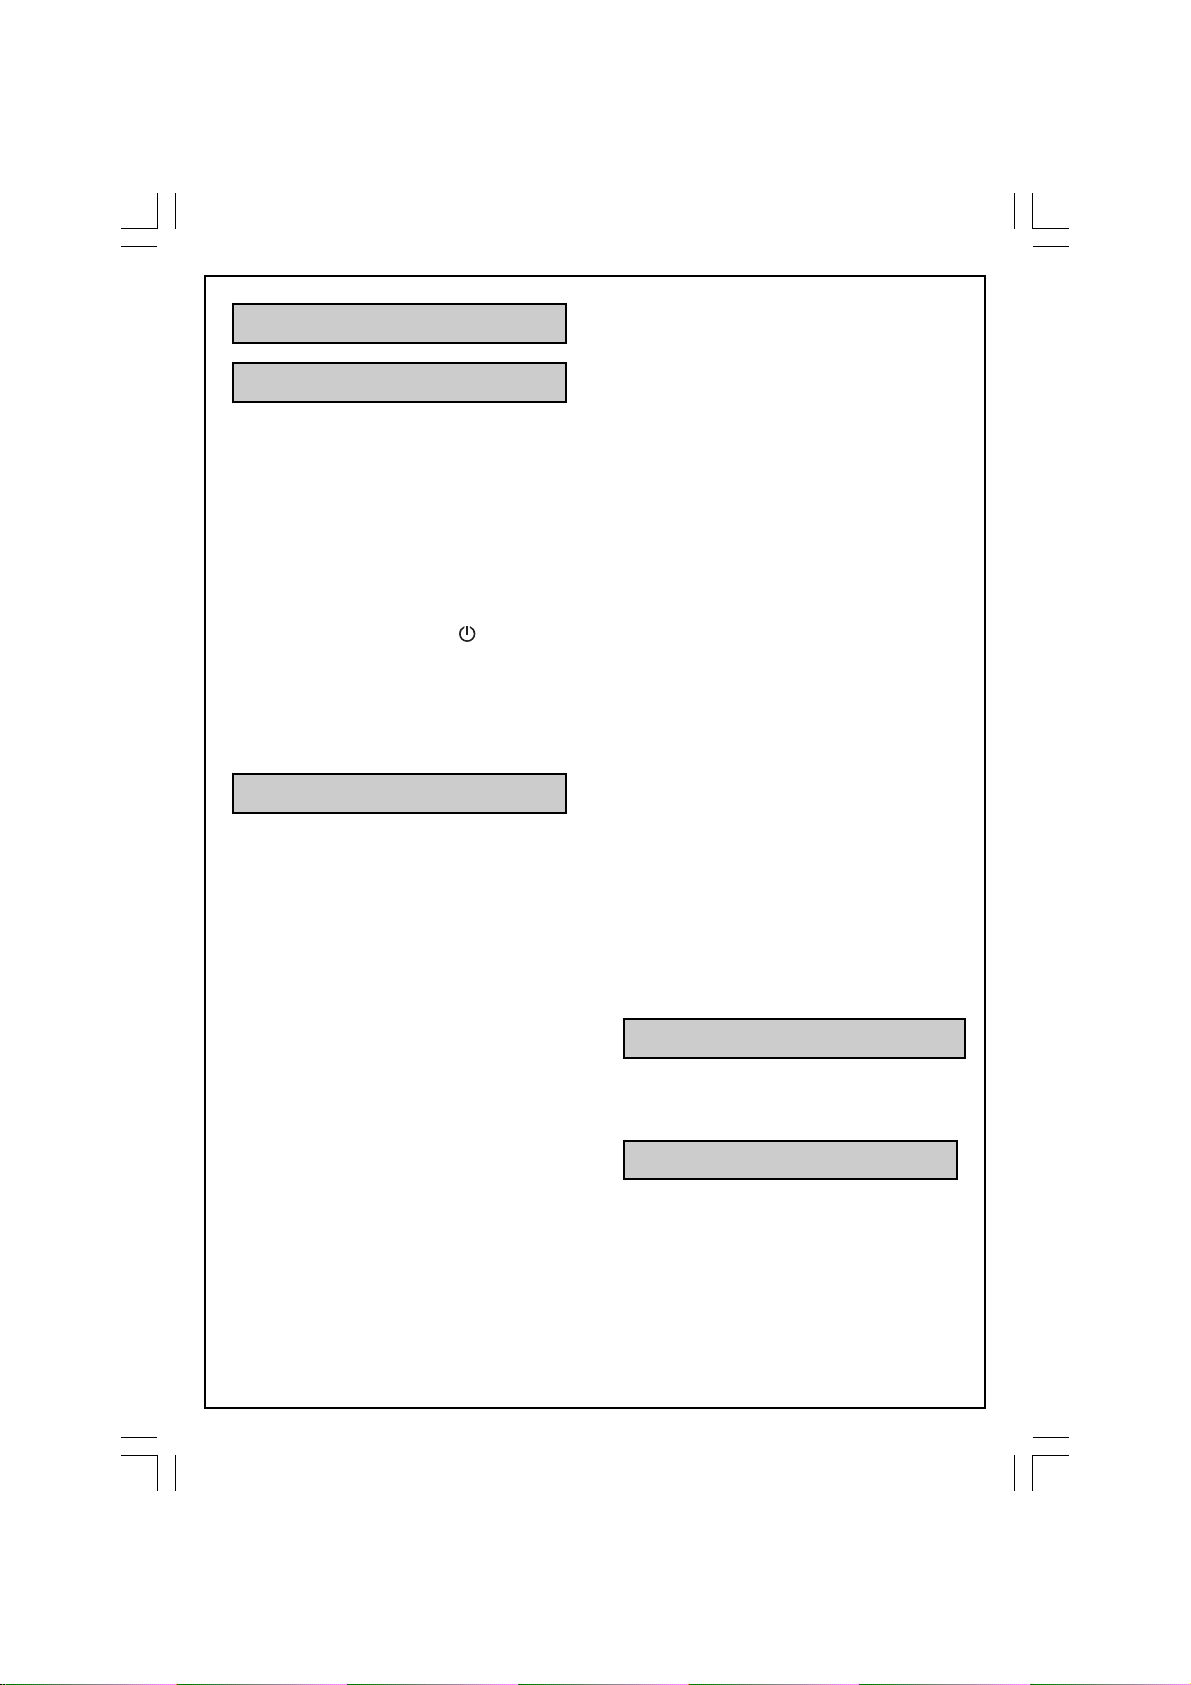
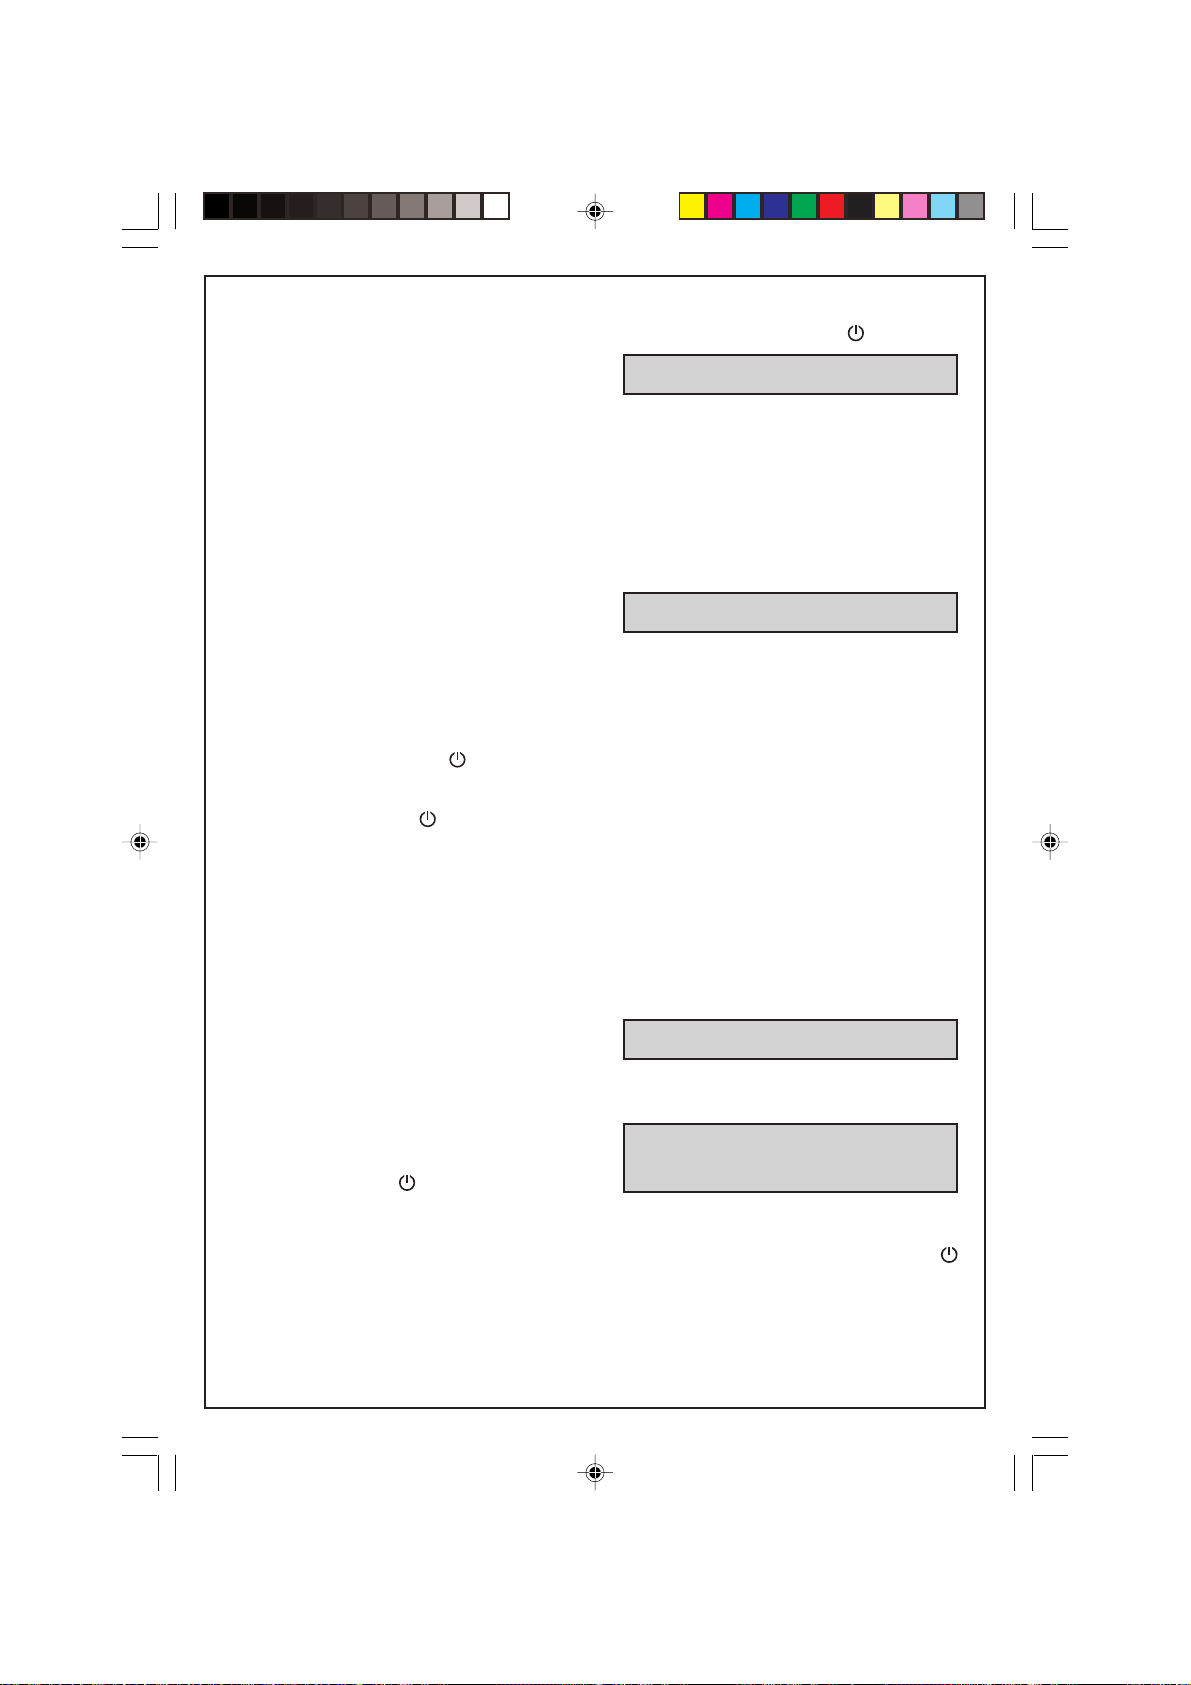
Description
a Couvercle
b Réservoir
c Porte-filtre
d Plaque chauffante
e Bouton Marche / arrêt ou écran de
contrôle
f Cuillère doseuse
g verseuse ou pot isotherme (selon
modèle)
Modèles programmables
h Ecran LCD
i Touche Marche / arrêt
j Touche AUTO
k Touche PRO
l Témoin de programmation (vert)
m T ouche HR
n Touche MIN
o Témoin marche / arrêt (rouge)
Conseils de sécurité
• Lire attentivement le mode d’emploi avant
la première utilisation de votre appareil :
une utilisation non conforme dégagerait
le fabricant de toute responsabilité.
• Ne pas laisser l’appareil à la portée des
enfants sans surveillance. L’utilisation de cet
appareil par des jeunes enfants ou des
personnes handicapées doit être faite sous
surveillance.
• Avant de brancher l’appareil, vérifier que la
tension d’alimentation de votre installation
correspond à celle de l’appareil et que la
prise de courant comporte bien la terre.
Toute erreur de branchement annule la
garantie.
• Votre appareil est destiné uniquement à un
usage domestique et à l’intérieur de la
maison.
• Débrancher l’appareil dès que vous cessez
de l’utiliser et que vous le nettoyez.
• Ne pas utiliser l’appareil s’il ne fonctionne
pas correctement ou s’il a été endommagé.
Dans ce cas, s’adresser à un centre service
agréé.
• Toute intervention autre que le nettoyage et
l’entretien usuel par le client doit être
effectuée par un centre service agréé.
• Si le câble d’alimentation ou la fiche sont
endommagés, n’utilisez pas l’appareil. Afin
d’éviter tout danger, faites obligatoirement
remplacer le câble d’alimentation par un
centre agréé.
• Ne pas mettre l’appareil, le câble d’alimentation ou la fiche dans l’eau ou tout autre
liquide.
• Ne pas laisser pendre le câble d’alimentation à portée de main des enfants.
• Le câble d’alimentation ne doit jamais être à
proximité ou en contact avec les parties
chaudes de votre appareil, près d’une source
de chaleur ou sur un angle vif.
• Pour votre sécurité, n’utiliser que des accessoires et des pièces détachées du fabricant
adaptés à votre appareil.
• Ne pas débrancher la fiche de la prise en
tirant sur le câble.
• Ne pas utiliser la verseuse ou le pot isotherme sur une flamme et sur des plaques
de cuisinières électriques.
• Ne pas remettre d’eau dans l’appareil s’il est
encore chaud.
• Toujours fermer le couvercle (a) lors du
fonctionnement de la cafetière.
• Tous les appareils sont soumis à un
contrôle qualité sévère. Des essais
d’utilisation pratiques sont faits avec des
appareils pris au hasard ce qui explique
d’éventuelles traces d’utilisation.
• Ne jamais mettre votre verseuse ou votre
pot isotherme dans un four à micro-ondes,
dans un lave-vaisselle ou sur une plaque de
cuisson.
• Ne jamais introduire votre main à l’intérieur
du pot isotherme.
• N’utilisez pas la verseuse ou le pot isotherme
sans leur couvercle.
Avant la première utilisation
• Faites fonctionner une première fois la
cafetière sans café avec 1 litre d’eau pour
rincer le circuit.
Préparation du café
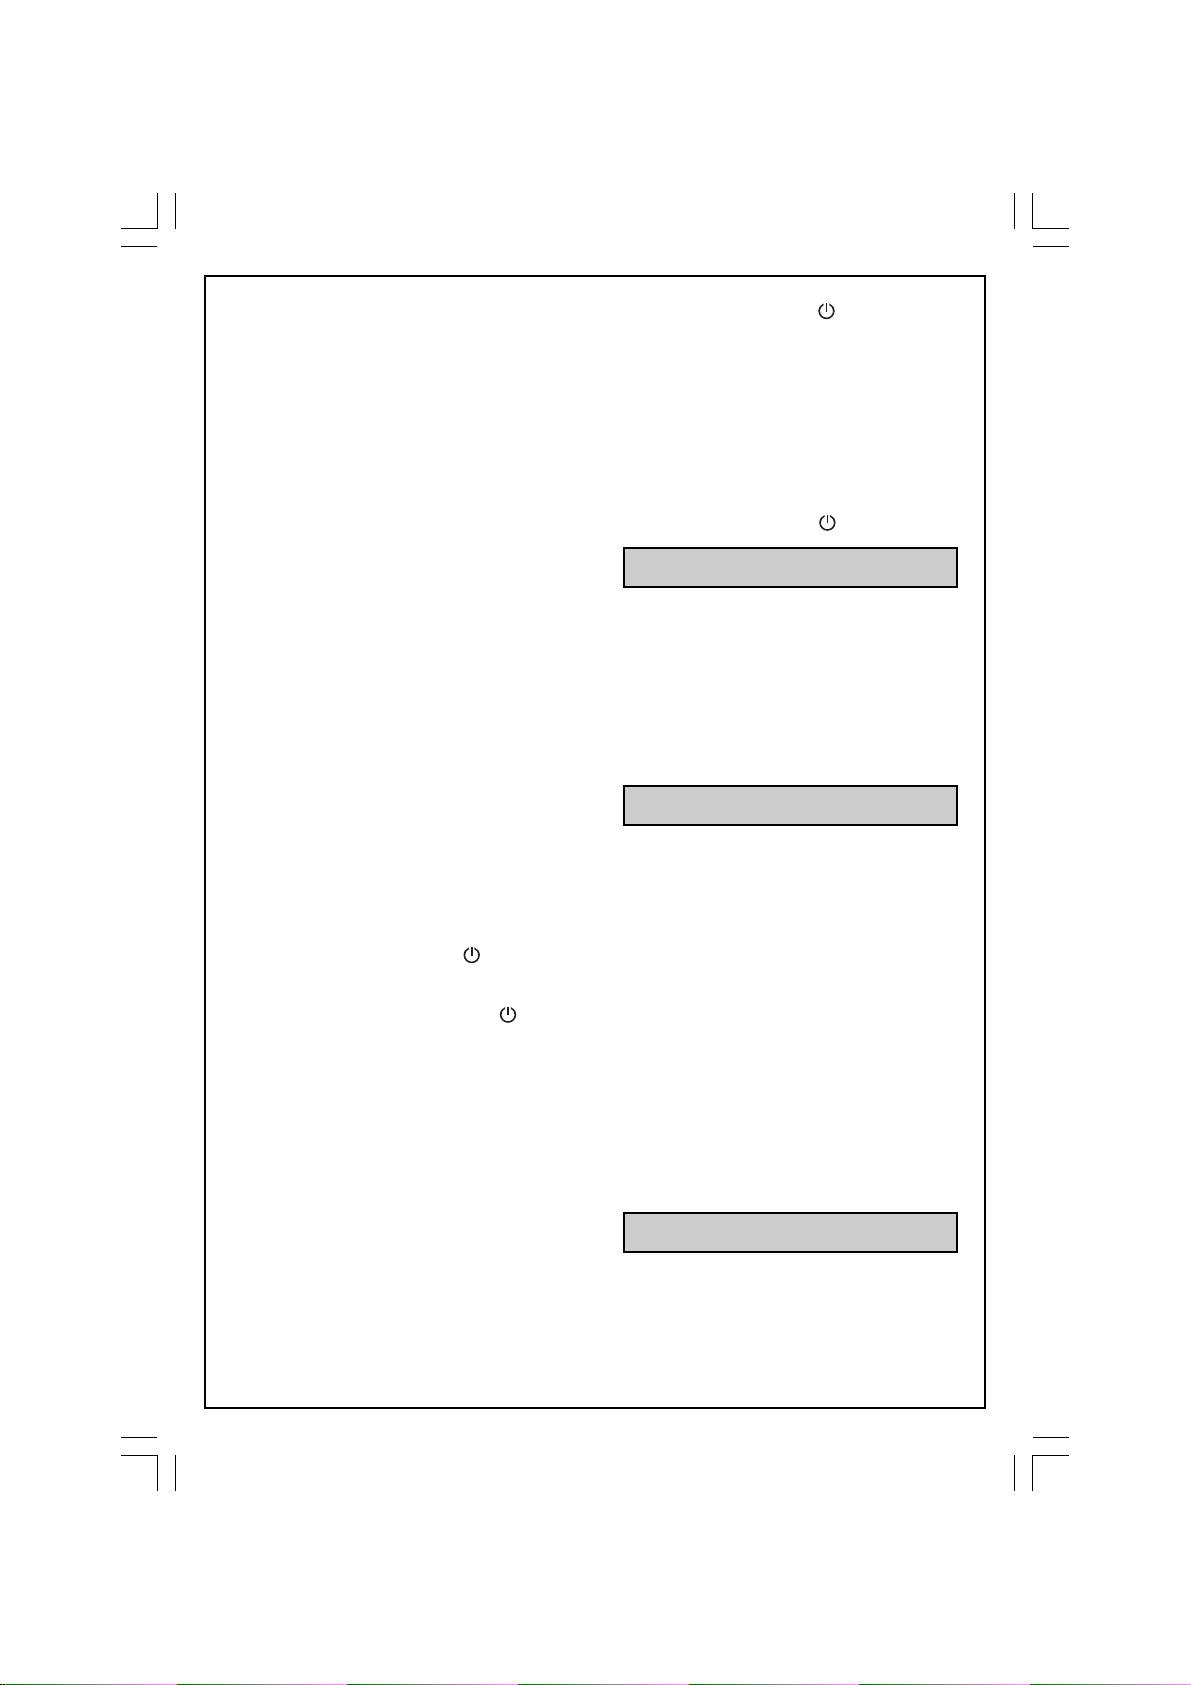
(Suivre les illustrations de 1 à 8)
• Utiliser uniquement de l’eau froide et un filtre papier n°4. Ne pas utiliser le pot isotherme sans son bouchon.
• Ne pas dépasser la quantité d’eau maximum
indiquée sur le niveau d’eau du réservoir.
• Cette cafetière est équipée d’un stop - goutte
permettant de se servir un café avant la fin
du passage d’eau. Replacer rapidement la
4
CafetièreCM823 1/06/06, 10:434
Page 3
verseuse ou le pot isotherme pour éviter tout
débordement.
• Pour une meilleure conservation de la chaleur, rincer le pot isotherme à l’eau chaude
avant utilisation.
• Le couvercle du pot isotherme doit être verrouillé fermement vers la droite jusqu’à la
butée pour la préparation et le maintien au
chaud du café.
Pour servir le café, appuyer sur le levier du
couvercle du pot isotherme vers le bas.
• Attendre quelques minutes avant de
réaliser une seconde préparation du café.
POUR LE MODÈLE PROGRAMMABLE :
Réglage de l’heure :
• Branchez la cafetière, l’écran LCD (h )
indique 12 : 00.
• Appuyez sur la touche « PRO » pendant 3
secondes, l’écran cesse de clignoter et indique « set time ».
• Appuyez sur la touche « HR » pour régler
l’heure. Un appui prolongé sur la touche permet de faire défiler rapidement les chiffres
• Appuyez sur la touche « MIN » pour régler
les minutes. Un appui prolongé sur la touche permet de faire défiler rapidement les
chiffres
• V alidez le réglage en appuyant à nouveau 3
secondes sur la touche « PRO »
Fonctionnement en mode manuel :
• Appuyer sur la touche rouge «
rouge s’allume et la cafetière se met à fonctionner.
• Appuyez à nouveau sur la touche «
arrêter le fonctionnement.
Fonctionnement en mode programmation:
• Appuyez deux fois sur la touche « PRO »,
l’écran indique « set time ».
• Appuyez sur la touche « HR » pour régler
l’heure.
• Appuyez sur la touche « MIN » pour régler
les minutes.
• Validez le réglage en appuyant à nouveau
sur la touche « PRO ». L’écran indique à nouveau l’heure actuelle.
• Appuyez sur la touche « AUTO » pour activer la programmation. Le voyant vert s’allume.
A l’heure programmée, le voyant rouge s’allume et la cafetière se met à fonctionner.
», le voyant
» pour
• Appuyez sur la touche «
fonctionnement.
• Vous pouvez annuler à tout moment la programmation en appuyant sur la touche
« AUTO ». Le voyant vert s’éteindra. Réactivez la programmation en appuyant à nouveau sur la touche « AUTO ».
Remarque sur les deux modes : La cafetière cesse automatiquement de fonctionner
après 2h, si vous ne l’avez pas arrêtée en fin
de cycle avec la touche «
» pour arrêter le
».
Nettoyage
• Pour évacuer la mouture usagée, retirer le
porte-filtre (c) de la cafetière.
• Débrancher l’appareil.
• Ne pas nettoyer l’appareil chaud.
• Nettoyer avec un chiffon ou une éponge humide.
• Ne jamais mettre l’appareil dans l’eau ou
sous l’eau courante.
• Le porte filtre est lavable au lave-vaisselle.
Détartrage
• Détartrez votre cafetière tous les 40 cycles.
Vous pouvez utiliser.
• soit un sachet de détartrant dilué dans
2 grandes tasses d’eau.
• soit 2 grandes tasses de vinaigre d’alcool
blanc.
• Verser dans le réservoir (b) et mettre la
cafetière en marche (sans mouture).
• Laisser couler dans la verseuse ou le pot
isotherme (g) l’équivalent d’une tasse, puis
arrêter.
• Laisser agir pendant une heure.
• Remettre la cafetière en marche pour
terminer l’écoulement.
• Rincer la cafetière en la faisant fonctionner
2 ou 3 fois avec 1 litre d’eau.
La garantie exclut les cafetières ne fonctionnant pas ou mal par absence de détartrage.
Accessoires
Pot isotherme
Verseuse verre
CafetièreCM823 1/06/06, 10:435
5
Page 4
En cas de problème
English
- Vérifier :
• le branchement.
• que l’interrupteur ou la touche Marche / arrêt (voyant rouge allumé) est en position
marche.
• que le porte filtre est bien verrouillé.
- Le temps d’écoulement de l’eau est trop long
ou les bruits sont excessifs :
• détartrez votre cafetière.
Votre appareil ne fonctionne toujours
pas ?Adressez-vous à un centre service agréé.
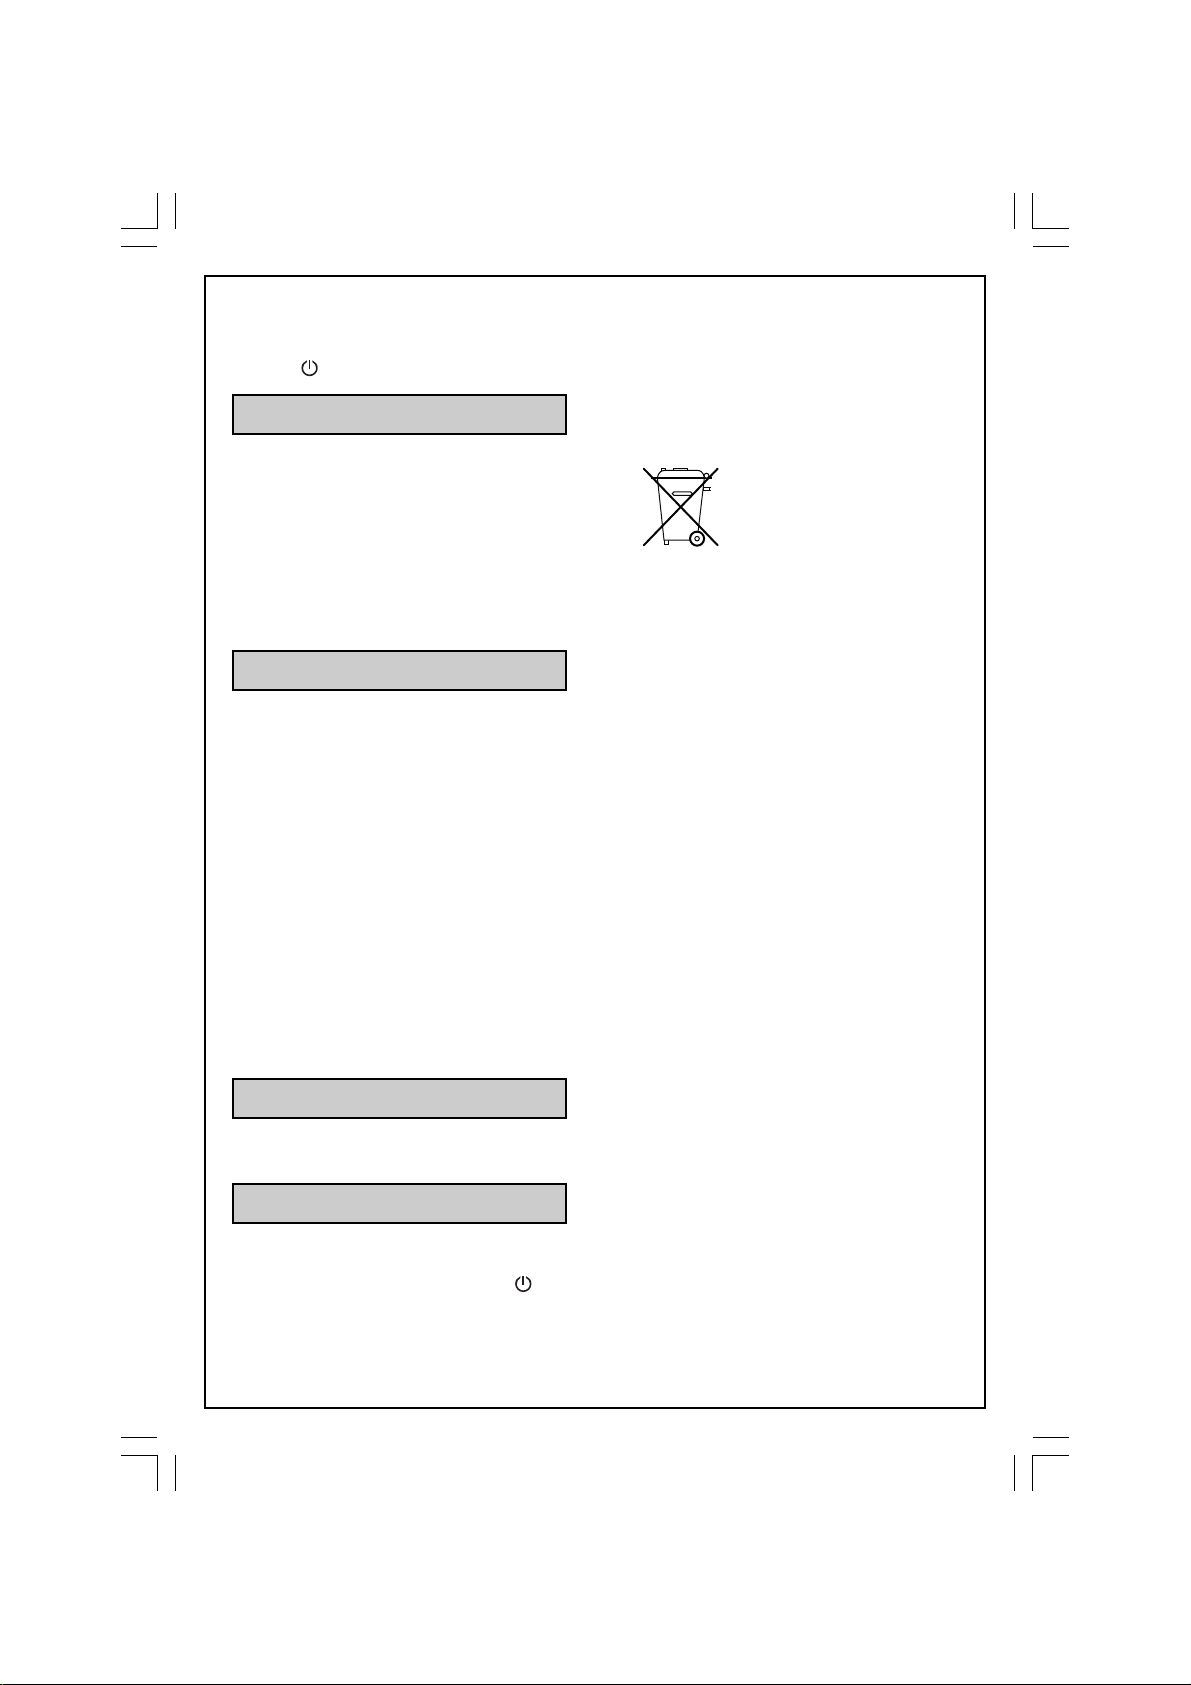
Participons à la protection
de l’environnement !
i Votre appareil contient de nombreux
matériaux valorisables ou recyclables.
ÜConfiez celui-ci dans un point de collecte
ou à défaut dans un centre service agrée
pour que son traitement soit effectué.
Description
a Lid
b Tank
c Filter holder
d Warming plate
e On / off button or control panel
f Measuring spoon
g Jug or insulated pot (according to
model)
Programmable models
h LCD screen
i On / off button
j AUTO button
k PRO button
l Programming indicator light (green)
m HR button
n MIN button
o On / off indicator light (red)
Safety recommendations
• Read the instructions for use carefully
before using your appliance for the first
time: the manufacturer does not accept
responsibility for use that does not
comply with the instructions.
• Keep the appliance out of reach of
unsupervised children. Use of this appliance
by young children or certain severely
disabled people must be supervised.
• Before plugging the appliance in, make sure
that the power it uses corresponds to your
electrical supply system and that the outlet
is earthed.
Any error in the electrical connection will
negate your guarantee.
• Y our appliance is designed for domestic use
only. Any commercial use, inappropriate use
or failure to comply with the instructions, the
manufacturer accepts no responsibility and
the guarantee will not apply.
• Unplug the appliance when you have
finished using it and when you clean it.
• Do not use the appliance if it is not working
properly or if it has been damaged. If this
occurs, contact an authorised service centre.
• All interventions other than cleaning and
everyday maintenance by the customer must
be performed by an authorised service centre.
6
CafetièreCM823 1/06/06, 10:436
Page 5
• Do not use the appliance if the power cord
or plug is damaged. The power cord must
be replaced by an authorised centre to
prevent any danger.
• Do not immerse the appliance, power cord
or plug in water or any other liquid.
• Do not leave the power cord within reach of
children.
• The power cord must never be close to or in
contact with the hot parts of your appliance,
near a source of heat or over a sharp edge.
• For your safety , only use the manufacturer’s
accessories and spare parts designed for
your appliance.
• Do not pull on the cord to unplug the
appliance.
• Do not use the jug or the insulated pot over
a flame or on the hob of a cooker.
• Do not pour water into the appliance if it is
still hot.
• Always close the lid (a) when running the
coffee maker.
• All appliances are subject to strict quality
control procedures. These include actual
usage tests on randomly selected
appliances, which would explain any traces
of use.
• Never place your jug or your insulated pot in
a microwave oven, in a dishwasher or on a
cooking hob.
• Never put your hand inside the insulated pot.
• Do not use the jug or the insulated pot without
their lid.
Before using for the first
time
• Run the coffee maker for the first time without
coffee, rinsing the circuit with 1 litre of water.
Making coffee
(Follow illustrations 1 to 8)
• Use cold water only and a No. 4 paper filter.
Do not use the insulated pot without its top.
• Do not exceed the maximum amount of
water indicated on the water tank level
indicator.
• This coffee maker is equipped with a dripstop feature so that you can serve a cup of
coffee before all the water has finished
flowing through. Return the jug or the
insulated pot to its base quickly to avoid
spillage.
• For better heat preservation, rinse the
insulated pot with hot water before use.
• The lid of the insulated pot must be locked
securely in place toward the right to the stop
to prepare coffee and to keep it hot.
To serve coffee, press the lever on the lid of
the insulated pot downwards.
• Wait a few minutes before preparing another
pot of coffee.
FOR THE PROGRAMMABLE MODEL:
Setting the time:
• Plug in the coffee maker; the LCD (h) screen
displays 12:00.
• Press the “PRO” button for 3 seconds; the
screen stops flashing and displays “set
time”.
• Press the “HR” button to set the hour. Holding down the button allows you to scroll
through the numbers rapidly.
• Press the “MIN” button to set the minutes.
Holding down the button allows you to scroll
through the numbers rapidly.
• Validate the setting by pressing the “PRO”
button for 3 seconds once again.
Operation in manual mode:
• Press the red “
light comes on and the coffee maker begins
to run.
• Press the “
Operation in programming mode:
• Press the “PRO” button twice; the screen
displays “set time”.
• Press the “HR” button to set the hour.
• Press the “MIN” button to set the minutes.
• Validate the setting by pressing the “PRO”
button again. The screen displays the current
time once more.
• Press the “AU TO” button to activate the
programming. The green indicator light
comes on.
At the programmed time, the red indicator light
comes on and the coffee maker begins to run.
• Press the “
• Y ou can cancel the programming at any time
by pressing the “AUTO” button. The green
indicator light goes out. Reactivate the
programming by pressing the “AUTO” button
again.
” button; the red indicator
” button again to stop operation.
” button to stop operation.
CafetièreCM823 1/06/06, 10:437
7
Page 6
Remark on the two modes: The coffee maker
automatically stops running after 2 hours if
you have not stopped it at the end of the cycle
with the “
” button.
Cleaning
• To dispose of the used coffee grounds,
remove the filter holder (c) from the coffee
maker.
• Unplug the appliance.
• Do not clean the appliance while hot.
• Clean with a damp cloth or sponge.
• Never put the appliance in water or under
running water.
• The filter holder can be washed in the
dishwasher.
• that the filter holder is locked in place
correctly.
- The water flow-through time is too long or
makes too much noise:
• descale your coffee maker.
If your appliance still doesn’t work please
contact an authorised service centre.
Environment protection
first!
iYour appliance contains valuable materials
which can be recovered or recycled.
Ü Leave it at a civic waste collection point.
Add the wheelie bin symbol
Descaling
• Descale your coffee maker after every
40 cycles.
Y ou can use:
• a packet of limescale remover diluted in
2 large cups of water.
• or 2 cups of white vinegar.
• Pour into the tank (b) and switch the coffee
maker on (without coffee).
• Let the equivalent of one cup flow into the
jug or the insulated pot (g), then switch off.
• Leave to act for one hour.
• Switch the coffee maker back on to run the
rest of the liquid through.
• Rinse the coffee maker by running 1 litre of
water through it 2 or 3 times.
The guarantee does not cover coffee
makers that do not work properly or do not
work at all because they have not been
descaled.
Accessories
Insulated pot
Glass jug
Troubleshooting
- Check:
• that it is plugged in properly.
• that the switch or the On / off button
indicator light on) is in the “ON” position.
(red
HELPLINE:
If you have any product problems or queries,
please contact our Customer Relations Team
first for expert help and advice:
0845 602 1454 – UK
(01) 475 1947 – Ireland
CafetièreCM823 1/06/06, 10:438
8
Page 7
Nederlands
Beschrijving
a Deksel
b Reservoir
c Filterhouder
d Warmhoudplaat
e Aan/uit-knop of display
f Maatschepje
g Schenkkan of thermoskan (afhankelijk
van het model)
Programmeerbare modellen
h LCD-scherm
i Aan/uit-toets
j AUTO-toets
k PRO-toets
l Controlelampje programmering
(groen)
m HR-toets
n MIN-toets
o Controlelampje aan/uit (rood)
Veiligheidsadviezen
• Lees deze gebruiksaanwijzing zorgvuldig
door voordat u het apparaat in gebruik
neemt: wanneer het apparaat niet op de
juiste wijze gebruikt wordt, kan de
fabrikant geen aansprakelijkheid
aanvaarden.
• Dit apparaat mag niet gebruikt worden door
kinderen of andere personen zonder hulp of
toezicht, indien hun fysieke, zintuiglijke of
mentale vermogens een veilig gebruik niet
mogelijk maken.
• Controleer, voordat u de stekker van het
apparaat in het stopcontact steekt, of de
netspanning van uw installatie overeenkomt
met die van het apparaat en of het
stopcontact geaard is.
Een verkeerde aansluiting maakt de garantie ongeldig.
• Uw apparaat is uitsluitend bedoeld voor
huishoudelijk gebruik binnenshuis.
• Trek, bij langdurige afwezigheid en als u het
apparaat schoonmaakt, de stekker uit het
stopcontact.
• Het apparaat niet gebruiken wanneer dit niet
goed werkt of beschadigd is. Wendt u in dat
geval tot een erkende servicedienst.
• Elke handeling anders dan schoonmaken en
het gewone onderhoud dient door een door
erkende servicedienst te gebeuren.
• Het apparaat niet gebruiken indien het
netsnoer of de stekker beschadigd zijn. Om
gevaarlijke situaties te voorkomen, dient u
het netsnoer door een erkende servicedienst
te laten vervangen.
• Zet het apparaat, het netsnoer of de stekker
niet in water of enige andere vloeistof.
• Laat het netsnoer niet binnen handbereik van
kinderen hangen.
• Laat het netsnoer nooit in aanraking komen
met of in de buurt hangen van warme
onderdelen van het apparaat of van andere
warmtebronnen en laat het niet over scherpe
hoeken en randen hangen.
• Voor uw eigen veiligheid dient u uitsluitend
de voor uw apparaat geschikte accessoires
en onderdelen van de fabrikant te gebruiken.
• Haal de stekker niet uit het stopcontact door
aan het snoer te trekken.
• De schenkkan of thermoskan niet op open
vuur of een elektrische kookplaat
verwarmen.
• Doe geen water in het apparaat wanneer dit
nog warm is.
• Tijdens de werking van het koffiezetapparaat
altijd het deksel (a) gesloten houden.
• Alle apparaten worden onderworpen aan een
strenge controle. Met sommige, willekeurig
uitgekozen apparaten zijn praktische
gebruikstests uitgevoerd, waardoor het kan
lijken of het apparaat reeds gebruikt is.
• De schenkkan of thermoskan nooit in een
magnetronoven, de vaatwasmachine of op
een kookplaat zetten.
• Steek uw hand nooit in de thermoskan.
• Gebruik de schenkkan of de thermoskan niet
zonder het deksel.
Voor het eerste gebruik
• Voor het allereerste gebruik spoelt u het
koffiezetapparaat om door het in werking te
stellen zonder koffiemaling en met 1 liter
water.
Koffiezetten
(Volg de afbeeldingen 1 tot en met 8)
• Gebruik uitsluitend koud water en een
papieren filter n°4. Gebruik de thermoskan
niet zonder zijn dop.
• Zorg dat u de maximale hoeveelheid water
die op het waterreservoir staat aangegeven,
niet overschrijdt.
9
CafetièreCM823 1/06/06, 10:439
Page 8
• Dankzij de druppelstopfunctie kunt u de
schenkkan tijdens het koffiezetten even uit
het koffiezetapparaat halen om een kopje
koffie in te schenken. Plaats de schenkkan
of de thermoskan snel weer terug in het
koffiezetapparaat om overlopen van de
filterhouder te voorkomen.
• Spoel de thermoskan vóór gebruik om met
warm water om de warmte beter vast te
houden.
• Het deksel van de thermoskan moet voor
het bereiden en warm houden van de koffie
stevig naar rechts gedraaid worden tot het
niet verder kan.
Druk voor het serveren van de koffie de hendel
van het deksel van de thermoskan naar
beneden.
• Wacht enkele minuten voordat u opnieuw
koffiezet.
• Druk op de toets «AUTO» om de
programmering in te schakelen. Het groene
controlelampje gaat branden.
Op het ingestelde tijdstip gaat het rode
controlelampje branden en gaat het
koffiezetapparaat aan.
• Druk op de toets «
schakelen.
• U kunt op ieder moment de programmering
annuleren door op de toets «AUTO » te
drukken. Het groene controlelampje gaat dan
uit. Schakel de programmering weer in door
opnieuw op de toets «AUTO» te drukken.
Opmerking betreffende de twee functies:
Het koffiezetapparaat schakelt automatisch
na 2 uur uit, wanneer u het aan het einde van
de cyclus niet heeft uitgeschakeld met de
toets «
».
» om de werking uit te
VOOR HET PROGRAMMEERBARE MODEL:
Instelling van de tijd:
• Steek de stekker van het koffiezetapparaat
in het stopcontact, het LCD-scherm (h) geeft
12:00 aan.
• Houd de toets «PRO» 3 seconden ingedrukt,
het scherm houdt op met knipperen en geeft
«set time» aan.
• Druk op de toets «HR» om het uur in te
stellen. Door de toets ingedrukt te houden,
komen de cijfers snel voorbij.
• Druk op de toets «MIN» om de minuten in te
stellen. Door de toets ingedrukt te houden,
komen de cijfers snel voorbij.
• Bevestig de instelling door opnieuw de toets
«PRO» 3 seconden ingedrukt te houden.
Werking in de handmatige functie:
• Druk op de rode toets «
controlelampje gaat branden en het
koffiezetapparaat gaat aan.
• Druk opnieuw op de toets «
werking uit te schakelen.
Werking in de programmeerfunctie:
• Druk tweemaal op de toets «PRO», het
beeldscherm geeft «set time» aan.
• Druk op de toets «HR» om het uur in te
stellen.
• Druk op de toets «MIN» om de minuten in te
stellen.
• Bevestig de instelling door opnieuw op de
toets «PRO» te drukken. Het scherm geeft
opnieuw de huidige tijd aan.
», het rode
» om de
Reinigen
• Voor het verwijderen van het gebruikte
koffiedik verwijdert u de filterhouder (c) uit
het koffiezetapparaat.
• Haal de stekker van het apparaat uit het
stopcontact.
• Het apparaat niet reinigen wanneer dit nog
warm is.
• Reinigen met een vochtige doek of spons.
• Het apparaat nooit in water onderdompelen
of onder de kraan houden.
• De filterhouder kan in de vaatwasmachine
gewassen worden.
Ontkalken
• Ontkalk uw koffiezetapparaat na 40 keer
koffie gezet te hebben.
U kunt hiervoor gebruiken:
• ofwel een zakje ontkalkingsmiddel, verdund
met 2 grote glazen water.
• ofwel 2 grote glazen schoonmaakazijn.
• Giet dit in het reservoir (b) en zet het
koffiezetapparaat aan (zonder koffiedik).
• Laat één kopje in de schenkkan of de
thermoskan (g) lopen en zet het apparaat
uit.
• Laat het gedurende 1 uur inwerken.
• Zet het koffiezetapparaat vervolgens weer
aan om het restant door te laten lopen.
• Spoel het koffiezetapparaat om en laat het
2 of 3 keer werken met 1 liter schoon water.
De garantie geldt niet voor apparaten die
niet of nauwelijks functioneren omdat zij
niet ontkalkt zijn.
10
CafetièreCM823 1/06/06, 10:4310
Page 9
Accessoires
Thermoskan
Schenkkan
Português
Descrição
Wat te doen bij problemen
- Controleer:
• of de stekker goed in het stopcontact zit.
• of de schakelaar of de Aan/uit-toets
controlelampje brandt) op Aan staat.
• of de filterhouder goed vergrendeld is.
- Het doorlopen van het water duurt te lang of
het apparaat maakt veel lawaai:
• het koffiezetapparaat dient ontkalkt te
worden.
Werkt uw apparaat nog steeds niet? Neem
contact op met een erkende servicedienst.
Wees vriendelijk
voor het milieu!
i Uw apparaat bevat materialen die geschikt
zijn voor hergebruik.
Ü Lever het in bij het milieustation in uw
gemeente of bij onze technische dienst.
(rode
a Tampa
b Reservatório
c Porta-filtro
d Placa de aquecimento
e Botão Ligar/Desligar ou ecrã de
controlo
f Colher doseadora
g Jarra de vidro ou jarra isotérmica
(consoante o modelo)
Modelos programáveis
h Ecrã LCD
i Botão Ligar/Desligar
j Botão AUTO
k Botão PRO (programação)
l Luz piloto de programação (verde)
m Botão HR (horas)
n Botão MIN (minutos)
o Luz piloto Ligar/Desligar (vermelho)
Conselhos de segurança
• Leia atentamente o manual de instruções
antes da primeira utilização do aparelho:
uma utilização não conforme ao manual
de instruções liberta o fabricante de
qualquer responsabilidade.
• Mantenha o aparelho fora do alcance de
crianças quando estas não estiverem sob
vigilância. A utilização deste aparelho por
crianças ou pessoas cujas capacidades
mentais, físicas ou sensoriais não lhes
permitam utilizar o aparelho com toda a
segurança deverá ser feita sob vigilância.
• Antes de ligar o aparelho, verifique se a
tensão de alimentação da sua instalação
corresponde à do seu aparelho e que a
tomada tem ligação à terra.
Qualquer erro de ligação anula a garantia.
• O seu aparelho destina-se exclusivamente
a uma utilização doméstica e no interior de
casa.
• Desligue o aparelho após cada utilização e
antes de proceder à sua limpeza.
• Não utilize o aparelho se este não estiver a
funcionar correctamente ou se estiver de
algum modo danificado. Neste caso, dirijase a um Serviço de Assistência Técnica
autorizado.
CafetièreCM823 1/06/06, 10:4311
11
Page 10
• Qualquer intervenção no aparelho, para
além das operações de limpeza e
manutenção normais, deve ser levada a
cabo por um Serviço de Assistência Técnica
autorizado.
• Se o cabo de alimentação ou a ficha se
encontrarem de alguma forma danificados,
não utilize o aparelho. Para evitar qualquer
perigo, mande substituir o cabo de
alimentação num Serviço de Assistência
Técnica autorizado.
• Não molhe o aparelho, o cabo de
alimentação ou a ficha com água ou
qualquer outro líquido.
• Não deixe o cabo de alimentação pendurado
e ao alcance de crianças.
• O cabo de alimentação nunca deve estar em
contacto com as partes quentes do aparelho,
junto de uma fonte de calor ou colocado sob
um ângulo cortante.
• Para sua segurança, utilize apenas
acessórios e peças sobressalentes de
origem adaptadas ao seu aparelho.
• Não retire a ficha da tomada puxando pelo
cabo.
• Não utilize a jarra de vidro ou a jarra
isotérmica sobre uma chama e sobre placas
de fogões eléctricos.
• Não deite água no aparelho se este ainda
estiver quente.
• Feche sempre a tampa (a) no decorrer do
funcionamento da cafeteira.
• Todos os aparelhos são sujeitos a um
controlo de qualidade rigoroso. São
realizados ensaios de utilização práticos
com aparelhos escolhidos aleatoriamente,
o que explica eventuais vestígios de
utilização.
• Nunca coloque a jarra de vidro ou a jarra
isotérmica num micro-ondas, na máquina da
loiça ou sobre placas de fogão.
• Nunca introduza a mão no interior da jarra
isotérmica.
• Não utilize a jarra de vidro ou a jarra
isotérmica sem a respectiva tampa.
Antes da primeira utilização
• Coloque a cafeteira a funcionar uma primeira
vez sem café com 1 litro de água para
enxaguar o circuito.
Preparação do café
(Siga as ilustrações de 1 a 8)
• Utilize apenas água fria e um filtro de papel
nº4. Não utilize a jarra isotérmica sem tampa.
• Não exceda a quantidade de água máxima
indicada no indicador do nível de água do
reservatório.
• Esta cafeteira está equipada com um
sistema anti-gota que permite servir o café
antes do fim da preparação. Coloque
rapidamente a jarra de vidro ou a jarra
isotérmica para evitar qualquer
transbordamento.
• Para uma melhor conservação do calor,
enxagúe a jarra isotérmica com água quente
antes da sua utilização.
• A tampa da jarra isotérmica tem de ser
firmemente bloqueada para a direita, até
encaixar, para a preparação e a manutenção
do café quente.
Para servir o café, carregue a alavanca da
jarra isotérmica para baixo.
• Aguarde alguns minutos antes de proceder
a uma segunda extracção de café.
PARA O MODELO PROGRAMÁVEL:
Regulação da hora:
• Ligue a cafeteira, o ecrã LCD (h) indica
12:00.
• Prima o botão “PRO” durante 3 segundos, o
ecrã deixa de piscar e indica “set time”
(“ajustar temporizador”).
• Prima o botão “HR” para ajustar a hora. Uma
pressão prolongada do botão permite
visualizar rapidamente os algarismos.
• Prima o botão “MIN” para ajustar os minutos.
Uma pressão prolongada do botão permite
visualizar rapidamente os algarismos.
• Valide o ajuste premindo de novo o botão
“PRO” durante 3 segundos.
Funcionamento no modo manual:
• Prima o botão encarnado “
vermelha ilumina-se e a cafeteira começa a
funcionar.
• Prima de novo o botão “
o funcionamento.
Funcionamento no modo de programação:
• Prima duas vezes o botão “PRO”, o ecrã
indica “set time” (“ajustar temporizador”).
• Prima o botão “HR” para ajustar a hora.
• Prima o botão “MIN” para ajustar os minutos.
• Valide o ajuste premindo de novo o botão
“PRO”. O ecrã indica novamente a hora
actual.
”, a luz piloto
” para interromper
CafetièreCM823 1/06/06, 10:4312
12
Page 11

• Prima o botão “AU TO” para activar a
programação. A luz piloto verde iluminar-seá.
À hora programada, a luz piloto vermelha
iluminar-se-á e a cafeteira começa a funcionar.
• Prima o botão “
funcionamento.
• Pode, a qualquer altura, anular a
programação premindo o botão “AUTO”. O
indicador verde apaga-se. Reactive a
programação premindo de novo o botão
“AUTO”.
Observação acerca dos dois modos: a
cafeteira deixa de funcionar automaticamente
ao fim de 2h caso não a tenha desligado no
final do ciclo com o botão “
” para interromper o
”.
Limpeza
• Para retirar as borras de café, retire o portafiltro (c) da cafeteira.
• Desligue o aparelho.
• Não limpe o aparelho enquanto este estiver
quente.
• Limpe com um pano ou uma esponja
húmida.
• Nunca coloque ou passe o aparelho sob
água corrente.
• O porta-filtro pode ser lavado na máquina
da loiça.
Acessórios
Jarra isotérmica
Jarra de vidro
No caso de problemas
- Verifique:
• a ligação.
• se o interruptor ou o botão Ligar/Desligar
(luz piloto vermelha acesa) se encontra na
posição ligar.
• se o porta-filtro se encontra devidamente
bloqueado.
- O tempo de escoamento da água é
demasiado longo ou o ruído é excessivo:
• proceda à descalcificação do aparelho.
Se o seu aparelho não funciona, o que
fazer? Dirija-se a um Serviço de Assistência
Técnica autorizado.
Protecção do ambiente em
primeiro lugar!
i O seu produto contém materiais que podem
ser recuperados ou reciclados.
Ü Entregue-o num ponto de recolha para
possibilitar o seu tratamento.
Descalcificação
• Proceda à descalcificação do seu aparelho
a cada 40 ciclos.
Pode utilizar:
• uma saqueta do produto de descalcificação
diluído em 2 grandes chávenas de água.
• ou 2 grandes chávenas de vinagre de álcool
branco.
• Verta a mistura no depósito (b) e ligue a
cafeteira (sem café moído).
• Deixe correr para a jarra de vidro ou a jarra
isotérmica (g) o equivalente a uma chávena
e, de seguida, desligue o aparelho.
• Deixe a mistura actuar no aparelho durante
uma hora.
• Volte a ligar a cafeteira para terminar o
enxaguamento.
• Enxagúe a cafeteira, fazendo-a funcionar 2
ou 3 vezes com 1 litro de água.
A garantia não abrange as cafeteiras que
não funcionam ou que funcionam mal
devido à falta de descalcificação.
CafetièreCM823 1/06/06, 10:4313
13
Page 12
Italiano
Descrizione
a Coperchio
b Serbatoio
c Porta-filtro
d Piastra riscaldante
e Interruttore on/off o display di controllo
f Cucchiaio dosatore
g Brocca o caraffa isotermica
(a seconda del modello)
Modelli programmabili
h Display LCD
i Tasto on/off
j Tasto AUTO
k Tasto PRO
l Spia di programmazione (verde)
m Tasto HR
n Tasto MIN
o Spia on/off (rosso)
”
Consigli di sicurezza
• Prima di utilizzare l’apparecchio, leggete
attentamente le istruzioni d’uso: un
utilizzo non conforme alle norme d’uso
manleverà il produttore da ogni
responsabilità.
• Non lasciate l’apparecchio alla portata dei
bambini senza sorveglianza. L’utilizzo di
questo apparecchio da parte di bambini o di
persone portatrici di handicap deve avvenire
sotto sorveglianza.
• Prima di collegare l’apparecchio,
assicuratevi che la tensione di alimentazione
di quest’ultimo corrisponda a quella del
vostro impianto elettrico e che la presa di
corrente sia dotata di messa a terra.
Qualsiasi errore di collegamento elettrico
annulla il diritto alla garanzia.
• L’apparecchio è destinato al solo uso
domestico, all’interno dell’abitazione.
• Al termine dell’utilizzo o durante le operazioni
di pulizia scollegate l’apparecchio.
• Se il vostro apparecchio non funziona
correttamente o se è stato danneggiato, non
utilizzatelo. In tal caso, rivolgetevi ad un
centro di assistenza autorizzato.
• Eventuali interventi diversi dalla pulizia e
dalle normali operazioni di manutenzione
effettuate dal cliente devono essere svolti
presso un centro di assistenza autorizzato.
• Se il cavo di alimentazione o la spina
risultano danneggiati, non utilizzate
l’apparecchio. Al fine di evitare qualsiasi
pericolo fate in ogni caso sostituire il cavo di
alimentazione presso un centro autorizzato.
• Non immergete mai l’apparecchio, il cavo o
la spina nell’acqua o in altro liquido.
• Non lasciate che il cavo di alimentazione
penda e sia a portata di mano dei bambini.
• Il cavo di alimentazione non deve mai trovarsi
vicino o a contatto con le parti riscaldate
dell’apparecchio, a una fonte di calore o a
uno spigolo vivo.
• Per la vostra sicurezza utilizzate solo
accessori e pezzi di ricambio originali del
fabbricante adatti al vostro apparecchio.
• Non scollegate la spina dalla presa tirando
il cavo.
• Non utilizzate la brocca o la caraffa
isotermica su una fiamma e su piastre di
fornelli elettrici.
• Non versate nuovamente acqua
nell’apparecchio se è ancora caldo.
• Chiudete sempre il coperchio (a) quando la
caffettiera è in funzione.
• Tutti gli apparecchi sono sottoposti a severi
controlli di qualità. Delle prove di utilizzo
pratico sono effettuate su apparecchi presi
a caso e questo spiega eventuali tracce di
uso su prodotti nuovi.
• Non mettete mai la brocca o la caraffa
isotermica in un forno a microonde, in una
lavastoviglie o su una piastra di cottura.
• Non introducete mai la vostra mano
all’interno della caraffa isotermica.
• Non utilizzate la brocca o la caraffa
isotermica senza il coperchio.
Primo utilizzo
• Fate funzionare l’apparecchio una volta
senza caffè e con 1 litro d’acqua per
sciacquare il circuito.
Preparazione del caffè
(Seguire le illustrazioni da 1 a 8)
• Utilizzate unicamente acqua fredda e un filtro
di carta n. 4. Non utilizzate la caraffa
isotermica senza il coperchio.
• Non oltrepassate il livello d’acqua massimo
indicato sul serbatoio.
• Questa caffettiera è dotata di un sistema
ferma-goccia che consente di servire il caffè
anche durante il passaggio dell’acqua. Per
evitare fuoriuscite, rimettete velocemente la
14
CafetièreCM823 1/06/06, 10:4314
Page 13
brocca o la caraffa isotermica al suo posto
nell’apparecchio.
• Per non far disperdere il calore, sciacquate
la caraffa isotermica sotto l’acqua calda
prima dell’utilizzo.
• Il coperchio della caraffa isotermica deve
essere avvitato saldamente verso destra fino
a fine corsa per preparare e mantenere caldo
il caffè.
Per servire il caffè premete la leva del coperchio
della caraffa isotermica verso il basso.
• Attendete alcuni minuti prima di iniziare una
seconda preparazione.
PER IL MODELLO PROGRAMMABILE:
Regolazione dell’ora
• Collegate la caffettiera: il display LCD (h)
indica le ore 12:00.
• Premete il tasto «PRO» per 3 secondi: il
display cessa di lampeggiare e indica «set
time».
• Premete il tasto «HR» per regolare l’ora. Una
pressione prolungata consente uno
scorrimento più rapido delle cifre.
• Premete il tasto «MIN» per regolare i minuti.
Una pressione prolungata consente uno
scorrimento più rapido delle cifre.
• Confermate l’impostazione premendo
nuovamente per 3 secondi il tasto «PRO».
Funzionamento in modalità manuale
• Premete il tasto rosso «
accende e la caffettiera inizia a funzionare.
• Premete nuovamente il tasto «
arrestare il funzionamento.
Funzionamento in modalità programmabile
• Premete due volte il tasto “PRO»: il display
indica «set time».
• Premete il tasto «HR» per regolare l’ora.
• Premete il tasto «MIN» per regolare i minuti.
• Confermate l’impostazione premendo
nuovamente il tasto «PRO». Il display ritorna
all’ora corrente.
• Premete il tasto «AU TO» per attivare la
programmazione. La spia verde si accende.
All’ora programmata, la spia rossa si accende
e la caffettiera inizia a funzionare.
• Premete il tasto «
funzionamento.
• Potete annullare in qualsiasi momento la
programmazione premendo il tasto «AUTO».
La spia verde si spegne. Riavviate la
programmazione premendo nuovamente il
tasto «AUTO».
”»: la spia rossa si
”» per
”» per arrestare il
Attenzione alle due modalità: se non l’avete
spenta con il tasto «
caffettiera cessa automaticamente di
funzionare dopo 2 ore.
”» a fine ciclo, la
Pulizia
• Per eliminare la miscela di caffè usata per la
preparazione, estraete il porta-filtro (c) dalla
caffettiera.
• Scollegate l’apparecchio.
• Non pulite l’apparecchio quando quest’ultimo
è ancora caldo.
• Pulite con un panno o con una spugna
umida.
• Non lavate mai l’apparecchio immergendolo
in acqua o passandolo sotto l’acqua
corrente.
• Il porta-filtro può essere messo in
lavastoviglie.
Decalcificazione
• L’operazione di decalcificazione deve essere
eseguita ogni 40 cicli.
Per far ciò, potete utilizzare:
• una bustina di decalcificante diluito in 2 tazze
grandi di acqua,
• o 2 tazze grandi di aceto di vino bianco.
• Versate nel serbatoio (b) e accendete la
caffettiera (senza miscela).
• Lasciate scendere nella brocca o nella
caraffa isotermica (g) l’equivalente di una
tazza, quindi interrompete il funzionamento.
• Lasciate agire per circa un’ora.
• Passato questo tempo, riavviate
l’apparecchio per terminare il passaggio del
liquido.
• Sciacquate la caffettiera facendola
funzionare 2 o 3 volte con 1 litro di acqua
pulita.
La garanzia non copre le caffettiere mal
funzionanti a causa della mancata
decalcificazione.
Accessori
Caraffa isotermica
Brocca in vetro
15
CafetièreCM823 1/06/06, 10:4315
Page 14

In caso di problemi
- Verificate:
• il collegamento elettrico;
• che l’interruttore o il tasto on/off
rossa accesa) sia in posizione on;
• che il porta-filtro sia ben chiuso.
- Il tempo di scorrimento dell’acqua è troppo
lungo o viene prodotto eccessivo rumore:
• decalcificate la vostra caffettiera.
L’apparecchio continua a non funzionare?
Rivolgetevi a un centro assistenza autorizzato.
Partecipiamo alla
protezione
dell’ambiente!
i Il vostro apparecchio è composto da diversi
materiali che possono essere riciclati.
Ü Lasciatelo in un punto di raccolta o presso
un Centro Assistenza Autorizzato.
” (spia
CafetièreCM823 1/06/06, 10:4316
16
Page 15

CafetièreCM823_ara_Vecto.qxd 31/05/06 17:24 Page 2
Page 16

CafetièreCM823_ara_Vecto.qxd 31/05/06 17:24 Page 1
Page 17

Dansk
Beskrivelse
a Låg
b Vandbeholder
c Filterholder
d Varmeplade
e Tænd / sluk knap eller
betjeningsdisplay
f Måleske
g Glaskande eller termokande
(afhængig af model)
Programmerbare modeller
h LCD display
i Tænd / sluk tast
AUTO tast
k PRO tast
l Kontrollampe for programmering
(grøn)
m HR tast
n MIN tast
o Kontrollampe for tænd / sluk (rød)
Sikkerhedsanvisninger
• Læs brugsanvisningen omhyggeligt
igennem, før kaffemaskinen tages i brug
første gang: Fabrikanten påtager sig intet
ansvar for skader opstået ved forkert
brug.
• Anbring ikke kaffemaskinen indenfor børns
rækkevidde uden opsyn. Lad ikke små børn
eller handicappede personer bruge
apparatet uden opsyn.
• Før kaffemaskinen tilsluttes, kontroller at el-
nettets spænding svarer til apparatets og at
el-stikket er ekstrabeskyttet med HFI-relæ.
Garantien bortfalder ved tilslutning til
forkert spænding.
• Kaffemaskinen er kun beregnet til indendørs
brug i en almindelig husholdning.
• Tag apparatets stik ud, når det ikke bruges
og under rengøring.
• Brug ikke kaffemaskinen, hvis den ikke
fungerer korrekt eller hvis den er beskadiget.
Kontakt i så fald et autoriseret
serviceværksted.
• Reparationer og service ud over kundens
almindelige vedligeholdelse og rengøring
skal foretages af et autoriseret
serviceværksted.
• Brug ikke kaffemaskinen hvis ledningen eller
stikket er beskadiget. Ledningen må kun
udskiftes af et autoriseret serviceværksted
for at undgå enhver fare.
• Dyp ikke kaffemaskinen, ledningen eller
stikket ned i vand eller enhver anden væske.
• Lad ikke ledningen hænge ned indenfor
børns rækkevidde.
• Ledningen må aldrig komme i nærheden af
eller i kontakt med kaffemaskinens varme
dele, en varmekilde eller en skarp kant.
• For at der ikke skal ske uheld og skader må
man kun bruge fabrikantens tilbehørsdele og
reservedele, der passer til modellen.
• Tag ikke stikket ud af stikkontakten ved at
trække i ledningen.
• Brug ikke kanden eller termokanden på et
gasblus eller en elektrisk kogeplade.
• Fyld ikke vand på kaffemaskinen mens den
endnu er varm.
• Luk altid låget (a) mens kaffemaskinen
fungerer.
• Alle apparaterne er underkastet en streng
kvalitetskontrol. Hvis kaffemaskinen ser ud
til at have været brugt, skyldes det, at der
afprøves tilfældigt udvalgte apparater.
• Stil aldrig kanden eller termokanden ind i en
mikrobølgeovn, i opvaskemaskine eller på
en kogeplade.
• Før aldrig hånden ind i termokanden.
• Brug ikke kanden eller termokanden uden
låg.
Før første ibrugtagning
• Første gang kaffemaskinen tages i brug,
start med en bryggefase uden kaffe og 1 liter
vand for at skylle kredsløbet.
Kaffebrygning
(Følg illustrationerne fra 1 til 8)
• Brug kun koldt vand og et kaffefilter nr. 4.
Brug ikke termokanden uden låg.
• Overskrid ikke max. niveauet for vand vist
på vandbeholderen.
• Denne kaffemaskine er udstyret med et
drypstopsystem, der gør det muligt at
skænke kaffe, før vandet er løbet helt
igennem. Stil hurtigt kanden eller
termokanden tilbage for at undgå, at filtret
løber over.
• Skyl termokanden i varmt vand før brug for
at bevare varmen bedre.
• Termokandens låg skal være skruet godt til
højre indtil anslag under kaffebrygningen og
for at holde kaffen varm.
19
Cafetière-DK-NV-SE-FI-ES.p65 9/10/06, 9:5619
Page 18
Tryk på håndtaget på termokandens låg for at
skænke kaffe.
• Vent i nogle minutter, før der brygges kaffe
igen.
2 timer, hvis man ikke har slukket for den efter
kaffebrygningen med tasten «
».
Rengøring
PROGRAMMERBAR MODEL:
Indstilling af klokkeslæt:
• Sæt kaffemaskinens stik i, LCD displayet (h)
viser 12:00.
• Tryk på tasten «PRO» i 3 sekunder.
Displayet holder op med at blinke og viser
«set time».
• Tryk på tasten «HR» for at indstille tallet for
timer. Med et langt tryk på tasten ruller tallene
hurtigt forbi.
• Tryk på tasten «MIN» for at indstille tallet for
minutter. Med et langt tryk på tasten ruller
tallene hurtigt forbi.
• Godkend indstillingen ved igen at trykke i
3 sekunder på tasten «PRO».
Virkemåde i manuel funktion:
• Tryk på den røde tast «
kontrollampe tænder og kaffemaskinen starter.
• Tryk igen på tasten «
kaffemaskinen.
Virkemåde i programmerbar funktion:
• Tryk to gange på tasten «PRO», displayet
viser «set time».
• Tryk på tasten «HR» for at indstillet tallet for
timer.
• Tryk på tasten «MIN» for at indstille tallet for
minutter.
• Godkend indstillingen ved igen at trykke på
tasten «PRO». Derefter viser displayet igen
det aktuelle klokkeslæt.
• Tryk på tasten «AUTO» for at aktivere
programmeringen. Den grønne kontrollampe
tænder.
På det programmerede klokkeslæt tænder
den røde kontrollampe og kaffemaskinen starter.
• Tryk på tasten «
kaffemaskinen.
• Man kan annullere programmeringen på et
vilkårligt tidspunkt ved at trykke på tasten
«AUTO». Den grønne kontrollampe slukker.
Programmeringen genaktiveres ved igen at
trykke på tasten «AUTO».
Bemærkning vedrørende de to funktioner:
Kaffemaskinen slukker automatisk efter
», den røde
» for at standse
» for at standse
• Tag filterholderen (c) ud af kaffemaskinen
for at kaste den brugte kaffe bort.
• Tag kaffemaskinens stik ud.
• Rengør ikke kaffemaskinen mens den er
varm.
• Rengør den med en fugtig klud eller svamp.
• Dyp aldrig kaffemaskinen ned i vand og hold
den aldrig under rindende vand.
• Filterholderen kan vaskes i opvaskemaskine.
Afkalkning
• Afkalk kaffemaskinen efter 40 kaffebrygninger.
Man kan bruge:
• enten en pose afkalkningsmiddel fortyndet i
2 store kopper vand.
• eller 2 store kopper hvid eddike.
• Hæld væsken ned i vandbeholderen (b) og
start kaffemaskinen (uden kaffe).
• Lad ca. halvdelen af væsken løbe ned i
kanden eller termokanden (g) og stands
derefter kaffemaskinen.
• Lad opløsningen virke i en time.
• Start kaffemaskinen igen for at lade resten
af væsken løbe igennem.
• Skyl derefter kaffemaskinen ved at starte den
2 eller 3 gange med 1 liter rent vand.
Garantien dækker ikke kaffemaskiner, der
ikke virker eller fungerer dårligt, fordi de
ikke er blevet afkalket.
Tilbehør
Termokande
Glaskande
Hvis kaffemaskinen ikke
virker
- Kontroller:
• at stikket er sat i.
• at kontakten eller Tænd / Sluk tasten
(rød kontrollampe) er slået til.
• at filterholderen er spærret.
- Hvis vandet løber for langsomt igennem eller
kaffemaskinen støjer for meget:
• afkalk kaffemaskinen.
Cafetière-DK-NV-SE-FI-ES.p65 9/10/06, 9:5620
20
Page 19

Hvis kaffemaskinen stadig ikke fungerer,
kontakt et autoriseret serviceværksted.
Norsk
Vi skal alle være med til at
beskytte miljøet!
Apparatet indeholder mange materialer,
der kan genvindes eller genbruges.
Bring det til et specialiseret
indsamlingssted for genbrug eller et
autoriseret serviceværksted, når det ikke
skal bruges mere.
Beskrivelse
a Lokk
b Vanntank
c Filterholder
d Varmeplate
e På/av-knapp eller kontrolldisplay
f Doseringsskje
g Kanne eller termokanne (avhengig
av modell)
Programmerbare modeller
h LCD-skjerm
i På/av-tast
j AUTO-tast
k PRO-tast
l Lysindikator for programmering
(grønn)
m HR-tast
n MIN-tast
o På/av-indikator (rød)
Sikkerhetsråd
• Les bruksanvisningen grundig før du
bruker apparatet første gang: Bruk i strid
med bruksanvisningen fritar
produsenten for ethvert ansvar.
• La aldri apparatet være innen barns
rekkevidde uten tilsyn. Når små barn eller
handikappede personer bruker maskinen,
må dette skje under tilsyn.
• Før apparatet tilkobles, sjekk at
nettspenningen i ditt hjem tilsvarer
apparatets nettspenning og at stikkontakten
er jordet.
Enhver tilkoblingsfeil opphever garantien.
• Denne maskinen er beregnet kun på privat
husholdningsbruk og til matlaging og kun
innendørs.
• Kople fra maskinen straks du ikke bruker den
mer eller når du rengjør den.
• Ikke bruk maskinen hvis den ikke fungerer
ordentlig eller hvis den har blitt skadet. I dette
tilfellet må du henvende deg til et godkjent
servicesenter.
• All annen intervensjon enn vanlig rengjøring
og vedlikehold av kunden, skal utføres av et
godkjent servicesenter.
• Ikke bruk maskinen hvis strømledningen
eller støpselet viser tegn på slitasje. For å
unngå enhver fare, må strømledningen
skiftes ut av et godkjent servicesenter.
21
Cafetière-DK-NV-SE-FI-ES.p65 9/10/06, 9:5621
Page 20

• Apparatet, strømledningen eller støpselet
må aldri legges ned i vann eller annen
væske.
• Ikke la strømledningen henge ned slik at små
barn kan gripe den.
• Strømledningen skal aldri være i nærheten
av eller i kontakt med maskinens varme
deler, i nærheten av en varmekilde eller ligge
på en skarp kant.
• Av sikkerhetsgrunner må du utelukkende
bruke tilbehørsdeler og reservedeler fra
produsenten som er tilpasset maskinen.
• Ikke ta ut støpselet fra stikkontakten ved å
dra i ledningen.
• Ikke bruk glass- eller termokannen over et
gassbluss eller på elektriske kokeplater.
• Ikke ha vann i maskinen dersom den ennå
er varm.
• Lukk alltid lokket (a) når kaffetrakteren er i
gang.
• Alle maskiner er underlagt en streng
kvalitetskontroll. Praktiske bruksprøver
utføres på tilfeldig utvalgte apparater, noe
som forklarer hvorfor det kan forekomme
spor etter bruk på visse maskiner.
• Sett aldri glass- eller termokannen i en
mikrobølgeovn, oppvaskmaskin eller på en
kokeplate.
• Før aldri hånden inn i termokannen.
• Bruk aldri glass- eller termokannen uten
lokket.
Før apparatet brukes første
gang
• Kjør kaffetrakteren en gang uten kaffe med
1 liter vann for å skylle kretsen.
Tilberedning av kaffe
(Følg illustrasjonene fra 1 til 8)
• Bruk kun kaldt vann og et papirfilter nr. 4.
Ikke bruk termokannen uten lokket.
• Ikke overstig den maksimale mengden vann
oppgitt på vannsandsindikatoren på
vanntanken.
• Denne kaffetrakteren er utstyrt med
dryppstopp slik at du kan servere en
kaffekopp før slutten av traktingen. Sett raskt
glass- eller termokannen tilbake på plass for
å unngå at vannet renner over.
• For at varmen holdes lengre, skyll
termokannen med varmt vann før du bruker
den.
• Lokket til termokannen skal låses ved å vri
det til høyre inntil stoppunktet under
tilberedningen av kaffen og mens kaffen
holdes varm.
Når kaffen serveres, trykk ned tasten på
termokannens lokk.
• Vent noen minutter før du trakter kaffe på
nytt.
FOR DEN PROGRAMMERBARE MODELLEN:
Innstilling av klokkeslett:
• Slå på kaffetrakteren. LCD-skjermen (h) viser 12:00.
• Trykk på tasten ”PRO” i 3 sekunder.
Skjermen slutter å blinke og viser ”set time”.
• Trykk på tasten ”HR” for å stille timen. Tallene
går fortere ved et langt trykk på tasten.
• Trykk på tasten ”MIN” for å stille minuttene.
Tallene går fortere ved et langt trykk på
tasten.
• Bekreft innstillingen ved å trykke på nytt
3 sekunder på tasten ”PRO”.
Manuell modus:
• Trykk på den røde tasten ”
indikatoren tennes og kaffetrakteren
begynner å trakte.
• Trykk på nytt på tasten ”
trakteren.
Programmerbar modus:
• Trykk to ganger på tasten ”PRO”. Skjermen
viser ”set time”.
• Trykk på tasten ”HR” for å stille timen.
• Trykk på tasten ”MIN” for å stille minuttene.
• Bekreft innstillingen ved å trykke på nytt på
tasten ”PRO”. Skjermen viser det aktuelle
klokkeslettet.
• Trykk på tasten ”AUTO” for å aktivere
programmeringen. Det grønne indikatorlyset
tennes.
På det programmerte tidspunktet, tennes den
røde indikatoren og kaffetrakteren begynner å
fungere.
• Trykk på tasten ”
• Du kan når som helst annullere
programmeringen ved å trykke på tasten
”AUTO”. Den grønne indikatoren slukkes.
Aktiver programmeringen på nytt ved å
trykke på nytt på tasten ”AUTO”.
Merknad om de to modusene: Kaffetrakteren
slutter automatisk å gå etter 2 timer hvis den
” for å stoppe trakteren.
”. Den røde
” for å stoppe
Cafetière-DK-NV-SE-FI-ES.p65 9/10/06, 9:5622
22
Page 21
ikke ble stanset ved slutten av syklusen med
tasten ”
”.
Svenska
Rengjøring
• For å fjerne det brukte kaffepulveret, ta
filterholderen (c) ut av kaffetrakteren.
• Koble fra maskinen.
• Ikke rengjør maskinen mens den er varm.
• Rengjør med en fuktig klut eller svamp.
• Aldri legg maskinen i vann eller hold den
under rennende vann.
• Filterholderen kan vaskes i oppvaskmaskin.
Avkalking
• Avkalk kaffetrakteren etter 40 sykluser.
Du kan bruke:
• enten en pose avkalkingsmiddel utblandet i
2 store kopper vann.
• eller 2 store kopper hvit eddik.
• Hell middelet i vanntanken (b) og slå på
kaffetrakteren (uten kaffepulver).
• La en koppfull renne inn i glass- eller
termokannen (g), slå den så av.
• La middelet virke i en time.
• Slå på kaffetrakteren igjen og la resten av
middelet renne gjennom.
• Skyll kaffetrakteren ved å kjøre den 2 eller 3
ganger med 1 liter vann.
Garantien utelukker kaffetraktere som ikke
fungerer, eller som fungerer dårlig på
grunn av mangel på avkalking.
Tilbehørsdeler
Termokanne
Glasskanne
Feilsøking
- Sjekk:
• tilkoblingen.
• at bryteren eller på/av-knappen
lysende indikator) er slått på.
• at filterholderen er riktig satt på plass.
- Gjennomrenningen av vannet er for langsom
eller den lager unormalt høy lyd:
• avkalk kaffetrakteren.
Fungerer maskinen fortsatt ikke? Henvend
deg til et godkjent servicesenter.
(rød
Beskrivning
a Lock
b Vattenbehållare
c Filterhållare
d Värmeplatta
e på-/avknapp eller kontrollfönster
f Kaffemått
g Kaffekanna eller termoskanna
(beroende på modell)
Programmerbara modeller
h LCD-display
i på-/avknapp
j AUTO-knapp
k PRO-knapp
l Programmeringslampa (grön)
m HR-knapp
n MIN-knapp
o Lampa för på/av (röd)
Säkerhetsföreskrifter
• Läs bruksanvisningen noggran t före den
första användningen: Tillverkaren fråntar
sig allt ansvar vid användning som inte
stämmer överens med bruksanvisningen.
• Lämna inte apparaten inom räckhåll för barn
utan tillsyn. Apparaten skall inte användas
av små barn eller av personer som inte klarar
av att hantera elektrisk utrustning utan tillsyn.
• Innan anslutning av apparaten, kontrollera
att din elektriska installation
överensstämmer med apparatens
nätspänning och att apparaten ansluts till ett
jordat uttag.
Garantin gäller inte om apparaten ansluts
på ett felaktigt sätt.
• Denna produkt är endast avsedd för
hemmabruk inomhus.
• Koppla ur apparaten så snart du inte
använder den och vid rengöring.
• Använd inte apparaten om den inte fungerar
normalt eller om den uppvisar skador.
Kontakta i så fall en godkänd
serviceverkstad.
• Alla åtgärder och reparationer, med
undantag av rengöring och sedvanligt
underhåll, skall utföras av en godkänd
serviceverkstad.
• Om sladden eller stickkontakten har skadats,
använd inte apparaten. För att undvika all
fara är det nödvändigt att de byts ut av en
godkänd serviceverkstad.
23
Cafetière-DK-NV-SE-FI-ES.p65 9/10/06, 9:5623
Page 22
• Doppa inte ner apparaten, sladden eller
stickkontakten i vatten eller annan vätska.
• Låt inte sladden hänga ner så att barn kan
nå den.
• Sladden skall aldrig vara i närheten av eller
i kontakt med apparatens varma delar, nära
en värmekälla eller hänga över vassa kanter.
• För din säkerhet, använd endast tillverkarens
tillbehör och reservdelar avsedda för din
apparat.
• Koppla inte ur apparaten genom att dra i
själva sladden.
• Använd inte kaffekannan eller termoskannan
över öppen låga eller på en elektrisk spis.
• Fyll inte på vatten i apparaten när den
fortfarande är varm.
• Stäng alltid locket (a) när kaffebryggaren är
igång.
• Alla apparater genomgår en sträng
kvalitetskontroll. Användningstester
tillämpas i praktiken med slumpmässigt
utvalda apparater, vilket förklarar eventuella
spår av användning.
• Placera aldrig kaffekannan eller
termoskannan i en ugn, mikrovågsugn,
diskmaskin eller på en spisplatta.
• Stick aldrig in handen inuti termoskannan.
• Använd inte kaffekannan eller termoskannan
utan tillhörande lock.
Före den första
användningen
• Kör igenom bryggaren den första gången
utan kaffepulver med 1 liter vatten för att
skölja systemet.
Kaffebryggning
(Följ bilderna 1–8)
• Använd bara kallvatten och ett pappersfilter
(nr 4). Använd inte termoskannan utan
tillhörande överdel.
• Överskrid inte maximal vattenkapacitet enligt
behållarens vattennivåmätare.
• Kaffebryggaren är utrustad med ett
droppstopp som gör det möjligt att servera
en kopp kaffe under pågående bryggning
även om allt vatten inte har runnit igenom.
Ställ snabbt tillbaka kaffekannan eller
termoskannan för att förhindra att filtret
svämmar över.
• För optimal varmhållning, skölj
termoskannan med hett vatten före
användning.
• Locket skall vara ordentligt påskruvat till
höger ända till spärren vid kaffebryggning
och varmhållning.
Håll ned spaken på termoskannans lock när
du vill servera kaffe.
• Vänta några minuter innan du brygger nästa
omgång kaffe.
FÖR DEN PROGRAMMERBARA MODELLEN:
Ställa in tiden:
• Anslut kaffebryggaren. På LCD-displayen (h)
visas då 12:00.
• Tryck på knappen "PRO" i 3 sekunder.
Displayen slutar att blinka och "set time" visas.
• Tryck på knappen "HR" för att ställa in
timmar. Om du håller in knappen räknar
siffrorna framåt snabbare.
• Tryck på knappen "MIN" för att ställa in minuter. Om du håller in knappen räknar
siffrorna framåt snabbare.
• Bekräfta inställningarna genom att trycka en
gång till i 3 sekunder på knappen "PRO".
Funktion i manuellt läge:
• Tryck på den röda knappen "
knappen tänds och kaffebryggaren sätter
igång.
• Tryck en gång till på knappen "
stoppa kaffebryggaren.
Funktion i programläge:
• Tryck två gånger på knappen "PRO". På
displayen visas då "set time".
• Tryck på knappen "HR" för att ställa in
timmar.
• Tryck på knappen "MIN" för att ställa in minuter.
• Bekräfta inställningarna genom att trycka en
gång till på knappen "PRO". Då visas åter
det aktuella klockslaget på displayen.
• Tryck på knappen "AUTO" för att aktivera
programmeringen. Den gröna lampan tänds.
När den programmerade tiden är inne tänds
den röda lampan och kaffebryggaren sätter
igång.
• Tryck på knappen "
kaffebryggaren.
• Du kan när som helst avbryta
programmeringen genom att trycka på
knappen "AUTO". Den gröna lampan släcks.
Omaktivera programmeringen genom att
trycka en gång till på knappen "AUTO".
24
" för att stoppa
". Den röda
" för att
Cafetière-DK-NV-SE-FI-ES.p65 9/10/06, 9:5624
Page 23

Anmärkning för båda lägena:
Kaffebryggaren stängs automatiskt av efter
två timmar om du inte har stängt av den med
knappen " " när kaffet är färdigbryggt.
Rengöring
Apparaten fungerar fortfarande inte?
Kontakta en godkänd serviceverkstad.
Var rädd om miljön!
• Ta av filterhållaren (c) från kaffebryggaren
för att slänga kaffesumpen.
• Koppla ur apparaten.
• Rengör inte en varm apparat.
• Rengör med en trasa eller en fuktig svamp.
• Ställ aldrig apparaten i vatten eller under
rinnande vatten.
• Filterhållaren kan diskas i diskmaskin.
Avkalkning
• Kalka av kaffebryggaren efter var 40:e
användning.
Du kan använda:
• antingen en dos avkalkningsmedel som
blandas ut i 2 stora koppar vatten.
• eller 2 stora koppar ättikssprit.
• Häll i vattenbehållaren (b) och starta
kaffebryggaren (utan kaffepulver).
• Låt motsvarande en kopp rinna ner i
kaffekannan eller termoskannan (g) stäng
därefter av.
• Låt verka i en timme.
• Sätt igång kaffebryggaren igen och låt resten
rinna igenom.
• Skölj kaffebryggaren genom att köra igenom
1 liter vatten 2 eller 3 ggr.
Garantin gäller inte för kaffebryggare som
inte fungerar eller fungerar onormalt på
grund av att avkalkning inte har gjorts.
Din apparat innehåller olika material som
kan återanvändas eller återvinnas.
Lämna den på en återvinningsstation eller
på en auktoriserad serviceverkstad för
omhändertagande och behandling.
Tillbehör
Termoskanna
Kaffekanna i glas
Vid problem
- Kontrollera:
• anslutningen.
• att strömbrytaren eller på-/av-knappen
i läge på (den röda lampan lyser).
• att filterhållaren är låst.
- Om det tar för lång tid för vattnet att rinna
igenom eller om kaffebryggarens ljudnivå
ökar:
• kalka av kaffebryggaren.
Cafetière-DK-NV-SE-FI-ES.p65 9/10/06, 9:5625
är
25
Page 24

Suomi
Kuvaus
a Kansi
b Säiliö
c Suodatinteline
d Lämmityslevy
e Käynnistys-/sammutusnappi tai
kontrollinäyttö
f Annoslusikka
g Kaatokannu tai termoskannu
(mallista riippuen)
Ohjelmoitavat mallit
h LCD-näyttö
i Käynnistys-/sammutusnäppäin
j AUTO- näppäin
k PRO- näppäin
l Ohjelmointimerkkivalo (vihreä)
m HR- näppäin
n MIN- näppäin
o Käynnistys-/sammutusmerkkivalo
(punainen)
Turvaohjeet
• Lue käyttöohjeet ennen laitteen
ensimmäistä käyttöä: ohjeiden vastainen
käyttö vapauttaa valmistajan kaikesta
vastuusta.
• Älä jätä laitetta lasten ulottuville ilman
valvontaa. Lapset ja henkisesti tai fyysisesti
kykenemättömät henkilöt saavat käyttää tätä
laitetta vain muiden valvonnassa.
• Ennen laitteen kytkemistä sähköverkkoon on
tarkistettava, että syöttövirran jännite vastaa
laitteen jännitettä ja että pistorasia on
maadoitettu.
Virheellinen sähköliitos kumoaa takuun.
• Laite on tarkoitettu vain kotikäyttöön
sisätiloissa.
• Irrota laite sähköverkosta, jos lopetat sen
käytön ja jos puhdistat sitä.
• Älä käytä laitetta, jos ei toimi kunnolla tai se
on vahingoittunut. Tässä tapauksessa on
käännyttävä valtuutetun huoltokeskuksen
puoleen.
• Kaikki muut toimenpiteet paitsi puhdistus ja
normaali huolto tulee antaa valtuutetun
huoltokeskuksen tehtäväksi.
• Jos sähköjohto tai pistoke on vahingoittunut,
älä käytä laitetta. Vaarojen välttämiseksi
sähköjohto on ehdottomasti annettava
valtuutetun huoltokeskuksen vaihdettavaksi.
• Älä laita laitetta, sen sähköjohtoa tai
pistoketta veteen tai muuhun nesteeseen.
• Älä anna sähköjohdon roikkua lasten
ulottuvilla.
• Sähköjohtoa ei saa laittaa kiinni laitteen
kuumiin osiin tai muihin lämmönlähteisiin tai
niiden lähelle tai terävälle kulmalle.
• Oman turvallisuutesi vuoksi käytä vain
valmistajan lisälaitteita ja varaosia, jotka
sopivat laitteeseen.
• Älä irrota pistoketta vetämällä johdosta.
• Älä käytä kaatokannua tai termoskannua
avotulella tai sähkölevyllä.
• Älä lisää laitteeseen vettä, jos se on vielä
kuuma.
• Sulje kansi (a) aina, kun käytät
kahvinkeitintä.
• Kaikki laitteet alistetaan tiukkaan
laatukontrolliin. Sattumanvaraisesti valituille
laitteille tehdään käyttökokeita, mikä selittää
mahdolliset merkit käytöstä.
• Älä koskaan laita kaatokannua tai
termoskannua mikroaaltouuniin,
astianpesukoneeseen tai keittolevylle.
• Älä koskaan laita kättä termospannun
sisään.
• Älä käytä kaatokannua tai termoskannua
ilman kantta.
Ennen ensimmäistä
käyttökertaa
• Käytä kahvinkeitintä ensimmäisellä kerralla
ilman kahvia 1 litralla vettä laitteen kierron
huuhtelemiseksi.
Kahvin valmistus
(Seuraa kuvia 1 - 8)
• Käytä vain kylmää vettä ja suodatinpaperia
n°4. Älä käytä termospannua ilman korkkia.
• Älä ylitä veden maksimimäärä, joka on
merkitty säiliön vedentason ilmaisimeen.
• Tämä kahvinkeitin on varustettu tippalukolla,
jonka ansiosta voit tarjoilla kahvia ennen
vedenkierron loppumista. Laita kaatokannu
tai termoskannu nopeasti takaisin
paikoilleen, jotta kahvi ei vuoda yli.
• Jotta lämpö säilyy pidempään, termoskannu
tulee huuhdella kuumalla vedellä ennen
käyttöä.
• Termoskannun kannen tulee olla lukittuna
tiukasti oikealle pysäyttäjään asti
Cafetière-DK-NV-SE-FI-ES.p65 9/10/06, 9:5626
26
Page 25
valmistettaessa kahvia ja pidettäessä sitä
lämpimänä.
Kahvin tarjoilemiseksi termoskannun kannen
vipua on painettava alaspäin.
• Odota muutaman minuutti ennen kahvin
keittämisen aloittamista uudelleen.
OHJELMOINTIKÄYTÖSSÄ:
Kellonajan säätö:
• Kytke kahvinkeitin virtalähteeseen, LCD-
näytössä (h) on 12:00.
• Paina näppäintä «PRO» 3 sekunnin ajan,
näyttö lakkaa vilkkumasta ja ilmoittaa «set
time».
• Paina näppäintä «HR» kellonajan
säätämiseksi. Pitkä painallus saa numerot
muuttumaan nopeasti.
• Paina näppäintä «MIN» minuuttien
säätämiseksi. Pitkä painallus saa numerot
muuttumaan nopeasti.
• Vahvista painamalla uudestaan 3 sekunnin
ajan näppäintä «PRO».
Toiminta manuaalisessa käytössä:
• Paina punaista näppäintä «
merkkivalo syttyy ja kahvinkeitin käynnistyy.
• Paina uudestaan näppäintä «
katkaisemiseksi.
Käyttö ohjelmointikäytössä:
• Paina kaksi kertaa näppäintä «PRO», näyttö
ilmoittaa «set time».
• Paina näppäintä «HR» tunnin säätämiseksi.
• Paina näppäintä «MIN» minuuttien
säätämiseksi.
• Vahvista säätö painamalla uudelleen
näppäintä «PRO». Näyttö ilmoittaa sen
hetkisen ajan.
• Paina näppäintä «AUTO» aktivoidaksesi
ohjelmoinnin. Vihreä merkkivalo syttyy.
Ohjelmoidun ajan tullessa täyteen punainen
merkkivalo syttyy ja kahvinkeitin käynnistyy.
• Paina näppäintä «
pysäyttämiseksi.
• Voit aina halutessasi perua ohjelmoinnin
painamalla näppäintä «AUTO». Vihreä
merkkivalo sammuu. Aktivoi ohjelmointi
uudelleen painamalla uudelleen näppäintä
«AUTO».
Huomaa molemmissa käytöissä:
Kahvinkeitin lakkaa toimimasta automaattisesti
2 tunnin kuluttua, jos et ole sammuttanut sitä
käytön lopussa painamalla näppäintä «
», punainen
» käytön
» toiminnan
».
Puhdistus
• Käytettyjen porojen ottamiseksi pois on
suodatinteline (c) otettava pois
kahvinkeittimestä.
• Irrota laite virtalähteestä.
• Älä puhdista laitetta kuumana.
• Puhdista kankaalla tai kostealla sienellä.
• Älä koska laita laitetta veteen tai juoksevan
veden alle.
• Suodatintelineen voi pestä
astianpesukoneessa.
Kalkinpoisto
• Poista kalkki kahvinkeittimestä
40 suodatuskerran välein.
Voit käyttää:
• kalkinpoistopussia, joka liuotetaan
2 kahvikupilliseen vettä.
• tai 2 isoa kahvikupillista väkiviinaetikkaa.
• Kaada puhdistusneste säiliöön (b) ja
käynnistä kahvinkeitin (ilman kahvijauhetta).
• Anna aineen valua kaatokannuun tai
termospannuun (g) noin kupillisen verran,
pysäytä laite sitten.
• Anna vaikutta yksi tunti.
• Käynnistä kahvinkeitin uudelleen valumisen
lopettamiseksi.
• Huuhtele kahvinkeitin käyttämällä sitä 2 tai
3 kertaa 1 litralla vettä.
Takuu ei kata kahvinkeittimiä, jotka
toimivat huonosti tai eivät toimi lainkaan
kalkinpoiston laiminlyönnin vuoksi.
Lisälaitteet
Termoskannu
Lasinen kaatokannu
Ongelmatapauksissa
- Tarkista:
• kytkentä.
• että käyttövalitsin
palaa) on käyttöasennossa.
• että suodatinteline on kunnolla lukittu.
- Veden valuma-aika on liian pitkä tai ääni on
liian kova:
• poista kahvinkeitin kalkki.
(punainen merkkivalo
Cafetière-DK-NV-SE-FI-ES.p65 9/10/06, 9:5627
27
Page 26

Laitteesi ei toimi vieläkään? Käänny
valtuutetun huoltokeskuksen puoleen.
Español
Huolehtikaamme
ympäristöstä!
Laitteesi on varustettu monilla arvokkailla
ja kierrätettävillä materiaaleilla.
Toimita laitteesi keräyspisteeseen tai
sellaisen puuttuessa vaikka valtuutettuun
huoltokeskukseen, jotta laitteen osat
varmasti kierrätetään.
Descripción
a Tapa
b Depósito
c Porta filtro
d Placa térmica
e Botón On/Off o pantalla de control
f Cuchara dosificadora
g Jarra o vaso isotérmico (según
modelo)
Modelos programables
h Pantalla LCD
i Botón On/Off
j Botón AUTO
k Botón PRO
l Indicador luminoso de programación
(verde)
m Botón HR
n Botón MIN
o Indicador luminoso on/off (rojo)
Consejos de seguridad
• Leer atentamente el modo de empleo
antes de utilizar el aparato por primera
vez: una utilización no conforme libraría
al fabricante de cualquier
responsabilidad.
• No dejar el aparato al alcance de los niños
sin supervisión. Los niños o las personas
discapacitadas deben utilizar este aparato
bajo vigilancia.
• Antes de conectar el aparato, comprobar que
la tensión de alimentación de la instalación
corresponde a la del aparato y que el
enchufe incluye toma de tierra.
Cualquier error de conexión anularía la
garantía.
• El aparato está destinado exclusivamente
para uso doméstico y en el interior de la
vivienda.
• Desconectar el aparato en cuanto deje de
utilizarlo y vaya a limpiarlo.
• No utilizar el aparato si no funciona
correctamente o si se ha dañado. En este
caso, dirigirse a un servicio técnico
autorizado.
• Cualquier intervención que no sea la limpieza
y el mantenimiento habitual por parte del
cliente, debe realizarla un servicio técnico
autorizado.
Cafetière-DK-NV-SE-FI-ES.p65 9/10/06, 9:5628
28
Page 27

• Si el cable de alimentación o el enchufe
están dañados, no utilice el aparato. Para
evitar cualquier peligro, lleve a remplazar el
cable de alimentación a un servicio técnico
autorizado.
• No introducir el aparato, el cable de
alimentación o el enchufe en agua o
cualquier otro líquido.
• No deje colgando el cable de alimentación
al alcance de los niños.
• El cable de alimentación nunca debe estar
cerca o en contacto con las partes calientes
del aparato, cerca de una fuente de calor o
en un ángulo vivo.
• Por su seguridad, utilizar sólo accesorios y
piezas sueltas del fabricante adaptados al
aparato.
• No desenchufar el aparato tirando del cable.
• No utilizar la jarra o el vaso isotérmico sobre
una llama y sobre placas de cocina
eléctricas.
• No volver a introducir agua en el aparato si
aún está caliente.
• Cerrar siempre la tapa (a) cuando la cafetera
esté funcionando.
• Todos los aparatos se someten a un estricto
control de calidad. Se han realizado pruebas
de utilización prácticas con aparatos
elegidos al azar, lo que explica las posibles
marcas de utilización.
• Nunca introducir la jarra o el vaso isotérmico
en un microondas, un lavavajillas o sobre
una placa de cocción.
• Nunca introducir la mano dentro del vaso
isotérmico.
• No utilizar la jarra o el vaso isotérmico sin la
tapa.
Antes de la primera
utilización
• Ponga a funcionar la cafetera por primera
vez sin café con 1 litro de agua para aclarar
el circuito.
Preparación del café
(Seguir las ilustraciones de 1 a 8)
• Utilizar únicamente agua fría y un filtro de
papel n°4. No utilizar el vaso isotérmico sin
el tapón.
• No sobrepasar la cantidad máxima de agua
indicada en el nivel de agua del depósito.
• Esta cafetera está provista de un sistema
anti-goteo que permite servir un café antes
de que haya terminado de pasar toda el
agua. Remplazar rápidamente la jarra o el
vaso isotérmico para evitar cualquier
desbordamiento.
• Para una mejor conservación del calor,
aclarar el vaso isotérmico con agua caliente
antes de utilizarlo.
• La tapa del vaso isotérmico debe bloquearse
firmemente hacia la derecha hasta el tope
para la preparación y el mantenimiento en
caliente del café.
Para servir el café, presionar la palanca de la
tapa del vaso isotérmico hacia abajo.
• Esperar unos minutos antes de realizar una
segunda preparación del café.
PARA EL MODELO PROGRAMABLE:
Ajuste de la hora:
• Conecte la cafetera, la pantalla LCD (h)
indica 12:00.
• Presione el botón “PRO” durante
3 segundos, la pantalla parará de parpadear
e indicará “set time”.
• Presione el botón “HR” para ajustar la hora.
Una presión prolongada del botón permite
que las cifras pasen rápidamente.
• Presione el botón “MIN” para ajustar los
minutos. Una presión prolongada del botón
permite que las cifras pasen rápidamente.
• Valide el ajuste presionando de nuevo
3 segundos el botón “PRO”
Funcionamiento en modo manual:
• Presione el botón rojo “
luminoso rojo se encenderá y la cafetera se
pondrá en funcionamiento.
• Presione de nuevo el botón “ ” para parar
el funcionamiento.
Funcionamiento en modo programación:
• Presione dos veces el botón “PRO”, la
pantalla indica “set time”.
• Presione el botón “HR” para ajustar la hora.
• Presione el botón “MIN” para ajustar los
minutos.
• Valide el ajuste presionando de nuevo el
botón “PRO”. La pantalla indica de nuevo la
hora actual.
• Presione el botón “AUTO” para activar la
programación. El indicador luminoso verde
se encenderá.
A la hora programada, el indicador luminoso
rojo se encenderá y la cafetera se pondrá en
funcionamiento.
29
”, el indicador
Cafetière-DK-NV-SE-FI-ES.p65 9/10/06, 9:5629
Page 28
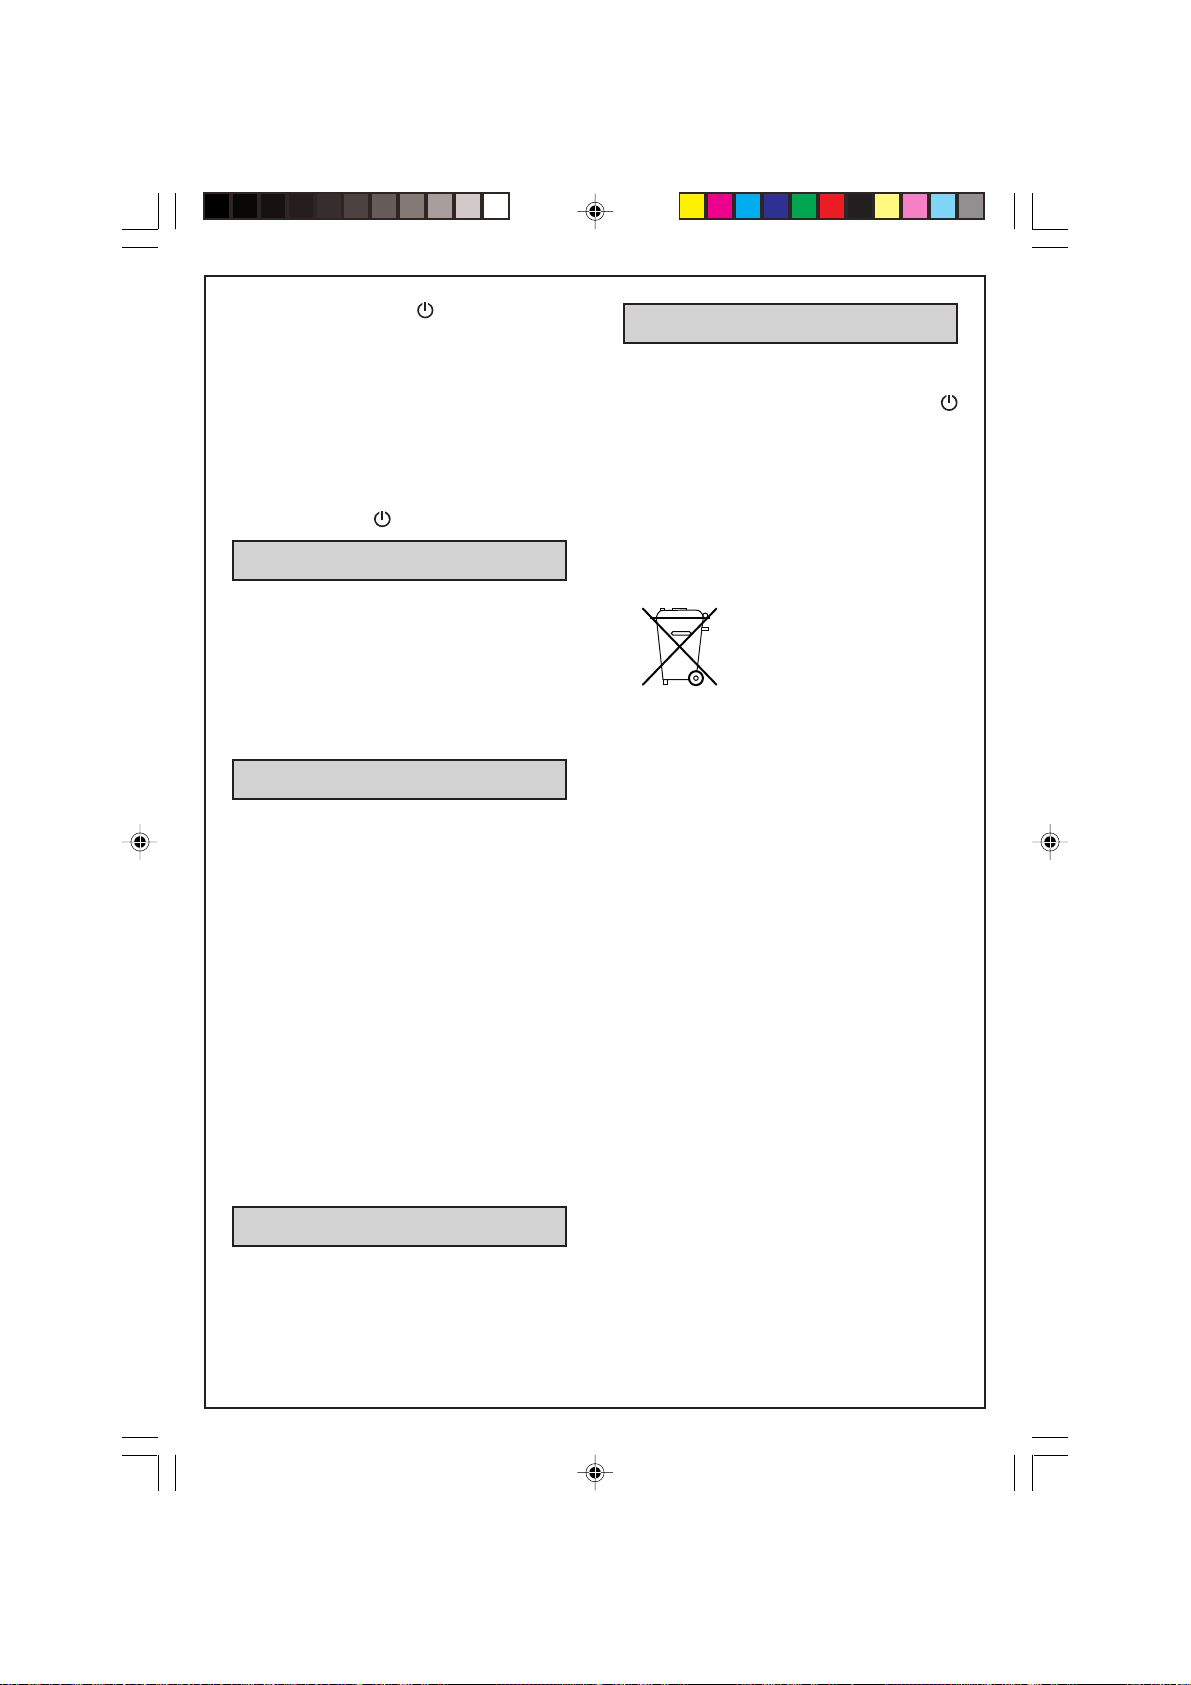
• Presione el botón “ ” para parar el
funcionamiento.
• Puede anular en cualquier momento la
programación presionando el botón “AUTO”.
El indicador luminoso verde se apagará.
Vuelva a activar la programación
presionando de nuevo el botón “AUTO”.
Observación sobre los dos modos: La
cafetera dejará de funcionar automáticamente
tras 2 horas, si no la ha apagado al final del
ciclo con el botón “
”.
En caso de problemas
- Comprobar:
• la conexión.
• que el interruptor o el botón On/Off
(indicador luminoso rojo encendido) esté en
posición de funcionamiento.
• que el porta filtro esté bien bloqueado.
- El tiempo que tarda en pasar el agua es
demasiado largo o los ruidos son excesivos:
• desincruste la cafetera.
Limpieza
• Para evacuar la molienda usada, retirar el
porta filtro (c) de la cafetera.
• Desconectar el aparato.
• No limpiar el aparato caliente.
• Limpiar con un paño o una esponja húmeda.
• Nunca introducir el aparato en agua o
colocarlo bajo el grifo.
• El porta filtro se puede lavar en el lavavajillas.
Desincrustación
• Desincrustar la cafetera cada 40 ciclos.
Puede utilizar.
• un sobrecito de desincrustante diluido en
2 grandes tazas de agua.
• 2 grandes tazas de vinagre de alcohol
blanco.
• Verterlo en el depósito (b) y poner la cafetera
en marcha (sin molienda).
• Verter en la jarra o el vaso isotérmico (g) el
equivalente a una taza, y a continuación
parar.
• Dejar actuar durante una hora.
• Volver a poner la cafetera en marcha para
que termine de pasar.
• Aclarar la cafetera poniéndola a funcionar
2 o 3 veces con 1 litro de agua.
La garantía excluye las cafeteras que no
funcionan o funcionan mal por no haber
realizado las operaciones de
desincrustación.
¿El aparato sigue sin funcionar? Diríjase a
un servicio técnico autorizado.
¡¡Participe en la
conservación del medio
ambiente!!
Su electrodoméstico contiene materiales
recuperables y/o reciclables.
Entréguelo al final de su vida útil, en un
Centro de Recogida Específico o en uno
de nuestros Servicios Oficiales Post Venta
donde será tratado de forma adecuada.
Accesorios
Vaso isotérmico
Jarra de cristal
Cafetière-DK-NV-SE-FI-ES.p65 9/10/06, 9:5630
30
Page 29

Last cover page.PM6.5 11/10/06, 16:146
Fr/Uk/Nl/Pt/It/Ar/Dk/No/Sv/Su/Es 0827 687
 Loading...