

Teeter Hang Ups GL9500 Inversion Table Owner's Manual
OWNER'S MANUAL
TM
GL9500
U.S. and foreign patents apply. Other foreign patents pending.
!
WARNING
It is your responsibility to familiarize yourself with the proper use of the equipment and the inherent risks of inversion, such as falling on
your head or neck, pinching, entrapment or equipment failure. FAILURE TO FOLLOW INSTRUCTIONS OR HEED WARNINGS COULD
RESULT IN SERIOUS INJURY OR DEATH.
Restrictions on Use
•
DO NOT use the equipment without a licensed physician's approval. Carefully review the following list of medical
contraindications for inversion with your licensed physician: (This is not an exhaustive list, it is intended only for reference)
· Middle ear infection · Conjunctivitis · Recent stroke or transient ischemic attack
· Extreme obesity · High blood pressure · Bone weakness (osteoporosis)
· Pregnancy · Hypertension · Recent or unhealed fractures
· Hiatal hernia · Heart or circulatory disorders · Medullary pins
· Ventral hernia · Spinal injury · Surgically implanted orthopedic supports
· Glaucoma · Cerebral sclerosis · Use of anticoagulants (including high doses of aspirin)
· Retinal detachment · Acutely swollen joints
• DO NOT use if you are over 6ft 6in (198 cm) or 300 lbs. (136 kg). Structural failure could occur or head/neck may impact the floor
during inversion.
•
DO NOT modify the equipment or use accessory attachments that are not recommended by the manufacturer. Utilize the
equipment for its intended purpose only.
• This product is not intended for use in public facilities.
Precautions Before Using
•
DO NOT use the inversion table until you have thoroughly and carefully read the Owner's Manual, viewed the Instructional DVD,
reviewed all other accompanying documents, and inspected the equipment.
• NEVER allow children to use the equipment unsupervised.
•
DO NOT operate equipment while under the influence of drugs, alcohol, or medication that may cause drowsiness or disorientation.
• ALWAYS inspect the equipment prior to use. Make sure that all fasteners are secure and that the equipment is located on a level
surface.
•
ALWAYS replace defective components immediately and/or keep the equipment out of use until repair.
• ALWAYS wear securely tied lace-up shoes with a flat sole, such as a normal tennis style shoe. DO NOT wear shoes with thick
soles, boots, high-tops or any shoe that extends above the anklebone.
• ALWAYS make sure the equipment is properly adjusted to the correct user settings prior to each use.
• Refer to additional warning notices posted on the equipment.
Precautions during use
•
DO NOT use aggressive movements, or use weights, elastic bands or any other exercise or stretching device while on the
inversion table.
•
ALWAYS keep hands and fingers away from moving parts to avoid injury. DO NOT drop or insert objects into any opening.
• First time users should use a spotter to ensure they are able to find the correct balance setting and are comfortable with the
operation of the table.
Height / Weight Capacity:
Max 6'6" / 300 lbs. (198 cm, 136 kg)
PRIOR TO USE
Make sure that the table rotates smoothly to the fully inverted position and back, and that all fasteners are secure.
Make sure the user settings described below are properly adjusted for your unique needs and body type. Take your time
finding your proper settings and REMEMBER THEM. Check these settings every time prior to using the equipment.
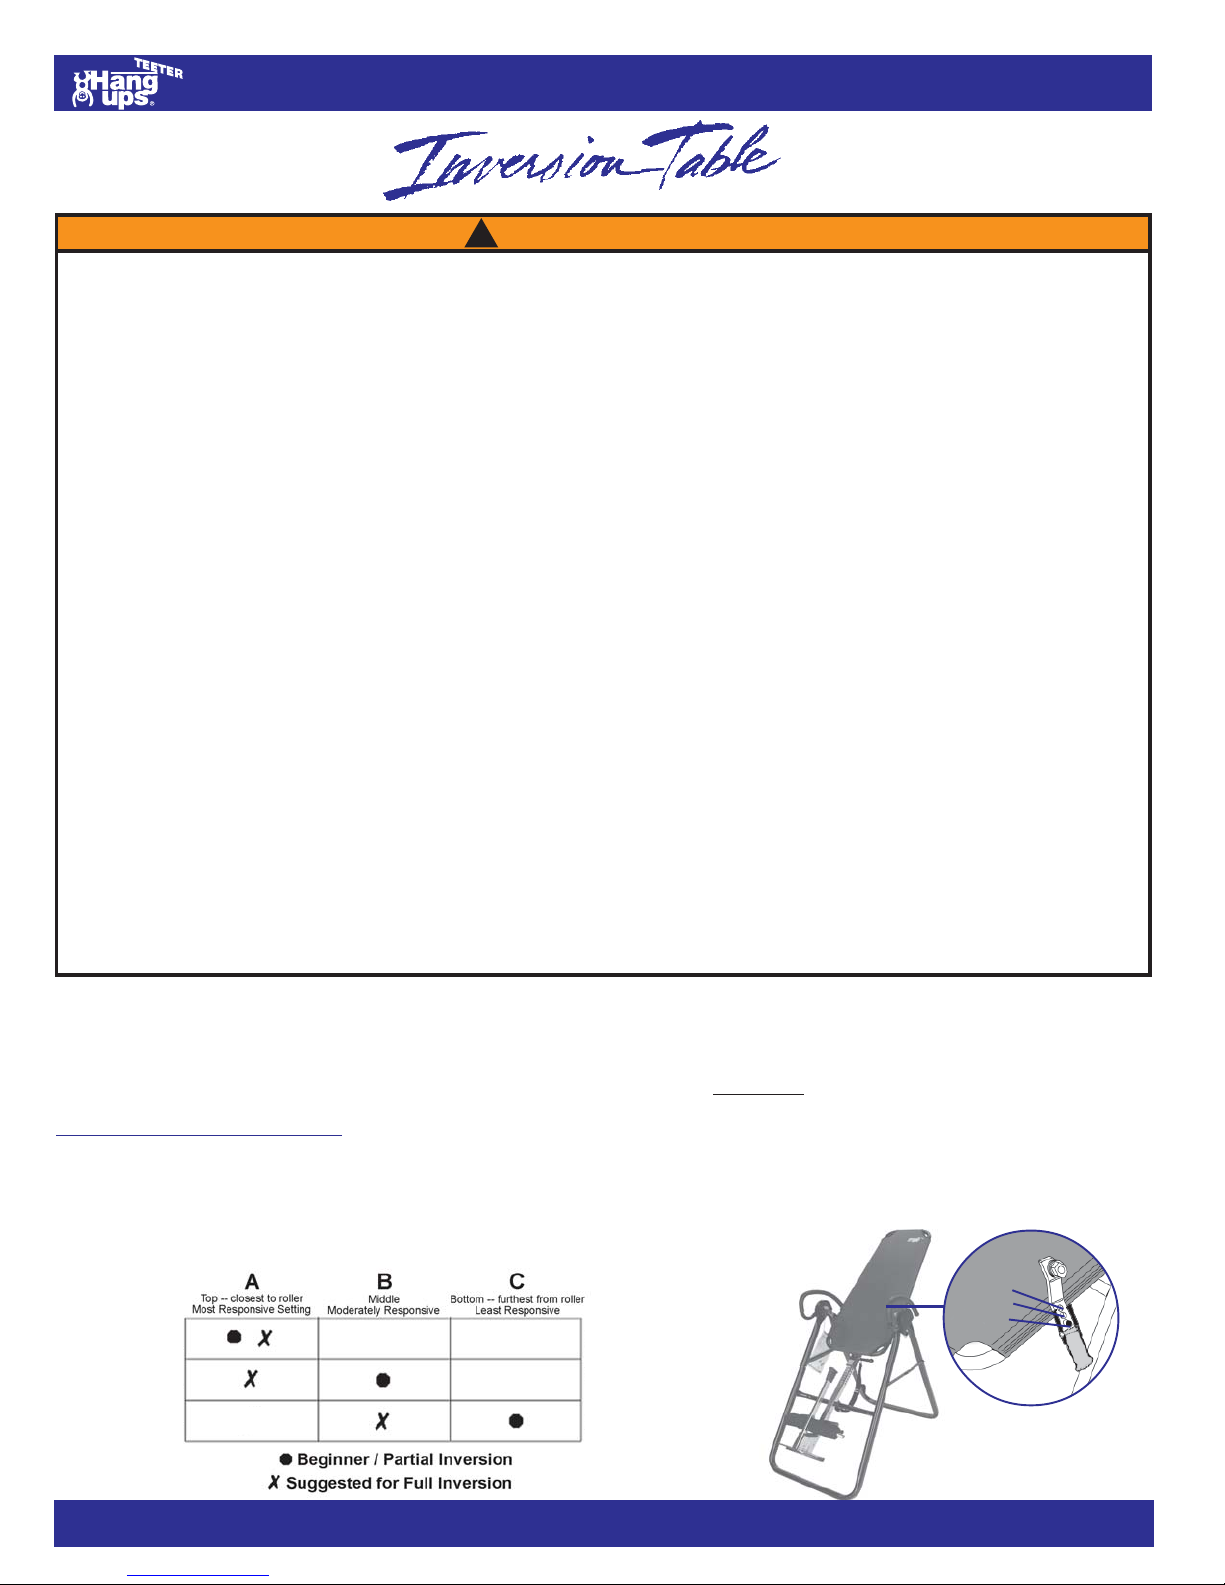
1. Adjust the Roller Hinge:
The roller hinge setting controls the responsiveness or rate of rotation. There are three holes; hole selection depends both on
your body weight and the rotational responsiveness you desire. For users just learning to use the inversion table, we
recommend starting with Setting C. (See Figure 1) IMPORTANT: Place the roller hinges in the same hole setting on each
side.
A
B
80-120 lbs.
120-220 lbs.
220-300 lbs.
(36-54 kg.)
(54-100 kg.)
(100-136 kg.)
C
DO NOT REMOVE FROM TABLE
Figure 1
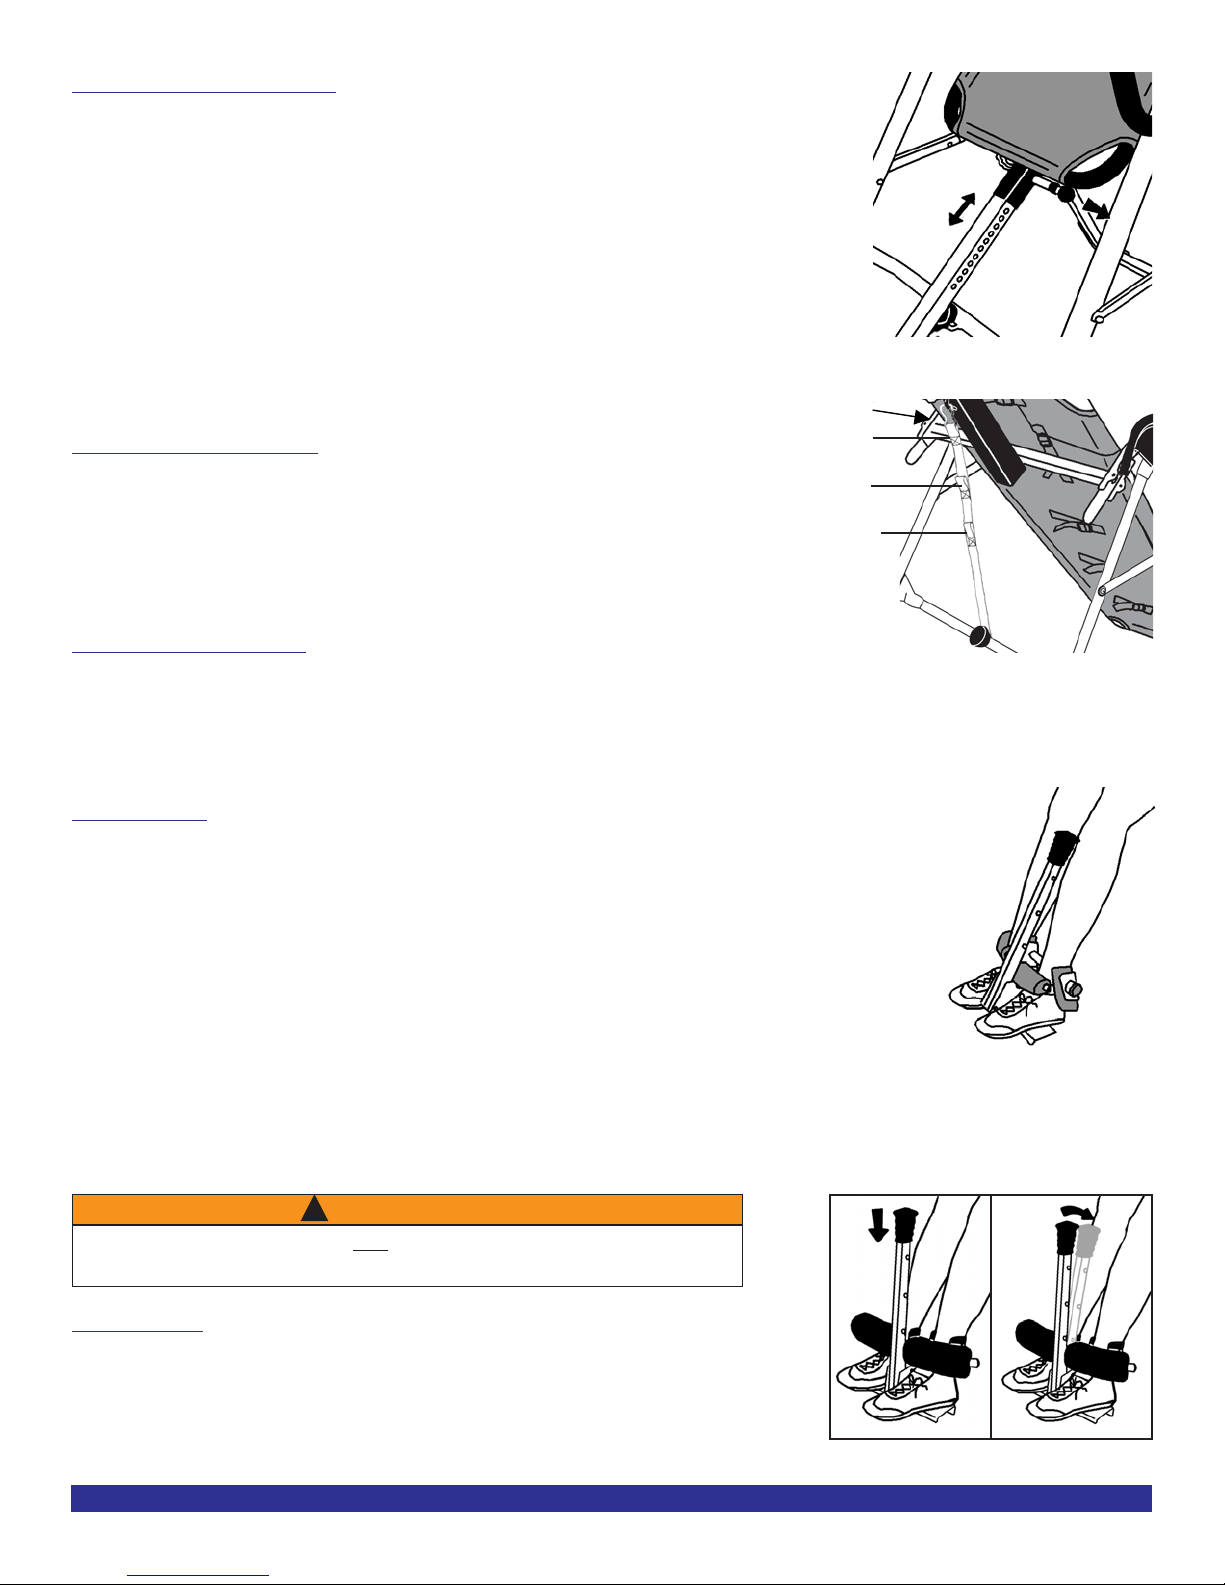
2. Adjust Height Setting:
The height settings are stamped on the main shaft in both inches and centimeters.
• Loosen the de-rattler knob.
• Pull out the height selector locking pin with your right hand while sliding the main shaft
with your left.
• Slide the main shaft until the last setting you can read is 1" more than your height. e.g.
If you're 5'10" (178 cm) the last numbers you'll be able to read will be 5'11" (180 cm).
NOTE: The best height setting for you will depend on your weight distribution and could
vary one or two inches on either side of your actual height. Starting at one or two inches
more than your height will help to ensure that the rotation of the table is not too fast.
• Release the height selector locking pin so that it fully engages in a hole.
Retighten the de-rattler knob.
(See Figure 2)
Hook tether
strap here.
3. Attach Tether Strap:
For first time users, attach the tether strap to control your angle of rotation.
(See Figure 3) You can increase the angle of rotation allowed by the tether
strap as you become more comfortable using the table, or remove it all-together
for full inversion.
°°
°
°°
60
°°
°
°°
40
blue
°°
°
°°
20
green
Figure 2
USING THE GRAVITY LOCK SYSTEM
No Strap:
°°
90
°
°°
1. Preparing to Mount:
• ALWAYS wear securely tied lace-up shoes with a flat sole, such as a normal
tennis style shoe. DO NOT wear shoes with thick soles, boots, high-tops or any shoe that extends above the anklebone,
as this type of footwear could interfere with properly securing your ankles.
• Push down on the knob of Gravity Lock Handle, close slightly, then push open-this allows the locking
system inside the Gravity Lock Housing to disengage.
Figure 3
2. Mounting:
• Slide your ankles between the foam ankle clamps, resting your feet on the Foot Platform.
• Press your ankles back firmly against the rear ankle clamps.
• Rotate the top of the rear clamps slightly inward toward your ankles - this will increase your
comfort while inverting.
• Pull the Gravity Lock Handle toward you. Make sure your pant legs do not interfere with
obtaining a secure closure.
• Adjust the ratchet handle to make sure both the front and rear ankle clamps are snug against
your ankles. (See Figure 4)
IMPORTANT!
Jiggle the Gravity Lock Handle from front to back to make sure the foot clamps are locked securely. ALWAYS carefully
check to be certain the Gravity Lock Handle is locked securely each time you use your inversion table and make sure
that both the front and rear ankle clamps are snug against your ankles or you could fall when the table inverts.
Figure 4
!
W ARNING
Failure to lock the foot clamps fully could result in serious injury or death!
DO NOT deviate from these instructions.
3. Unlocking
• Push down the knob of the Gravity Lock Handle. (See Figure 5)
• Pull the Handle toward you slightly, allowing the spring locking system inside
the Gravity Lock Housing to disengage. (See Figure 5A)
• Push out so that you have enough room to slide your feet out from between
the Ankle Clamps .
Owner's Manual #LG9502 Pg. 2
Figure 5
Figure 5A
 Loading...