

Page 1
TeeterLink® Tracker
Owner’s Manual
Page 2
To review and register your 1-Year Warranty, go
to teeter.com/Support/Warranty-Registration
Questions or concerns? Contact Teeter
Customer Service at 800.847.0143, or via
online forms or Live Chat at teeter.com.
WARNING
!
• DO NOT operate Tracker in wet or moist conditions.
• DO NOT expose Tracker to excessive heat, dust, or vibration
• DO NOT disassemble or replace any parts, except batteries.
• ALWAYS store Tracker in dry conditions at room temperature.
• ALWAYS store Tracker away from children and pets.
• ALWAYS use AAA 1.5V Alkaline batteries with Tracker.
• ALWAYS replace both batteries at the same time.
• DO NOT mix old and new batteries or different types.
• ALWAYS wipe the battery and device contacts clean with a dry
cloth prior to battery installation.
• ALWAYS ensure batteries are installed correctly regarding polarity.
• ALWAYS remove batteries from Tracker if it is not to be used for an
extended period.
• ALWAYS remove depleted batteries promptly.
1
Page 3

• TeeterLink® Tracker
• 2 × AAA Batteries
• Owner’s Manual
• Mounting Bracket (X & LX Series Only)
Included
Technical Specications
• Compatibility: iOS
®
and Android
®
• Transmission Range: 32 ft (30 m)
• Sensor: 6 Axle Motion Sensor
• Battery Model: 2 × AAA 1.5V Alkaline
• Weight: 0.15 lbs (0.07 kg)
• Dimensions: 3.25 x 2.75 x 1.25 in
(8.26 x 7.00 x 3.18 cm)
What’s in the box?
2
Page 4
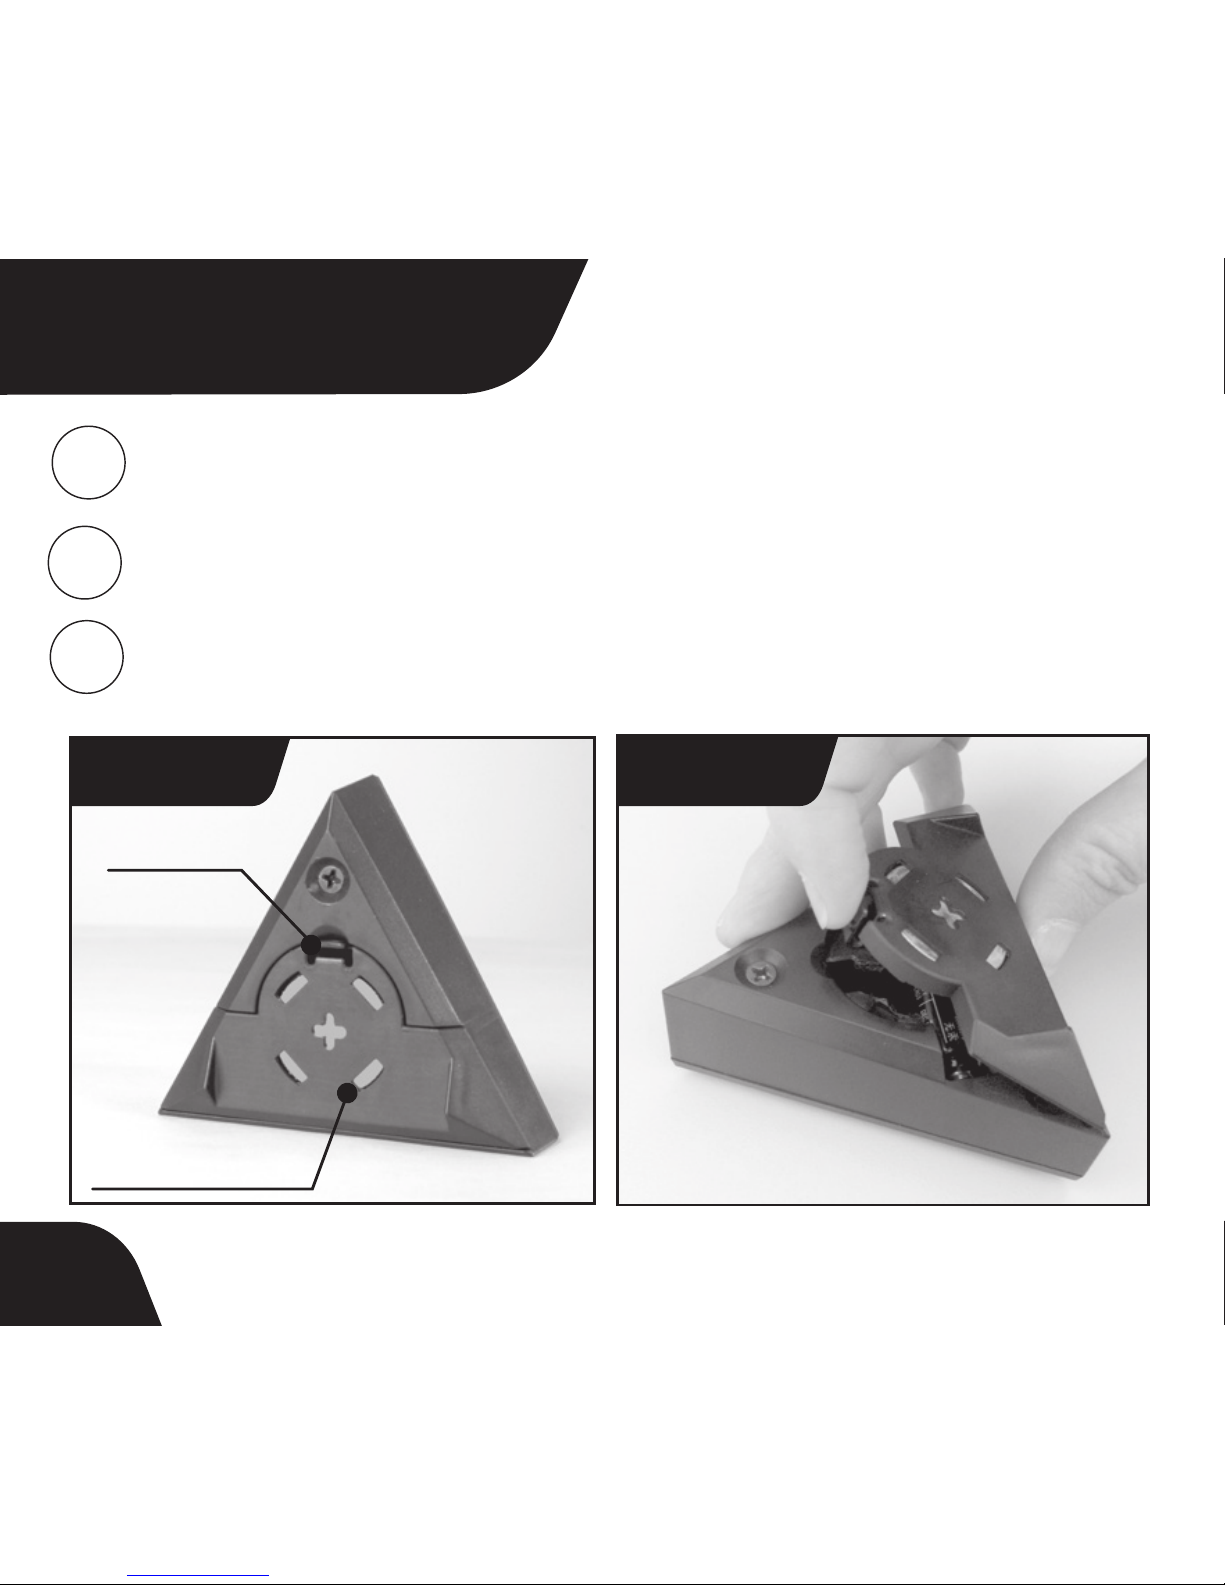
Battery Lid
Lid Tab
FIGURE 1 FIGURE 2
Remove the Battery Lid by pressing down on the Lid
Tab and pulling outward (Figure 1).
Insert the batteries noting ( + ) and ( - ).
Reattach the Battery Lid by aligning the bottom
rst, then snapping it into place (Figure 2).
Battery Installation
1
2
3
3
Page 5
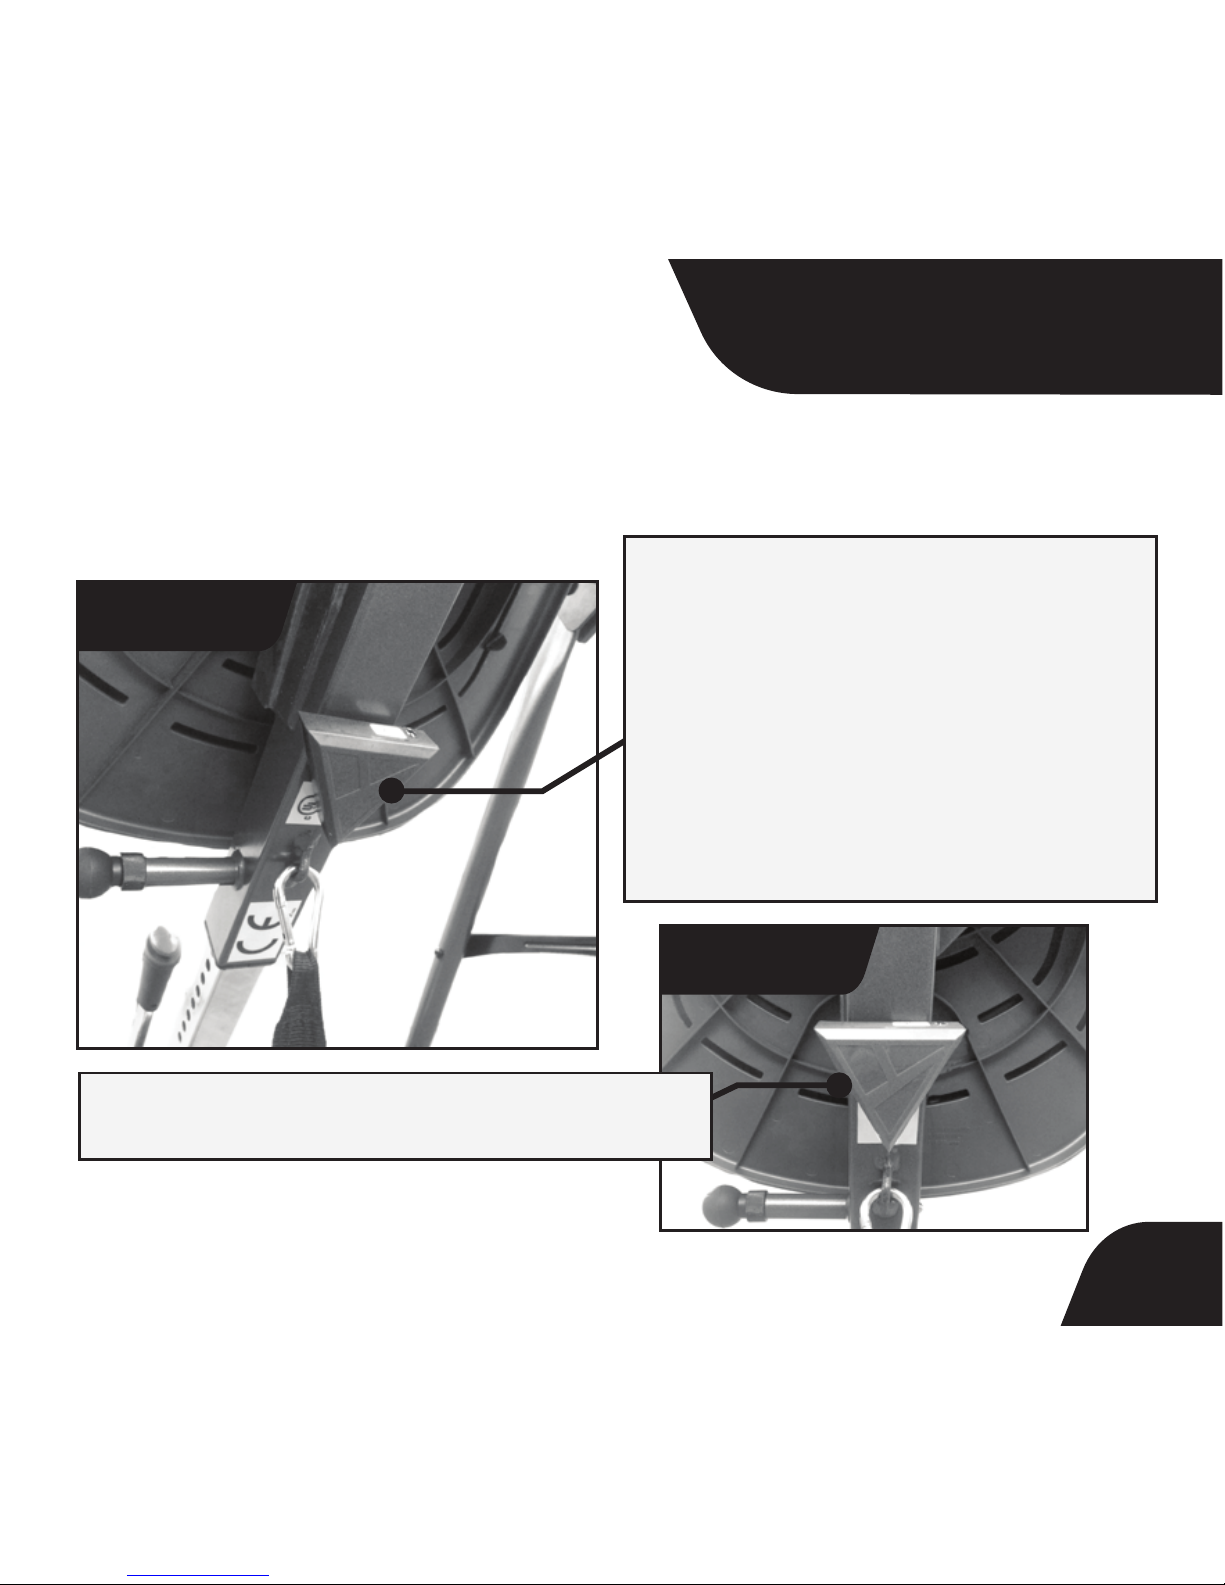
The TeeterLink® Tracker attaches to your Teeter with
a built-in magnet. Note: For X and LX Series Inversion
Tables, skip to Page 5.
Place the Tracker on
the Main Shaft Housing.
NOTE: If proper placement is
not followed, the device may
not work properly or may be
damaged by the operation of
the equipment.
Position the Tracker as shown.
Proceed to page 7.
Attaching Tracker
4
FIGURE 3
FIGURE 4
Page 6
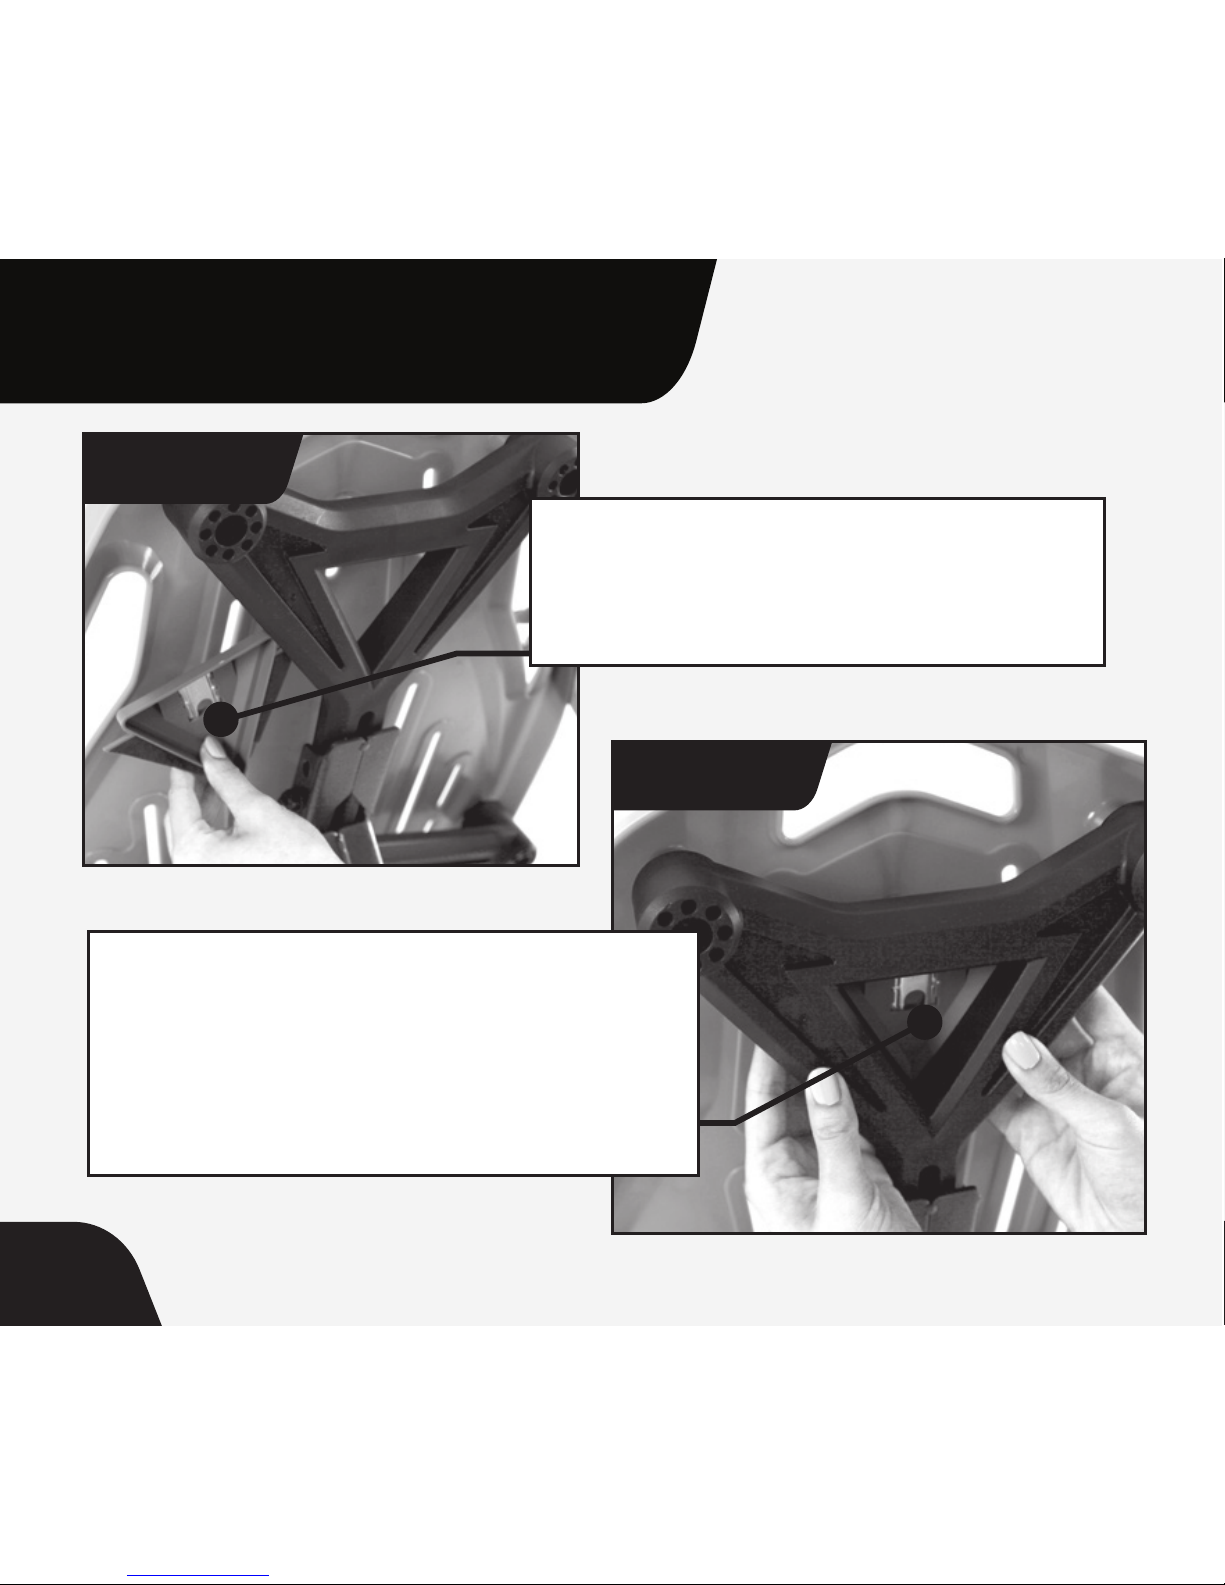
X & LX Series Attachment
On back of the Table Bed,
locate the Upper Rib and
press the Tracker Mount into
place as shown.
Locate the Tracker Mount
and peel off the backing.
5
FIGURE 5
FIGURE 6
Page 7
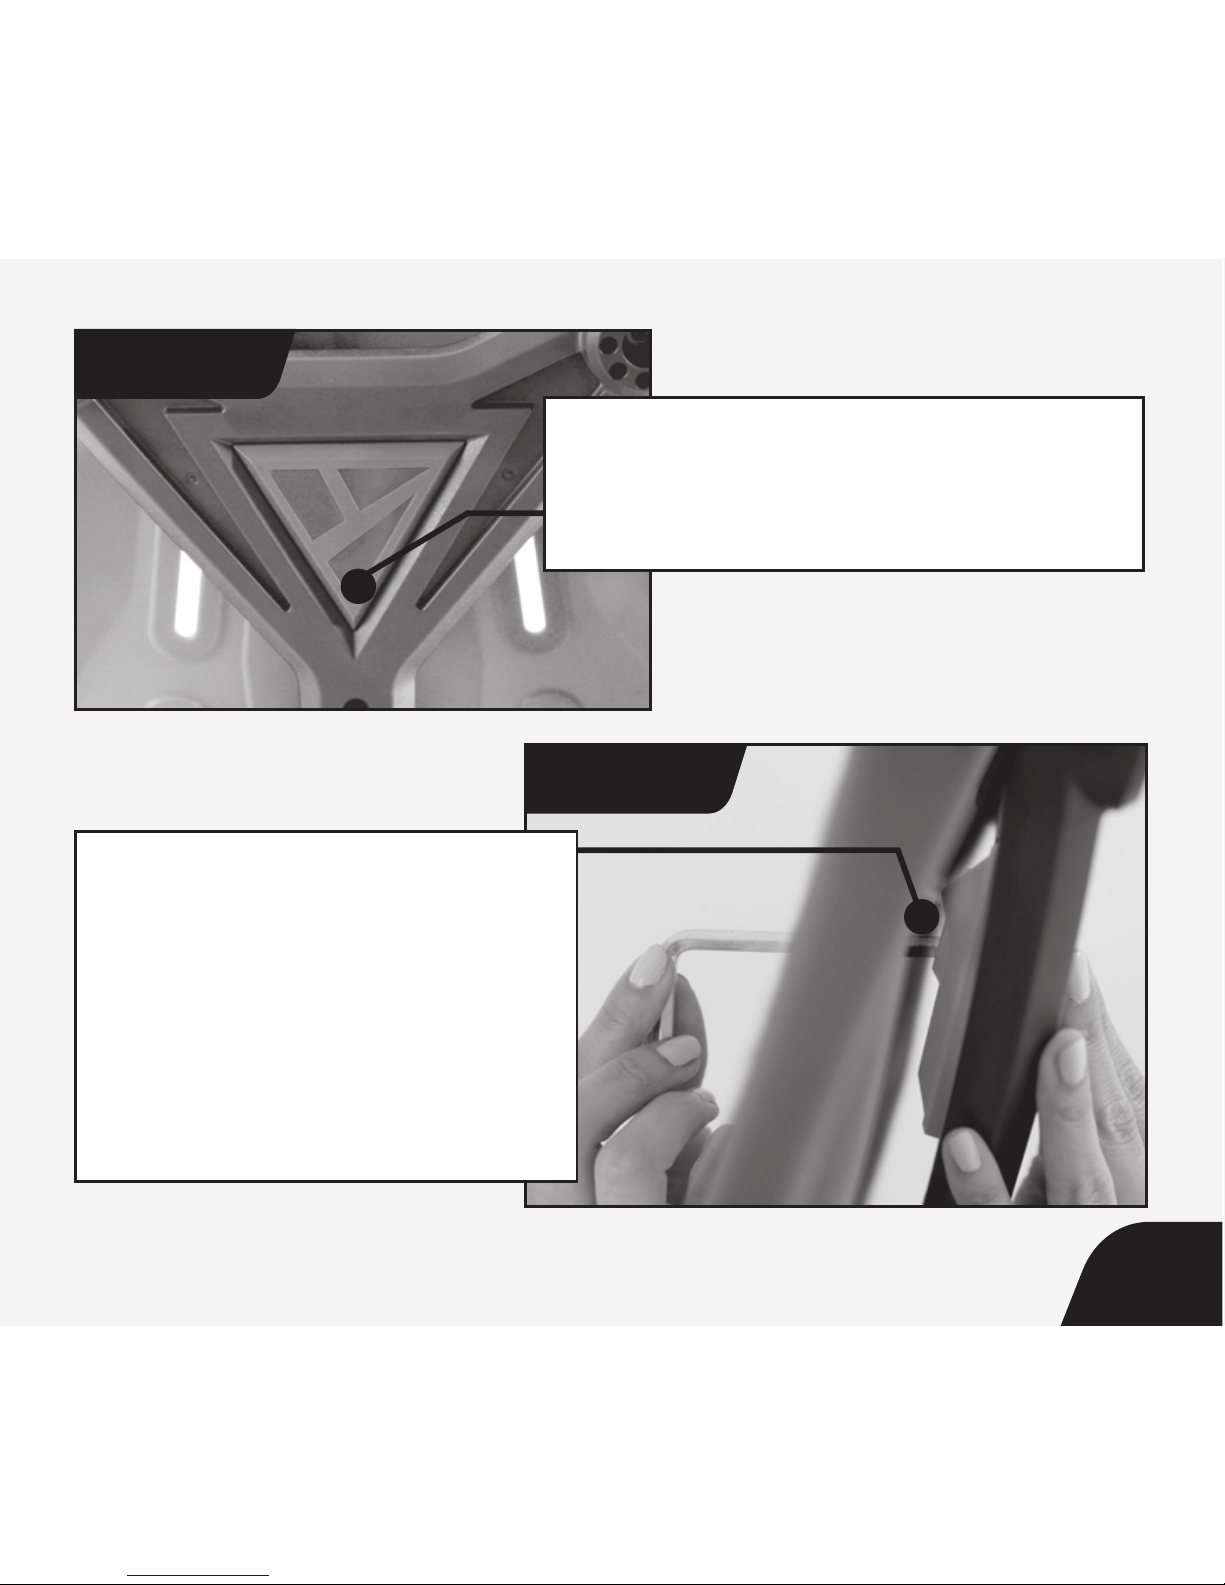
Position the Tracker in the
Upper Rib as shown.
To remove the Tracker,
push an Allen Wrench
through the hole in the
front of the Table Bed
to push the Tracker out
of the Upper Rib.
FIGURE 7
FIGURE 8
6
Page 8
Download TeeterLink
®
Go to: bit.ly/teeterlink-app
Or scan here to download:
7
Getting Started with TeeterLink
®
Page 9

Pair Tracker to TeeterLink
®
Launch TeeterLink®.
Enable Bluetooth
®
on your device.
Tap the Teeter Logo at the bottom of
the screen.
With the Tracker attached to your inversion
table, activate it by double tapping it.
At the top of the screen, tap CONNECT.
The Bluetooth
®
Icon ® will pulse and the
button will show CONNECTED when the
Tracker has paired to your device.
The Tracker will automatically power off
after 30 minutes of inactivity. Double tap the
Tracker to wake it up before your next session.
2
1
3
4
5
6
8
Page 10

• The Tracker must be within 32 ft (10 m) of
your device to connect.
• Make sure Bluetooth® is enabled on your device.
• Remove and replace the Tracker batteries.
• Relaunch TeeterLink® and retry connecting.
Troubleshooting
9
Toll Free: 800-847-0143
teeter.com | [email protected]
Need assistance?
Contact Teeter Product Specialists here:
Page 11
Roger Teeter
Founder &
Innovator
Feel Better. Move Better.
Live Better.
-Roger Teeter
I created Teeter so people could
live healthier, more active lives.
35
YEARS OF
QUALITY
10
Page 12

©2018 Teeter, Bonney Lake, WA. All rights reserved. TeeterLink, Teeter, and Teeter
logo are trademarks or registered trademarks of Teeter. International law prohibits
any copying. Google Play and the Google Play logo are trademarks of Google
LLC. The Android robot is reproduced or modied from work created and shared
by Google and used according to terms described in the Creative Commons
3.0 Attribution License. Apple and the Apple logo are trademarks of Apple Inc.,
registered in the U.S. and other countries. App Store is a service mark of Apple
Inc., registered in the U.S. and other countries. IOS is a trademark or registered
trademark of Cisco in the U.S. and other countries and is used under license. The
Bluetooth logo and word mark are owned by Bluetooth SIG, Inc. AF1030 0318-1
EN
This device complies with Part 15 of the FCC Rules. Operation is subject to the
following two conditions: (1) this device may not cause harmful interference, and
(2) this device must accept any interference received, including interference that
may cause undesired operation.
NOTE: This equipment has been tested and found to comply with the limits
for a ClassB digital device, pursuant to Part 15 of the FCC rules. These limits
are designed to provide reasonable protection against harmful interference
in a residential installation. This equipment generates, uses and can radiate
radio frequency energy and, if not installed and used in accordance with
the instructions, may cause harmful interference to radio communications.
However, there is no guarantee that the interference will not occur in a particular
installation. If this equipment does cause harmful interference to radio or
television reception, which can be determined by turning the equipment off and
on, the user is encouraged to try to correct the interference by one or more of the
following measures:
• Reorient or relocate the receiving antenna. Increase the separation between
the equiment and receiver.
• Connect the equipment into an outlet on a circuit different from that of the receiver.
• Consult the dealer or an experienced radio/TV technician for help.
 Loading...