

Page 1
P. 1
| Tecshow Mini -Hive 10
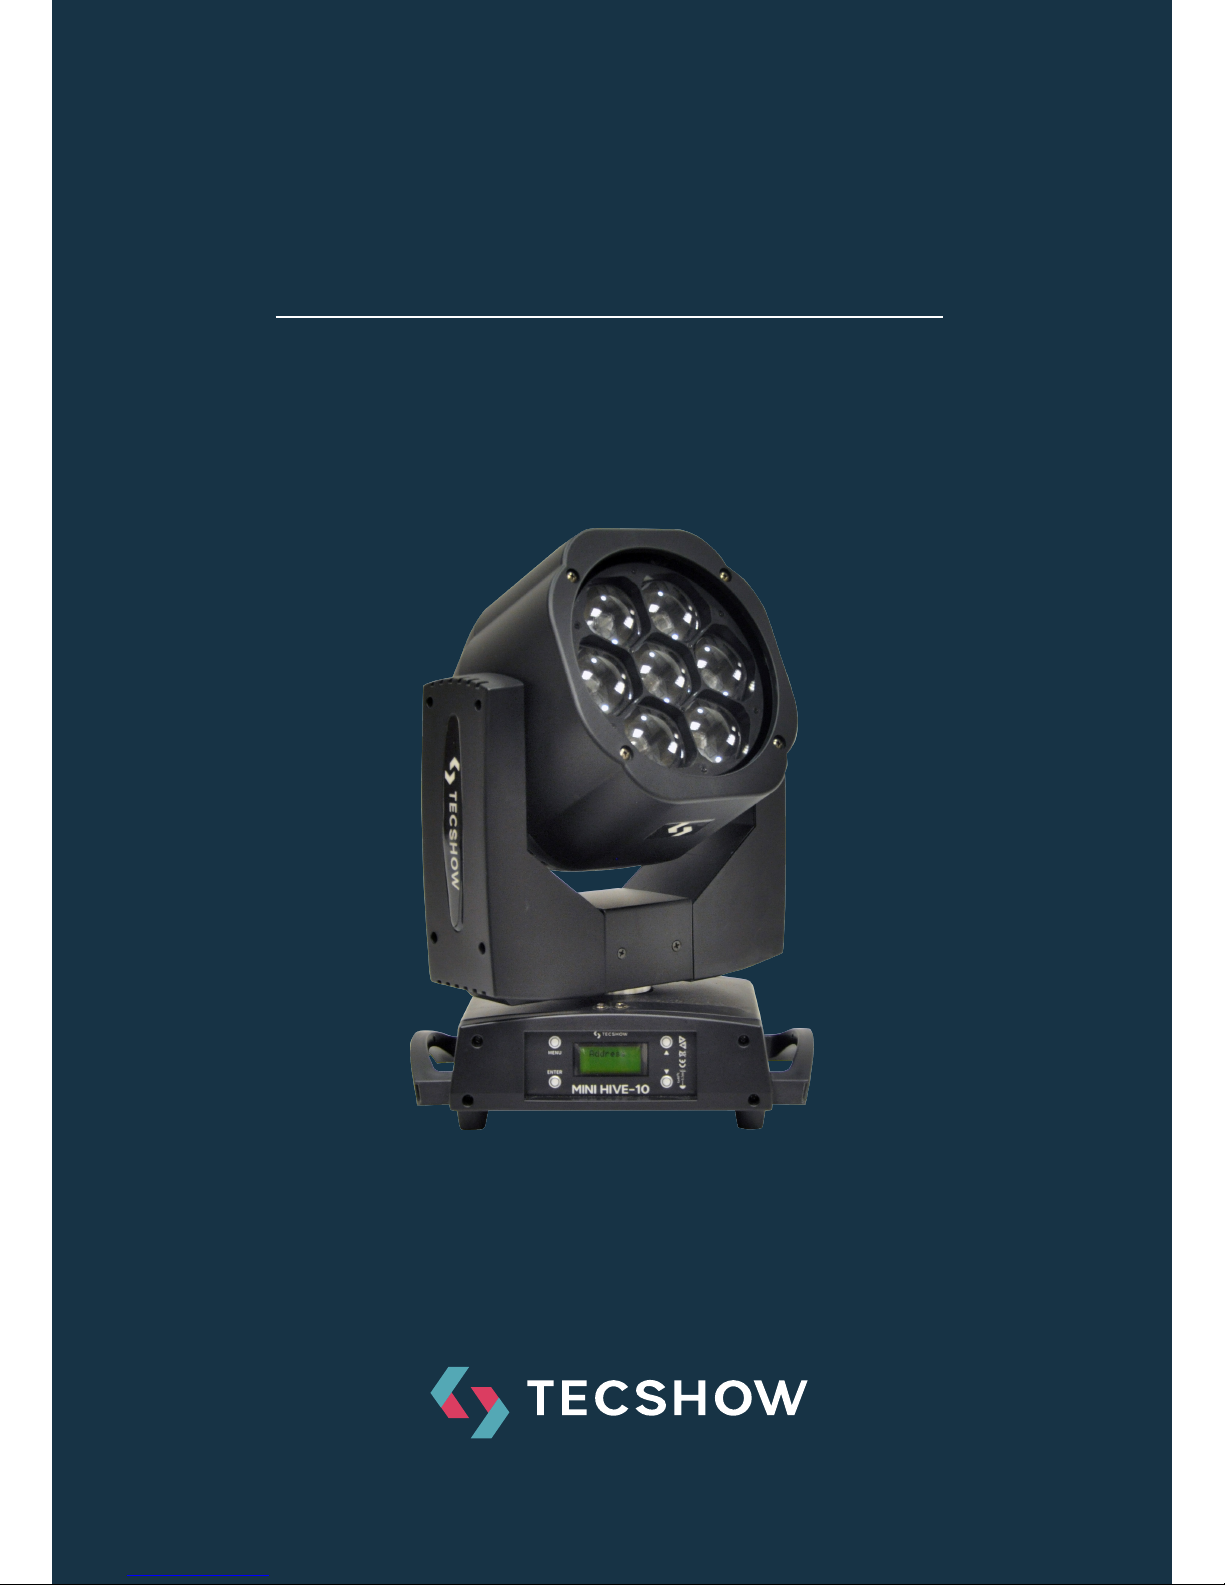
MINI-HIVE 10
Moving head Equipped with 7 x 4-in-1 15W
LEDs and a precise zoom function
USER MANUAL / MANUAL DE USUARIO
PLEASE READ THE INSTRUCTIONS CAREFULLY BEFORE USE
POR FAVOR LEA LAS INSTRUCCIÓNES ANTES DE USAR
Page 2

P. 2
Tecshow Mini -Hive 10 |
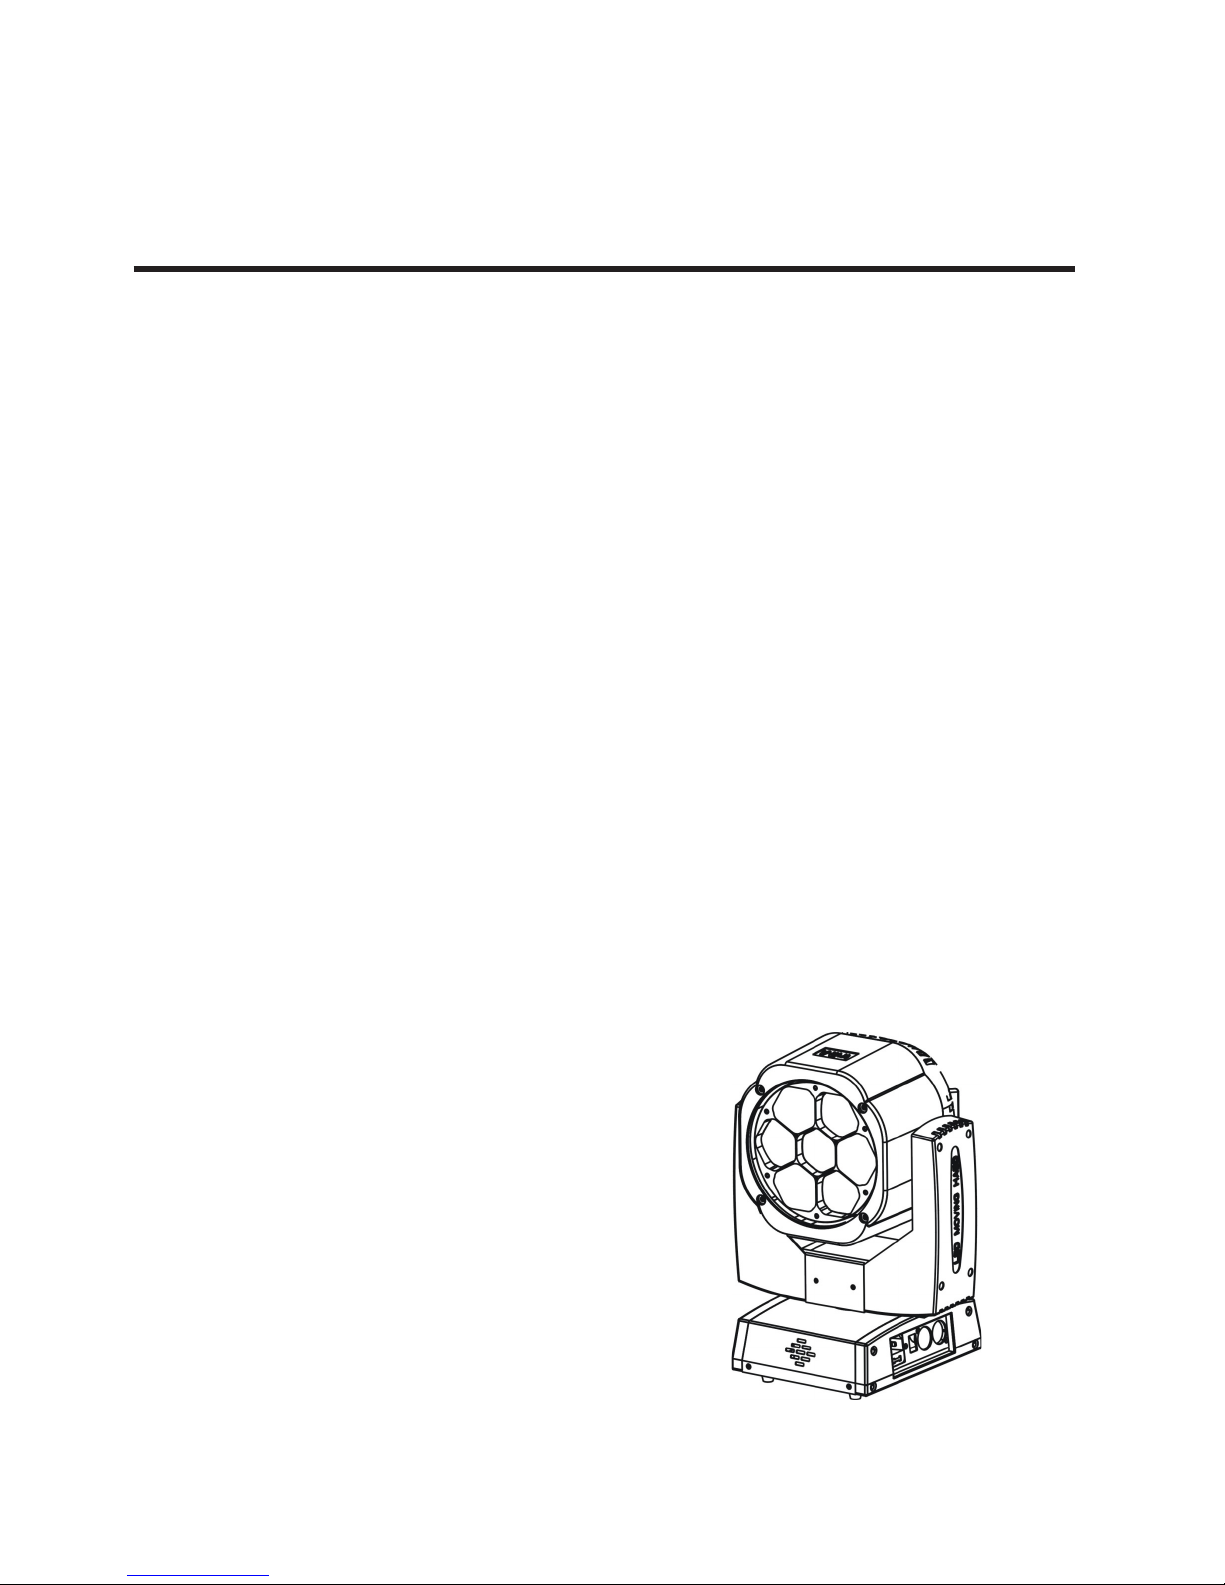
Mini Hive-10
Moving head Equipped with 7 x 4-in-1 15W LEDs and a
precise zoom function
Mini Hive-10 is a moving head that, thanks to its
versatility, comes to change the game. Equipped
with 7 x 4-in-1 15W LEDs and a precise zoom func-
tion, this xture gives you the possibility of going
from beam to wash in a snap by changing its beam
angle between 4º and 60º. As a highlight, this innovative equipment has an innite rotation lens to
both sides, making it able to achieve an awesome
honeycomb visual eect. Mini Hive-10 also sports a
color mix without multicolor shadows, pixel by pixel
control, 65 color macros and CTO.
Specications
Source & Optics
• Light Source: 7 x 4-in-1 OSRAM® 15W LEDs
• LEDs life: 60,000 hours
• Zoom: 4° to 60° linear zoom
Eects and functions
• Pixel mapping: Pixel by pixel control
• Bi-directional rotating lens
• Honeycomb eect
• Quad-color LED technology: Smooth RGBW mix
with no multi colored shadows
• Vivid, saturated and uniform colors
• 65 color macros
• Dimmer: Full range 0-100%
• Strobe eect
• CTO color temperature linear change from
2500-8000K
Control
• DMX Channels: 25/55
• Operational modes: Sound active, DMX &
Master/Slave
Movement
• Pan: 540º
• Tilt: 210º
• 16-bit resolution
• Auto repositioning
Physical
• DMX Connectors: 2 XLR connectors (XLR-3
input & output)
• Power supply connectors: PowerCON™ In/Out
• LCD display
• Dimensions: 346x200x167 mm. / 13.6x7.9x6.5 in.
• Weight: 8.2 Kg. / 18 Lb.
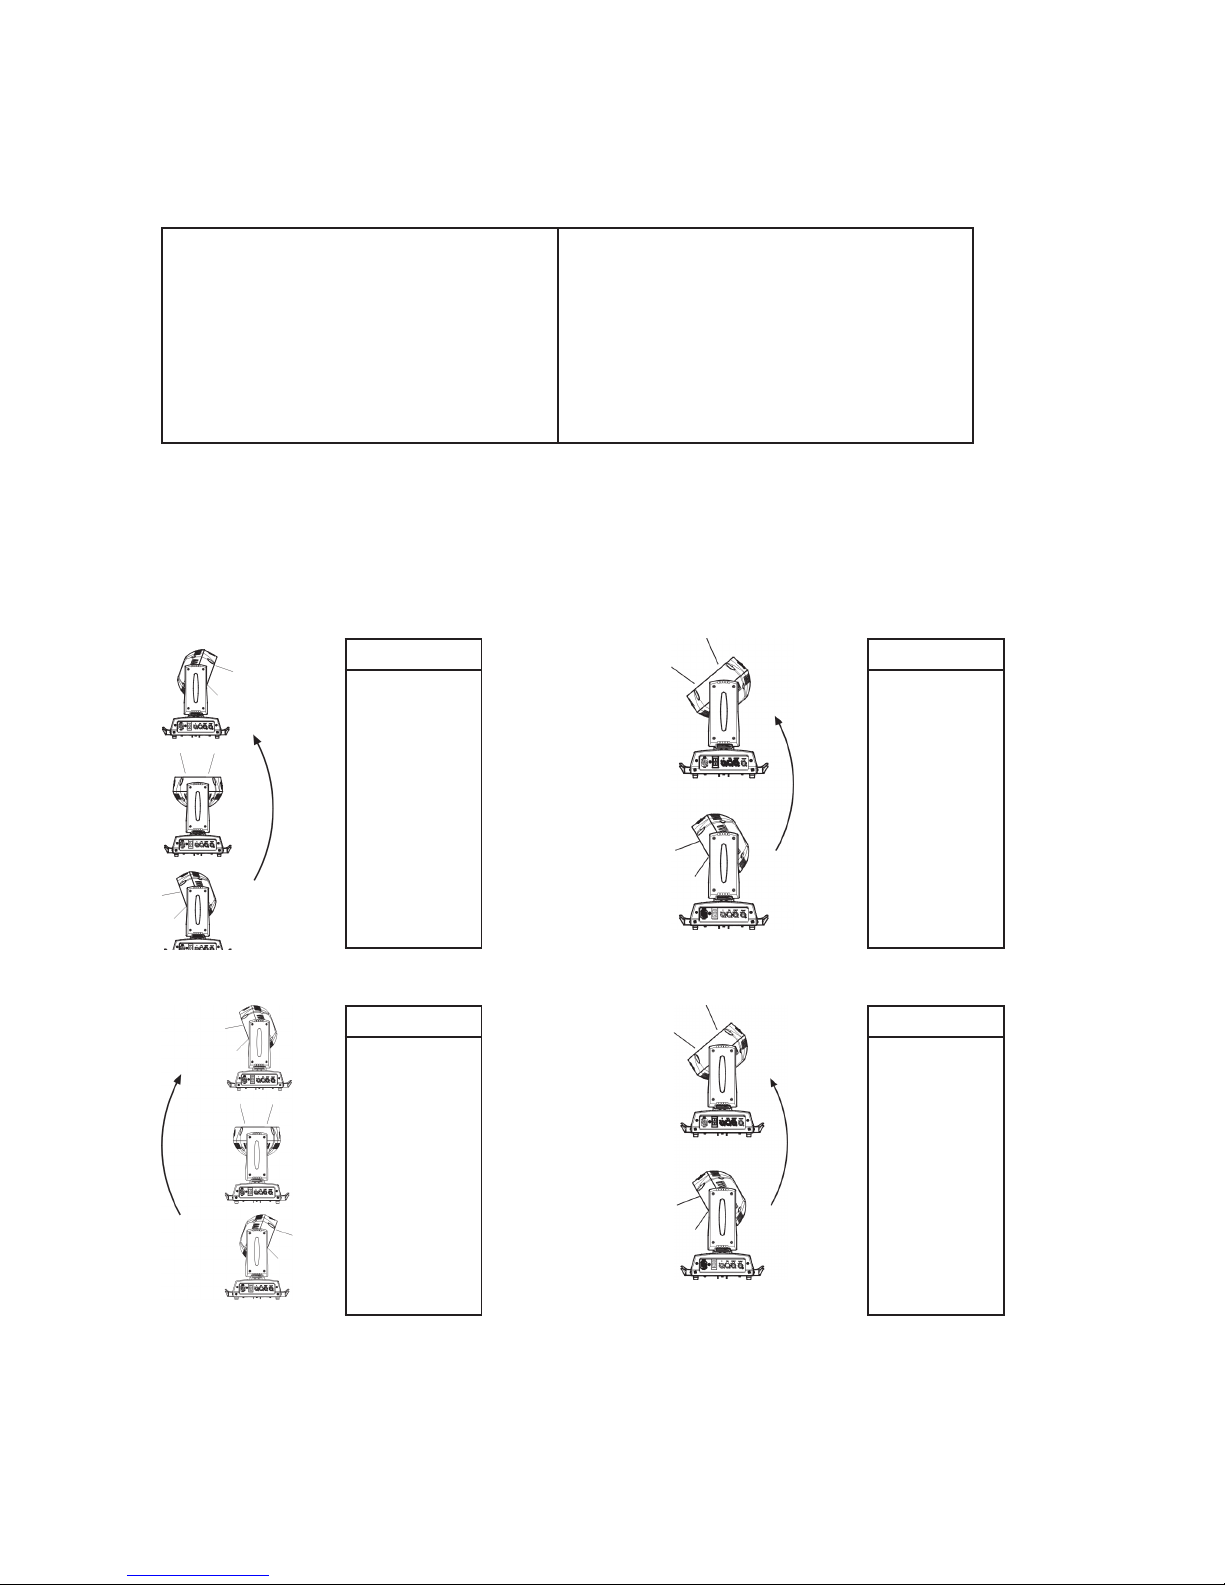
1. OVERVIEW
English version
Page 3
P. 3
| Tecshow Mini -Hive 10
English version
2. BEFORE USING
What is included
• Equipment x 1
• Power cable with Plug x 1
• User manual x 1
• Iron holder x 2
Open Instructions
Please open the equipment carefully, and check
all the spare parts are included or not. If any part
cause failure due to improper transportation or carton, please keep the packing materials and immediately inform the shipper to check. If the equipment
must be returned to the factory, the equipment
should be in the original carton and packaging.
AC Power Supply
The equipment power supply is able to adapt to
the wide input voltage. Please conrm the input
voltage is in the scale of rated voltage. The equip-
ment can adapt to100V-240V AC voltage. Frequency
50-60HZ. It can not run a rheostat (variable resistor)
or dimmer circuits.
Safety Instruction
This product is I level protection equipment, so it
is must be connected well and connected by the
professional people.
• Make sure the voltage don’t be above or below
which the user manual rated values.
• Conrm the power cord is not a sword cut or
damaged.
• Must be cut o the power supply in the condition of no using or cleaning.
• Only allowed with the power cord plug connection. Please do not force when unplug the
power cord to pull the plug.
• Be careful in the process of installation of
equipment. Avoid touching the bare wire, otherwise it will suer fatal shocks.
• Don’t look the light source directly, otherwise it
will hurts the eyes.
• The front lens may be innited rotation in for-
ward and reverse.
• 0-20HZ strobe.
• Zoom anger: 4°-60°.
• When choosing installation position of equip-
ment and the equipment must be more than
0.5m distance between objects.
• Please use the equipment wires appropriate.
• Without the manufacturer’s authorization or
laypeople don’t remove, repair and modication of equipment.
• The maximum operating temperature is 40°C
don’t operate the equipment when it is over
40°C.
• Do not connect the equipment to the dimmer
equipment.
• Under 120V voltage,output power don’t series
more than 10 pcs equipment, voltage 230V.
Output power don’t series more than 15 pcs.
Page 4
P. 4
Tecshow Mini -Hive 10 |
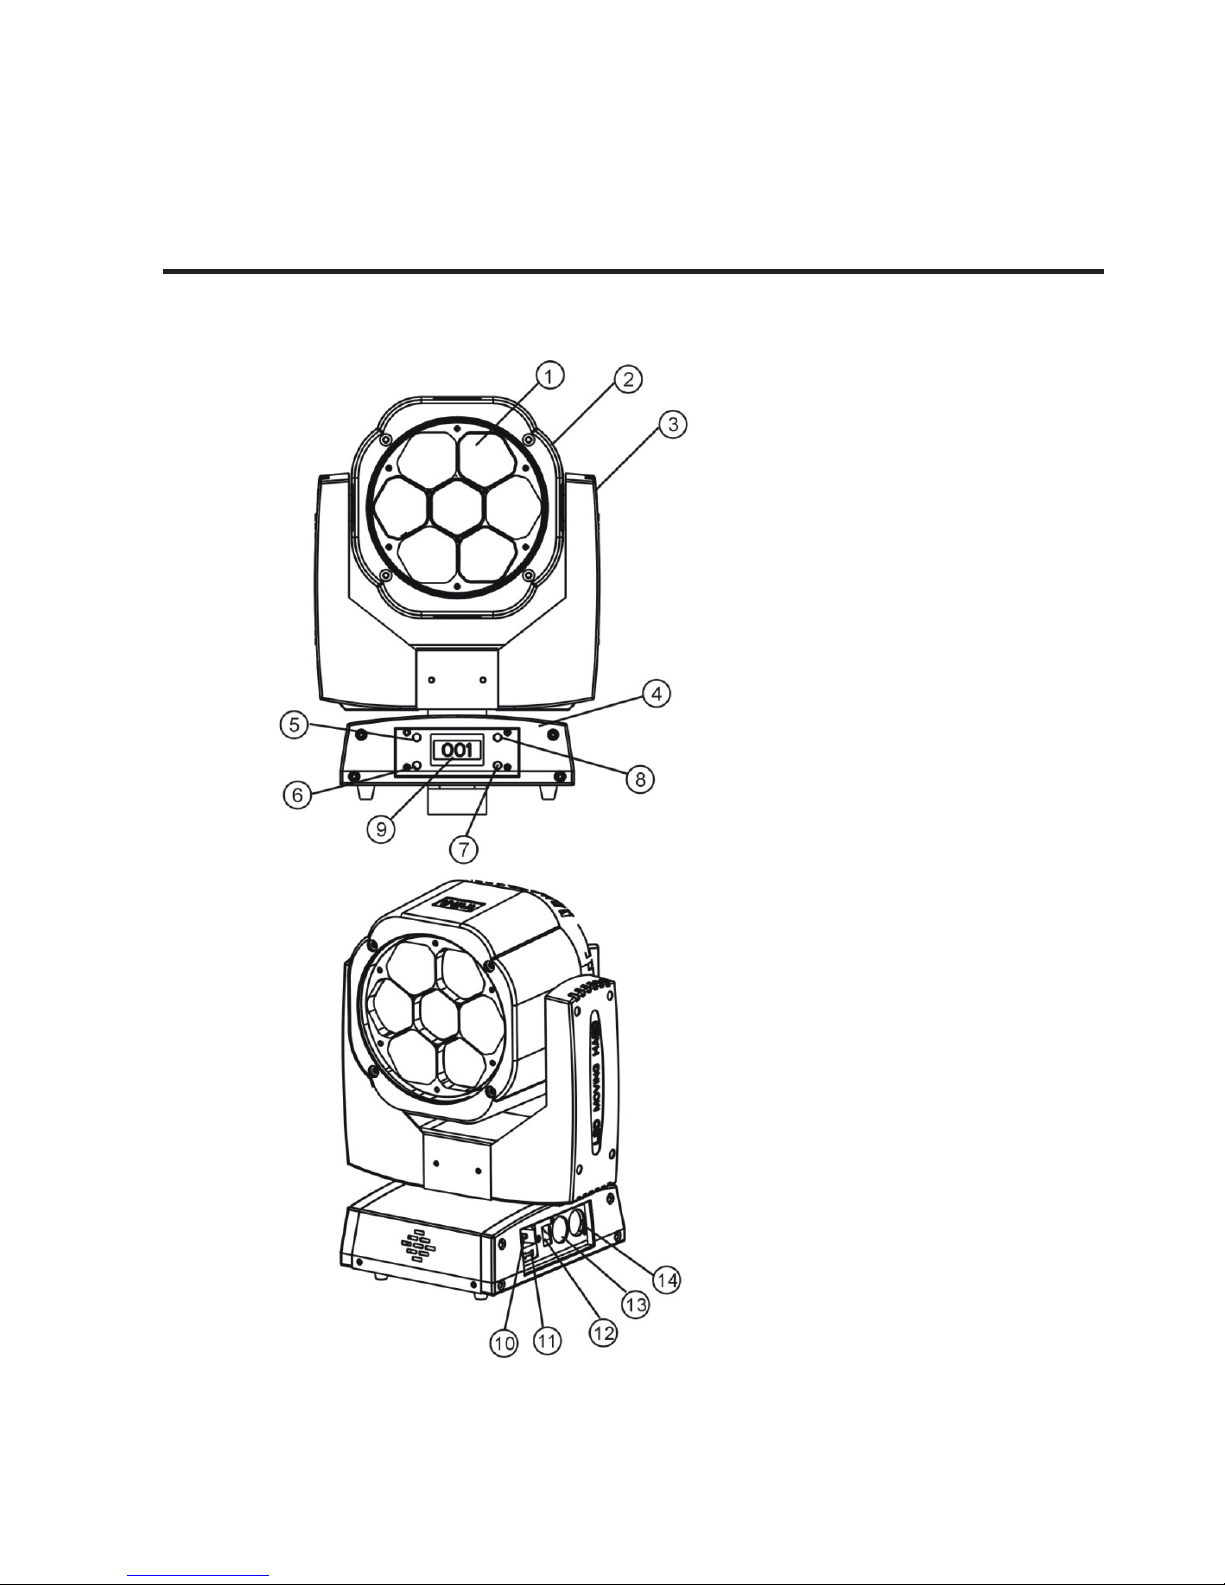
3. PRODUCT INTRODUCTION
English version
1. Lens
2. Head
3. Arm
4. Botton
5. Menu-button
6. Enter-button
7. Down.button
8. UP-button
9. LCD display
10. Power in
11. Fuse
12. Poser switch
13. DMX in
14. DMX out
Page 5
P. 5
| Tecshow Mini -Hive 10
4. INSTALLATION
English version
Installation Requirements
This equipment can be used in many places, it can
hang and put on the ground.
• Choosing a suitable place to put or hang the
equipment when installation. Must be use the
special screws and hook to make sure the lamp’s
weight is in the weight range.
• When installing the equipment, ensure no inam-
mable and explosive goods at 0.5 meter distance.
• Please ask the professionals to install the equipment, any improper installation will cause person-
al injury or material damage.
• To prevent others entering the working ares be-
low, the installation or maintenance of equipment
with suitable and stable platform.
• The equipment must be placed in ventilated place,
at least 50 cm from the ground, please ensure that
the vent without clogging.
Power Supply connection
The equipment can be used in the wide voltage
input. Please make sure the voltage is the scale
of rated voltage when connecting the power. The
equipment can adapt to 100V to 240 V AC voltage
and 50-60 Hz.
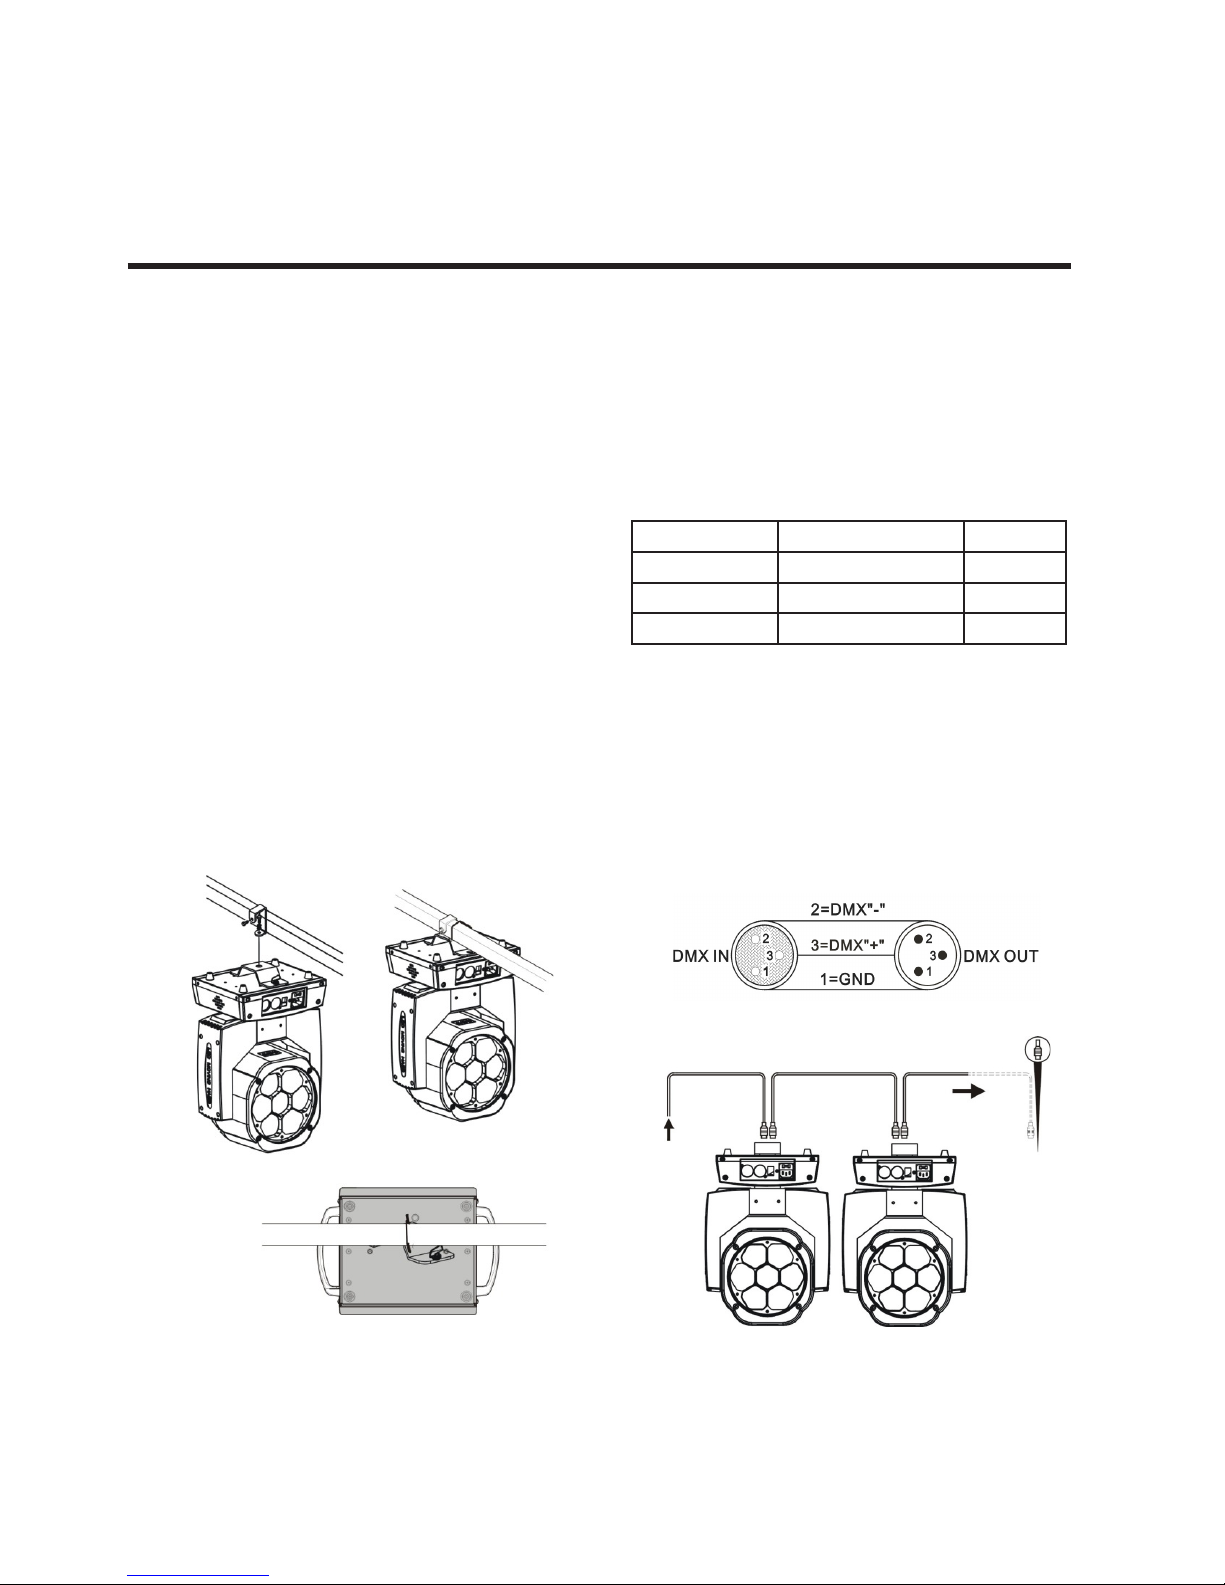
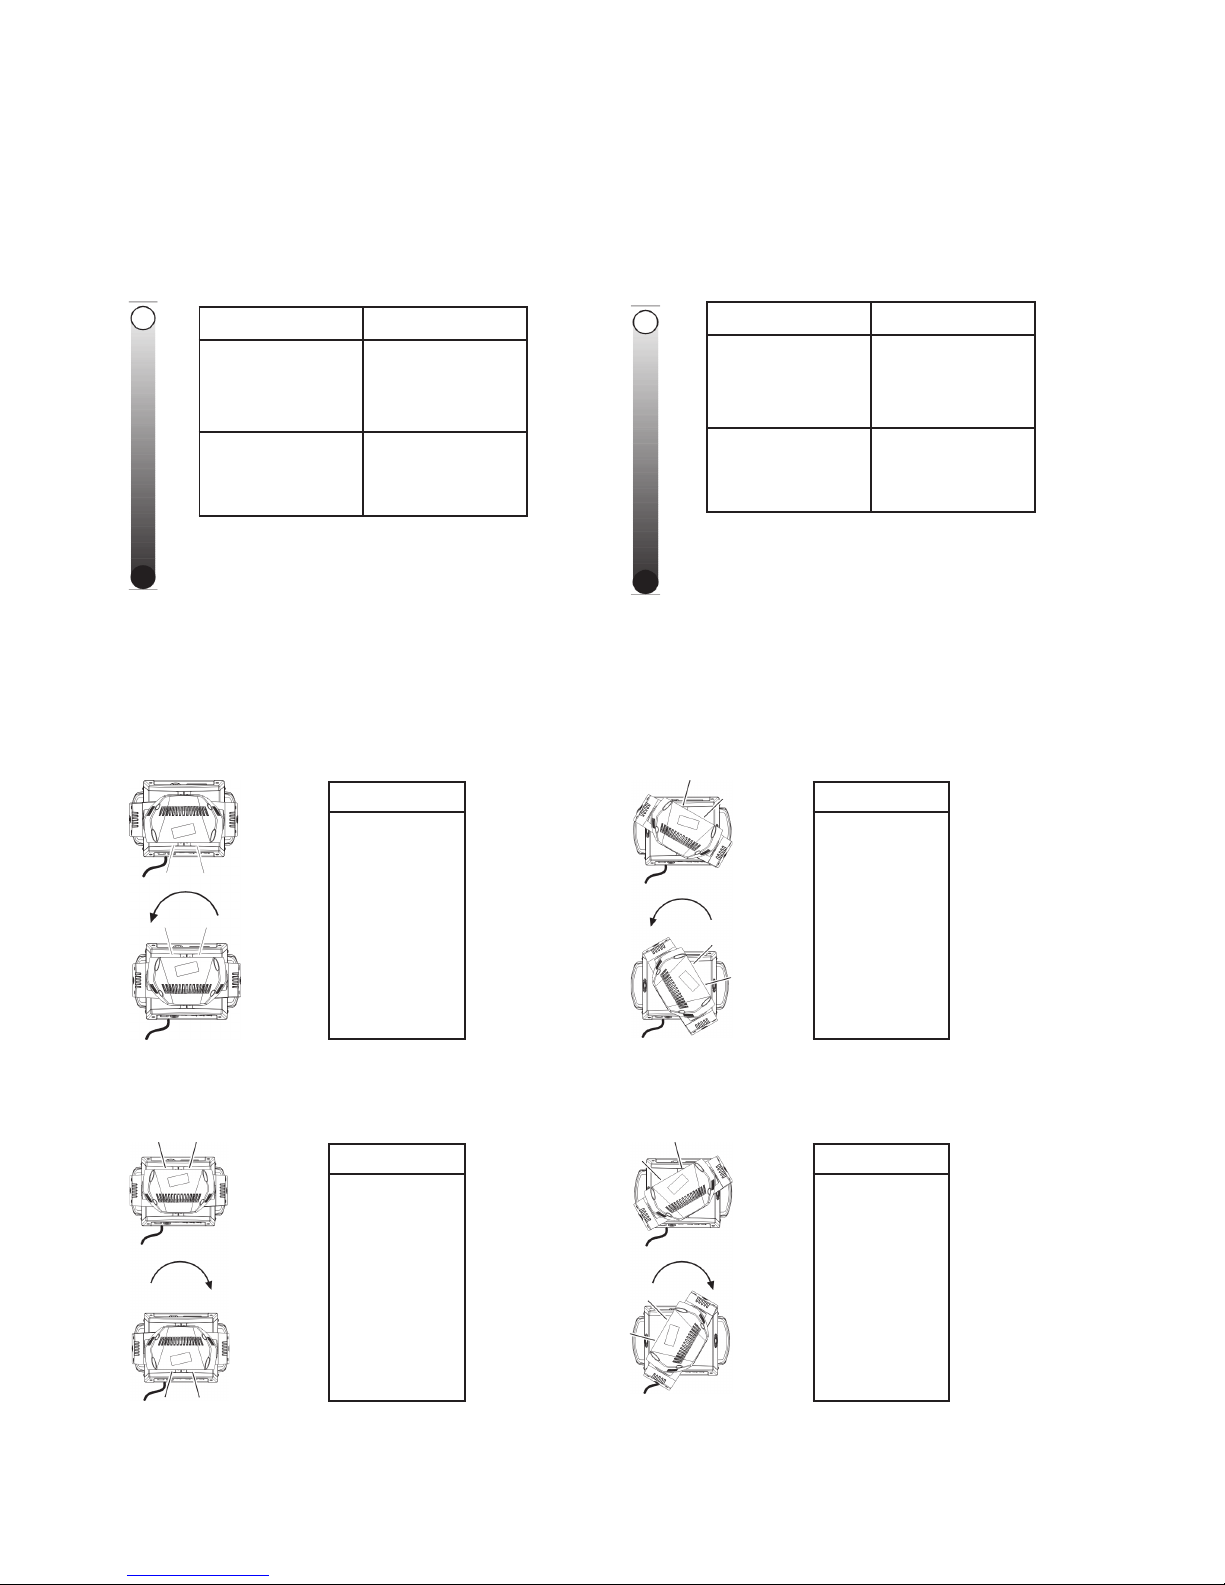
DMX Signal Connection
1. Use DMX512 controller, use the DMX signal
(male) to plug into the rst lamp (female) 3 pin.
2. Put out of the equipment of the rst signal wire
(head), connected to the equipment of the next
3 pin plug (female), so on. See belowed pictures:
Colors Connection Pin
Brown AC Live 1
Blue AC Neutral 2
Green/Yellow AC Ground 3
Page 6
P. 6
Tecshow Mini -Hive 10 |
English version
5. OPERATING INSTRUCTIONS
Operating Instructions
Control Panel Functions
Menu map
Button Function
MENU Choose Menu or function exit
ENTER Current show menu or enter into the current selected function
UP Increase the value
DOWN Decrease the value
Page 7
P. 7
| Tecshow Mini -Hive 10
English version
Menu Instruction
DMX address setting
• Press MENU when it shows Address, then press
ENTER.
• Change the DMX address by UP or DOWN.
Function selection
• Press MENU until it shows Intro, press ENTER
• Press UP or DOWN to choose Reset, Run.
• When choosing Reset, press ENTER and press UP
or DOWN to choose YES or NO. When choosing
YES, press ENTER the equipment reset, restore
factory sett.
• When choosing Run, press ENTER press UP or
DOWN to choose DMX512, Auto1, Auto2, Auto3,
Sound1, Sound2, Slave. When choosing DMX512
the DMX controller sending the signal (3 pin signal
is valid).
• When choosing Auto1, Auto2, Auto3, Sound1 or
Sound2, Auto1, Auto2, Auto3, Sound1, Sound2
choose Auto or Sound mode, it can be used as
the master. When choosing Slave it is Slave receive
the Master signal. Choose the Slave need to quit
to the main menu can be controlled.
DMX Mode selection
• Press MENU until it shows Users mode press
ENTER.
• Choose Channel mode by pressing UP or
DOWN: 25CH, 55CH.
Test Procedure
• Press MENU until it shows Test and then press
ENTER.
• Press UP or DOWN to choose All Pan & Tilt and
LED. When selecting All it is testing the motor
and LED. When selecting Pan & Tilt to test the
motor choose LED; it is only LED operated.
Adaptive function setting
• Press MENU until it shows Set and then just
press ENTER.
• Press UP, DOWN to choose Disp.setting, Pan
Tilt.
• When selecting Disp.setting press ENTER, press
UP or DOWN to choose Shut o time, Flip dis-
play, Key lock, or Disp ash. If selecting Shut
o time press ENTER operate UP or DOWN it
can be set LCD backlight close from 2-60 mins.
• When selecting Key lock press ENTER and operate UP or DOWN. Enter Option ON/OFF and
select option ON. When the backlight shuts o,
the button key is locked, it means the operation
is invalid at this time. It must be entered Up,
Down, Down, then press ENTER to conrm the
unlock. When selecting Disp ash, press EN-
TER, operate UP or DOWN, it can be choosed
ON/OFF, choose ON, the screen’s backlight
begin to blink when the equipment received
the DMX signal; that means it has received
the DMX signal. The screen’s backlight closed
when there is no signal. When selecting Pan or
Page 8
P. 8
Tecshow Mini -Hive 10 |
English version
Tilt, press ENTER, operate UP or DOWN. Choose
Normal or Reverse to set the forward and reverse
operation.
Check equipment’information
• Press MENU until it shows Info, then press ENTER.
• Operate UP or DOWN to choose Time Info So-
ware Ver.
• When selecting Time Info press ENTER operate
UP or DOWN to choose Power on Ttl Life hrs or
Last Run Hrs. If choosing Power on press EN-
TER to enter into the equipment “XXXX” hours. If
selecting Ttl Life hrs press ENTER to enter into
the equipment total operation time “XXXX” hours.
If selecting Last Run Hrs press ENTER to show the
LED’s last operation“XXXX”hours.
• When selecting Soware Ver press ENTER, it will
show the equipment ’soware version.
Macro Colour
Bit Lee Reference Colour Bit value
R G B W
209-255 - White 255 235 66 255
208 - Dirty White 255 255 122 255
207 197 Alice Blue 128 255 143 0
191-206 181 Congo Blue 77 0 255 0
184-190 174 Dark Steel Blue 181 255 95 0
180-183 170 Deep lavender 255 168 64 0
179 169 Lilac Tint 255 199 49 0
175 -178 165 Daylight Blue 82 214 90 0
174 164 Flame Red 255 46 2 0
172-173 162 Bastard Amber 255 181 28 0
Page 9

P. 9
| Tecshow Mini -Hive 10
English version
168-171 158 Deep Orange 222 84 0 0
162-167 152 Pale Gold 253 171 26 0
157-161 147 Apricot 255 143 13 0
151-156 141 Bright Blue 0 255 87 0
149-150 139 Primary Green 77 255 0 0
147-148 137 Special lavender 219 197 79 0
146 136 Pale Lavender 255 197 61 0
145 135 Deep Golden Amber 255 58 0 0
142-144 132 Medium Blue 0 255 143 0
138-141 128 Bright Pink 255 53 36 0
136-137 126 Mauve 227 41 56 0
134-135 124 Dark Green 84 255 13 0
131-133 121 Leaf Green 206 255 0 0
129-130 119 Dark Blue 0 186 255 0
128 118 Light Blue 74 255 82 0
127 117 Steel Blue 206 255 56 0
126 116 Med Blue Green 206 255 56 0
125 115 Peacock Blue 51 255 51 0
123-124 113 Magenta 255 20 15 0
121-122 111 Dark Pink 255 109 33 0
120 110 Middle Rose 217 130 28 0
119 109 Light Salmon 255 138 31 0
118 108 English Rose 255 148 23 0
117 107 Light Rose 255 141 31 0
115-116 105 Orange 255 122 0 0
114 104 Deep Amber 255 166 0 0
113 103 Straw 230 160 0 69
112 102 Light Amber 237 163 0 0
110-111 100 Spring Yellow 245 202 0 0
100-109 90 Dark yellow green 41 219 0 0
89-99 79 Just Blue 0 194 130 0
78-88 68 Sky Blue 0 255 135 0
68-77 58 Lavender 243 117 133 199
62-67 52 Light Lavender 243 117 39 197
49-61 39 Pink Carnation 255 107 0 130
46-48 36 Medium Pink 255 87 0 107
45 35 Light Pink 255 112 0 141
35-44 25 Sunrise Red 255 83 2 0
Page 10

P. 1 0
Tecshow Mini -Hive 10 |
32-34 22 Dark Amber 255 65 0 0
31 21 Gold Amber 255 100 0 0
30 20 Medium Amber 255 135 0 0
29 19 Fire 255 56 0 0
27-28 17 Surprise Peach 198 114 9 0
23-26 13 Straw Tint 152 115 9 0
20-22 10 Medium Yellow 156 126 0 0
19 - Black 0 0 0 0
18 - White 5000 K 255 137 0 193
17 - White 3700 K 255 201 25 255
16 - White 7000 K 216 237 61 255
15 - Magenta 255 0 255 0
14 - Yellow 255 255 0 0
13 - Cyan 0 255 255 0
12 - Blue 0 0 255 0
11 - Green 0 255 0 0
10 - Red 255 0 0 0
0-9 - Macro color OFF - - - -
English version
Page 11
P. 11
| Tecshow Mini -Hive 10
Linear cto
Note: If CTO channel is active, the WHITE channel
is disabled.
Bit Eect
255 8000K
224 7200K
188 6000K
144 5600K
117 5000K
99 4000K
54 3200K
10 2500K
0-9 Unused range
RED
GREEN
BLUE
WHITE
Bit Eect
255 LED ON
0 LED OFF
Stop Strobe - Foreground Strobe - Background Strobe
Bit Eect
252-255
239-251
226-238
213-225
208-212
207
OPEN
RANDOM FAST STROBE
RANDOM MEDIUM STROBE
RANDOM SLOW STROBE
OPEN
FAST PULSATION (25 ash/sec)
English version
Page 12
P. 12
Tecshow Mini -Hive 10 |
108
104-107
103
.
4
0-3
SLOW PULSATION (0,5 ash/sec)
OPEN
FAST STROBE (25 ash/sec)
SLOW STROBE (1 ash/sec)
CLOSED
Tilt
Operation with option InvertPan, GO (Tilt conventionally represented at 35 bit and option Invert Tilt, GO)
Operation with option InvertPan, GOn (Tilt conventionally represented at 35 bit and option Invert Tilt, GO)
Bit
255
0
Bit
255
0
Bit
255
0
Bit
255
0
English version
Page 13
P. 13
| Tecshow Mini -Hive 10
Dimmer Fin
Pan Fin
Dimmer
Pan
Bit Eect
255 FULL LIGHT
0 NO LIGHT
Bit Eect
255 UP
0 LOW
Bit
255
0
Bit
255
0
Bit
255
0
Bit
255
0
English version
Page 14

P. 14
Tecshow Mini -Hive 10 |
Function
Reset
Operation with option InvertPan, GO (Tilt conventionally represented at 35 bit and option Invert Tilt,
GO)
Bit Eect
58 – 255
53 – 57
48 – 52
43 – 47
38 – 42
24 – 37
12 – 24
0 – 11
Reserved
Dimmer Curve 4
Dimmer Curve 3
Dimmer Curve 2
Dimmer Curve 1
Pan Tilt Normal xy
Pan Tilt Fast (Default)
Function o – rearmed
Bit Eect
255
.
.
.
.
128
127
.
.
.
.
.
77
76
.
.
.
.
.
26
25
0
COMPLETE RESET
Complete reset is activated passing throug
the unused range and staying 5 seconds in
complete reset levels
COMPLETE RESET
PAN / TILT RESET
Pan / Tilt reset is activated passing throug the
unused range and staying 5 seconds in Pan /
Tilt reset levels
PAN / TILT RESET
ZOOM RESET
Eects reset is activated passing throug the
unused range and staying 5 seconds in Eects
reset levels.
ZOOM RESET
UNUSED RANGE
English version
Page 15

P. 15
| Tecshow Mini -Hive 10
Zoom
Zoom Rotation
Bit Eect
255
.
.
.
.
.
.
..
.
.
.
.
0
WIDE BEAM
.
.
.
.
.
.
.
.
.
.
.
NARROW BEAM
Bit Eect
255
.
193
191-192
190
.
.
128
127
.
.
.
0
FAST ROTATION
SLOW ROTATION
STOP
SLOW ROTATION
FAST ROTATION
LINEAR ROTATION
English version
Page 16

P. 1 6
Tecshow Mini -Hive 10 |
(Available on zoom channel from 0 bit to 42 bit)
(Available on zoom channel at 255 bit only)
Bit Macro eect
193-255
191-192.
128-190.
127.
126
…..
3
2
1
0
CCW Rotation, speed from 3 RPH to 10 RPM
Stop rotation
CW Rotation, speed from 10 RPM to 3 RPH
Indexed zone. Lens angle = 60.00
Indexed zone. Lens angle = 59.52
Indexed zone. Lens angle = 1.42
Indexed zone. Lens angle = 0.94
Indexed zone. Lens angle = 0.47
Indexed zone. Lens angle = 0
Bit Macro eect
128-255
127.
126
125
…..
1
0
Lens oset angle: 0.00 degree
Lens oset angle: +4.00 degree
Lens oset angle: +3.94 degree
Lens oset angle: +3.87 degree
Lens oset angle: +0.06 degree
Lens oset angle: 0.00 degree
RED LED 1 to…
GREEN LED 1 to…
BLUE LED 1 to…
WHITE LED 1 to…
Bit Eect
255 LED ON
0 LED OFF
English version
Page 17

P. 17
| Tecshow Mini -Hive 10
Shape selection - shape sped - shape oset
BIT Shape-selection Description Pandom
colors 1
Shape speed Shape oset
0-7 Macro OFF N.a N.a N.a
8-12
13-17
Ring 1
Ring 2
Static eects.The ring
or rings used by the
macro are turned-on
with the foreground
colour.
N.a N.a N.a
18-22 NO Function
23-27 Ring 1+2
28-32 NO Function
33-37 Ring Opening
(Closing)
Yes 0-63 = Radius size,
static.
64-158 = max to
min speed,
Closing eect 159160 = STOP
161-255 = min to
max speed,
Opening eect
0-9 → continuous
10-255→ random
distribution of
ash from 2 to 20
xtures 2-20
38-42 Ring Opening
(Closing) Filled
Yes
43-47 Ring Opening
(Close/open)
Yes 0-63 = Radius size,
static.
64-158 = max to
min speed,
Closing eect, 159160 = STOP.
161-255 = min to
max speed,
Opening eect
48-52 Ring Opening
(Close/open)
Filled
Yes
53-57 Random pixels
distributed on
many xtures
Yes 0-63 = STOP
64-158 = max to
min speed, In-
stant-on + fade out.
159-160 = STOP.
161-255 = min to
max speed, Fade In
+ Fade Out.
Fade or snap
depending on fade
channel
0-255 → select
random distribu-
tion from 2 up to
20 xtures
0-255 →select
pixel density
58-62 Random pixels
with variable
density and
speed
Yes
English version
Page 18

P. 18
Tecshow Mini -Hive 10 |
63-67 Rainbow 1
Variable speed
N.a 0-63 = Angle 0-360°,
static.
64-158 = max to
min speed, c.cw
rotation 159-160 =
STOP
161-255 = min to
max Speed, cw
rotation
0-255 → angle
oset from 0 to
360°
68-72 Rainbow 2 Fixed
speed with varia-
ble color oset
N.a 0-63 = STOP
64-158 = c.cw rota-
tion.cw
159-160 = STOP
161-255 = cw rota-
tion cw
The value64-158
or 161-255 change
the rainbow angle
oset (the orange
starting angle).
N.a
73-77 Fan (3 ams) N.a 0-63 = angle oset,
0-360°
64-158 = max to
min speed, c.cw
rotation
159-160 = STOP
61-255 = min to max
speed, cw rotation
0-255 → angle
oset from 0 to
360°
78-82 Bar (2 ams)
83-87 Half moon
88-92 Triangle
93-97 Two rotating bars
of dierent colors
98-102 Two rotating arcs
of dierent colors
103-107 Two rotating arcs
of dierent colors
and direction
108-112 Shape 1 N.a 0-63 = angle oset,
0-360°
64-158 = max to
min speed, c.cw
rotation
159-160 = STOP
61-255 = min to max
speed, cw rotation
0-255 → angle
oset from 0 to
360
113-117 Shape 2
118-122 Shape 3
123-127 Shape 4
128-132 Shape 5
133-137 Shape 6 61-255 = min to max
speed, cw rotation
138-142 Shape 7
143-147 Shape 8
148-152 Shape 9
153-157 Shape 10
158-162 Shape 11
163-255 Reserved N.a N.a
English version
Page 19

P. 1 9
| Tecshow Mini -Hive 10
Macro O
DMX channel value: from 0 to 7. No shape eects activated Turns o any previously selected shape.
Static Rings
DMX channel value: from 8 to 32 . The ring or ring used
by the macro are turned on with the foreground colour
(Shape Red + Shape Green+Shape blue + Shape White)
Available combinations: Ring 1 On, Ring 2 On.
Random pixels
DMX DMX channel value: 63-72. Leds are turned and
o randomly. The Shape Speed channel increases the
speed and denes the fade fade eect for the leds:
from 126 (min speed) to 0 (max speed) with a lnstant-on/fade-out led eect and from 129 (min speed)
to 255 (max speed) with a fade-in+fade-out led eect,
At a DMX value of 127 and 128 the macro stays still.
lf foreground colors are all set to 0 the Random-Colors
mode is activated.
The Shape Smoothing channel adjusts the fading
eect applied to the macro movement.
The color used by the macro changes at every restart.
Shape fade
Bit Macro eect
246-255
245
243
244
.
.
.
.
.
18
17
16
0-15
Smooth, fading curve with automatic gamma*
Smooth, fading curve gamma 2
Smooth, fading curve gamma 1,986
Smooth, fading curve gamma 1,993
Smooth, fading curve gamma 0,513
Smooth, fading curve gamma 0,506
Smooth, fading curve gamma 0,5
Snap
English version
Page 20

P. 2 0
Tecshow Mini -Hive 10 |
Shape transition
Shape Rgbw
Shape Dimmer
Background Dimmer
LED reference number
for pixel mapping
TILT: channel 16 @ 200 bit
Bit Eect
255 LED ON
0 LED OFF
Bit Eect
255
.
.
216
.
.
171
.
.
113
.
.
73
.
.
5
0-4
4 sec
3 sec
2 sec
1 sec
0,5 sec
100 ms
No fade
English version
Page 21

P. 2 1
| Tecshow Mini -Hive 10
6. DMX CHANNEL TABLE
Channel Channel mode
1 Red
2 Green
3 Blue
4 White
5 Linear CTO
6 Macro colour
7 Strobe
8 Dimmer
9 Pan
10 Tilt
11 Function
12 Reset
13 Zoom
14 Zoom Rotation
15 Shape Selection
16 Shape Speed
17 Shape Fade
18 Shape R
19 Shape G
20 Shape B
21 Shape W
22 Shape Dimmer
23 Background Dimmer
24 Shape Transition
25 Shape Oset
Channel Channel mode
1 Red
2 Green
3 Blue
4 White
5 Linear CTO
6 Macro colour
7 Strobe
8 Dimmer
9 Pan
10 Pan Fine
11 Tilt
12 Tilt Fine
13 Function
14 Reset
15 Zoom
16 Zoom Rotation
17 Shape Selection
18 Shape Speed
19 Shape Fade
20 Shape R
21 Shape G
22 Shape B
23 Shape W
24 Shape Dimmer
25 Background Dimmer
26 Shape Transition
27 Shape Oset
28 Red LED 1
29 Green LED 1
30 Blue LED 1
31 White LED1
…. Red LED …
25CH Mode 55CH Mode
English version
Page 22

P. 2 2
Tecshow Mini -Hive 10 |
…. Green LED …
…. Blue LED …
51 Red LED 7
52 Green LED7
53 Blue LED7
55 White LE7
English version
Page 23

P. 2 3
| Tecshow Mini -Hive 10
Mini Hive-10
Cabezal móvil equipado con 7 LEDs 4-en-1 de 15W y
una precisa función zoom
Mini Hive-10 es un cabezal móvil que, desde su
versatilidad, cambia las reglas del juego. Equipado
con 7 LEDs 4-en-1 de 15W, y una precisa función
zoom, es tanto beam como wash, pudiendo variar
su ángulo de haz de 4º a 60º. Como punto alto, este
innovador equipo cuenta con un lente de rotación
innita hacia ambas direcciones, lo cual permite
lograr un efecto de panal de abejas de gran impacto visual. Mini Hive-10 tiene control pixel por pixel y,
en cuanto a colores, no solo permite una mezcla sin
sombras multicolores sino que, además, posee 65
macros de color y CTO.
Especicaciones
Fuente & Ópticas
• Fuente de luz: 7 LEDs 4-en-1 de 15W
• Vida útil promedio: 60,000 horas
• Zoom: Zoom lineal de 4° a 60°
Efectos y Funciones
• Pixel mapping: Control pixel por pixel
• Lente de rotación innita y bidireccional
• Efecto panal de abejas de gran impacto visual
• Tecnología LED 4-en-1: Mezcla RGBW suave sin
sombras
• Colores vividos, saturados e uniformes
• 65 macros de color
• Dimmer: Rango completo 0-100%
• Efecto estrobo
• Ajuste lineal de CTO de 2500-8000K
Control
• Canales DMX: 25/55
• Modos de operación: DMX, Audioritmico &
Maestro/Esclavo
Movimiento
• Pan: 540°
• Tilt: 210°
• Resolución de 16-bit
• Reposicionamiento automático
Físico
• Conectores DMX: 2 conectores XLR (XLR-3 de
entrada & salida)
• Conectores de alimentación: PowerCON ™
Entrada/Salida
• Display LCD
• Dimensiones: 346x200x167 mm. / 13.6x7.9x6.5
pulg.
• Peso: 8.2 Kg. / 18 Lb.
1. DESCRIPCIÓN
Versión Español
Page 24

P. 2 4
Tecshow Mini -Hive 10 |
Versión Español
2. ANTES DE USARLO
Que viene incluido
• La unidad
• Cable de suministro eléctrico con enchufe
• Manual del Usuario
• Soporte de hierro x 2
Instrucciones
Abra la unidad con cuidado y verique que todas
las piezas se encuentren presentes. En caso de que
faltasen piezas o alguna no funcionase correctamente como consecuencia de un transporte defec-
tuoso o por daños en la caja, conserve el embalaje
e informe al transportista para que realice una
inspección. Si el equipo tuviere que ser devuelto a
la fábrica, use la misma caja y envoltorio.
Suministro eléctrico
La fuente de alimentación suministrada permite el
uso de una amplia gama de voltajes de entrada. De
todos modos, conrme que el voltaje utilizado co-
rresponda con la escala permitida. La unidad
puede utilizarse con un voltaje de 100V-240V CA
y una frecuencia de 50-60HZ. No podrá utilizar
reóstatos (resistor variable) o circuitos dimmer.
Instrucciones de Seguridad
La unidad tiene un grado de protección I, por lo
cual su instalación y las conexiones deberán ser
realizadas por profesionales exclusivamente
• Procure que el voltaje utilizado no sea superior
ni inferior a los valores indicados en el presente
manual.
• Verique que el cable de suministro eléctrico
no se encuentre cortado o dañado. Si ese fuera
el caso, no lo utilice y reemplácelo por otro
cable en óptimas condiciones.
• Utilice únicamente el enchufe provisto. Nunca
tire del cable para desconectar la unidad.
• Tome todas las precauciones necesarias al mo-
mento de instalar la unidad. Evite tocar cables
pelados ya que podría producir una descarga
letal.
• Nunca mire en forma directa a la fuente de luz
ya que podría experimentar daños en sus ojos.
• La unidad deberá ser instalada a una distancia
de al menos 0.5 metros de objetos o supercies
inamables.
• Utilice los cables adecuados y consérvelos en
buen estado. Las reparaciones podrán ser realizadas únicamente por personas debidamente
calicadas. No introduzca modicaciones en el
equipo sin la previa autorización del fabricante.
• La unidad debe operarse en ambientes cuya
temperatura no supere los 40. No utilice el equi-
po si la temperatura fuese superior.
• No conecte la unidad al dimmer.
• En caso de que el voltaje fuere inferior a 120 V,
no conecte más de 10 unidades en serie. Si el
voltaje fuere de 230, no conecte en serie más de
15 unidades.
Page 25

P. 2 5
| Tecshow Mini -Hive 10
Versión Español
3. INTRODUCCIÓN
1. Lente
2. Cabezal
3. Brazo
4. Tecla
5. Tecla Menú
6. Tecla Enter
7. Tecla Down
8. Tecla Up
9. Pantalla LCD
10. Encendido
11. Fusible
12. Interruptor encendido
13. Entrada DMX
14. Salida DMX
Page 26

P. 2 6
Tecshow Mini -Hive 10 |
Versión Español
4. INSTALACIÓN
Requisitos para la instalación
La unidad podrá ser utilizada en lugares difer entes.
Podrá colocarla en una posición colgante o bien ubicarla en el piso.
• Seleccione un lugar adecuado para instalar la unidad.
En el caso de instalaciones colgantes, use tornillos
y ganchos especiales para procurar una colocación
segura.
• Cuando instale el equipo, deje una distancia de al
menos 0.5 metros con supercies inamables y objetos combustibles.
• El equipo deberá ser instalado por profesionales
especializados. Tenga en cuenta que una instalación
incorrecta podría causar daños en las per- sonas o en
los objetos.
• El equipo deberá ubicarse sobre supercies esta-
bles y apropiadas, a n de evitar que se generen daños
en las personas que se desplazan por de bajo del área
de instalación. La unidad deberá ser colocada en un
sitio ventilado, al menos a 50 cm del piso. Asegúrese
de que los oricios de ventilación no se encuentren
obstruidos.
Conexiones
La unidad podrá ser utilizada con una amplia gama
de voltajes de entrada. De todos modos, procure
que el voltaje utilizado se encuentre dentro de la
escala permitida. El rango de valores permitido es
de 100V a 240 V CA y 50-60.
Conexión DMX
1. Utilice el controlador DMX512. Use la señal DMX
macho para establecer la conexión en la primera lámpara (hembra) de tres pines.
2. Conecte el cable de señal (cabezal) de la primera unidad con el enchufe de tres pines (hembra)
de la unidad siguiente y así sucesivamente. Vea
el gráco que se ilustra a continuación:
Color Conexión Pin
Marrón Cable de aliment-
ación de CA
1
Azul Cable CA neutro 2
Verde/Amarillo Puesta a tierra 3
Entrada
DMX
Salida
DMX
Page 27

P. 2 7
| Tecshow Mini -Hive 10
Versión Español
5. INSTRUCCIONES
Instrucciones de Uso
Funciones del Panel de Control
Descripción del Menú
Teclas Función
MENU Seleccione la función deseada del menú o la opción Exit para salir.
ENTER Ingrese en la función actual o seleccione la función deseada
UP Utilice esta opción para aumentar el valor de la función
DOWN Utilice esta opción para disminuir el valor de la función
Page 28

P. 2 8
Tecshow Mini -Hive 10 |
Versión Español
Instrucciones del Menú
Conguración de dirección DMX
• Seleccione la opción MENU hasta visualizar Address. Luego presione ENTER.
• Utilice las opciones UP y DOWN para modicar la
dirección DMX.
Selección de Funciones
• Presione la tecla MENU hasta que se muestre el
mensaje, Intro, press. Luego presione ENTER.
• Presione UP o DOWN para seleccionar las opciones, Reset, Run.
• Seleccione la opción Reset, presione ENTER y
utilice las teclas UP y DOWN a n de alternar entre
las opciones YES o NO. Si selecciona la opción YES
y luego presiona ENTER, la unidad regresará a la
conguración de fábrica.
• Si selecciona la opción Run presione ENTER y
utilice las opciones UP o DOWN para elegir una
de las siguientes alternativas: DMX512, Auto1,
Auto2, Auto3, Sound1, Sound2 y Slave. En caso de
seleccionar la opción DMX512 el controlador DMX
comenzará a enviar señal.
• Seleccione las opciones Auto1, Auto2, Auto3,
Sound1 o Sound2, Auto1, Auto2, Auto3,
Sound1, Sound2a n de determinar el modo de
operación de la unidad (master o slave). Tenga en
cuenta que para cambiar el modo en el que opera
la unidad deberá salir del menú principal y volver
a realizar la selección deseada.
Selección del Modo DMX
• Presione la tecla MENU hasta que se muestre
el mensaje Users mode. Luego presione la tecla
ENTER.
• Utilice las opciones UP o DOWN para seleccionar el canal deseado 25 CH, 55Ch.
Procedimiento de Prueba
• Presione MENU hasta visualizar Test. Luego
presione ENTER.
• Utilice las opciones UP o DOWN para seleccionar una de las funciones All Pan & Tilt y
LED. Seleccione la opción All a n de testear el
motor y el LED. Seleccione la opción Pan & Tilt
para testear el motor. Seleccione la opción LED
para testear el LED.
Conguración de funciones adaptadas
• Seleccione la opción MENU hasta visualizar la
función Set. Luego presione ENTER.
• Utilice las opciones UP o DOWN a n de seleccionar la función Disp.setting Pan, Tilt.
• Luego de ingresar en la opción Disp.setting
presione ENTER y utilice las opciones UP o
DOWN para seleccionar una de las siguientes
categorías Shut o time Flip display, Key lock
o Disp ash. Si selecciona la opción Shut o
time y presiona ENTER, a través de las op-
ciones UP o DOWN podrá ajustar la duración
de la retroiluminación en el rango de 2 a 60
minutos.
• Cuando seleccione la opción Key lock presione ENTER y opere a través de la opción UP
Page 29

P. 2 9
| Tecshow Mini -Hive 10
Versión Español
o DOWN ingrese a la opción ON/OFF y seleccione
la opción ON. En caso de que la retroiluminación
se encuentre cerrada, la tecla estará bloqueada.
La operación en este caso será inválida. Deberá
ingresar Up, Down, Up, Down y luego presionar
Enter para conrmar el desbloqueo. Seleccione la
opción Disp ash, presione ENTER y opere me-
diante las teclas UP o DOWN a n de ingresar en
las opciones ON/OFF. Si selecciona la opción ON,
la pantalla comenzará a parpadear en caso de que
la unidad reciba señal DMX. Si la unidad no reci-
biera dicha señal, la función de retroiluminación
permanecerá inactiva.
• Seleccione las opciones Pan or Tilt presione ENTER y utilice las opciones UP o DOWN a los efectos
de utilizar las alternativas Normal o Reverse y
denir el modo de operación, ya sea hacia adelante o invertido.
Vericación de la Información de la Unidad
• Seleccione la opción MENU hasta visualizar
Info. Luego presione ENTER. Utilice las opciones UP o DOWN para desplazarse entre las
opciones Time Info, Soware Ver.
• Cuando seleccione la opción Time Info, presione ENTER y utilice las teclas UP y DOWN
para seleccionar las siguientes opciones: Power
on, Ttl Life hrs, o Last Run Hrs. En caso de se-
leccionar la opción Power on presione ENTER
para conocer la información relativa a la canti-
dad de horas “XXXX” horas de encendido de
la unidad. Si selecciona la opción Ttl Life hrs y
presiona ENTER, podrá conocer la cantidad de
horas totales de funcionamiento de la unidad
“XXXX” horas. Si selecciona la opción Last Run
Hrs e ingresa ENTER podrá conocer la cantidad
de horas de la última ejecución “XXXX” horas.
Seleccione la opción Soware Ver y seleccione
la opción ENTER a n de visualizar la versión
del soware de la unidad.
Color Macro
Bit Lee Referencia Colores Valor de Bit
R G B W
209-255 - Blanco 255 235 66 255
208 - Blanco Sucio 255 255 122 255
207 197 Azul Alicia 128 255 143 0
191-206 181 Azul Congo 77 0 255 0
184-190 174 Azul Acero Oscuro 181 255 95 0
180-183 170 Lavanda Profundo 255 168 64 0
179 169 Lila 255 199 49 0
175 -178 165 Azul Luminoso 82 214 90 0
174 164 Rojo Flama 255 46 2 0
172-173 162 Ámbar 255 181 28 0
Page 30

P. 3 0
Tecshow Mini -Hive 10 |
Versión Español
168-171 158 Naranja Profundo 222 84 0 0
162-167 152 Oro Pálido 235 171 26 0
157-161 147 Albaricoque 255 143 13 0
151-156 141 Azul Brillante 0 255 87 0
149-150 139 Verde Primario 77 255 0 0
147-148 137 Lavanda Especial 219 197 79 0
146 136 Lavanda Pálido 255 197 61 0
145 135 Ambar Dorado
Profundo
255 58 0 0
142-144 132 Azul Mediano 0 255 143 0
138-141 128 Rosa Brillante 255 53 36 0
136-137 126 Malva 227 41 56 0
134-135 124 Verde Oscuro 84 255 13 0
131-133 121 Verde Hoja 206 255 0 0
129-130 119 Azul Oscuro 0 186 255 0
128 118 Azul Claro 74 255 82 0
127 117 Azul Acero 206 255 56 0
126 116 Azul Verde
Mediterraneo
206 255 56 0
125 115 Azul eléctrico 51 255 51 0
123-124 113 Magenta 255 20 15 0
121-122 111 Rosa Oscuro 255 109 33 0
120 110 Rosa Medio 217 130 28 0
119 109 Salmón Claro 255 138 31 0
118 108 Rosa Ingles 255 148 23 0
117 107 Rosa Claro 255 141 31 0
115-116 105 Naranja 255 122 0 0
114 104 Ámbar profundo 255 166 0 0
113 103 Pajizo 230 160 0 69
112 102 Ámbar Claro 237 163 0 0
110-111 100 Amarillo Primavera 245 202 0 0
100-109 90 Verde Amarillo
Oscuro
41 219 0 0
89-99 79 Azul 0 194 130 0
78-88 68 Azul cielo 0 255 135 0
68-77 58 Lavanda 243 117 133 199
62-67 52 Lavanda claro 243 117 39 197
49-61 39 Rosa clavel 255 107 0 130
46-48 36 Rosa medio 255 87 0 107
45 35 Rosa claro 255 112 0 141
35-44 25 Rojo amanecer 255 83 2 0
Page 31

P. 3 1
| Tecshow Mini -Hive 10
Versión Español
32-34 22 Ámbar oscuro 255 65 0 0
31 21 Ámbar dorado 255 100 0 0
30 20 Ámbar medio 255 135 0 0
29 19 Fuego 255 56 0 0
27-28 17 Melocotón 198 114 9 0
23-26 13 Pajizo 152 115 9 0
20-22 10 Amarillo medio 156 126 0 0
19 - Negro 0 0 0 0
18 - Blanco 5000 K 255 137 0 193
17 - Blanco 3700 K 255 201 25 255
16 - Blanco 7000 K 216 237 61 255
15 - Magenta 255 0 255 0
14 - Amarillo 255 255 0 0
13 - Cian 0 255 255 0
12 - Azul 0 0 255 0
11 - Verde 0 255 0 0
10 - Rojo 255 0 0 0
0-9 - Colores macro-
apagado
- - - -
Page 32

P. 3 2
Tecshow Mini -Hive 10 |
CTO Lineal
Nota: En caso de que el canal CTO se encuentre
activo, el canal BLANCO estará desactivado.
Bit Eect
255 8000K
224 7200K
188 6000K
144 5600K
117 5000K
99 4000K
54 3200K
10 2500K
0-9 Rango Sin Utilizar
ROJO
VERDE
AZUL
BLANCO
Bit Efecto
255 LED Encendido
0 LED Apagado
Detener Estrobo- Strobe Hacia Adelante - Estrobo Hacia Atrás
Bit Efecto
252-255
239-251
226-238
213-225
208-212
207
ABIERTO
ESTROBO ALEATORIO RÁPIDO
ESTROBO ALEATORIO MEDIO
ESTROBO ALEATORIO LENTO
ABIERTO
PULSACIÓN RÁPIDA (25 Flash/Segundo)
Versión Español
Page 33

P. 3 3
| Tecshow Mini -Hive 10
108
104-107
103
.
4
0-3
PULSACIÓN LENTA (0,5 Flash/Segundo)
ABIERTO
ESTROBO RÀPIDO (25 Flash/Segundo)
Tilt
Operaciones con la opción de Invertir PanGO, Función
Tilt representada convencionalmente en 35 bit y con
opción de inversión Tilt, GO.
Operaciones con la opción de inversión Pan, GOn (el
tilt generalmente está representado en 35 bit y con la
opción de inversión Tilt, GO).
Bit
255
0
Bit
255
0
Bit
255
0
Bit
255
0
Versión Español
Page 34

P. 3 4
Tecshow Mini -Hive 10 |
Dimmer Fin
Pan Fin
Dimmer
Pan
Bit Efecto
255 LUZ TOTAL
0 FALTA DE LUZ
Bit Efecto
255 ARRIBA
0 BAJO
Bit
255
0
Bit
255
0
Bit
255
0
Bit
255
0
Versión Español
Page 35

P. 3 5
| Tecshow Mini -Hive 10
Funciones
Reset
Operaciones con la opción de Invertir Pan, GO
Función Tilt representada convencionalmente en 35
bit y con opción de inversión Tilt, GO).
Bit Efecto
58 – 255
53 – 57
48 – 52
43 – 47
38 – 42
24 – 37
12 – 24
0 – 11
Reservado
Curva Dimmer 4
Curva Dimmer 3
Curva Dimmer 2
Curva Dimmer 1
Pan Tilt Normal xy
Pan Tilt Rápido (Predeterminado)
Función o – Rearmado
Bit Efecto
256
.
.
.
.
.
128
127
.
.
.
.
.
77
76
.
.
.
.
.
26
25
0
REINICIO COMPLETO
La Unidad Se Reiniciará En Caso De Que
Transcurra Un Intervalo Sin Que Se La Utilice
Y Permanezca Cinco Segundos En Los Niveles
De Reinicio Completo.
REINICIO COMPLETO
REINICIO PAN/TILT
El Reinicio De Pan/Tilt Se Activa Cuando
Transcurre Un Intervalo Sin Que Se Utilice
La Unidad Y Permanezca 5 Segundos En Los
Niveles De Reinicio De Pan/Tilt.
REINICIO PAN/TILT
REINICIO DEL ZOOM
El Reinicio De Los Efectos Se Activa Cuando
Transcurre Un Intervalo Sin Que Se Utilice
La Unidad Y Permanezca 5 Segundos En Los
Niveles De Reinicio De Efectos.
REINICIO ZOOM
UNUSED RANGE
Versión Español
Page 36

P. 3 6
Tecshow Mini -Hive 10 |
Zoom
Zoom Rotation
Bit Efecto
255
.
.
.
.
.
.
..
.
.
.
.
0
HAZ ANCHO
.
.
.
.
.
.
.
.
.
.
.
HAZ ESTRECHO
Bit Efecto
255
.
193
191-192
190
.
.
128
127
.
.
.
0
ROTACIÓN RÁPIDA
ROTACIÓN LENTA
INTERRUPCIÓN
ROTACIÓN LENTA
ROTACIPON RÁPIDA
ROTACIÓN LINEAL
Versión Español
Page 37

P. 3 7
| Tecshow Mini -Hive 10
Disponible únicamente en canal zoom de 0 bit a 42 bit.
Disponible únicamente en canal zoom con 255 bit.
Bit Efecto Macro
193-255
191-192.
128-190.
127.
126
…..
3
2
1
0
Rotación Ccw , Velocidad De 3 Rph To 10 Rpm
Detener La Rotación
Rotación Ccw , Velocidad De 10 Rph To 3 Rpm
Zona Indexada Ángulo Del Lente= 60.00
Zona Indexada Ángulo Del Lente= 59.52
Zona Indexada Ángulo Del Lente= 1.42
Zona Indexada Ángulo Del Lente= 0.94
Zona Indexada Ángulo Del Lente= 0.47
Zona Indexada Ángulo Del Lente= 0
Bit Efecto Macro
128-255
127.
126
125
…..
1
0
Ángulo de desplazamiento del lente 0,00 grados
Ángulo de desplazamiento del lente +4,00 grados
Ángulo de desplazamiento del lente +3,94 grados
Ángulo de desplazamiento del lente +3,87 grados
Ángulo de desplazamiento del lente +0,06 grados
Ángulo de desplazamiento del lente 0,00 grados
LED ROJO 1 a…
LED VERDE 1 to…
LED AZUL 1 to…
LED BLANCO 1 to…
Bit Efecto
255 LED ENCENDIDO
0 LED APAGADO
Versión Español
Page 38

P. 3 8
Tecshow Mini -Hive 10 |
Selección, Velocidad Y Compensación De La Forma
BIT Selección de
forma
Descripción Color
pandom 1
Velocidad de la
forma
Compensación
0-7 Macro Apagado N.a N.a N.a
8-12
13-17
Anillo 1
Anillo 2
Efecto estático. El o los
anillos utilizados por
el macro se encienden
con el color
N.a N.a N.a
18-22 Sin función
23-27 Anillo 1+2
28-32 Sin función
33-37 Operación de
anillos (cierre)
Si 0-63 = Tamaño del
radio, estático.
64-158 = Máximo a
mínimo Velocidad,
efecto de cierre
159-160 = STOP
161-255 = Mínimo a
máximo Velocidad,
efecto de apertura
0-9 → Continuo
10-255→ Distribución aleatoria
del ash de 2 a 20
unidades 2-20
38-42 Apertura de
Anillos (Cierre)
Si
43-47 Apertura de
Anillos (Apertura/
cierre)
Si 0-63 = Tamaño del
radio, estático.
64-158 = Máximo a
mínimo Velocidad,
efecto de cierre
159-160 = STOP.
161-255 = Mínimo a
máximo Velocidad,
efecto de apertura
48-52 Apertura de
Anillos (Apertura/
cierre)
Si
53-57 Distribución
aleatoria de los
pixeles en muchas unidades
Si 0-63 = STOP 64-
158 = Máx. a mín,
velocidad, encen-
dido instantáneo +
desvanecimiento
159-160 = STOP.
161-255 = mínimo a
máximo, velocidad,
desvanecimiento
entrada
0-255 → Selección
de distribución
aleatoria de 2 y
hasta 20 unidades
0-255 → Selección
de la densidad de
los pixeles
58-62 Pixeles aleatorios
con densidad y
velocidad variable
Si
Versión Español
Page 39

P. 3 9
| Tecshow Mini -Hive 10
63-67 Efecto arco irir 1,
velocidad varia-
ble
N.a 0-63 = Ángulo
0-360°, estático. 64158 = Máx. a mín.
velocidad, rotac-
ión c.cw 159-160
= STOP 161-255 =
Mínimo a máximo,
velocidad, rotación
ccw
0-255 → Desplazamiento del án-
gulo de 0 a 360°
68-72 Efecto arco iris 2.
Velocidad ja con
desvanecimien-
to variable de
colores
N.a 0-63 = STOP 64-158
= c.cw rotación. cw
159-160 = STOP 161255 = cw rotación
cw El valor 64-158 o
161-255 cambian el
ángulo de desplazamiento del arco
iris (con inicio en el
color naranja).
N.a
73-77 Ventiladores
(3 ams)
N.a 0-63 → Desplazam-
iento del ángulo de
0 a-360° 64-158 =
Máx. a mín. Velocidad, rotación c.cw
159-160 = STOP
61-255 = Velocidad
mínima a máxima,
rotación cw.
0-255 → Despla-
zamiento del án-
gulo de 0 a 360°
78-82 Barra (2 ams)
83-87 Media Luna
88-92 Triangulo
93-97 Dos barras que
rotan con colores
diferentes
98-102 Dos arcos que
rotan con colores
diferentes
103-107 Dos arcos que
rotan con colores
y direcciones
diferentes
108-112 Shape 1 N.a 0-63 = angle oset,
0-360°
64-158 = max to
min speed, c.cw
rotation
159-160 = STOP
61-255 = min to max
speed, cw rotation
0-255 → angle
oset from 0 to
360
113-117 Shape 2
118-122 Shape 3
123-127 Shape 4
128-132 Shape 5
133-137 Forma 6 61-255 = velocidad
mínima a máxima,
rotación cw
138-142 Forma 7
143-147 Forma 8
148-152 Forma 9
153-157 Forma 10
158-162 Forma 11
163-255 Reservado N.a N.a
Versión Español
Page 40

P. 4 0
Tecshow Mini -Hive 10 |
Macro Apagado
Valores del canal DMX: de 0 a 7 Si no se activa ningún
efecto para las formas, se anula cualquier forma seleccionada previamente.
Anillos Estáticos
Valores del canal DMX: de 8 a 32 El o los anillos utilizados por el macro se encienden con el color en primer
plano (Forma roja+verde+azul+blanca). Combinaciones posibles: Anillo 1, encendido; anillo 2, encendido.
Pixeles Aleatorios
DMX: valores de canal DMX :63-72. Los Leds se encienden y se apagan en forma aleatoria. El canal de
Velocidad de la forma incrementa su velocidad y
determina el efecto de desvanecimeinto para los leds
de 126 (velocidad mínima) a 0 (velocidad máxima) con
un efecto led lnstant-on/fade-out y de 129 (velocidad
mínima) a 255 (velocidad máxima) con un efecto led
fade-in+fade-out. En caso de que el valor DMX sea de
127 y 128, los macros permanecerán quietos. Si los
colores de fondo se conguran en 0, se activará el
modo de colores aleatorios. El canal de suavizado de
la forma ajusta el efecto de desvanecimiento aplicado
al movimiento macro.
Desvanecimiento de la Forma
Bit Macro Efecto
246-255
245
243
244
.
.
.
.
.
18
17
16
0-15
Suave, curva de desvanecimiento con gamma automático
Suave, curva de desvanecimiento gamma 2
Suave, curva de desvanecimiento gamma 1.986
Suave, curva de desvanecimiento gamma 1.993
Suave, curva de desvanecimiento gamma 0.513
Suave, curva de desvanecimiento gamma 0.506
Suave, curva de desvanecimiento gamma 0,5
Snap
Versión Español
Page 41

P. 41
| Tecshow Mini -Hive 10
Transición de la Forma
Forma,
Forma Rgbw,
Dimmer,
Dimmer De Fondo
LED reference number
for pixel mapping
TILT: channel 16 @ 200 bit
Bit Efecto
255 LED ENCENDIDO
0 LED APAGADO
Bit Efecto
255
.
.
216
.
.
171
.
.
113
.
.
73
.
.
5
0-4
4 seg
3 seg
2 seg
1 seg
0,5 seg
100 ms
Sin desvanecimiento
Versión Español
Page 42

P. 4 2
Tecshow Mini -Hive 10 |
6. CUADRO DE CANALES DMX
Canal Modo de canal
1 Rojo
2 Verde
3 Azul
4 Blanco
5 CTO lineal
6 Colores macro
7 Estrobo
8 Dimmer
9 Pan
10 Tilt
11 Función
12 Reset
13 Zoom :
14 Rotación del zoom
15 Selección de la forma
16 Velocidad de la forma
17 Desvanecimiento de la
forma
18 Forma R
19 Forma G
20 Forma B
21 Forma W
22 Forma de la luz
23 Luz de fondo
24 Transición de la forma
25 Compensación
Canal Modo de canal
1 Rojo
2 Verde
3 Azul
4 Blanco
5 CTO lineal
6 Colores macro
7 Estrobo
8 Dimmer
9 Pan
10 Pan no
11 Tilt
12 Tilt no
13 Función
14 Reset
15 Zoom :
16 Rotación del zoom
17 Selección de la forma
18 Velocidad de la forma
19 Desvanecimiento de la
forma
20 Forma R
21 Forma G
22 Forma B
23 Forma W
24 Forma de la luz
25 Luz de fondo
26 Transición de la forma
27 Compensación
28 LED Rojo 1
29 LED Verde 1
30 LED azul 1
31 LED Blanco 1
Modo 25 Canales Modo 55 Canales
Versión Español
Page 43

P. 4 3
| Tecshow Mini -Hive 10
…. LED rojo
…. LED verde
…. LED azul
51 LED Rojo 7
52 LED Verde 7
53 LED Azul 7
55 LED Blanco 7
Versión Español
Page 44

P. 4 4
Tecshow Mini -Hive 10 |
FOR MORE INFO ON THIS PRODUCT PLEASE CHECK WWW.TEC-SHOW.COM /
PARA MAS INFORMACION SOBRE ESTE PRODUCTO VISITE WWW.TEC-SHOW.COM
 Loading...