

Page 1
P. 1
| Tecshow Halo 6 0 Spot
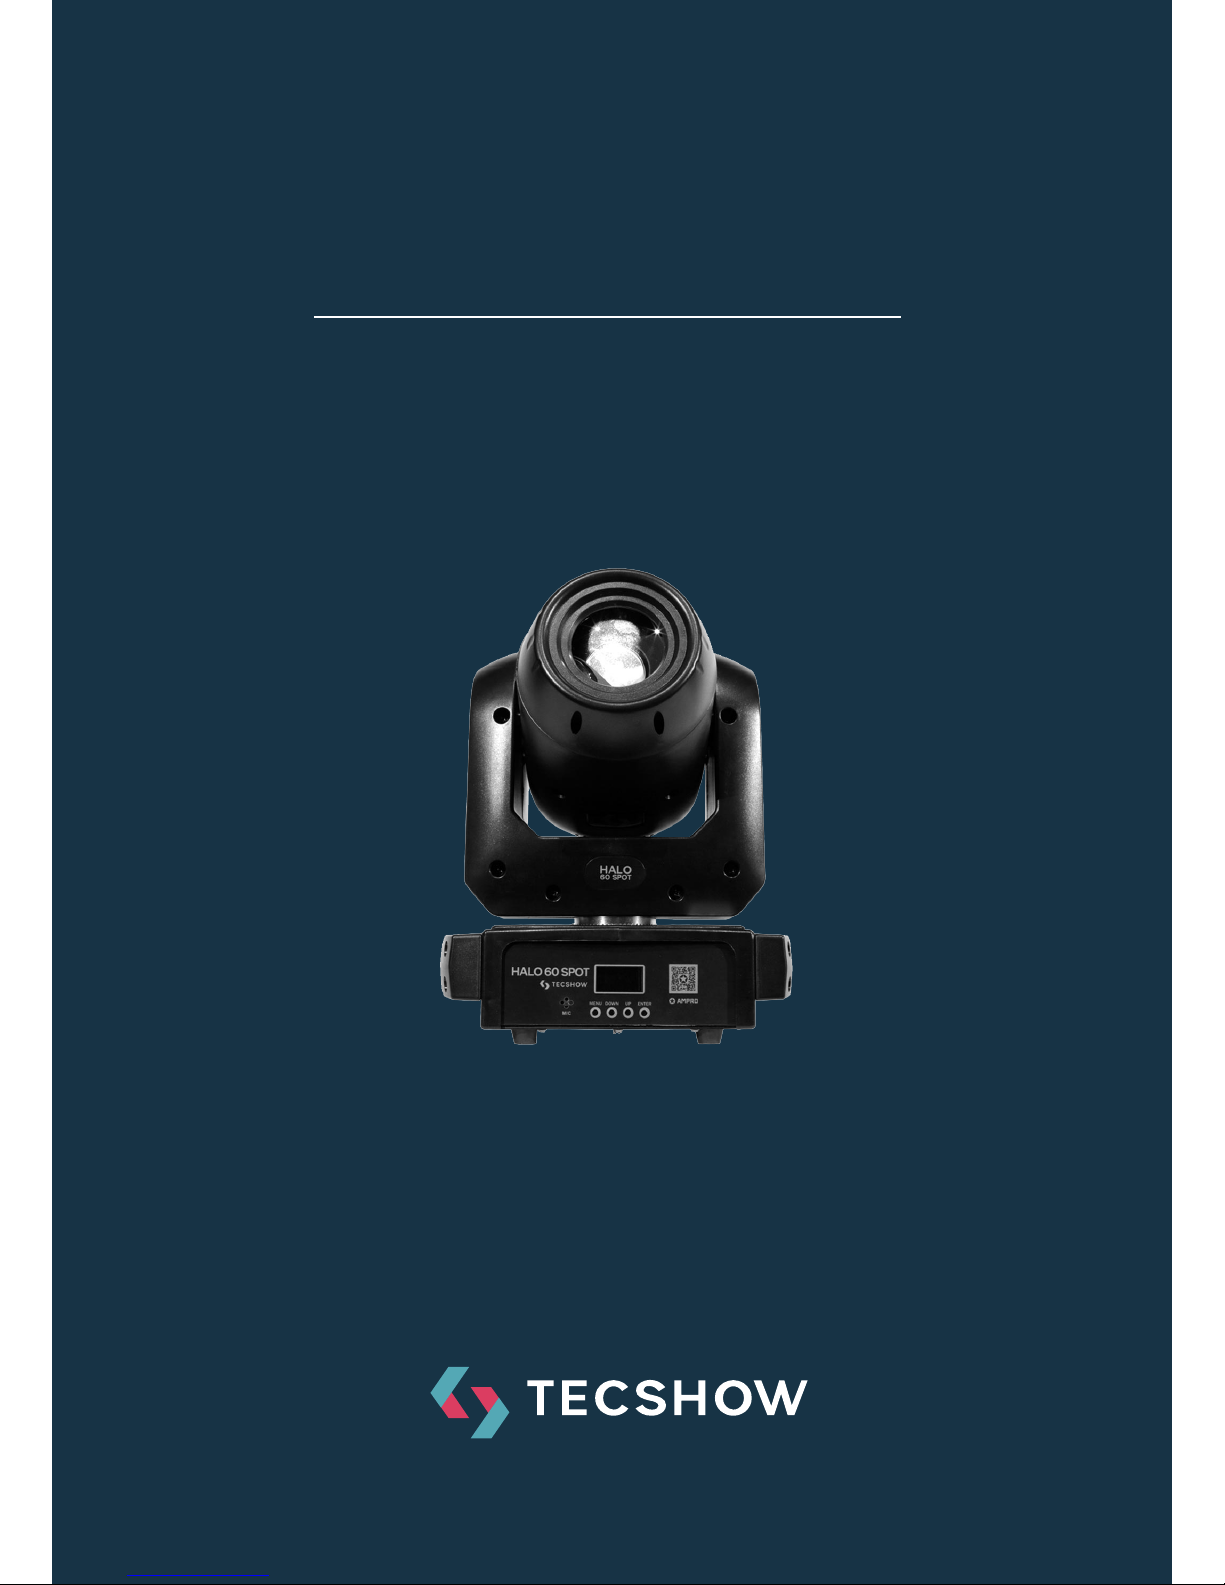
HALO 60 SPOT
Spot Moving Head
USER MANUAL / MANUAL DE USUARIO
PLEASE READ THE INSTRUCTIONS CAREFULLY BEFORE USE
POR FAVOR LEA LAS INSTRUCCIÓNES ANTES DE USAR
Page 2

P. 2
Tecshow Halo 6 0 Spot |
HALO 60 SPOT
Spot moving head - Powered by a 60W White LED
Halo 60 Spot is a spot moving head that sports a
60W white LED. The xture has a beam angle of 10º
and also features motorized focus, 3-facet prism,
full-range dimmer and a 0-30Hz strobe. Halo 60
Spot has a color wheel with 7 dichroic lters + open
and bidirectional rainbow eect and another wheel
with 5 rotating gobos + open. Ideal for mobile
applications of small and medium scale, the xture
stands out for the speed of its movements, due to
its compact and lightweight design.
Specications
Source & Optics
• Light Source: 1 x 60W White LED
• LEDs life: 50,000 hours
• Beam angle: 10º
Photometric data
• Flux: 7,380 Lux @ 2.5M (8 .)
Eects & Functions
• Color wheel: 7 dichroic lters + open with bidirectional rainbow eect
• Rotating gobo wheel: 5 bidirectional indexable
gobos + open
• Gobo shaking
• 3-facet rotating prism
• Motorized focus
• Dimmer: Full range 0-100%
• Strobe eect
Control
• DMX channels: 8/14
• Operational modes: DMX, Master/Slave, Au-
to-run & Sound active
Movement
• Pan: 540°
• Tilt: 210°
• 16-bit resolution
• Auto repositioning
Physical
• DMX connectors: 2 XLR connectors (XLR-3 In
and Out)
• Power supply connectors: Interlock Input
• OLED display
• Dimensions: 245x145x345 mm. / 9.6x5.7x13.6 in.
• Weight: 4.35 Kg. / 9.6 Lbs.
1. OVERVIEW
English version
Page 3
P. 3
| Tecshow Halo 6 0 Spot
English version
Caution
Keep this device away from rain and
moisture.
Caution
Unplug mains lead before opening the
housing.
Every person involved with the installation, operation and maintenance of this device has to:
• be qualied
• follow carefully the instructions of this manual
Please check carefully that there is no damage
caused by transportation. Should there be any,
lease consult your dealer and don’t install this
device.
2. SAFETY WARNING INFORMATION
Cautions
For added protection mount the xtures in areas
outside walking paths ,seating areas,or in areas
were the xture might be reached by unauthorized
personnel.
Before mounting the xture to any surface make
sure that the installation area can hold a minimum
point load of 10 times the device’s weight.
Fixture installation must always be secured with a
secondary safety attachment, such as an appropriate safety cable.
Never stand directly below the device when mounting ,removing, or servicing the xture, from a
ceiling,or set on a at level surface (see illustration
below). Be sure this xture is kept at least 0.5m
(1.5) away from any ammable (decoration etc.)
Always use and install the supplied safety cable as
a safe cable as safety measure to prevent accident
damage and/or injury in the event the clamp fails.
3. MOUNTING AND INSTALLATION
Page 4
P. 4
Tecshow Halo 6 0 Spot |
English version
Mounting points
Overhead mounting requires extensive experience,
including among others calculating working load
limits, a ne knowledge of the installation material being used, and periodic safety inspection of
all installation material and the xture. If you lack
these qualications. Do not attempt the installation
yourself, improper installation can result in bodily
injury.
Be sure to complete all rigging and installation
procedures before connecting the main power cord
to the appropriate wall outlet.
Clamp mounting
The Halo 60 Spot provides a unique mounting
bracket assembly that integrates the bottom of the
base, the included ‘omega bracket’ and the safety
cable rigging point in one unit (see the illustration
below). When mounting this xture to truss be sure
to sere to secure an appropritely rated clamp to the
included omega bracket using a M10 screw tted
through the center hole of the ‘omega bracket’.As
an added safety measure be sure to attached at
least one properly rated safety cable to the xture
using on of the safety cable rigging point integrated
in the base assembly.
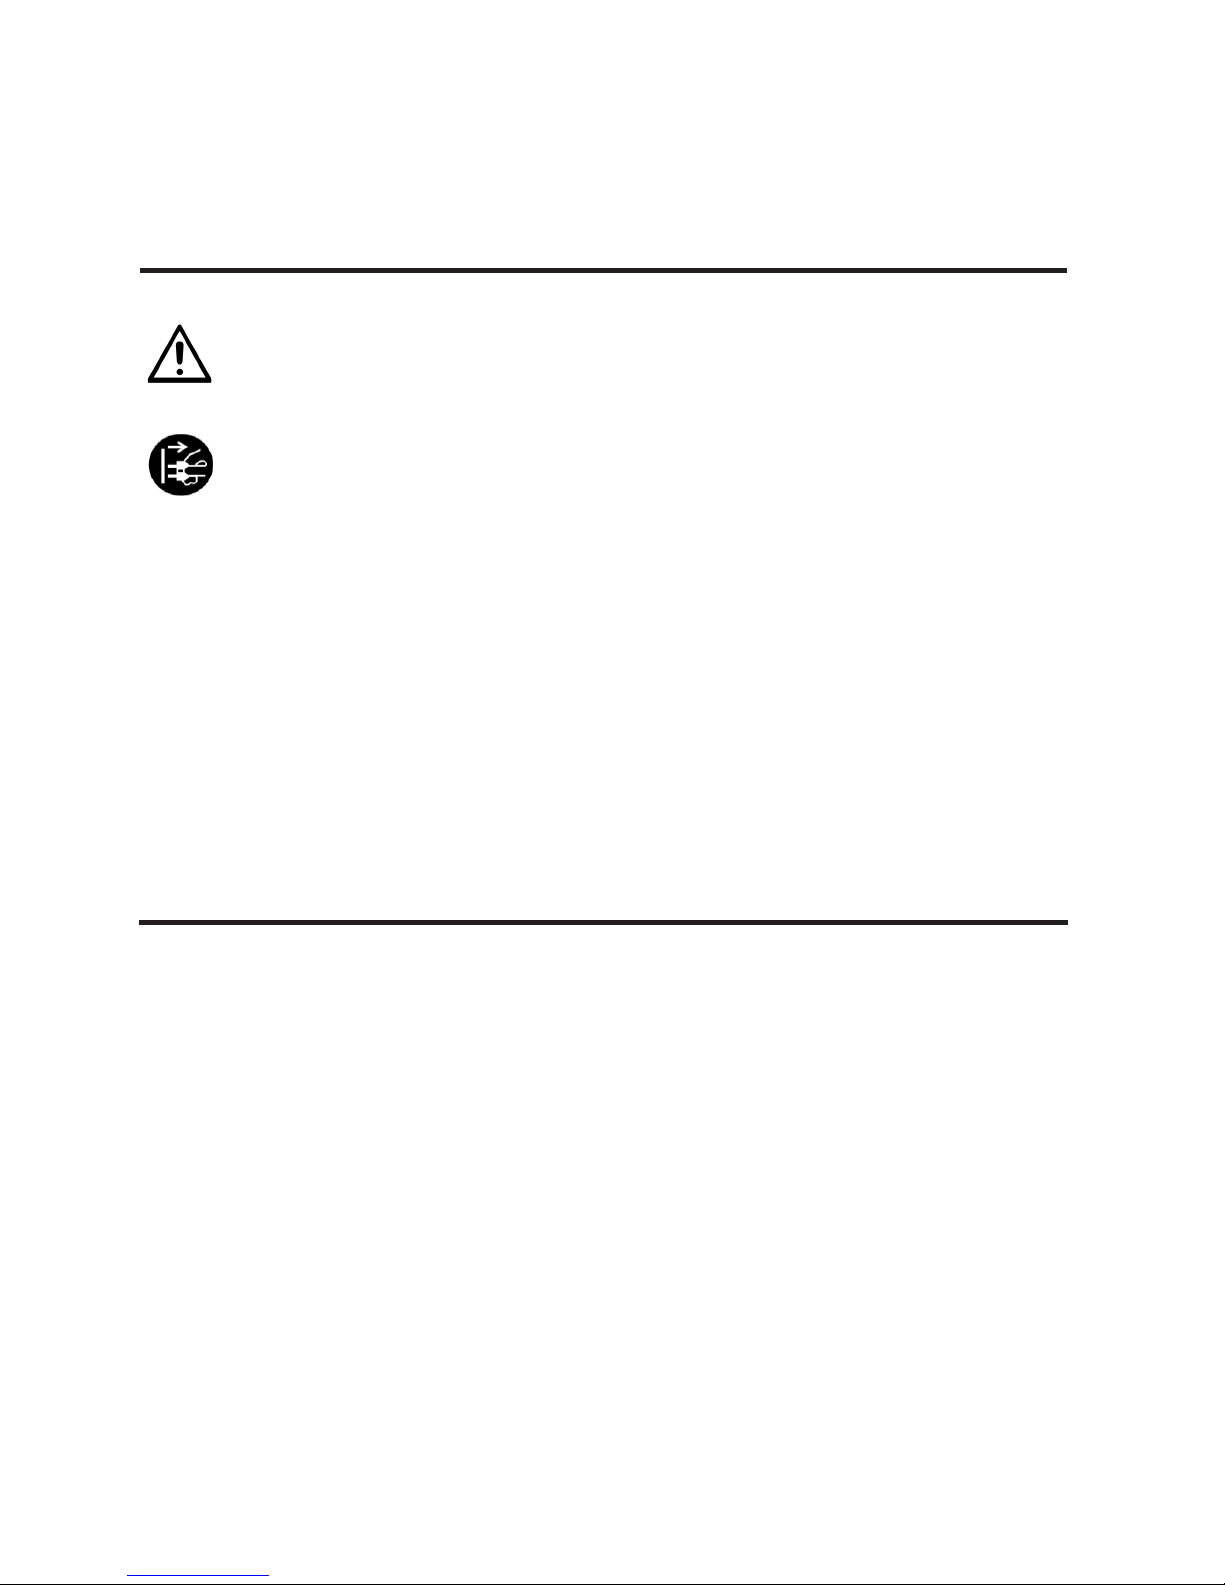
DMX-512 control connection
Connect the provided XLR cable to the female 3-pin
XLR output of your controller and the other side to
the male 3-pin XLR input of the Halo 60 Spot. You
can chain multiple Halo 60 Spot together through
serial linking. The cable needed should be two core,
screened cable with XLR input and output connectors. Please refer to the diagram below.
DMX-512 connection with DMX
terminator
For installations where the DMX cable has to run a
long distance or is in an electrically noisy environment, such as in a discotheque, it is recommended
to use a DMX terminator. This helps in preventing
corruption of the digital control signal by electrical
noise. The DMX terminator is simply an XLR plug
with a 120 resistor connected between pins 2 and 3,
which is then plugged into the output XLR socket of
the last xture in the chain. Please see illustrations
below.
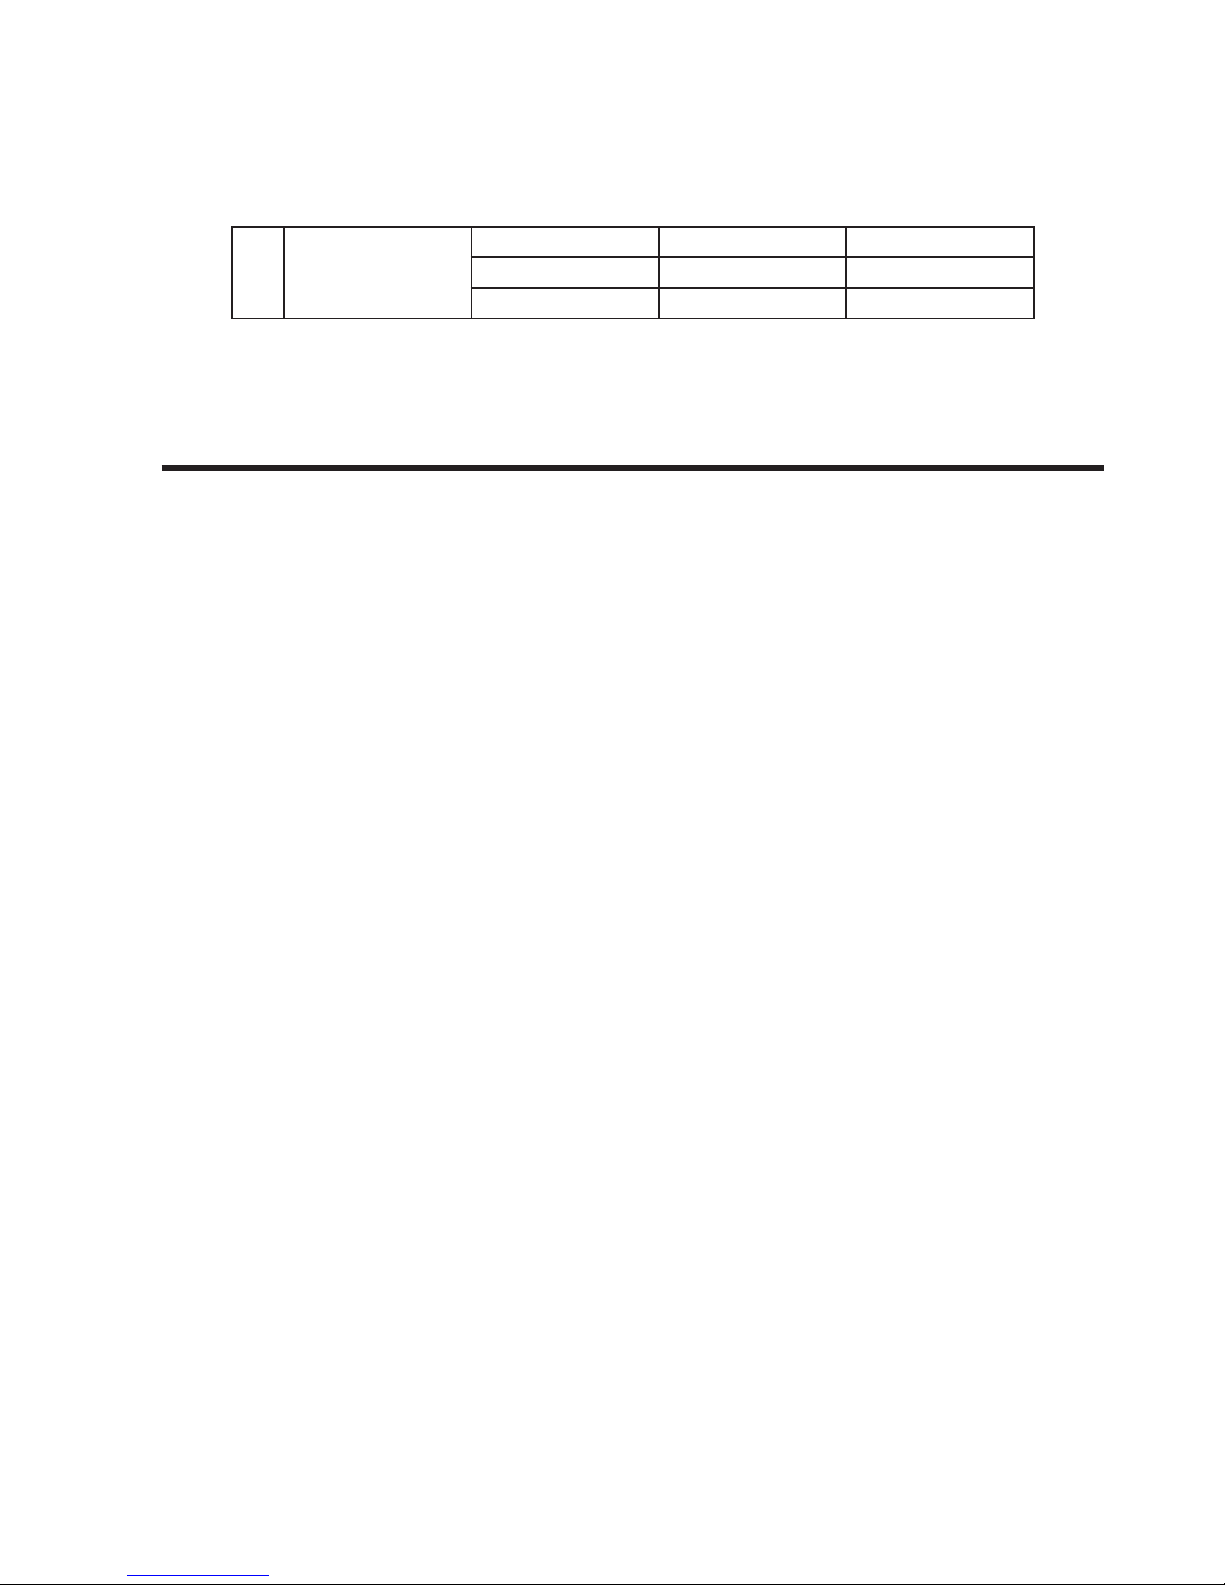
Common
DMX +
DMX -
DMX512 Out
3-Pin XLR
DMX512 In
3-Pin XLR
DMX Output
3-Pin XLR Socket
DMX Input
3-Pin XLR Socket
1. Ground
2. Data -
3. Data+
Page 5
P. 5
| Tecshow Halo 6 0 Spot
English version
1 DMX Address 001-512
2 DMX Channel
DMX 14 Ch
DMX 08 Ch
3 Running Mode
DMX
Auto
Sound
Slave
4 Programs
Program1
Program2
Program3
Program4
Program5
Program6
Program7
Program8
5 Settings
Pan Rev No
Yes
Tilt Rev No
Yes
Display Rev No
Yes
Sensitivity 0-100
Dmx Fail OFF
Hold
Calibration Password
All To Origin Clear ALL (3s)
Pan .=0-120
Tilt .=0-120
Spot Color .=0-120
Gobo .=0-120
Focus .=0-120
Prism .=0-120
Factory Reset Yes
No
Reset Motor (Reset all Motor)
4. DISPLAY MENU
Page 6
P. 6
Tecshow Halo 6 0 Spot |
English version
DMX Address
With this function, you can adjust the address from
001 to 512, Press the UP or DOWN buttons to nd
your desired address. Press ENTER to set your desired DMX address.
DMX Channel
The LED moving head have 8CH and 14CH.
Running Mode
In the Running Mode, it show (DMX), (Auto), (Sound)
and (Slave) mode on the display, you can choose
the mode to run.
Programs
With this function, you can run the 8 Inside program
with master mode.
Settings
(1) Pan Rev
With this function you can reverse the Pan-move-
ment.
(2) Tilt Rev
With this function you can reverse the Tilt -movement.
(3) Display Rev
With this function you can reverse the
display-movement.
(4) Sensitivity
This function is for sound-controlled, you can ad-
just the value from 0 to 100, the value is more high,
Sensitivity is more better.
(5) Dmx Fail
In this function you can check the problem of the
DMX, if the DMX meet the problem, it have OFF and
Hold for select.
(6) Calibration
Enter into this function, have each items Calibration.
(7) Factory Reset
With this function, you can select Factory Reset for
Yes or NO, the default is NO.
(8) Reset Motor
Enter into this function, all Motor will Reset to the
original.
System Info
In this function, you can check the detail for the
(Soware), (Mode) in DMX, (Address) value 001.
5. FUNCTION MODE
6 System Info
Soware
Mode DMX
Address 001
Page 7

P. 7
| Tecshow Halo 6 0 Spot
English version
8 Channel Denition Table
6. DMX CHANNELS
Channel DMX Value Function
1 000-255 Pan
2 000-255 Tilt
3 000-255 P/T Speed
4 000-255 Dimmer
5
0-9 Strobe open
10-250 Strobe from slow to fast
251-255 Strobe open
6 000-255 Focus
7
0-10 No function
11-20 White + Open
21-40 Auto play color + gobo 1
41-50 Auto play color + gobo 2
51-70 White + Gobo 3
71-80 White + prism + blank gobo
81-100 Auto play color + Prism + gobo 1 rotation
101-110 Auto play color + Prism + gobo 2 rotation
111-130 White + Prism + gobo 3 rotation
131-150 Auto play color + Gobo1 →Auto play color + Prism + gobo 1 rotation
151-160 Auto play color + Gobo2 →Auto play color + Prism + gobo 2 rotation
161-170 Auto play color + Gobo3 →Color change + Prism + gobo 3 rotation
171-180 Auto play color + Prism + gobo 3 rotation
181-255 Color 3 + Prism + gobo 3 rotation
8
0-229 No function
230-240 Reset aer 3 seconds
240-255 No function
Page 8

P. 8
Tecshow Halo 6 0 Spot |
English version
14 Channel Denition Table
Channel DMX Value Function
1 000-255 Pan
2 000-255 Pan Fine
3 000-255 Tilt
4 000-255 Tilt Fine
5 000-255 P/T Speed
6 000-255 Dimmer
7
0-9 Strobe open
10-250 Strobe from slow to fast
251-255 Strobe open
8
0-13 White(Open)
14-31 Color1
32-49 Color2
50-67 Color3
68-85 Color4
86 -103 Color5
104-121 Color6
122-130 Color7
131-139 White
140-196 Color CCW Change from fast to slow
197-255 Color CW Change from slow to fast
9
0-8 Open
9-33 Gobo1
34-58 Gobo2
59-83 Gobo3
84-108 Gobo4
109-133 Gobo5
13 4 -194 Gobo CCW Change from fast to slow
195-255 Gobo CW Change from slow to fast
10
0-9 Stop
10-129 Forward gobo rotation from fast to slow
130-134 Stop
135-255 Backward gobo rotation from slow to fast
11 000-255 Focus
12
000-128 No function
129-255 Prism
Page 9

P. 9
| Tecshow Halo 6 0 Spot
English version
13
0-10 No function
11-20 White + Open
21-40 Auto play color + gobo 1
41-50 Auto play color + gobo 2
51-70 White + Gobo 3
71-80 White + prism + blank gobo
81-100 Auto play color + Prism + gobo 1 rotation
101-110 Auto play color + Prism + gobo 2 rotation
111-130 White + Prism + gobo 3 rotation
131-150 Auto play color + Gobo1 →Auto play color + Prism + gobo 1 rotation
151-160 Auto play color + Gobo2 →Auto play color + Prism + gobo 2 rotation
161-170 Auto play color + Gobo3 →Color change + Prism + gobo 3 rotation
171-180 Auto play color + Prism + gobo 3 rotation
181-255 Color 3 + Prism + gobo 3 rotation
14
0-229 No function
230-240 Reset aer 3 seconds
240-255 No function
Design and product specications are subject to change without prior notice.
Page 10

P. 1 0
Tecshow Halo 6 0 Spot |
HALO 60 SPOT
Cabezal móvil spot - 1 LED blanco de 60W
Halo 60 Spot es un cabezal móvil tipo spot que
cuenta con un LED blanco de 60W. La unidad tiene
un ángulo de haz de 10º y posee, además, foco motorizado, prisma de 3 caras, dimmer de rango completo y un estrobo de 0-30Hz. Halo 60 Spot cuenta
con una rueda de color con 7 ltros dicroicos +
abierto con efecto arcoíris bidireccional y otra rueda con 5 gobos rotativos. Ideal para aplicaciones
móviles de pequeña y mediana escala, el cabezal
se destaca por la velocidad de sus movimientos,
debido a su compacto y liviano diseño.
Especicaciones
Fuente & Óptica
• Fuente de luz: 1 LED blanco de 60W
• Vida útil promedio: 50.000 horas
• Ángulo de haz: 10º
Información fotométrica
• Flux: 7.380 Lux @ 2,5M (8 pies)
Efectos y Funciones
• Rueda de color: 7 ltros dicroicos + abierto, con
efecto arcoiris bidireccional
• Rueda de gobos rotativos: 5 gobos bidireccionales e indexables + abierto
• Gobo Shaking
• Prisma rotativo de 3 caras
• Foco motorizado
• Dimmer: Rango completo 0-100%
• Efecto estrobo
Control
• Canales DMX:8/14
• Modos de operación: DMX, Master/Slave, Au-
tomático y audiorítmico
Movimiento
• Pan: 540°
• Tilt: 210°
• 16-bit de resolución
• Reposicionamiento automático
Físico
• Conectores DMX: 2 conectores XLR (XLR-3 de
entrada & salida)
• Conectores de alimentación: Interlock de Entrada
• Display OLED
• Dimensiones: 245x145x345 mm. / 9,6x5,7x13,6
pulg.
• Peso: 4,35 Kg. / 9,6 Lbs.
1. DESCRIPCIÓN
Versión Español
Page 11

P. 11
| Tecshow Halo 6 0 Spot
Versión Español
Precaución
Mantenga el equipo alejado de la lluvia y
la humedad excesiva.
Advertencia
Desconecte el equipo antes de realizar
cualquier tipo de mantenimiento.
Toda persona involucrada con la instalación, operación y mantenimiento de este dispositivo debe:
• estar calicada para la tarea;
• seguir las instrucciones del manual con
atención.
Verique que el equipo no haya sufrido averías
durante el envío. En caso de que observe daños o
piezas faltantes, póngase en contacto con su distribuidor de inmediato.
2. INFORMACIÓN IMPORTANTE
Advertencias
Para mayor seguridad, realice la instalación del
equipo fuera de las zonas de circulación de personas o donde personal no autorizado pueda tener
acceso al equipo.
Para garantizar una instalación segura, la estructura en la que se je el equipo debe poder soportar diez veces su peso durante una hora, sin sufrir
deformaciones.
Utilice un accesorio de seguridad adicional, como
un cable de seguridad durante la instalación.
Evite situarse debajo del equipo para realizar su
montaje, desmontaje o mantenimiento (ver diagrama debajo).
Asegúrese de mantener el equipo al menos a 50 cm
de distancia de materiales inamables (decoración,
escenografía, etc.).
Procure utilizar el cable de seguridad provisto con
el equipo para evitar accidentes o daños en caso de
que falle la abrazadera.
3. MONTAJE E INSTALACIÓN
Page 12

P. 12
Tecshow Halo 6 0 Spot |
Versión Español
Puntos de montaje
Para realizar un montaje en altura se requiere de
experiencia y conocimientos previos para calcular
los límites de peso, los materiales a emplear, las
medidas de seguridad, etc.
Si no cumple con estos requisitos, no realice la
instalación por sus propios medios. Una instalación
inadecuada podría resultar en lesiones corporales
graves. Asegúrese de haber completado todo el
proceso de instalación y anclaje antes de conectar
el equipo al suministro eléctrico.
Montaje con abrazadera
Halo 60 Spot facilita el ensamblaje de manera
única, integrando la base del equipo, el soporte
omega incluido y el punto de anclaje del cable de
seguridad en una unidad (ver diagrama debajo). Al
realizar el montaje del equipo, procure utilizar el
tipo de abrazadera apropiada para el truss seleccionado. Fije la abrazadera al soporte omega con
tornillos M10. Como medida de seguridad adicional,
siempre utilice un cable de seguridad adecuado.
Colóquelo en la base, a través del punto de anclaje
correspondiente.
Conexión DMX 512
Utilice el cable XLR provisto. Conecte un extremo
del cable en la salida XLR-3 hembra de su contro-
lador y el otro extremo, en la entrada XLR-3 macho
del cabezal móvil. Reitere este paso para enlazar
todas las unidades deseadas. Recuerde que el cable
utilizado debe ser bilar y blindado con conectores
XLR de entrada y salida. Para obtener más información, reérase al siguiente diagrama:
Conexión DMX 512 con un
terminador DMX
En aplicaciones donde el cable DMX debe recorrer
largas distancias o se encuentra en un ambiente
con mucho ruido eléctrico, como en una discoteca, se recomienda el uso de un terminador DMX.
El terminador ayudará a prevenir que el ruido
eléctrico perjudique la señal de control digital. Es
básicamente un conector XLR con una resistencia
de 120 Ω soldado entre los pines 2 y 3, que luego
se conecta en la salida XLR del último equipo de la
serie de enlace para garantizar la transmisión ecaz
de los datos DMX y evitar la pérdida de señal en el
cableado. Para obtener más información, reérase
al siguiente diagrama:
Common
DMX +
DMX -
DMX512 Out
3-Pin XLR
DMX512 In
3-Pin XLR
Conector DMX
XLR-3 de salida
Conector DMX
XLR-3 de entrada
1. Tierra
2. Señal +
3. Señal -
Page 13

P. 13
| Tecshow Halo 6 0 Spot
Versión Español
1 Dirección DMX 001-512
2
Modo de
canales DMX
DMX 14 Ch
DMX 08 Ch
3 Modo de ejecución
DMX
Auto
Sound
Slave
4 Programas
Program1
Program2
Program3
Program4
Program5
Program6
Program7
Program8
5 Ajustes
Pan Rev No
Yes
Tilt Rev No
Yes
Display Rev No
Yes
Sensitivity 0-100
Dmx Fail OFF
Hold
Calibration Password
All To Origin Clear ALL (3s)
Pan .=0-120
Tilt .=0-120
Spot Color .=0-120
Gobo .=0-120
Focus .=0-120
Prism .=0-120
Factory Reset Yes
No
Reset Motor (Reset all Motor)
4. MENÚ DE FUNCIONES
Page 14

P. 14
Tecshow Halo 6 0 Spot |
Versión Español
Dirección DMX
Utilice esta función para regular la dirección DMX
entre 001 y 512. Presione UP o DOWN para seleccionar el valor deseado. Presione ENTER para conrmar la selección.
Modo de canales DMX
El usuario puede seleccionar entre el modo de 8
canales y el de 14 canales.
Modo de ejecución
Halo 60 Spot cuenta con diferentes modos de
ejecución seleccionables: (DMX), (Auto), (Sound) y
(Slave).
Programas integrados
Utilice esta opción para ejecutar los 8 programas
internos con modo maestro.
Ajustes
(1) Pan hacia atrás
Invierta el movimiento del pan con esta función.
(2) Tilt hacia atrás
Invierta el movimiento del tilt con esta función.
(3) Rotar pantalla
Invierta la dirección de la pantalla con esta función.
(4) Sensibilidad
Utilice esta función en el modo audiorítmico. Regule el valor de sensibilidad entre 0 y 100. A mayor
valor, mayor será la sensibilidad.
(5) Sin señal DMX
Utilice esta función cuando el equipo no reciba
señal DMX. Seleccione entre OFF (apagado) y Hold
(mantener).
(6) Calibración
Ingrese a esta función para calibrar diversos ajustes
del equipo, entre ellos: pan, tilt y colores.
(7) Restablecer valores de fábrica
Regrese la conguración a los valores predeterminados de fábrica. Seleccione entre YES (sí) o NO (no).
(8) Restablecer motor
Seleccione esta opción para restablecer todos los
motores a su estado original.
Información del sistema
Acceda a la información del sistema para ver detalles de (Soware), (Mode) DMX, (Address) valor
001.
5. INSTRUCCIONES DE USO
6
Información del
sistema
Soware
Mode DMX
Address 001
Page 15

P. 15
| Tecshow Halo 6 0 Spot
Versión Español
Modo 8 canales
6. CUADRO DE CANALES DMX
Canal Valor DMX Función
1 000-255 Pan
2 000-255 Tilt
3 000-255 Velocidad de pan y tilt
4 000-255 Dimmer
5
0-9 Estrobo abierto
10-250 Estrobo, velocidad creciente
251-255 Estrobo abierto
6 000-255 Foco
7
0-10 Sin función
11-20 Blanco + abierto
21-40 Reproducción automática de color + gobo 1
41-50 Reproducción automática de color + gobo 2
51-70 Blanco + gobo 3
71-80 Blanco + prisma + gobo abierto
81-100 Reproducción automática de color + prisma + rotación de gobo 1
101-110 Reproducción automática de color + prisma + rotación de gobo 2
111-130 Blanco + prisma + rotación de gobo 3
131-150 Reproducción automática de color + gobo 1 → Reproducción automática
de color + prisma + rotación de gobo 1
151-160 Reproducción automática de color + gobo 2 → Reproducción automática
de color + prisma + rotación de gobo 2
161-170 Reproducción automática de color + gobo 3 → Cambio de color + prisma +
rotación de gobo 3
171-180 Reproducción automática de color + prisma + rotación de gobo 3
181-255 Color 3 + prisma + rotación de gobo 3
8
0-229 Sin función
230-240 Restablecer luego de 3 segundos
240-255 Sin función
Page 16

P. 1 6
Tecshow Halo 6 0 Spot |
Versión Español
Modo 14 canales
Canal Valor DMX Función
1 000-255 Pan
2 000-255 Pan no
3 000-255 Tilt
4 000-255 Tilt no
5 000-255 Velocidad de pan y tilt
6 000-255 Dimmer
7
0-9 Estrobo abierto
10-250 Estrobo, velocidad creciente
251-255 Estrobo abierto
8
0-13 Blanco (abierto)
14-31 Color 1
32-49 Color 2
50-67 Color 3
68-85 Color 4
86 -103 Color 5
104-121 Color 6
122-130 Color 7
131-139 Blanco
140-196 Cambio de color, rotación hacia la izquierda, velocidad decreciente
197-255 Cambio de color, rotación hacia la derecha, velocidad creciente
9
0-8 Abierto
9-33 Gobo 1
34-58 Gobo 2
59-83 Gobo 3
84-108 Gobo 4
109-133 Gobo 5
13 4 -194 Gobo, rotación hacia la izquierda, velocidad decreciente
195-255 Gobo, rotación hacia la derecha, velocidad creciente
10
0-9 Detención
10-129 Rotación de gobo hacia adelante, velocidad decreciente
130-134 Detención
135-255 Rotación de gobo hacia atrás, velocidad creciente
11 000-255 Foco
12
000-128 Sin función
129-255 Prisma
Page 17

P. 17
| Tecshow Halo 6 0 Spot
Versión Español
13
0-10 Sin función
11-20 Blanco + abierto
21-40 Reproducción automática de color + gobo 1
41-50 Reproducción automática de color + gobo 2
51-70 Blanco + gobo 3
71-80 Blanco + prisma + gobo abierto
81-100 Reproducción automática de color + prisma + rotación de gobo 1
101-110 Reproducción automática de color + prisma + rotación de gobo 2
111-130 Blanco + prisma + rotación de gobo 3
131-150 Reproducción automática de color + gobo 1 → Reproducción automática
de color + prisma + rotación de gobo 1
151-160 Reproducción automática de color + gobo 2 → Reproducción automática
de color + prisma + rotación de gobo 2
161-170 Reproducción automática de color + gobo 3 → Cambio de color + prisma +
rotación de gobo 3
171-180 Reproducción automática de color + prisma + rotación de gobo 3
181-255 Color 3 + prisma + rotación de gobo 3
14
0-229 Sin función
230-240 Restablecer luego de 3 segundos
240-255 Sin función
Observación: La información de este manual está sujeta a cambios sin previo aviso.
Page 18

P. 18
Tecshow Halo 6 0 Spot |
tecshow.amproweb.com
 Loading...