

Page 1

P. 1
| Tecshow Dua ltec 3 in 1
Dualtec
3-in-1
Hybrid eect - bi-color laser + RGBWA LED Eect + Strobe
USER MANUAL / MANUAL DE USUARIO
PLEASE READ THE INSTRUCTIONS CAREFULLY BEFORE USE
POR FAVOR LEA LAS INSTRUCCIÓNES ANTES DE USAR
Page 2

P. 2
Tecshow Dua ltec 3 in 1 |
1. OVERVIEW
English version
DUALTEC 3-IN-1
Hybrid eect - bi-color laser + RGBWA LED Eect +
Strobe
Dualtec 3-in-1 is an innovative LED eect that combines a classic moonower LED eect with a powerful
bi-color laser and a blunt white strobe. With 10 x 3W
RGBWA LEDs in the area of the eect, 4 x 1W White
LEDs in its strobe function and a red + green laser, this xture is the perfect combination between
power and versatility. Dualtec 3-in-1 has 4 operational modes (DMX, sound active, master/slave and
auto) and sports also the option to shoot integrated
shows, or each of its functions separately. One xture, multiple solutions.
Source & Optics
• Laser: Red: 150mw/650nm, Green:
50mw/532nm
• Moonower: 10 x 3W RGBWA (2R, 2G, 2B, 2W, 2Y)
LEDs
• Strobe: 4 x 1W White LEDs
Eects & Functions
• All-in-one eect: Laser + RGBWA LED eect +
Strobe
• Compact design
• Dazzling laser eects
• Strobe eect
• Optimized sound-active mode
• Razor sharp beams
• 4 integrated shows
Control
• DMX Channels: 1/21
• Operational modes: DMX, sound active, mas-
ter/slave & auto
• Built-in microphone
Electrical
• Power supply: AC100V~240V 50/60Hz
• Max. power consumption: 45W
Physical
• 4-digit LED display
• Power supply connectors: Interlock
• Mode selector
• Dimensions: 350x280x100 mm. / 13,8x11x3,9
in.
• Weight: 3.05 Kg. / 6.7 Lbs.
Page 3
P. 3
| Tecshow Dua ltec 3 in 1
English version
1. When opening the packing, take all accessories out, and remove the light to a horizontal
table for good operation. First check whether
the accessories are complete, then check carefully whether the whole light has no damage. If
there is any damage, please contact us assoon
as possible.
2. AC Power: Check whether the local power supply is accordance with the requirements of the
product rated voltage.
3. The product is only suitable for indoor working
environment. The light should keep dry, keep
away from wet, overheat or dusty environment. Don’t come into contact with water and
other liquids to prevent or reduce the risk of
electric shock or re.
4. Please do not install the light directly on the
surface of the combustible substance.
5. The people who install, operate and maintain
of light professional certicate required.
6. When there are faults of the light, please stop
using the light immediately. Don’t try to repair,
please contact the nearest authorized technical assistance center, if the parts damage,always use the same type of parts replaced.
7. Don’t touch any electrical wiring in the process of operation to prevent the risk of electric
shock.
8. To make sure the light working environment
temperature, the highest do not exceed 40°
the lowest do not exceed -20 °.
9. Under the stable cooling working situation,
the highest temperature of the housing of the
light can reach 80°,please do not touch.
10. The light is design according to the type of
electric shock protection. The light should be
use in good connection grounding power system and the ground wire must connect with
the ground wire of the power supply system.
The earth sign port of the light should be connected to the installing xtures.
11. Do not use the damage of the insulating layer
wire and also do not use the power cord overlap on the other wire. When not in use or clean
the light, please disconnect the power, don’t
pull the plug in hard or just drag the wires.
12. There are no components inside for maintenance. Before start operation the light, please
check whether all of the shell is installed. In
the case of the shell open used the light isprohibited.
Note: Under any installation, maintenance and
clean the light, please conrm that has cut o the
power cord!
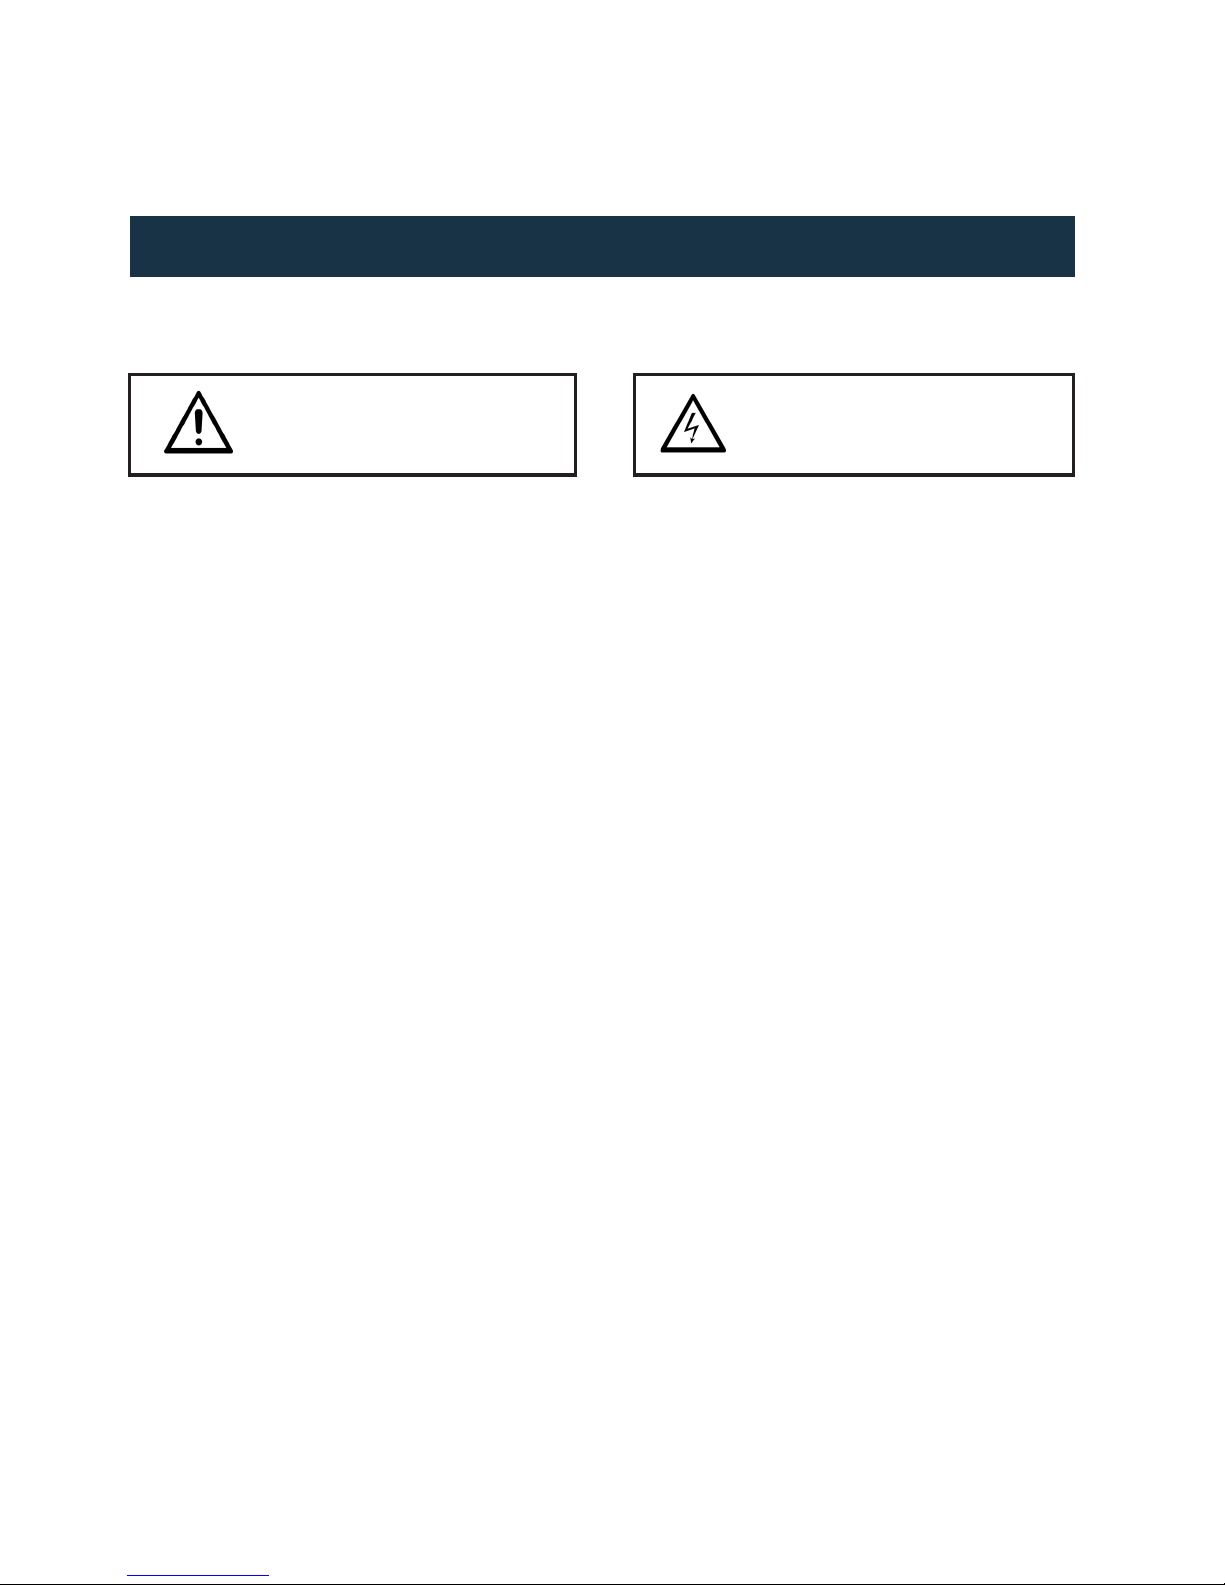
2. SAFETY INSTRUCTIONS
Keep this equipment away from rain,
moisture and liquids
CAUTION!
Take care using this equipment!
High voltage-risk of electric shock!
CAUTION!
Page 4
P. 4
Tecshow Dua ltec 3 in 1 |
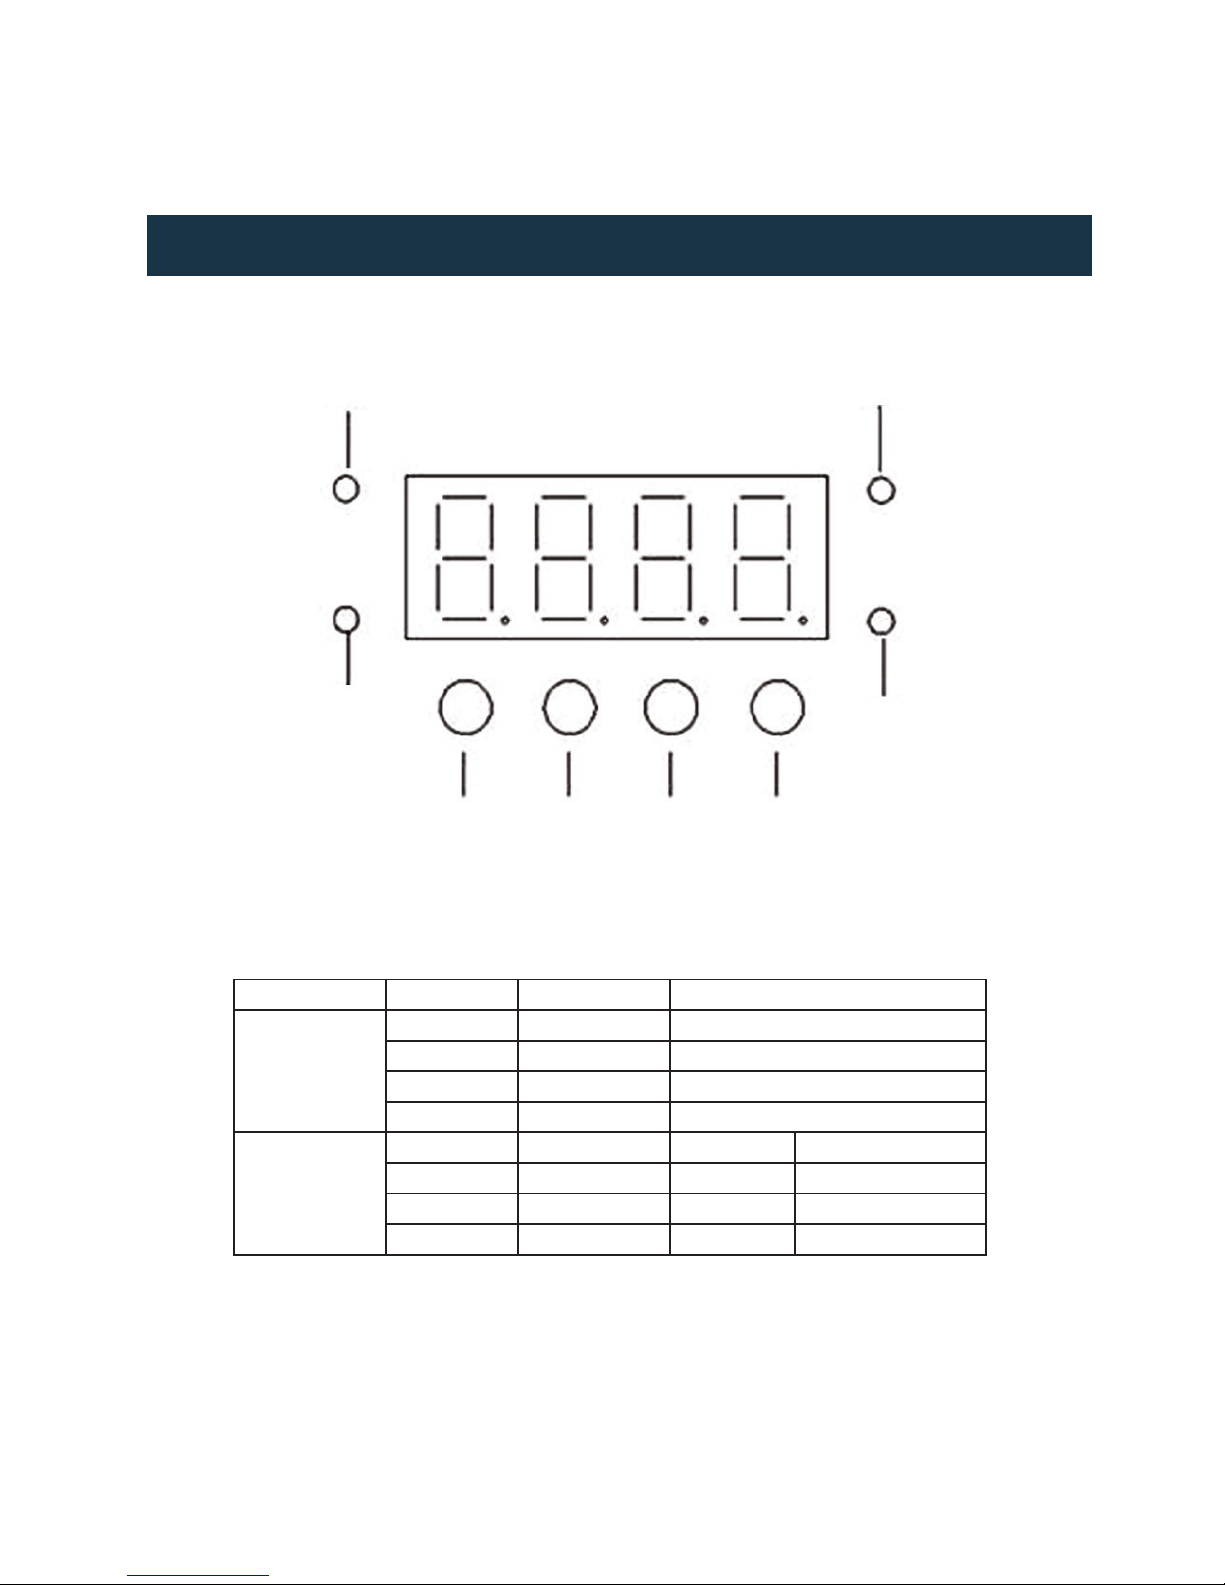
3. DISPLAY
English version
1
7
5
8
6
2 3 4
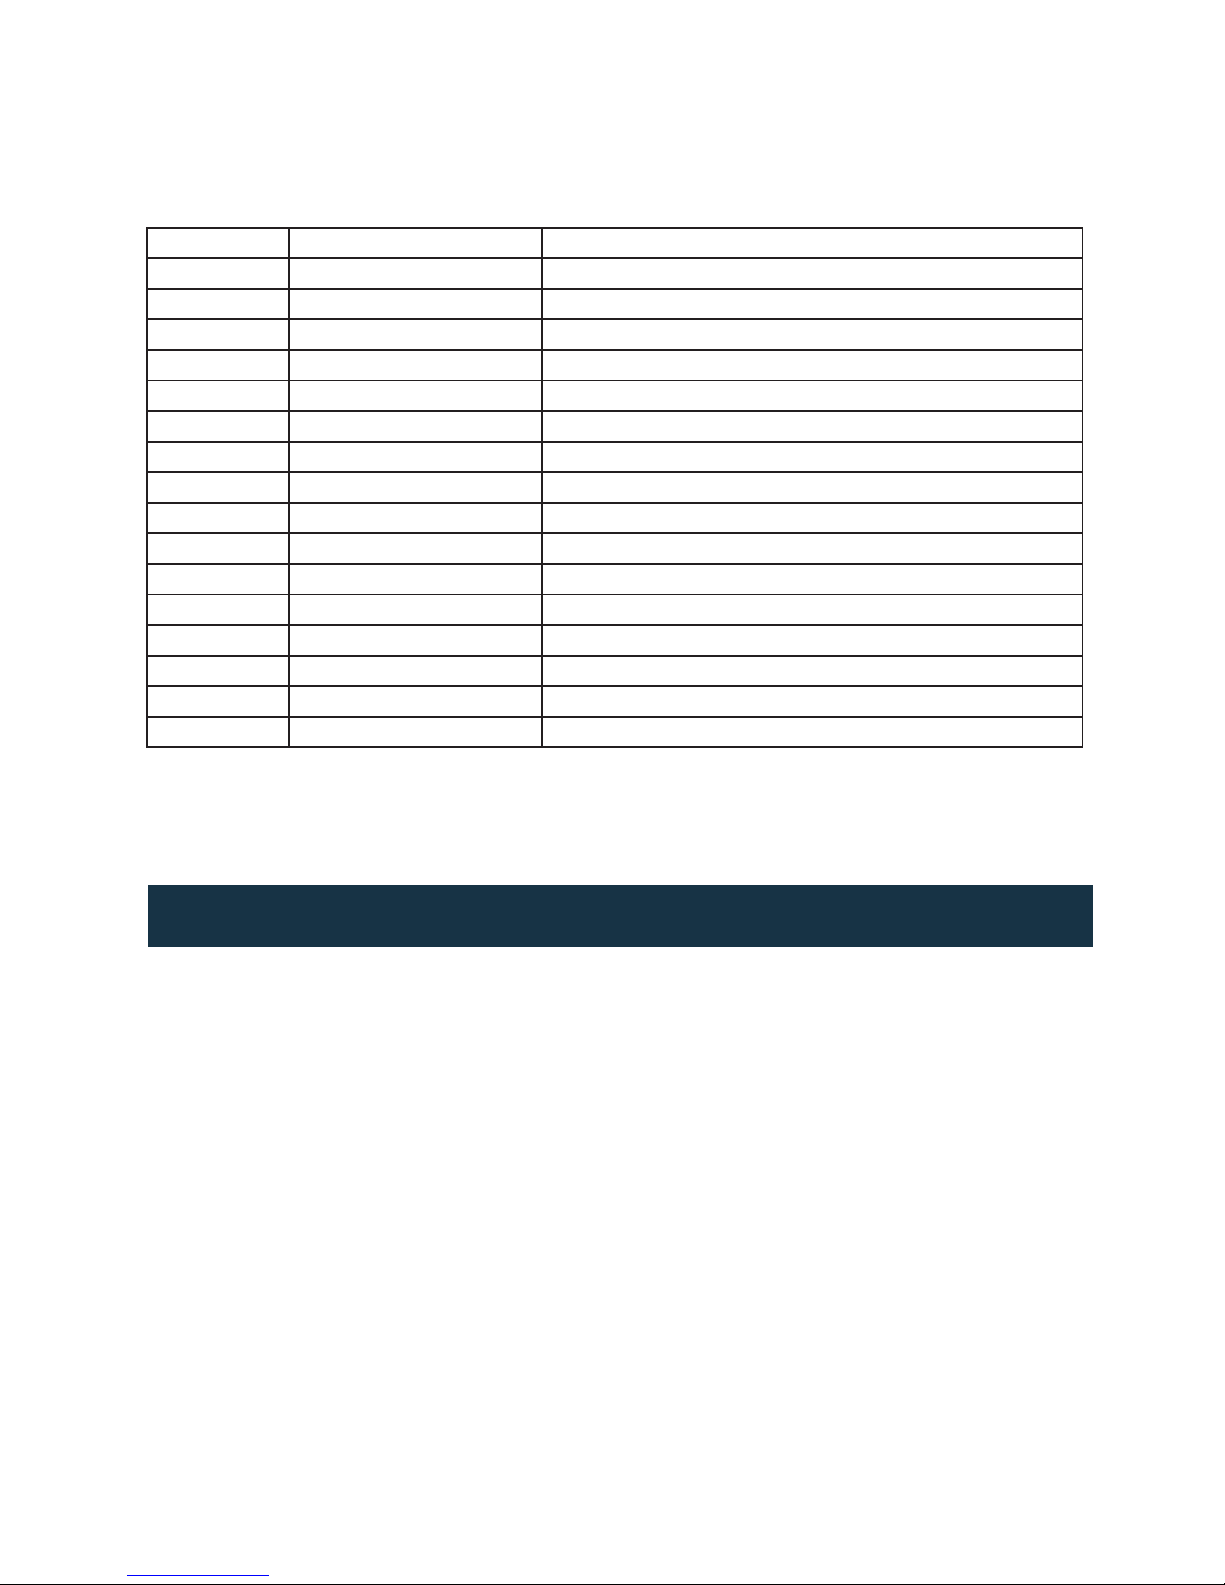
Item No. Display Function
Button
1 Menu Enter/check the menu function
2 Down Check the next menu
3 Up Check the previus menu
4 Enter Enter the selected Menu/Enter
LED
5 DMX Strobe DMX input
6 Slave Strobe Slave mode
7 Master Strobe Master mode
8 Sound Strobe Sound active mode
Page 5
P. 5
| Tecshow Dua ltec 3 in 1
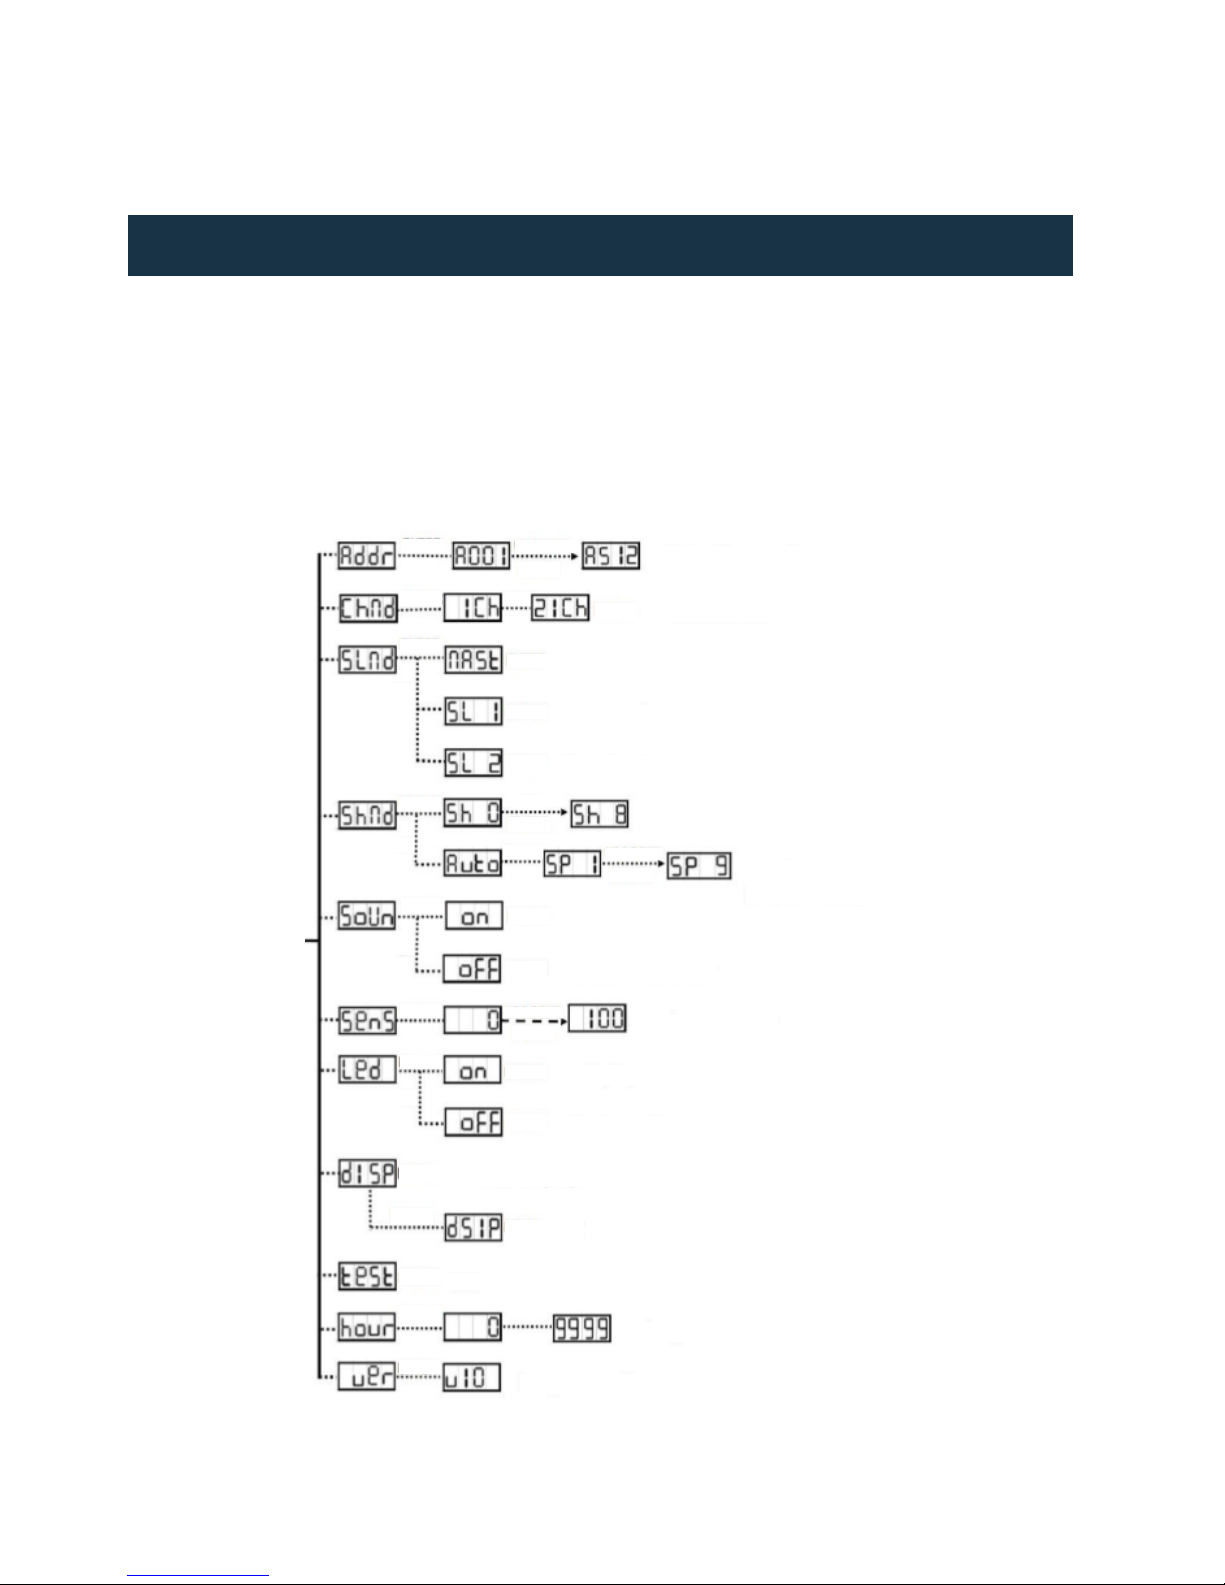
4. MAIN FUNCTION
English version
When choose a function, press MENU button, select menu options you want. Press ENTER button to the
selected function, the display will be strobe, then press UP/DOWN button to select the required function,
press ENTER button, or wait for 10 seconds or press MENU button for long time, then enter the menu
mode.
Main function:
ENTER
ENTER
ENTER
UP & DOWN
UP & DOWN
UP & DOWN
ENTER
ENTER
UP
UP
UP
UP
UP
UP
ENTER
ENTER
MENU
MENU
TEST
ENTER
ENTER
ENTER
ENTER
ENTER
ENTER
ENTER
ENTER
ENTER
ENTER
ENTER
ENTER
ENTER
ENTER
ENTER
ENTER
ENTER
PROGR AM VERSION
WORKING TIME
INVERS ION DISPLAY
LED DISPLAY
DISPLAY OFF
DISPLAY ON
SOUND SENSITIVITY
SOUND CONTROL OFF
SOUND CONTROL ON
SHOW MODE
DMX ADRE SS CODE
CHANNEL DOME
MAST ER MODE
SLAVEL MODE
SLAVE2 MODE
AUTO MODE
(1-9 IS SPEED)
ENTER
MENU
Page 6
P. 6
Tecshow Dua ltec 3 in 1 |
5. MAIN FUNCTION
1. DMX 512 Address Setting
Choose , press ENTER button to conrm.
Press UP/DOWN button to nd initial address, then
press ENTER button to save it. Aer 10 seconds or
press MENU for long time to return to main menu.
2. Channel mode
Choose , press ENTER button to conrm.
Press UP/DOWN button to select the channel, like
1CH or 21CH mode, etc. Press ENTER button to
save it. Aer 10 seconds or press MENU for long
time to return to main menu.
3. Slave mode
Choose , press ENTER button to enter, MAST
(Master) or SL1 (Slave 1) or SL2 (Slave 2) mode,
press ENTER button to save it. Aer 10 seconds or
press MENU for long time to return to main menu.
4. Show mode
Choose , press ENTER button to conrm,
enter SH0 (Random show) or SH1 (show 1) or SH2
(show 2) or … or SH8 (show 8),then press ENTER
button to save it. Aer 10 seconds or press MENU
for long time to return to main menu. Choose ,
press ENTER button to conrm, press UP button to
enter AUTO, then press ENTER to enter SP1, use UP
button to increase conversion speed, the maximums speed is SP9.
5. Sound Control
Choose, press ENTER button to conrm. Use
UP/DOWN button to select ON (Sound control on)
or OFF (Sound control o), then press ENTER button to save it. Aer 10 seconds or press MENU for
long time to return to main menu.
6. Sound Sensitivity
Choose, press ENTER button to conrm. Use
UP/DOWN button to adjust the sensitivity value
from no sound control 0 to the max 100, aer
selection, then press ENTER button to save it. Aer
10 seconds or press MENU for long time to return
to main menu.
7. LED display
Choose, press ENTER button to conrm.
Use UP/DOWN button to select ON (display on) or
OFF (display o) mode, aer selection, then press
ENTER button to save it. Aer 10 seconds or press
MENU for long time to return to main menu.
8. Display Nixie tube the normal and inversion show
Choose (Normal), press ENTER button to
conrm, then enter (Inversion), aer selection, press MENU button to enter the mode that
has been selected.Aer 10 seconds or press MENU
for long time to return to main menu.
9. Test
Press MENU button to , press ENTER button,
the led display will strobe, the light will run builtin program to test, press MENU to back to main
menu.
10. Working time
Press MENU button to , press ENTER button,
it will show the working time on the display. Press
MENU to back to main menu.
11. Program version
Press MENU button to , press ENTER button,
it will show the Program version on the display.
Press MENU to back to main menu.
English version
Page 7

P. 7
| Tecshow Dua ltec 3 in 1
6. HOW TO OPERATION
• HERE ARE 3 WAYS TO OPERATE:
1. Master/slave build-inprogram to control
2. DMX controller
6.1 Master/slave build-infunction
Connect the lights in series, the rst light control
the other light to auto show, sound control show
and so on. It’s very good for the instant show
mod. Must set the rst light to be master light
MAST same time to choose SH0 (Random show),
SH1 (show 1) or …or SH8 (show 8). If there are no
DMX signals, the master mode LED will light up,
the sound control LED will strobe according to the
m u s i c , t h e o t h e r l i g h t s w i l l n o t w o r k i n s l a v e m o d e .
C Choose SL1 (Normal) or SL2 (two light show)
mode, when connect the DMX cable, the slave LED
will light up.
Two light show
For the slave light, slave1 (SL1) running same as
the master light, slave 2 (SL2) running against
the master light.If there are just two light, could
set these cond light as slave light (SL2) for better
show.
6.2 DMX Controller
If controlled by DMX controller, you need to set the
DMX address code to control the light, the address
code value is between 1-512, then the light will
receive the signal accordingly.
Press MENU button, choose , press ENTER
button, address code will strobe. Use UP/DOWN to
select DMX 512 address code. Aer address code
settled, press ENTER button until the address
code stops strobing, it will automatically return to
the menu aer 8 seconds. If you want to go back
to the previous status and without any changes,
you could press MENU button.
DMX 512 (Choose A001 DEFAULT ADRESS CODE)
CH 1
Channel Value Function
CH1
(008-255allundersound control)
000-007 No function
008-037 Show mode 1
038-067 Show mode 2
068-097 Show mode 3
098-127 Show mode 4
128-157 Show mode 5
158-187 Show mode 6
188-217 Show mode 7
218-247 Show mode 8
248-255 Random show 1-8
English version
Page 8

P. 8
Tecshow Dua ltec 3 in 1 |
English version
CH 21
Channel Value Function
CH 1 000-255 Full dimmer 1,0-100%
CH 2 000-255 Strobe 1, slow to fast
CH 3 000-255 R1 dimmer, 0-100%
CH 4 000-255 G1 dimmer, 0-100%
CH 5 000-255 B1 dimmer, 0-100%
CH 6 000-255 W1 dimmer, 0-100%
CH 7 000-255 A1 dimmer,0-100%
CH 8 000-255 R2 dimmer, 0-100%
CH 9 000-255 G2 dimmer, 0-100%
CH 10 000-255 B2 dimmer, 0-100%
CH 11 000-255 W2 dimmer, 0-100%
CH 12 000-255 A2 dimmer, 0-100%
CH 13 000-255 Full dimmer 2, 0-100%
CH 14 000-255 Strobe 2, slow to fast
CH 15 000-255 W1 dimmer, 0-100%
CH 16 000-255 W2 dimmer, 0-100%
CH 17 000-255 W3 dimmer, 0-100%
CH 18 000-255 W4 dimmer, 0-100%
CH 19 000-255 Red laser light up
CH 20 000-255 Green laser light up
CH 21 000-255 Laser Eect
7. PRODUCT STATEMENT
1. This product is in good performance situation
and completely packed before leaving factory.
Users should be strictly abide by the below
cautions and operation instructions, any damage caused by misuse is not within the company warranty.
2. There is no notice for the change of the technology information in the manual, or the
upgrading of the product.
Page 9

P. 9
| Tecshow Dua ltec 3 in 1
Versión Español
1. DESCRIPCIÓN
DUALTEC 3-IN-1
Efecto híbrido - Láser bi-color + Efecto LED RGBWA +
Estrobo
Dualtec 3-in-1 es un innovador efecto LED que combina un clásico efecto LED con un potente láser bicolor y un contundente estrobo. Con 10 LEDs RGBWA
de 3W en el área del efecto, 4 LEDs blancos de 1W en
su función estrobo y un láser rojo de 150mw + verde
de 50mw, el equipo es la combinación perfecta entre
potencia y versatilidad. Dualtec 3-in-1 tiene 4 modos
de operación (DMX, audiorítmico, maestro/esclavo y
automático) y posee además, la opción de disparar
shows integrados, o de cada una de sus funciones
por separado. Un solo equipo, múltiples soluciones.
Fuente & Ópticas
• Láser: Rojo: 150mw/650nm, Verde:
50mw/532nm
• Efecto: 10 LEDS RGBWA (2R, 2G, 2B, 2W, 2Y) de
3W
• Estrobo: 4 LEDs Blancos de 1W
Efectos y funciones
• Efecto todo-en-uno: Láser + Efecto LED RGBWA
+ Estrobo
• Diseño compacto
• Deslumbrantes efectos láser
• Efecto Estrobo
• Modo audiorítmico optimizado
• Haces denidos y losos
• 4 shows integrados
Control
• Canales DMX: 1/21
• Modos de operación: DMX, audiorítmico,
maestro/esclavo & automático
• Micrófono incorporado
Eléctrico
• Rango de voltaje de entrada: AC100V~240V
50/60Hz
• Consumo de potencia: 45W
Físico
• Pantalla LED de 4 dígitos
• Conector de alimentación: Interlock
• Selector de modo
• Dimensiones: 350x280x100 mm. / 13,8x11x3,9
pulg.
• Peso: 3.05 Kg. / 6.7 Lbs.
Page 10

P. 1 0
Tecshow Dua ltec 3 in 1 |
1. Luego de adquirido el producto, procure
retirarlo de su embalaje y colóquelo sobre
una supercie estable. Antes de utilizarlo,
revise detenidamente que no se haya dañado
durante el envío. En caso de que encuentre
daños, comuníquese de inmediato con el fa-
bricante o proveedor local.
2. Compruebe que el voltaje utilizado no sea
superior ni inferior a los valores indicados en
el presente manual.
3. El equipo se diseñó para uso en interiores.
Para reducir el riesgo de descargas eléctrica, proteja el equipo de la humedad, el calor
excesivo y líquidos. No opere el equipo si se
encuentra mojado.
4. No instale el equipo sobre supercies ina-
mables.
5. Toda persona involucrada con la instalación,
operación y mantenimiento de este dispositivo debe estar calicada para la tarea.
6. Desconecte el equipo de inmediato si observa un problema grave de funcionamiento. El
equipo no contiene piezas que puedan ser
reparadas por el usuario. En caso de precisar
asistencia, póngase en contacto con el servicio
técnico autorizado y demande el uso de repuestos del mismo tipo.
7. Para reducir el riesgo de descarga eléctrica, evite
entrar en contacto con los cables cuando el equipo esté en funcionamiento.
8. No utilice el equipo si la temperatura ambiente
es inferior a los -20 °C o superior a los 40 °C.
9. Evite tocar el equipo durante su funcionamiento.
La cubierta alcanza una temperatura de 80 °C.
10. Procure la conexión a tierra del equipo para reducir el riesgo de descarga eléctrica.
11. Verique que la capa aislante de cable del
suministro eléctrico no se encuentre cortada ni
dañada. En ningún caso deje que los cables de
alimentación entren en contacto con cables de
otro tipo.
12. No utilice el equipo si la cubierta se encuentra
abierta.
13. Desconecte el equipo del suministro eléctrico antes de realizar cualquier tarea de mantenimiento
(limpieza, instalación, mantenimiento).
2. INSTRUCCIONES DE SEGURIDAD
Proteja el equipo de la lluvia, líquidos
y la humedad excesiva.
PRECAUCIÓN
Opere con sumo cuidado. Alto voltaje.
Riesgo de descarga eléctrica.
PELIGRO
Versión Español
Page 11

P. 11
| Tecshow Dua ltec 3 in 1
3. PANEL DE CONTROL
1
7
5
8
6
2 3 4
Ítem Nro. Función Descripción
Tecla
1 Menu Accede al menú principal
2 Down Se desplaza hacia abajo
3 Up Se desplaza hacia arriba
4 Enter
Accede a la función deseada.
Conrma la selección
LED
5 DMX Estrobo Entrada DMX
6 Slave Estrobo Modo esclavo
7 Master Estrobo Modo maestro
8 Sound Estrobo Modo audiorítmico
Versión Español
Page 12

P. 12
Tecshow Dua ltec 3 in 1 |
4. MENÚ DE FUNCIONES
Para acceder al menú de funciones, presione la tecla MENU y desplácese por las opciones disponibles.
Una vez seleccionada la función deseada, presione ENTER y luego las teclas UP y DOWN si desea escoger entre más opciones. Por último, presione ENTER, aguarde 10 segundos o mantenga presionada la
tecla MENU para regresar al menú principal.
ENTER
ENTER
ENTER
UP & DOWN
UP & DOWN
UP & DOWN
ENTER
ENTER
UP
UP
UP
UP
UP
UP
ENTER
ENTER
MENU
MENU
TEST
ENTER
ENTER
ENTER
ENTER
ENTER
ENTER
ENTER
ENTER
ENTER
ENTER
ENTER
ENTER
ENTER
ENTER
ENTER
ENTER
ENTER
PROGR AM VERSION
WORKING TIME
INVERS ION DISPLAY
LED DISPLAY
DISPLAY OFF
DISPLAY ON
SOUND SENSITIVITY
SOUND CONTROL OFF
SOUND CONTROL ON
SHOW MODE
DMX ADRE SS CODE
CHANNEL DOME
MAST ER MODE
SLAVEL MODE
SLAVE2 MODE
AUTO MODE
(1-9 IS SPEED)
ENTER
MENU
Versión Español
Page 13

P. 13
| Tecshow Dua ltec 3 in 1
Referencias
DMX address mode Conguración de dirección DMX
Channel mode Modo de canales
Master mode Modo maestro
Slave 1 mode Modo esclavo 1
Slave 2 mode Modo esclavo 2
Show mode Modo show
Auto mode (1-9 is speed) Modo automático (velocidades 1-9)
Sound control on Modo audiorítmico encendido
Sound control o Modo audiorítmico apagado
Sound sensitivity Sensibilidad de sonido
Display on Pantalla encendida
Display o Pantalla apagada
LED display Pantalla LED
Inversion display Rotación de pantalla
Test Prueba
Working time Tiempo total de funcionamiento
Program version Versión de soware
5. INSTRUCCIONES DE USO
1. Conguración de dirección DMX
Seleccione la opción y presione ENTER para
acceder. Utilice las teclas UP/DOWN para optar por
la dirección deseada. Presione ENTER para conrmar su selección o mantenga presionada la tecla
MENU para volver al menú principal.
2. Modo de canales
Seleccione y presione ENTER para acceder.
Utilice las teclas UP/DOWN para optar entre el
modo 1CH o 21CH. Presione ENTER para conrmar
su selección o mantenga presionada la tecla MENU
para volver al menú principal.
3. Modo esclavo
Seleccione y presione ENTER para acceder. Utilice las teclas UP/DOWN para optar entre
MAST (maestro), SL1 (esclavo 1) o SL2 (esclavo
2). Presione ENTER para conrmar su selección o
mantenga presionada la tecla MENU para volver al
menú principal.
4. Modo show
Seleccione y presione ENTER para acceder.
Utilice las teclas UP/DOWN para escoger un show
entre SH0-SH8 (el show 0 es aleatorio). Presione
ENTER para conrmar su selección o mantenga
presionada la tecla MENU para volver al menú
Versión Español
Page 14

P. 14
Tecshow Dua ltec 3 in 1 |
principal. Seleccione SHND y presione ENTER para
acceder. Utilice las teclas UP/DOWN para optar por
AUTO y luego ENTER para acceder. Utilice las teclas UP/DOWN para congurar la velocidad entre
SP1-SP9 (la velocidad máxima es SP9). Presione
ENTER para conrmar su selección o mantenga
presionada la tecla MENU para volver al menú
principal.
5. Modo audiorítmico
Seleccione y presione ENTER para acceder.
Utilice las teclas UP/DOWN para optar entre ON
(encendido) y OFF (apagado).Presione ENTER para
conrmar su selección o mantenga presionada la
tecla MENU para volver al menú principal.
6. Sensibilidad de sonido
Seleccione y presione ENTER para acceder.
Utilice las teclas UP/DOWN para congurar el valor
de sensibilidad entre 0-100. Presione ENTER para
conrmar su selección o mantenga presionada la
tecla MENU para volver al menú principal.
7. Pantalla LED
Seleccione y presione ENTER para acceder.
Utilice las teclas UP/DOWN optar entre ON (encendida) y OFF (apagada). Presione ENTER para
conrmar su selección o mantenga presionada la
tecla MENU para volver al menú principal.
8. Rotación de pantalla
Seleccione DISP y presione ENTER para acceder. Presione ENTER nuevamente para activar
la función DISP (rotación de pantalla). Presione
ENTER para conrmar su selección o mantenga
presionada la tecla MENU para volver al menú
principal.
9. Prueba
Seleccione TEST y presione ENTER para acceder.
La pantalla titilará. El equipo ejecutará un programa automático de prueba. Presione la tecla MENU
para volver al menú principal.
10. Tiempo total de funcionamiento
Seleccione y presione ENTER para acceder.
En la pantalla visualizará el tiempo total de funcionamiento del equipo. Presione la tecla MENU para
volver al menú principal.
11. Versión de soware
Seleccione y presione ENTER para acceder.
En la pantalla visualizará la versión actual del soware instalado. Presione la tecla MENU para volver
al menú principal.
6. MODOS DE OPERACIÓN
• DUALTEC 3-IN-1 CUENTA CON LOS
SIGUIENTES MODOS DE OPERACIÓN:
1. Modo maestro/esclavo
2. Controlador DMX
6.1 Modo maestro/esclavo
Conecte los equipos en serie. El primer Dualtec
3-in-1 determinará el modo de operación del resto, por lo tanto, congúrelo como equipo maestro
(MAST) y, al mismo tiempo, seleccione un tipo de
show (SH0-8). En caso de que el equipo no reciba señal DMX, se encenderá el indicador LED del
modo maestro, titilará el LED indicador del modo
audiorítmico, pero el resto de los equipos esclavos
no funcionará. Seleccione el modo SL1 (normal) o
Versión Español
Page 15

P. 15
| Tecshow Dua ltec 3 in 1
SL2 (show de dos equipos) cuando haya señal DMX
y se encenderá el LED indicador de modo esclavo.
Show de dos equipos
Seleccione SL1 para el primer equipo esclavo,
que se ejecutará en el mismo modo que el equipo
maestro. Seleccione SL2 para el segundo equipo
esclavo, que se ejecutará en un modo diferente
que el equipo maestro. Si el show dispone únicamente de dos luces, se recomienda congurar
el segundo equipo como esclavo para obtener
mejores resultados.
6.2 Controlador DMX
Si el usuario decide utilizar un controlador DMX
para operar las luces, primero debe congurar
la dirección DMX correspondiente (valores 1-512)
así cada equipo recibirá la señal necesaria para
funcionar.
Presione la tecla MENU, seleccione ADDR y presione ENTER para acceder. Utilice las teclas UP/
DOWN para seleccionar la dirección DMX deseada.
Una vez ingresado el valor, presione ENTER hasta
que dicho valor deje de titilar. La pantalla regresará al menú principal automáticamente luego de
8 segundos. Por el contrario, si desea dirigirse al
menú anterior, sin guardar cambios, presione la
tecla MENU.
Cuadro de canales DMX
Modo 1 canal
Canal Valor Función
1
(008-255 modo audiorítmico)
000-007 Sin función
008-037 Show 1
038-067 Show 2
068-097 Show 3
098-127 Show 4
128-157 Show 5
158-187 Show 6
188-217 Show 7
218-247 Show 8
248-255 Show aleatorio 1-8
Modo 21 canales
Canal Valor Función
1 000-255 Dimmer full 1,0-100%
2 000-255 Estrobo 1, velocidad creciente
3 000-255 Rojo 1 dimmer 0-100%
4 000-255 Verde 1 dimmer 0-100%
Versión Español
Page 16
P. 1 6
Tecshow Dua ltec 3 in 1 |
5 000-255 Azul 1 dimmer 0-100%
6 000-255 Blanco 1 dimmer 0-100%
7 000-255 Ámbar 1 dimmer 0-100%
8 000-255 Rojo 2 dimmer 0-100%
9 000-255 Verde 2 dimmer 0-100%
10 000-255 Azul 2 dimmer 0-100%
11 000-255 Blanco 2 dimmer 0-100%
12 000-255 Azul 2 dimmer,0-100%
13 000-255 Dimmer full 2,0-100%
14 000-255 Estrobo 2, velocidad creciente
15 000-255 Blanco 1 dimmer 0-100%
16 000-255 Blanco 2 dimmer 0-100%
17 000-255 Blanco 3 dimmer 0-100%
18 000-255 Blanco 4 dimmer 0-100%
19 000-255 Láser rojo
20 000-255 Láser verde
21 000-255 Efecto láser
7. OBSERVACIONES
1. Previo a su entrega, este equipo fue sometido
a estrictas inspecciones que avalan su funcionamiento. Lea atentamente el manual antes
de utilizar el equipo. La garantía no cubre
daños provocados por el uso inapropiado de
este producto. El fabricante no se responsabilizará por los daños causados por el uso
inapropiado de este producto.
2. El proveedor no asumirá responsabilidad por
los errores u omisiones del manual. La información de este manual está sujeta a cambios
sin previo aviso.
Versión Español
Page 17

P. 17
| Tecshow Dua ltec 3 in 1
FOR MORE INFO ON THIS PRODUCT PLEASE CHECK WWW.TEC-SHOW.COM /
PARA MAS INFORMACION SOBRE ESTE PRODUCTO VISITE WWW.TEC-SHOW.COM
 Loading...