

Page 1

TS1066
Network Access Controller
Installation Manual
STOP!
Before you begin
Please download the latest version of firmware by
following the instructions at
http://www.interlogix.com.au/downloads
P/N MAINST-TS1066 • REV 3.2 • ISS 16AUG19
Page 2

Copyright
© 2019 UTC Fire & Security Australia Pty Ltd. All rights reserved.
Trademarks and
patents
The Challenger name and logo are trademarks of
UTC Fire & Security Australia Pty Ltd.
Other trade names used in this document may be trademarks or
registered trademarks of the manufacturers or vendors of the
respective products.
Manufacturer
Made in China by United Technologies Safety Systems
No. 80, Changjiang East Road, QETDZ, Qinhuangdao, Hebei,
P. R. China 066004
Imported by UTC Fire & Security Australia Pty Ltd t/a Interlogix
10 Ferntree Place
Notting Hill, Victoria, 3168, Australia
ACMA compliance
Notice! This is a Class B product. In a domestic
environment this product may cause radio interference
in which case the user may be required to take
adequate measures.
WEEE compliance
For proper recycling, dispose all the batteries and the
packaging as required by local ordinances or
regulations
Contact information
For contact information, see www.interlogix.com.au.
2
Page 3

Contents
Important information ................................................................... 5
Limitation of liability ......................................................................... 5
Agency compliance ......................................................................... 5
Contact information ......................................................................... 5
Product overview .......................................................................... 6
Specifications .................................................................................. 7
Product contents ............................................................................. 7
Warning .......................................................................................... 8
Related documentation ................................................................... 8
Before you begin ........................................................................... 9
Safety Warnings.............................................................................. 9
Enclosure Access Restrictions ........................................................ 9
Installing the Network Access Controller ................................. 10
Installation guidelines .................................................................... 10
Installation procedure .................................................................... 10
Mounting Network Access Controller in the enclosure ....... 10
DIP switch settings ........................................................................ 11
Connections .................................................................................. 12
Power Input ........................................................................ 16
Batteries ............................................................................. 17
Battery fitment and replacement ........................................ 18
Battery charging current ..................................................... 19
Auxiliary power terminals ................................................... 19
Siren ................................................................................... 20
RS-485 Networks ............................................................... 21
ChallengerPlus LAN ........................................................... 21
RS-485 buses .................................................................... 21
RS-485 cabling ................................................................... 21
Terminating the RS-485 ..................................................... 25
Lock power ......................................................................... 25
Door lock relay wiring ......................................................... 26
Inputs ................................................................................. 26
Connecting expansion modules .................................................... 28
Relay expansion ................................................................. 28
LED indicators............................................................................... 29
Powering up the Network Access Controller ........................... 31
Defaulting the Network Access Controller ..................................... 31
Defaulting the USB Comms Path .................................................. 32
On-Board Memory Retention ........................................................ 32
3
Page 4

Appendix B: Output fusing and user current limits ................. 34
Appendix C: Operating temperature ......................................... 35
Appendix D: Cabling requirements ........................................... 36
System earthing ................................................................. 36
Ethernet cabling ................................................................. 36
Power supply to RS-485 devices (refer to Figure 5 External
Power Supply Connection to RAS on page 24) .................. 36
4
Page 5

Important information
Limitation of liability
To the maximum extent permitted by applicable law, in no event will Interlogix be
liable for any lost profits or business opportunities, loss of use, business
interruption, loss of data, or any other indirect, special, incidental, or
consequential damages under any theory of liability, whether based in contract,
tort, negligence, product liability, or otherwise. Because some jurisdictions do not
allow the exclusion or limitation of liability for consequential or incidental
damages the preceding limitation may not apply to you. In any event the total
liability of Interlogix shall not exceed the purchase price of the product. The
foregoing limitation will apply to the maximum extent permitted by applicable law,
regardless of whether Interlogix has been advised of the possibility of such
damages and regardless of whether any remedy fails of its essential purpose.
Installation in accordance with these manual, applicable codes and the
instructions of the authority having jurisdiction is mandatory.
The customer is responsible for testing and determining the suitability of this
product for specific applications. The customer is responsible for testing the
product at least once every three months.
While every precaution has been taken during the preparation of this manual to
ensure the accuracy of its contents, Interlogix assumes no responsibility for
errors or omissions.
Agency compliance
This product conforms to the standards set by Standards Australia on behalf of
the Australian Communications and Media Authority (ACMA).
Ensure that enclosure covers are fitted to maintain ACMA compliance.
Notice! This is a Class B product. In a domestic environment this product may
cause radio interference in which case the user may be required to take
adequate measures.
Contact information
For contact information, see www.interlogix.com.au.
5
Page 6

Product overview
This manual applies to the TS1066 Network Access Controller.
Up to 12 Network Access Controllers can be connected to a ChallengerPlus
panel’s RS-485 system LAN. ChallengerPlus panels have two RS-485 system
LANs and can have a total of 24 Network Access Controllers.
The Network Access Controller can operate independently of a ChallengerPlus
panel, depending on its operating mode.
The Network Access Controller, in addition to its Tecom bus, has two RS-485
buses (local LANs) to connect readers for doors, as well as RASs, DGPs, and
Tecom peripherals.
Network Access Controllers provide enhanced access control functionality to the
ChallengerPlus system. This manual describes:
• How to install the Network Access Controller
• How to connect other equipment to the Network Access Controller
This manual is intended for use only by trained Challenger installation and
configuration technicians.
Refer to the MAPROG-TS1066 R1.2 TS1066 Network Access Controller
Programming Manual for more details on supported system configurations.
6
Page 7

Mechanical
Physical dimensions
(W x D x H)
Weight
product
boxed
mm
g
kg
254 x110 x55
330
12
Electrical
AC input voltage
Nominal
Limits*
Battery requirements
Type
Terminal voltage
Nominal
Maximum
Charging current limit
Compliance
Battery lead fuse
Size
Type
Current
Voltage
Example parts
Vrms
Vrms
V
V
A
A
VAC
19
15 to 24.5
SLA(Sealed Lead Acid)/
VRLA(Valve regulated Lead Acid)
12
15 (severely overcharged)
>1.5
AS/NZS 2201.1:2007, Appendix C
3AG/3AB (6x32 mm)
Time lag (slow blow)
8
250
Bel Fuse 3SB 8-R
Littelfuse 0313008.HXP
Schurter 8020.5020
Environmental
Room temperature
Storage
Operating**
Relative humidity
Location
Pollution Class
Altitude
°C
°C
%
m
-20 to +80
0 to +50
0 to 93 non-condensing
Indoor. Dry area.
2 or lower
≤ 2000
Enclosure
details
Compatible enclosure
ENC-LGE
Specifications
* Includes all tolerances and Mains supply variations.
**Refer to Appendix C: Operating temperature.
Product contents
Inspect the package and contents for visible damage. If any components are
damaged or missing, do not use the unit; contact the supplier immediately. If you
need to return the unit, you must ship it in the original box.
Table 1 lists the items that are shipped with a TS1066 Network Access
Controller.
7
Page 8
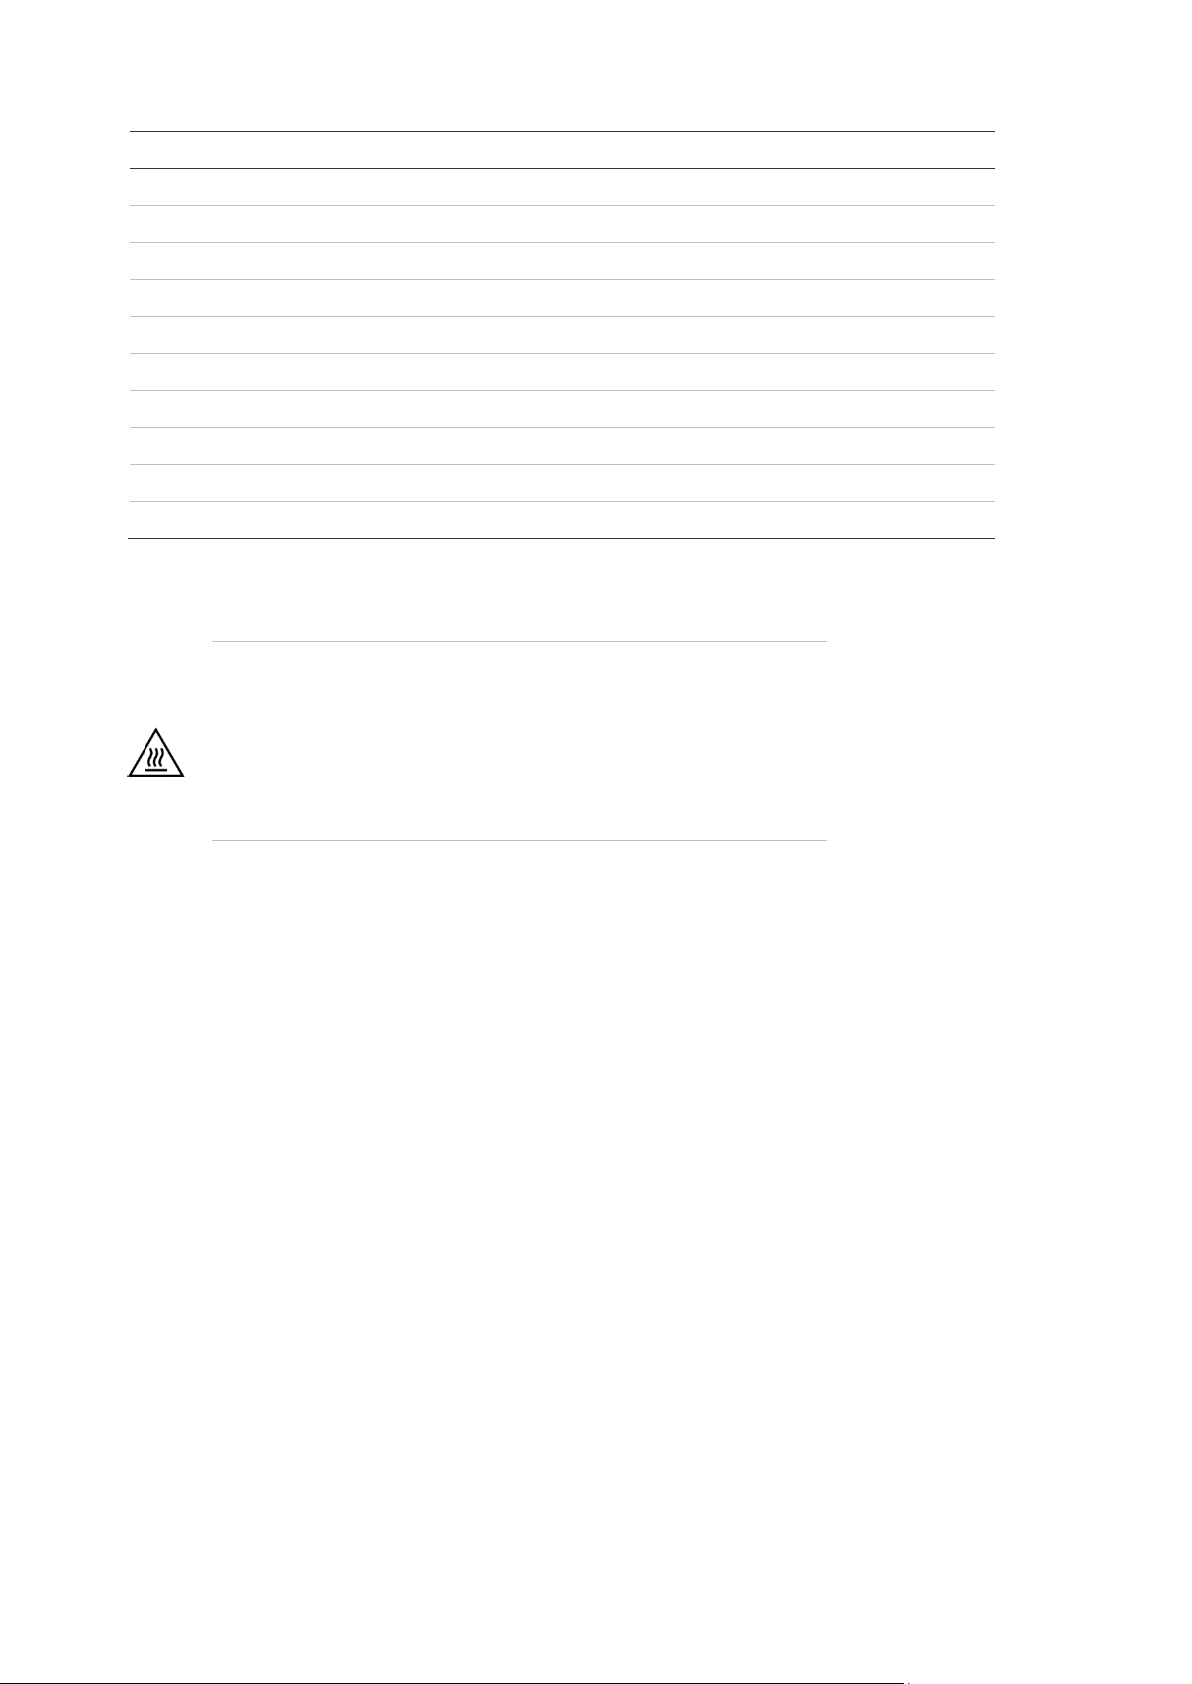
Table 1: TS1066 shipping list
Quantity
Item
1
TS1066B board
1
TS1066 Network Access Controller Installation Manual
7
M3 x 10 pan head screws
6
Standoff board mounts
12
3-way plug-on screw terminal connectors
14
2-way plug-on screw terminal connectors
2
Battery leads (combined negative and fused positive)
1
1K 1/4 watt resistor
16
10K 1/4 watt resistors
5
Link jumpers
Warning
Take appropriate precautions if working on an active or
recently de-powered device.
The circuit board and the heatsink on the Network
Access Controller board may be hot.
Do not touch.
Related documentation
The ChallengerPlus Installation and Quick Programming Manual and
ChallengerPlus Programming Manual provide detailed information about
configuring and programming a ChallengerPlus system.
The ENC-LGE Large Enclosure Installation Manual provides instructions for
installing the ENC-LGE Large Enclosure.
The TS1066 Network Access Controller Programming Manual provides detailed
information about configuring and programming the Network Access Controller.
The Challenger system is modular. Refer to the documentation that is shipped
with each module that you intend to use.
8
Page 9

Before you begin
When installing a Network Access Controller, or any other parts of the system,
you need to be aware of requirements for cabling and earthing, and plan
accordingly. Refer to “Appendix D: Cabling requirements” on page 36.
Notice! A qualified service person, complying with all applicable codes, should
perform all required hardware installation.
The customer is responsible for testing and determining the suitability of this
product for specific applications. The customer is responsible for testing the
product at least once every three months.
Disclaimer: This manual contains recommendations based on Australia and
New Zealand codes. It is not an authoritative reference regarding codes and has
not been reviewed by the responsible authorities. The codes may change and
may not be reflected in this document.
Safety Warnings
Field wiring errors or damage may present hazardous voltages inside the
enclosure. Treat all wires and boards in the enclosure as hazardous until
checked and validated as safe.
Interlogix recommends the use of personal protection equipment, such
as gloves, glasses, voltage detectors and meters for all installation and
maintenance operations.
Enclosure Access Restrictions
To comply with Australian standard AS/NZS 60950-1, access to the interior of the
enclosure:
Must be restricted to suitably trained and qualified installation and
maintenance technicians.
Must require the use of a tool.
These restrictions can be met by implementing one or more of the following
options:
Fit a lock to the enclosure. Ensure that the unit is locked when
unsupervised.
Tighten the door screws ¼ turn beyond finger tight (i.e. > 2Nm) using a
tool.
Secure the door with M6 standard or tamper proof screws (not
supplied), firmly tightened.
9
Page 10

Installing the Network Access Controller
Installation guidelines
Installers must adhere to any country dependent requirements and local
applicable standards.
• Installation must be performed in accordance with AS/NZS 2201.
• The installation environment must comply with environmental
specifications.
• The Network Access Controller, as well as all other boards with earth
terminals must be earthed according to the recommendations in the
section “System earthing" in Appendix D: Cabling requirements on page
36.
• The batteries used with this unit must comply with the requirements
provided in the section “Batteries” on page 17.
• Avoid loops of wire inside the enclosure, and route cables so that they do
not lie on top or underneath the printed circuit board. The use of cable ties
is recommended and improves neatness of the wiring within the box. All
wires entering the enclosure should be secured near point of entry, as
required by applicable codes.
Installation procedure
The Network Access Controller must be installed in an approved, compatible
enclosure, as detailed in the Specifications table on page 7. Ensure the
enclosure has been mounted on the wall and the transformer is installed in the
enclosure before mounting the Network Access Controller. Refer to the enclosure
installation manual for the details.
Mounting Network Access Controller in the enclosure
The installation procedure is as follows:
1. Install six standoff board mounts for the TS1066B board in the enclosure.
Refer to the enclosure installation for standoff mount location and fitment.
2. Remove the TS1066 board from its antistatic bag.
3. Use six M3 x 10 pan head screws to fix the board to the enclosure’s
standoffs. Refer to Figure 2 on page 13 for the mounting hole locations.
4. Combine terminal blocks as appropriate (e.g. 2 x 3-way, 2-way + 3-way, 2
x 2-way) and attach to the headers (e.g. 6-way, 5-way, 4-way) around the
periphery of the board.
5. If the Network Access Controller is to be connected to a ChallengerPlus
then its address must be configured. Refer to “DIP switch settings” on
page 11.
10
Page 11

LAN
Address
Polled as
S1-1
S1-2
S1-3
S1-4
LAN 1
1
DGP 1
I O O
O
LAN 1
2
DGP 2
O I O
O
LAN 1
3
DGP 3
I I O
O
LAN 1
4
DGP 4
O O I O LAN 1
5
DGP 5
I O I O LAN 1
6
DGP 6
O I I O LAN 1
7
DGP 7
I I I O LAN 1
8
DGP 8
O O O
I
LAN 1
9
DGP 9
I O O
I
LAN 1
10
DGP 10
O I O
I
LAN 1
11
DGP 11
I I O
I
LAN 1
12
DGP 12
O O I I LAN 2
1
DGP 17
I O O
O
LAN 2
2
DGP 18
O I O
O
LAN 2
3
DGP 19
I I O
O
LAN 2
4
DGP 20
O O I
O
LAN 2
5
DGP 21
I O I O LAN 2
6
DGP 22
O I I O LAN 2
7
DGP 23
I I I O LAN 2
8
DGP 24
O O O
I
LAN 2
9
DGP 25
I O O
I
LAN 2
10
DGP 26
O I O
I
LAN 2
11
DGP 27
I I O
I
LAN 2
12
DGP 28
O O I
I
Legend: I = ON, O = OFF
DIP switch settings
If a Network Access Controller is connected to a ChallengerPlus panel’s system
LAN, then it must be addressed as a DGP in the range 1 to 12. Use the foursegment Address DIP switch (Figure 2 on page 13, item 36) to set the address.
Figure 1: Address DIP switch
Table 2: DIP switch settings
11
Page 12

Connections
Figure 2 on page 13 identifies the locations and details of the connectors and
other items. See “Appendix D: Cabling requirements” on page 36 for
recommendations for the application and wiring of Challenger equipment.
12
Page 13

Figure 2: TS1066B board details
13
Page 14

Figure 2 legend
Item
Description
1.
Mounting Hole. Ensure all standoffs are used.
2.
AC power input terminals. Details provided in Specifications.See Power Input on page 16.
3.
Earth terminal. Connect the power earth wire from the enclosure’s mains transformer to
the earth terminal. See System earthing in Appendix D: Cabling requirements.
Data cable shields can also be connected.
4.
Battery 1 terminals. See Batteries on page 17.
5.
Battery 1 terminals. See Batteries on page 17.
6.
Auxiliary power output. See Auxiliary power terminals on page 19.
7.
Siren Output. See Siren on page 20.
8.
ChallengerPlus LAN interface
See: RS-485 Networks on page 21.
Appendix D: Cabling requirements on page 36
9.
Tamper switch input.
Connect the TAMP T and TAMP C terminals to the panel tamper switch in the enclosure.
Short circuit for sealed, open circuit for unsealed. Must be sealed if not used.
Can only be used with normally closed contacts such as the panel tamper switches.
See enclosure manual for tamper switch details.
10.
Relay and lock power connections for four doors.
Refer to Door lock relay wiring on page 26
11.
Earth terminal.
Connection point for cable shields or for earthing other boards connected to the TS1066B
in the enclosure. Preferred length should be approximately 60mm.
Refer to System earthing in Appendix D: Cabling requirements
12.
Input terminals. See Inputs on page 26.
13.
Relay expansion connector.
10 pin plugin cable socket for relay expansion modules.
See Relay expansion on page 28.
14.
PWR Link
Power link for relay expansion cards.
Refer to Relay expansion on page 28.
15.
Micro-B USB port (USB cable not supplied).
16.
Ethernet port (Ethernet cable not supplied).
17.
Heartbeat LED. See LED indicators on page 29.
18.
Bus 1 quick connect header
See RS-485 buses on page 21
Note: This connector is not a STU port.
19.
BUS 2 connector
See RS-485 buses on page 21
20.
BUS 1 connector
See RS-485 buses on page 21
21.
Bus 1 quick connect header
See RS-485 buses on page 21
Note: This connector is not a STU port.
14
Page 15

Item
Description
22.
Lock power 2 quick connect header
See Lock power on page 25
23.
BUS1 Rx LED. See LED indicators on page 29.
24.
BUS 1 Tx LED. See LED indicators on page 29.
25.
Bus 1 TERM link. See Terminating the RS-485 on page 25.
26.
BUS 2 Rx LED. See LED indicators on page 29.
27.
BUS 2 Tx LED. See LED indicators on page 29.
28.
Bus 2 TERM link. See Terminating the RS-485 on page 25.
29.
ChallengerPlus LAN Rx LED. See LED indicators on page 29.
30.
ChallengerPlus LAN Tx LED. See LED indicators on page 29.
31.
ChallengerPlus LAN TERM link. See Terminating the RS-485 on page 25.
32.
Lock power 1 quick connect header.
See Lock power on page 25.
33.
Ethernet 10/100 Mbps LED. See LED indicators on page 29.
34.
Ethernet Link Active LED. See LED indicators on page 29.
35.
Test links (not fitted during normal operations). Refer to Defaulting the Network Access
Controller on page 31.
36.
System Ready LEDs. See LED indicators on page 29.
37.
Address selection DIP switch (If connecting to a ChallengerPlus panel). Refer to DIP
switch settings on page 11.
38.
Relay coil active LED. See LED indicators on page 29
15
Page 16

Figure 3 below details the wiring for terminal blocks in Figure 2, items 1 through 8.
Figure 3: Connection details for terminal blocks
Power Input
AC power input for the NAC is provided via the two unpolarised AC terminals.
Power is typically provisioned from the transformer fitted to the enclosure in
which the NAC is installed.
The NAC AC voltage requirements are specified in Specifications.
The enclosure installation manual provides further details for the transformer,
along with fuse location and specifications.
Notice! Transformers supplied by Interlogix have internal thermal fuses. Shorting
the AC leads together may blow the thermal fuse before the replaceable fuse can
react, rendering the unit inoperative.
Notice! In case of a worn, pinched or otherwise damaged transformer lead, the
transformer must be replaced in order to avoid hazard.
The transformer leads supply high currents to the board. Poor connections lead
to excessive voltage drop and can affect system performance.
At the board connection, the installer must ensure that:
a) Terminal wiring is performed with the transformer power input disconnected
16
Page 17

b) The bare wire ends are neatly dressed and fully inserted into the terminal
housing. Less than 2mm of exposed wire should be visible after termination.
c) The complete bundle of wire strands is inserted into the screw terminal. No
broken strands should be visible.
d) There are no free strands outside of the metal block in the terminal housing.
e) The retaining screw is correctly torqued.
Batteries
The Network Access Controller requires battery backup to maintain functionality
when primary power is lost. Two independent battery channels are provided for
this purpose.
Key battery requirements are listed in the Electrical section of Specifications on
page 5. The table does not specify battery dimensions, capacity and temperature
ratings as they are installation dependent. The installer is responsible for
ensuring that:
a) The specified battery or batteries, in conjunction with the configured
system load and TS1066 charger settings, provide the required system
backup and recharge times.
b) The battery operating temperature range is compatible with the specific
TS1066 installation environment; a minimum range of 0°C to +40°C is
recommended.
c) The batteries fit into the system enclosure and are oriented so that there is
no possibility of their uncovered terminals being bridged by metal when
the leads are not attached.
d) The system enclosure is properly sited and mounted to handle the
configured system weight and allow for safe installation and removal of the
batteries in compliance with the warnings in this manual and all local
codes and OHS requirements.
e) For scheduling on-going battery system checks as required by the
applicable standards and codes to ensure user safety, battery integrity
and system performance; a 3 monthly interval is suggested.
A fuse is required in the positive lead of each battery, as fitted in the
supplied battery leads; a spare is not provided. The fuse is specified in the
Electrical section of Specifications on page 7.
The battery leads are provided with receptacles to suit the 4.75mm FastOn tabs commonly used on 12V SLA batteries with 7Ahr and 12Ahr
capacities. Higher capacity batteries will have different terminal types,
necessitating the use of adaptors or modifications to the leads. When
modifying the leads:
a) Disconnect leads from the NAC.
b) Take care not to damage the fuse holder.
17
Page 18

c) Add sleeving or covers to any exposed metal on the modified battery
connection arrangement.
Notice! Batteries can supply very high currents. This can happen when terminals
are bridged by metalwork, wires, tools, jewelry, etc. The bridging metal can get
very hot, melt, or vaporize, leading to damage and serious injuries.
Take all necessary precautions to ensure safety, including covering bare
terminals, when transporting or replacing batteries.
Notice! Batteries can be large, heavy and have slippery cases. These factors
contribute to mishandling incidents such as slipping and dropping. Impact
damage can rupture the battery case, releasing hazardous chemicals. Slips and
drops can allow terminals to contact metal, or cause injuries to the installer or
others nearby. Take all necessary precautions to ensure safety, including not
working overhead or blind in cramped areas, covering bare terminals, and using
appropriate means to safely handle the awkward and heavy units.
Notice!
Worn, pinched or otherwise damaged battery leads must be replaced in order to
avoid hazard.
Battery fitment and replacement
The battery leads supply high currents to the board during fault conditions.
Poor connections lead to excessive voltage drop and can affect system
performance.
At the board connection, the installer must ensure that:
a) Terminal wiring is performed with the battery disconnected.
b) The bare wire ends are neatly dressed and fully inserted into the terminal
housing. Less than 2mm of exposed wire should be visible after
termination.
c) The complete bundle of wire strands is inserted into the screw terminal.
No broken strands should be visible.
d) There are no free strands outside of the metal block in the terminal
housing.
e) The retaining screw is correctly torqued.
f) On completion, the polarity is verified at the board (red to positive, black to
negative) prior to battery connection.
At the battery connection, the installer must ensure that :
a) The positive lead (red) is the first wire connected and the last wire
disconnected.
18
Page 19

b) The battery terminal polarity and open terminal voltage is validated prior to
a connection being made.
c) The battery tab and receptacle mate firmly and completely. It should not
be possible to remove the terminal with gentle force.
d) If a custom battery terminal is in use, the checks in the prior section
regarding wire dress, strand damage and connection firmness are
appropriately applied.
New batteries must be clearly marked with the date of installation in order
to facilitate future maintenance activities.
When batteries are replaced, the board should be queried using the
control software to validate the newly installed units.
When making voltage measurements at the battery terminals to establish
battery state, healthy batteries that have not been discharged in the
preceding 48hrs should measure >13.5V
The installer is responsible for identifying and specifying batteries within
an operating temperature range that measures up with the specific
TS1066 installation environment; a minimum range of 0°C to +40°C is
recommended.
A fuse is required in the positive lead of each battery. Each fuse must be a
3AG/3AB (6x32 mm) 8A, 250 VAC, slow blow (time lag) fuse, compliant with UL
248.14. Suitable parts include Littelfuse 0313008.HXP, Bel Fuse 3SB 8-R, and
Schurter 8020.5020.
The installer (or user) is responsible for scheduling on-going battery
system checks as required by the applicable standards and codes to
ensure user safety, battery integrity and system performance; a 3 monthly
interval is suggested.
The battery leads are designed to suit 4.75mm Fast-On tabs. SLA batteries with
7Ahr and 12Ahr capacities are available with these tabs as standard from many
suppliers.
Higher capacity batteries will have different terminal types, necessitating the use
of adaptors or modifications to the leads. In these situations, sleeving or covers
should be added to cover exposed metal on the battery tabs or connections.
Battery charging current
Nominal charging current is 600mA.
Auxiliary power terminals
Connect the AUX POWER +12 and AUX POWER − output terminals to devices
that require 12V DC power, such as detectors. Three sets of auxiliary power
19
Page 20

output terminals are provided: if you need more than three connections, you can
use a TS0844 Power Distribution Board or TS1044 Power Distribution Board to
increase the number of terminals.
Note: Network Access Controller system design should consider the fuse
partitioning and load limitations specified in Appendix B: Output fusing and user
current limits on page 34.
Siren
Connect the OUT S+ and OUT S– terminals to an 8 Ω siren speaker or two 8Ω
siren speakers in parallel. Alternatively, connect a device requiring 12VDC
power.
The OUT S+ terminal is always powered. The OUT S- terminal is switched
according to the Siren SW settings.
A 1K 1/4 watt resistor (supplied) should be connected across the OUT S+ and
OUT S– terminals:
a) At the load side when driving digital inputs or other light loads.
b) At the terminals when no device is connected.
Note: Network Access Controller system design should consider the fuse
partitioning and load limitations specified in Appendix B: Output fusing and user
current limits on page 34.
Warning: The siren type must be configured correctly in CTPlus. Specifying a
siren type of DC Volts when there is an 8 Ω siren connected to the Network
Access Controller may damage the siren.
20
Page 21

RS-485 Networks
The TS1066 provides three RS485 networks;
• The ChallengerPlus Lan (Figure 2, item 8)
• RS485 BUS1 (Figure 2, item 19)
• RS485 BUS2 (Figure 2, item 20)
All network interfaces have similar wiring requirements which are detailed
below in section RS485 cabling.
ChallengerPlus LAN
The PANEL (TECOM BUS) connector is used to connect the Network Access
Controller to a ChallengerPlus LAN, if required by its operating mode.
There is no power terminal on this interface: the Network Access Controller is
a slave device on the ChallengerPlus LAN, so it is not expected to power the
host, and its operating current is too high to be supplied by the host.
RS-485 buses
The Network Access Controller can have up to 16 RAS devices such as
keypads, card readers, arming stations, or Smart Door Controllers on each
BUS (local LAN). The Network Access Controller can also have up to 15 DGP
devices on BUS 1 and up to 16 DGP devices on BUS 2.
Each BUS supports protocols other than Tecom, namely OSDP v2 (Open
Supervised Device Protocol), SALLIS by SALTO, and Aperio. The protocol to
be used on each BUS can be independently configured.
All network interfaces have similar wiring requirements which are detailed
below section RS485 cabling.
Note: Devices connected to the RS-485 buses and powered by the Network
Access Controller must comply with Appendix B: Output fusing and user
current limits on page 34
Devices can be connected to the Network Access Controller via the 4-pin RS485 terminals for BUS 1 (Figure 2 on page 13, item 19) or BUS 2 (Figure 2 on
page 13, item 18).
Alternatively, devices can be connected to BUS 1 via the 4-pin plug-in RS485 sockets (Figure 2 on page 13, items 17 and 20). The sockets are for easy
connection to the expander boards that support the connection such as the
TS1061 Dual Wiegand Interface.
RS-485 cabling
Interlogix recommends that the RS485 network wiring comply with the
following:
* Use 2 pair twisted shielded data cable such as Belden 8723.
* Keep the total length of wire on each RS-485 network below1.5 km.
* Networks must not span buildings or separate earth zones without the use
of LAN isolation devices such as TS0893.
21
Page 22

Using the screw terminal interfaces:
The wire colours below assume the use of the recommended cable and follow
the ChallengerPlus LAN conventions.
For communications, the following connections are required:
The - terminal is the interface 0V reference. Connect it to the black
wire.
The D+ terminal is data positive. Connect it to the white wire.
The D- terminal is data negative. Connect it to the green wire.
The data cable shield should be connected or insulated according to
the system earthing plan. Earthing points are identified figure 2 as
items 2 and 10.
On the RS485 BUS1 and BUS2 interfaces, the +12 terminal is able to
provide +12 V to RASs or other remote devices. Connect the +12
terminal to the red wire when using this feature.
Note: Devices connected to the RS-485 buses and powered by the
Network Access Controller must comply with Appendix B: Output
fusing and user current limits on page 34
When multiple devices are to be connected to the same network, the
use of TS0844 or TS1044 Power Distribution Boards is recommended
to increase the number of terminals and simplify the wiring effort.
To prevent failures, false alarms and hazards, all wires inside the
enclosure should be insulated up to the point of contact. Typically less
than 2mm of bare conductor should be exposed outside of the screw
terminal blocks and all conductor strands bound by the crew.
Damaged insulation, poor workmanship and other observed faults
must be corrected as soon as possible.
Using the plug-in BUS 1 sockets:
To easily connect a Tecom peripheral to BUS 1, connect a 4-way RS-485
cable (supplied with the Tecom peripheral) to one of the 4-pin plug-in RS-485
cable sockets (Figure 2 on page 13, items 17 and 20).
Refer to Figure 4 on page 23 for example connections of 4-way RS-485
cables from a Network Access Controller to a Tecom peripheral (items B and
D).
22
Page 23

Figure 4: Example TS1066 to TS1061 cable connections for RS-485 and lock power
23
Page 24

Figure 5 External Power Supply Connection to RAS
24
Page 25

Figure 6: Connecting a Smart Card Reader to the one of the buses
Terminating the RS-485
All RS-485 devices (including the panel) use a 470 Ω RS-485 termination resistor
where required. RS-485 termination resistors are used to set the impedance of
the RS-485 to around 220 Ω in order to minimise noise. The termination resistor
may be external or on-board (devices with an on-board resistor use a link to set
the RS-485 termination to ON).
A RS-485 should have only two devices with the RS-485 termination set to ON
(or the RS-485 termination resistor fitted):
• In a straight RS-485 configuration, the TERM links are ON at the
ChallengerPlus panel and the most distant device.
• In a star RS-485 configuration, the TERM links are ON at the two devices
that are the furthest apart (and OFF at the ChallengerPlus panel).
In a completely connected (but powered down) system, you can check for correct
LAN termination by measuring the resistance across the D+ and D− terminals:
• 0 Ω indicates a short circuit in the cabling
• 160 Ω or less indicates that too many devices are terminated
• 220 Ω is good
• 470 Ω or more indicates that not enough devices are terminated
Lock power
There are two cable sockets providing extra lock power (Figure 2 on page 13,
items 21 and 31), if required. The sockets are for easy connection to Tecom
peripheral that support the connection, such as the TS1061 Dual Wiegand
Interface.
Connect a 2-way lock power cable (supplied with the Tecom peripheral) to one of
the 2-pin plug-in lock power sockets.
Refer to Figure 4 on page 23 for example connections of 2-way lock power
cables from a Network Access Controller to a Tecom peripheral (items A and C).
Note: Devices connected to the RS-485 buses and powered by the Network
Access Controller must comply with Appendix B: Output fusing and user current
limits on page 34
25
Page 26

Door lock relay wiring
Figure 7 below details the wiring for the relay terminal blocks.
Figure 7:
Note: A suppression diode such as 1N4004 must be used in door lock circuits.
The diode must be co-located with the lock.
When using on board 12V power for locks, refer to Appendix B: Output fusing
and user current limits on page 34.
When powering locks from an external power supply or using the relays for other
purposes, the relay contact rating must be observed.
Maximum switching capacity (resistive/load):3A, 30VDC.
Minimum switching capacity: 100mA, 5VDC
Inputs
Inputs can be configured as an alarm input if the Network Access Controller is
connected to a ChallengerPlus system via the LAN.
A Challenger system can receive alarm signals from:
• The Challenger panel’s on-board inputs
• Inputs connected to Data Gathering Panels (DGPs)
Each pair of input terminals may be connected to a device such as a detector or
reed switch.
26
Page 27

The Network Access Controller can monitor its input circuits for four states
(sealed, unsealed, open circuit, and short circuit). This is accomplished by using
two end-of-line (EOL) resistors in each input circuit, as shown in Figure 8 below.
Note: A Network Access Controller can have various EOL resistor values for
input tamper monitoring (the default is 10 kΩ resistors).
Install EOL resistors in input circuits at the end of the circuit.
If an alarm device is connected, place the EOL resistors at the device’s
connections.
If an input is not used, you do not need to connect an EOL resistor.
Tip: Use sleeves on the resistor leads to prevent accidental shorting.
Figure 8: Four-state monitored input circuits
When four-state monitoring is used, the panel uses the circuit’s resistance to
determine the state of the input. In this example, 10 kΩ EOL resistors have been
used:
• 10 kΩ indicates sealed
• 5 kΩ or 20 kΩ indicates unsealed
• Open circuit indicates input tamper
• Short circuit indicates input tamper
To use four-state monitoring, input tamper monitoring must be set to Yes (Install
menu option 7, System Options) for the ChallengerPlus panel, and tamper
monitoring must be enabled for the Network Access Controller. See the TS1066
Network Access Controller Programming Manual for information on enabling
tamper monitoring.
Alternatively, the ChallengerPlus system can be configured to monitor inputs for
two states (sealed and unsealed). This is accomplished by using one resistor in
each circuit, as shown in Figure 9 on page 28.
27
Page 28

Figure 9: Two-state monitored input circuits
The panel uses the circuit’s resistance to determine the state of the input. In this
example, 10 kΩ EOL resistors have been used:
• 10 kΩ indicates sealed
• Open circuit or short circuit indicates unsealed
To use two-state monitoring, tamper monitoring must be disabled for the Network
Access Controller. See the TS1066 Network Access Controller Programming
Manual for information on disabling tamper monitoring.
Note: Two-state monitoring is not compatible with input types 33 or 40. See the
MAPROG-TS1066 R1.2 TS1066 Network Access Controller Programming
Manual for details.
Connecting expansion modules
Relay expansion
The Network Access Controller has four onboard relays that are assigned the
first four relay numbers.
If relay expansion cards are used, additional relays are numbered according to
their physical address, starting at 5. The Network Access Controller allows for
relay mapping to be programmed such that a physical relay number (e.g. 5) can
be mapped to a relay number in the ChallengerPlus system (e.g. 21).
One TS0840 Four-Way Relay Card may be connected to the Relay Card
(Figure 2 on page 13, item 12) to add four relays. Alternatively, TS0841
Eight-Way Clocked Relay Expansion Boards or TS0842 16-Way Clocked Open
Collector Expansion Boards may be connected to the Relay Card individually or
daisy-chained to add eight relays per card (for TS0841) or 16 open collector
outputs per card (for TS0842).
28
Page 29

Item
LED
Item
number
Description
Network
Access
Controller
Heart Beat
16
Slow flashing indicates normal operation.
Rapid flashing if firmware update or Network Access Controller default
is in process.
System Ready
35
Not currently used.
System LAN
Rx
30
Flashing indicates polling data being received from the ChallengerPlus
panel on the system LAN.
Tx
29
Flashing indicates the Network Access Controller is replying to polling
from the ChallengerPlus panel on the system LAN.
Off indicates that the Network Access Controller is not correctly
addressed, the ChallengerPlus panel is not programmed to poll the
DGP address, or there is no ChallengerPlus panel connected.
BUS 1
Rx
22
Flashing indicates remote units, such as readers, replying to polling on
BUS 1
Tx
23
Rapid flashing if a remote unit is connected to BUS 1.
Off if no remote unit is connected to BUS 1.
BUS 2
Rx
25
Flashing indicates remote units replying to polling on BUS 2.
Tx
26
Rapid flashing if a remote unit is connected to BUS 2.
Off if no remote unit is connected to BUS 2.
Note: If TS0841 and/or TS0842 boards are used, then a value for Relay
Controllers must be programmed for the Network Access Controller in CTPlus,
where 1 represents each eight relays or open collector outputs. Refer to the
TS1066 Network Access Controller Programming Manual or CTPlus online help
for details.
The PWR link (Figure 2 on page 13, item 13) enables the Network Access
Controller to power a connected relay expansion module. Remove the link if the
relay card is powered from an external 12 V supply. Note: If two relay boards are
used, link should be removed and the relay boards should be powered from
external supply.
Note: Devices connected to the RS-485 buses and powered by the Network
Access Controller must comply with Appendix B: Output fusing and user current
limits on page 34
LED indicators
LEDs on the printed circuit board indicate the state of the Network Access
Controller, the ChallengerPlus system LAN, the local LANs (BUS 1 and BUS 2),
and Ethernet activity.
Table 3 below shows the LEDs for each of the items above. The numbers in the
Item number column indicate the LED location on the Network Access Controller
as shown in Figure 2 on page 13.
Table 3: LED indications
29
Page 30

Item
LED
Item
number
Description
Ethernet
Relay
Link Active
33
Flashing indicates Ethernet activity.
10/100 Mbps
Relay coil active
LED
32
38
On indicates Ethernet speed is 100Mbps.
On when relay coils is energized.
30
Page 31

Powering up the Network Access Controller
In case the Network Access Controller will be connected to a ChallengerPlus
panel
Ensure the ChallengerPlus system LAN is connected to the Panel
terminals (Figure 2 on page 13, item 7)
Ensure the Network Access Controller’s address is set. (Refer to DIP
switch settings on page 11).
Ensure that jumpers on board are set correctly and that TEST LINKS are not
fitted.
After power-up, check the Heart Beat LED (Figure 2 on page 13, item 16). See
LED indicators on page 29.
Note: Devices connected to the RS-485 buses and powered by the Network
Access Controller must comply with Appendix B: Output fusing and user current
limits on page 5.
Refer to the TS1066 Network Access Controller Programming Manual for
information on configuring the Network Access Controller.
Defaulting the Network Access Controller
You may want to perform a “default” to reset the Network Access Controller to its
factory default state and erase all programming.
To default the Network Access Controller:
1. Remove power to the Network Access Controller and wait for all LEDs to
turn off.
2. Fit test link 1 (Figure 2 on page 13, item 34) and repower the system. The
Heart Beat LED (Figure 2 on page 13, item 16) illuminates for about 20
seconds, flashes quickly for about 20 seconds to indicate reset mode, and
then flashes slowly to indicate normal mode.
Note: The Network Access Controller can only be defaulted in the
20-second interval when the Heart Beat LED is flashing quickly (in reset
mode). The Network Access Controller returns to normal mode
automatically to help protect against accidental reset.
3. Remove test link 1 when the Heart Beat LED is flashing quickly to default
the Network Access Controller.
31
Page 32

Defaulting the USB Comms Path
You may want to perform a “default” for USB.
To default the USB:
1. Access the NAC panel PCB.
2. Fit test link 1 (Figure 2 on page 13, item 34) momentarily, and then
remove the link.
On-Board Memory Retention
In the absence of any power source, the on-board capacitor storage will maintain
the real-time clock and system configuration/logs for 5 days under typical
circumstances.
Programming the Network Access Controller
Refer to the TS1066 Network Access Controller Programming Manual for
detailed information about programming the Network Access Controller.
32
Page 33

Appendix A: Standalone current draw
The current draw of the TS1066 running from battery power only is provided
below for bare configuration:
• Battery charging is off
• Siren is not active
• The tamper input is sealed (wire link, 0 Ω)
• All eight inputs are sealed (10 kΩ EOL resistors)
• The four on-board relays are not active
• There is no relay card attached
• USB is not connected
• The RS-485 system LAN is terminated and is connected to a terminated
ChallengerPlus panel Comms port.
• The local LANs (BUS 1 and BUS 2) are not terminated and not active (no
connection)
• Ethernet is not active.
Consumption = 226mA (whilst battery voltage is 12.0V)
• Active Ethernet adds 25mA.
• Each active relay coil adds 55mA.
Note: Relay coil current forms part of the allowable user current draw. Refer to
Appendix B: Output fusing and user current limits on page 34.
33
Page 34

Appendix B: Output fusing and user current
Device
Item number
Maximum current draw
Auxiliary power
5
0.81 A
Siren output
6
1.25 A
Four onboard relays
9
1.7 A each (when using lock
power 12v and 0v)
Active relay coil
9
55 mA
Relay card
12
0.5 A
BUS 1
17, 19, and 20
1.0 A total
BUS 2
18
0.5 A
Lock power 1
31
1.9 A
Lock power 2
21
1.25 A
limits
The current draw on the Network Access Controller for all user devices must not
exceed 3 A. This value excludes battery charging and standalone board current.
The Network Access Controller will shut down if this is exceeded.
In some environments, further restrictions on user current apply as detailed in
Appendix C.
On-board fuses provide over-current protection for devices as described in
Table 4 below. The numbers in the Item number column refer to items in Figure 2
on page 13.
Table 4: Maximum current draw per output
Consider the maximum current draw from the devices above when calculating
the total user current draw.
34
Page 35

Total User
current %
Appendix C: Operating temperature
The operating ambient (room) temperature for the Network Access Controller is 0
to 50°C.
If the Network Access Controller is to operate for prolonged periods in an
environment with an ambient temperature above 40°C, de-rate the user current
drawn from the Network Access Controller according to the chart in Figure 10
below.
Figure 10: Power derating chart
35
Page 36

Appendix D: Cabling requirements
This section contains recommendations for installers and electricians for the
application and wiring of Challenger equipment with respect to:
• System earthing
• Ethernet cabling
System earthing
The following requirements are essential to the reliable operation of the
Challenger system.
• The earth connection is provided in the enclosure transformer output lead. Do
not extend this wire to any device outside of the enclosure.
• Install LAN isolation devices between multiple buildings and maintain
independent earthing systems. For example, use TS0893, TS0894, or
TS0896 Isolation Interface modules to provide electrical isolation and/or to
extend distance.
Ethernet cabling
To comply with Class B radiated emissions the Ethernet cable should be cable
tied to the enclosure rear for a minimum length of 40cm.This can be a straight
run or a number of loops.
Power supply to RS-485 devices (refer to Figure 5 External Power Supply
Connection to RAS on page 24)
Devices on the Network Access Controller’s buses may be supplied from the
Network Access Controller’s 12V DC LAN output. Use an external 12V power
supply (such as TS0073 2 A Power Supply) when:
• The device is more than 100 m (data cable length) from the panel
• Electrical isolation is required
• More power is needed than can be provided by the LAN
When powering a LAN device from an external 12 V power supply:
• Connect the external power supply ‘+’ terminal to the device ‘+’ terminal.
Do not connect the power supply ‘+’ to the LAN ‘+’.
• Connect the external power supply ‘−’ terminal to the device ‘−’ terminal.
• Connect the LAN cable black wire ‘−’ to the device ‘−’ terminal.
36
 Loading...