

Page 1
The Users’ Manual
of IP ATA
Page 2

IP ATA Users’ M anual
Specification Note
In this manual, the “★” mark indicates that the specification or feature described there may be not
available yet and is reserved for the future.
Northern America FCC S tatement
This equipment generates, uses and can radiate radio frequency energy and, if not installed and used in accordance
with the instructions in this manual, may cause interference to radio communications. This equipment as been
tested and found to comply with the limits for a Class B
rules, which are designed to provide reasonable protection against radio interference when operated in a
commercial environment. Operation of this equipment in a residential area is likely to cause interference, in which
case the user, at is own expense, will be required to take whatever measures are necessary to correct the interface.
computing device pursuant to Subpart J of Part 15 of FCC
Europe CE Declaration of Conformity
This equipment complies with the requirements relating to electromagnetic compatibility, EN55022 Class B for
ITE and EN 50082-1. This meets the essential protection requirements of the European Council Directive
89/336/EEC on the approximation of the laws of the Member States relating to electromagnetic compatibility.
Japan VCCI Declaration of Conformity
This equipment complies with the Class B standard of the Voluntary Control Council for Interference from
Information Technology Equipment (VCCI). This meets the essential protection requirements of Japan laws
relating to electromagnetic compatibility.
Copyright Notice
©Copyright, 2003. All rights reserved. No part of this publication may be reproduced, transmitted, transcribed,
stored in retrieval system or translated in to any language or computer language, in any from or by any means,
electronic, mechanical, magnetic, optical, chemical, manual or otherwise, without the prior written permission of
Owner (The Company).
The Company reserves the right to revise the publication and make changes from time to time in the contents
hereof without obligation of this company to notify person of such revision or changes. The material contained
herein is supplied without representation or warranty of any kind. The Company ther efore assumes no
responsibility and shall have no liability of any kind arising from the supply or use of this document or the
material contained herein.
Trademarks
Windows 98/2000/XP/NT™, NetMeeting™, Internet Explorer™ are registered trademarks of Microsoft
Corporation. All company, brand and product names are trademarks or registered trademarks of their respective
owners.
©Copyright, All rights reserved, 2004.
- 2 -
Page 3

IP ATA Users’ M anual
Table of Contents
1. The Appearance of Product................................................ 4
2. The Features and Specifications......................................... 5
2.1 Features of Product...................................................................................................... 5
2.2 Specifications of Product............................................................................................. 5
2.2.1 Software Specifications ...................................................................................... 5
2.2.2 Hardware Specifications..................................................................................... 6
3. Installation............................................................................ 7
3.1 How to Installation the IP ATA................................................................................... 7
3.2 What should do before make a Call........................................................................... 7
4. The Definitions of LED........................................................ 8
5. Configure IP ATA ................................................................. 9
5.1 How to configure IP ATA............................................................................................. 9
5.2 The Description Of Fields In IP ATA Web............................................................... 10
- 3 -
©Copyright, All rights reserved, 2004.
Page 4
IP ATA Users’ M anual
Chapter 1
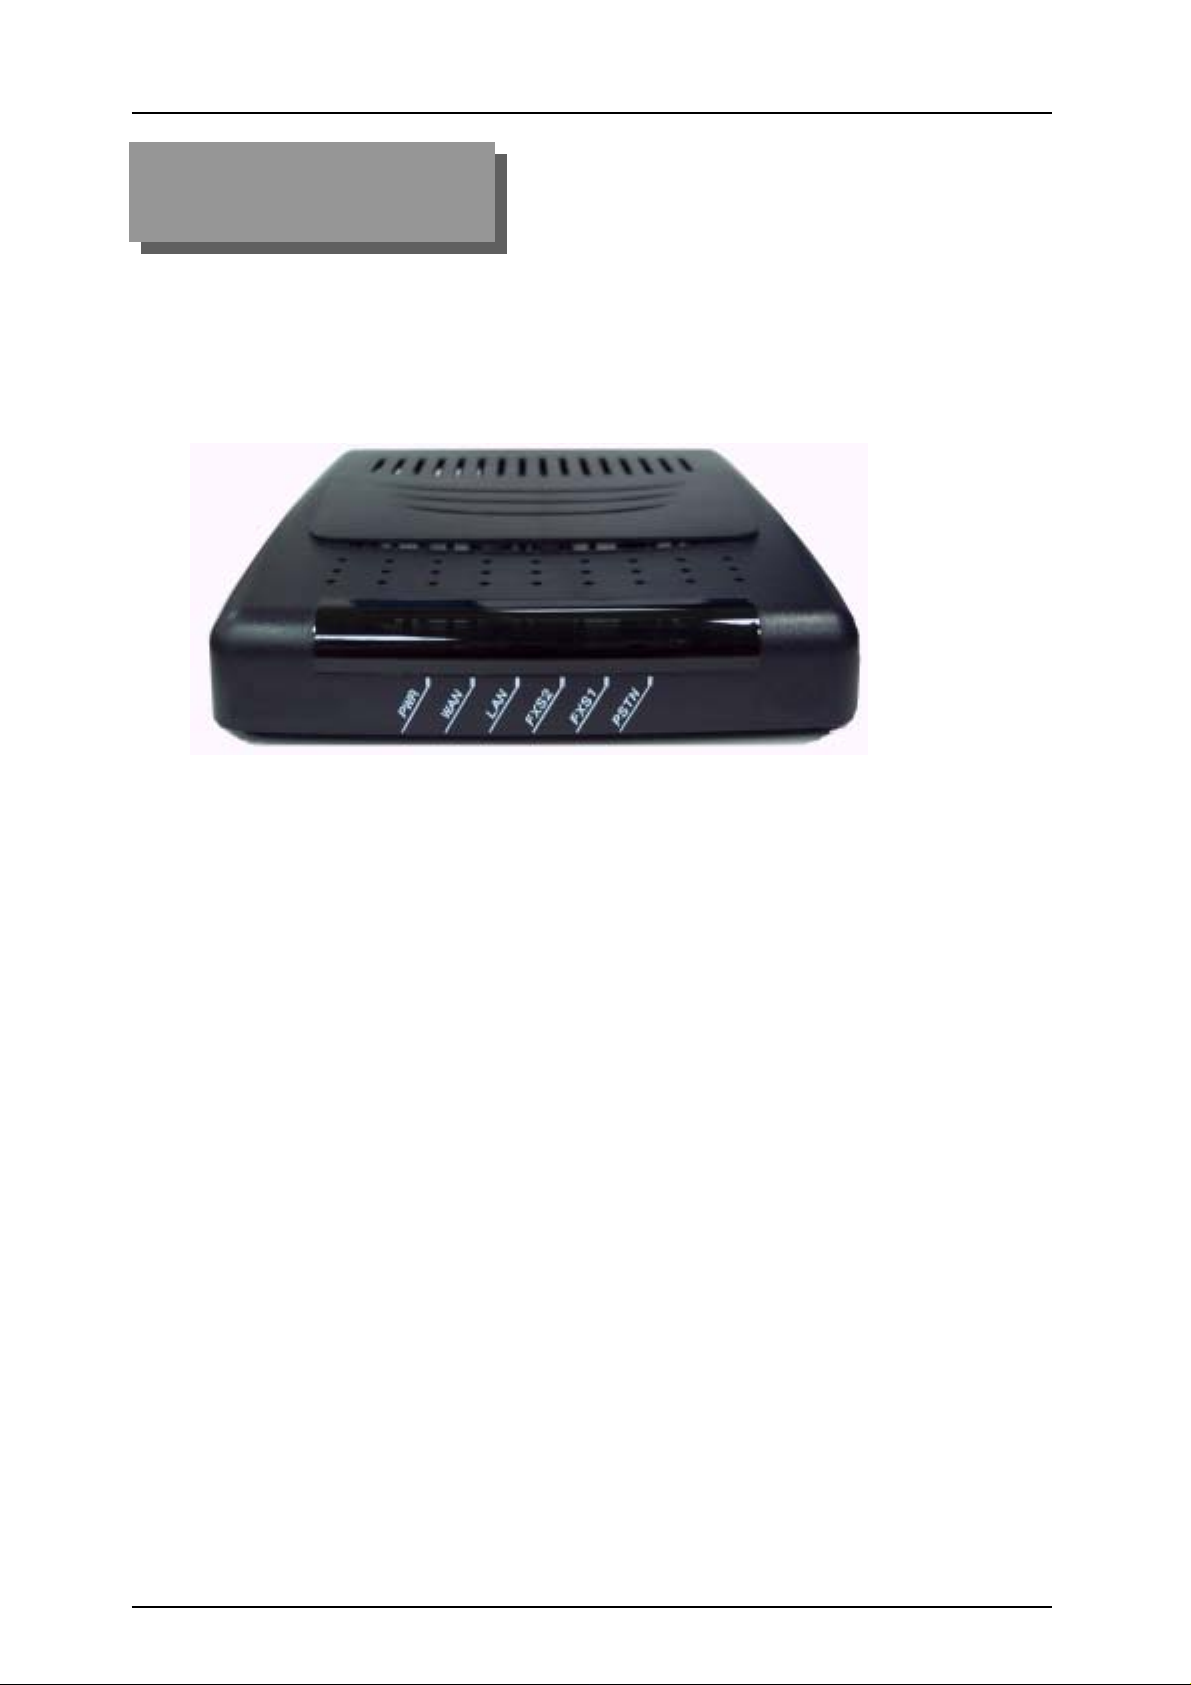
1. The Appearance of Product
The Figure 1.1 illustrates the top view of the IP ATA.
Figure 1.1. The appearance of The IP ATA
©Copyright, All rights reserved, 2004.
- 4 -
Page 5

IP ATA Users’ M anual
Chapter 2
2. The Features and Specifications
With highly integrated chip and sophisticated design, this IP Gateway offers a variety of
features. And it can provide high performance and reliable VoIP communication for the user
through a PSTN phone. The key features are list as follows. For detailed description of them,
please refer to the next session of product specifications.
2.1 Features of Product
Supports SIP RFC 3261, DTMF RFC2833
One WAN, two POTS, and one PSTN backup line
Firmware/ Profile upgrade thru Web
Optional managed switch with QoS/ToS/DiffServ
Web-based management
DHCP and STUN NAT support
2.2 Specifications of Product
2.2.1 Software Specifications
Protocols supported:
- SIP, SDP
- TCP/IP, UDP
- DHCP client (for getting a assigned IP address)
- DNS client
- Web Http Server (Web-based management & configuration)
- Ethernet IEEE 802.3 (10 Base-T), IEEE 802.3u (100Base-TX)
- STUN
Calling ways:
- With your PSTN phone connected to IP ATA, Phone-to-Phone dialing with
phone number
Voice Handling:
- Manual selection of G.711 µ law.
- Manual selection of G.711 µ law, G.711 a law, G.723, G726 groups (16kbps,
24kbps, 32kbps, 40kbps) and G729
- Supports VAD (Voice Auto Detection)
- Adaptive Jitter buffering function supported.
Tone Function:
- Out-band DTMF tone generation (RFC2833).
- 5 -
©Copyright, All rights reserved, 2004.
Page 6

IP ATA Users’ M anual
Supports Convenient system booting methods
- Support local and remote warm boot functions
- Can be done from Web-page
Web-based management support:
- Basic Web server built-in
- Supports password control and change capability.
- Almost of parameters can be configured thru browser easily
- Two level web page for [User] and [Administrator]. (
Upgrade firmware supported:
- From PC to download firmware thru webpage.
Network Protocol functions supported:
- DNS client: Able to find SIP Server thru DNS server
- DHCP client: Able to get IP address from DHCP server
Support NAT and virtual IP:
- Supports built-in virtual NAT Proxy (in Enable mode)
- Allowed to set a NAT port mapping for virtual IP issue.
2.2.2 Hardware Specifications
Main Unit:
- Dimension: 129(w)* 146(l)* 29(h)
- Plastic material: ABS type and anti-fire
LAN and PC up-link Ports:
- Supports 2 port Ethernet switch
- 2 standard RJ-45 connectors
- IEEE 802.3 10BaseT / 802.3u 100BaseTx compliant
- Supports voice priority function on the Ethernet Switch
- Auto-negotiation with link speed and full/half duplex mode
- Auto MDI/MDIX for both downlink and uplink auto-swapping
- 6 LED indicators for monitoring network link and activities
LED Indicators for GW operation:
- 6 dual-color LED indicators supported
- Two for Line FXS status
- One for PSTN status.
- One for LAN status
- One for WAN status
- One for Power display
Power supply:
- 12V DC 850mA linear power adapter
- With 5 types of different country /area for option.
★reserved)
©Copyright, All rights reserved, 2004.
- 6 -
Page 7

IP ATA Users’ M anual
Chapter 3
3. Installation
3.1 How to Installation the IP ATA
Step 1: Plug the power cord to the rear panel of IP ATA as shown below. Then plug the
power adapter to the wall socket. You will see that the LED is lightened. If
everything is ready, install as Figure 3.1 showed below.
[NOTE]: Please don’t interrupt the booting until it gets ready. Then do the
following steps.
Figure3.1. Install the GW2000 With Power Adaptor
Step 2: Check if the IP ATA works by connecting an analog phone to it. If there is a
dialing tone, then dial several numbers to see whether the phone is connected or
not. If it works, basically IP ATA is correctly set and the analog phone is fine.
3.2 What should do before make a Call
If IP ATA has already been checked and preset well by your supplier or Administrator,
you just follow his/her instruction and may skip this Chapter. If the IP ATA is not yet
configured, you may try the following Installation and testing.
There are several settings that need your understanding before you start to place a
simple call. You can configure these settings thru the webpage of the IP ATA. Basically,
you should set the following fields at least before you make a call.
i. Set a Static IP address or choose DHCP.
ii. Default gateway.
iii. SIP Proxy Server.
iv. SIP Registrar Server.
v. Authentication username.
vi. Authentication password.
- 7 -
©Copyright, All rights reserved, 2004.
Page 8

IP ATA Users’ M anual
Chapter 4
4. The Definitions of LED
On the panel of IP ATA, there are 6 LED indicators as shown below.
The following table describes the definition of LED status.
Table 4.1. The Definitions Of LED Status
LED LED
Indicator
PWR
(LED1)
LAN
(LED2)
WAN
(LED3)
FXS2
(LED4)
FXS1
(LED5)
PSTN
(LED6)
Static OFF Slowly flashing Static ON Fast flashing
(★reserved) (★reserved)
to indicate LAN
port has been
disconnected.
to indicate WAN
port has been
disconnected.
to indicate FXS
port has been
successfully
registered to
Server
to indicate FXS
port has been
successfully
registered to
Server
When PSTN
mode is not
active or when
power-off.
(★reserved)
(★reserved)
to indicate the
FXS is ringing.
to indicate the
FXS is ringing.
(★reserved)
to show power is
on
to indicate LAN
port has been
connected.
to indicate WAN
port has been
connected.
to indicate FXS
is under
communication.
to indicate FXS
is under
communication.
When FXS1 port
is connected to
PSTN line
already.
(★reserved)
to indicate LAN
port is active.
to indicate WAN
port is active.
to indicate the
FXS is not
successful
registered to the
Server
to indicate the
FXS is not
successful
registered to the
Server.
(★reserved)
©Copyright, All rights reserved, 2004.
- 8 -
Page 9

IP ATA Users’ M anual
Chapter 5
5. Configure IP ATA
5.1 How to configure IP ATA
IP ATA provide Web interface for user to configure the device.
You can press the S/W button in the rear panel when the device is power up, with hearing a
click sound, the device enter the config mode.
At this time, user can use web browser in a PC to configure the IP ATA. The steps list as
following:
(1) Enter the IP address as URL, the default IP Address of the device is: 192.168.1.10
(2) Then a popup window require input username and password, the default value are:
Username: user
Password: 1234
(3) If the authentication successful, the following webpage can be shown.
Figure 5.1. IP ATA Web Page
- 9 -
©Copyright, All rights reserved, 2004.
Page 10

IP ATA Users’ M anual
5.2 The Description Of Fields In IP ATA Web
IP:
On this page you can configure the IP address used by the SIP device. For "static" mode, the IP
address settings are given below. For "DHCP" mode, these settings may be overridden by a
DHCP server on your network.
IP address configuration: select to use static IP address or get IP address from DHCP Server.
Default IP address: display the IP address of IP ATA.
Default subnet mask: display the subnet mask.
Default gateway: display the IP address of gateway.
DNS Server: display the IP address of DNS server.
Save: save the new setting in this page.
Cancel: don’t change the setting in this page.
©Copyright, All rights reserved, 2004.
- 10 -
Page 11

IP ATA Users’ M anual
STUN:
On this page you can configure the STUN server you would like to use for the NAT traversal.
Setting the refresh interval to 0 disables STUN.
STUN Server: set the IP address or domain name of STUN server.
STUN Server port: set the port of STUN server.
Refresh interval in seconds: set the STUN refresh interval, 0 to disable the STUN.
Save: save the new setting in this page.
Cancel: don’t change the setting in this page.
- 11 -
©Copyright, All rights reserved, 2004.
Page 12

IP ATA Users’ M anual
SIP:
On this page you can configure the SIP settings of this SIP device and the proxy /
registrar server.
SIP Proxy server: display the IP address or domain name of SIP Proxy.
SIP Registrar: display the IP address or domain name of SIP registrar.
Display Name: display the name displayed in the LCD.
SIP user name: display the user name of IP ATA.
Authentication name: display the register name of IP ATA.
Authentication password: display the register password of IP ATA.
SIP Register interval (secs): display the register interval time of IP ATA.
Dialplan: display the definition of the dial plan in this device.
Save: save the new setting in this page.
Cancel: don’t change the setting in this page.
©Copyright, All rights reserved, 2004.
- 12 -
Page 13

Audio:
On this page you can adjust the codec selection of the SIP device.
IP ATA Users’ M anual
Preferred codec: To select the preferred type of audio codec.
Min RTP TX packet time (ms):
Jitter buffer type: select the jitter buffer type from 3 kinds: Fixed, Sequential, Adaptive.
Jitter buffer delay in milliseconds: display the Jitter buffer delay.
Enable VAD: select to use VAD or not.
Bandwidth: Specifies the WAN egress port bandwidth throttling in kbps
Save: save the new setting in this page.
Cancel: don’t change the setting in this page.
- 13 -
©Copyright, All rights reserved, 2004.
Page 14

IP ATA Users’ M anual
Admin:
On this page you can change the password, reboot the SIP device, or reset all settings to their
factory defaults. If you have changed any settings it is necessary to reboot the SIP device for
the new settings to take effect.
User name: display the user name to enter the setting webpage.
Administrator password (enter twice): enter and confirm the password of administrator.
Save: save the new setting in this page.
Cancel: don’t change the setting in this page.
Reboot device: restart the device to save the change of settings.
Reset to factory defaults: set all of the setting to default values.
Note: User must press Reboot to switch IP ATA from Config mode to normal mode.
©Copyright, All rights reserved, 2004.
- 14 -
Page 15

IP ATA Users’ M anual
Upload:
Warning: Uploading a new firmware image will overwrite the existing firmware.
File to upload: to choose a bin file to upload to the IP ATA. After reboot, the firmware will be
the new one while the configure setting will be the same one.
- 15 -
©Copyright, All rights reserved, 2004.
 Loading...