

Page 1
B10
Via Bonazzi, 4 - 40013 Castel Maggiore (BO)
Tel. +39 051 700096 (10 linee) - Fax +39 051 700175
[email protected] - www.tecnotelai.it
! /!1 3
!
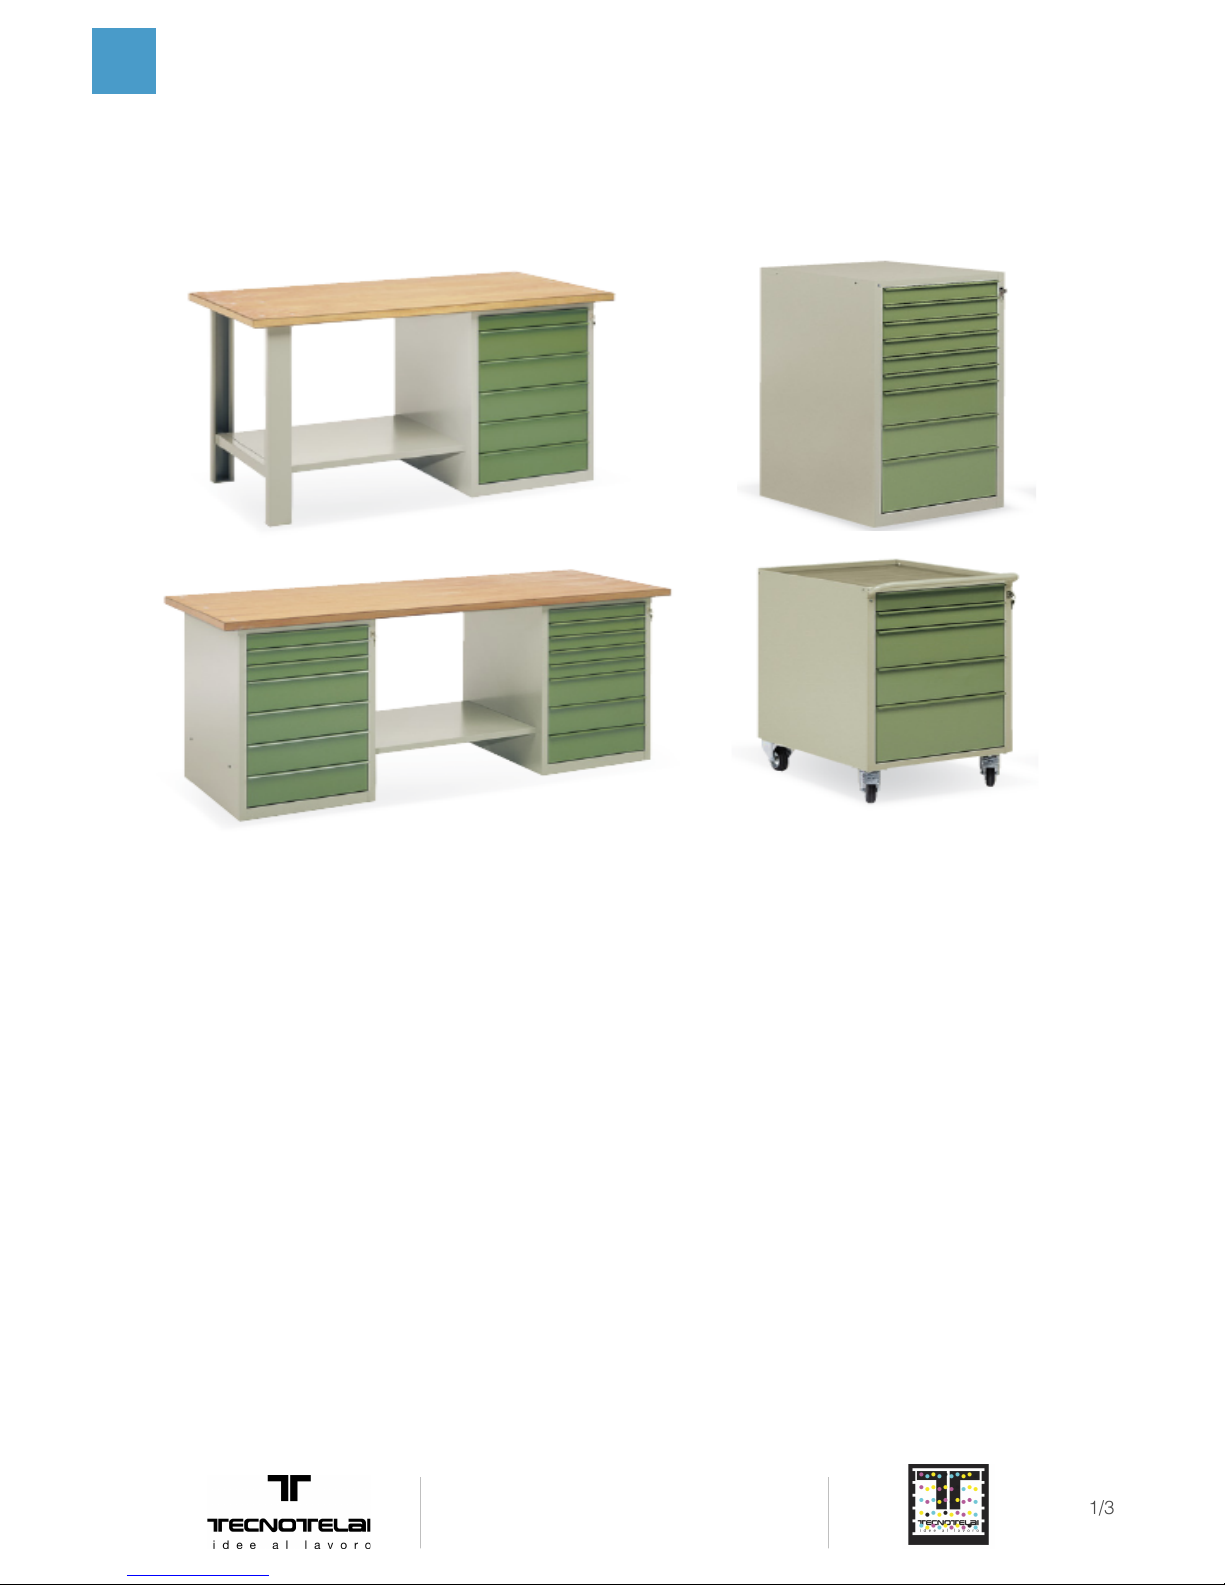
TOOL BENCH - MINI TOOL HOLDER
installation, use and maintenance instructions
* BEFORE USING THE TOOL BENCH OR THE TOOL HOLDER make sure that the floors are in good
condition and that they have an appropriate consistency for the capacity of the cabinet. In the case of floors
with slight unevenness, shim the cabinet and check the proper operation of the lock.
* DURING TRANSIT WITH PALLET TRUCKS the drawers must be closed and the front part must be facing
the operator.
* MAKE SURE THE KEY IS IN OPENING POSITION BEFORE CLOSING THE DRAWERS.
* THE OPENING AND CLOSING OF DRAWERS must be done with only one drawer at a time.
Page 2
B10
Via Bonazzi, 4 - 40013 Castel Maggiore (BO)
Tel. +39 051 700096 (10 linee) - Fax +39 051 700175
[email protected] - www.tecnotelai.it
! /!2 3
!
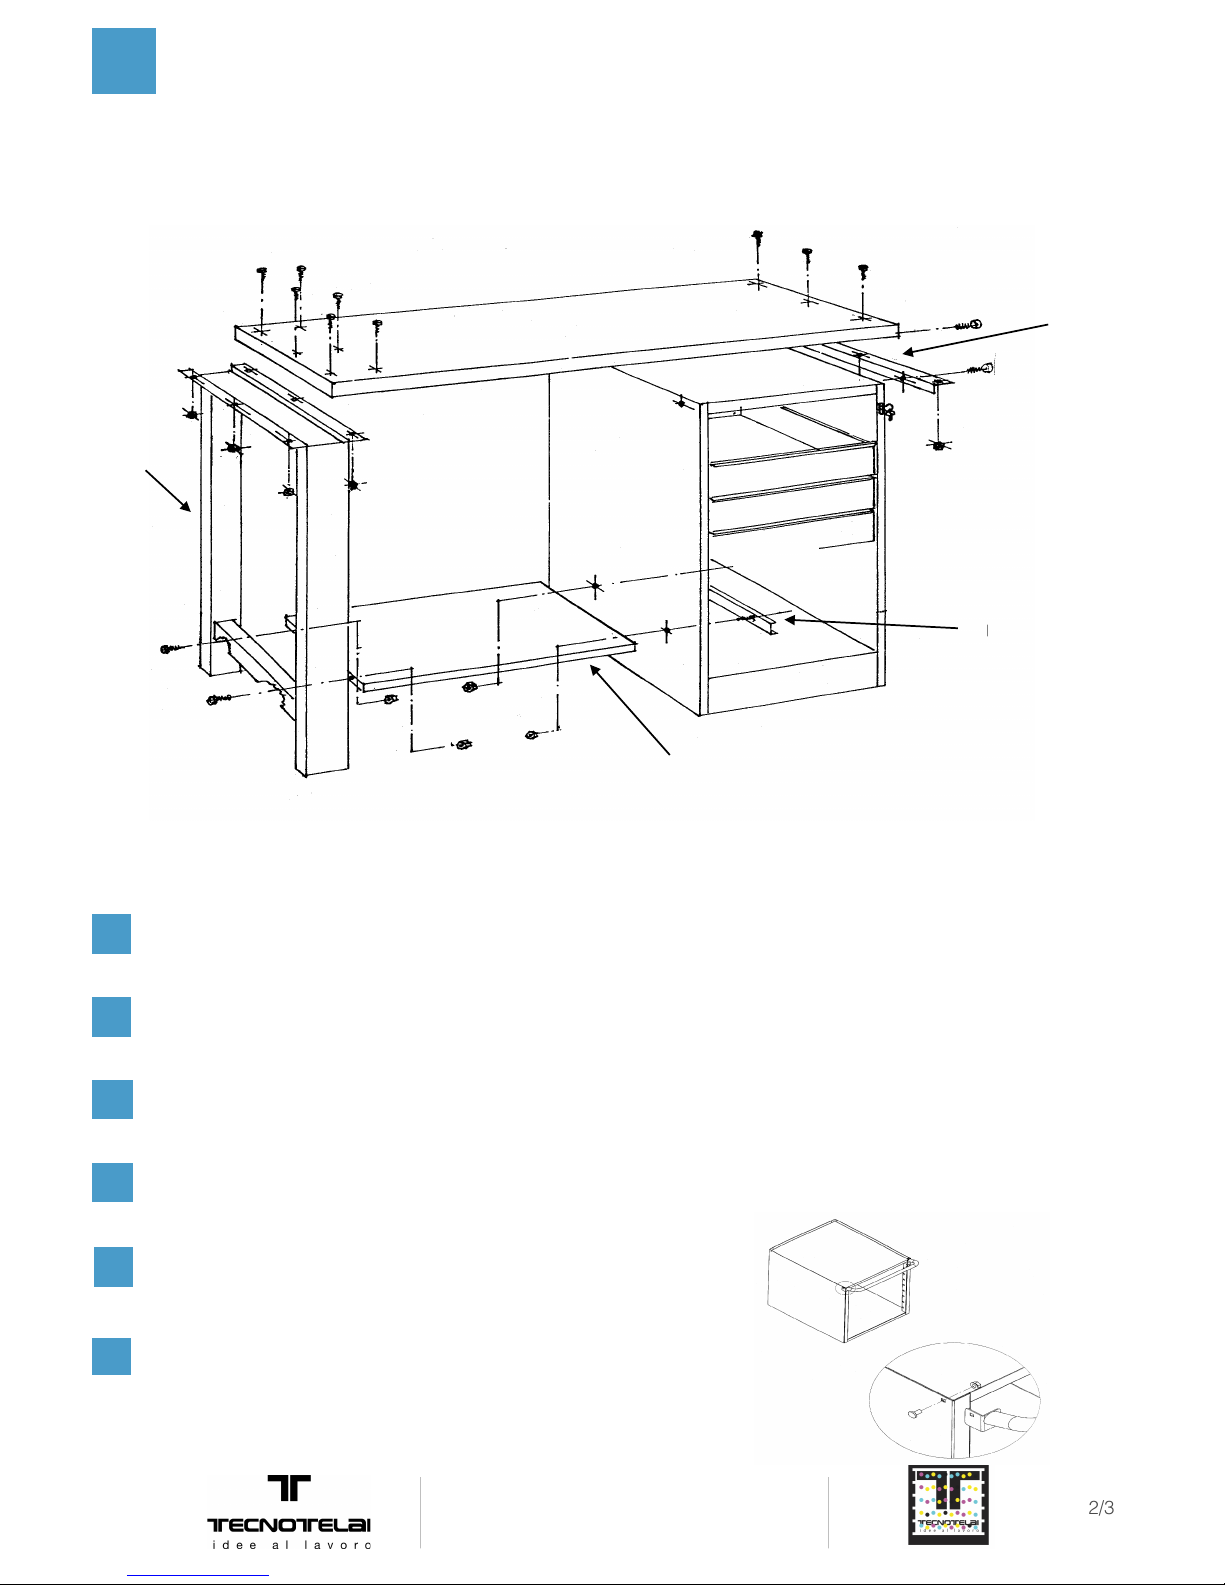
Attach the angle bar supporting the top in the upper holes of the outer side of the drawers unit with 2 flanged
screws TE 8x16 near the welded nuts inside.
FITTING THE TROLLEY HANDLE
Within the 1st or 2nd drawer, the handle to be fixed is inserted with 2 oval
head screws 6x12.
1
6
MOUNTING THE TOOL BENCH
wooden top
"U" profile
undermount
side panel
angle bar
supporting
the top
Pull out the drawers near the lower holes of the drawers unit.
2
Insert the "U" profile inside the drawers unit, and with 2 flanged screws TE 8x16, attach it to the drawers unit
and undermount, then lock by means of the washer and of 2 nuts of 8; finish the installation of the undermount
by securing the side panel using 2 flanged TE screws 8x16 and 2 tab nuts.
3
Place the work top on the structures and insert the countersunk head screws 8x55 in correspondence with the
holes on the side and/or the support angle bar of the top; screw with washers and nuts supplied.
4
Once the assembly is completed, check and tighten all screws.
5
Page 3
B10
Via Bonazzi, 4 - 40013 Castel Maggiore (BO)
Tel. +39 051 700096 (10 linee) - Fax +39 051 700175
[email protected] - www.tecnotelai.it
! /!3 3
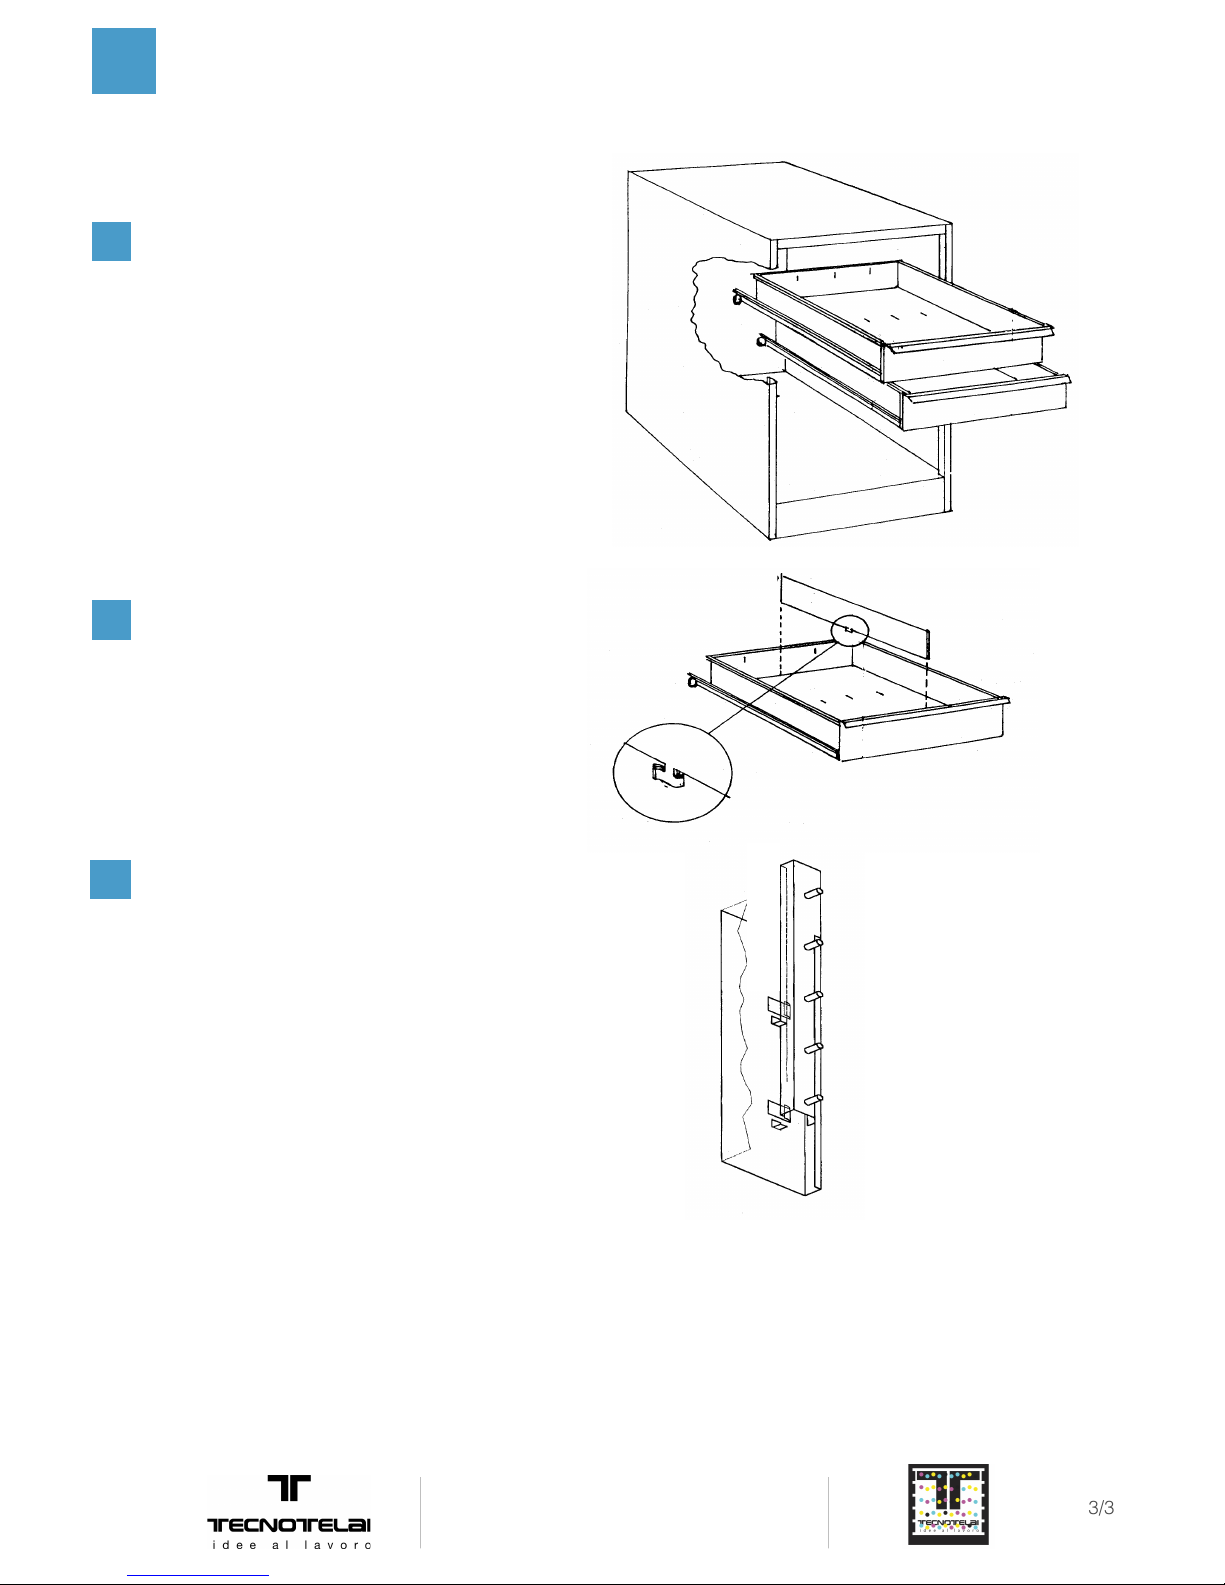
USE OF DRAWERS UNIT
EXTRACTION OF DRAWERS.
Check that all the drawers are perfectly closed,
completely remove the drawer and, slightly raising
the front part, surpass the 1st and the 2nd stop.
To facilitate extraction, close the key to unlock the
bearing after the 2nd stop and reopen after
insertion.
7
LOCKING THE SLOTTED SEPARATOR.
Insert the separator in the desired position and twist
the tab through the bottom of the drawer.
8
ANOMALIES IN THE OPENING/CLOSING OF
DRAWERS WITH ANTI-TIPPING.
*
Ensure that all drawers are correctly closed.
"
*
Unlock the key and open 1 drawer at a time,
making sure that the others are closed.
"
*
If the drawers do not close properly, pull the first
drawers of the top part (see step "7") and, by
stretching out an arm or with the help of a
screwdriver, push downwards on the rod with the
pins positioned to the left, to the bottom of the
drawers unit. Re-insert the drawers, which should
operate normally.
9
rod
sliding
MAINTENANCE
Lubricate the bearings whenever it is deemed necessary in order to maintain a smooth sliding of the drawers.
If any parts are damaged, have them replaced.
 Loading...