

tecnotelai DETACHABLE WORKBENCHES Installation Instructions Manual
033
Via Bonazzi, 4 - 40013 Castel Maggiore (BO)
Tel. +39 051 700096 (10 linee) - Fax +39 051 700175
info@tecnotelai.it - www.tecnotelai.it
! /!1 3
!
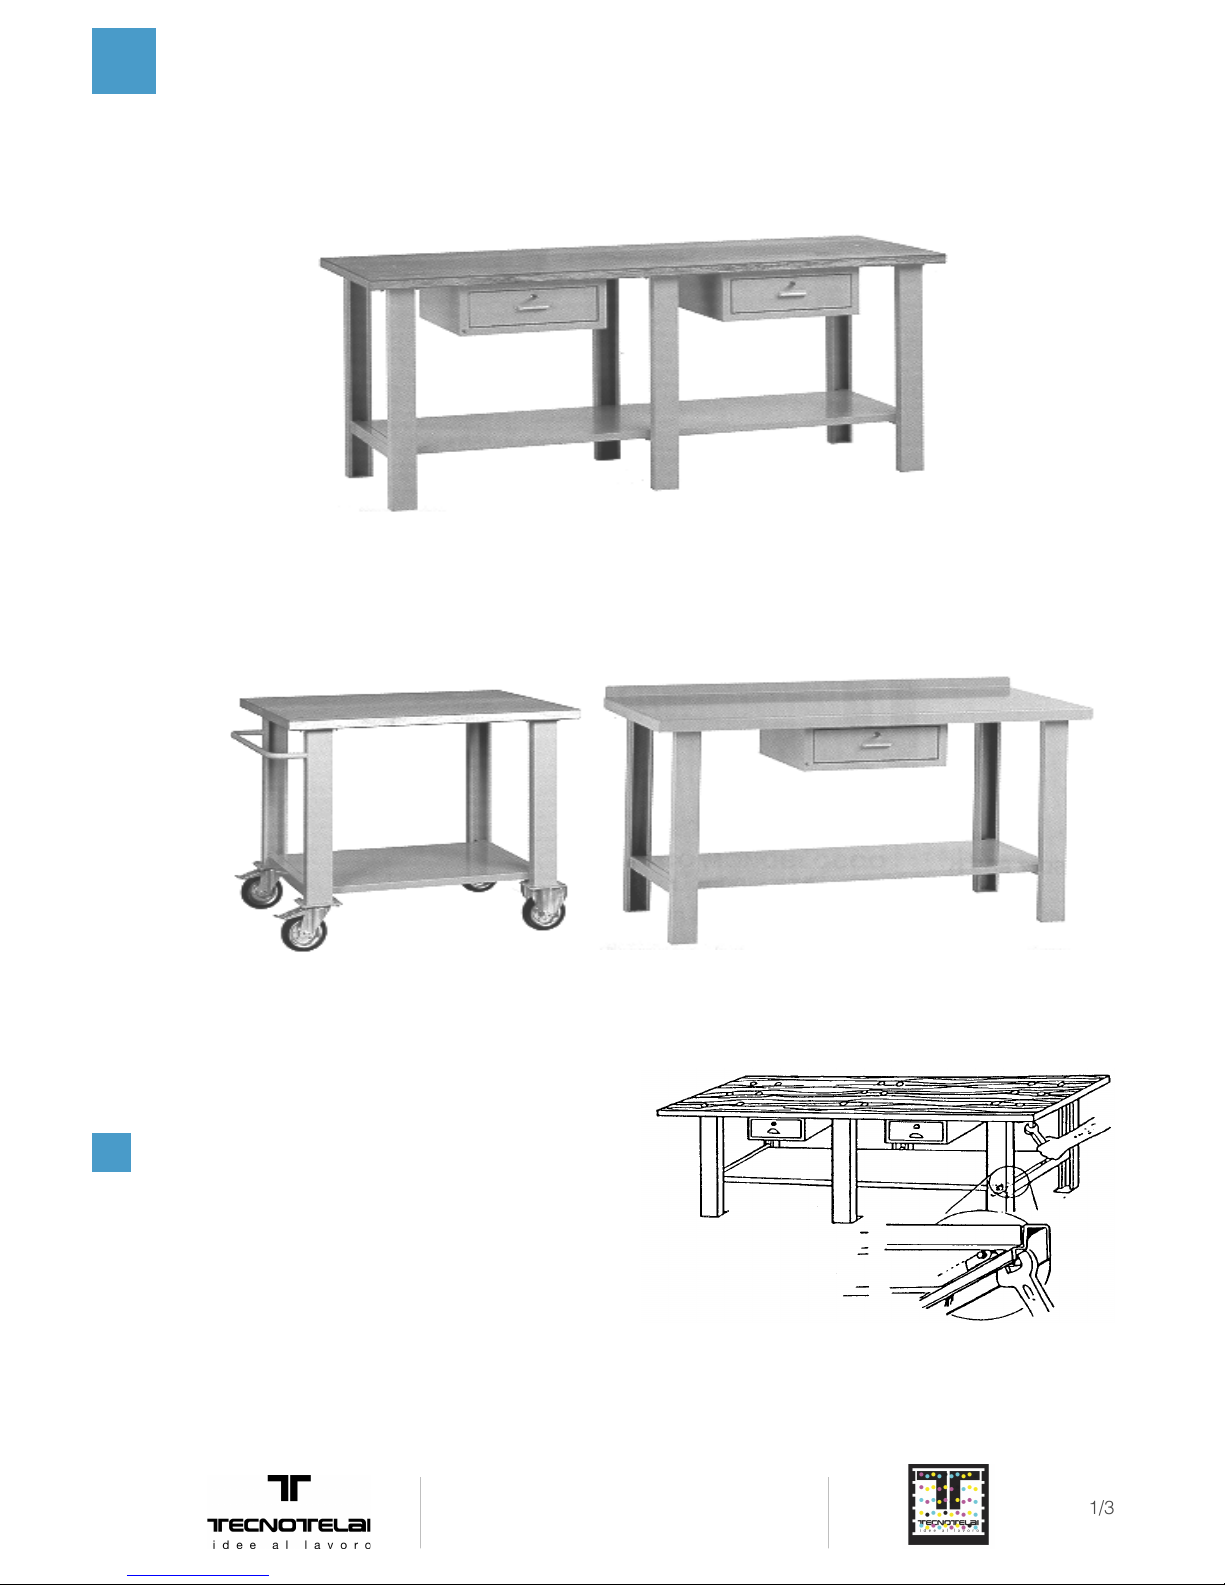
DETACHABLE WORKBENCHES
installation instructions
UNDERMOUNTS ASSEMBLY.
Put sides in vertical position and proceed to the assembly
of the undermounts, taking care to insert them in the
appropriate fittings and secure them with the screws TE
8x16 and tab nuts.
1
033
Via Bonazzi, 4 - 40013 Castel Maggiore (BO)
Tel. +39 051 700096 (10 linee) - Fax +39 051 700175
info@tecnotelai.it - www.tecnotelai.it
! /!2 3
!
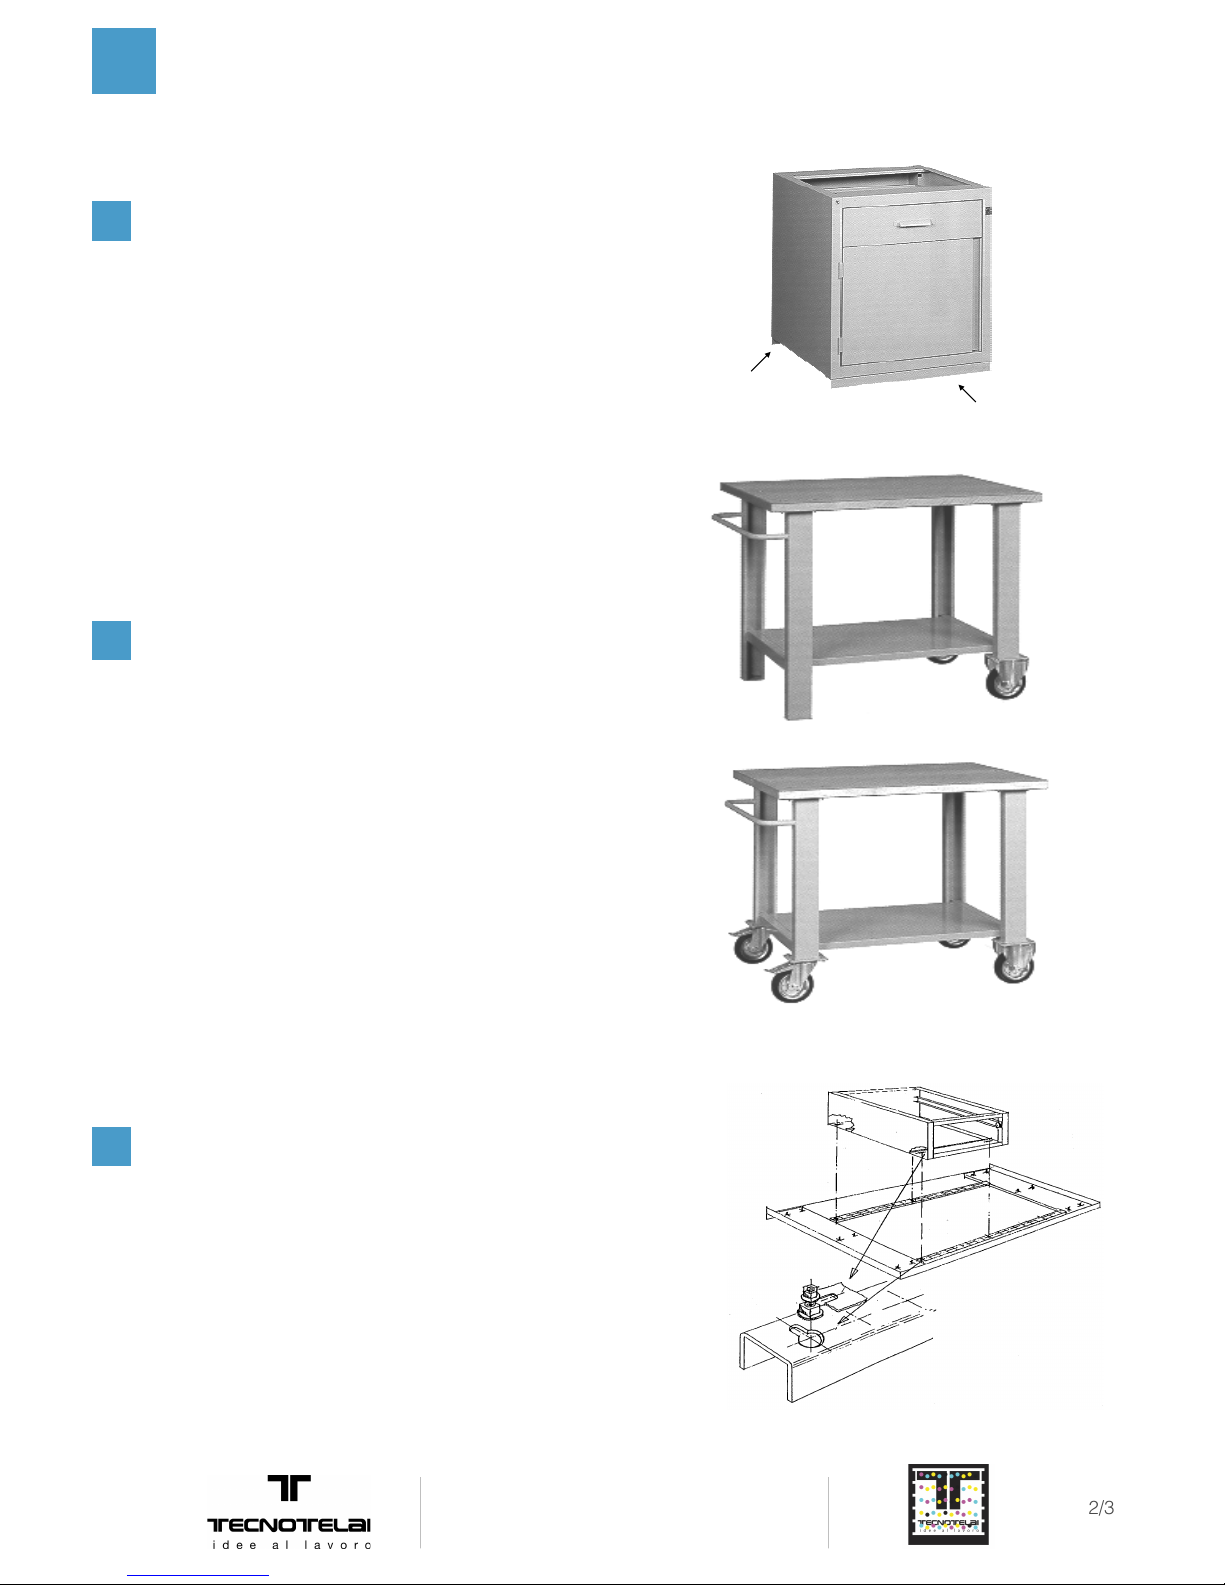
INSERTION OF DRAWERS UNITS AND CHESTS.
Before mounting the work top, interlock the "L"
profile on the front of the drawers unit/chest and
the "C" profile in the back; support the drawers unit/
chest on the undermount and interlock the profiles.
2
rear "C"
profile
front "L"
profile
WORKBENCHES WITH WHEELS.
Mount the handle on the perforated side with 4 flanged
screws TE 8x16 with nut. In the case of workbench art.
0435 the side with the handle does not have wheels,
while in the workbenches art.0436-0439-0441 it is
necessary to screw 2 braking swivel wheels, each with 4
flanged screws supplied TE 8x16 with nut.
In the other side, screw the two fixed wheels.
3
0435
Activate the brake to the wheels
and proceed as in step "1".
0436-0439-0441
ASSEMBLY OF WORKBENCH DRAWERS
WITH STEEL SHEET TOP.
Remove the drawer from the body shell.
In the slots of the upside down body shell, tighten 4 oval
head screws supplied 6x12 on their hex nuts with serrated
washer. The oval head of the screw must be outside of
the body shell. Position the heads near the round part of
the slots of the work top and push the whole thing into the
narrow part. Fully tighten the nuts.
4
 Loading...