

tecnotelai BANCHI VENDITA Installation And Maintenance Instructions Manual
A90B
Via Bonazzi, 4 - 40013 Castel Maggiore (BO)
Tel. +39 051 700096 (10 linee) - Fax +39 051 700175
info@tecnotelai.it - www.tecnotelai.it
! /!1 2
!
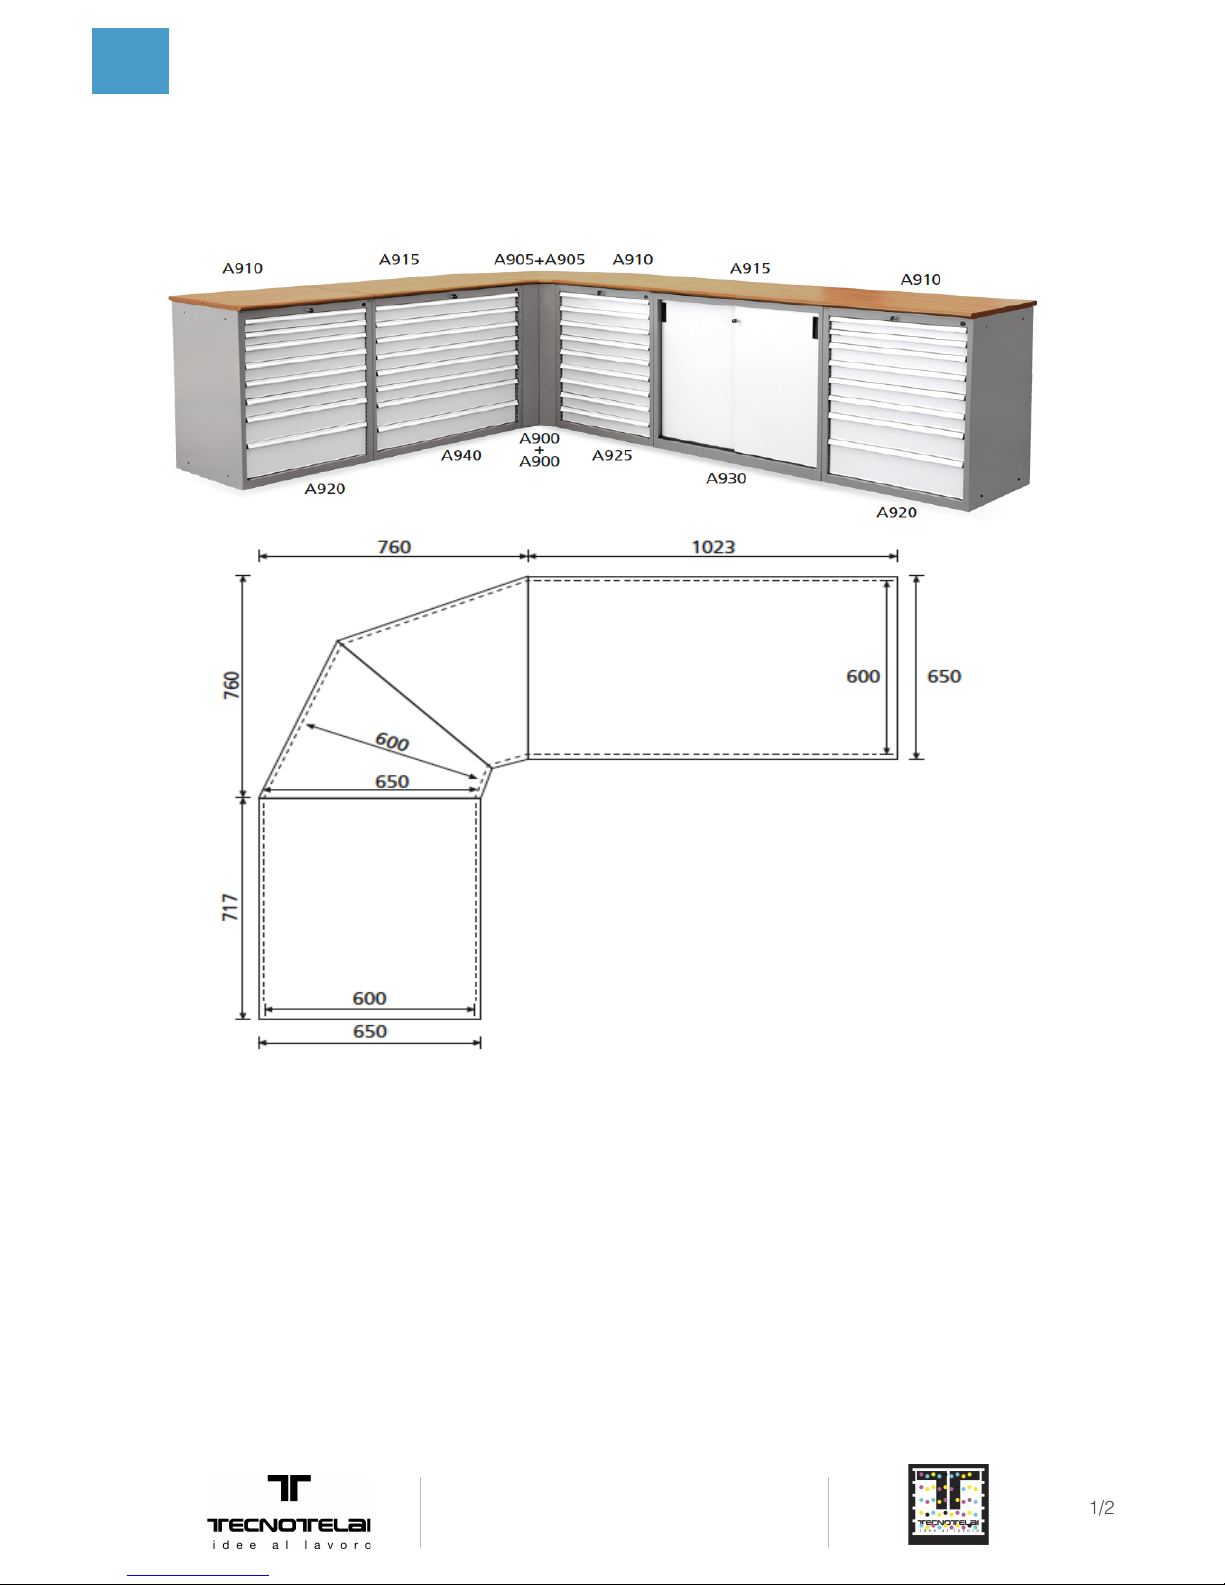
BANCHI VENDITA
installation and maintenance instructions
* BEFORE USING THE CABINETS check the floors, which must be in good condition and must have an
appropriate consistency for their capacities. In the case of floors with slight unevenness, shim the cabinets and
check the proper operation of the locks.
* FLOOR MOUNTING is necessary in order to maintain the capacity of the drawers unchanged.
* MAKE SURE THE KEY IS IN OPENING POSITION BEFORE CLOSING THE DRAWERS.
* THE OPENING AND CLOSING OF DRAWERS must be done with only one drawer at a time.

A90B
Via Bonazzi, 4 - 40013 Castel Maggiore (BO)
Tel. +39 051 700096 (10 linee) - Fax +39 051 700175
info@tecnotelai.it - www.tecnotelai.it
! /!2 2
MAINTENANCE
Each time you use the cabinet, check that all its components are intact and kept in good condition.
If any parts are damaged, have them replaced.
Lubricate the bearings whenever it is deemed necessary in order to maintain a smooth sliding of the drawers.
FITTING THE CABINETS.
In order to connect the cabinets it is
necessary to remove the first 2/3
upper d rawe rs to get a gap of
approximately 250mm in height and to
be able to easily perform the fixing for
the bottom part, simply remove the
bottom drawer. The drawers come off
by carefully, slightly raising the front
part. The lateral fixing uses 4 screws
TE 6x12, 8 washers 6x18 and 4 nuts
of 6. Provide all cabinets necessary for
the online bench or bench with corner.
1
FITTING THE CORNER.
The corner can be at 45° or 90°. Every single
element is supplied with 8 flanged screws TE
6x16, 8 square nuts in cage and 8 washers
6x24. The 45° corner is directly connected to
the cabinets with all screws. To form the corner
at 90° connect 2 elements at 45° from each
other with 4 screws, nuts and washers. Another
8 screws will be used for connecting to the
cabinets.
2
TOPS ASSEMBLY.
Pre p are al l t he up p er to p s
connecting them together with 2
wooden pegs of 50 mm diam.8.
3
TOPS FITTING.
Position the complete top above the cabinets.
Align in length and depth shimming the bases
to have a perfect positioning. Secure each top
over the ceilings of the cabinets that already
have suitable holes in place (excluding
cabinet with doors), with 4 self-tapping
screws TE 6x20 and 4 washers 6x24, always
from inside the unit. If the cabinet with door is in
a central position it does not require fixing; on
the contrary, if it is in end position, you must
puncture the cabinet ceiling and fix as above or
using double-sided adhesive.
4
FITTING THE DRAWERS.
Reposition the previously removed drawers and check the proper functioning of the anti-tipping device.
5
 Loading...