

Page 1
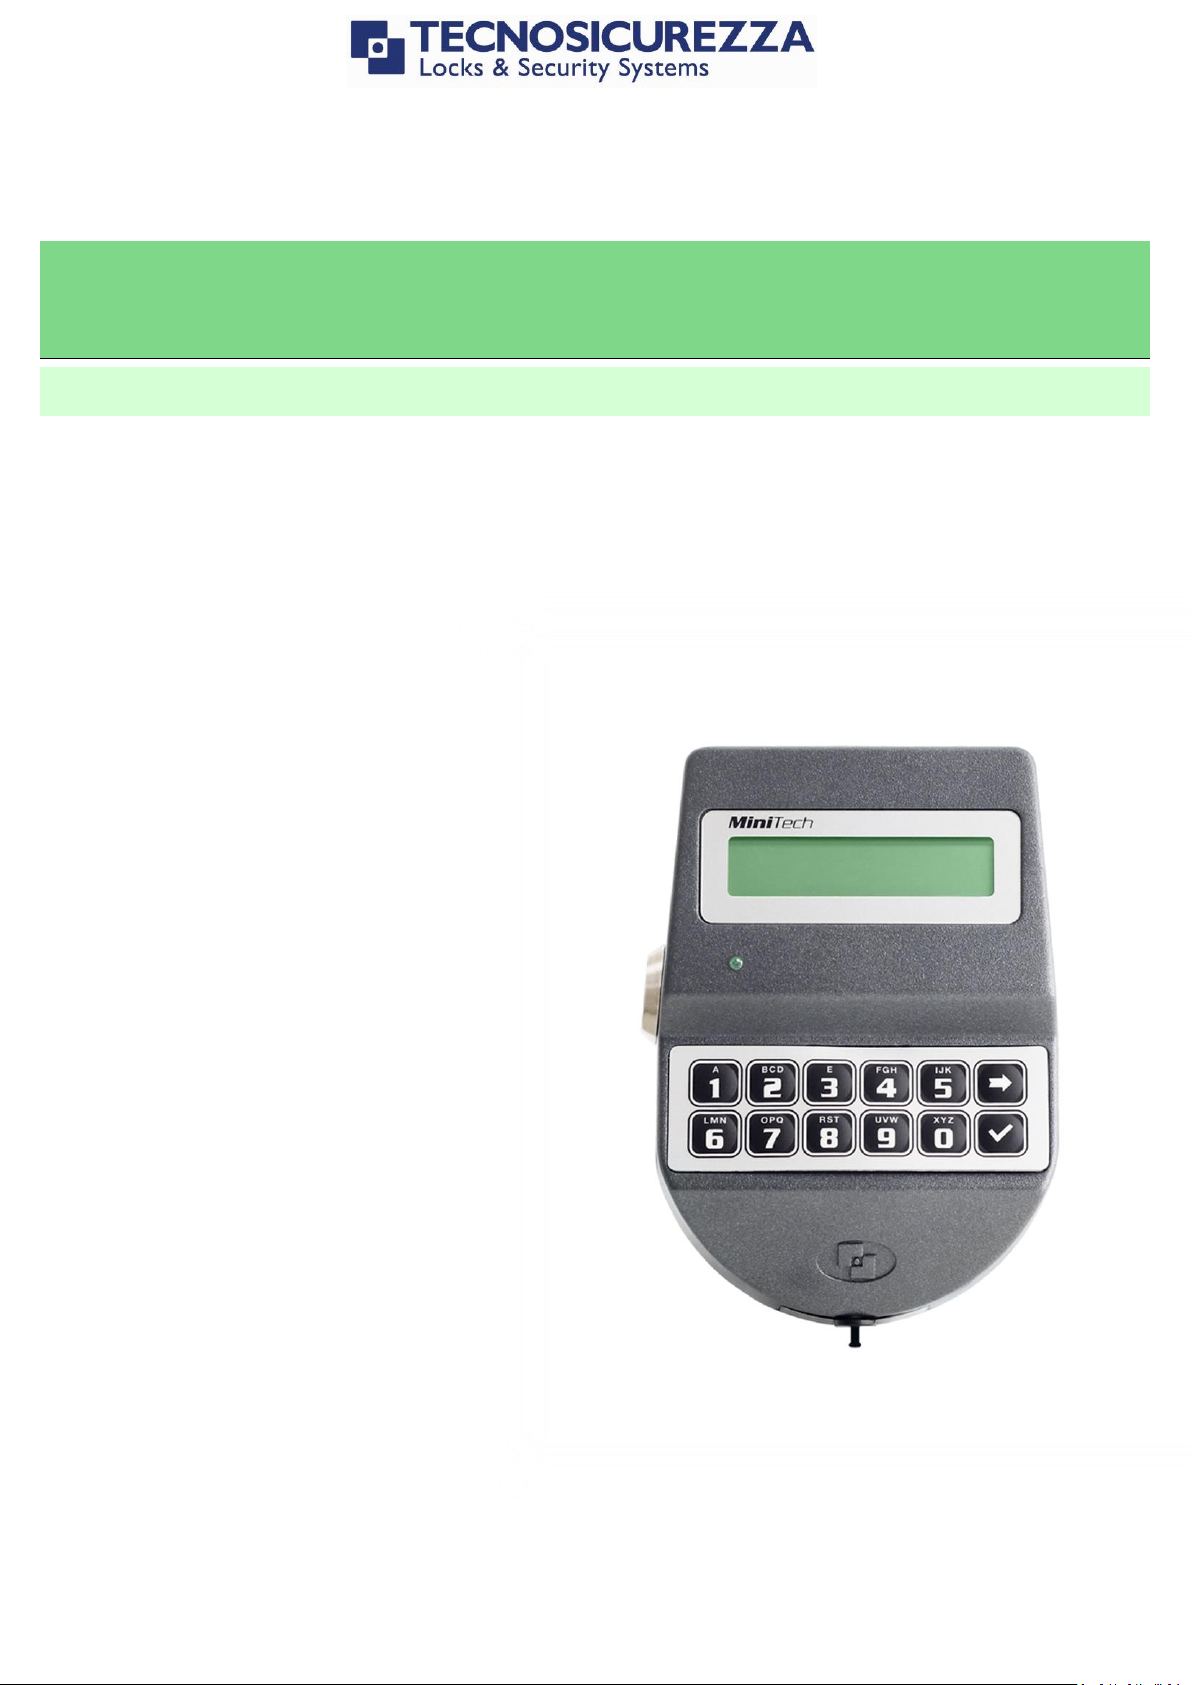
MiniTech
User Instructions
Page 2

2 di 22 IU_ MiniTech_04
User instructions
MiniTech
Company
Founded in 1983 with the aim of providing a complete range of professional products,
Tecnosicurezza is now a consolidated reality in the field of locks and security systems for safes.
The experience gained in over 35 years of activity in the security sector has allowed the
designing and manufacturing of high technology and reliability systems, which continue to
receive the approval of an increasingly demanding clientele.
TECNOSICUREZZA is present directly on the Italian, Spanish and US markets and, through a
extensive distribution network, in many European and extra-European countries.
TECNOSICUREZZA is aimed at national and international customers of primary importance, such
as banks, safe manufacturers, cash in transit companies, mass market retailers and post offices.
Today TECNOSICUREZZA is a leading company focused on the customers’ needs and
constantly in step with technology.
Page 3

IU_MiniTech_04 3 di 22
User instructions
MiniTech
Table of contents
COMPANY 2
TABLE OF CONTENTS 3
IMPORTANT NOTES! 5
GENERAL INFORMATION 6
OVERVIEW FUNCTIONS 8
LOCK OPENING 9
MANAGER (01) AND USERS (02-49): 9
OVERRIDE USERS (50-59): 9
CODE CHANGING 9
USER MANAGEMENT 10
LOCK SETUP 10
SETUP WITH DALLAS KEY 10
SETUP WITH PC 10
OPENING WITH DYNAMIC CODES 11
BLOCK AND UNBLOCK THE LOCK 11
TEST MODE 12
KEYPAD LANGUAGE 12
AUDIT 13
EVENTS CHECK ON LCD 13
DOWNLOAD THE AUDIT ON A DALLAS KEY 13
DOWNLOAD AUDIT ON PC 14
FIRMWARE VERSION 14
CONTRAST ADJUSTMENT 14
TIME DELAY 15
MASTER MENU 15
TIME & DATE SETTINGS 15
TIME LOCK SETTINGS 15
WEEKLY TIME LOCK SETTINGS – ADDING NEW VALUES 16
WEEKLY TIME LOCK SETTINGS – VERIFY OR DELETE VALUES 16
CLOSING PERIODS (OFF DAYS) – ADD NEW VALUES 17
OPENING PERIODS - ADD NEW VALUES 18
Page 4

4 di 22 IU_ MiniTech_04
User instructions
MiniTech
OPENING PERIODS - VERIFY OR DELETE VALUES 18
AUDIT 19
DOWNLOAD THE AUDIT ON A DALLAS KEY 19
EVENTS CHECK ON LCD 19
CHANGE MASTER CODE 19
MANGER MANAGEMENT 19
DYNAMIC CODES – ENABLING/DISABLING 20
LOCK RECLOSURE MODE 20
CONTACTS 22
Page 5

IU_MiniTech_04 5 di 22
User instructions
MiniTech
Important notes!
• Before installing this product, please read carefully the installation and operating
instructions.
• Locks have been designed to correctly operate in a temperature range from -5°C to +
50°C and and in an environment with non-condensing humidity between 25% and 90%.
• The lock must not be oiled/lubricated/greased.
• If installed in normal domestic or office environments, the locks do not require particular
maintenance; in any case, after 10,000 opening/locking cycles, it is recommended to run
a test that verifies the correct and complete operation of the product.
• Use only DURACELL™ 9 Volt Alkaline batteries, or battery holders with DURACELL™ 1.5
Volt Alkaline batteries. Alternatively, it is possible to use a 12VDC - 1A power adapter
(p.n. N1212) with relative power supply interface (p.n. T6005/W or p.n. T6005).
• A long beep together with the message “LOW BATTERY” on the display, indicate a low
battery level which need immediate replacing.
• It is strongly recommended to change the default codes before the usage and to keep
safely the new codes.
• Do never use codes easy to be guessed such as 123456, birth dates or others, based on
own personal information.
• After changing a code, perform several opening/closing tests before closing the door.
Should the lock label be removed, warranty is void.
Page 6
6 di 22 IU_ MiniTech_04
User instructions
MiniTech
General information
Using your keypad
• Press any button to power up the keypad. LCD which shows:
ENTER CODE
X X – X X X X X X
If more locks are installed, LCD shows:
Enter the lock number to select it.
SELECT LOCK
• To enter a code, power up the LCD and enter the corresponding
digits.
• LCD automatically switches OFF if no buttons are pressed
within 30s.
• To scroll the menu, press .
• To confirm an operation, press .
• To leave a menu or come back to the main menu, scroll the
functions until “EXIT?” and press OK.
• To enter a code plus Dallas key (if set), enter the code digits and
insert the Dallas key in the keypad reader.
• To enter a user provided with Dallas key only (if set), insert the
Dallas key in the keypad reader. LCD shows:
ENTER CODE
ID-XXXXXX
• To start a time delay counting (if set), enter a code. LCD shows:
TIME DELAY
00:59
• To stop a time delay counting, press and then confirm with
STOP DELAY
COUNTING?
After time delay counting, LCD shows open window counting:
Press and enter a code for opening.
OPEN WINDOW
00:01
Page 7
IU_MiniTech_04 7 di 22
User instructions
MiniTech
• If a wrong code is entered, LCD displays the message:
WRONG CODE
• To open or access the menu in dual mode (if set), enter the first
code. LCD shows:
Then, enter the second code.
ENTER 2° CODE
X X – X X X X X X
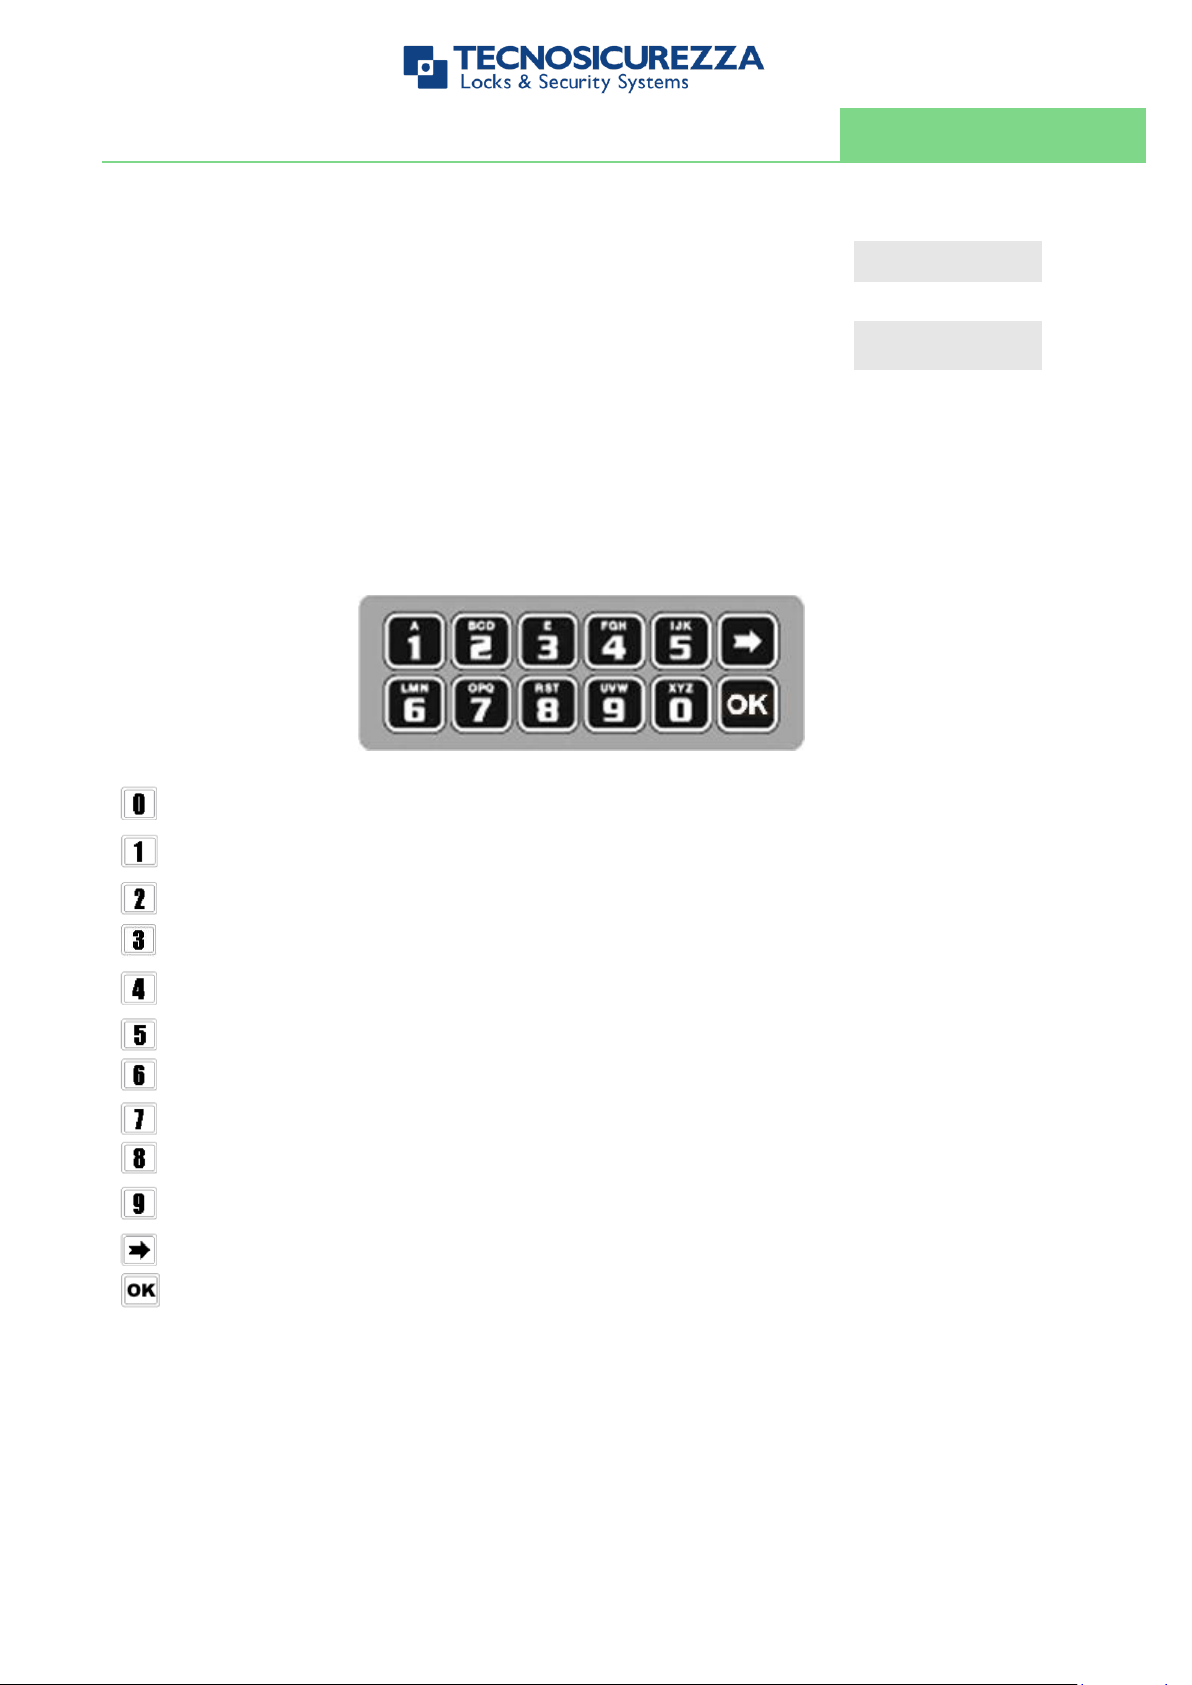
Shortcuts
Press and hold for 2 seconds the button related to the needed function:
= Change Manager code (01), users (02-49) and override users (50-59)
= Users management
= Lock setup (even with Dallas key)
= PIN entering for dynamic codes
= Block/release the lock
= Test mode
= Change language
= Audit and PC link (only in pre-setup mode)
= System info and contrast adjustment
= Time delay and opening window
= Exit and back to the main menu
= Master menu
User properties and default codes
Users can be set for opening with code only, code + Dallas key or with Dallas key only. It is also
possible to set a dual mode opening: in this case, entering the two users codes is required to
open the lock.
Default codes are:
Page 8

8 di 22 IU_ MiniTech_04
User instructions
MiniTech
Master: 1-2-3-4-5-6-7-8.
Manager: 123456.
Users from 02 to 49: 02-020202, 03-030303, and so on. They always open with time delay if
set.
Override users from 50 to 59: 50-505050, 51-515151, and so on. They always open without time
delay.
This user manual describes the standard programming. According such programming and unless
different requests while ordering the product, an opening can be performed by entering sigle
users codes (no dual mode) and without time delay. Thus, the user manual must be adapted
according the configuration selected.
It is strongly recommended to change the default codes before using the lock.
Overview functions
Lock opening
After entering an opening code, it is possible to open the lock within 3 seconds. It’s no necessary
instead with motorized locks: in this case indeed, the motor moves the bolt which remains in
opening position for about 8 seconds before returning in closing position. In the manual closing
version instead, the bolt can be closed by pressing key for few seconds.
Penalty
Four consecutive wrong codes initiate a four minutes penalty time. During this period, LCD
shows the message “PENALTY” and no operation is allowed.
Time Delay
Programmable time delay in between 0 and 99 minutes. Programmable opening window in
between 1 and 19 minutes.
Dallas keys
Available as option for Manager and users (not for Master).
Power supply
Lock can be powered with:
• an ALKALINE 9V battery located in the battery compartement below the keypad;
• an internal battery box provided by Tecnosicurezza (6 ALKALINE 1.5 batteries);
• A power adapter (ref. N1212) with power supply interface (ref. T6005/W or T6005) both
provided by Tecnosicurezza.
Page 9

IU_MiniTech_04 9 di 22
User instructions
MiniTech
Low battery warning
A long beep together with the message “LOW BATTERY” on the display, indicate a low battery
level which need immediate replacing.
Audit
The lock is able to save the last 5500 operations with time, date, user and operations
description.
IMPORTANT
Some options/characteristics reported in this user manual, can only be used if previously
enabled through the setup software. Thus, please refer to the user manual
IU_Minitech_setup_XX.
Please contact Tecnosicurezza for further information.
Lock opening
Manager (01) and users (02-49):
Power up the keypad and enter an opening code. LCD shows:
OPEN
Open the lock within 3 seconds.
Override users (50-59):
Power up the keypad and enter an override user code. LCD shows:
OPEN
Open the lock within 3 seconds.
Code changing
WARNING: it is recommended to always perform this operation with door open.
Manager (ID 01), users (ID 02-49) and override users (ID 50-59)
Power up the keypad. Press and hold . LCD shows:
ENTER OLD CODE
X X – X X X X X X
Enter the old code. LCD shows:
ENTER NEW CODE
X X X X X X
Enter the new code. LCD shows:
CONFIRM CODE
X X X X X X
Confirm the new code.
Page 10

10 di 22 IU_ MiniTech_04
User instructions
MiniTech
User management
Power up the keypad. Press and hold . LCD shows:
USERS MANAGEMENT
0 1 – X X X X X X
Enter Manager code.
Press to scroll users list or enter user ID.
02 03 04 05 06
✓ x _ _ ✓
“ ” user installed, “_” user deleted, “X” user disabled.
Override users 50 ÷ 59 can be only installed when the lock is open.
Press . If the user is not installed LCD shows the message:
02
INSTALL?
“ ” Dallas key, “ ” code, “+” dual mode, “TL” time lock
Press to confirm or to exit or for switching to the next user.
Enter the new user code and confirm it.
If the selected user is already installed, press to choose whether
to disable it, to delete it or for leaving and selecting another user. Press
to confirm the choice.
Lock setup
Lock setup can be performed through a Dallas key properly programmed or through a direct
PC link. In both cases, lock must be in pre-setup mode (press 1 to open it).
Setup with Dallas key
Power up the keypad. Press and hold . LCD shows:
SYSTEM SETUP
Insert the setup Dallas key in the reader and connect the reader with
the keypad by means of the jack connector. LCD shows:
08:00 FRI
27/01/2019
Check time and date. Press to confirm or to update the values.
Then press again to confirm. LCD shows:
UPLOADING 10%
If the operation is successfully performed, LCD shows:
OPERATION DONE
Setup with PC
Power up the keypad. Press and hold . LCD shows:
PC LINK
Page 11

IU_MiniTech_04 11 di 22
User instructions
MiniTech
Press , LCD shows:
PC LINK
...
Start the programming on the Setup software or press to exit.
If the operation is successfully performed, LCD shows the firmware
version and few seconds later the keypad switches OFF. Pease refer
to the user manual IU_Minitech_setup_XX for further information.
Opening with dynamic codes
Power up the keypad and insert the Dallas dynamic key in the Dallas
reader. Alternatively, press and hold to enter the dynamic user
PIN (optional). LCD shows:
DYNAMIC USER
X X X X
Enter the dynamic user PIN. LCD shows:
DYNAMIC CODE
X X X X X X X X X
Enter the dynamic code and press .
Open the lock within 3 seconds (green led ON).
If set by the software Dyama or Dyamaweb for dynamic codes creation,
LCD shows the closing code when the bolt re-closes. Please refer to the
user manuals IU_Dyama_XX or IU_DyamaWeb_XX for further
information.
CLOSING CODE
179
Block and unblock the lock
Power up the keypad. Press and hold . LCD shows:
BLOCK SYSTEM
X X – X X X X X X
Enter the requested code.
If a weekly time lock is already scheduled, LCD shows the next opening
time.
BLOCK UNTIL
14/09 08:00
To set a different opening time, enter the new values (max. 31 days)
and then press to confirm.
BLOCK UNTIL:
DD/MM hh:mm
LCD shows:
BLOCK THE
LOCK?
Press to confirm. LCD will display the message:
LOCK BLOCKED
Page 12

12 di 22 IU_ MiniTech_04
User instructions
MiniTech
To unblock the lock press and hold . LCD shows:
UNBLOCK SYSTEM
X X – X X X X X X
Enter the requested code.
LCD shows:
OPERATION
DONE
Depending by the lock setup, you may be required to enter the Master code.
Test mode
This function allows to check the correct system operation.
Power up the keypad. Press and old . LCD shows:
TEST MODE
1234567890 ➔
Enter the sequence of buttons shown on the LCD.
TEST MODE
1234567890 ➔
Any working button produces a short beep.
A damaged button produces a long beep. LCD shows:
WRONG/FAULTY
KEY
Two short beeps are produced if the test terminates successfully. LCD
shows:
OPERATION
DONE
Keypad language
Power up the keypad. Press and old . LCD shows:
ITALIANO
1 2 3
Enter one of the numbers shown on the LCD to select a new language
(the new language will be automatically changed). Press to
confirm or to exit.
ENGLISH
1 2 3
Page 13

IU_MiniTech_04 13 di 22
User instructions
MiniTech
Audit
Keypad and lock events can be checked on the LCD (only openings and closings). These
events can be also stored in a Dallas key previously programmed using “DMT Audit”
software.
Dallas key only allows to store the last 1200 events which can be later downloaded on PC
through an USB interface provided by Tecnosicurezza.
Direct PC connection allows to download all 5500 events, using an USB interface and a
specific software provided by Tecnosicurezza.
For further information, refer to the user manual IU_DMT_Audit_00_XX or contact
Tecnosicurezza.
Events check on LCD
Use this function to check all opening and closing events previously recorded.
Power up the keypad. Press and old . LCD shows:
LOCK AUDIT
0 1 – X X X X X X
Enter Manager code. LCD shows:
ENTER DALLAS
…
Wait for few seconds or press , LCD shows:
PC LINK ➔
SCROLL EVENTS
Press , LCD shows:
SCROLL EVENTS
ON LCD
Wait for few seconds, LCD shows the last opening/closing event.
001: WED
28/09 14:42:48
Press to scroll all the events or to exit.
Download the audit on a Dallas key
Events can be downloaded through a Dallas key provided by Tecnosicurezza, specifically
programmed with the software Tecnosicurezza DMT Audit. For further information, refer to
the user manual IU_DMT_Audit_XX.
Power up the keypad. Press and old . LCD shows:
LOCK AUDIT
0 1 – X X X X X X
Enter Manager code. LCD shows:
ENTER DALLAS
…
Insert the Audit Dallas key into the reader. Events download begins
automatically. LCD shows:
DOWNLOADING
32%
If download is successful, LCD shows:
OPERATION DONE
Page 14

14 di 22 IU_ MiniTech_04
User instructions
MiniTech
Use the software Tecnosicurezza DMT Audit to download the events
on PC. For further information refer to the user manual
IU_DMT_Audit_XX or contact Tecnosicurezza.
Download audit on PC
Events can be downloaded through a USB interface provided by Tecnosicurezza.
Power up the keypad. Press and old . LCD shows:
LOCK AUDIT
0 1 – X X X X X X
Enter Manager code. LCD shows:
ENTER DALLAS
…
Wait for few seconds or press , LCD shows:
PC LINK
SCROLL EVENTS
Press , LCD shows:
PC LINK
...
Start the download using the software DMT Audit or press to exit.
For further information refer to the user manual IU_DMT_Audit_XX or
contact Tecnosicurezza.
Firmware version
Power up the keypad. Press and old . LCD shows:
MiniTech v 1.00
21/02/12
Press to come back to the main menu.
Contrast adjustment
Power up the keypad. Press and hold . LCD shows:
MiniTech v 1.00
21/02/12
Press and hold again . LCD shows:
ADJUST CONTRAST
1 2 3 4 5 6 7 8
Enter a value 1÷8 to select a different contrast level which will be quickly applied. Press
to confirm or to exit.
Page 15

IU_MiniTech_04 15 di 22
User instructions
MiniTech
Time delay
Power up the keypad. Press and hold . LCD shows:
SET TIME DELAY
01 – X X X X X X
Enter Manager code. LCD shows the current values for time delay and
open window.
TIME DELAY 00
OPEN WINDOW 01
Press to exit or to set new values.
TIME DELAY mm
OPEN WINDOW mm
Enter the new values and press to confirm. LCD shows:
VALUES UPDATED
Time delay can be set in between 0 and 99 minutes, the open window in between 1 and 19
minutes instead.
To set a time delay shorter than the one curretly present, lock must be open.
Master menu
Power up the keypad. Press and hold . LCD shows:
MASTER MENU
X X X X X X X X
Enter Master code (default value 1-2-3-4-5-6-7-8).
Time & date settings
Enter the Master menu. LCD shows:
TIME AND DATE
SETTINGS
Press . LCD shows the current time and date.
08:00 FRI
27/01/2006
Press to change time and date.
hh:mm _ _ _
GG / MM / YYYY
Enter the new time and date values and press to confirm.
Time Lock settings
WARNING:
It is recommended to enter this menu always with the door open;
Master menu, allows to add/delete the settings for time lock/closing periods/opening
periods, only if current time and date values are included in an opening period.
Enter the Master menu. Press until LCD shows:
TIME LOCK
SETTING
Page 16

16 di 22 IU_ MiniTech_04
User instructions
MiniTech
Weekly time lock settings – Adding new values
Enter Time Lock menu and press . LCD shows:
WEEKLY TIME LOCK
SETTING
Press . LCD shows:
ADD NEW VALUES
Press . LCD shows the current day of the week.
hh:mm FRI
hh:mm
The first one is an opening time while the second one is a closing time.
Enter the new values.
Press to confirm. LCD shows the next day of the week, proposing
the same time values. Press to confirm or to select another
day without entering new time values or else enter the new time
values as previously illustrated.
At the end of the week, LCD shows:
END OF LIST
EXIT AND SAVE? ✓
Press to save or come back to the first week day.
All values entered can be saved only by pressing .
Inside Time Lock menu, opening time intervals are indicated: it means the safe can be
opened by entering a valid code, but only inside the time interval itself (ex. opening time
interval from 08.00 to 14.00 from Monday to Friday: the safe can be only opened from
08.00 to 14.00 and only in those days, it cannot be opened before 08.00 and after 14.00.
Moreover, safe cannot be opened on Saturdays and Sundays).
It is possible to schedule up to 4 time intervals per day (ex. Monday from 07.00 to 10.00,
from 12.00 to 13.00, 15.00 to 16.00 and 18.00 to 19.00).
Weekly time lock settings – Verify or delete values
Enter Time Lock menu and press . LCD shows:
WEEKLY TIME LOCK
SETTING
Press . LCD shows:
ADD NEW VALUES
Press . LCD shows:
VERIFY OR DELETE
VALUES
Press . LCD shows the values for the first day.
hh:mm FRI
hh:mm
Press to scroll all the schedules list.
Press on a schedule. LCD shows:
DELETE VALUES?
✓
Press to confirm or to exit.
At the end of the list, press . LCD shows:
END OF LIST
EXIT?
Page 17

IU_MiniTech_04 17 di 22
User instructions
MiniTech
Closing periods (OFF days) – Add new values
Closing periods are time intervals in which is possible to close the lock even when a time
lock is enabled.
It is possible to schedule up to 60 closing periods. Each one of them has a maximum time
length of 14 days.
Enter Time Lock menu and press . LCD shows:
WEEKLY TIME LOCK
SETTING
Press . LCD shows:
CLOSING PERIODS
SETTING
Press . LCD shows:
ADD NEW VALUES
Press . LCD shows:
GG/MM/AA hh:mm
GG/MM/AA hh:mm
The first one is an closing time while second one is an opening time.
Enter the time of start and the ending time for the closing period, then
press to confirm.
Should the year be set, the closing period is not repeated.
Should not the year be set (press ), the closing period is yearly repeated instead.
Press to delete all values entered.
Repeat the steps above for each closing period.
The safe cannot be open during closing periods.
Closing periods (OFF days) – Verify or delete values
Enter Time Lock menu and press . LCD shows:
WEEKLY TIME LOCK
SETTING
Press until the LCD shows:
CLOSING PERIODS
SETTINGS
Press . LCD shows:
ADD NEW VALUES
Press . LCD shows:
VERIFY OR DELETE
VALUES
Press to check the first closing period scheduled.
GG/MM/AAhh:mm
GG/MM/AA hh:mm
Press to scroll all the scheduled closing periods.
Press to delete the scheduled closing periods.
DELETE VALUES?
✓
press to confirm or to exit.
At the end of the list, press .
END OF LIST
EXIT?
Page 18

18 di 22 IU_ MiniTech_04
User instructions
MiniTech
Opening periods - Add new values
Opening periods are time intervals in which is possible to open the lock even when a time
lock is enabled.
It is possible to schedule up to 60 opening periods. Each one of them has a maximum time
length of 14 days.
Enter Time Lock menu and press . LCD shows:
WEEKLY TIME LOCK
SETTING
Press until the LCD shows:
OPENING PERIODS
SETTINGS
Press . LCD shows:
ADD NEW VALUES
Press . LCD shows:
GG/MM/AA hh:mm
GG/MM/AA hh:mm
The first one is an opening time while the second one is a closing time.
Enter a date and time for opening and closing, then press to
confirm.
Should the year be set, the opening period is not repeated.
Should not the year be set (press ), the opening period is yearly repeated instead.
Press to delete the values entered.
Opening periods - Verify or delete values
Enter Time Lock menu and press . LCD shows:
WEEKLY TIME LOCK
SETTING
Press until the LCD shows:
OPENING PERIODS
SETTINGS
Press . LCD shows:
ADD NEW VALUES
Press . LCD shows:
VERIFY OR DELETE
VALUES
Press . LCD shows the first opening period.
GG/MM/AA hh:mm
GG/MM/AA hh:mm
Press to scroll all the scheduled opening periods.
Press to delete. LCD shows:
DELETE VALUES?
✓
Press to confirm or to exit.
At the end of the list, press .
END OF LIST
EXIT?
Page 19

IU_MiniTech_04 19 di 22
User instructions
MiniTech
Audit
Download the audit on a Dallas key
Events can be downloaded through a Dallas key.
Enter Master menu. Press until the LCD shows:
SYSTEM AUDIT
Insert the Audit Dallas key into the reader.
ENTER DALLAS
…
Press . LCD shows:
DOWNLOADING
10%
If download is successful, LCD shows:
OPERATION DONE
Events check on LCD
This function allows to check all openings and closings performed on LCD.
Enter Master menu. Press until the LCD shows:
SYSTEM AUDIT
Press and wait for few seconds. LCD shows:
PC LINK ➔
SCROLL EVENTS
Press . After few seconds, LCD shows the last opening/closing
event recorded.
001: WED
28/09 14:42:48
Press to scroll all the events or to exit.
Change Master code
Enter Master menu. Press until the LCD shows:
CHANGE MASTER
CODE
Press and enter the new code.
ENTER NEW CODE
X X X X X X X X
Enter the new code again to confirm it.
CONFIRM CODE
X X X X X X X X
Manager Management
This menu can only be used if previously enabled through the setup
software. Thus, please refer to the user manual
IU_Minitech_setup_XX.
Please contact Tecnosicurezza for further information.
Enter Master menu. Press until the LCD shows:
MANAGER
MANAGEMENT
Press . LCD shows:
MANAGER ✓
“ ” installed, “_” deleted, “X” disabled.
Page 20

20 di 22 IU_ MiniTech_04
User instructions
MiniTech
Press . If the Manager is not installed, LCD shows:
01
INSTALL?
Press to confirm. Then enter the new Manager code and confirm
it. LCD shows:
OPERATION DONE
If the Manager is already installed, press for
disable/delete/install. Then press to confirm.
Dynamic codes – Enabling/Disabling
WARNING: it is recommended to always perform this operation with door open, to
enable/disable the dynamic codes.
Enter Master menu. Press until the LCD shows:
DYNAMIC CODES
Press . LCD shows:
DYNAMIC CODES
ENABLED
Press . The LCD shows:
DYNAMIC CODES
DISABLE?
Press to confirm. LCD shows:
OPERATION DONE
Lock reclosure mode
This option is only available for motorized locks. To enable it, lock must be opened.
Enter Master menu. Press until the LCD shows:
LOCK RECLOSURE
MODE
Press . LCD shows:
MODE:
AUTOMATIC
Press to select between AUTOMATIC and MANUAL mode.
Press to confirm.
With MANUAL, lock can be closed by pressing and holding for 2
seconds.
With AUTOMATIC instead, lock automatically re-closes after the time
set with MiniTech Setup.
Page 21

IU_MiniTech_04 21 di 22
User instructions
MiniTech
NOTES
Page 22

Correct disposal of this product:
(Waste Electrical & Electronic Equipment)
Applicable in the European Union and other European countries with separate collection systems.
This marking displayed on the product or its literature indicates that it should not be disposed with other wastes at the end of its
working life.
To prevent possible harm to the environment or human health from uncontrolled waste disposal, please separate this from other
types of wastes and recycle it responsibly to promote the sustainable reuse of material resources.
Contacts
GLOBAL HEADQUARTERS
USA HEADQUARTERS
SPAIN HEADQUARTERS
Tecnosicurezza SpA
Tecnosicurezza Inc.
Tecnosicurezza Sa
Via Cesare Battisti, 276
50, Thomas Lane
C/Menor, 4 - Nave 10
37057 San Giovanni Lupatoto
Verona
Versailles, KY 40383
Pol. Ind La Mina 28770
Colmenar Viejo
Tel.+39 045 826 64 70
Tel.+1 859 490 89 30
Tel.+34 91 804 33 91
Fax. +39 045 826 64 69
Fax.+34 91 804 32 63
 Loading...