

Tecnolec DUO EC 3 Operating Instructions Manual

DUO EC 3
DOUBLE OVEN
ELECTRIC COOKER
Operating Instructions
Before operating this cooker,
please read these instructions carefully
°
C
°
C
9
8
7
DUO
2
Introduction Installation
CONTENTS
– Introduction page 2
– Installation ” 2-3-4-5
– Technical Data ” 3
– Features ” 6
– How to use the hotplates ” 7-8
– How to use the autotimer ” 9-10
– How to use the ovens ” 10
– How to use the Top
conventional oven ” 11
– How to use the Bottom
fan oven ” 12
– Temperature recipe guide ” 13
– Care and maintenance ” 14-15
– After sales service ” 15
INTRODUCTION
Congratulations on your purchase of this
TECNOLEC electric cooker which has
been carefully designed and produced to
give you many years of satisfactory use.
Before using this appliance it is essential
that the following instructions are carefully read and fully understood.
We would emphasize that the installation
section must be fully complied with for
your safety and to ensure that you obtain
the maximum benefits from your appliance.
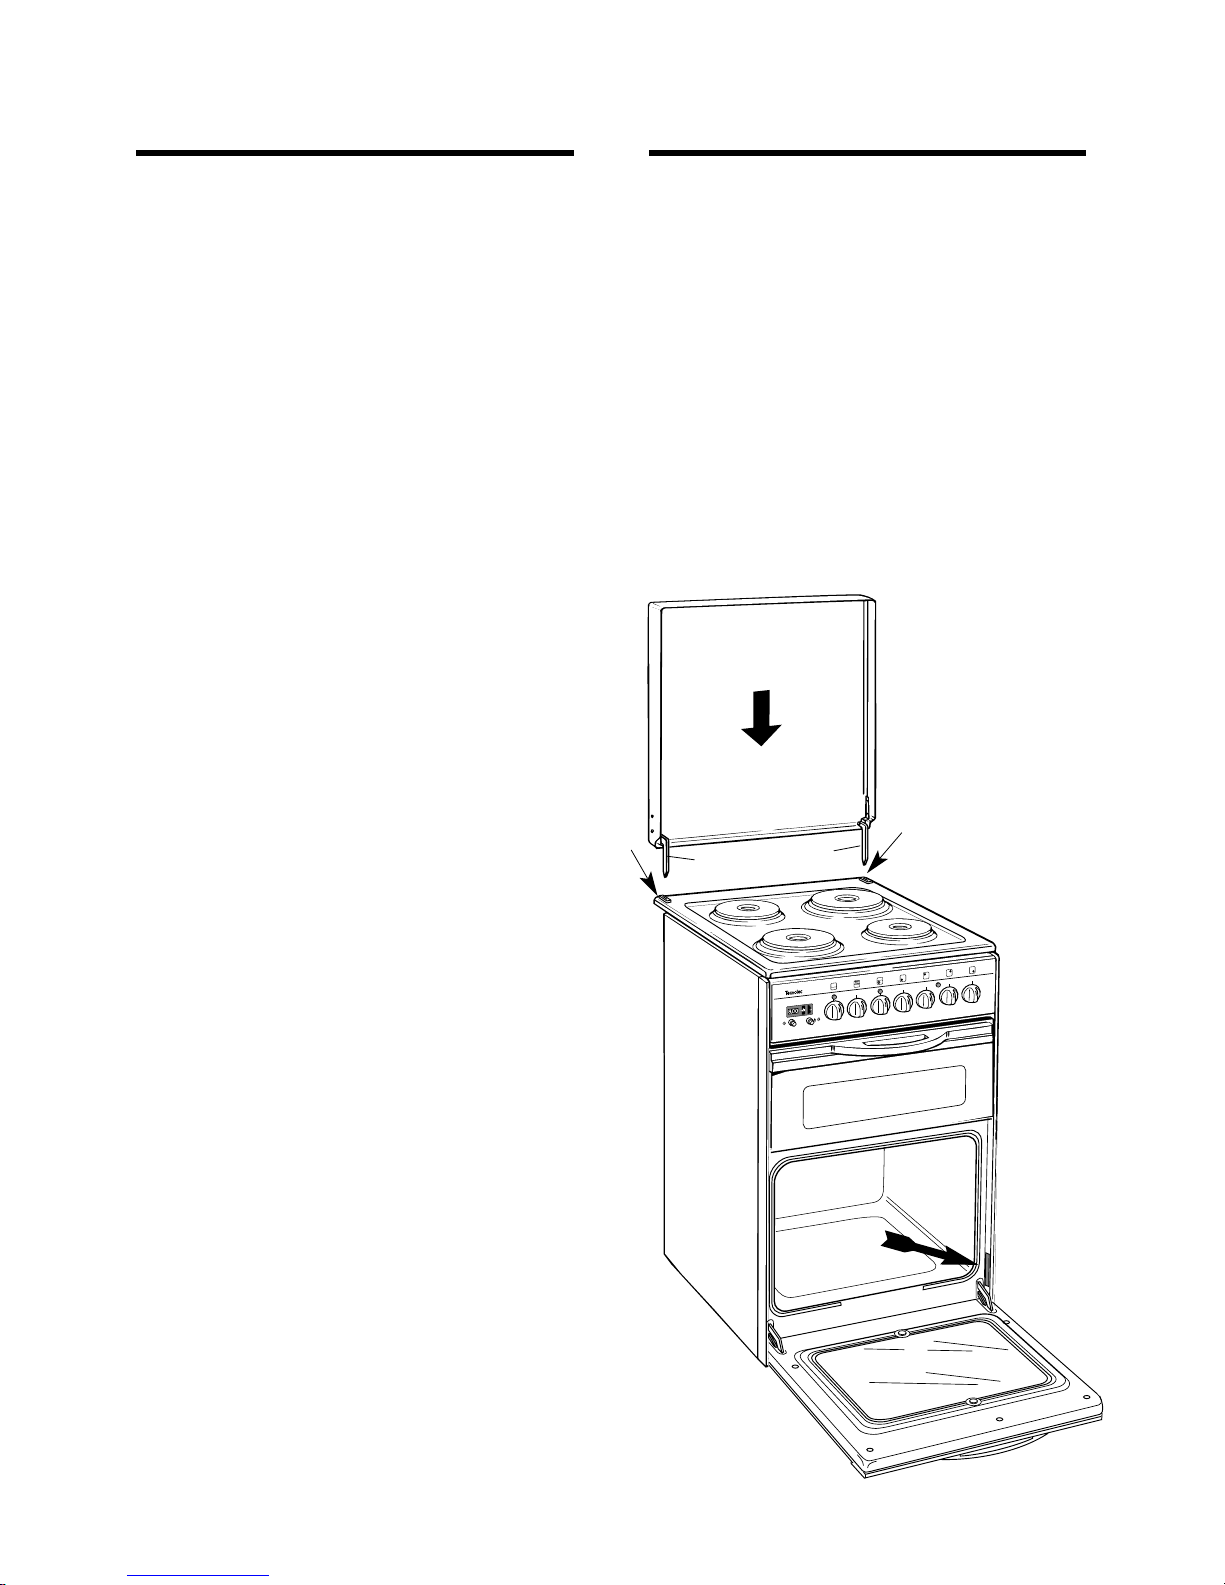
MOUNTING THE LID
Insert the bayonets B of the lid in the
holes H on the cooktop (see fig. 1).
Fig. 1
B
B
H
H

3
Installation
INSTALLATION
All electrical wiring must be in
compliance with the appropriate IEE
regulations and carried out by a qualified
electrician.
The cooker must be supplied via a
suitable double pole isolating switch
placed in a readily accessible position
adjacent to the oven.
Each cooker is equipped with a data
plate (see fig. 1) indicating the rated
input and voltage at which the oven
should operate.
Before installing the cooker the electricity
must be turned off.
The electrical connections must be
connected to the terminal block as
detailed opposite. A cable of the correct
rating of this appliance must be used
type H05 RR-F section 4 mm
2
.
Cable must be able to withstand a
temperature rise of 75°C above ambient
temperature.
TECHNICAL DATA
230 Volts AC - 50 Hz
Static top oven
– Top element 0.7 kW
– Bottom element 1.1 kW
– Grill element 2.1 kW
Fan Bottom Oven
– Fan element 2.5 kW
Maximum power rating
– Top oven 2.1 kW
– Bottom oven 2.5 kW
Hotplate
– Front left 2.0 kW
– Back left 1.0 kW
– Back right 1.5 kW
– Front right 1.0 kW
Oven lamp 15 W
300 °C, miniature edison screw
Maximum rated power 10,155 W

4
Installation
L
N
Green &Yellow
(Earth)
Brown
(Live)
Blue
(Neutral)
Fig. 2
P
C
B
A
CONNECTING THE MAINS CABLE
– Remove the two screws securing the cover plate A behind the cooker.
– Remove the screw C from the cable clamp.
– Insert the mains cable (type H05 RR-F) of minimum 4 mm
2
section into the cable pro-
tector P.
– Connect the phase and earth cables to the mains terminal connection block B.
EARTH
N NEUTRAL
L LIVE
IMPORTANT: This appliance must be earthed.
– Refit the cable clamp so that it clamps the outer sleeving of the cable.
– Refit the cover plate A.
5
Installation
BEFORE USE
Please ensure that all packing has
been removed from the appliance
before switching on.
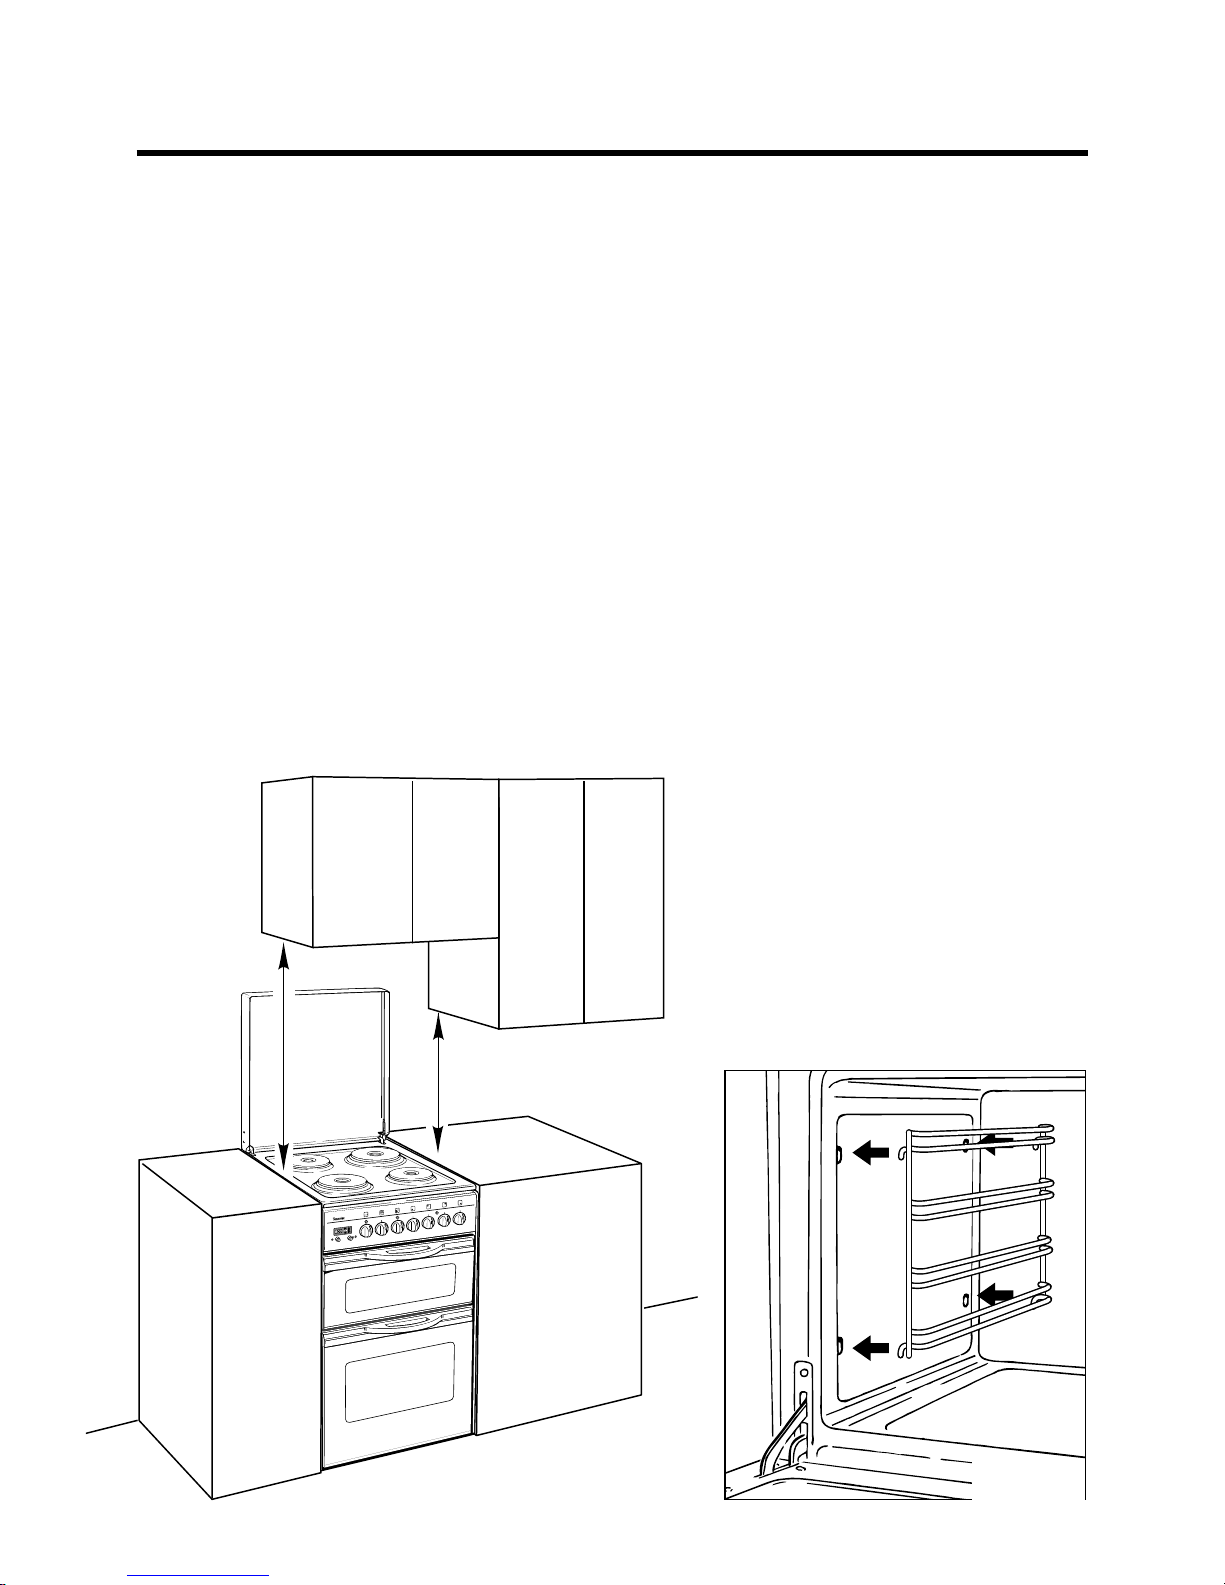
PREPARING THE OVEN
Clean the upper and lower ovens
thoroughly before using it for the
first time; use water and soap,
then rinse carefully.
Hook the lateral frames (fig. 4) to
the side walls and then insert the
rack shelves and grill pan into the
shelf guides provided in the side
frames. Once you have done this
heat the oven and the grill element for about 30 minutes to eliminate any residual factory grease
that might impart unpleassant
smells to the meals being cooked.
IMPORTANT
As a safety measure, before you
start to clean the oven, switch off
the electrical supply.
Fig. 4
400 mm
15.7"
650 mm
25.5"
°
C
°
C
9
8
7
D
U
O
Fig. 3
LOCATION
This appliance is designed with type “X” protection with regard to overheating of surrounding
surfaces.
The adjacent cabinets must be able to withstand
a temperature rise of 75 °C.
 Loading...