

Page 1
RF 2.4GHz Cordless Keyboard & Mouse
Manual
SKU:X600
Caution: To use this device properly, please read the user’s guide
before installation.
For German, French language user manual, please
download from our website: www.tecknet.co.uk . Sorry
for the inconvenience.
Page 2

System Requirements
To use this mouse, your computer must meet the following hardware
requirements and run one of the operating systems listed below.
Hardware
• PC with a Pentium processor or equivalent AMD processors
• USB 2.0
Operation System
• Windows 2000/2003/XP/Vista/Win 7/Win 8/Win8.1 .
Note: The scroll wheel only works under the operating systems listed
above. If you use the mouse under a different operating system, the
mouse may either not work or lose its enhanced features and function
as a standard three-button mouse only.
Supplied with the Product
• 1 × Cordless Mouse
• 1 x Cordless Keyboard
• 1 × USB Nano Receiver
• 1 × User Manual
• 1 × Warranty Card
3-Button Mouse
The mouse is featured with three buttons and one scroll wheel as
shown in below picture.
1. Left Click Button
2. Right Click Button
3. Scroll Wheel
4. DPI Switch Button/Low Battery Indicator
4
3
2
1
Scroll Wheel
DPI Switch Button/
Low Battery Indicator
Right Click Button
Left Click Button
01
Page 3
12-Month Battery Life
The mouse consumes little power and offers a long battery life up to
12 months without changing battery. However please note that the
actual battery life may vary with using conditions.
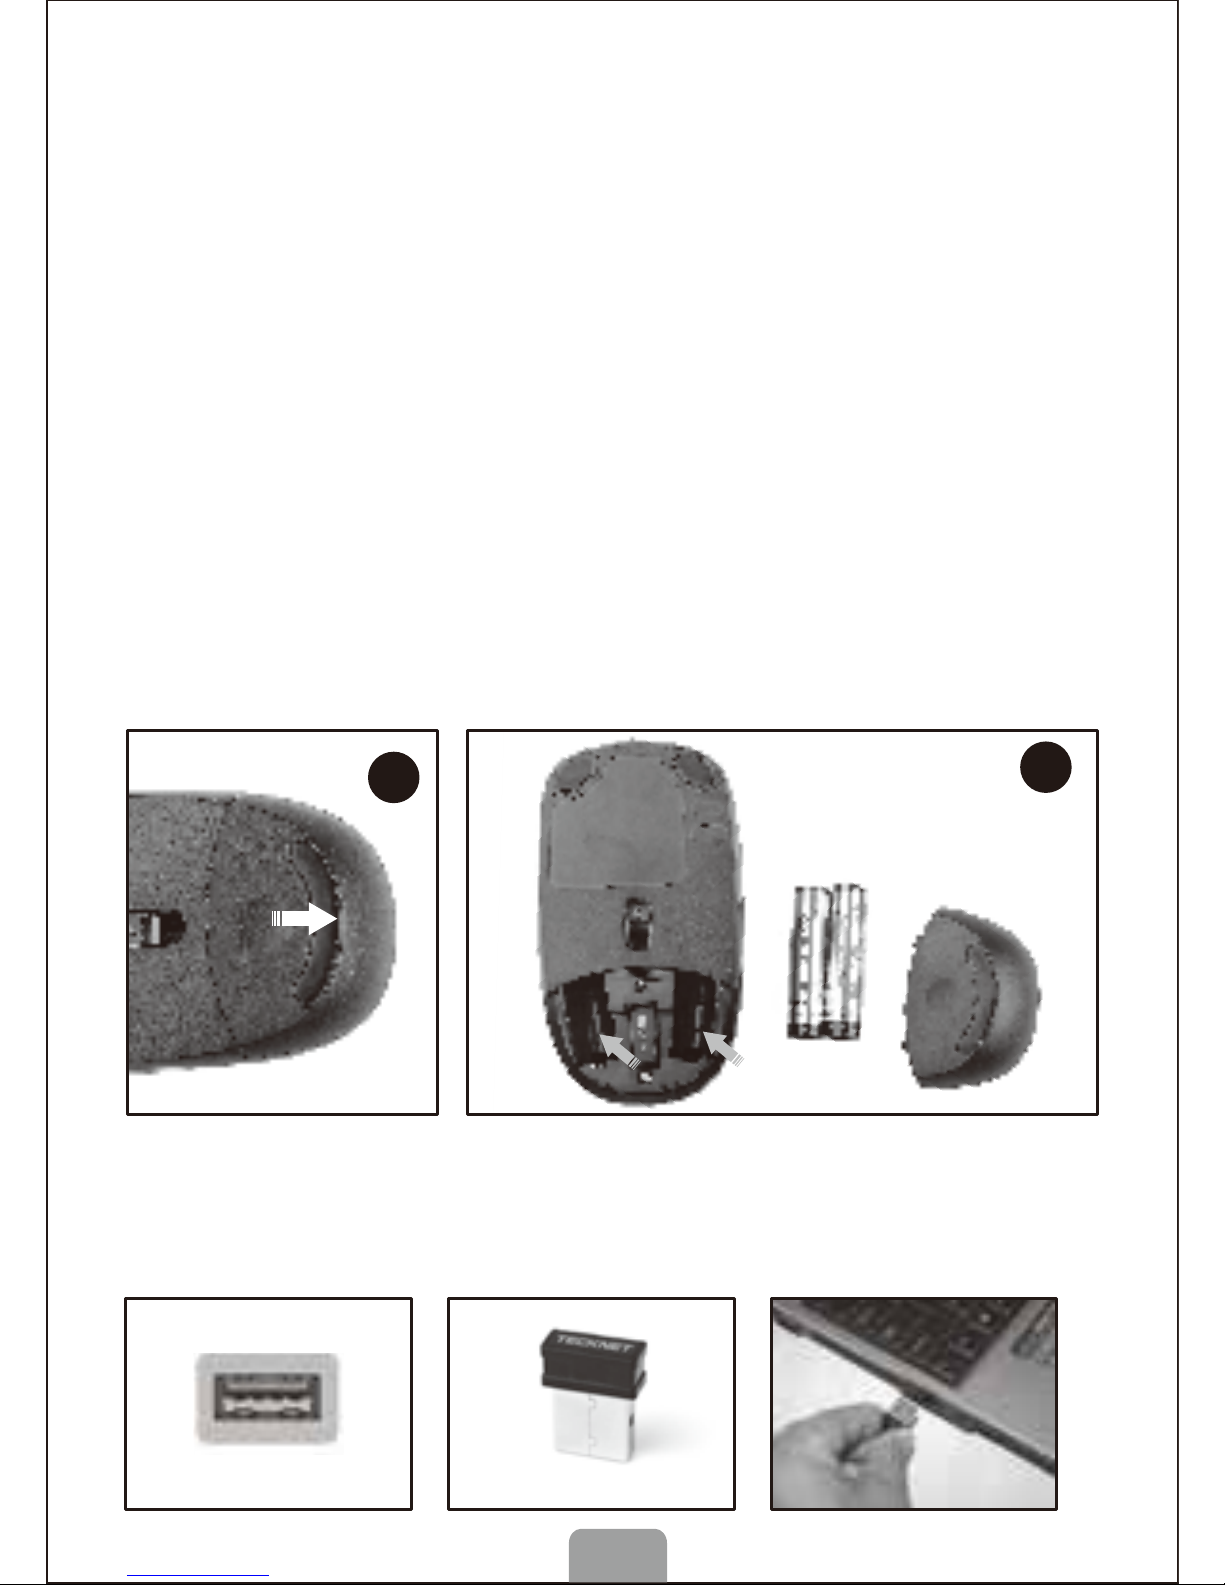
Install the Battery
The RF 2.4GHZ optical mouse uses two AAA batteries (Batteries is not
included).
1. Press the button at the bottom of the mouse as shown in the picture
below. The batteries compartment cover will open.
2. Take out the batteries compartment cover on the bottom of the mouse.
3. Insert the batteries into the compartment, ensuring they correspond
with the polarity markings.
4. Replace the battery cover.
5. The red LED of the power indicator at the top of the mouse will flash
for 10 seconds.
Note: Make sure that the polarity of the batteries is correct. The positive (+) and
negative (-) ends of each battery must match the positive (+) and negative (-)
markings in the battery housing.
Connecting the Receiver
Take out USB Nano receiver and plug it into a free USB port in your
computer. The Plug & Play function of your system will detect that a
new device has been connected and install it automatically.
2
1
USB Port Nano receiver
PRESS
02
Page 4

USB Nano Receiver
The receiver can be removed and stored at the bottom of the mouse
as shown in below pictures.
Intelligent Power Saving (IPS)
The mouse is equipped with Intelligent Power Saving (IPS) function.
• When the USB Nano receiver is disconnected or the PC is switched
off, the mouse will be switched off automatically for the purpose of
power-saving.
• When your mouse is not operated for 3 seconds, it will automatically
drop to the first level of IPS. To wake the mouse, click any button.
• When your mouse is not operated for 10 seconds, it will
automatically drop to the second level of IPS. To wake the mouse,
click any button.
• When your mouse is not operated for 8 minutes, it will automatically
drop to the third level of IPS, e.g. sleep model. To wake the mouse,
click any button.
DPI Switch
The mouse supports 2000 DPI, 1500 DPI and 1000 DPI. To switch to
either setting, press the DPI button.
• The default setting is 1000 DPI.
• Short press the DPI button on the top of the
mouse once to switch from 1000 DPI to 1500 DPI,
the scroll wheel LED will flash twice.
• Short press the DPI button on the top of the
mouse once again to switch from 1500 DPI to
2000 DPI, the scroll wheel LED will flash three
times.
• Short press the DPI button on the top of the
mouse once again to switch from 2000 DPI to
1000 DPI, the scroll wheel LED will flash once.
2
1
Take out the receiver Store the receiver
DPI Switch
03
Page 5

Low Power Indicator
Note: we recommend you use AAA alkaline dry cell
battery which supplies longer battery life.
Low Power Capacity Indication
The mouse and keyboard are equipped with
low power capacity indicator. When the
battery power gets low during use, the Low
Power Capacity Indicator (the DPI Switch
Button) on the top of the mouse and on right
top of the keyboard will flash. Please replace
the battery.
Restoring Factory Default Settings (Manual Syncing Steps)
This product is equipped with an auto-syncing function. The USB
Nano Receiver and the Cordless Mouse will sync automatically once
they are activated. Should there be any problem while auto-syncing,
please employ the following steps to sync manually.
1. Ensure the battery voltage is correct; if the voltage is low, replace
the battery.
2. Press the right button and middle button
simultaneously (Do not release both buttons until you have
completed step 3); or press the key of ESC and K at the same time,
3. Plug the USB Nano receiver into a free USB port of your computer
within 15 seconds.
4. Then release both buttons.
5. After that the red scroll wheel LED will flash, the mouse will finish the
manual syncing and should work within 3-5 seconds. When
reconnect the keyboard, the lower power indicator will flash.
CAPS LOCK and NUM LOCK indication.
The keyboard has CAPS LOCK and NUM
LOCK indicators on the right top of keyboard.
The CAPS LOCK and NUM LOCK status are
indicated by the red LED lights.
Multimedia function key
The keyboard includes 12 multimedia function
keys for different multimedia experiences.
Attention
1. To maximize battery life, it is recommended
you use the mouse on a white or light
coloured surface.
2. If not used, the mouse will drop into auto-sleeping mode within 60
seconds, press any key or scroll wheel to activate the mouse.
3. Never use the mouse on a glass or mirrored surface as these
surfaces will cause the mouse to fail temporarily.
04
Page 6

Notes on Handling Batteries
• Keep batteries out of the reach of children.
• Replace old or weak batteries promptly.
• Remove the batteries if the mouse is not going to be used.
Safety Measures
• Keep the mouse away from young children.
• Any attempt to disassemble, adjust or repair the mouse may result
in explosion and other safety hazards.
Specifications
Button Count: 3 buttons
Operating Frequency: 2.4GHz
Number of Channels: 34
Resolution: 1000/1500/2000 DPI
Receiver interface: USB version 2.0
Operating Voltage: 3V
Operating Current: 3.5mA
Distance: up to 10m
Troubleshooting
What do I do if the mouse does not work?
• Make sure that the polarity of the batteries is correct. The positive
(+) and negative (-) ends of each battery must match the positive
(+) and negative (-) markings in the battery housing.
• Make sure the batteries are not discharged.
• Please try to remove the batteries, and reinstall the batteries again.
• Verify that your computer's power management features are turned off.
• Check that the Nano receiver's USB connector is firmly attached to
the USB port of your computer.
• Still not working? Please try restoring the factory default settings
(Manual Syncing Steps)
The USB Nano receiver is recognized by Windows (Windows 2000
/2003/XP/Vista/Win 7/Win 8/Win8.1) but the cursor does not move
4. The mouse might not work smoothly on some special surfaces,
such as smooth, dark black, reflecting and 3D mouse pads surfaces.
5. Please avoid using the mouse on a metal surface. Metals, such as
iron, aluminium or copper, shield the radio frequency transmission
and may slow down the mouse presenter’s response time or cause
the mouse to fail temporarily.
6. If your PC has a metal case that contains aluminium or magnesium,
use the mouse to the side. The display panel may interfere with the
radio frequency signal if you use the mouse directly in front of the PC.
7. Please remove the batteries if you are not going to use it for a while
(several weeks or months).
05
Page 7

When I use the mouse, other 2.4G Cordless devices work more
slowly or fail temporarily – what should I do?
• The mouse has 34 channels to prevent interference. However the
mouse may cause interference with any cordless, radio-based device
that operates at 2402MHz - 2480MHz, such as a 2.4G telephone,
2.4G baby monitors, 2.4G cordless routers and toys. To reduce
interference, move the mouse’s receiver and the base unit of the
affected device as far away from each other as possible; alternatively
try to change the 2.4G frequency of the affected devices.
What do I do if the response time of the mouse is slow or the
mouse intermittently stops working?
• Ensure that the mouse is within the operational working distance
(ideally 1.5m) from the USB Nano receiver and restart your PC.
• Increase the distance between the Nano receiver and the base units
of other cordless devices.
• Turn off any cordless device and their base units that are near the
mouse Nano receiver.
• If you are using the mouse on a metal surface, move the mouse and
the receiver to a non-metallic surface. Metals, such as iron,
aluminium or copper, shield the radio frequency transmission and
may slow down the mouse presenter’s response time or cause the
mouse to fail temporarily.
I can not use the mouse while another cordless mouse is in use
– what should I do?
Reset the identification code. See “Restoring factory default settings
(Manual Syncing Steps)”
Disclaimer
Every effort has been made to ensure that the information and
procedures in this guide are accurate and complete, no liability can be
accepted for any errors or omissions and we reserve the right to make
any changes without further notice to any products mentioned herein.
Warranty
We warrant that product from authorized distributors will meet the
applicable product specifications and be free from all defects in design,
assembly, material and workmanship. Please contact TECKNET retailers,
or visit our website www.tecknet.co.uk for more information
about the product.
• Check whether the low power indicator on the top of the mouse
lights up. If the sensor lights up, it is likely that the batteries are
discharged. Please replace them.
• If replacing the batteries does not help, it is likely that the mouse is not
connected to the receiver. Please try restoring the factory default settings
(Manual Syncing Steps) and ensure that the mouse is within the optimal
operational working distance (1.5m) from its USB Nano receiver.
06
Page 8

RF 2.4GHz Cordless Keyboard & Mouse
www.tecknet.co.uk
TECKNET
P.O. Box 122
 Loading...