

Page 1
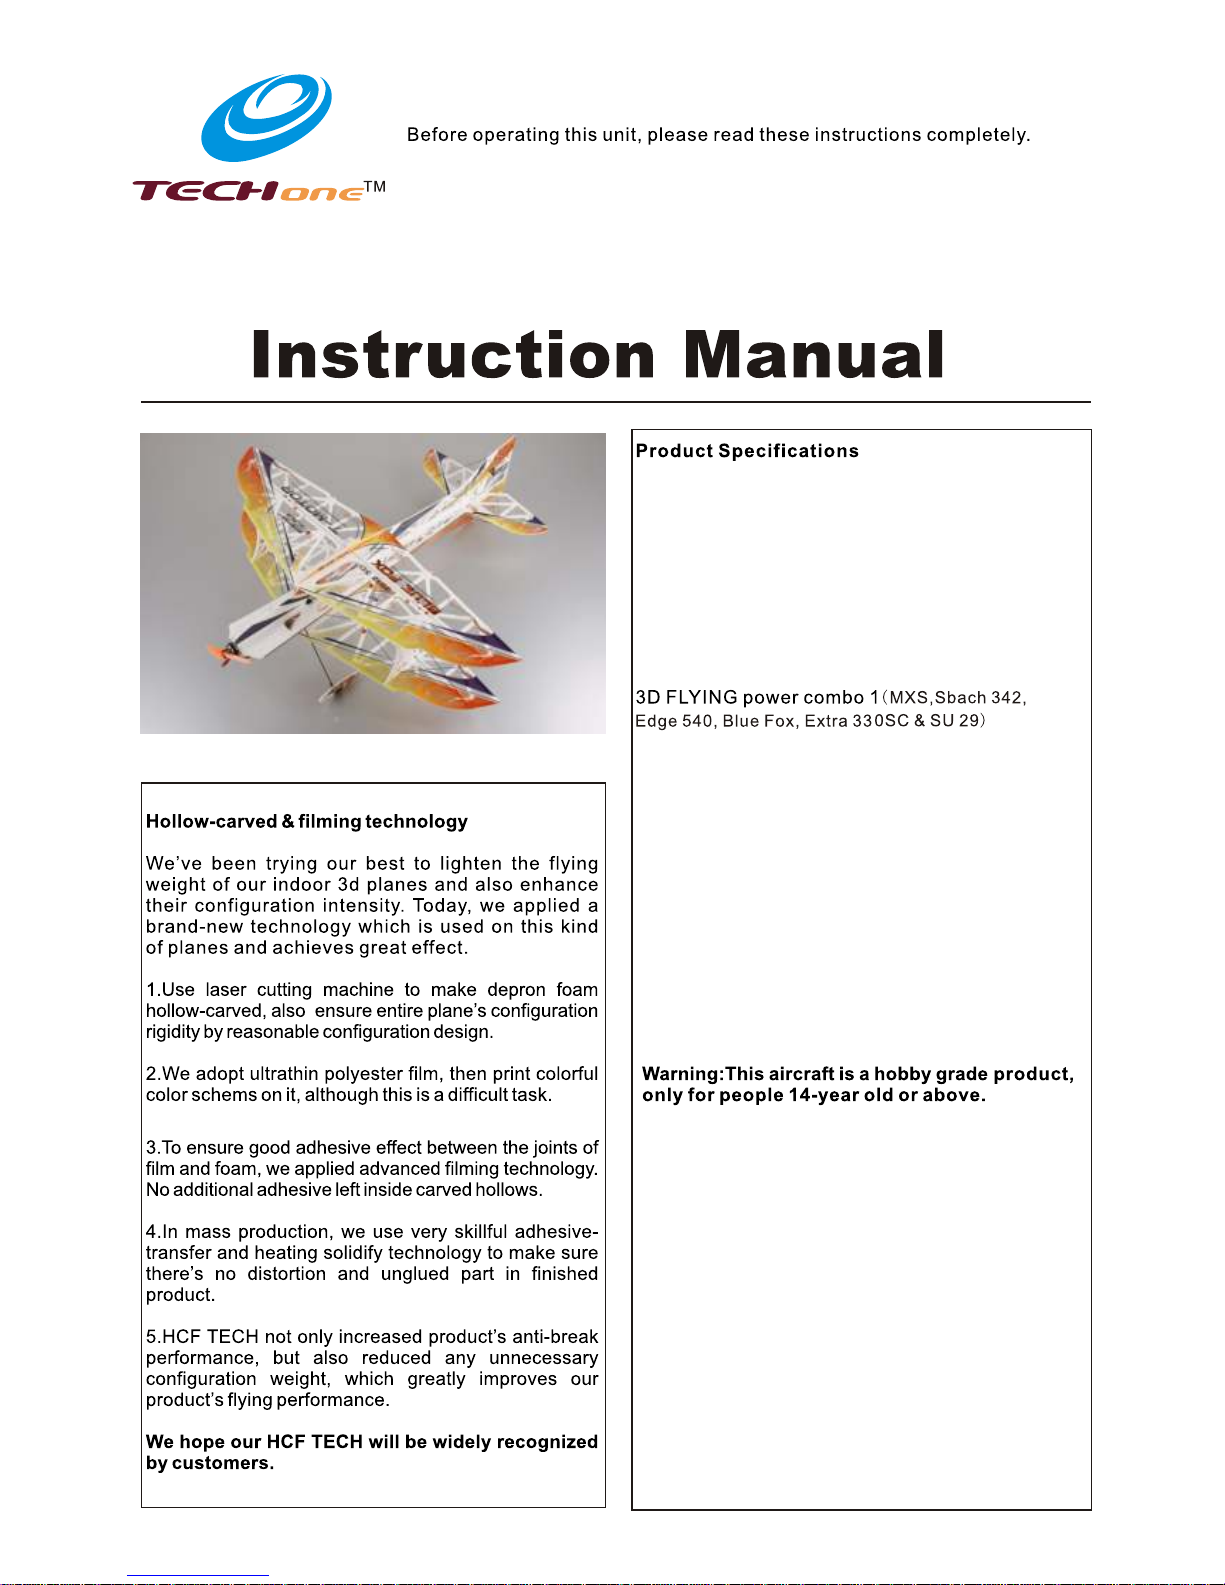
BLUEFOX 2012 3D-HCF INSTRUCTIONSBLUEFOX 2012 3D-HCF INSTRUCTIONS
SERVO:DT55
0.07 sec/60°at 6.0V
0.07 sec/60°at 6.0V
1.5kg-cm at 6.0V
20.8X11X20mm
Weight:6.5 g
ESC: 6Amp 2-3s Lipo BEC 1A/5V
BATTERY: 350mAh 7.4v Lipo 20C
Fuselage Length: 850mm ( 33.5in. )
Wingspan: 780mm ( 30.7in. )
Flying Weight: 115-140g (with battery)
Motor : AS2204 KV1700
ESC : 6-10Amp
Propeller: 8043SF prop or 8040 HD prop
Servos: 4-6g micro servo *3pcs
Radio: 4/more channel
Battery: 7.4v 2S 250-450mAh Li-po 25C
MOTOR: AS2204 KV 1700 outrunner brushless
motor
Page 2
65-75
65-75
40
404040
50
45
45
45
45
63
80
Page 3
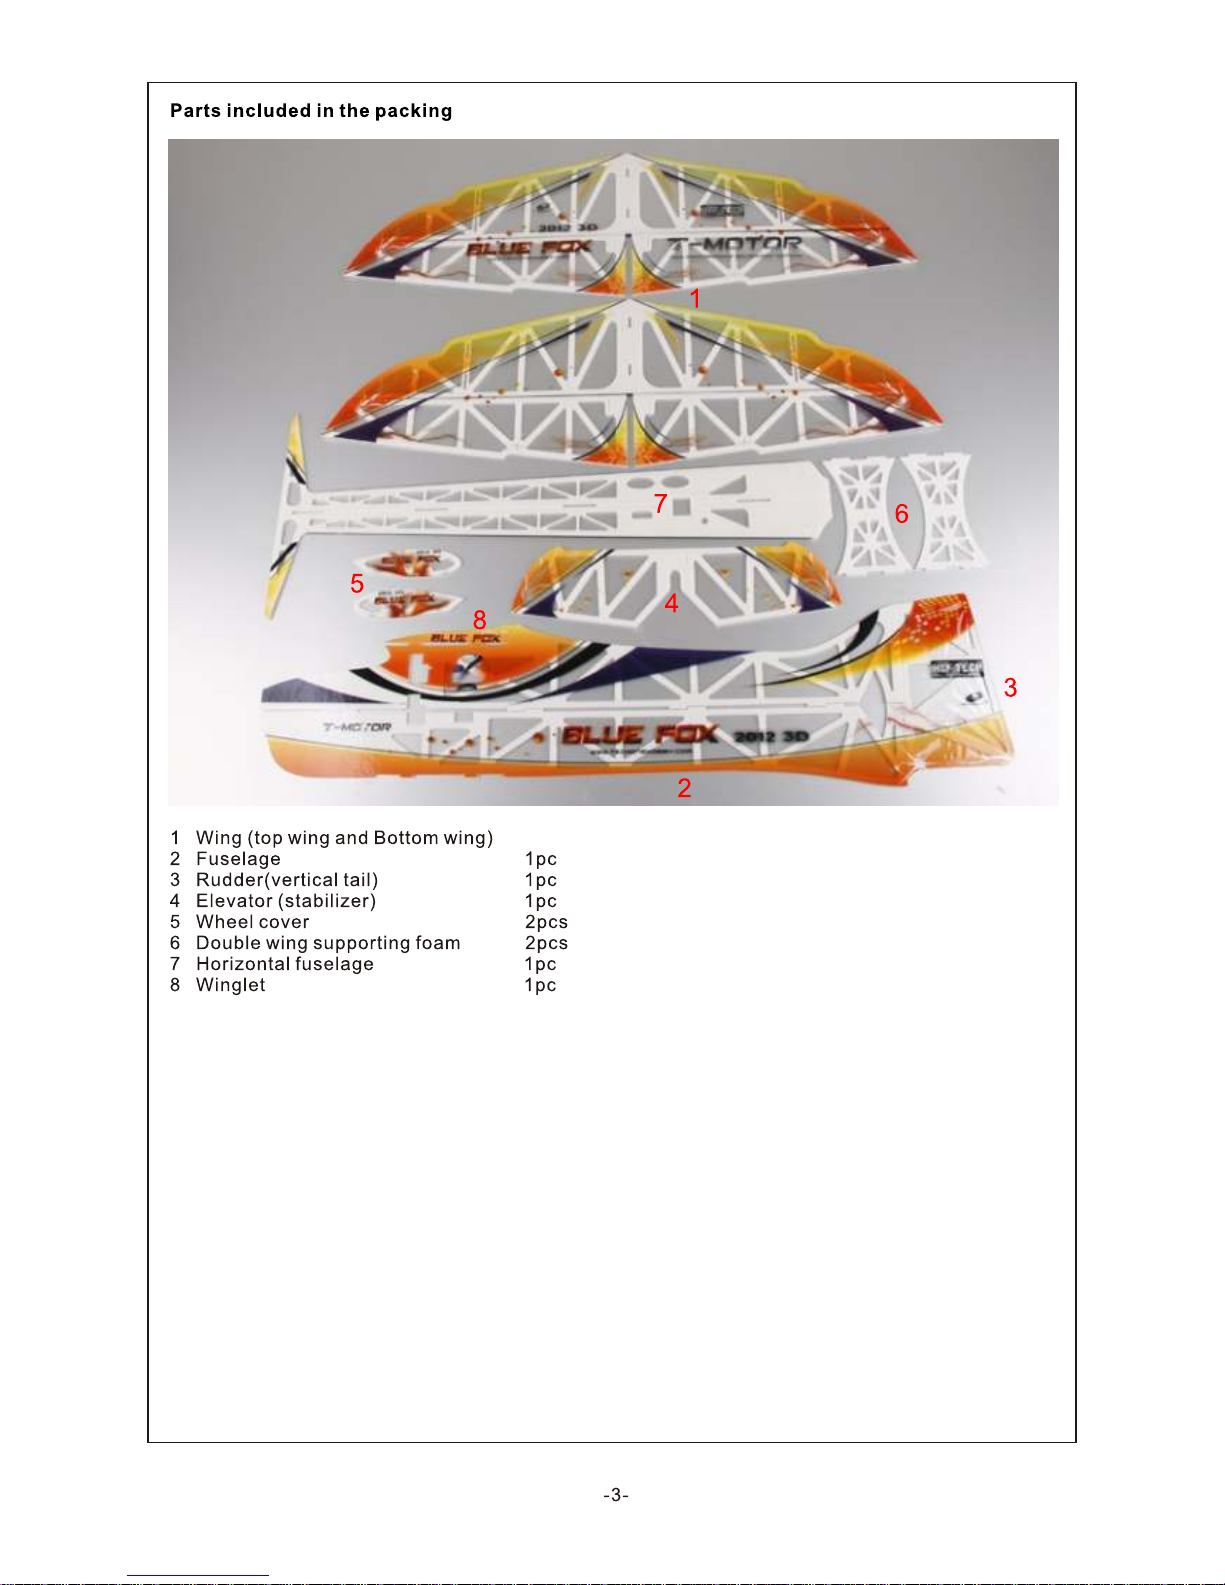
2pcs
Page 4

1pc
1pc
1pc
Page 5
Page 6

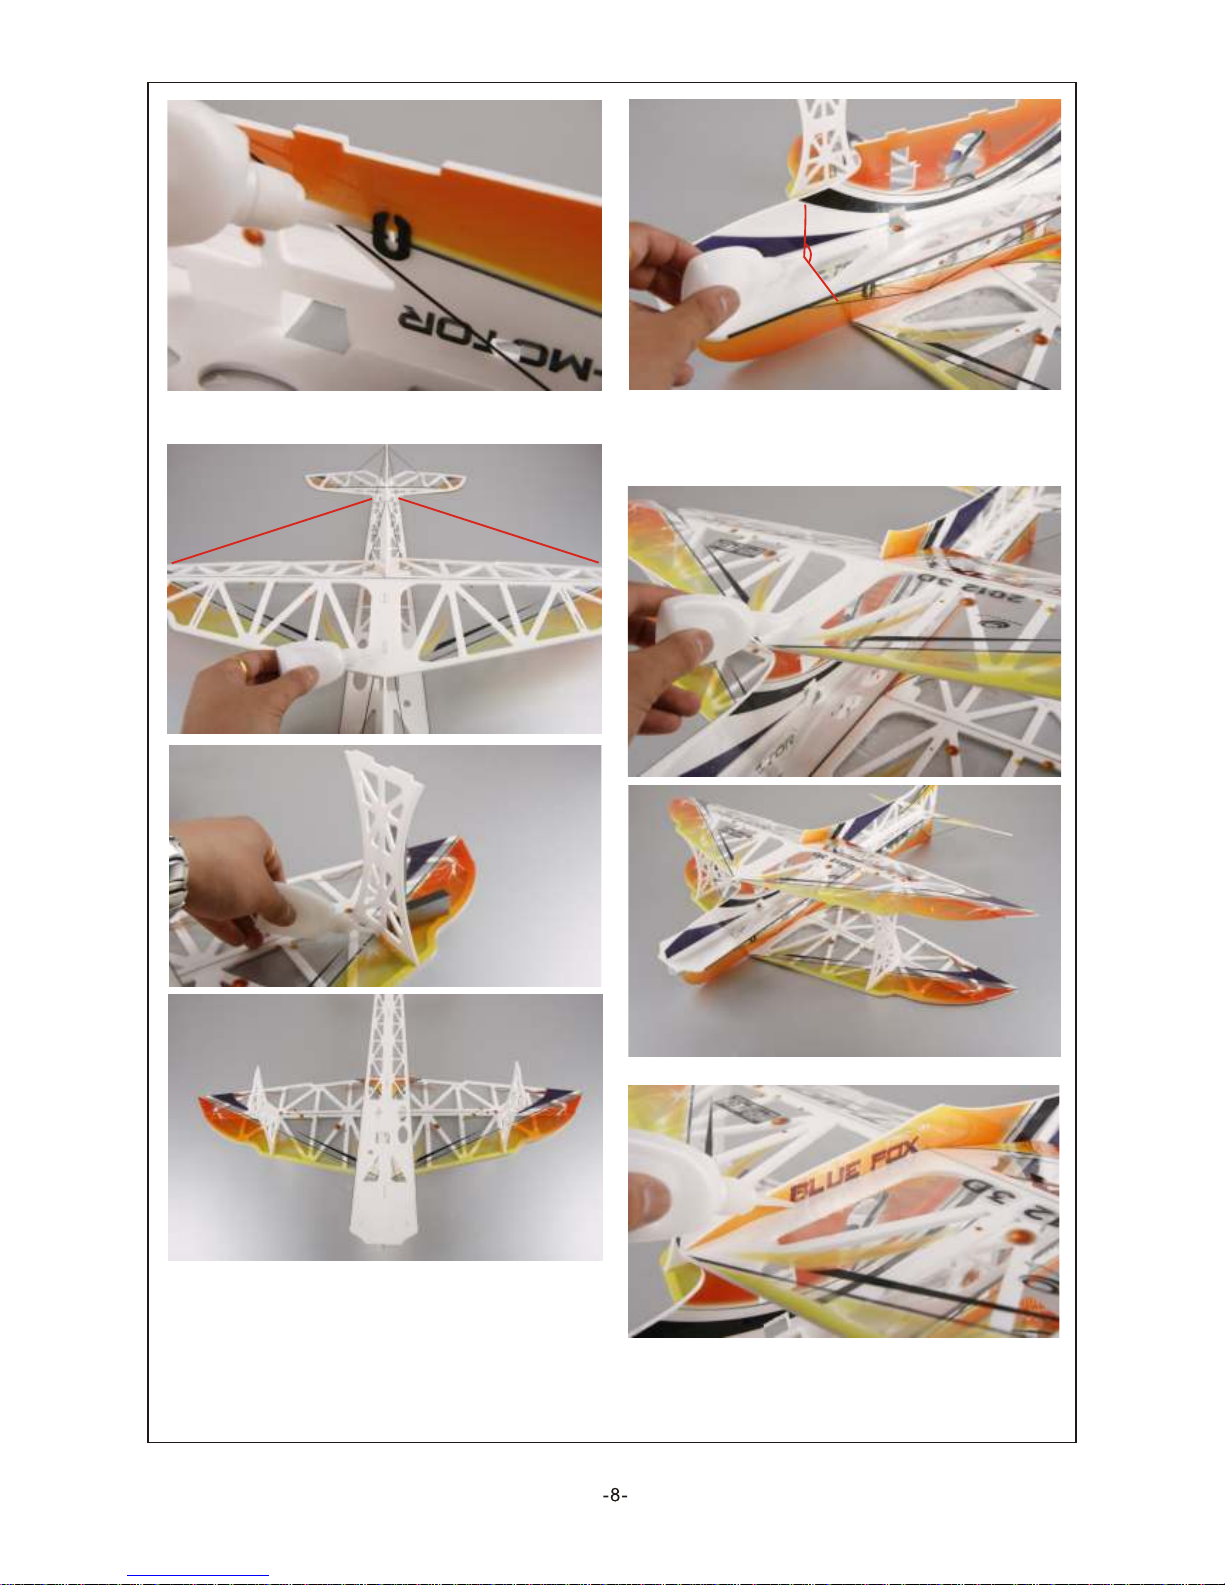
2.Fix left and right ailerons, same as last step.
3.Insert lower vertical fuselage into the slot of
horizontal fuselage, then use CA to fix.
Notice: make sure both fuselages are perpendicul
ar to each other.
90°
4.Glue 4pcs reinforcing doublers onto
pre-reserved holes on back fuselage, refer to
above pictures.
Page 7

5.Install other carbon rods, and make sure the
vertical fuselage is perpendicular to wing.
142
mm
1
3
8mm
1
92m
m
0
mm
1
3
58
m
1
m
163mm
Page 8
6.Fix landing gear reinforcements to
corresponding hole with glue.
A
B
A=B
7.Fix left and right wing supporting foam with
glue.
8.Insert upper vertical fuselage into the slot of
horizontal fuselage, then use CA to fix.
Notice: make sure both fuselages are
perpendicular to each other.
90°
9.Install top wing.
10.Install wing fences on corresponding places
of bottom wing and fix with glue.
Page 9

11.Install rudder on vertical fuselage.
12.Install landing gear sets.
13.Install wheel covers.
Page 10
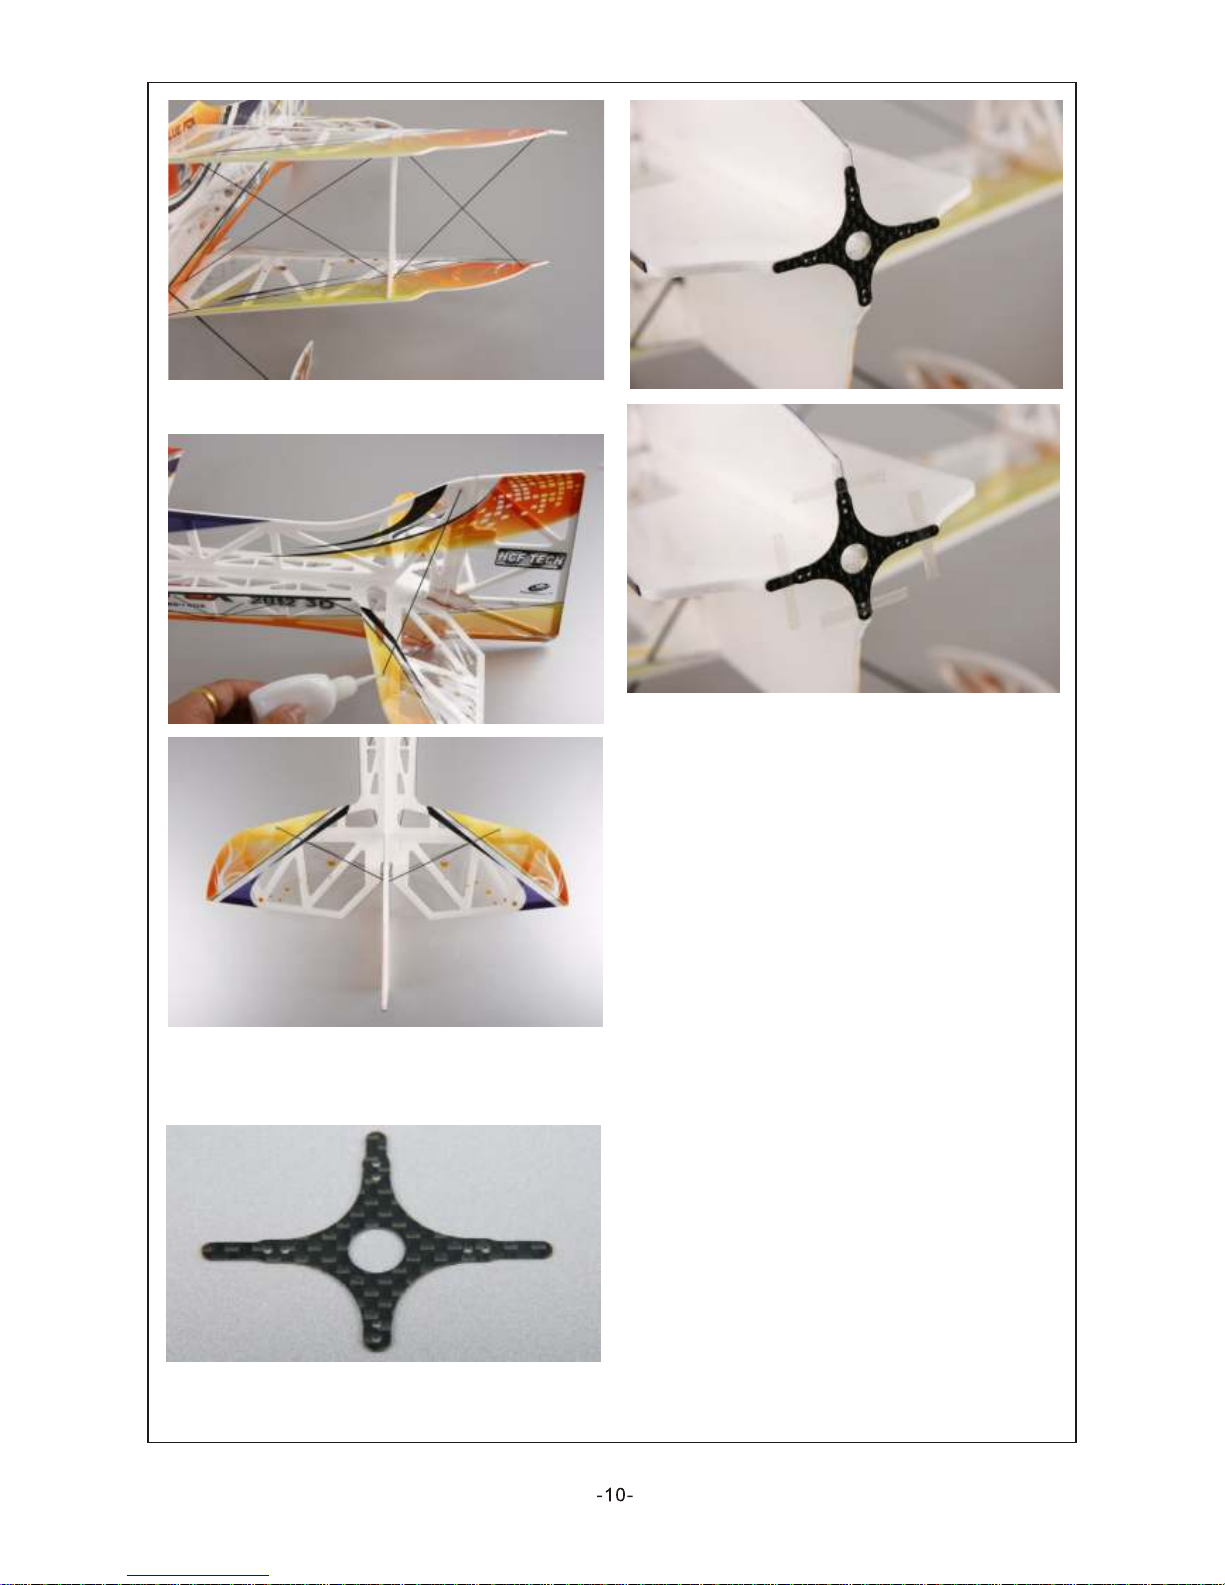
14.Install carbon fiber bracings between two
wings.
15.Install 2pcs carbon fiber rods between upper
stabilizer and rear vertical fuselage.
Make sure stabilizer is perpendicular to vertical
fuselage.
16.Install motor mount on nose, then use fiber
tape to reinforce.
06m
m
2
2
57mm
6
1
0mm
Page 11

17.Install 2pcs aileron control horns on back
wings.
18.Install elevator control horns.
19.Install rudder control horns.
20.Install motor on motor mount with 4pcs self
tapping screws.
21.Fix propeller with o ring.
Page 12
22.Install ailerons connector with glue, then use
carbon fiber rods to connect top and bottom
ailerons.
23.Place aileron servo into pre-cut servo hole
on fuselage and fix with glue.
135mm
95mm
Page 13

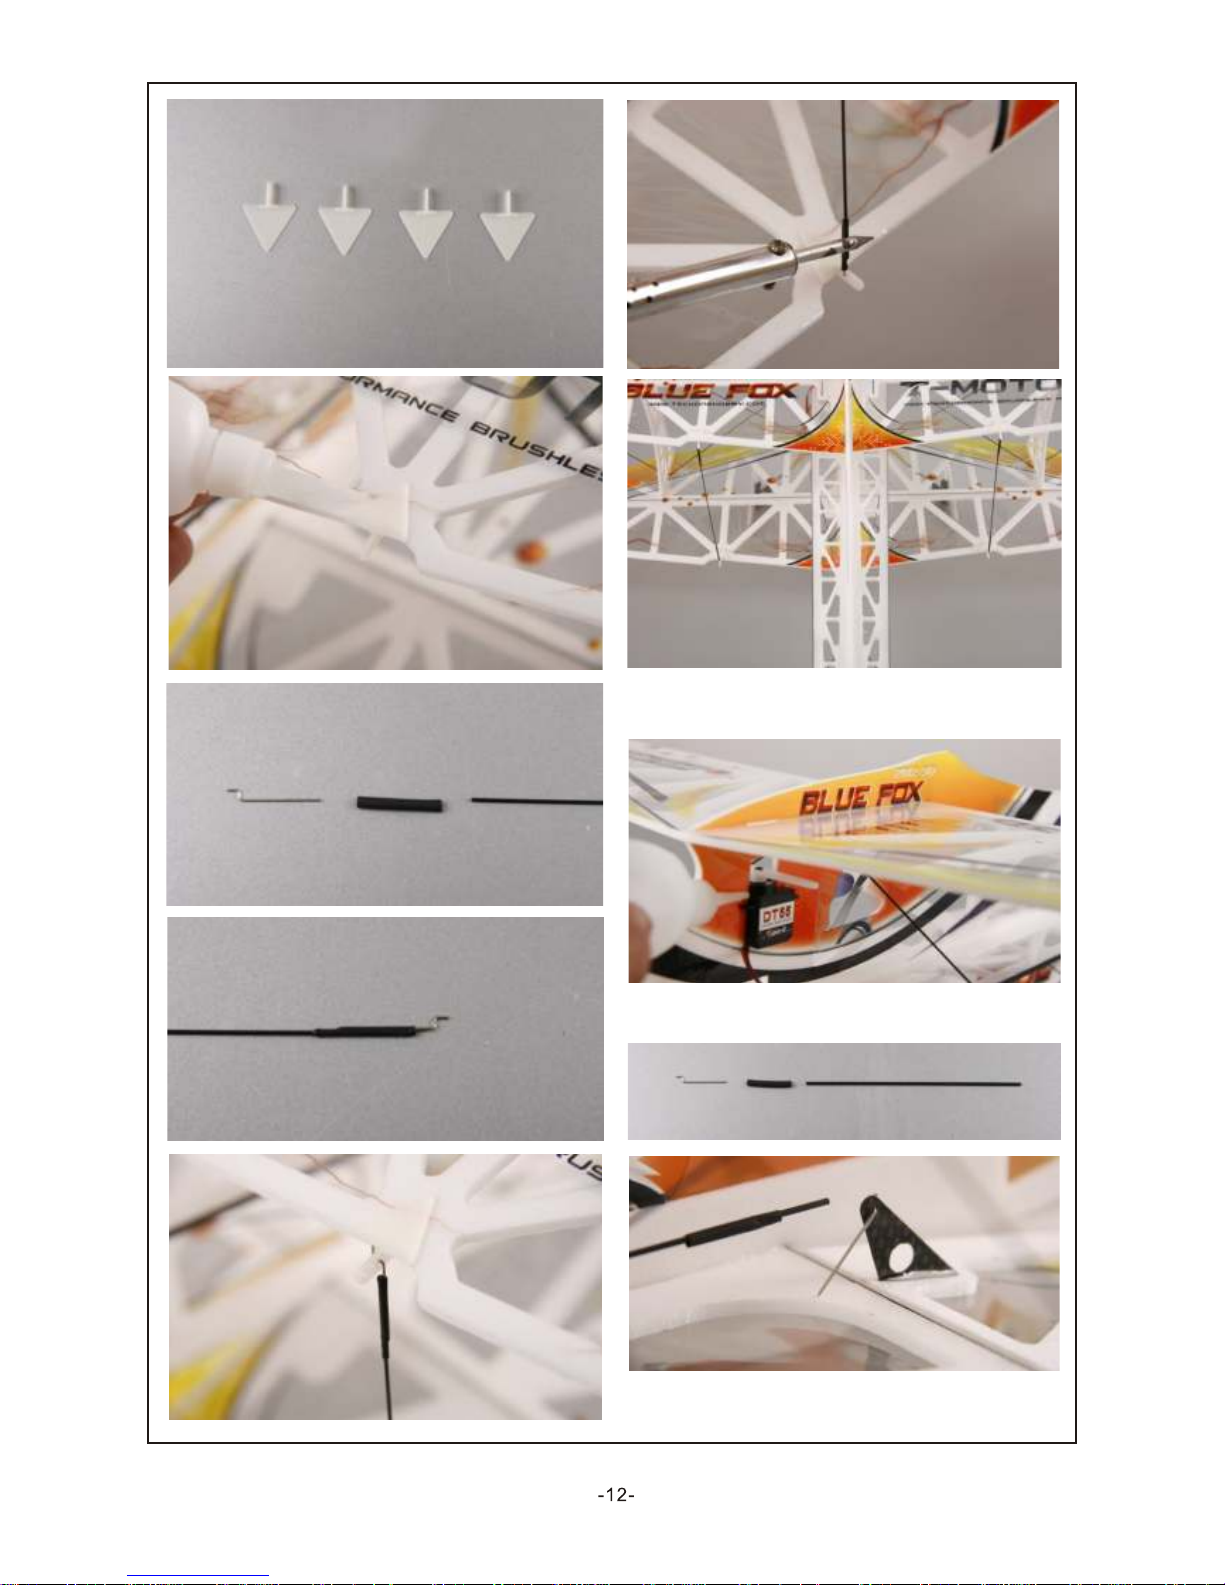
27.Across thread through 3 holes on pull-pull
thread adjustor.
28.Then pass through steel tube.
29.Then thread through the hole on rudder servo
arm. Stave steel tube with plier and fix with CA.
24.Install aileron push rods.
25.Install rudder servo arm extension.
26.Drop some CA on the ends of thread to make
them a little harder, so they can easily thread
through small holes.
Page 14

30.Pass another end of thread through rudder
control horn, and stave steel tube with plier, then
fix with CA. The same operation as last step.
31.Install another elevator pull-pull thread.
Same operation as last step.
Notice: make sure the thread is taut.
32.Install elevator pull-pull thread. Same
operation as rudder pull-pull thread.
Page 15

33.Fix ESC with nylon velcro on lower vertical
fuselage.
34.Fix receiver and battery with velcro.
35.Pass all servo wires through fuselage and
place them close to receiver.
36.Connect servo and ESC to receiver, then
power on and do equipment test.
Page 16

37.A perfect Blue Fox 2012 3D is done after
your careful assembly. While assembly, the
flying weight is really critical to the flight
performance and will be affected by adding
weight, so you should reduce any unnecessary
weight while assembly. Then you’ll get the best
flying performance.
 Loading...